HOLIDAY DONATION DRIVE - SUPPORT MSW - DO YOUR PART TO KEEP THIS GREAT FORUM GOING! (Only 13 donations so far - C'mon guys!)
×

patrickmil
-
Posts
1,209 -
Joined
-
Last visited
Content Type
Profiles
Forums
Gallery
Events
Everything posted by patrickmil
-
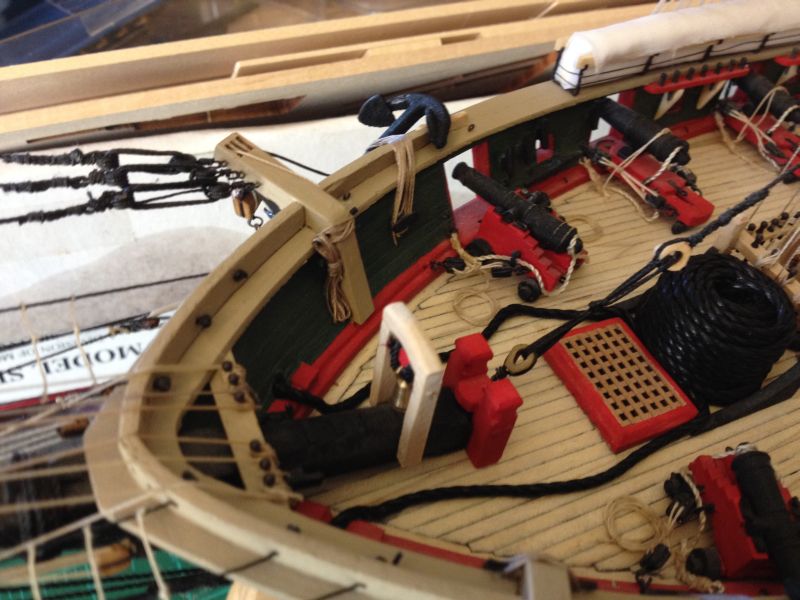
 Your gundeck is outstanding. It looks so much like wood we would have a hard time believing otherwise. Fantastic work as always.
 -
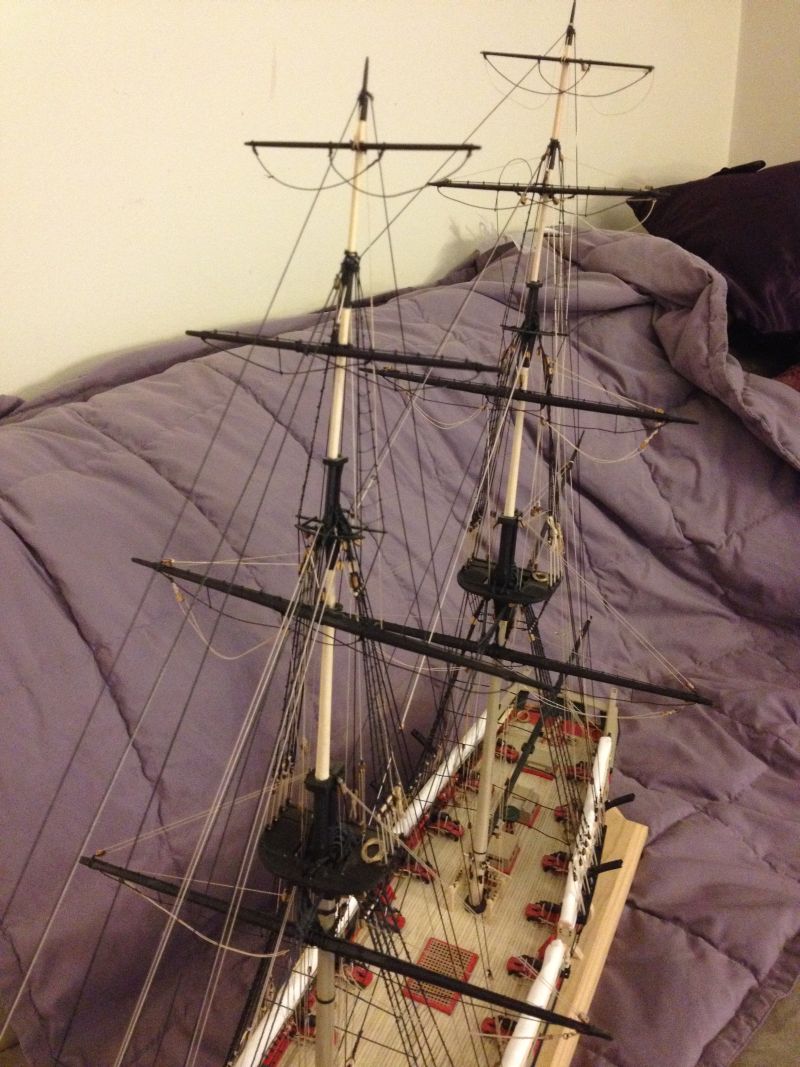
Thanks for looking in Sjors. I'm posting a few pictures to show some overall progress. I think it's also helping to motivate me to finish her up since I'm so close to the end of this build.


- 299 replies
-
- 11
-

-
- niagara
- model shipways
- (and 1 more)
-
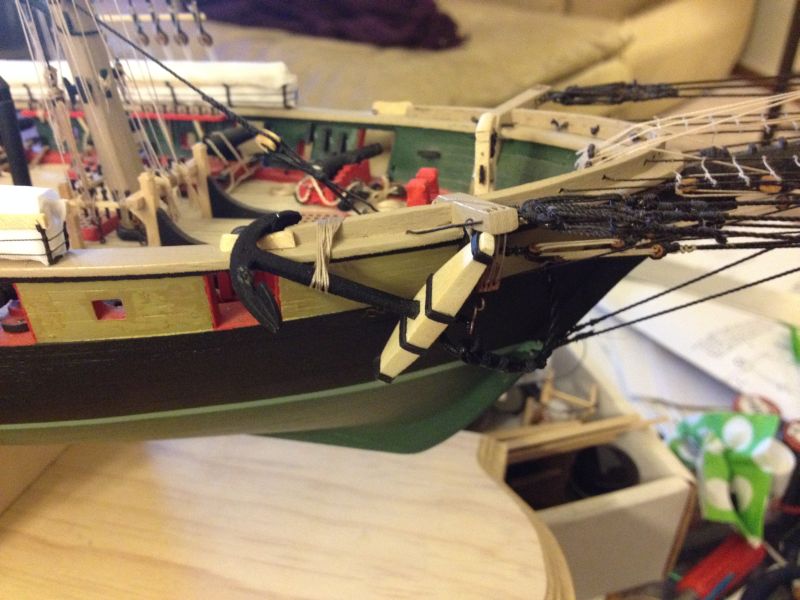
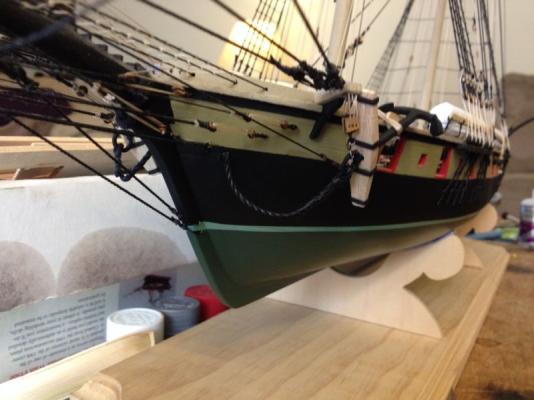
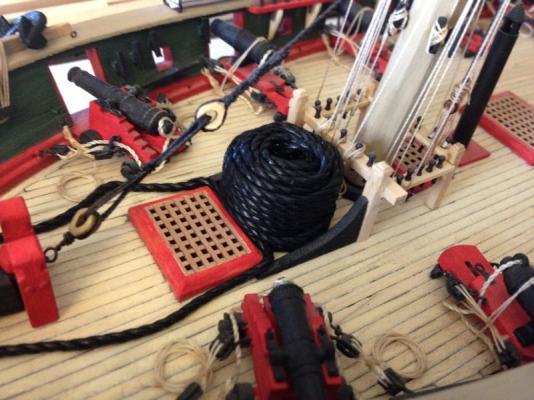
A small update... Both anchors are now hung and I have the hawsers in place and coiled in their proper spot per photos I've seen of the real thing. Thanks David, aka Bahamas Diver. I'll be working on some running rigging and getting the other two ship's boats completed and ready for hanging. Thanks for looking in.


- 299 replies
-
- 3
-
-
- niagara
- model shipways
- (and 1 more)
-
Sjors, my first scratch build will be a ways off as I will be starting on my Constitution after finishing with the Niagara. I do have big plans for a scratch one day though.
- 299 replies
-
- 1
-
-
- niagara
- model shipways
- (and 1 more)
-
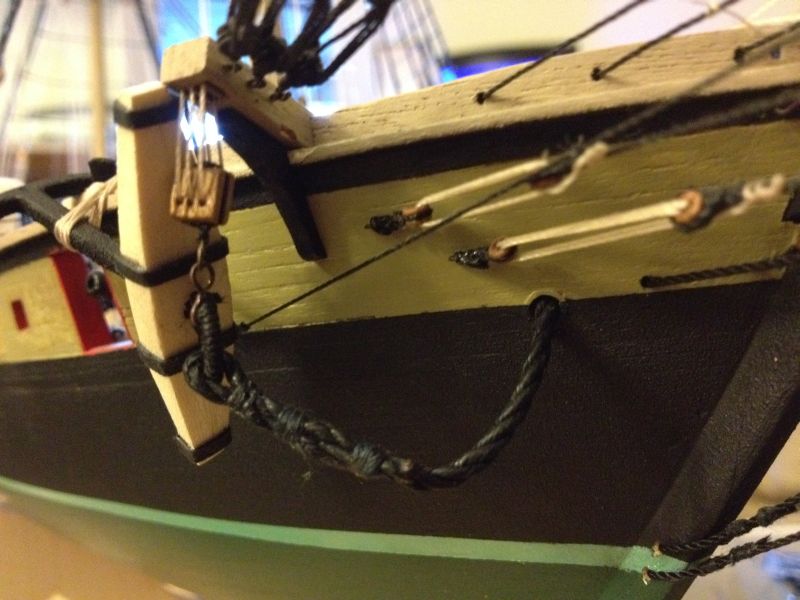
Thanks for looking in Ben. Here are some pictures of the starboard anchor in place. I'll be working on the port anchor and will put in place the coiled hawsers once I've got that done.


- 299 replies
-
- 5
-
-
- niagara
- model shipways
- (and 1 more)
-
Mobbsie, when are you making a trip to Columbus Ohio? I will try to have a ship ready for you to rig when you arrive. I can't even come close to rigging that neat.
- 1,279 replies
-
- 1
-
-
- agamemnon
- caldercraft
- (and 1 more)
-
Popeye, I think you have a time machine that allows you to manipulate your time to work on so many builds so quickly. The canopy, cradle and lantern look great.
-
Sjors, I'm a bit far off from full scratch building. I do however like to build my own version of some pieces when the kit's version isn't well done.
- 299 replies
-
- 1
-
-
- niagara
- model shipways
- (and 1 more)
-
Popeye and Augie, thanks for looking in. I was thinking I would post more tonight but my favorite tool (Jefferson's Bourbon) starting doing it's work. I should be posting more tomorrow though. I'm close to being finished with hanging an anchor.
- 299 replies
-
- 2
-
-
- niagara
- model shipways
- (and 1 more)
-
Hey John, I figured I'd pop in on your blog as well. It looks as though you've been away for a bit as well. We're anxious to see some progress.
- 2,250 replies
-
- 1
-
-
- model shipways
- Charles W Morgan
- (and 1 more)
-
John and Larry, thanks for looking in. I am working hard on getting a single anchor in place. I forgot the amount of work that goes into constructing some of these tiny little metal bits. I'm still optimistic for some more pics tonight.
-
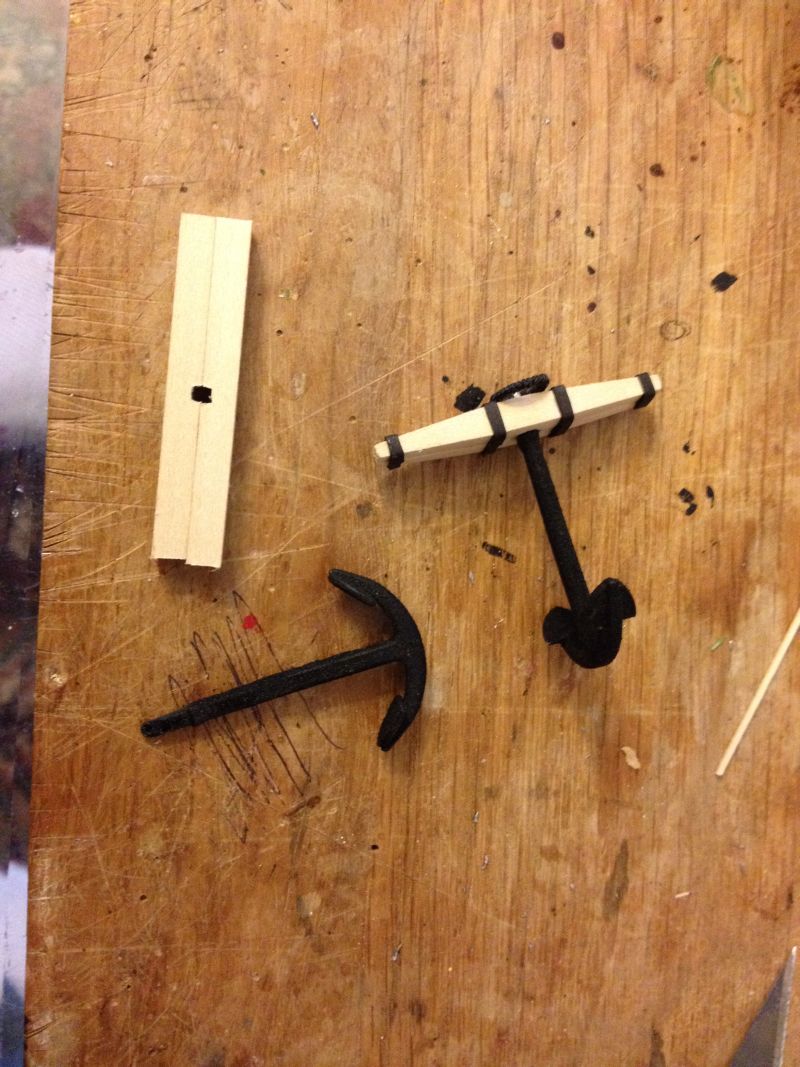
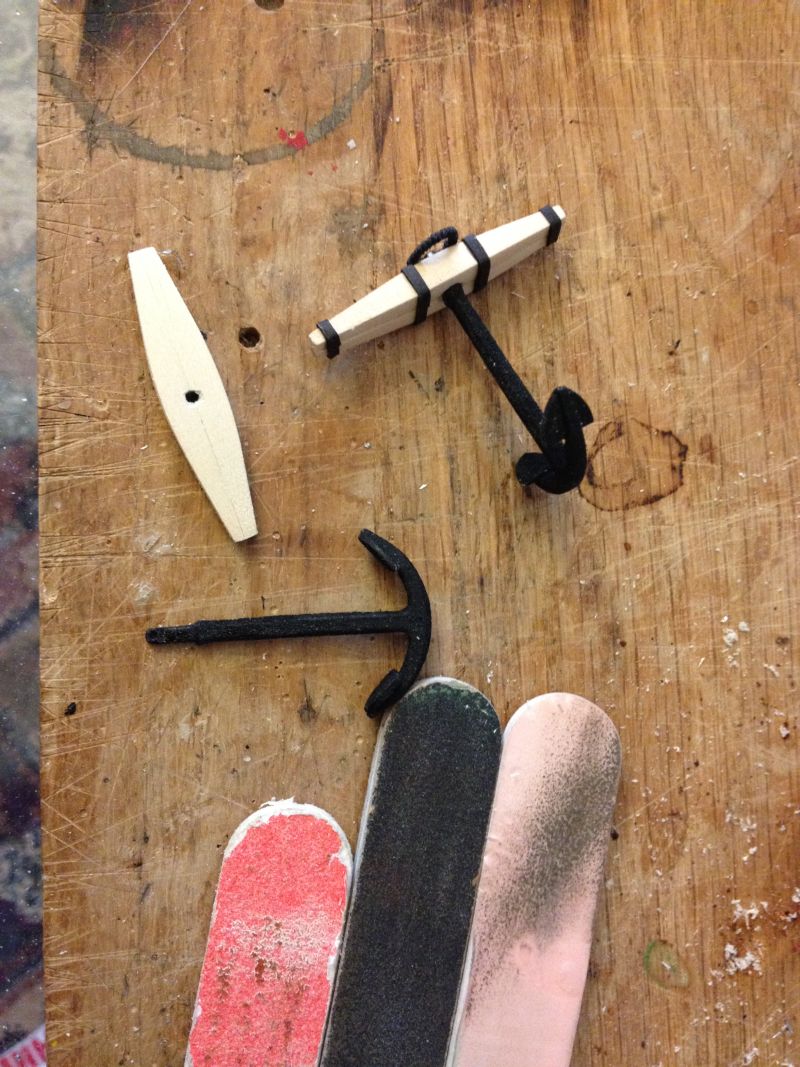
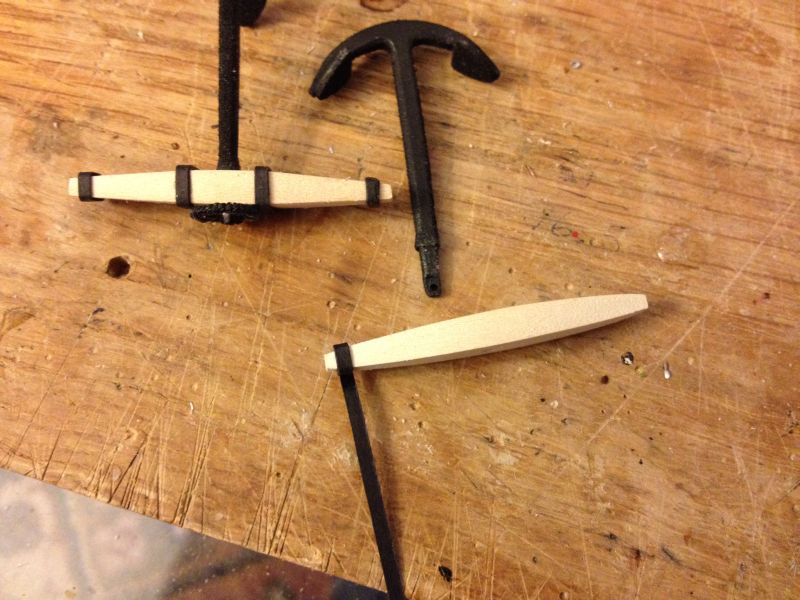
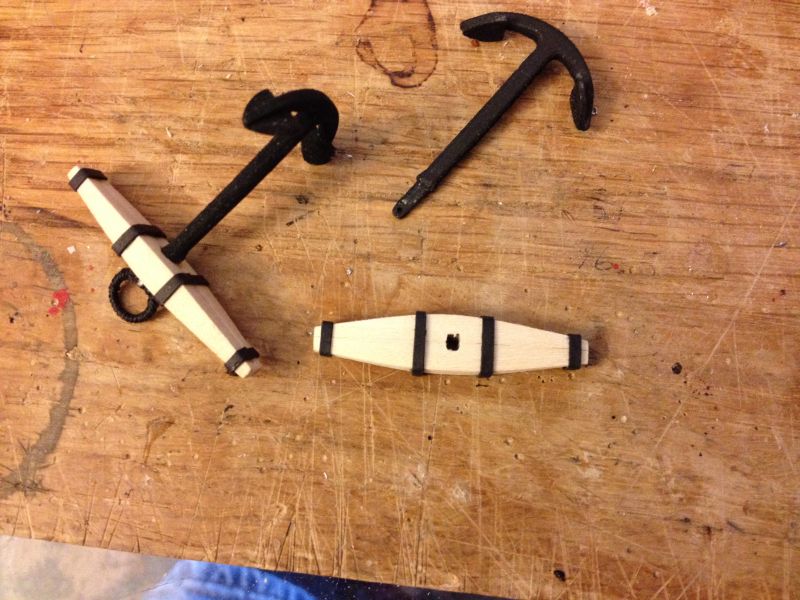
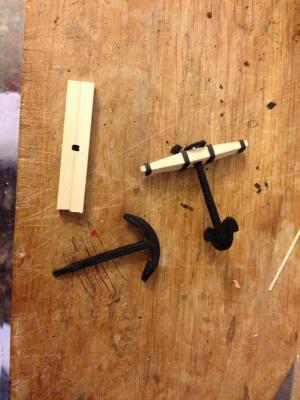
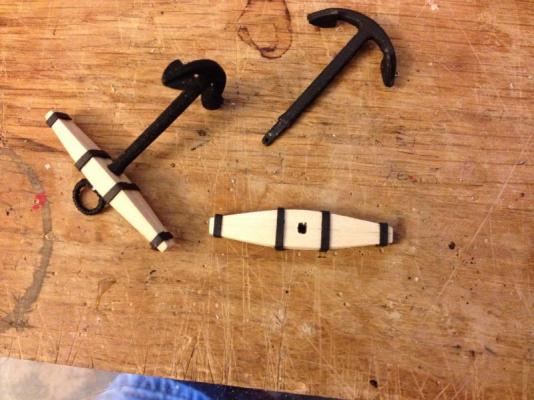
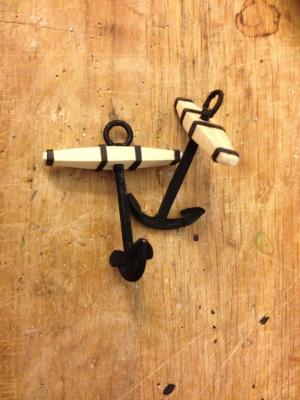
Hey all, this will be a small update for the time being. I am working on more and hopefully may be able to add later. I had only one of my anchors constructed and decided that it was time to get the second one ready. I hope to be adding them to the Niagara soon. I figured I'd show my method for constructing the anchors. I discarded the white metal upper piece and sprayed the lower piece with a thick black metal primer to get some casting texture. Next I glued to pieces of basswood together with a square hole through the middle. After some shaping I took some black heavy paper cut into strips and added the iron bands. I added the brass hoops and wrapped them in black nylon thread and painted over this with flat black paint to hold things in place and cover any bright spots. They are ready to go now. I will be working on adding these 'sleeve catchers' to the Niagara next. By the way, has anyone been catching the new pirate series on a certain premium cable channel? It is completely awesome and makes for a good background distraction while model building. I haven't spoken with anyone else who has watched it and was looking for alternate points of view on it. I read somewhere that a new series about Blackbeard will be on a national broadcast station soon. I'm anxious to see that come out too.


- 299 replies
-
- 5
-
-
- niagara
- model shipways
- (and 1 more)
-
Bob, that is some sweet progress. The cabin and galleries look fantastic.
-
Scott, thanks for the nice comments. I have periodically been checking in on MSW to see progress but haven't had much interaction. I was getting tired of tying thousands of tiny knots. LOL. That is all about to change though. I took a hiatus to work on some plastic models that have been gathering dust and have become reinvigorated to finish up my Niagara. I dug all of my tools and the Niagara out last night and am planning on an update post by Thursday. Thanks for looking in.
- 299 replies
-
- 3
-
-
- niagara
- model shipways
- (and 1 more)
-
Popeye, your progress looks great. I know we're all anxious to see more progress pictures.
-
Those pictures are very nice Sjors. It looks like you've done quite a bit since I last looked at your log. Very nice progress.
- 1,873 replies
-
- 1
-
-
- occre
- san ildefonso
- (and 1 more)
-
Hey Larry, I hope the holidays were good to you and your family. Your Niagara is looking great and I am impressed by the very clean lines of your planking.
-
Bob, your planking looks just as clean as always.
-
I'd have to agree with your assessment of the supplied gun port linings. I think you will have a better looking model with using timber to line you gun ports. Your Victory bow section is looking very nice so far.
-
Kimberly, I am sorry for the confusion. The lanyards I was referring to are the simulated (in plastic) ropes that have two deadeyes attached at either end; one end being at the chainplated and the other end (floating in the breeze) will attach to the shroud. The ropes that come with the kits (plastic and wood) is many times less than a quality material and we all, at times, find replacements for it. New rope and the experience of having already done it once should provide you with an outstanding finished product.
- 94 replies
-
- 1
-
-
- santa maria
- revell
- (and 1 more)
-
Daniel, I like these scenes where you have the figures involved. It gives us all a small sense of how things actually worked in a visual way. Please keep up with the excellent progress and detail.
-
If it's similar to what is on Revell's Constitution then each deadeye should have simulated inboard and outboard lanyards attaching them deadeyes on the chainplates. You would then pass the shroud rope between these lanyards and back up to seize the loose end onto the shroud. I hope I'm making sense here.
-
Kimberly, it almost looks as though they are indicating that there should be a loop up there for the shrouds to pass through. As far the where the shrouds attach to the deadeyes, I don't know. A closeup of the deadeyes would be very helpful though.
-
That yard looks great in place Sjors. I'm glad to see you're making progress still on both ships.