patrickmil
-
Posts
1,209 -
Joined
-
Last visited
Content Type
Profiles
Forums
Gallery
Events
Everything posted by patrickmil
-
 Glad to see some progress being made Sjors. Great pictures and I completely agree with Wayne.
- 1,873 replies
-
- 2
-

-
- occre
- san ildefonso
- (and 1 more)
-
Your main hatch combing looks great. It's going to look much nicer with separating all of those different panels.
-
The yellow you've picked out works very well in contrast to the black. I really like how clean the line is between the yellow and black.
-
You're doing an outstanding job on your Santa Maria! I really like the colors of paint you've chosen to apply. Very clean build so far!
- 94 replies
-
- 1
-
-
- santa maria
- revell
- (and 1 more)
-
The wales planking looks great Bob.
-
Hey Augie, I really like the red color you have painted your gun ports in. I have found the minwax ebony stain to be great in getting the black color you are looking for with the tiled floor.
- 2,191 replies
-
- 1
-
-
- confederacy
- Model Shipways
- (and 1 more)
-
Your painted hull halves look great Kimberly. When I was working with plastic models, I would sometimes paint first and then glue and sometime I would glue first and then paint. Either way is going to require some touch-ups here and there almost every time.
- 94 replies
-
- 1
-
-
- santa maria
- revell
- (and 1 more)
-
Nice (faux?) sheaves Augie. Those are nice little details!
- 2,191 replies
-
- 1
-
-
- confederacy
- Model Shipways
- (and 1 more)
-
She's looking great Popeye. A little varnish and some curing time will do her real nice! Lookin' forward to seeing progress on the Gothenborg.
-
Wes, the green looks perfect to me.
-
The Half Moon is looking great Popeye. You're really working fast and everything looks very nice and clean.
-
Nelson's favorite ship is really coming alive with your careful attention. The ship's boats look great in their places and I'm very anxious to see some masts and rigging with your skills.
- 1,279 replies
-
- 1
-
-
- agamemnon
- caldercraft
- (and 1 more)
-
Kimberly, your Jolly Roger looks really nice. Congrats on completing her!
- 118 replies
-
- 1
-
-
- jolly roger
- lindberg
- (and 2 more)
-
I really like what I see here JP. The gun port in your picture looks cleaner. The sheave also is a nice touch.
-
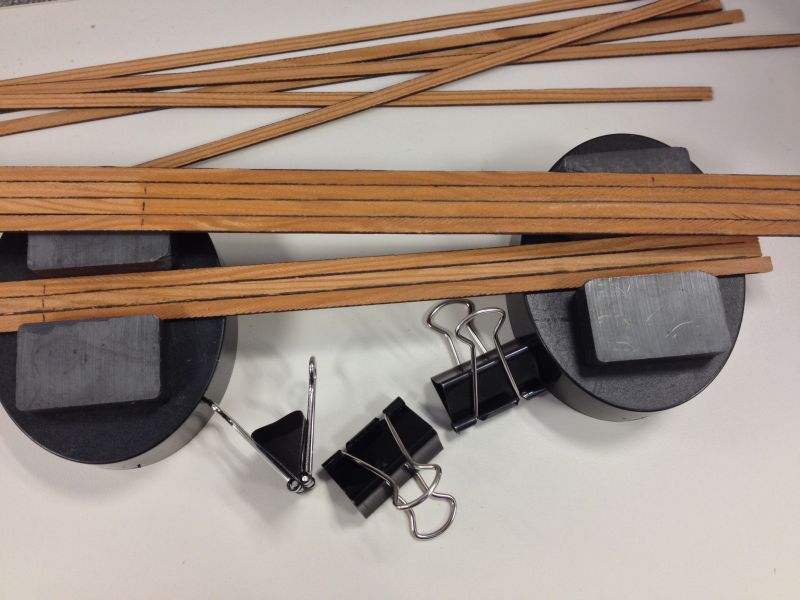
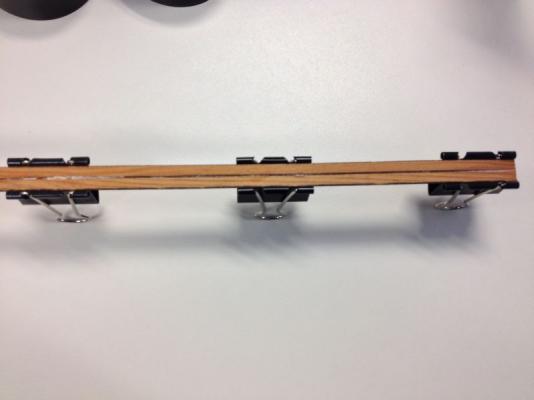
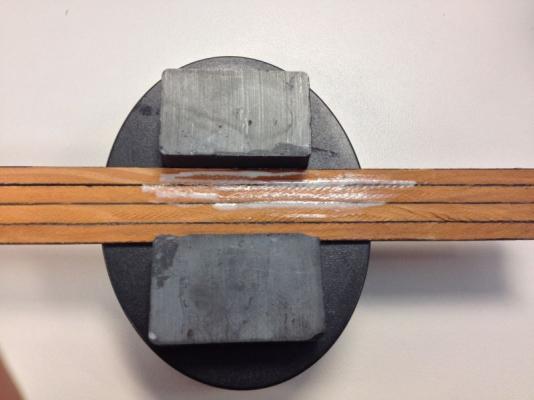
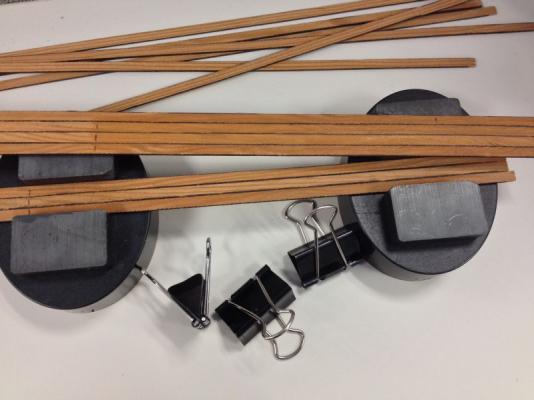
I'm back for an update and I come bearing pictures. Just a quick explanation. Tools and devices at work are few to keep it simple. I am starting to glue planks together to form the skiff's bottom and am using some paper clamps and a couple of large magnet sets. Once I have a several planks glued together I have been spreading a bit of glue across them to help firm things up and fill in and defects. At the end of yesterday's shift I had several sections of planking that will need to be glued together to form one large bottom. I should have it complete by Tuesday or Wednesday. Thanks for stopping by and feel free to offer any comments of suggestions.


-
The sweep ports look well lined up and it appears that you are very near to planking this behemoth. Great progress.
-
Your bowsprit and figurehead look great Sjors. That is a very large model BTW.
-
Popeye, I really like the look of what you have done in place of the cap rails. The pin racks are also a great addition.
-
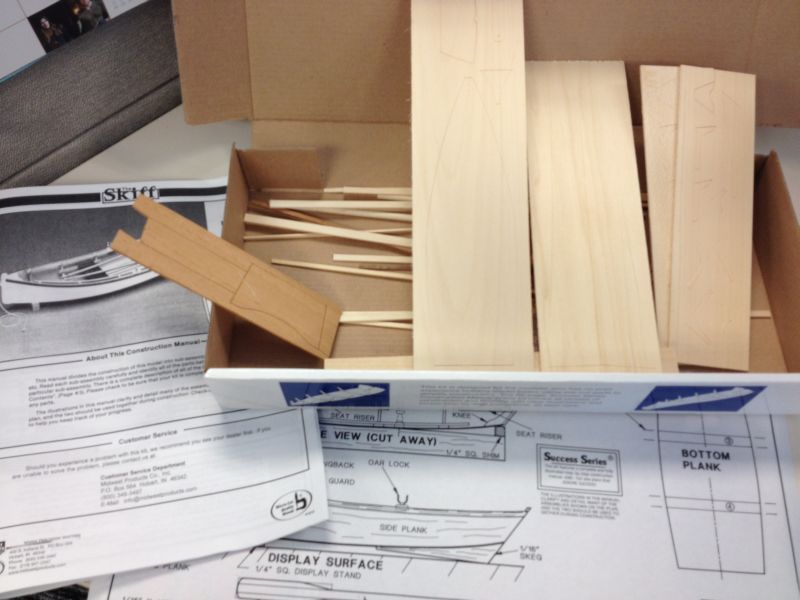
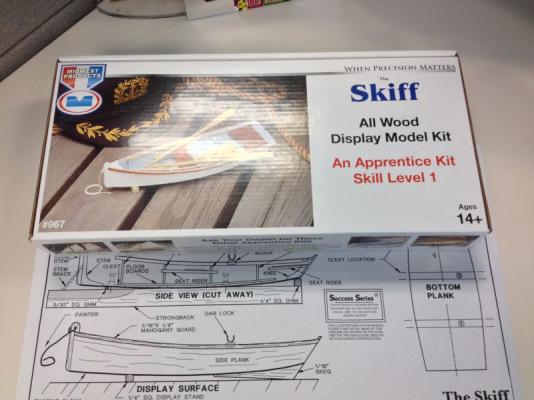
It's time to add an update. A small addition to my introduction of this build log: Due to some sensitive information at work, I have to keep my photographs small and exclusive to the skiff's materials so the pictures may not give a good idea of the scale of this boat in relation to full size objects. I prepared for the start of this build by gluing the kit's single plan sheet to a piece of cardboard. I am going to begin construction with building the skiff's bottom. I used the archival ink pen to color the edges of the planks that are making up the bottom. The ink will be barely visible. It's more of a preshading technique to give an idea that the bottom is made of planks rather than plywood. I will be doing the same thing to the skiff's sides and transom. I have also traced the bottom's plan to another piece of paper to assist with placement of the bottom ribs. I have started to glue several of the planks together, but I will save pictures of that for my third update. Thanks for looking in.
-
Well, the hiatus on my Niagara continues.... The story goes something like this: One day I am walking around Hobby Lobby with my seven year old, Eva, and we stumble upon the section of the store containing dollhouses. Well, they had this monstrosity there in the color red and her eyes got as big as dinner plates and I watched as her face lit up like few times I have seen before. With Christmas and then her birthday right around the corner, it was a no-brainer. Needless to say, I was back the next week with a coupon for 40% off and I made the purchase of a dollhouse KIT (I stress the kit part which means massive and painstaking assembly required). Soooo.... My plans to cut some rigging out of the Niagara and re-rig her were quickly put to rest to imagining my youngest daughter's delight. While there I did spot the Midwest Products Skiff kit on clearance for $12.00. Why not buy it and put to rest some of the questions at work about how scale model ships and boats are made? This kit is great for work as my desk measures an impressive four feet wide (LMAO) and is dominated by two large flat screen monitors. A few tools and the kit and I would have onlookers galore! The Midwest kit is a great kit for beginners and is wonderful for fulfilling my model ship sickness until the dollhouse at home is complete. The scale is 1/12th and I will be replacing the plywood pieces with extra strips of planking I had from an old AL kit. I am doing this in the hopes of recreating an old skiff (before plywood was all the rage) that has been beaten and worn down. I will be painting it and stressing the paint and will place my creating in a shadowbox to hang on the wall next to some pictures of lighthouses. My saga begins....

-
It's good to see some headway being made on your Victory JP. You know... the thoroughness of your approach should be appreciated by these manufacturers as it really gives everyone an idea of how everything goes together better than the instructions.
-
Tony, your progress is looking great. I read the first statement at the top of this page and I have to admit, I feel the same with mine and I think most of us think the same thing with every build. I like the treenailed version of planking you have done. The treenails are a good color and are appropriately small in my opinion.
-
Hey Bob, I'm glad you went with doing the treenails. I like the look of the darker treenails and especially how you have them arranged.