HOLIDAY DONATION DRIVE - SUPPORT MSW - DO YOUR PART TO KEEP THIS GREAT FORUM GOING! (Only 44 donations so far out of 49,000 members - C'mon guys!)
×


clearway
-
Posts
2,228 -
Joined
-
Last visited
Content Type
Profiles
Forums
Gallery
Events
Everything posted by clearway
-
 Coming along nicely there Boyd nice work with the windows. Keith
 -
I polished and then used spray on lacquer for my cutty sark- touch wood 17 years later they still look ok. Keith
-
The tracks are ye old rubber band style supplied with the kit- i have discovered a company called fruilmodel who manufacture white metal tank tracks- a very extensive range acually- so using these to replace the tamiya tracks, and any future armour builds including trumpeter and dragon models kits. Keith
-
think it will look good Boyd- you will need to file a fair bit off some of the castings though to get them to fit within the confines of the billings stern. Keith
-
Thanks everyone, been doing some 1/35 scale armour for the last week or so- needed a break from ships for a while! Boyd i was thinking about building up the wooden supplied scroll work but as i am painting mine decided to buy the castings- wood the brass castings not look ok left au natural on your wood finish(i love the look of polished brass)? and Bob i left my cutty because of no workshop facilities and other projects and it was 12 years before i finished her off Keith
-
A lot of source works i have read specify 15" spacing for the ratlines. Keith
-
True Nenad- at the moment i am building some 1/35 scale armour (m4 sherman and jagdpanther late version by Tamiya) as a break from ship building for a while- fruil model metal tank tracks are kewl Keith
-
if you don't say anything else about the tumblers Bob no one will know any different them catheads are looking fantastic. Nenad and you are nearly making me want to do Cutty Sark version 2.0 - note how i said nearly! keith
-
Hope the bits arrive- not sure about the 1/78 scale fittings as the 1/78 castings i got for my hms victory stern are way over scale and i will need to file them down a little to fit and my stern is supposed to be 1/75th scale! keith
-
Looking good, the paint below the waterline will develop more lustre after a couple of coats of matt varnish. For marking waterlines you can hold the ship in a cradle and tape a pencil to a block of wood the same height as the waterline then scribe along the hull -that way you only need to make one measurement- hopes that makes sense Keith
-
if you have a lines plan you can lift the frames from that- you will need some tech. drawing skills though, but it is not as hard as people think. Keith
-
Nice work Bob- I didn't put my whisker booms in place till near the end of the build- i rig from the stern forwards- and the stays/ booms were about the last pieces to get rigged and even then they still got a few "knocks" Keith
-
Certainly looks a lot better Ian- nice job. Keith
-
Looking through some old books on ship modelling a lot of them old guys used card and cuttings from cigar box labels and even old xmas cards for bits of scroll work and decoration. Keith
-
hmmm that is going to prove interesting- with the newer kits at least they have a sheet showing all the parts with relevant numbering so you can find them on the ply sheets which would have given you some idea of the shape at least- i suppose it is the problem of taking over a kit where someone hasn't kept everything with it. Keith
-
Nice work so far-Is it not possible to work out the basic shape from the plans for the missing parts? Keith
-
Ouch Keith- at least if you start from scratch you will have a lot of fittings available for it. Keith
-
Ty for the likes everyone.I thought this mike, but they moved all in with the laser cut ply on this kit. The only plastic mouldings are the gun carriages which is weird compared to all the other billings kits i have built. keith
-
That looks a lot better Bob Keith
-
glad to be of service me old mucker
-
Nice one foxy, how about drilling a hole into the bottom of the gun trolley and the deck then using a piece of brass wire as a spigot to hold the guns in place? Keith
-
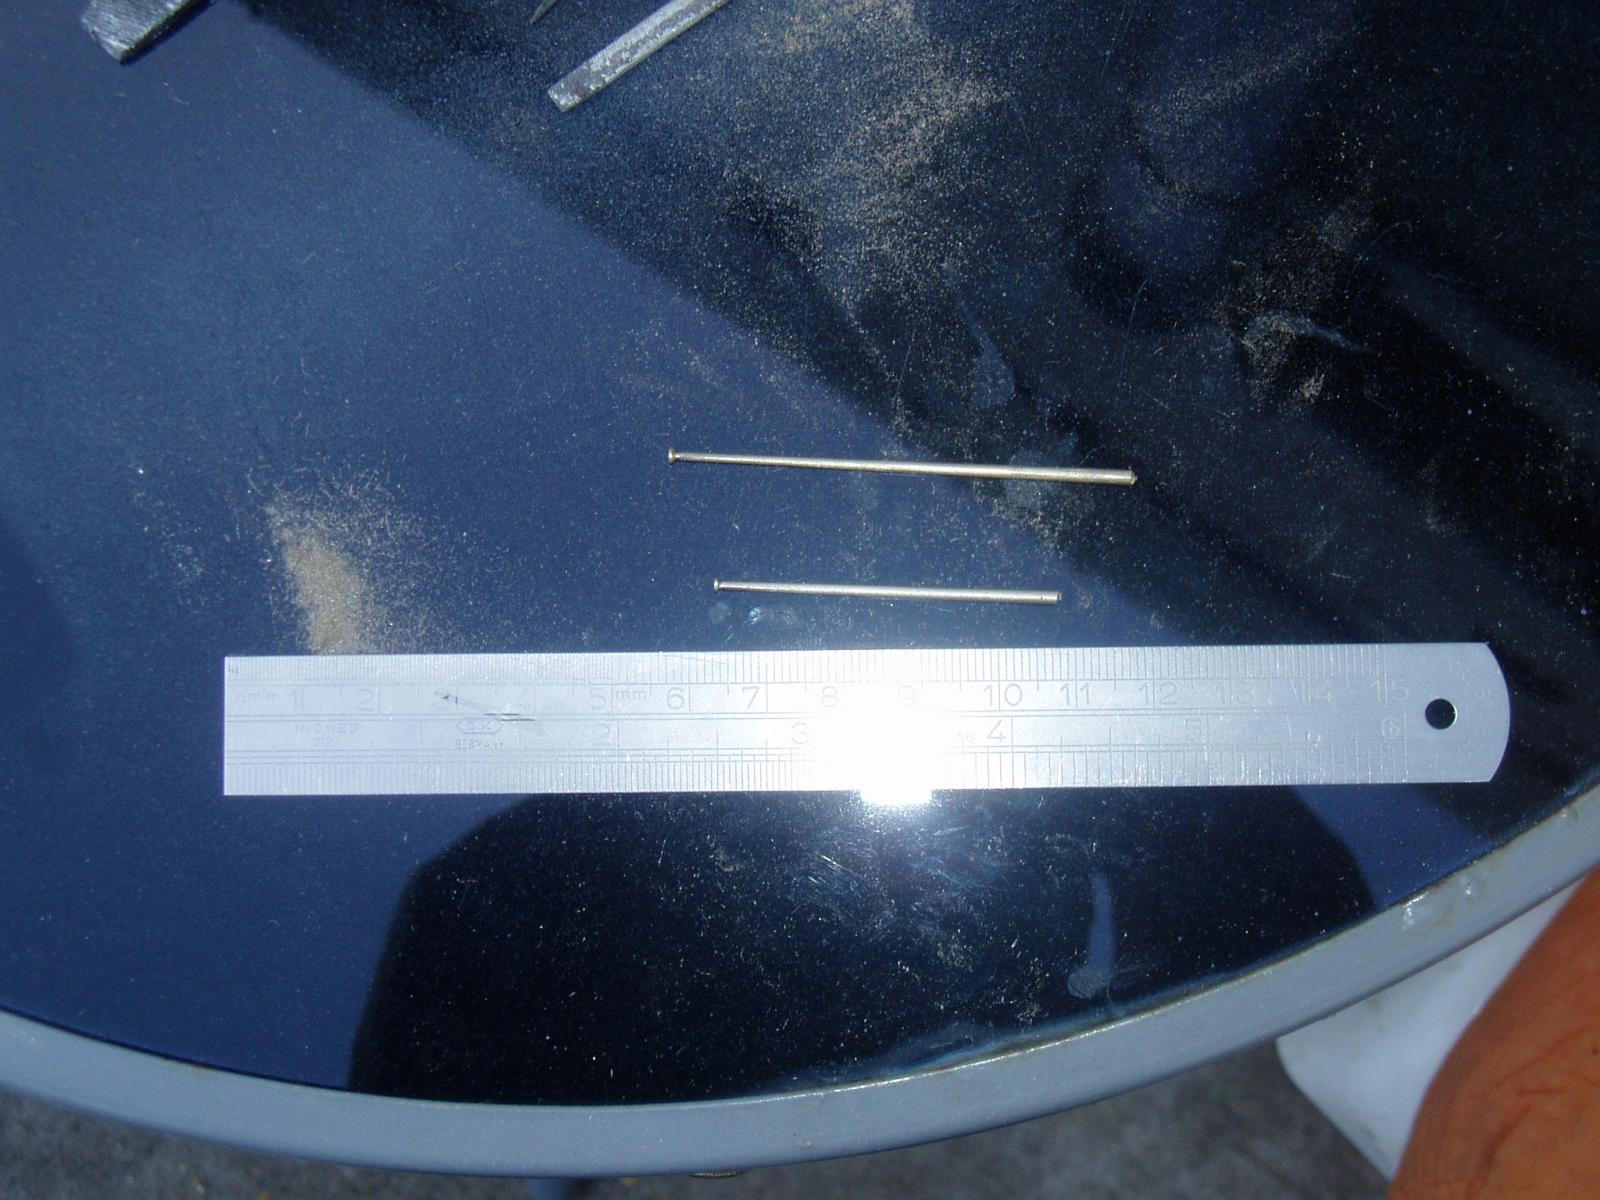
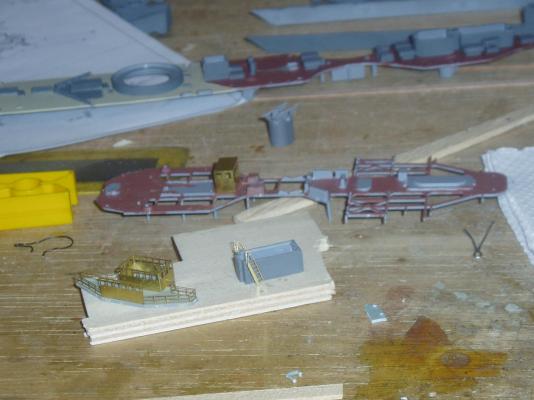
Been assembling some of the brass etchings for the wheelhouse and ladders. Also decided to make new masts from 2mm brass rod- i dont have a lathe so the were tapered down using needle files by draw filing- also got HMS Warspite to look forward to with the white ensign etchings- sometimes think i need my head read- the things we do for fun New masts below- next job will be to file notches for the yards- still cant decide whether to cyano the yards in place or solder them. Keith

- 22 replies
-
- 7
-

-
- dreadnought
- zvezda
- (and 1 more)