


Justin P.
-
Posts
991 -
Joined
Content Type
Profiles
Forums
Gallery
Events
Posts posted by Justin P.
-
-
Im in! Id love to follow along. Sound like you went through or are going through a lot of the same thoughts that I did. I settled the other-way around and went with Triton first - but am looking forward to how you get on with the Echo. Funny how we all interpret things differently... I actually though (having no previous experience) that Triton looked to be an easier first foray into scratch building, despite all the supporting materials provided by Admiralty!
I dont think you need a spindle sander. I had similar workshop space considerations to deal with and ended up decided on a bench top drill press that can be used as a spindle sander. My drill press/spindle sander deal cost me about $150 all-together and got both tools (more or less). I did all my Triton frames this way. You dont need it, but it does save time - and if you can combine tools you save space.
- mtaylor, Old Collingwood, VTHokiEE and 3 others
-
 6
6
-
Looks like a lot of Model Shipwright titles…. Somebody better jump on that soon!
- Keith Black, thibaultron, mtaylor and 1 other
-
4
-
-
1 hour ago, mtaylor said:
Very well done, Justin
Thanks Mark, what are your thoughts about the plank ends meeting in the area of the gunport frame? I admit I did this wondering if it was correct, but couldn’t find anything definitive that says special care would have been made to ensure planks did not meet in this way.
Thoughts?
-
-
8 minutes ago, BobG said:
Is "brass ager" the brand name of the blackening agent that you use?
Hi Bob, I don't know about brand. The stuff I use sells through amazon from Rockler. Interestingly they dont list it on their actual website, but do sell it through Amazon.
-
-
28 minutes ago, WalrusGuy said:
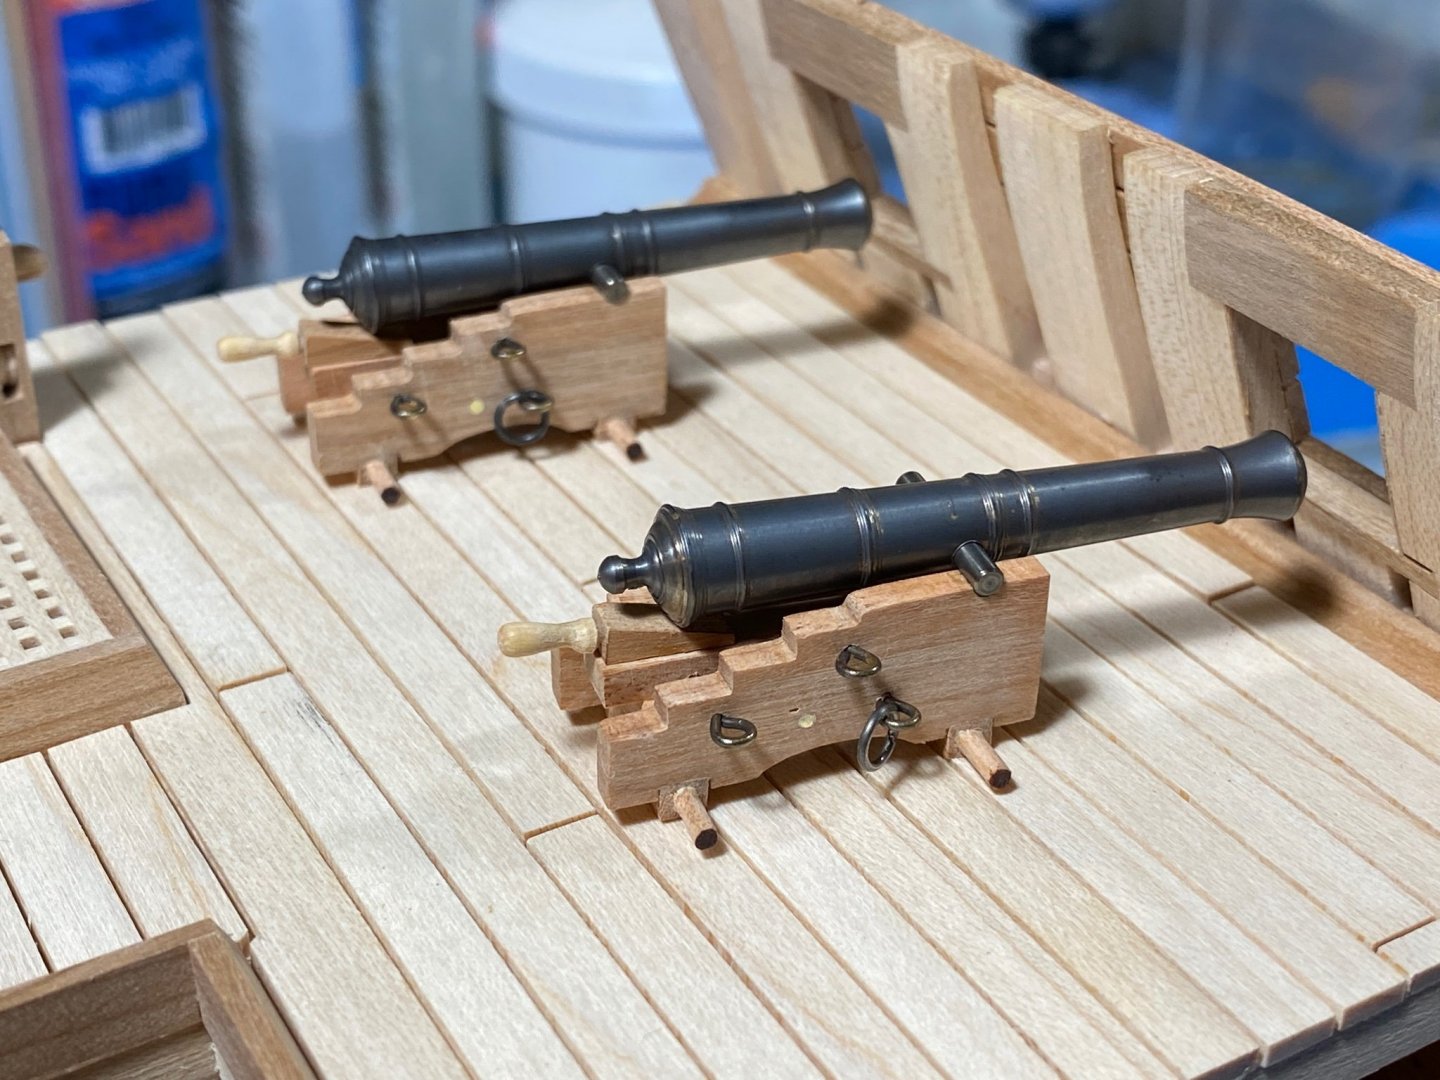
How did you blacken the guns evenly? They look really good! 🙂
Thanks! I dont know if I do it the right way... I use brass ager, diluted in water and then do successive treatments until its as dark as I want it.
- Ryland Craze, Edwardkenway, mtaylor and 2 others
-
4
-
 1
1
-
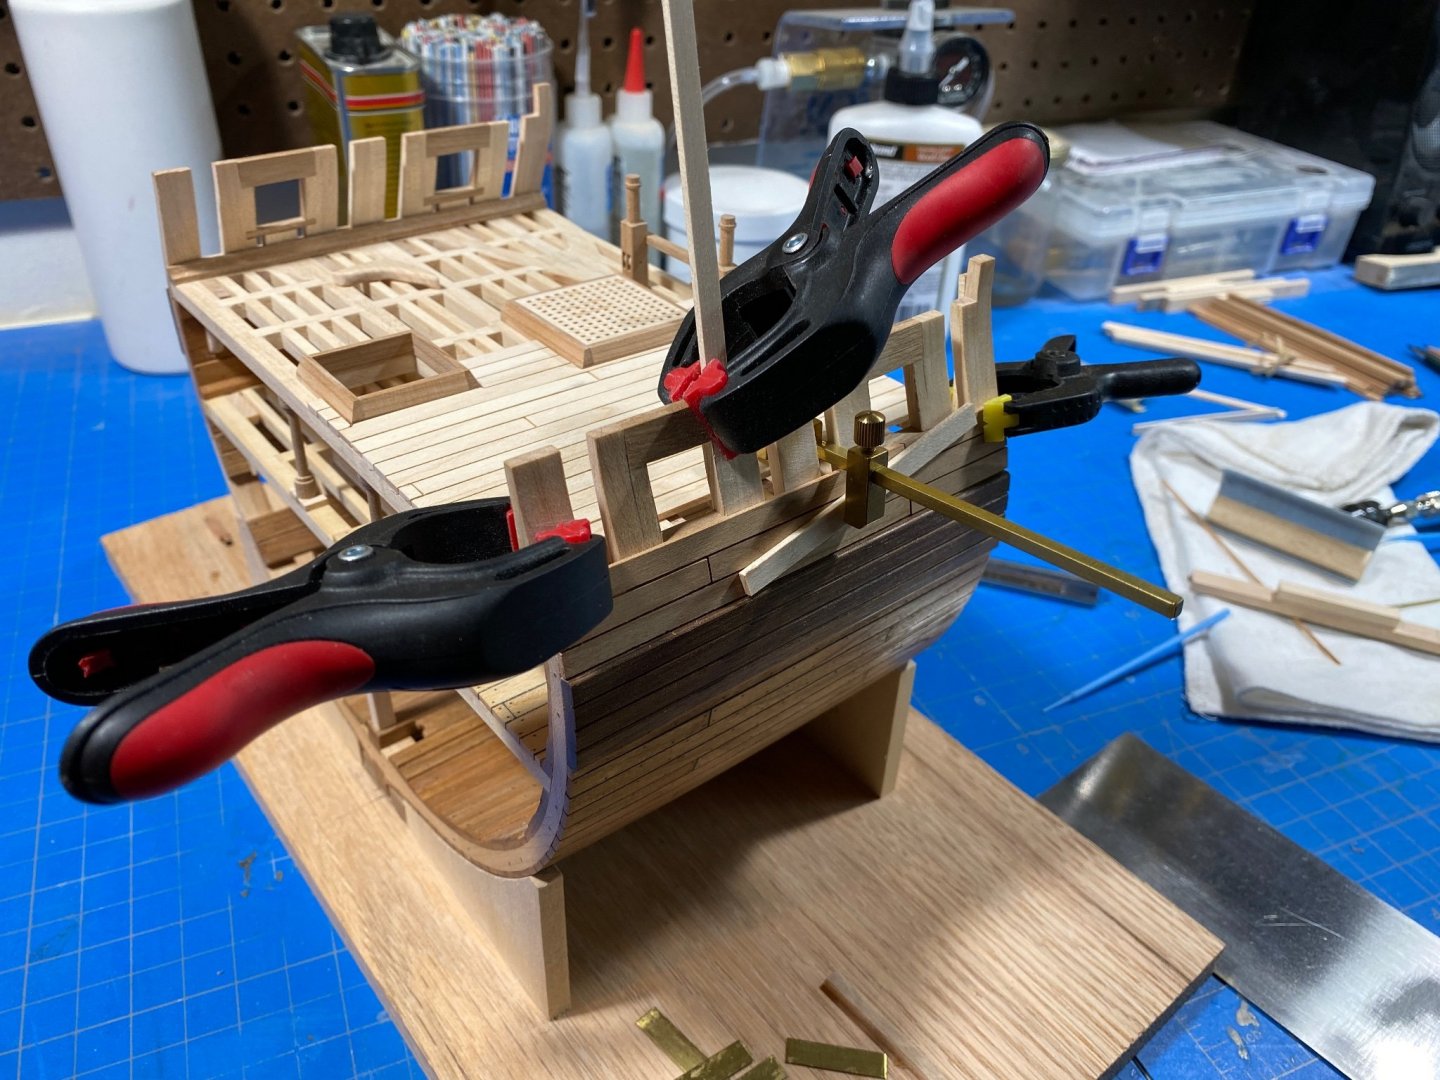
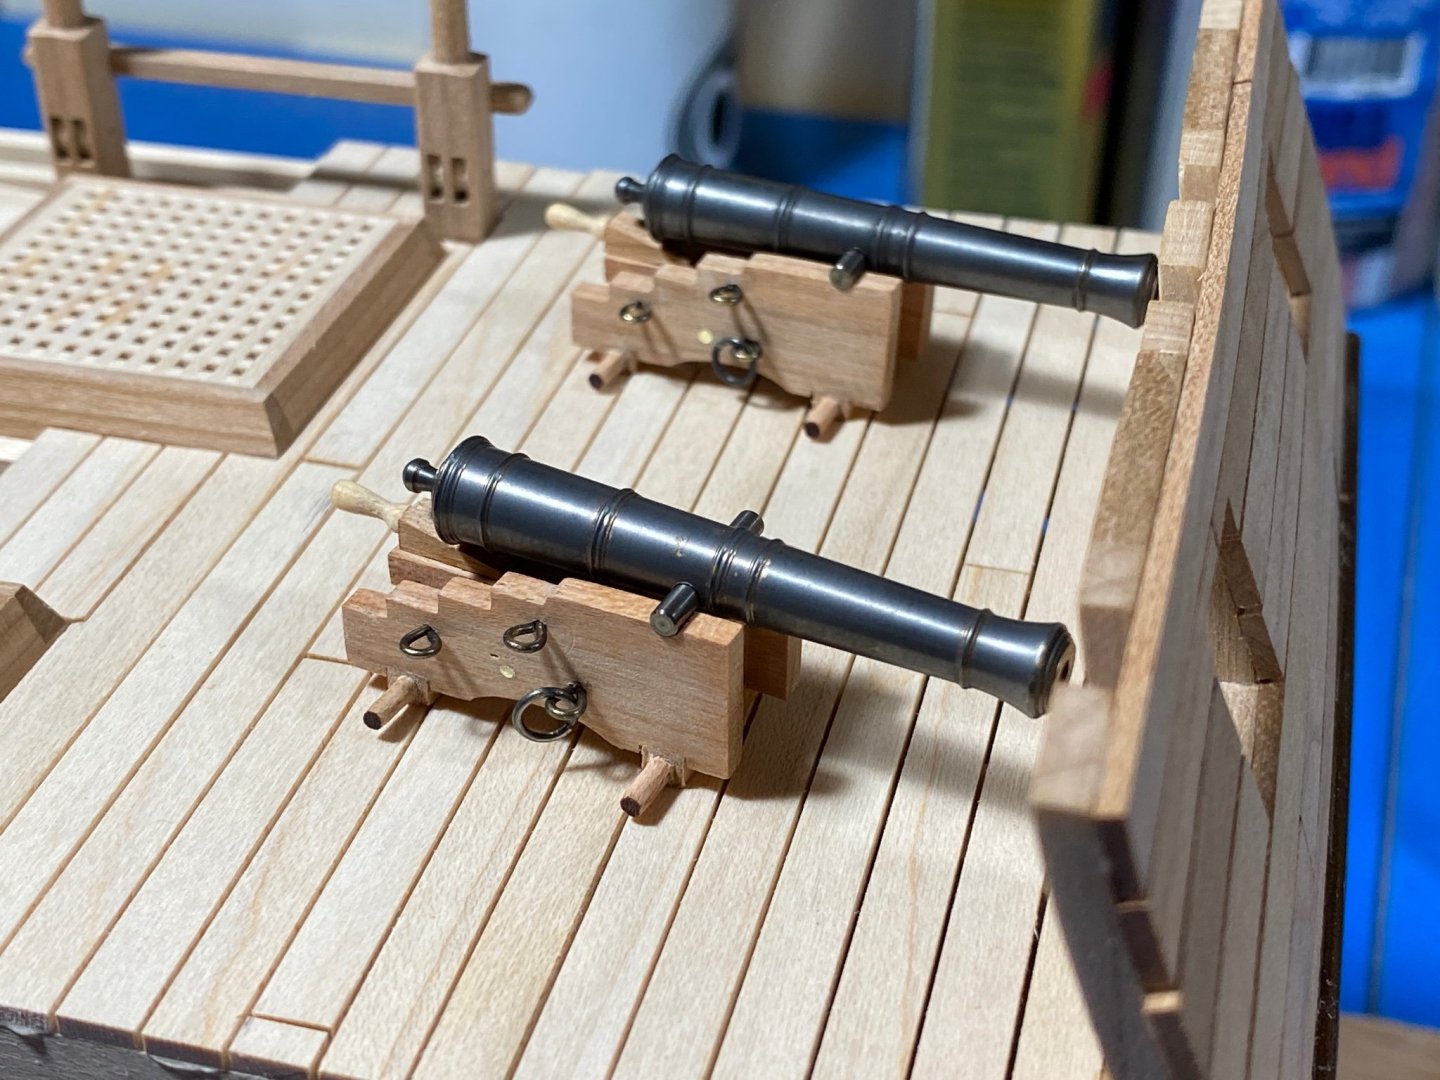
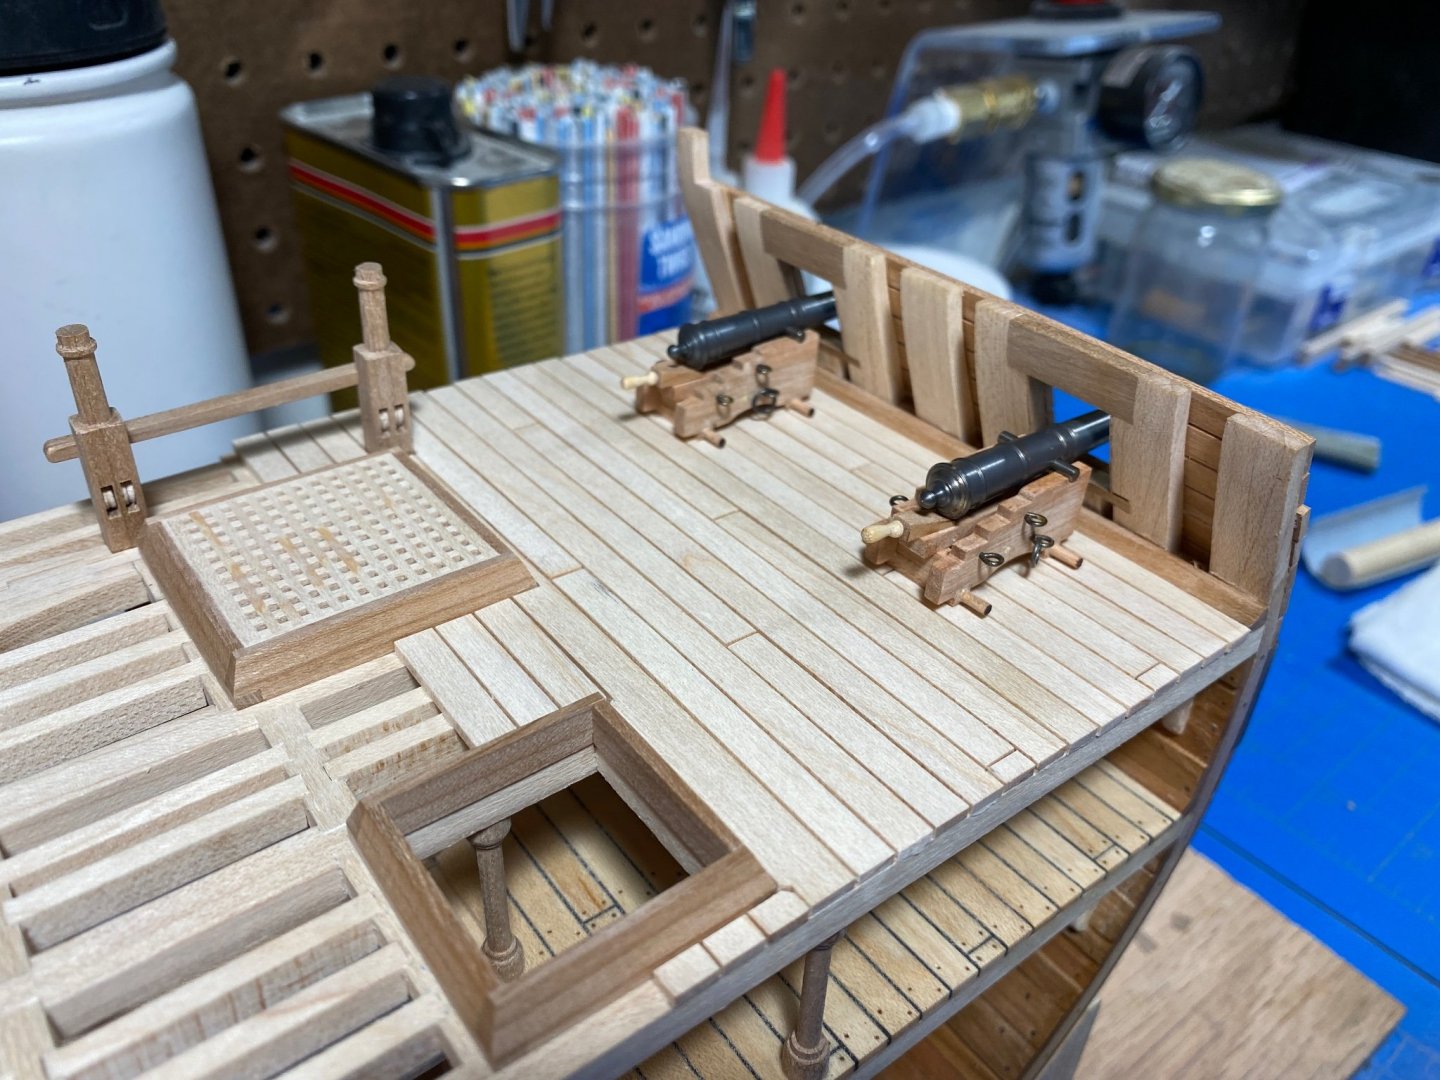
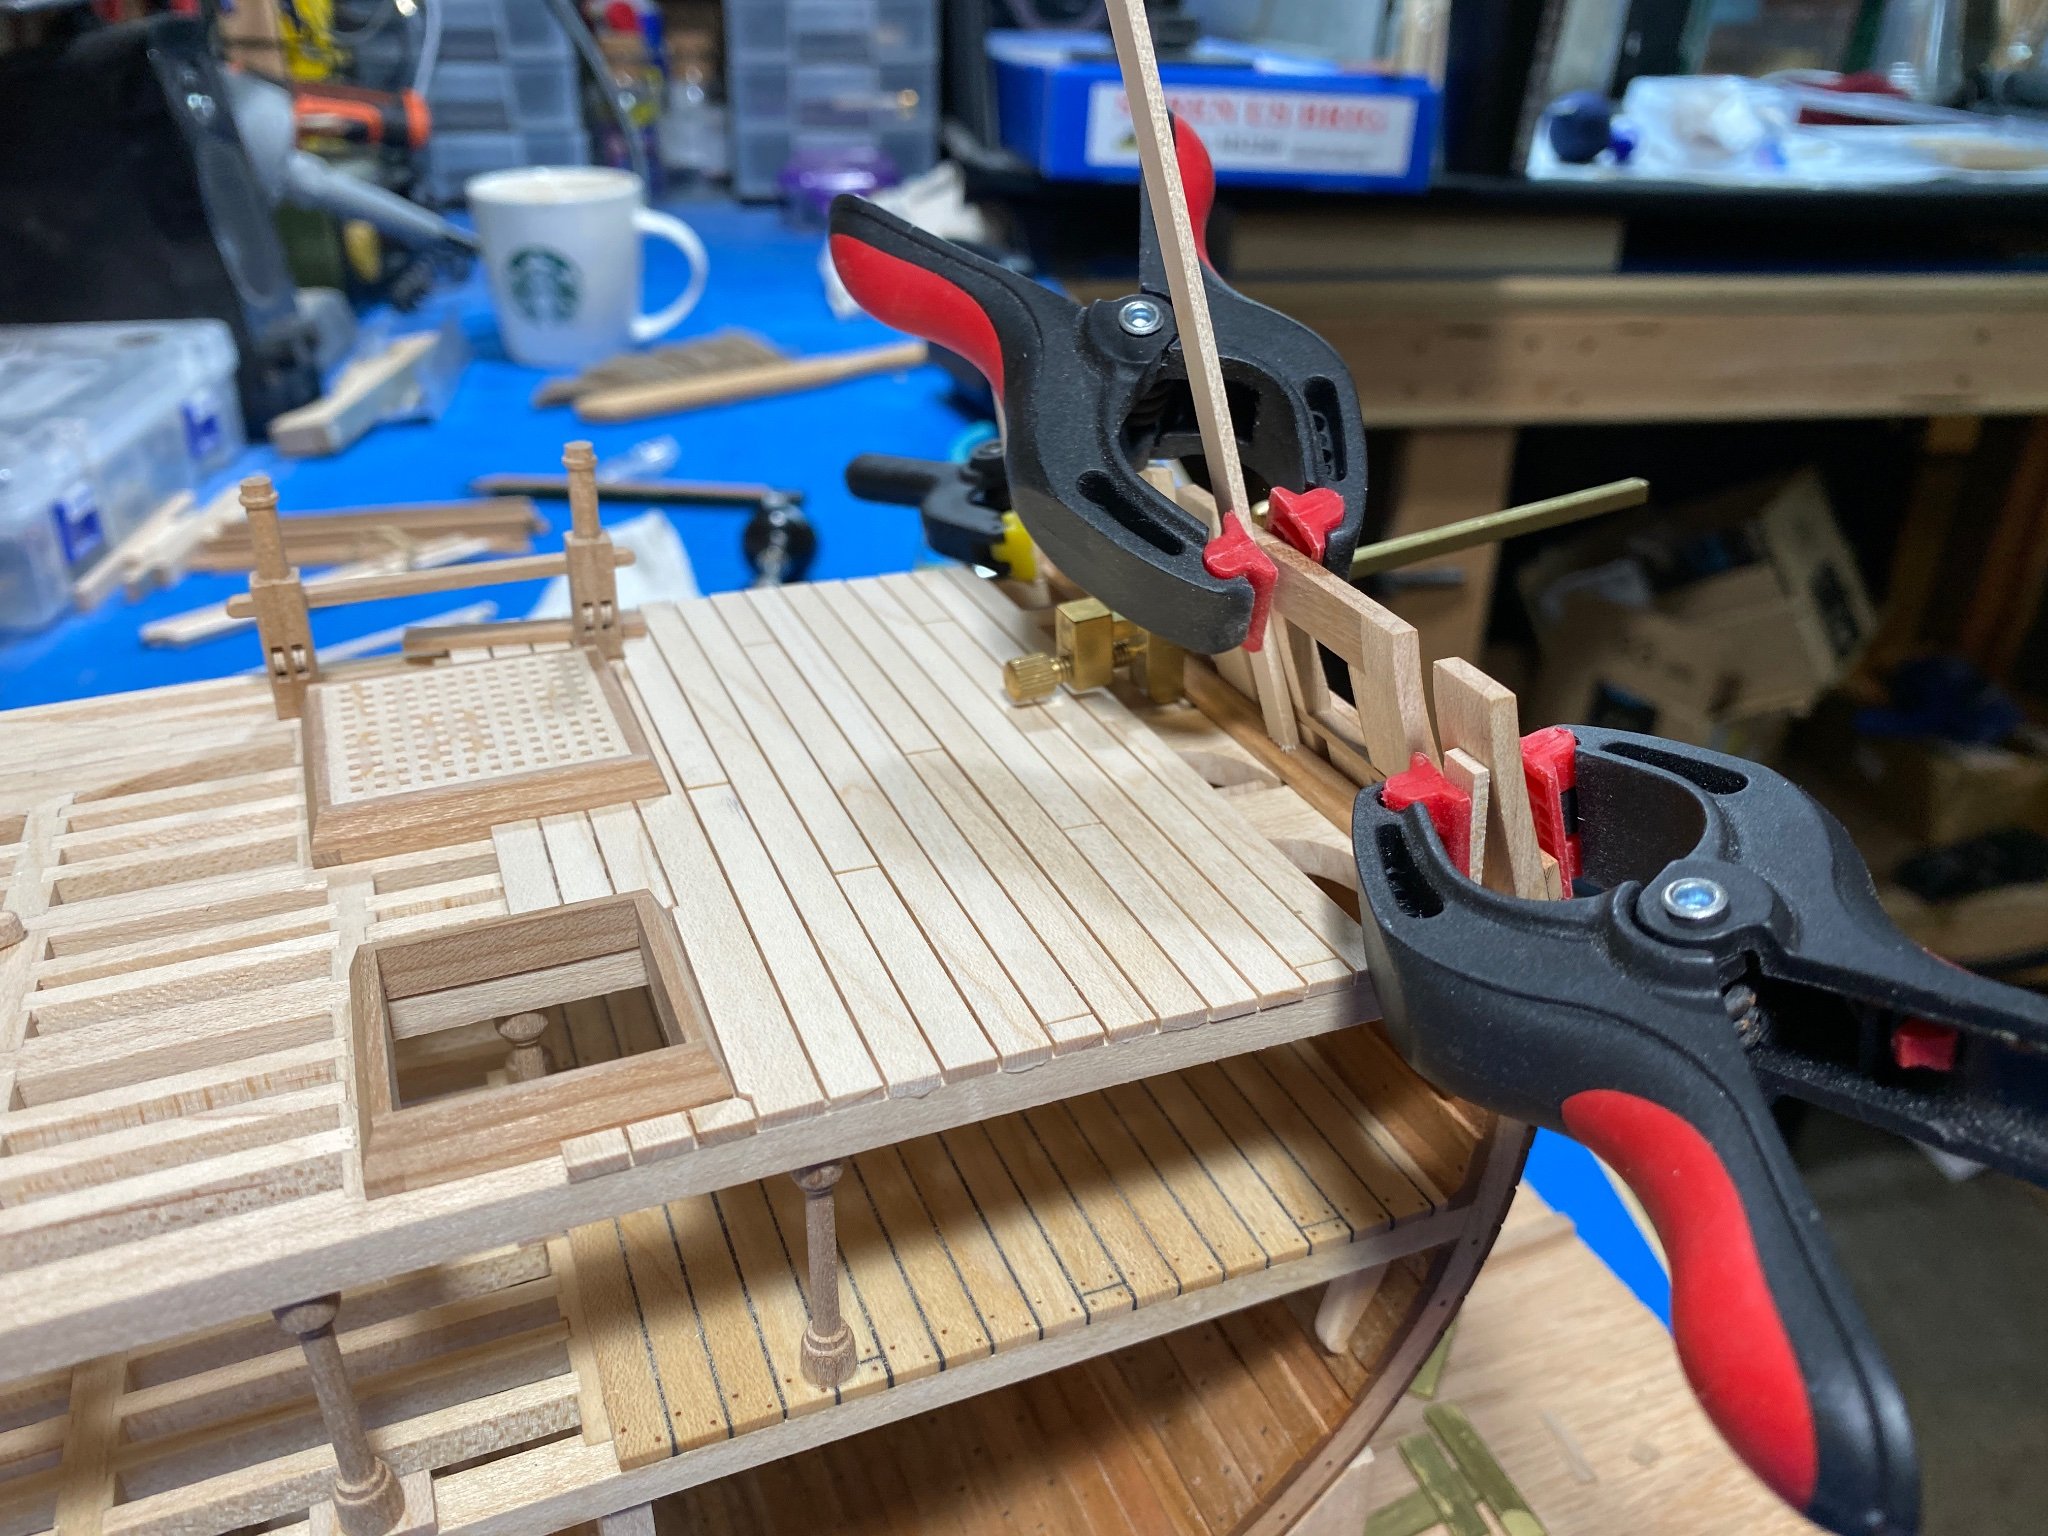
More planking and a bit of fun - Guns!
Got a little headway with the rest of the gun deck planking and started assembling guns. Probably a bit early for guns at this point, but I was excited to see them come together so went ahead anyway. I went back and forth wondering if I would be "cheating" on a scratch build by buying a gun kit, as I have no experience turning brass and am not even sure I could do it on my MIDI lathe. Ordered these from Syren, along with the carriage kits in cherry. I actually spoke with Chuck about this to check in about size in relation to the Triton plans, and got some good input on what blocks sizes would be appropriate as well as rope. The plans are a bit dodgy with regard to some of these details. Otherwise, the cherry kits from Syren align quite well with the plans in terms of size of guns, carriages and so forth.
I feel better actually knowing that despite being a kit they still required quite a bit of work to get them right. All the hardware has to be made yourself, along with assembly and removing char. It actually did take me quite a while to get them this far - while also adding a few planks in between stages to both the deck and the exterior. Still some cleaning up on this work before I move on but I'd call it a productive weekend.


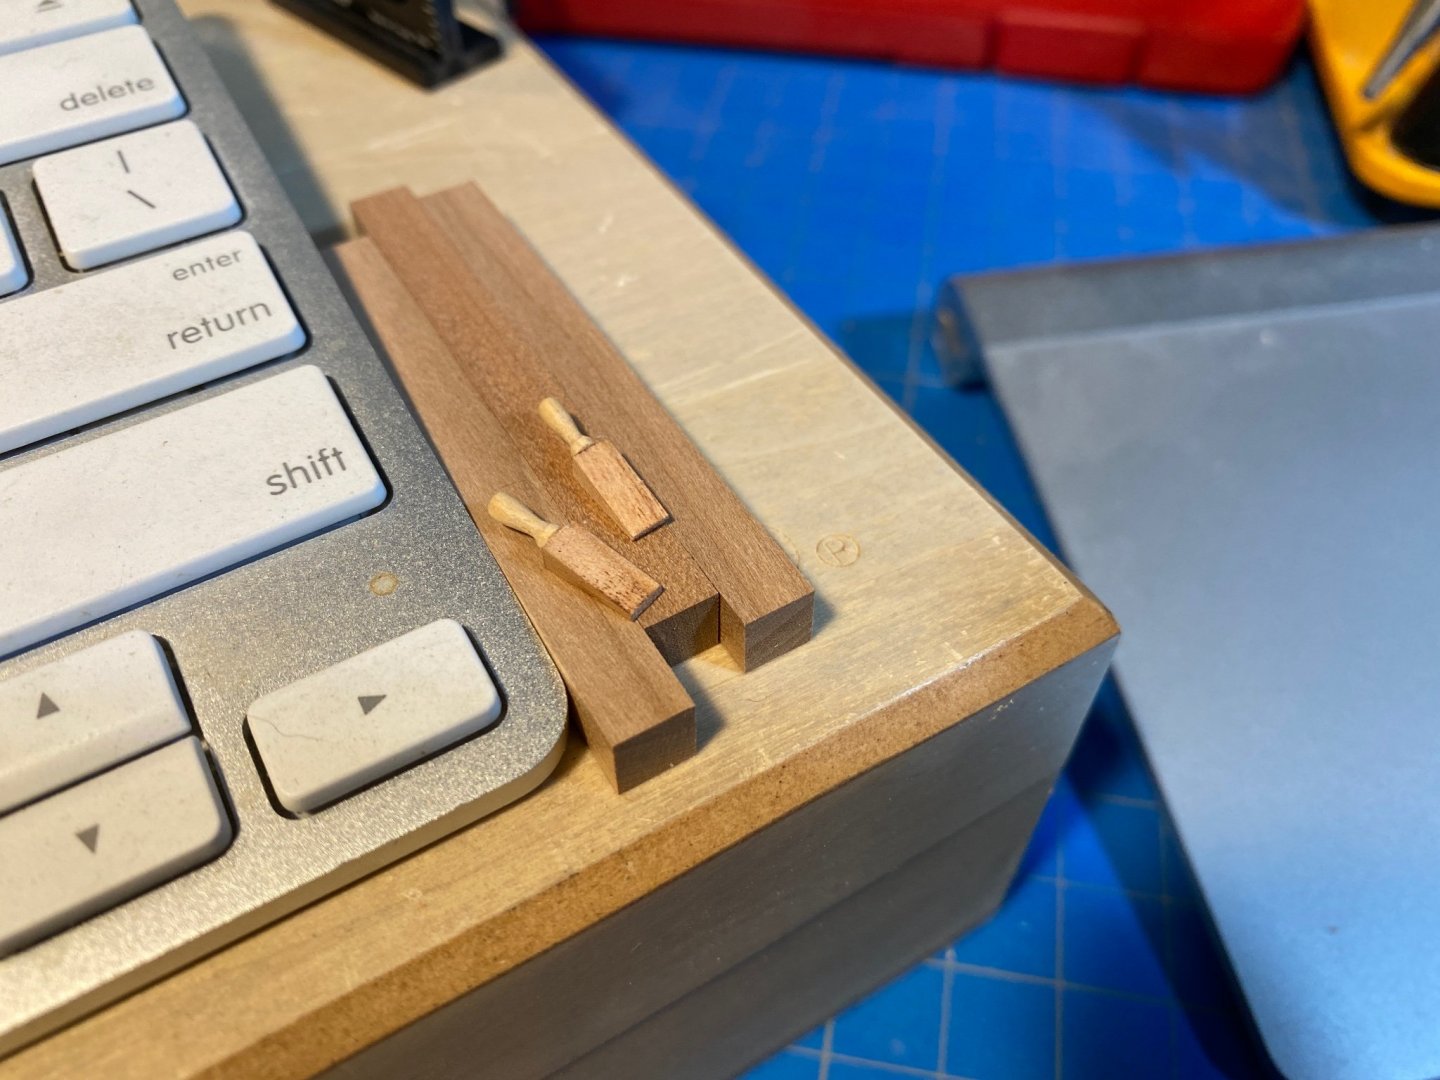
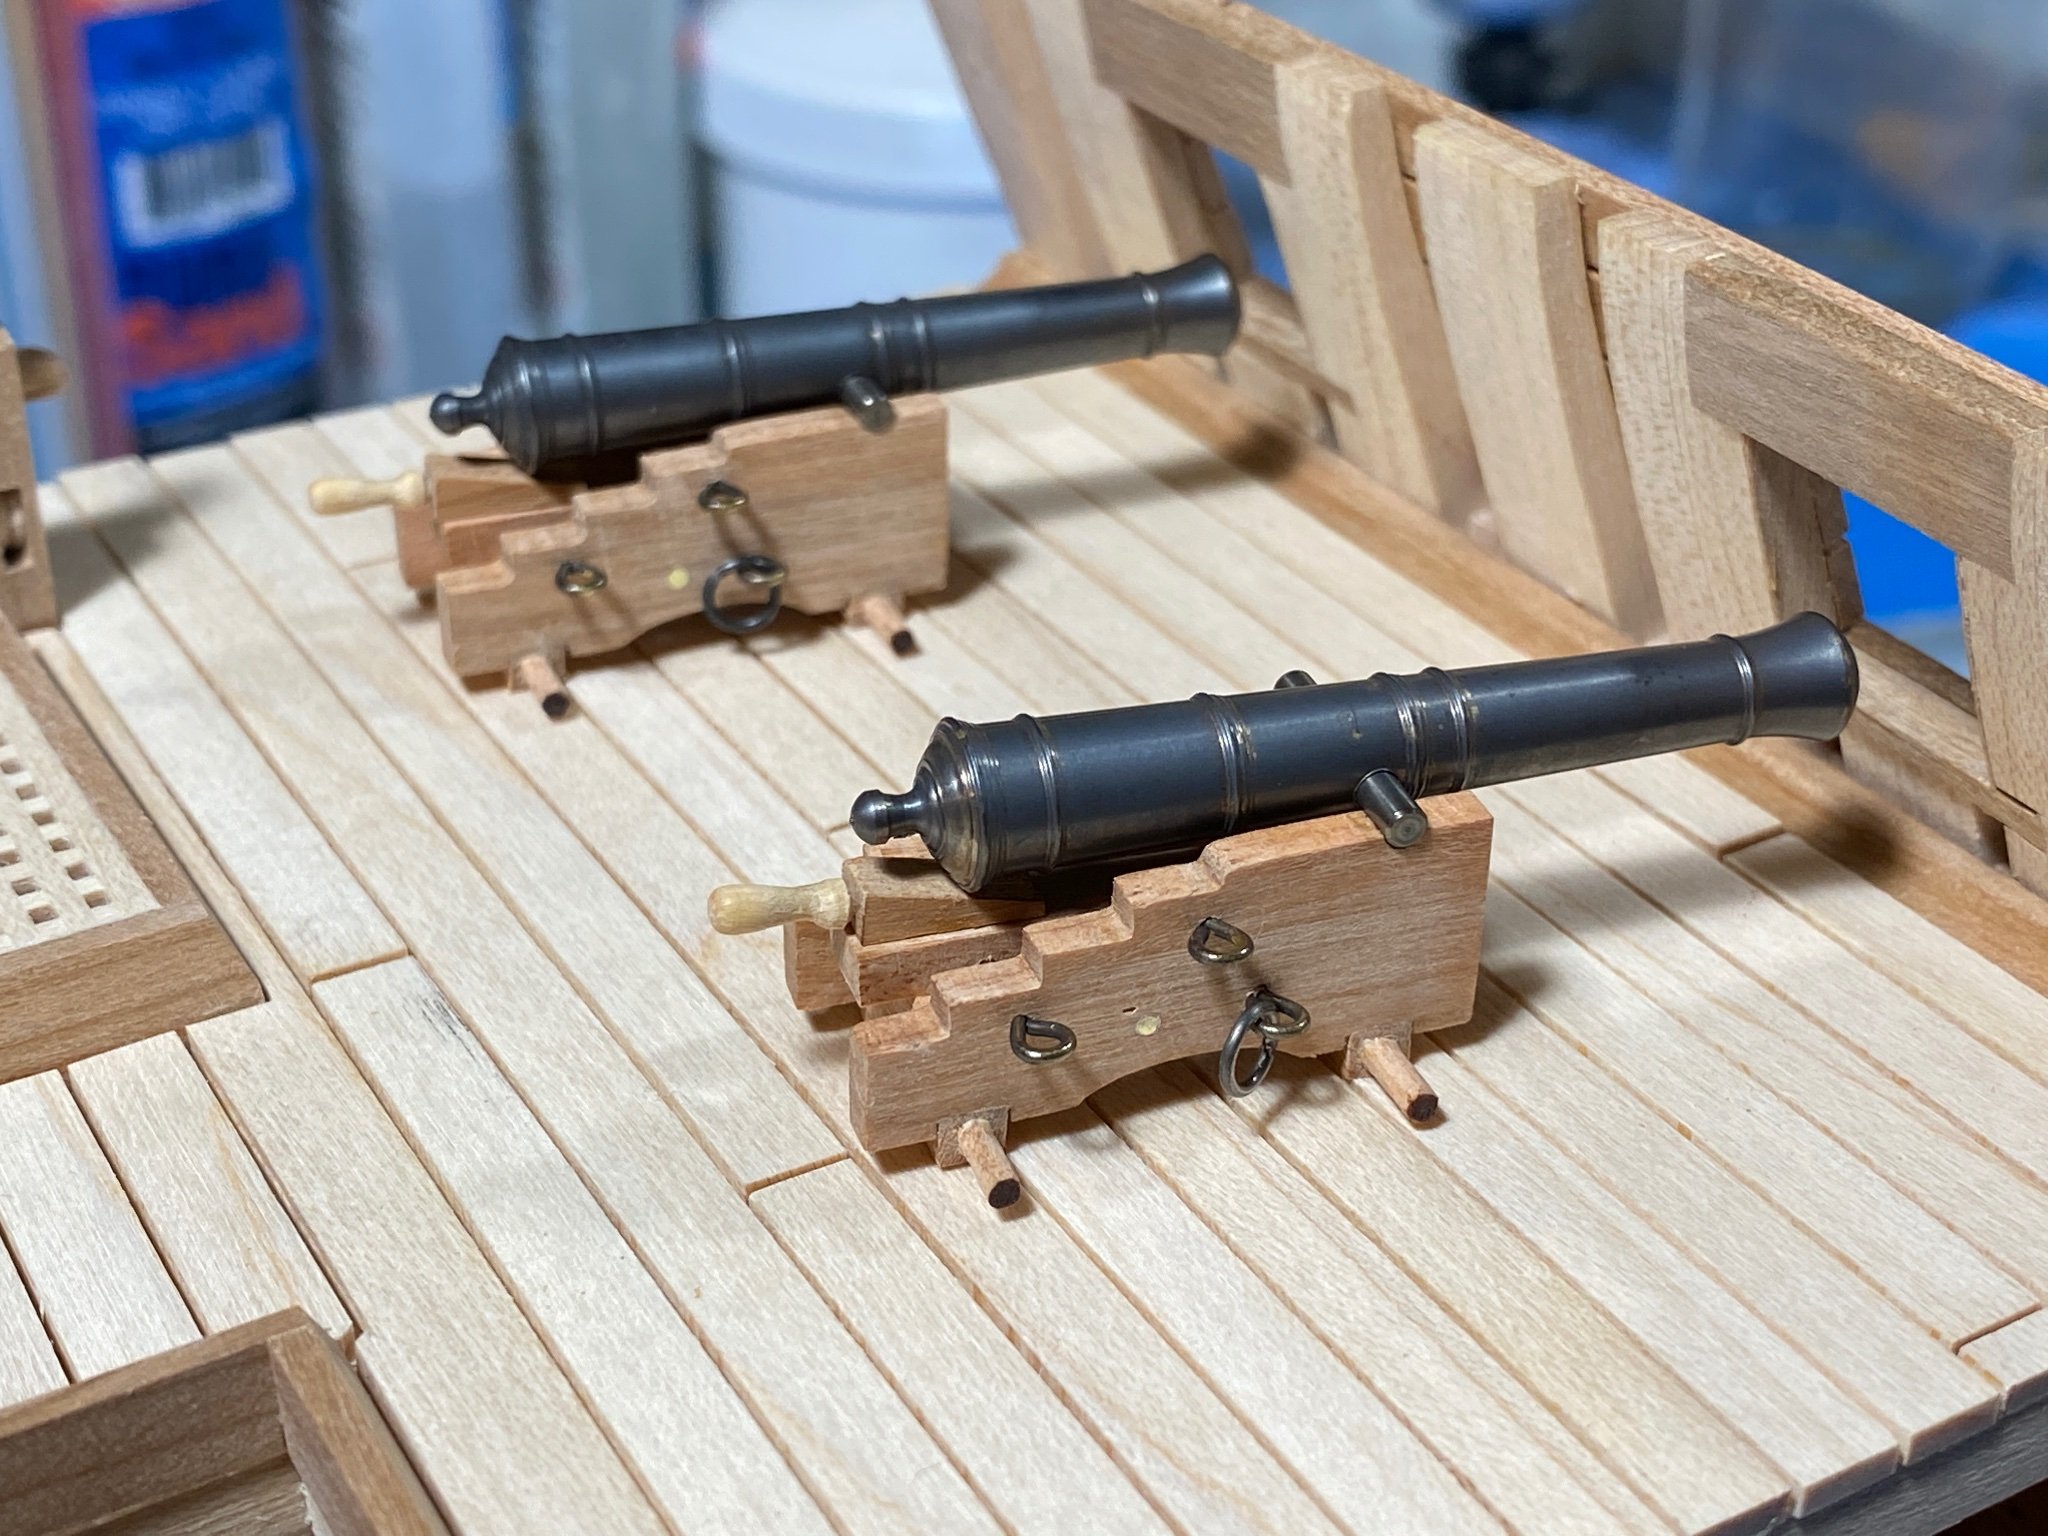
I did some blackening and tiny turning to get the Quoin right. Aside from the basic construction of the carriage nothing is glued or permanent. I think there are few elements that I should think about a little longer.
- 1. The quoin is in a contrasting wood color to the rest of the assembly. For whatever reason I thought this would give the overall assembly something more interesting but I dont know if it really makes sense.
- 2. The eyes look a little large. I may need to pull them and make a small channel so they can recess a bit more. OR, I may need to scale them down farther. Perhaps @Chuck has an opinion. Also worried a bout about the height of the guns in relation to the ports. Once I add the wheels, I may be relying on the quoin to point the guns back down to center in the port... not sure if this will look ridiculous.
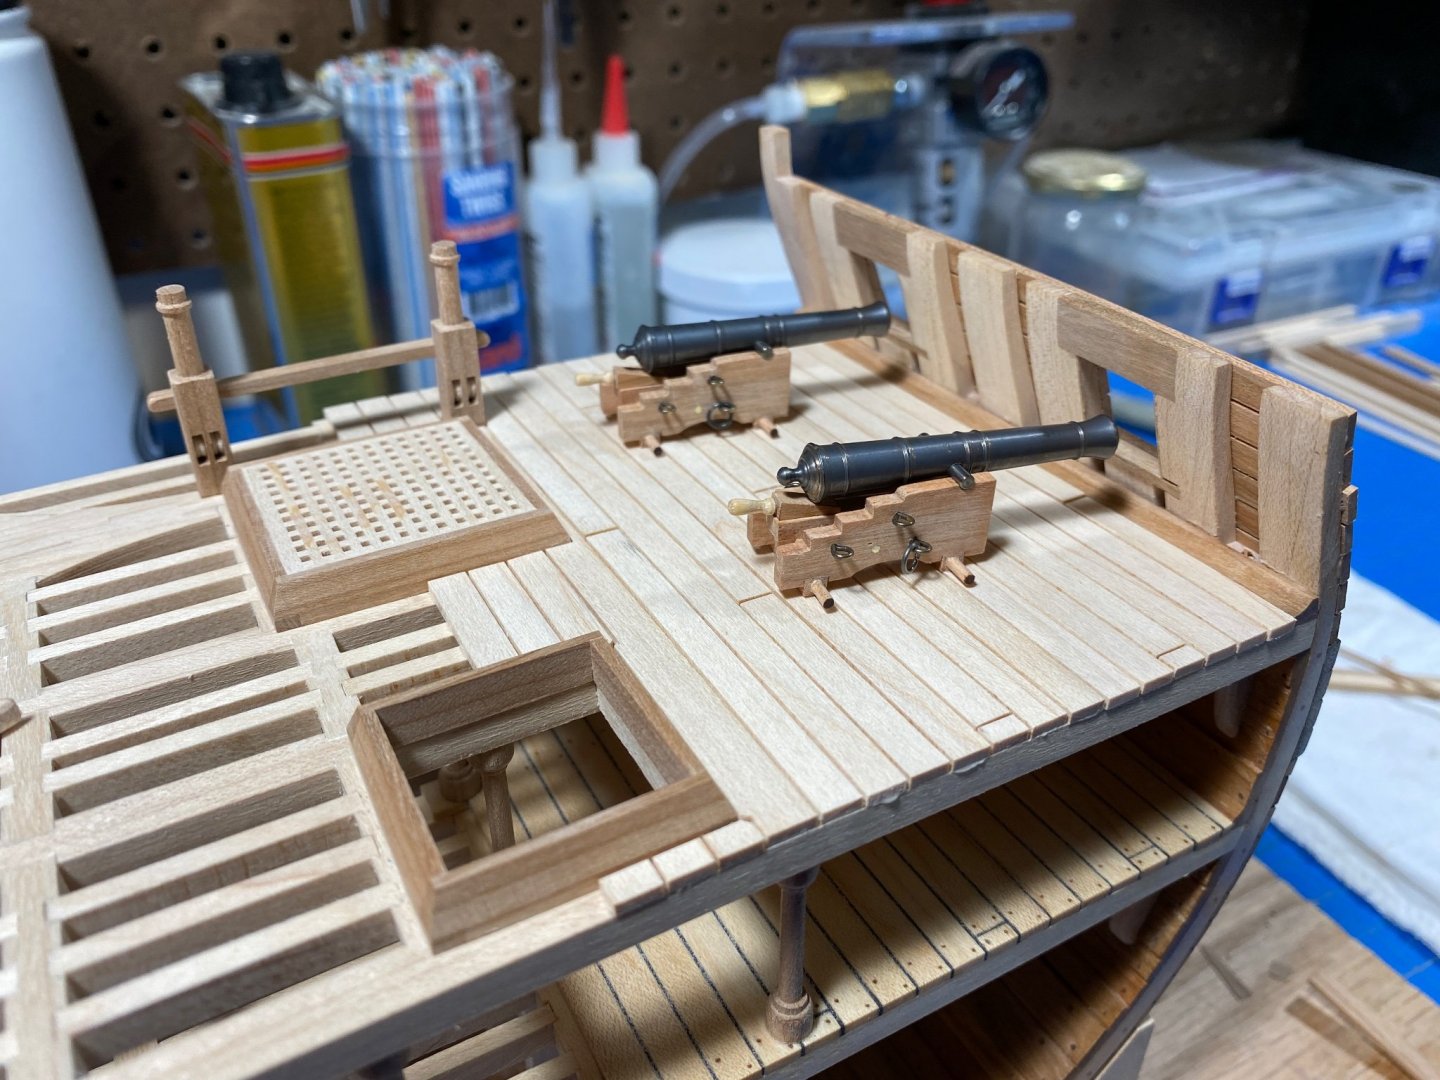
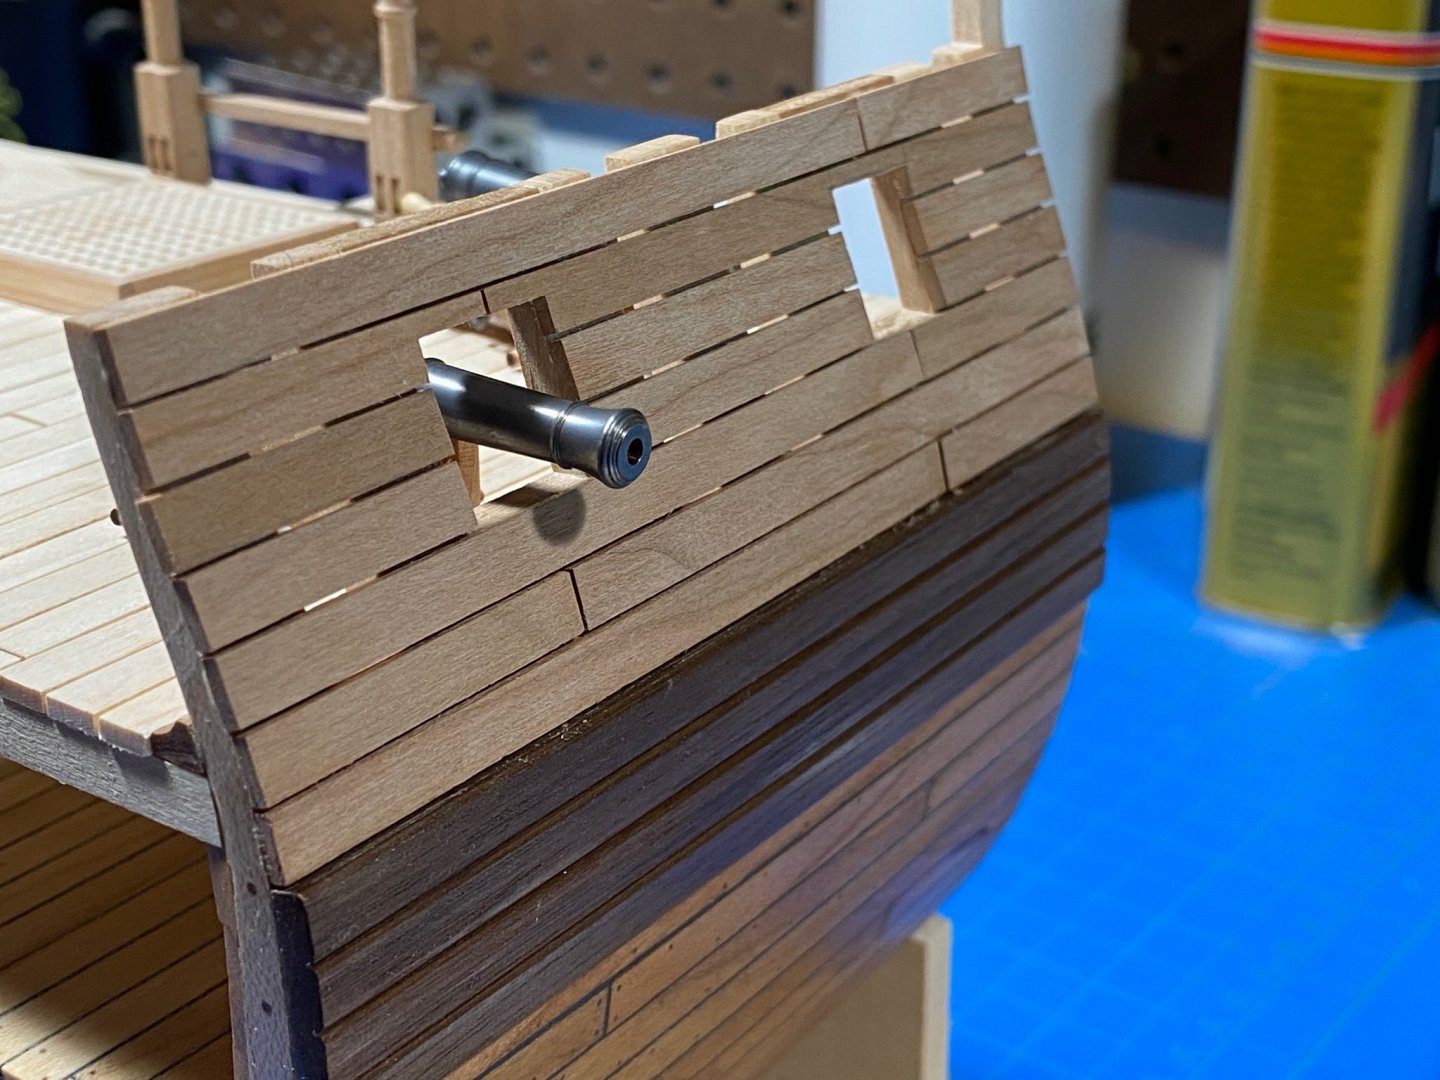
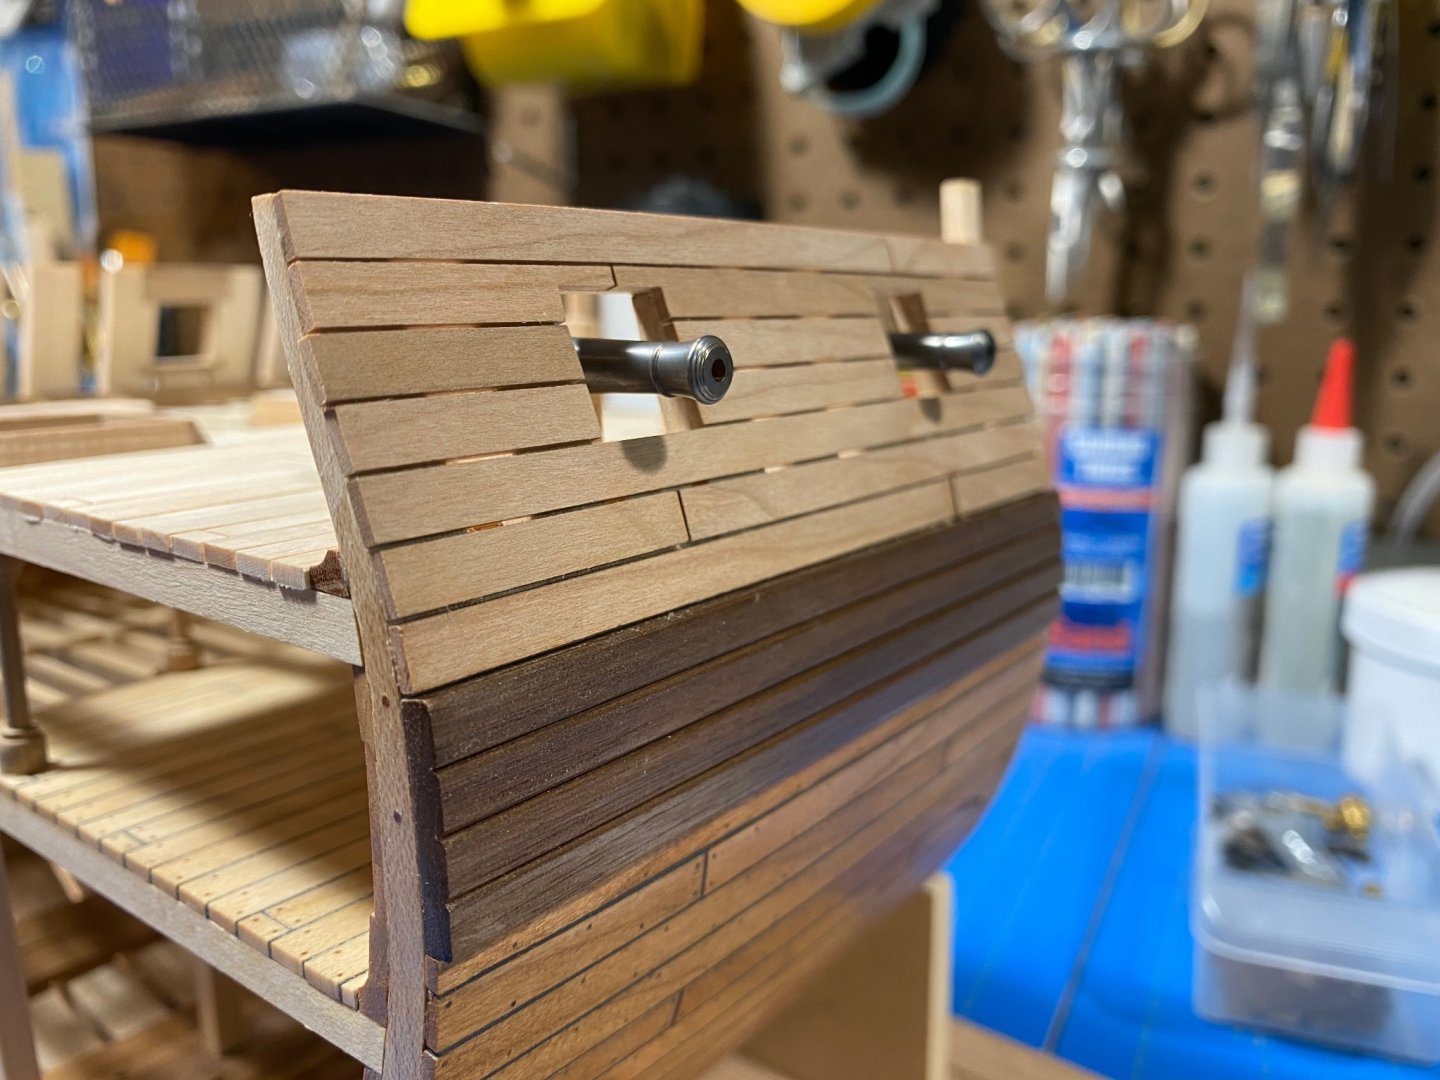
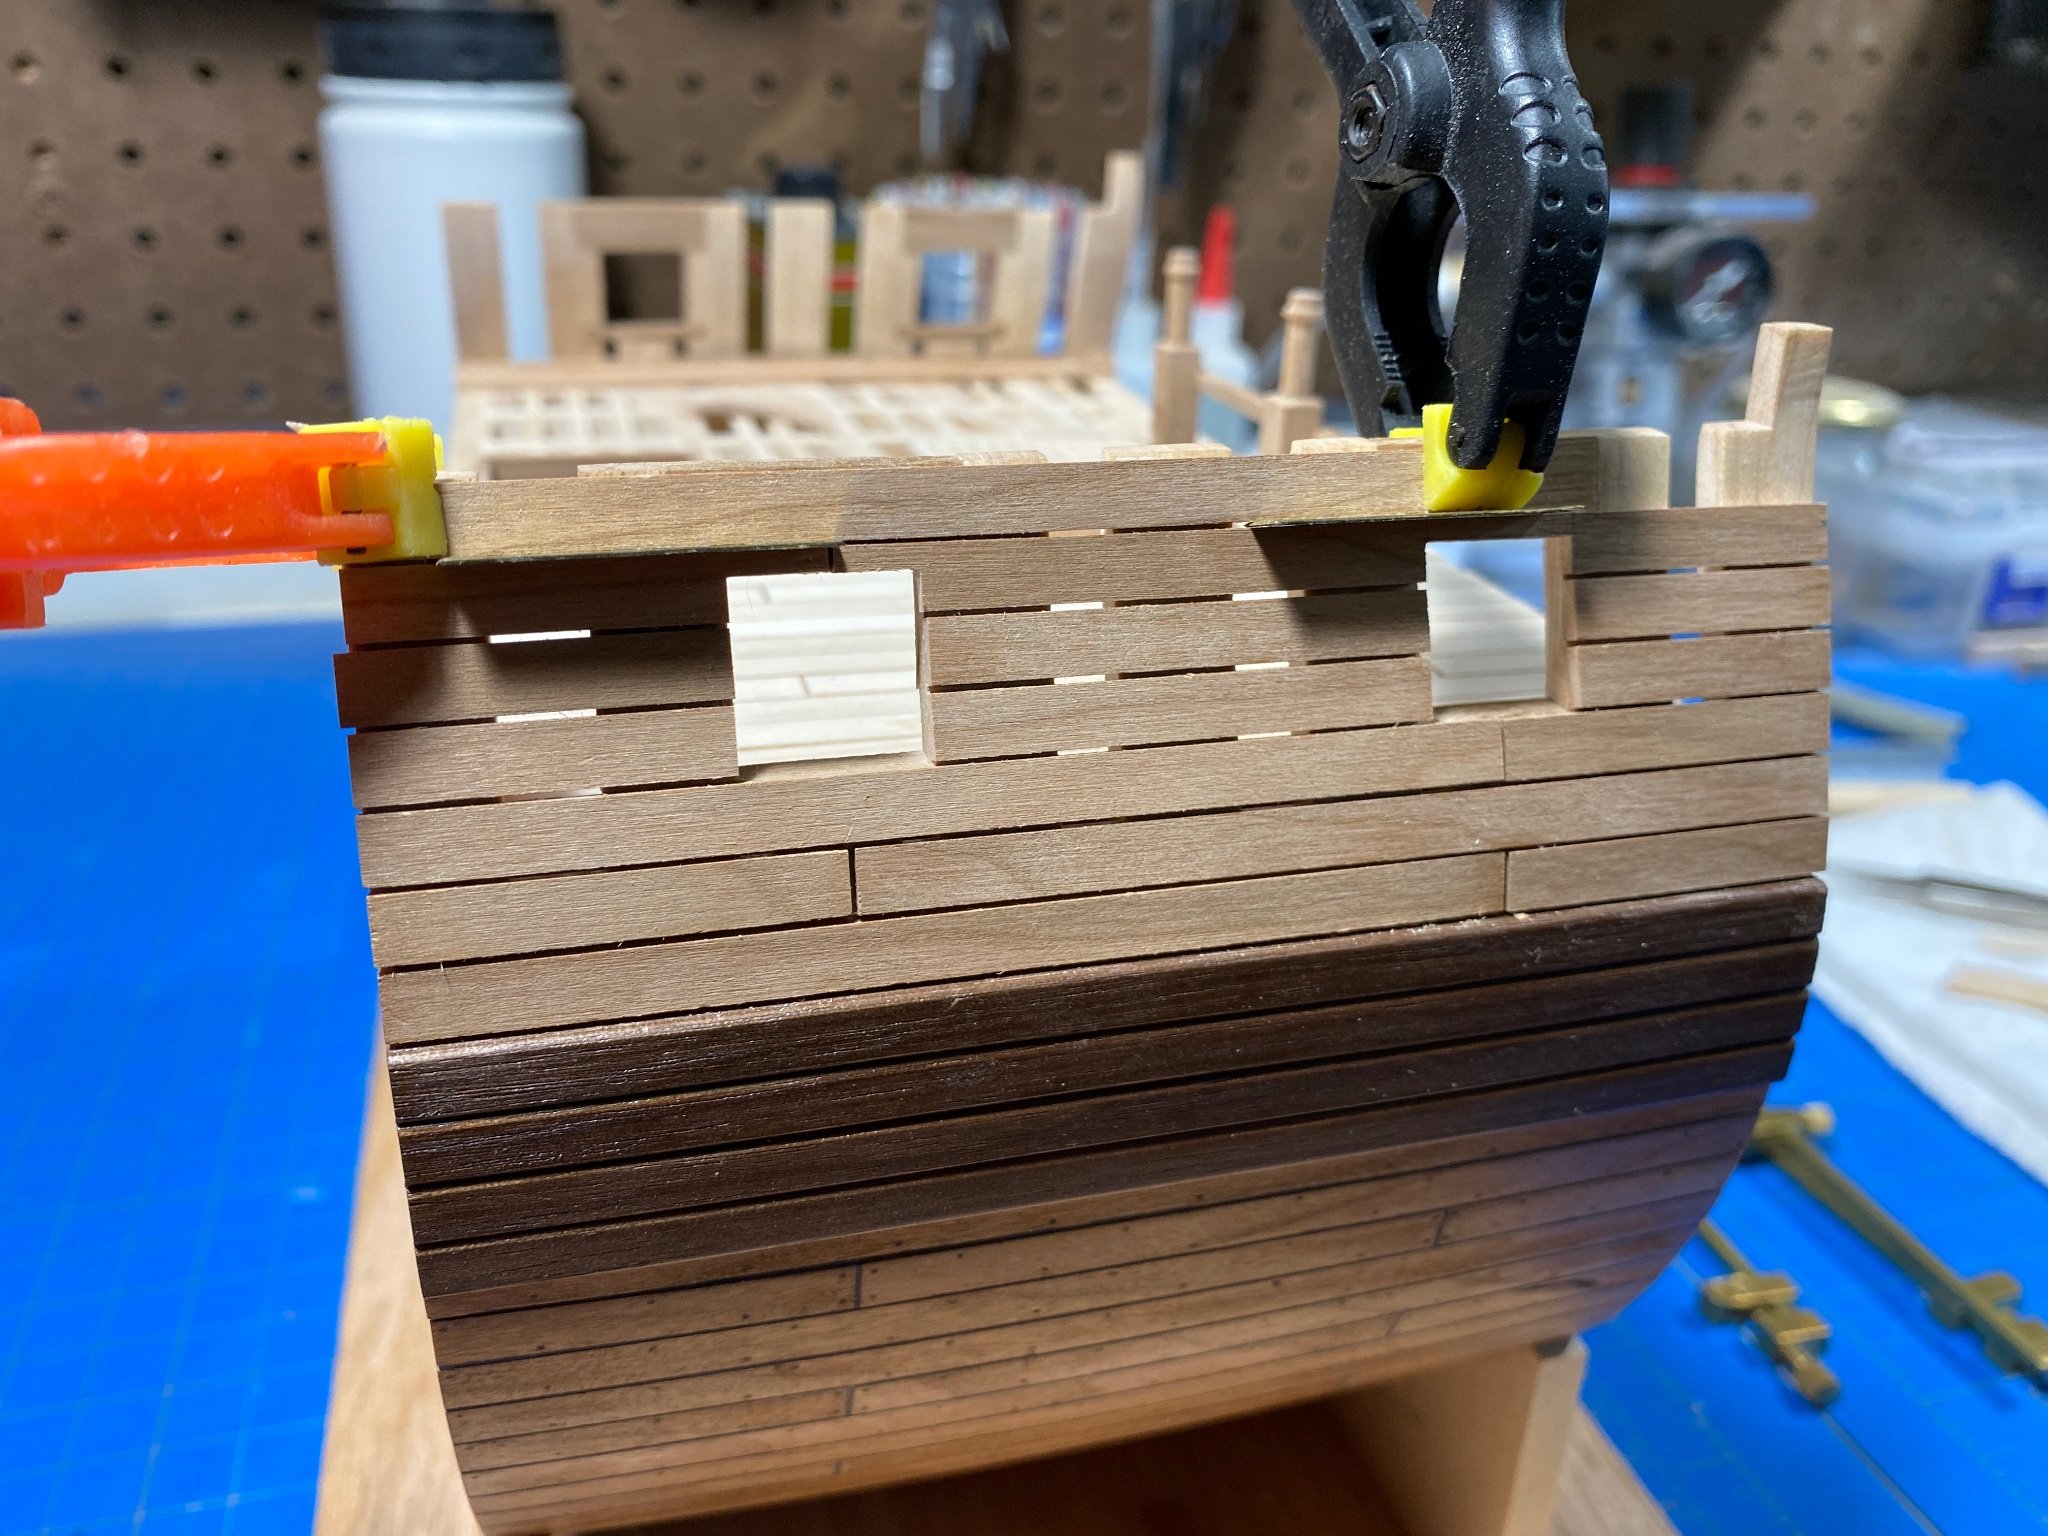
- 3. The exterior planking runs split at the edges of the gun ports... I wonder if this is a detail that needs to be fixed. I did some digging in the various books and couldn't find anything that specifically deals with this and whether it would have been avoided. If anyone has any input on this, I would appreciate sounding it out.
-
11 hours ago, Dr PR said:
This brings me to my point. Most of us are not photographing museum pieces, and we don't have the large photo studio with all the specialized camera equipment and long rails. So it isn't "better" for those of us who don't have it.
Well... I think we can agree to disagree. I didnt mean to offend anyone with my rail suggestion. Its a minimal investment, and if used correctly can be very helpful - hence, my suggestion. It is afterall, only my opinion. You are absolutely right, a rail isnt helpful if you dont have one.
I personally would not use a macro lens or a telephoto lens to shoot something like a model ship If I were going to be focus stacking (unless I was doing close-ups on some detail, but still never a telephoto). While its true that I do shoot museum pieces for work, I only brought that up as an example that you can shoot things that are complex 3-d objects of the same size as a model ship using a rail with no problem. It isnt complicated and does not require anything expensive or special. The rail we use in my studio at work is the same I use at home... $25, and about 10" long. We use pretty standard cameras, lights... nothing specialized. Its a common misconception that good photography requires heavy investment.
It is true that you can get good results using all sorts of methods - from precision rails on a $400 tripod, to standing on your head in a 20 knot wind. There hasnt been a photography thread that isnt rife with 5 different methods and 20 different opinions. I was just offering one.
-
-
5 hours ago, gsdpic said:
Using a rail for macro focus stacking is certainly helpful. But at model ship sizes it may not be practical
I dont know if this is necessarily true. I think depending on your standard, and your capacity you probably can get away with both. However, I perform technical photography for documentation and examination purposes on medium to large size three-dimensional museum/library objects all the time. One facet of these workflows generally include focus-stacked images that can span up to 12" or more of depth and I use a rail. Doing so provides images with far fewer anomalies. Much depends on how you setup your workflow and how you plan your post-processing and the capabilities/resolution of your camera as well as your proficiency with purpose built software.
-
Good focus stacking requires a rail in my opinion. They can be had for small amounts of money. In this way you are not adjust the focus of the camera, but it’s distance from the object providing greater clarity. Helicon Focus software is a great purpose built option if your looking to take focus stacking seriously.
-
-
Just to throw a bit of snark in: given what Ive seen of Victory as a model kit, I would say the best one is the one you think you can complete.
- Old Collingwood, ted99, uss frolick and 10 others
-
12
-
 1
1
-
-
2 hours ago, vaddoc said:
Using by mistake a plank that took 3 hours to make as scrap wood
This is a good one. I have learned that I am somehow compelled to absentmindedly destroy things Ive spent hours on. Newly completed parts now are put almost out of the room so I won't stupidly grab them.
Moving slowly is good advice... not only in your build but also in your body. Learning exactly how your arms and hands are not inherently compatible with the structure of 1:48 rigging, yards and masts is a tough lesson. The model has its space and you have your space, and when the two meet: hope it's voluntary.
-
The Master Korabel kit I completed was very accurate... I found the precut planks to be well made and true (though not a particularly challenging model). The other I completed was the Model Shipways Bounty Launch, which was less accurate, I wound up having to spile several of my own. However, as @VTHokiEE mentions, much of this is dependent on accuracy in initial steps.
- Canute, mtaylor and Ryland Craze
-
3
-
That looks like a great way to get an even taper on the stem, I hope I remember it when the time comes. I read on your instagram feed that you were using Fixogum (rubber cement) to adhere the templates. How are you applying it? Does it apply evenly? How difficult is it to remove. How would you compare it to something like a regular glue stick?
(Picture 3, post #9): Can I also ask how or to what purpose are you using the pencil lines? Seems like you penciled them in after removing the template, but then sanded them away? What was their function?
(Picture 3, post #8):Final question... looks like your're using the Proxxon mini mill, but the motor mount looks different than mine... or maybe that is a lamp?
I agree with @druxey, that pear looks wonderful. Where did you source it?
- Seahawk1313 and mtaylor
-
2
-
3 hours ago, JohnLea said:
Are there any tricks in sharpening the Veritas mini tools?
It’s Veritas, you’ll need to use it a LOT before it needs sharpening. Strop a lot though….
I’ve had mine almost two years, I’m real careful with it and it’s still extremely sharp. Having good blade etiquette goes a long way…. The bed of mine never goes on the table. Always goes back in the case when I’m done.
Otherwise, I think you just approach like you would any plane blade.
- JohnLea, WalrusGuy and michael mott
-
3
-
2 hours ago, WalrusGuy said:
I also bought his smaller brother
Thats actually the only one I have, I also have the small shoulder plane... I use them a lot. Great tools even if small.
-
Nice! That plane jig looks great, is that the Veritas? I love that plane, I use it all the time. Ive never tried a jig though, now my mind is racing! Ill follow along if you dont mind.
-
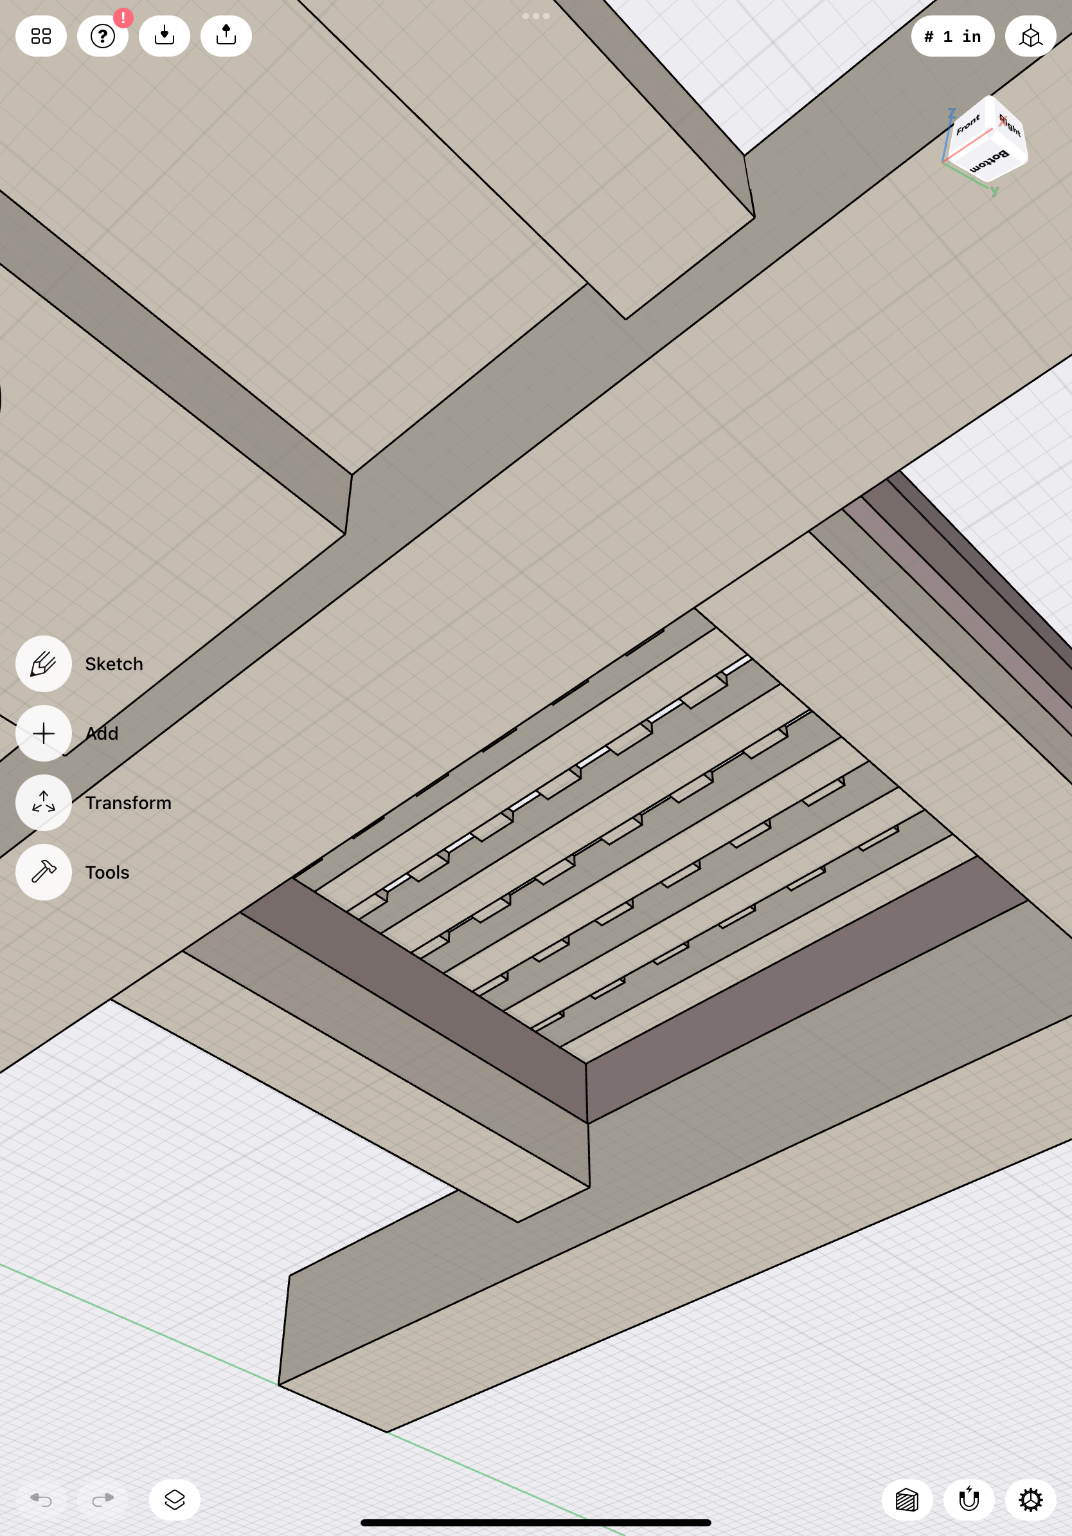
If I recall I chose to fit my coamings, grates etc to fit the interior dimension as given dimensions would have decreased the sized of the opening and was not in keeping with other plans of similar period ships Ive seen. I too went around and around with this. I decided the interior wall of the coaming should align with the interior face of the carlings and beams. This should be born our in the plans, even if not necessarily in the tutorial. Seen from below:

- popash42, modeller_masa, mtaylor and 1 other
-
4
-
Oliver! Finally discovered this build log and realized it is the same as the one I’ve been following on Instagram! Happy and grateful to find this build on MSW.
- mtaylor and Oliver1973
-
2


Harold Hahn method
in Building, Framing, Planking and plating a ships hull and deck
Posted
Im having a hard time following this conversation. What current fad?