HOLIDAY DONATION DRIVE - SUPPORT MSW - DO YOUR PART TO KEEP THIS GREAT FORUM GOING! (Only 72 donations so far out of 49,000 members - Can we at least get 100? C'mon guys!)
×


Louie da fly
-
Posts
7,989 -
Joined
-
Last visited
Content Type
Profiles
Forums
Gallery
Events
Everything posted by Louie da fly
-

How are sails fixed to yards?
Louie da fly replied to Louie da fly's topic in Masting, rigging and sails
Thanks, people. That helps a lot. Chris, I didn't think of looking at Zu Mondfeld. Steven -
OK, I'm really displaying my iggerance here, but I don't know any other way to find out. How exactly (i.e. what arrangement of ropes) is a sail fixed to a yard? All I ever see is the yard, the sail and a series of what appear to be loops of rope coming up and over the yard from the sail. But is that one continuous rope (alright, line) or a series of loops each independent of the others? And if so, how is the sail bent to the yard or unbent when it's time to replace it? Yours in considerable confusion, Steven
-
A lovely piece of work, Peter. Congratulations and well done. Steven
- 236 replies
-
- 1
-

-
- artesania latina
- kitbashing
- (and 2 more)
-
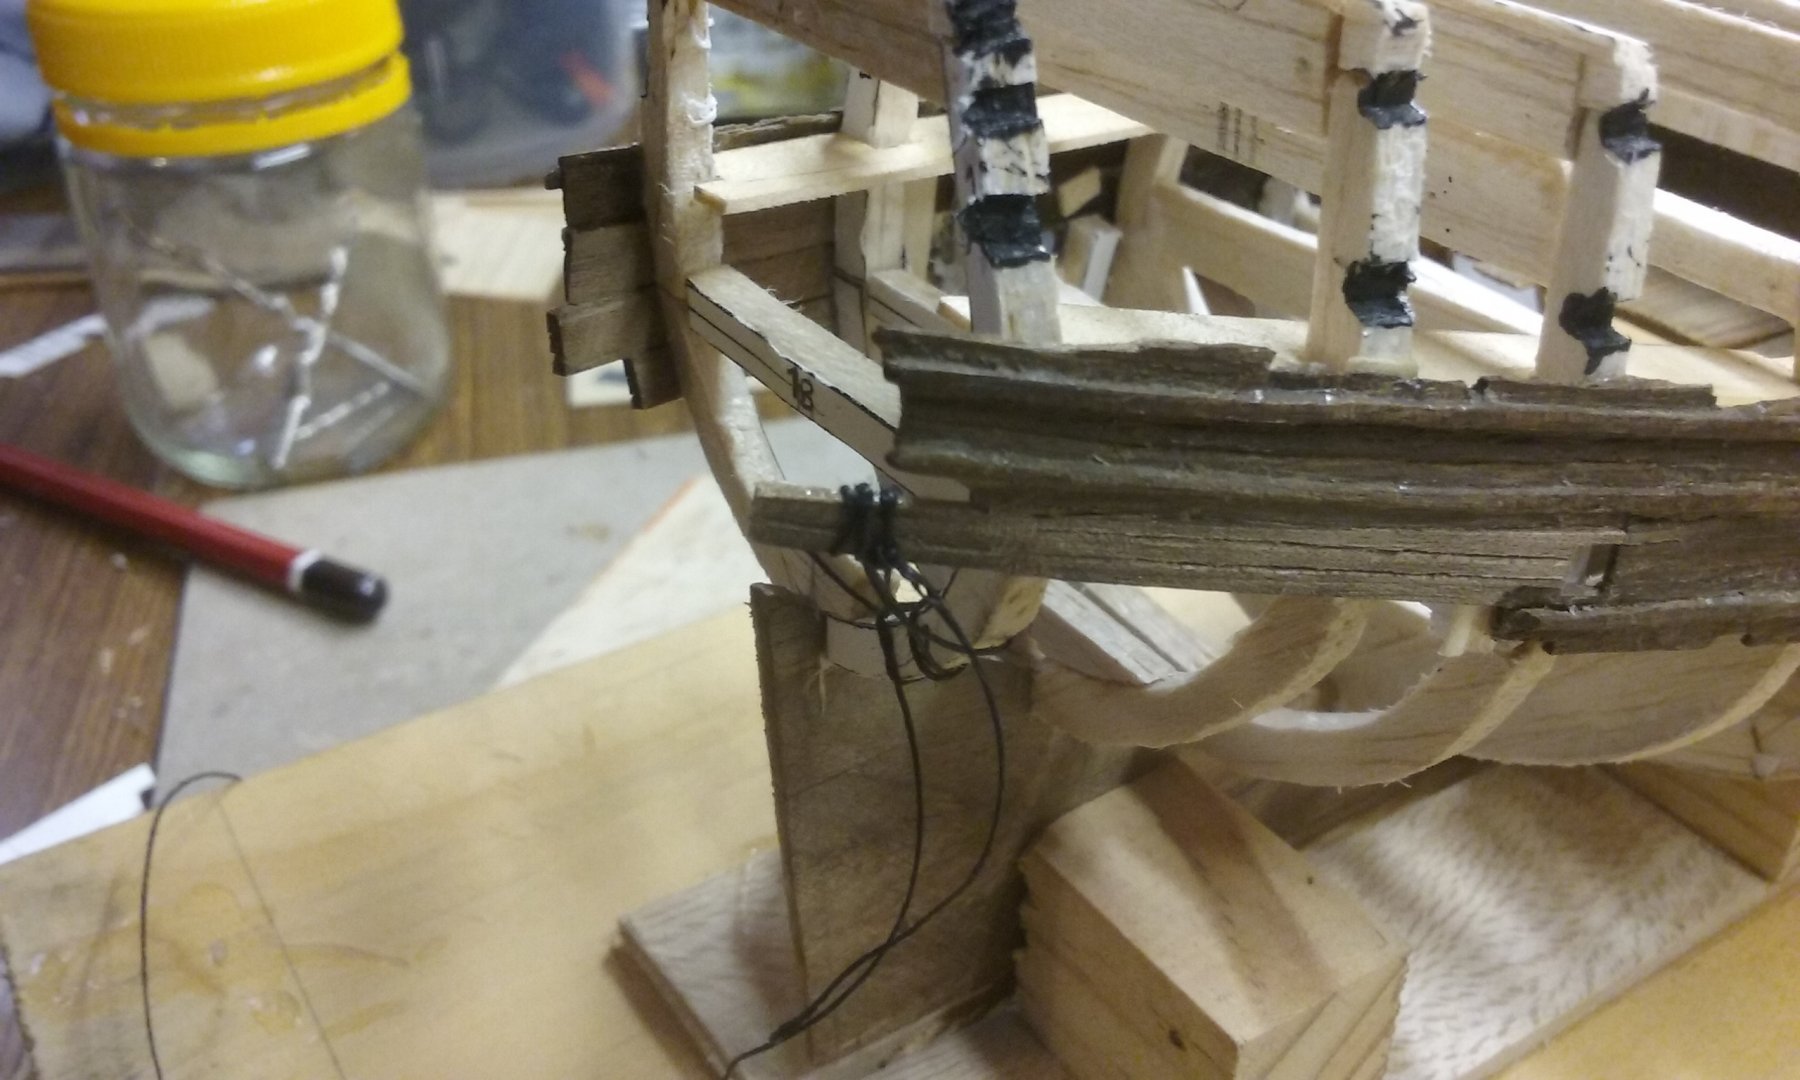
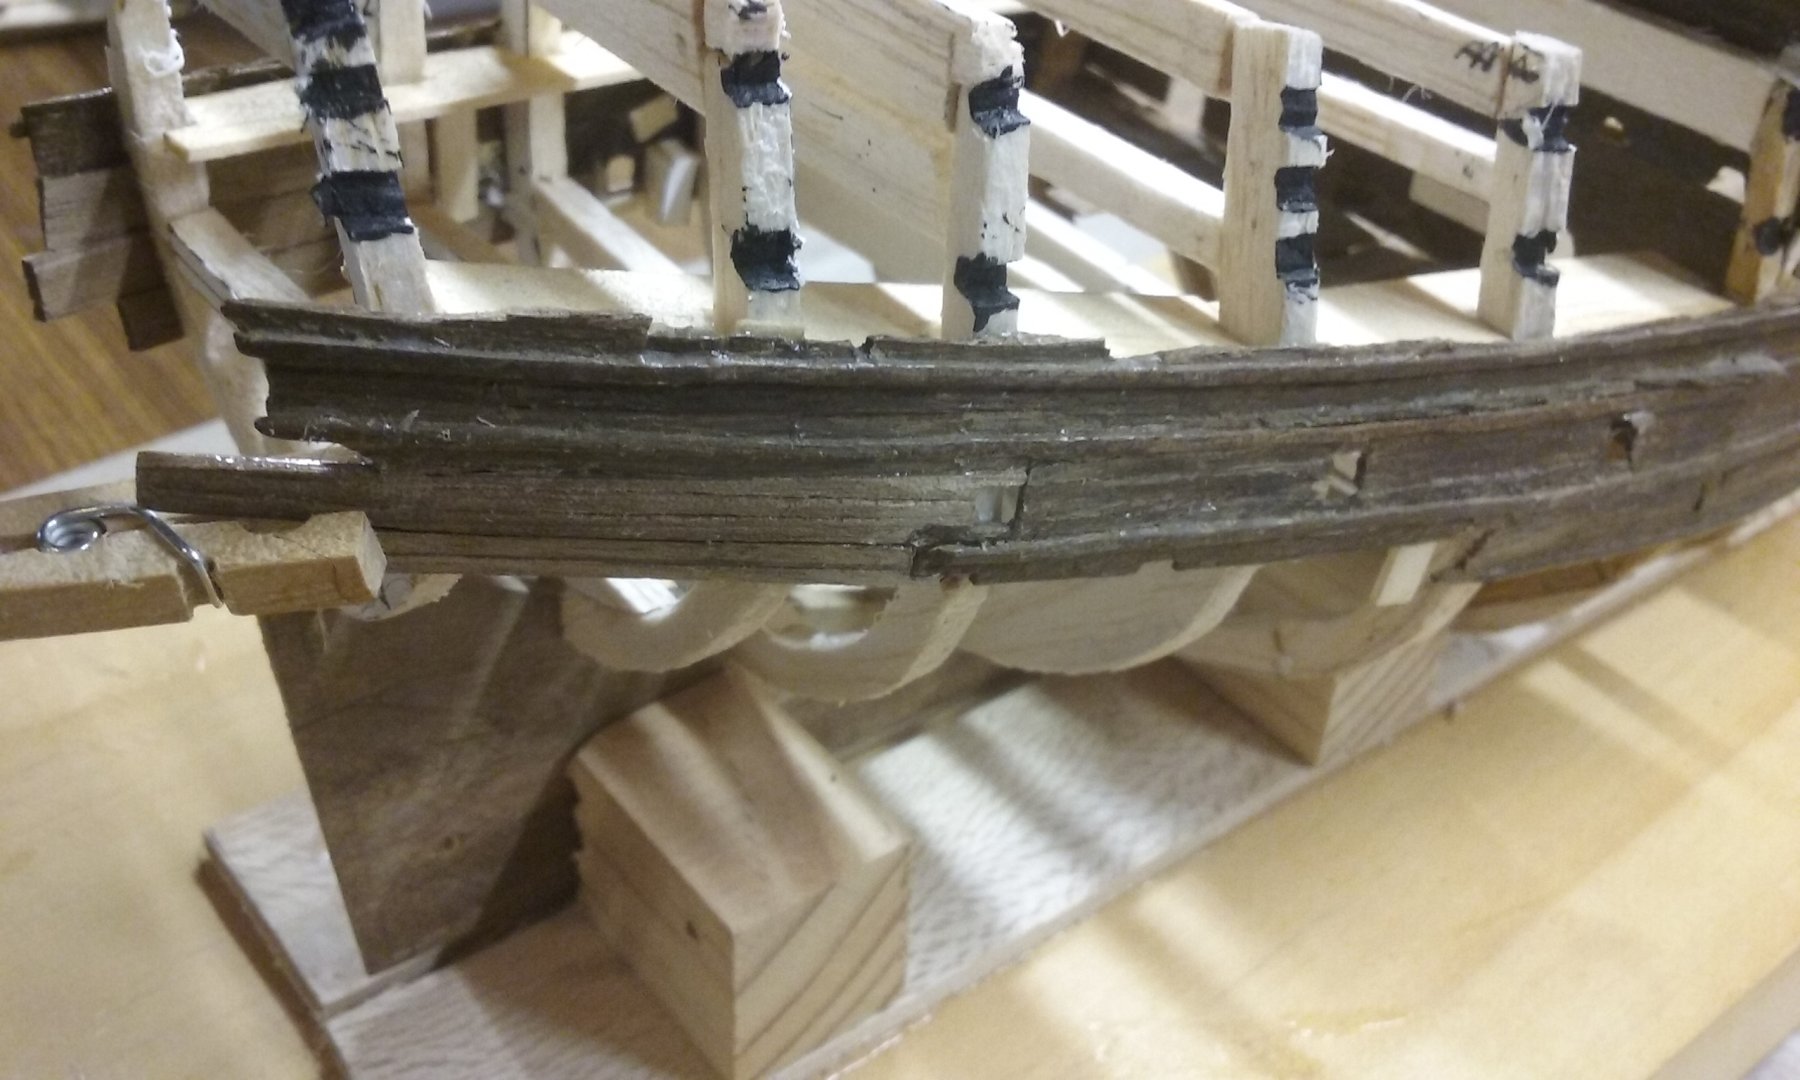
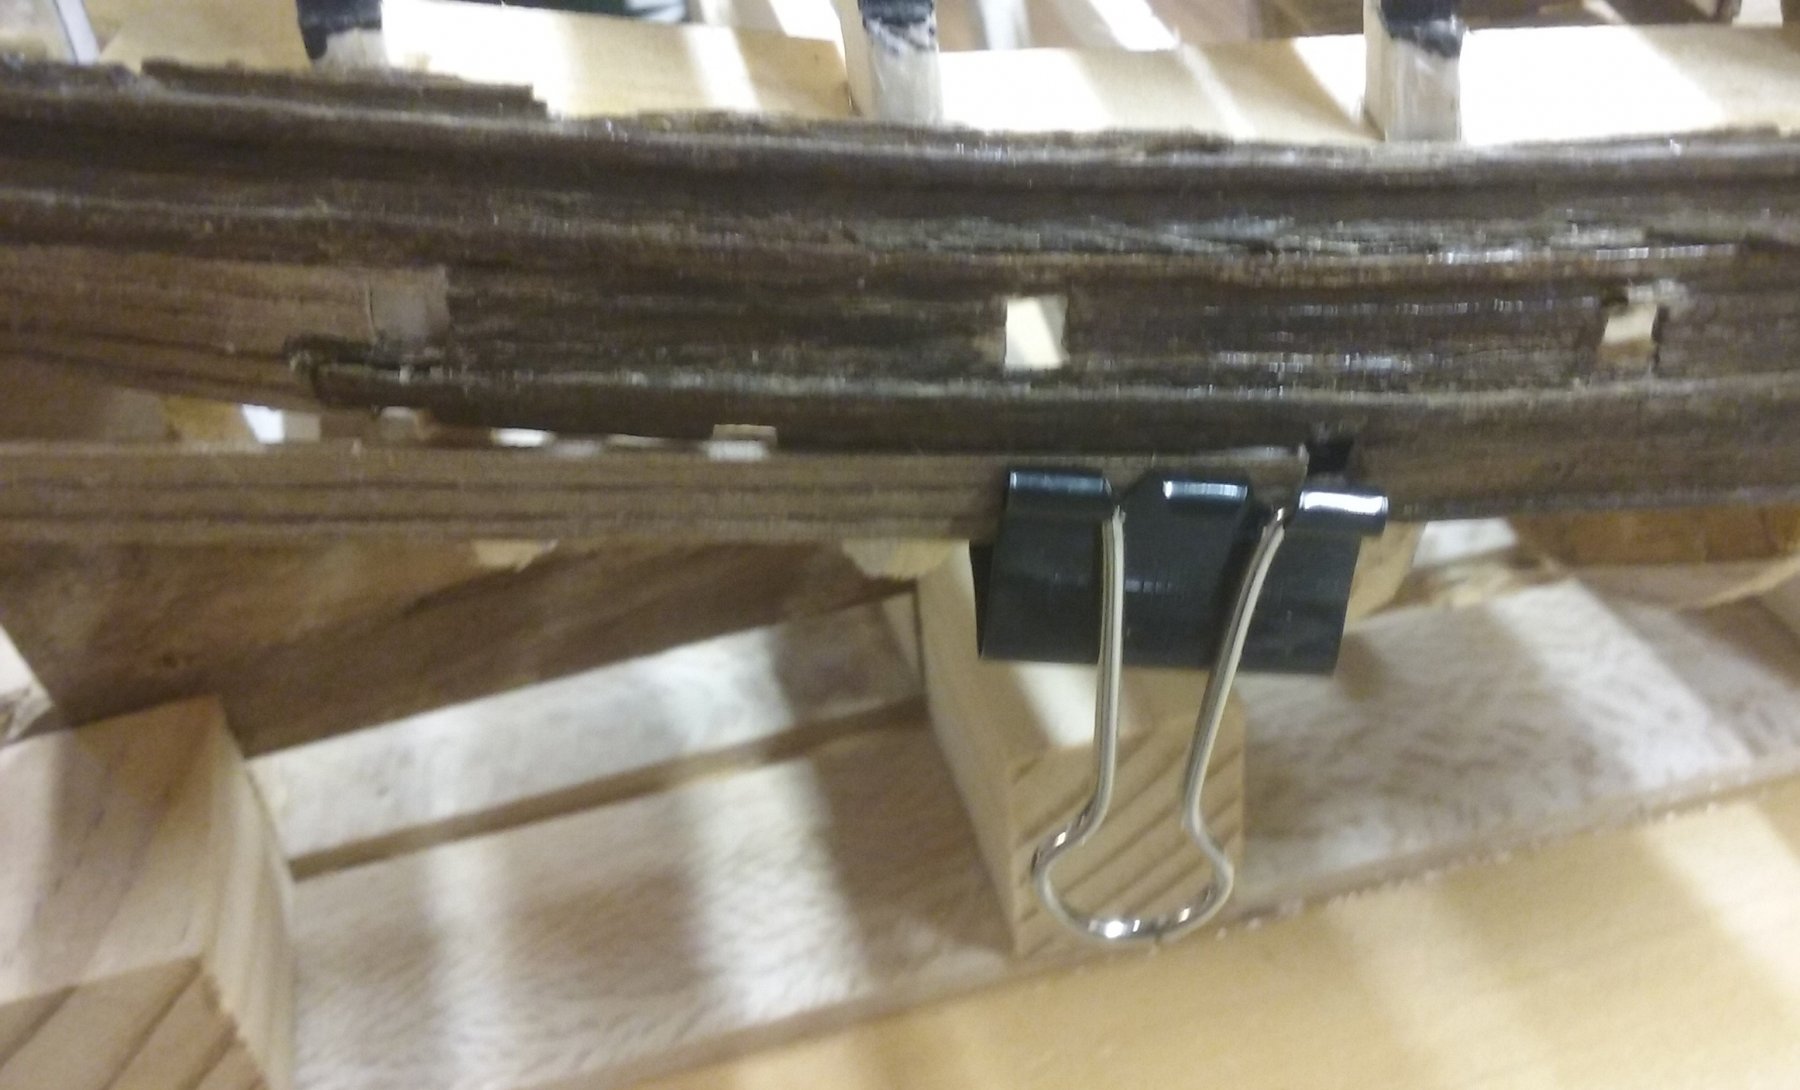
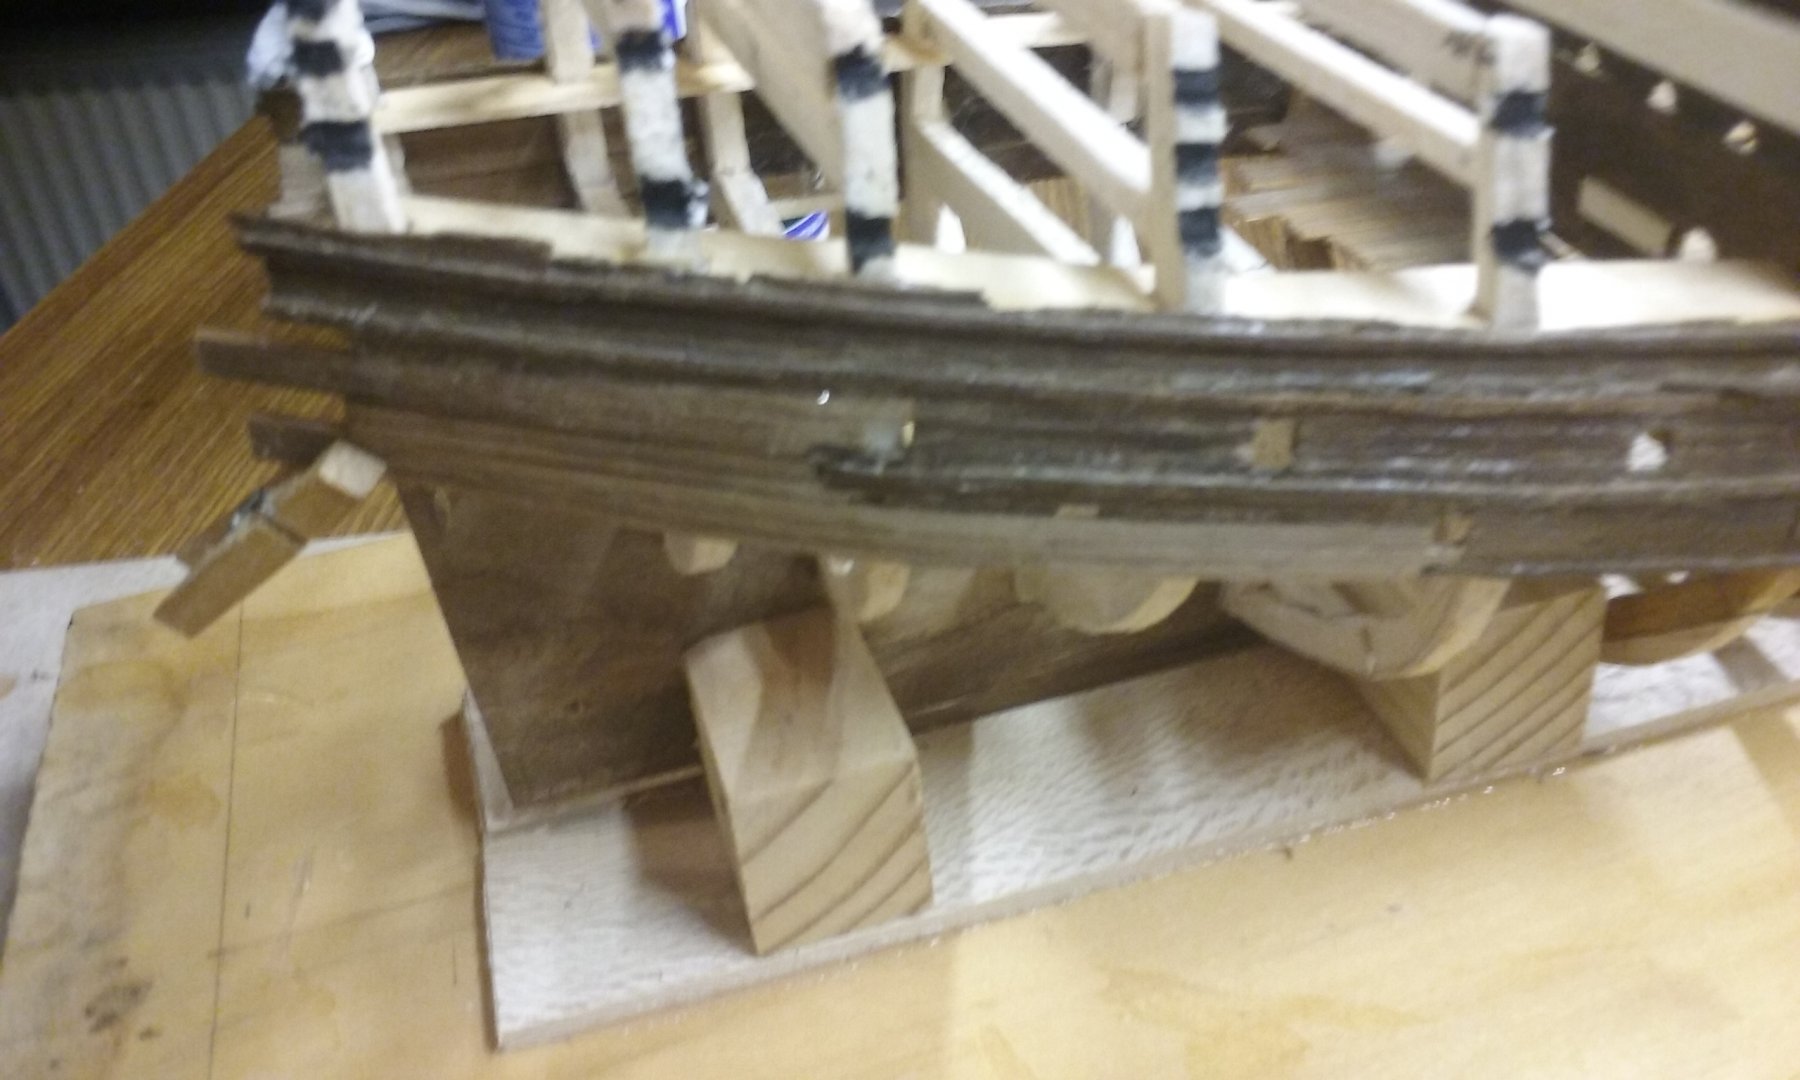
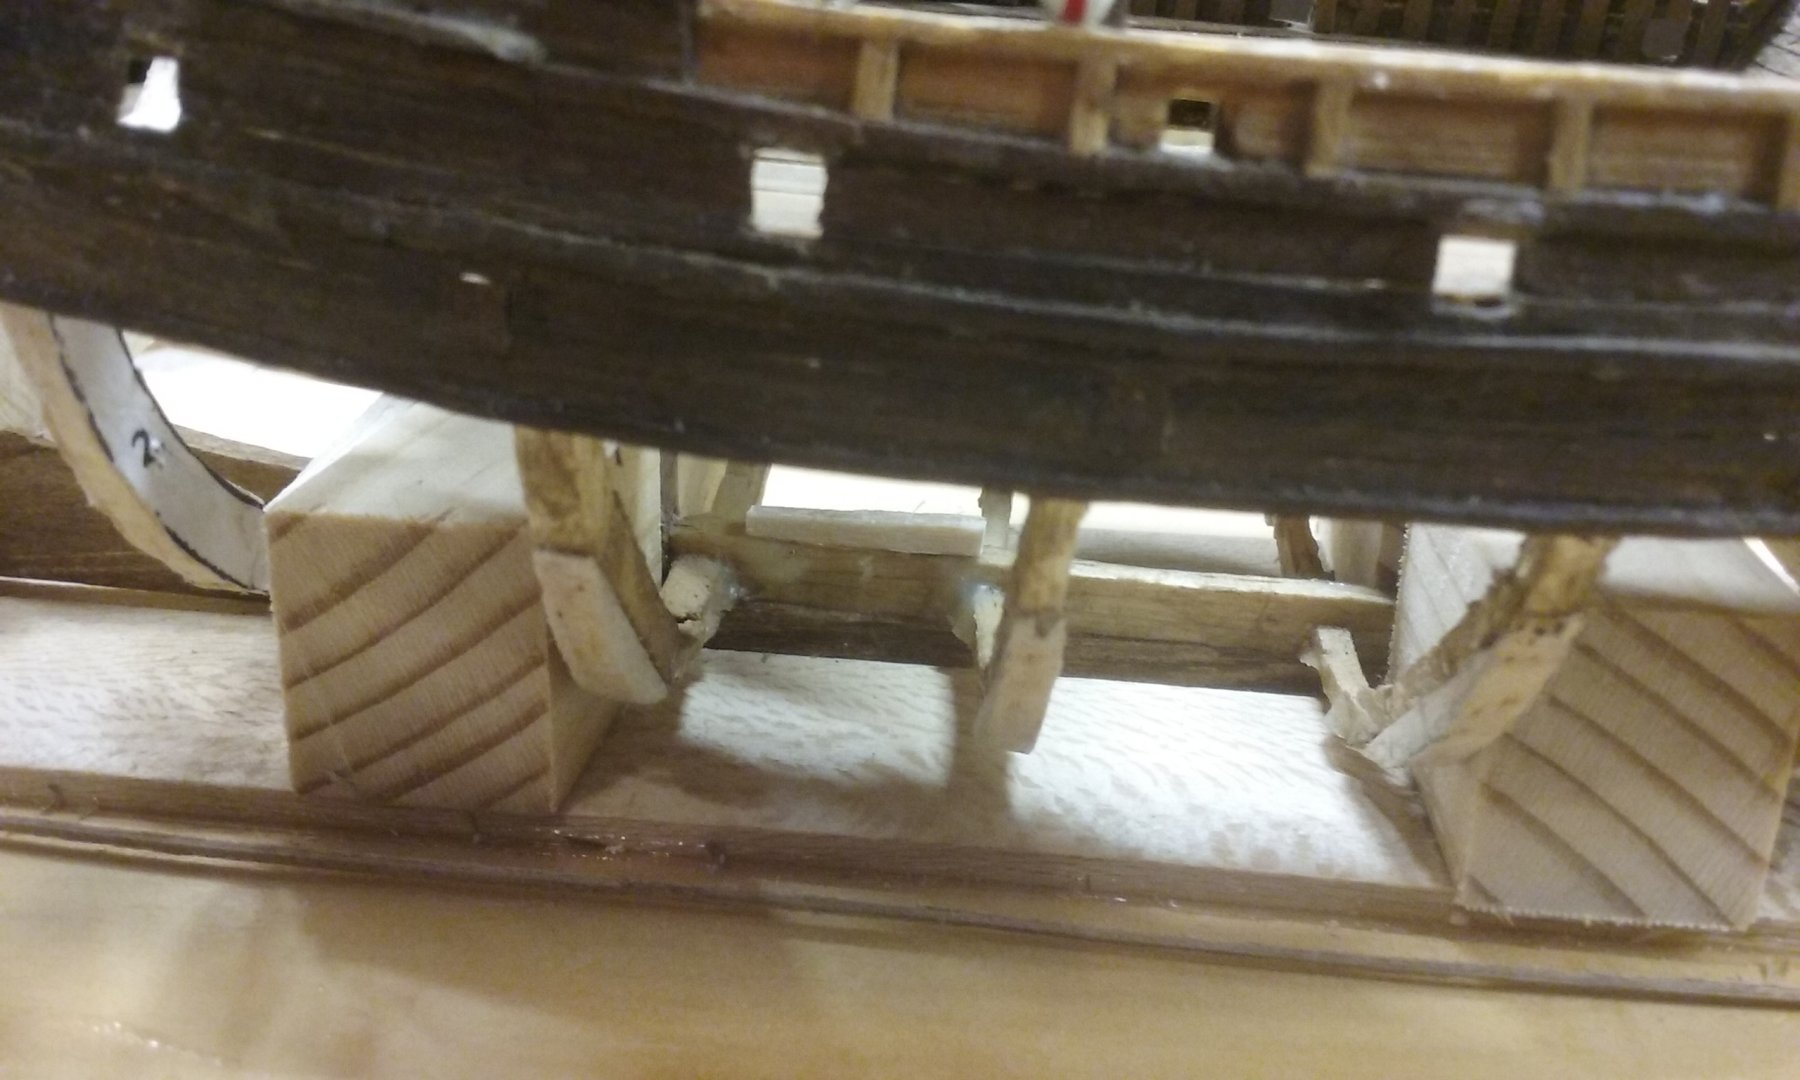
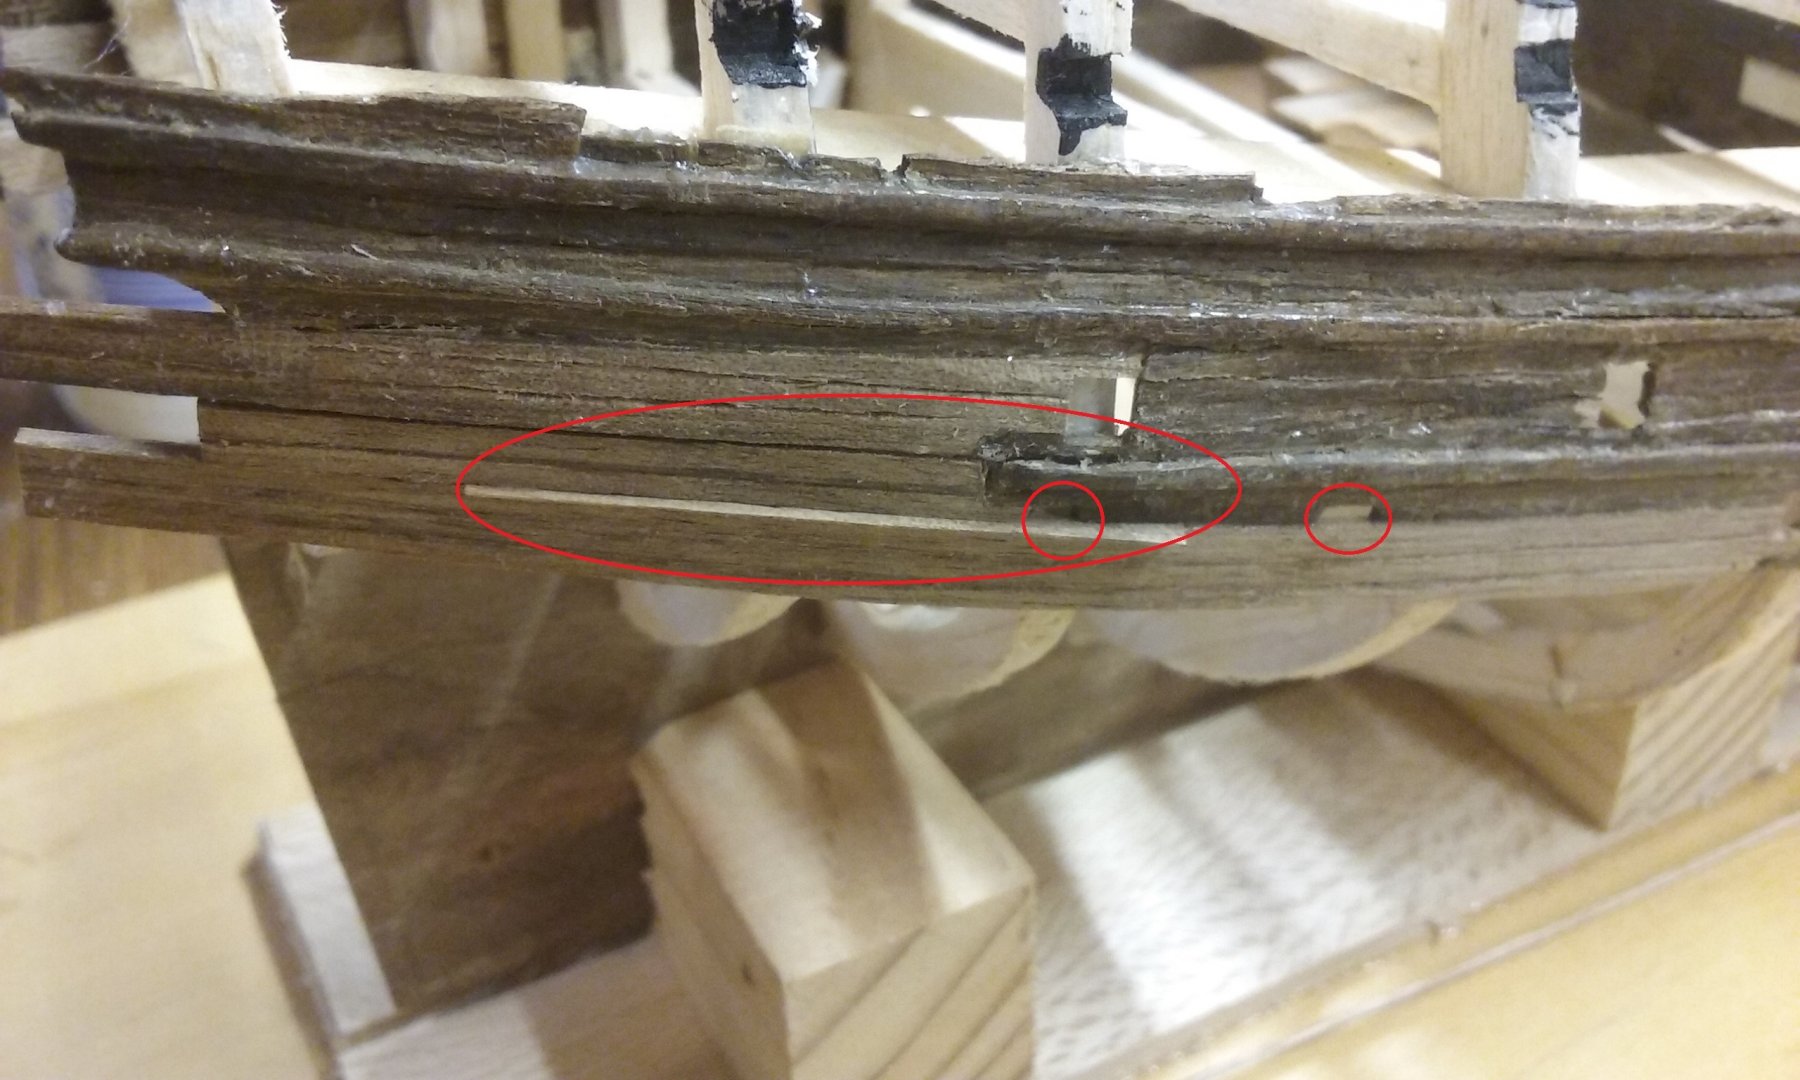
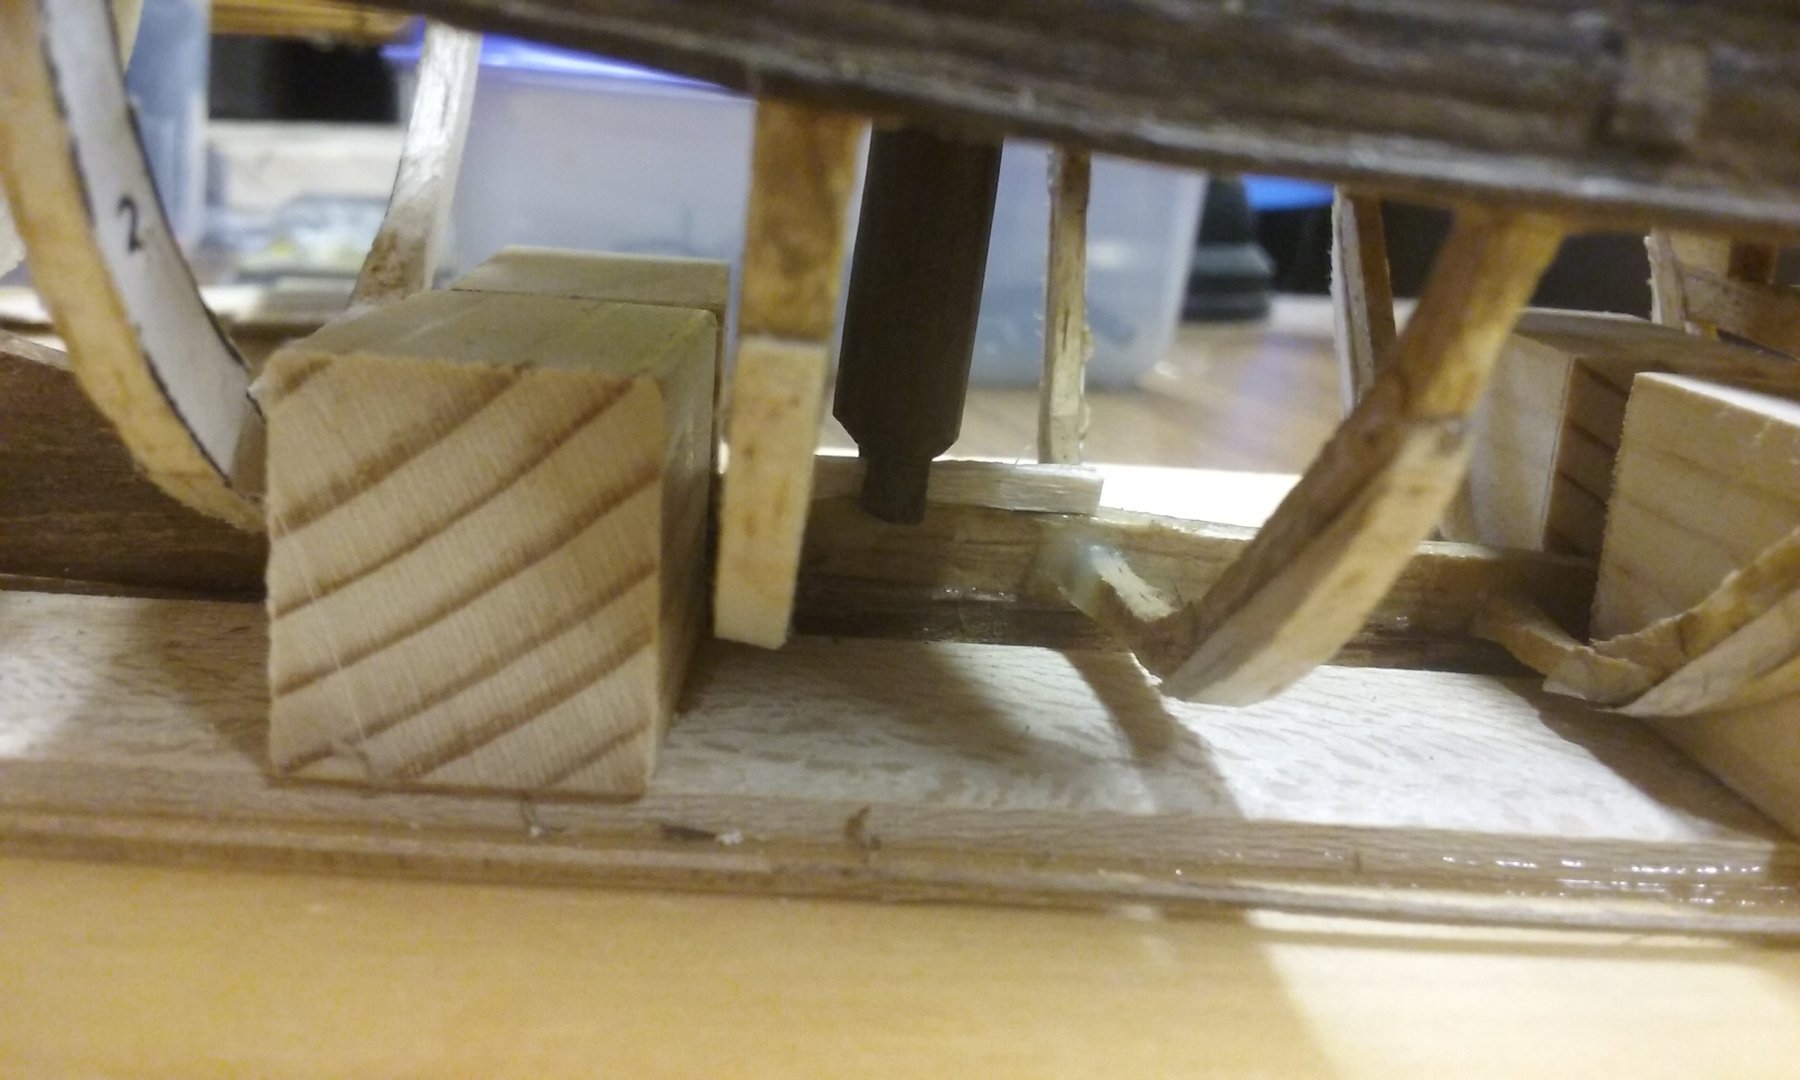
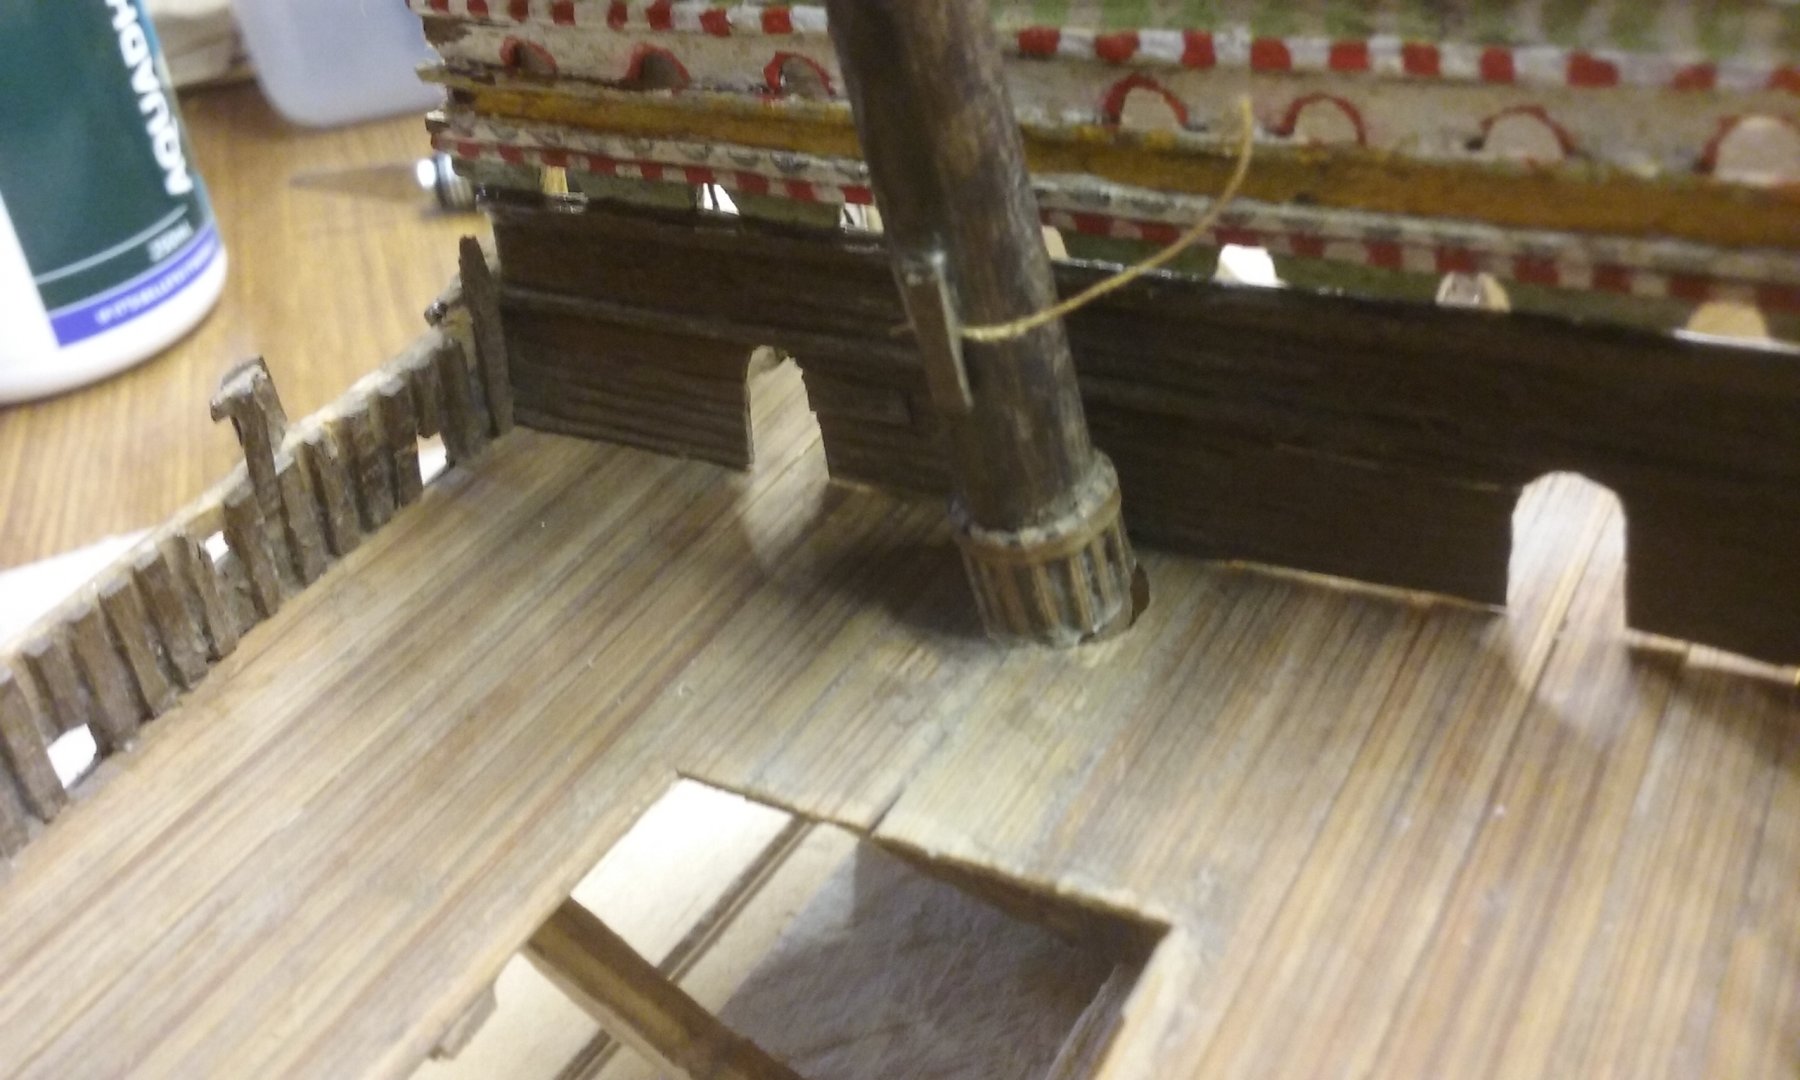
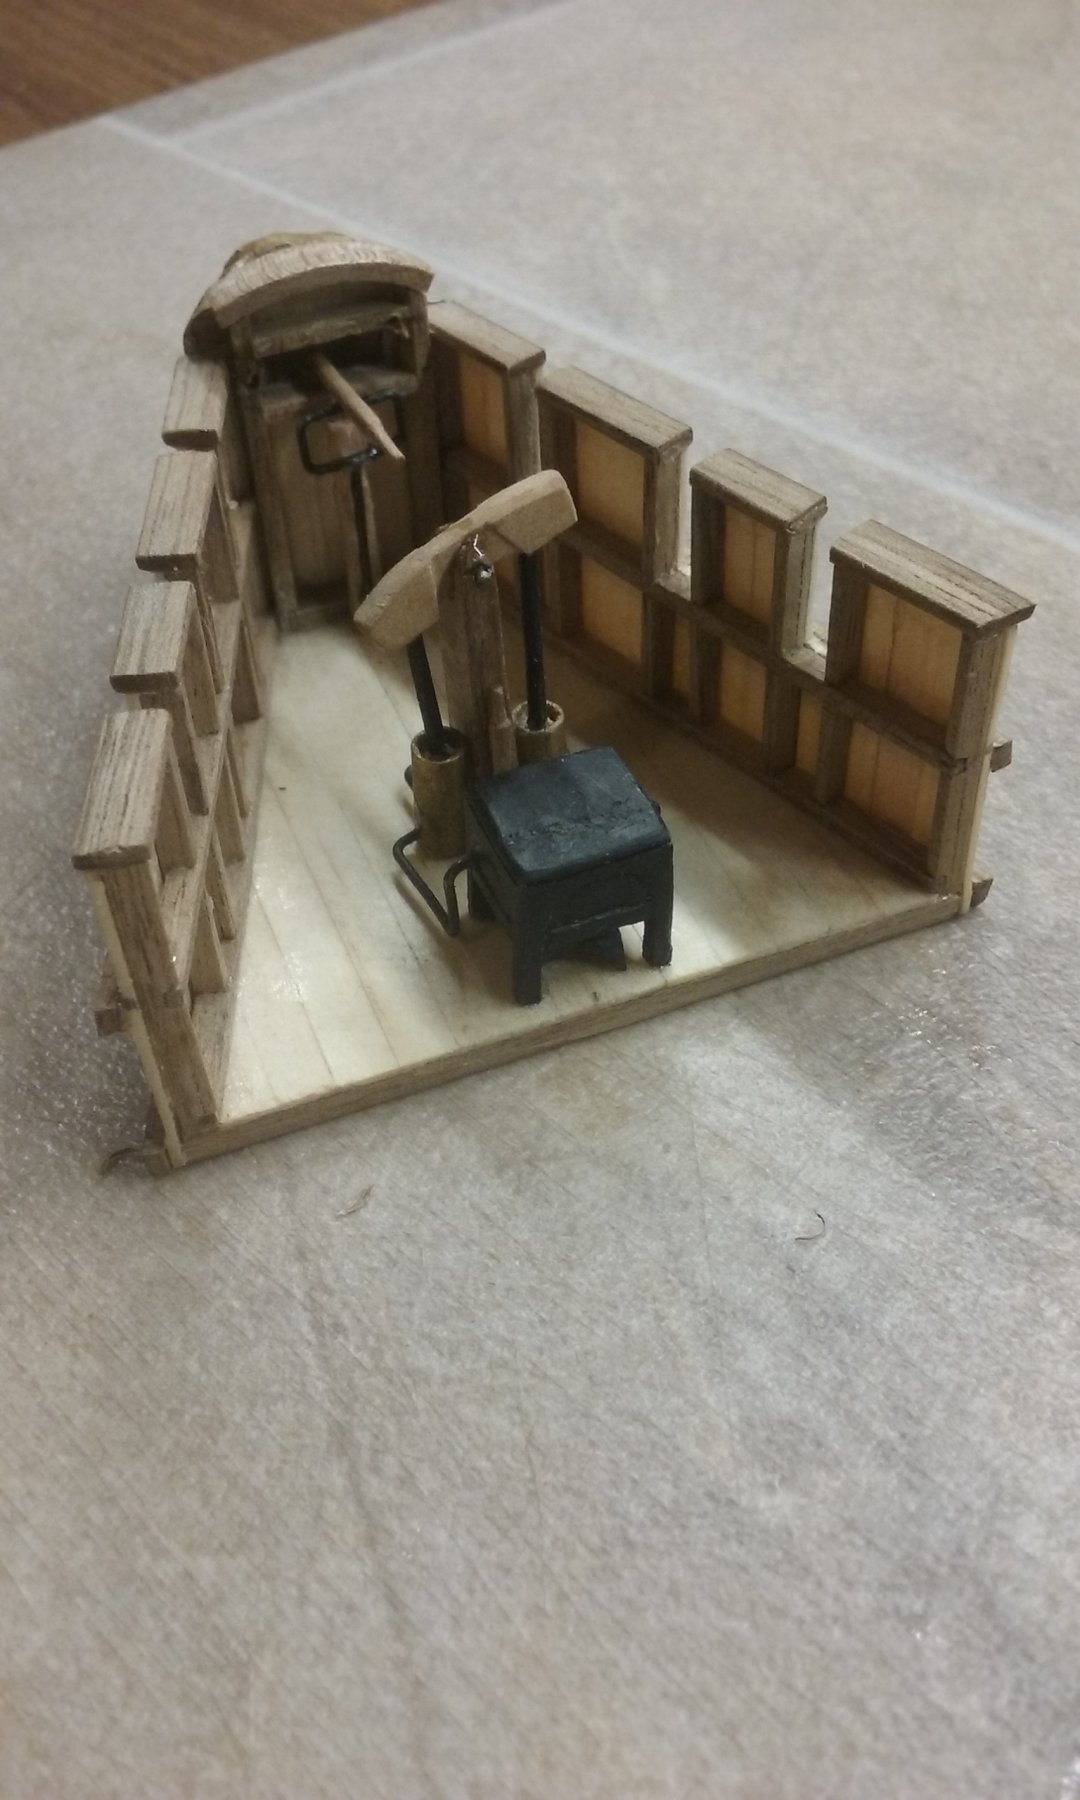
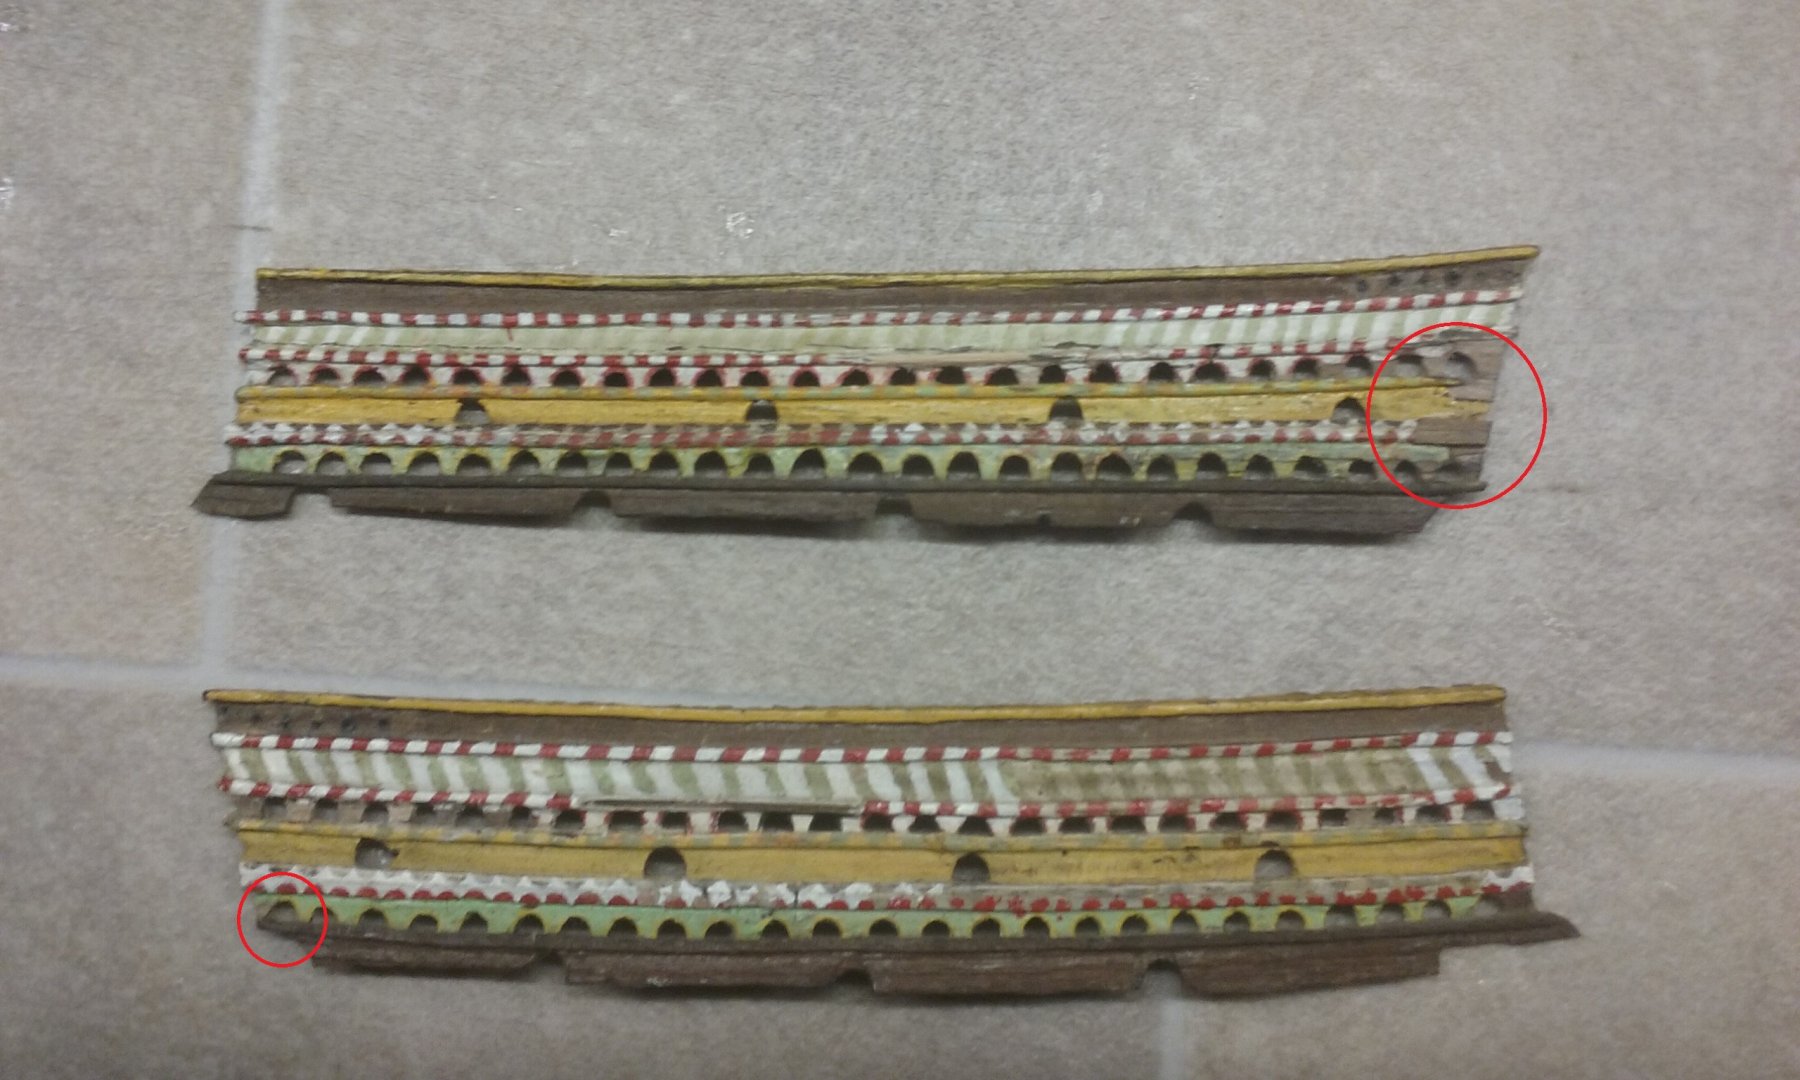
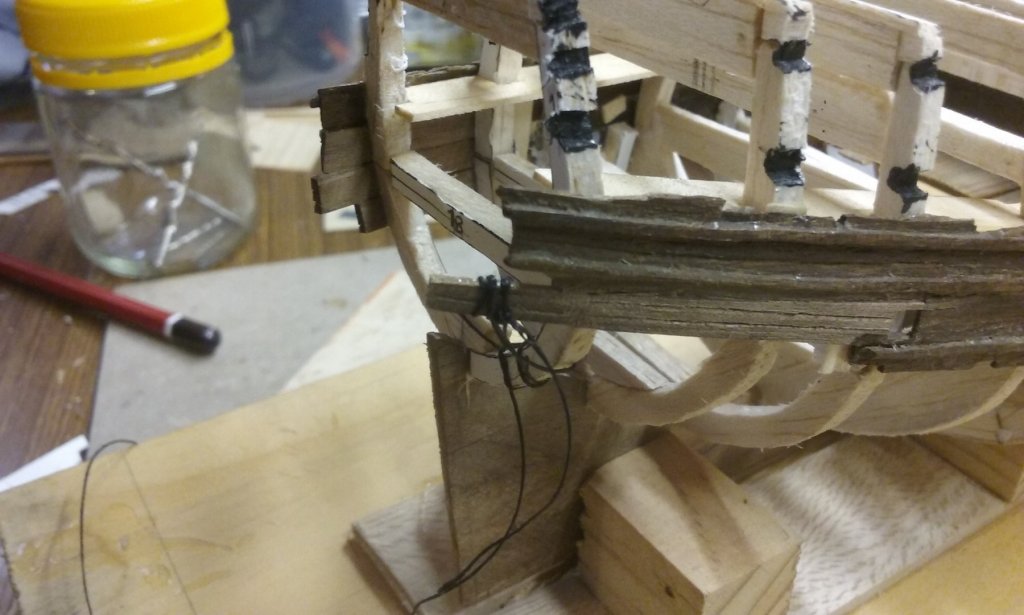
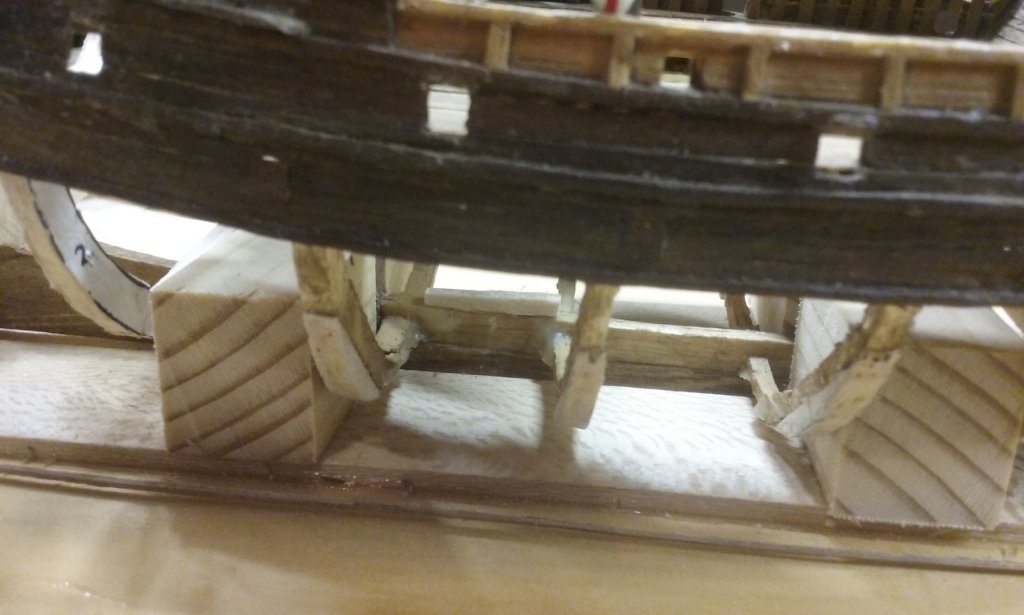
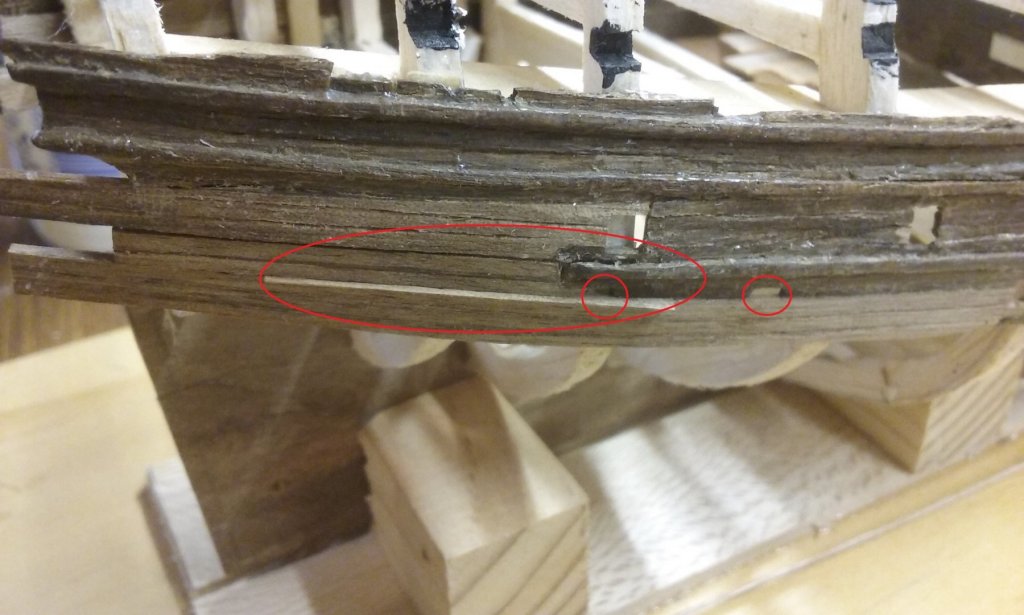
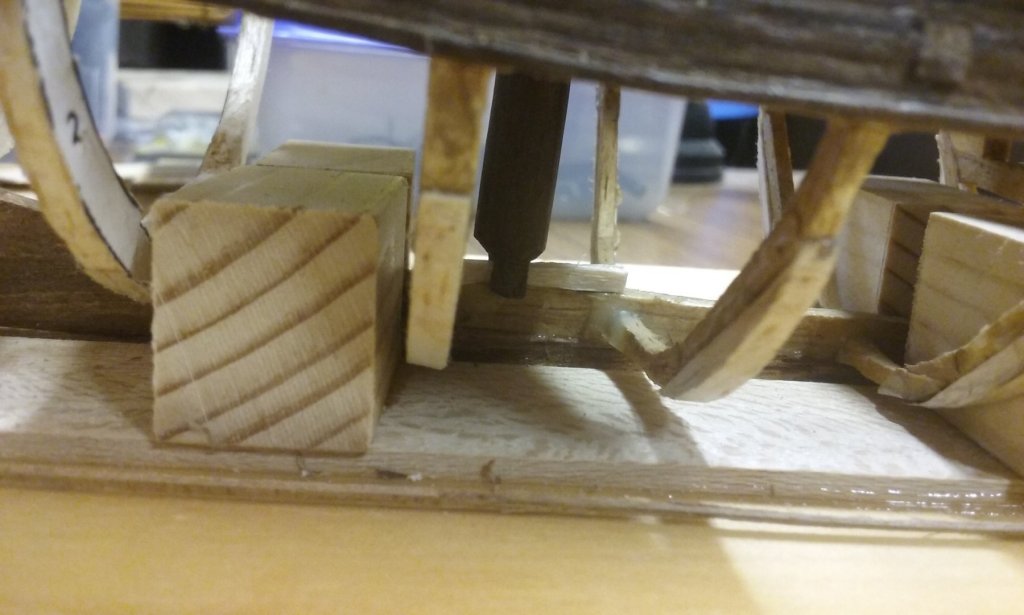
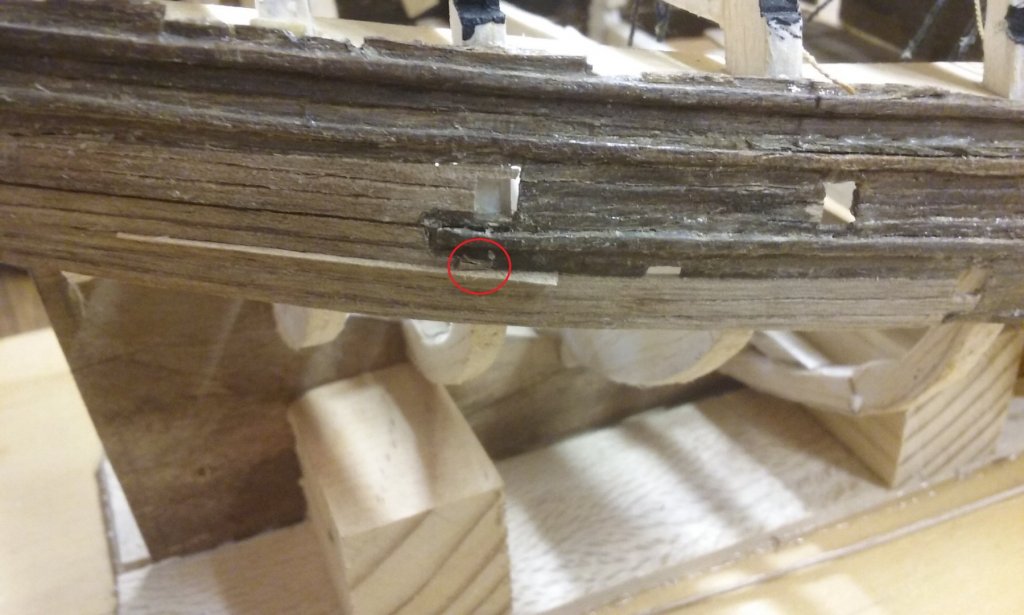
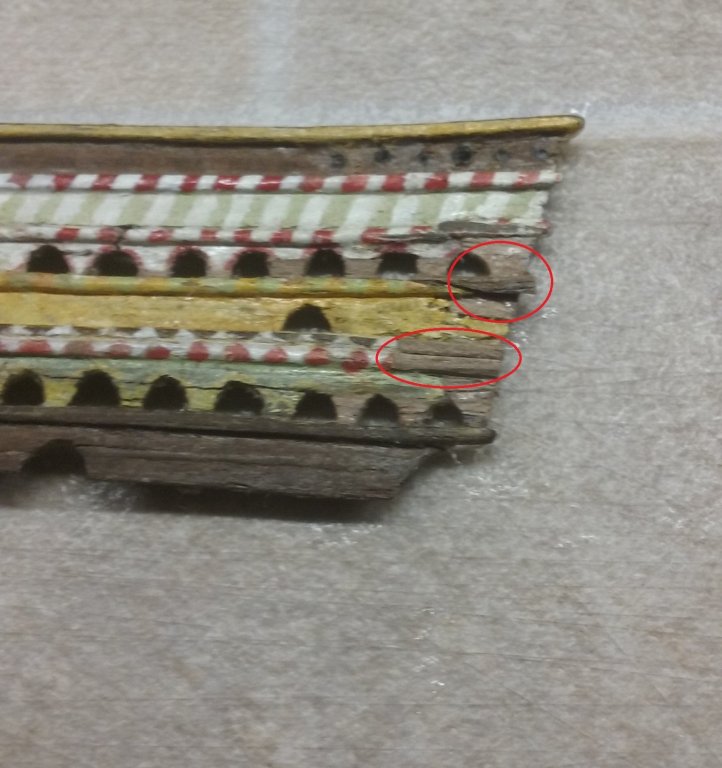
More panels of planking added, this time on the starboard side: Third last panel - firstly glued the forward end in place (not photographed), then when that was dry, pulled it in and glued it in place against the rest of the frames. Nowhere to put a clamp, so I used cotton to hold the end in position. Infill panel to bring everything in line. Same technique; glue forward end in place then once dry, glue and clamp the rest. And now, the final panel of planking above the water line. Unfortunately I slightly miscalculated the run of the last panel and there was a very narrow gap between it and the previous one, so I shaved a sliver of walnut down and slid it into the gap (long red oval). Also, I'd left a hole at the bottom of the previous panel, mistakenly thinking that was where a gunport was supposed to be (small red circle within the red oval). The real gunport is in the small circle on the right. So then I carved a small bit of walnut and put it in the "gunport" gap. I have yet to trim this and the "sliver" down flush with the planking. I discovered that the keel was too low for the slot at the bottom of the mast to go over it, so I had to add an extra bit to the top of the keel. Perhaps it never fitted, even when I built it 40 years ago. And because back then I had no idea of the function of the wedges around the mast and just put something in that looked like them because they were in the pictures, there's a gap between the mast and the hole in the deck. I think I'll have to make new wedges and do it properly. Steven


- 740 replies
-
- 5
-
-
- Tudor
- restoration
- (and 4 more)
-
Good to hear from you, Ships88. Totally understandable - some things are much more important than others. Best wishes - I hope your wife gets well soon. Steven
-
I agree with Mark. Hold off doing anything drastic until you can check that it's right (from bitter personal experience - far too many times). Steven
-
It would be good to see this one carried through to completion. But I guess sometimes life gets in the way . . . Steven
-
Congratulations and welcome back! Red Dragon is looking very good. When you finish, will you be getting back to the Cocca? It would be nice to see that one finished, too. Steven
-
Thanks everybody for the likes. They are much appreciated. Pat, thanks for the comment. Yes, the foil from the scalpel packets seems to be exactly the right thickness. I've tried other types of foil (kitchen foil, cat food containers, those foil boxes you cook food in, but this is certainly the best I've found for this purpose, though you really have to be careful not to mess up the smoothness of the surface. Regarding that paper, no hurry. (But it would be very nice if you can find it). Steven
-
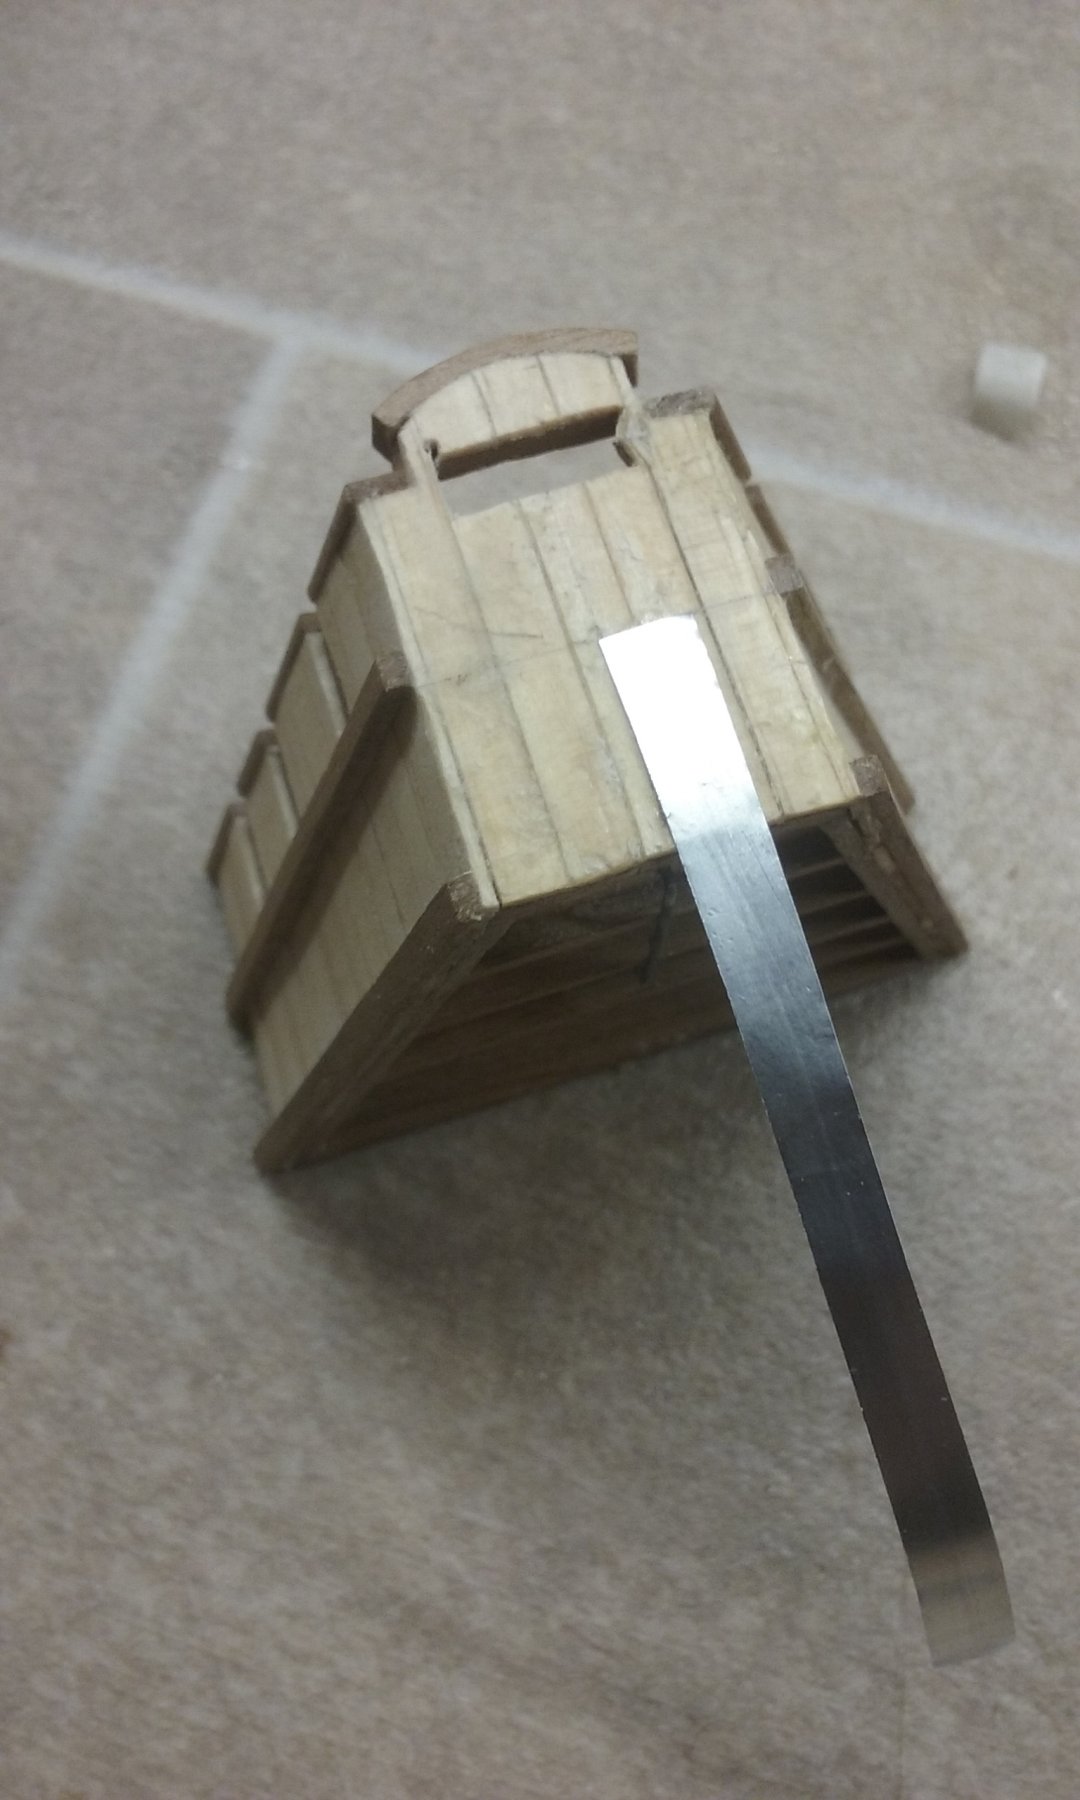
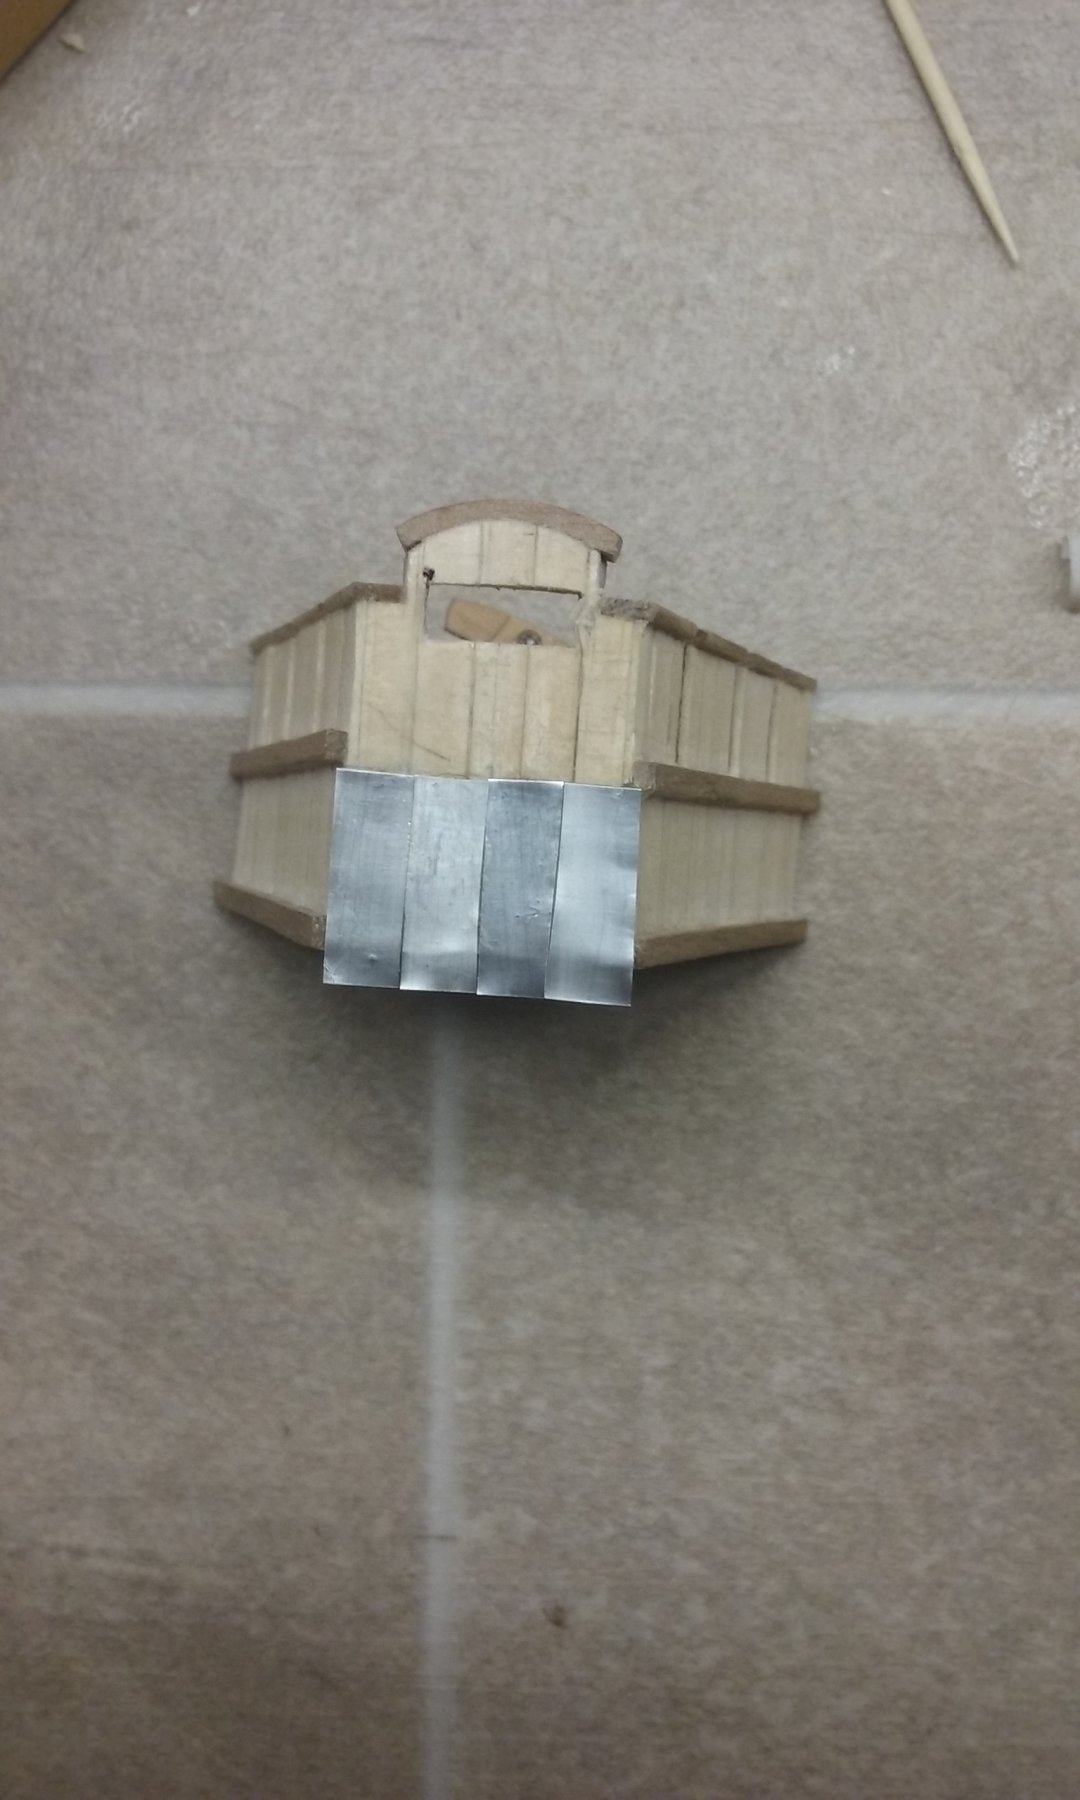
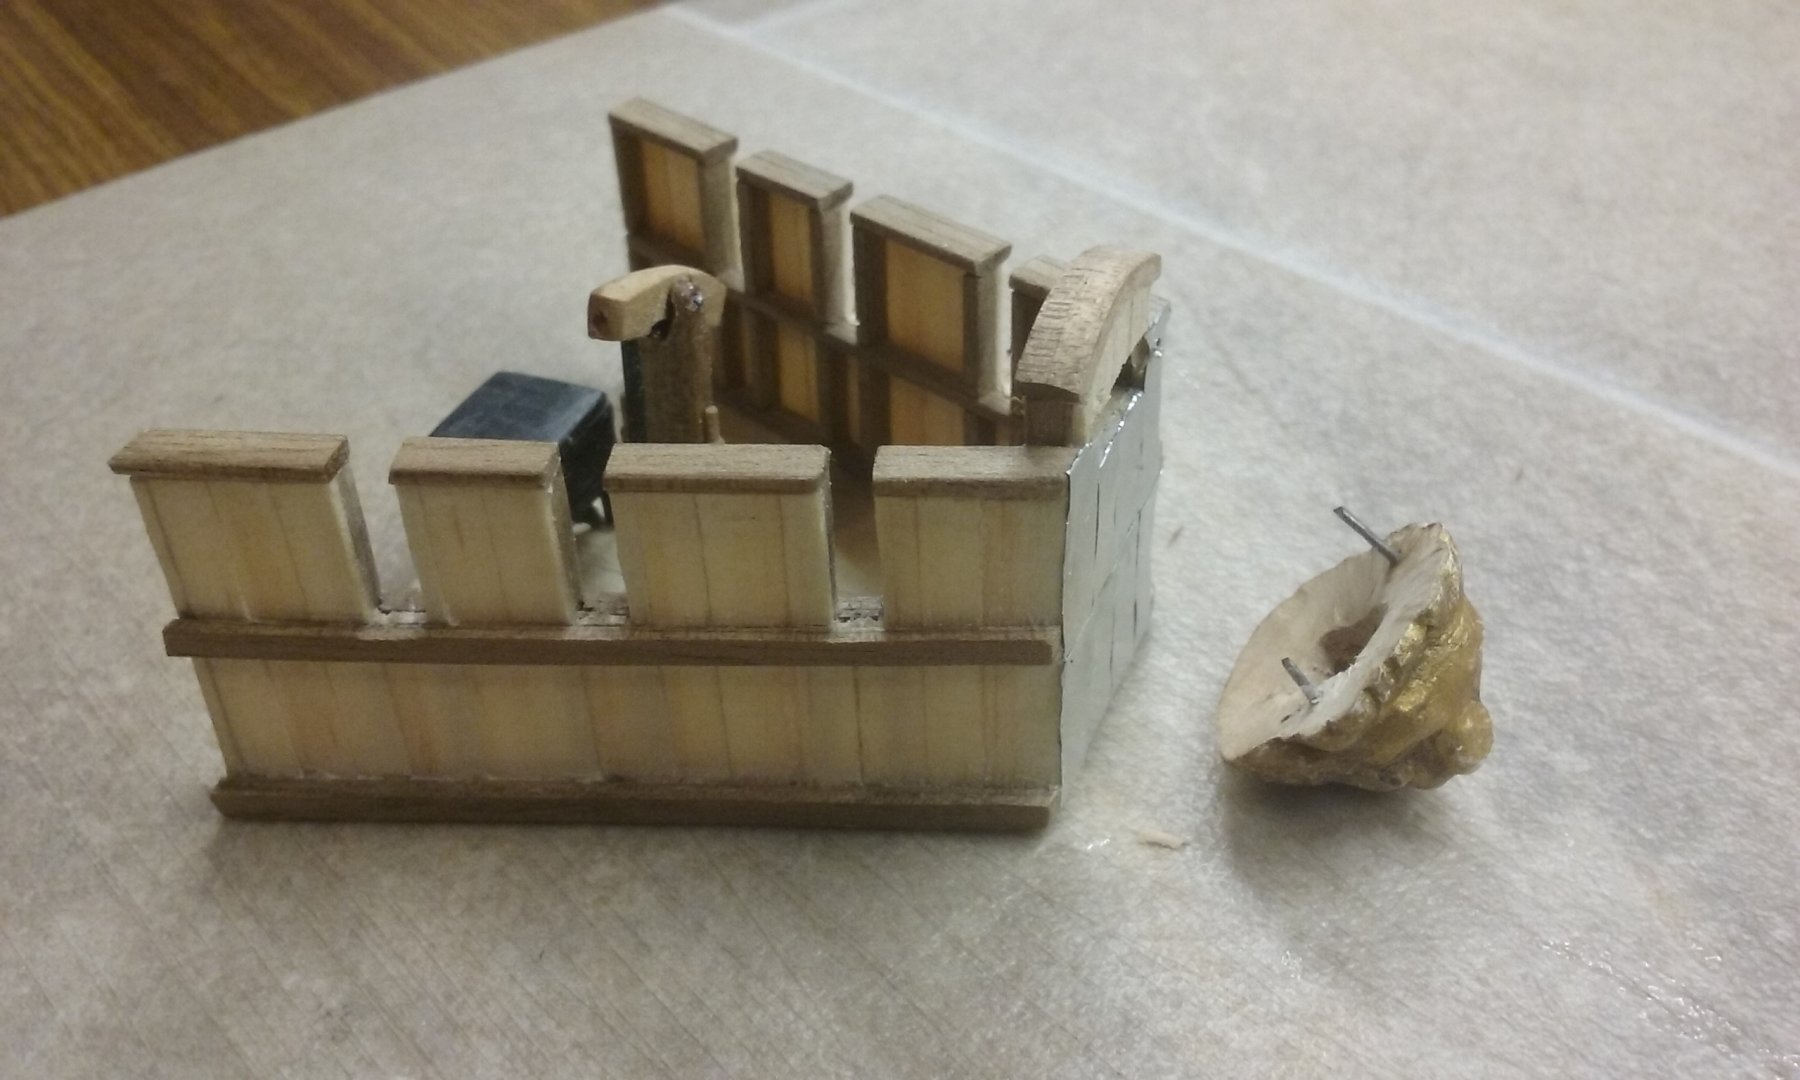
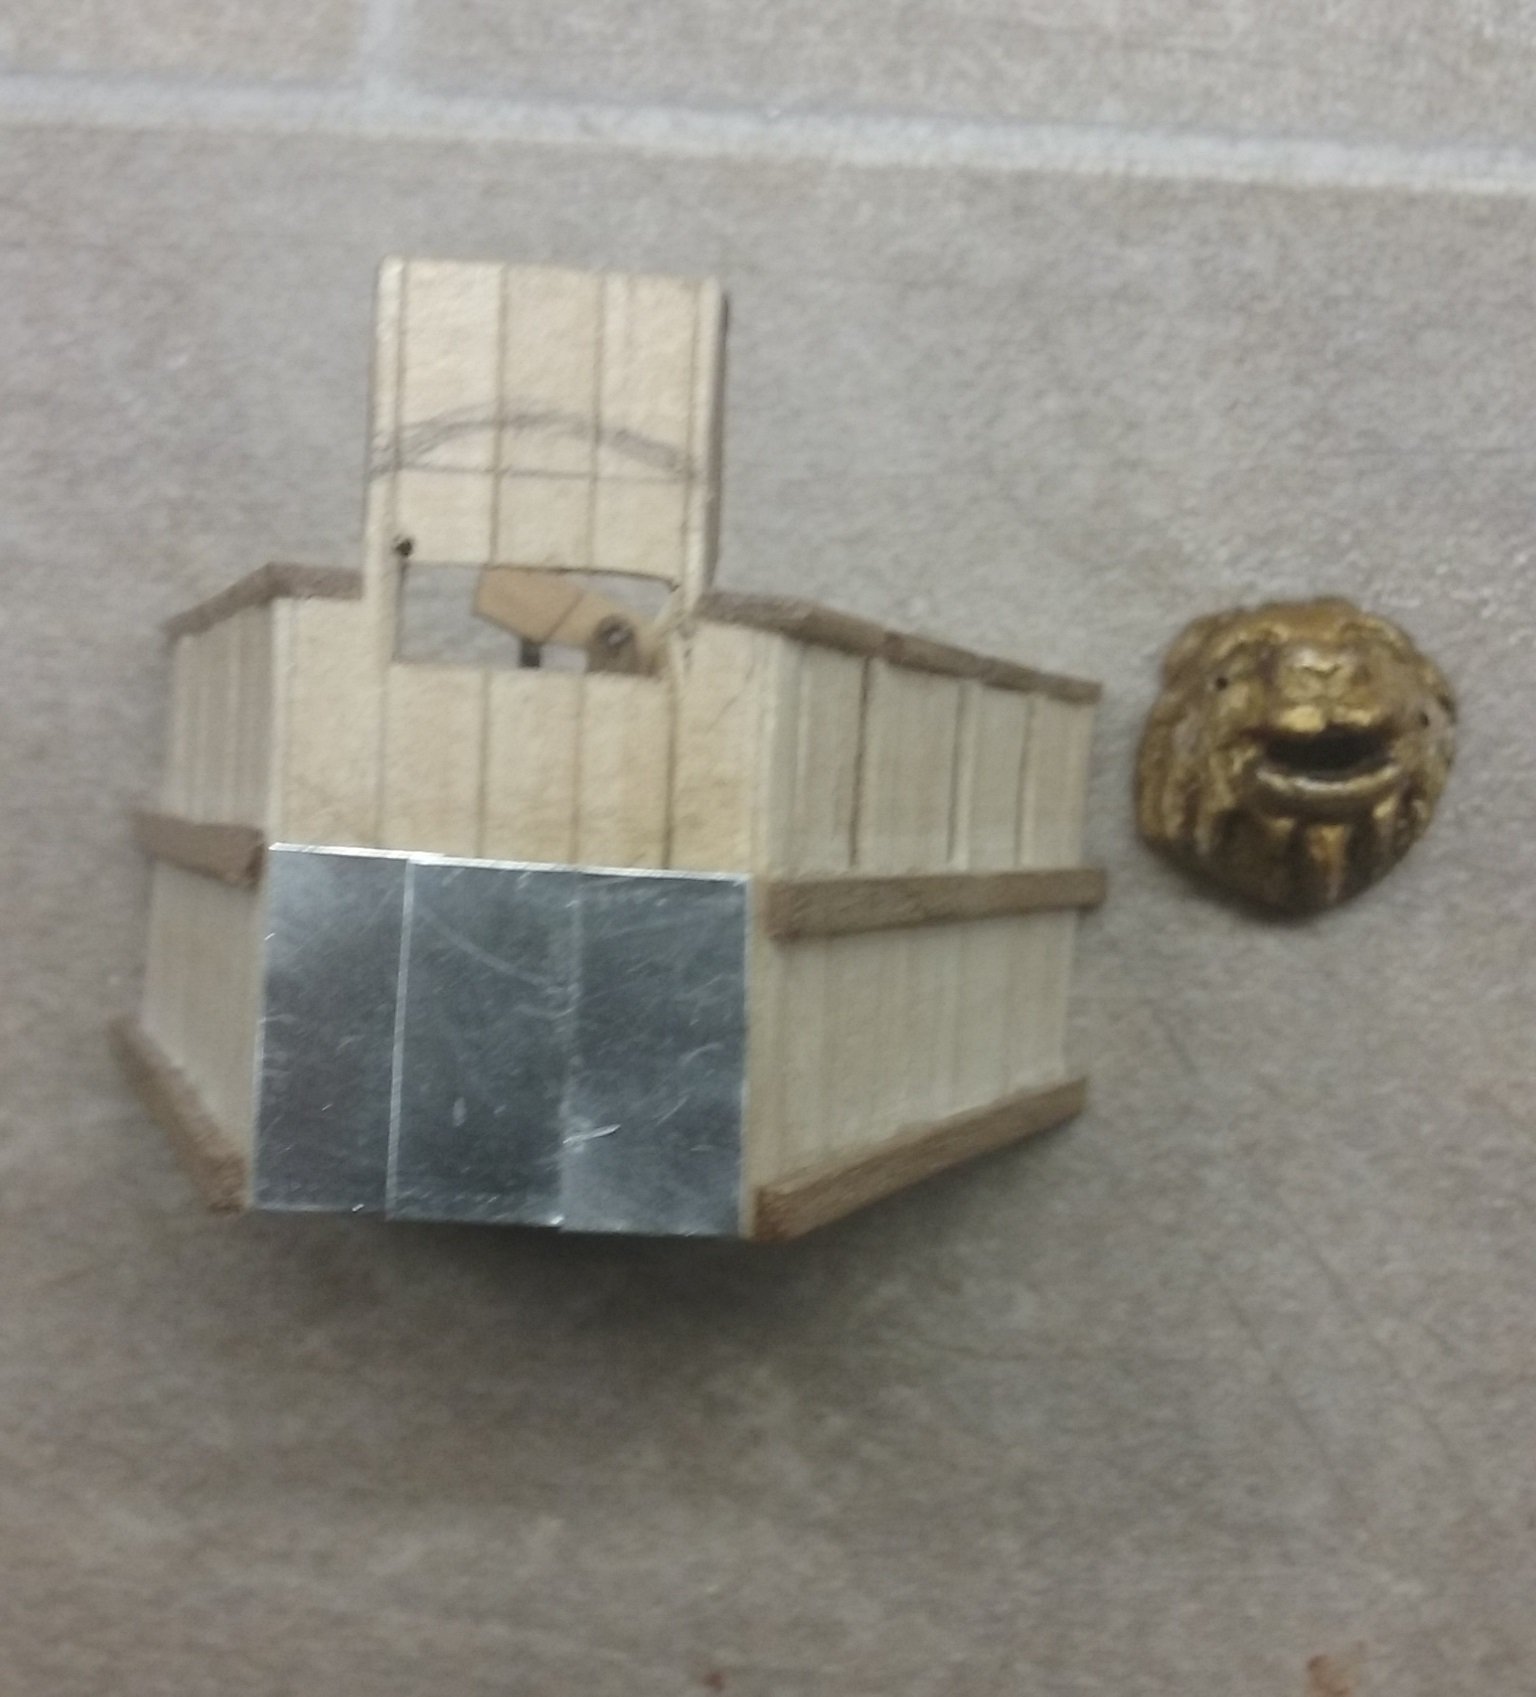
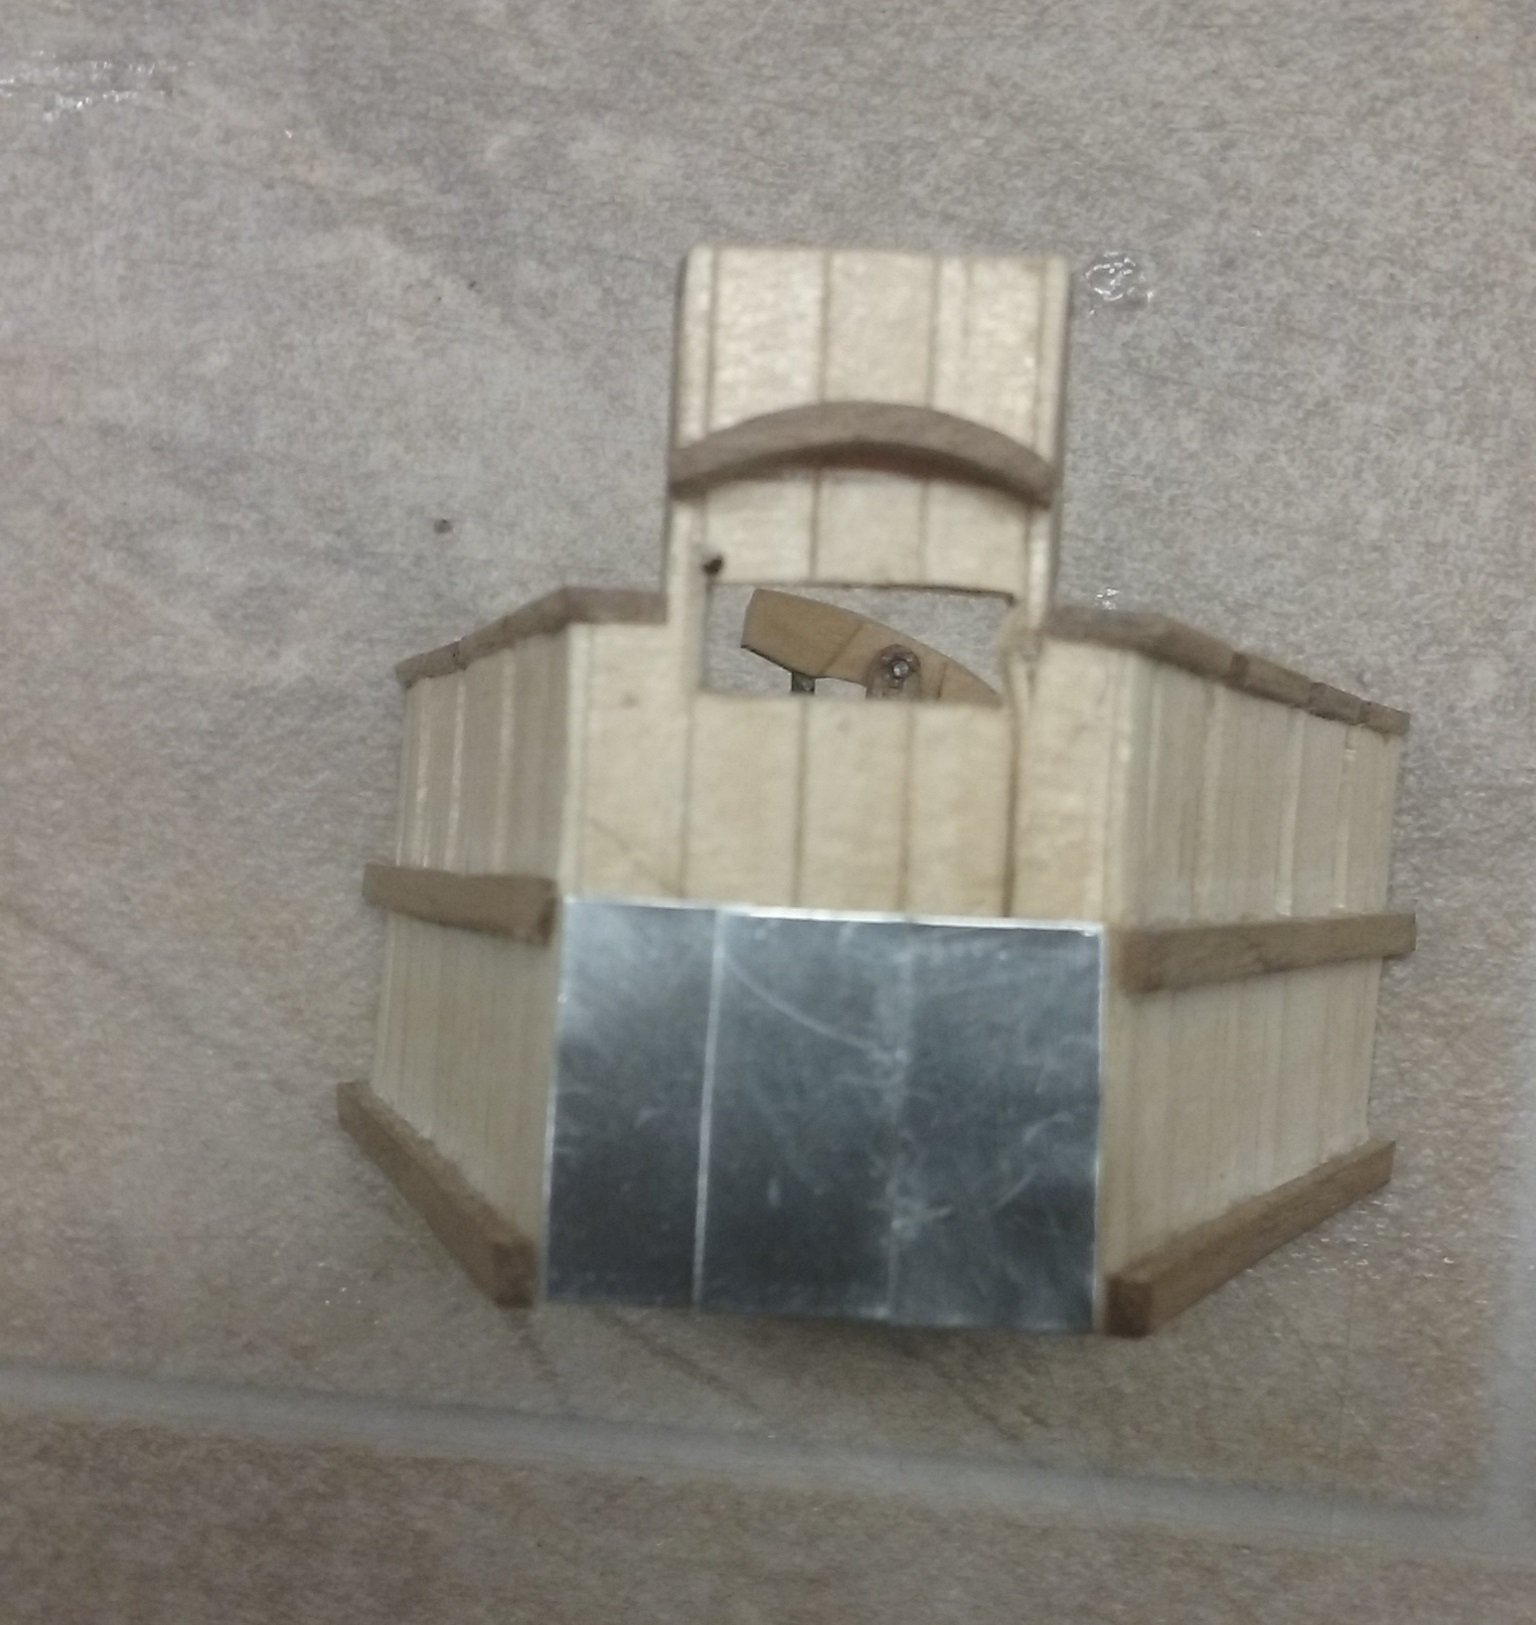
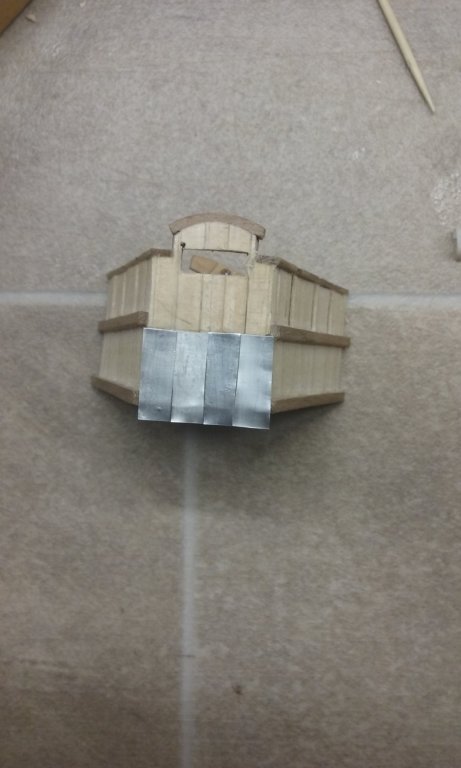
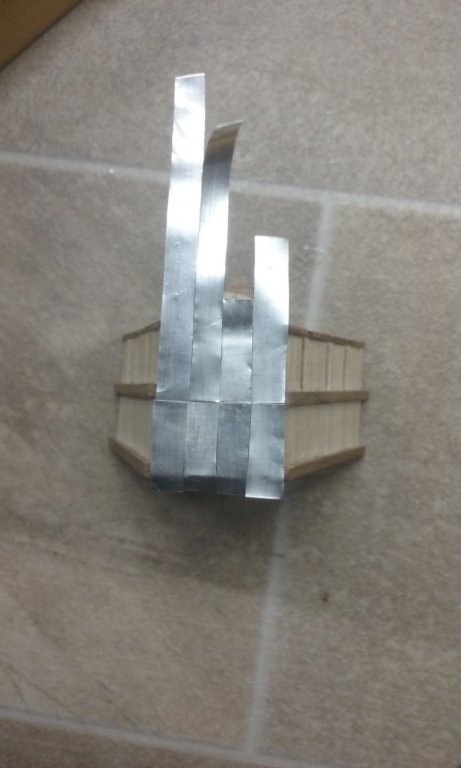
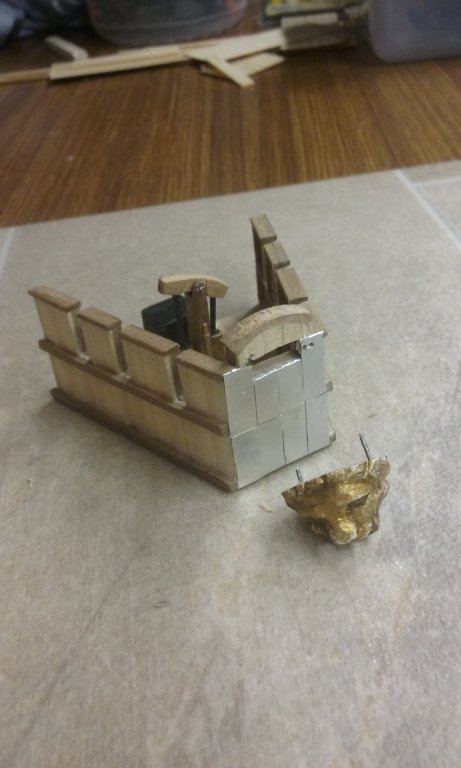
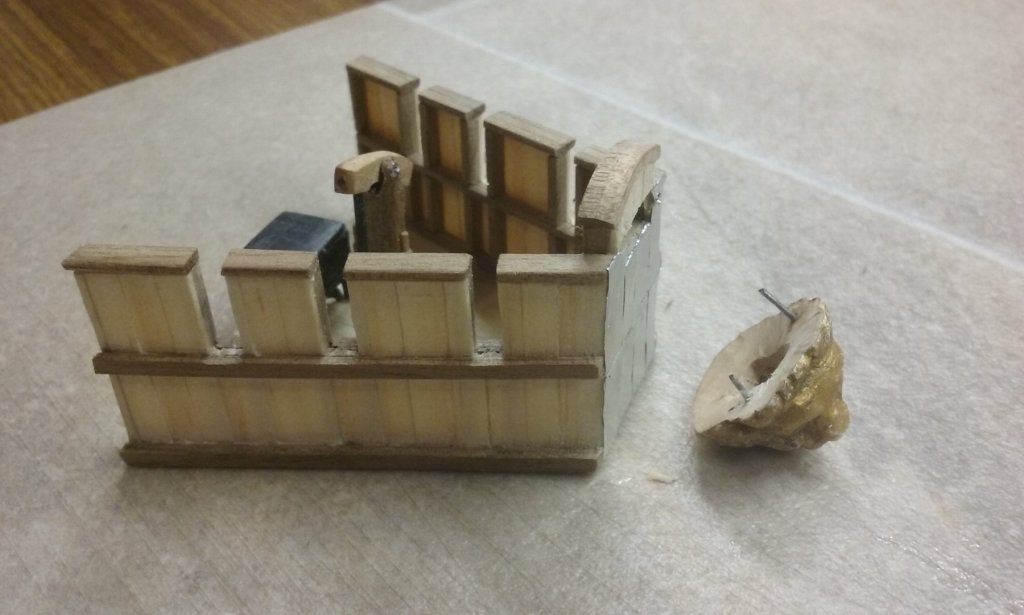
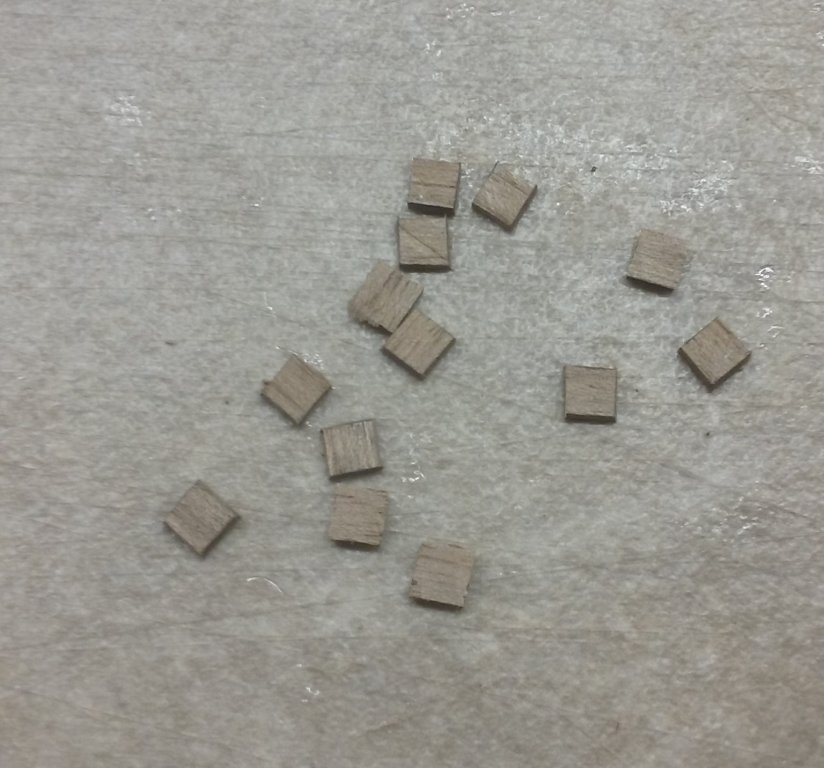
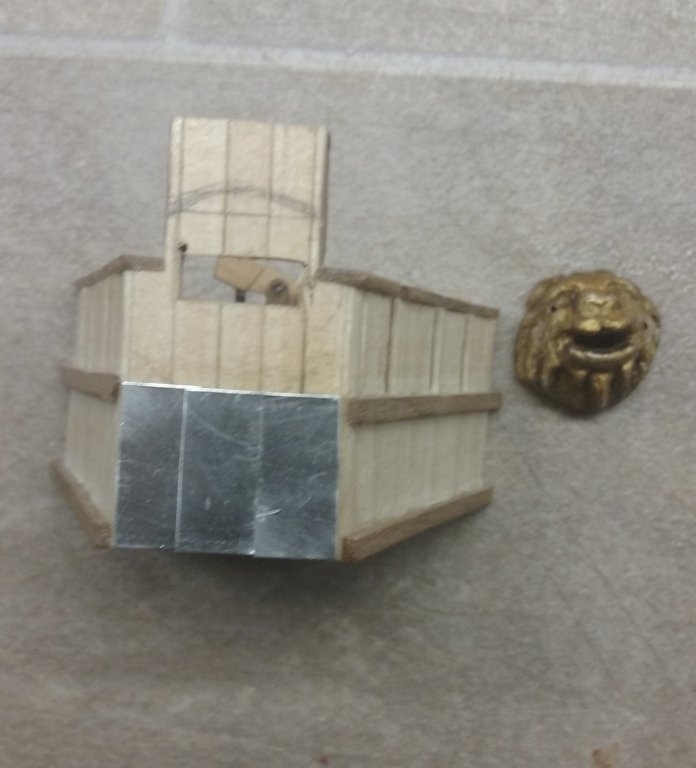
Forecastle all but complete! I got rid of the metal plates I'd put on the front face - they were just too thick and I decided I couldn't live with them. I got the thinner foil from the individual packets my No. 11 scalpel blades came in. Using it was difficult - it takes on all the irregularities of the surface behind it so you have to smooth it out on a totally flat surface and then not let it come into contact too firmly with the planking behind it when you glue it on. So . . . after two unsuccessful attempts I finally got it right. Trimmed the foil plating and then started on the lion's head. I drilled two holes through it and the parapet behind, and glued bits of wire in the holes in the head with CA to locate it onto the parapet. Initially it refused to sit flat against the planking, and I realised that the surfaces just weren't meshing. I cut away the back of the head to make a concave surface so only the outside edge contacted the parapet, which solved the problem. I also cut away more wood behind the lion's mouth, to make it look more like it was made from sheet metal. The wires were glued into the holes in the parapet, also with CA, fixing the lion's head into position. Then I was able to slide the nozzle of the siphon through the lion's mouth and glue the nozzle assembly to the riser pipe. Opening out behind the lion's mouth also gave the nozzle more room to move around, to aim up and down, left and right. So there it is. The foil plating needs to be painted to look like bronze and the lion's head needs to be gilded (using imitation gold leaf - I can't justify buying a whole packet of the real stuff to use on such a small job. I'll have to seal the "gold" leaf with varnish to keep it from tarnishing). Steven


-
Interesting ship to build. Looking forward to seeing the progress on this one. Steven
-
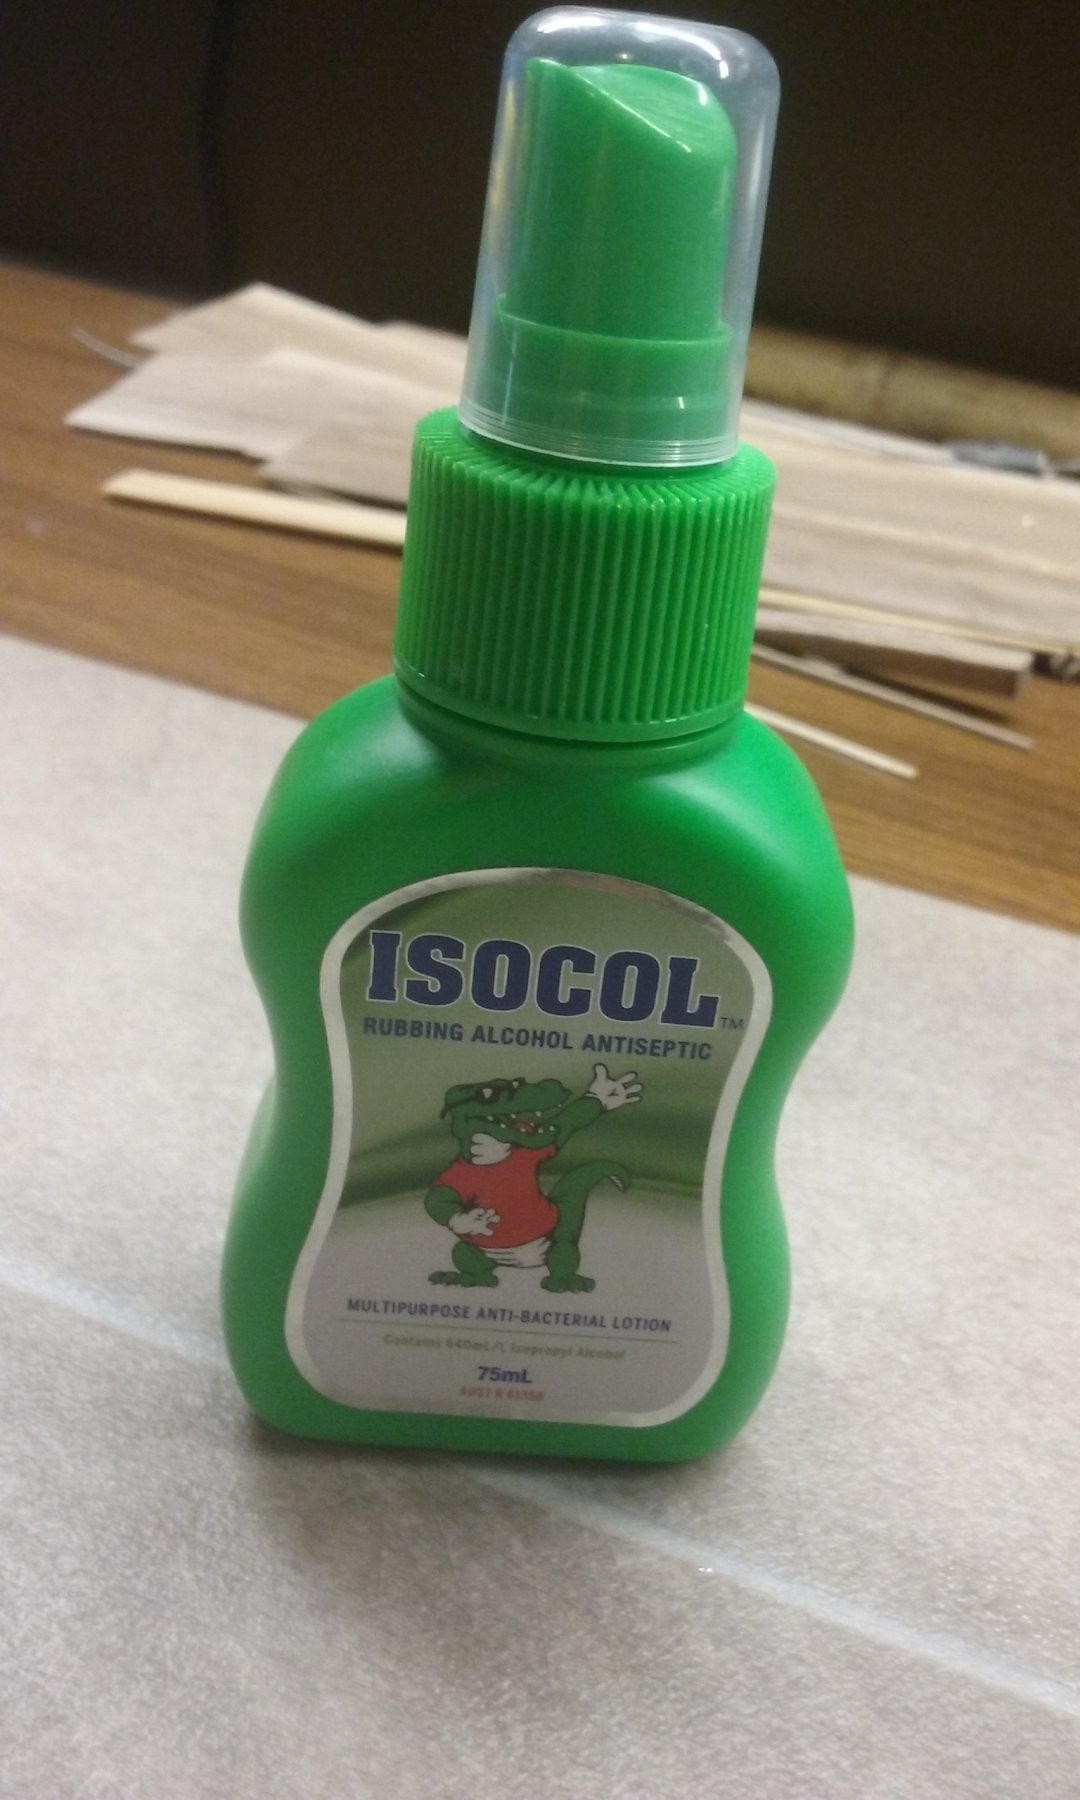
Jo, you can get isopropyl alcohol at Woolies -I got mine from the health and beauty section (where the antiseptic creams are). It's in a little green plastic bottle (75ml) with the brand name Isocol. Cost me something over 5 dollars. It works on PVA glue, but I don't know, however, if it'll dissolve the Titebond you're using. Original Titebond is PVA, so isopropynol will work on it; I don't know about Titebond II or III. Steven [Edit] Oops - looks like I was too late with the advice about Woolies - If I'd checked previous posts Id have found out you'd already bought some!

-
What is this type of rig called.
Louie da fly replied to BANYAN's topic in Masting, rigging and sails
In the absence of anything more specific I think this sounds like a good way forward, Pat. It makes sense that the main course wouldn't have been set when she was under steam. As far as conserving coal goes, it makes sense to use it only when necessary. Getting out of the river into the bay without needing a tug would have been an advantage. Also Port Philip Bay is pretty big, and in the event of a (never materialised) attack it would have been important to be able to manoeuvre as fast as possible to the point of danger without having to rely on the wind. As I understand it, Victoria would have been about the only major warship available at the time, so mobility would have to take the place of numbers. The forts either side of the Rip would have been the other part of the defenses, but if an enemy vessel managed to get past them, Victoria would have been the backup defense. Presumably she would have had enough warning from the fort lookouts to get steam up in time to meet an attack. Steven -
Shame about the toe. Look after yourself and I'm sure it will be better before you know it. One thing I like about the Hurstwic site is it's the only place I've seen that shows you what Viking oars looked like. I see the model has shields along the sides. You might be interested in this link - http://members.ozemail.com.au/~chrisandpeter/shield/shield.html particularly the section on decoration. Steven
-
That means you're back to where you were before the problems arose and have a second chance at it. That is good progress (though it mightn't seem like it at the moment). Sorry to hear about the toe. Hope it's all getting better ok. I just came across this link which might be of use to you. http://www.hurstwic.org/history/articles/manufacturing/text/norse_ships.htm You might already have https://www.vikingeskibsmuseet.dk/en/professions/education/viking-knowledge/the-longships/findings-of-longships-from-the-viking-age/skuldelev-2/ but I'm including it just in case. I haven't chased up on it but you might find it also has links leading from it that give more info. Good luck with it all. Steven
-
A very good site for Viking ships, not only nails but many other things is at http://www.hurstwic.org/history/articles/manufacturing/text/norse_ships.htm If those nails/rivets are 3" long you should be able to roughly work out the diameter and head size at 1:50. Hope that helps, Steven
-
Ironclads! Pre-Dreadnoughts! The list could go on forever . . . 😉 Steven
-
Thanks everybody for the likes (and comments). More tidying up. Superstructure - cutting out the arches in the infill bits and adding the rough cut of the double wale above the green section: The repair to the starboard side of the superstructure is pretty much finished. Still a bit to do on the port side. Adding the end of the wale above the yellow section and trimming the double wale. Still needs a bit of shaping and smoothing off. Cut out the port lids. Main hull -adding the second wale on the port side. (While I want to keep the model as close to the way it should have been had I finished it back in the day, I can't help trying to make the finish of the repairs a little better than the original.) Almost complete on the port side. Still one or more panels to add on the starboard. Steven


- 740 replies
-
- 6
-
-
- Tudor
- restoration
- (and 4 more)
-
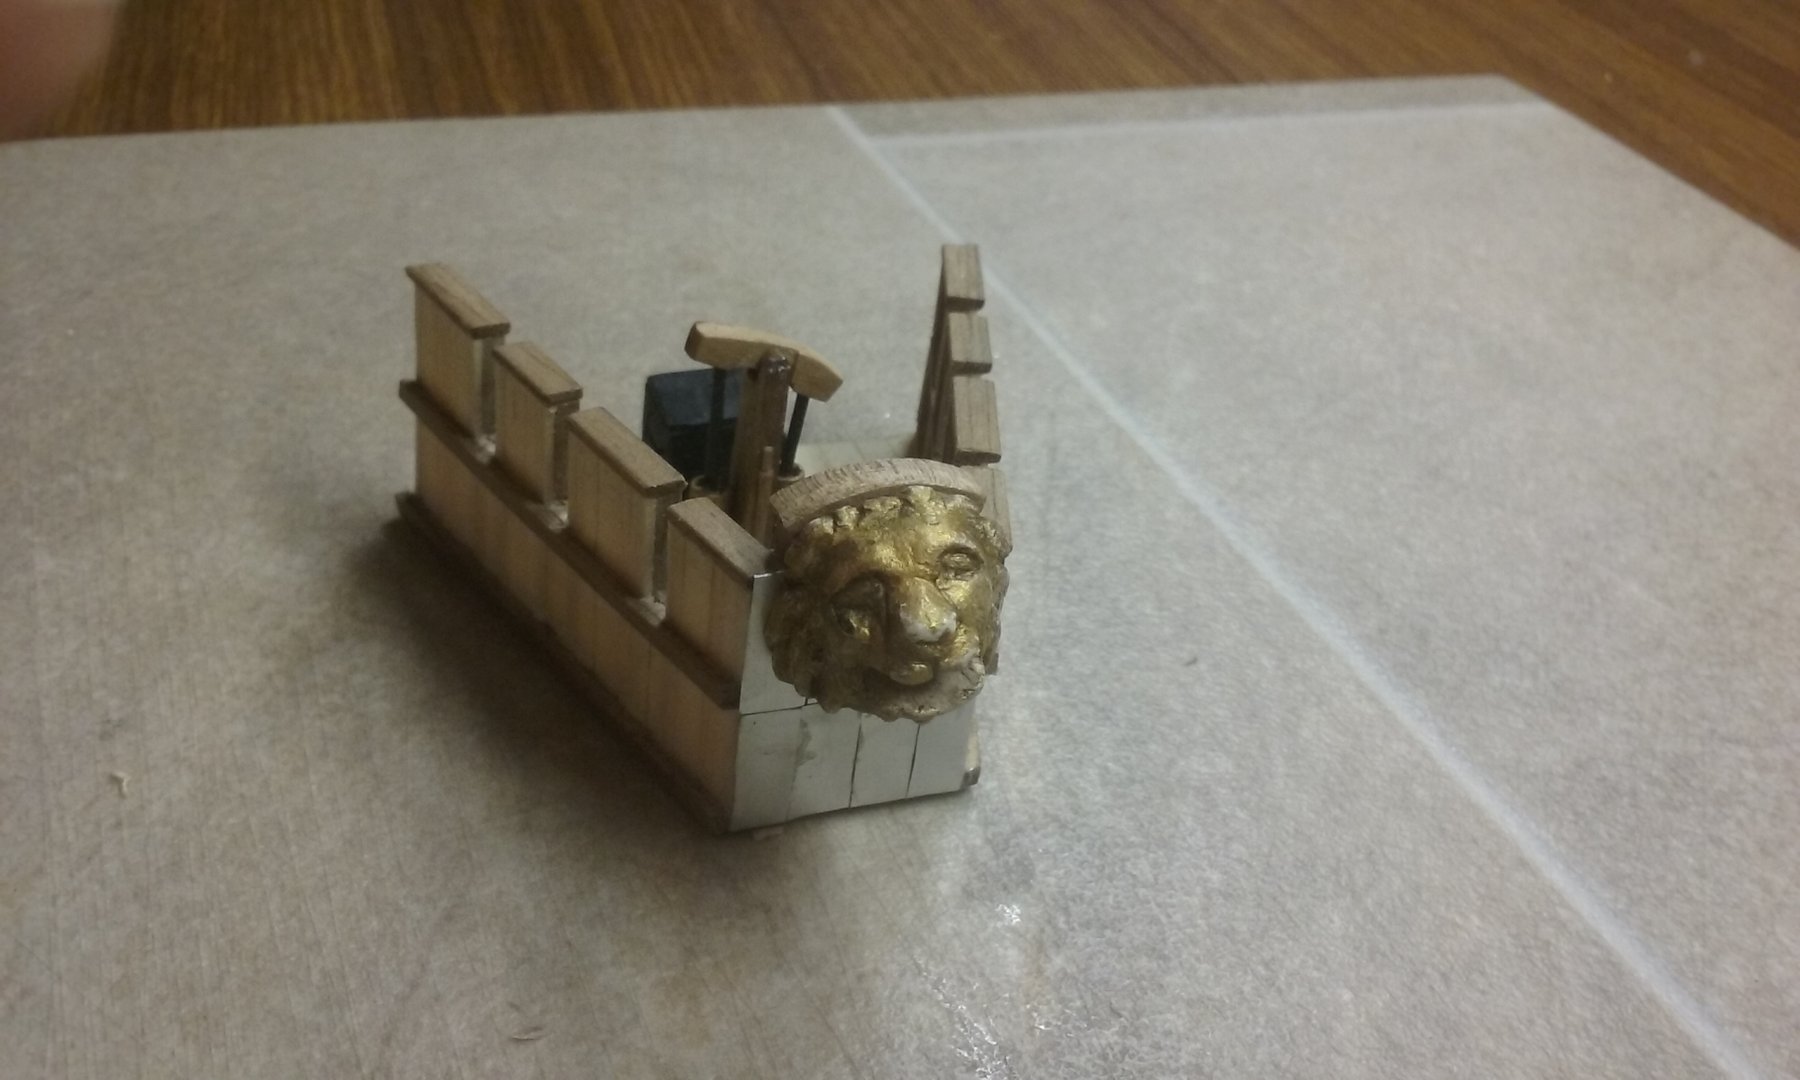
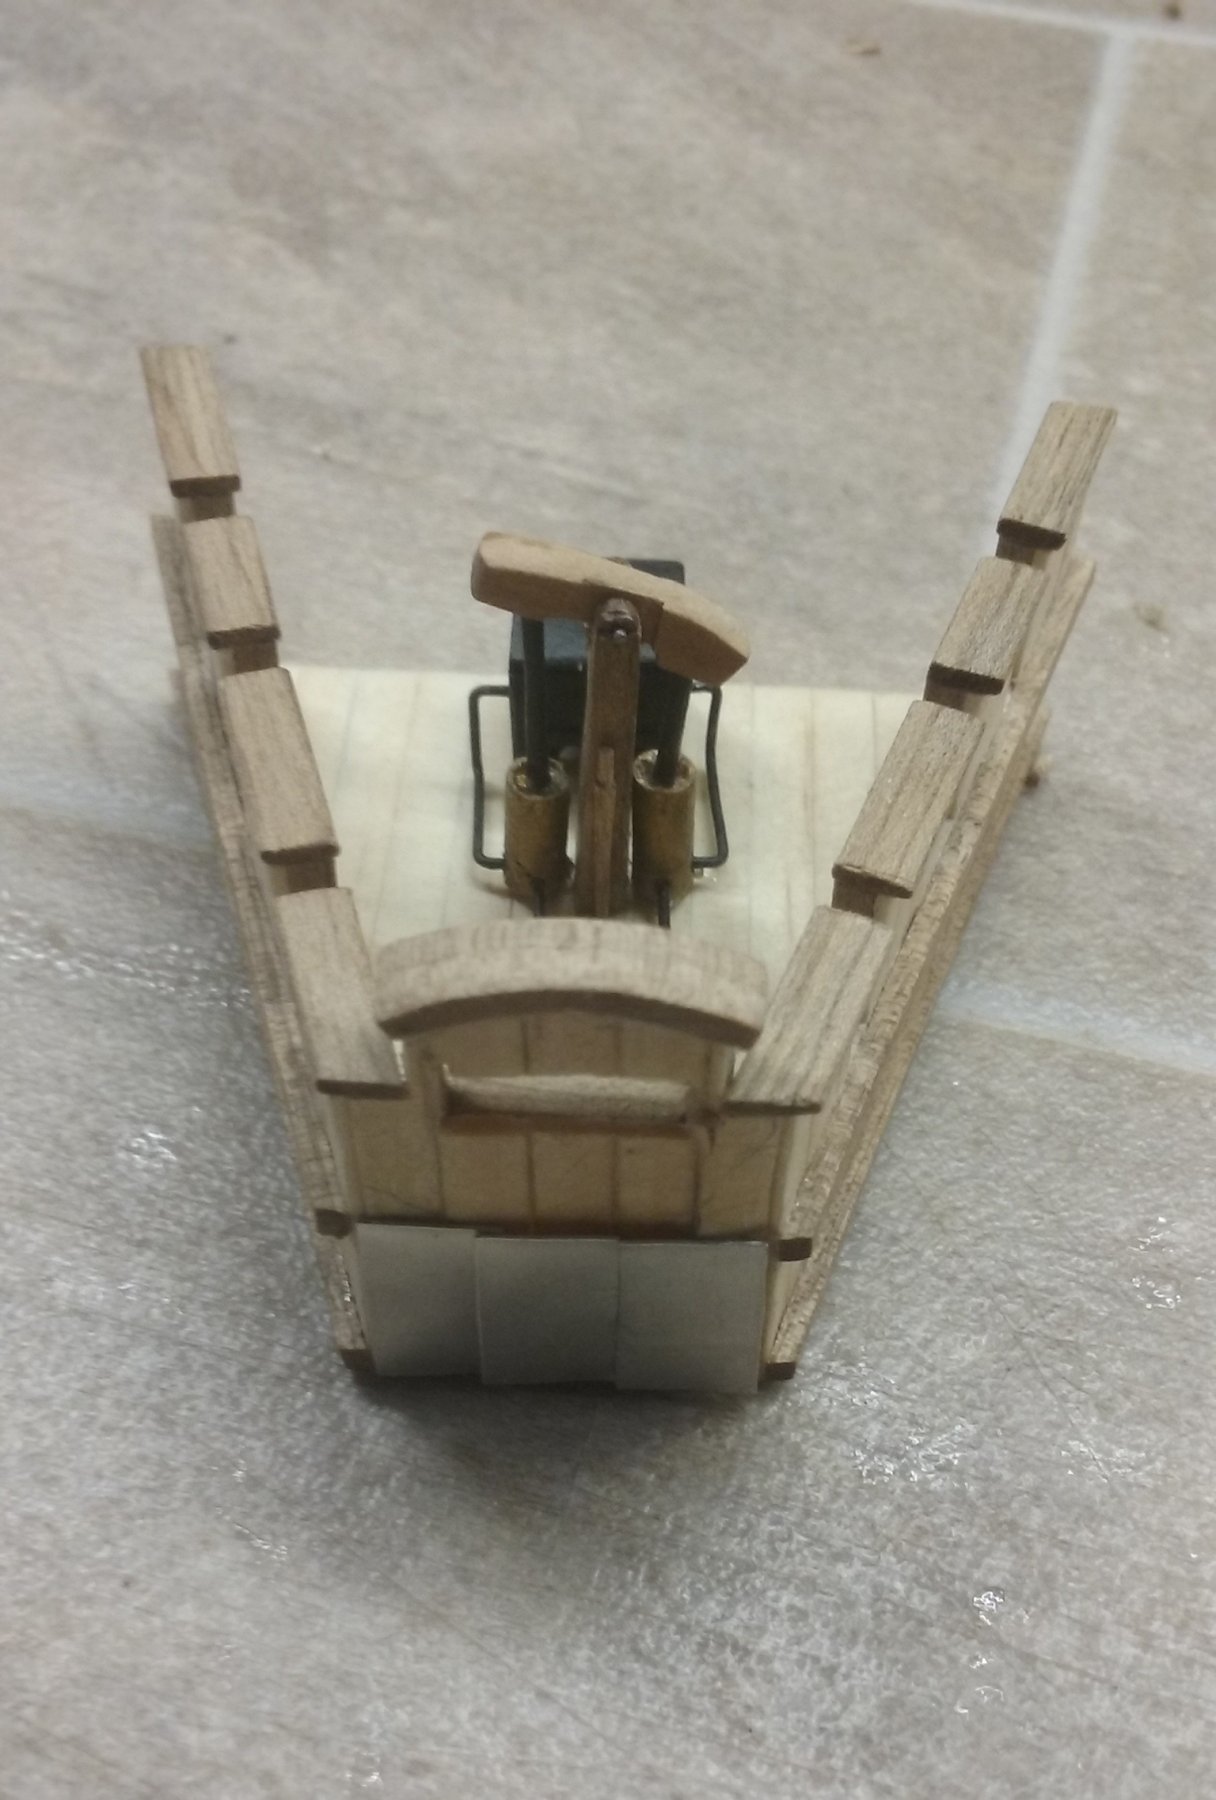
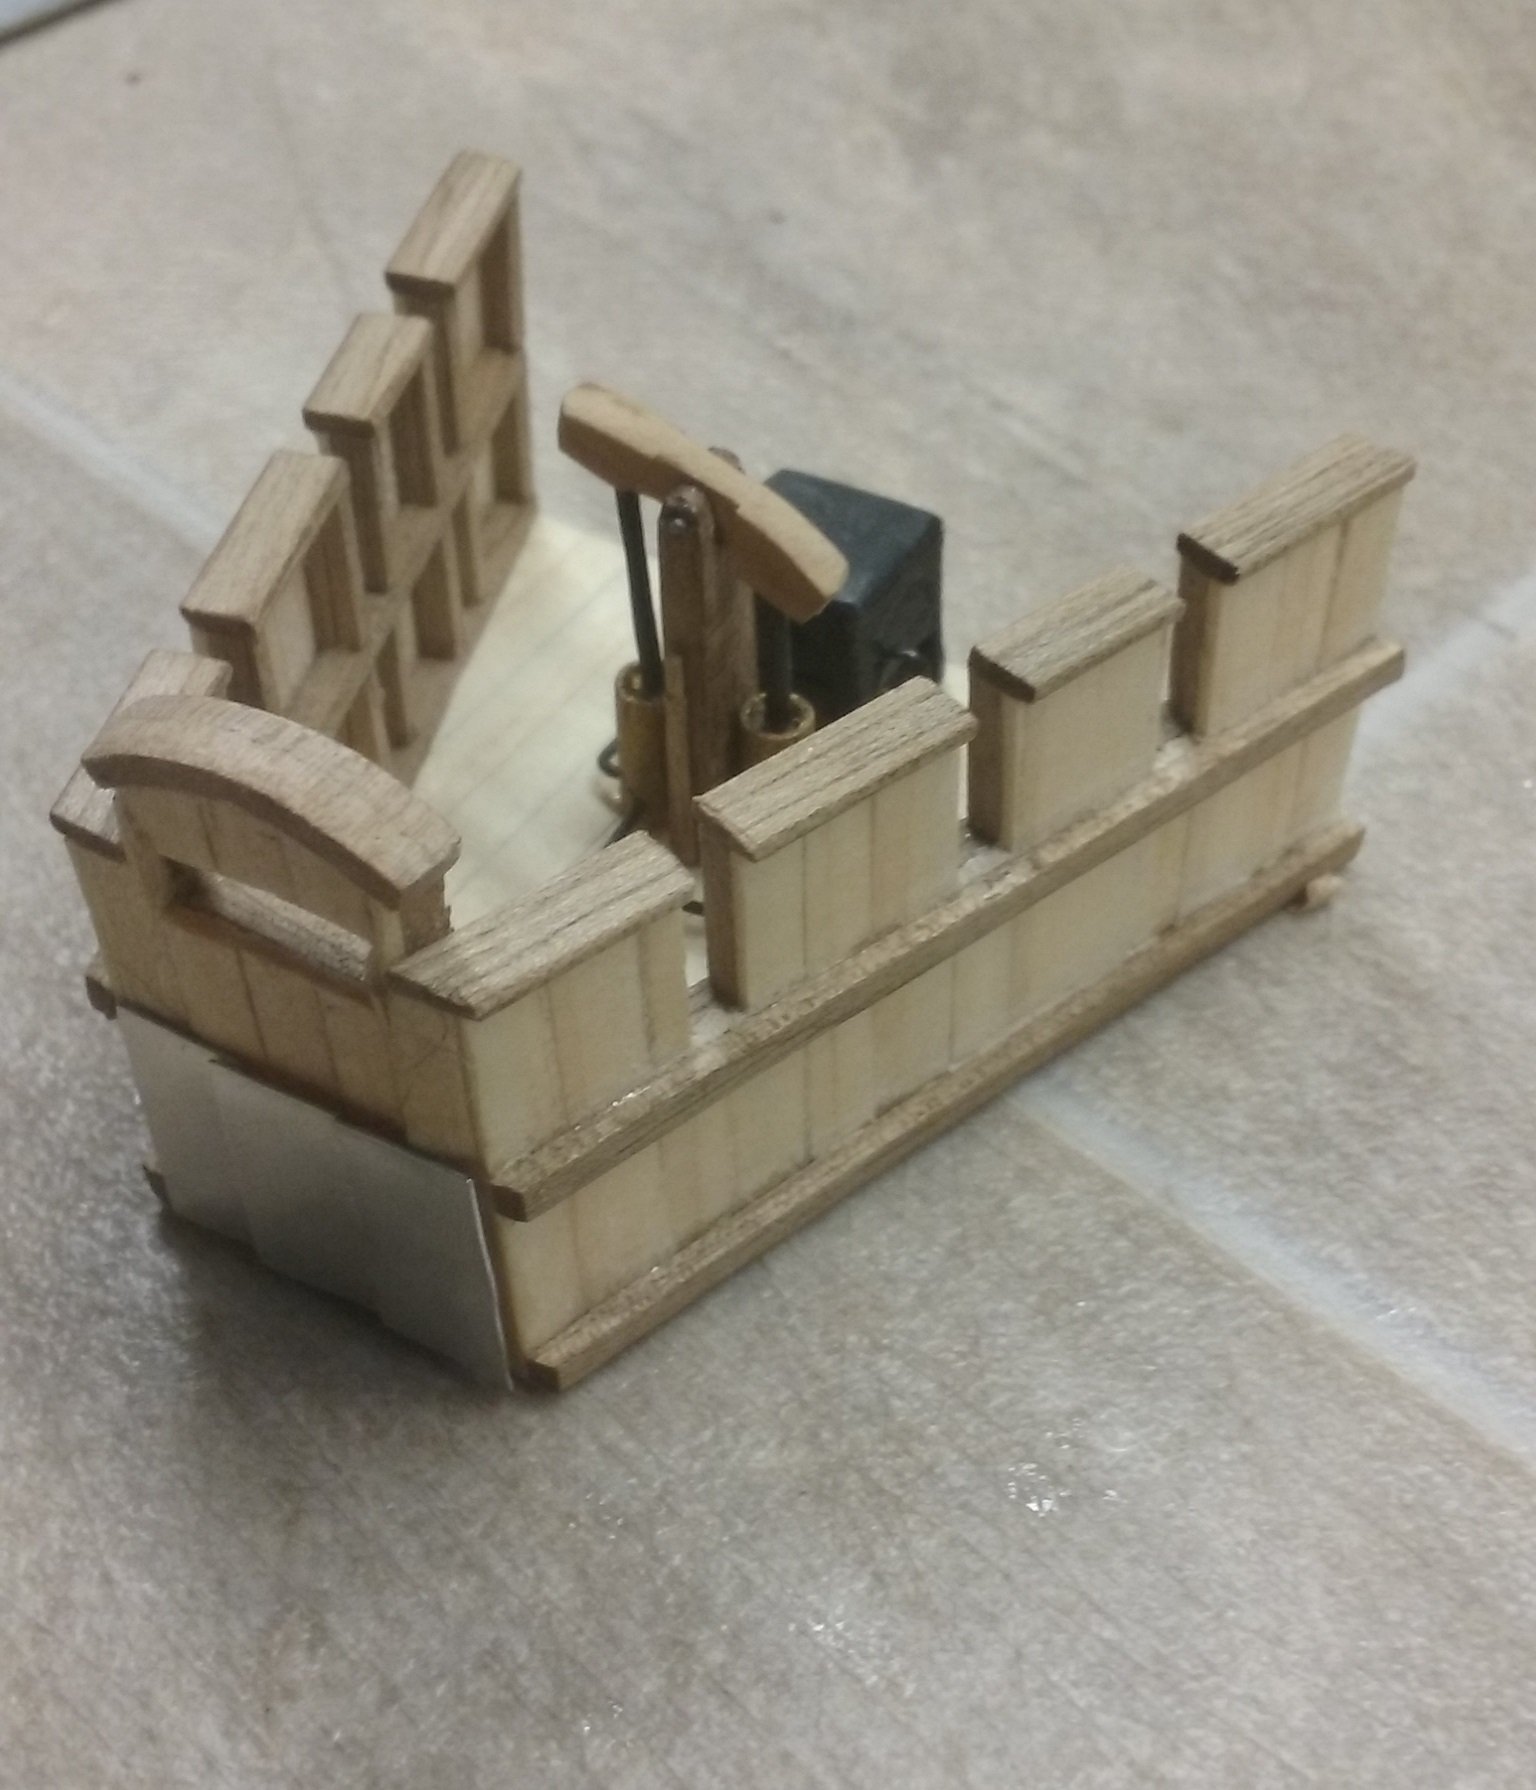
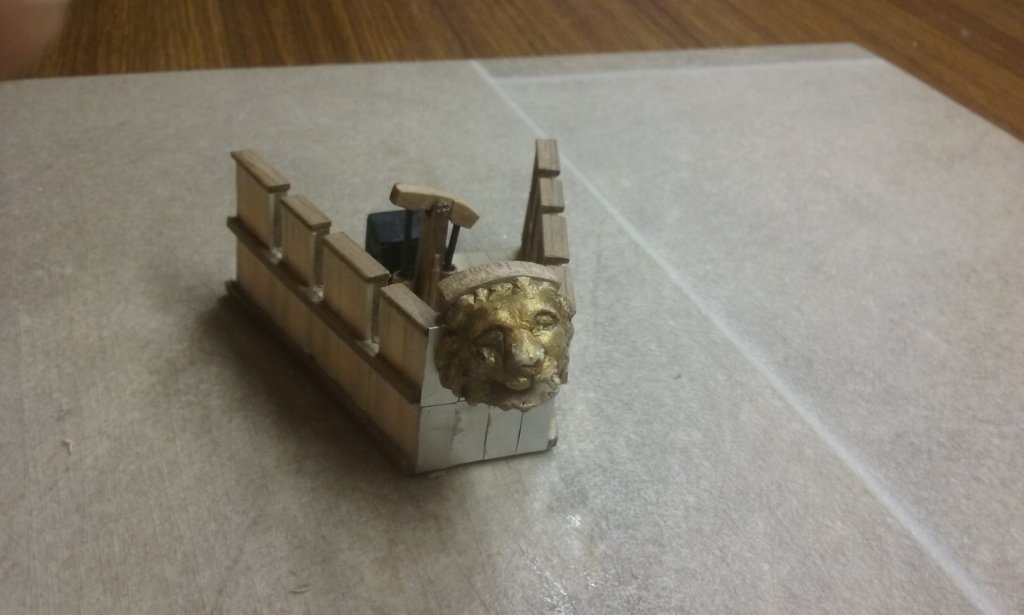
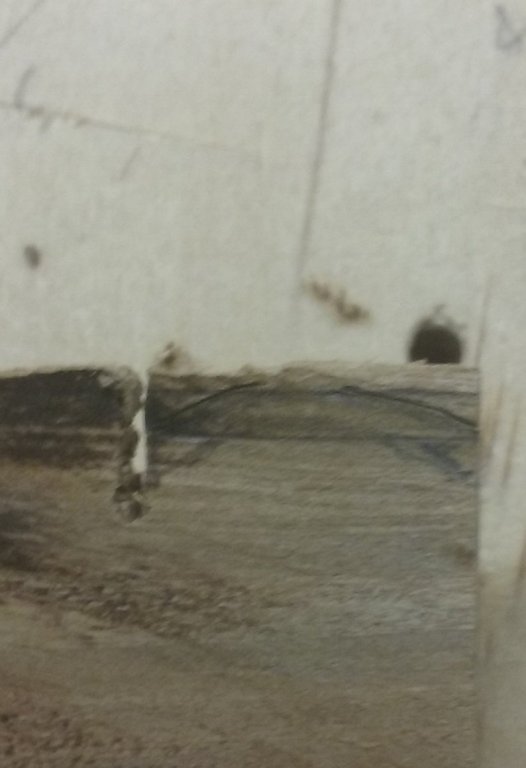
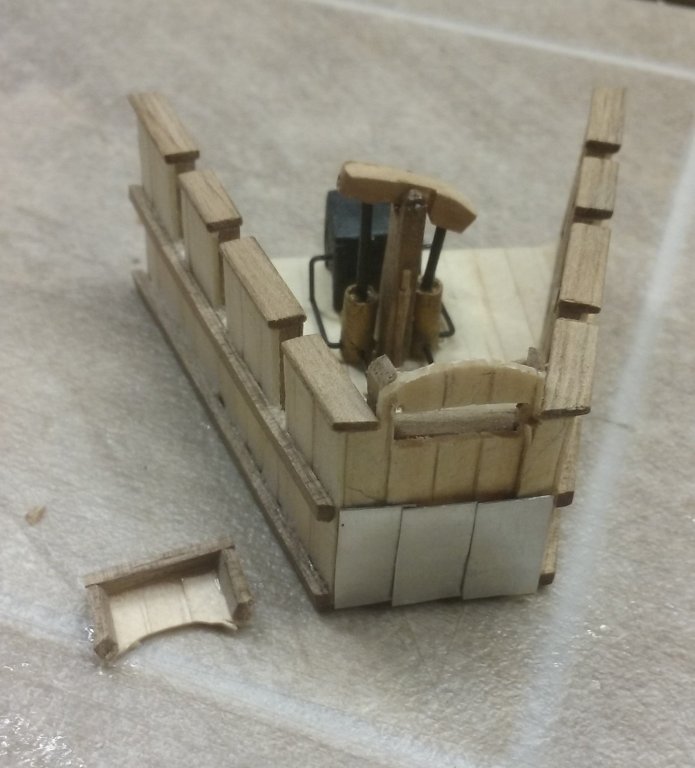
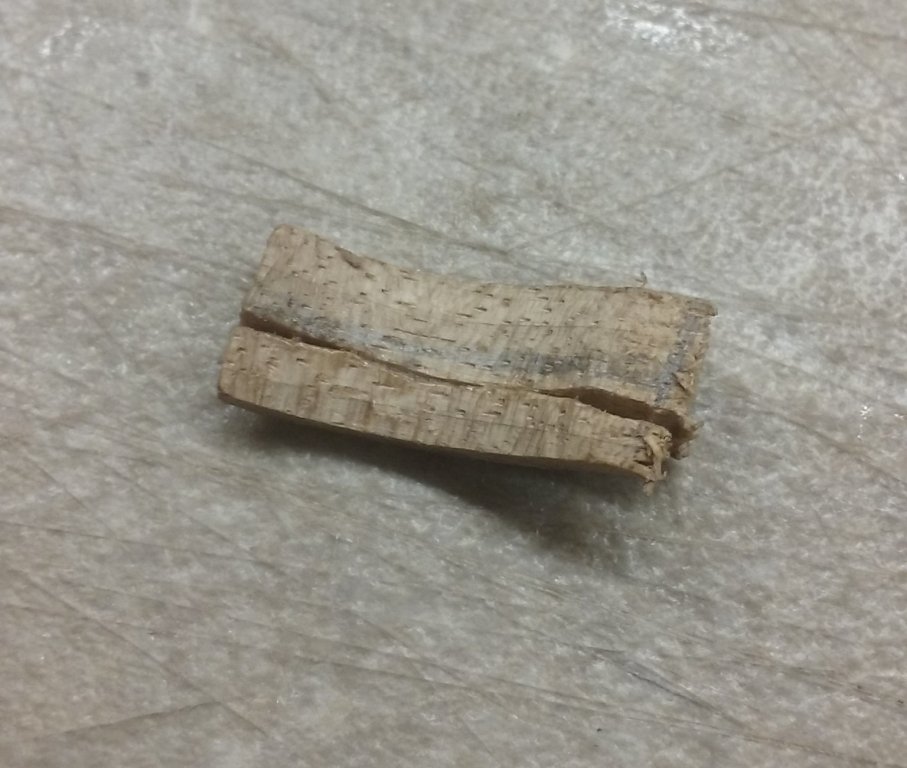
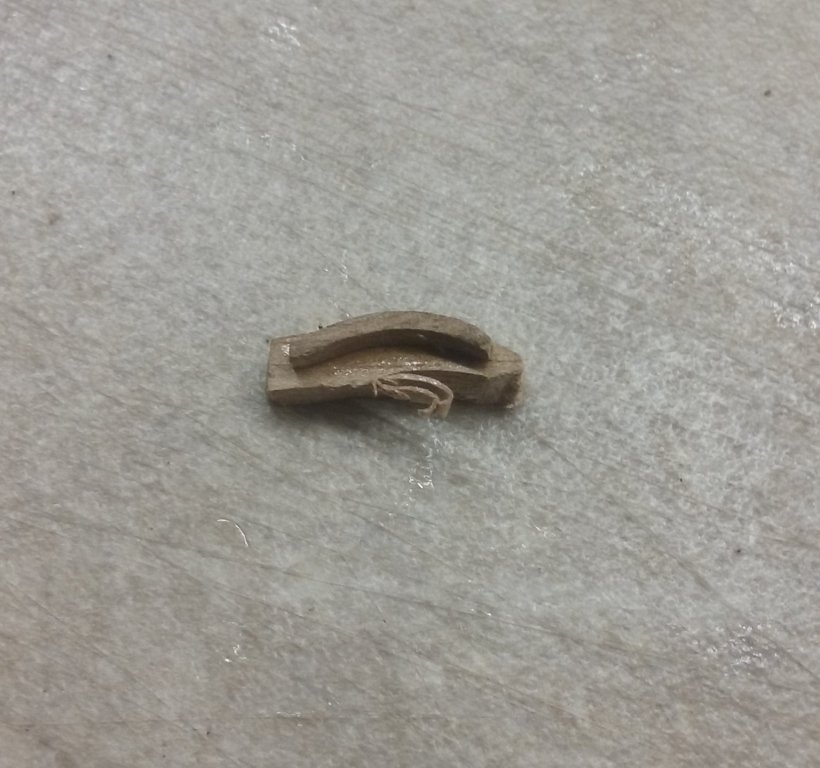
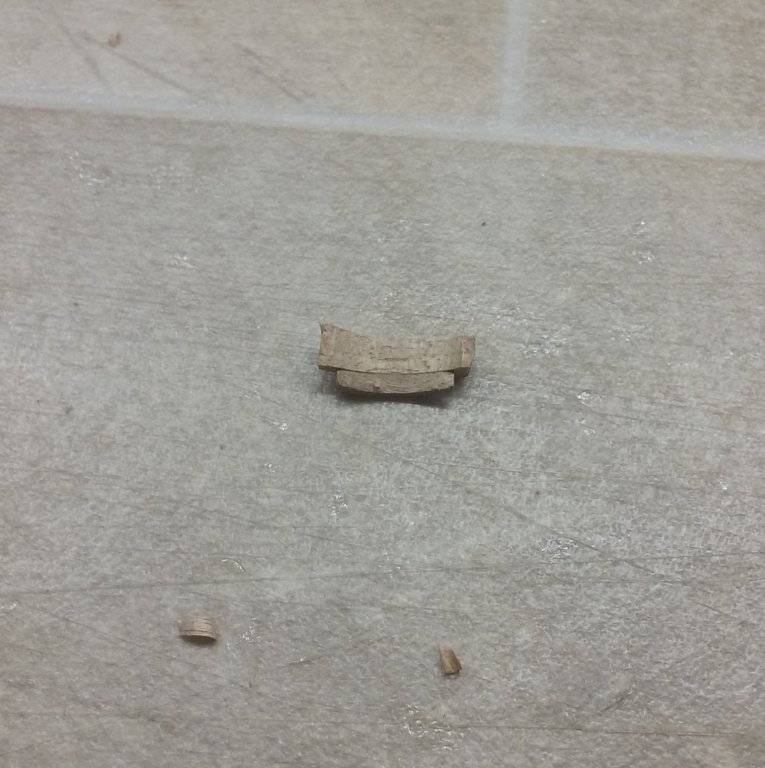
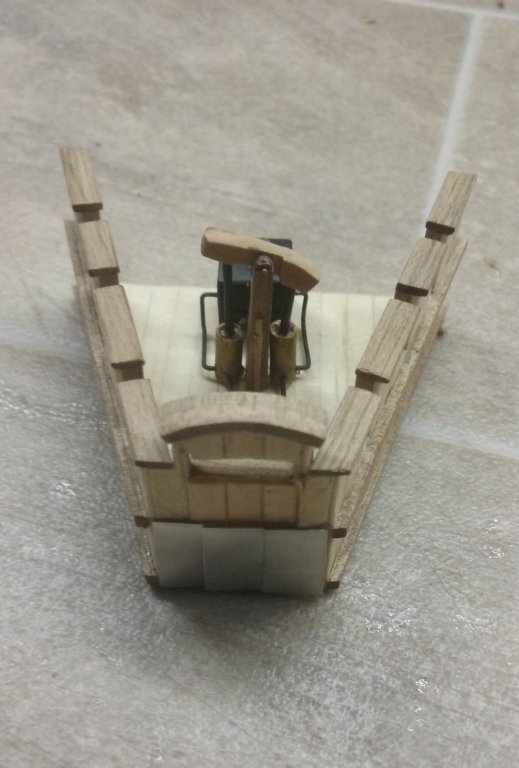
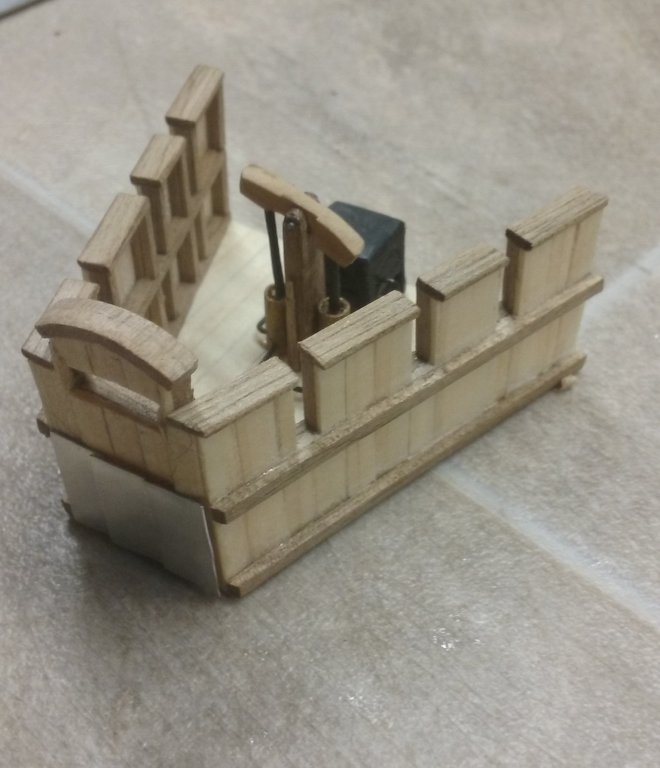
Thanks for the likes, and in particular Mark and Alberto for the suggestions. At the moment I'm just going to put the issue of the oars on the back burner, but I think I'll be putting in the "oar racks" as I originally intended to unless I come up with a better explanation/solution for what was done with the upper bank of oars when going into combat. In the meantime, I decided to cut down the parapet behind the lion's head, so the head is more obvious. From Haldon's experiments it's clear that a fair bit of shielding against the heat of the Greek fire was necessary for the siphonator - Haldon's collaborators wore firefighters' outfits or something similar and still complained about the heat. But the lion's head itself should give sufficient shielding where the parapet doesn't. I marked the outline of the lion's head against the parapet: and cut along the curve: Then I had three goes at cutting a curved top timber for the parapet. First time it was a little too short and also I cut it from too thin a piece of wood, so it didn't go far enough back to cover the full thickness of the parapet wall. Version 2 was going great until I cut it out of the block I was carving it in - and cut it too thin again! Tried gluing it back to the piece I'd cut it away from. Didn't work, of course - there seemed to be a chip missing and I couldn't get it to line up anyway. Third time worked well - I took my time, glued version 1 to a bit of wood that was definitely thick enough and using version 1 as a guide carved the concave surface until it matched the top of the parapet smoothly. Cut version 1 off and continued carving until it was the way I wanted it. And glued it into place. The lesson to be learnt - take a break when you need to. Don't grit your teeth and go ahead when all you want to do is throw the whole thing against the wall. Now, I thought I should give the evidence for the whole lion's head thing, It comes from the Alexiad, the biography of Emperor Alexios I Komnenos by his daughter Anna and relates to a naval campaign against the Pisans in 1098-9 AD. [Emperor Alexios ] knew the Pisans were masters of naval warfare and he feared a sea battle with them. Accordingly, on the prow of each vessel he had the heads of lions and other land animals affixed; they were made of bronze or iron, and the mouths were open; the thin layer of gold with which they were covered made the very sight of them terrifying. The fire to be hurled at the enemy through tubes was made to issue from the mouths of these figure-heads in such a way that they appeared to be belching out fire. It looks to be a one-off occurrence, not by any means usual procedure for dromons. So of course almost all modern dromon models and representations, no matter what century they represent, have animal heads on the siphons - some of them pretty inappropriate, and only rarely those of lions. Yes I'm putting one as well, but I can justify my decision . . . on the basis that it looks so cool . . . Steven

-
What is this type of rig called.
Louie da fly replied to BANYAN's topic in Masting, rigging and sails
Or a quark? Oh, no - that one's already been taken. A squawk? Steven -
What is this type of rig called.
Louie da fly replied to BANYAN's topic in Masting, rigging and sails
Well, she's certainly not a topsail schooner or a barquentine. Neither is she a "pure" schooner or barque, but she has elements of both. But despite the gaff mainsails on fore and mainmasts, she has square rig on the first two masts (I'd count the courses in this definition, even if they're "light" - whatever that means) and only fore and aft on the mizzen. If she has to be put in a category I'd agree with grsjax in calling her a barque/bark. After all, if instead of gaffs you had staysails behind the fore and mainmasts there'd be no hesitation in calling her a barque. Otherwise, maybe vossiewulf has the right of it - as Dr Maturin would say, her rig is "nondescript" - in the sense that it has never previously been described. Perhaps a squark? Steven -
I wonder if this is the La Fontaine you're after? From 7 December 1716, from the book Memoires pour servir a l'Histoire du XVIII Siecle (Memoirs of the History of the 18th century) by Monseigneur de Lamberty (Volume 9) In the meantime it happened that the vessel La Fontaine Galley asking for a passport to take a load of iron to Gottenburg , Baron de Gortz persuaded the owners instead of payment to take some of the aforementioned passengers on board, to carry them there, and made a contract with them before a Notary. Perhaps your La Fontaine was a galley? That's the only reference I've been able to find. Steven

-
Not only that, but they're hanging not from their normal fulcrum but from the handles. Rather than just being let go and hanging from their pivot point, they seem to have been moved outboard, almost to the end of the oar. As there are no specific oarsmen shown, I guess we have to assume they're the ones doing the fighting. So they've pushed their oars outward and trailed them in the water, and then got stuck into the hand-to-hand fighting. Maybe the vertical oars in the water stabilise the ship in combat? Other than that I've no explanation for it at all. All seems a little strange. Agreed. That seems to make much more sense than the other picture. How all that applies to dromons, however, is anybody's guess. Steven