


Louie da fly
-
Posts
7,983 -
Joined
-
Last visited
Content Type
Profiles
Forums
Gallery
Events
Posts posted by Louie da fly
-
-
-
Thanks for all the likes, and thanks Druxey and Pat for the encouraging comments. Very much appreciated, particularly with what turned out to be a very frustrating stage of the build.
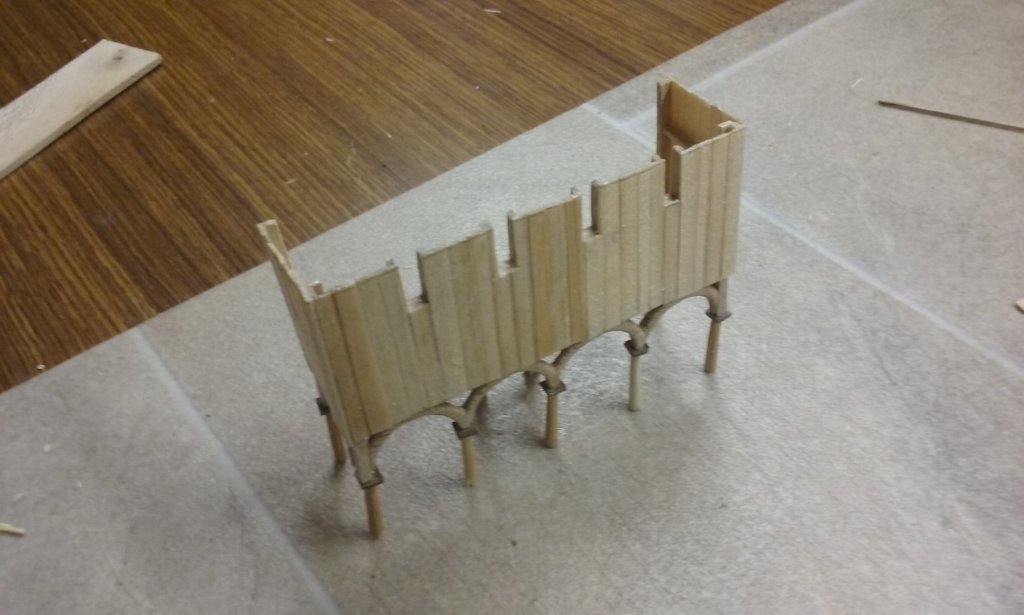
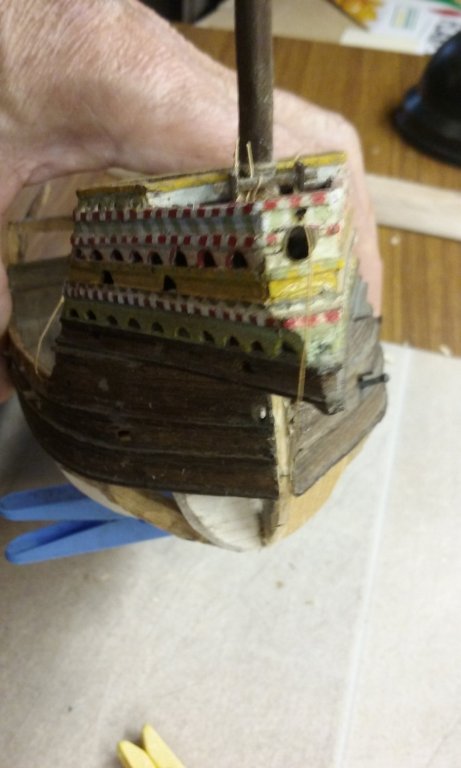
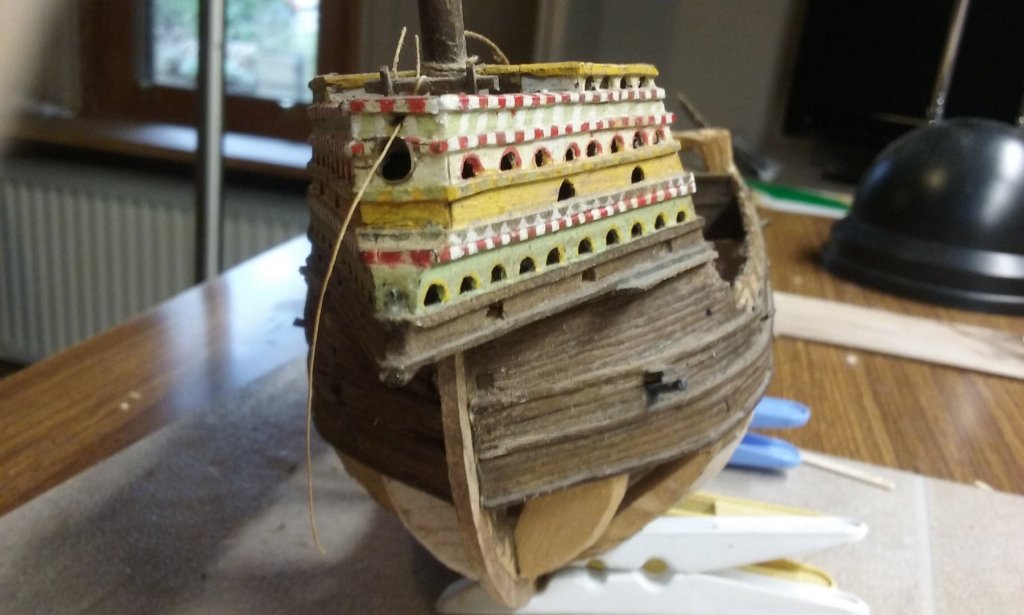
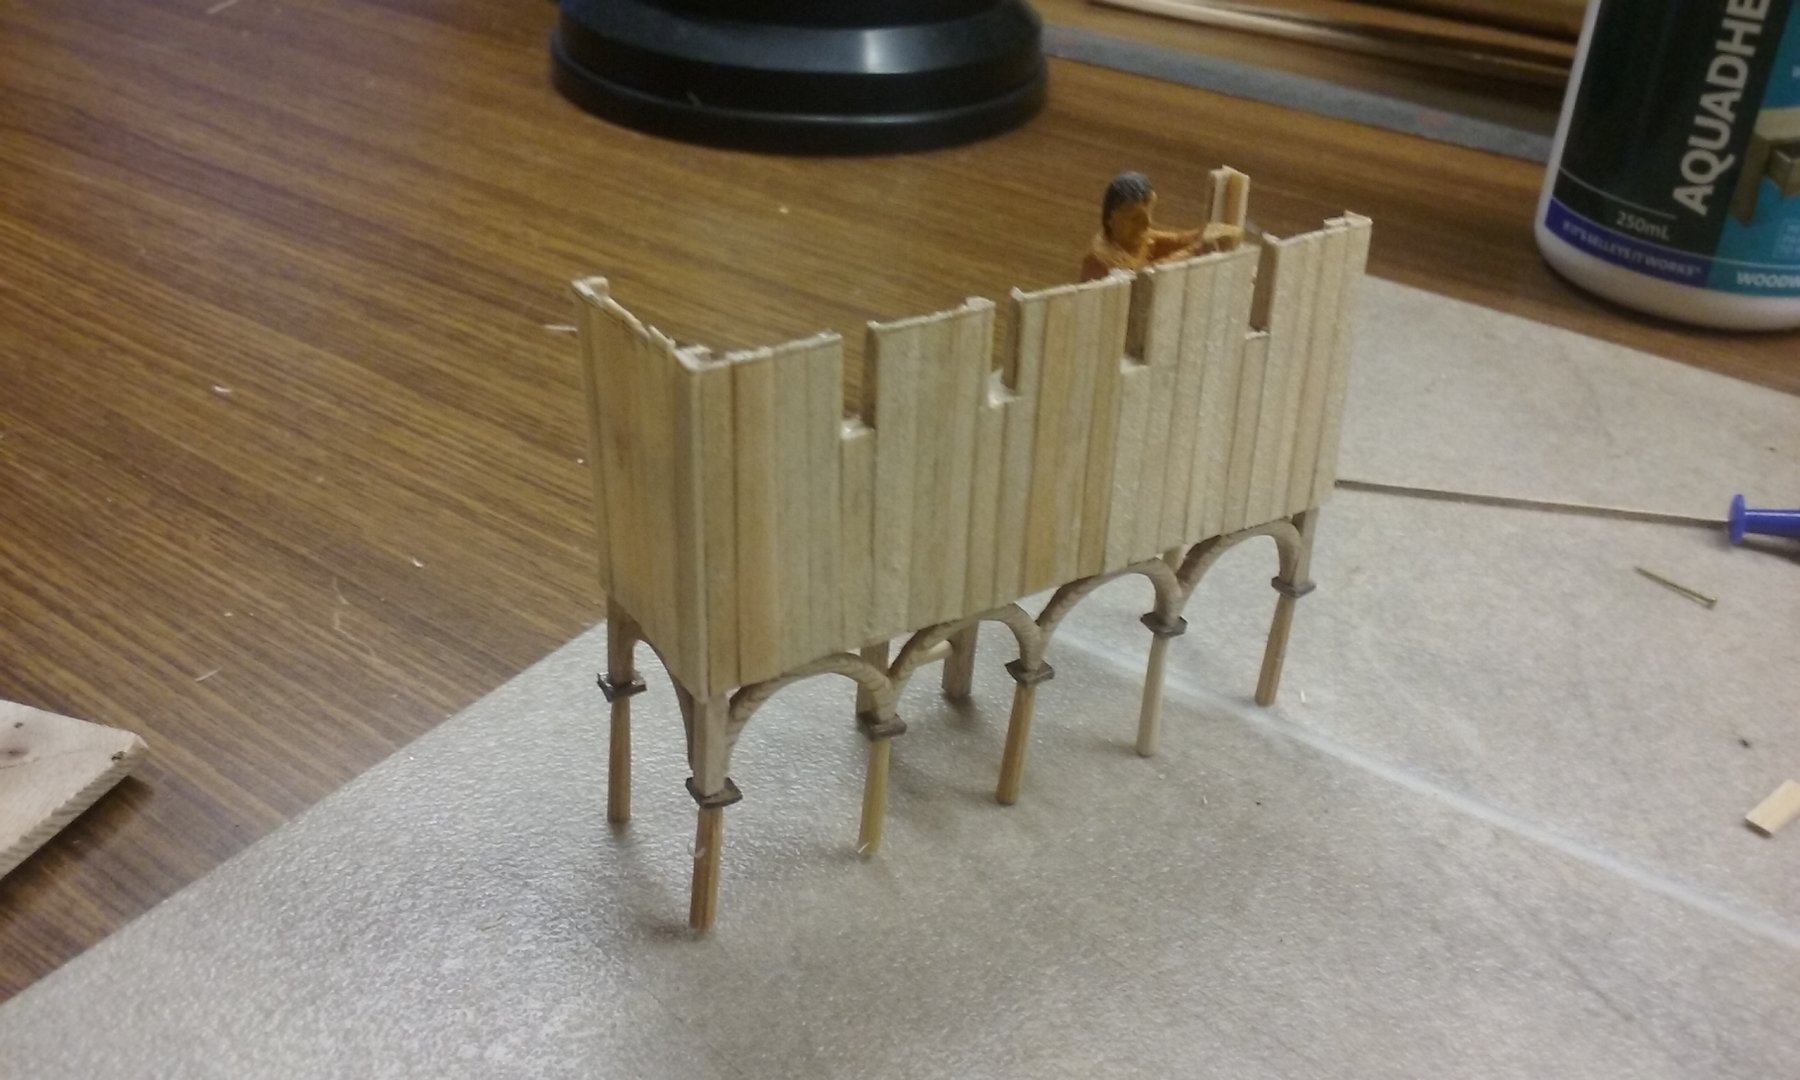
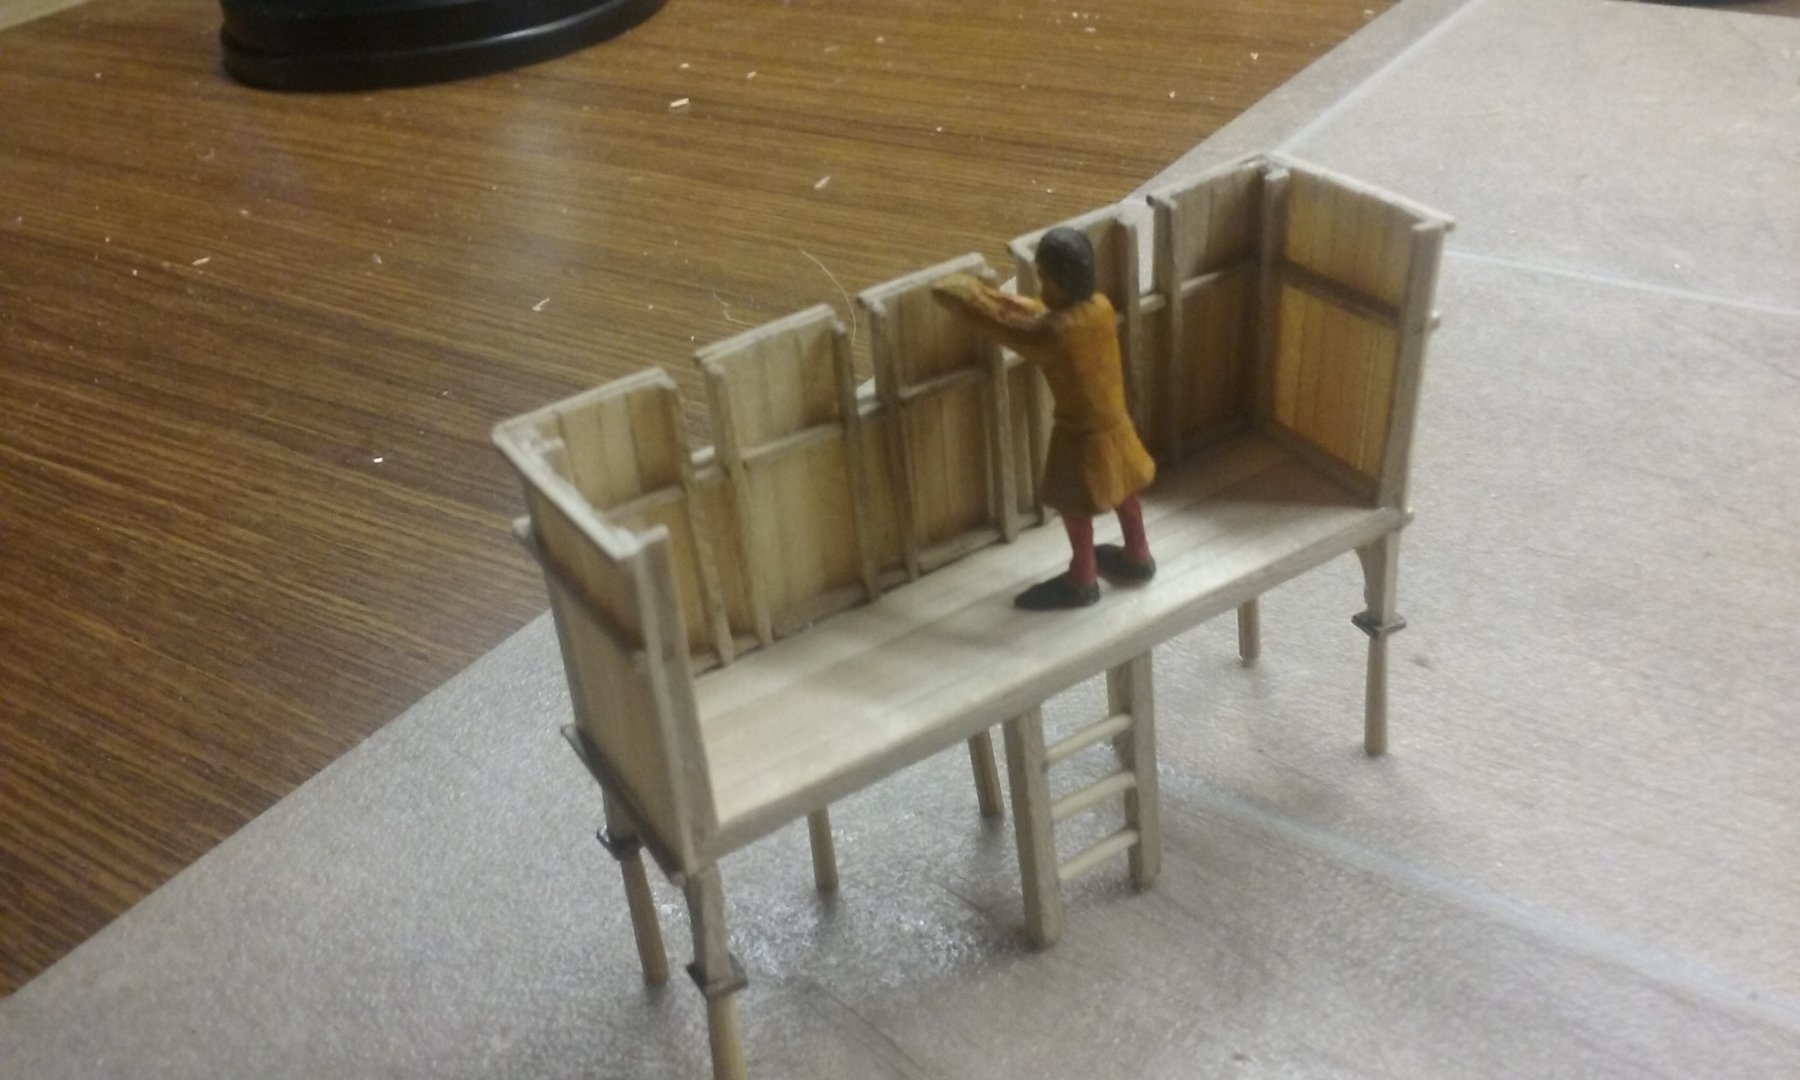
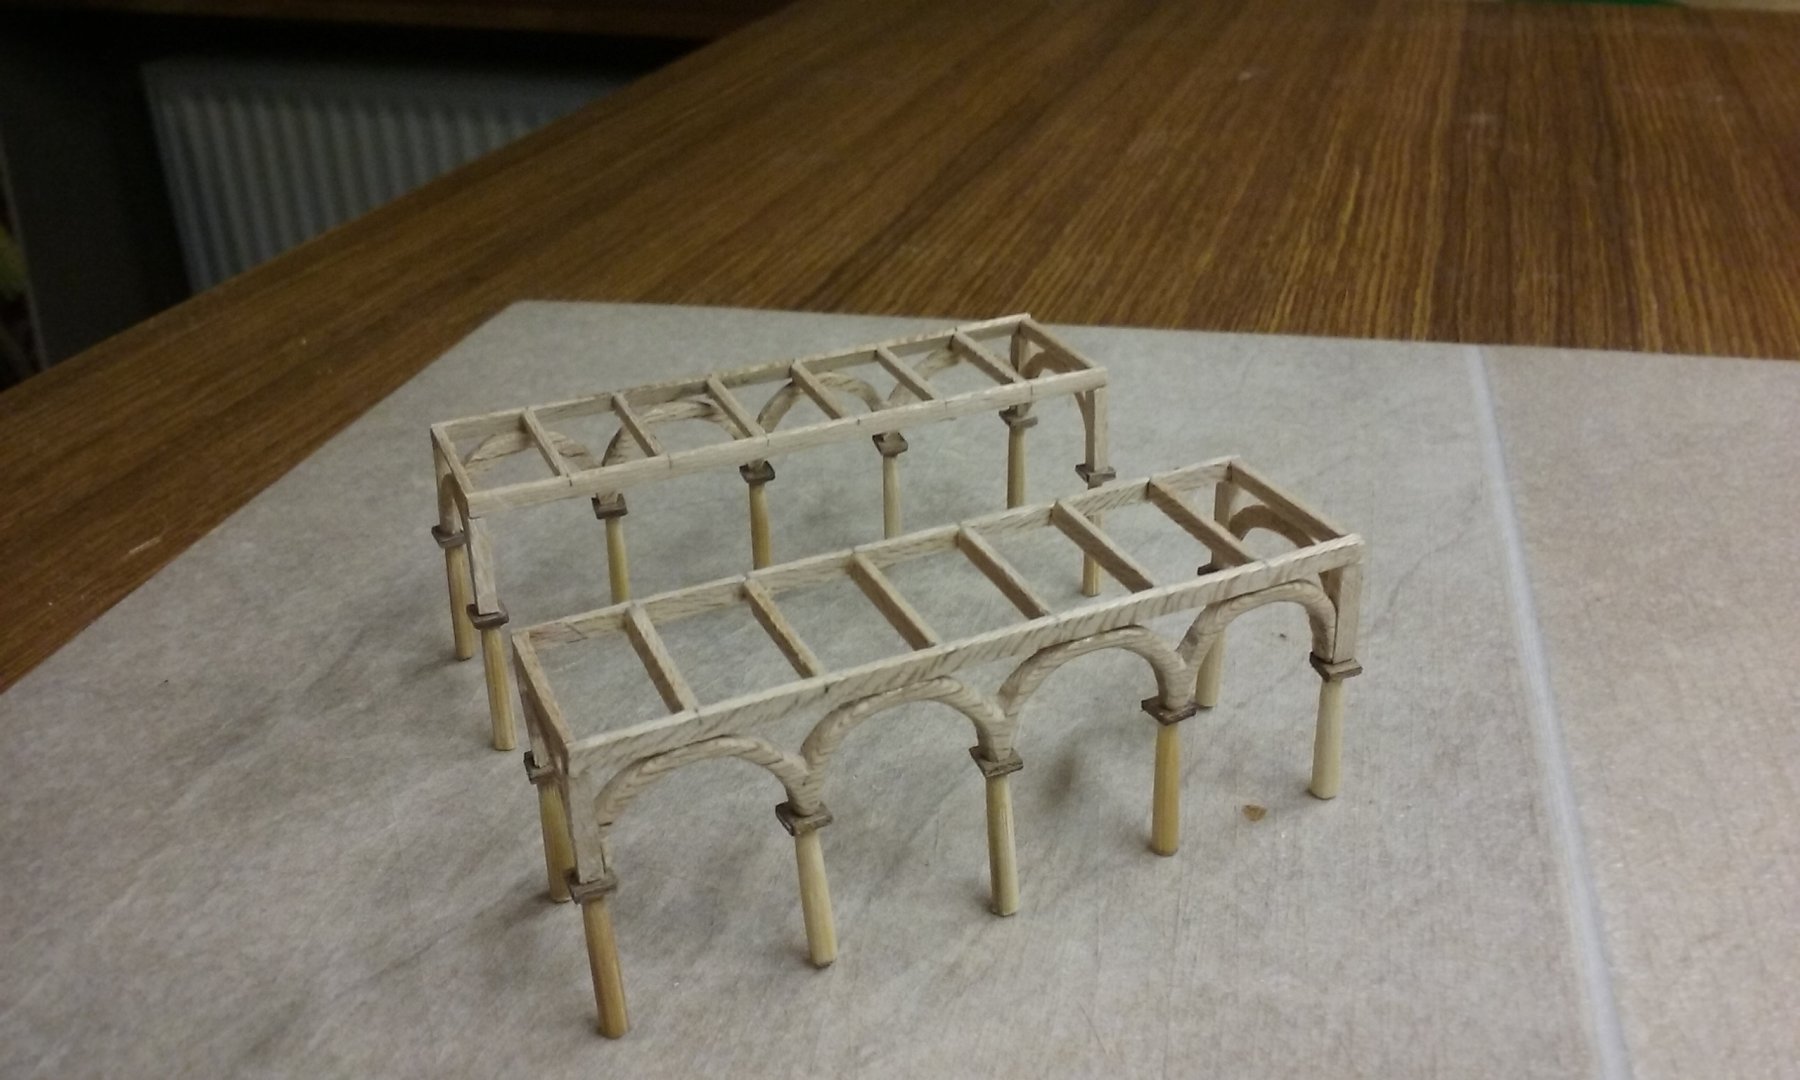
Well, I've finished the xylokastra at last.
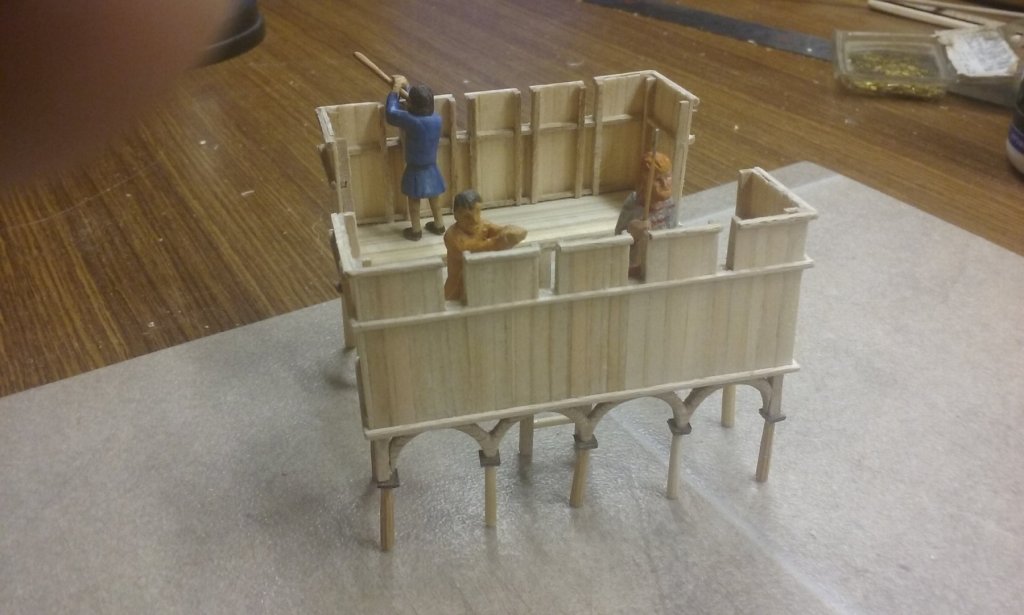
Parapet planking nearly complete on the first one - with a crewman for comparison.
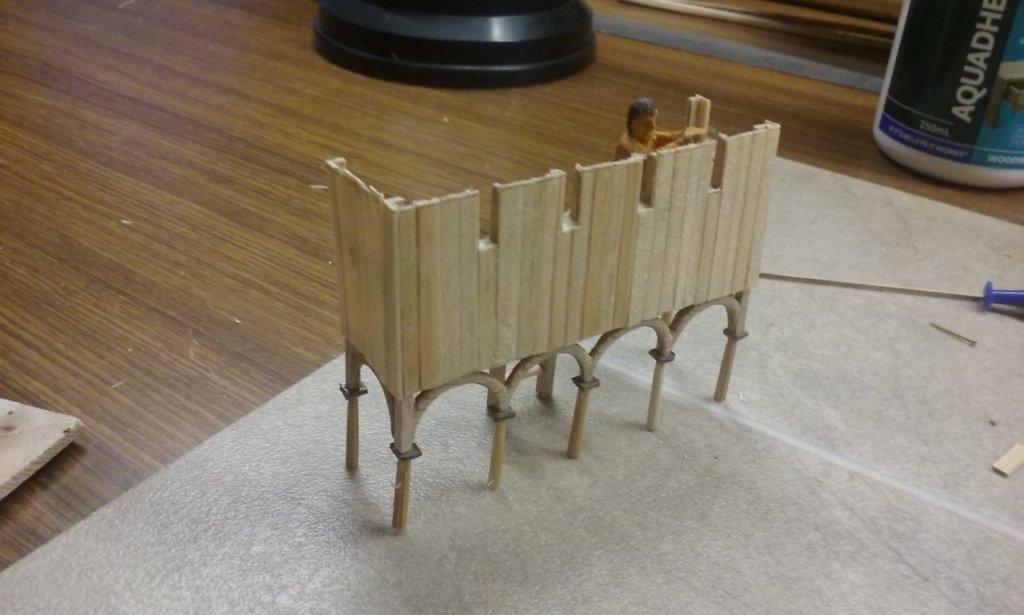
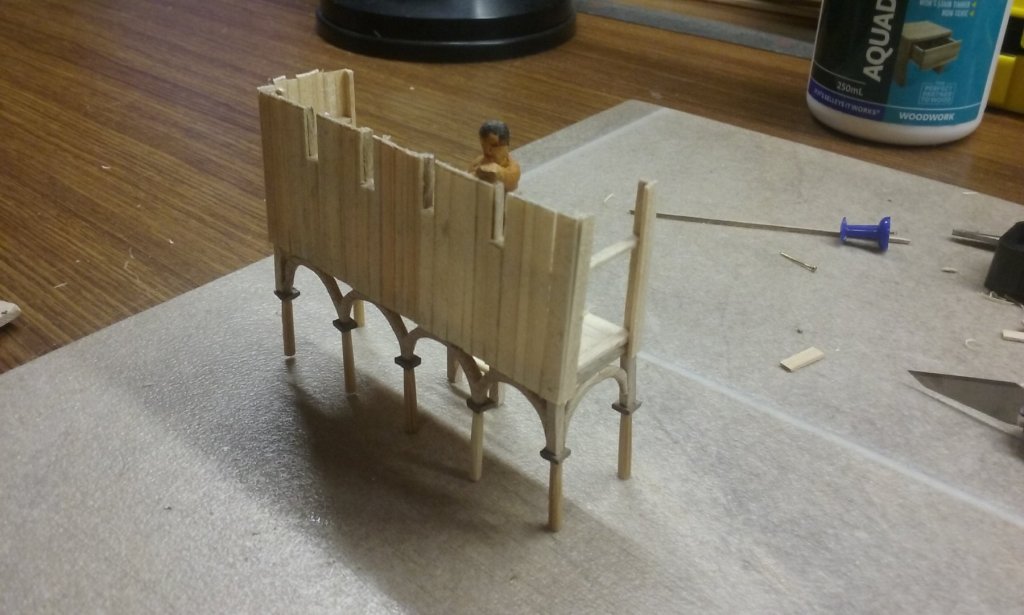
Planking complete.
I sanded it all smooth, but it looked a little bare, so I added some horizontals nominally to strengthen the structure but really to make it look better.

Another column came loose, so I "pinned" it.
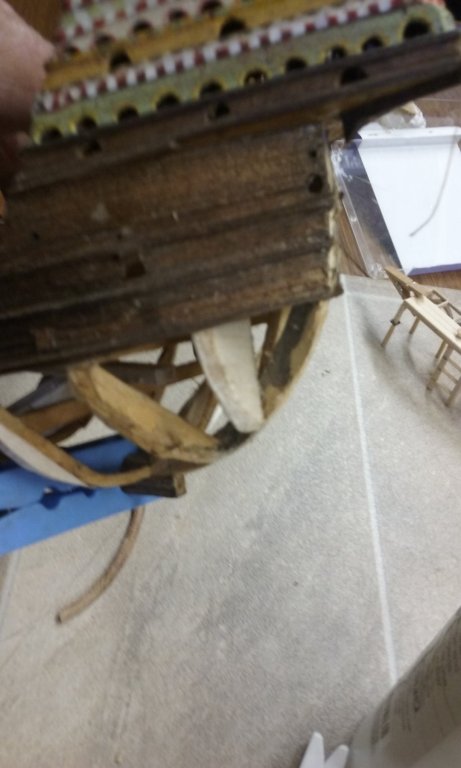
I ended up doing this to all the corner columns, and even then I had to repeat the procedure with at least one of them because the pin broke. Next time I do this (for the forecastle or pseudopation) I'll do the columns last, because a lot of repair had to be done to damage which occurred while I was working on the superstructure. And I'll carve an integral pin into the end of each column to hold everything together, rather than (a) butt-jointing the tops of the columns and/or (b) drilling holes in the tops of the columns to add the pins.
The same problem came up with the corner pieces of the substructure, and in future I'll pin these as well. As you can see below the corner piece came away along with everything attached to it as I was working on the superstructure, and the whole thing had to be repaired.
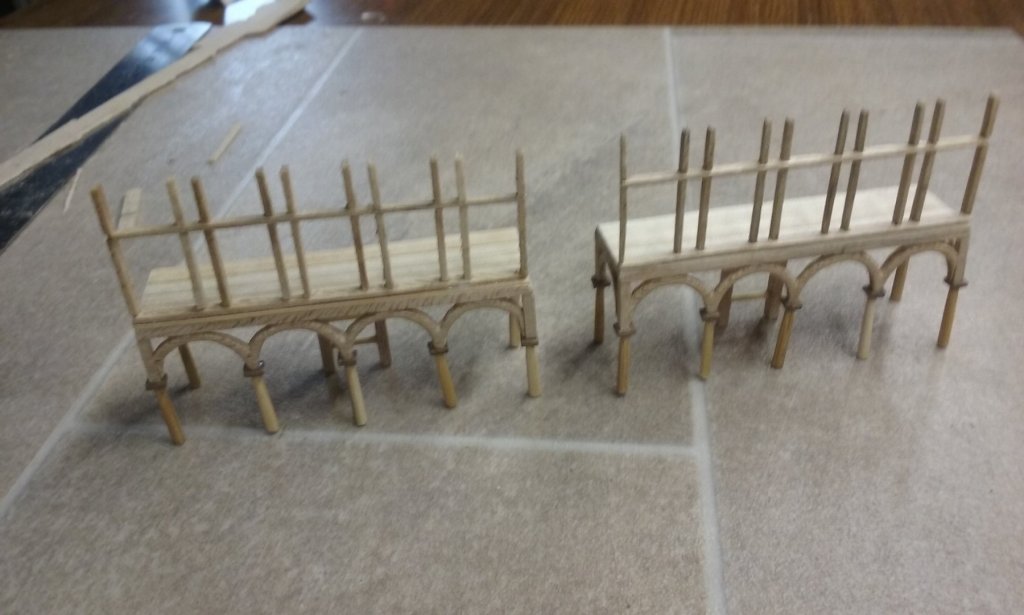
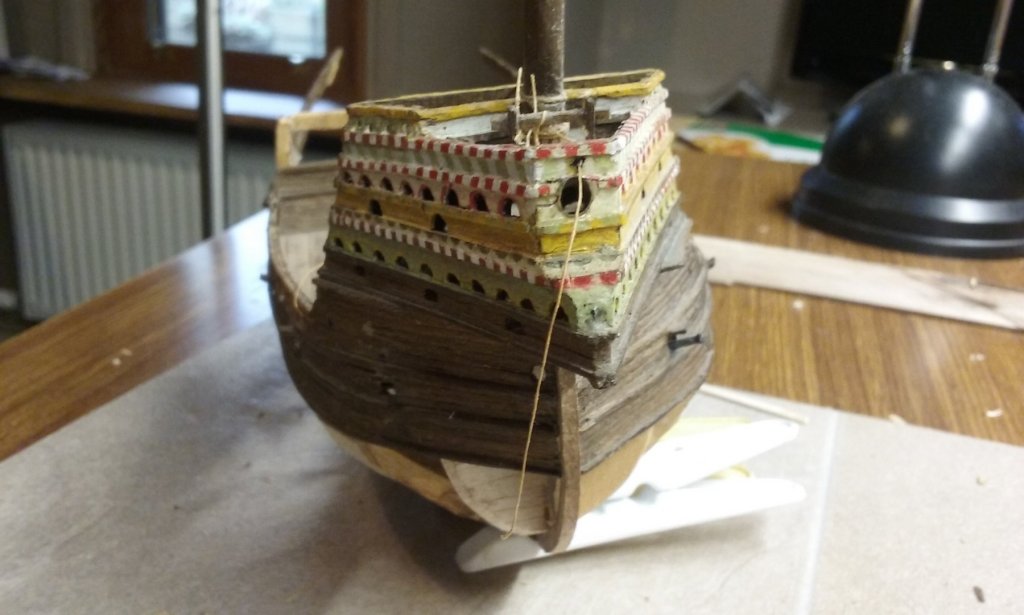
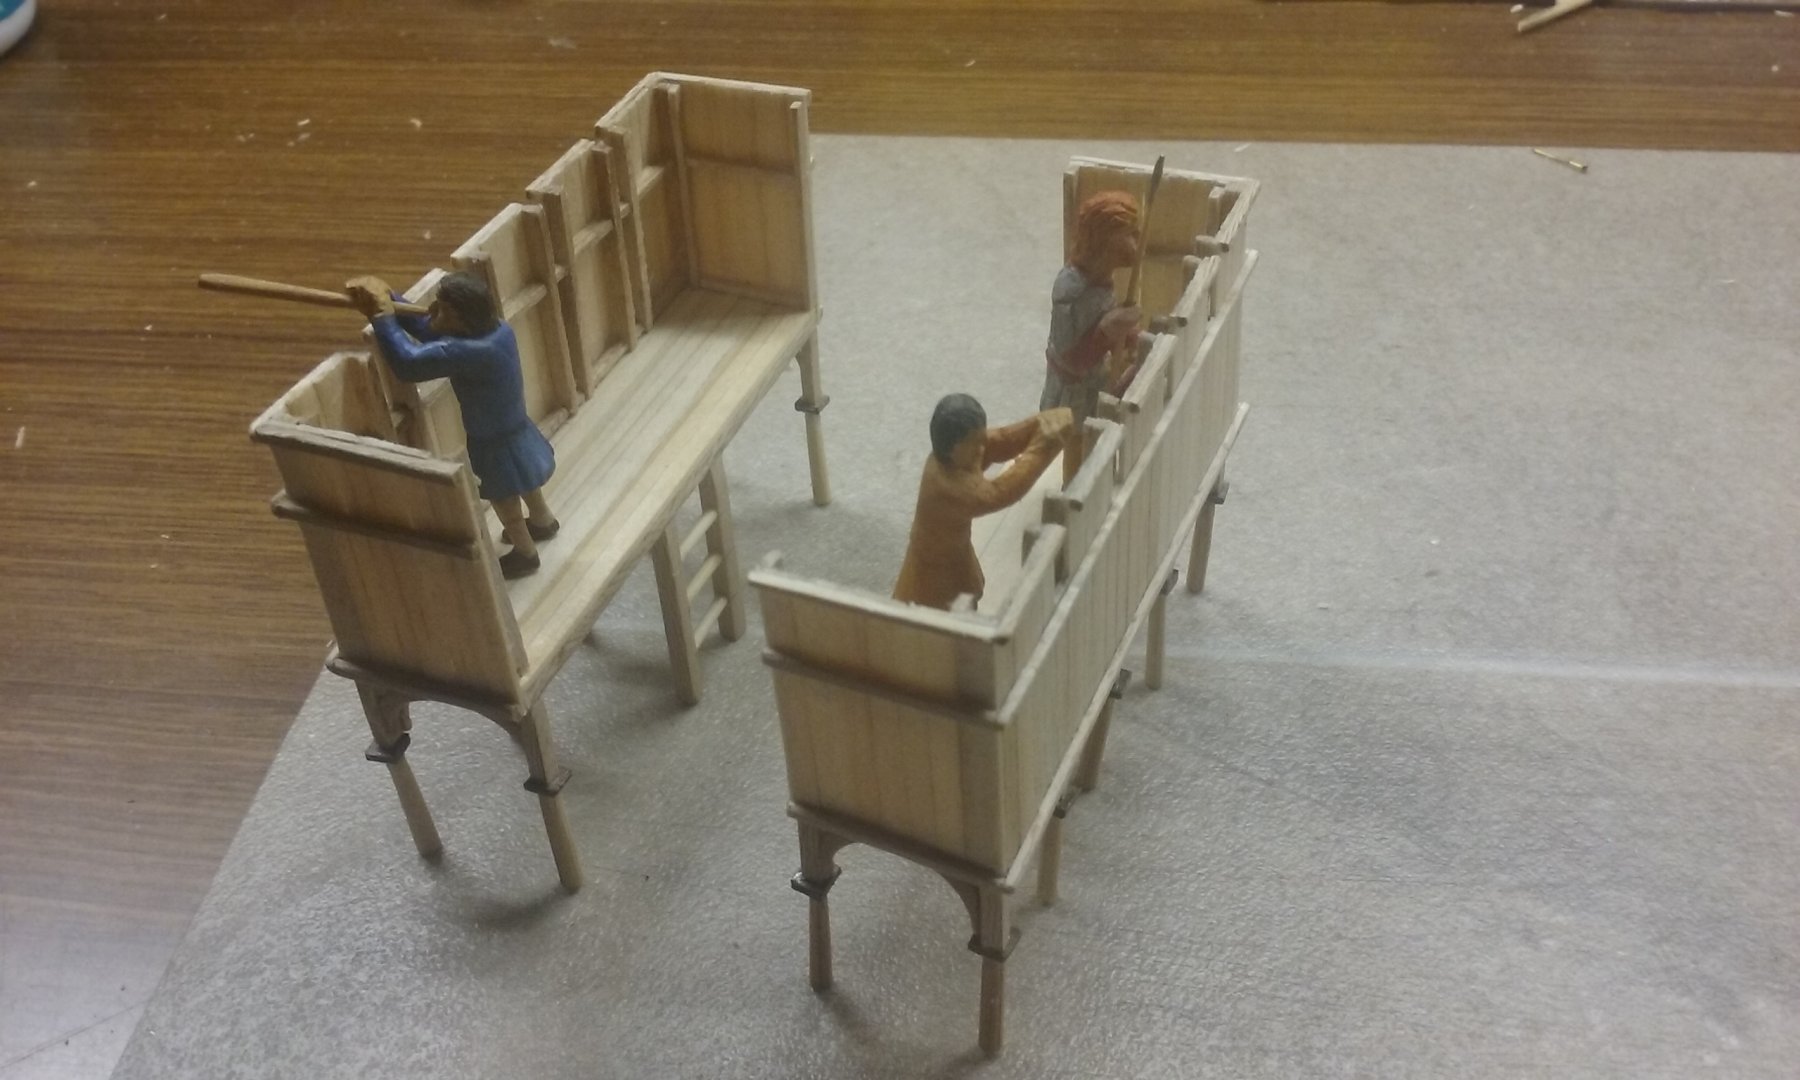
The first xylokastron complete.

The second one under way.
And a comparison with the finished one.
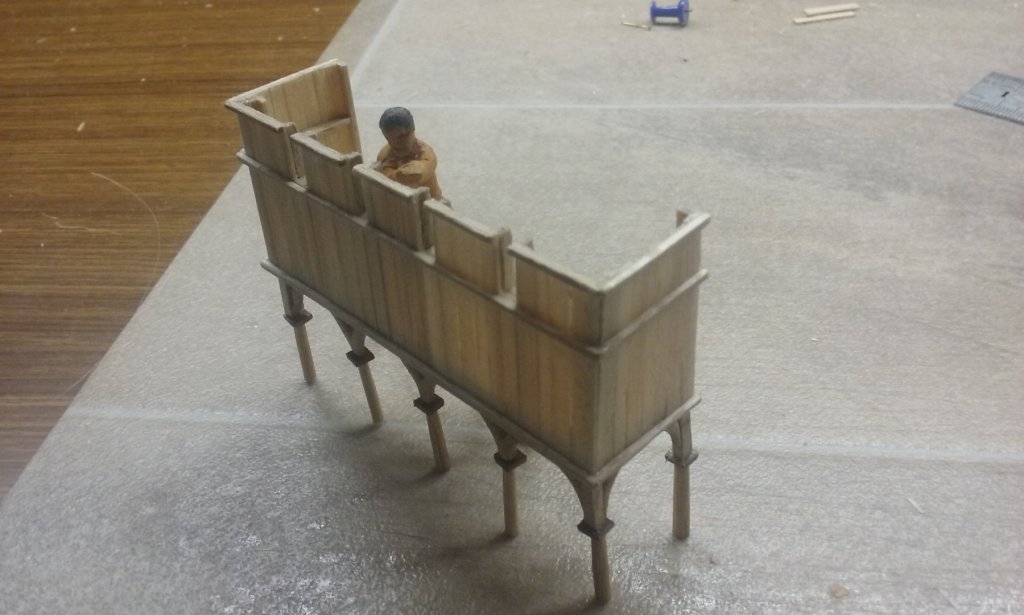
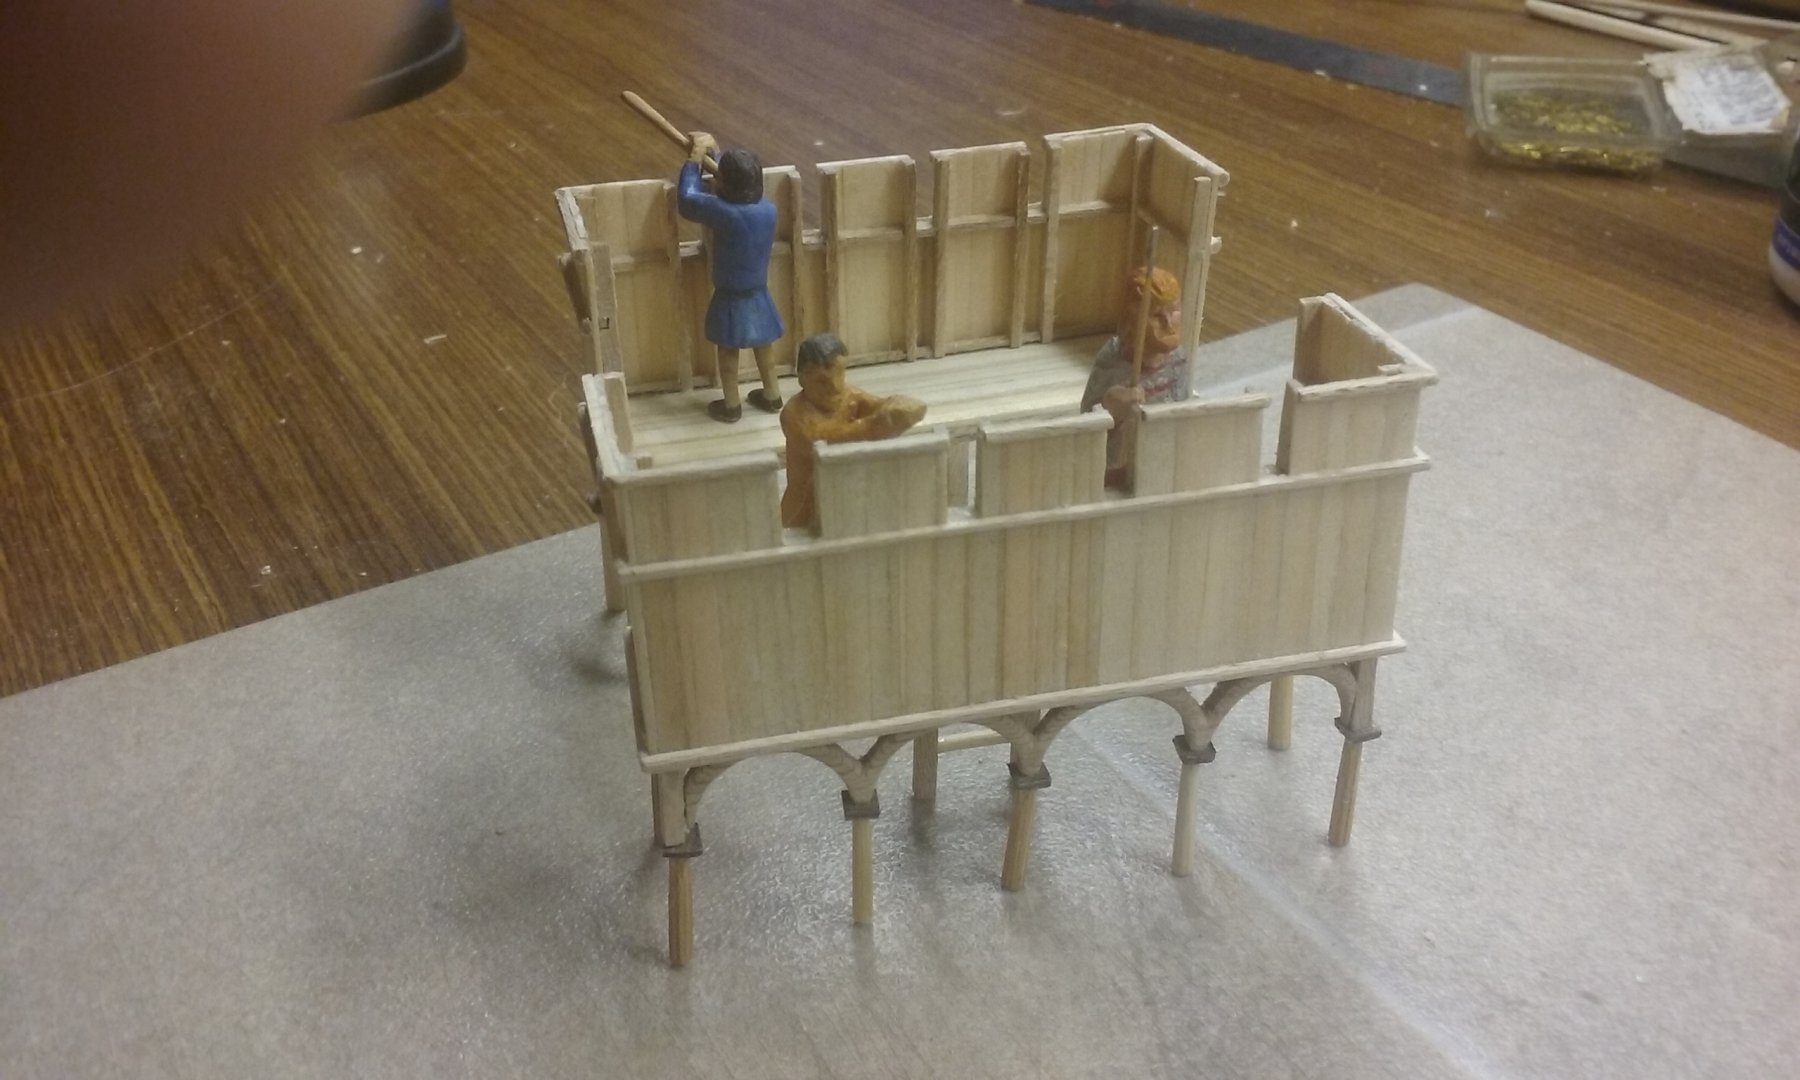
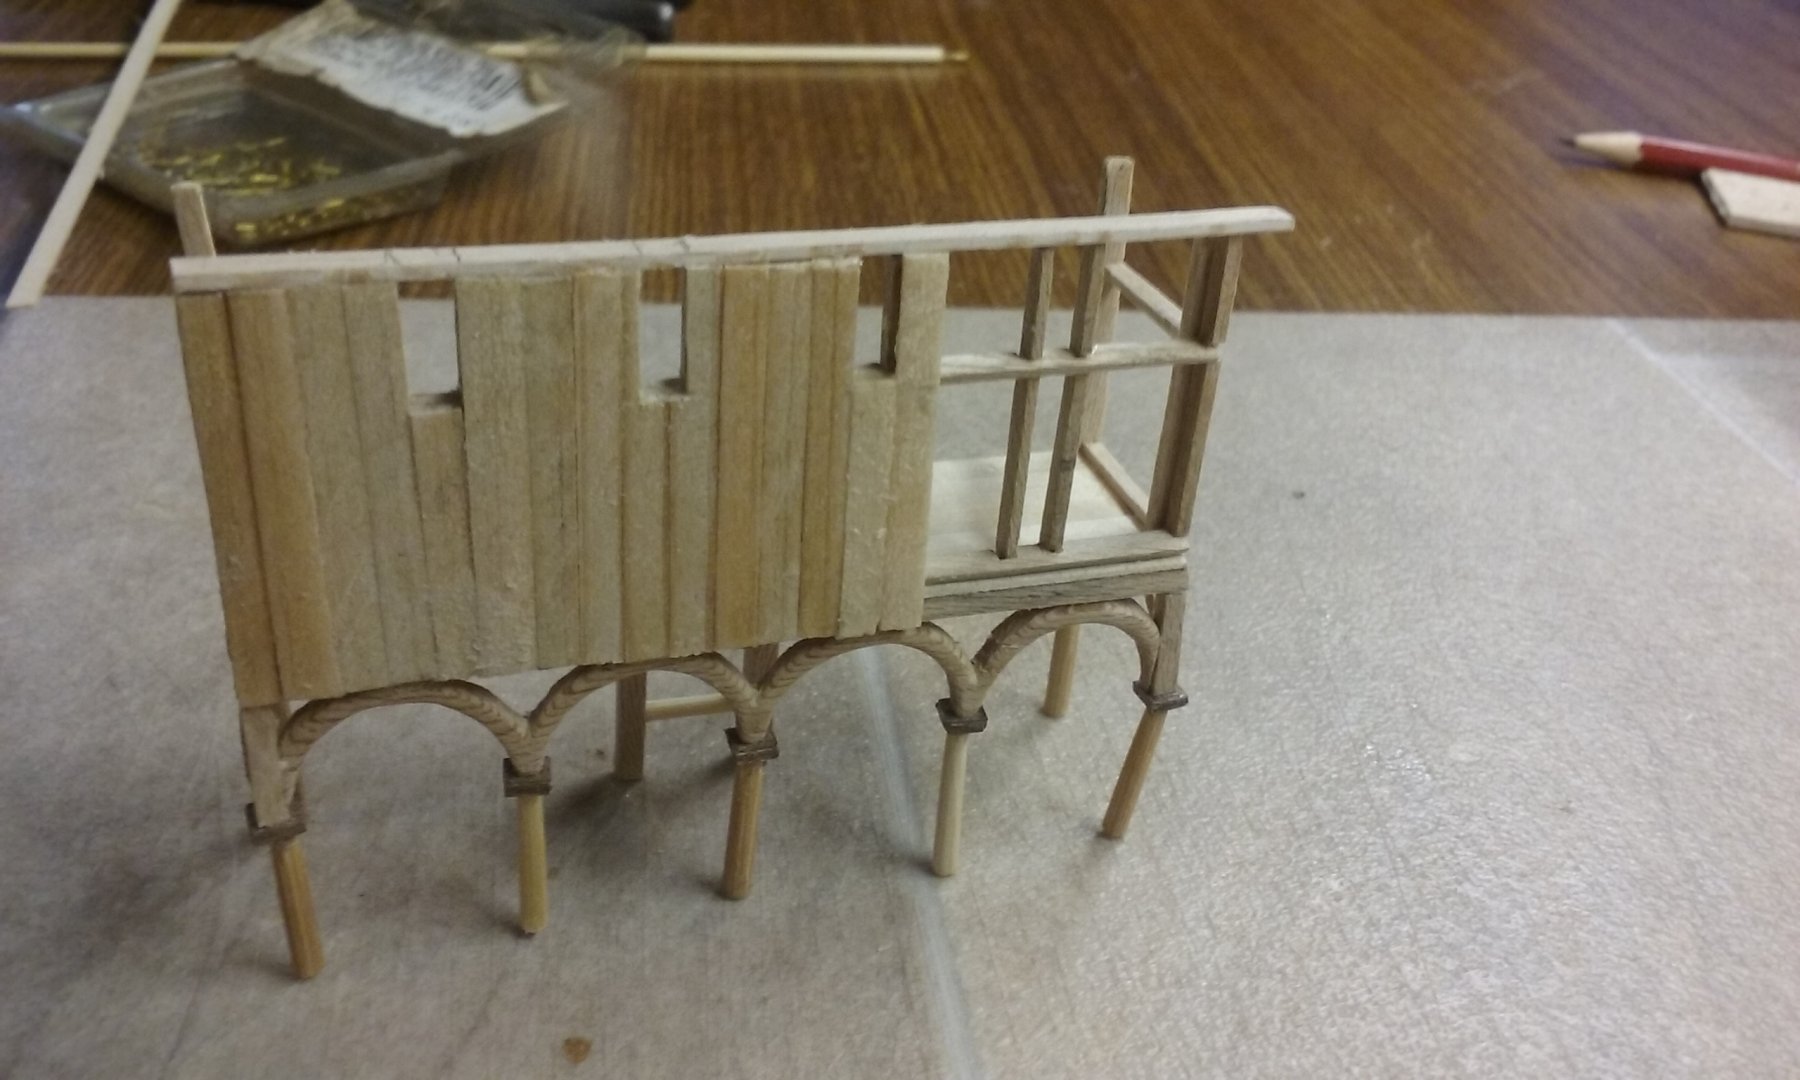
Both xylokastra complete and inhabited, with a crewman, a Varangian guardsman and a flute-player (for giving the rowing pace to the oarsmen). These aren't the guys who will be there - they're to go elsewhere on the ship. In fact I might leave the xylokastra completely uninhabited, as the vessel's not in combat.

It's been a long and difficult process, but I've learnt a lot while doing it, which will stand me in good stead later in this and future builds.
Steven
-
Thanks for the likes.
I discovered I'd made the frames too narrow for a smooth curve of the hull where they were supposed to be. Not too much of a problem - I just moved them sternwards till they fitted within the curve. The furthest aft frame stayed where it was and I glued it in place. I had to work out some sort of temporary jig to get it square to the hull and the keel - voila! Pins and a couple of bits of balsa.

Clamped the jig to the keel with a clothes peg and glued the frame in place. When I wanted to remove the jig, I just pulled out the pins.

Then I clamped the existing planking to it with clothes pegs to get the curve I wanted, placed the next frame so it just reached the inside face of the planking on both sides and glued it in place using the same type of jig.


And same technique with the third frame from the stern/
Now I need to make some more, wider frames, which will fill the gap forrard of the ones I relocated.
Steven
-
-
-
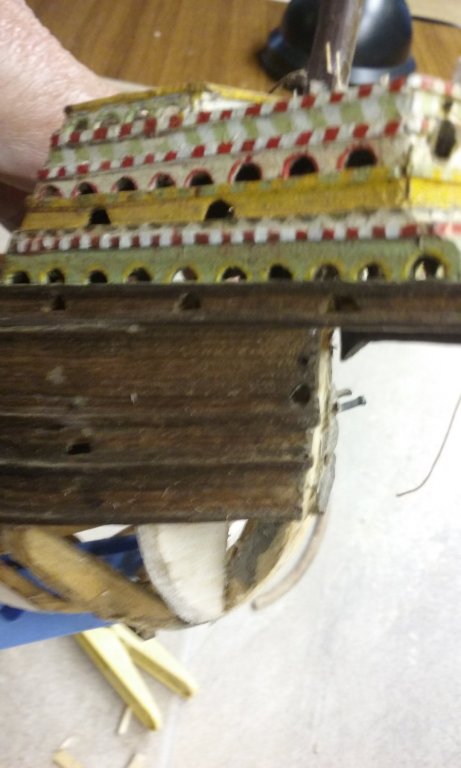
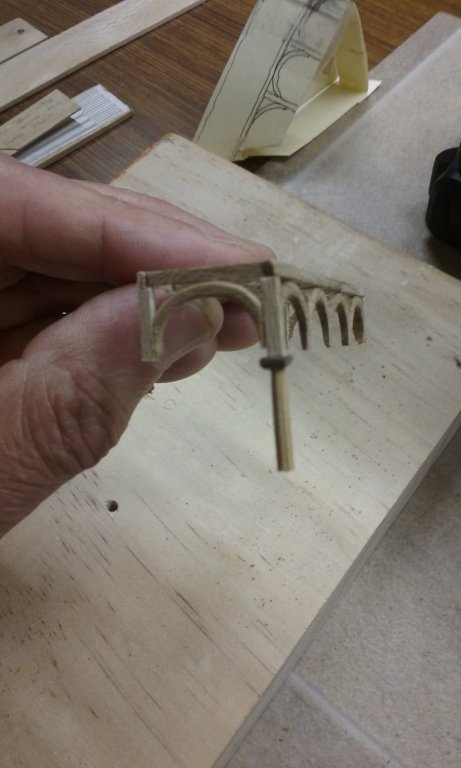
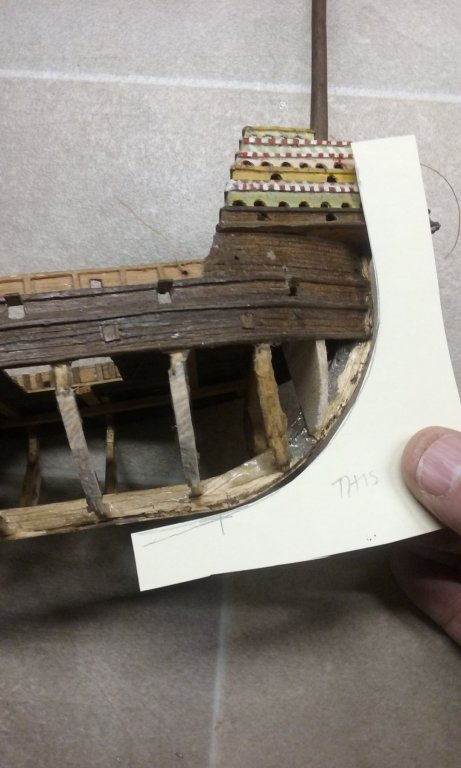
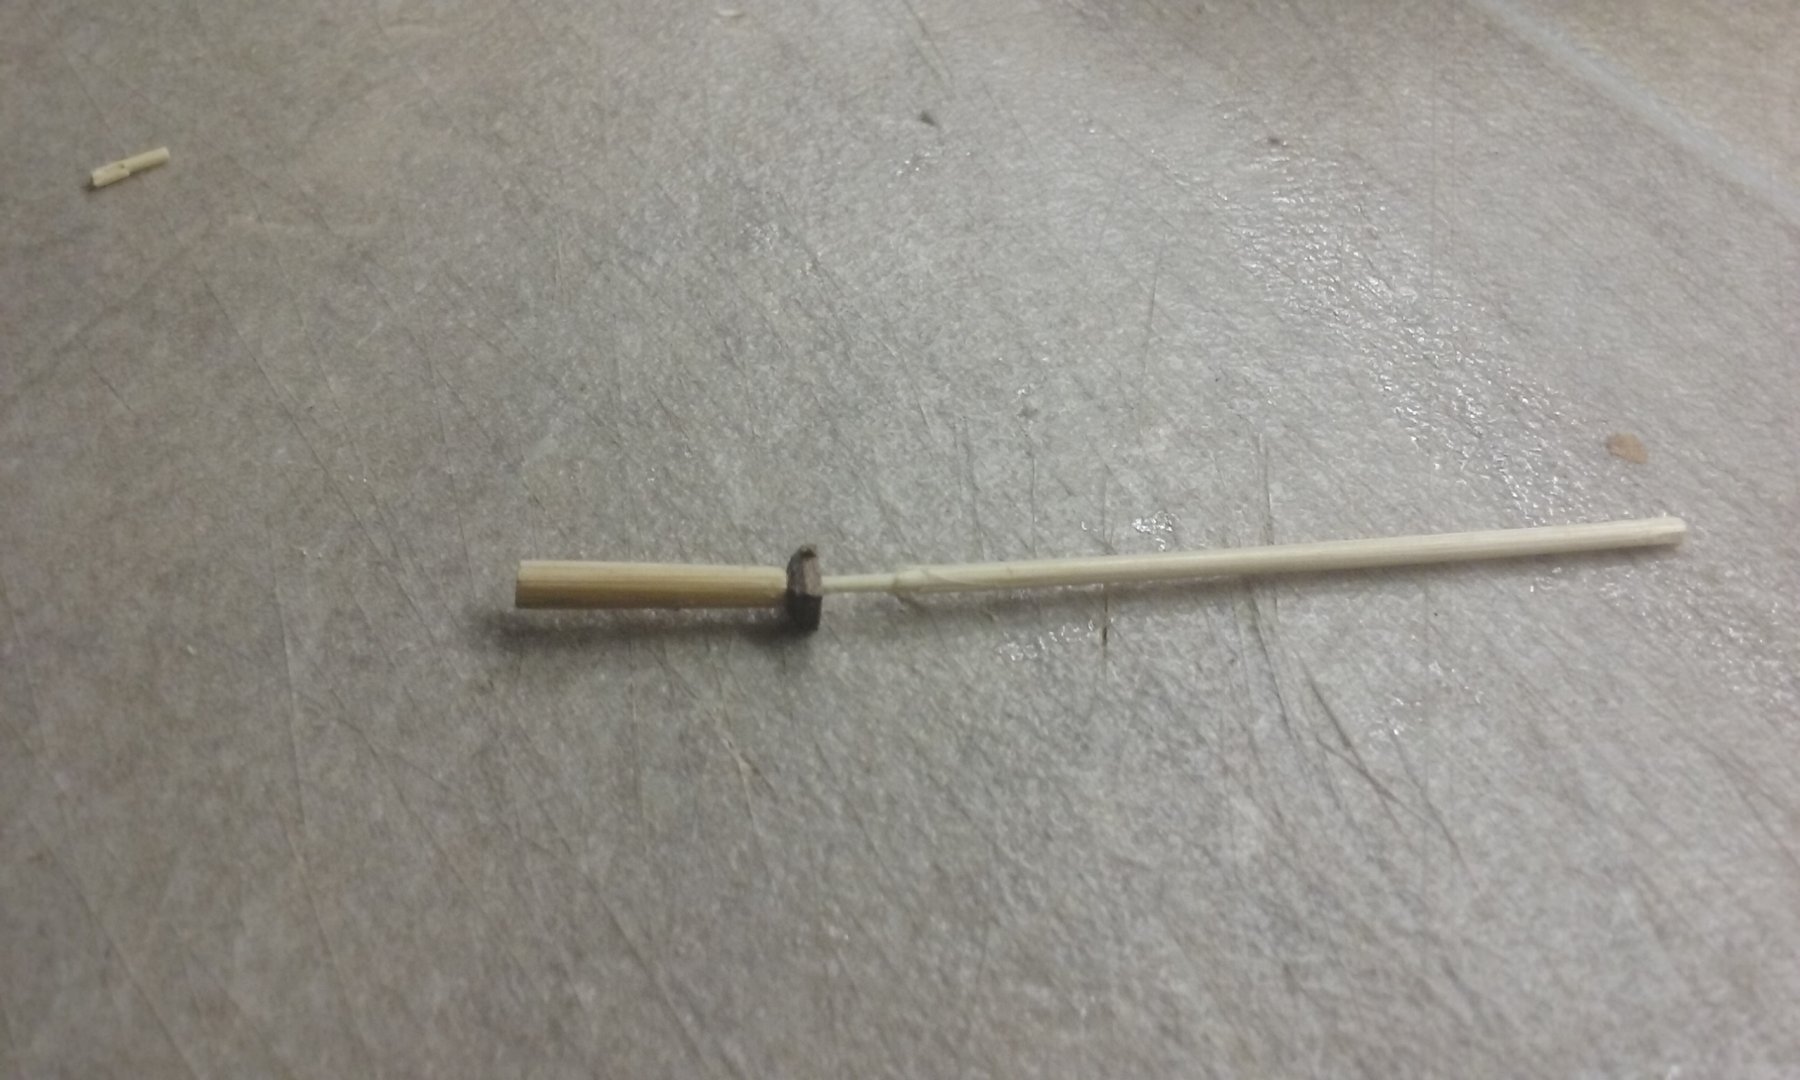
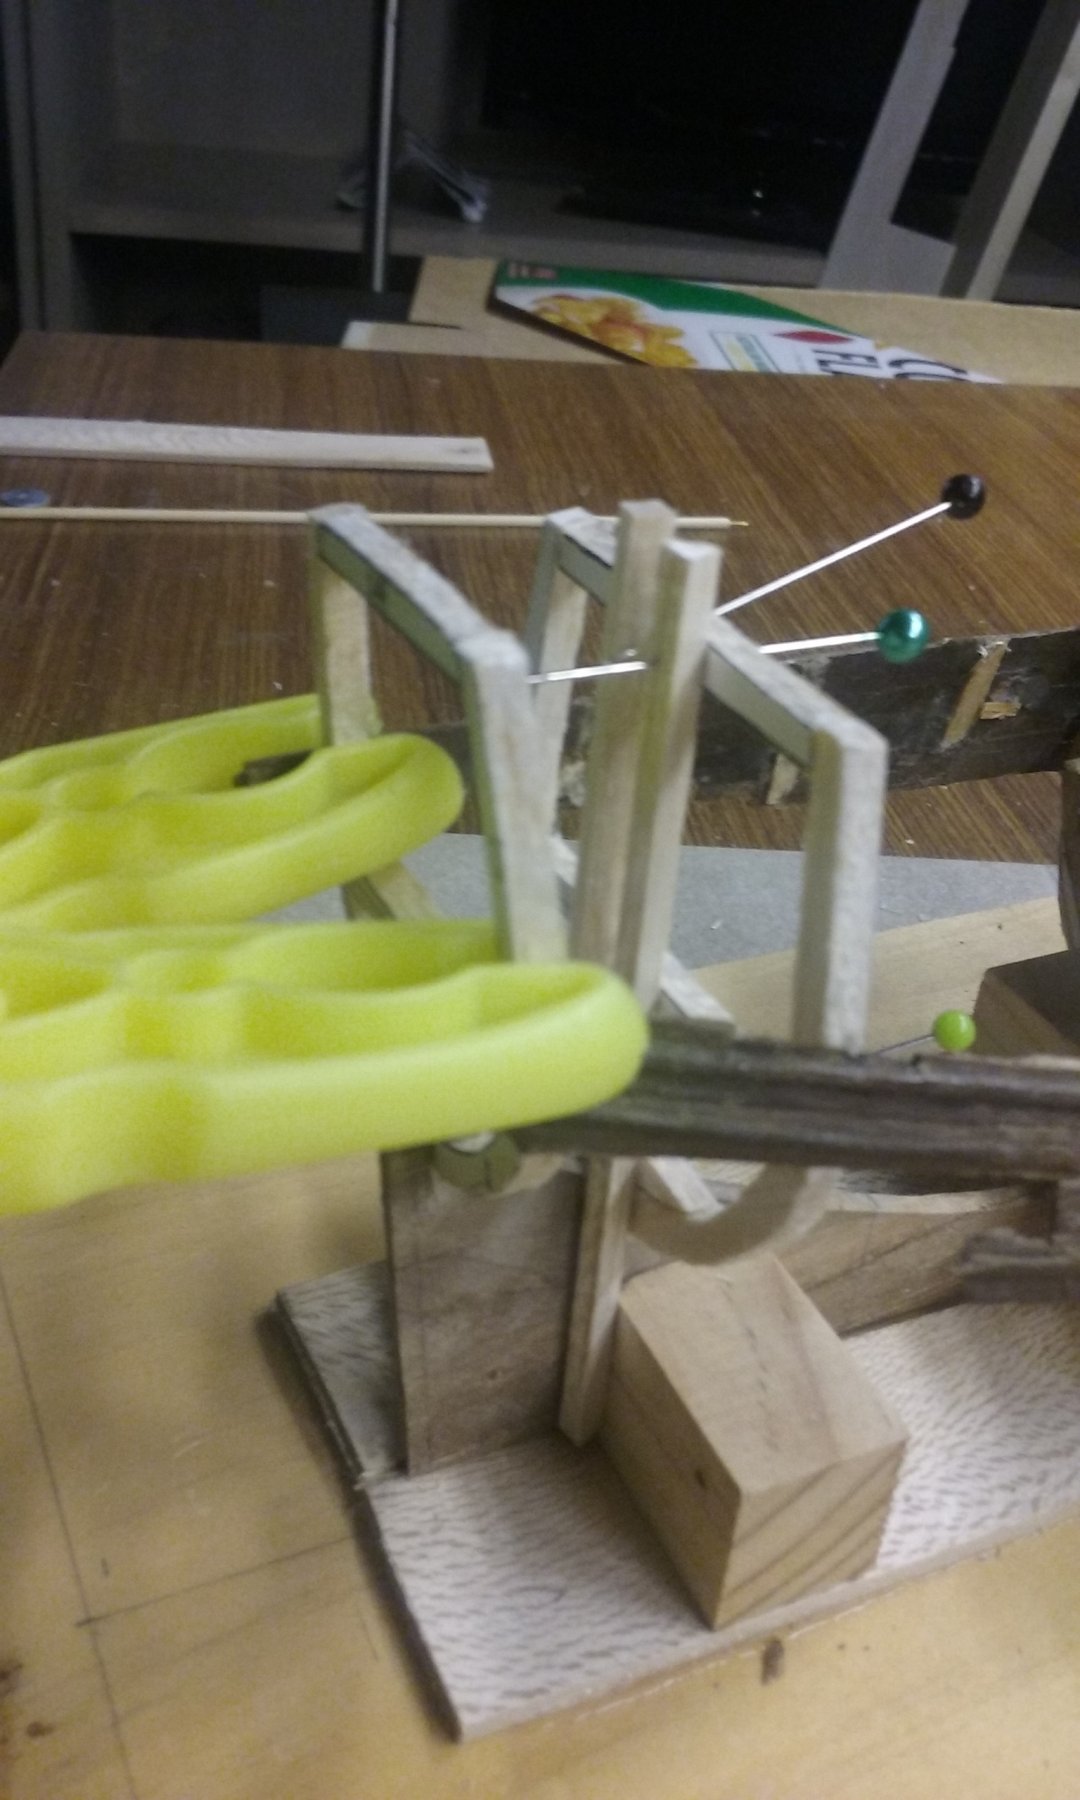
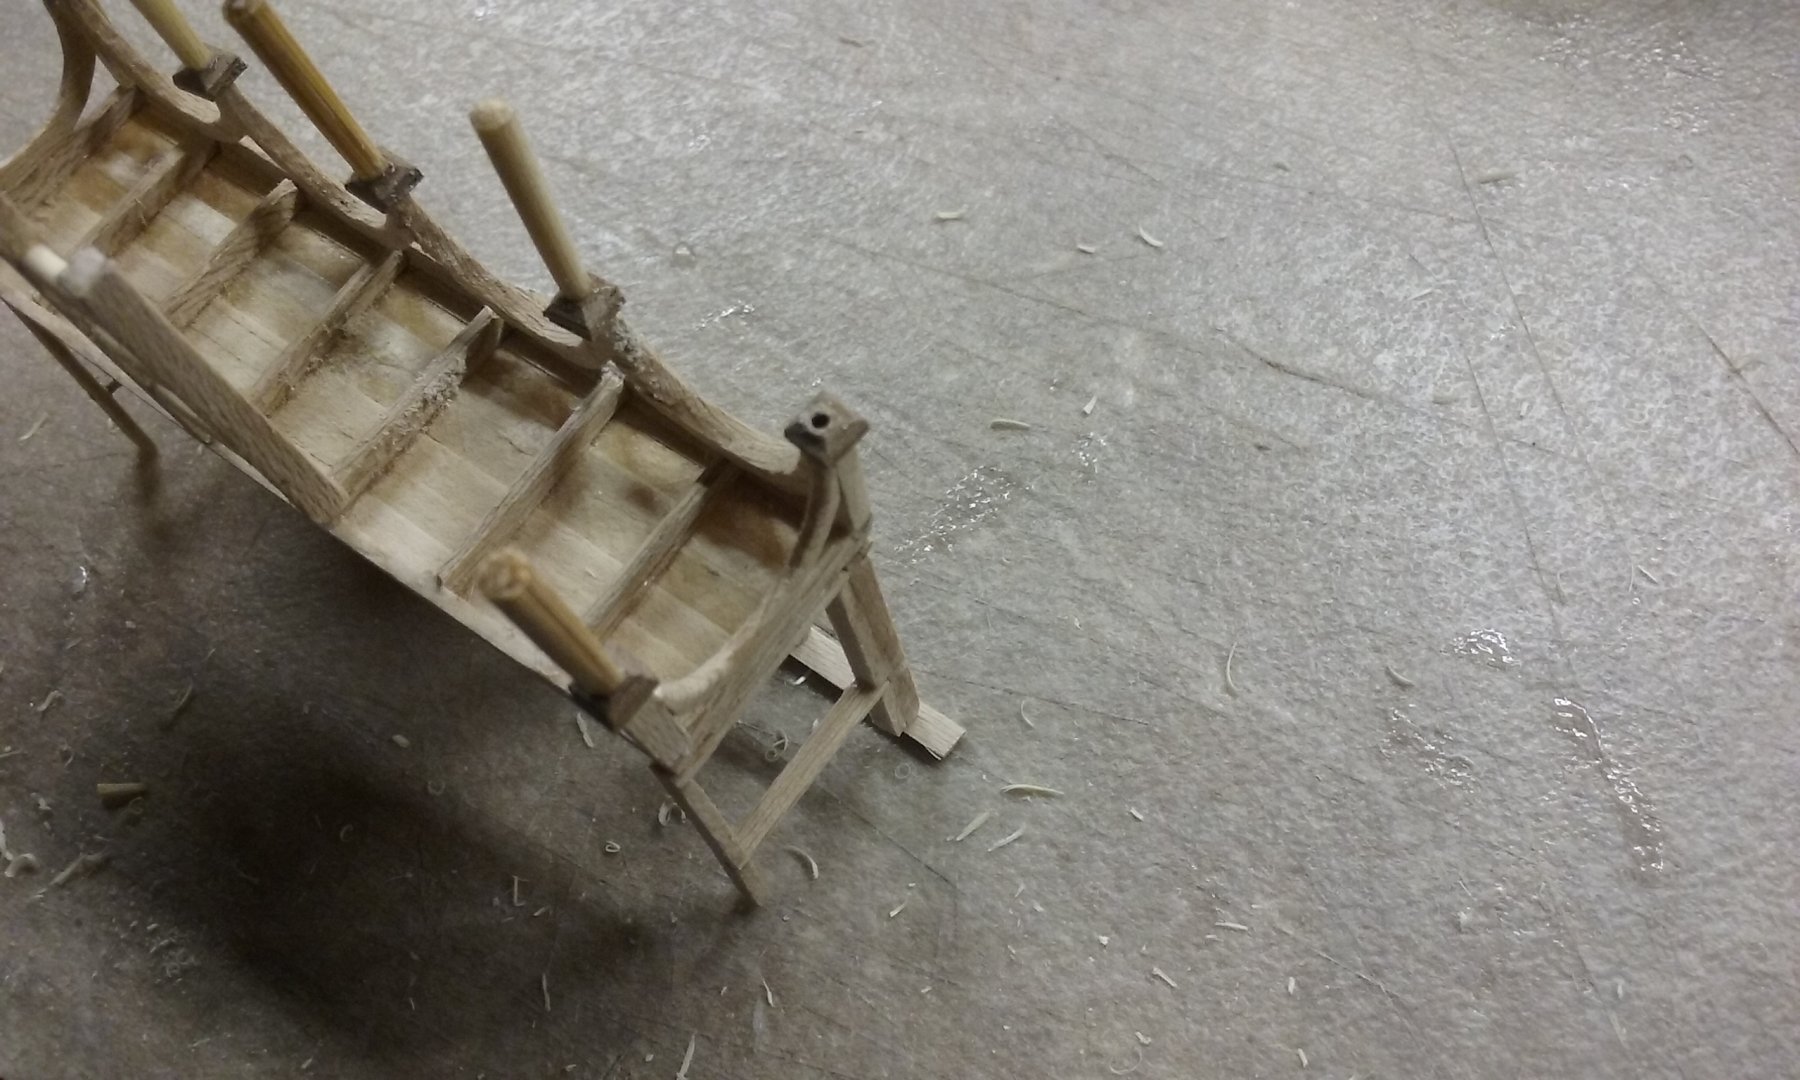
A problem from an earlier step got in the way - the tops of the columns were only butt-jointed to the rest of the assembly. Look at what happens when you use flexible PVA (white) glue.

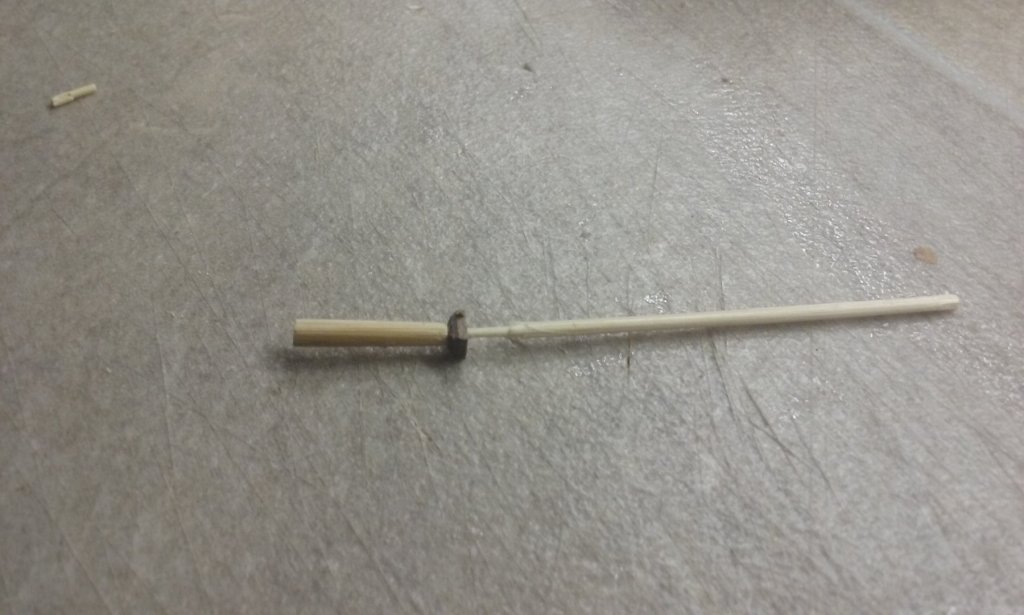
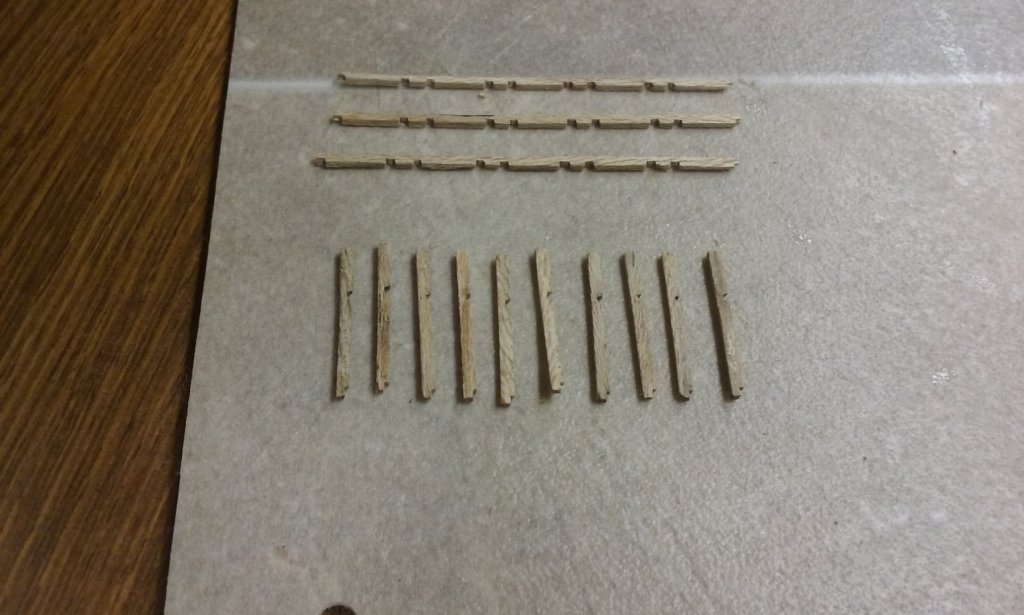
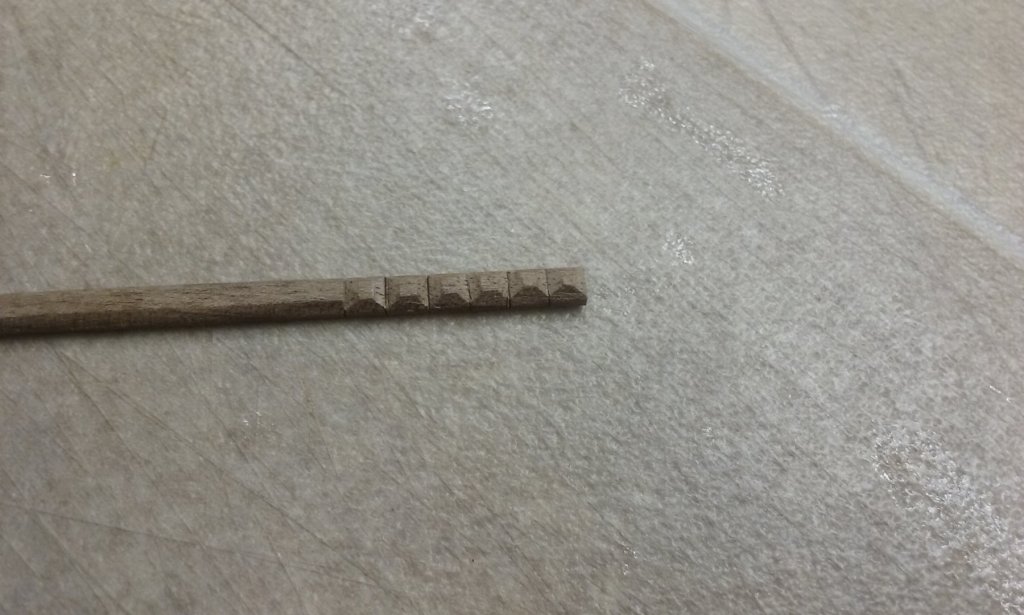
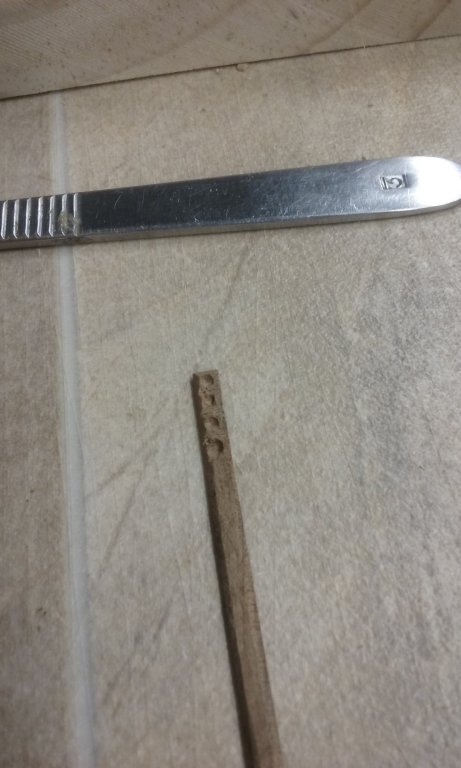
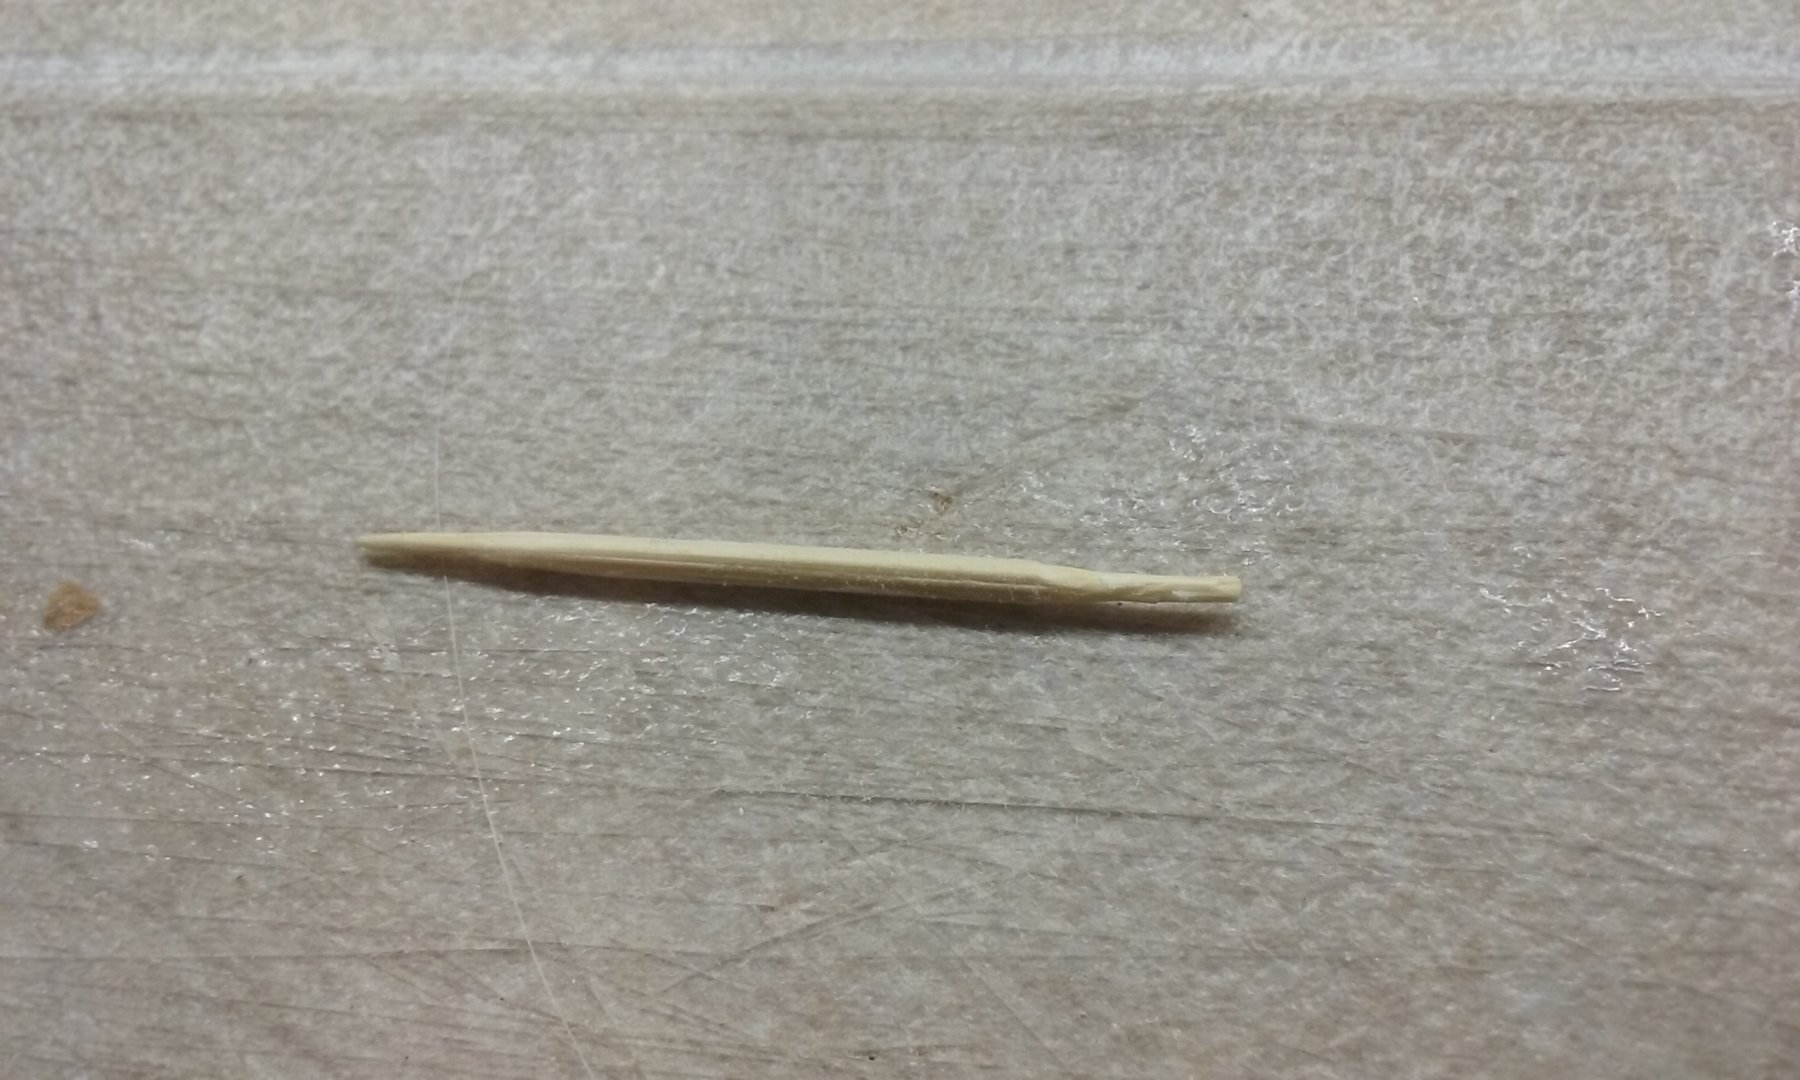
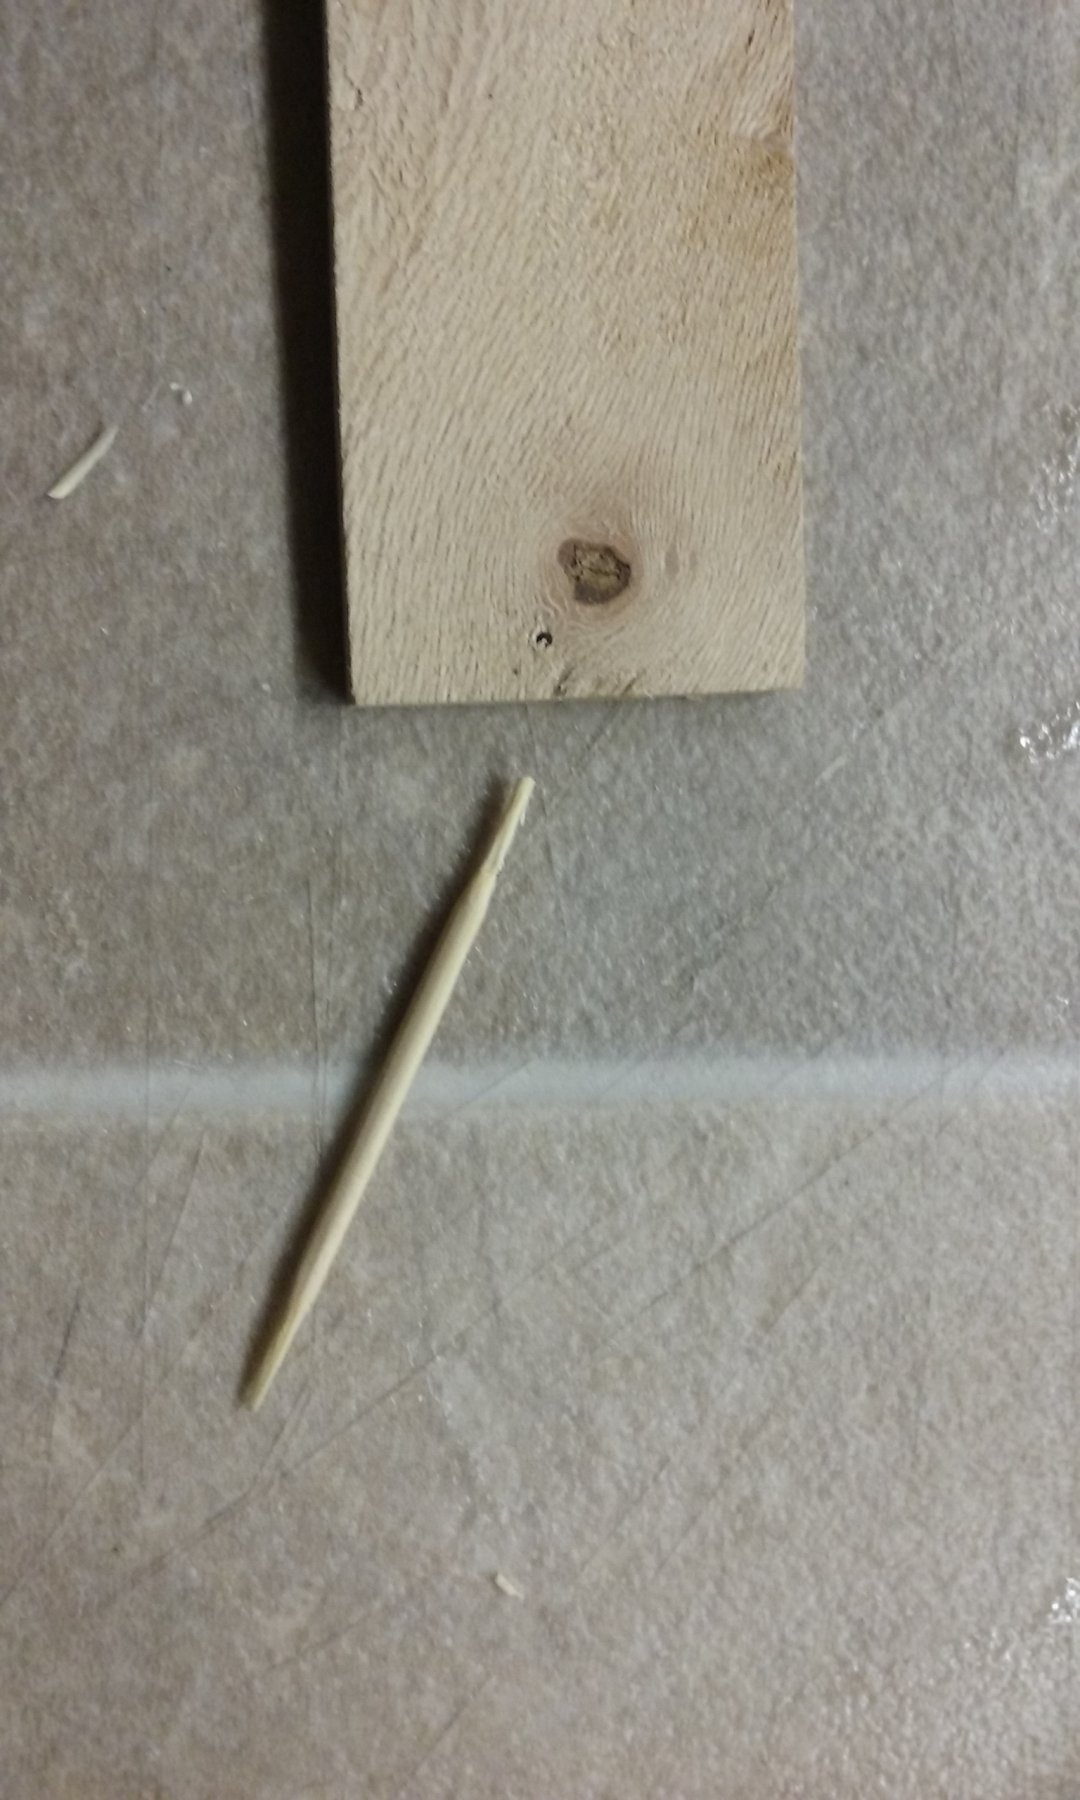
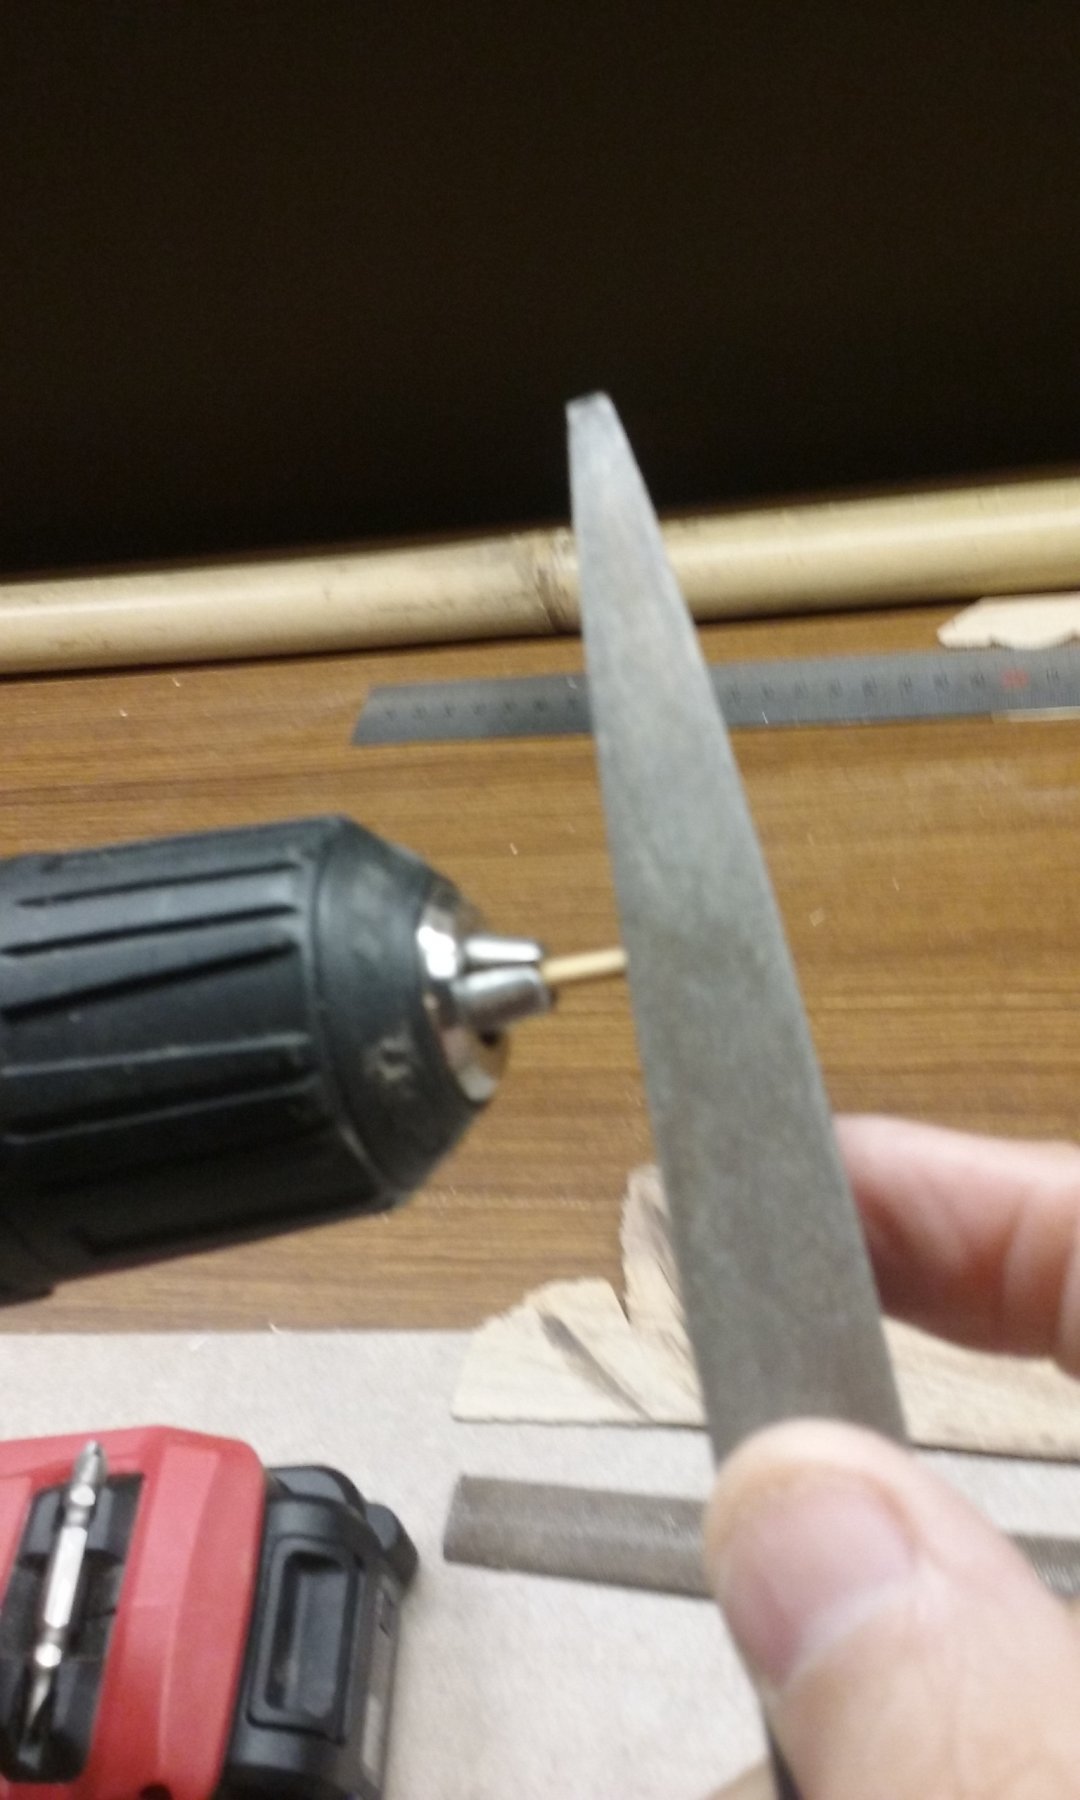
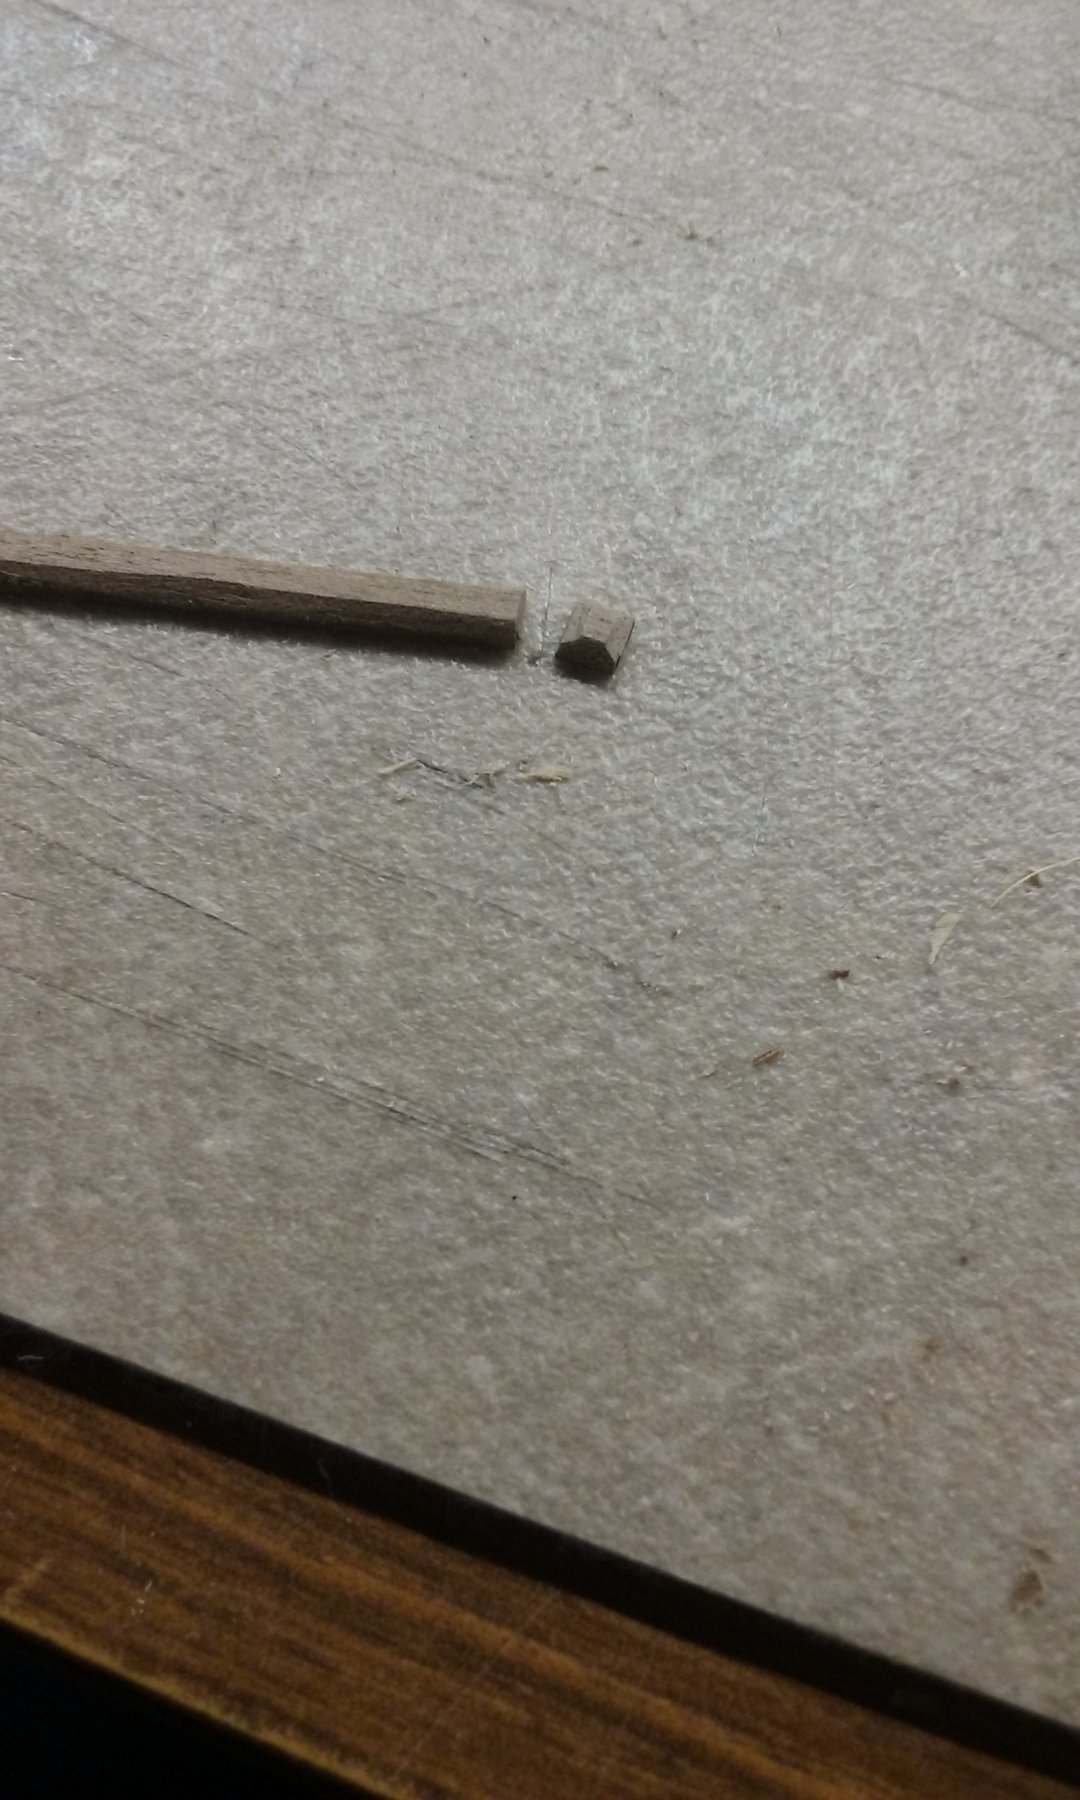
I had to use some kind of pin or peg to join the columns to the rest of the assembly. The smallest drill I could get was 1mm, so I needed a 1mm peg. Couldn't find any, so I made my own from bamboo toothpicks.
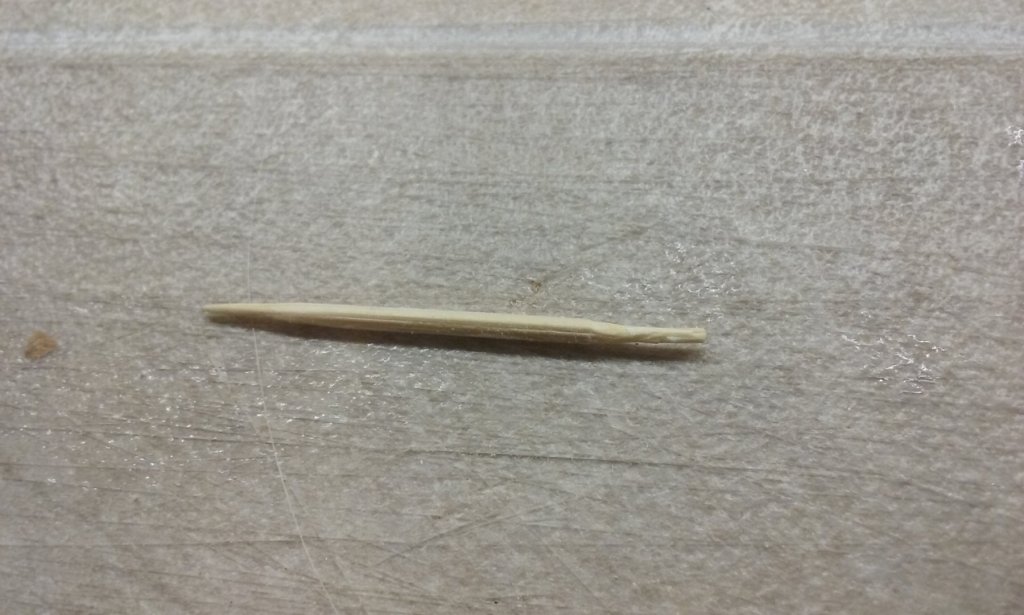
Size checked against a 1mm hole.
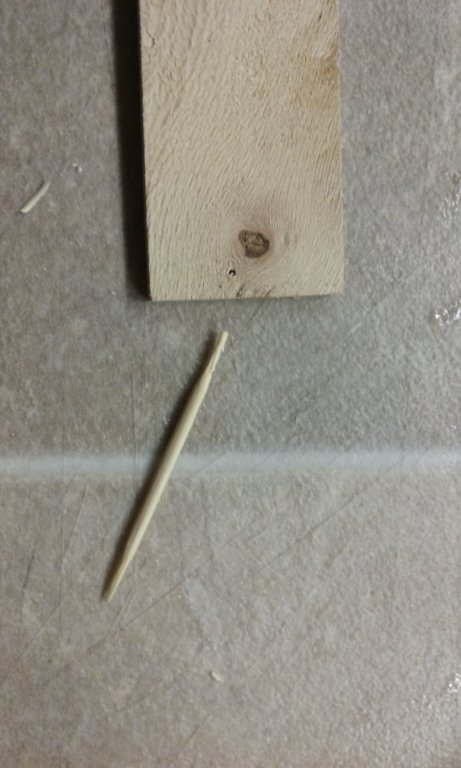
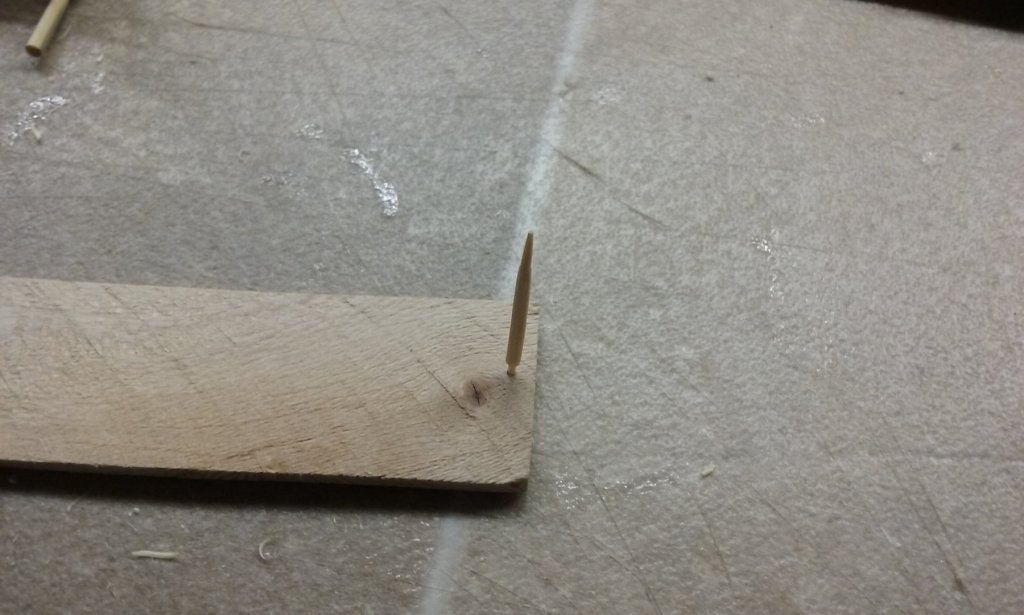
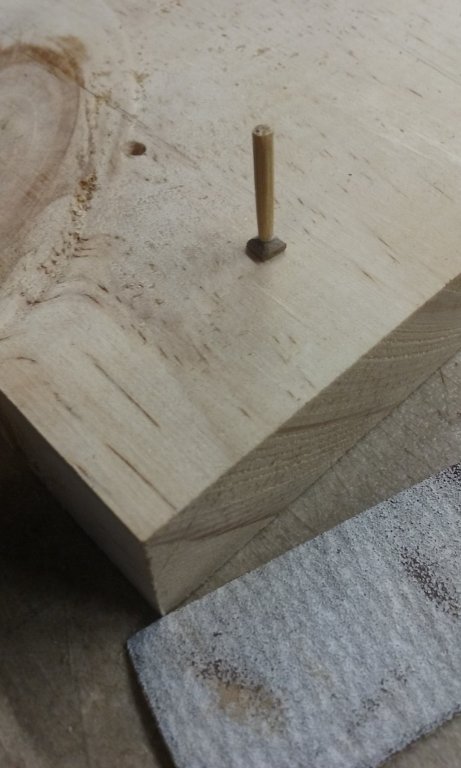
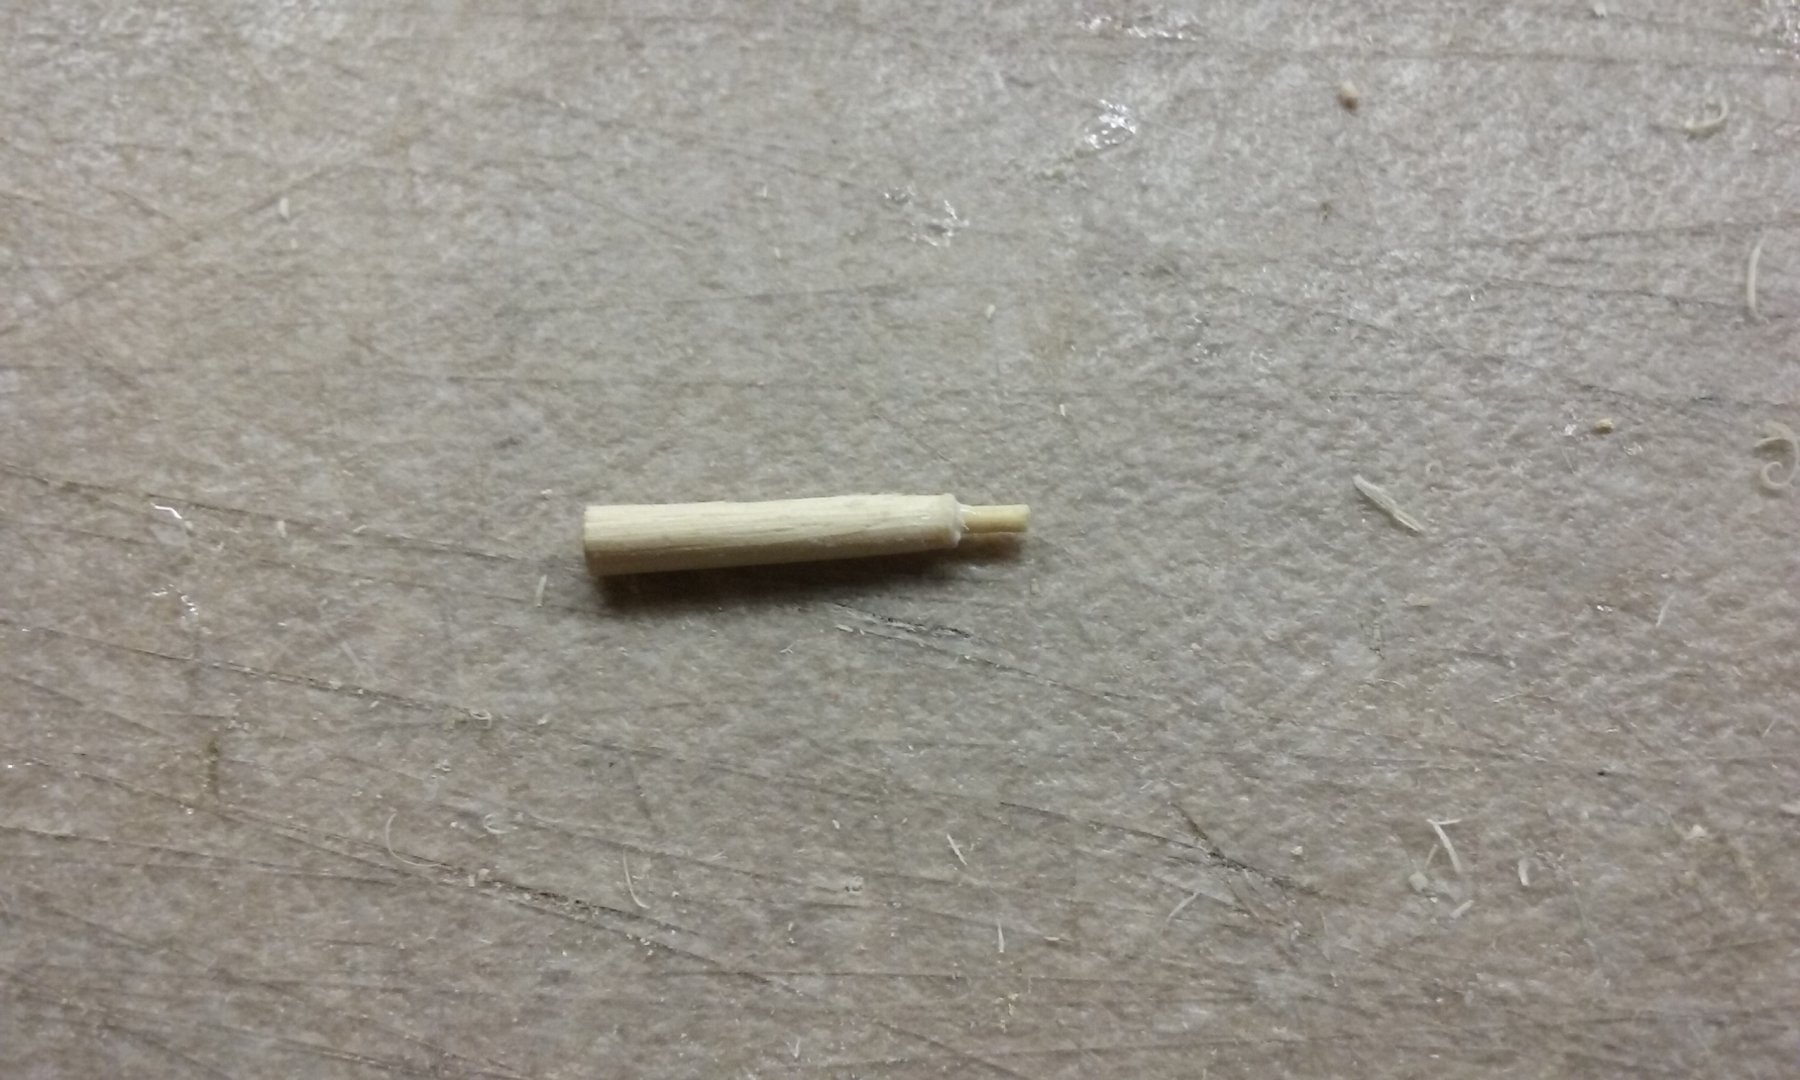
Peg inserted in a hole drilled in the top of the column and glued in place.

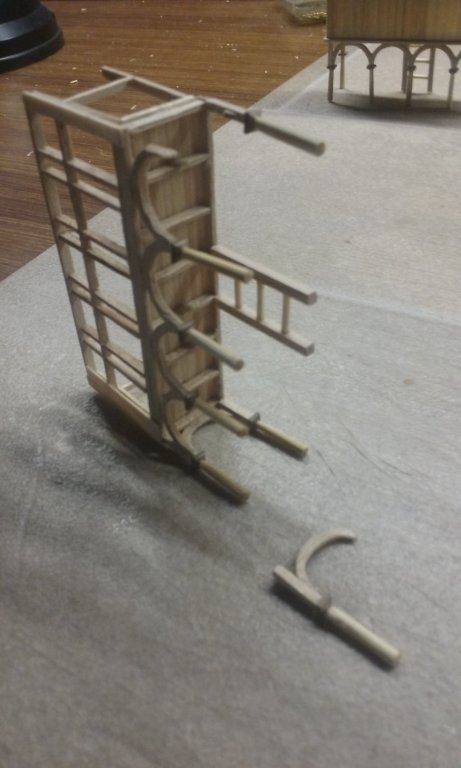
Hole drilled into the capital and the xylokastron framing above it.

Peg inserted and glued into the hole in the capital.

A bit labour intensive, but it seems to have worked. Pushing the outside of the envelope, though, with the (pretty basic) equipment I've got. Getting the holes centred and in line was very difficult.
Unfortunately I can only do this at the corners of the xylokastra, where there's enough "meat" above th columns to take a 1mm hole. With the other columns I'll just have to be very careful to make sure they're vertical before I glue their bases in place on the deck of the ship.
Steven
-
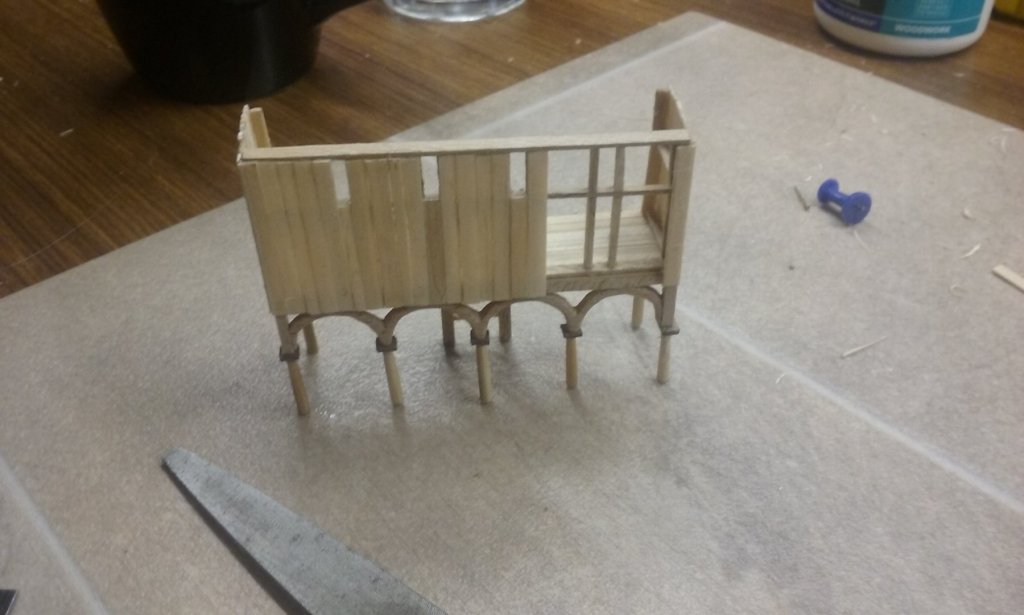
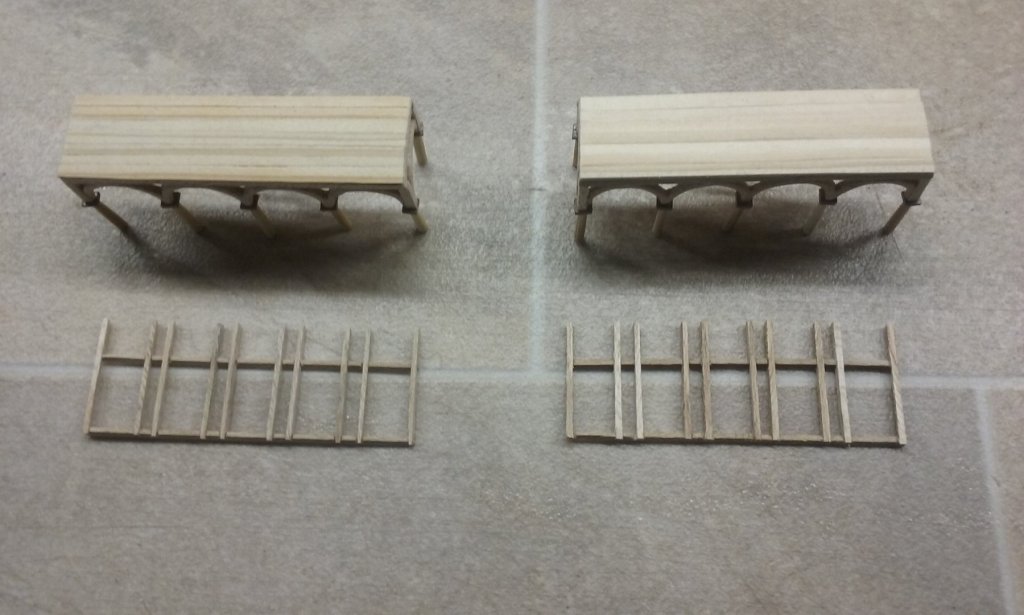
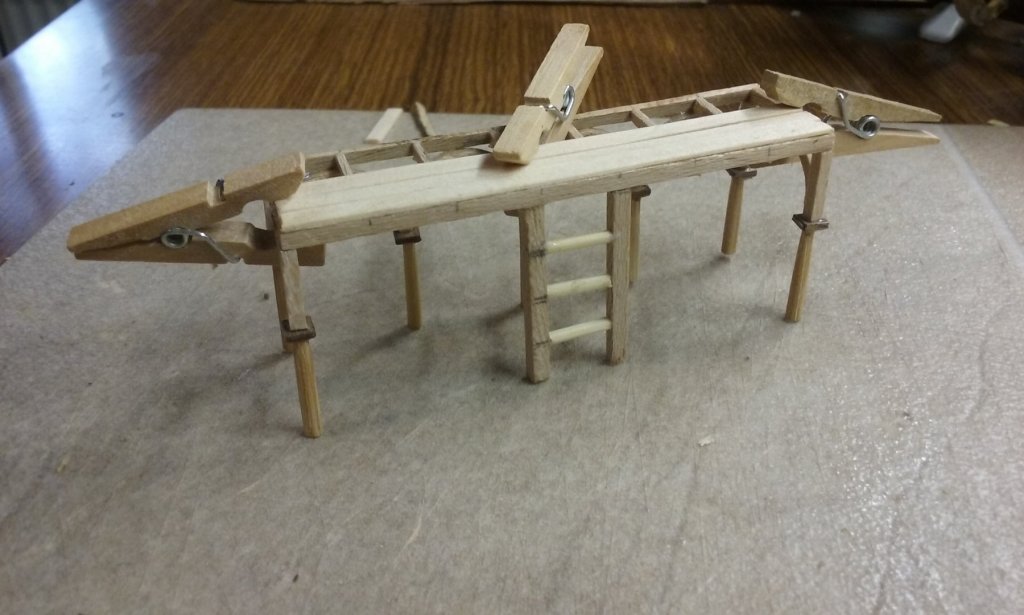
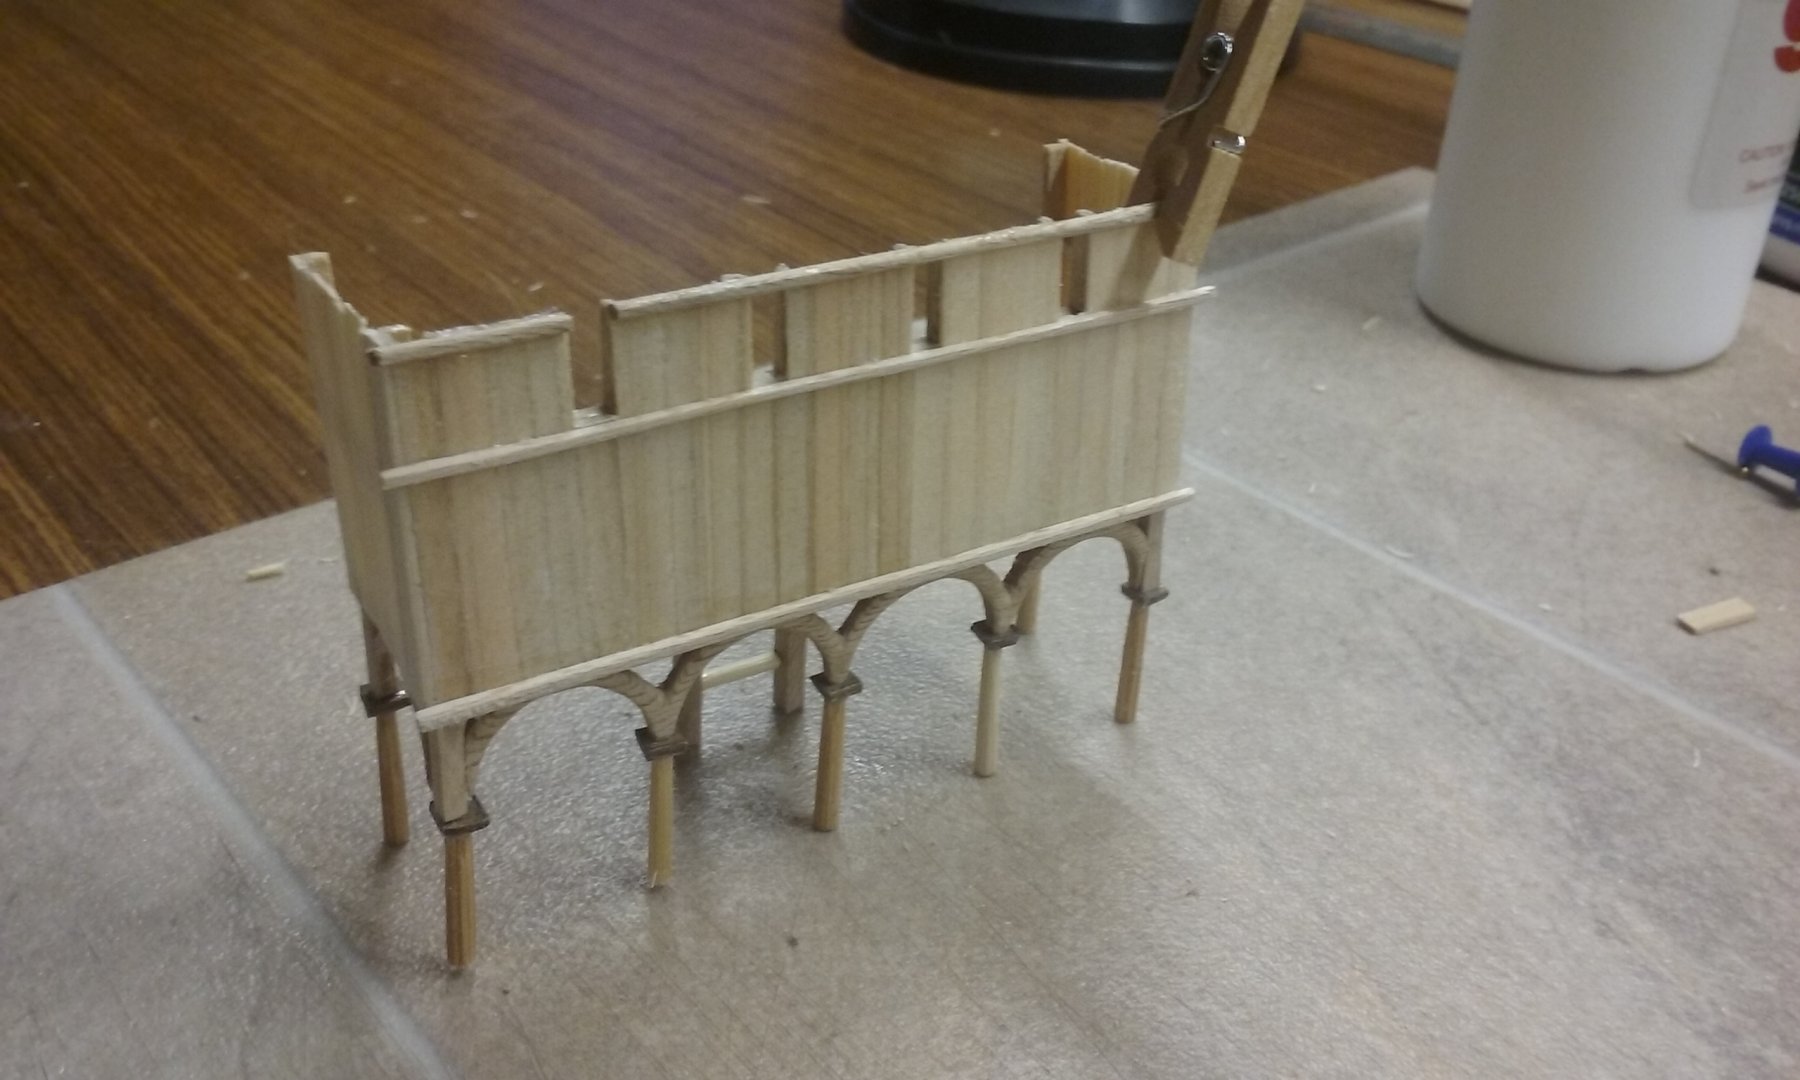
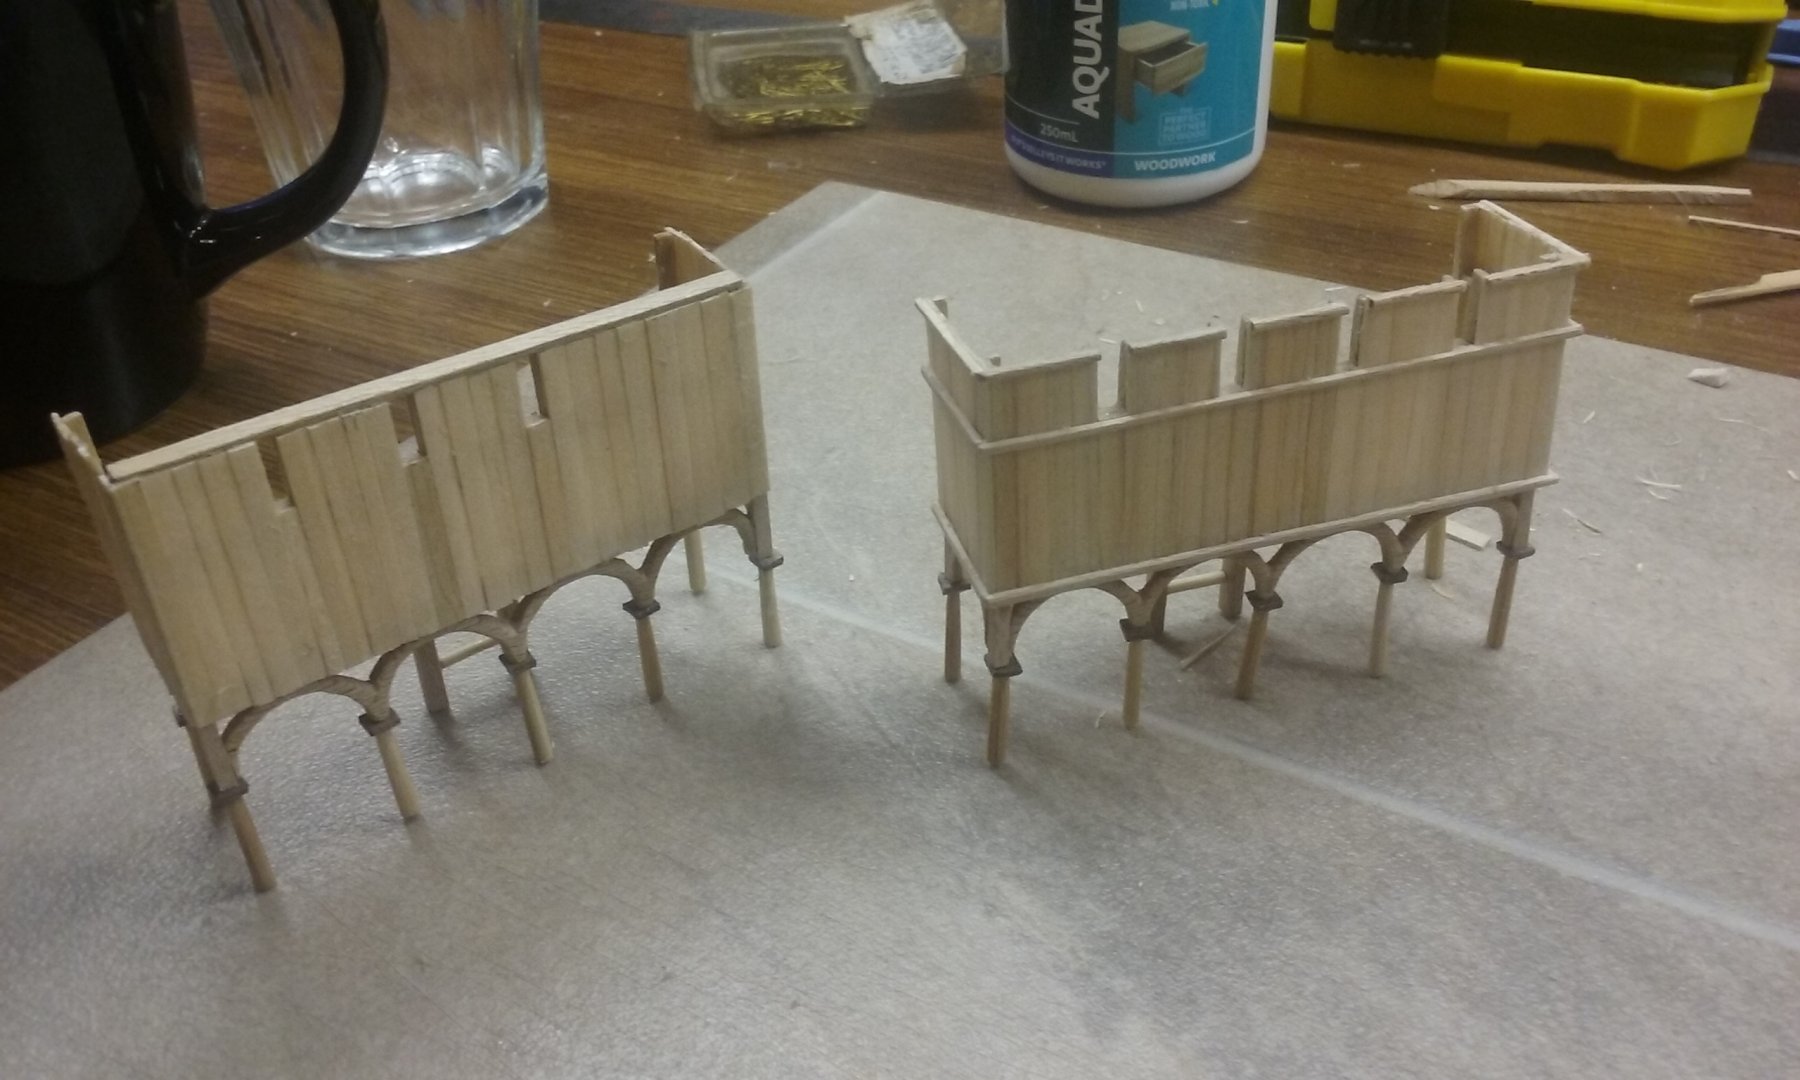
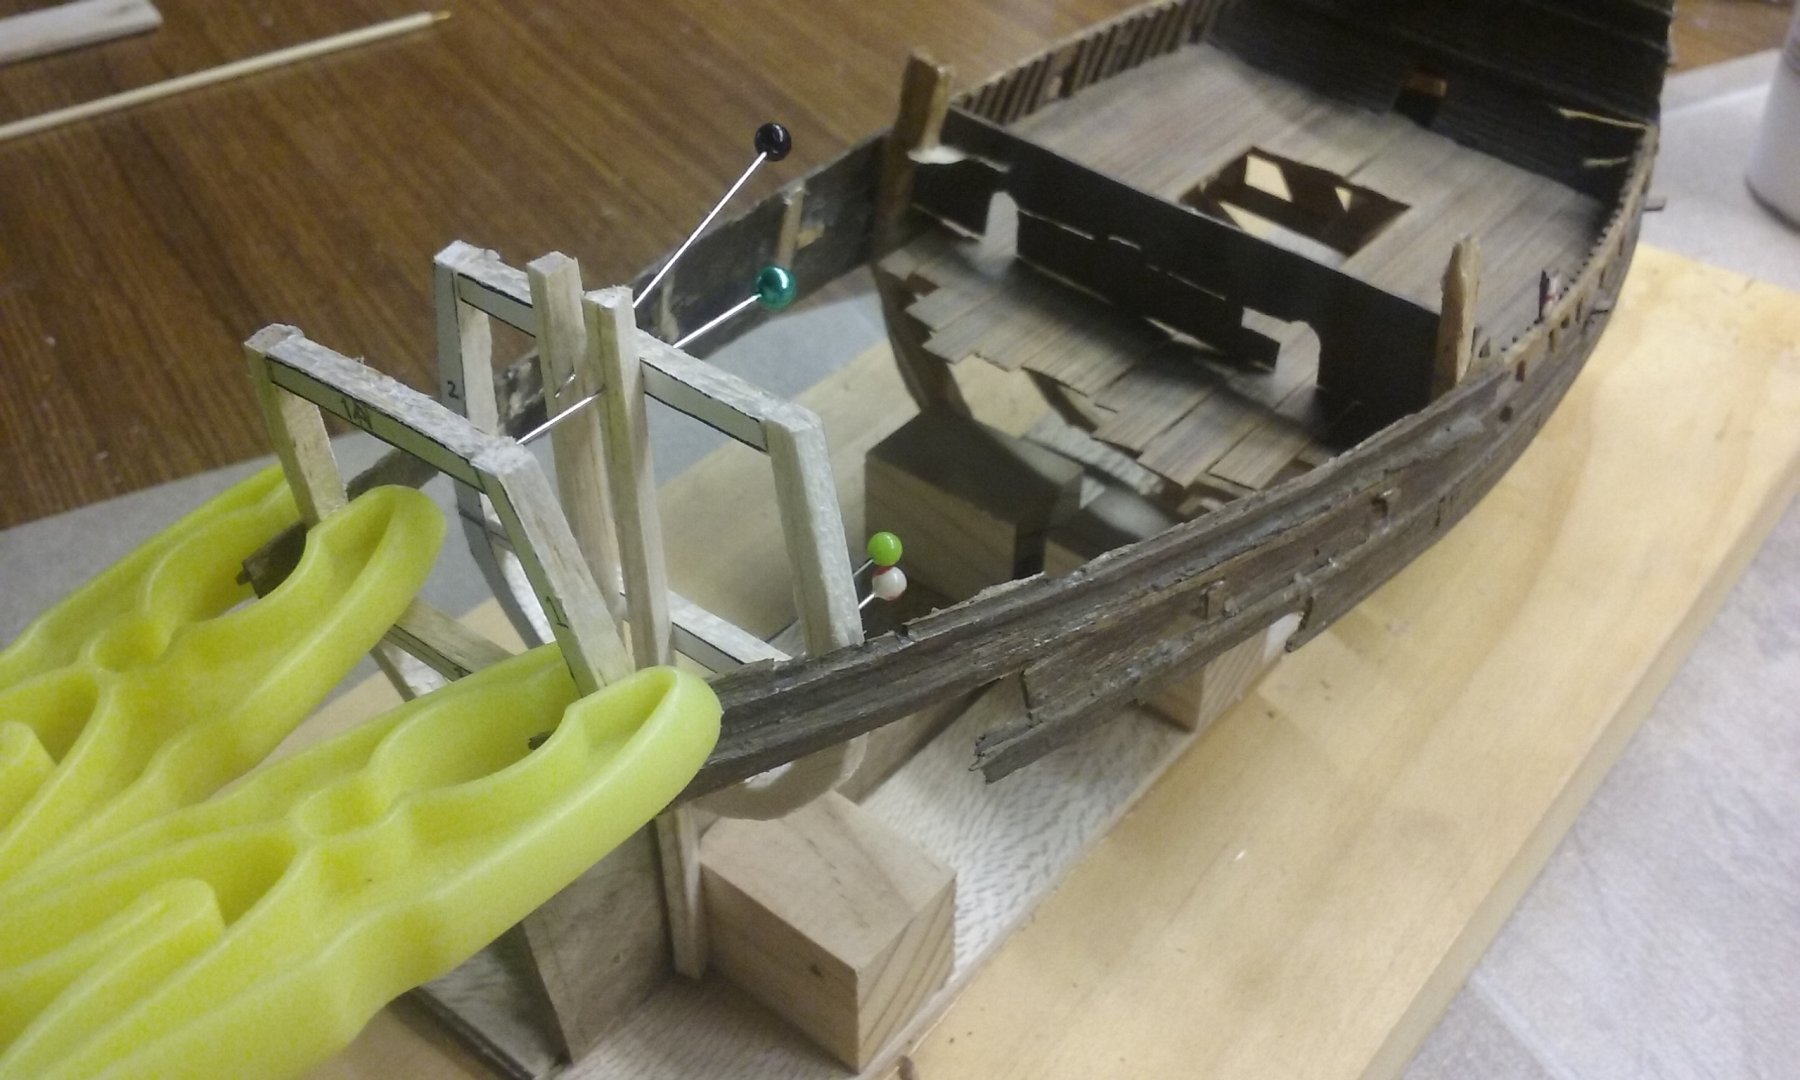
I've now added the framing for the xylokastra parapets and started on the planking.
Laid the assemblies on the tabletop to glue the front parapet frames on.

Here they are in place
The glued the sides of the parapet frames on and held them in place with pegs.
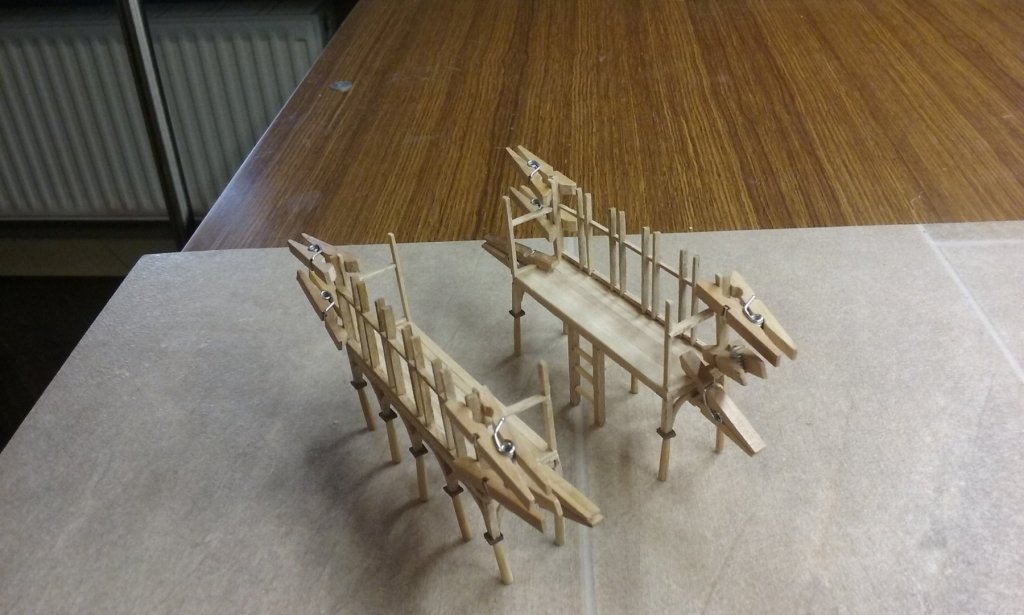
Here they are - frames complete

Steven
-
There have been several repairs of old models (many of which really weren't terribly accurate in the first place) undertaken by members of this forum, often with very good results, considering the limitations of the original model. I believe yours fits in well with these and you certainly have nothing to be ashamed of in putting this log up on the scratch build section. I agree with mark and Roger - a very nice, clean and attractive piece of work.
And in its own right, it's a good record of a model of a type belonging to that time and place - in itself, a piece of history.
Steven
- mtaylor, Keith Black and Canute
-
 3
3
-
Nice research work, Pat. What a find!
Beautiful fine work on those tiny pumps. Looking forward to the PE.
Sometimes time apparently missed from modelling turns out to be better used put into research.
Steven
- BANYAN, popeye the sailor, mtaylor and 3 others
-
6
-
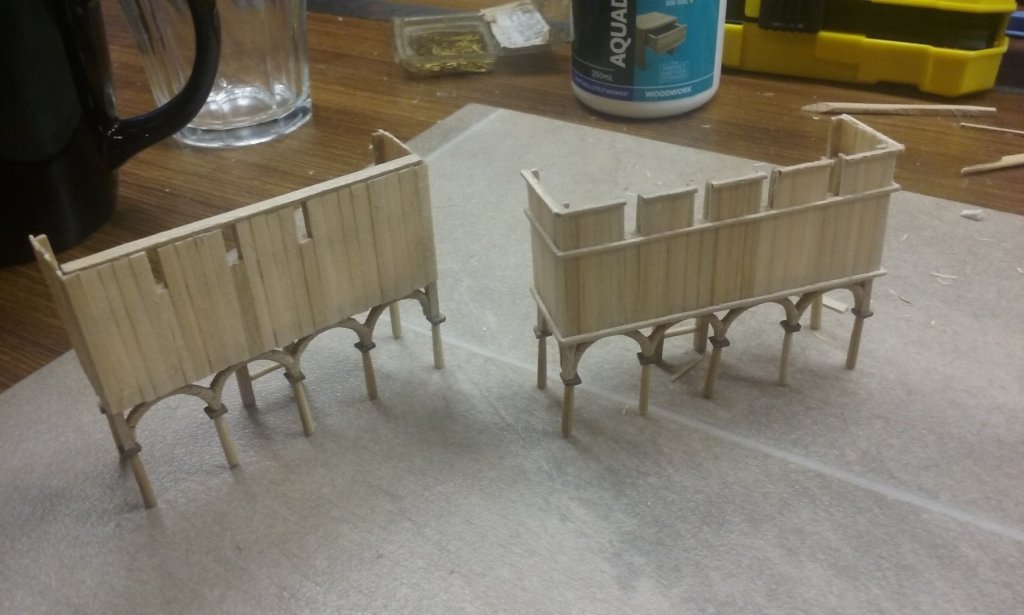
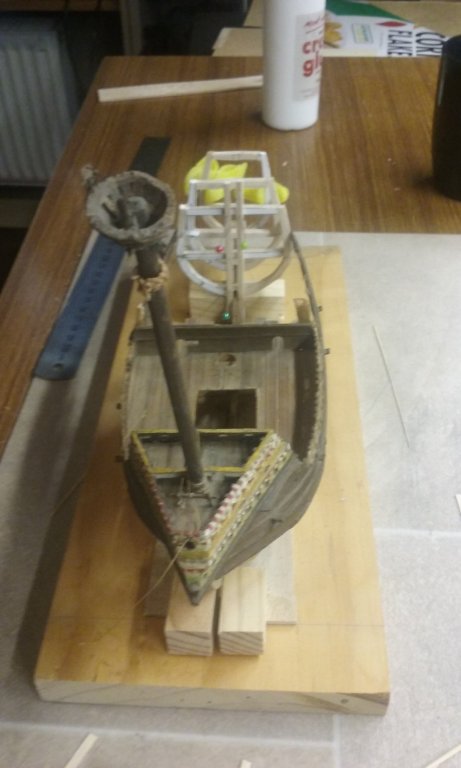
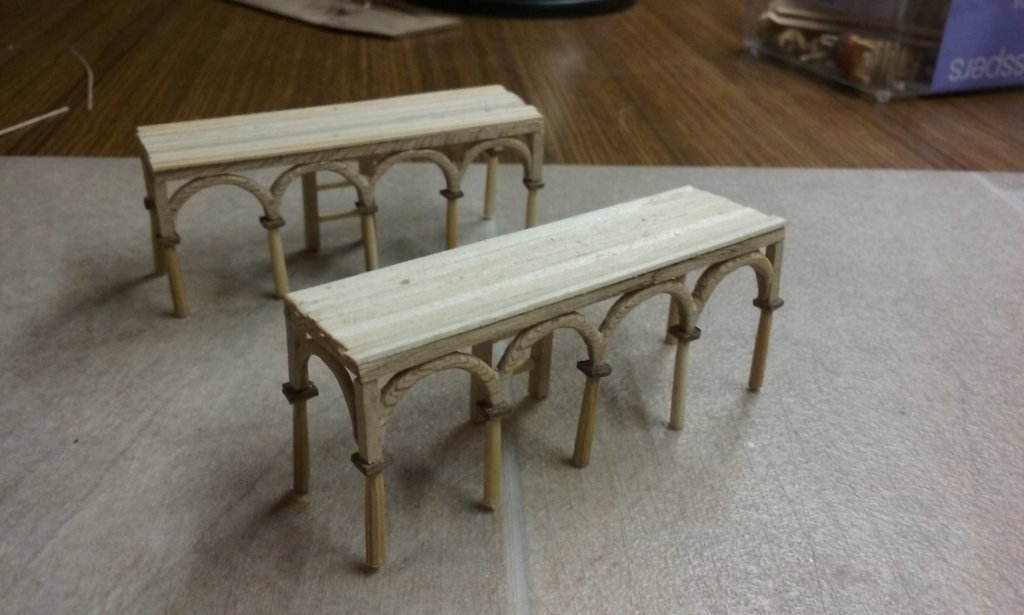
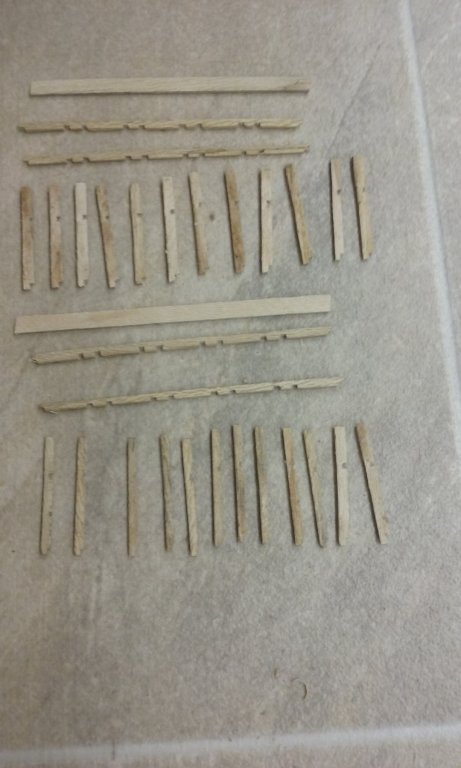
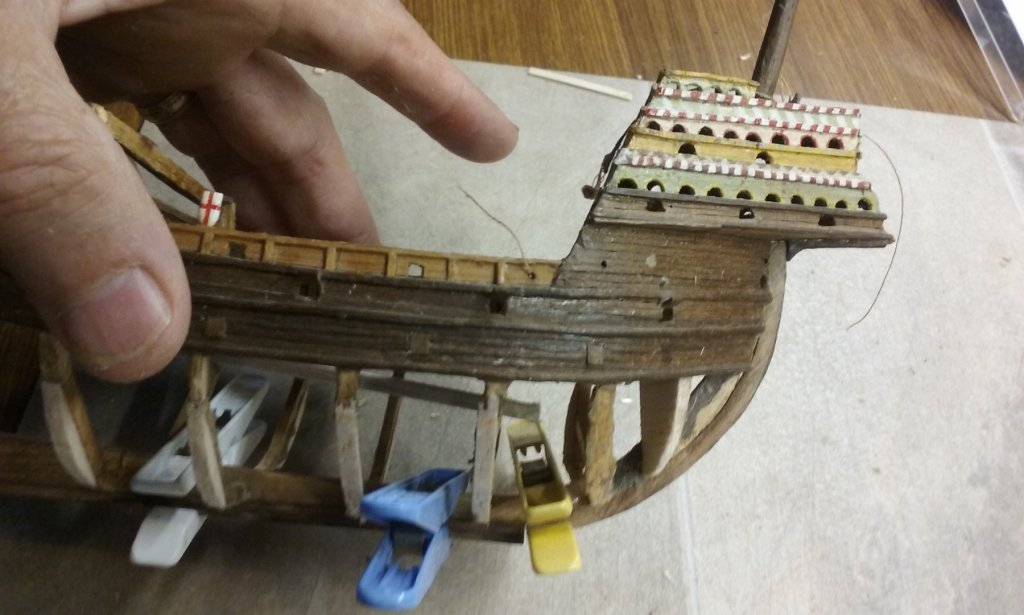
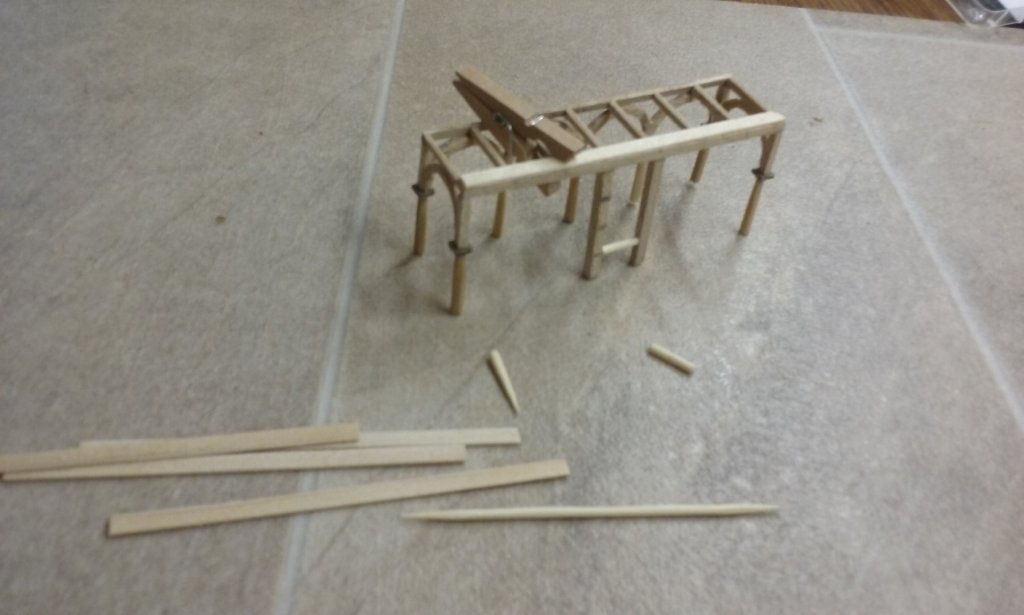
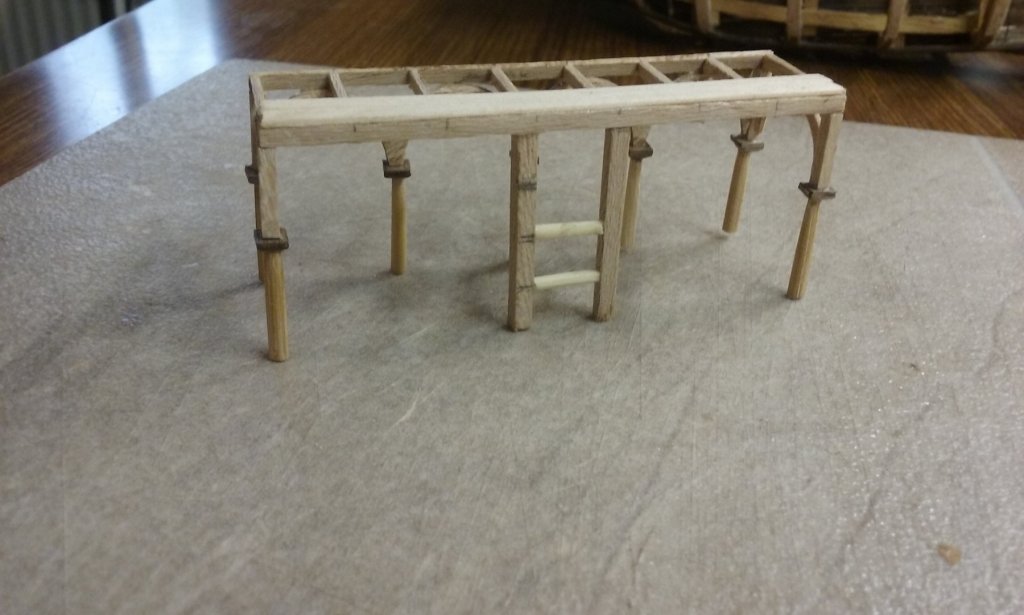
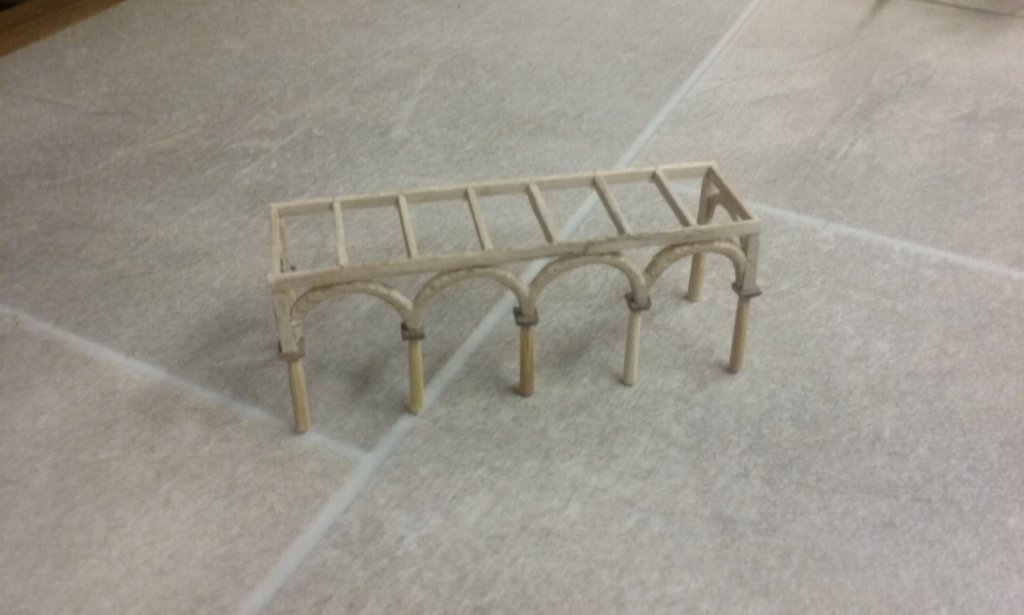
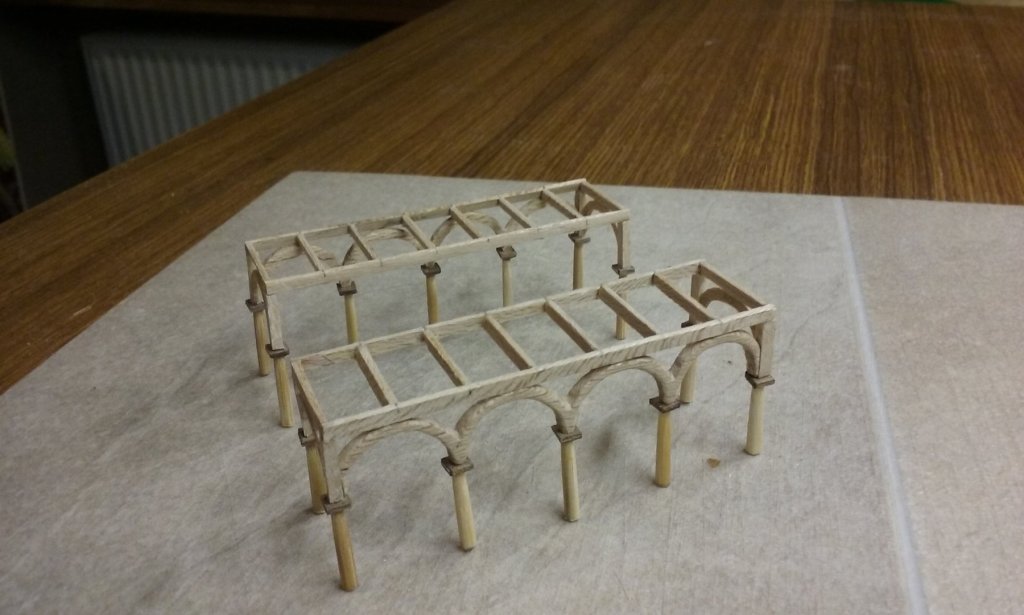
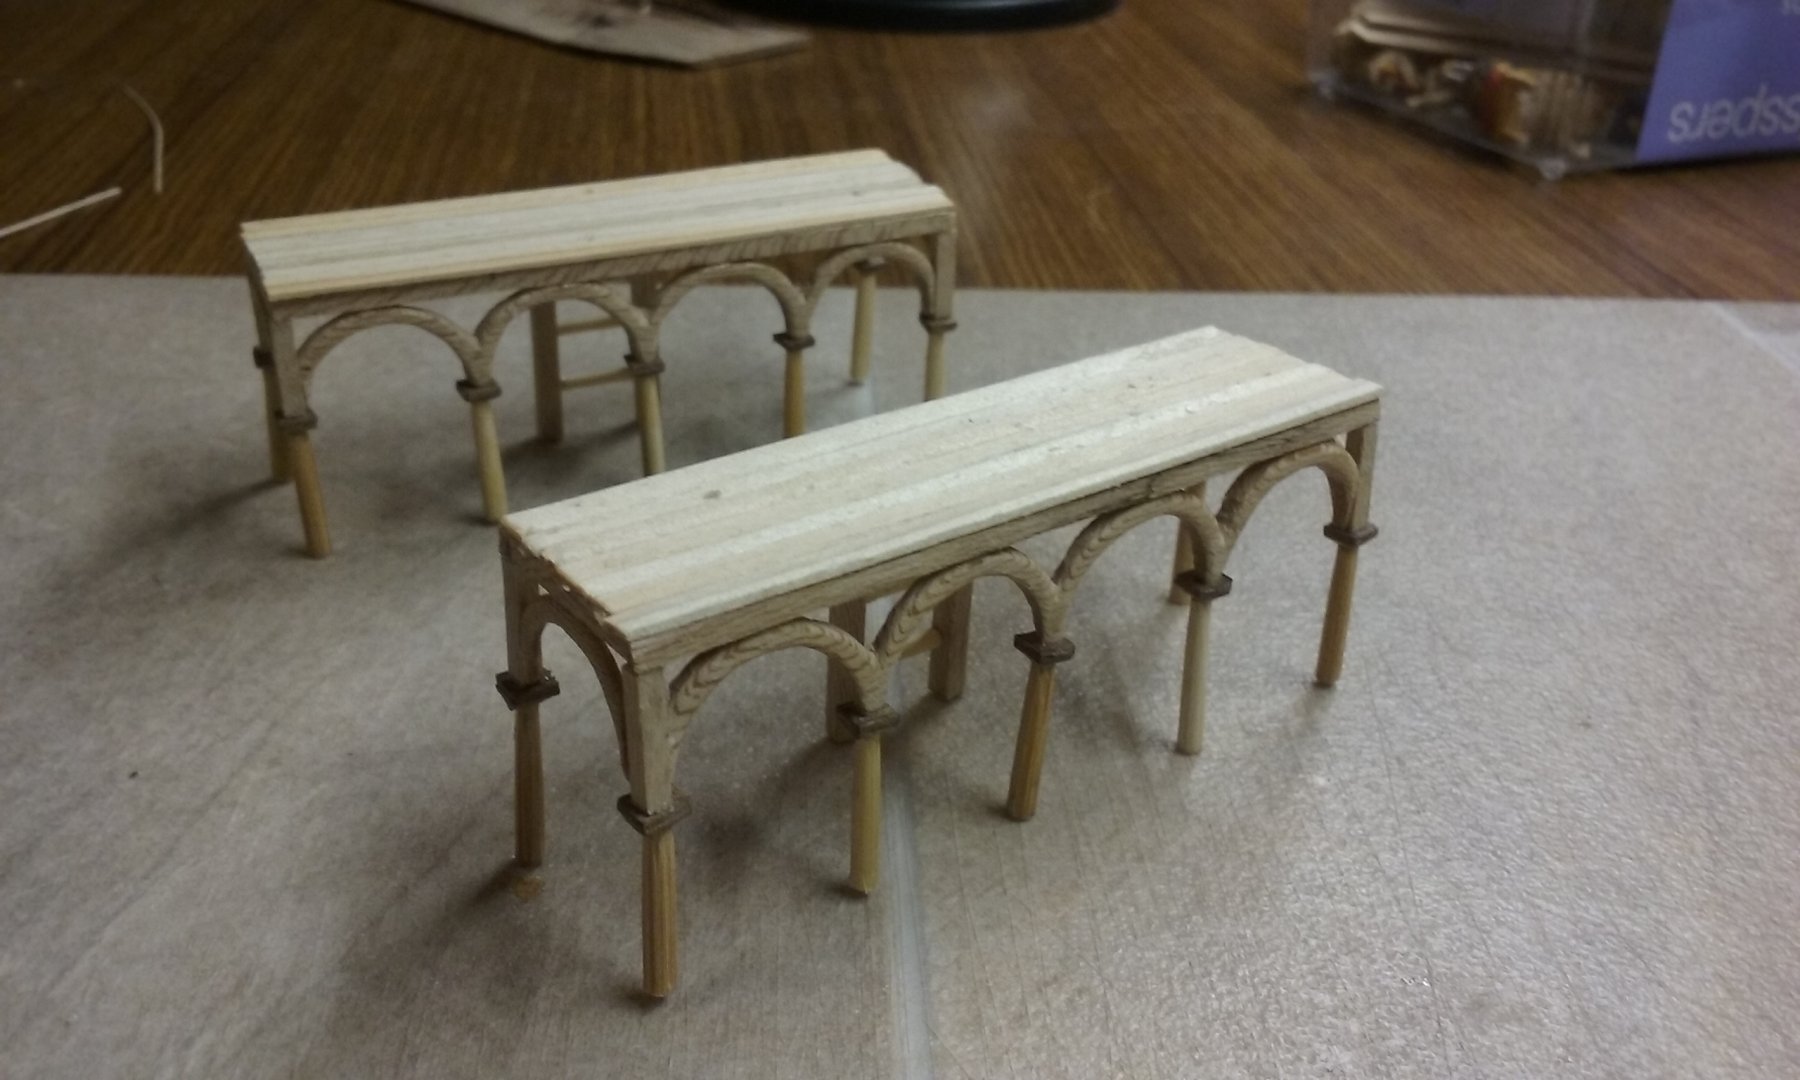
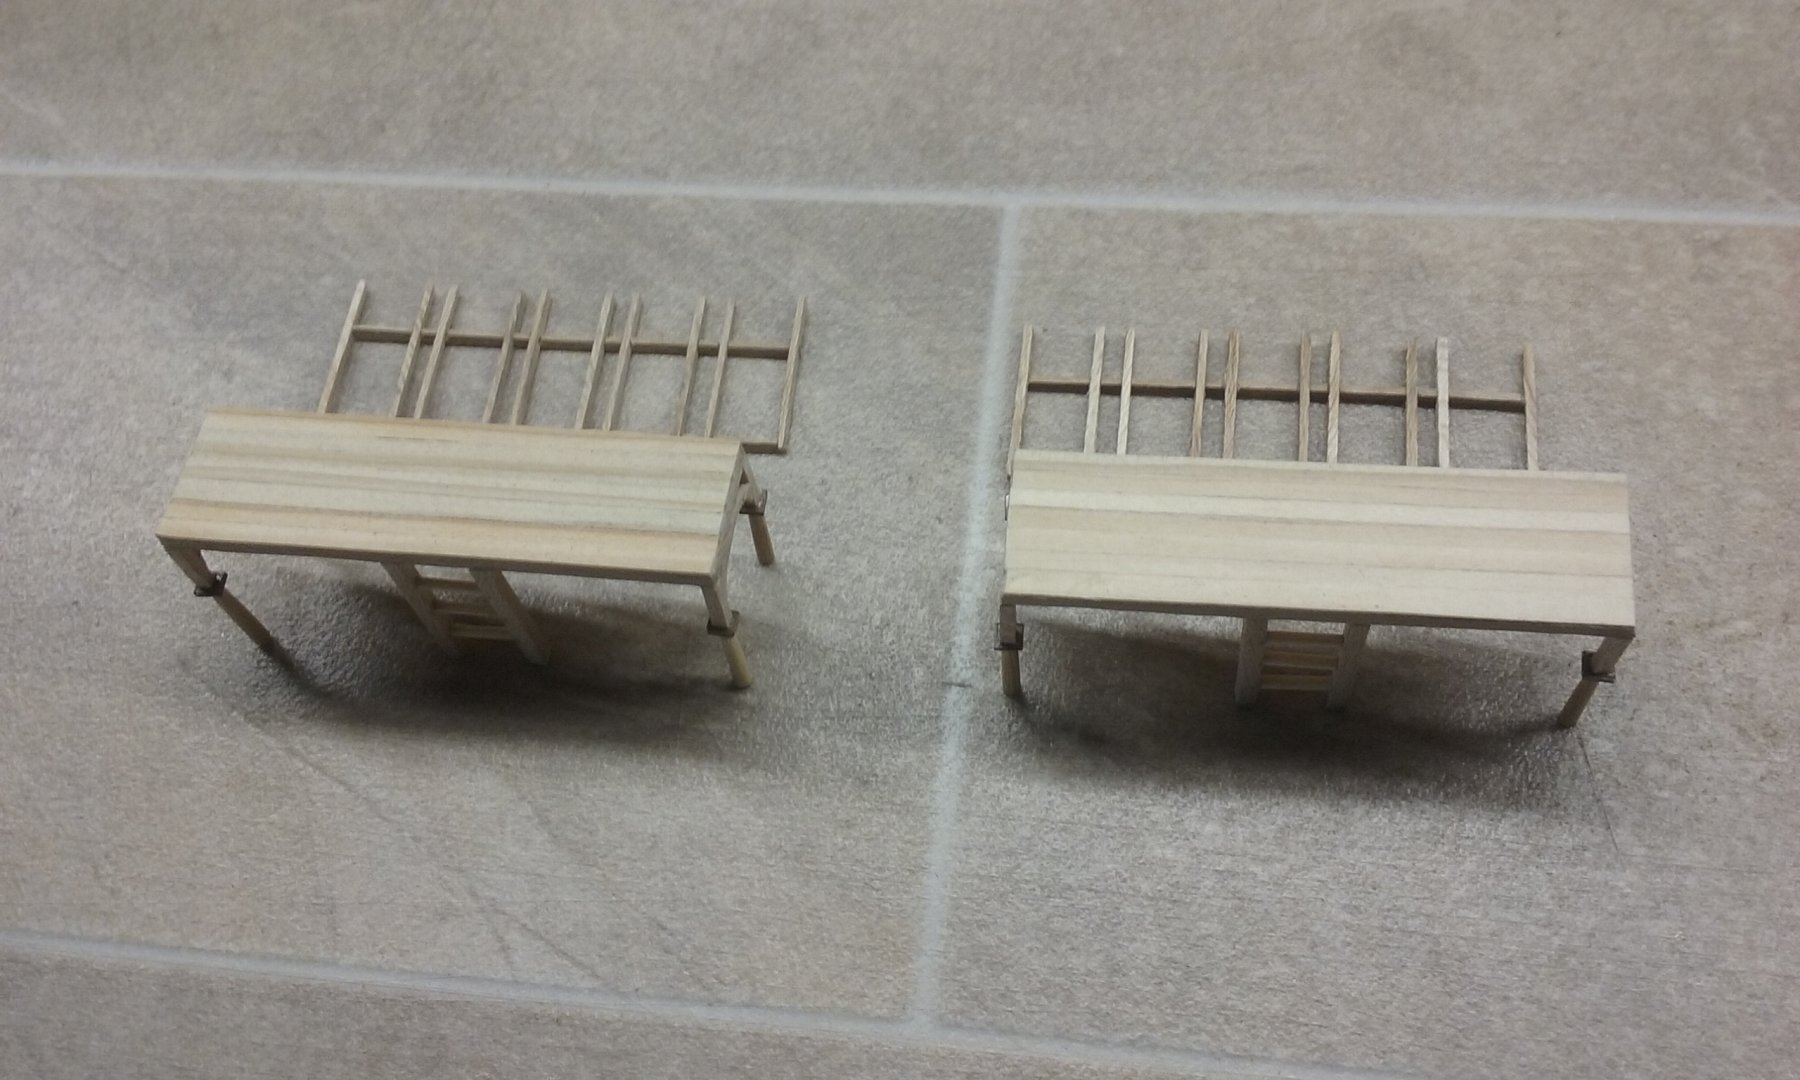
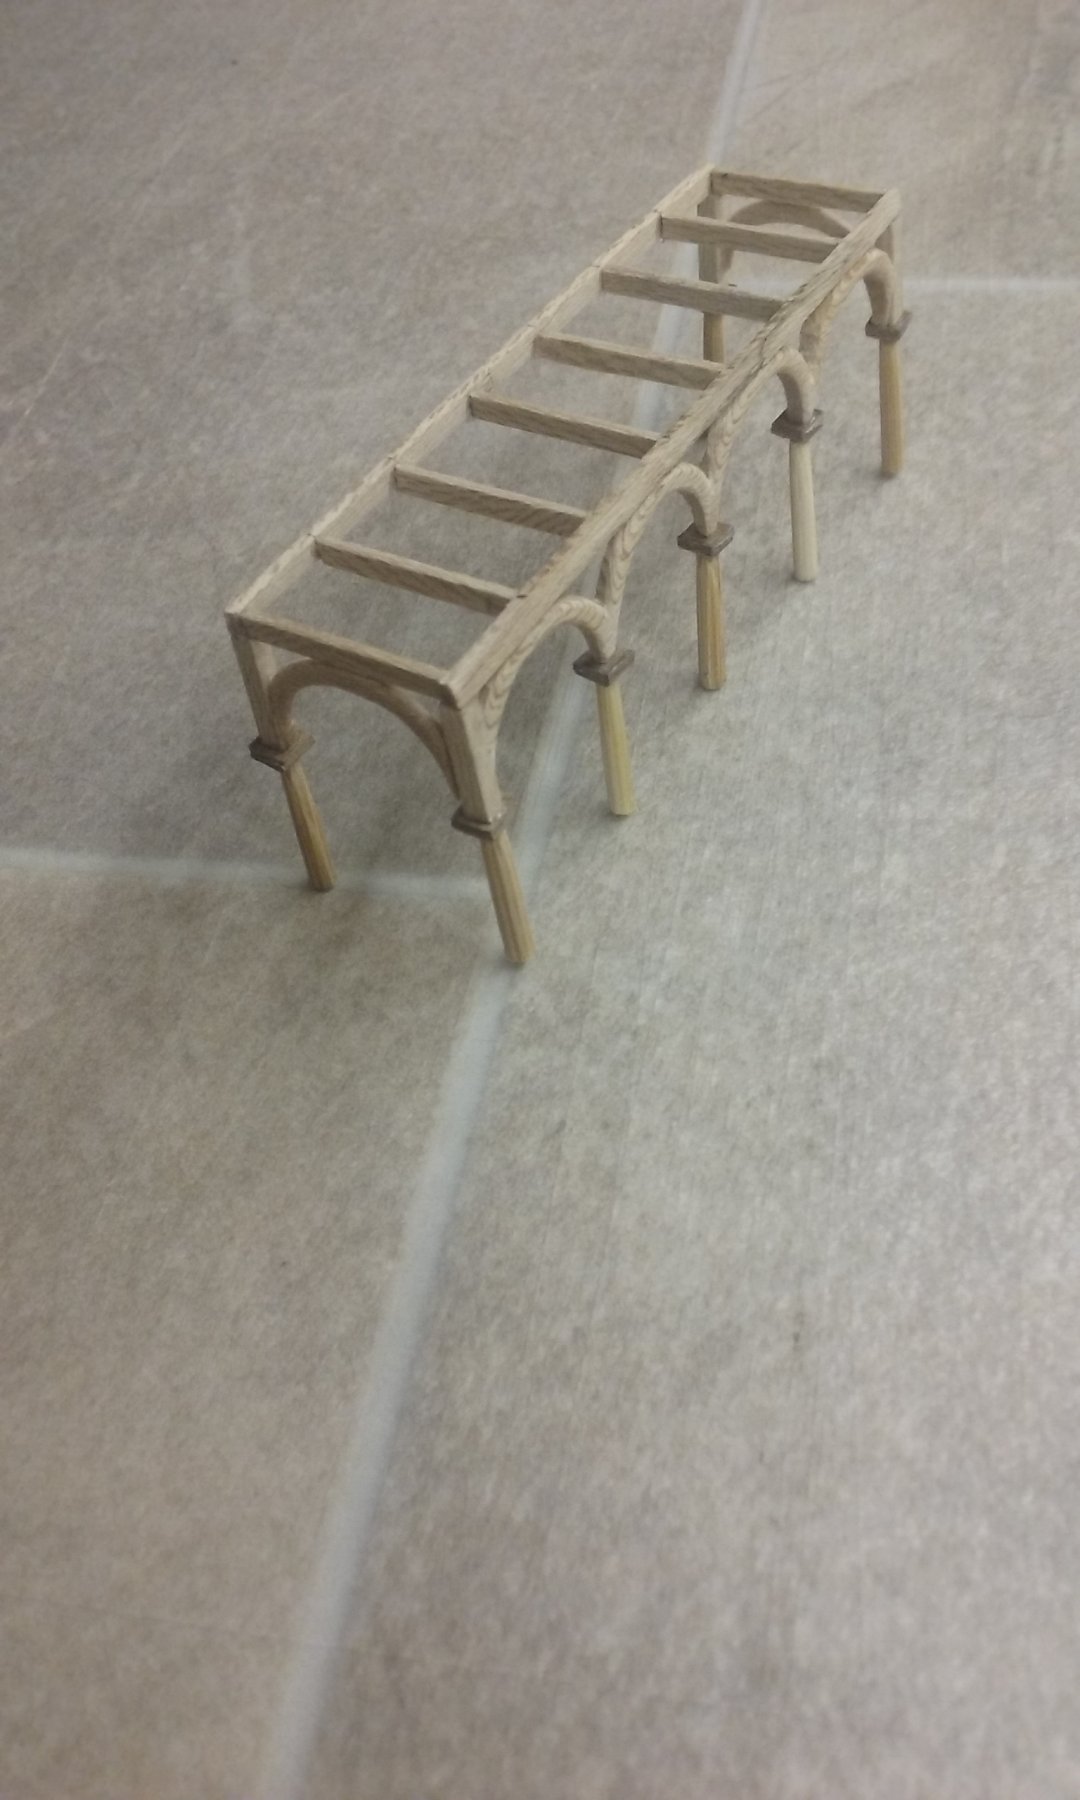
I've been working on the xylokastra. The first photo shows them with the decking added.
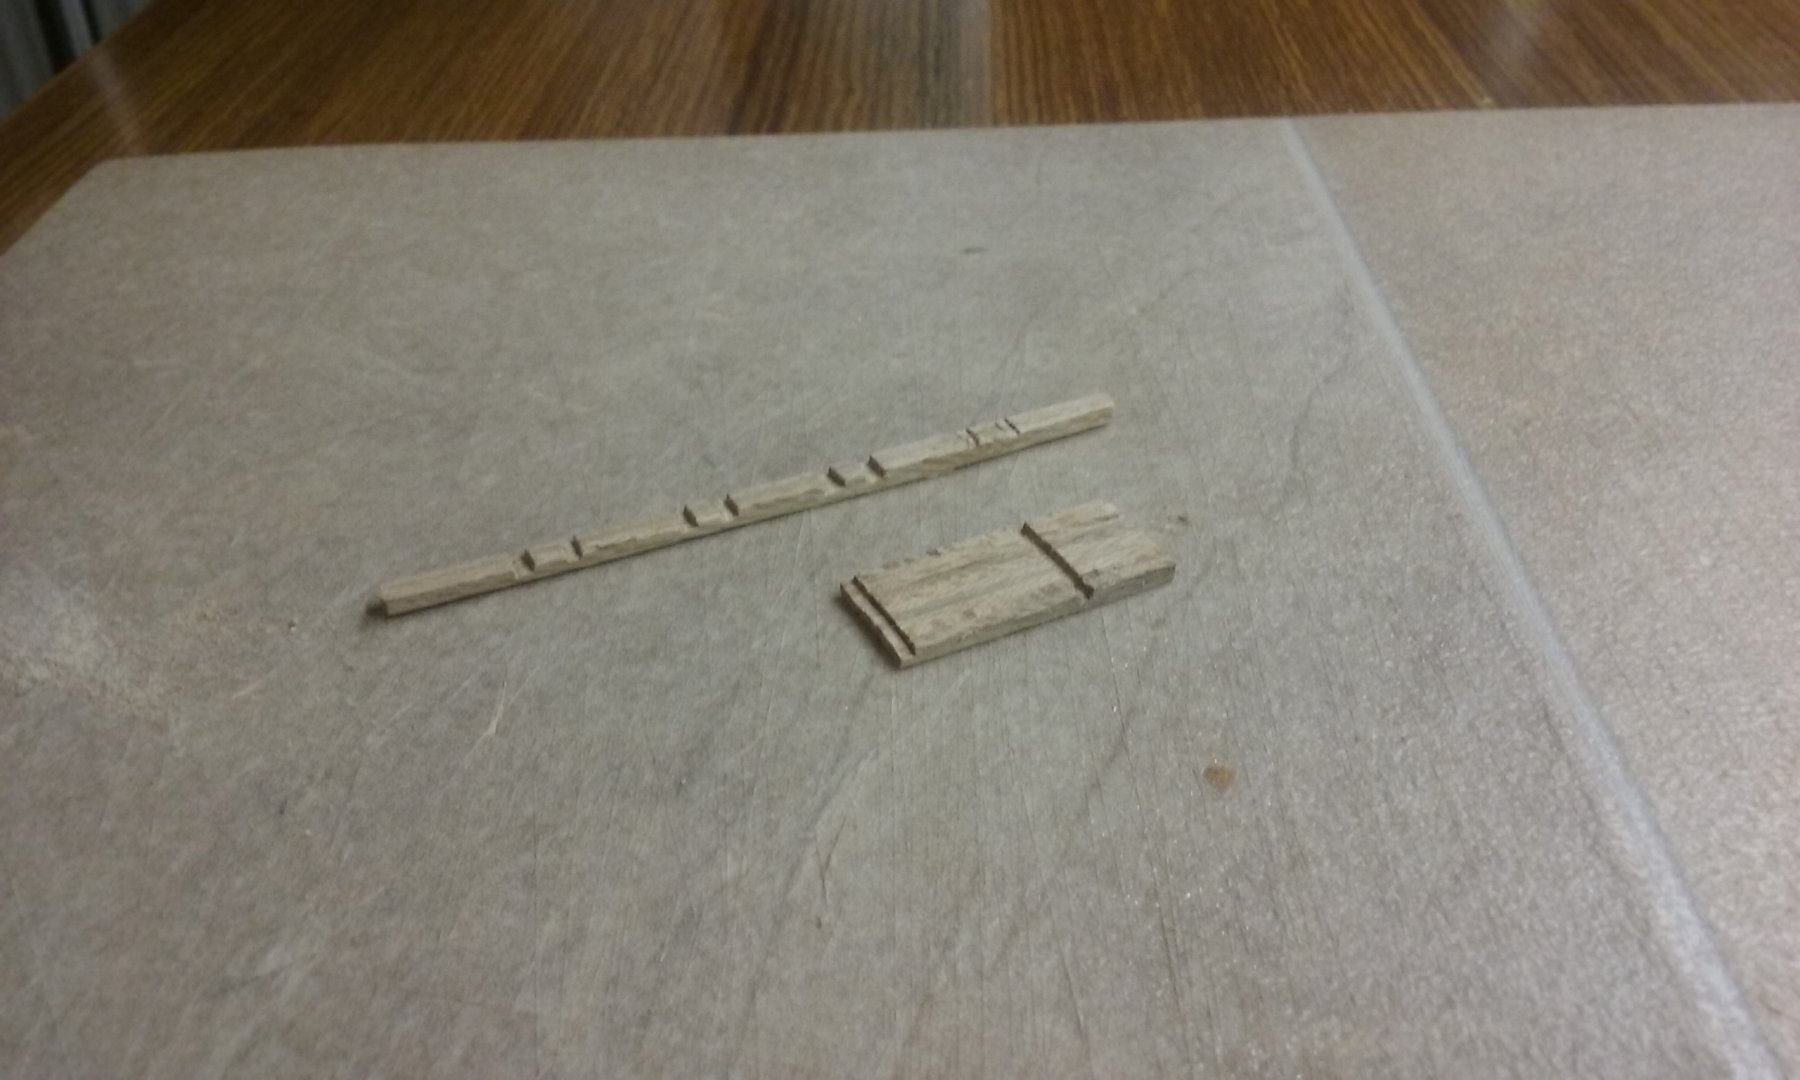
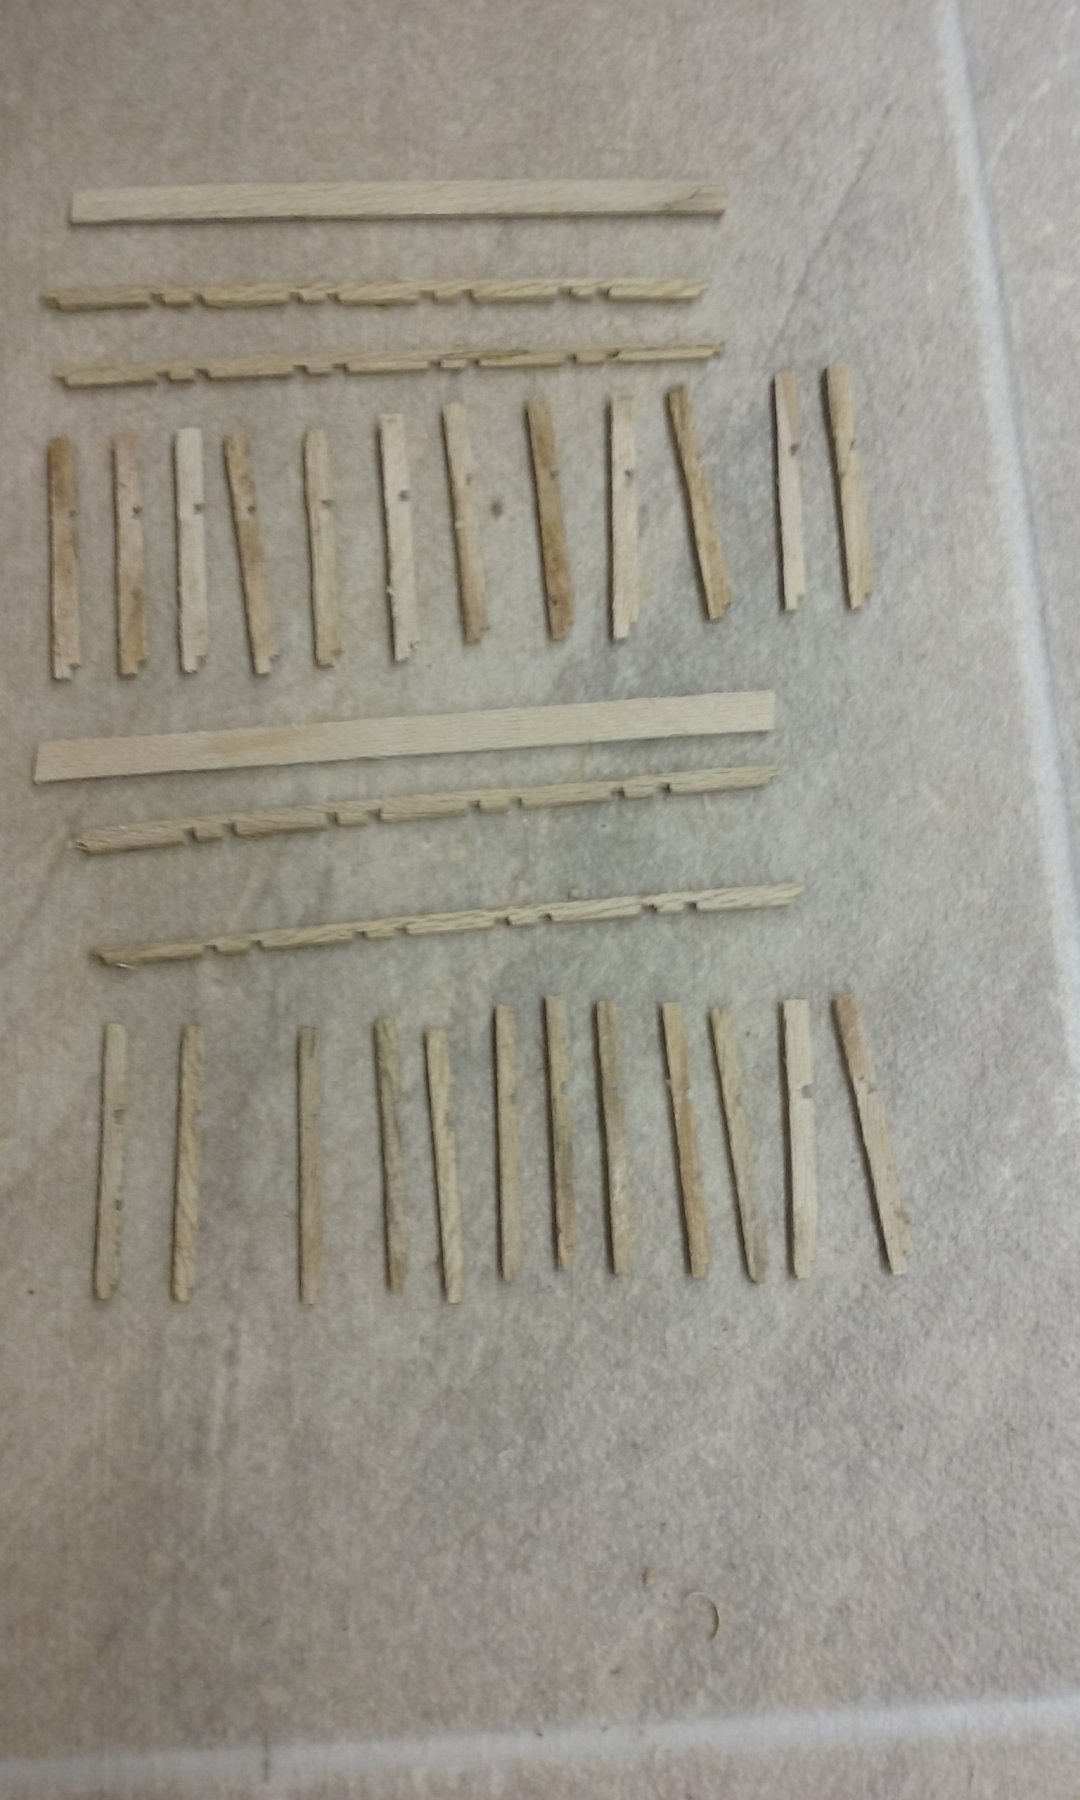
Here is the framing for the parapets/battlements to protect the marines in battle. First the framing members were cut to shape and all the identical ones glued together - the long ones are the horizontals, the short ones are the verticals. Then grooves cut into them where the mortises were to go for halving joints.

Using isopropyl alcohol the glue was dissolved and the members separated.
More framing members, including the ones for the sides and top of the parapets.
The frames assembled
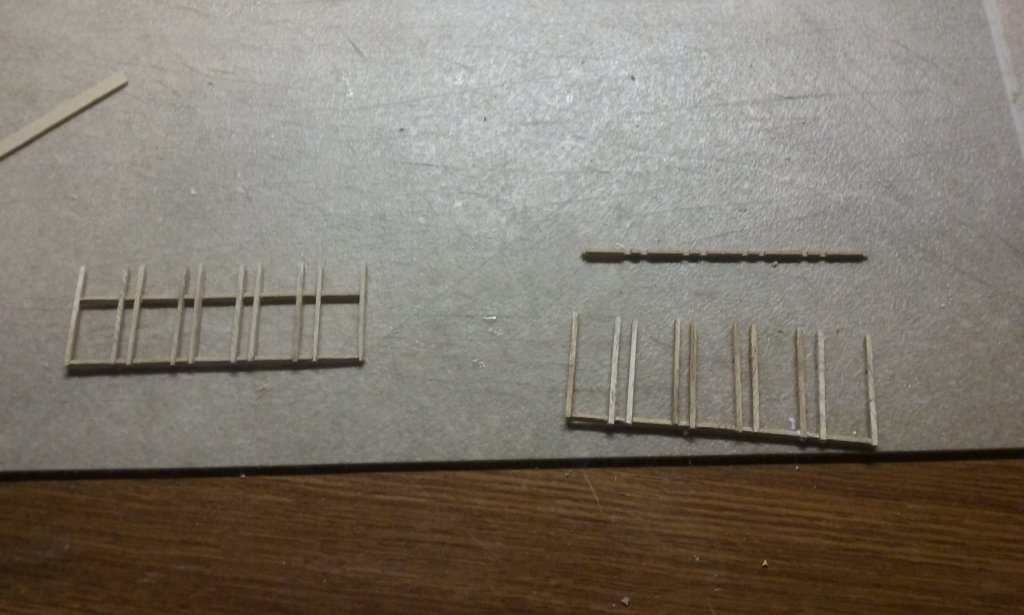
and ready to put in place.
Steven
-
-
Hard to be sure. I was only told about one wreck, and by someone not versed in things maritime, so I was only looking for one. But if I remember correctly, there was only one group of remains visible, so it's likely the Ferret remains were buried.
The wreck is on a narrow bit of beach at the bottom of this enormous cliff. There's a timber walkway/stairway down to the beach now, but it would have been murder getting up the cliff in the day. It's now all part of a National Park, very popular with fishermen, and you can stay (if you can afford it) in the renovated cottages used by the gypsum miners. Worth a visit, but pretty bloody stark and rugged. It's all limestone just under the sand and scrubland on top. I think I saw a tree there . . .😉
Steven
- Rik Thistle and mtaylor
-
2
-
-
Very true, Patrick. It's happened to me too.
Unfortunately I can't get plastic clothespegs this small, so I have to go with wooden ones.
Steven
- kees de mol, Baker, cog and 1 other
-
4
-
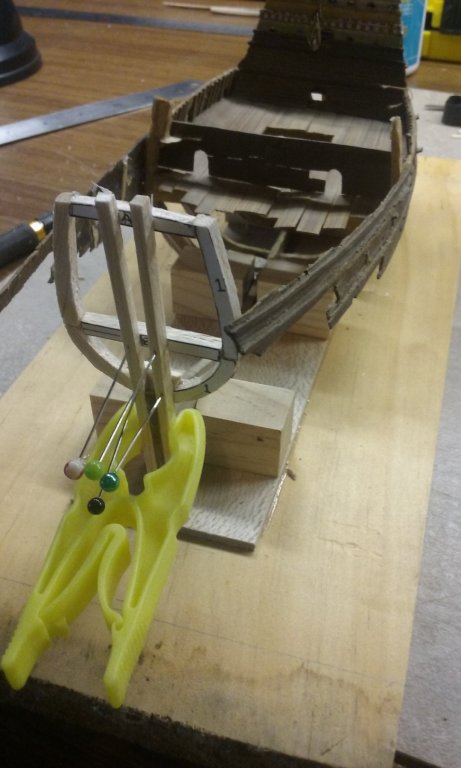
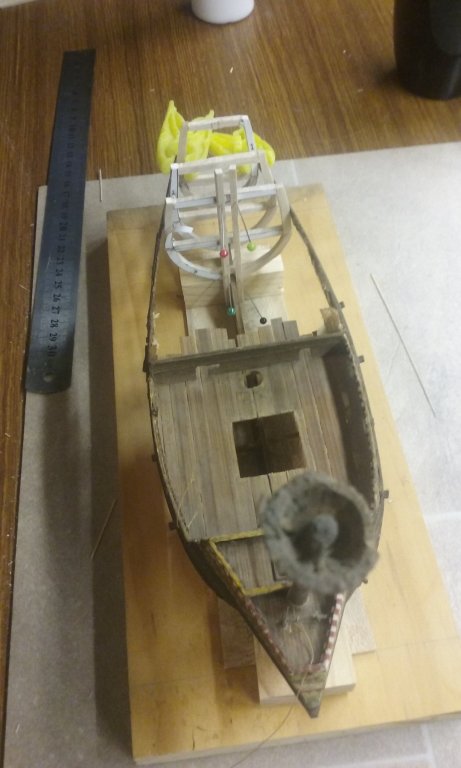
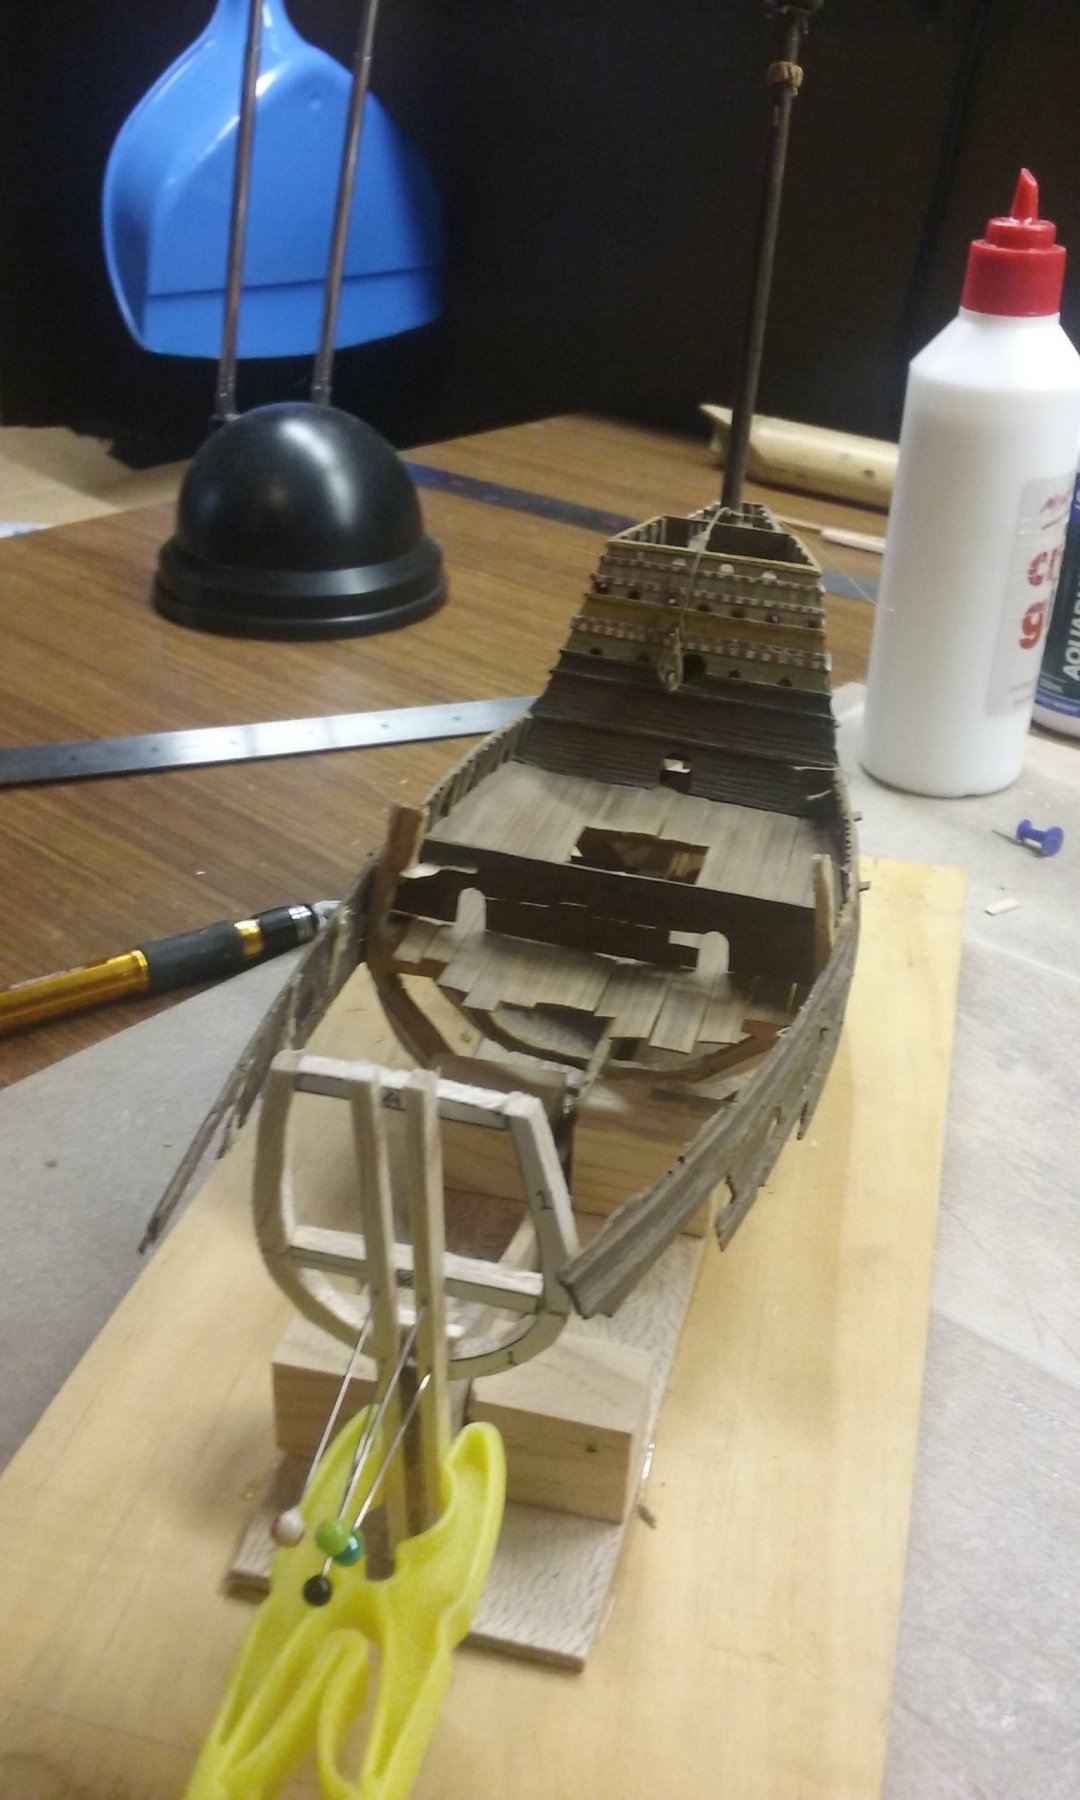
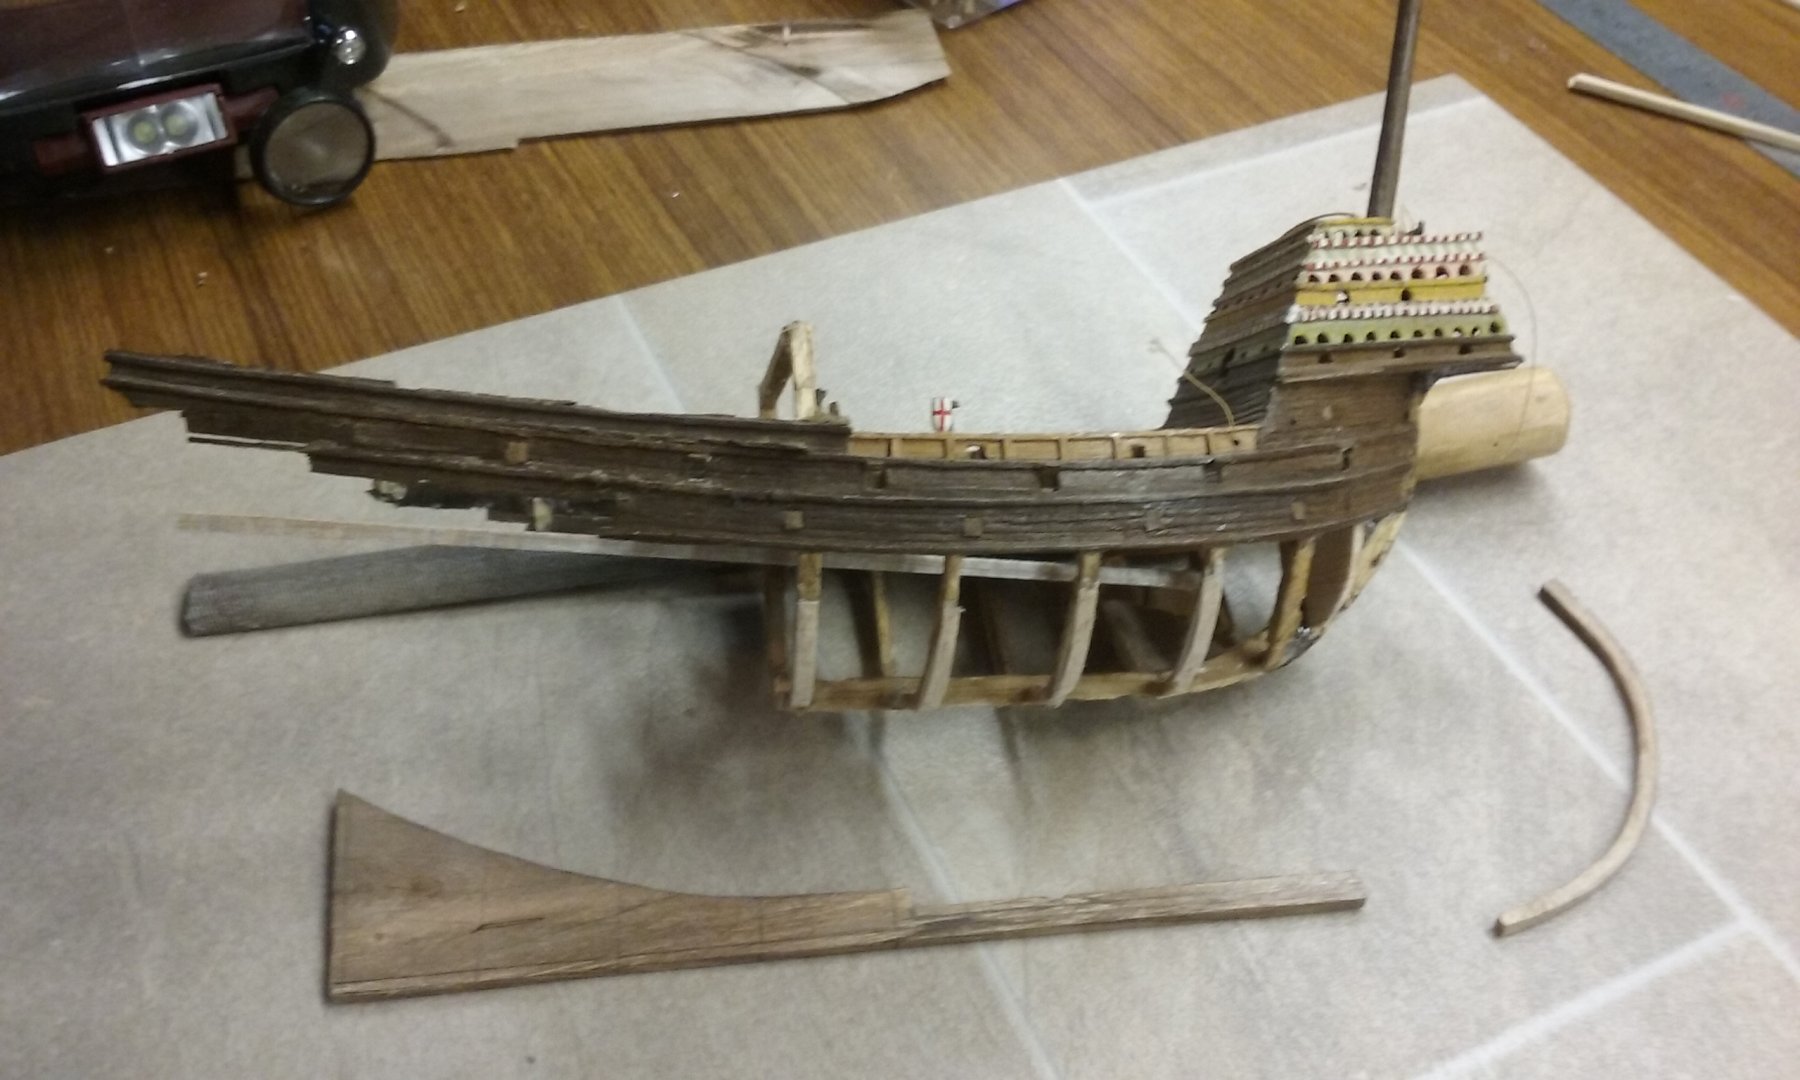
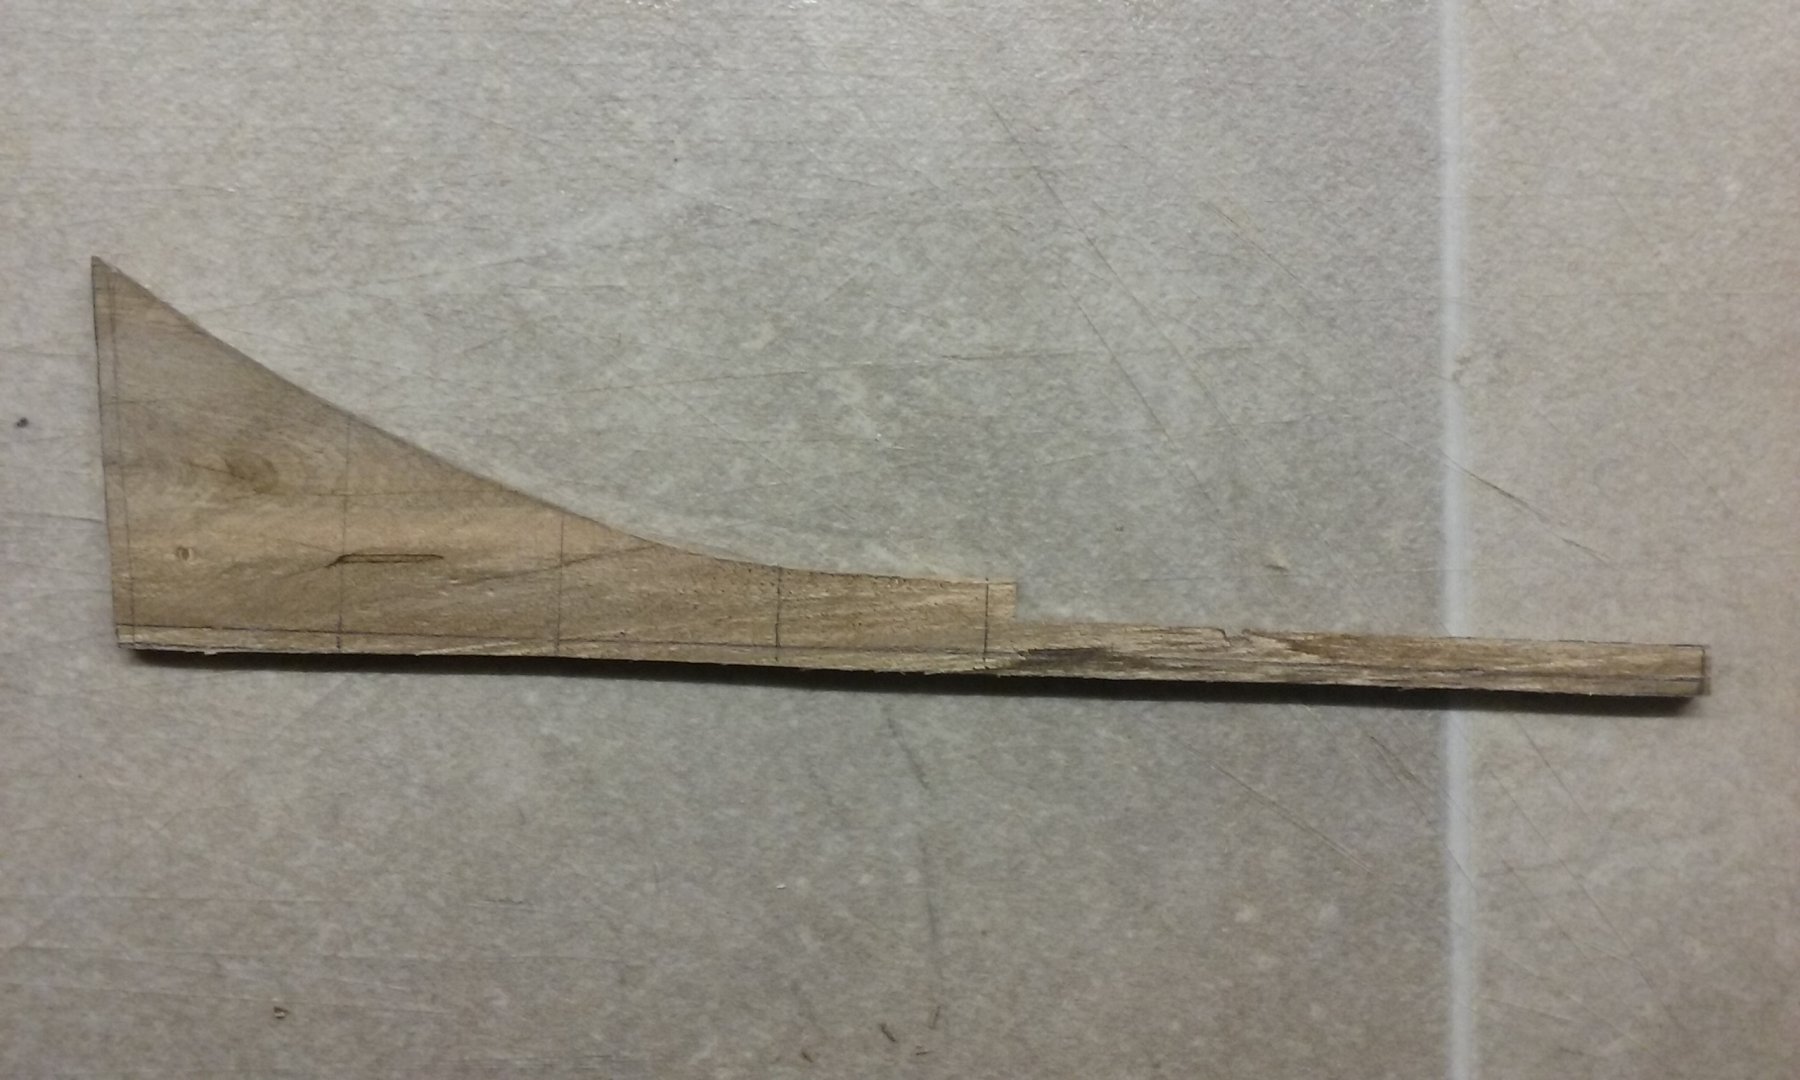
I've cut away the stern section of the balsa keel so I can replace it with the new walnut one, which you can see below the ship, along with the new stempost in walnut.

I'm leaving part of the balsa keel in place where there are already existing frames which aren't to change, and cut it back level with the bottoms of the existing frames so that only the new walnut keel will show.
I've shaved the old stempost down to allow a "slot" for the new exposed walnut one to fit into.
Here's the new stempost and keel dry fitted. The keel is still a bit too thick and needs to be thinned down before gluing can take place.

You might be able to see a small gap between the stempost and the forrard end of the keel. I've since fixed that using a bit of trimming and juggling back and forth.
And here is the new stempost from forrard (still dry fitted).
There was a lot of trial and error getting the new pieces to fit smoothly, but it all worked out in the end.
Steven
-
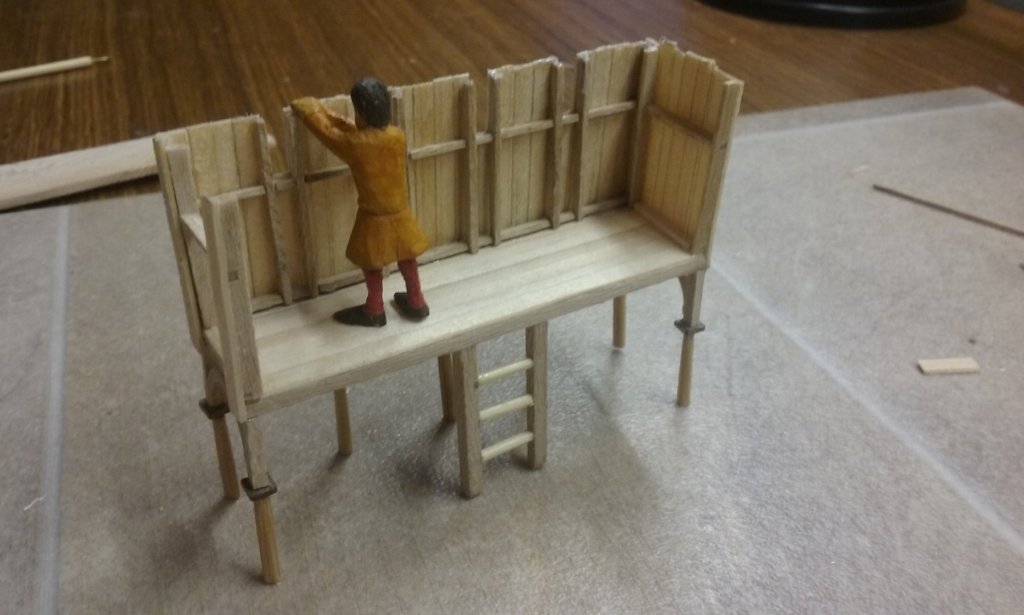
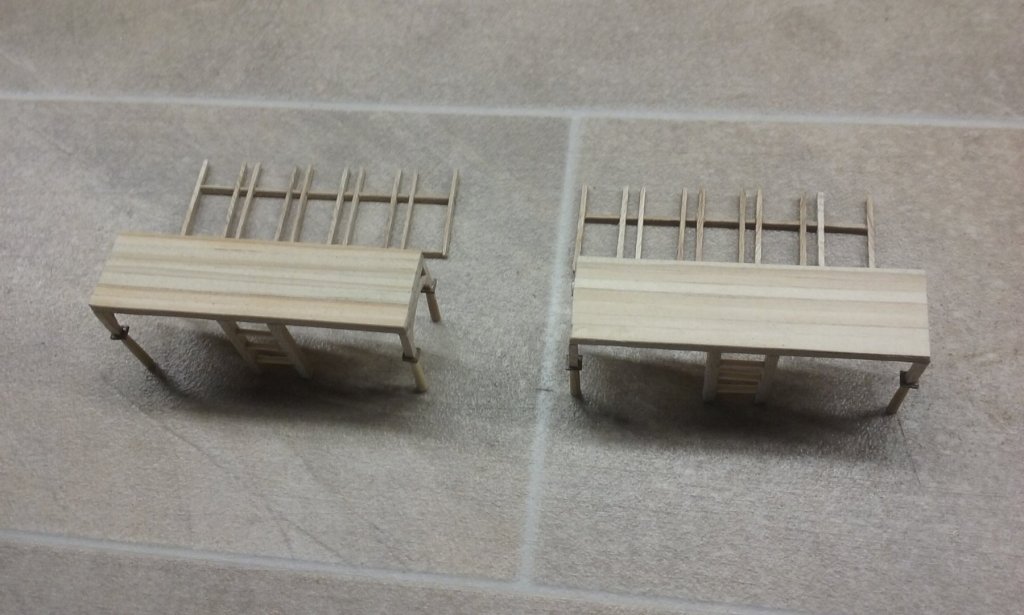
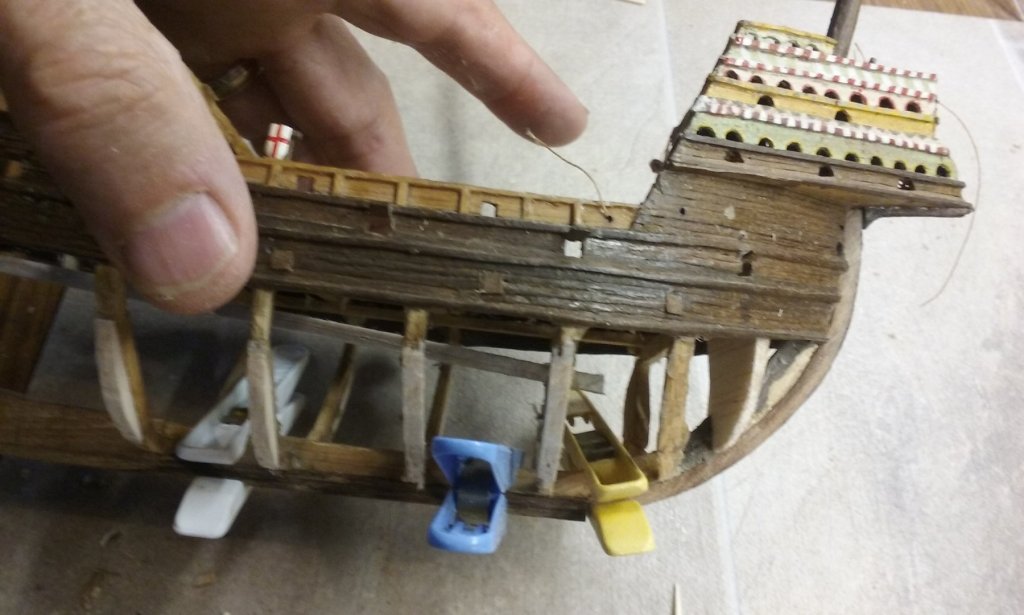
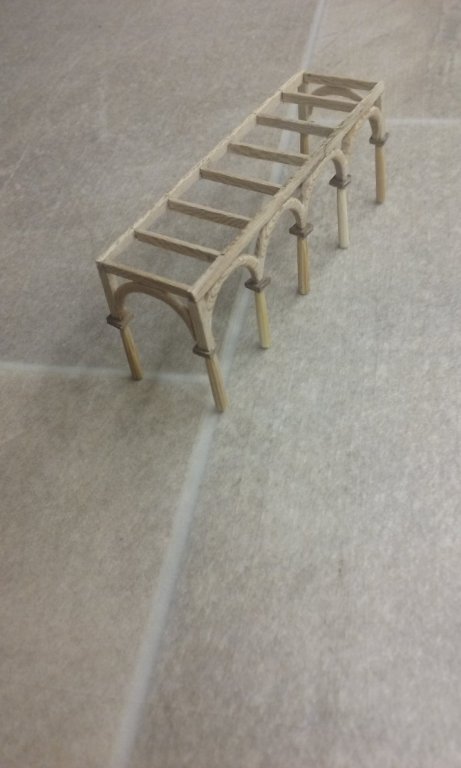
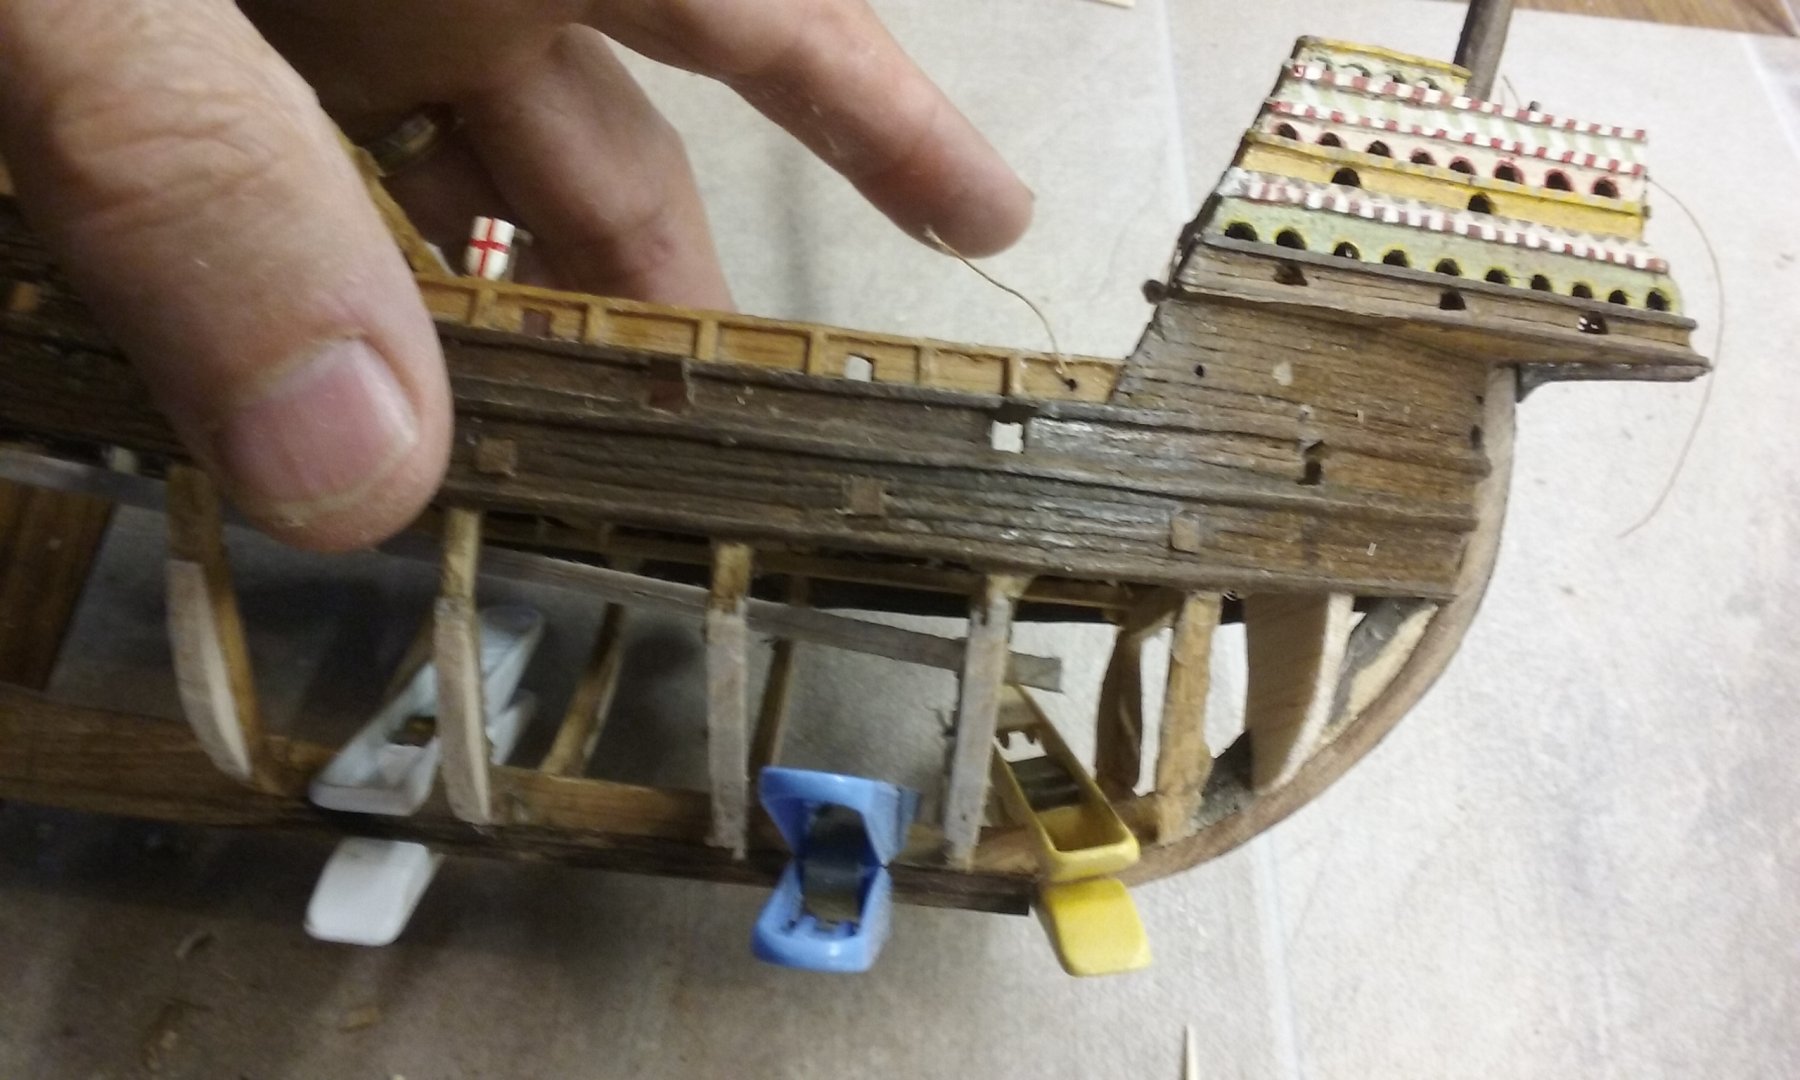
Adding decking and ladders to the xylokastra. The uprights of the ladders double as supports for the beam carrying the rear of the deck. (The rungs are made from toothpicks).
Steven
- Mark Pearse, druxey, cog and 6 others
-
9
-
-
And here is the next step in the making of the xylokastra.
Supporting columns for the arcades shaped from bamboo skewer, using an electric drill as a lathe

Capitals made for the columns

Capitals attached to the columns
and then attached to the arcade
Here's one of the xylokastra with all the columns in place. Butt joints throughout - mainly because I couldn't think of a sufficiently precise way of fixing everything at right angles and in the proper place.
I tried drilling short holes in the lower side of the capitals to act as mortices to take tenons at the tops of the columns,
but I just couldn't do it precisely enough, and had to throw them away and start again. However, the PVA glue of the butt joints is slightly flexible, so I can adjust the angles of the columns until everything is square.
And here are the two xylokastra with all columns in place.
Next is to make their "wooden walls" and add the raised decking for marines to stand on.
Steven
-
2 hours ago, BANYAN said:
Love the sign
")
Yes, my wife thought it was hilarious, too.
Steven
-
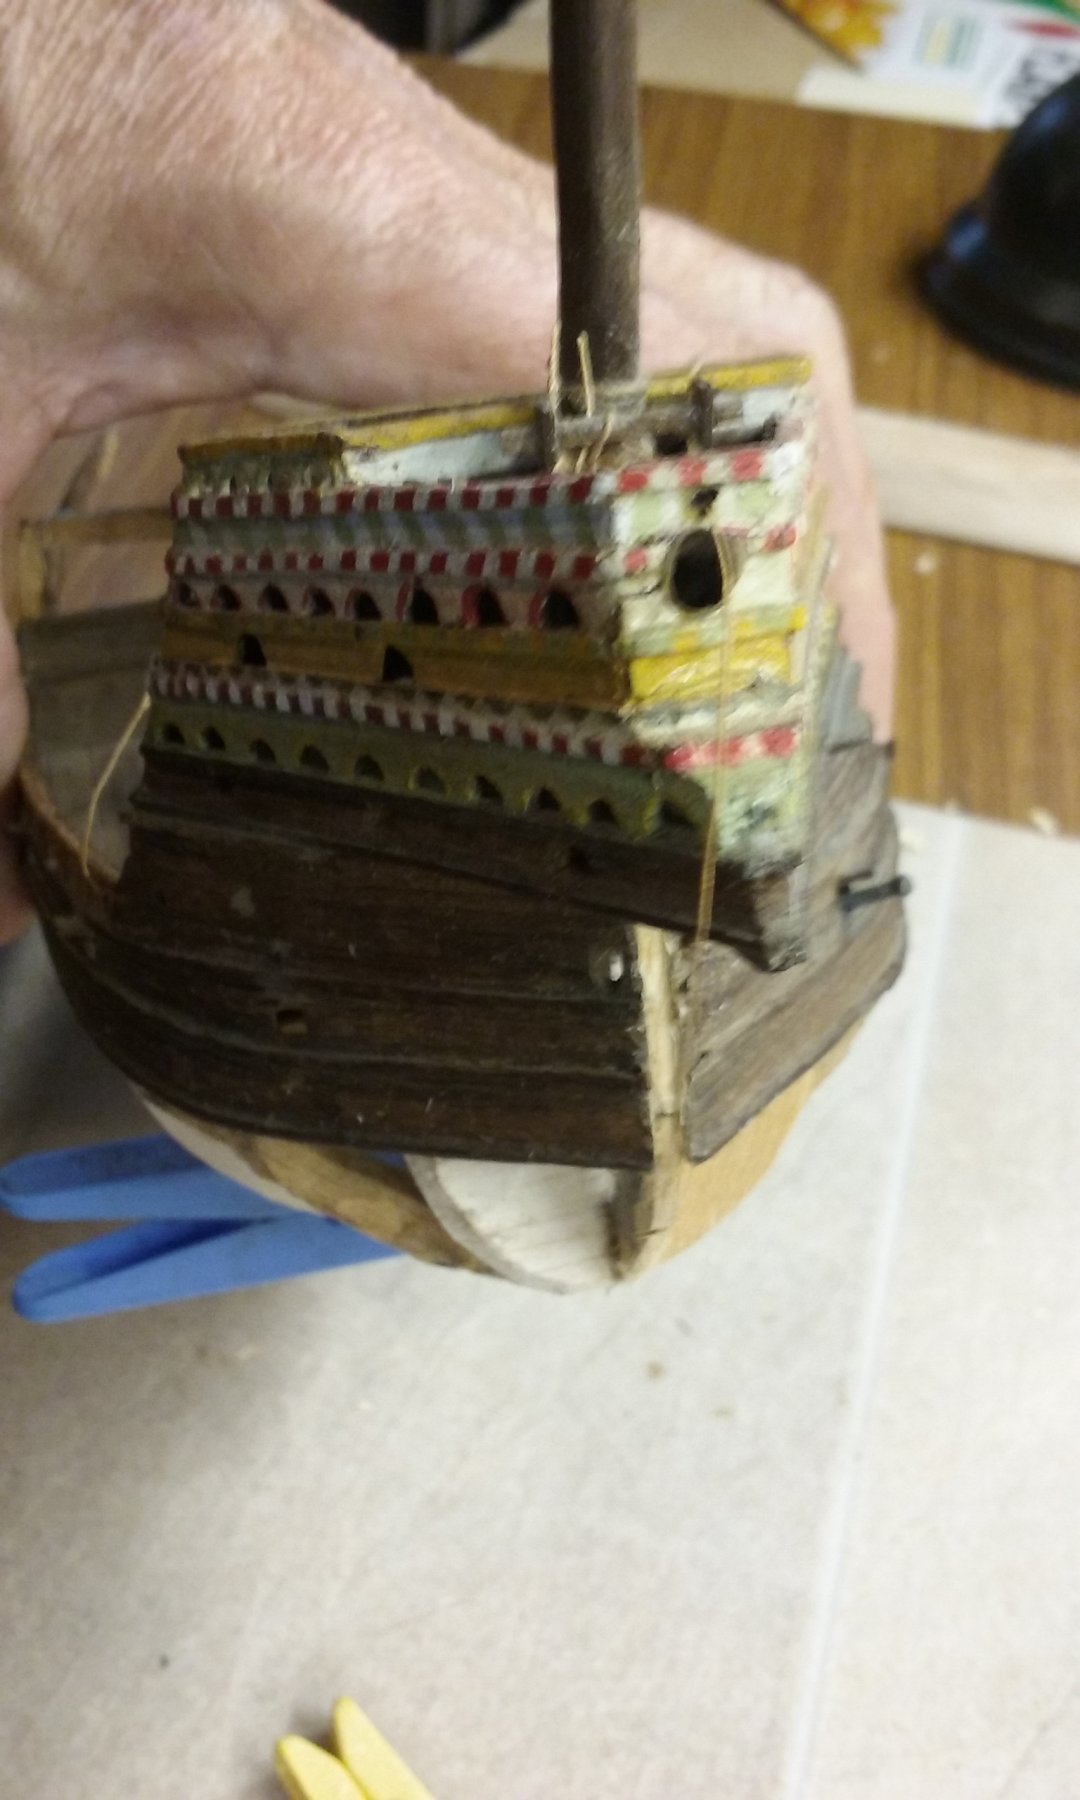
Sometimes when I'm working away at the dromon build, I look over at the Great Harry looking all forgotten and neglected and have a bout of conscience. So I've done a bit more in the last couple of days. I'd always intended to replace the balsa keel with something a bit more decent, so here are a few photos of what I've been doing.
The keel re-made in walnut (from the dead tree next door, kindly donated by the neighbour)

Despite the look of the photo, there isn't really a great gouge out of the keel. It's just a weird reflection from the timber. I made it out of a single piece of wood, as I'm trying to replicate my state of knowledge and skill when I originally built the model at the age of 17. I have introduced a few changes in the light of my current (hopefully more advanced) understanding, but not too many.
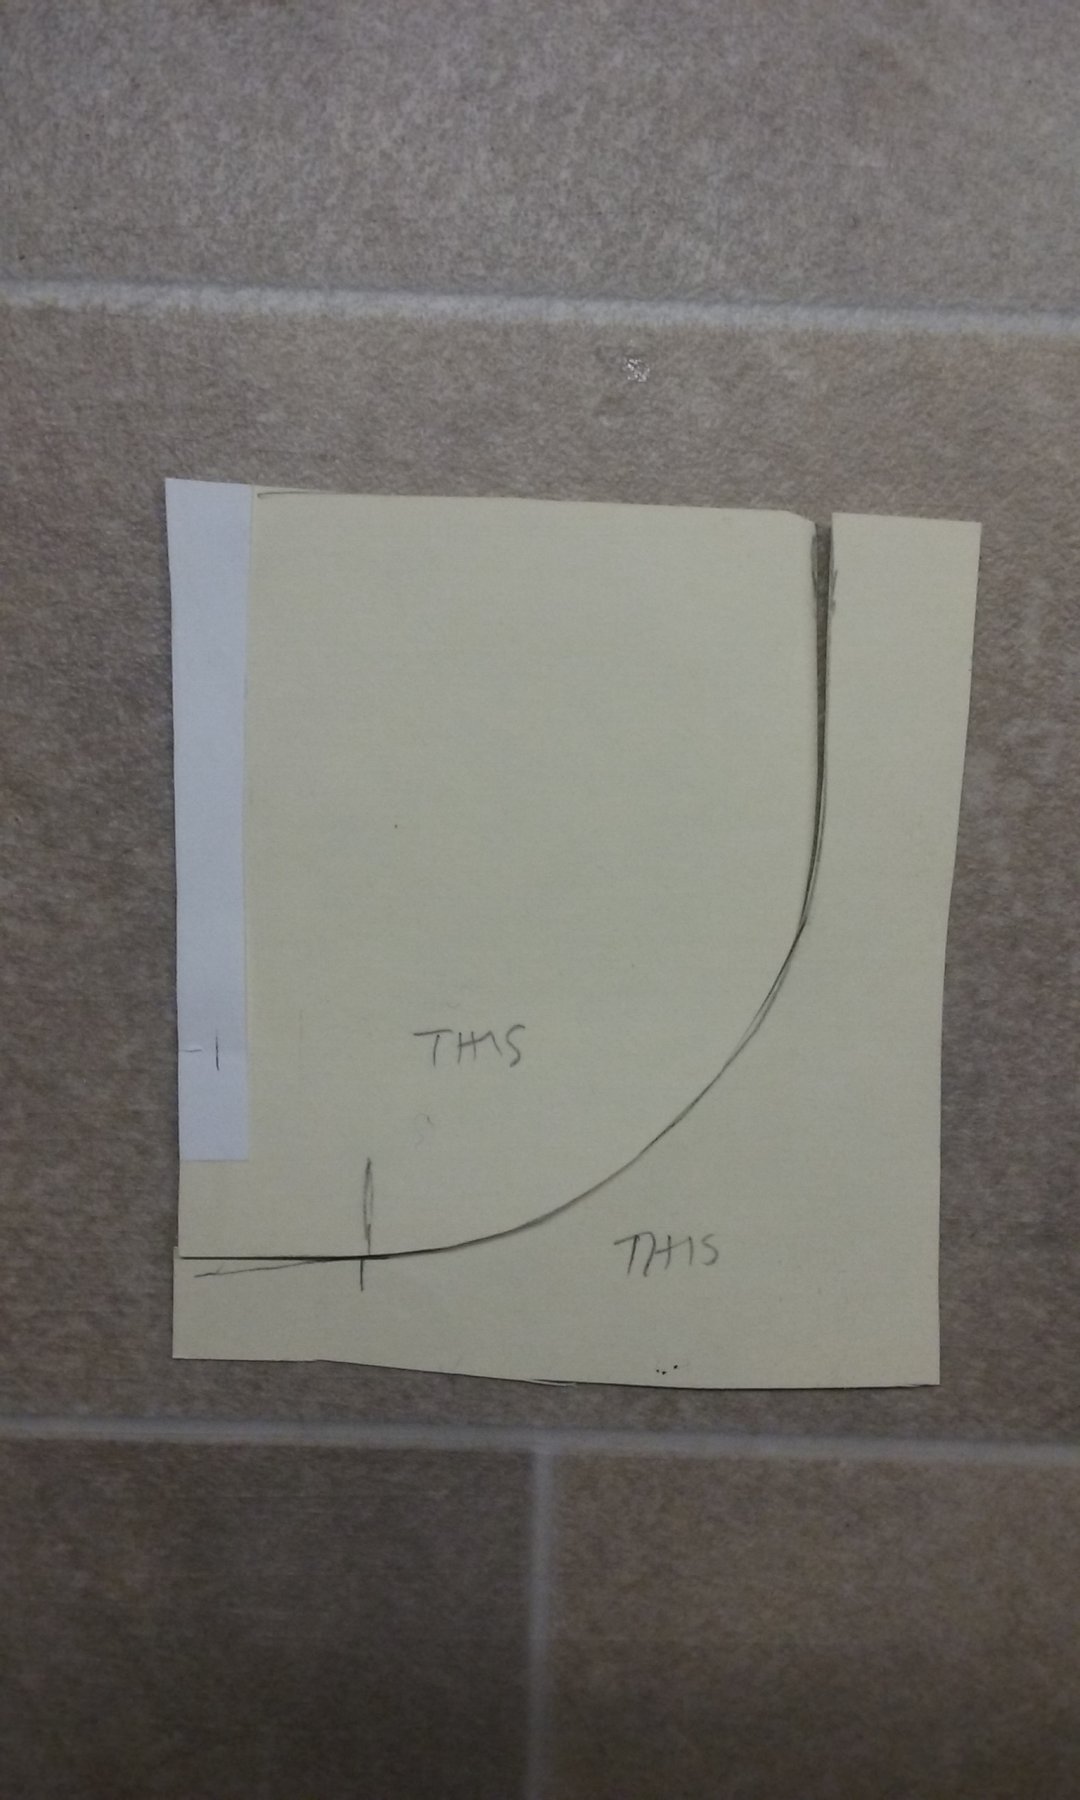
And making up a cardboard template for the stempost. Quite a lot of failed attempts but finally got the shape right.

PS: Druxey, in case you didn't see it in the dromon build, I've discovered isoproanol is MUCH better than metho for dissolving PVA. Ah well, another theory down the drain.
Steven
- druxey, BLACK VIKING, Baker and 3 others
-
6
-
-
-
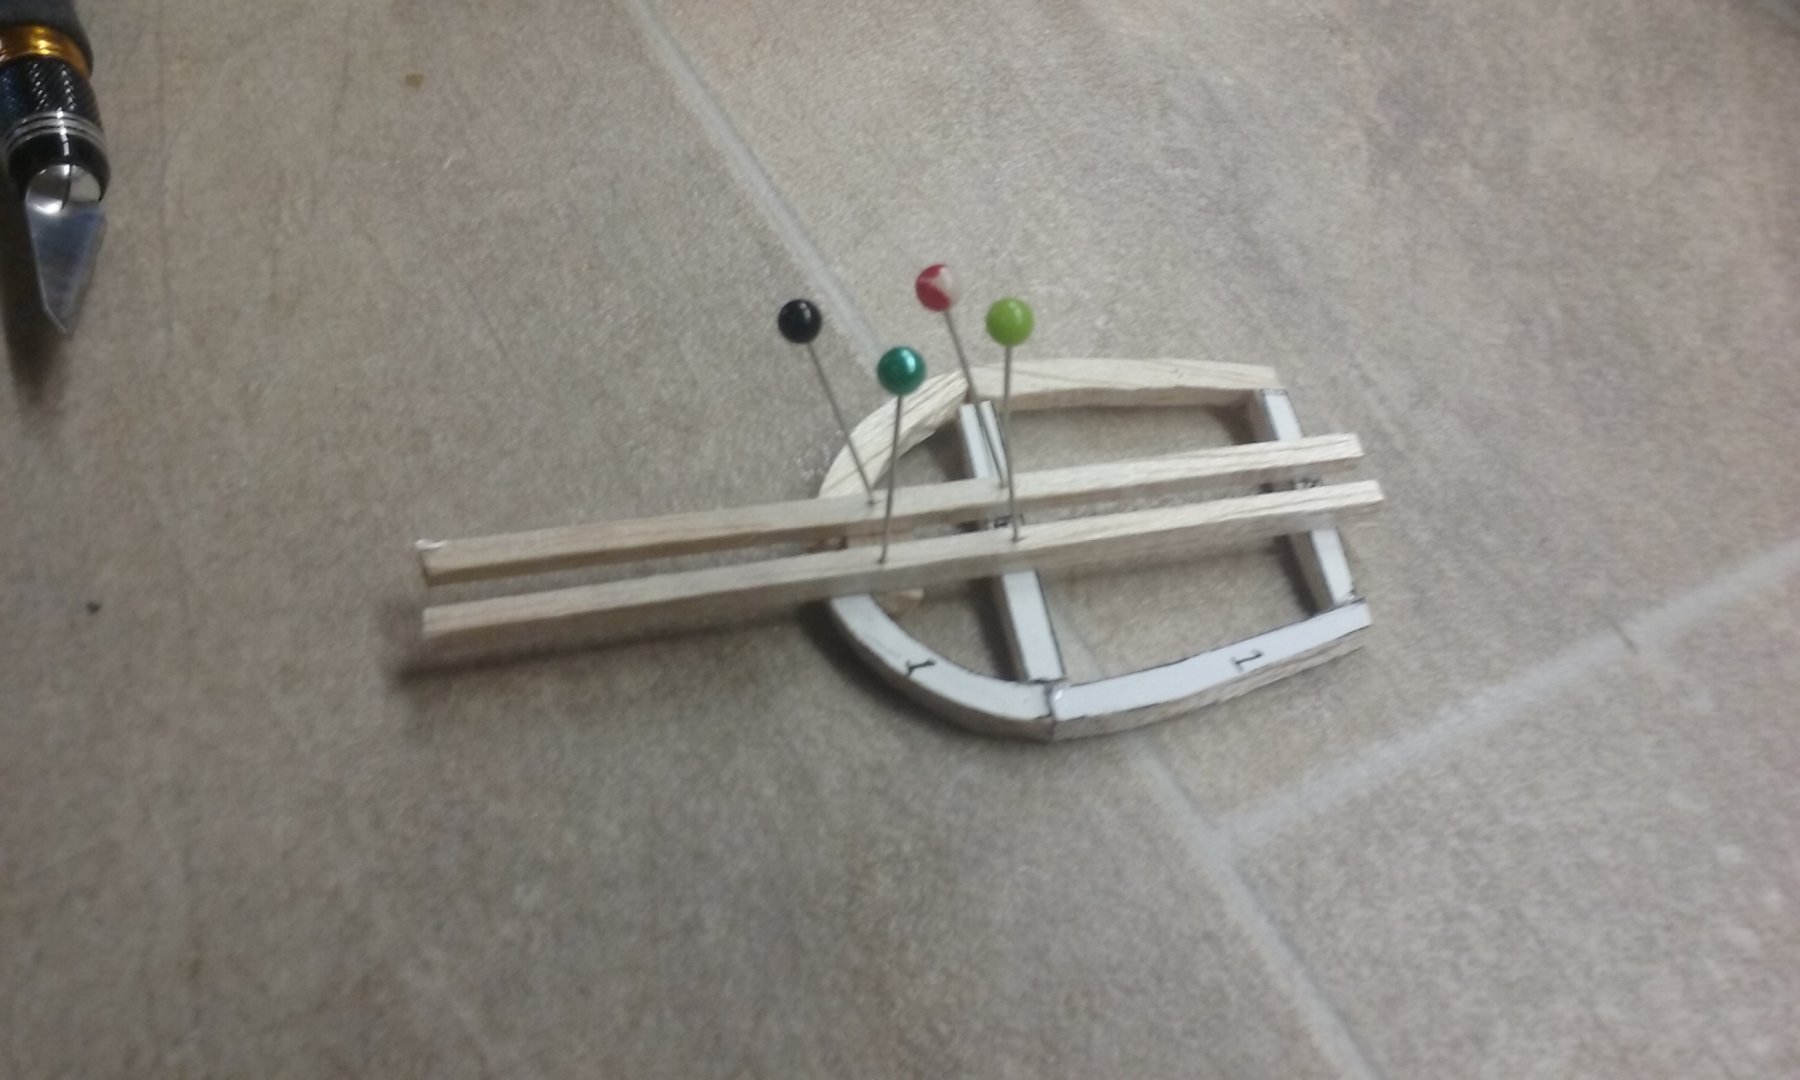
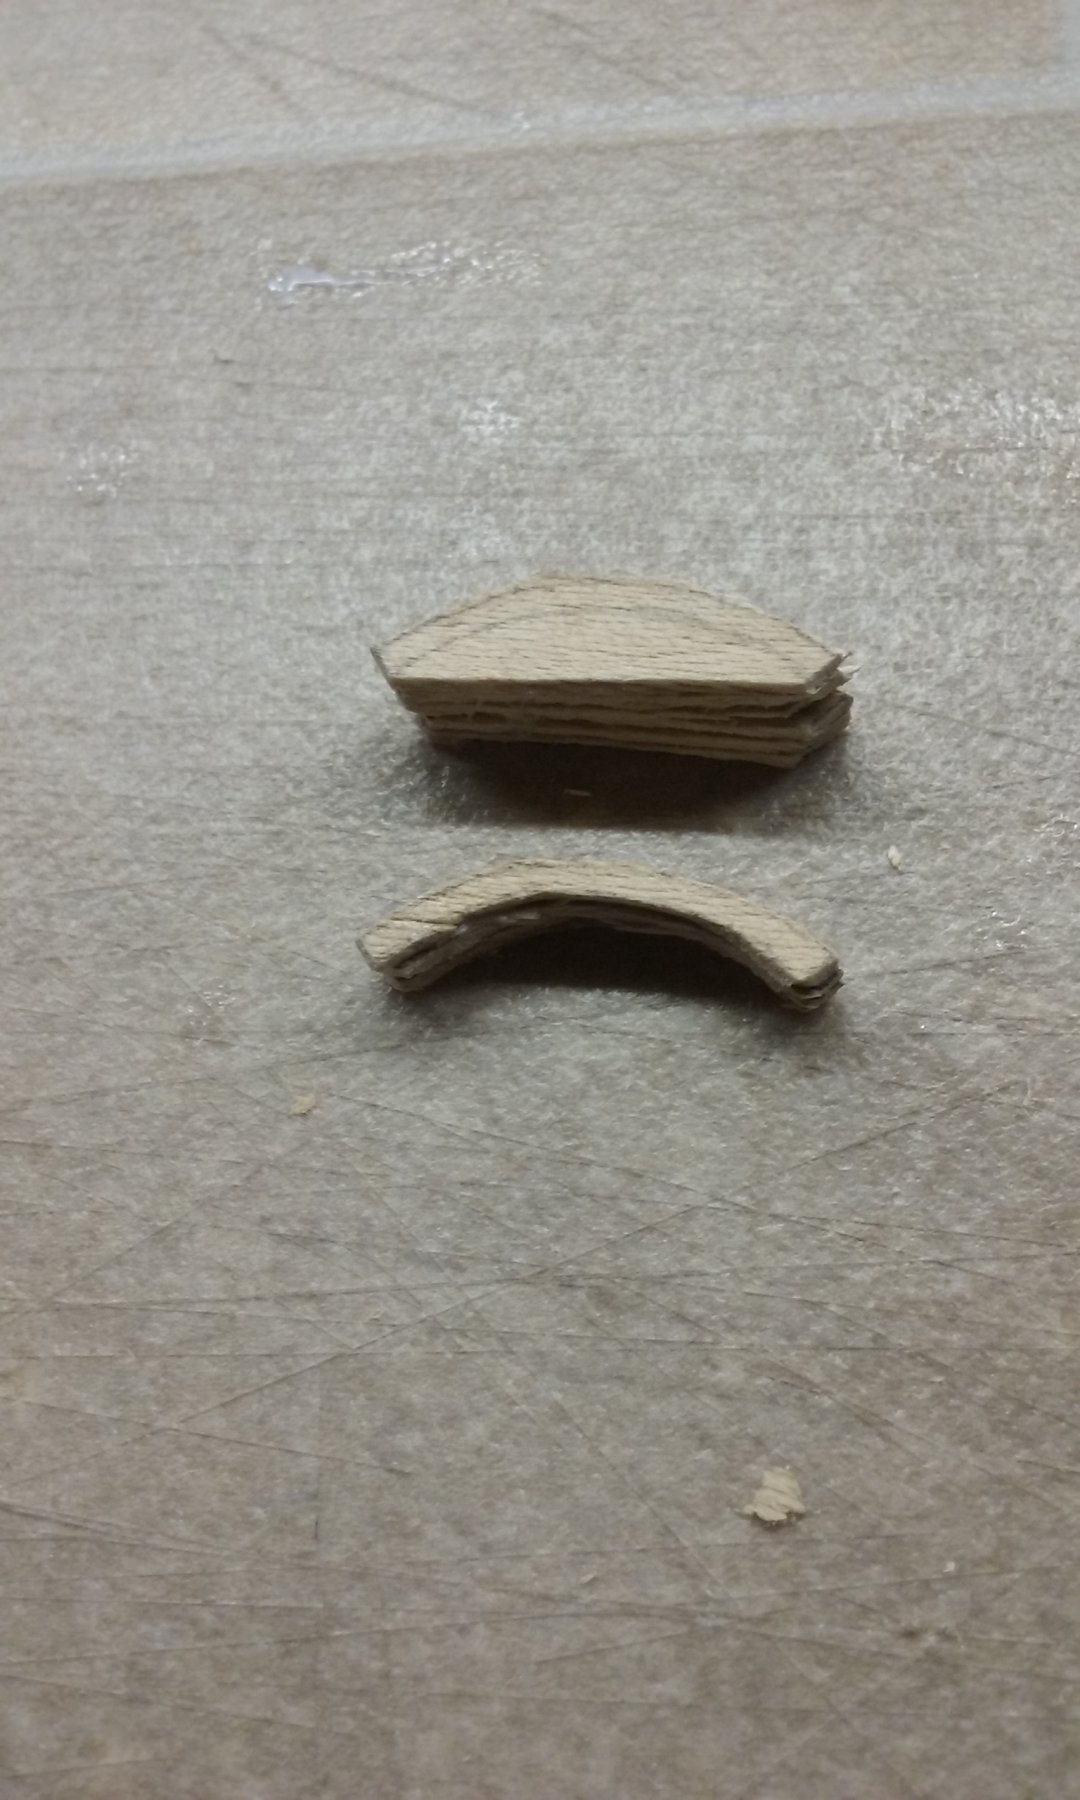
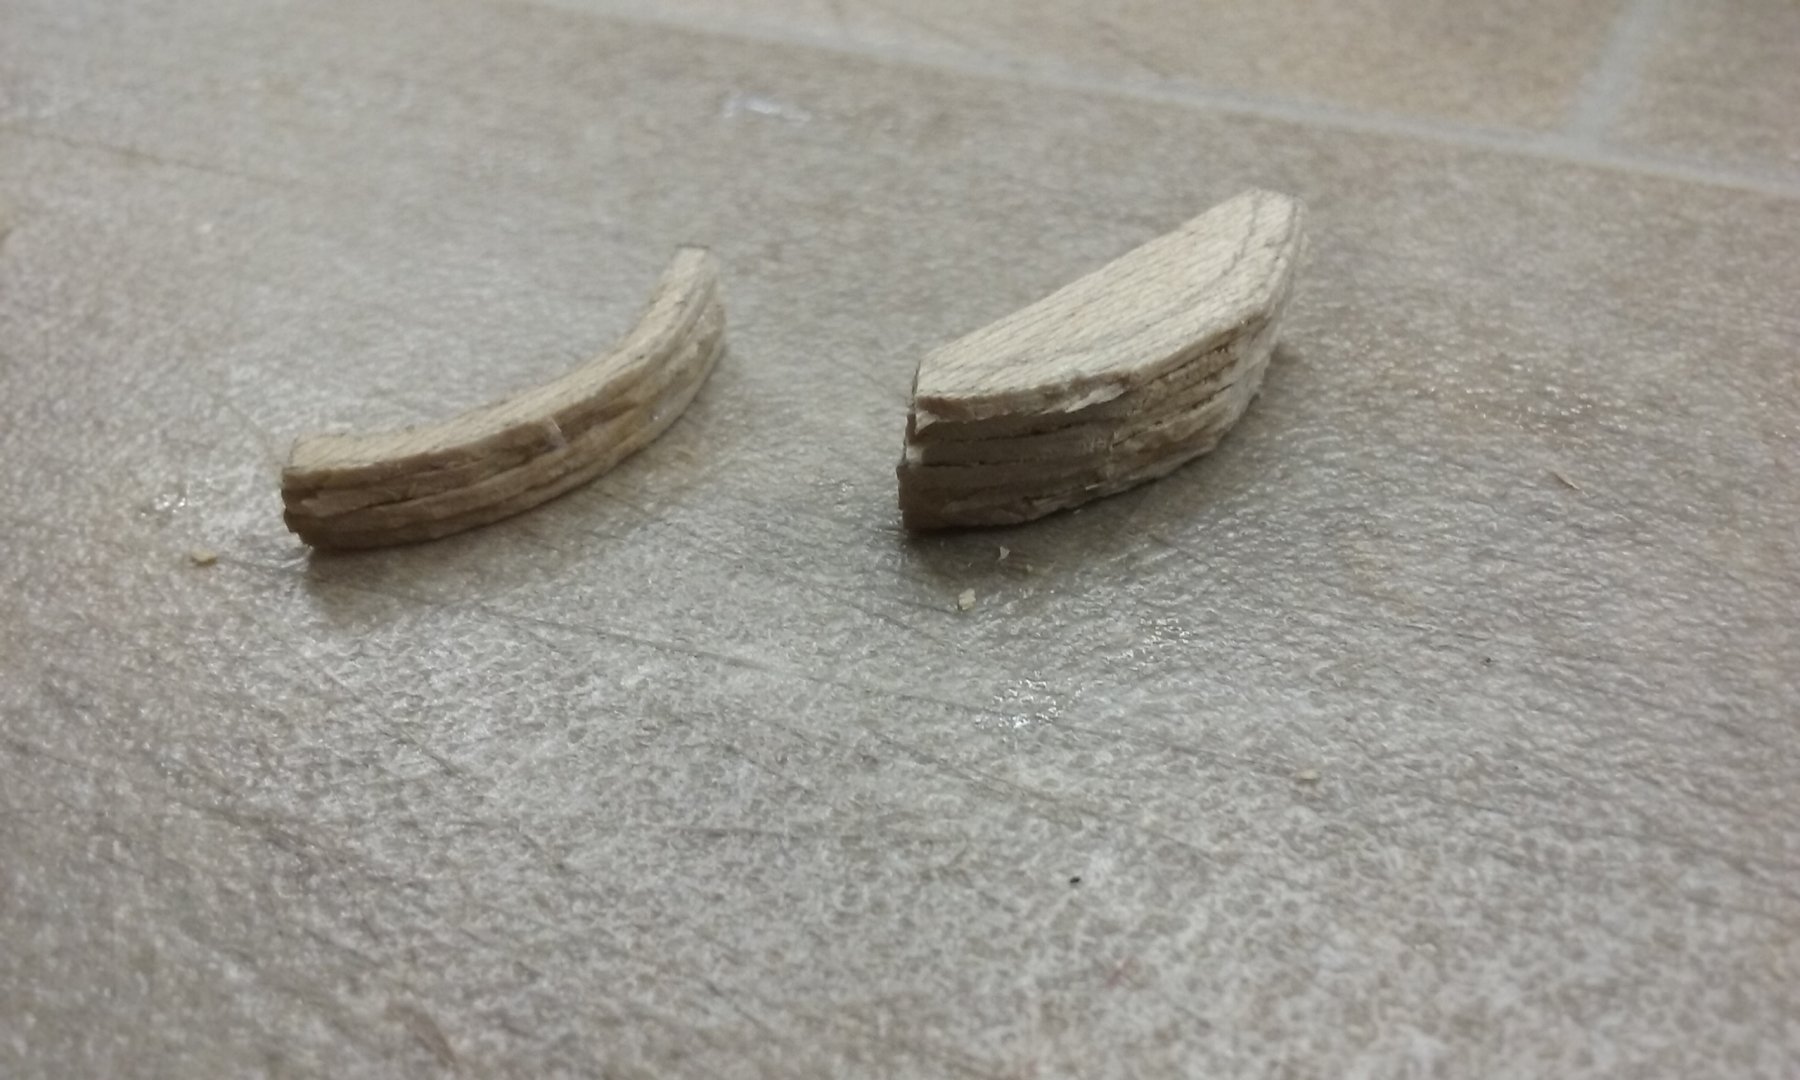
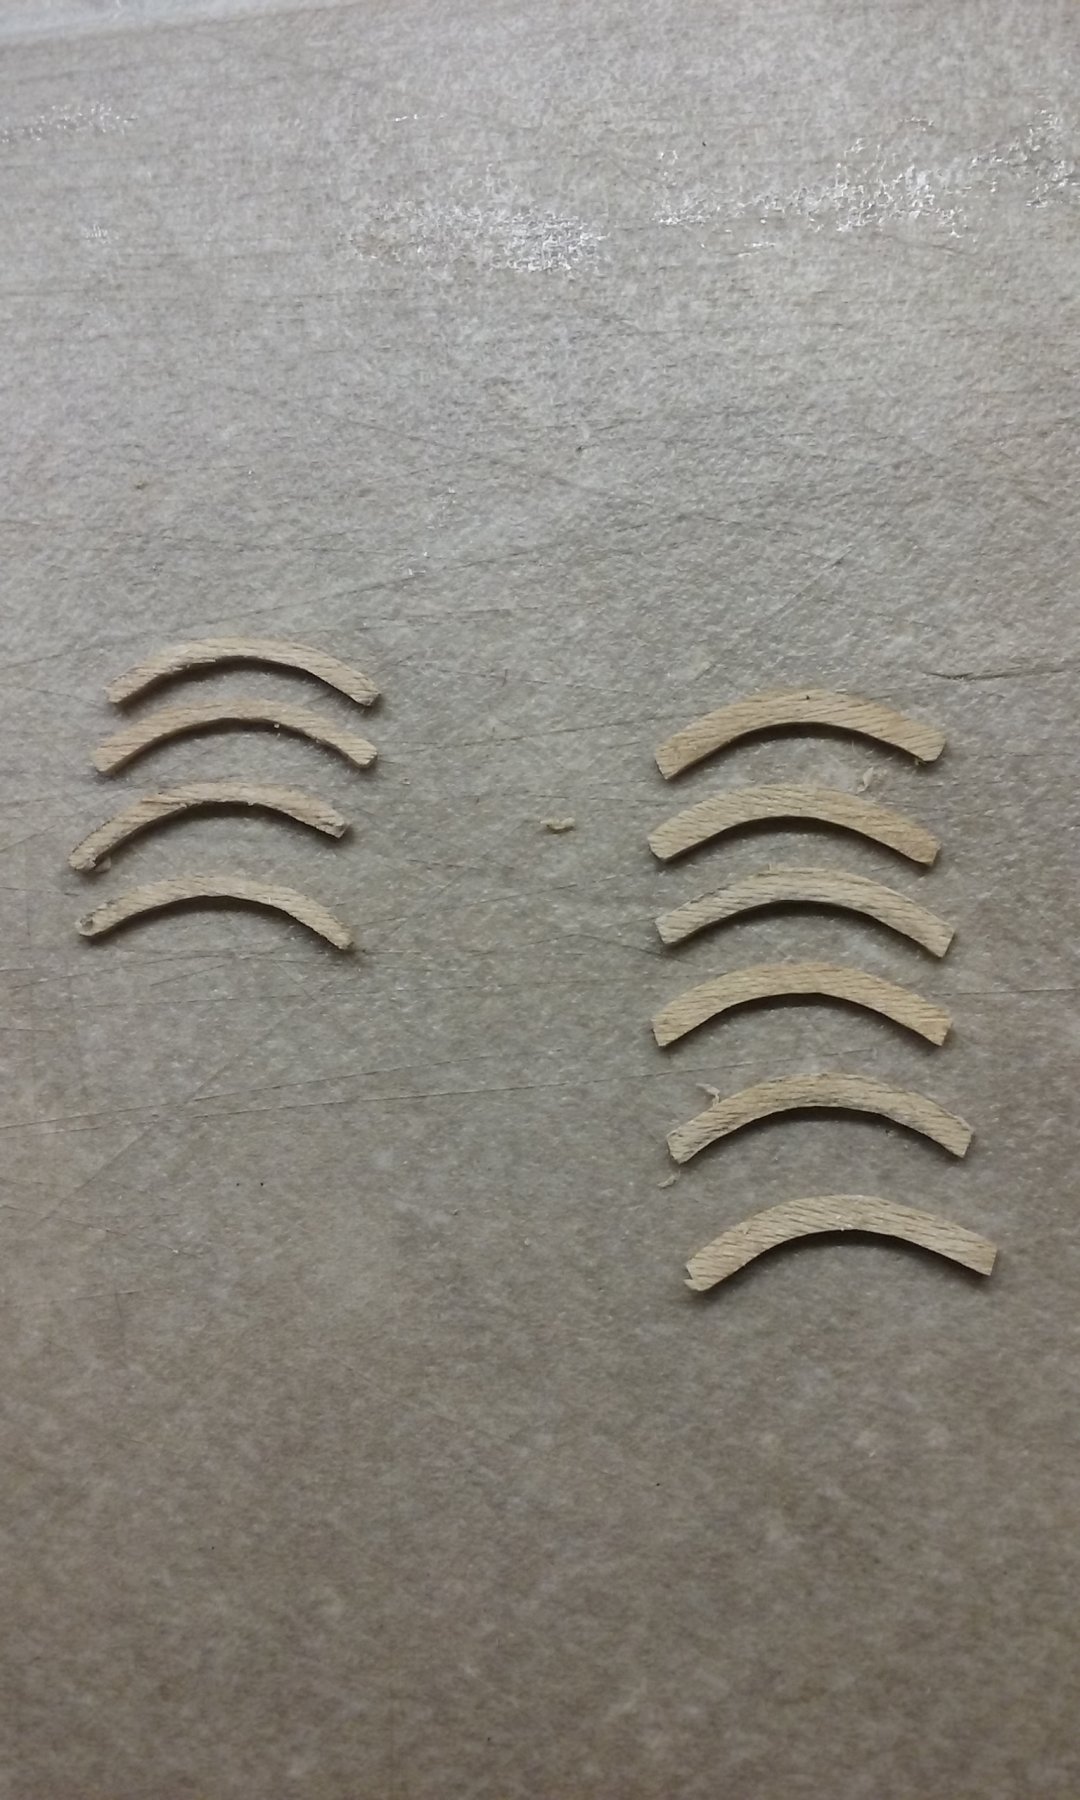
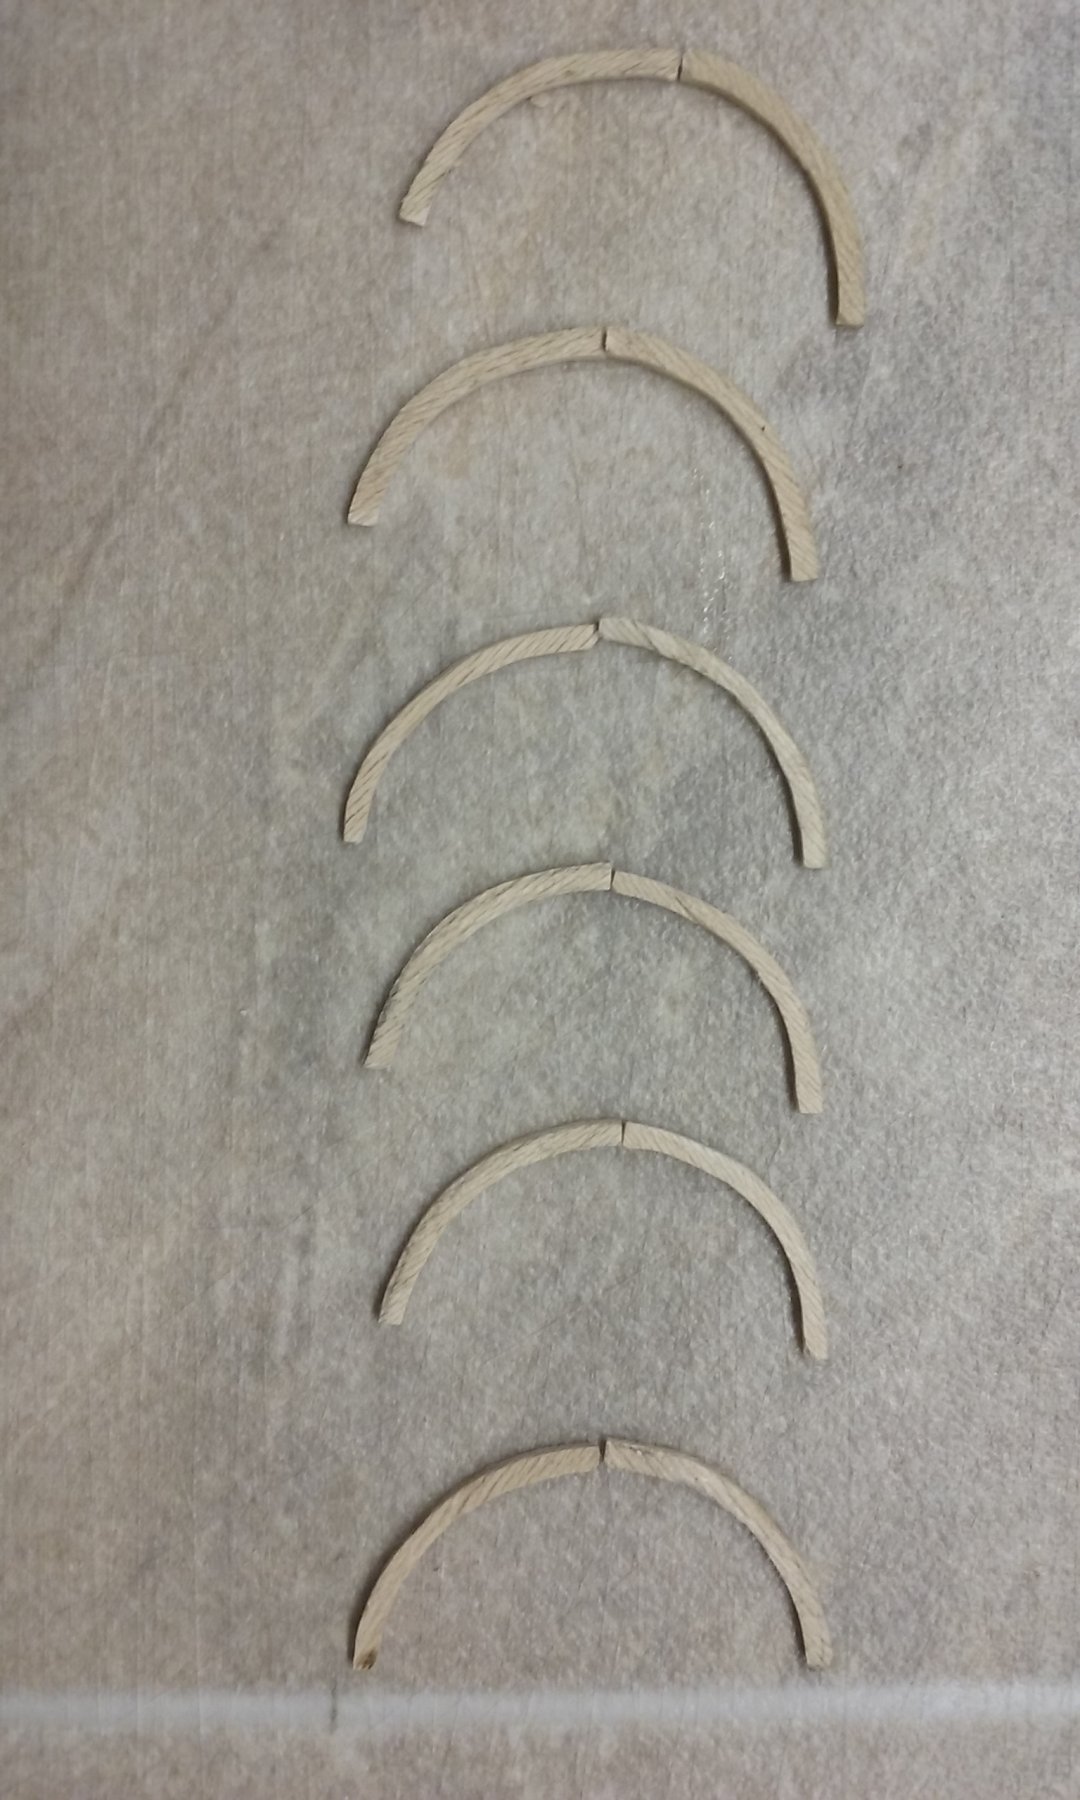
Some photos I omitted to include in the last post but one, showing the procedure used in making the arches for the awning over the poop.
The first photos show one set of blanks glued together and cut roughly to shape, plus a set formed into half-arches

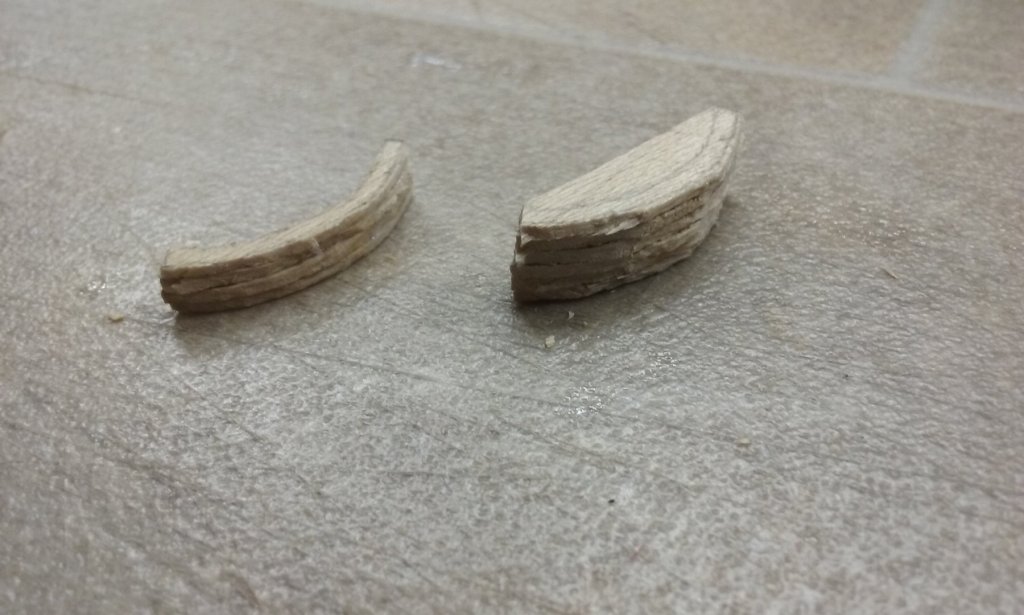
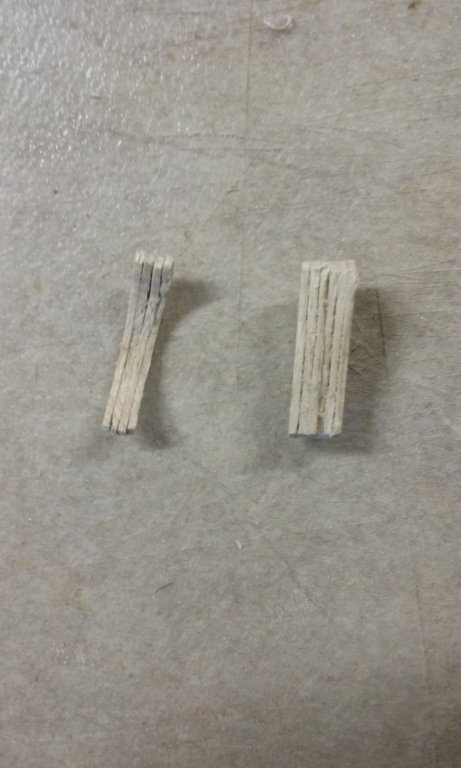
And the half-arches separated ready for fine shaping.
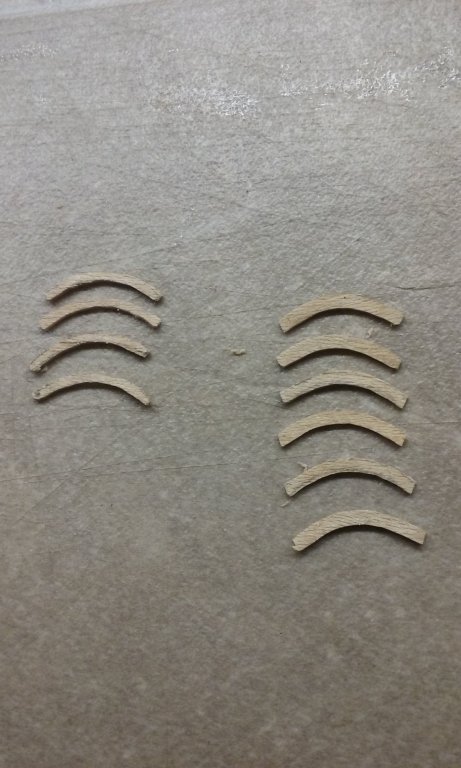
The last photo (same as in post #561 above) shows the half-arches dry fitted to make full arches.

Steven
- Baker, mtaylor, GrandpaPhil and 6 others
-
9
-
Yeah, I got mine from Woolies. On the other hand, I've found I can re-use it time and again, so by the time it's all used up it should have justified the 5 bucks outlay.
Pat, there's a sign up in the local Men's shed - "My only fear is that when I die, my wife will sell all my tools for what I told her I paid for them . . ."
Steven
- usedtosail, cog, Baker and 3 others
-
6


SMS Seydlitz by Canute, Cog, Stein Gildberg & RGL - FINISHED - Hobbyboss - 1/350 - PLASTIC
in - Kit build logs for subjects built from 1901 - Present Day
Posted
Beautiful weathering work, Greg. She really looks like she's been at sea for a good while.
Looking at your post #173 I couldn't figure out why a WWI battleship would have a WWII funnel. Then looking further on I realised it was the funnel of the model behind her . . . Yamato?
Steven