HOLIDAY DONATION DRIVE - SUPPORT MSW - DO YOUR PART TO KEEP THIS GREAT FORUM GOING! (Only 13 donations so far - C'mon guys!)
×


GuntherMT
-
Posts
2,213 -
Joined
-
Last visited
Content Type
Profiles
Forums
Gallery
Events
Everything posted by GuntherMT
-
2015 NRG Conference Update - MYSTIC
GuntherMT replied to Chuck's topic in NAUTICAL RESEARCH GUILD - News & Information
Too bad it couldn't be at the Wyndham Bayside, quite literally across the street from the museum! -
Looking good Charlie. I actually think that the solid hull looks more difficult to me than a plank on bulkhead build.
-
Great job Bob, she's definitely something you can be proud of, and display for everyone to see.
- 47 replies
-
- 1
-

-
- carmen
- constructo
- (and 2 more)
-
Great to see you are back and had a great trip Frank. Your rigging looks great, it's amazing how different your rigging is than mine because of the different sail plans and of course the time span between them.
-
Try clicking on "More Reply Options" at the bottom of the text area, this brings up the full text editor. If that doesn't work, copy/paste into Notepad, and try pasting from there to see if it's a copy/paste issue, or something else. If you are using IE10, it has issues and sometimes doesn't work with this forum, try using Chrome as your browser and see if that fixes it.
- 843 replies
-
- 4
-
-
- niagara
- model shipways
- (and 2 more)
-
Thanks again, everyone. Patrick, since almost nothing above the false deck (except the bulkheads) is out of the box, I don't think it would be very honest of MS to use my build photos in their marketing.
- 831 replies
-
- 11
-
-
- Armed Virginia Sloop
- Model Shipways
- (and 1 more)
-
Thanks everyone. I'm pretty happy with how she turned out. I'm always my own worst critic so I of course see all the faults, but yea, I'm pretty proud of this ship. Frank, feel free to bring whatever you like! You'll of course see her on Saturday as well, will be interesting to see how the plastic folks feel about it.
- 831 replies
-
- 7
-
-
- Armed Virginia Sloop
- Model Shipways
- (and 1 more)
-
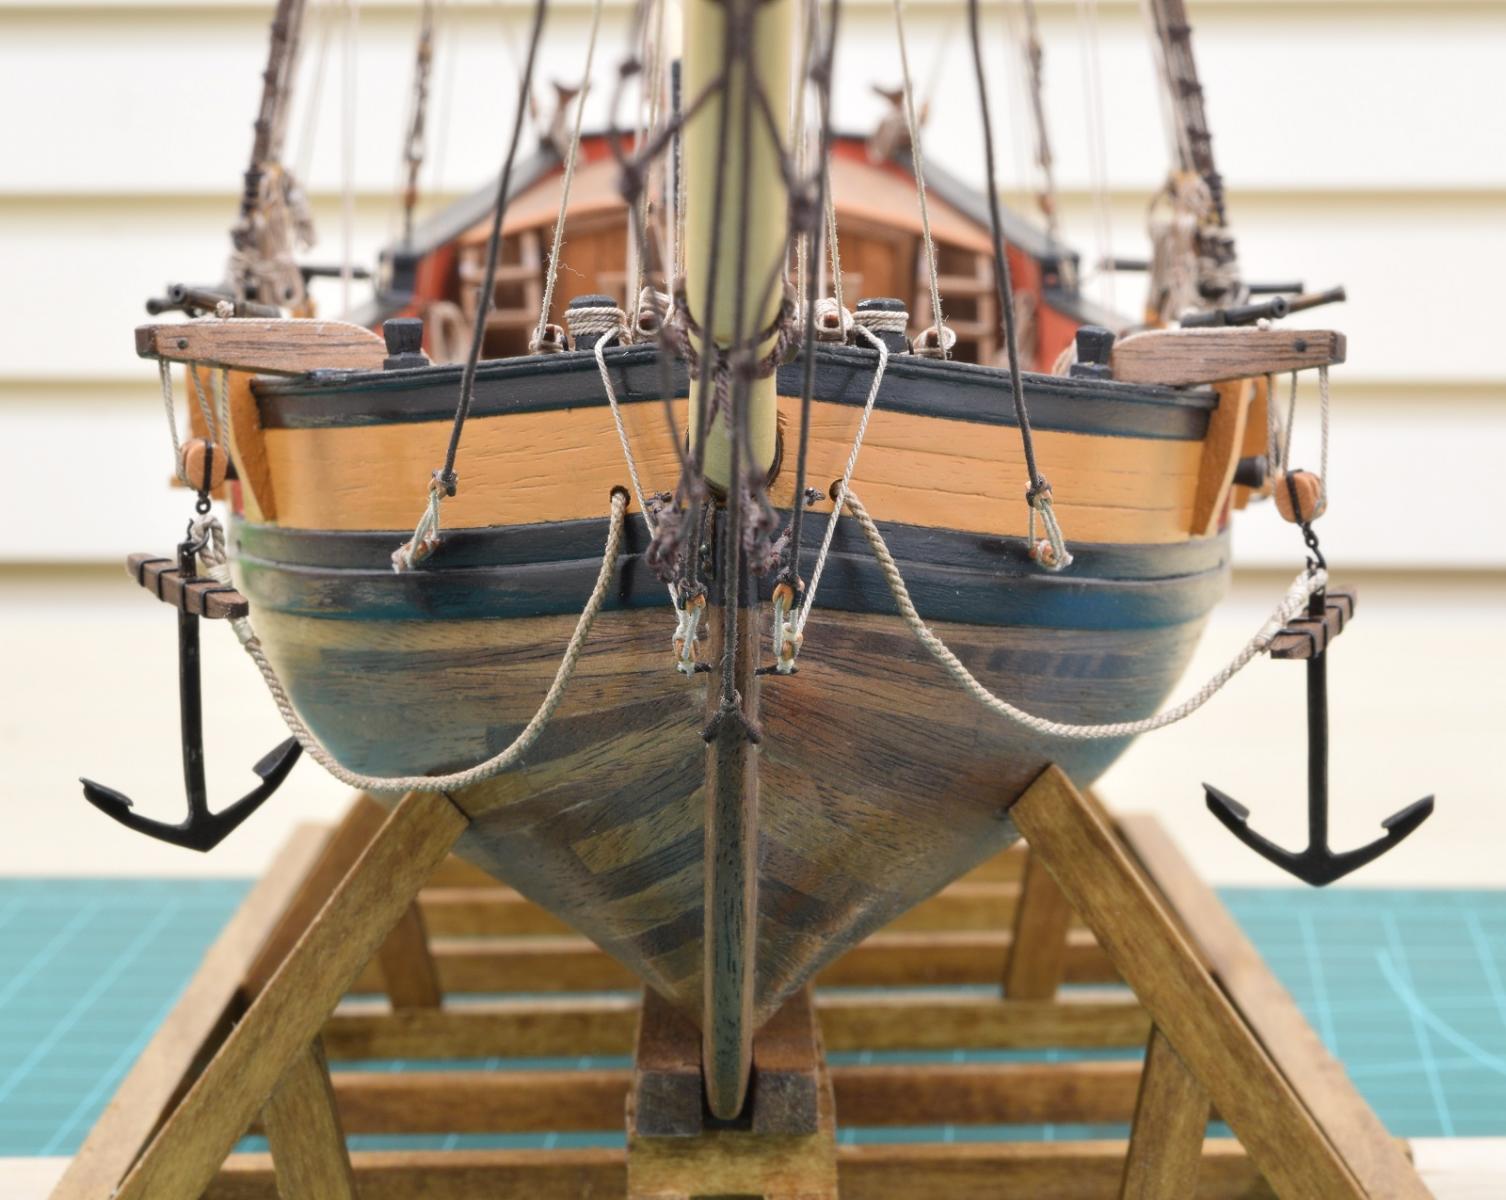
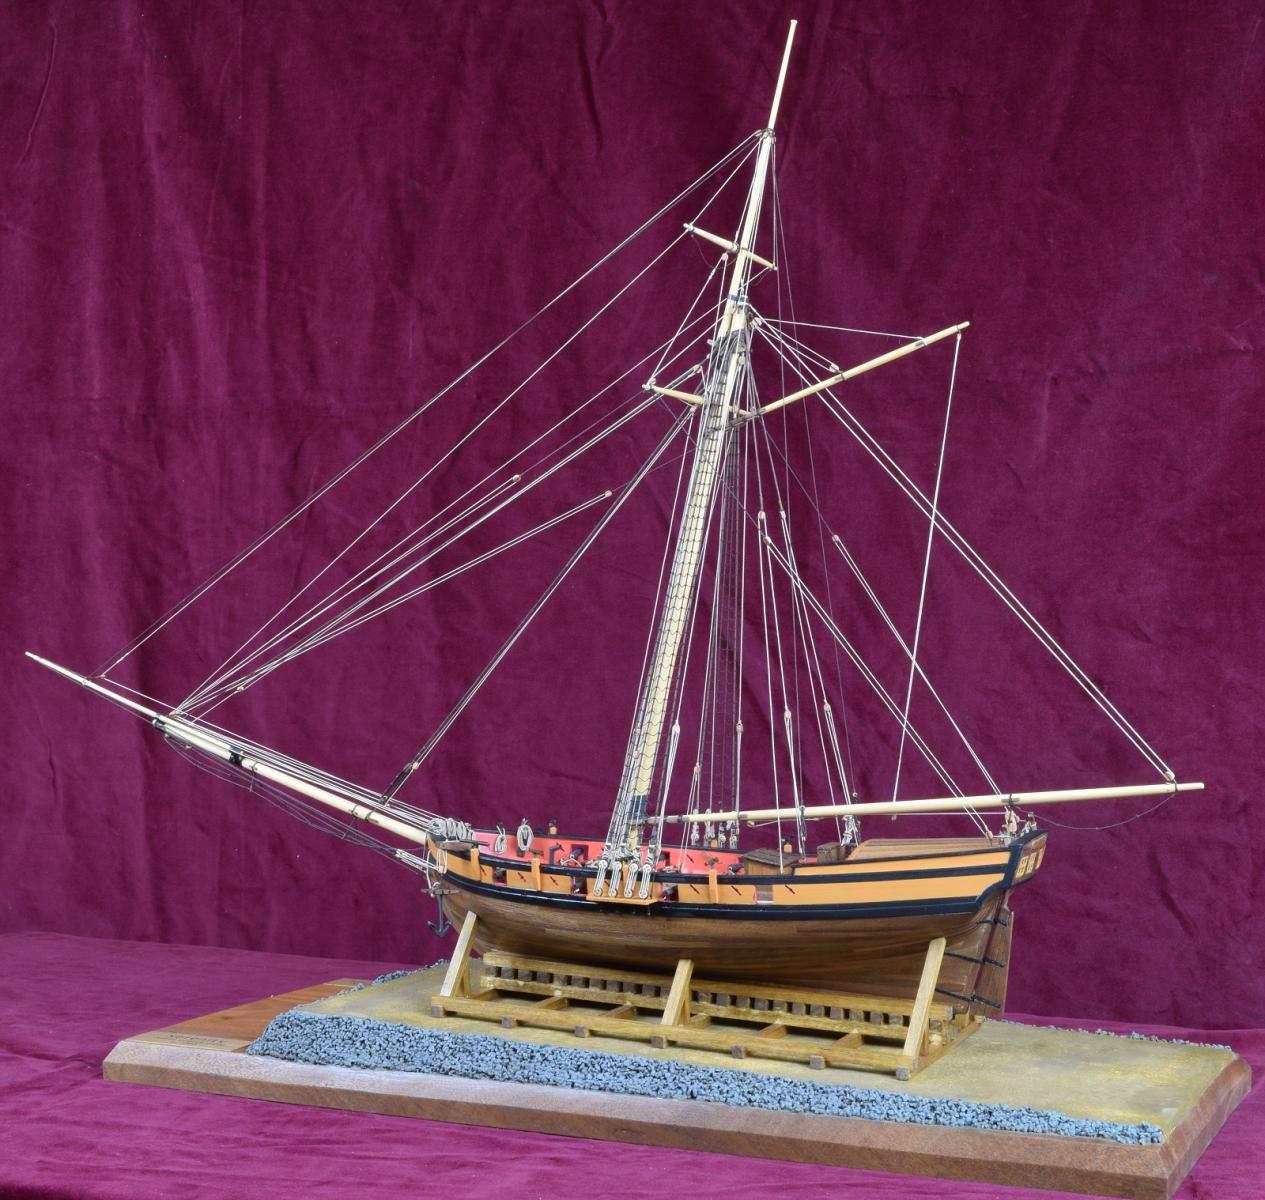
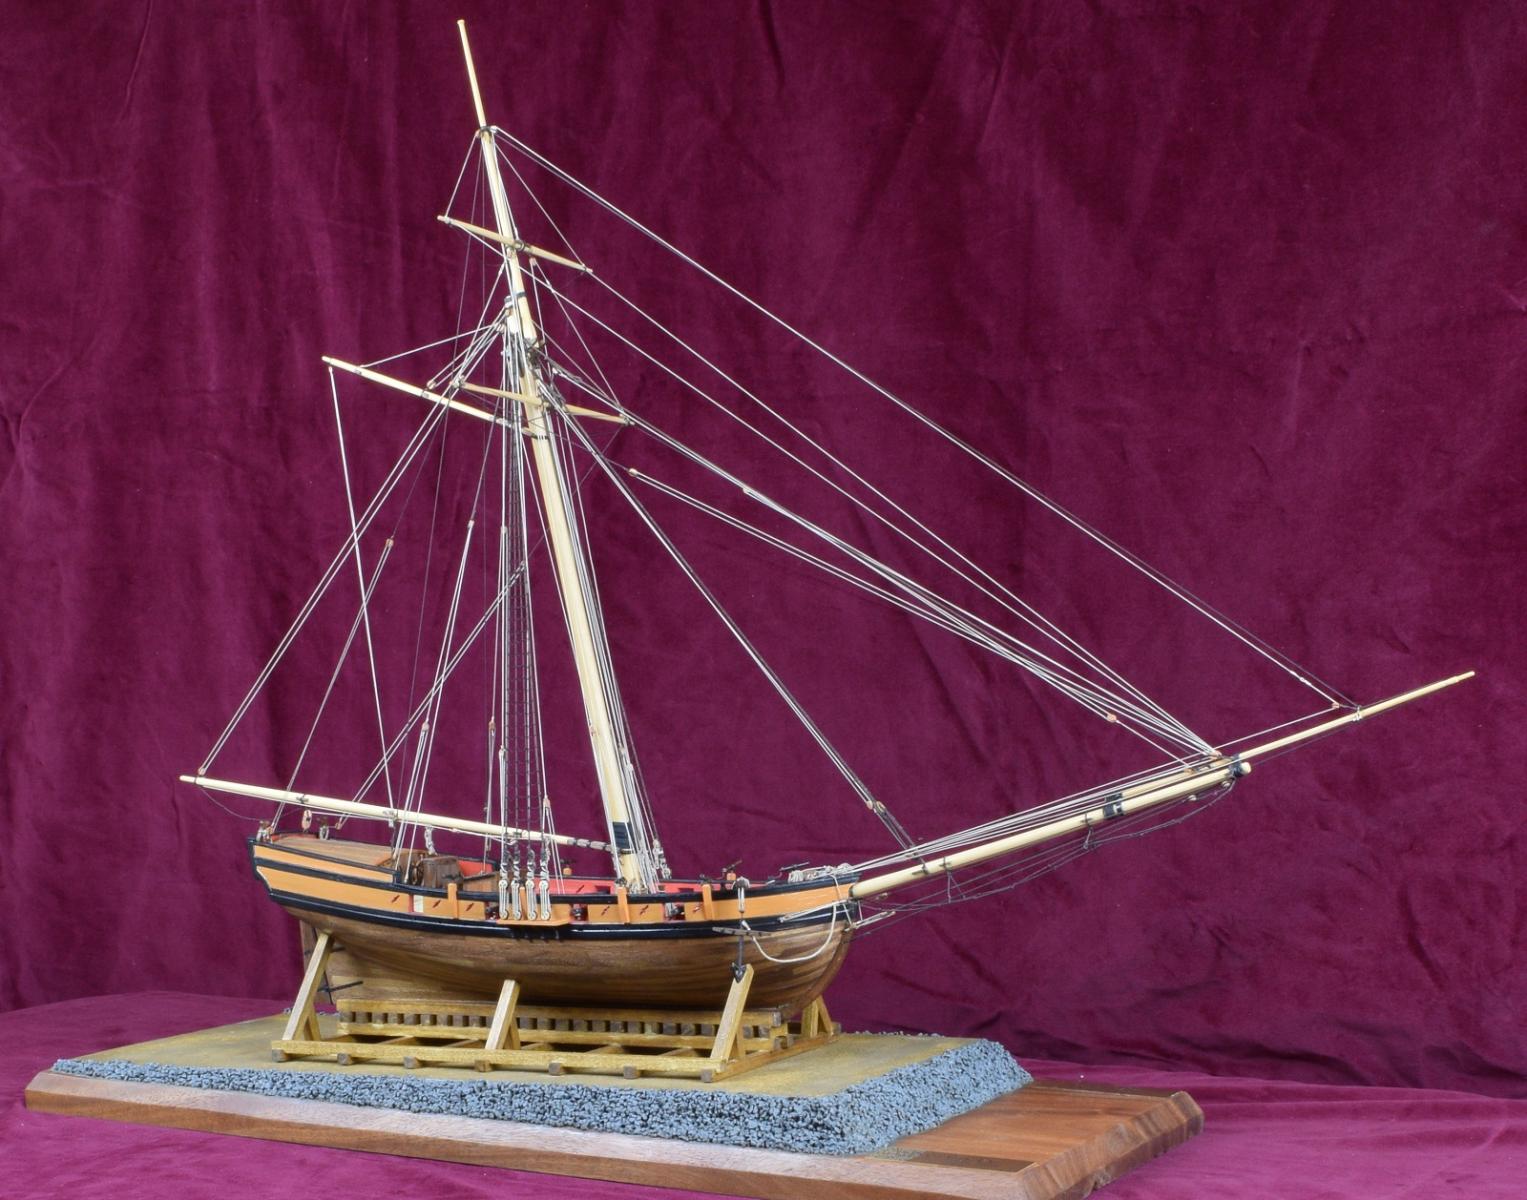
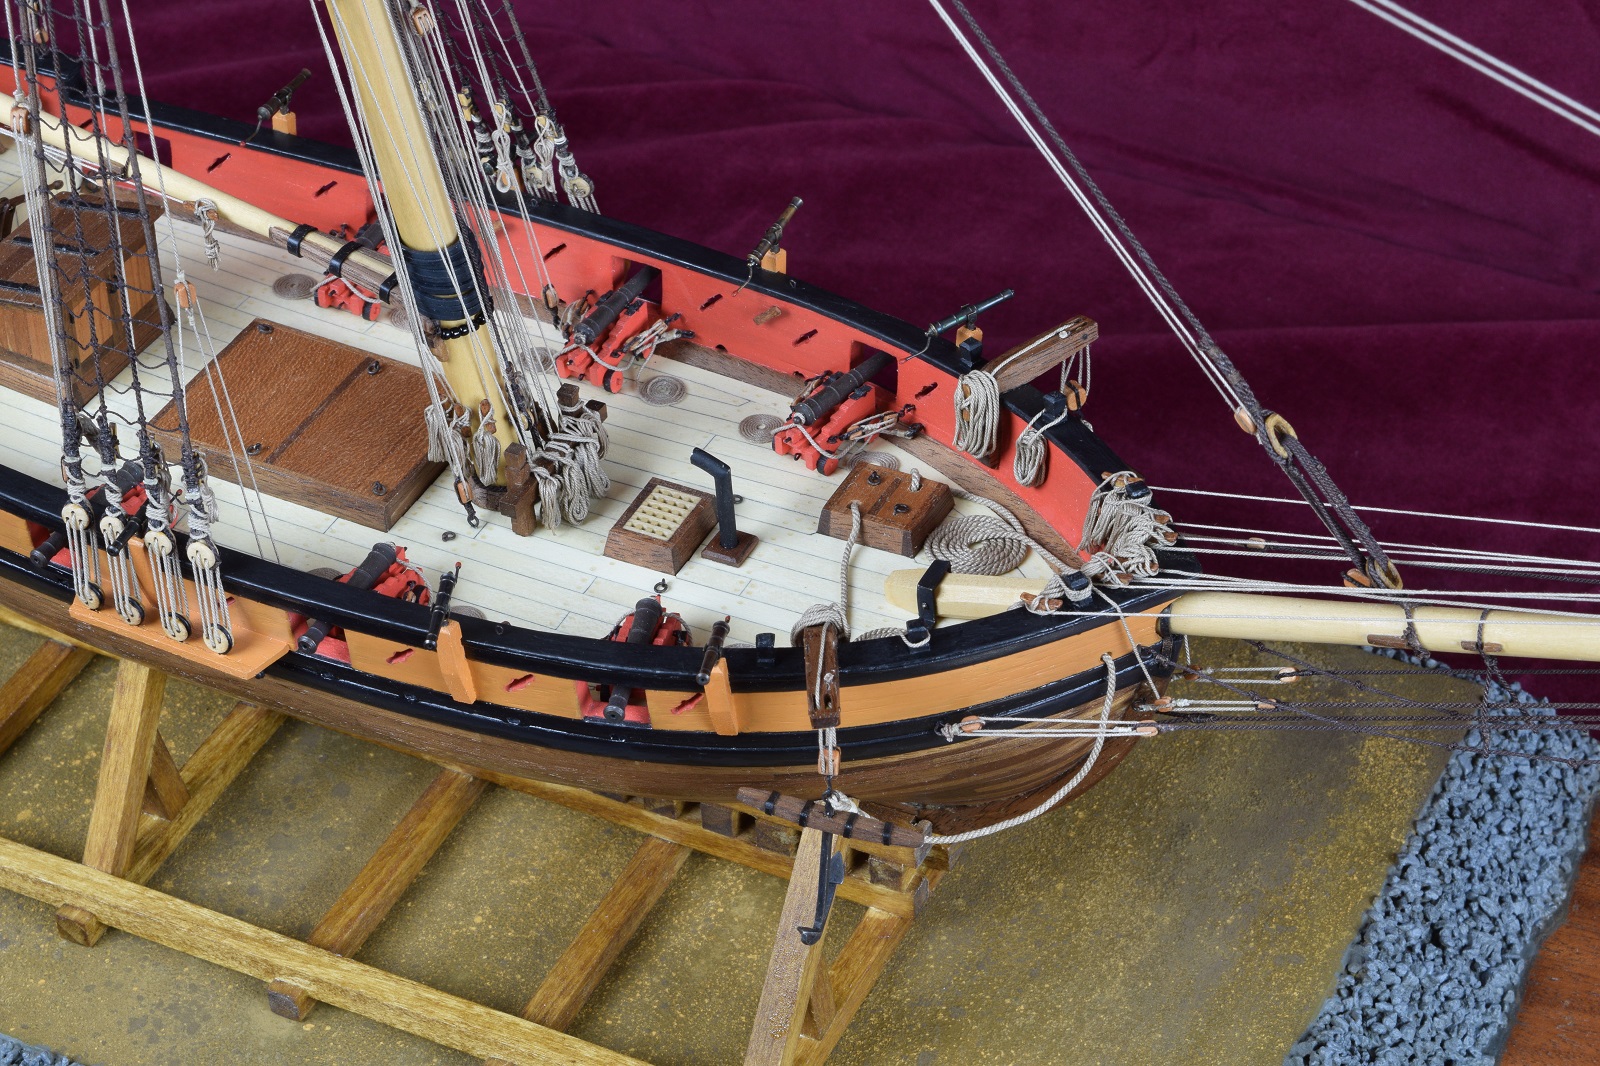
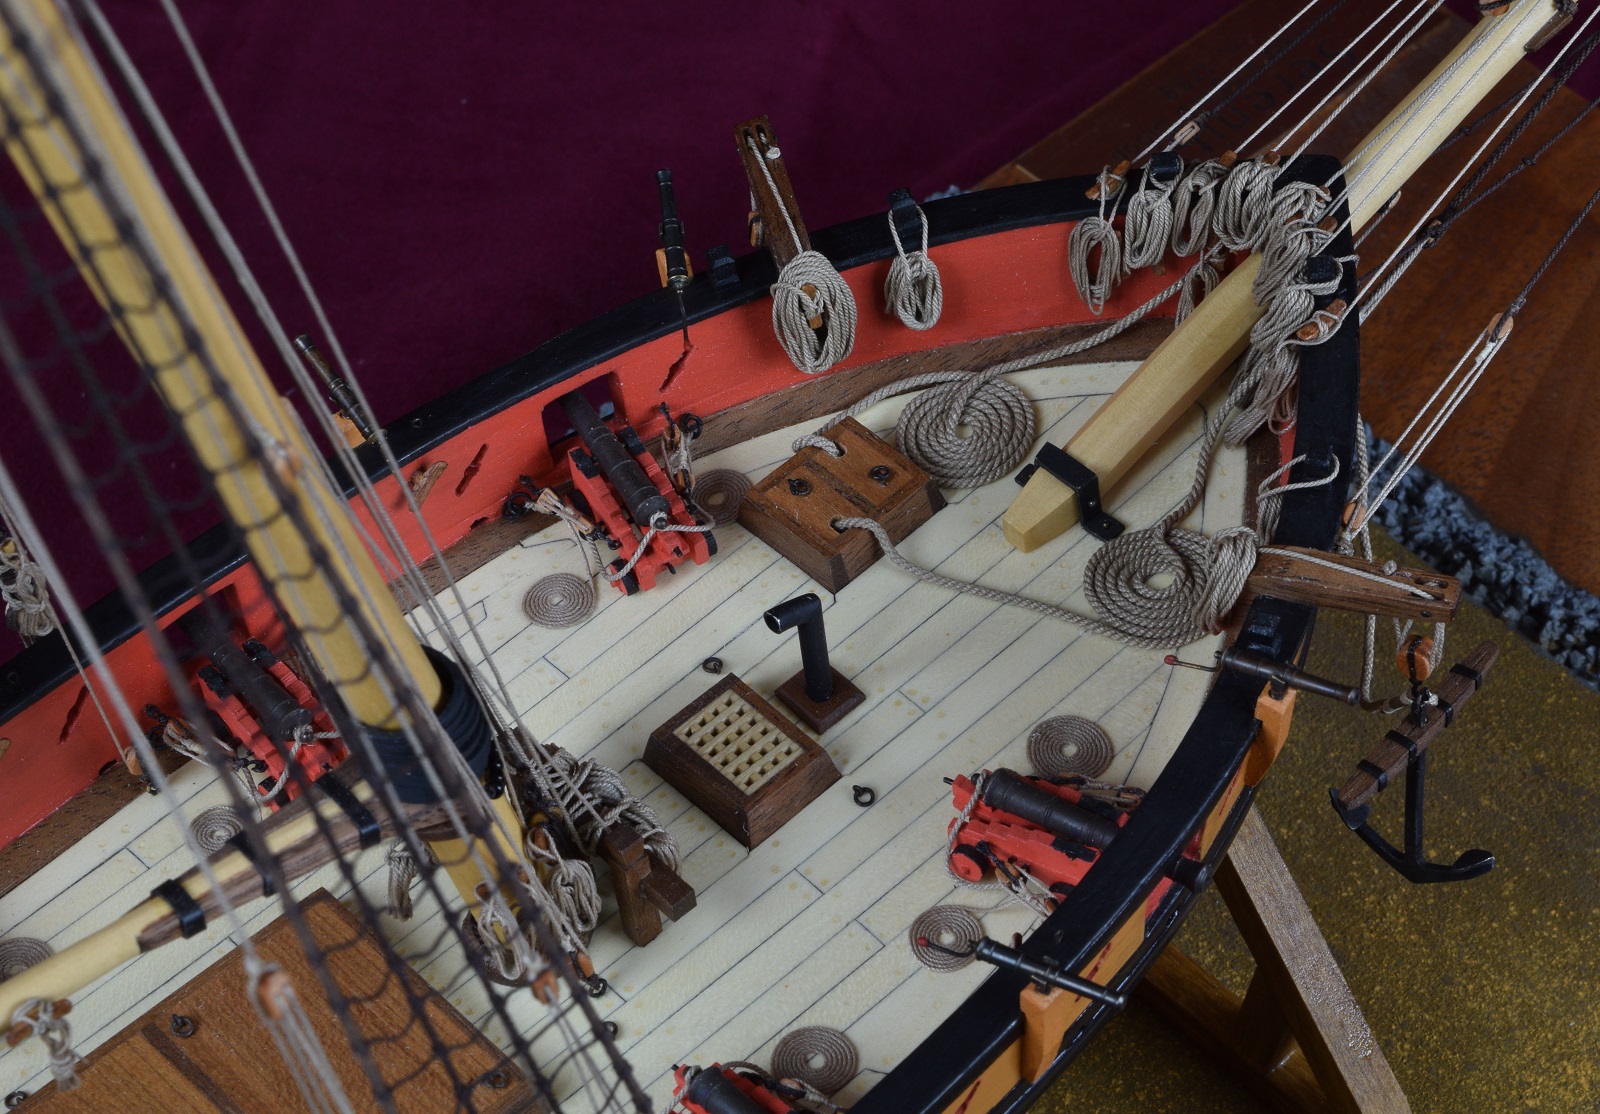
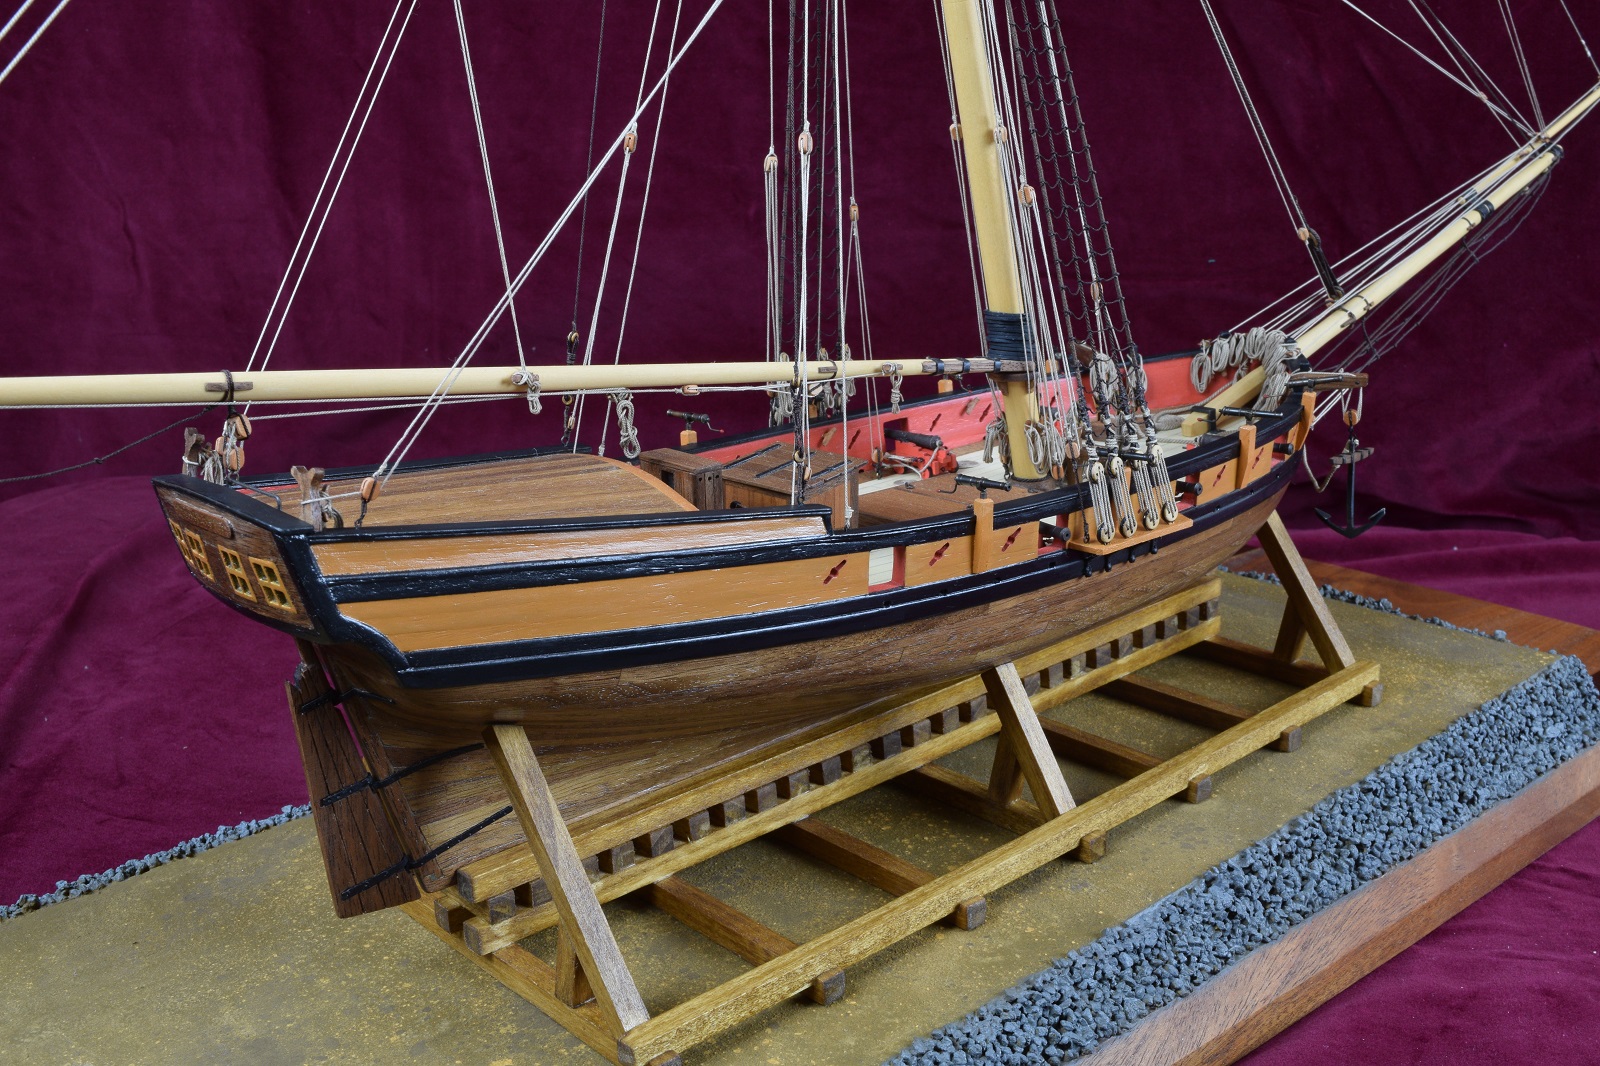
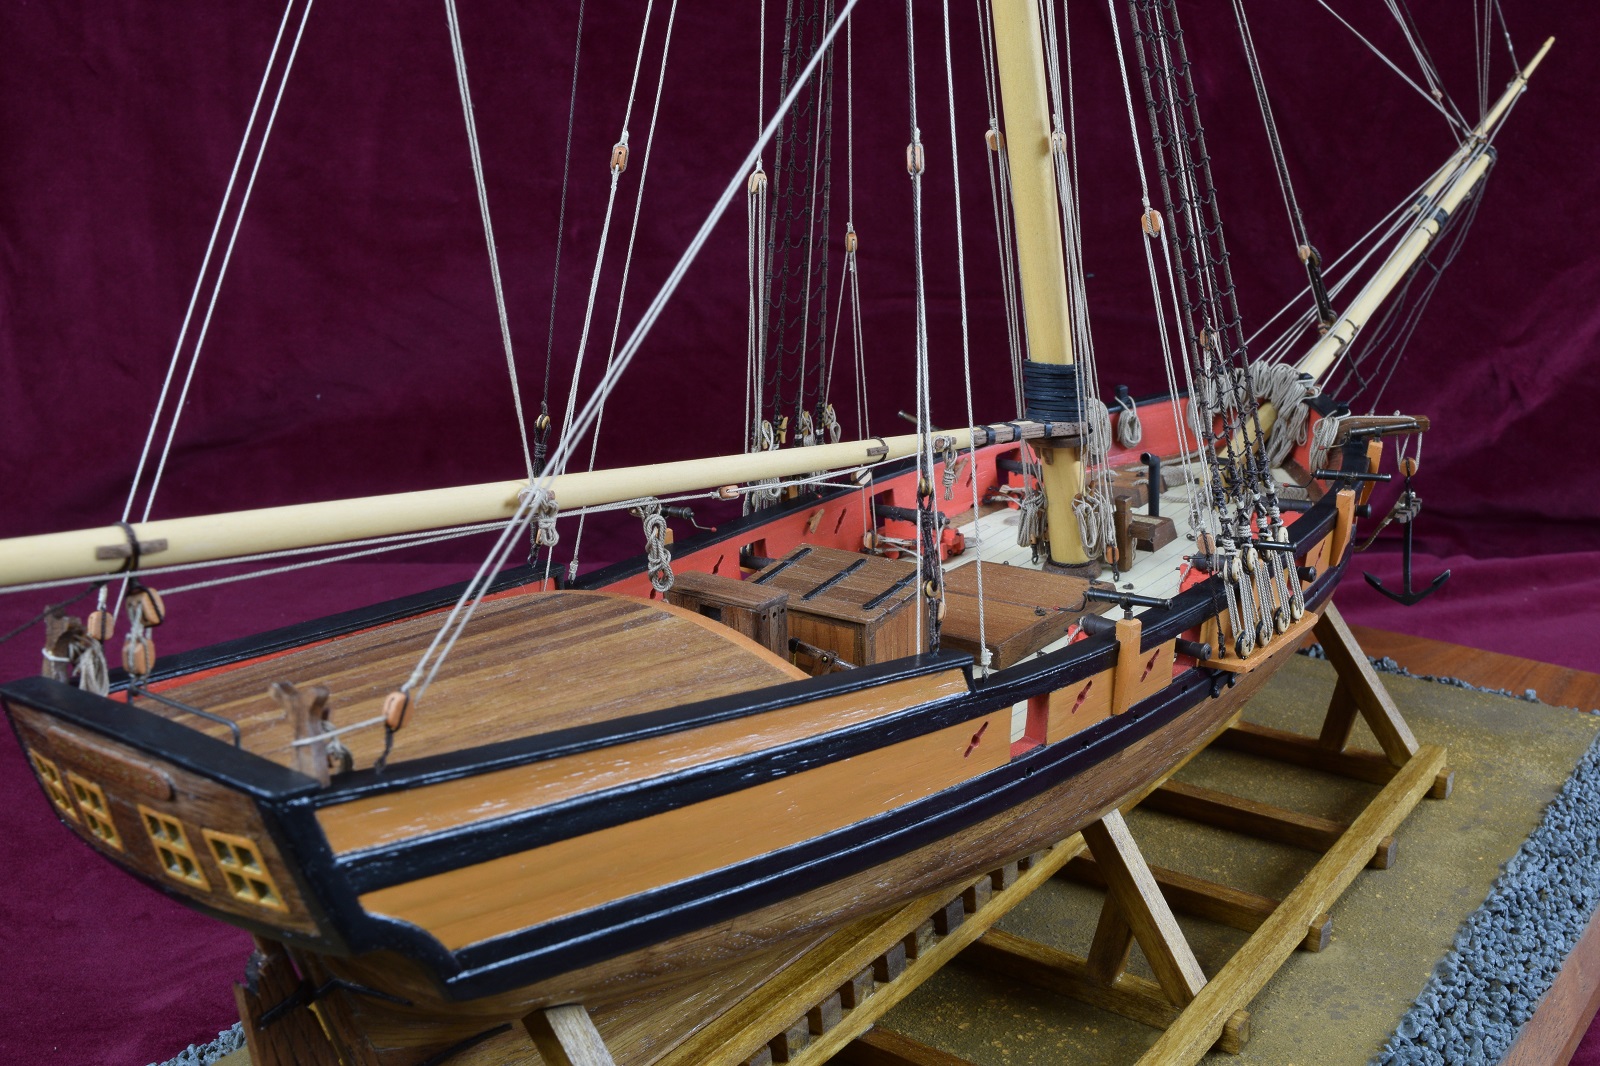
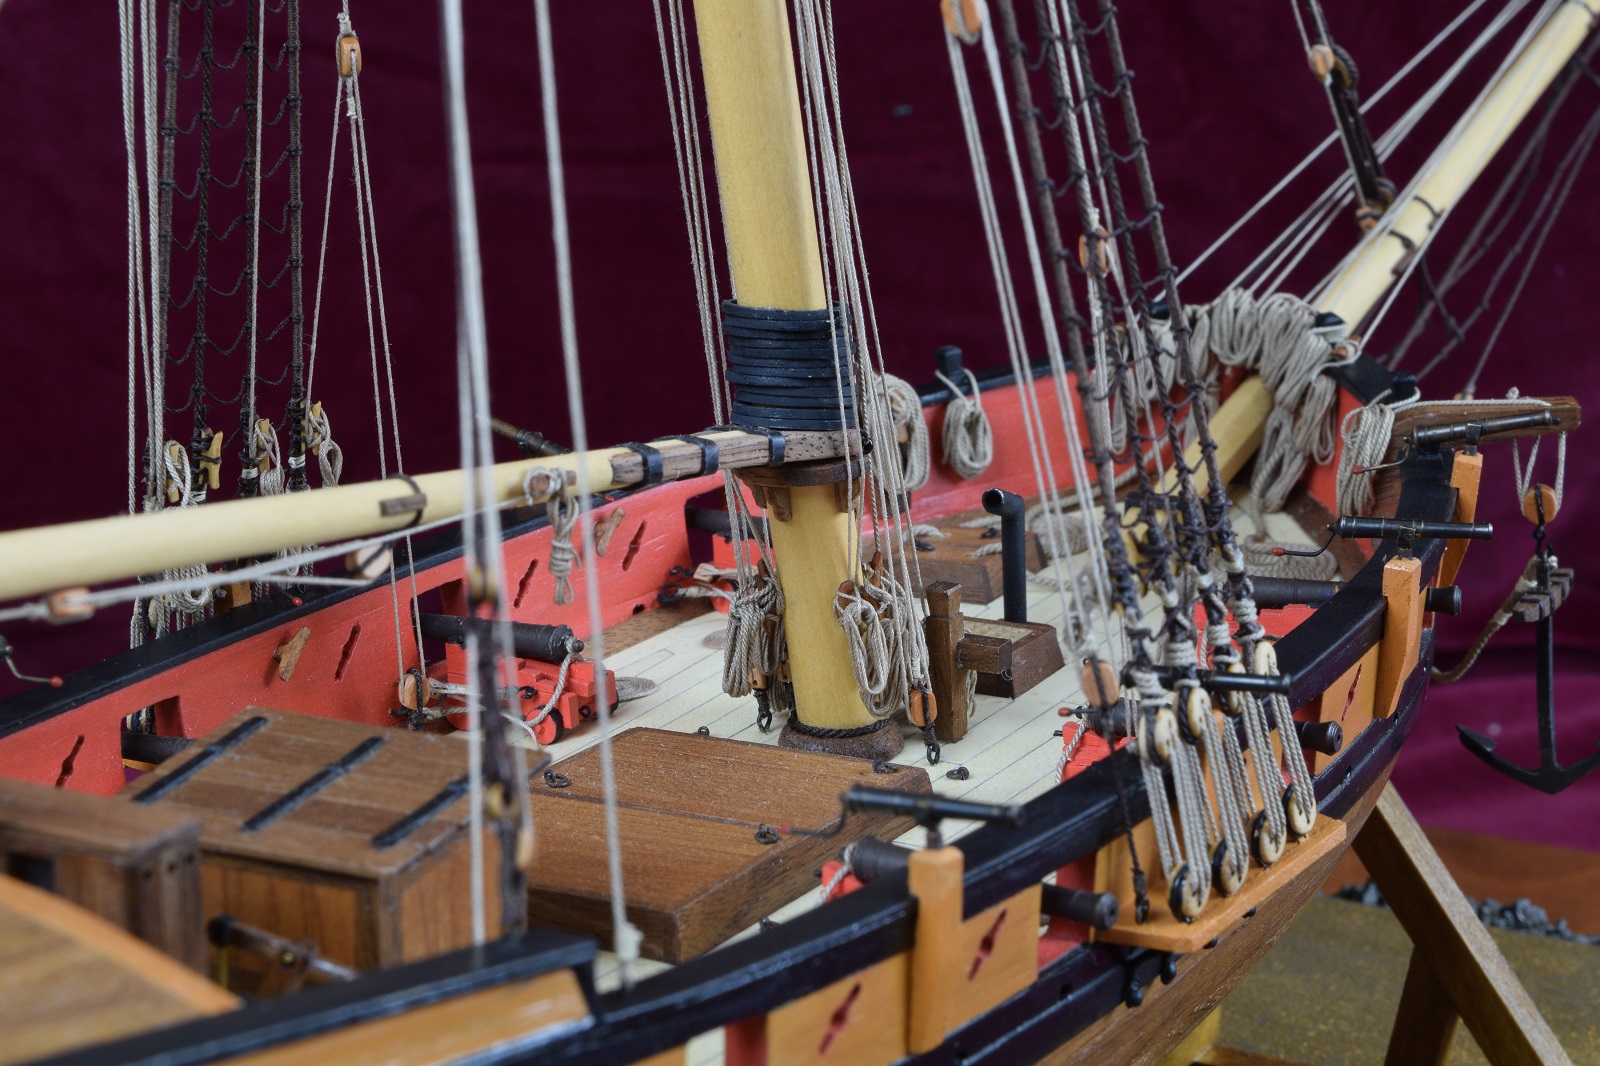
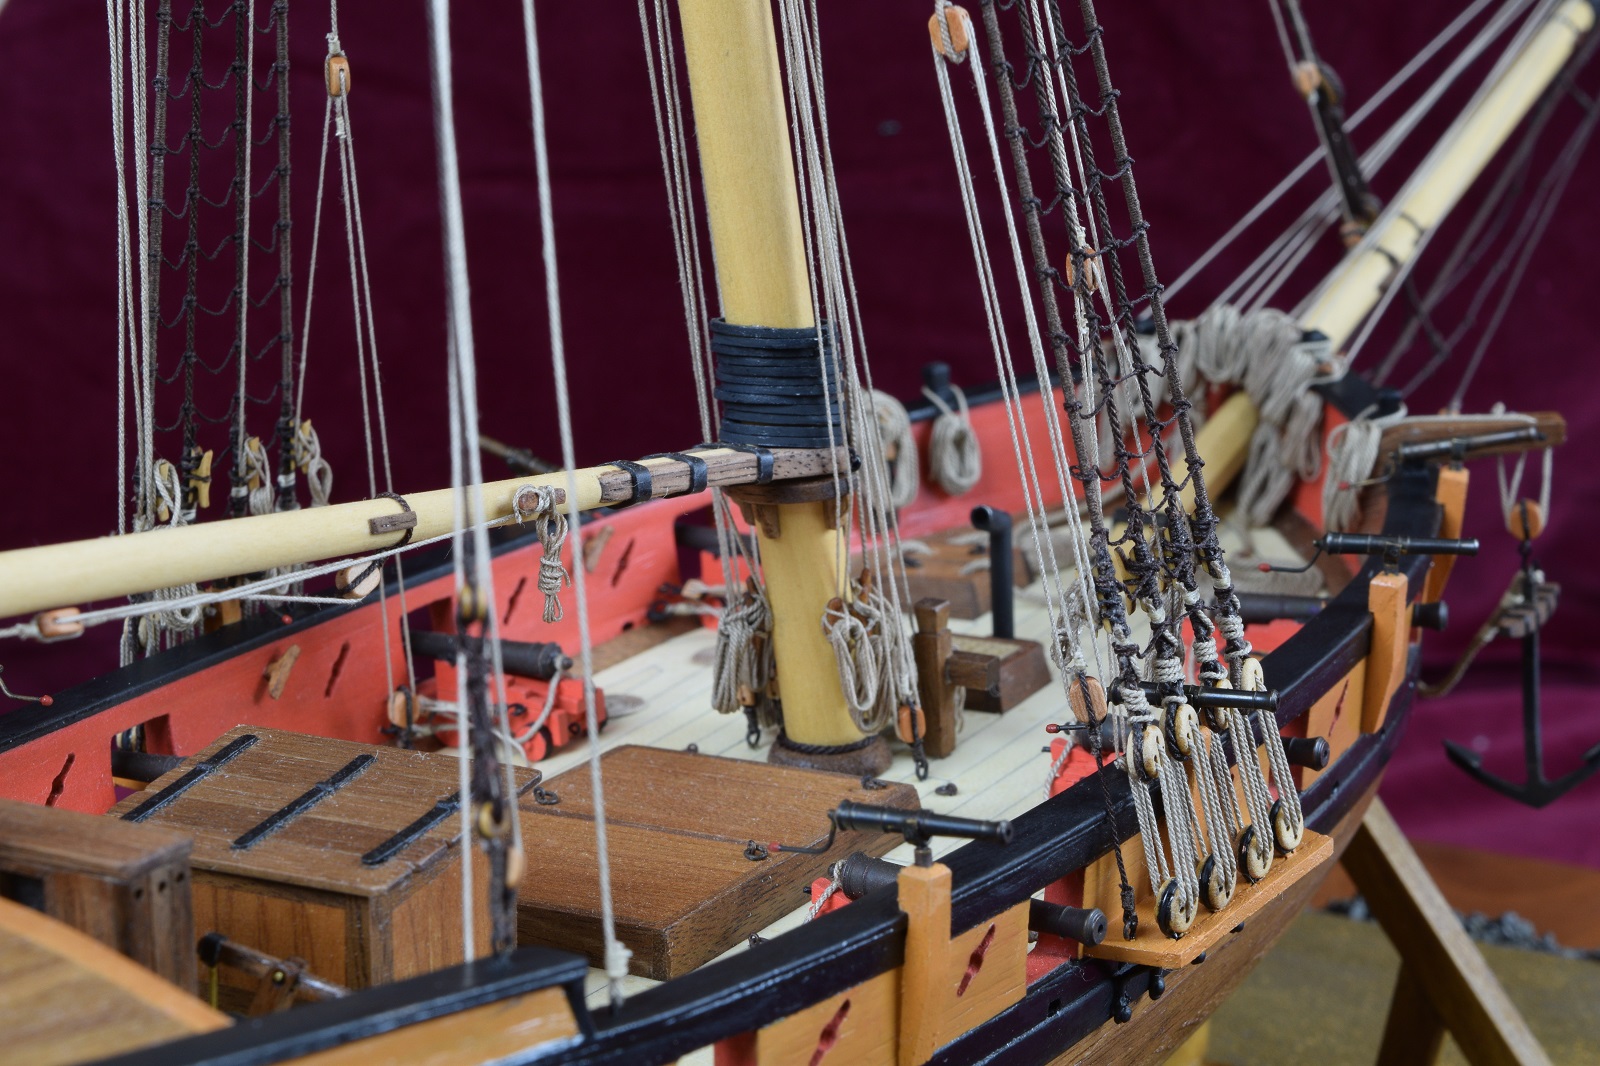
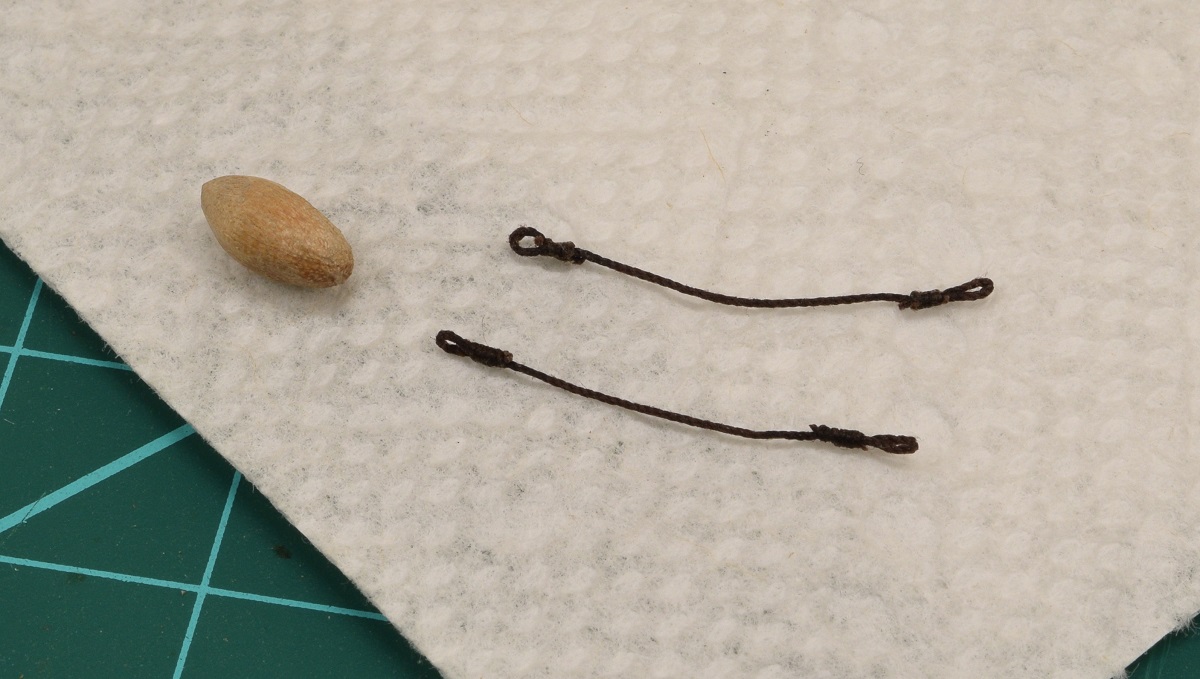
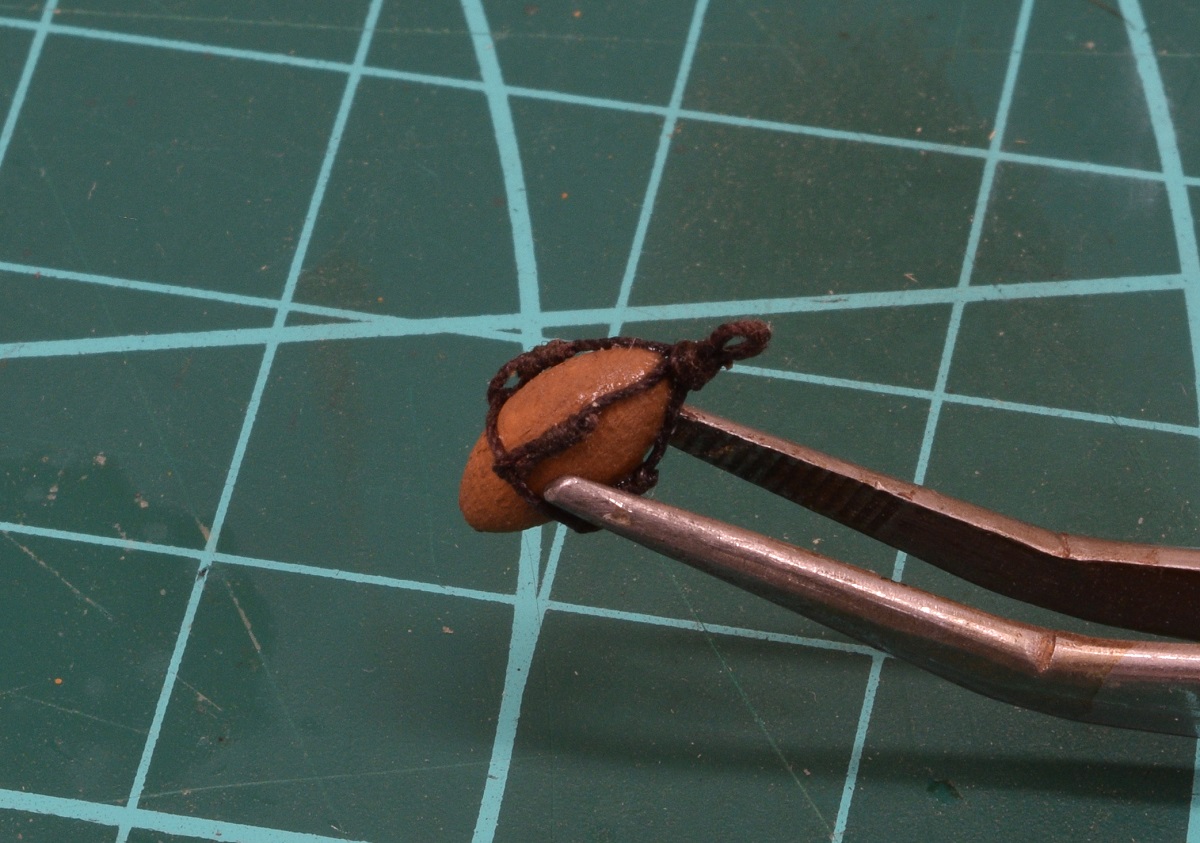
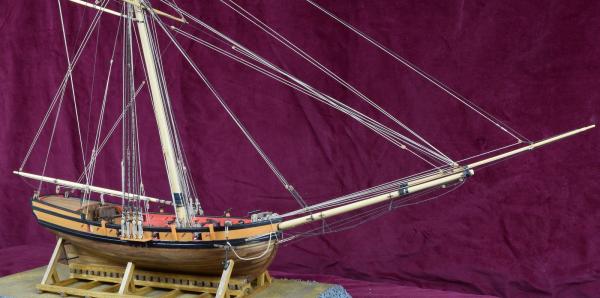
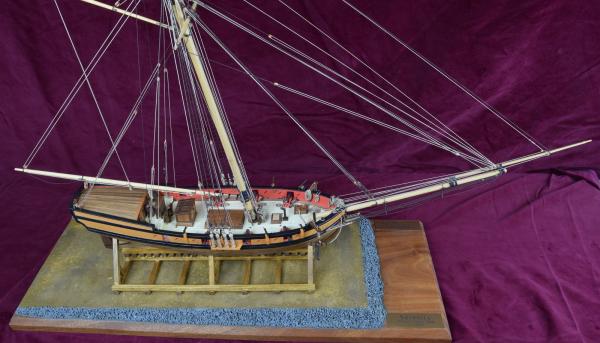
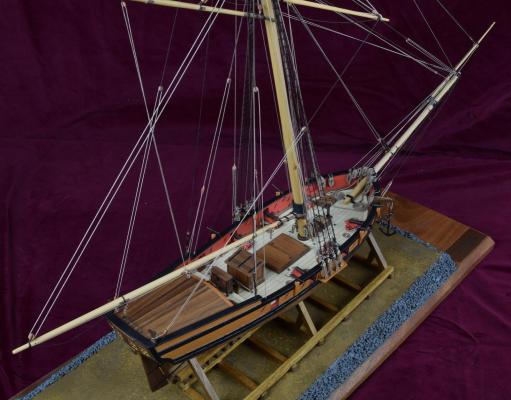
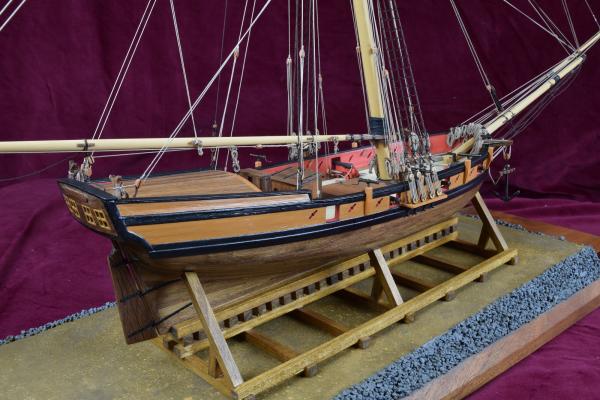
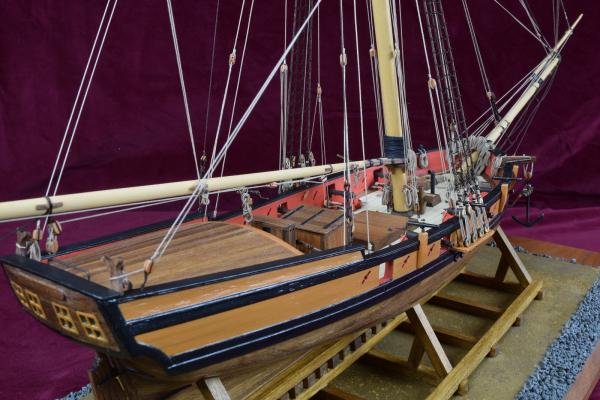
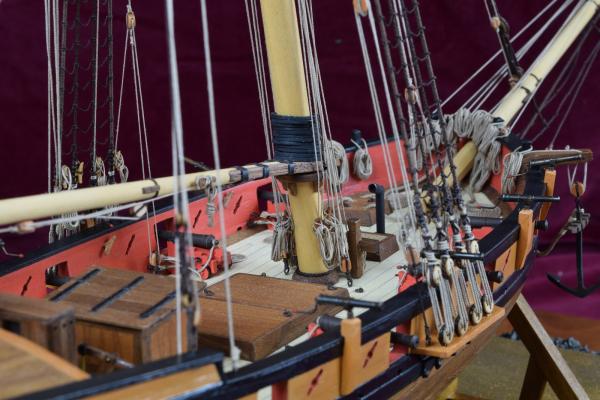
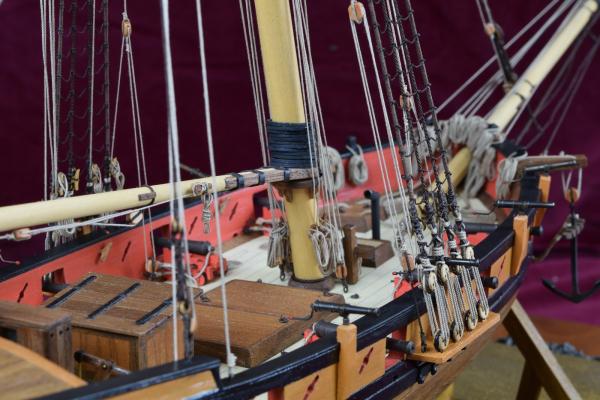
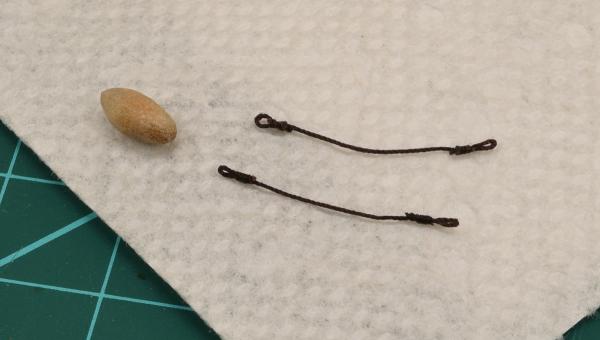
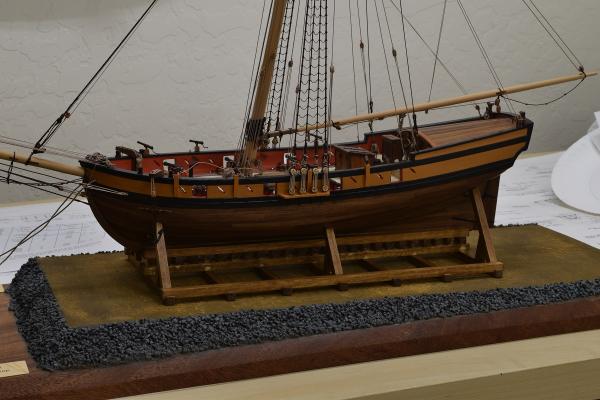
The day has come. I spent a lot of time messing with the anchors, but I simply couldn't find a position where they looked decent to me when lashed to the timberheads, so I chose to display them hanging from the catheads. I then spent far more time than I probably should have messing with the anchor buoys, and in the end was just unhappy with how they looked when properly attached to the anchors, so I decided to display the ship without them. I may make a couple of rope coils and place them on the empty timberheads where the buoys would be hung and belayed, but other than that, and some inspection and touch-up painting/matting, the Serenity is done. I need to re-do my lighting arrangement (which means rearranging the room I take these in) as I'm not real happy with the way these photo's turned out (from a lighting perspective), so I will probably do a full 'finished' photo-shoot sometime later this week. Image dump (bigger than usual - 1600x on the long side)...


- 831 replies
-
- 40
-
-
- Armed Virginia Sloop
- Model Shipways
- (and 1 more)
-
Exactly Andy. There are certainly exception planks where you need an odd shape where just using the ends won't work, and you are correct, mark the 'thickest' spot of that plank, and cut back to each end.
-
Glad you made it back Frank! Thanks for the kind words, and see you Saturday.
- 831 replies
-
- 3
-
-
- Armed Virginia Sloop
- Model Shipways
- (and 1 more)
-
I like the extension of the black strake into the stern. Looks great.
- 306 replies
-
- 2
-
-
- armed virginia sloop
- Patrick Henry
- (and 2 more)
-
Andy - on the tapering/shaping of the planks, here is the process which I used that worked very well for me on the AVS (applies only to my 2nd planking). I used scale length planks which keeps the size (length) of the planks fairly reasonable to work with. It appears that you are doing that already. I would cut a plank to length (actually I just pre-cut a bunch of them all to the same length). Lay the scale plank in the spot where I would be placing it. Mark both ends of the plank by using either the tick marks on the bulkheads, or the mating edge of the plank it would butt up against. Now, take the plank and using a steel straight edge, I would use a #11 X-acto blade (very sharp, replace them often as needed) and cut the taper along the line formed by the straight edge between the two marked points on the ends of the plank. I would always err on the side of cutting the plank slightly wide at this point. Next, using a fairly fine sand paper, form a bevel into the edge of the plank that will mate up with the existing planks. This helps make a nice tight fit even with the curvature of the hull. Finally, again using the fine sand paper, sand the outer straight edge a little bit at a time until the plank mates properly with the butt of the already place plank on one end, and the tick mark on the other end. Adjust as needed until it fits right, and don't be afraid to toss out planks that are poor fits or over sanded, etc. Be patient and work on each plank as it's own little model to fit into that space as defined by the existing planks and your tick marks.
-
Beautiful work on those carronades, they are perfect to my eye.
-
They are moving to a different location, perhaps it's an opportunity to replace equipment and/or it make more sense to do it this way than move it?
-
Very interesting subject you've chosen. Will be interesting to see your build of her.
- 348 replies
-
- 4
-
-
- pequot
- cable ship
- (and 1 more)
-
Thanks all. Mike, Yes I do know what the next build will be, and it's on the shelf waiting. I'll be unveiling that after the AVS is completed, which might be sometime next week. The building has slowed significantly as I've decided that I needed to get off my **** (literally) and do something about my fitness before I keeled over of a heart attack. So I joined a gym and have been working with a personal trainer, which is now eating up a large portion of what was already limited free time. Combine that with the sailing classes on the weekend, and still trying to spend some time with my family on occasion, oh yea, and working full time, and things are quite a bit slower these days in the hobby room than they were at other points in the last year. I have all of next week off on vacation though, so I will absolutely finish the AVS, and then go through and try to make something slightly less messy out of the hobby room and then will begin the next ship building adventure. Other Mike (haha!) - the rigging line really makes a huge difference, and when you consider how long a build takes, it's not really a large cost factor. Edit: Hahaa.. the forum censors "a r s e". That's pretty funny.
- 831 replies
-
- 15
-
-
- Armed Virginia Sloop
- Model Shipways
- (and 1 more)
-
They'd have to build/buy a new ship now, the Surprise is owned by the San Diego Maritime Museum. Of course if the studio was willing to foot the bill for a full up re-build, I'm sure they would work something out, she needs lots of maintenance.
-
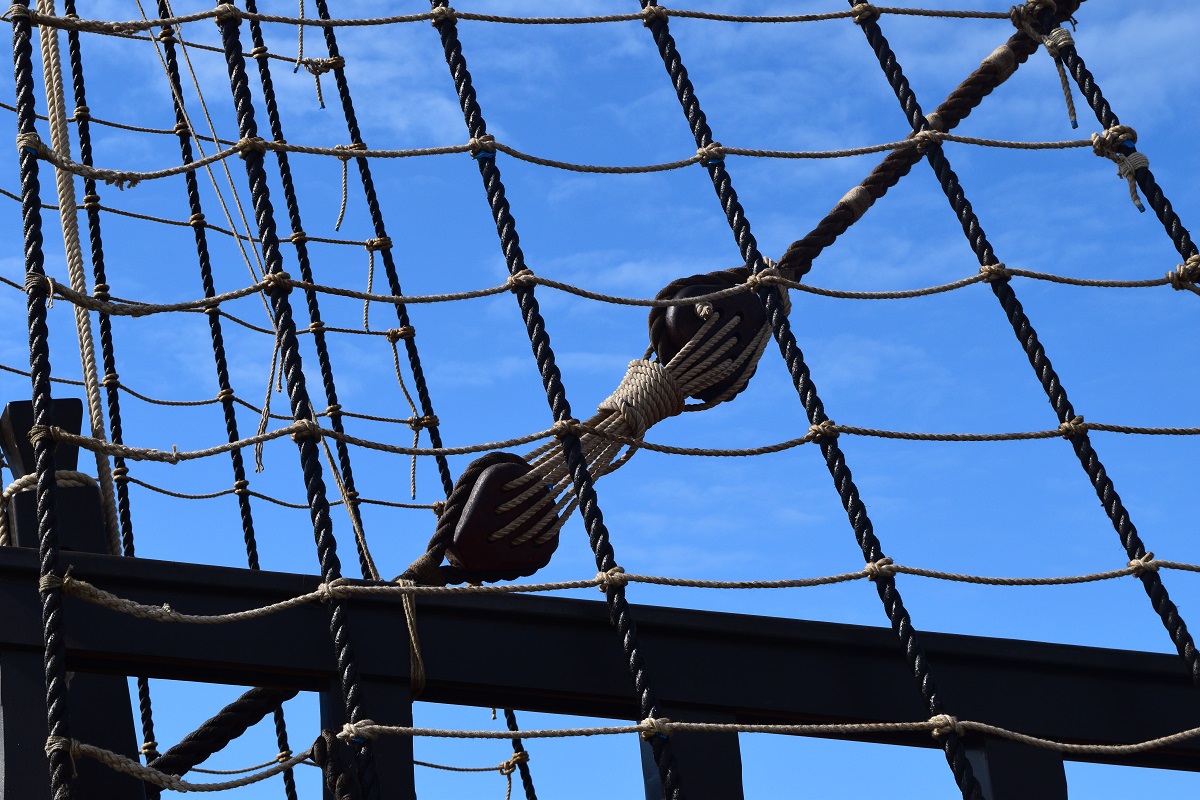
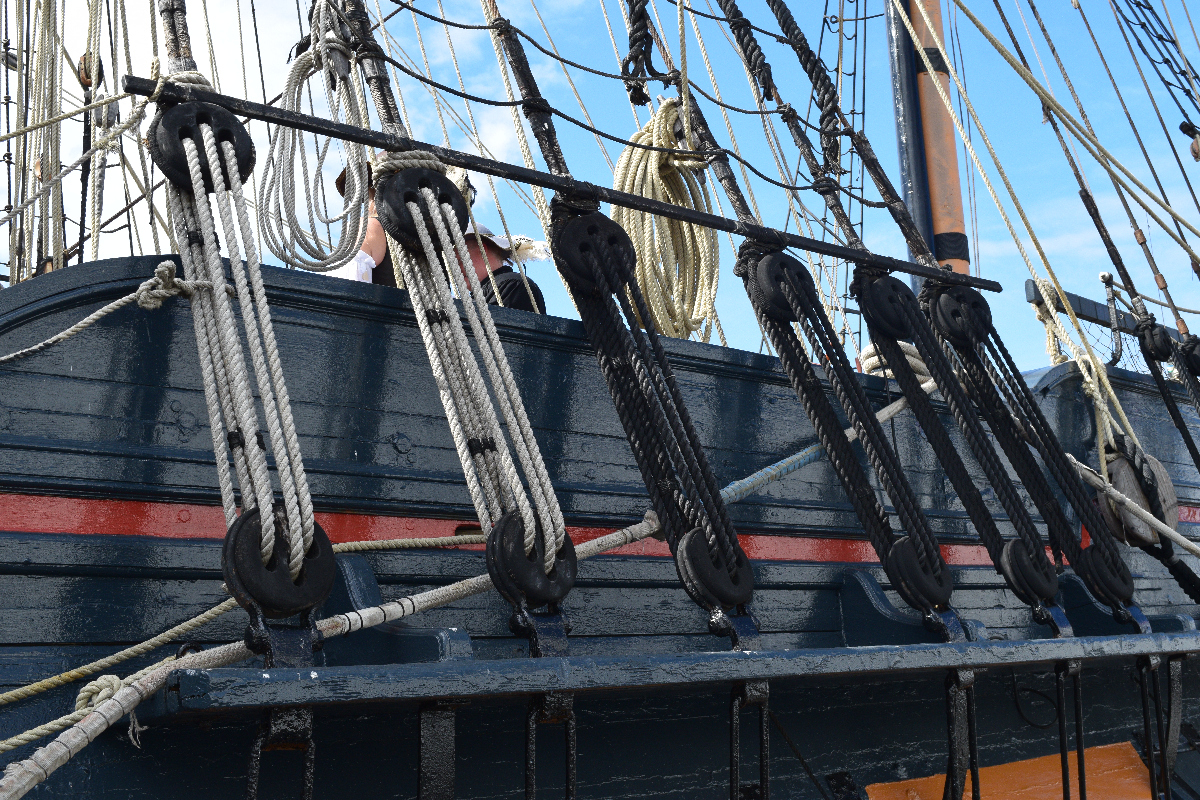
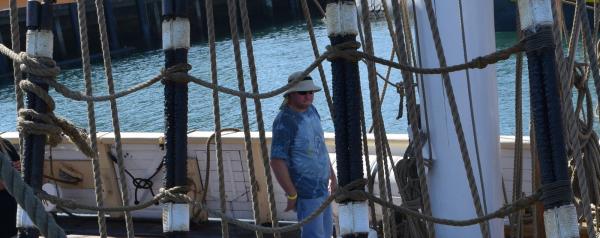
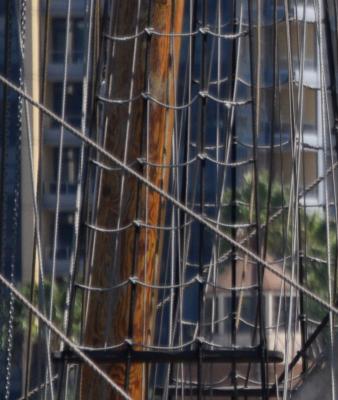
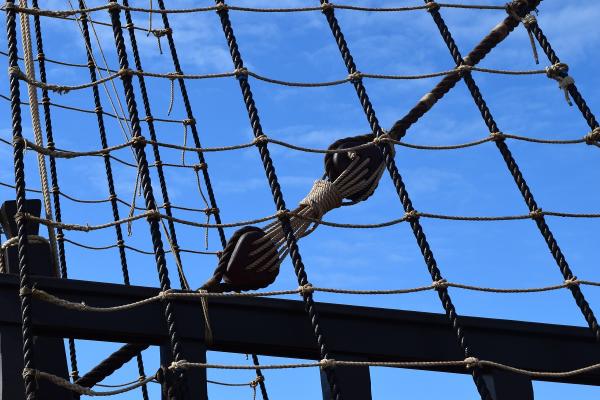
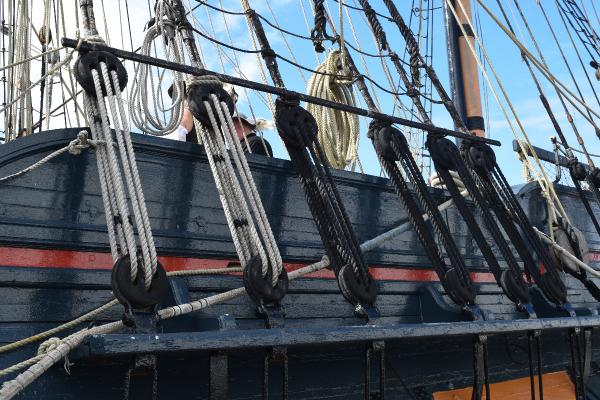
Counter point - there is plenty of evidence, and many current replica's that do not have the ratlines tarred. I'd go with whichever looks best to your eye. When I was in San Diego, there were six ships with rope rat-lines. Four of them were not darkened (Pilgrim, Exy Johnson, Irving Johnson, San Salvador), and one of them was (the Surprise). I don't recall on the Californian, and didn't get any proper photo's to reference. Here is a shot of the ratlines on the Pilgrim: Here is a shot of the ratlines on one of the Johnsons (they are basically identical sister-ships): And the San Salvador: I'm not sure how good of an example the Surprise is of blackened lines, as they had a real mishmash of blackened and unblackened lines all over the place. Like here you can see the blackened ratlines, but also both blackened and natural lanyards between the deadeyes. So yea. Do whatever makes you happy for the ratlines.
- 69 replies
-
- 1
-
-
- admiral vernon
- steingraber
- (and 1 more)
-
The result looks very good RMC. The difference in number of wraps on the two lanyards you are considering re-doing is not obvious when looking at the photo's, I would not have noticed if you hadn't pointed it out, but that may be one of those things that will bug you forever if you don't make it right for yourself.
-
That CA glue is widely available as "Bob Smith Industries" brand. I believe it's the defacto glue that is re-branded (by labeling) for hobby shops all over the world. http://www.amazon.com/Bob-Smith-Insta-Cure-Super-Thin/dp/B001NI4JWI/ref=sr_1_28?ie=UTF8&qid=1446043256&sr=8-28&keywords=super+glue
-
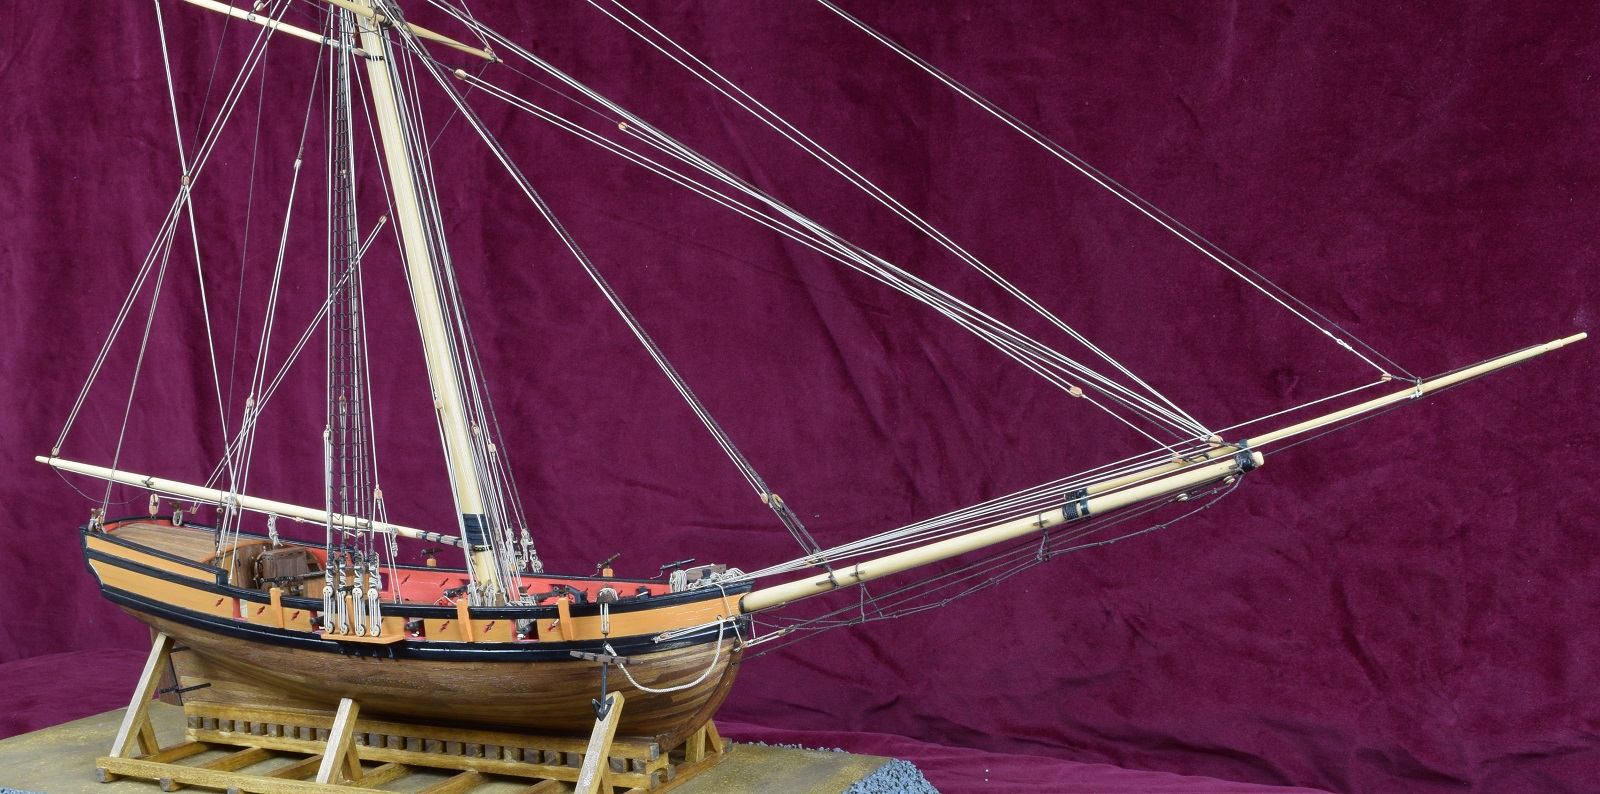
Sneak peak on the finish line approaching.. I've been working on a display base to hold the ship at the slight angle it should be at to make the waterline 'level' with the viewer, and finally started working on the anchor buoys and I rigged the catheads. What could this possibly be? Silliness is what it is! And that sneak peak...

- 831 replies
-
- 33
-
-
- Armed Virginia Sloop
- Model Shipways
- (and 1 more)
-
how to work with teeny blocks???
GuntherMT replied to achuck49's topic in Masting, rigging and sails
I put together a bit of mini-tutorial showing how I strop blocks in my build log in this post: http://modelshipworld.com/index.php/topic/8085-armed-virginia-sloop-by-gunthermt-model-shipways-scale-148/page-24#entry328294 Not sure if it will help you any more than all the information already in this thread though. -
If you do a waterway, it is generally going to be thicker than the planking, and be beveled to match the planking level at the inner edge. If you are just wanting to create an edge plank for your deck planking to mate with rather than just going directly to the bulkheads, then that is a 'nibbing plank' and will be the same thickness as your deck planking. You can also do both, which I believe would be the typical fashion (it's how my AVS was done, both waterway and nibbing plank). I think the nibbing plank is called differently based upon how the deck planking joins with it, as in some cases (like my AVS) there is not actually any nibbing done into that plank (it's a hook & scarph arrangement into the nibbing plank). The AVS included the waterway and nibbing plank, but I didn't follow the plans at all for the planking, and it was my second build. I just followed a sort of 'standard' planking plan based on an arbitrary plank length that I decided on, starting at the centerline and working out. The nibbing plank was just faked by creating a pattern off of the plans, but leaving out the nibbing part, and then smoothing it to fit up against the waterway. The planking was then made to fit snugly against the nibbing plank. It's actually easier than doing the hull planking, as the deck is almost completely flat so the only real challenge is making the outer edge fit well, and maintaining whatever pattern you choose to go with.