

captain_hook
-
Posts
675 -
Joined
-
Last visited
Content Type
Profiles
Forums
Gallery
Events
Posts posted by captain_hook
-
-
Anyway, planking the inner ship is where I stopped the build. I use 2mm x 4,5mm cherry stripes for the thick stuff that runs along the joints of the lower and middle futtocks. The planking is then done with 1,2mm x 3,5mm cherry stripes. Not as clean and nicely grained as boxwood or pear but will do. For that I use just an usual planking pattern I found in my „Historical Ship Models“ book by Mondfeld as it won‘t be seen later because the area below the thick stuff will be covered with interior. It is just for practice and recovering my knowledge, might take about the next week to finish this task …


-
Sorry guys, I took a break from ship-modeling - much longer than expected. I was and I am still a little concerned about the things going on in Eastern Europe and all the things that might happen in the future so I thought it would be best to spend more time with my family. And my self-employment kept me busy as well. Although I passed my model about a hundred times continuing the build was not on my mind all the time. Guess I had to wait for my mojo to return ..
-
On 12/9/2020 at 12:58 AM, Commander Bond, RNSVR said:
Greetings, sir! My compliments on your brilliant craftsmanship. I started this model about ten years ago, was forced to abandon it, and intend to start fresh anew. Your work is inspiring.
Thank you very much. It was a pleasure to build and has a very fine manual. Good luck for your build! -
On 1/12/2022 at 2:47 AM, robert952 said:
It's all about he family. Who knows? You might get her interested in building her own Hogwarts.
Well I’m afraid in the end daddy has to fix all mistakes and to secure wood and paint stock .. -
A fantastic build and a beautiful finished model! And a nice printing and weathering job as well. These 3D-printing technology may still be in the beginning stage but the modeling possibilities today are quite impressive.
- lmagna, Old Collingwood, mtaylor and 2 others
-
 5
5
-
-
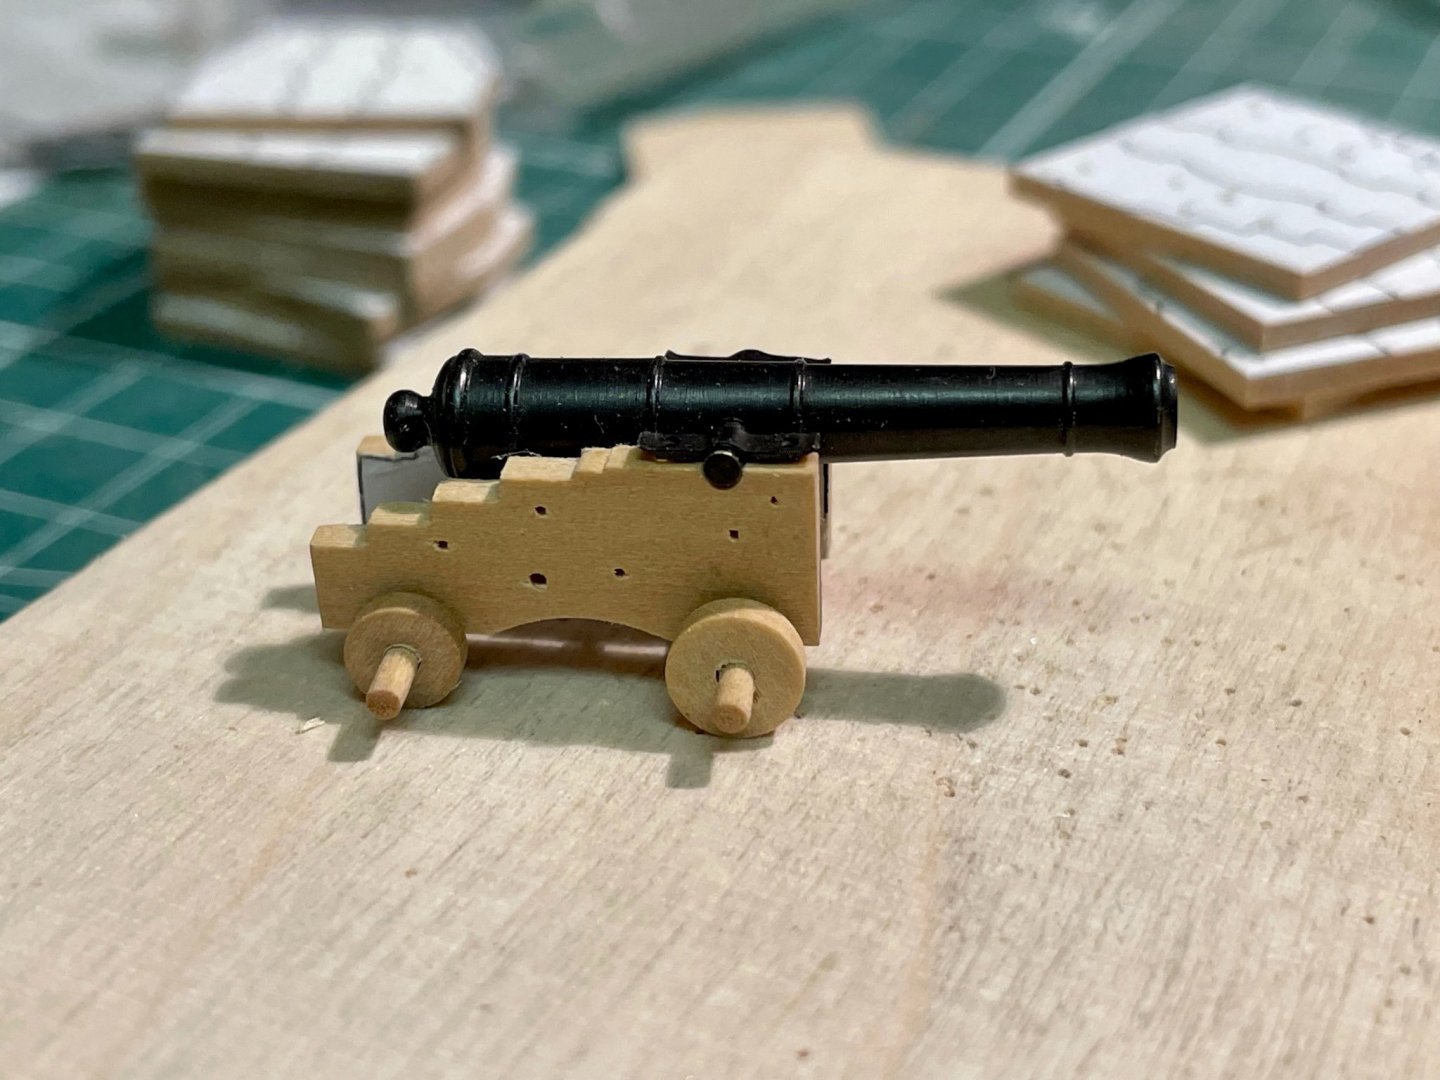
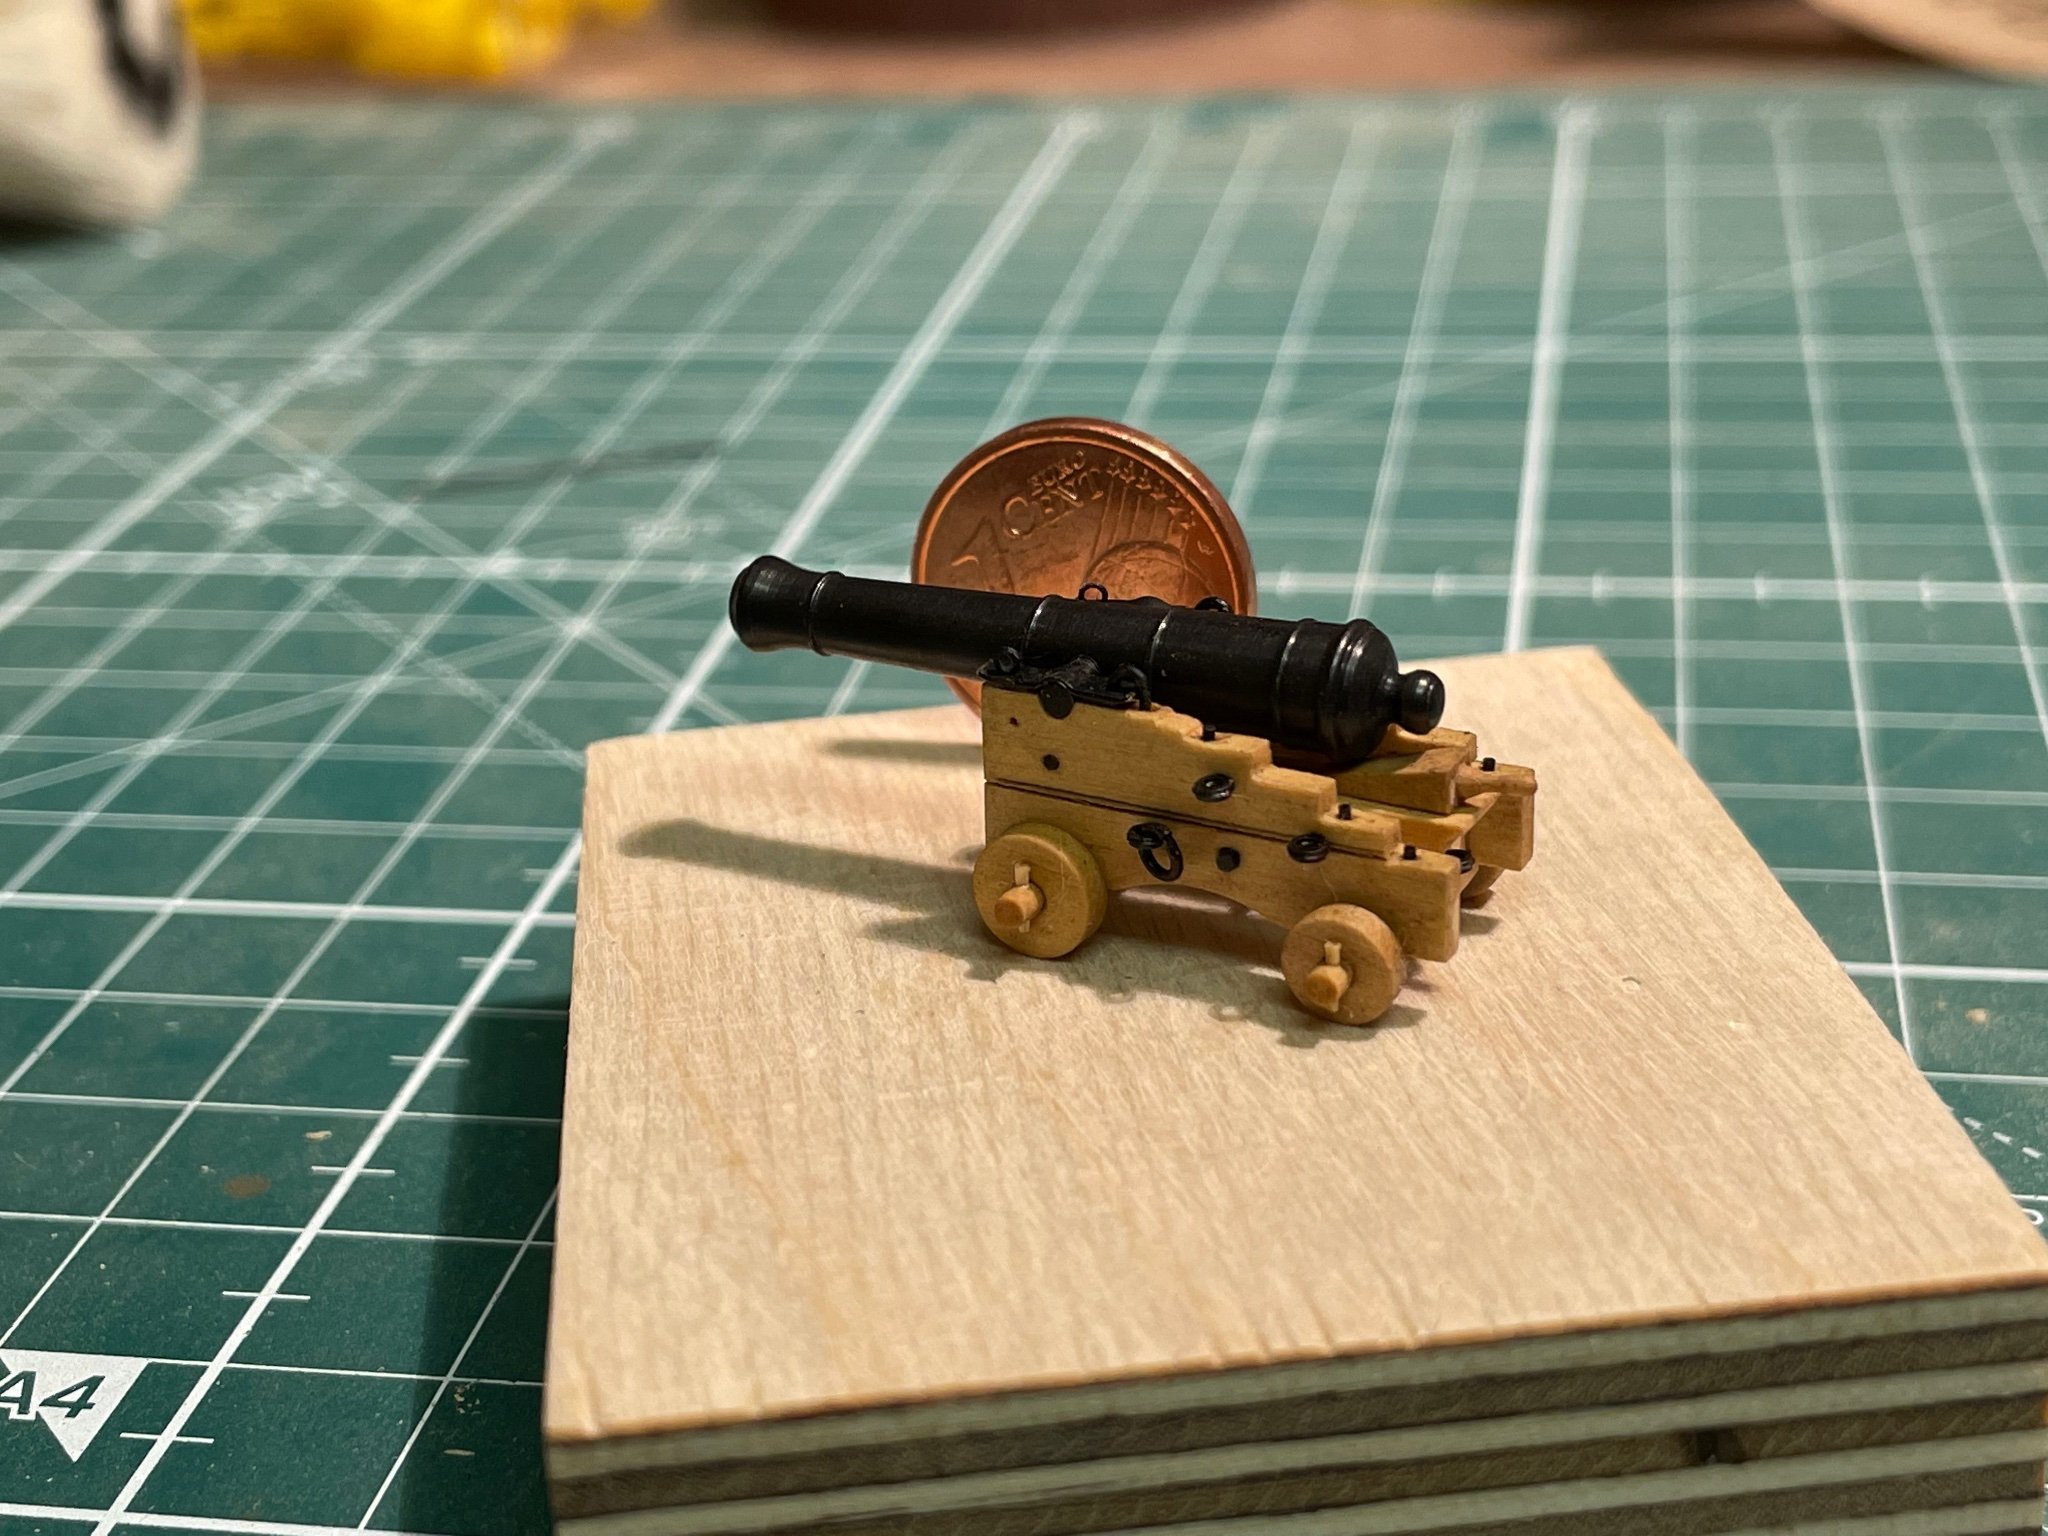
I have finished a prototype 4-pounder gun today - my first scratch-build carriage. It is not very accurate yet (I misaligned the etched line at first time so my gun has two lines and the just applied WOP give it a quite dirty look) but the goal was to prove the correct dimensions of the gun / the height of the gunports and to try some new techniques that will be used when all the guns are build later. The final carriages will be painted red but I decided to leave this one natural.


The chain for securing the iron bands is still missing and it will be added for the final design. If any company had sold 4-pounder gun carriages in quarter scale it would have saved me a lot of work. But I understand what scratch building is about. At least I have done all parts for the carriages, so building them won’t hopefully take too much time.
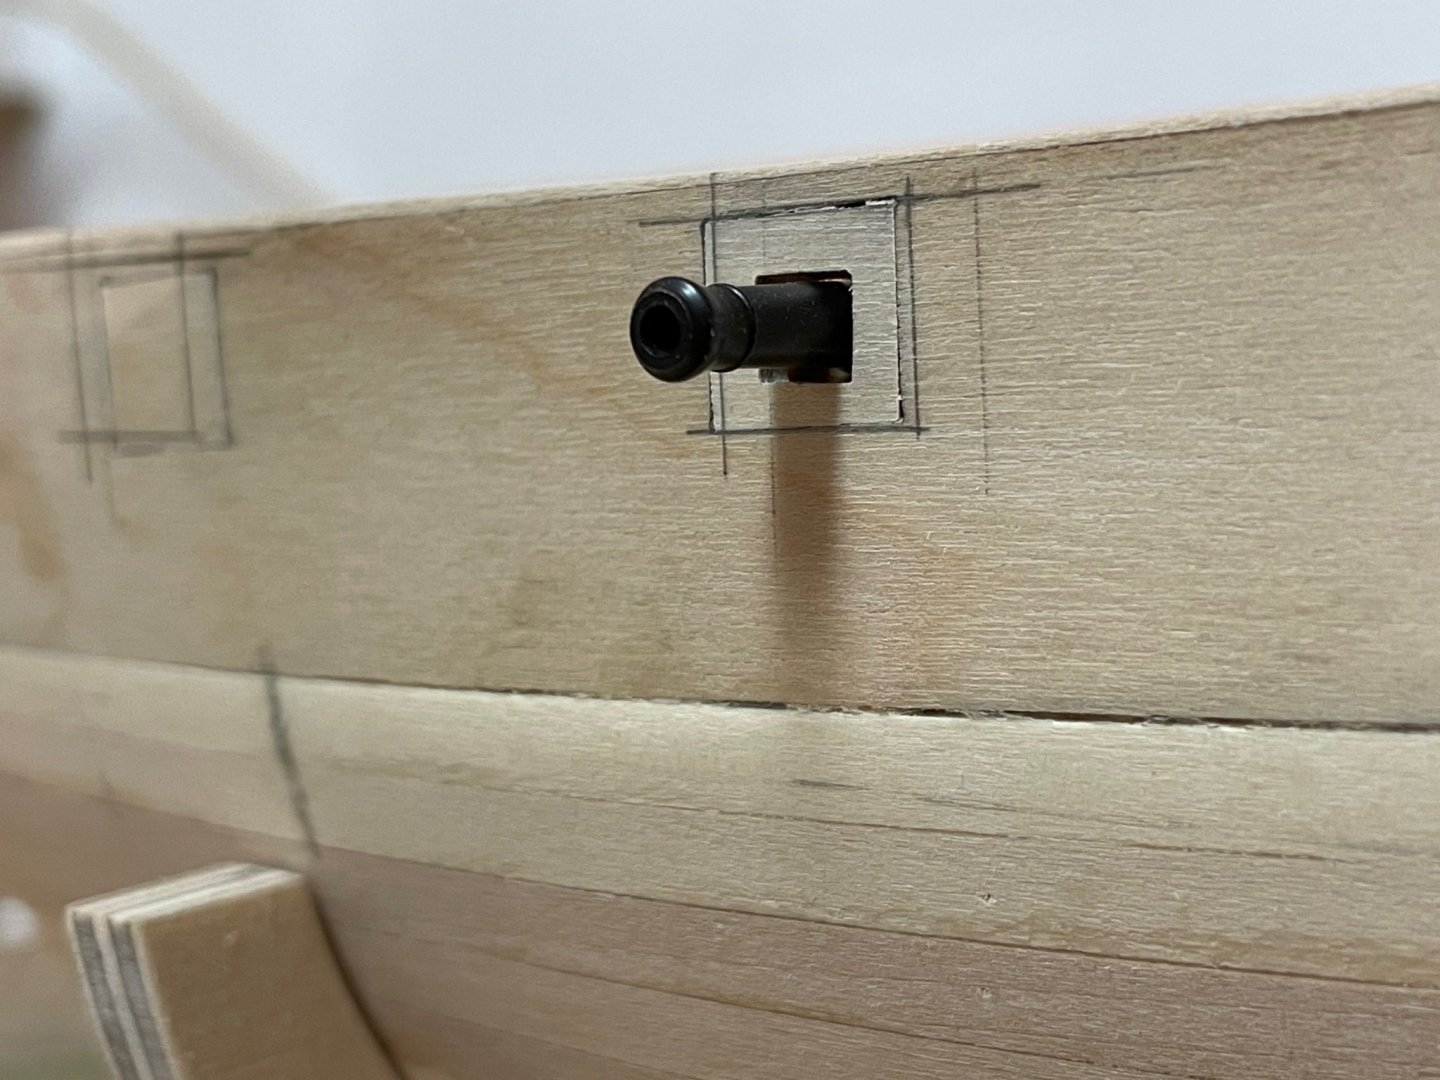
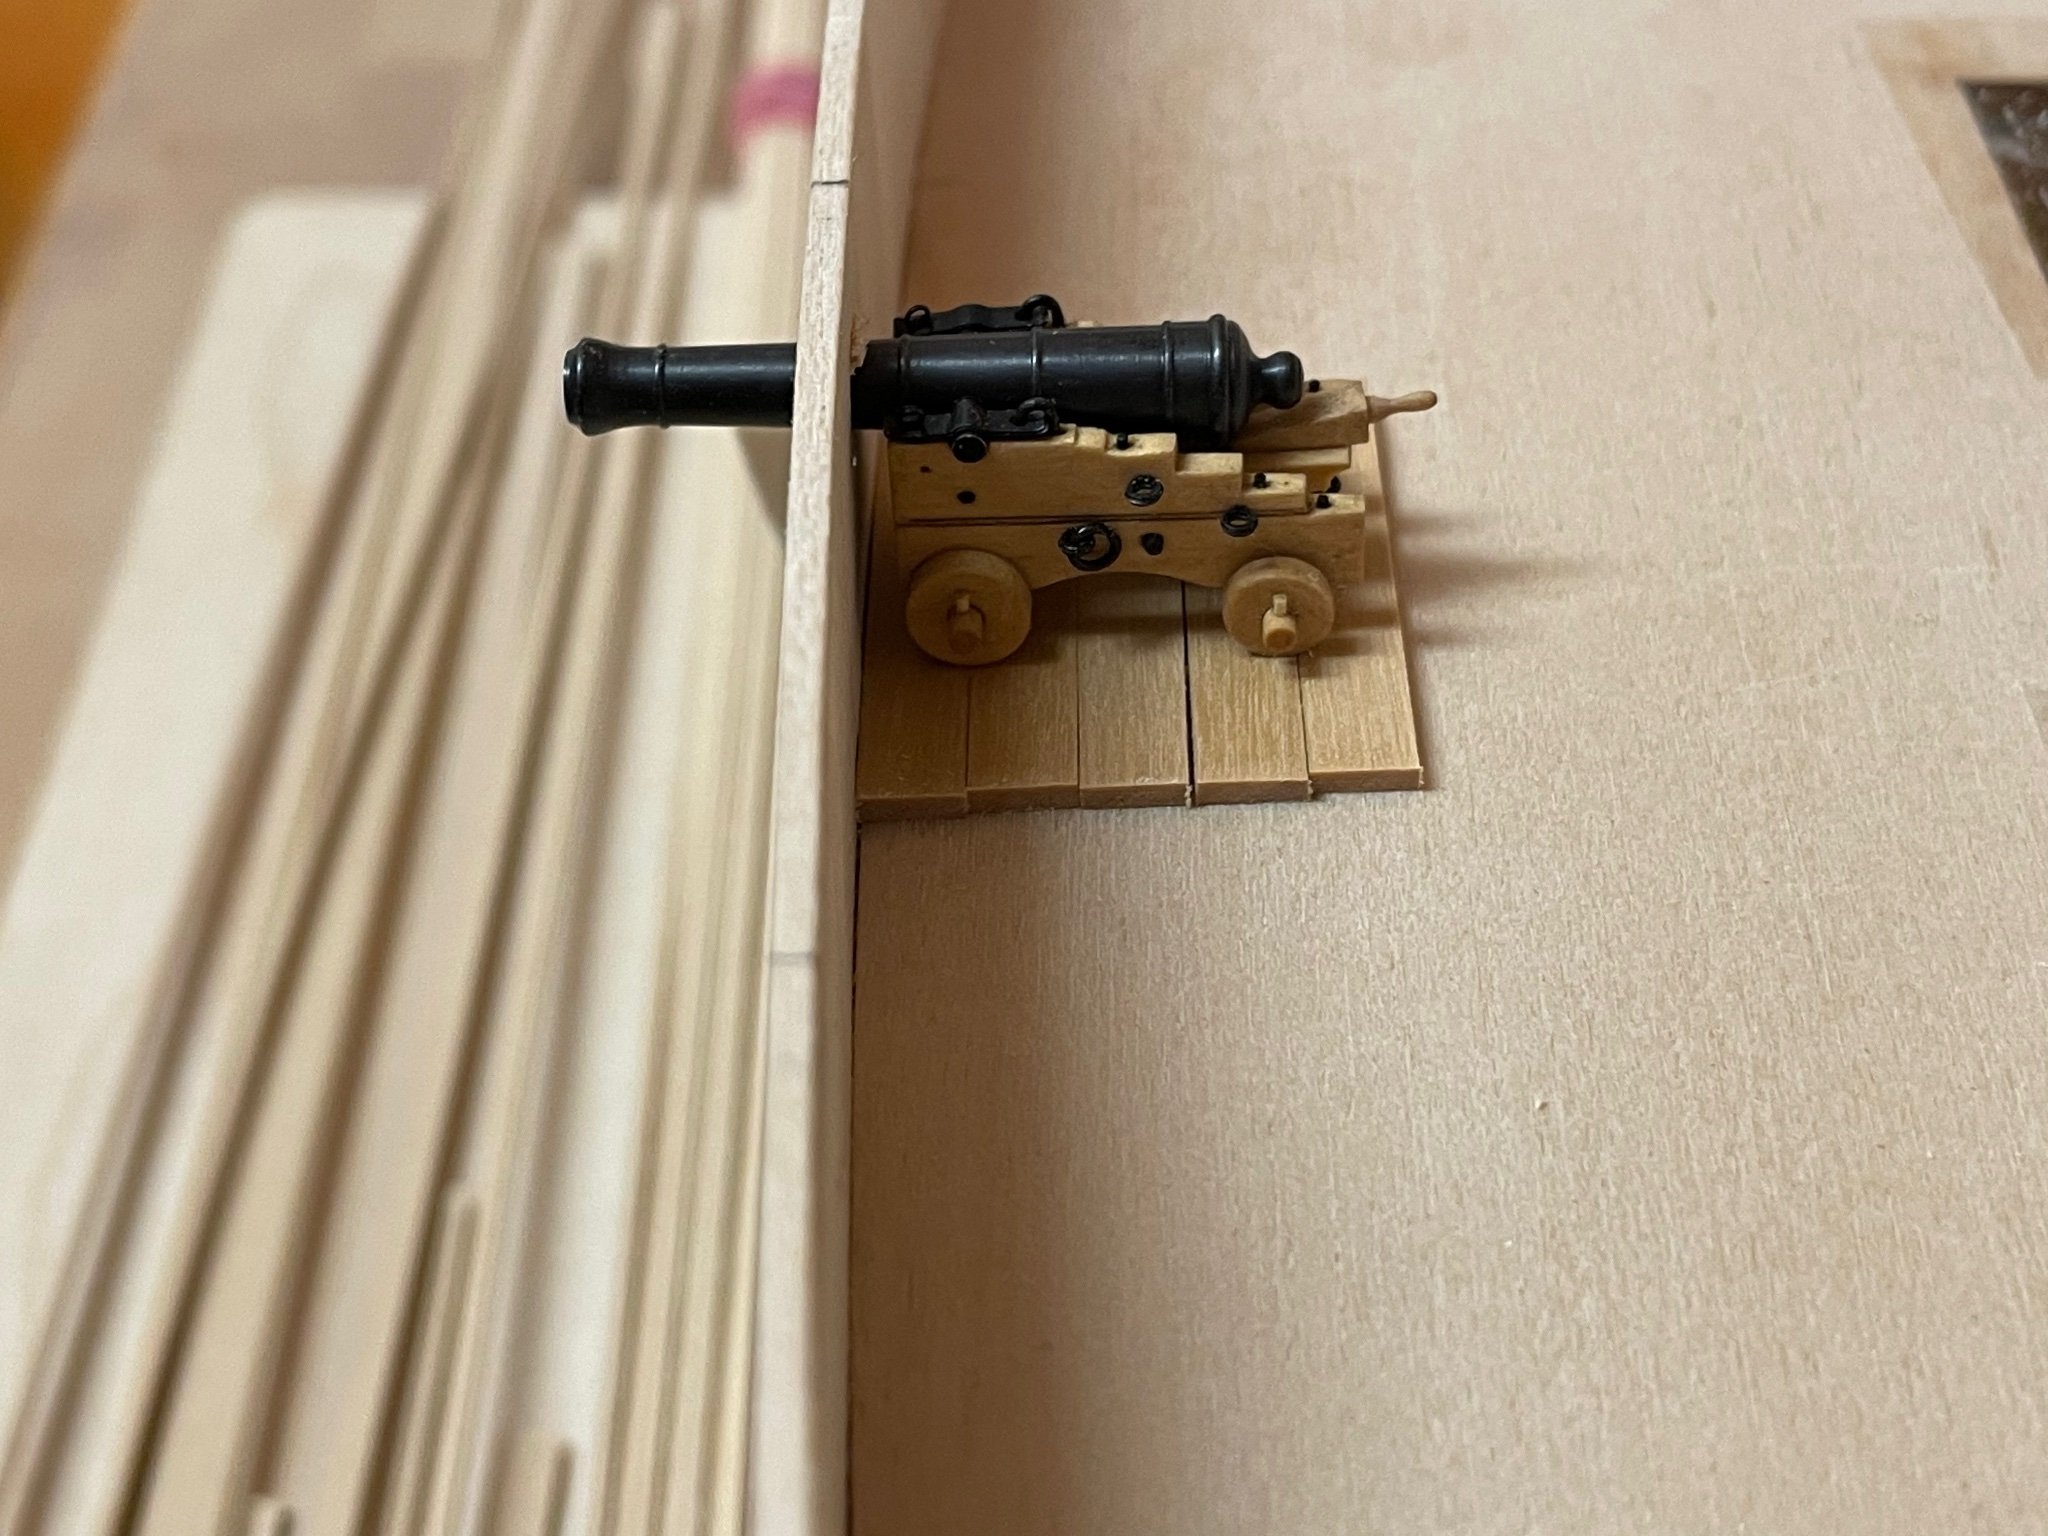
The good thing is that the test-gun fits the gunport - the barrel almost centers it.
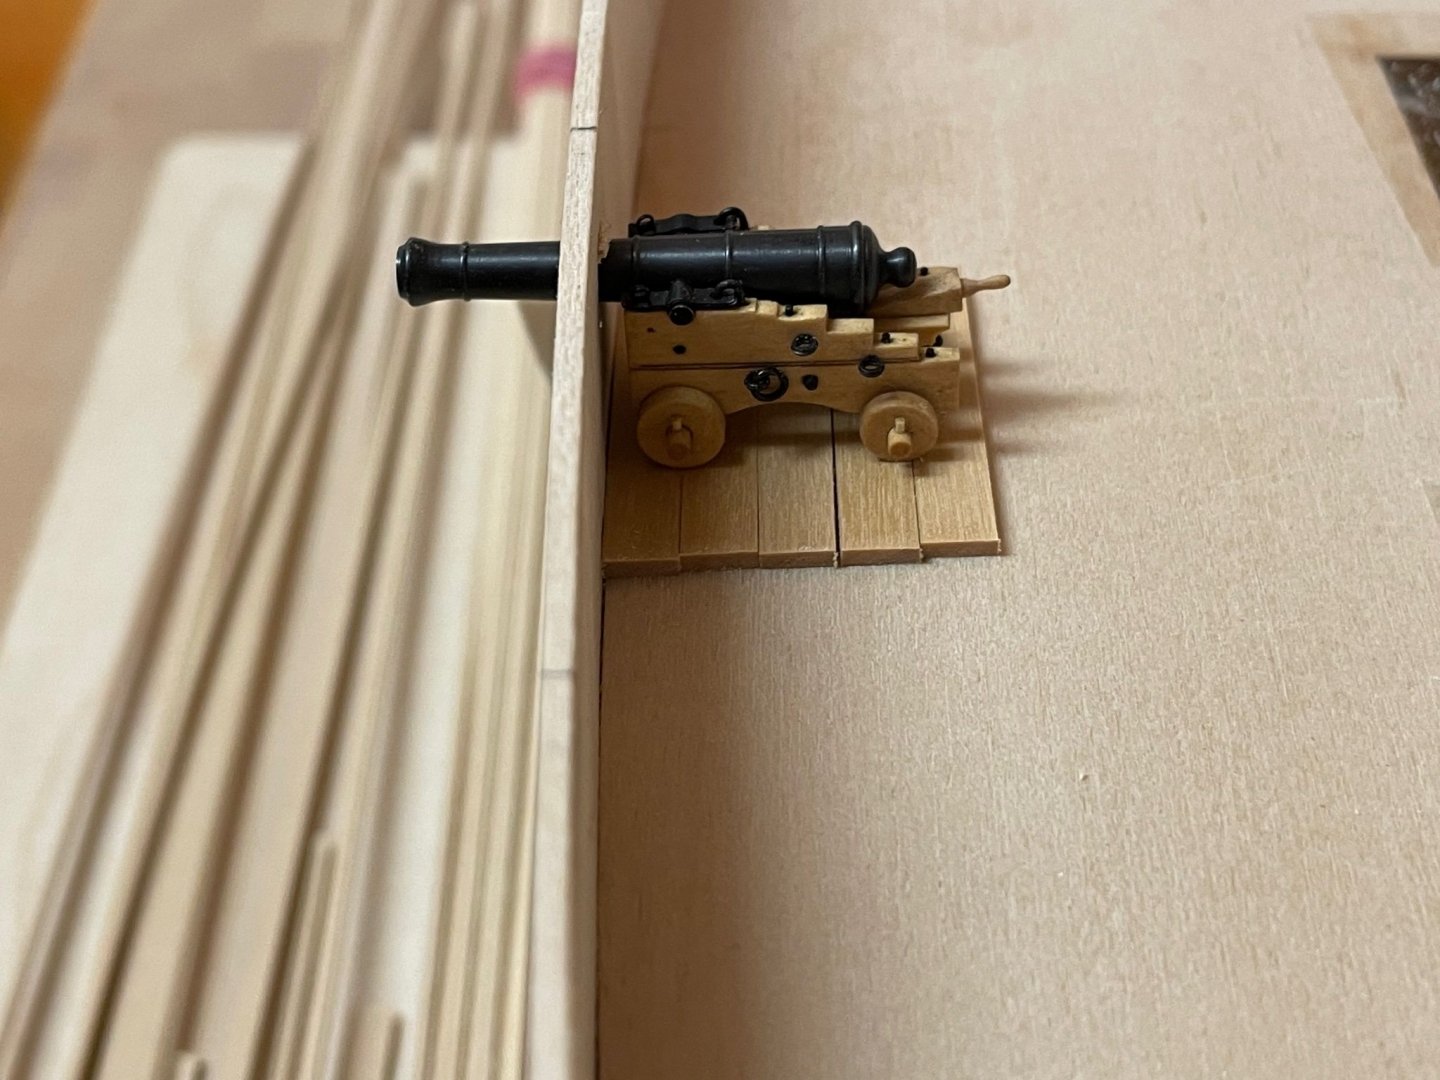
Now I can continue to work on the hull. Stay tuned and save.
Andreas
-
-
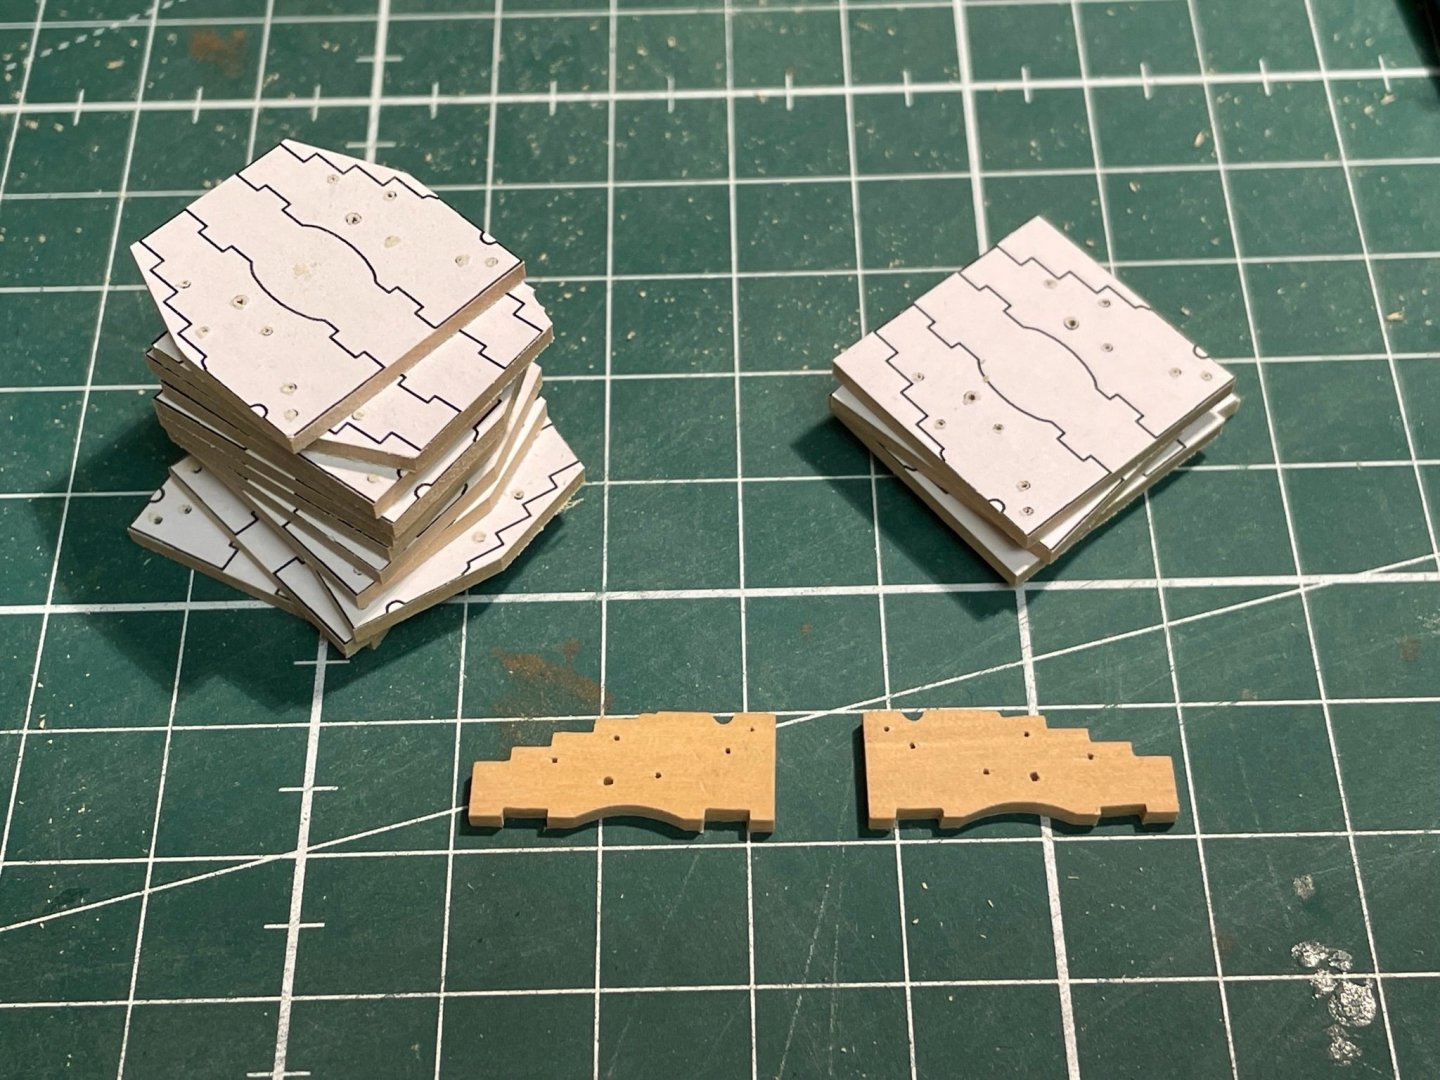
Thank you all for the likes, The side covers have a complex shape and lot of holes for eyebolts and other stuff. I first made a template for both sides with Corel Draw and printed it on adhesive paper. The template was then glued onto a 1/16 inch boxwood sheet.
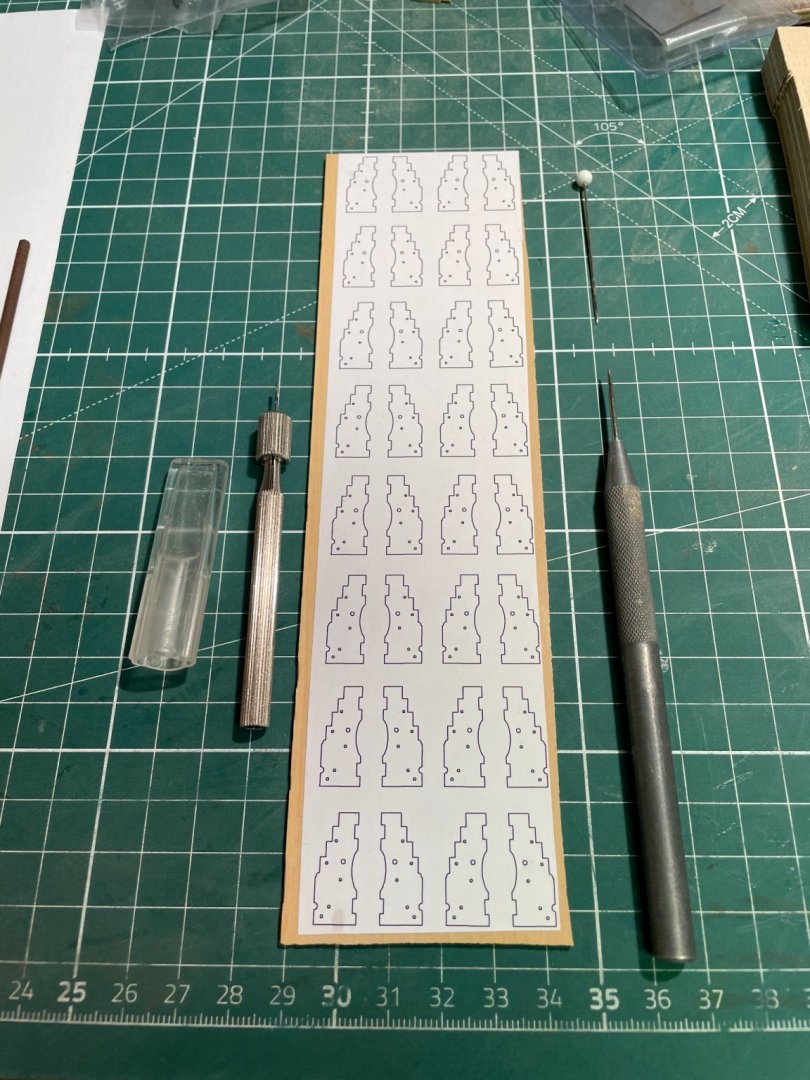
Then I carefully pinned all template marks for holes with a prick and drilled the holes with a small hand drill. The sides were then cut out with a bandsaw and a disc sander was used to sand the pieces to shape. At last the final shape was done with needle files.
I try to finalize a test cannon by the end of the week but there are still some parts missing. But here is a sneak preview ..
Stay tuned and save.
Andreas
- GrandpaPhil, Gregory, Edwardkenway and 3 others
-
6
-
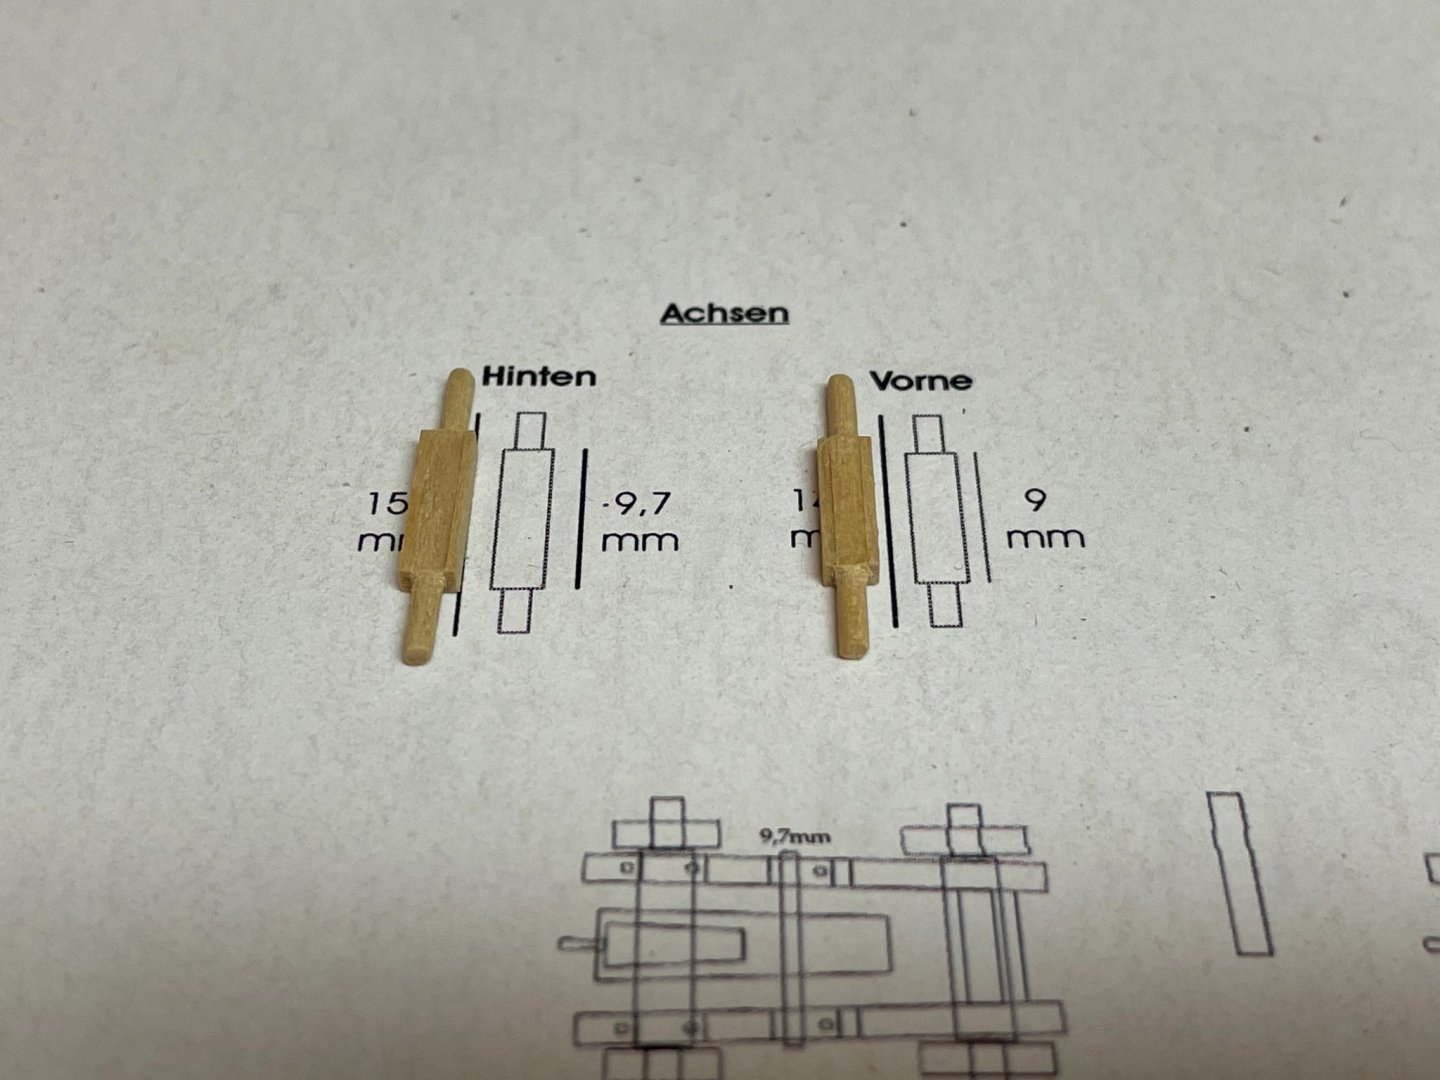
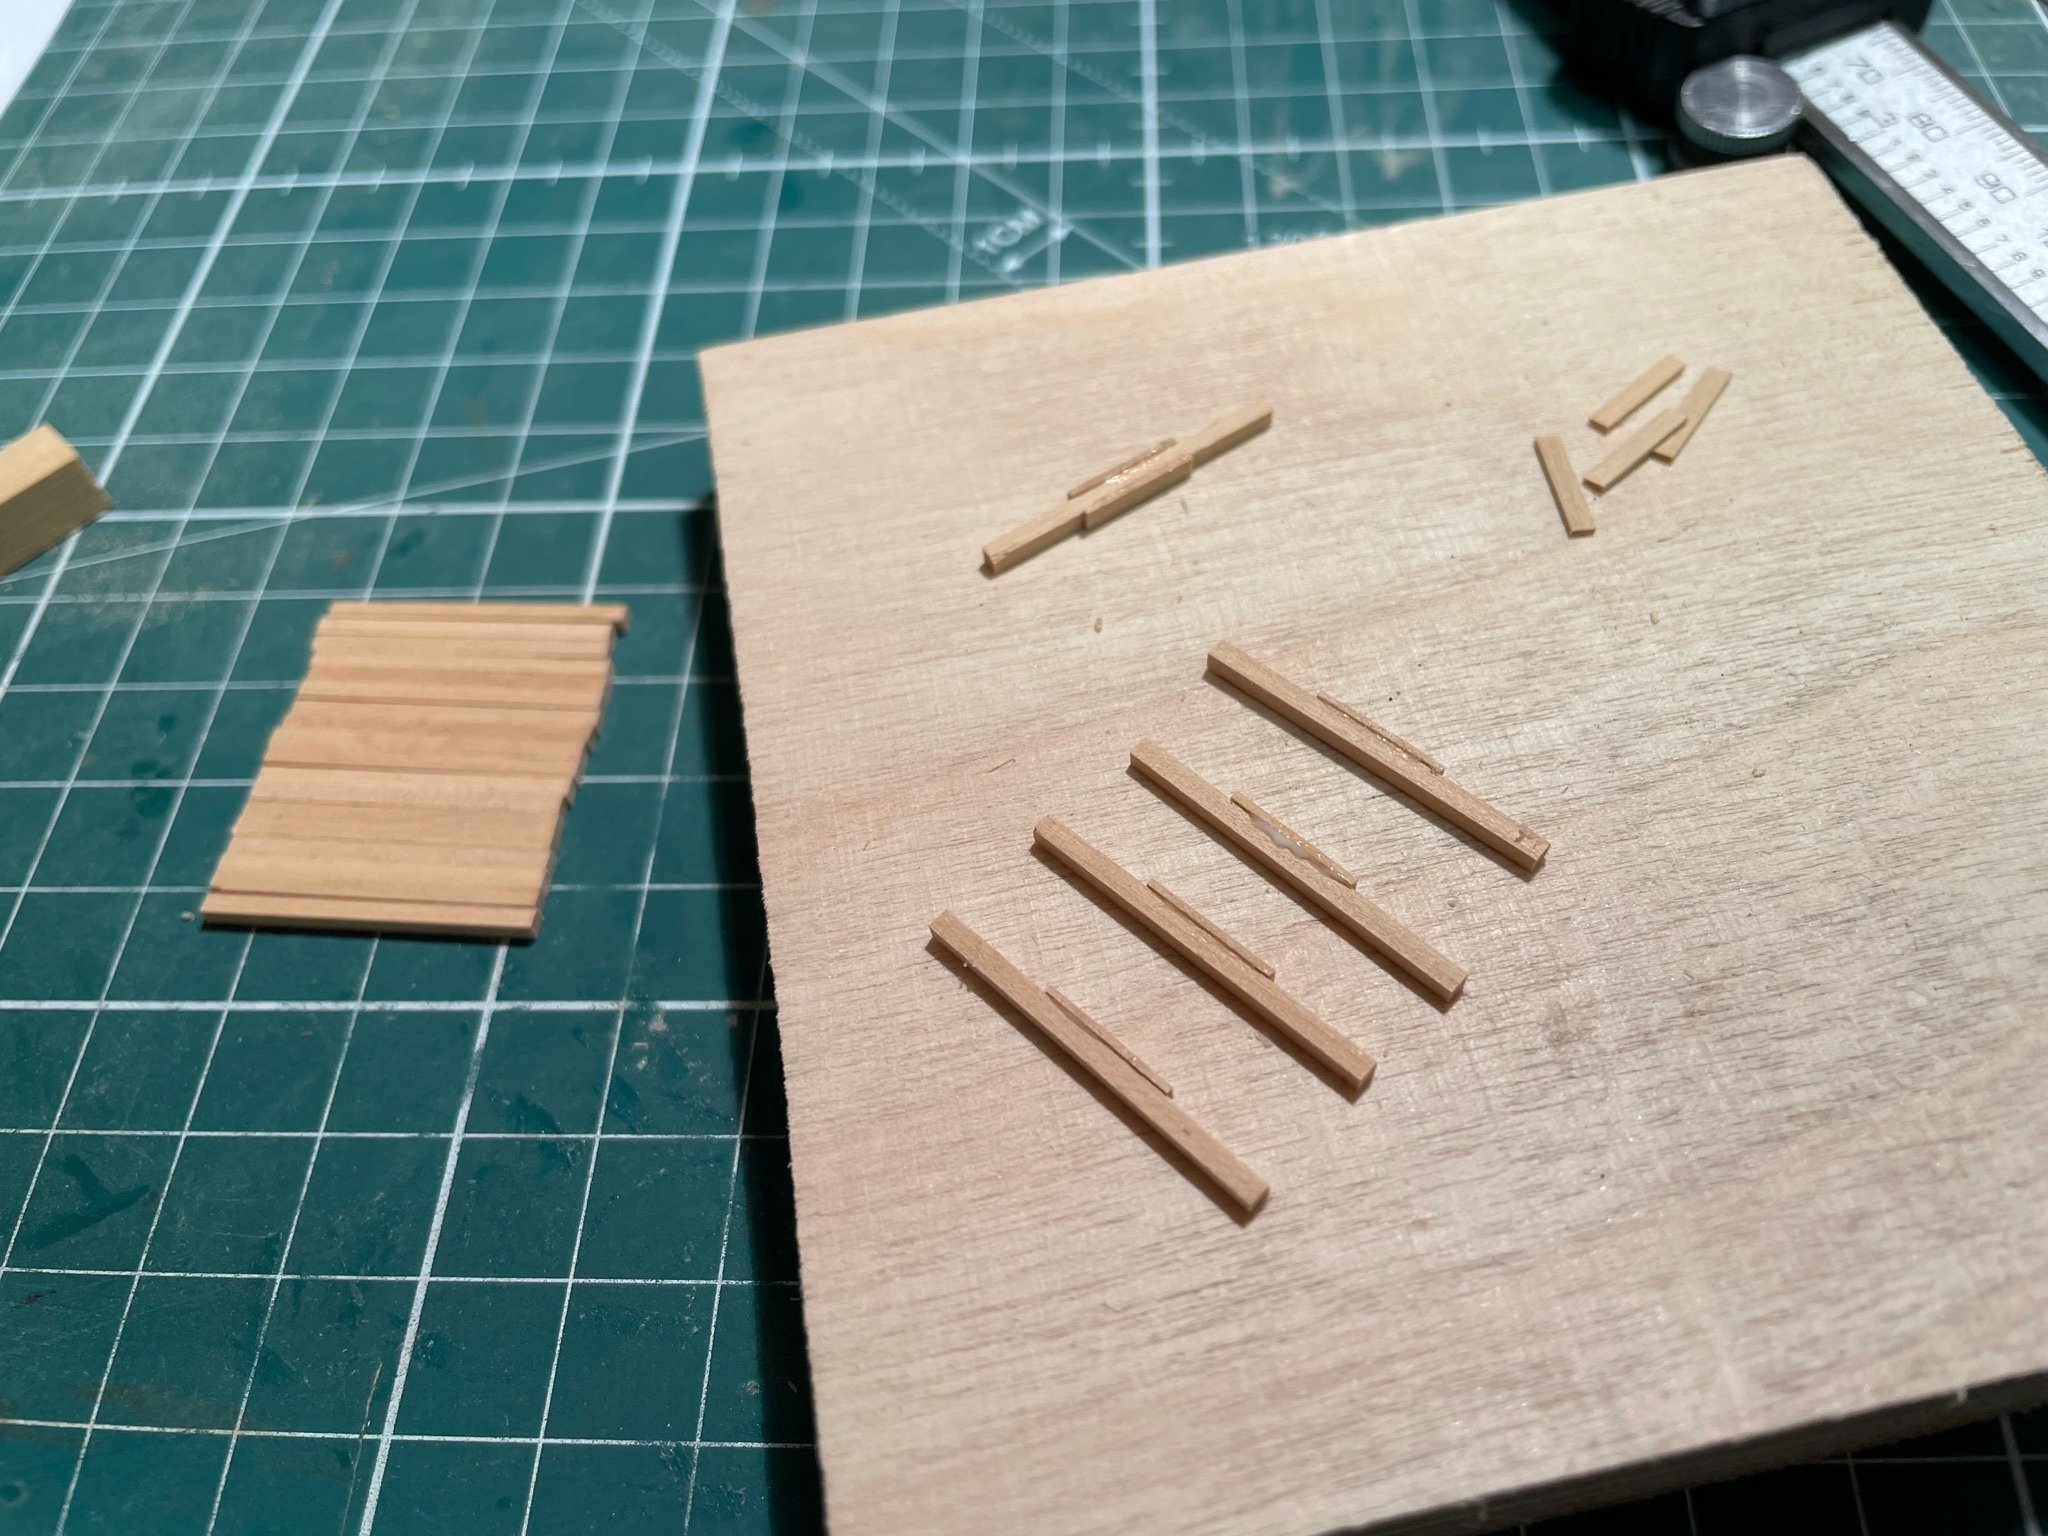
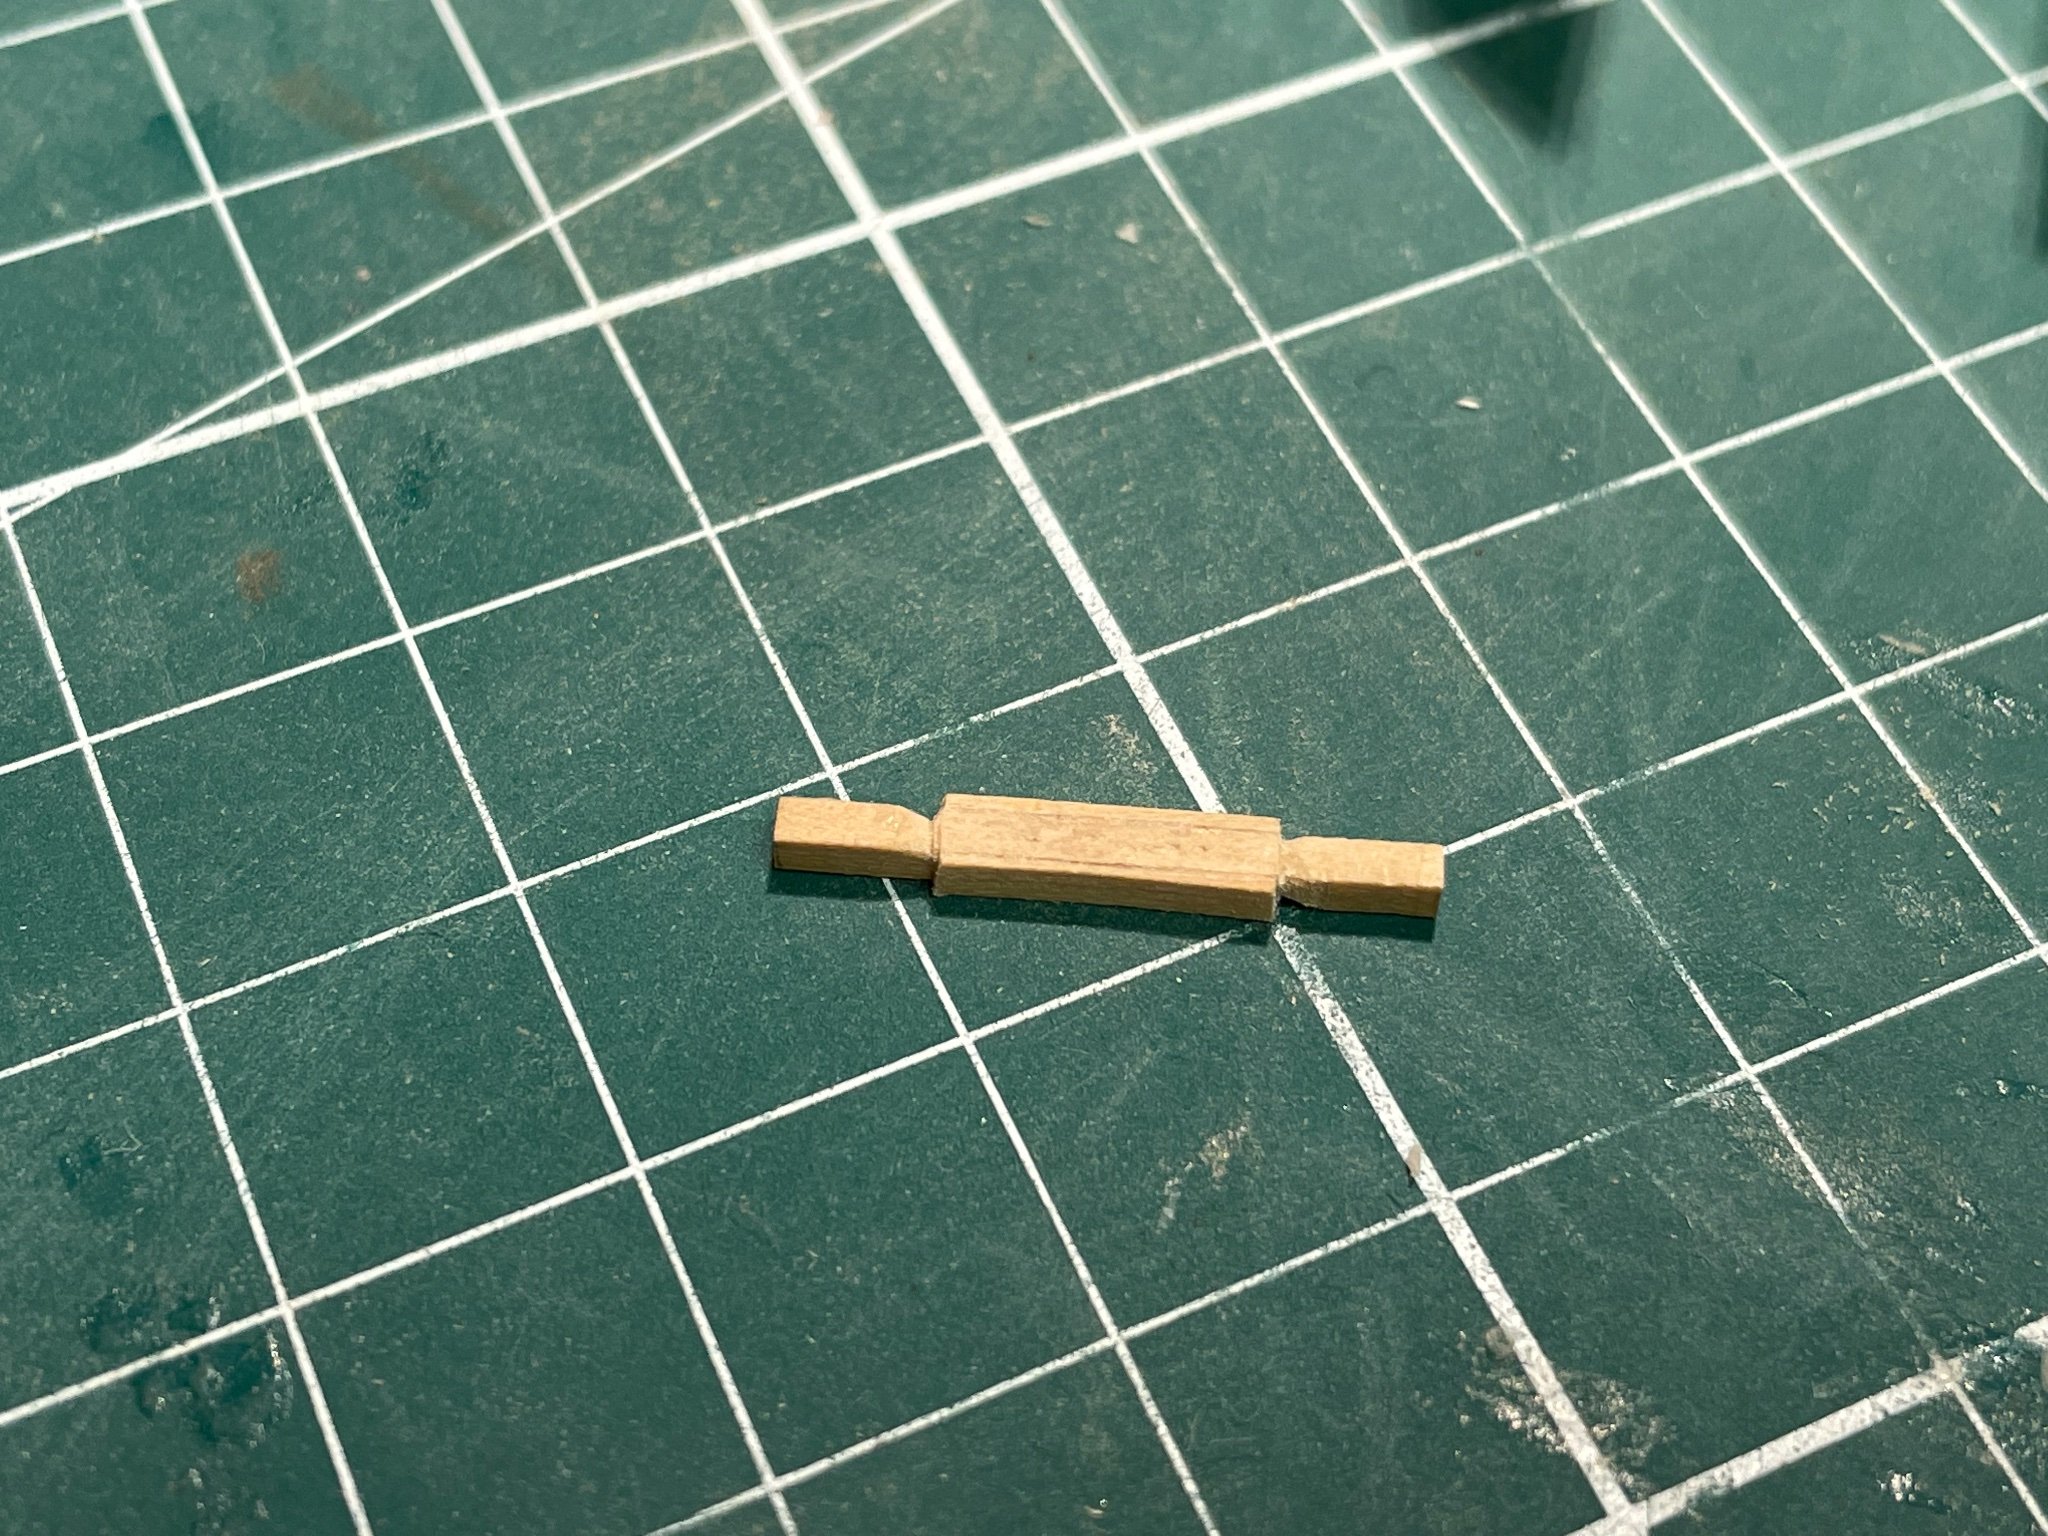
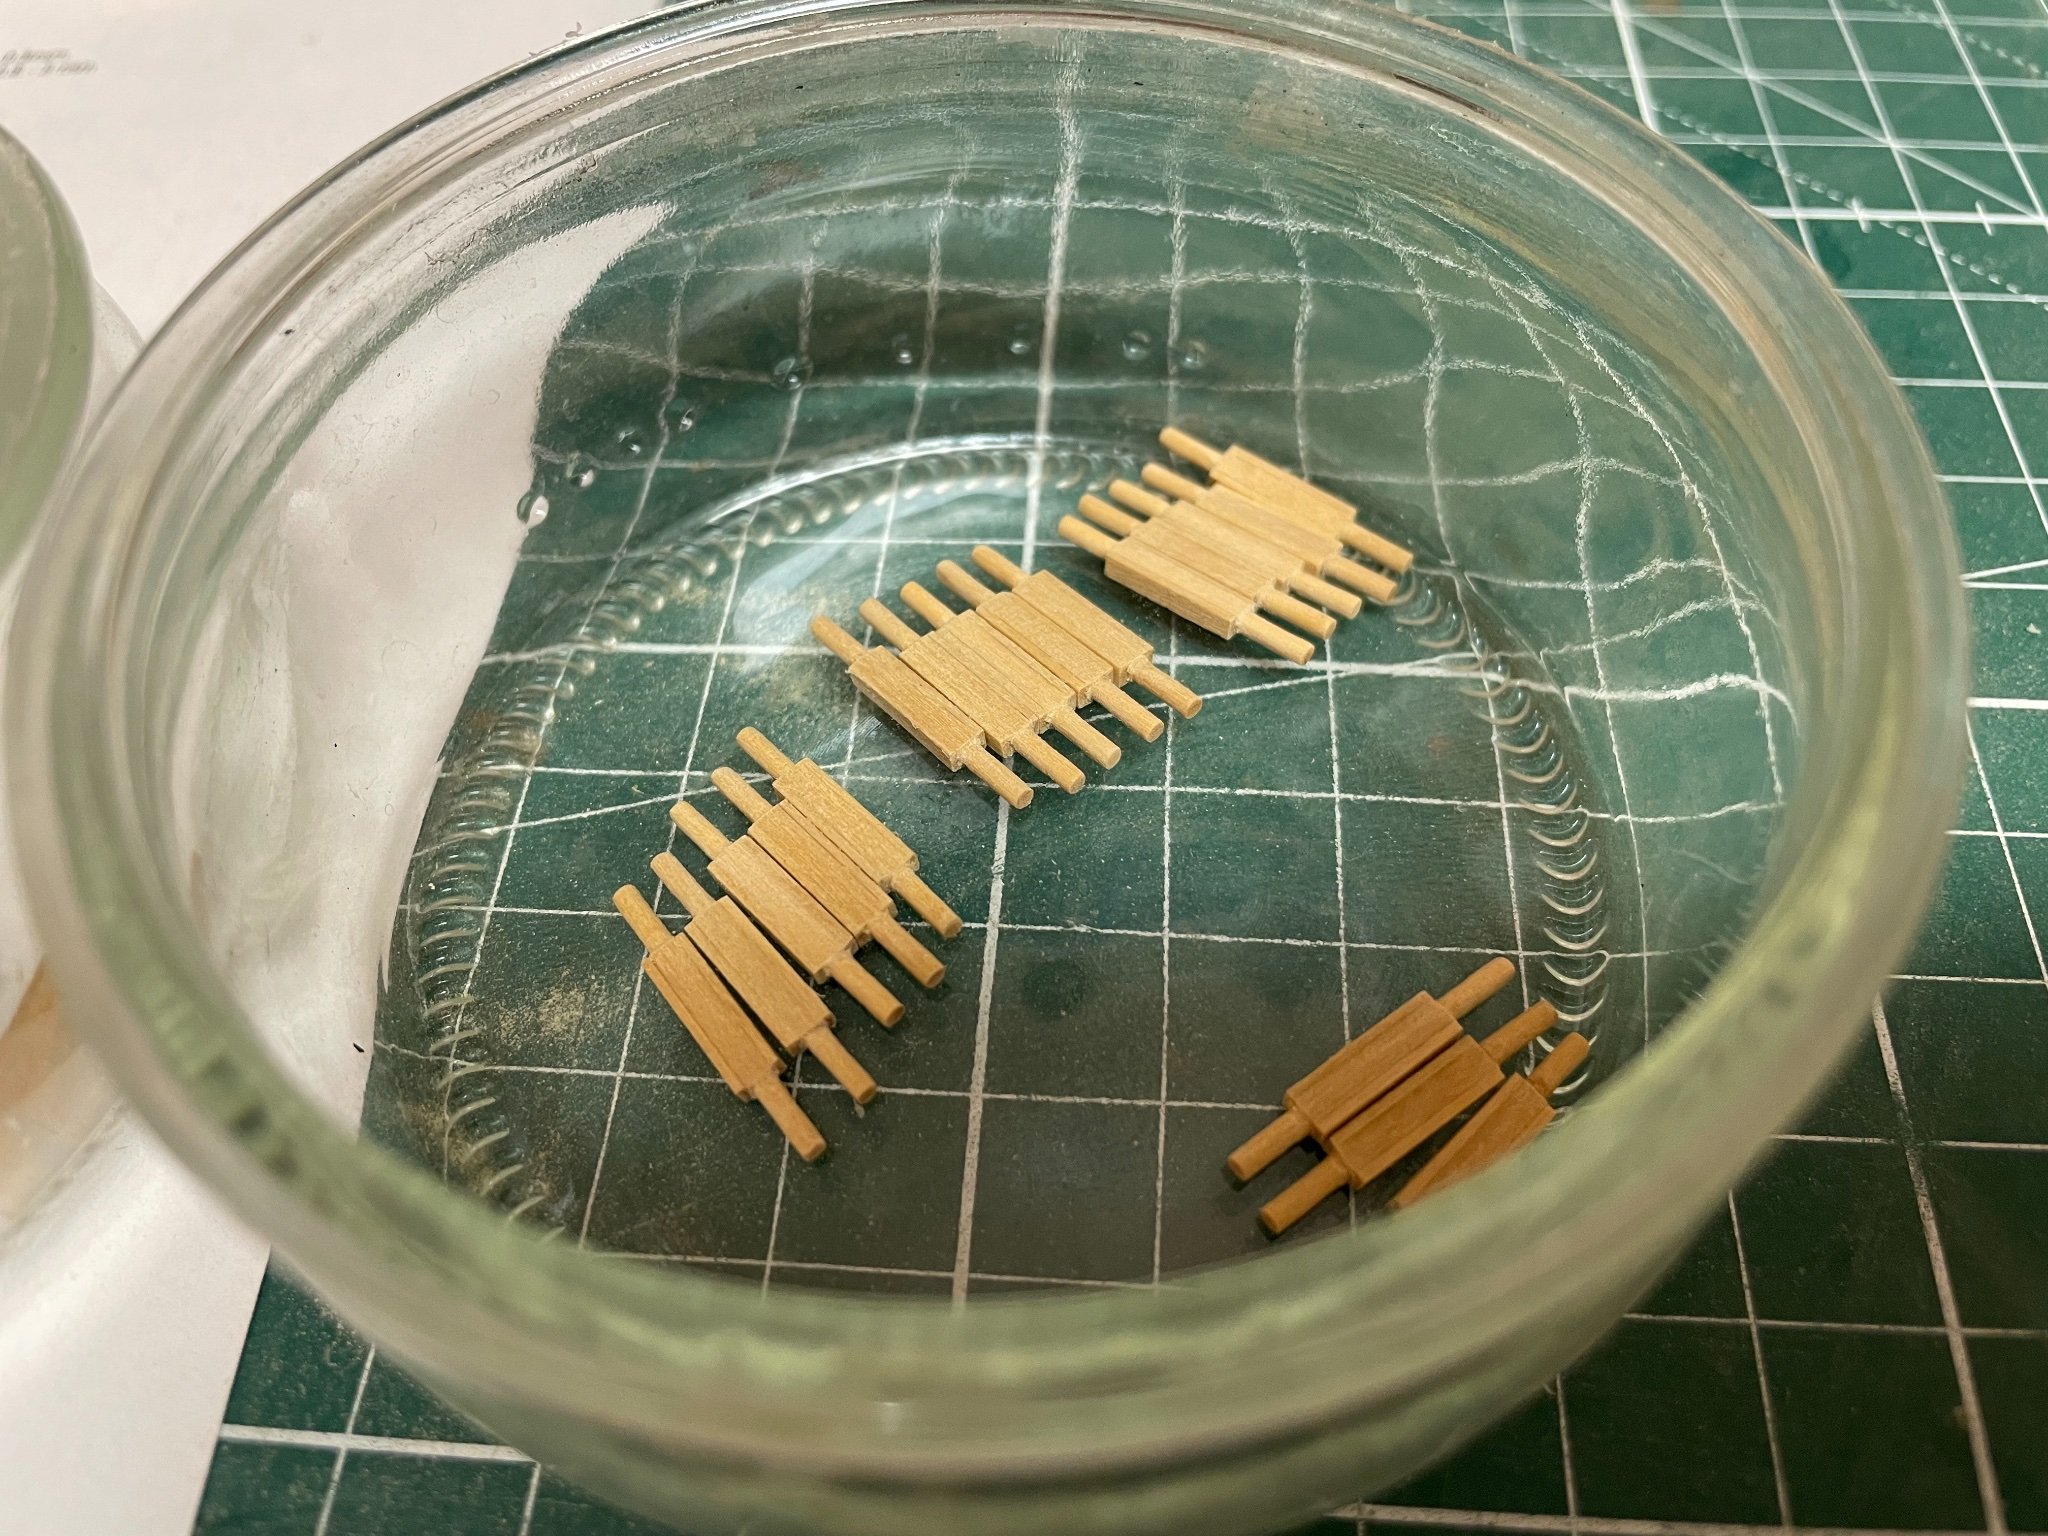
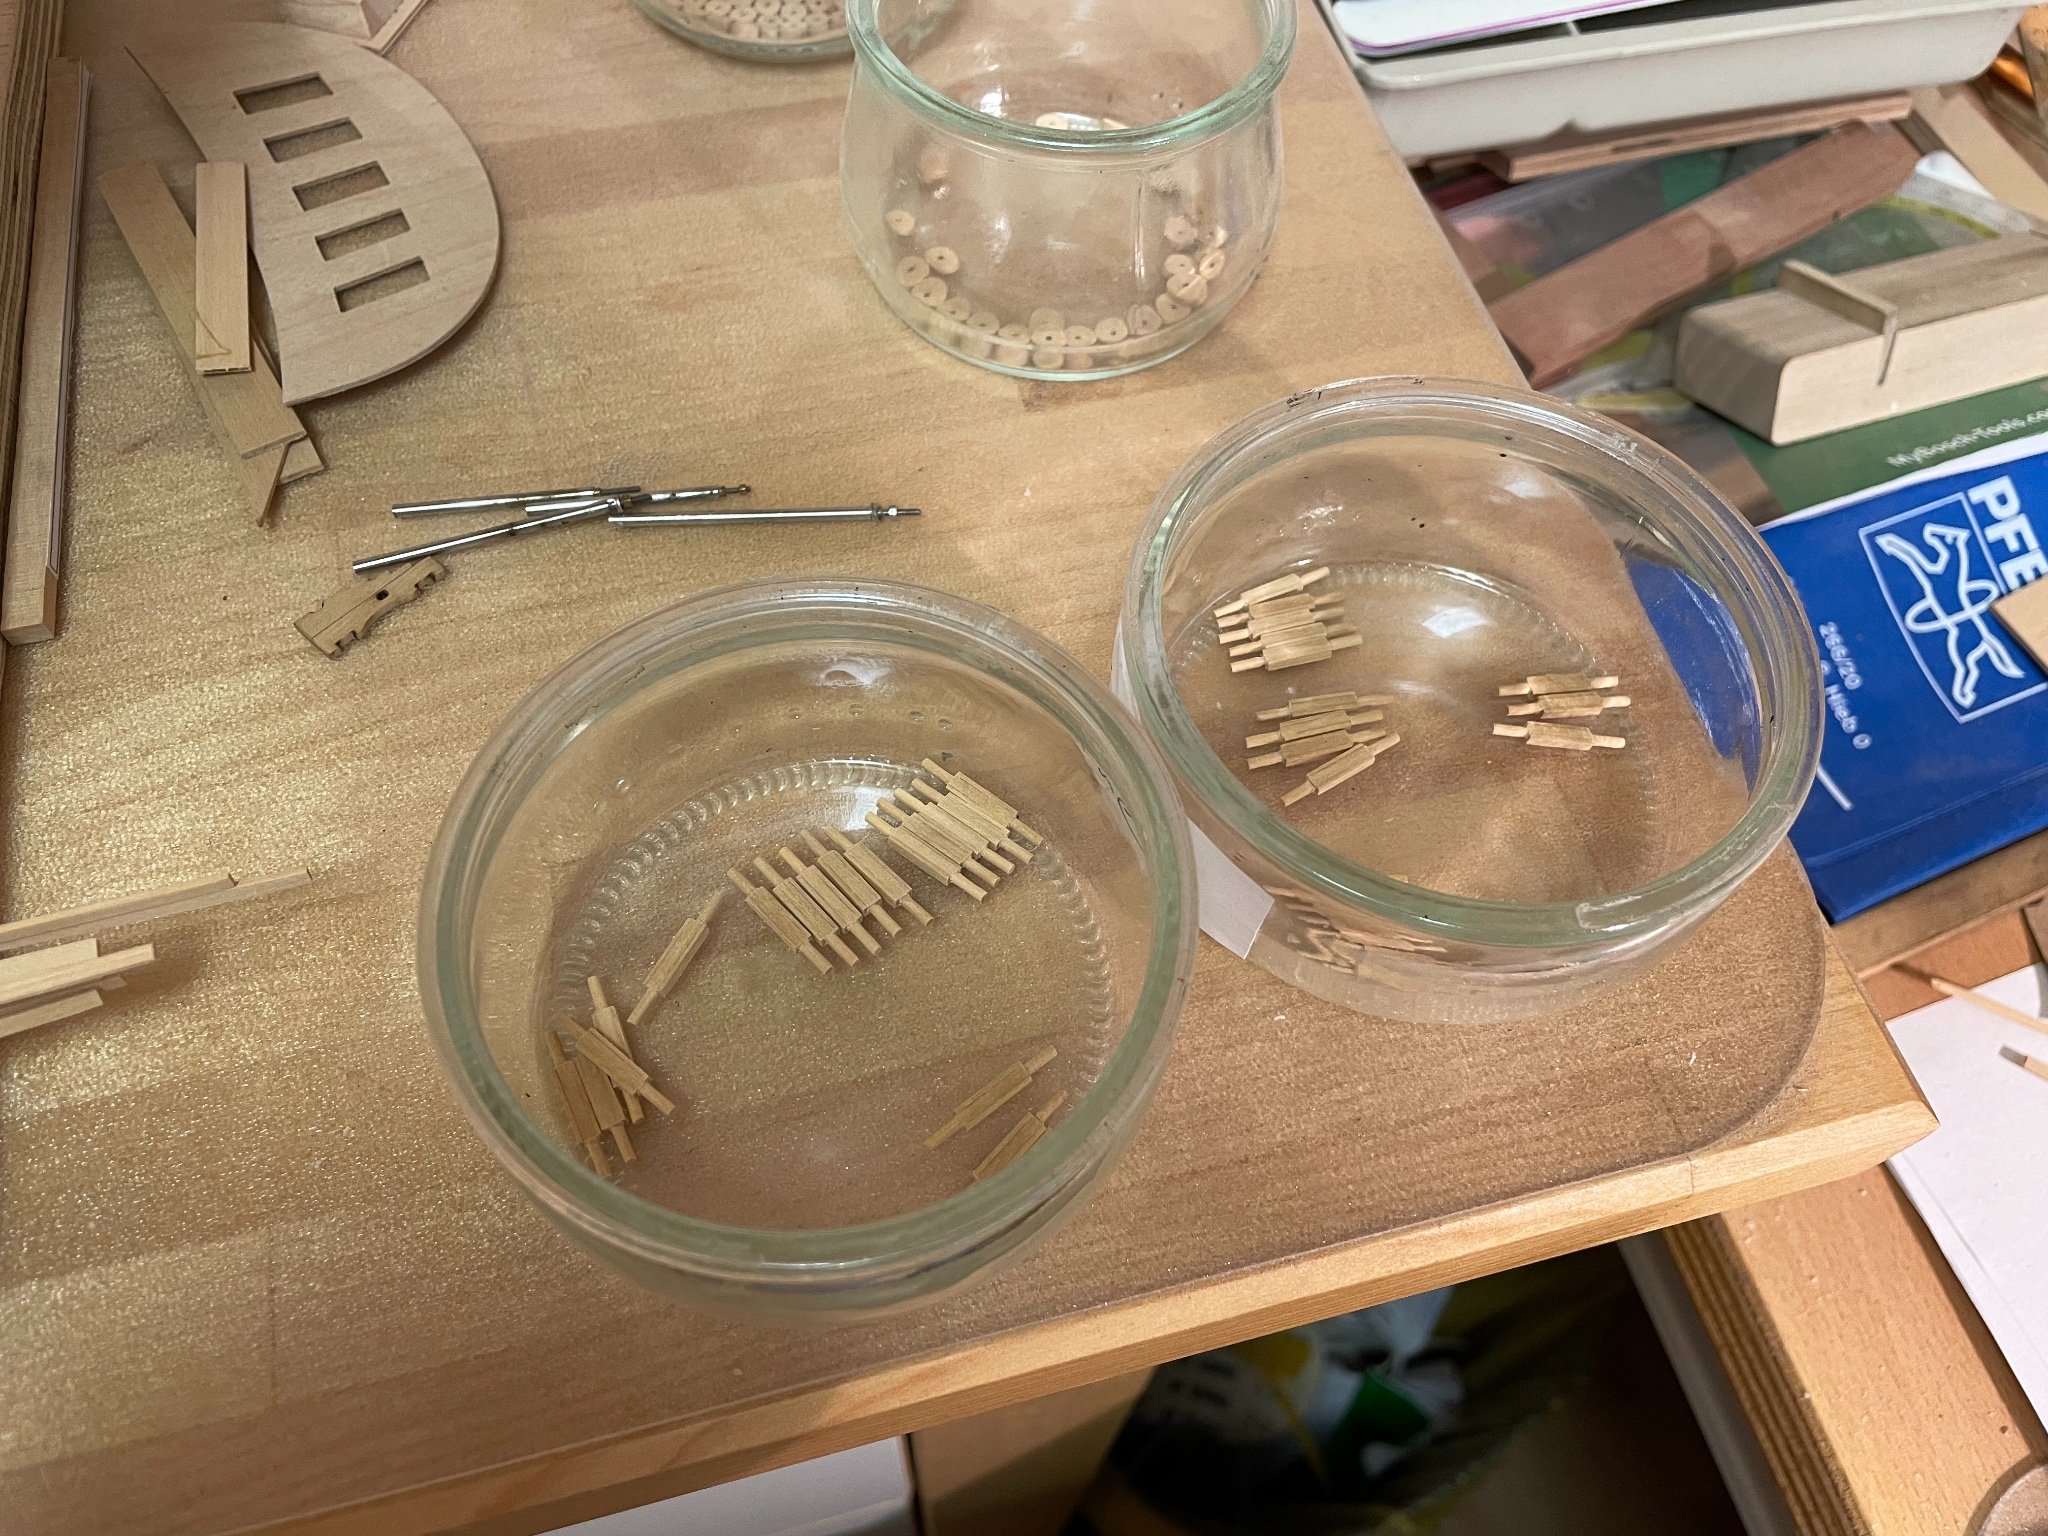
After a longer break I have resumed the build. Next thing is to build front and rear axis of the cannons. I used a rather complicated and time-consuming method but it gave good results in the end. First I determined the diameter of the central axis the wheels will be attached on later, it is about 1,5 mm. So I cut a 1/16 square boxwood stripe segment (rather large for better handling) and glued two .5 mm thick segments on either side that will form the basic shape of the axis - 9 mm for the front axis and 9.8 mm for the rear one.

The parts are then cleaned and the length is reduced.

With a needle file (triangular shape) a tiny groove is made just along the outside of the center pieces. This is to use the drawplate later without getting stuck.

Then the axis are rounded up, just a little sanding for the basic shape. I made myself a sanding stick with sandpaper (120 and 240 on the opposing side) attached by double-adhesive tape close to the sides.
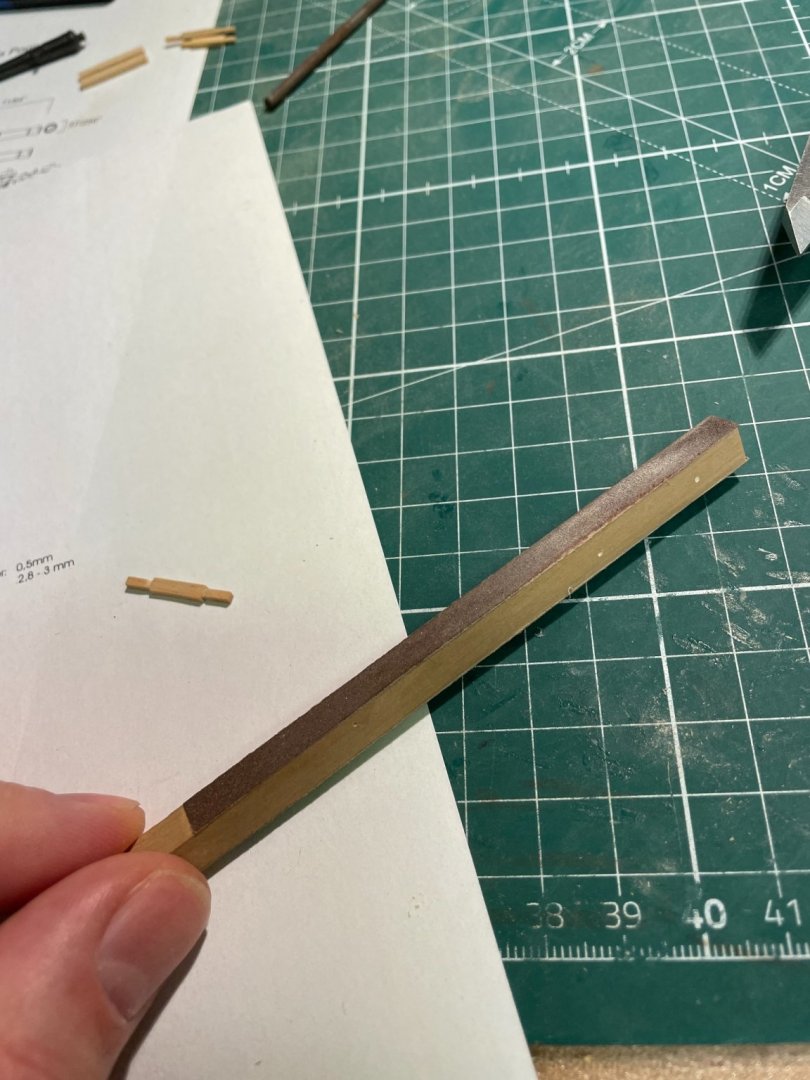
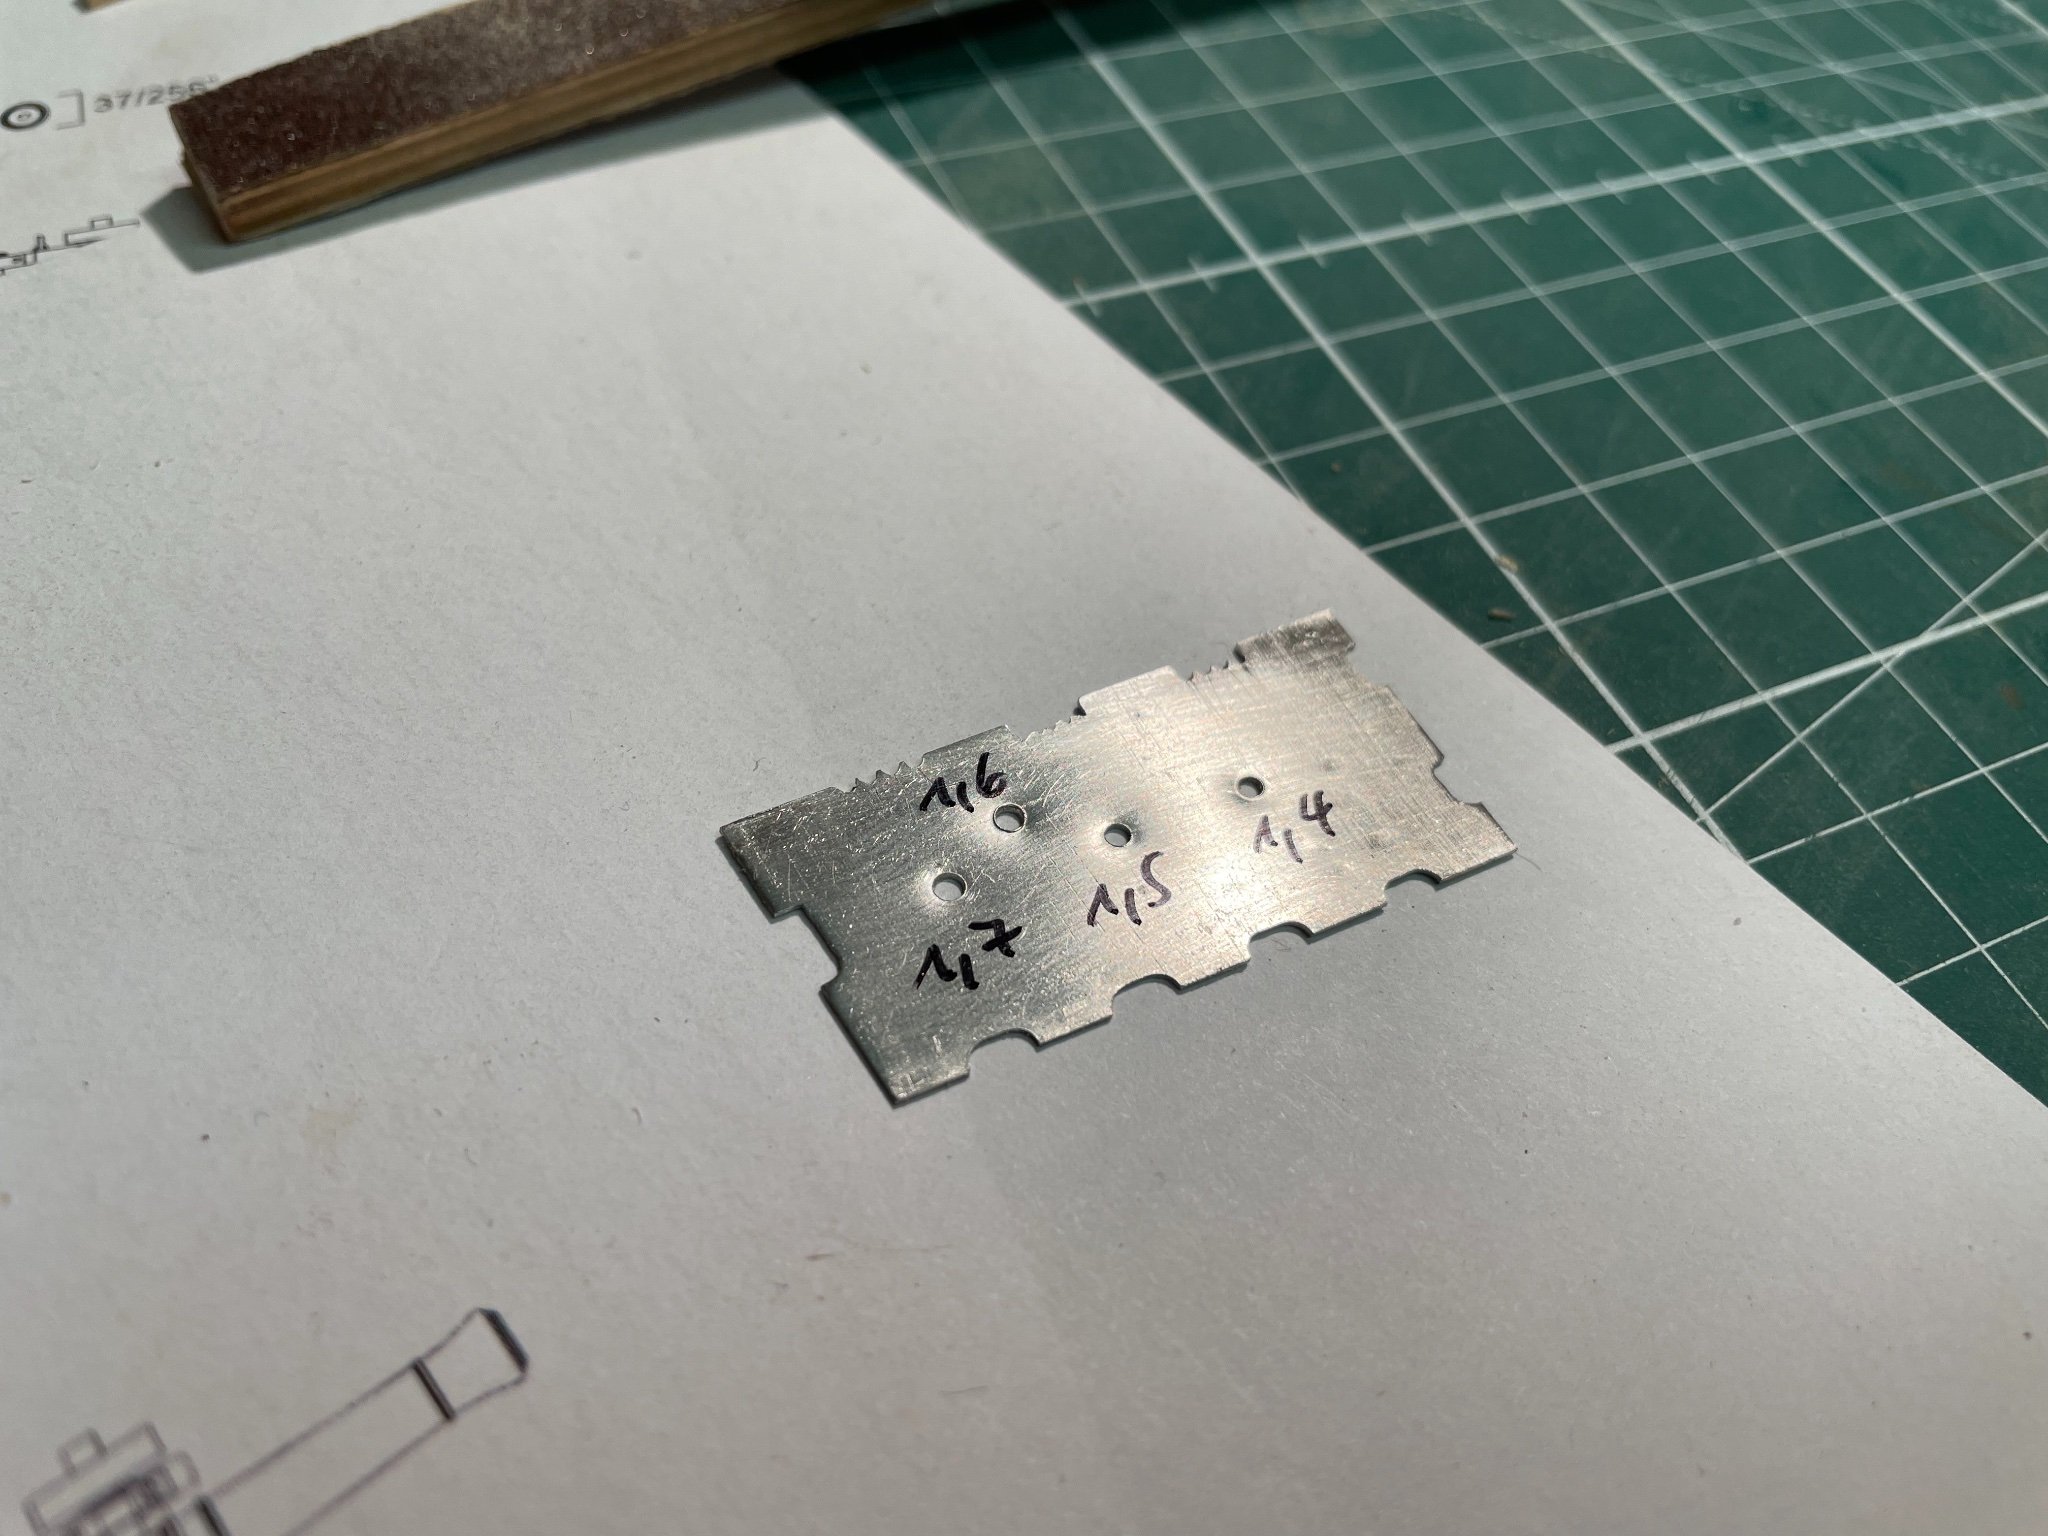
At last a selfmade drawplate from scrap is used to give the axis the round shape.

Just sand a little and then use each step on the drawplate to finalize the shape. The groove will enable to use the drawplate close to the center pieces without getting stuck.
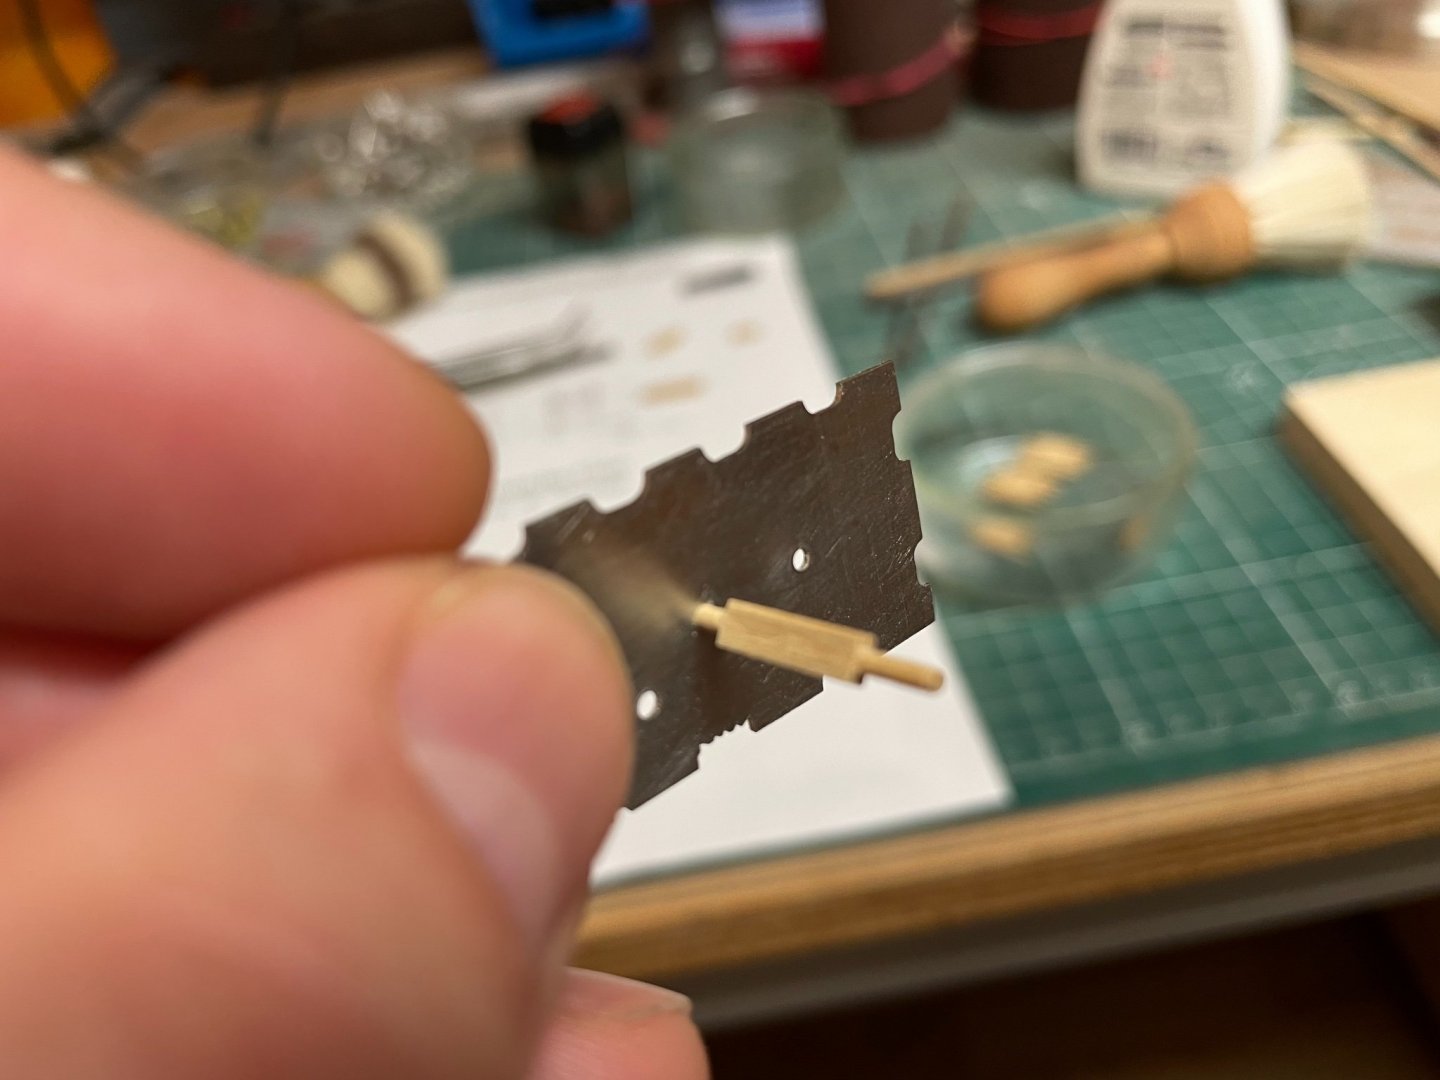
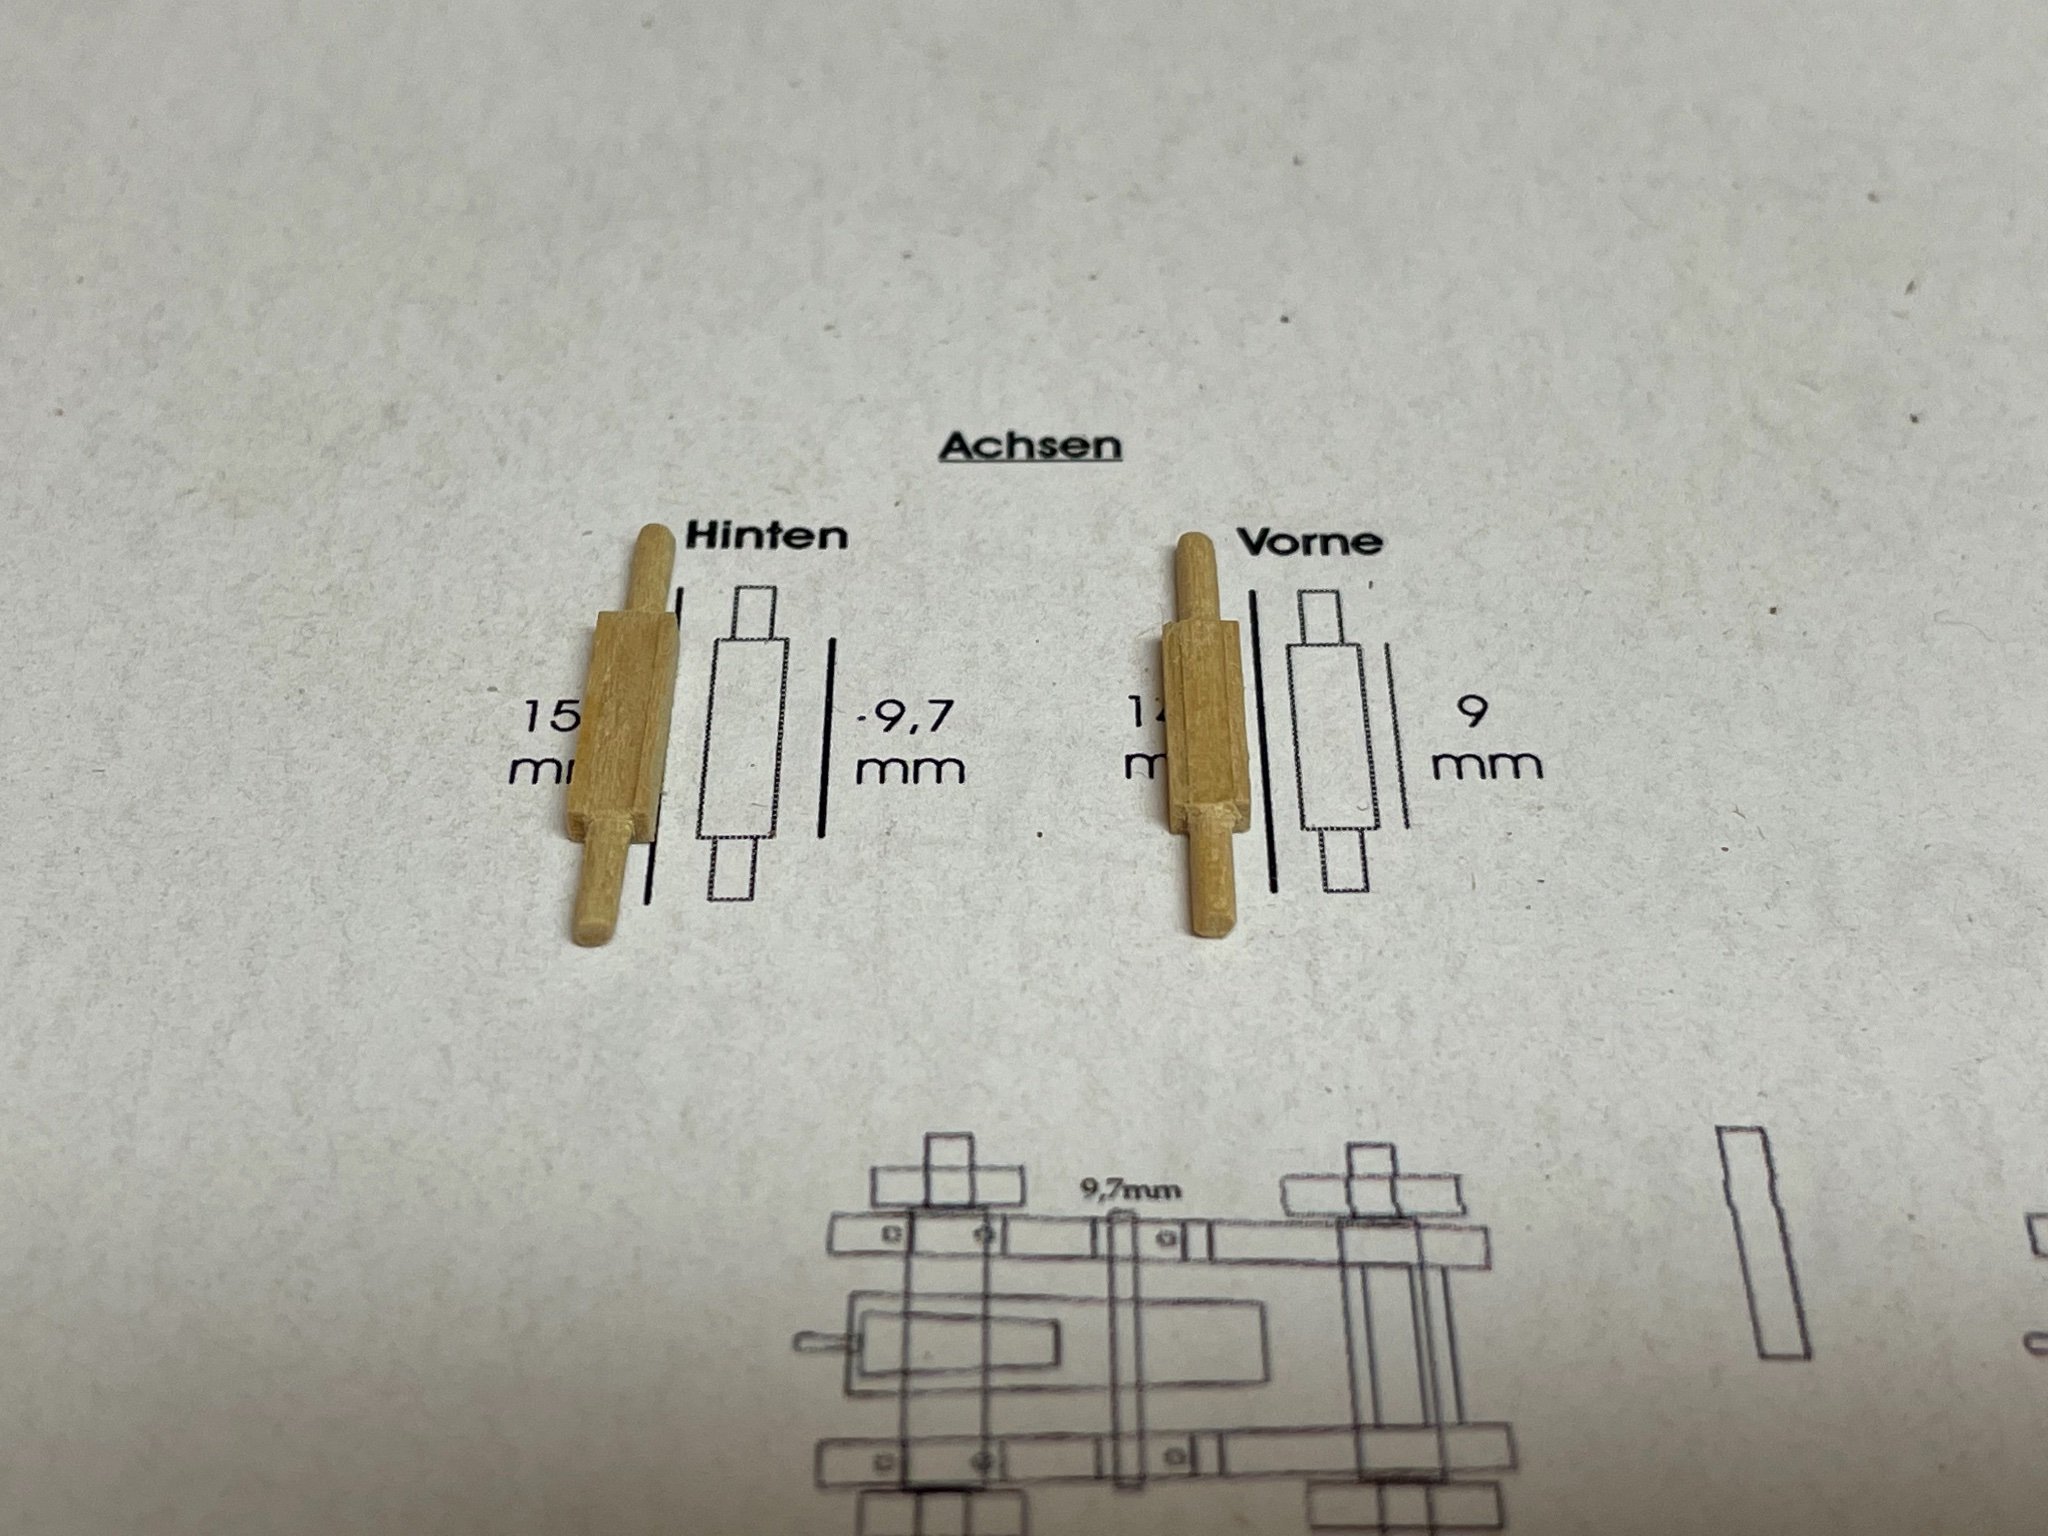
Some final cleaning and you‘re done. Complicated but give nice results.
Now only the side covers are missing. After that I can finally build up all guns.


Stay tuned and save.
Andreas
- ccoyle, Ronald-V, GrandpaPhil and 7 others
-
10
-
Absolutely amazing and nicely executed. The gun platform looks very realistic.
- Old Collingwood, yvesvidal, Egilman and 2 others
-
5
-
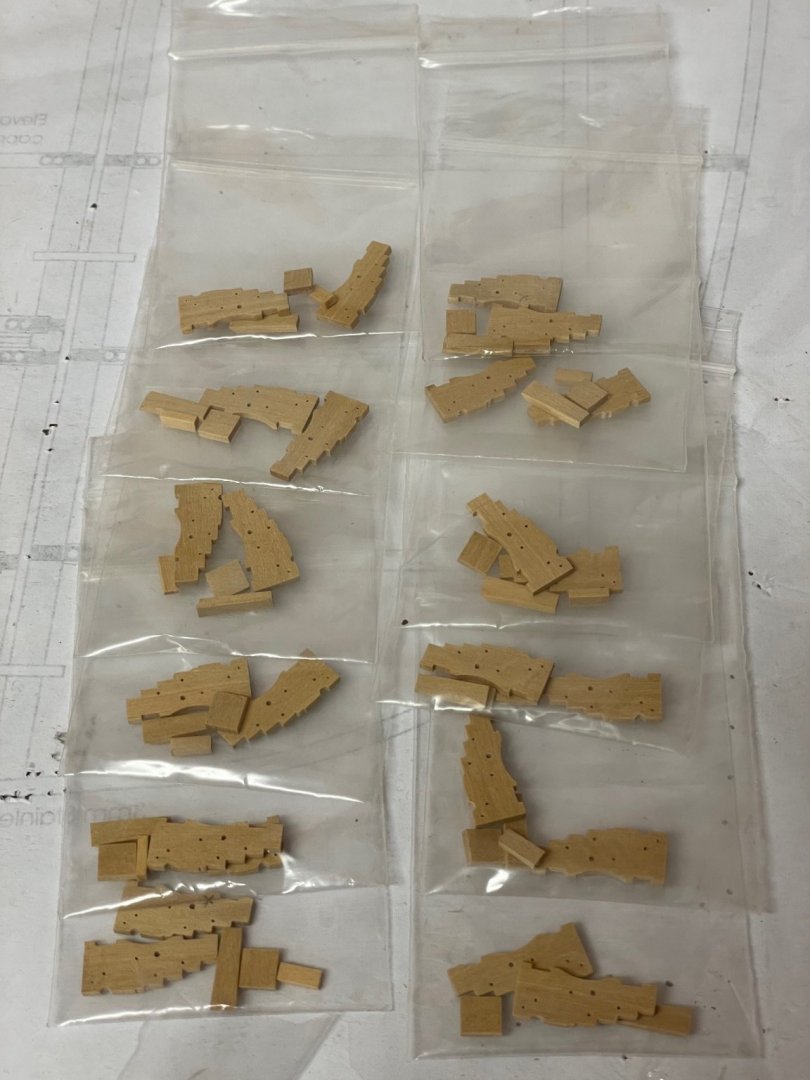
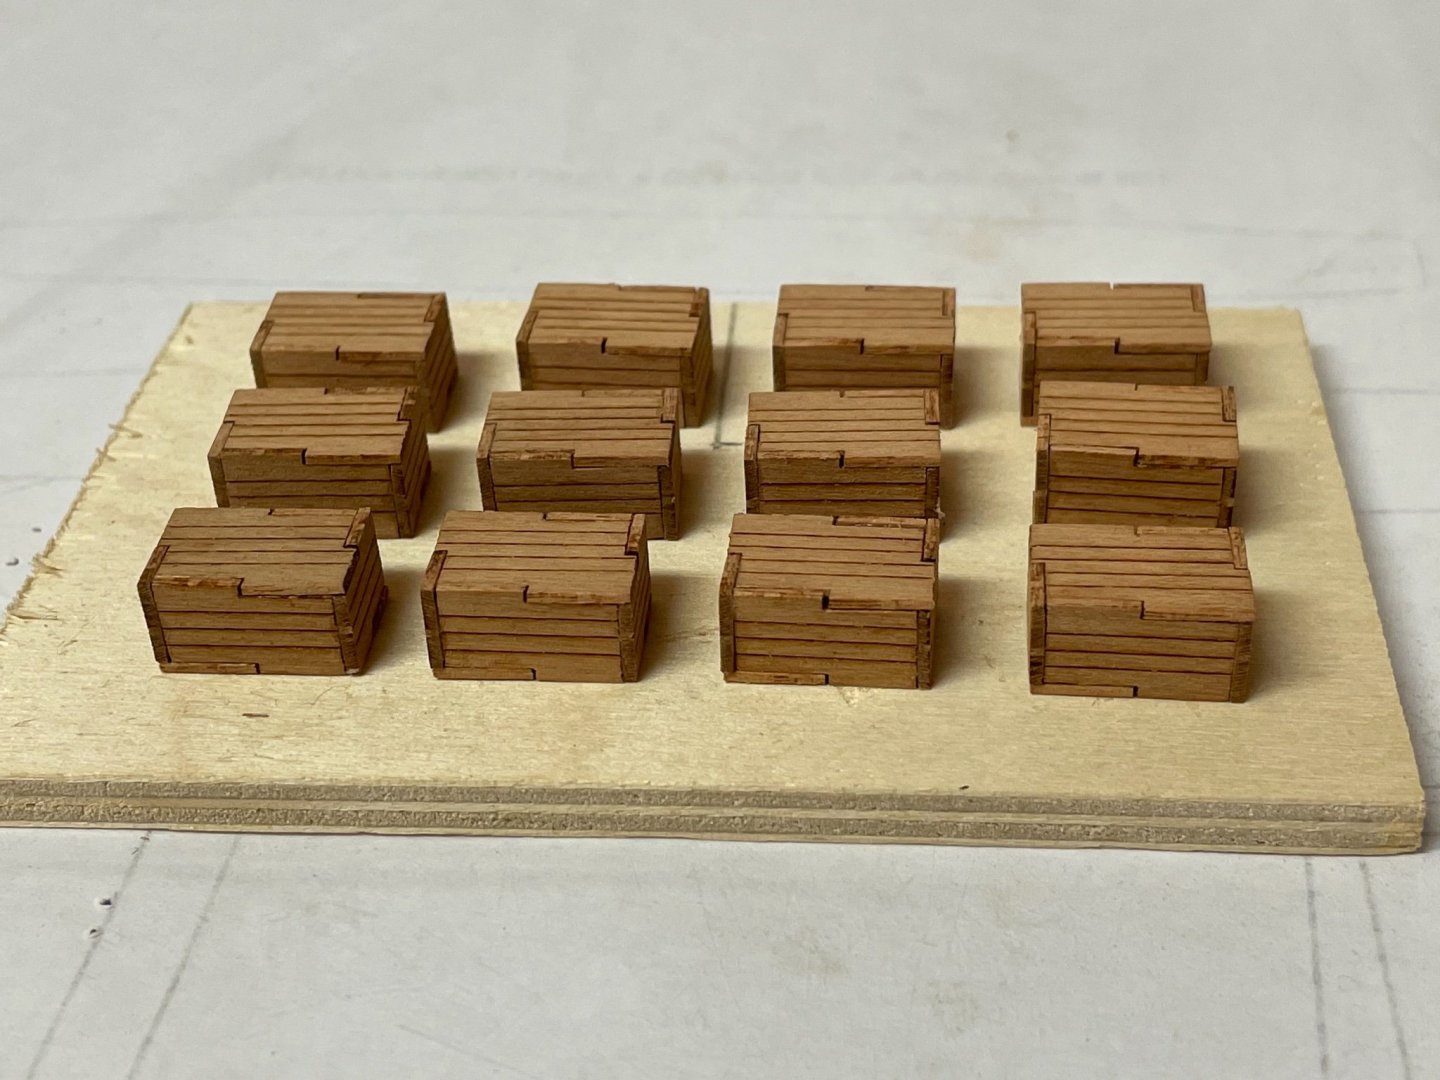
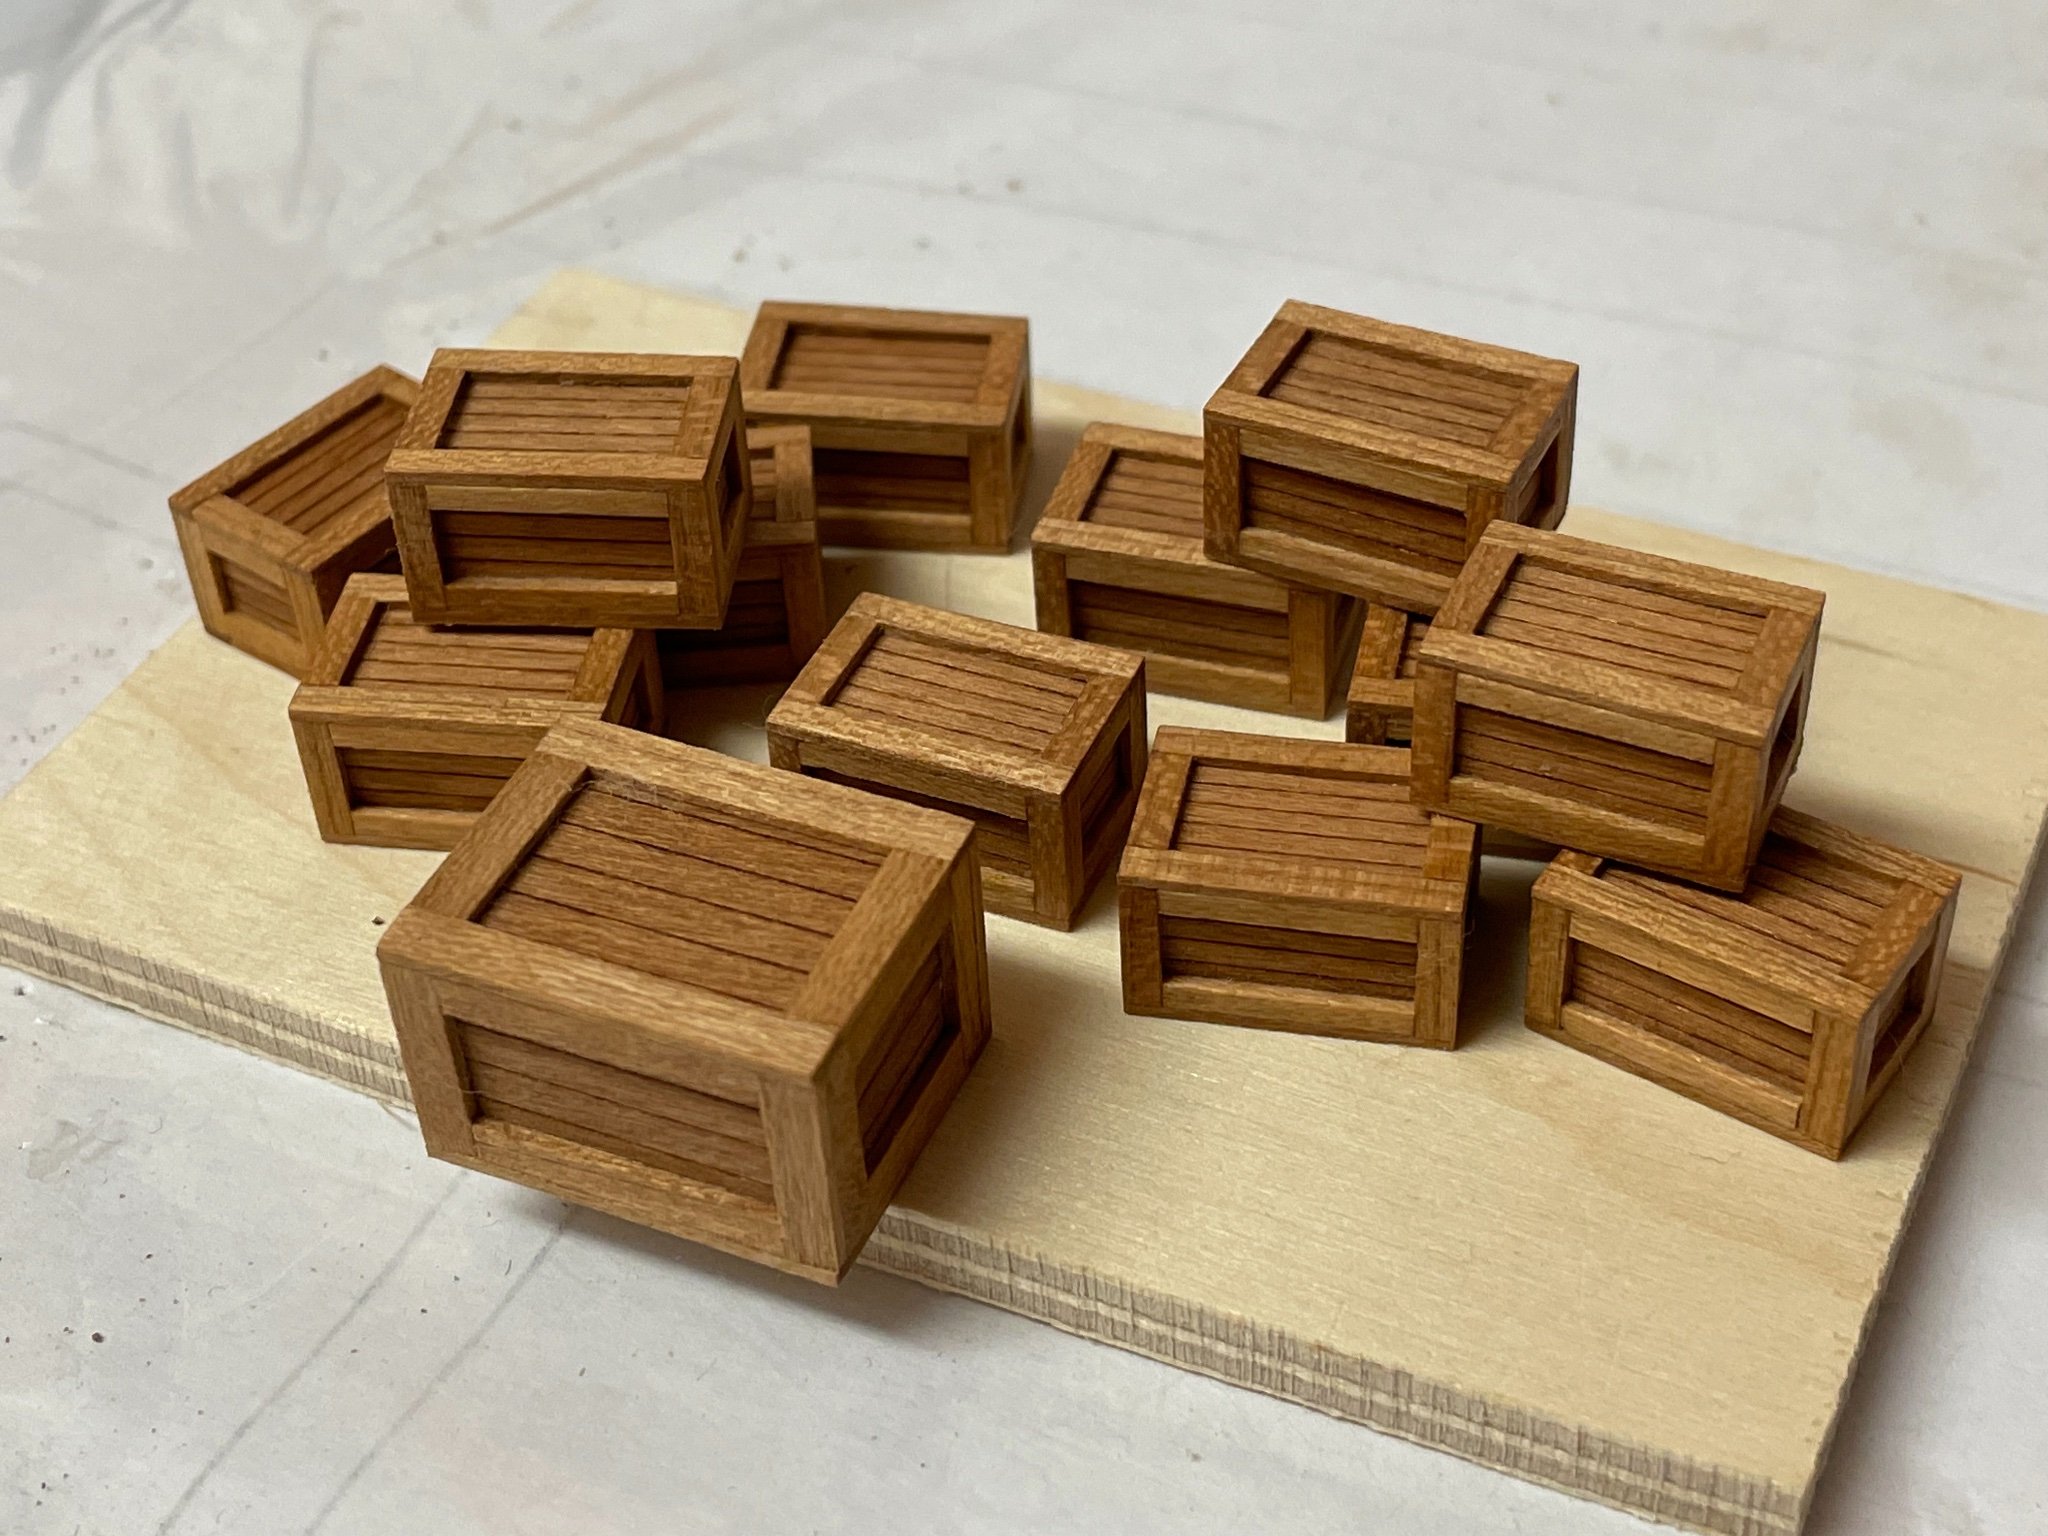
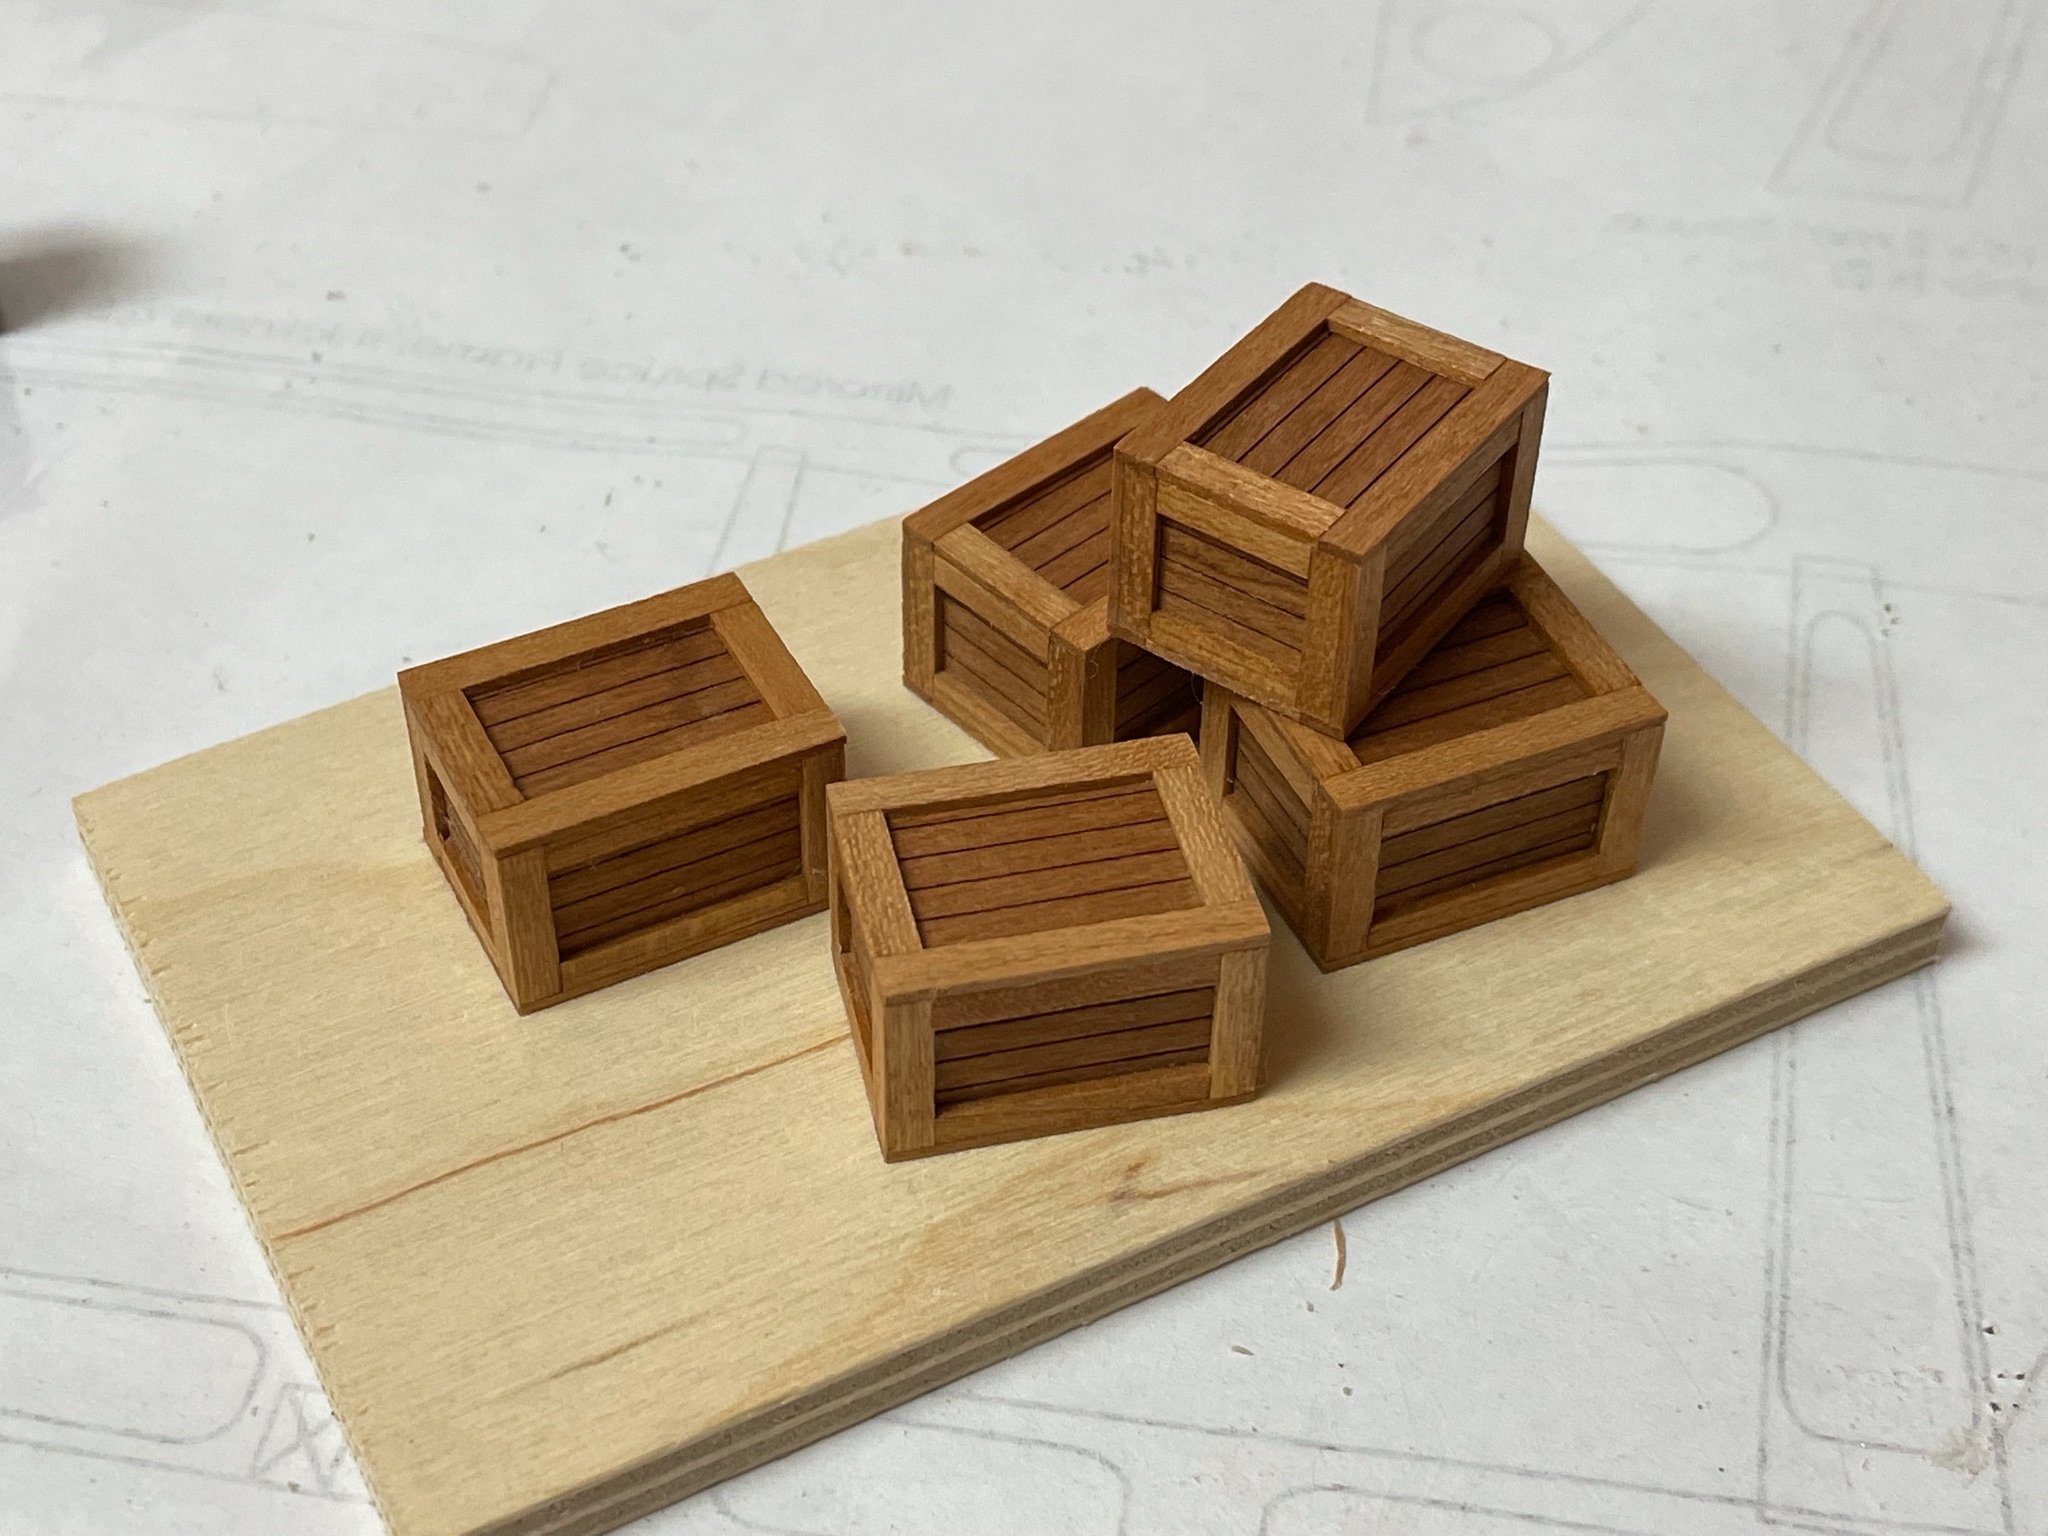
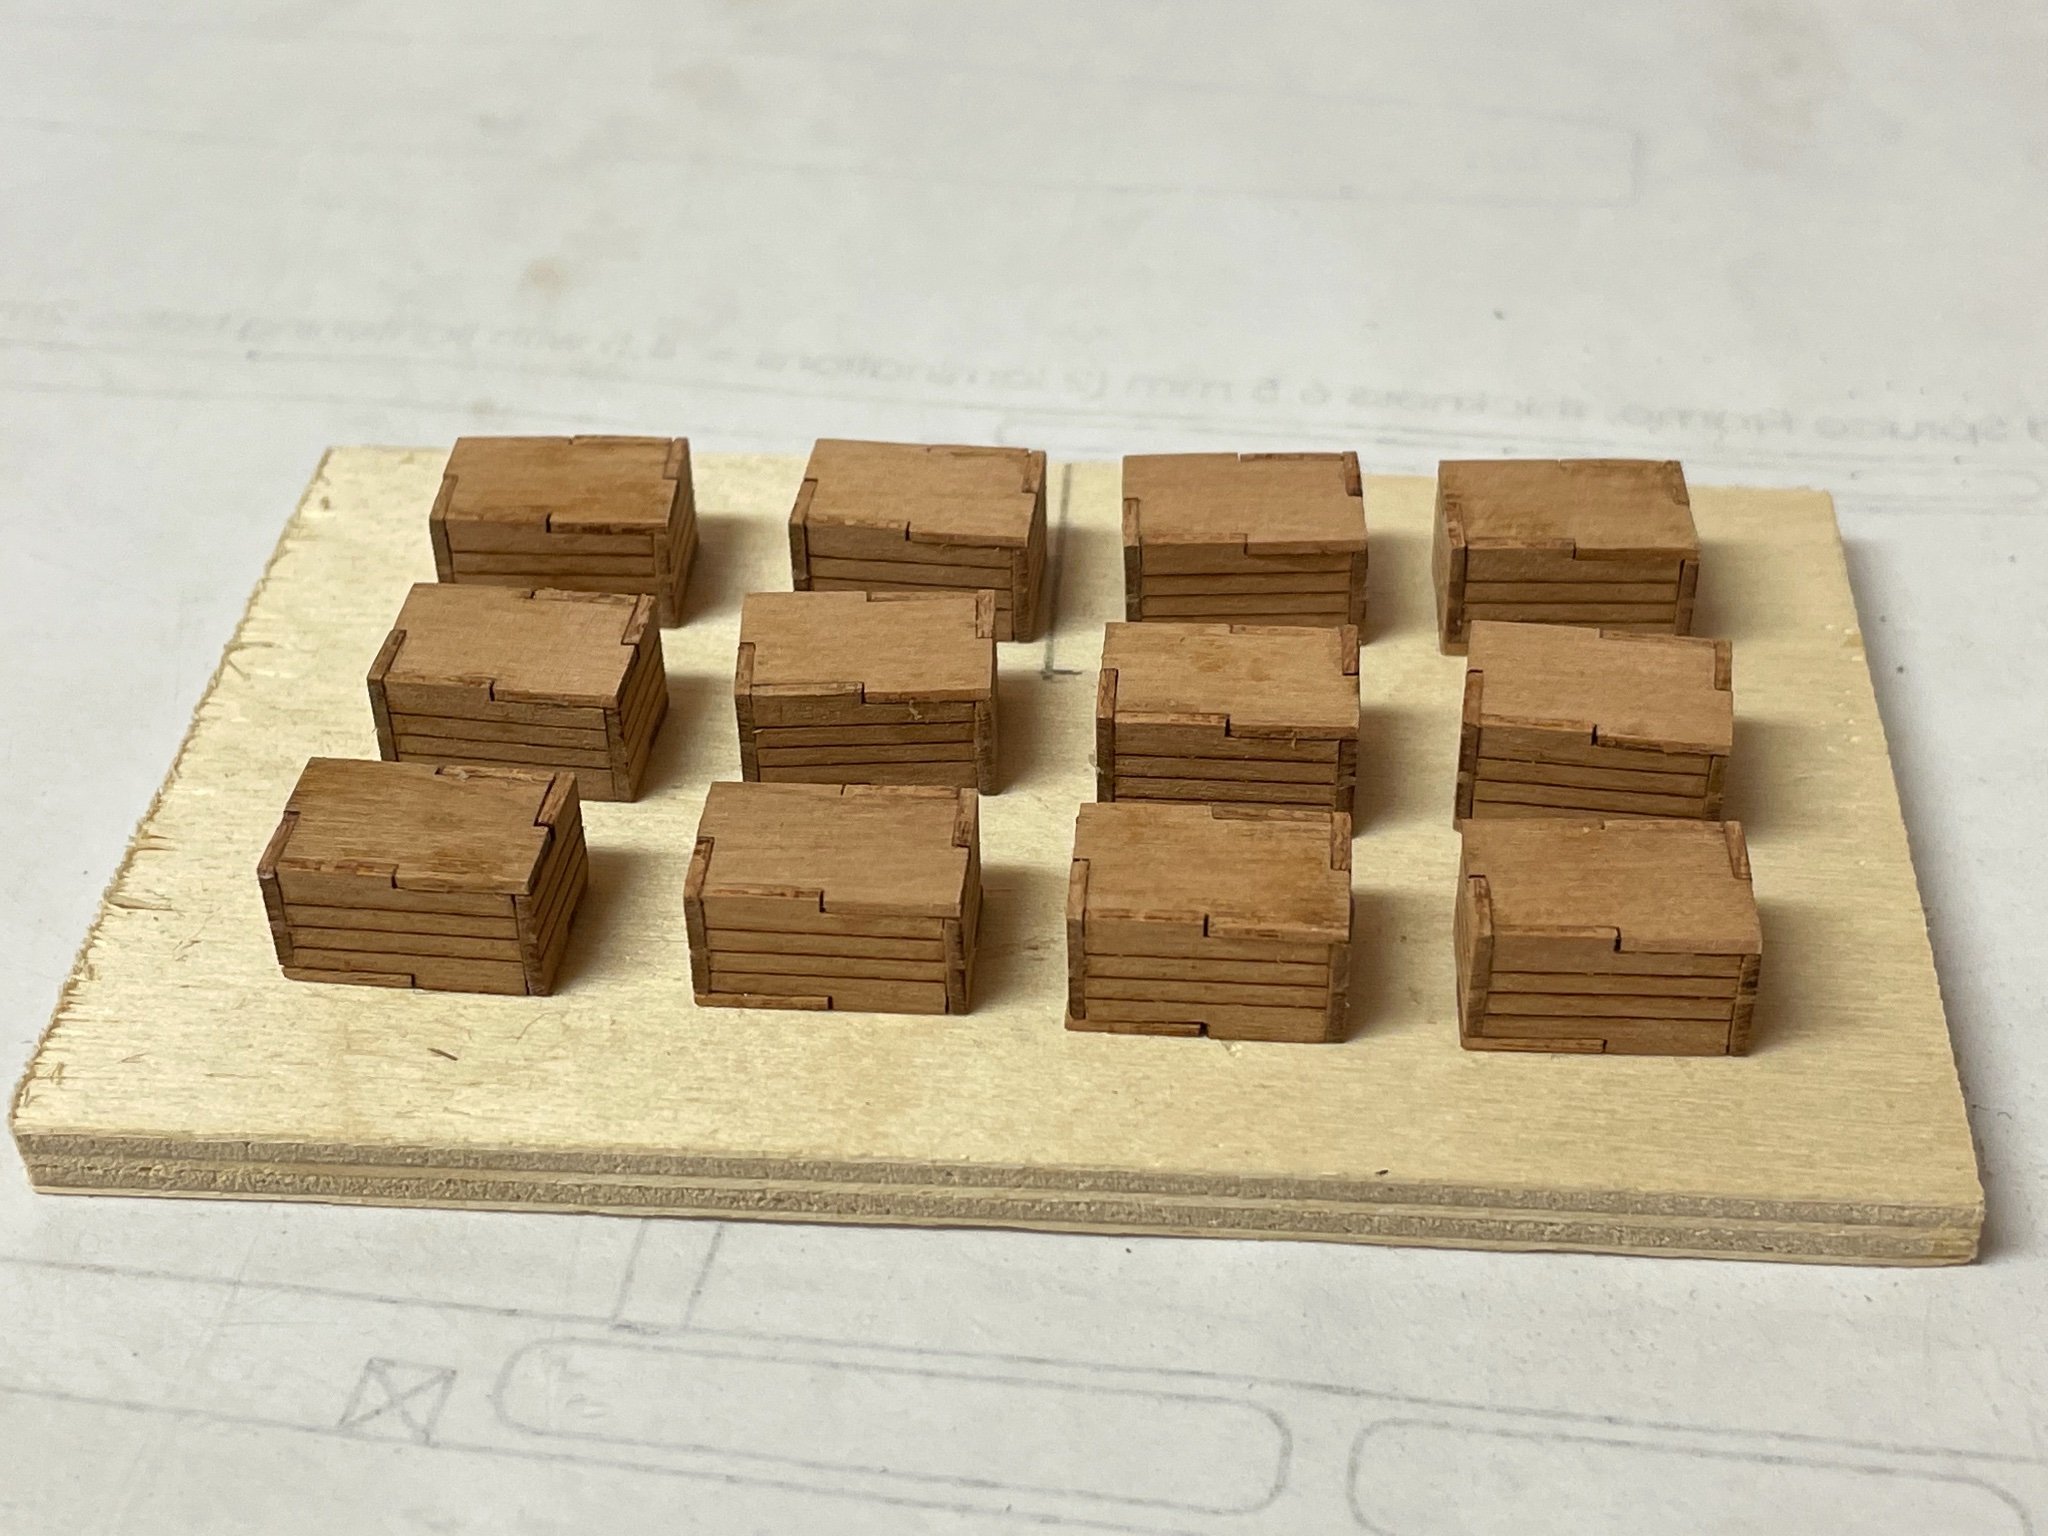
And the twelve smaller ones as well. They are covered with 1,5 x 0.8 mm and 2,0 x 0.8 mm cherry stripes as substitute for the supplied laser-cut parts. The applied WOP still has to dry.
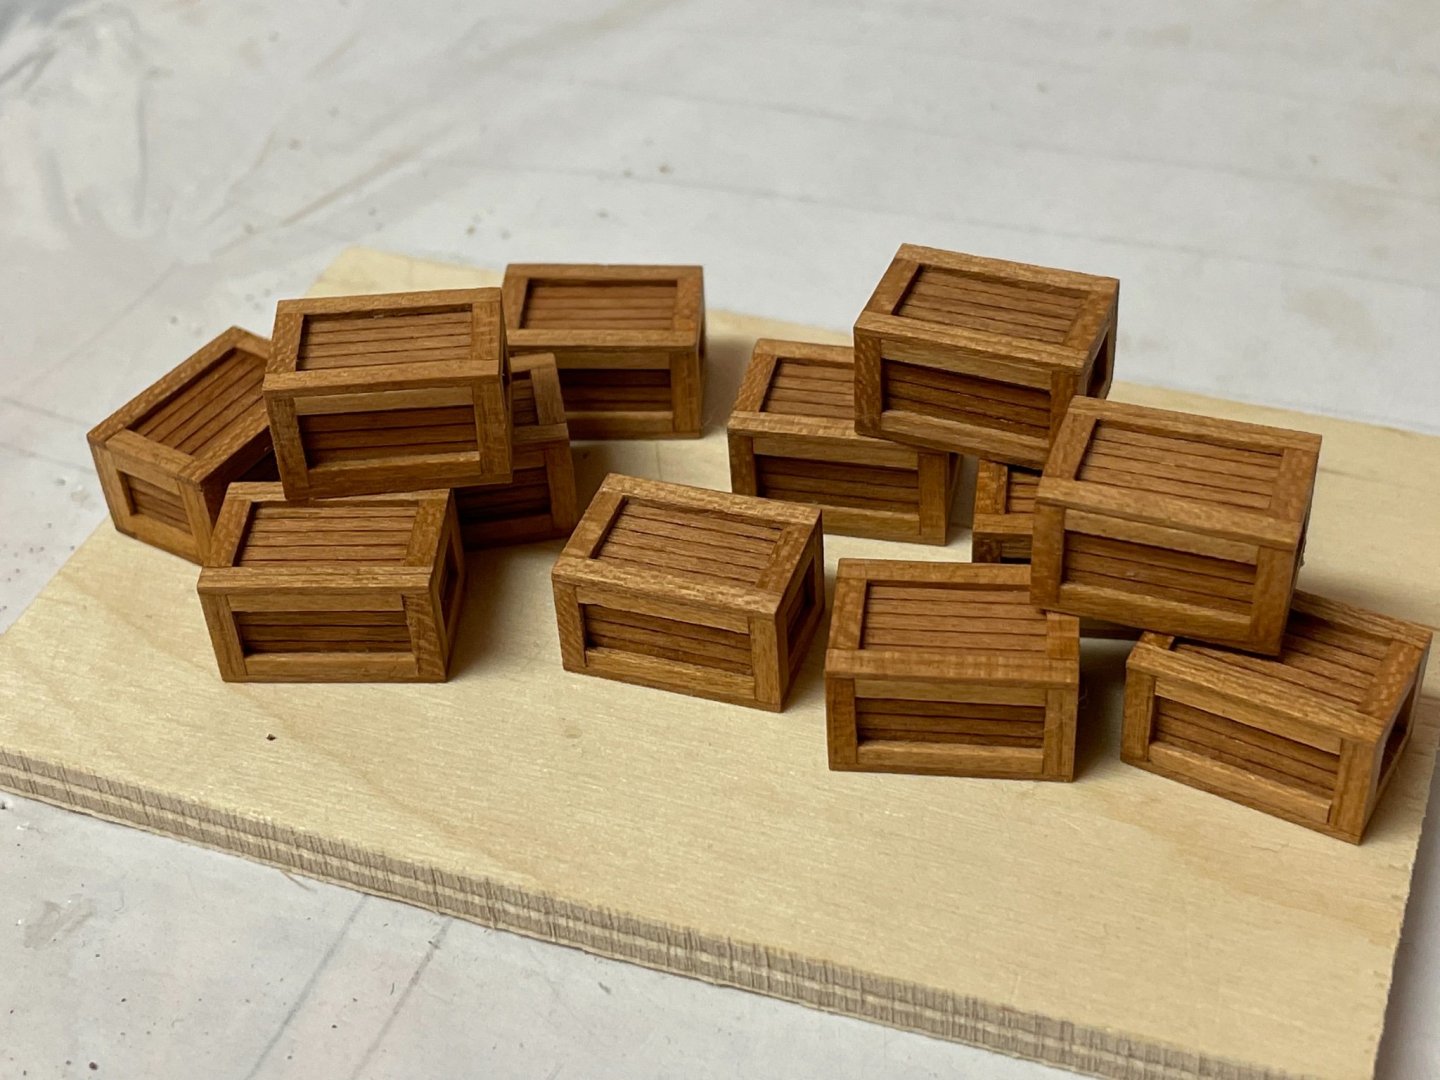
For a size comparison there is also a picture with a larger box and another with a 1-cent coin.
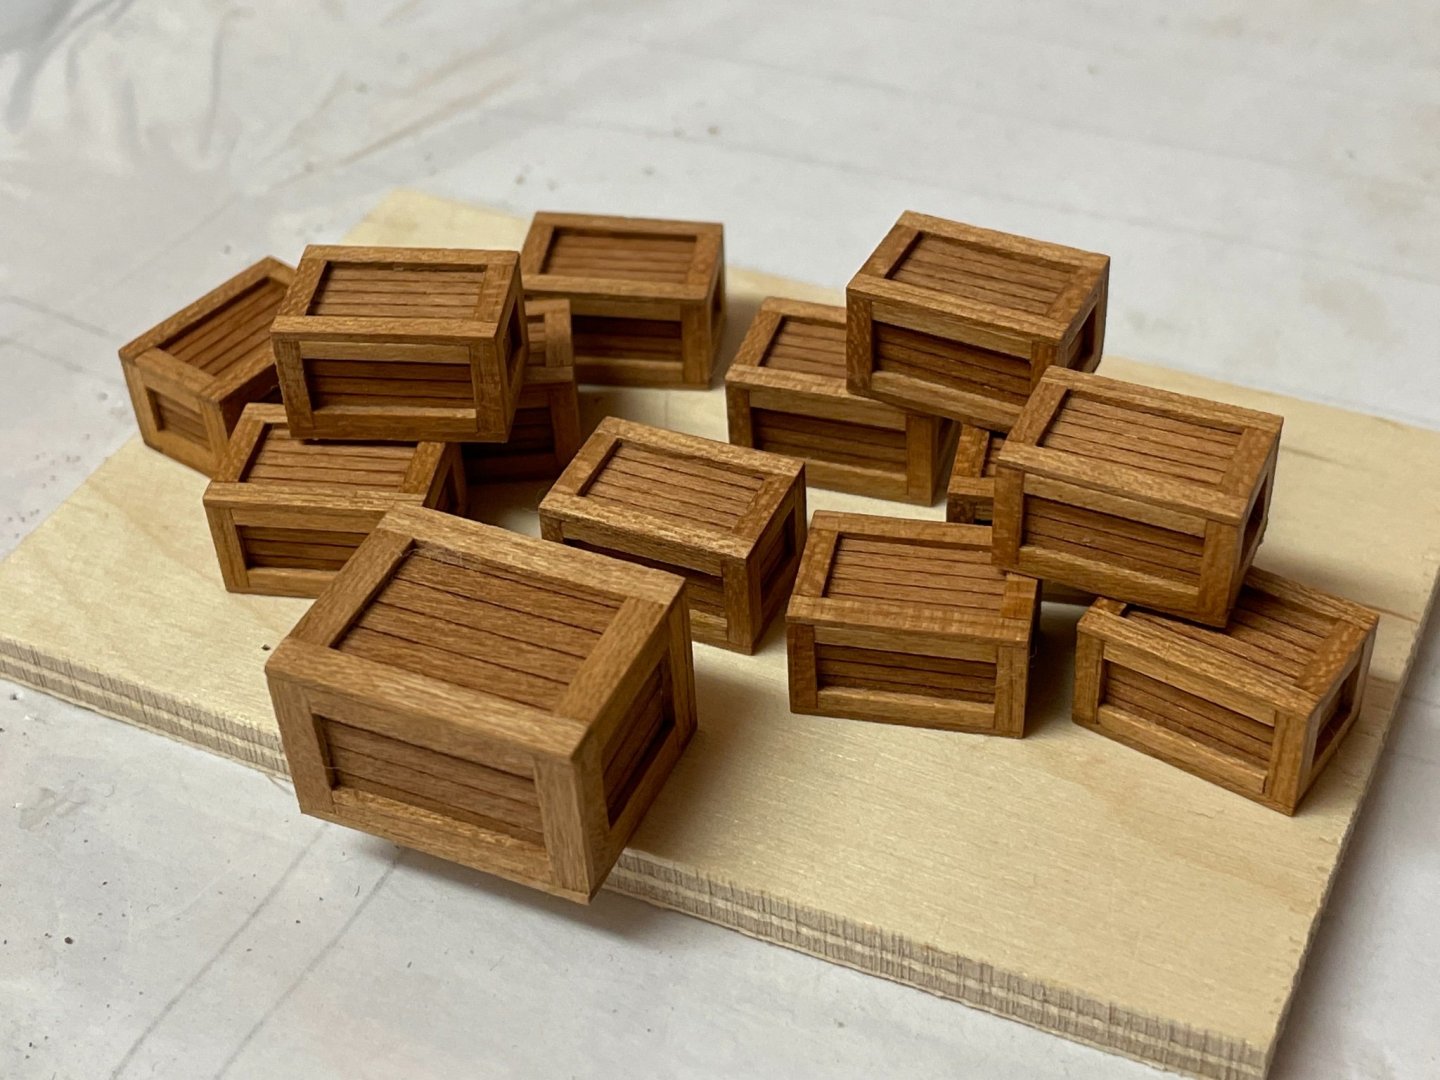
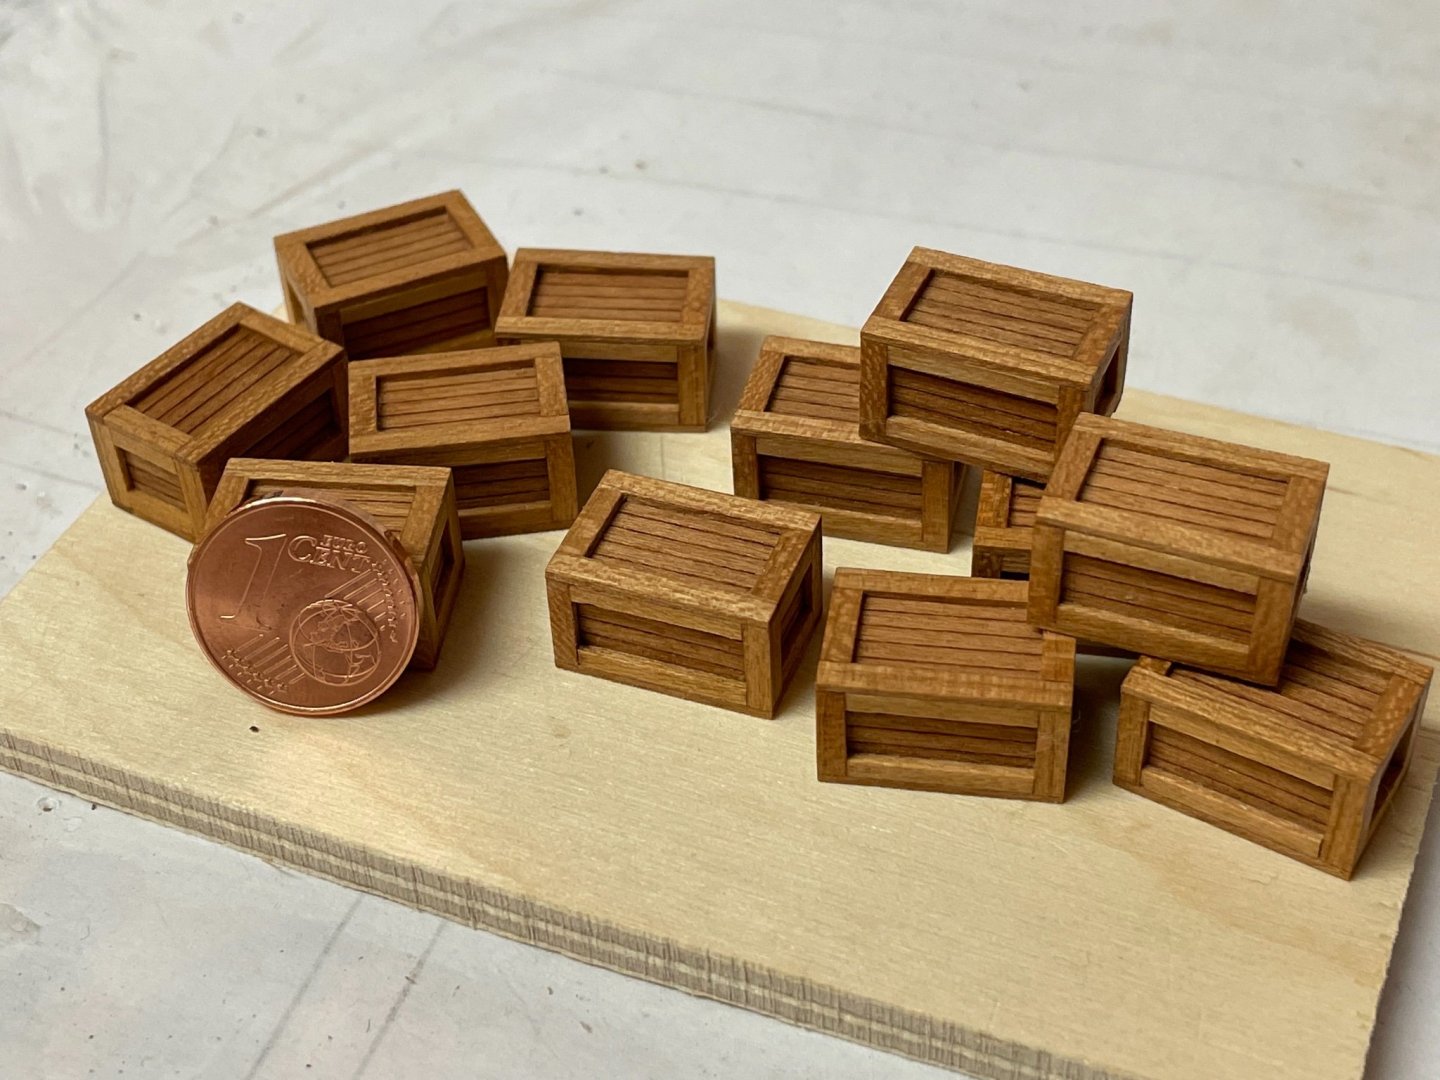
After finishing these side projects I can now continue to work on the hull.
Stay tuned and save.
Andreas
- coxswain, Tigersteve, GrandpaPhil and 9 others
-
10
-
 1
1
-
 1
1
-
-
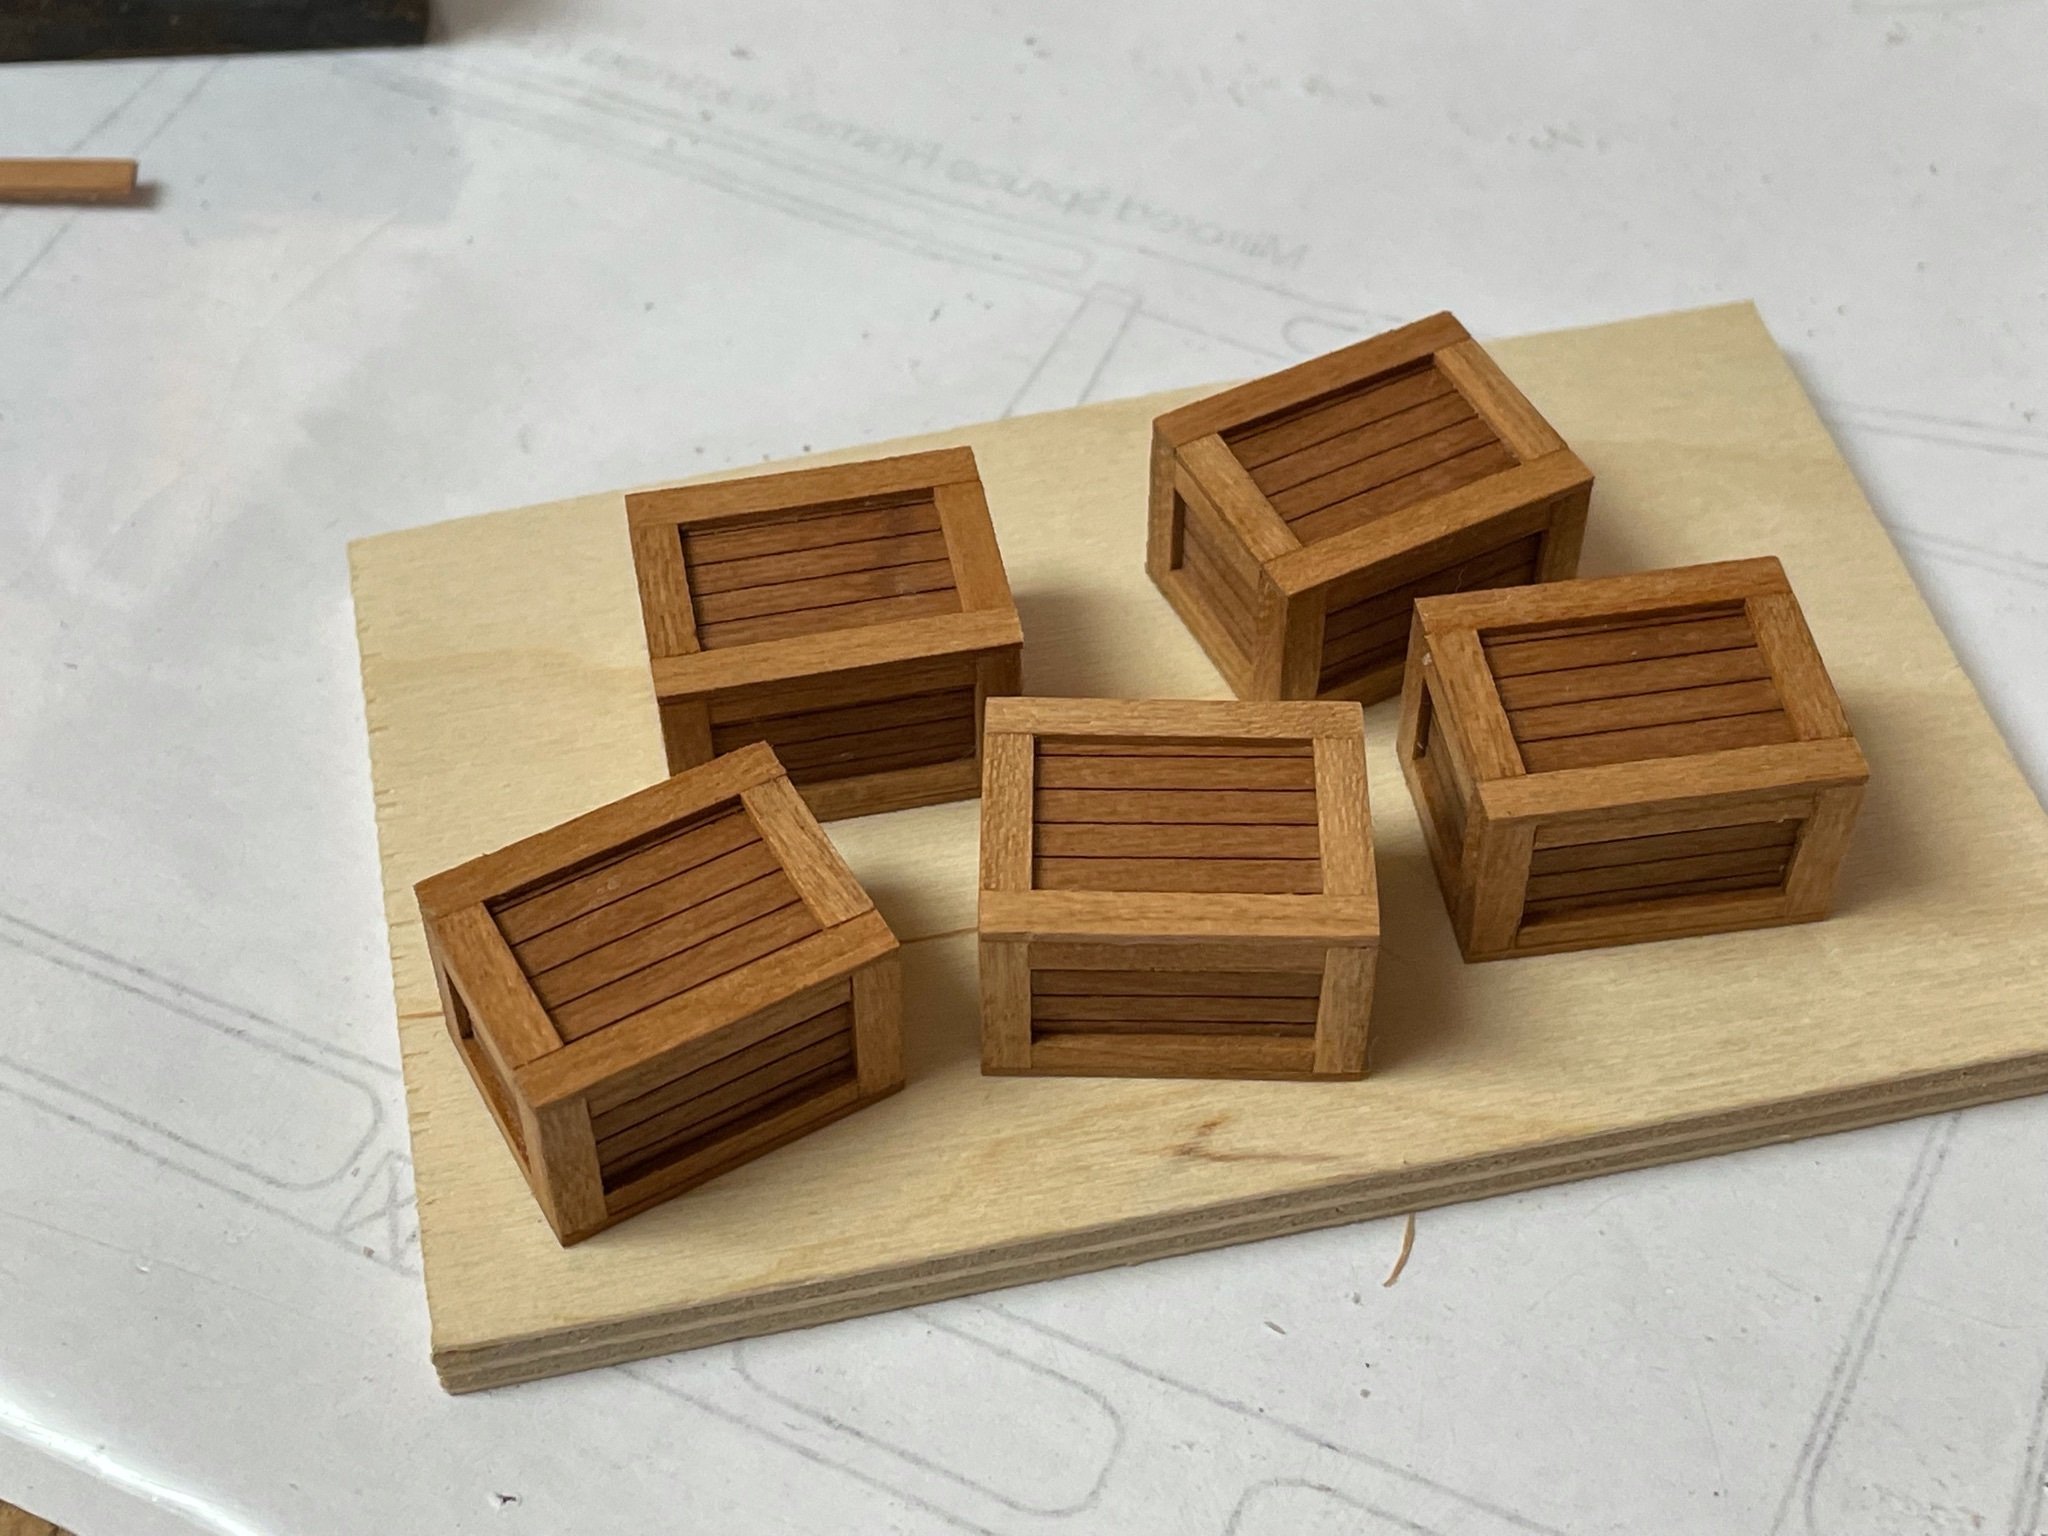
My replacement cherry
wood has finally arrived, now I can start planking the inside.
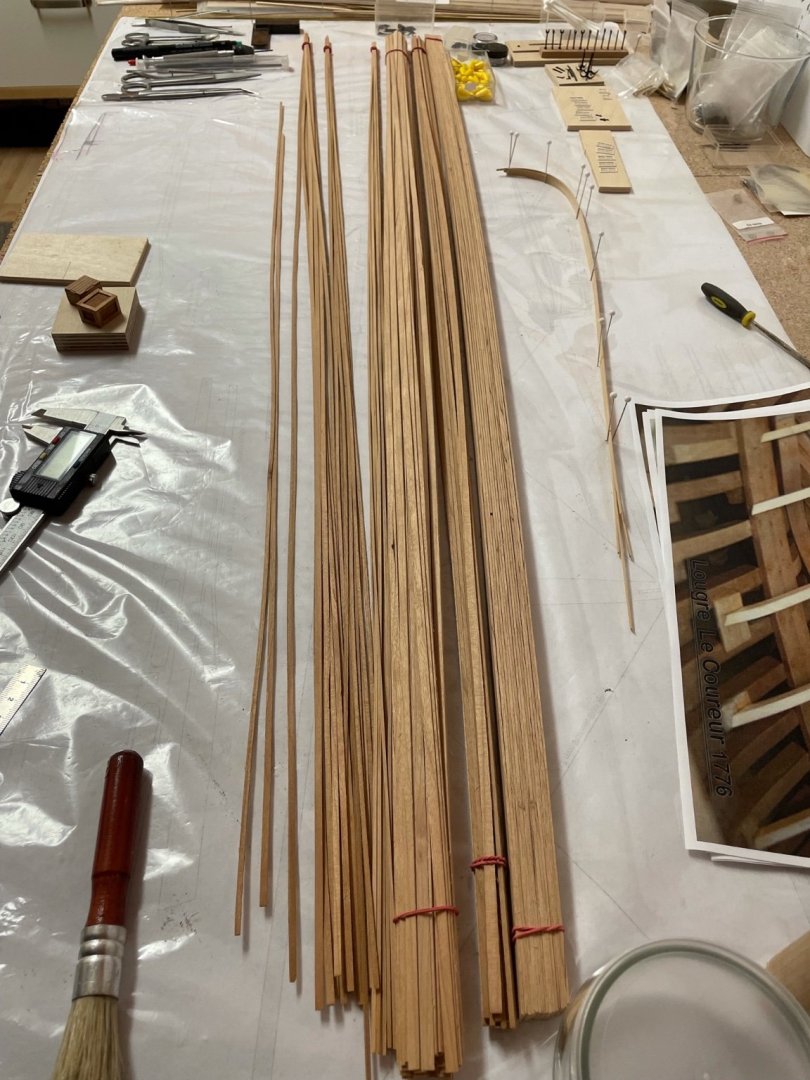
But before I do that I will replace the supplied lasercut box covers with stripewood as they don’t fit the boxes. For the bigger boxes I use 3mm x 0.8 mm and 2mm x 0.8mm cherry stripes. Finishing just one of them needs 24 pieces and I have 4 bigger ones and 12 smaller ones left to do … ahhwww, why do all these side projects have to be so time-consuming? Well, here is a picture of the finished one with WOP just applied.

Stay save,
Andreas
- JpR62, BobG, GrandpaPhil and 10 others
-
13
-
-
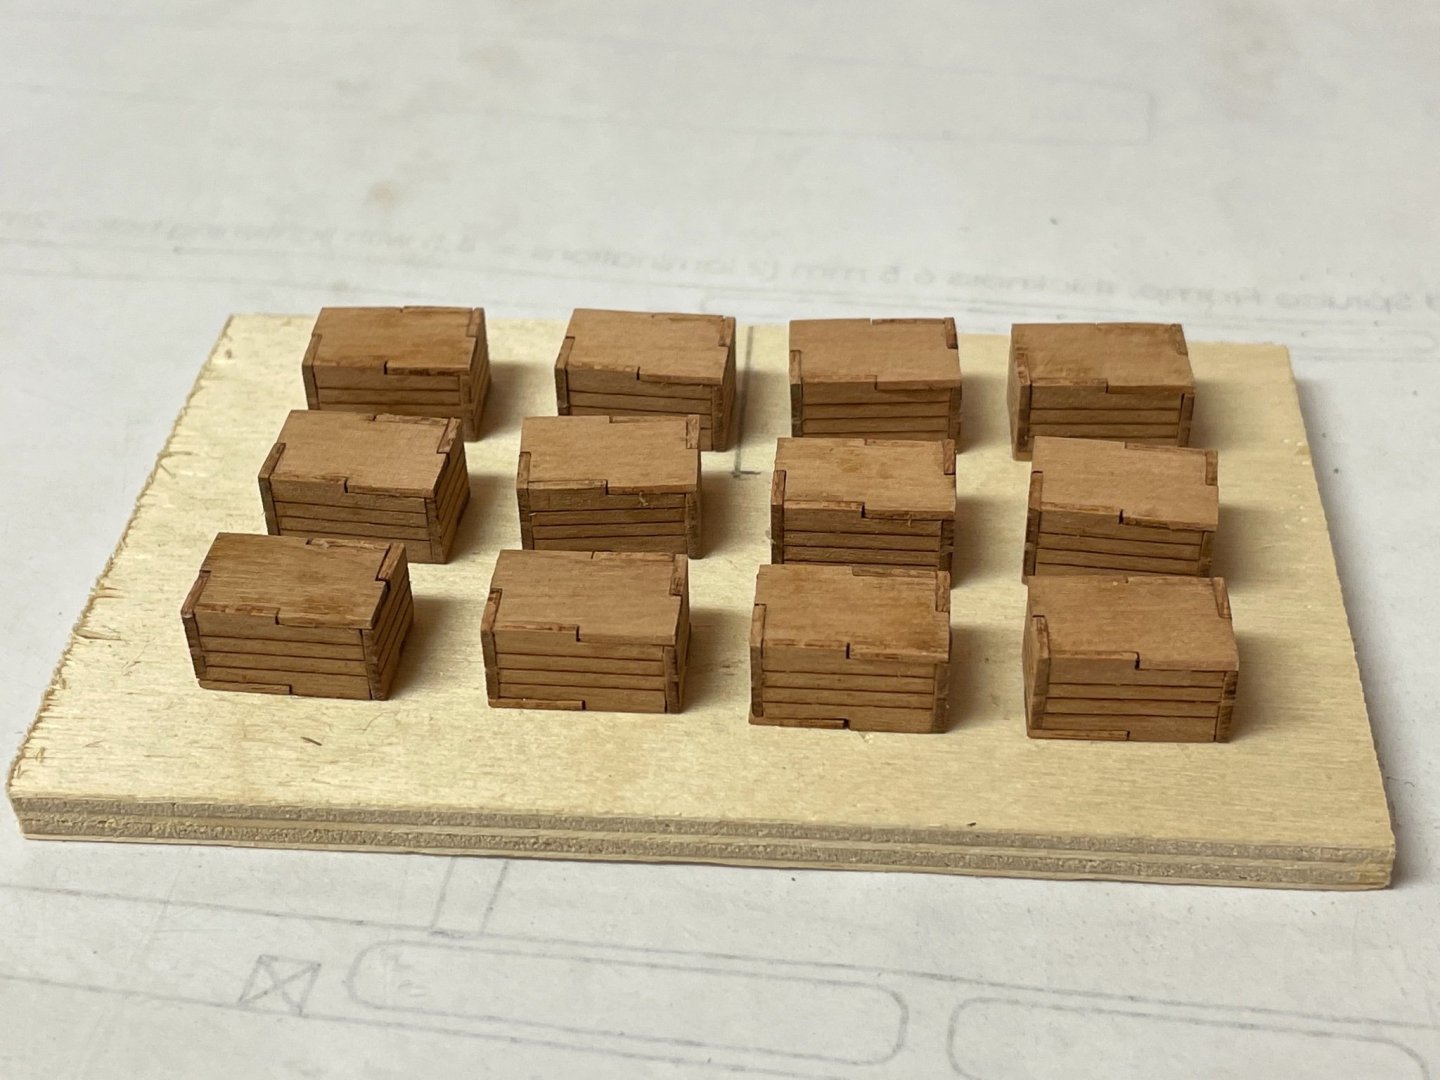
BTW I solved the little box problem. I removed the downsides from the already build-up boxes and used them as upper panels for the remaining six boxes.
Now all small boxes have upper sides with engraved laser pattern but downsides without one (but who cares about the bottom?). So if you ordered the barrels and boxes add-on, please check the parts first and if you encounter mirrored parts this might be a solution.
Stay save.
Andreas
- mtaylor, GrandpaPhil, bruce d and 5 others
-
8
-
-
-
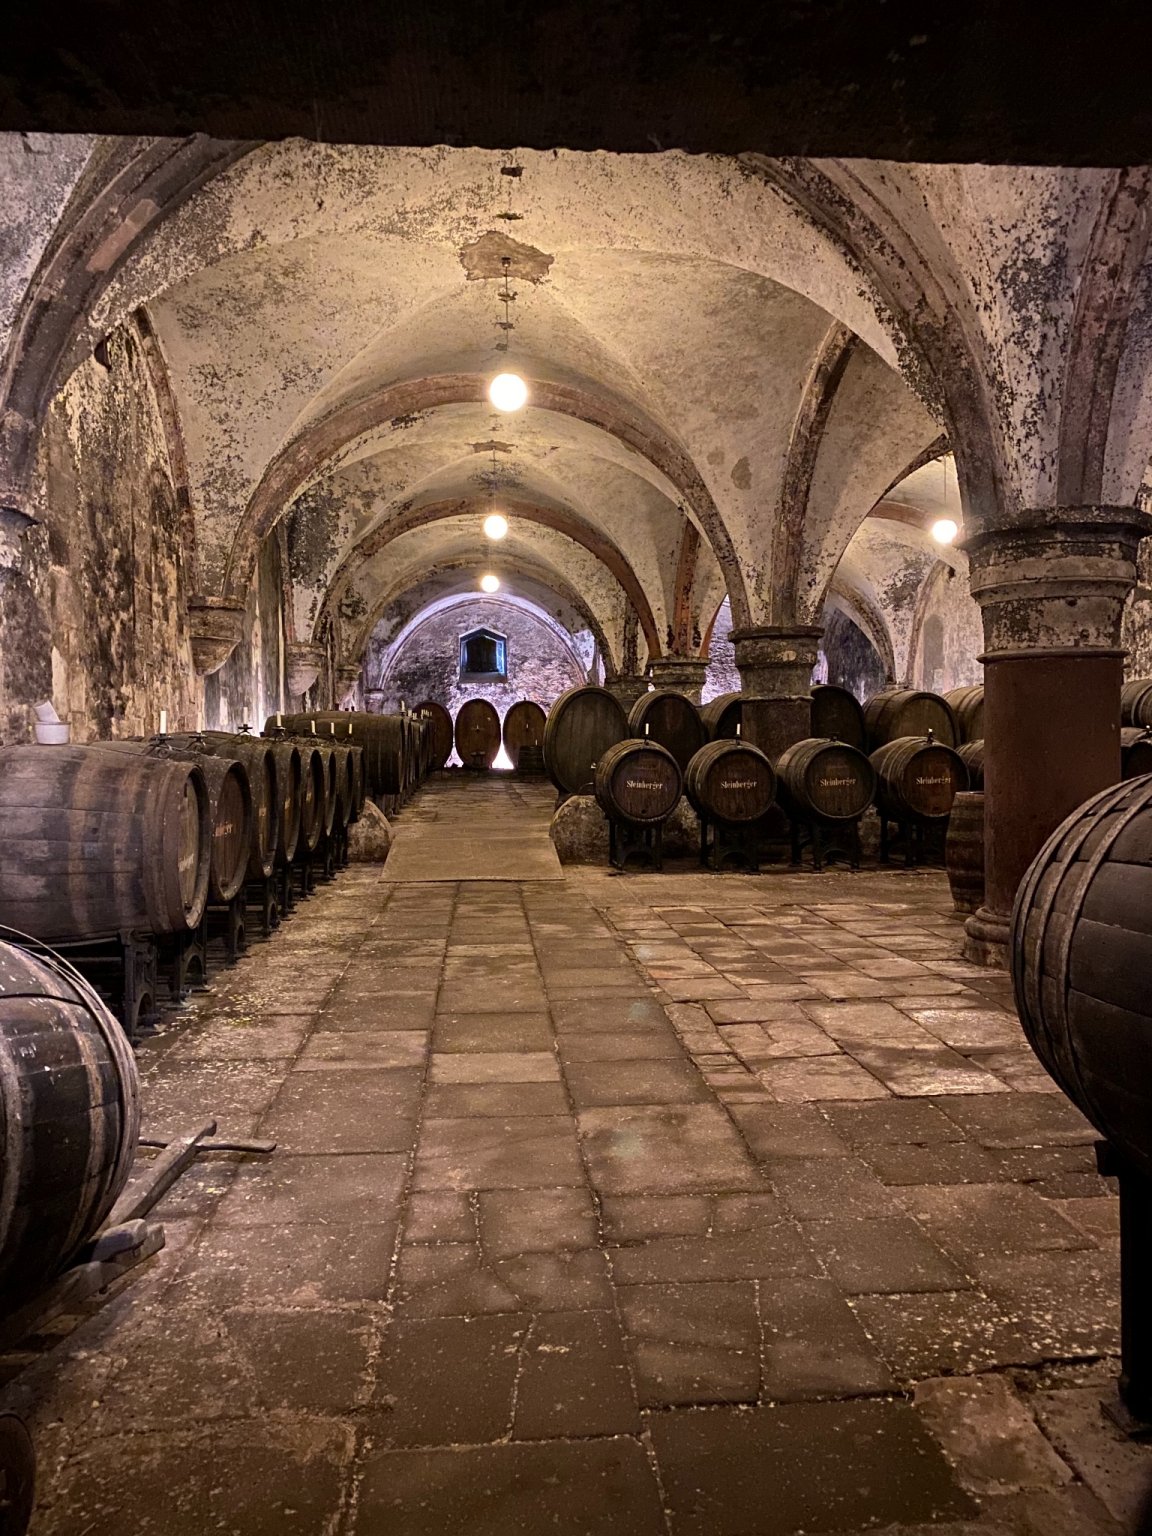
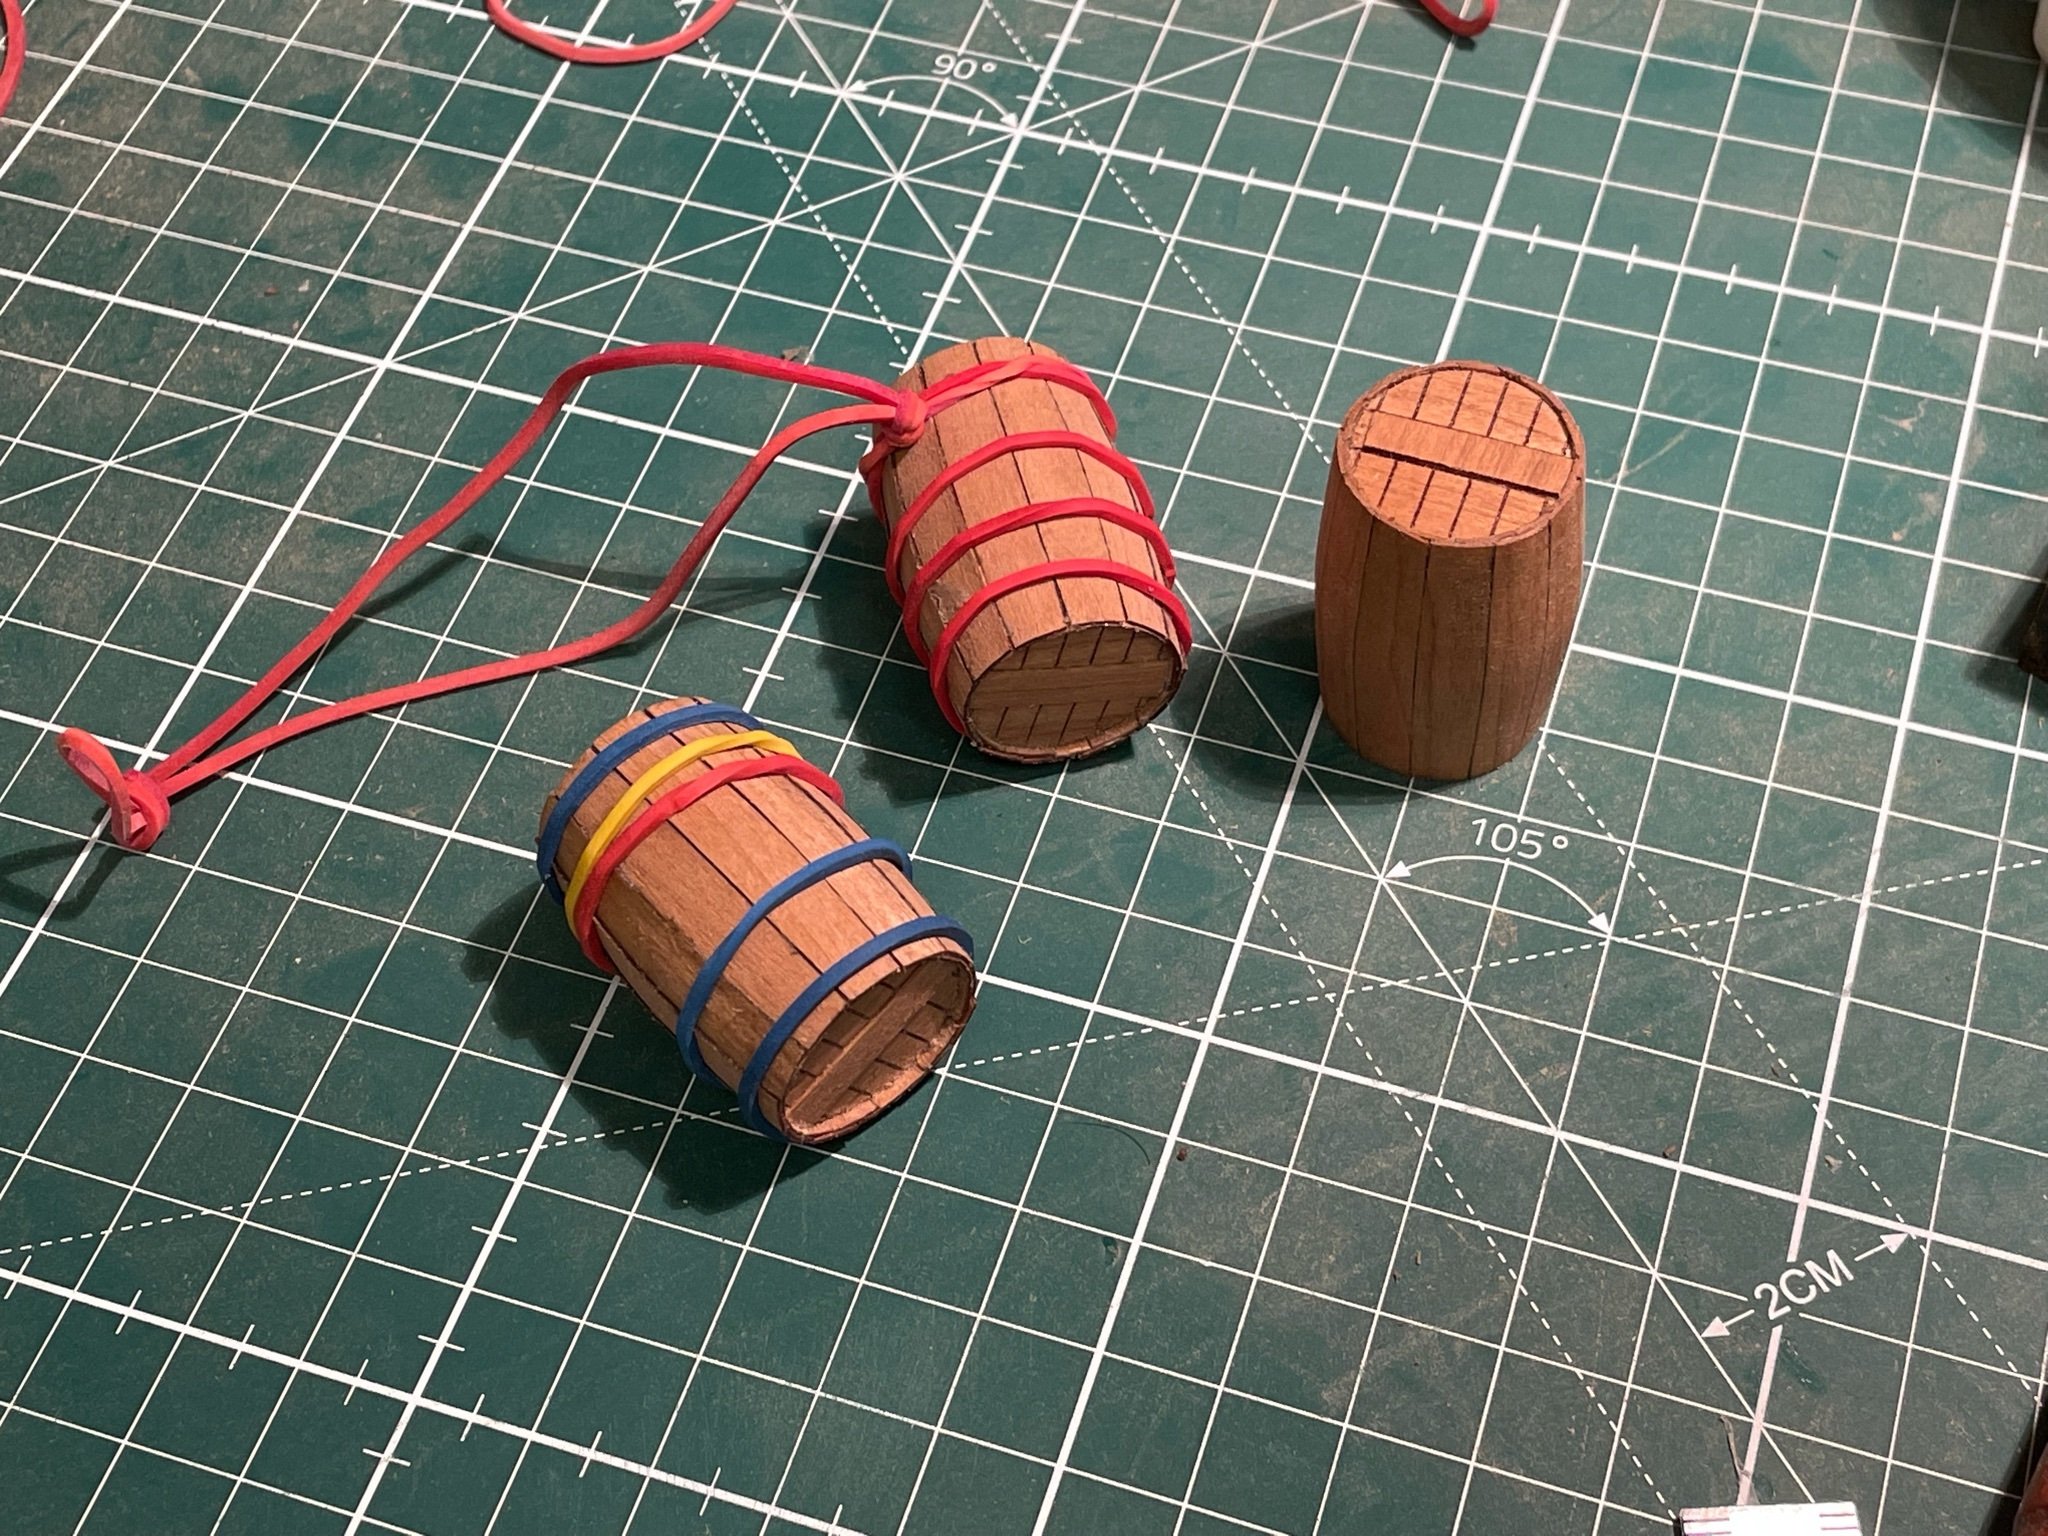
Marcus, you‘re right. In fact, most barrels hat either 4 or 6 iron bands to fix all wooden parts in place. I visited an old medieval church some day ago and the wine barrels show either 4 or 6 band, none had 5 bands attached.

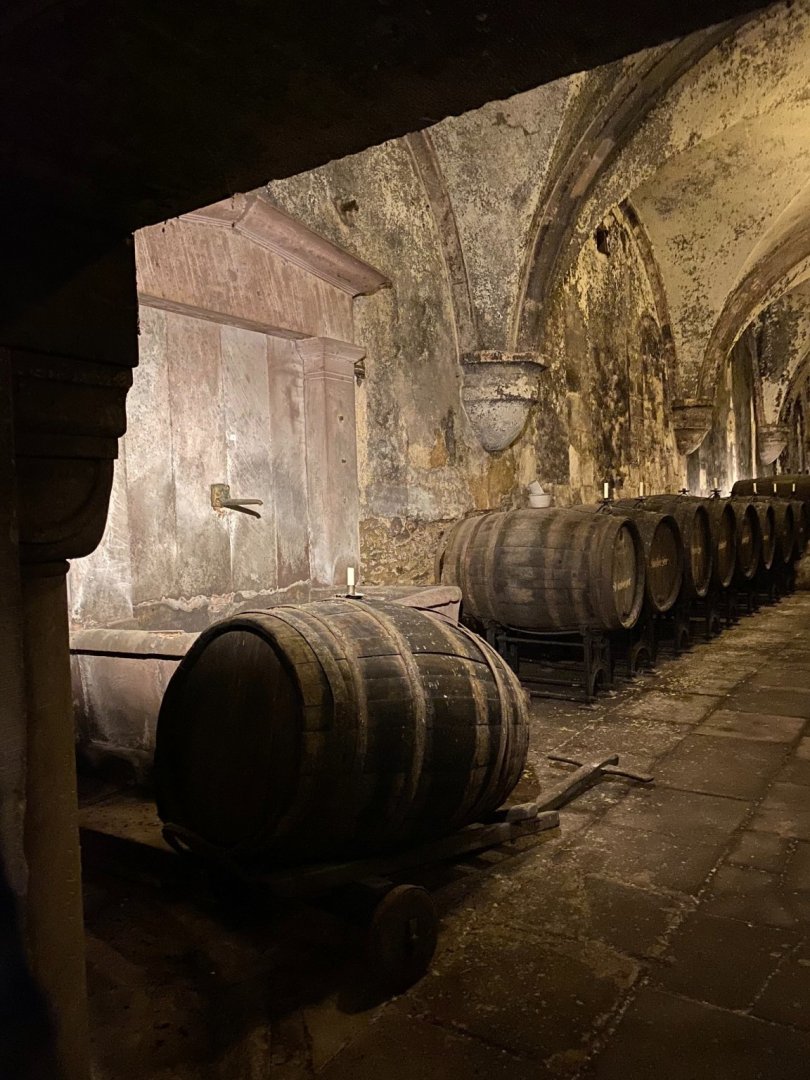
But if I question all construction details and try to correct all mistakes (and there are several ones in the kit), I will end up better building one from scratch. I think I have to accept that it is a kit-build model with simplified construction methods and details shown that are rather aesthetically pleasing than historically correct, although I try to make it as accurate as possible.
But the barrels will barely be seen and nothing is fixed or glued yet - I may remove the enter one or leave it as it is. And the bands have a snug fit, you need some force now to move the bands out of position.
-
-
-
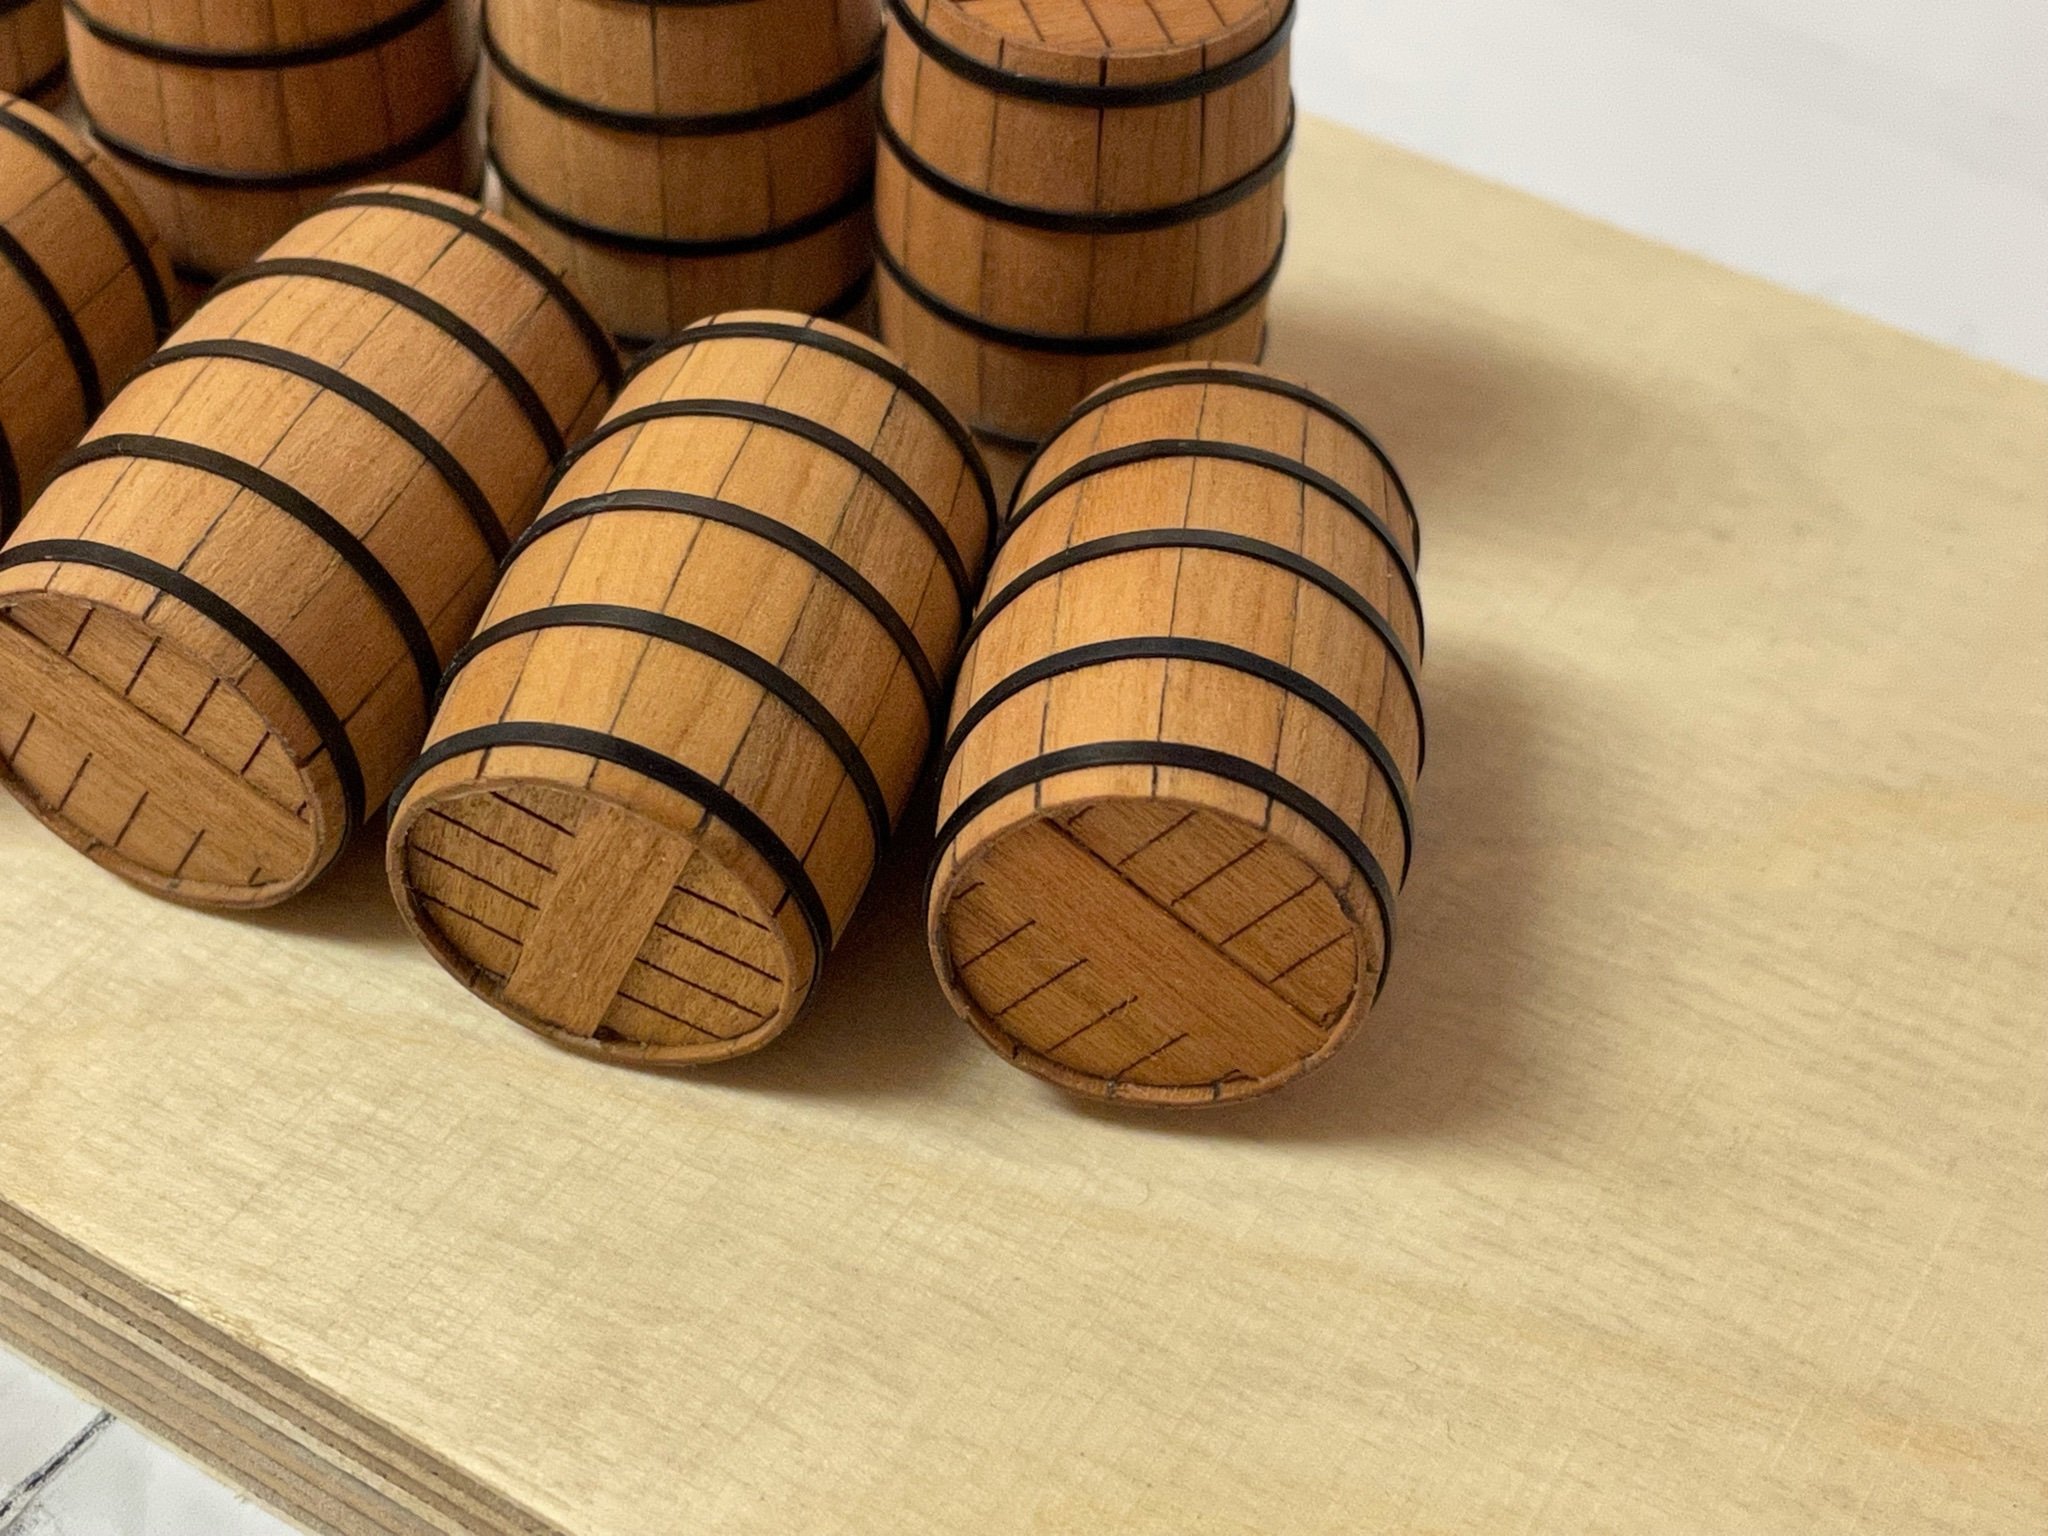
Sorry Marcus, just kidding. These iron bands were more time consuming than the barrels itself. There are 5 bands per barrel supplied as photoetched parts. Each band has an overlap of about 2-3 mm, so I used a needle file to reduce the thickness of these overlap about 50% (and also on the other end - opposing side) and soldered these ends together with soft solder - over 50 pieces. Blackened all parts with my favorite blackening chemical (from Krick) and painted the little soldering spots with some black acrylic (they won‘t be seen anyway because all soldering spots are at the bottom of the barrel).
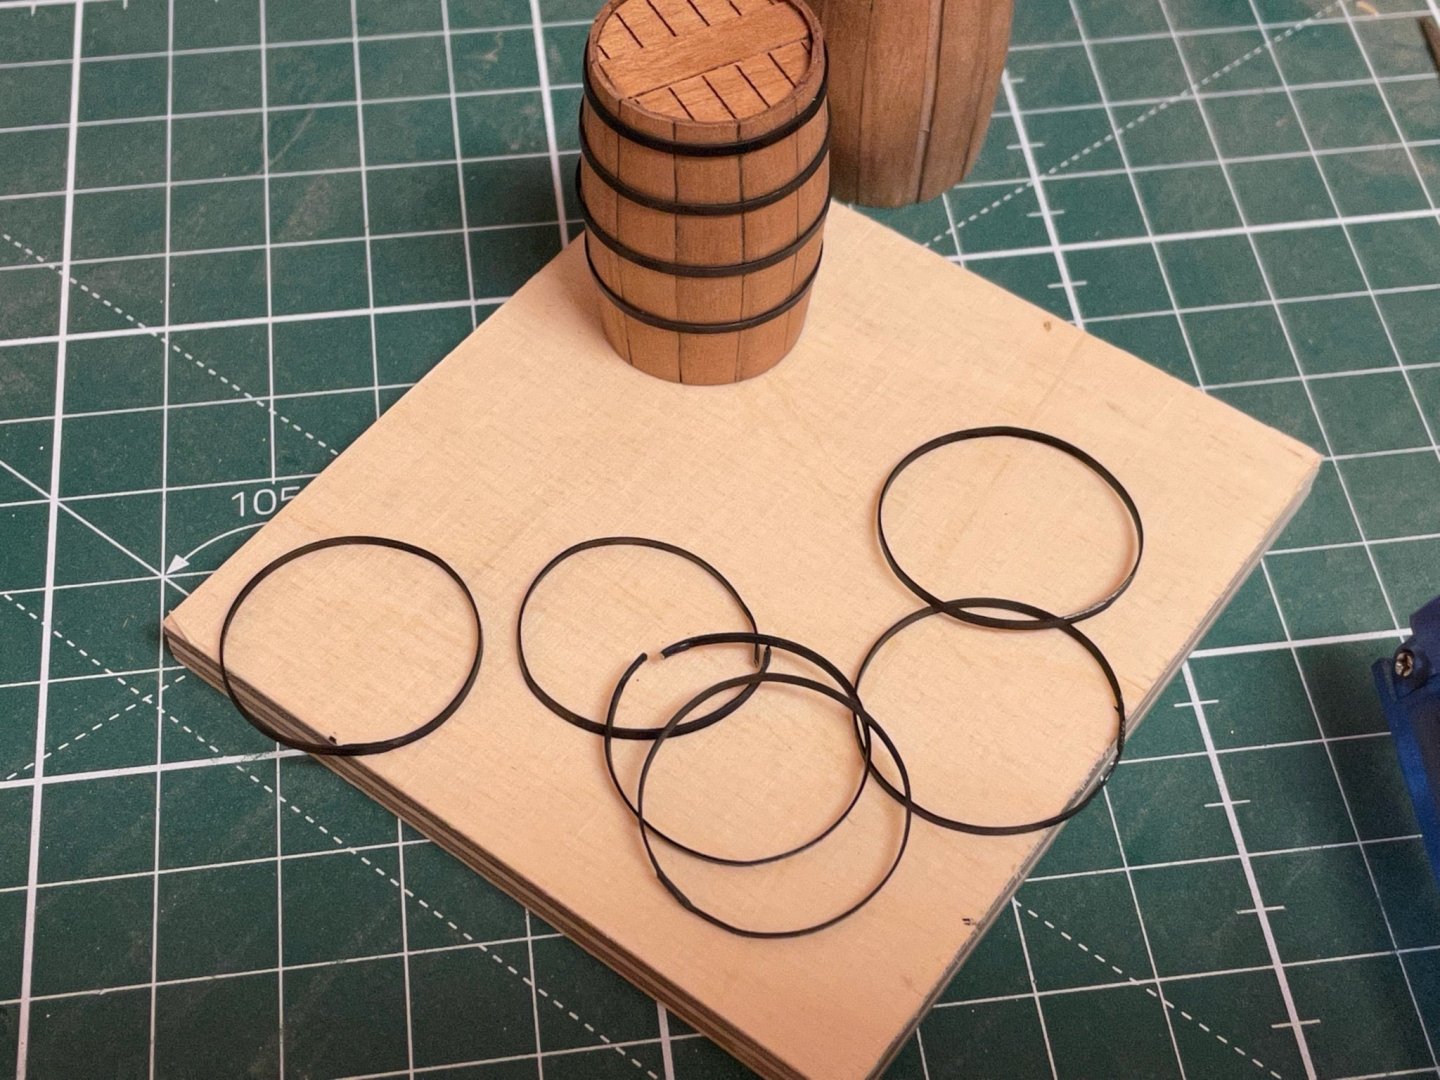
The bands are slightly smaller than the diameter needed, so pushed the bands about 1 mm into their final position.
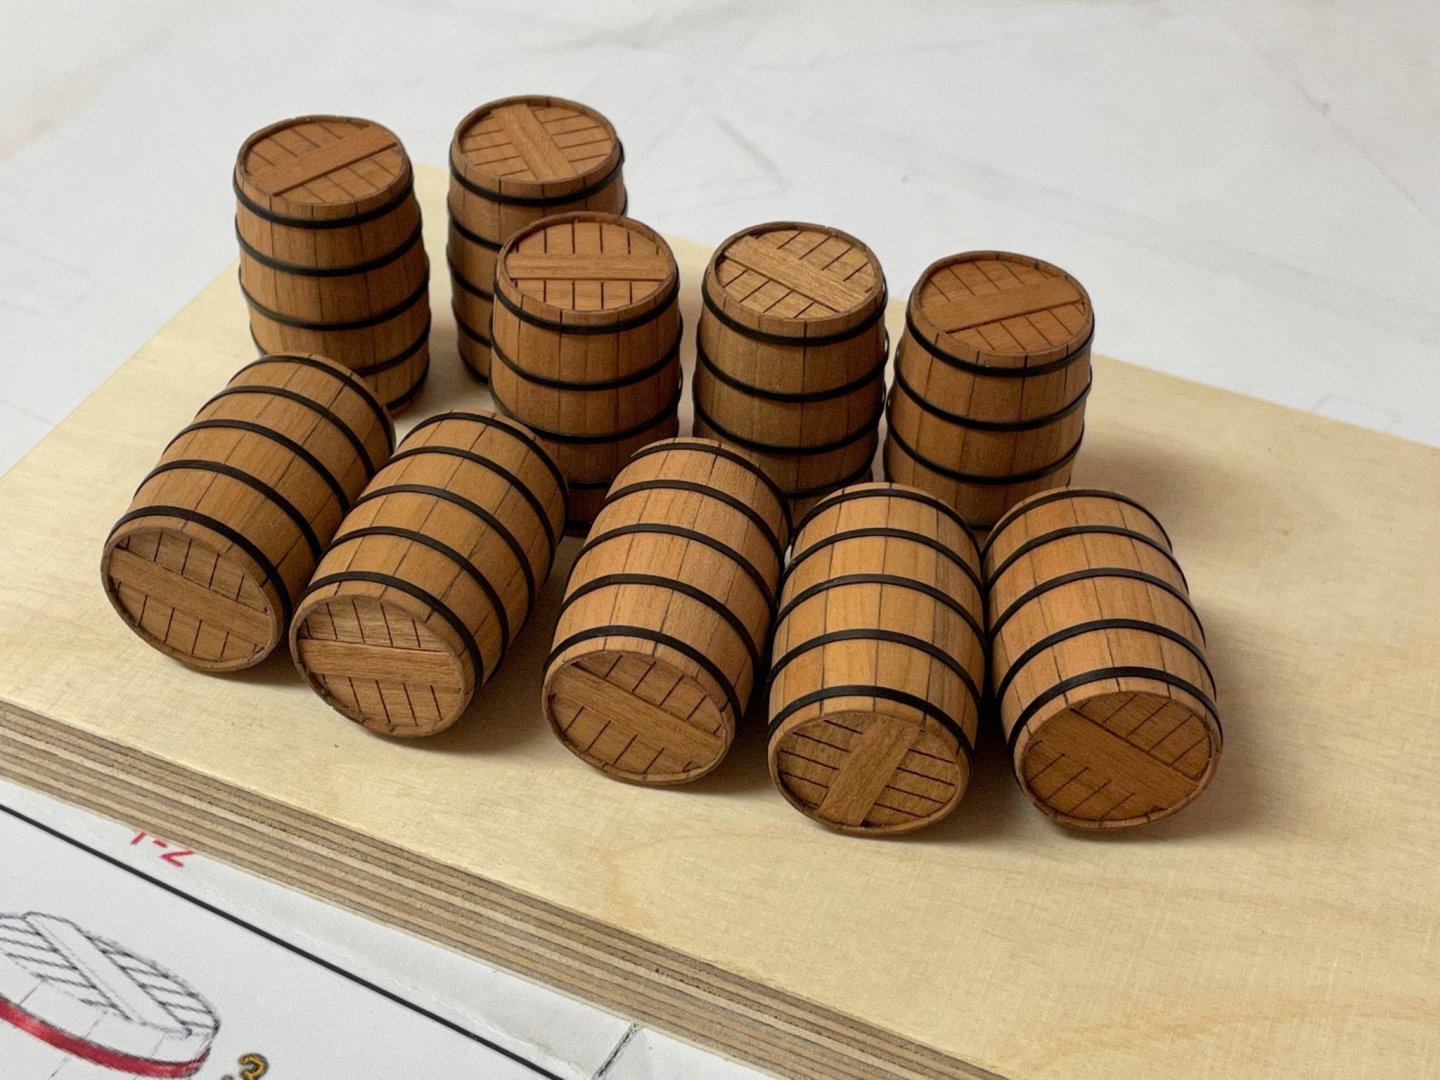
I made 10 barrels altogether but not sure if I will use all of them because they might block your view while viewing into the side of the ship.

Now I can‘t go further because I have to wait for the ordered wood first. Stay save.
Andreas
-
On 8/9/2021 at 10:05 AM, Marcus.K. said:
They are in fact very nice !
But - maybe I am too impatient and you already plan to do them - or - maybe it´s because I just don´t know enough about old barrels and their technique is differing from barrels I know - ..
.. but wouldn´t you need some hoops on those barrles to keep them tight?
Iron bands? No, not needed. My barrels are held together by cosmic energy. -
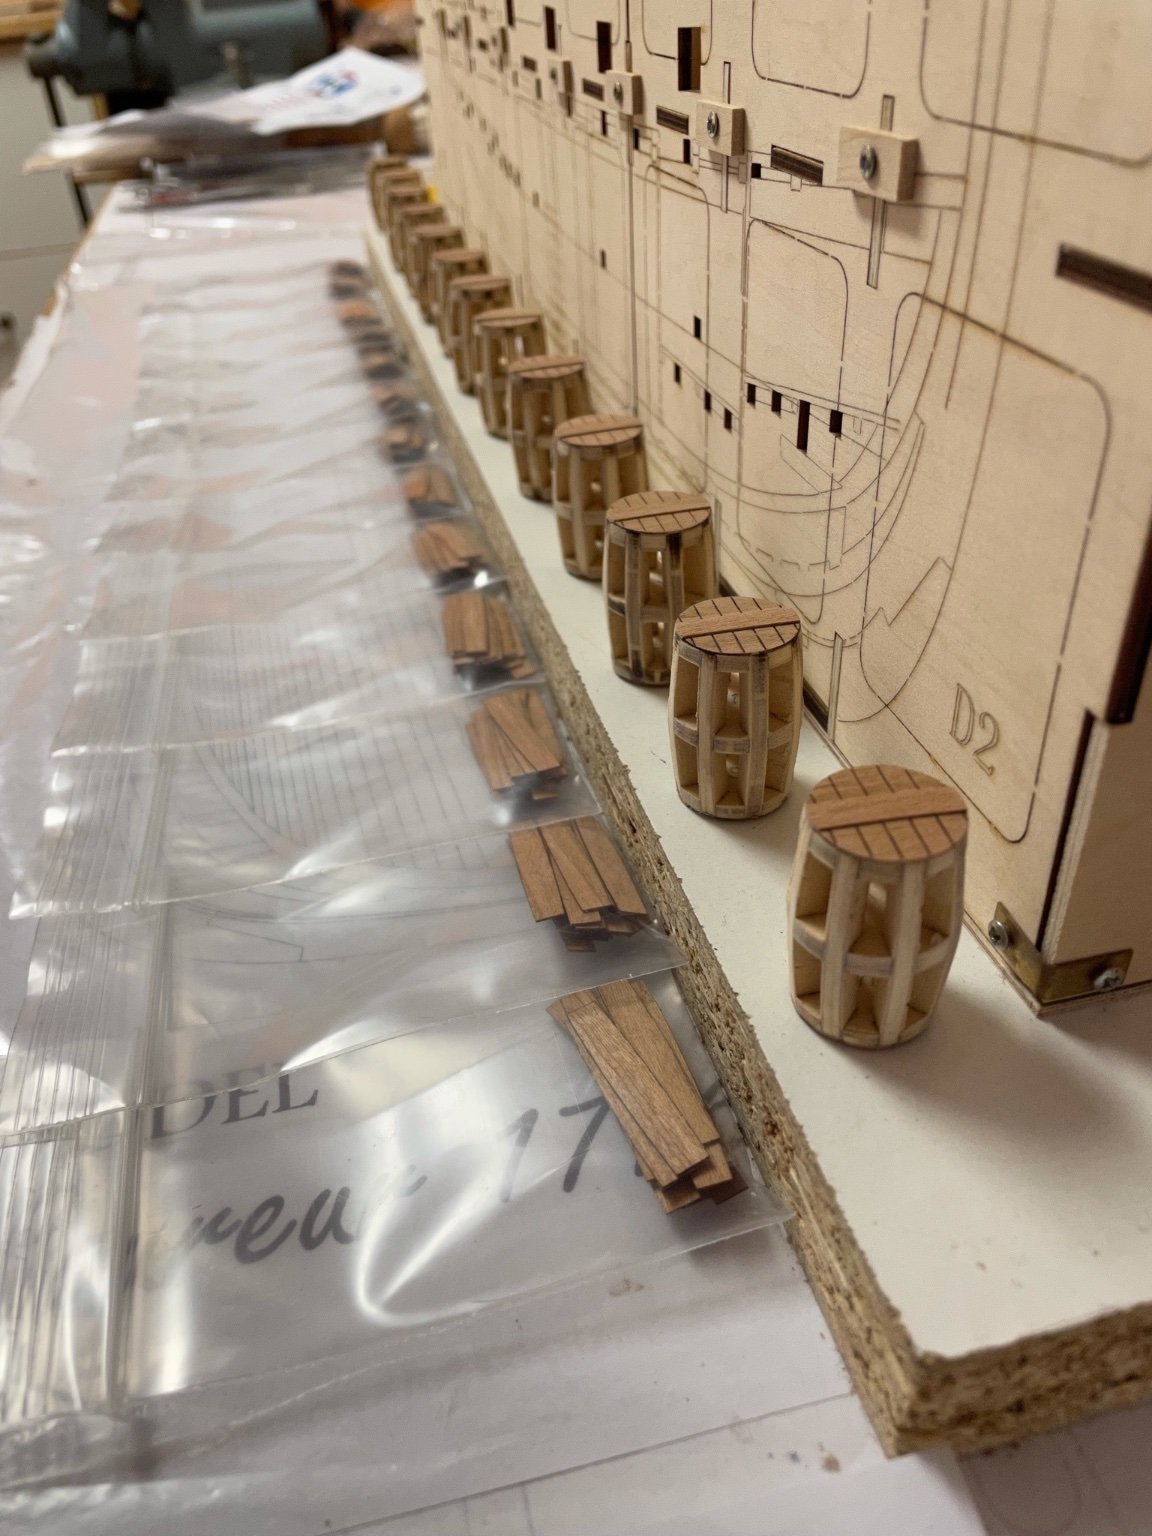
The barrels are mini-kits sold separately. They are made of a center plywood piece planked with two layers of cherry veneer. These barrels take quite a long time to build because every barrel needs 24 veneer parts to complete. The center plywood piece is assembled first and a piece of cherry veneer with some laser engraving is glued at top and bottom.

Then the first layer of planking is glued on the center piece. There are only 24 pieces supplied so be careful while you bend them. I selected the best ones for the outer layer and used the rest for the inner layer.
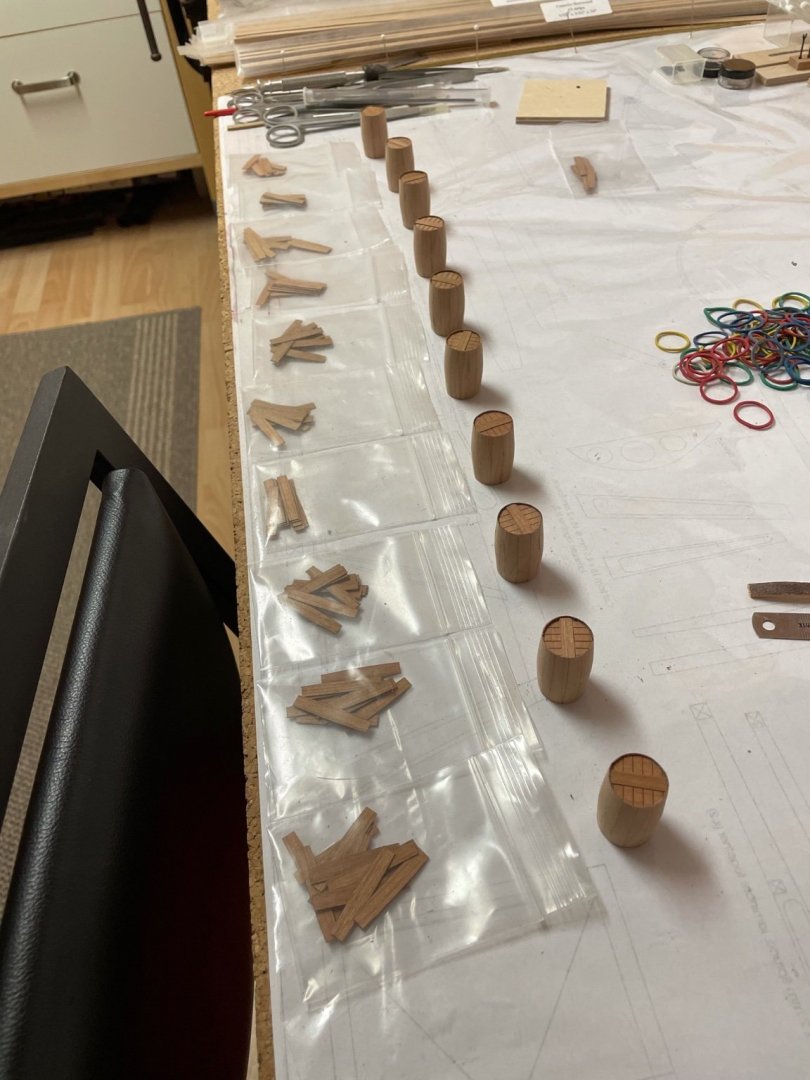
Then I gave the first layer a good sanding. Be careful - these layers are only .5 mm thick and are easily damaged. After that I glued the second layer - one part at once - and used several rubber bands to fix the part until glue had dried. As I made all barrels at once this took several hours to complete.

I gave the second layer another good sanding and applied some WOP, now they have to dry first. I will attach the iron belts in the next day, these are made of photoetched brass parts that have to be soldered to shape. A snapshot of all barrels - my crew prefer old bordeaux, keeps good mood.

Stay save.
- coxswain, Tigersteve, VTHokiEE and 12 others
-
15


Le Coureur 1776 by captain_hook - CAF - Scale 1:48
in - Kit build logs for subjects built from 1751 - 1800
Posted · Edited by captain_hook
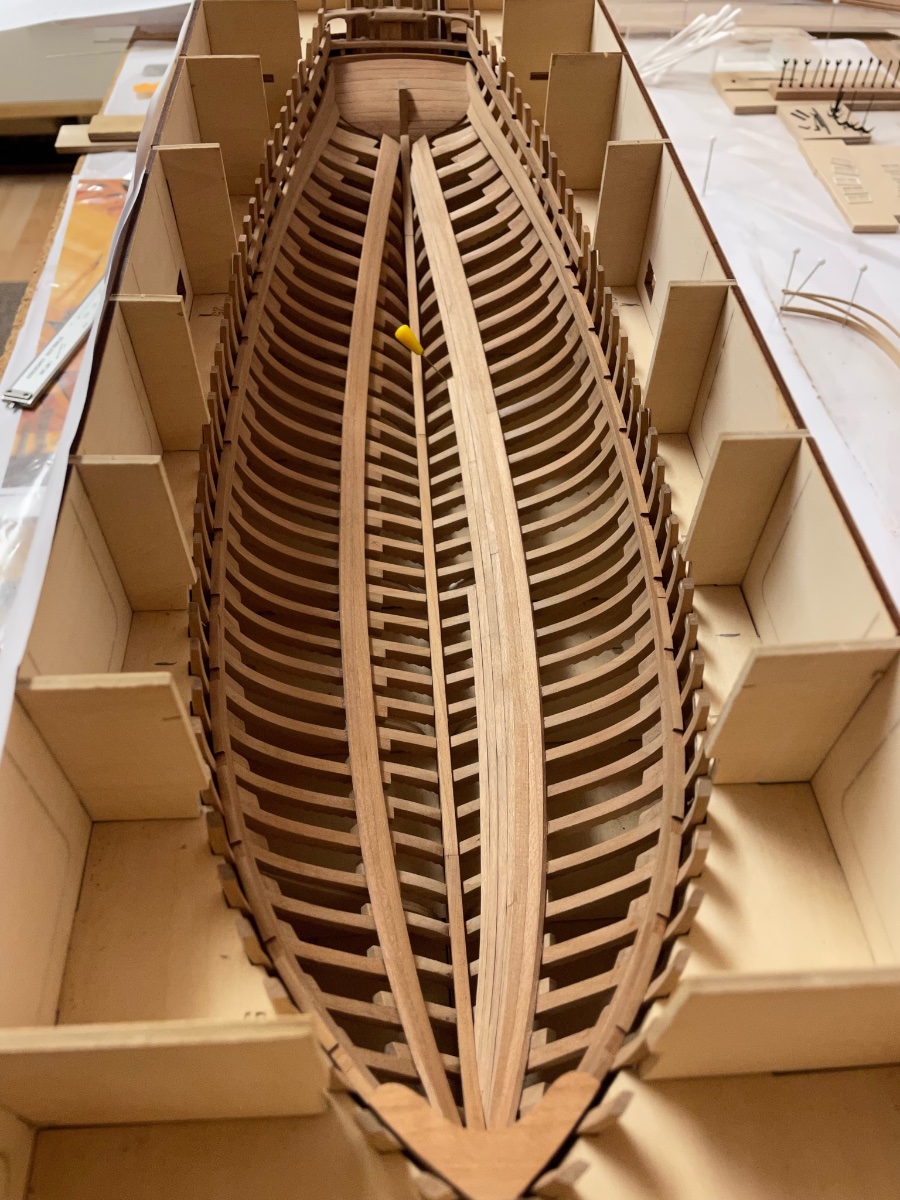
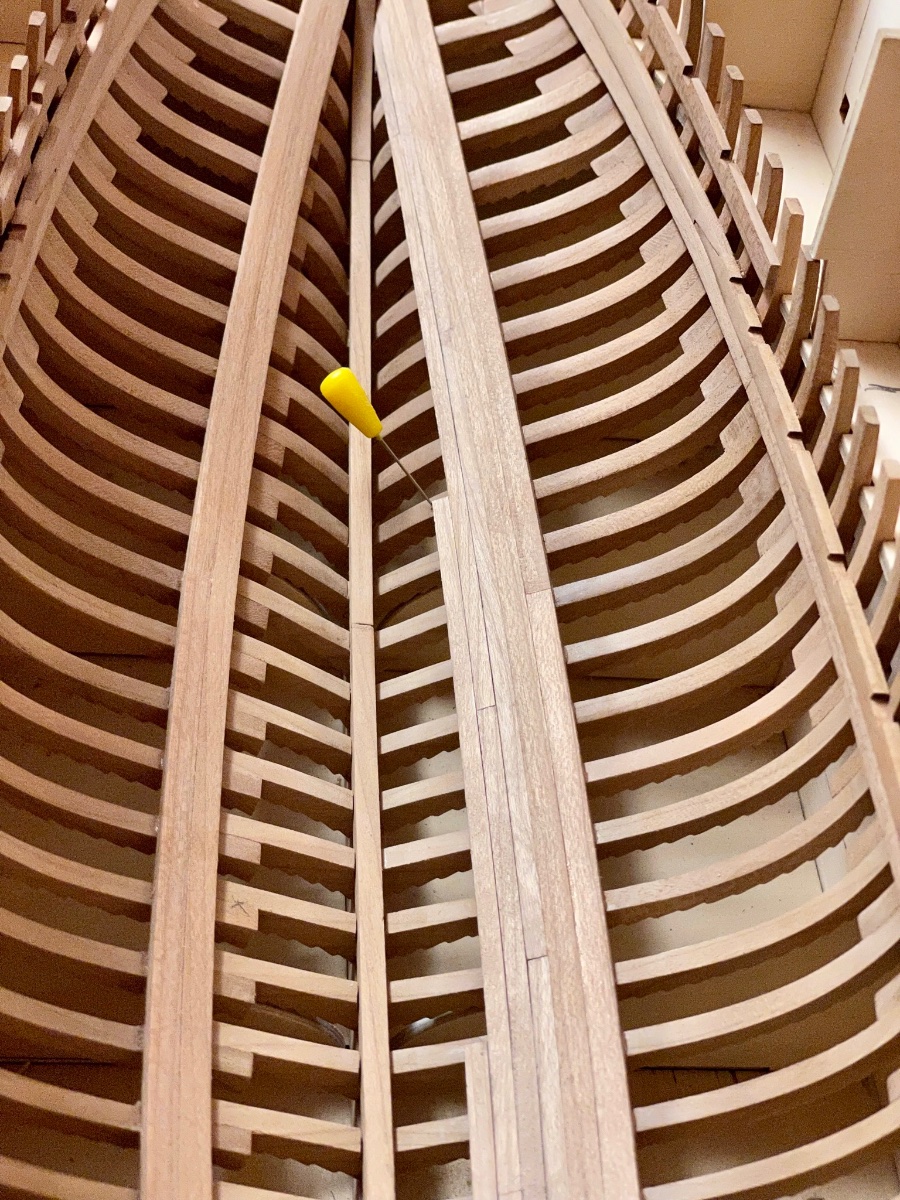
Thank you guys for the likes. I‘m making slow progress towards the false keel and have already reached it on the bow. Some fishing was used there to get a smooth planking run. Will try to complete the port section tomorrow.
The starboard side will be a mirrored version of the port side and I hope this will speed up the planking. Stay tuned ..
.