ccoyle
-
Posts
10,599 -
Joined
-
Last visited
Content Type
Profiles
Forums
Gallery
Events
Everything posted by ccoyle
-
Welcome aboard!
-
 I'm back from bleeding money, er -- I mean, "vacationing" -- in Gatlinburg. The arresting hook and tail wheel are now done.
- 92 replies
-
- 17
-

-

-
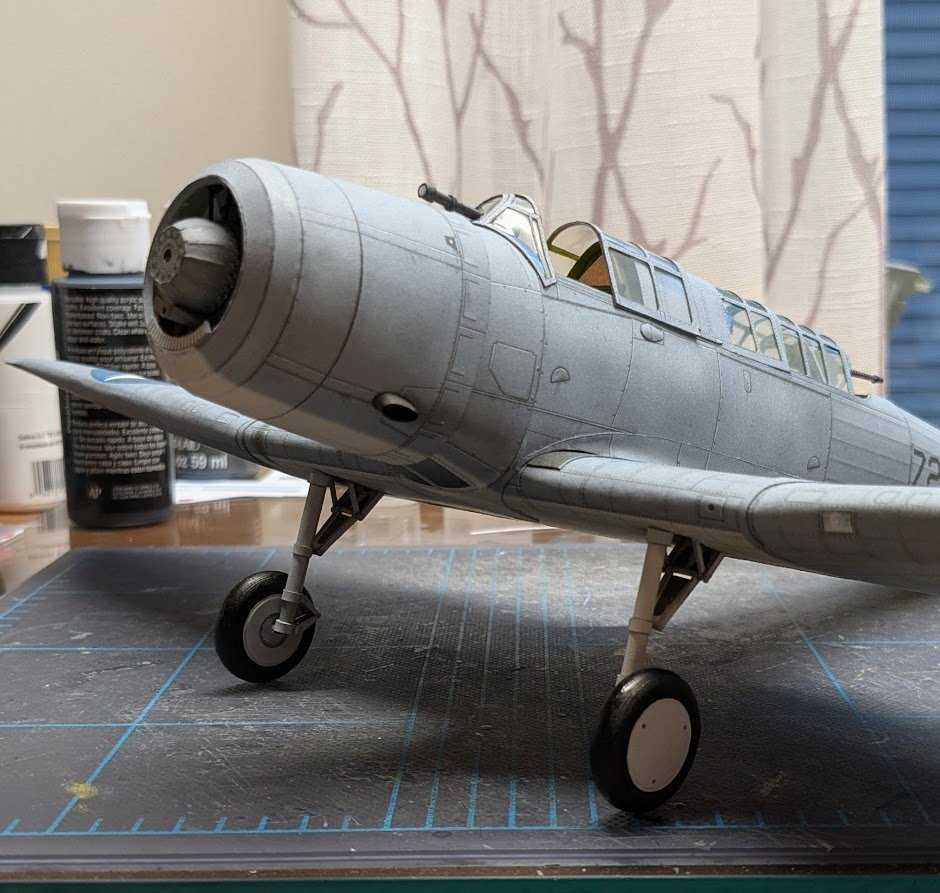
Main gear covers added. That odd little kink between the upper and lower covers on each strut is not a construction error -- the real covers were 'bent' in that fashion.
- 92 replies
-
- 16
-
-
Sad news. https://www.bbc.com/news/articles/cn7em5p087vo
-
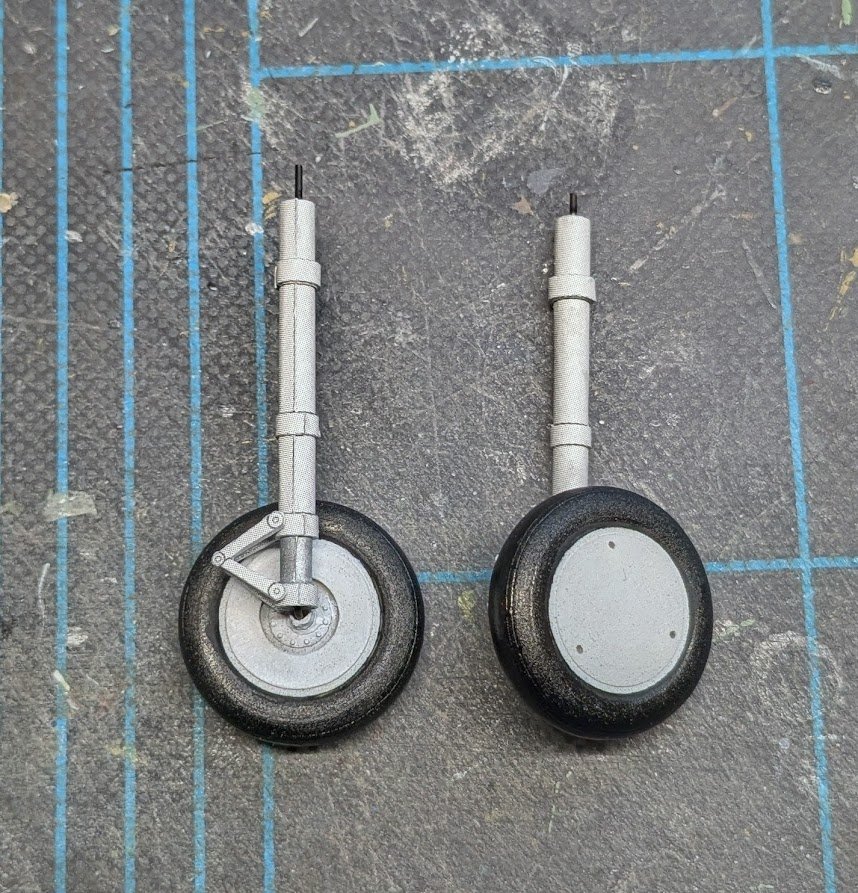
Have been making slow progress on the main landing gear. The struts are the usual paper wrapped on wire; the wheels are resin.
- 92 replies
-
- 16
-
-

-
Ya know, with a pair of long guns right there in the cabin, those two could have done a bang-up job, literally, of the 1812 Overture -- if only they hadn't preceded its writing by 75 years!
-
Welcome aboard, Glenn!
-
Welcome aboard, Nico! There is a discussion area for plastic kits here: https://modelshipworld.com/forum/26-plastic-model-kits/
-
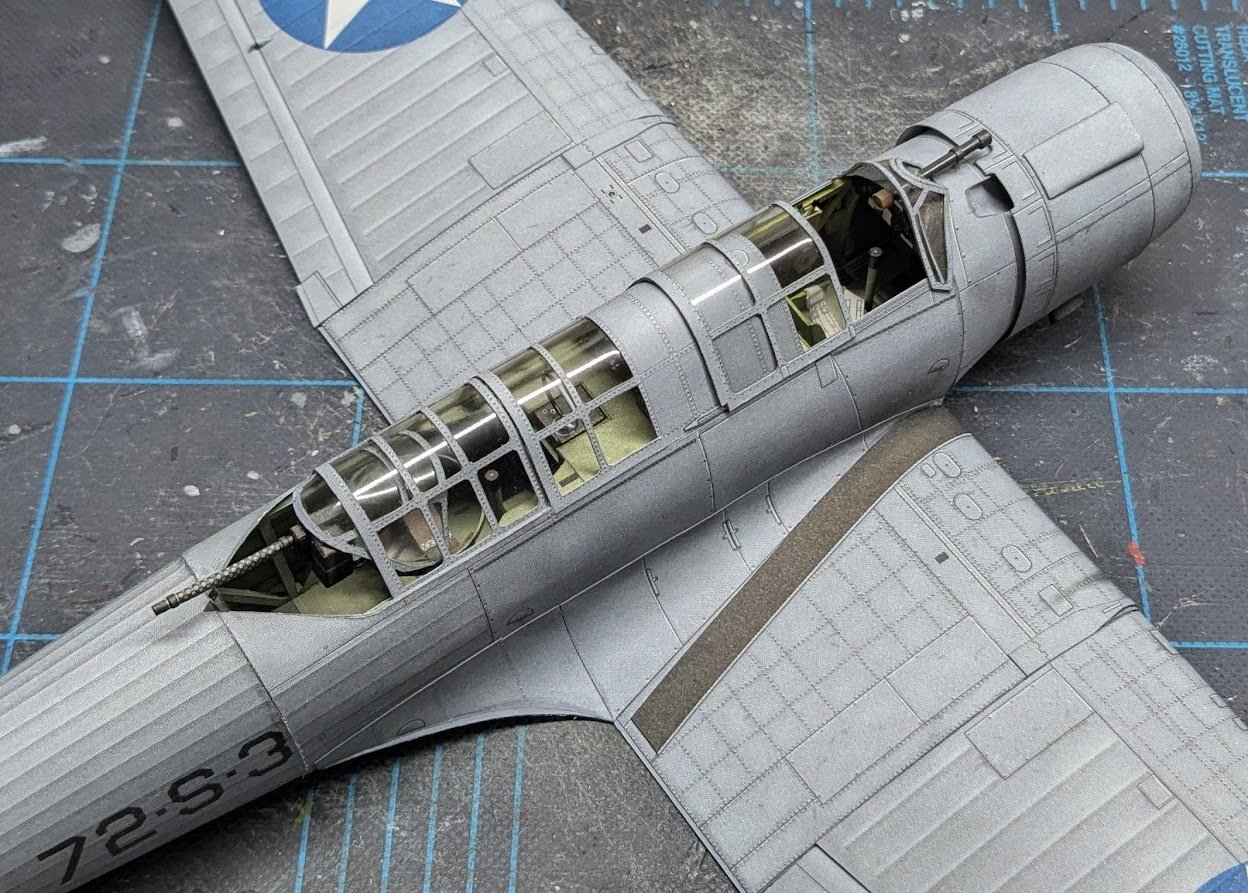
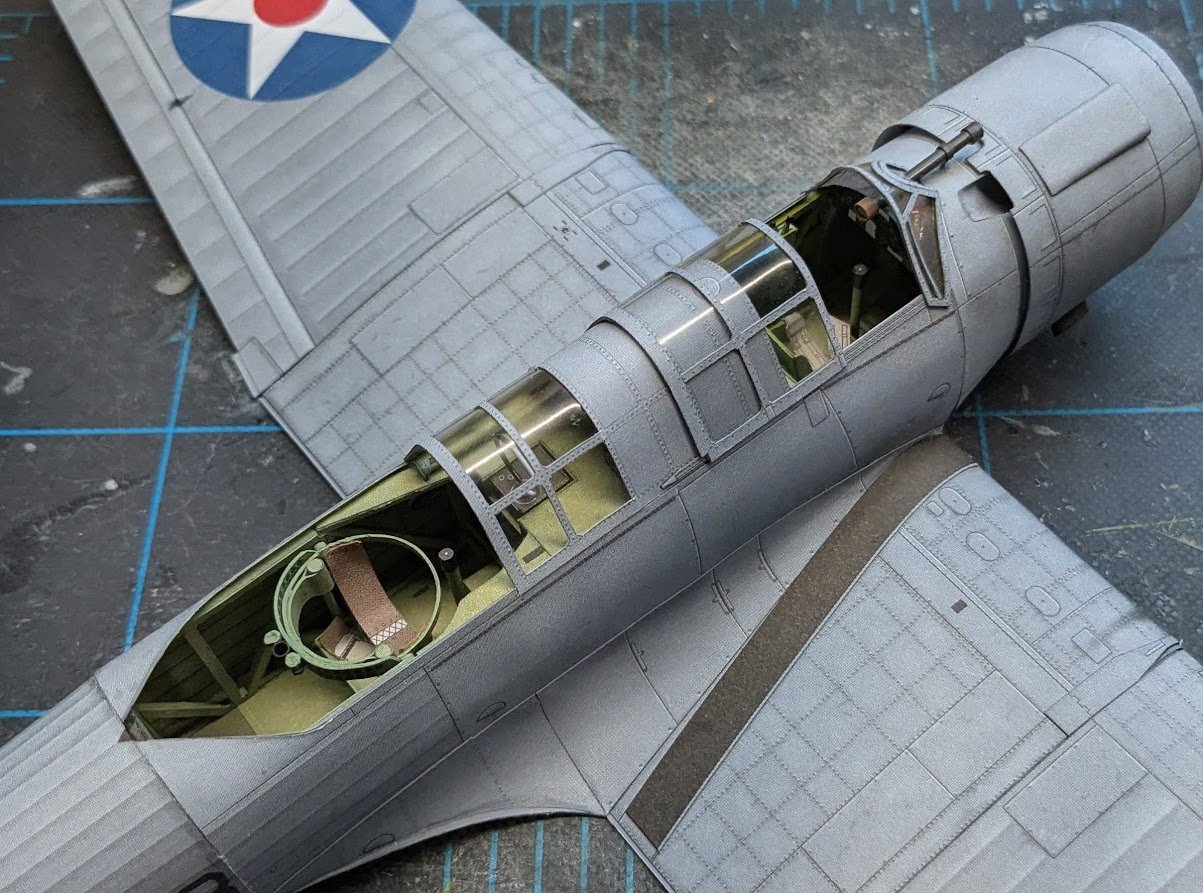
The only thing I got done today was the last two canopy pieces. The first one was not too much trouble -- until I realized it was riding too high because it is supposed to sit inside the fuselage rails, not on them. So, I had to cut it free from the fuselage, clean up the glued edges, and glue it down again. Then came the last piece. It was an absolute nightmare. I had to take a best guess at how far back the framing went on the molded canopy, because the forward part wouldn't sit right if the frame was too far back, and the aft part wouldn't sit right if the frame was too far forward. Ultimately, I must have guessed wrong, because the resulting piece absolutely would not fit where it was supposed to go, and no amount of cajoling had any positive effect. I also discovered that the machine gun was going to have to go in before installing the last piece, because it would not fit in after the piece was installed. I finally had to resort to cutting off some of the aft portion of the last canopy piece. The resulting shape is now wrong, but at least I was able to finally install it after many, many attempts. This process literally took hours to complete. 😑 Next up: landing gear.
- 92 replies
-
- 16
-
-
-
Windscreen and cockpit canopy done. Building and installing the bomb sight was a booger -- the paper part wound up being too large, so I had to replace it with a piece of styrene rod wrapped with several paper bands.
- 92 replies
-
- 17
-
-
-
Yep. There's a picture of it in the first post.
-
I laughed when I read that, but only because I know the magnitude of the understatement!
- 106 replies
-
- 2
-
-
- digital navy
- v108
- (and 3 more)
-
In all seriousness, I think I built mine back in the days of pinching Crayola markers from my kids. I think I may even still have the gray one somewhere. These days, I would much prefer something like the AK markers I purchased a while back. Sadly, the set included only one or two shades of gray, and nothing in the usual nautical grays.
- 106 replies
-
- 3
-
-
- digital navy
- v108
- (and 3 more)
-
Sounds like a great trip! Believe it or not, I still haven't been north of Charlotte since moving to SC ten years ago!
-
Browsing Experience
ccoyle replied to mrcc's topic in Using the MSW forum - **NO MODELING CONTENT IN THIS SUB-FORUM**
And I thought I had a lot of tabs open! 😮 -
Do you mean Oregon pine? That is a regional name for Douglas fir. It was very commonly used in West Coast ship building, it being a very large and straight-trunked tree, which made it a prime source of long, straight-grained planks. Most of the West Coast schooners that have been in the news here on the forum lately were built of Doug fir.
- 33 replies
-
- 4
-
-
- gaff sloop
- restoration
- (and 1 more)
-
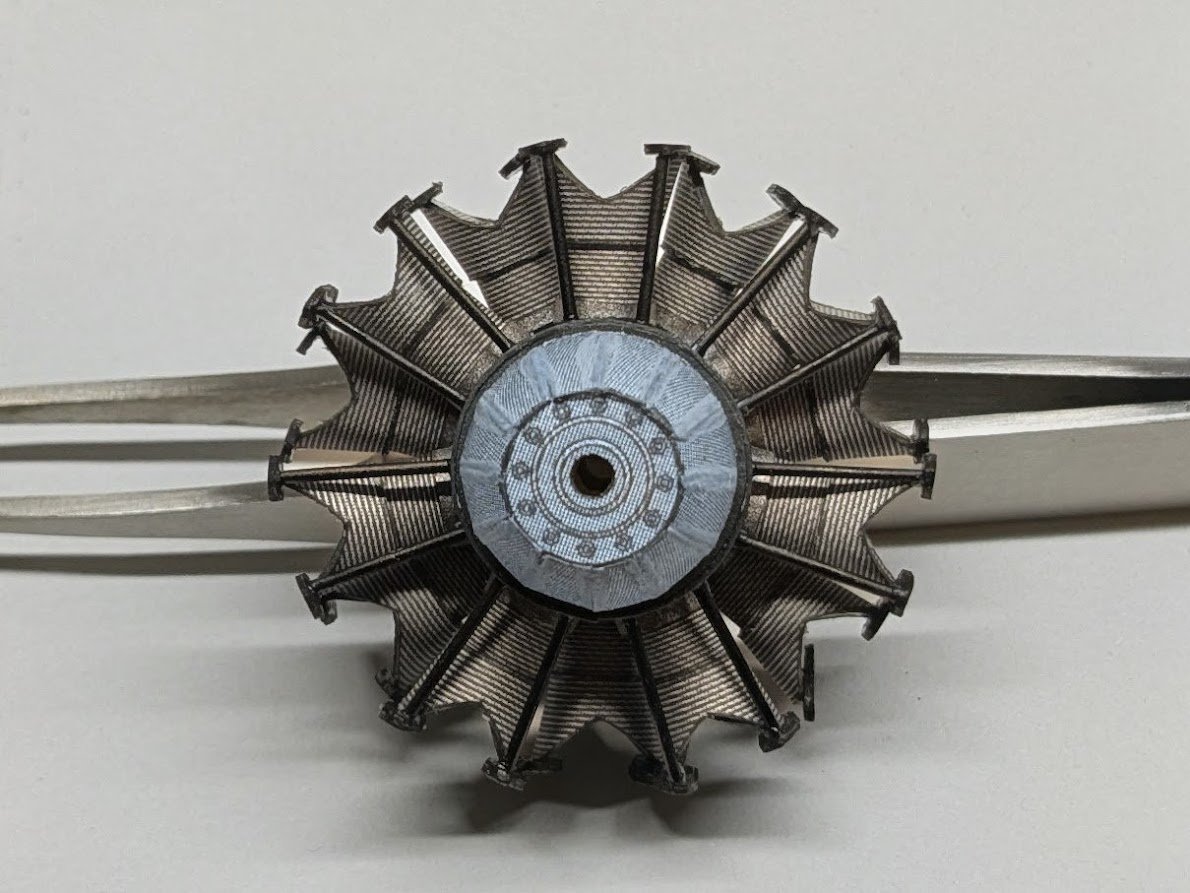
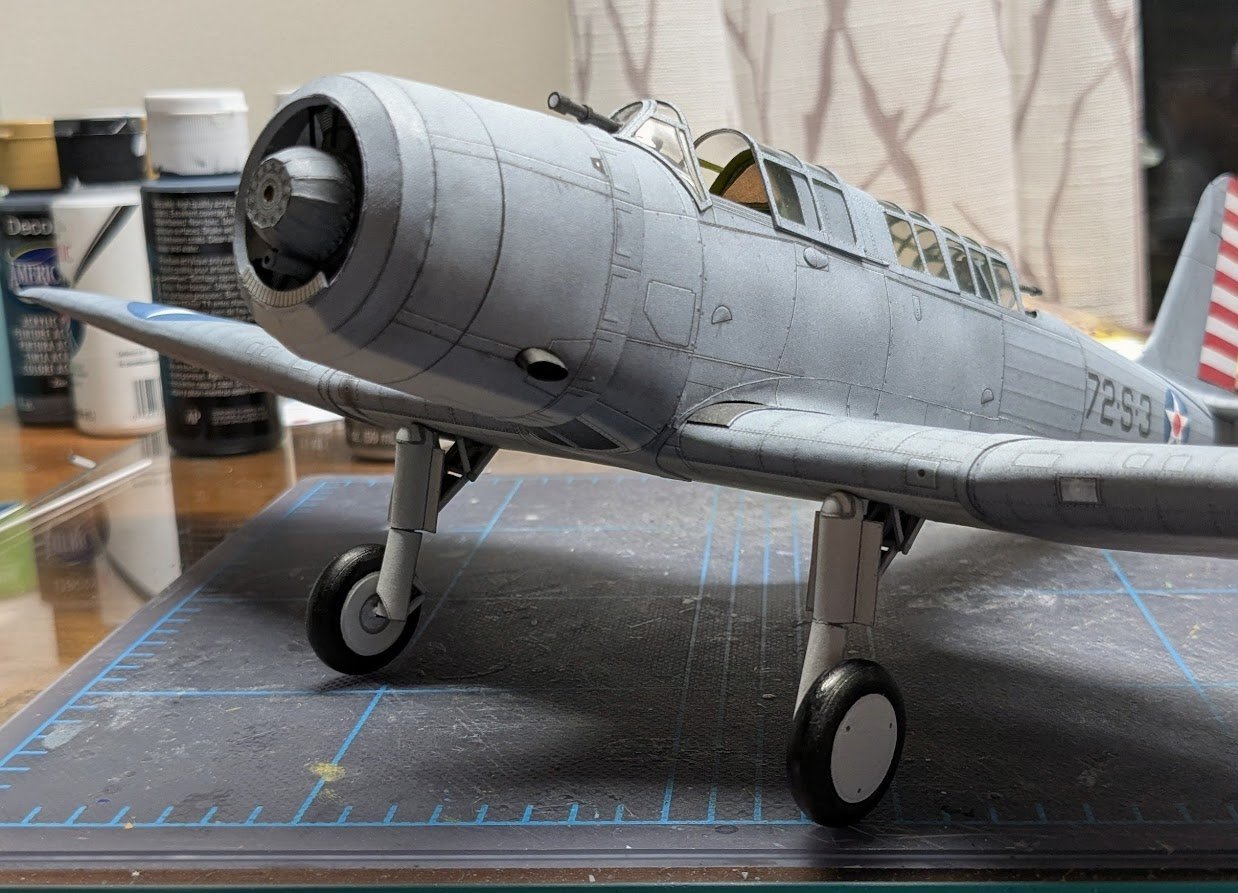
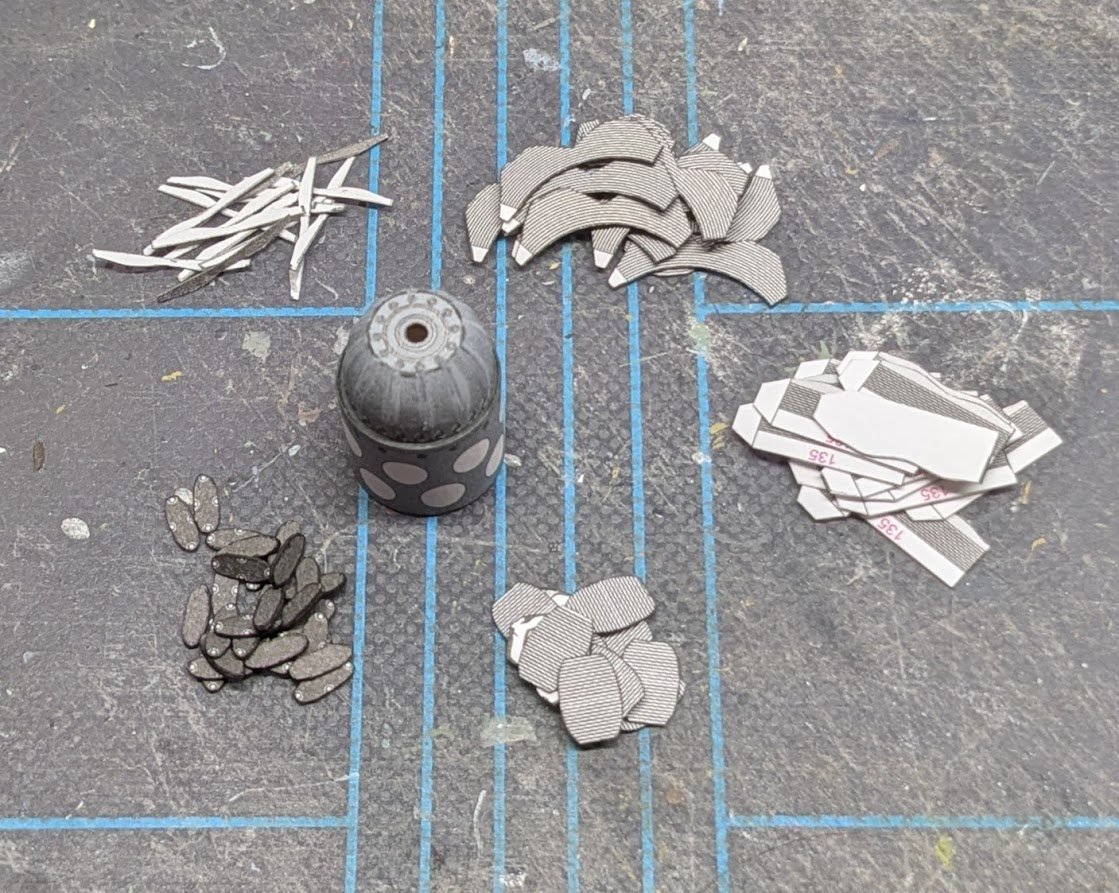
Made quite a lot of progress since the last update. First, I got the engine mated to its bulkhead and the forward fuselage ring done. You can see some of the cowl rings in the background. Next, all of the cowl rings were shaped and closed. At this point they still need a little final shaping. Here the cowl rings have been added. I had a problem with the last ring because I didn't realize that it was supposed to angle back into the cowl opening instead of forward. I made a few cosmetic boo-boos in getting it repositioned. I also overlooked that there is a printed interior cowl piece. Fortunately, as this photo suggests, the interior is difficult to see, so the interior piece's absence shouldn't stand out. A couple of exhaust stubs and an air scoop later and the forward fuselage was ready to mate to the rest of the model. Finally, the .30 cal mount was completed. It's just loose-fitted for this shot -- I will remove it while I work on the canopy. I had originally planned to display the gun in the stowed position and have the aft canopy closed, but the diagrams were unclear on how to configure the mounting to make that possible, and I could find no helpful images online. Displaying the gun deployed means that the rearmost canopy section will need to be separated from the rest of the canopy in order to display it in the open position. That's it for now!


- 92 replies
-
- 15
-
-
-
Not much -- which is why I'm going to pass on super-detailing this one.
-
I got the engine block built and all of the paper parts for the cylinders cut out -- fourteen cylinders at six parts each = eighty-four parts to cut out. After that I started rolling cylinders, but I only got two done before my brain died. 🥴
- 92 replies
-
- 19
-
-
-