ccoyle
-
Posts
10,529 -
Joined
-
Last visited
Content Type
Profiles
Forums
Gallery
Events
Everything posted by ccoyle
-
 I should add that confidence is high at the moment. My last Halinski effort, the Brewster B-239, never got past the cockpit stage, so this is already a big improvement.
- 130 replies
-
- 10
-

-
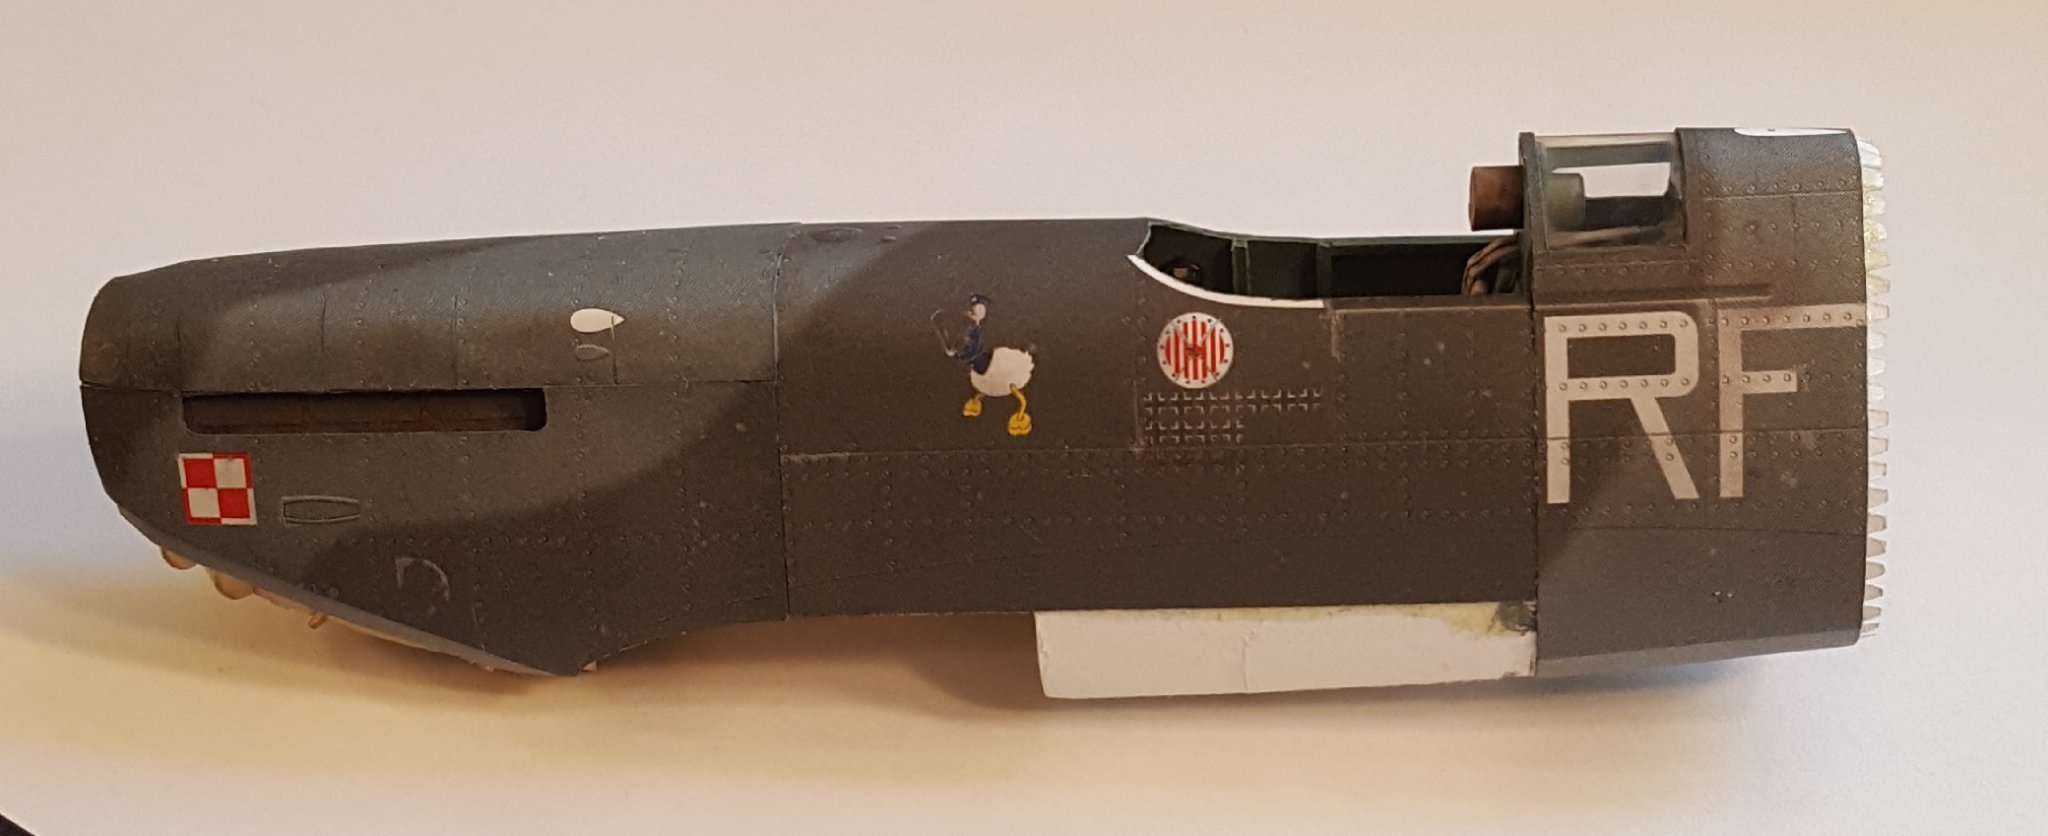
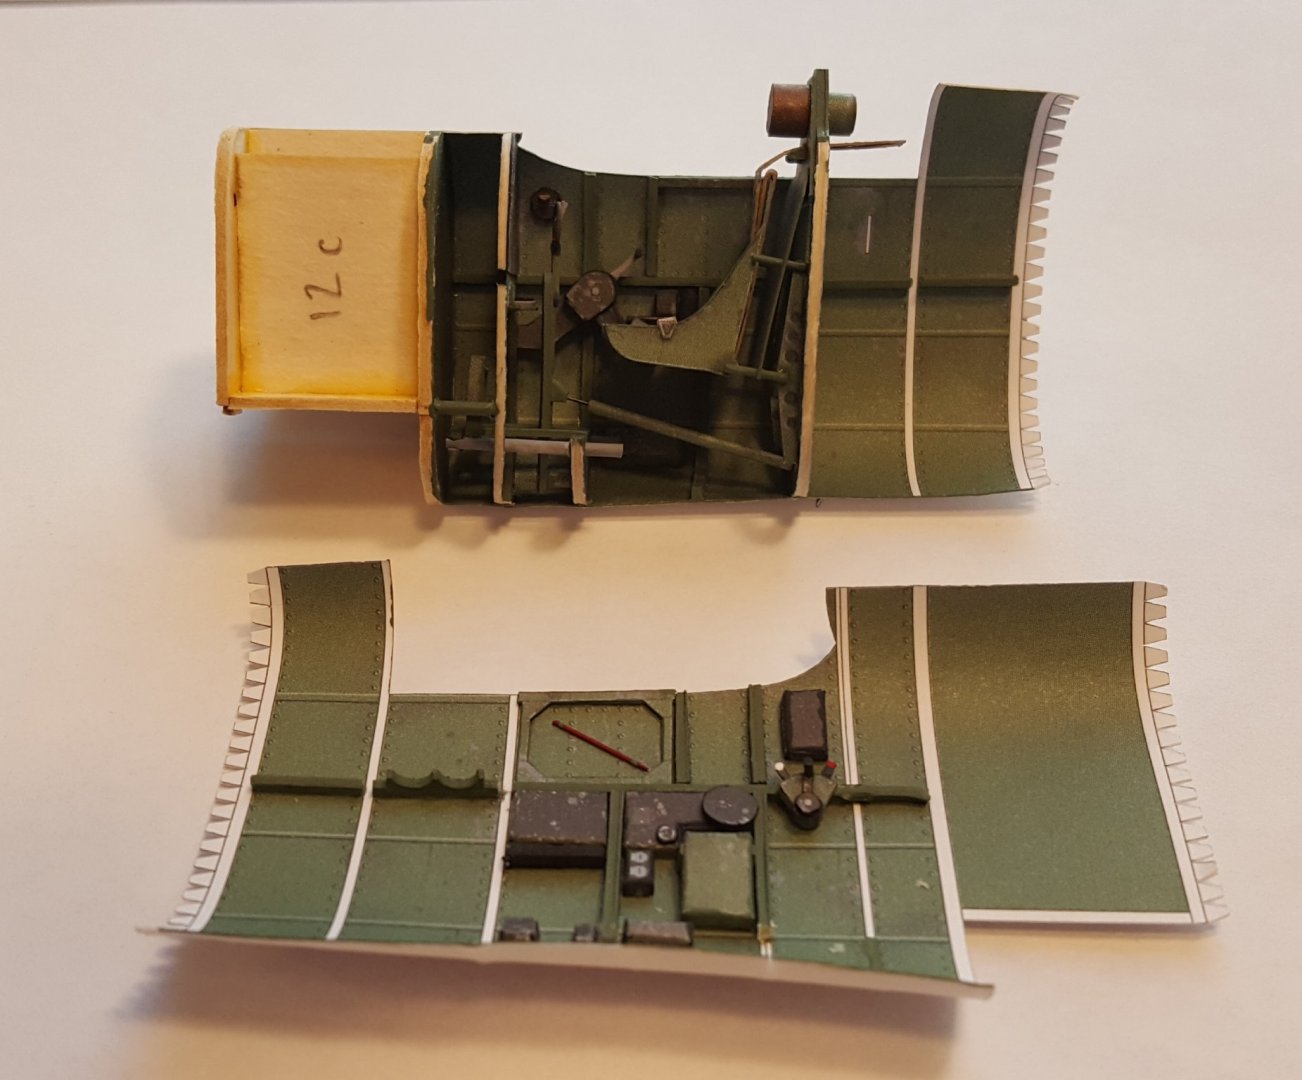
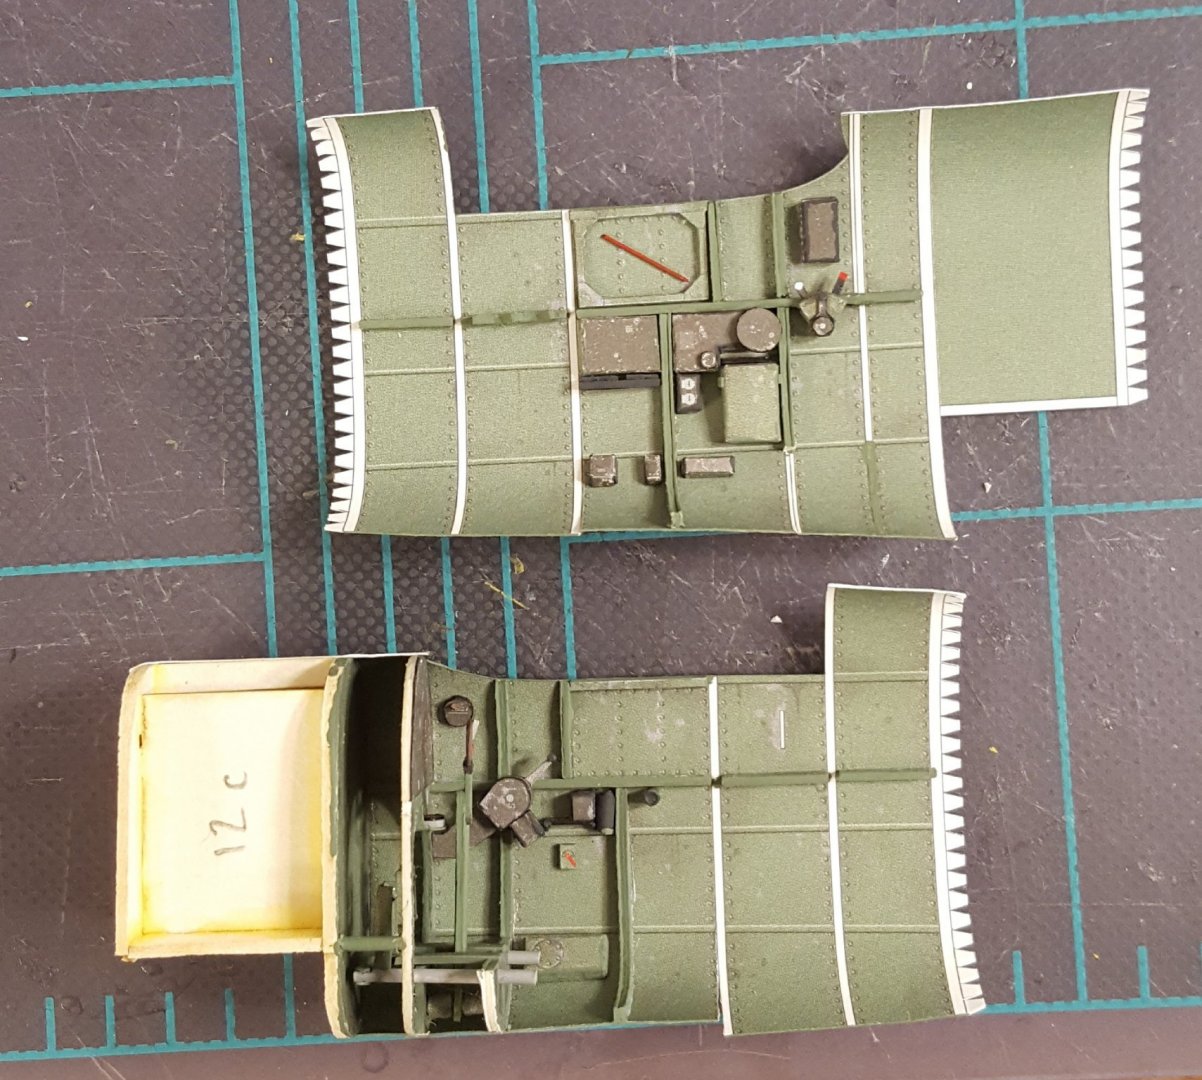
Ch. 11 Forward Fuselage This next shot doesn't convey how much work went in to getting this section done. The upper forward fuselage is wrapped in three separate sections, two sides and a top. Before adding these, the sub-structure needed to be sanded, and although the frames did have laser-etched fairing marks on them, there was still some guesswork involved in getting the shape correct (and I won't know if I got everything truly correct until the lower skins are added). The real problem, though, is that the very first frame, the round one to which the propeller will eventually be fitted, was revealed during dry-fitting to stick out about 1 mm too far. I double-checked the diagrams and part numbers to make sure I hadn't gotten something wrong (I hadn't), then removed the offending frame. After removing most of its material, I glued it into the topside skin, then glued that down to the frames, followed by the two sides. I had to do some very slight trimming and filling, but overall I think the finished structure is okay.

- 130 replies
-
- 19
-
-
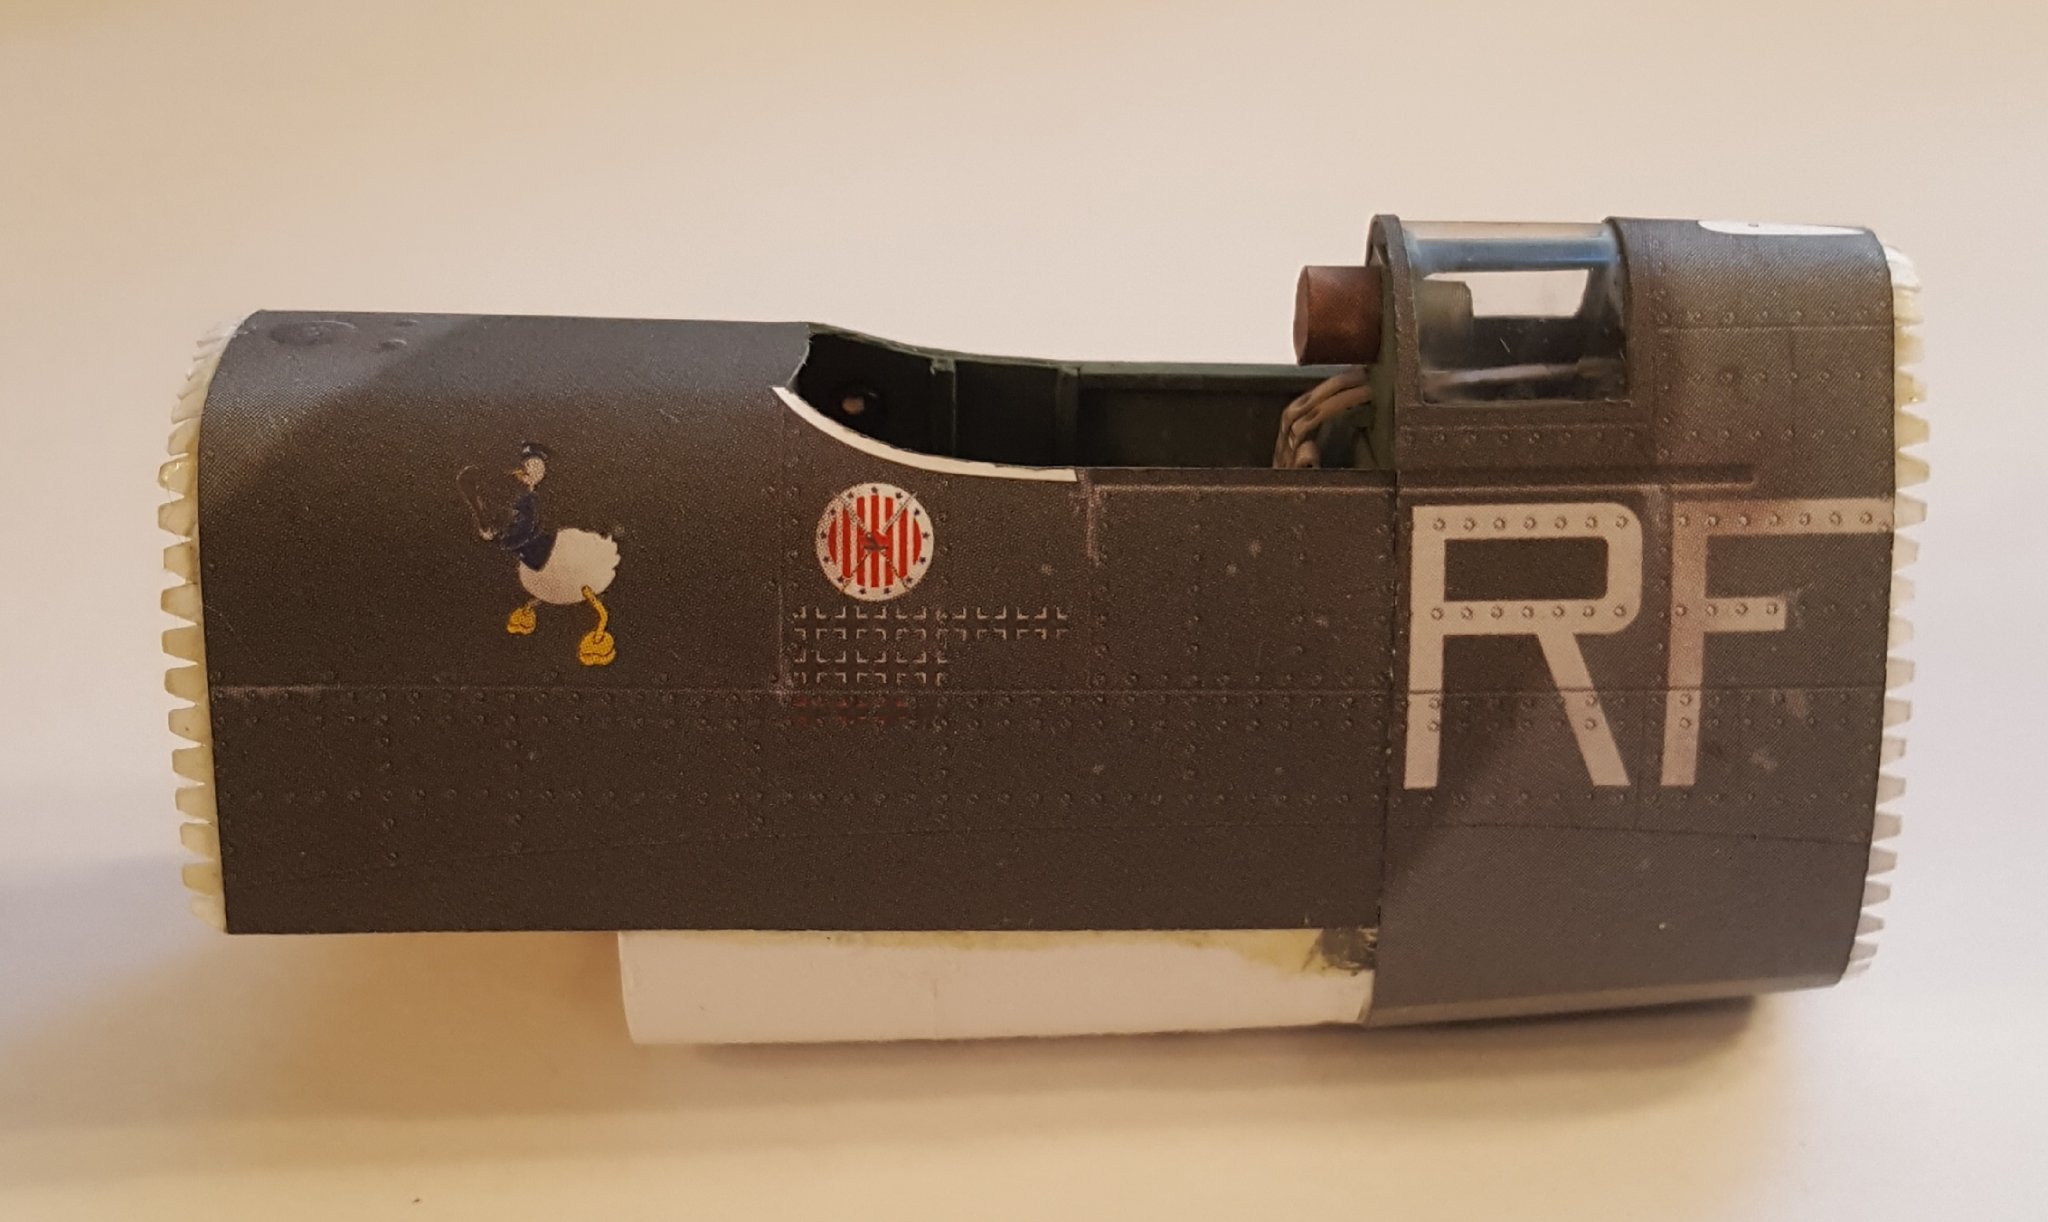
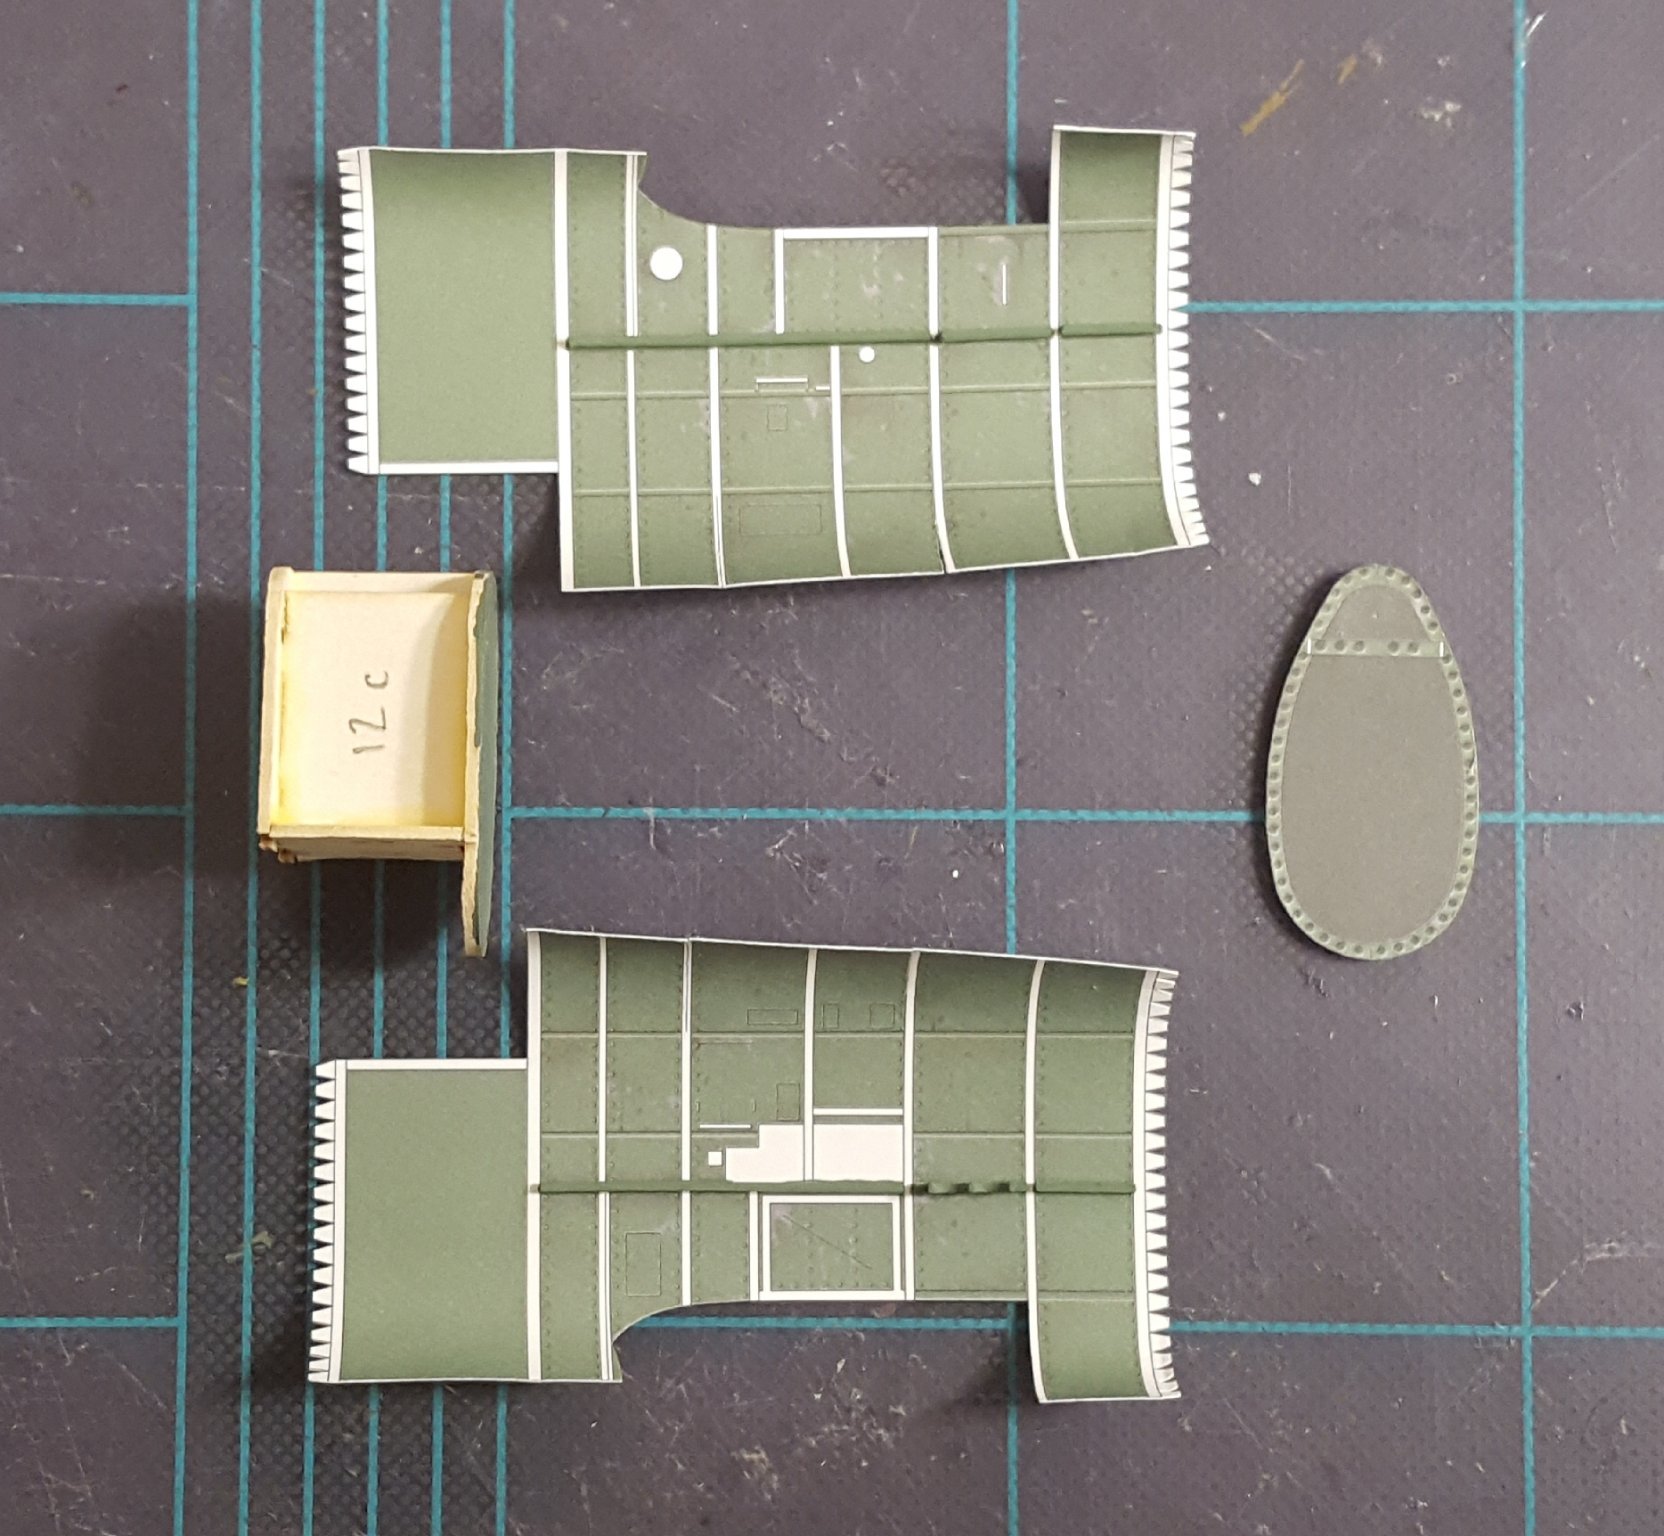
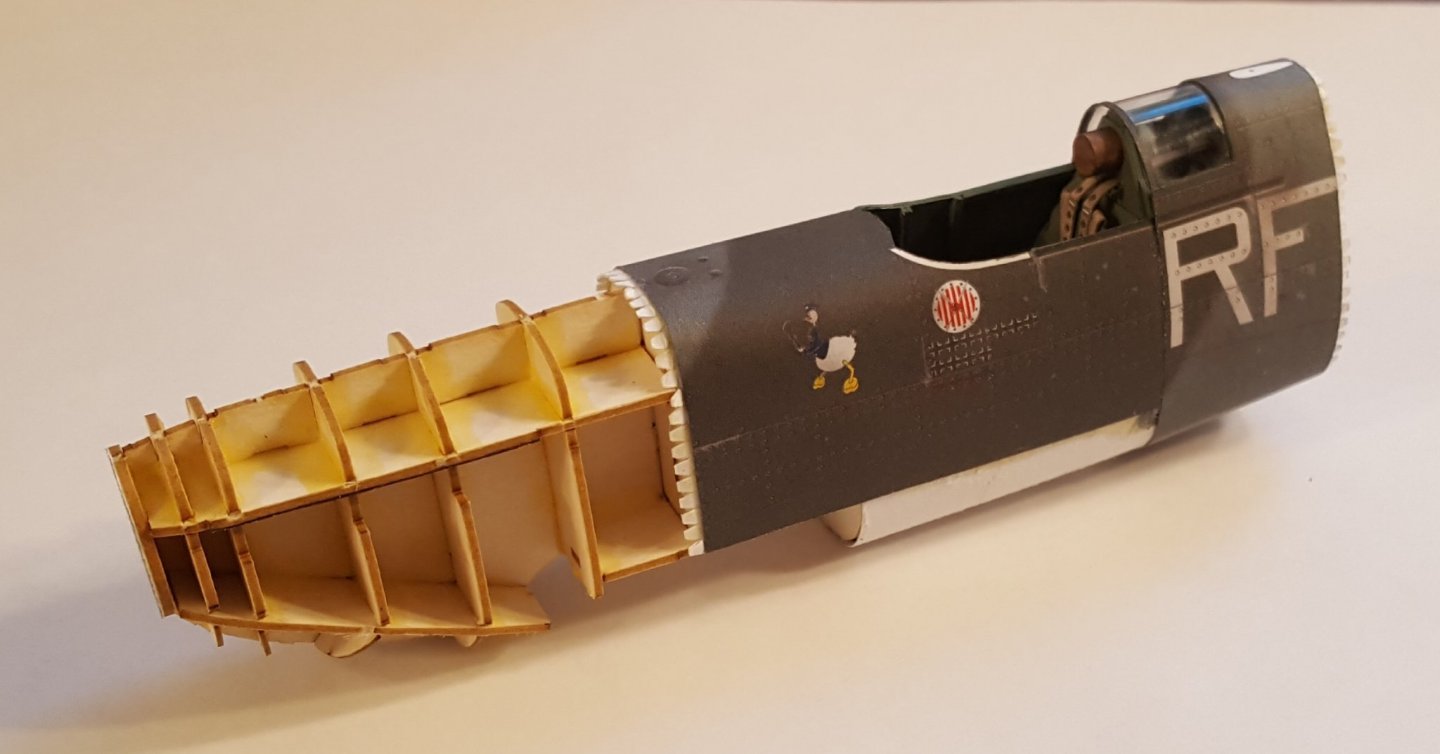
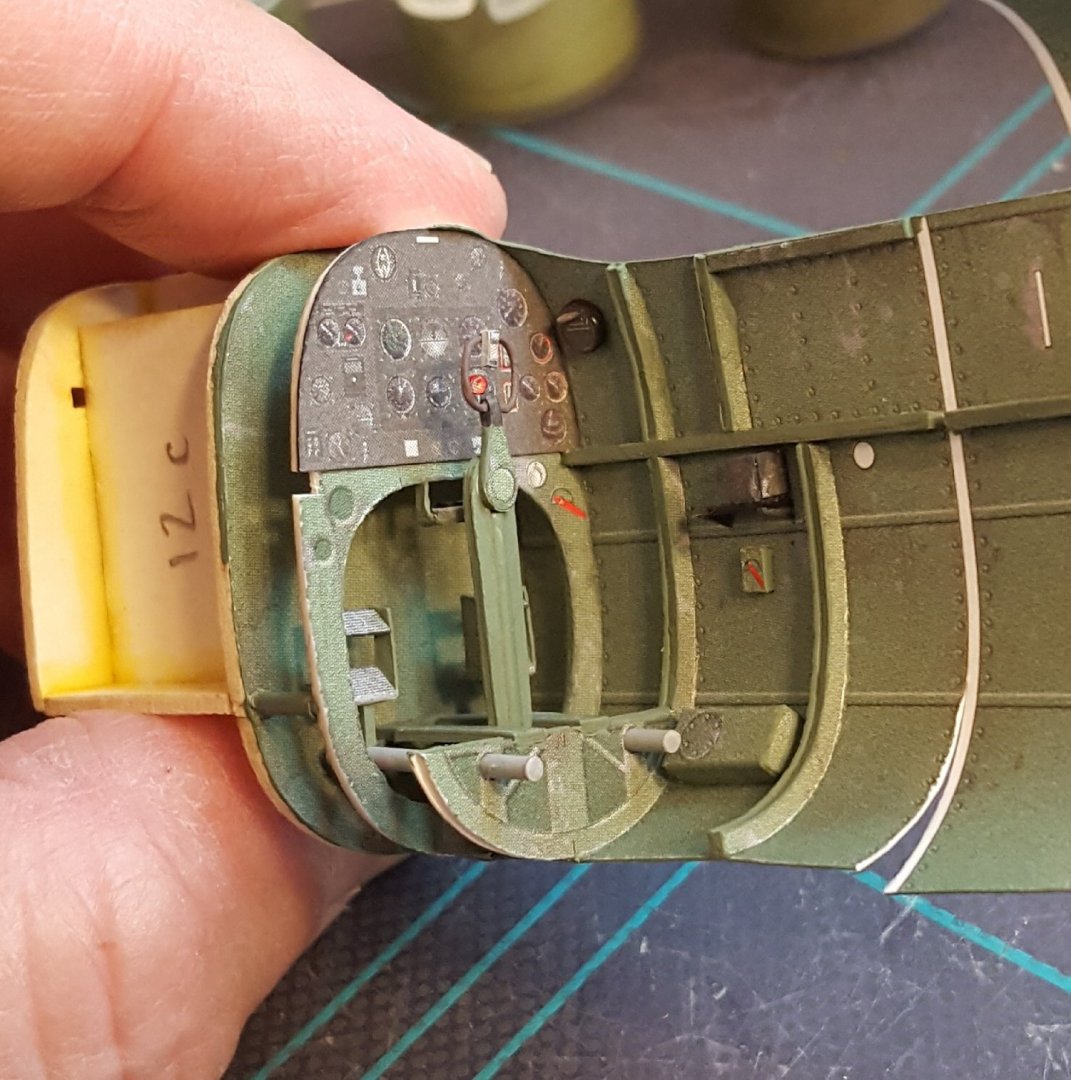
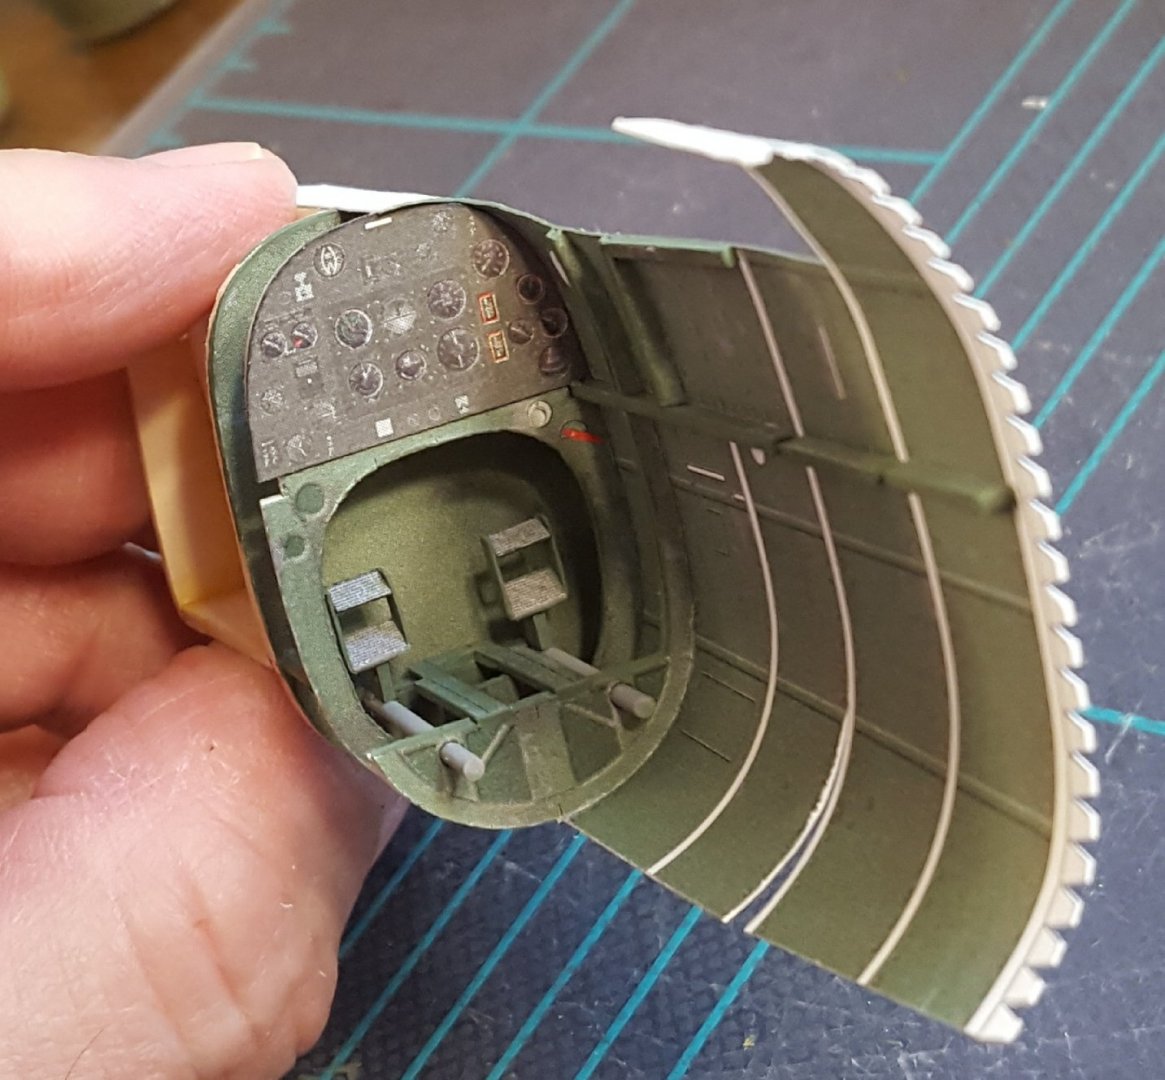
Ch. 10 Cockpit Exterior Skins The first two exterior skins are on, though not without some issues. The aft section would simply not fit all the way 'round the fuselage, even though there were no gaps between the inner panels. Sanding the inner skins helped some, but did not completely alleviate the problem. I ended up with about a 1 mm gap along the underside that I had to fill in with some colored card stock. The glazing in the aft section is made from an overhead transparency sheet and glued in with canopy glue (yes, I got hold of some and, yes, it seems to bond paper and plastic tightly). Sadly, I got some glue where it shouldn't have gone and wasn't able to clean it up entirely, but it looks okay from a distance, and it will be somewhat hidden by the Malcolm hood when that is eventually added. After that bit was done, I glued the forward sub-structure together, here seen test-fitted to the cockpit section. You can see that it is quite robust. 'Till later!

- 130 replies
-
- 21
-
-

-
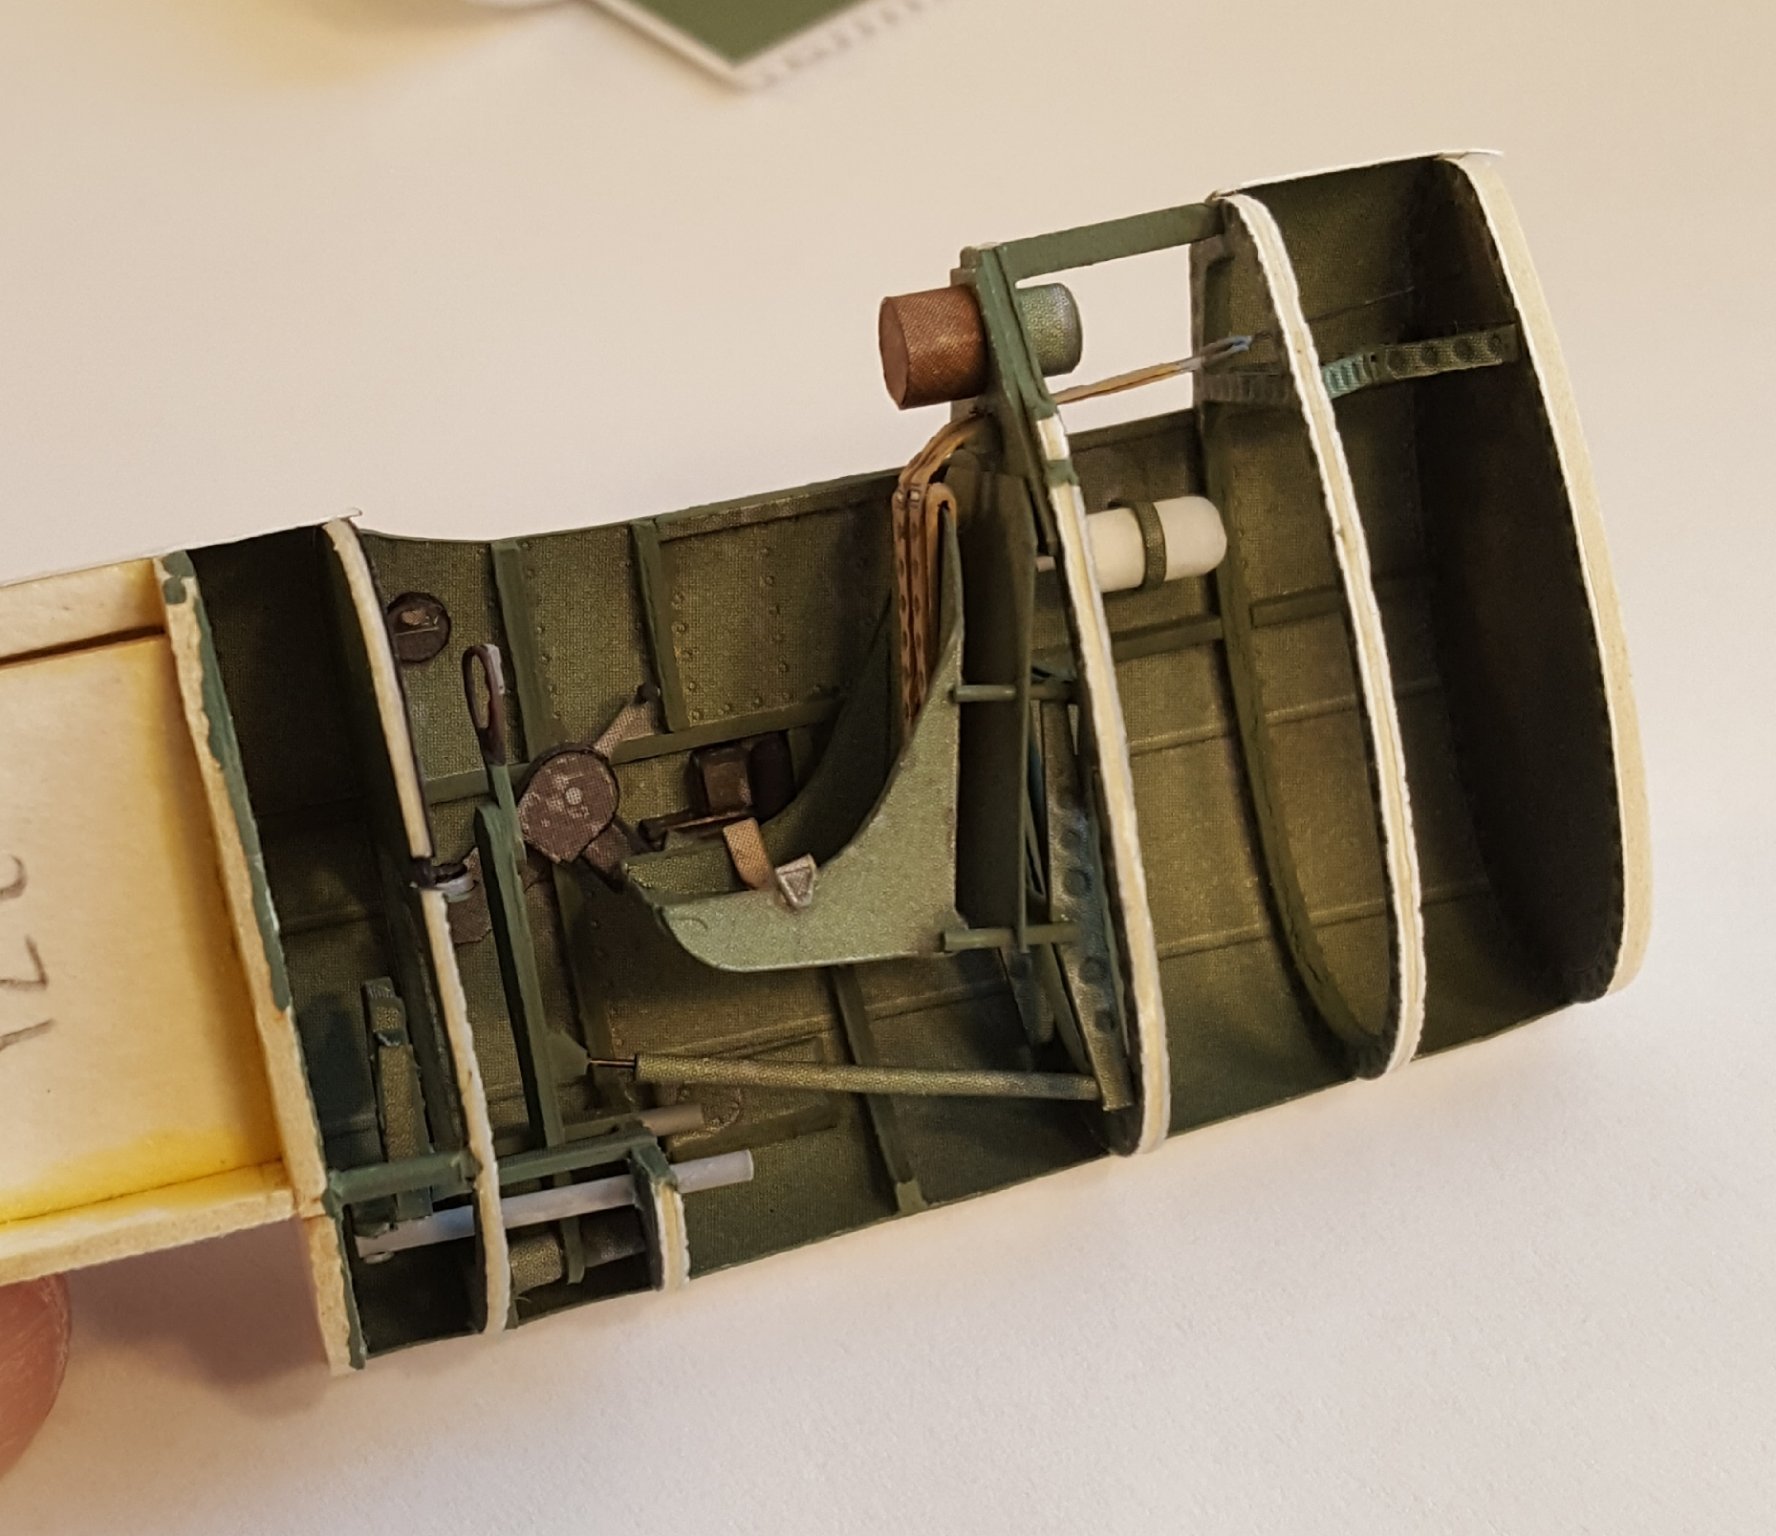
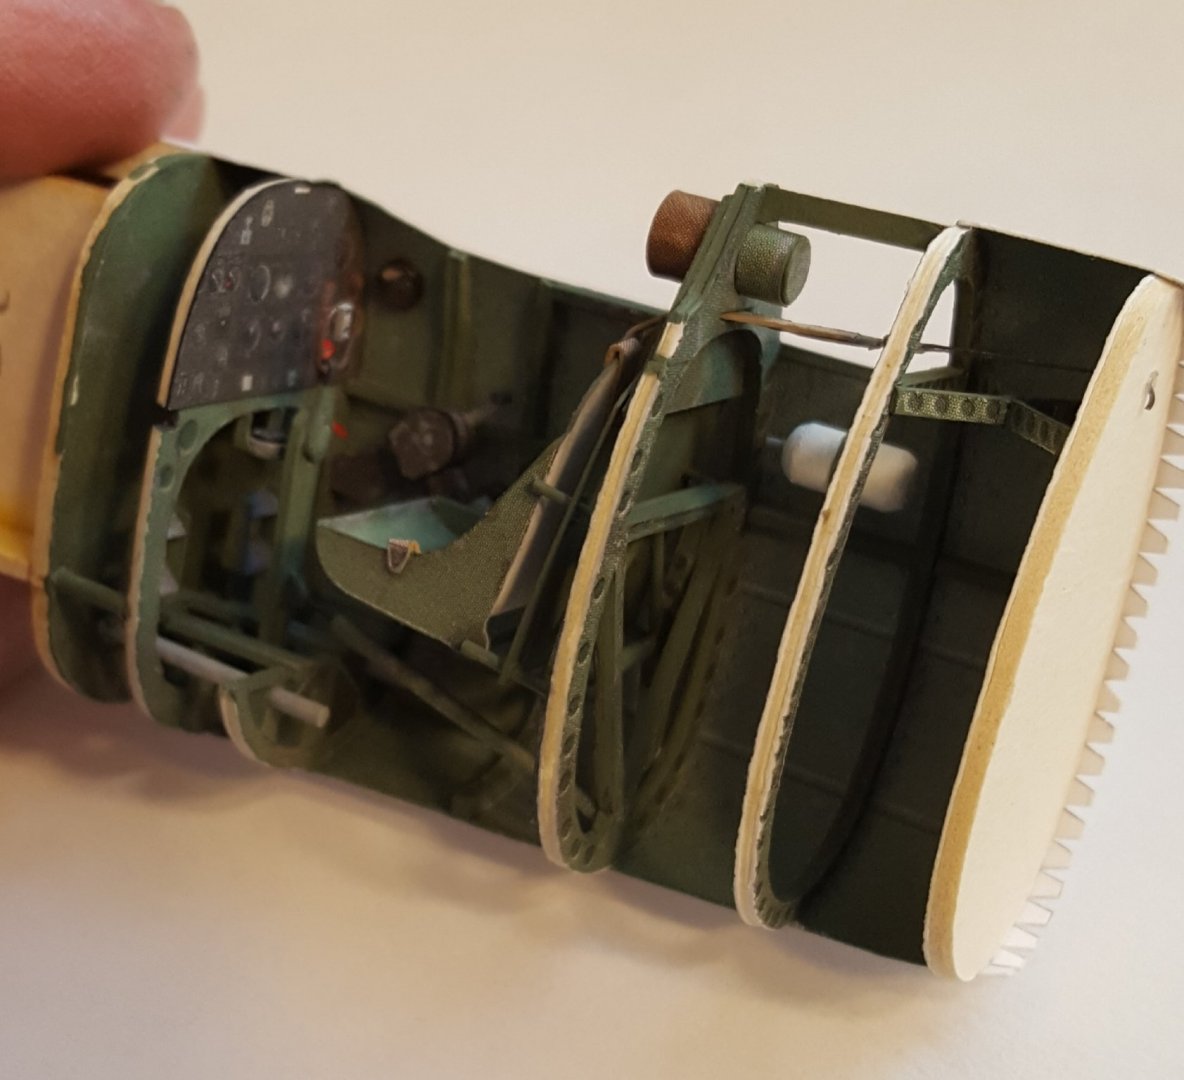
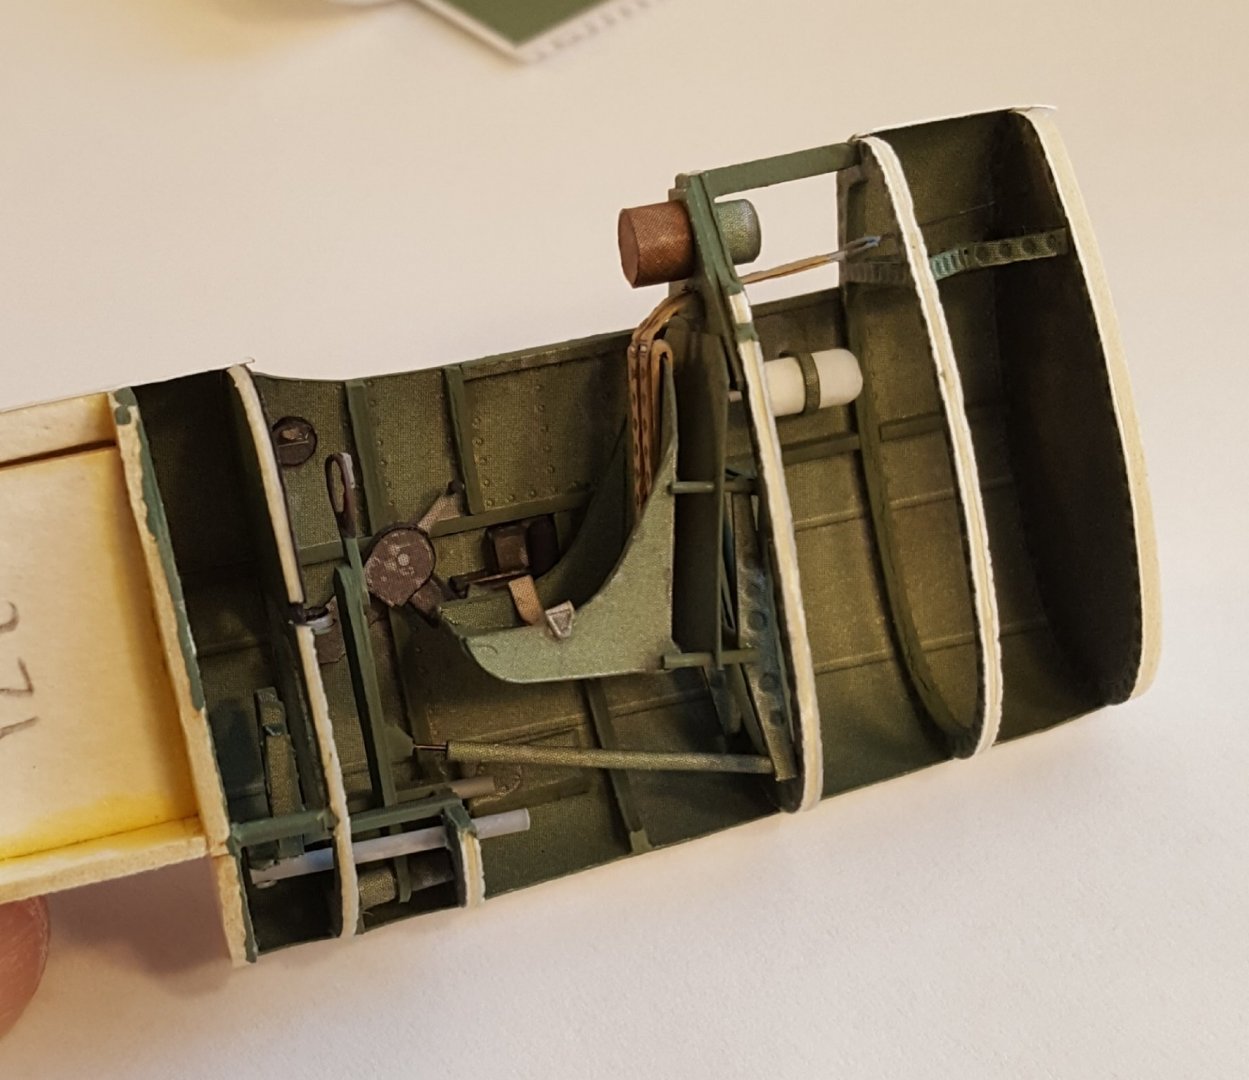
Ch. 9, Cockpit -- The Final Chapter After a week of work, the cockpit is finally completed. Here are the final interior photos -- the next step will be to zip the two sides together, after which much of this will be very, very inconspicuous At this point, it's still not too late to open up the port-side cockpit door. I haven't decided on that bit yet. EDIT: Okay, made my mind up. After perusing some photos, I find that displaying the door open would require some additional scratch-building (hinges, latching mechanism) that I don't feel up for.

- 130 replies
-
- 17
-
-
-
Some of the finest modelers I have known built their models in this style. Welcome aboard!
-
BTW, Santa brought a very important part of my-probably-next-project (we do gifts on Christmas Eve -- long story). You'll have to stay tuned to find out what it is! 😮
-
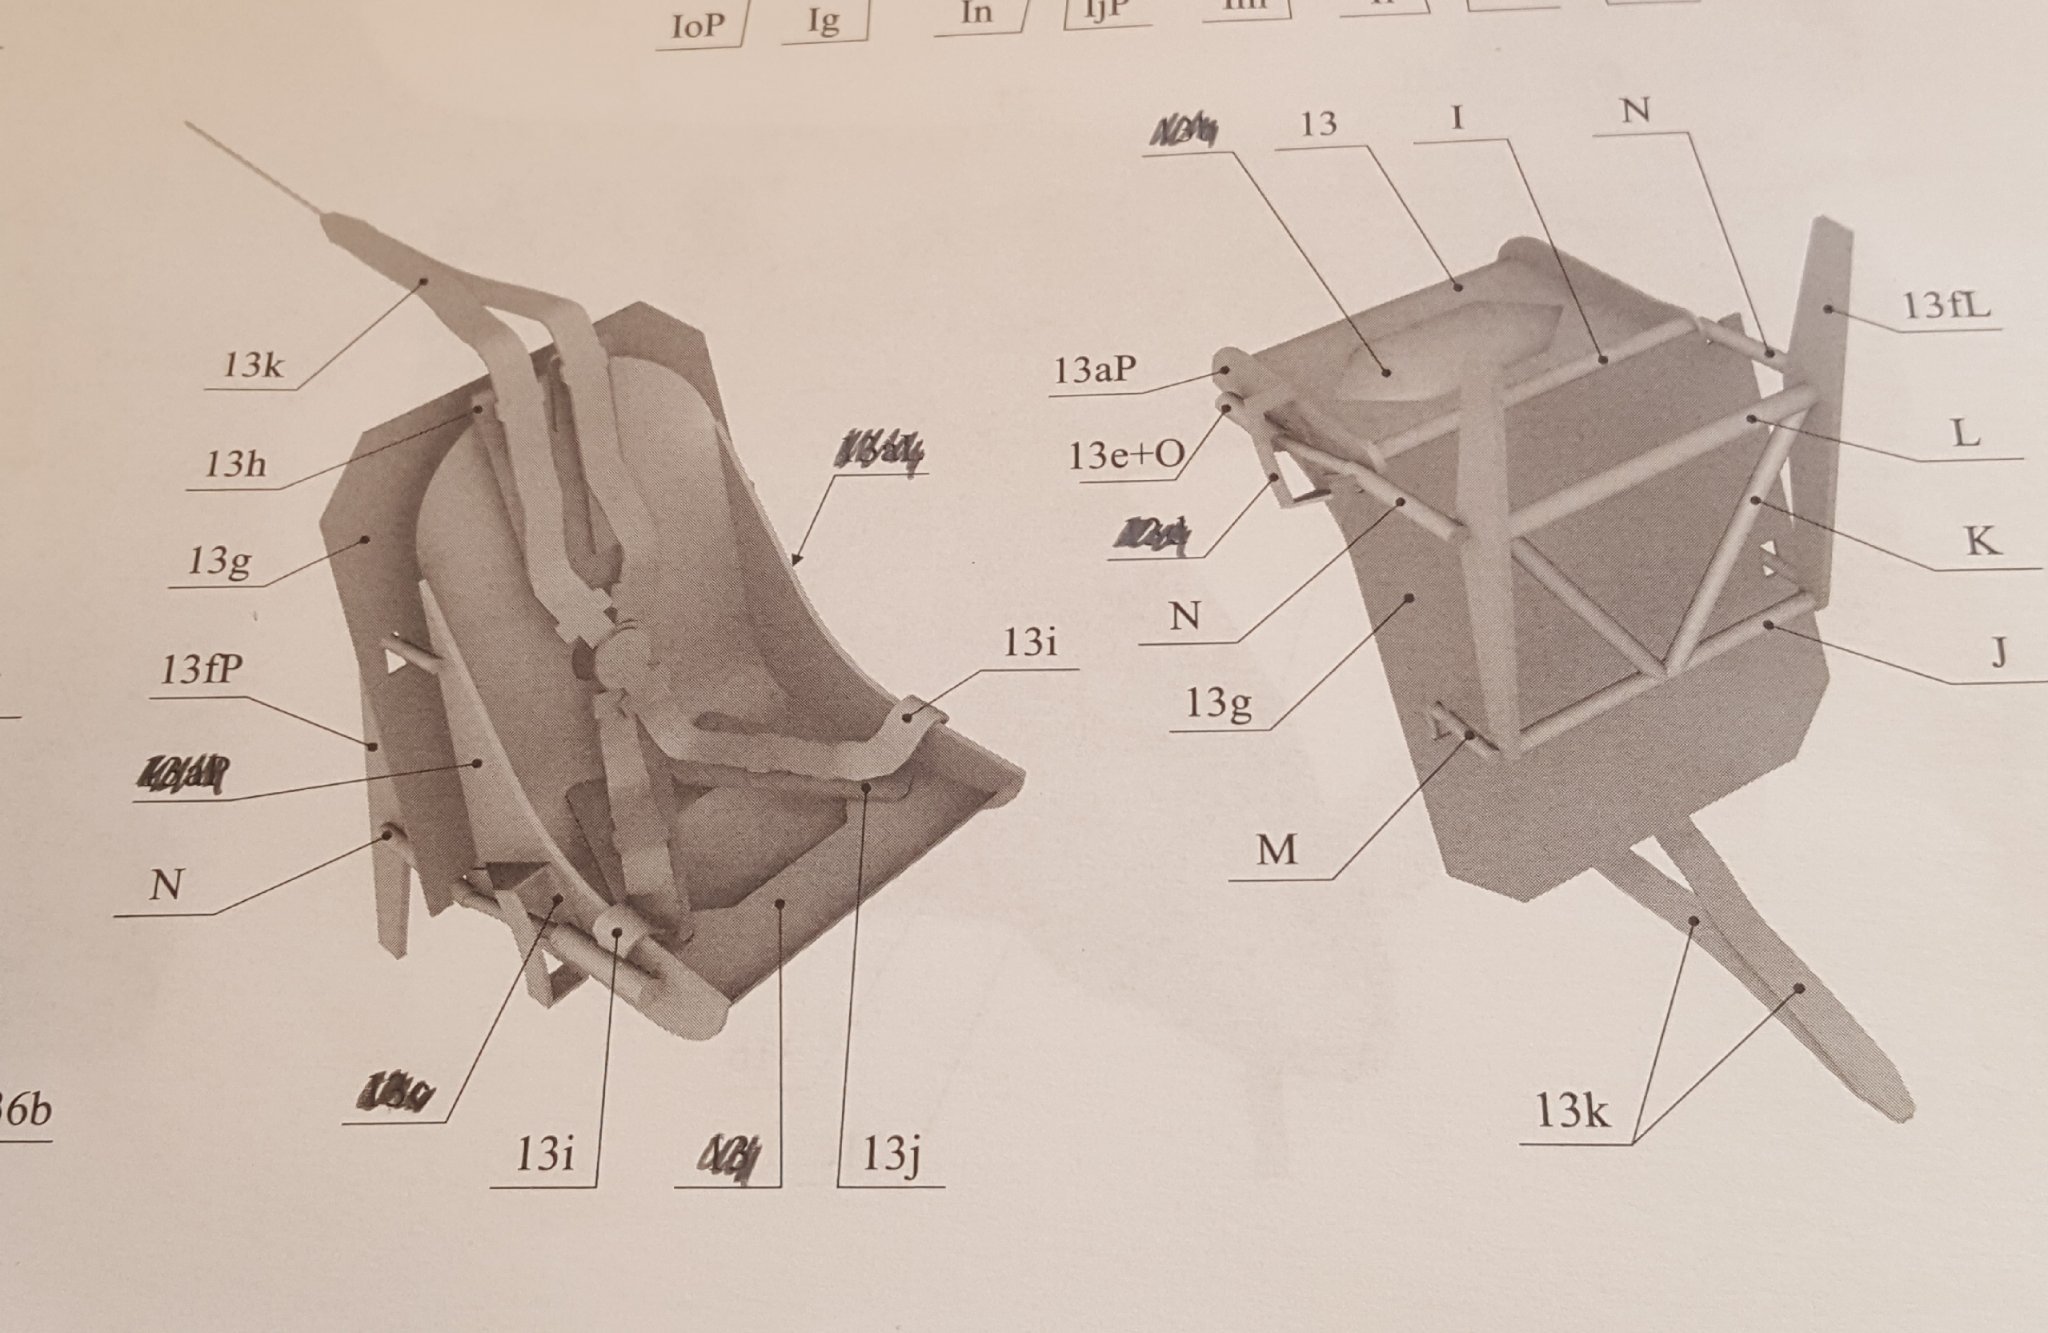
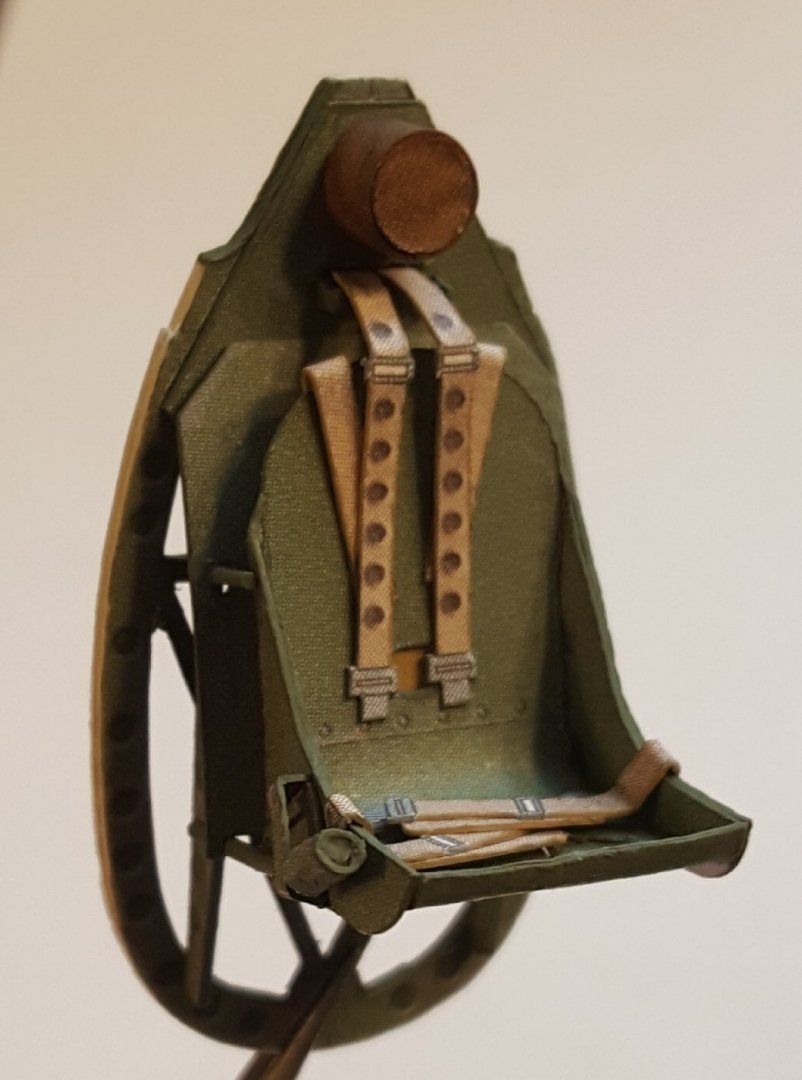
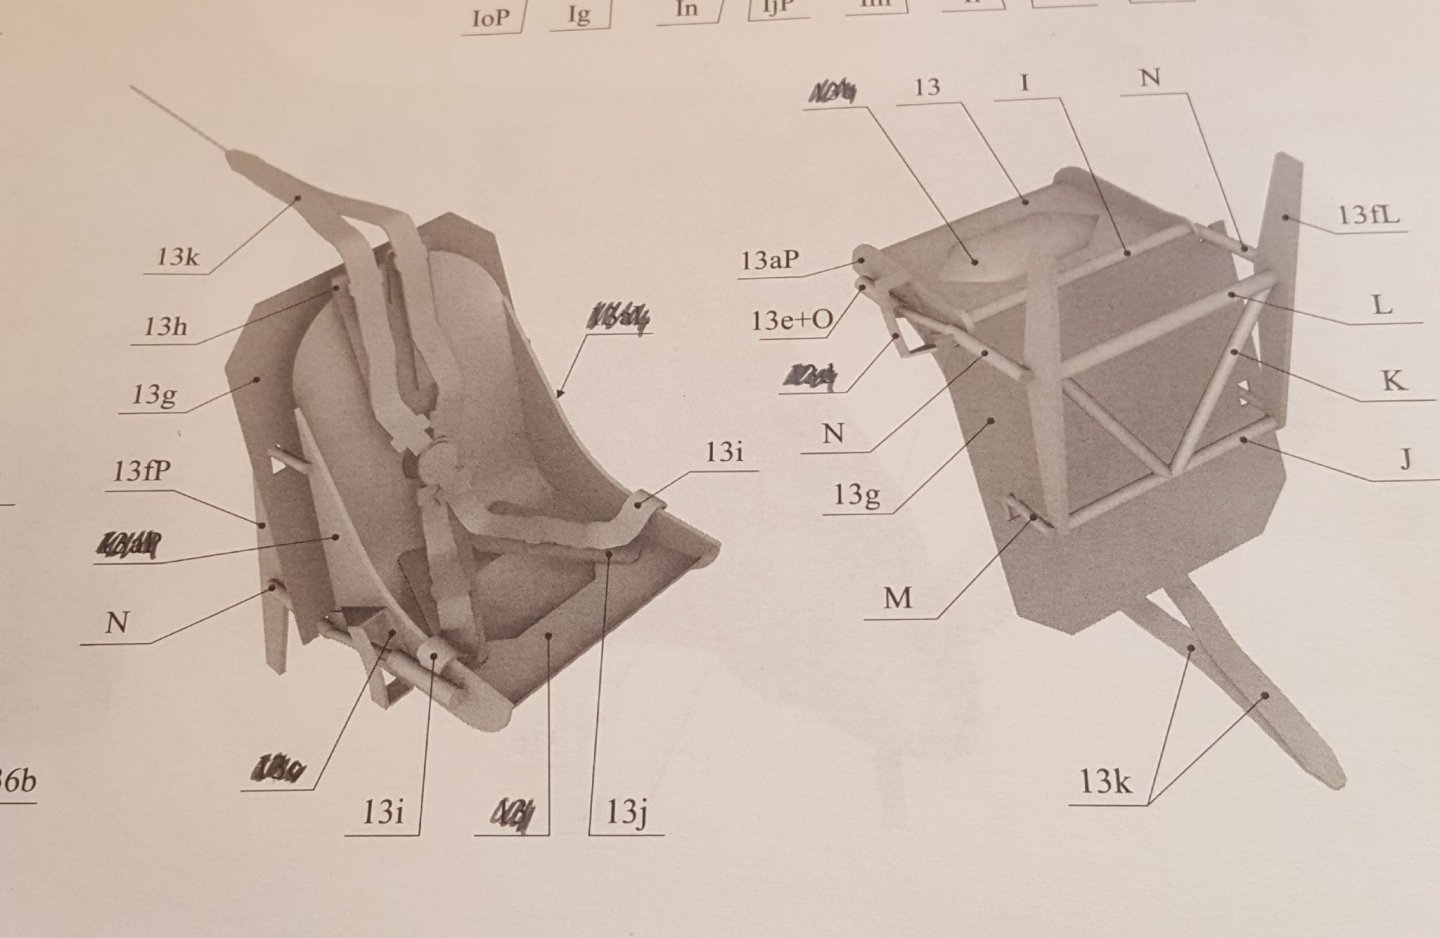
From what I read online, I gather that the inertia cable passed to a frame farther back in the fuselage. For the kit, the cable terminates two frames back from the seat. The harness actually has two sets of shoulder straps. The two in front are attached to the inertia system, and the two behind them are part of a yoke that goes over the back of the seat, down between the seat and armor, and fastens to a crossbar beneath the seat. All of these were fastened by a single pin at the pilot's midriff, so that in the event of a needfully speedy exit, the pilot could undo the single pin to release all of the straps simultaneously.
- 130 replies
-
- 10
-
-
Ch. 8 Seat, Pt. III The seat is finished up with the addition of its Sutton harness. There's a slight mistake in the way it's installed, which is due to a combination of my ignorance about the harness coupled with some slight ambiguity in the diagrams. I won't tell you what the mistake is. 😁 The seat and its bulkhead are now installed in the cockpit and the transfer linkage to the control yoke is added. The straps that extend aft through the bulkhead are part of a tensioning system that allowed the pilot to lean forward in his seat while still being adequately restrained in the event of a hard landing. The cables for the system will be installed later.
- 130 replies
-
- 18
-
-
-
Outstanding work and a fine birthday accomplishment!
-
Congratulations, Andrew -- well done!
-
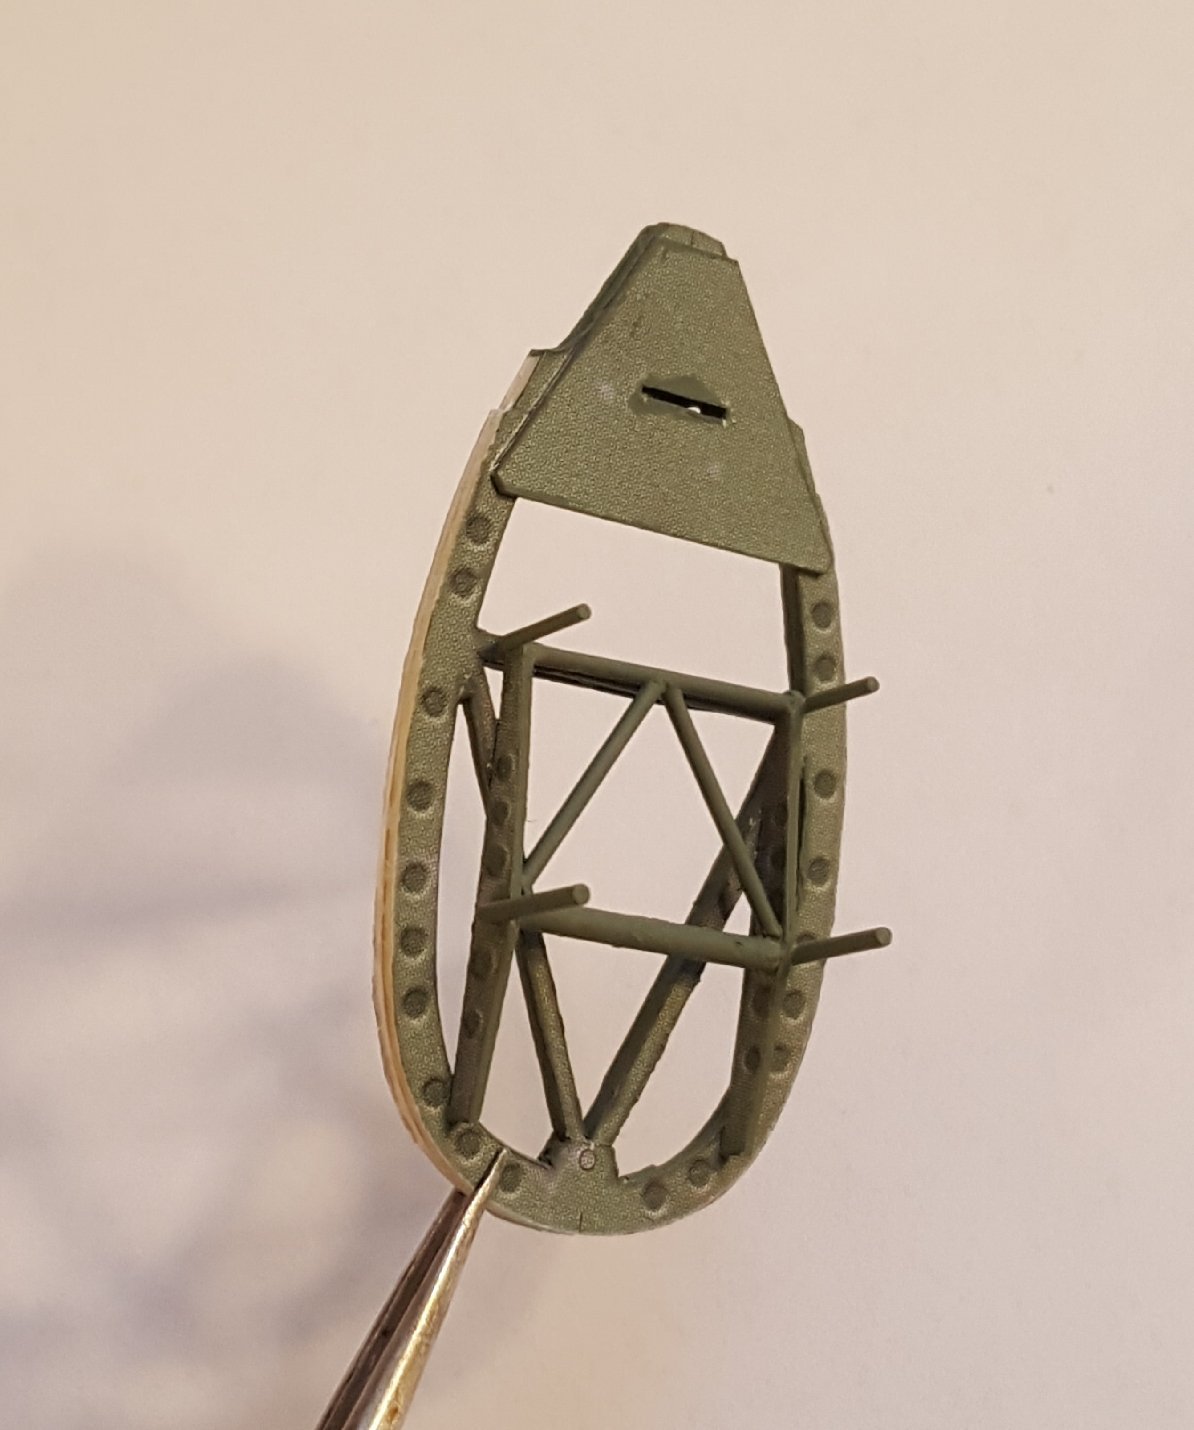
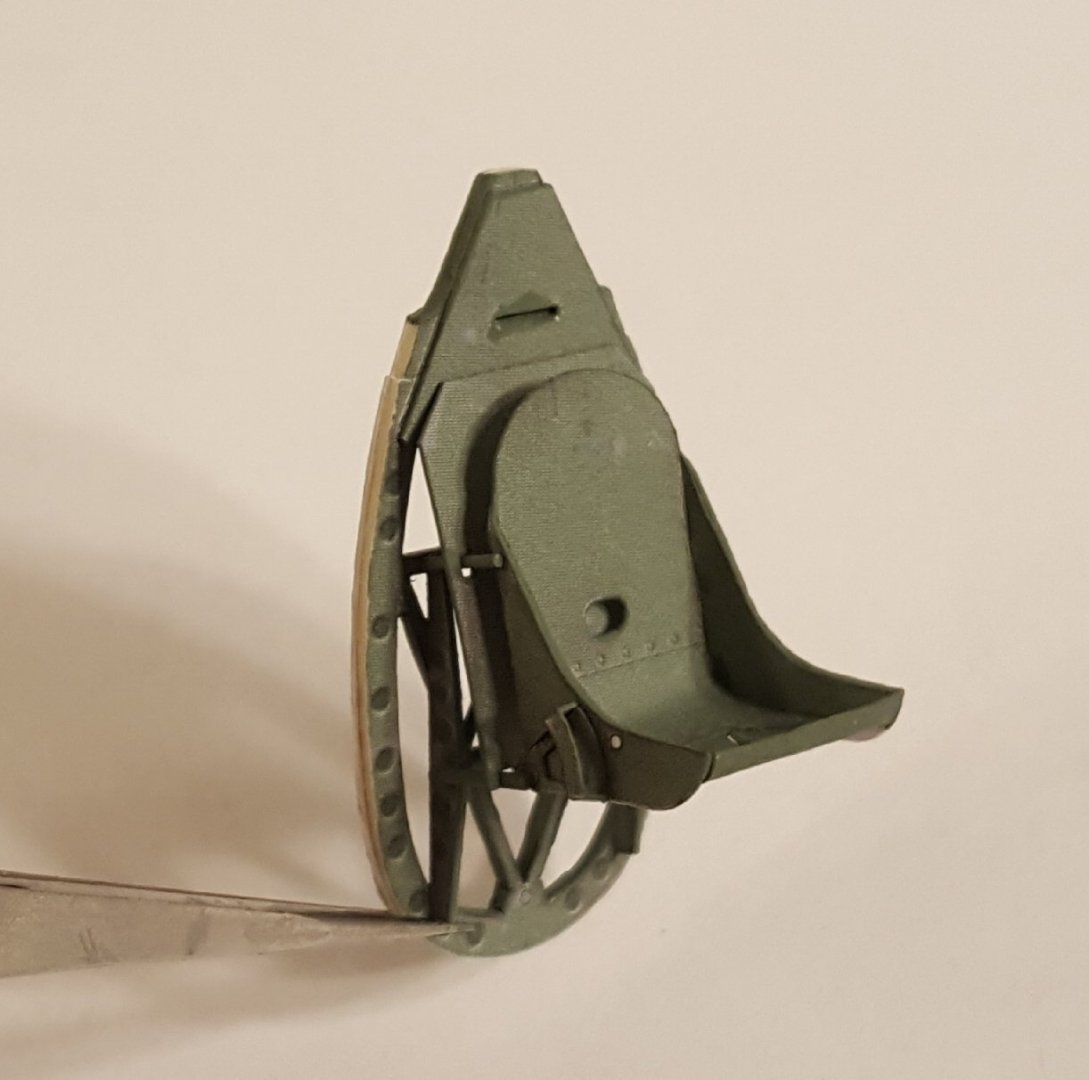
Ch. 7 Seat, Pt. II The frame upon which the seat hangs first had to have some interior bits removed. To strengthen what was left, I wicked thin CA into the cut edges before edge coloring them. The head armor was then added. Next, the seat frame was constructed from styrene rod -- not the hardest piece I have ever built, thanks to all of the parts being thankfully straight. Finally, the back armor and seat were added, bringing the total number of parts in this sub-assembly to eighteen. A really, really nice little detail is that, where required, the printed parts in this sub-assembly have tick marks to indicate both where other parts attach and at what angle they should be attached. P.S. I also just now noticed that I glued the head armor on upside down. Fortunately, the mistake is merely annoying, not structurally significant.

- 130 replies
-
- 15
-
-
-

-
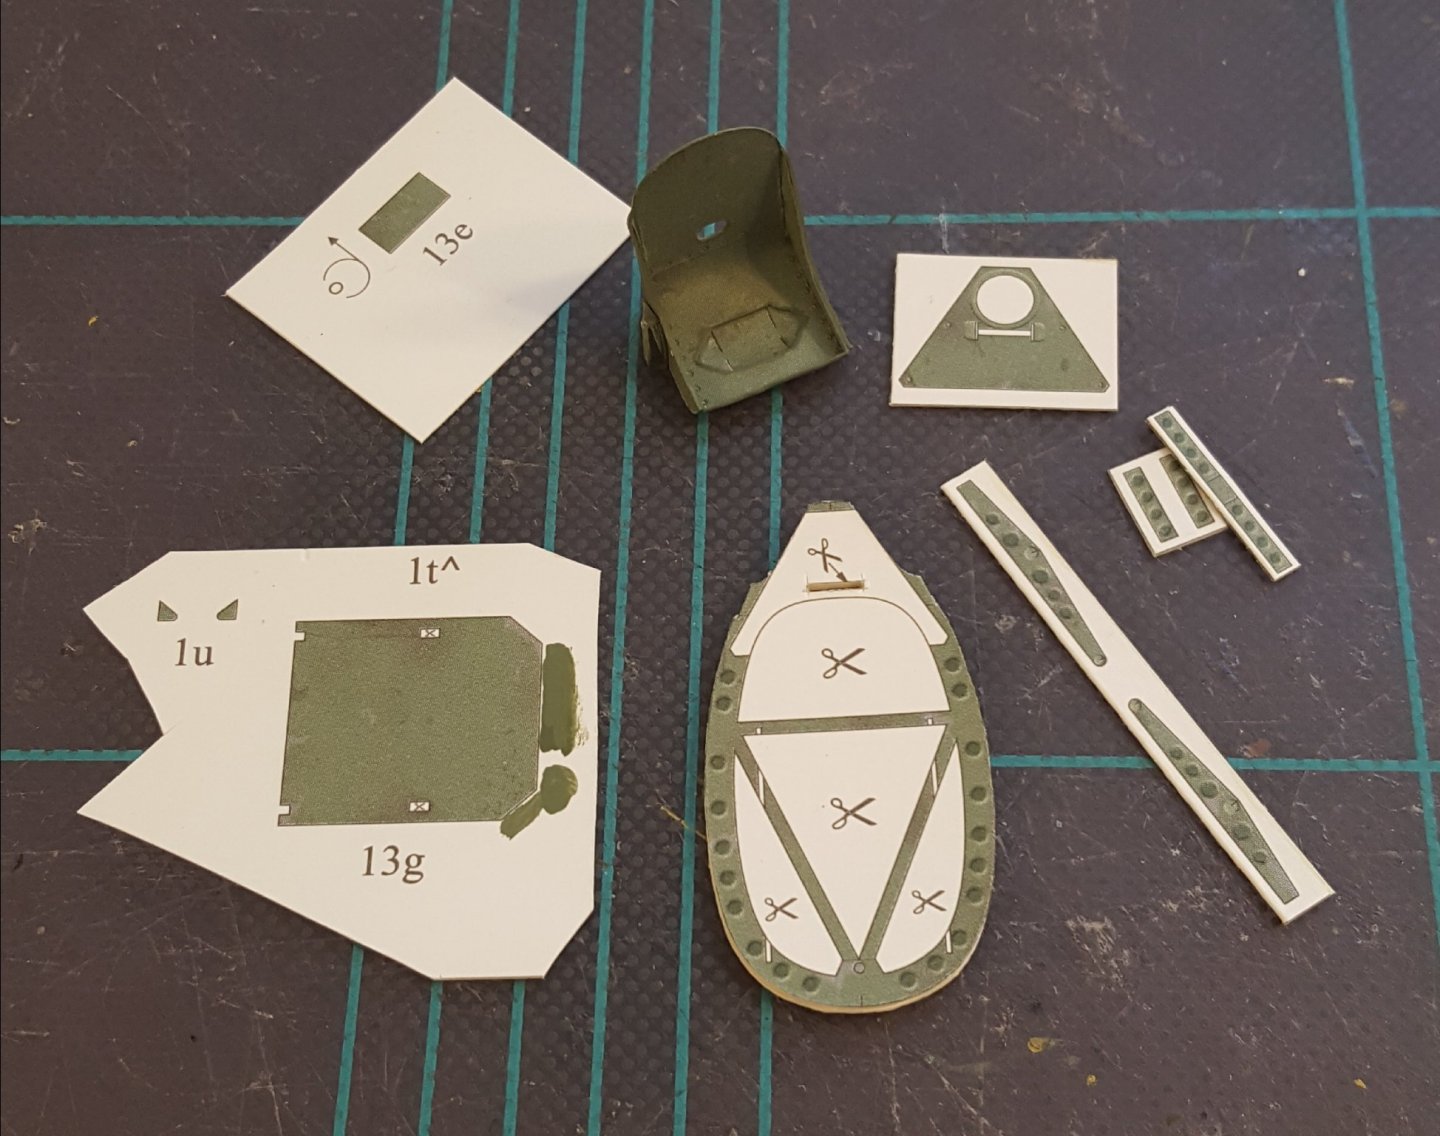
Ch. 6 Seat, Pt. I Seat construction in progress. Here's a shot of the basic seat and some of its components still to be added. . .but not all of them. 😮 And here is the cause for my most recent headaches . . . Now to get back to the fun!

- 130 replies
-
- 16
-
-
-
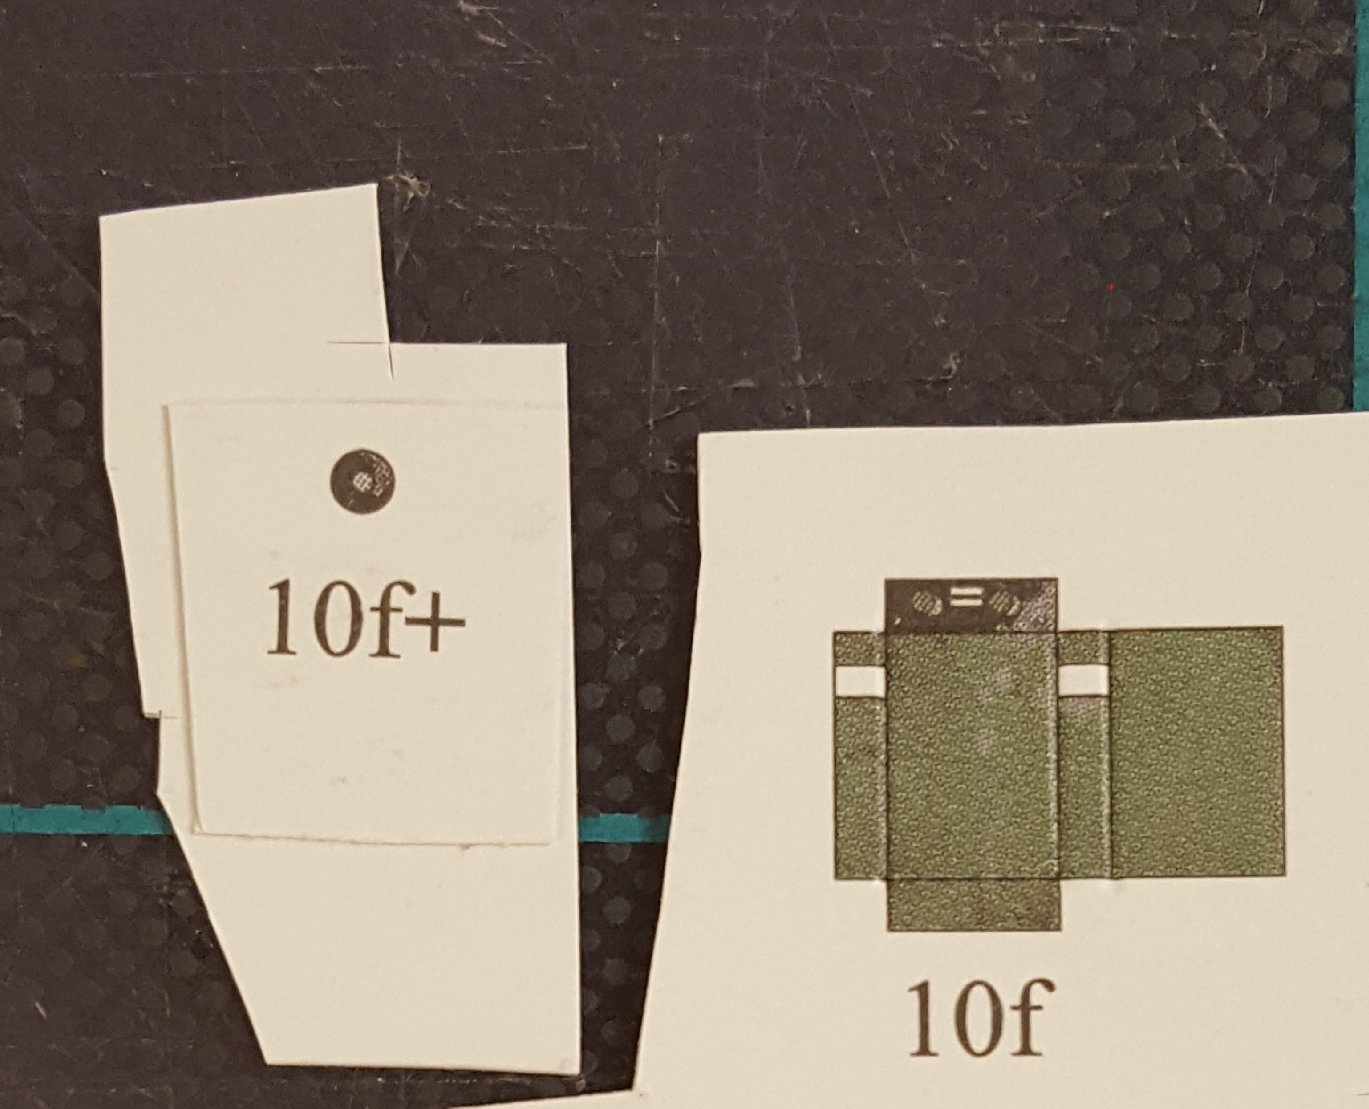
Ch. 5 Cockpit Interior Details Even a Halinski kit can have minor issues, like this one: Yep, that's two parts 10f (the '+' sign only indicates that the part is to be doubled). I think I solved this riddle correctly. So far, 16 parts have been added to the starboard cockpit wall and 27 to the port side. Work will soon commence on the seat, which in this case is, in fact, a real piece of work. 😬

- 130 replies
-
- 17
-
-
-
James probably has some secret way of doing this, but the easiest way for us amateurs is to chuck the mast dowel into an electric variable-speed drill and taper the mast with progressively finer grits of sandpaper. The taper should be repeatedly checked against the plans using calipers.
- 28 replies
-
- 3
-
-
- vanguard models
- Brixham trawler
- (and 2 more)
-
Welcome aboard!
-
I have seen some of these super-detailed to insane levels -- way beyond my abilities. Funny story: I have no idea what most of the cockpit elements are in real life. I just glue them together according to the diagrams and plug them in. One of the items I finished yesterday was a quadrant of some sort with a single handle; the diagram showed the handle protruding at what would be an intermediate setting on the real instrument. Later, as I surfed the internet for some cockpit photos, I discovered that the quadrant raises and lowers the landing gear: handle all the way forward is raised, all the way down is lowered. In between is . . . well, is nothing. Half-lowered gear are not very useful. Anyways, I tried to see if I could detach and reposition the handle without too much difficulty, but it is super tiny and stuck fast, so no joy. You wouldn't notice it unless I told you, or else perhaps you're a Spitfire pilot. So now I have told you, and you are sworn to secrecy!
- 130 replies
-
- 16
-
-
-
Intro to Card Models Pt. V: Building V108 - The Hull
ccoyle replied to ccoyle's topic in Card and Paper Models
Hi, Richard. This has never been an issue for me.- 25 replies
-
- 3
-
-
- card models
- paper models
- (and 1 more)
-
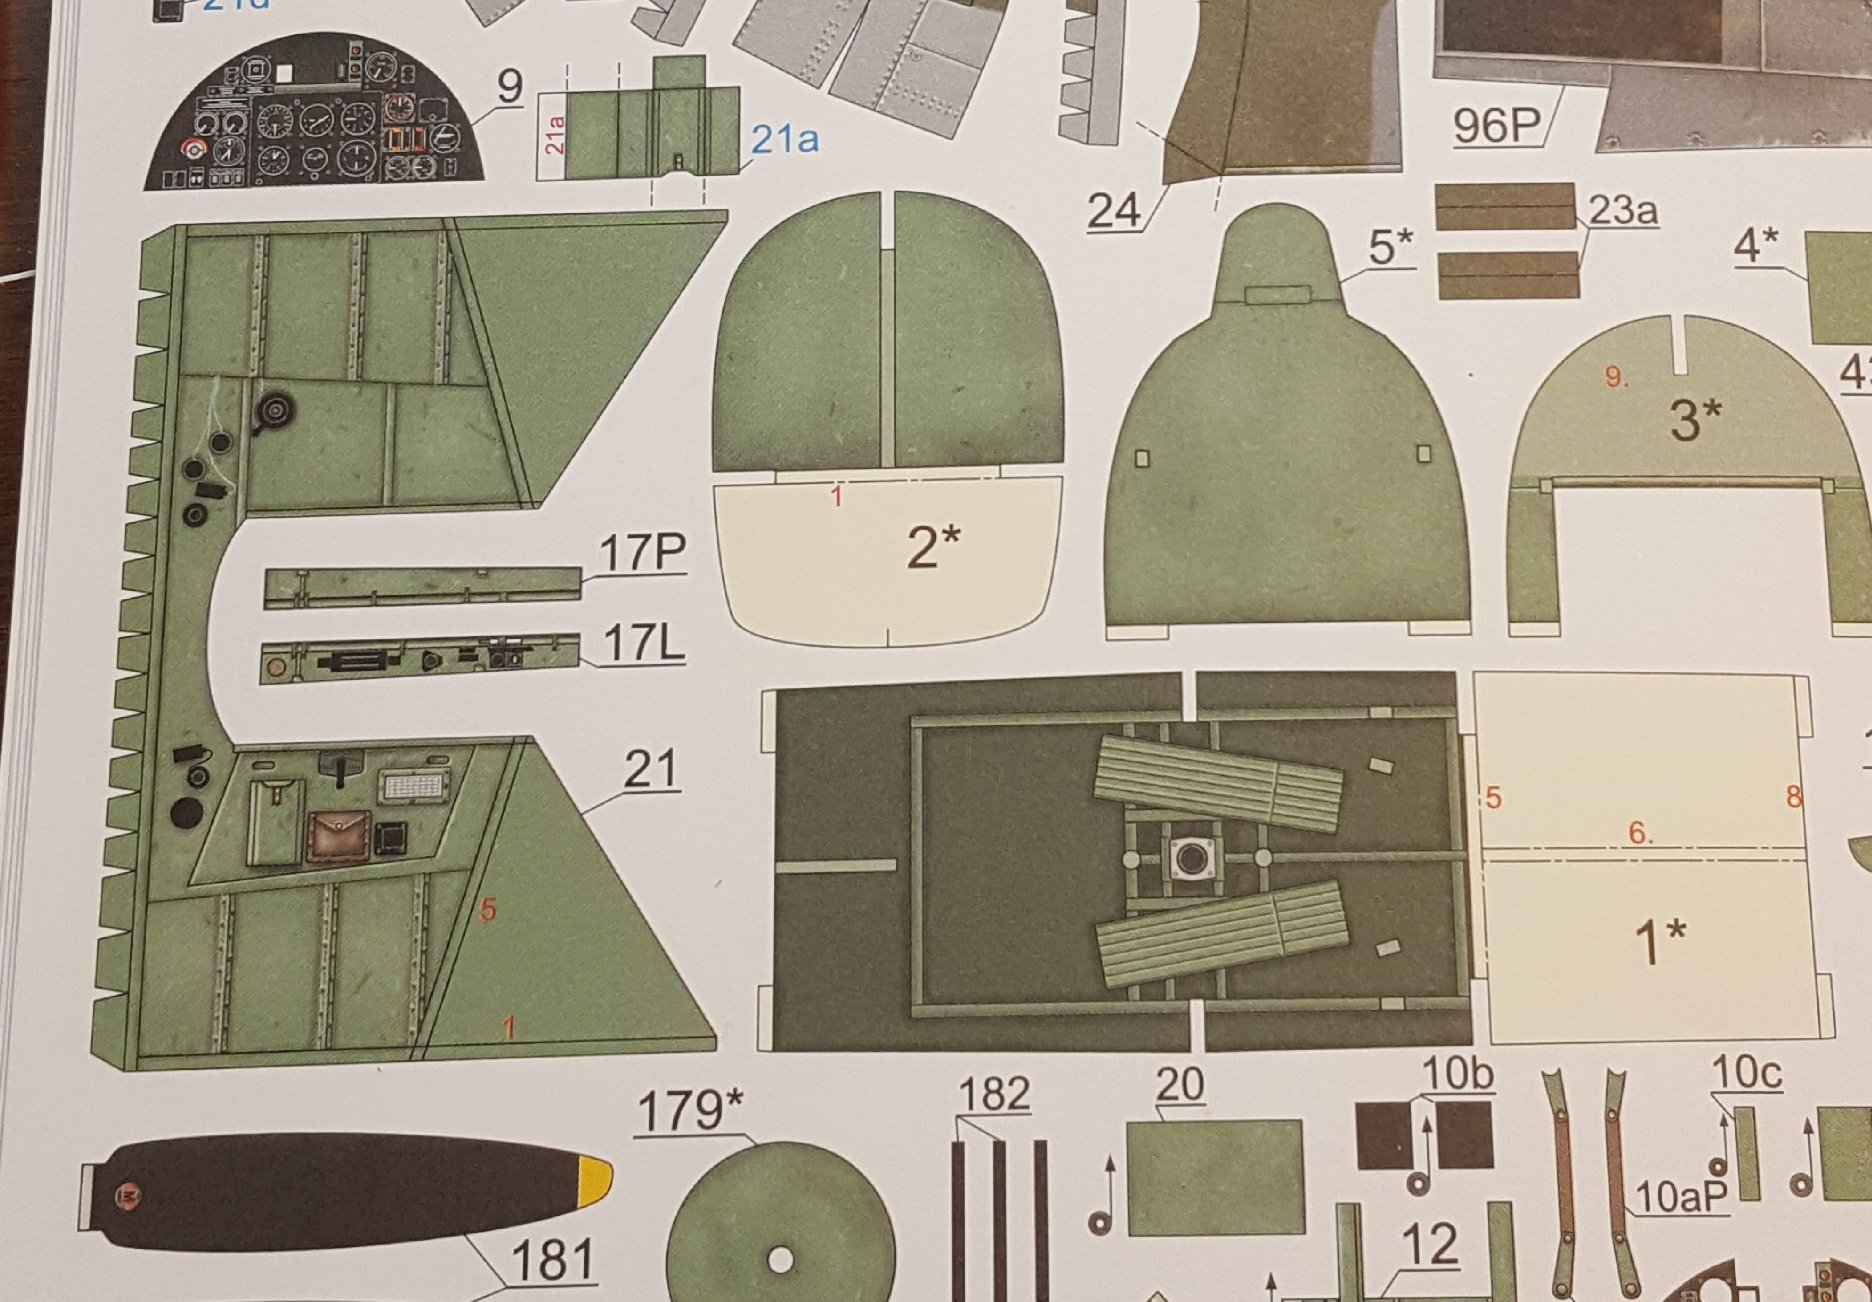
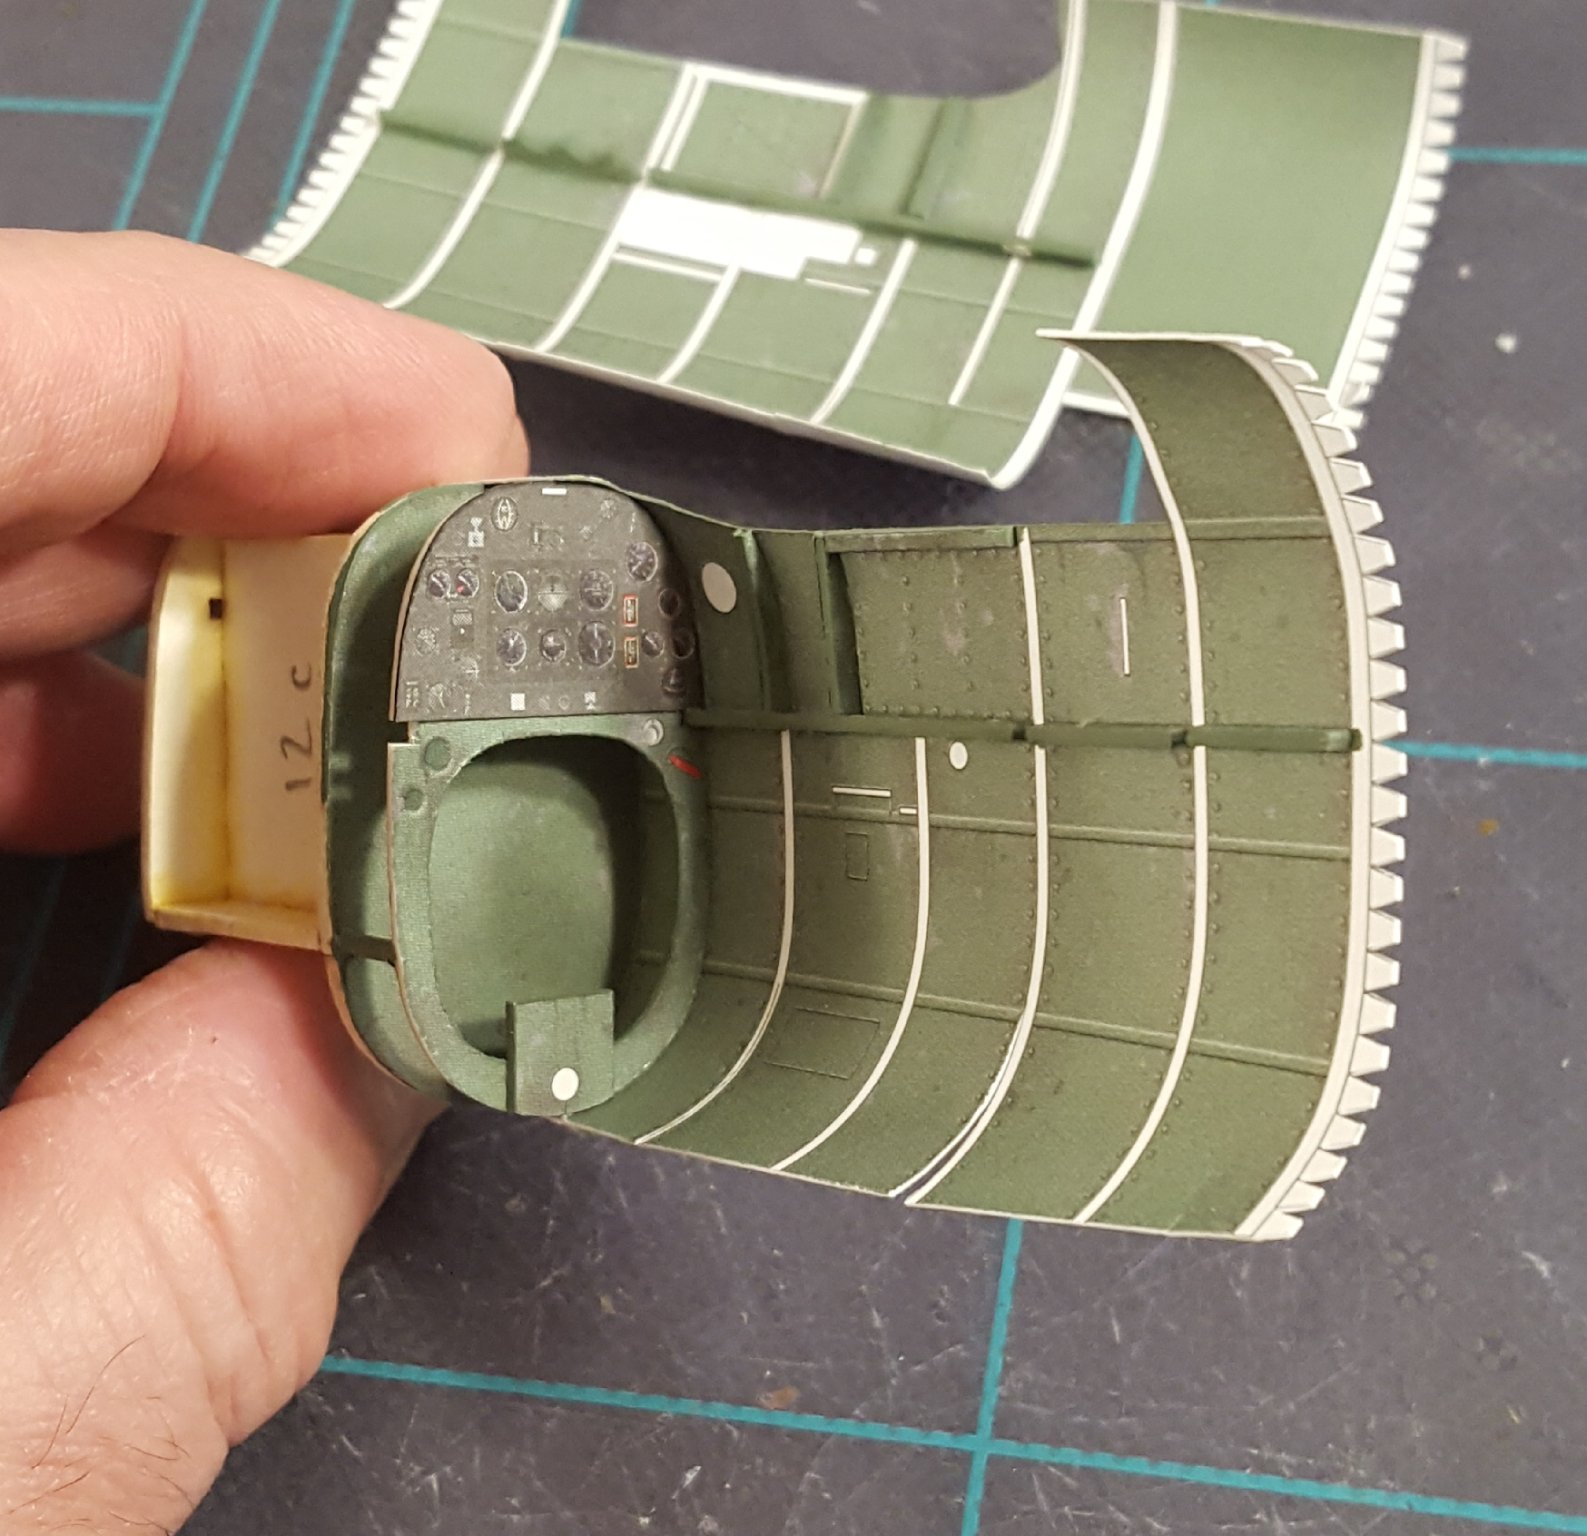
Ch. 4 Control Yoke The cockpit is getting busier with the addition of the control yoke, compass, and various bits on the starboard interior. It will get even busier still. I thought some viewers might be interested in the difference between an ultra-detailed and difficult Halinski kit and a less difficult but still pretty detailed Kartonowa Kolekcja kit. The shot below shows a portion of the cockpit parts for KK's Hurricane IIc. Of particular interest for this comparison are parts 1 and 21. Notice that a lot of the 3-D details are printed in 2-D, e.g. the interior framing, rudder pedals, and wall-mounted accoutrements. In the Halinski kit, these are all provided as separate parts. Yikes!

- 130 replies
-
- 15
-
-
I believe those parts are more correctly made from wire. I'm afraid such knowledge is above my pay grade. To get the sort of neatness shown in that template, you're probably looking at some kind of soldering.
-
Ch. 3 Rudder Pedals Another half-frame and rudder pedals added. This bit of progress consists of 14 parts and took over 3 hours to cut, fold, laminate, paint, test fit, and glue. That's Halinski for ya.
- 130 replies
-
- 16
-
-
-
Ch. 1 Cockpit Interior Construction begins with the cockpit. Inner skins were pre-formed, and internal framing is slowly being added. There is quite a bit of it to add. The bit of plastic rod near my thumb in the second picture is simply a spacer I added to help stabilize the second bulkhead frame during all the man-handling yet to come. It won't be easily seen once the cockpit is closed up.


- 130 replies
-
- 18
-
-
Congratulations on finishing your model!
-
Once it's dinged, you're back to the realization that it's just a material thing -- an expensive thing, but a thing nonetheless.