


ccoyle
-
Posts
10,527 -
Joined
-
Last visited
Content Type
Profiles
Forums
Gallery
Events
Everything posted by ccoyle
-
 Moin moin, Nils! I always enjoy seeing another smallcraft project in the forum. With your considerable skills, I'm sure this will be a real gem. Cheers!
 -
Our sponsor, Chesapeake Light Craft, makes a very nice kit for a full-size wherry. If I had the time and $$$ and space and towing capacity for such a project ... but I guess that's four strikes already. 😐
- 12 replies
-
- 1
-

-
- lincolville wherry
- finished
- (and 1 more)
-
Vought F4U-1D by Papa - Tamiya - PLASTIC
ccoyle replied to Papa's topic in Completed non-ship models
Interestingly, it was the Brits who ironed out the problems that Corsairs had in operating from carriers. In his paintings thread, Vegaskip recently shared one of HMS Formidable at a time when she was operating Corsairs in her air group. The Corsair has long been my favorite WWII piston engine fighter. -
The descriptions of the rapidity with which Formidable was returned to flight operations after each kamikaze attack are indeed enlightening.
-
New and need help to identify a mystery model? Read here first!
ccoyle replied to ccoyle's topic in New member Introductions
Ellen, Look for the word "scala" (Italian for "scale") on either the plans (usually in the lower right corner) or box. Pinta is a very common modeling subject and available from numerous kit manufacturers. The Aeropiccola version is likely to be older and not up to the same standards of quality as newer kits. If you were to sell it on an auction site like eBay, I would expect that you might get something in the neighborhood of US$50. It's not a high-demand kit. As for something to build yourself, there are many kits out there that are suitable for beginners -- your choice will depend in some measure on what type of subject appeals to you. Kind regards, -
Ron, U.S. card stocks are usually sold by weight, with card stock being labeled anywhere between 60 and 120 lb. Since you have experience with card kits, just grab whatever looks and feels right. You can use spray adhesive to laminate sheets together for thicker stock. Also, ask the counter clerks at the store if they have remnants from opened packages available for you to examine. That way you can "test drive" a particular stock by the sheet instead of buying an entire package.
-
You have already done BBs for UK, Germany, and Japan, but not for USA, so I vote for a South Dakota-class BB.
-
Ron, we obtained permission from Roman to host the V-108 files here. Go to the first post in Pt. V of the V-108 tutorial.
-
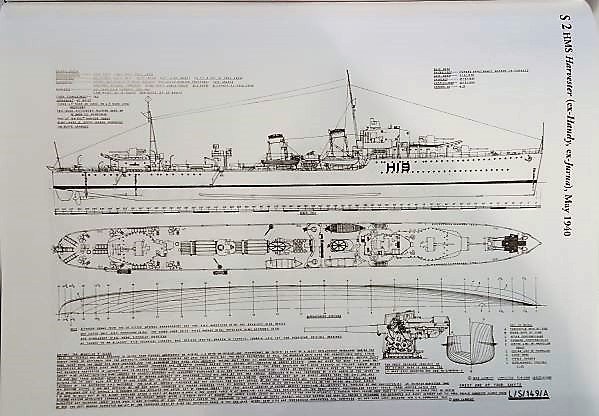
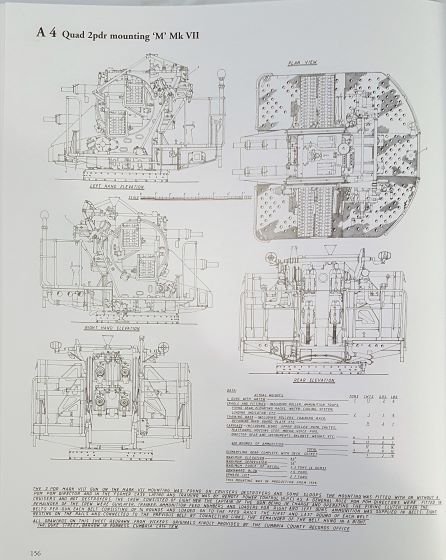
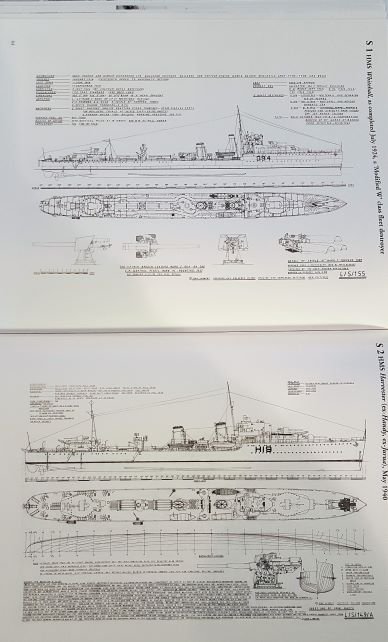
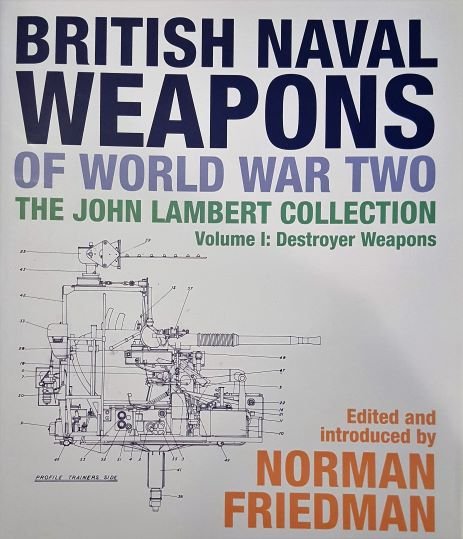
BRITISH NAVAL WEAPONS OF WORLD WAR TWO, The John Lambert Collection Vol. 1: Destroyer Weapons Edited by Norman Friedman Seaforth Publishing, 2019 25 cm by 29.5 cm format 240 pages Suggested retail GBP 40.00 Verdict: Building any British destroyer models soon? Get this! John Lambert, who passed away in 2016, was one of those men with a singular passion that only a small number of people will ever appreciate, but that small group will really appreciate his work. Lambert's passion was creating draughts (English spelling retained as a nod to this volume's English roots) of British naval vessels and weaponry, and he drew a LOT of them. British Naval Weapons Vol.1: Destroyer Weapons (BNW1) is the first volume in a series of books that will eventually be released by Seaforth, and if the first volume is any indication, modelers will want to keep a sharp-eyed lookout for subsequent editions. The first 63 pages of this BNW1 are a narrative that covers the development of British destroyer weapons from World War 1 through the end of World War 2, along with a survey of the changing realities of naval warfare that dictated that development. As the role of the destroyer evolved, so did the types of weapons they carried and the manner in which they were arranged aboard ship. This is described by editor Norman Friedman in an engaging style and accompanied by many black and white period photos. The heart of BNW1 though, without doubt, is the immense number of highly detailed draughts done by Mr. Lambert. The first twelve of these are of ships and include shipbuilder's drawings of common weapons. Naturally, a drawing of every British destroyer that ever served, including the ever-changing armament of each, is beyond the scope of practically any book. The twelve pages of ships' draughts are intended to be representative of the group as a whole and give an overview of how destroyer armaments changed during the time period covered. The drawings range from HMS Whitehall 1924 to HMS Caesar 1944. The remainder of BNW1 consists entirely of drawings of the weapons carried by British destroyers, beginning with main guns, e.g. the 4 in QF Mk IV of 1916, and on down to AA weapons, torpedoes, mines, depth charges, and other equipment including paravanes, range finders, and fire controls. It's all there -- and in extraordinary detail. The subject of the 2-pdr quad Mk VII M came up in a recent post here at MSW, and to demonstrate just how much information is packed into this book, there are six plates of drawings for this weapon and mount combination alone. There are over 30 individual drawings of the Mk VII M, including front, rear, left side, and right side elevations; plan view; oblique views; details of wiring; and detail views of just about every subsystem -- sights, training and elevation gearing, ammunition trays, you name it -- that formed part of the weapon. There seems to be no stone left unturned. And that's just one system. For anyone wishing to super-detail any British destroyer of this era, this book looks to be a real must-have. Highly recommended! CDC
-
- 10
-
-
All I can say is 😲.
-
Hey, Ron. Don't fret! You took on a fairly challenging project. My first couple of card models wound up in the trash, too -- there's a learning curve, to be sure. When you get around to feeling like another try, may I suggest having a crack at a free model? There's some good ones out there.
-
Hello! I took the liberty of fleshing out your build log title a bit, as I'm sure that many members (like me, for instance) will have no idea what a "Vapor Rimac" is. Perhaps you know the story behind the unusual name?
- 19 replies
-
- 2
-
-
- vapor rimac
- paddlewheel
- (and 1 more)
-
Umm ... shouldn't you of all people be saying something like "it's hours of great fun"? 😉
- 356 replies
-
- 5
-
-

-
- red jacket
- finished
- (and 1 more)
-
Welcome aboard! We do hope that one day soon you'll feel comfortable enough here to let us in on your real name. Perhaps we can call you 'SF' for short in the interim? When you get around to building your model, feel free to start a build log in the 'Build Logs for SHIP MODEL KITS' section (be sure to read the pinned topics there). We look forward to seeing your project and wish you every success on the road to completing it. Cheers!
-
Welcome back! I just made the move in the opposite direction a few years ago.
-
Welcome aboard! I built the Midwest flattie kit as my second venture into wooden models. Your scratch-build looks very well done. I for one enjoy seeing something a little different being modeled, and your personal connection to the subject makes it that much more interesting. Cheers!
-
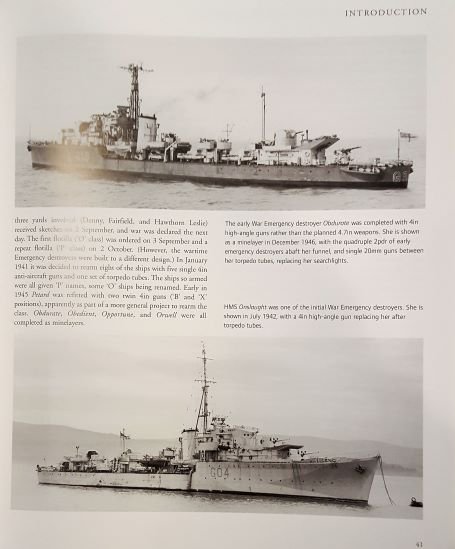
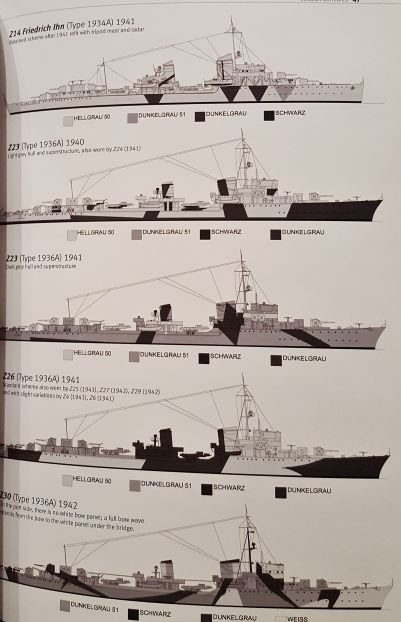
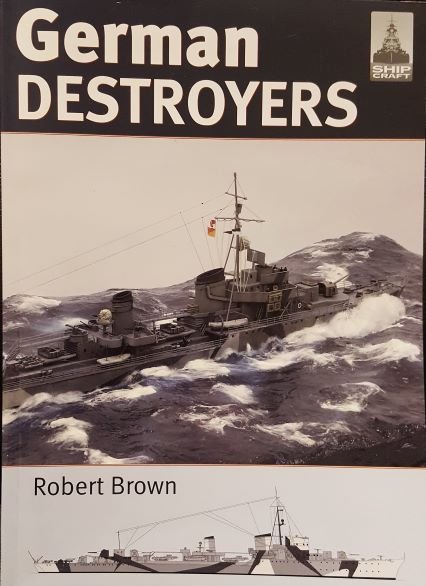
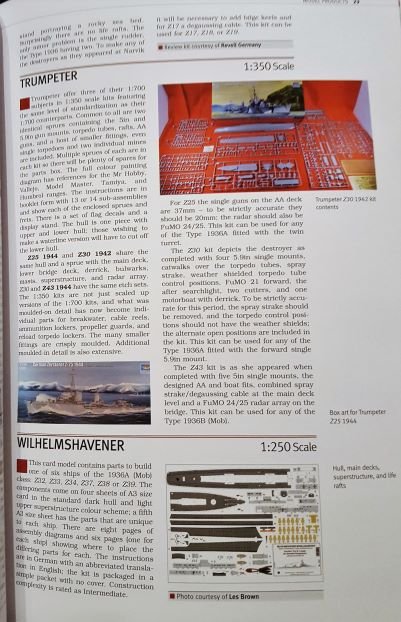
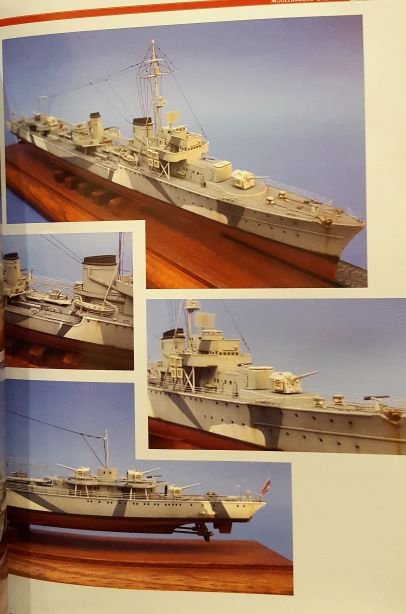
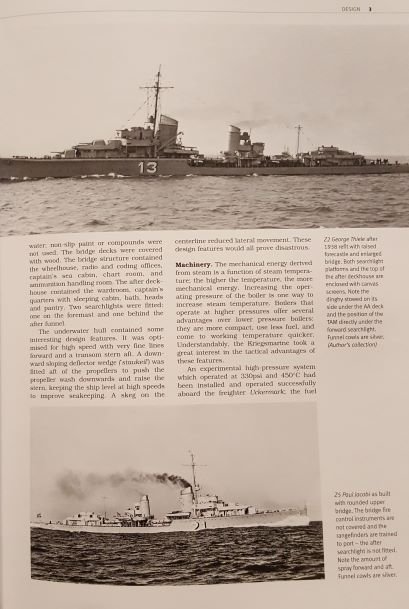
GERMAN DESTROYERS Robert Brown Seaforth Publishing, 2019 64 pages, 21 cm x 29.5 cm format MSRP: $24.95 (GBP14.99) Verdict: Wow! (Apologies in advance for the perhaps odd-looking cropping of the photos that accompany this review -- it is really hard for this old guy to take photos using a digital camera with one hand while holding a stiff paperback open with the other hand!) Call me ignorant, but I had not previously heard of the ShipCraft series published by Seaforth. But after reviewing the most recent addition to this series, German Destroyers by author Robert Brown, suffice it to say that I will be alert for further titles. There is a lot of information packed into 64 glossy pages here, along with plenty of illustrations. Forty destroyers were built for the Kriegsmarine beginning in 1934 (of which 25 were lost), and they were essentially all built to the same design, naturally with some modifications to newer units. The book starts off with a discussion of the design elements incorporated into both the class as a whole and to individual vessels or groups of vessels within the class. This section includes a discussion of the inherent weaknesses of the basic design, these being the result of a lack of German shipyard experience due to limitations imposed by the Treaty of Versailles coupled with a lack of time for testing and improving the type -- a mere five years between the time the building program began in 1934 and commencement of hostilities in 1939. This portion of the book is accompanied by many B&W period photos. The next portion of the book was something quite unexpected: a survey of the various kits available for the subject, in everything from 1/1250 scale on up to 1/250. The described kits included both newer offerings from well-known manufacturers such as Revell, Trumpeter, and Dragon, along with 'classic' kits such as those from Eaglewall, Heller, and Matchbox. I was pleasantly surprised to see that two card kits (those from Wilhelmshavener and JSC) were included in this section. Along with the basic kits, this section also reviews the various aftermarket upgrades that are available. The next section is a gallery of some really well done models. It made me want to whip out my credit card and buy some kits and PE detail sets -- but I know my limits (both to my skills and to my line of credit). The gallery is followed by three pages of paint schemes, shown in black and white but including a key for the various shades of paint. Don't worry -- English translations are provided for the German color names. The last section of the book is a lengthy treatment of the appearance of the type. This includes both a discussion of general appearance and a section on variations and modifications made to the different classes within the type. Attention is even given to such variations and modifications made to individual vessels, so that the modeler is really very well prepared to attempt a portrayal of just about any of the 40 ships. This section is accompanied by four pages of crisp drawings consisting of side profiles and deck arrangements. Finally, a list of additional references is given, along with a list of the 27 other titles in the ShipCraft lineup. Might have to get me some of those other works! I can't say enough nice things about this book. The writing, photography, line drawings, and printing are all first-rate, making the book worth every penny of its US$24.95 price tag in this reviewer's opinion. CDC
-
- 5
-
-
Looks great from here, Danny! I have the Halinski Spitfire Mk V in my stash.
-
Agree! That looks fabulous, especially considering the age and scale of the kit. Very nice work!
- 90 replies
-
- 5
-
-
- bomb ketch
- pyro
- (and 1 more)
-
Looks suspiciously like a rendition of HMS Beagle. Google "HMS Beagle" and you'll find many similar images and models.
-
Moin moin aus South Carolina! My college degree is in the closely allied field of fisheries science, and I also have a keen interest in a certain Bavarian professional soccer club. Hope to see your work here soon! Tchuess!