newbuilder101
-
Posts
870 -
Joined
-
Last visited
Content Type
Profiles
Forums
Gallery
Events
Everything posted by newbuilder101
-
 Great to see the new log up and running - will be looking forward to the first installment!
 -
Andy: Thanks! I think I can breathe a sigh of relief now. Crackers: Thank-you, and you're right about the encouragement here on MSW!!! I will look around and see if I can dig up some more of my art work to post - you can't see it now, but I'm blushing Augie: Thank-you! The leaf and vine thingies - I had more black bits of sticky string on me than anywhere else. It's a wonder they turned out at all! If you receive a package in the mail that looks somewhat like a black furball...it's your order of leaf and vine thingies. Michael: Thank-you! I had thought about using a polymer clay, but decided that it would be too tiny to achieve the desired result.
-
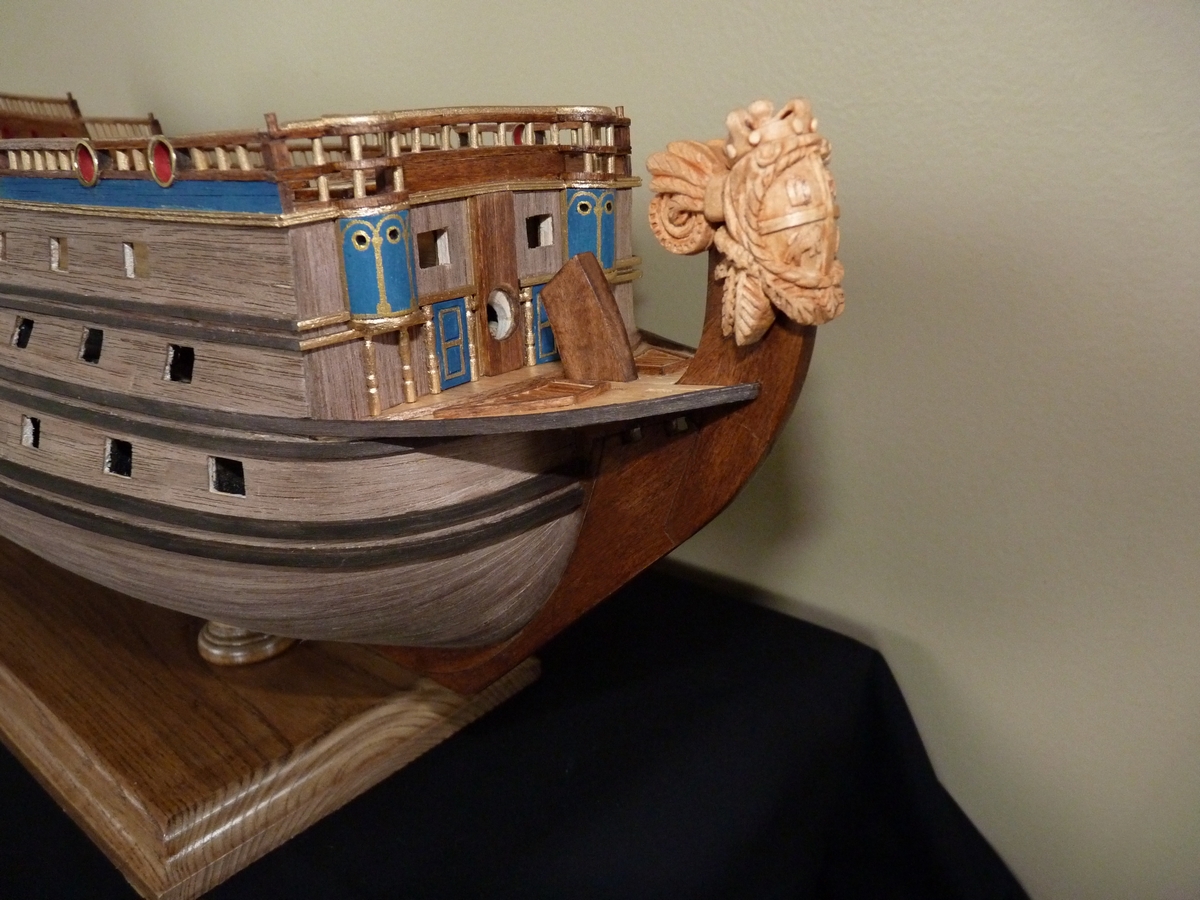
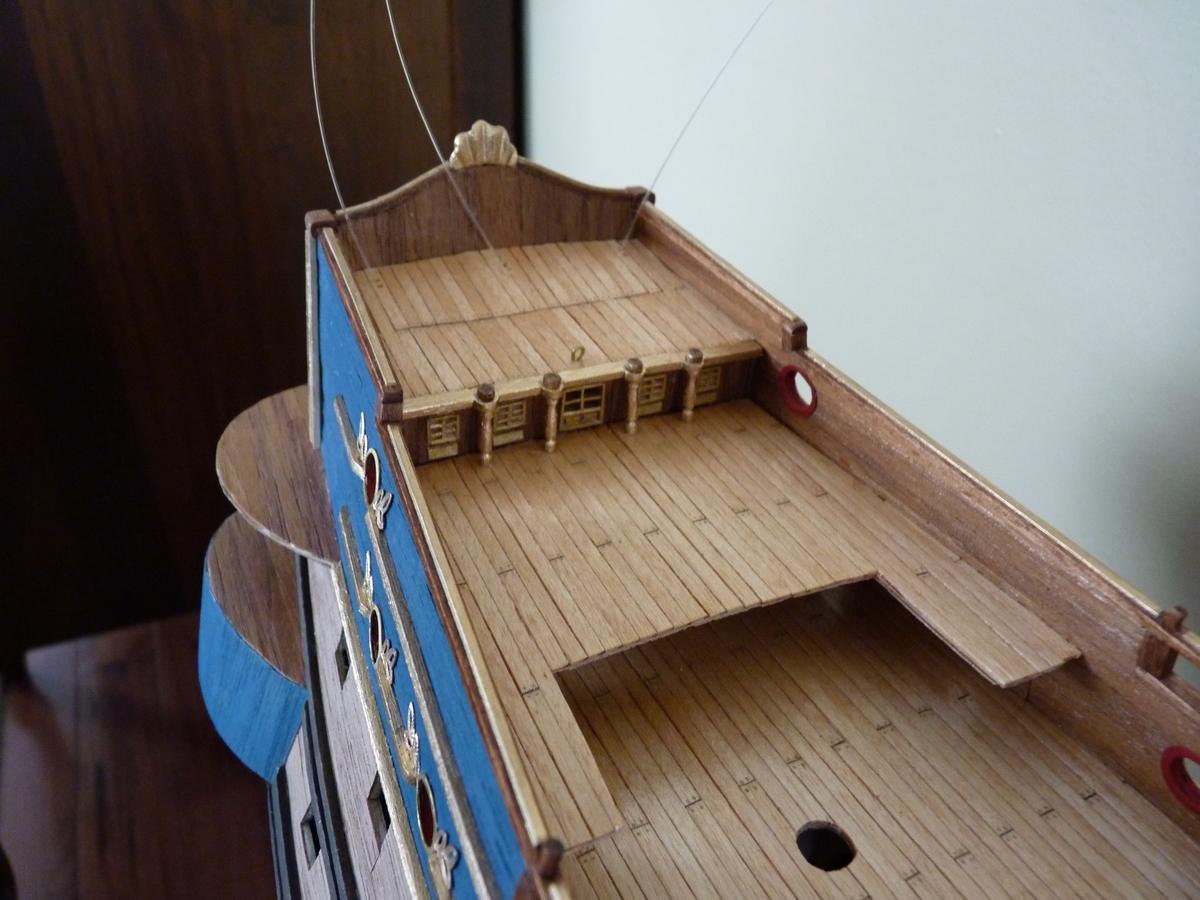
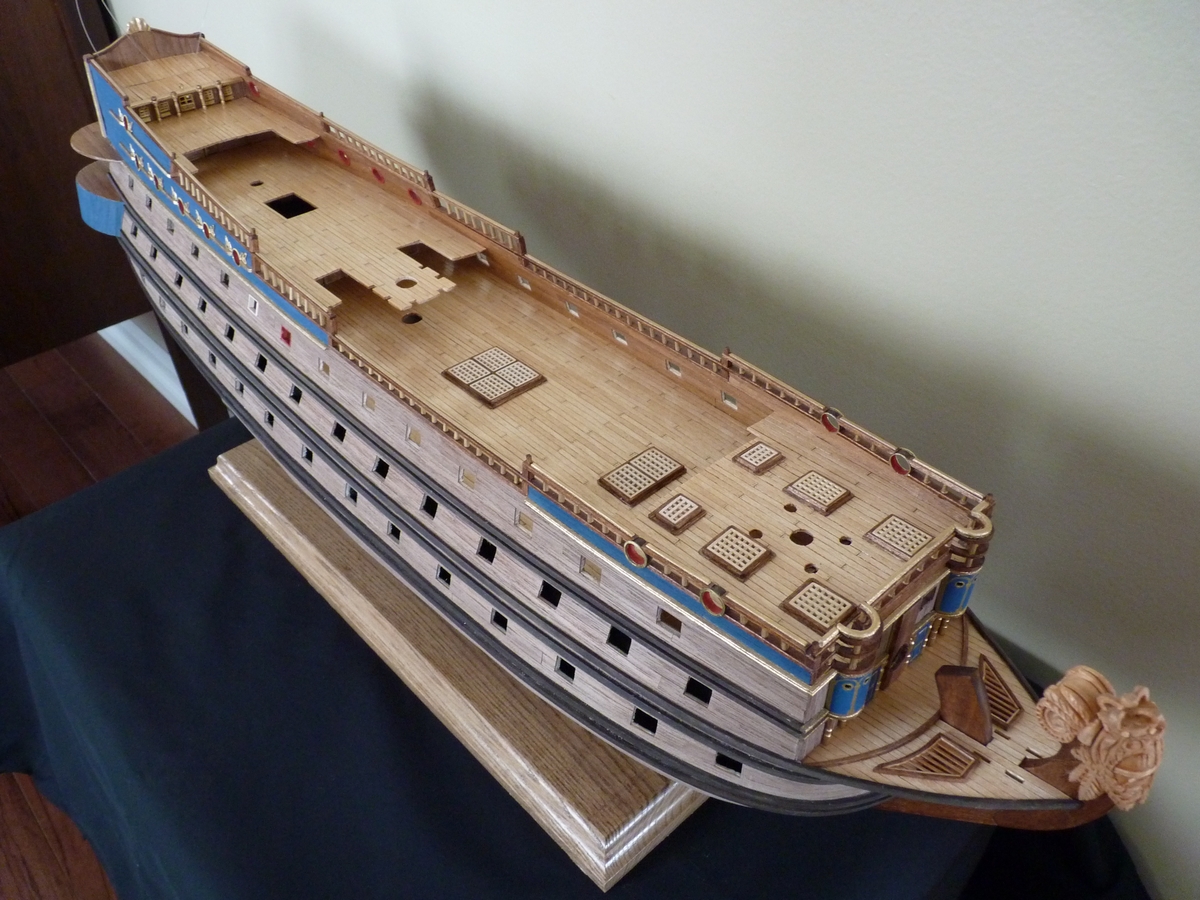
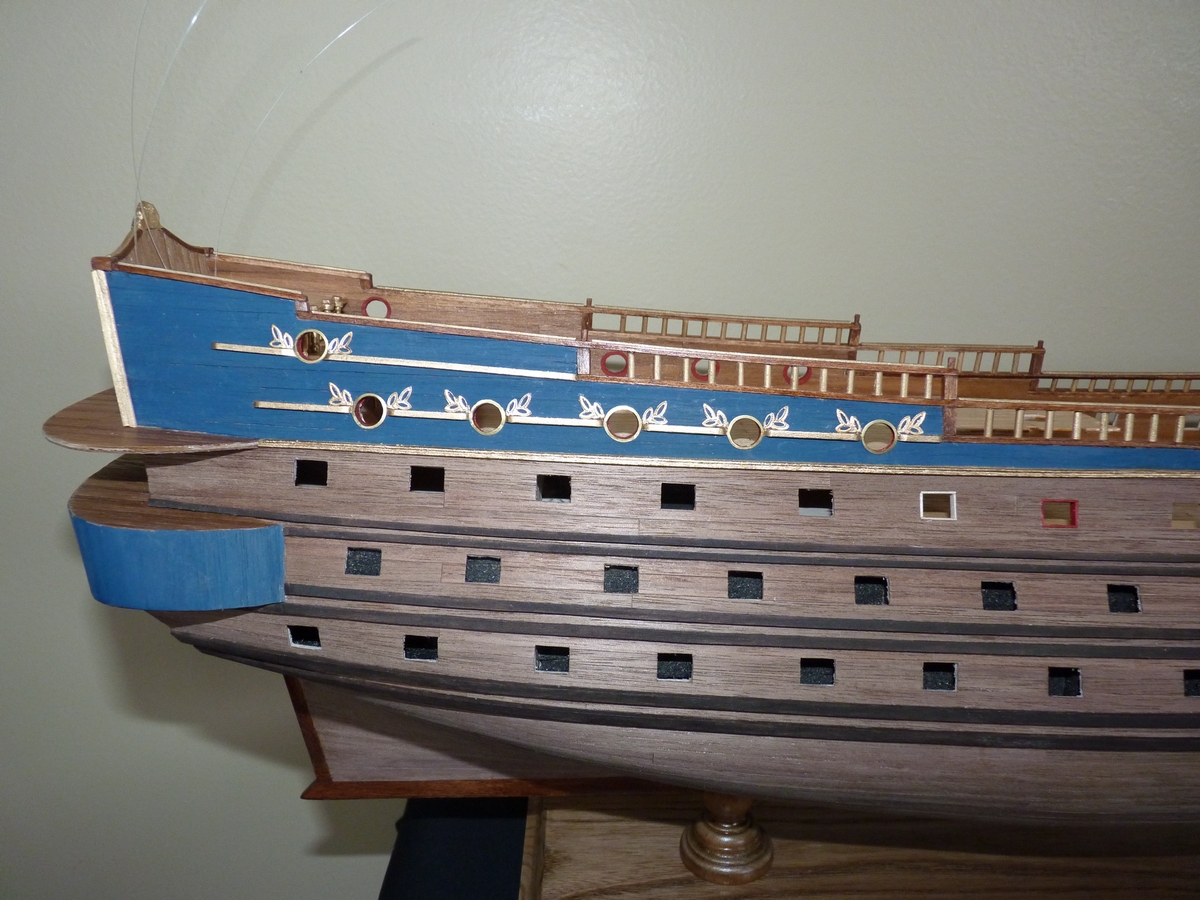
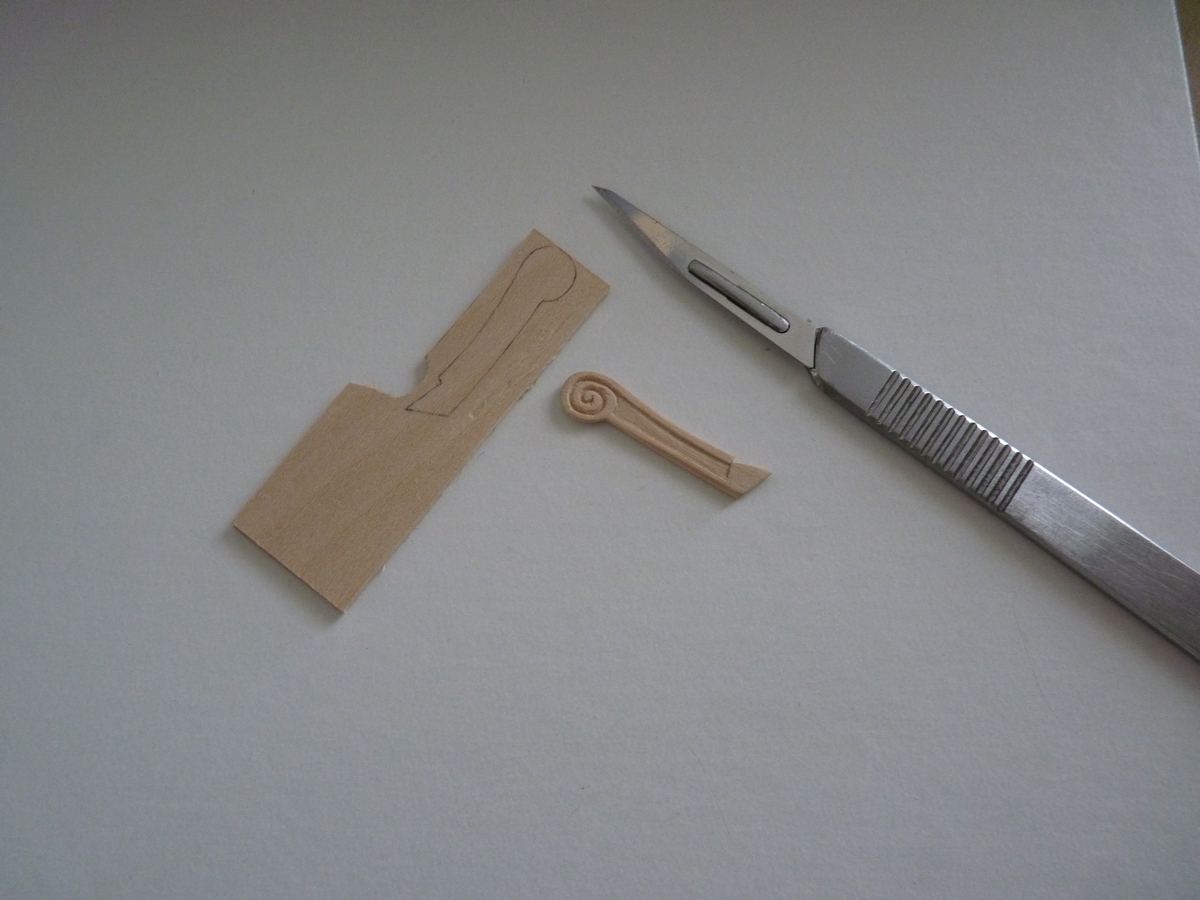
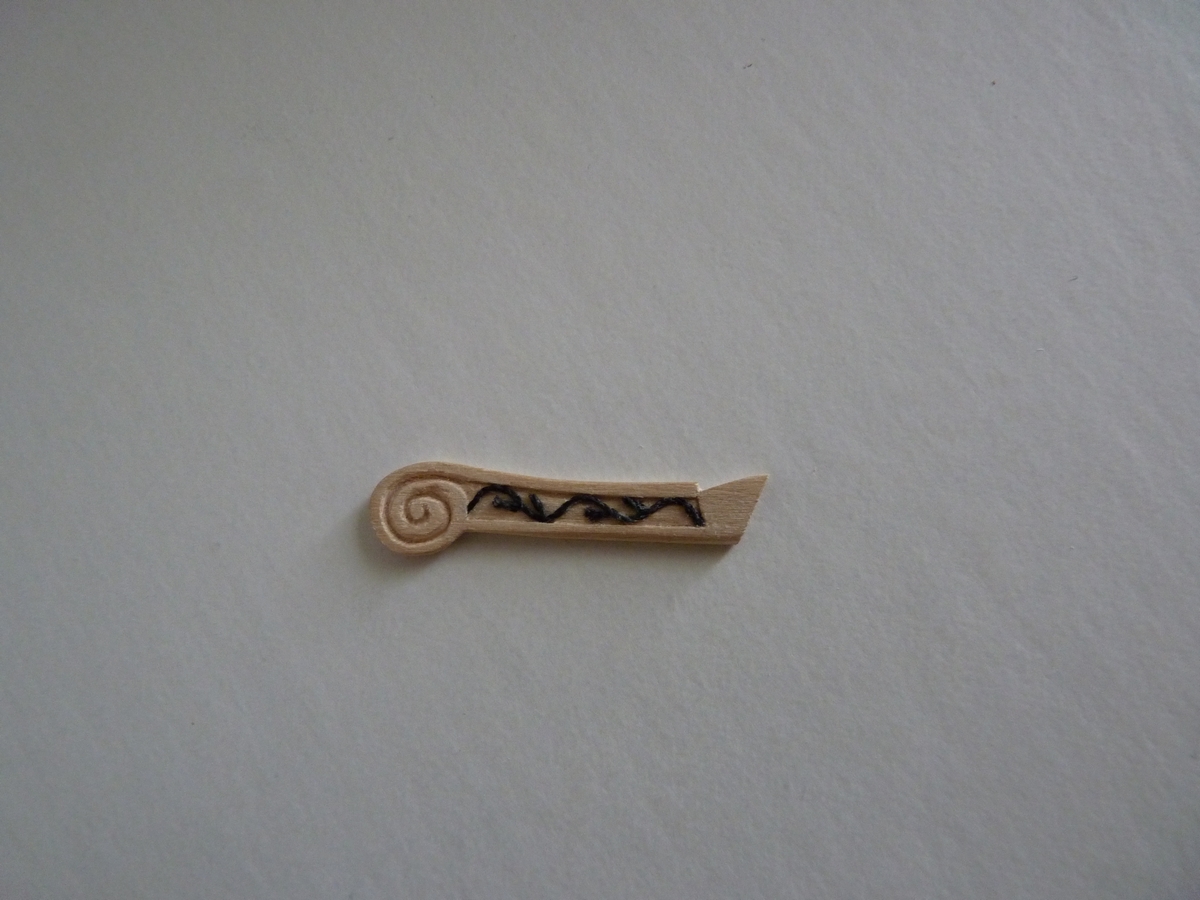
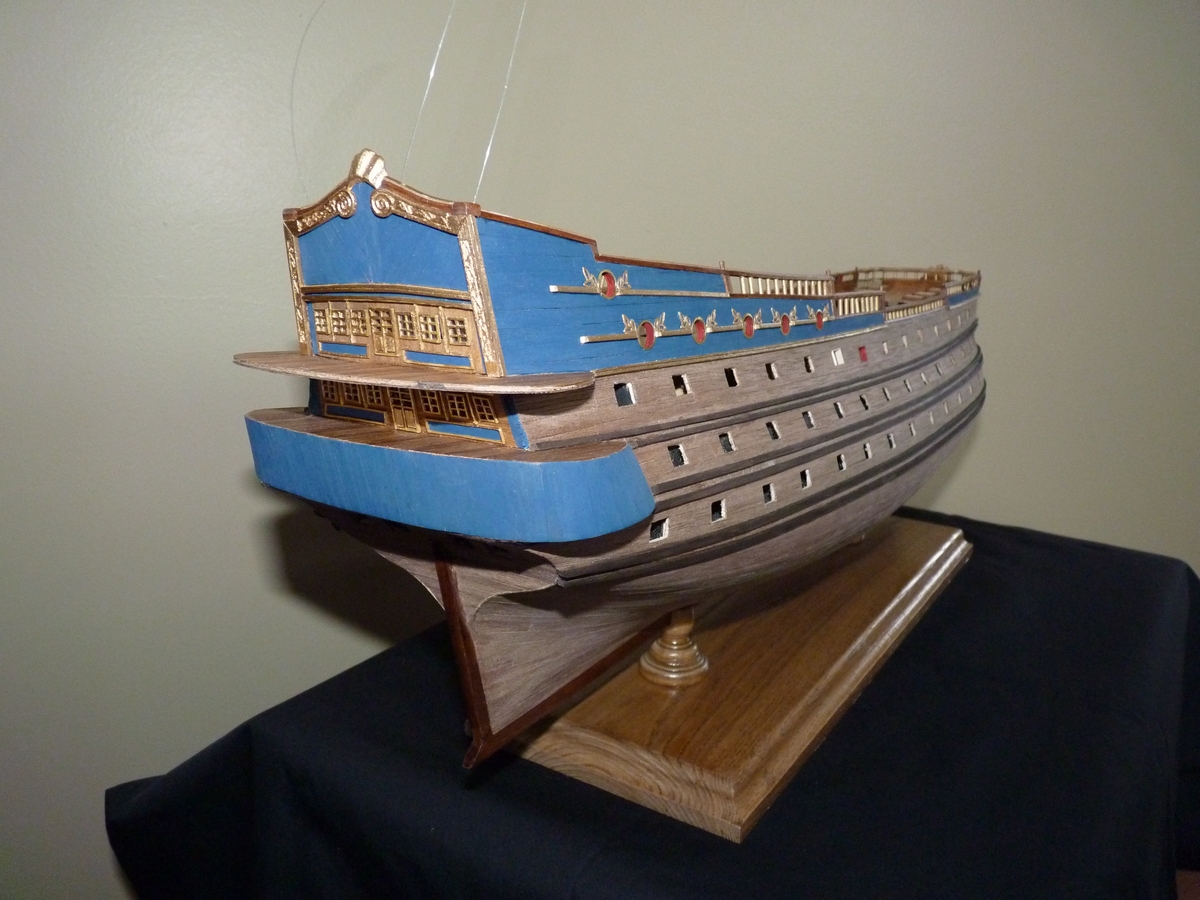
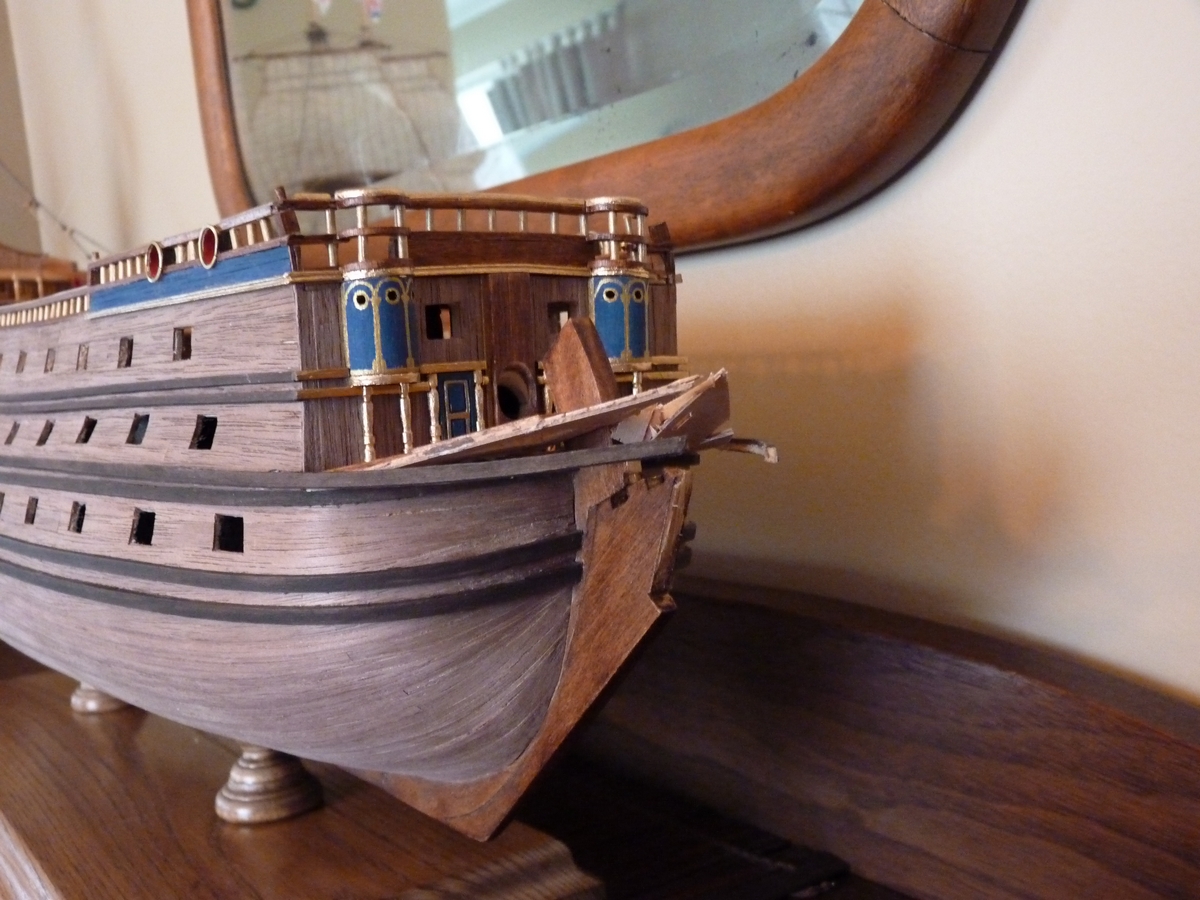
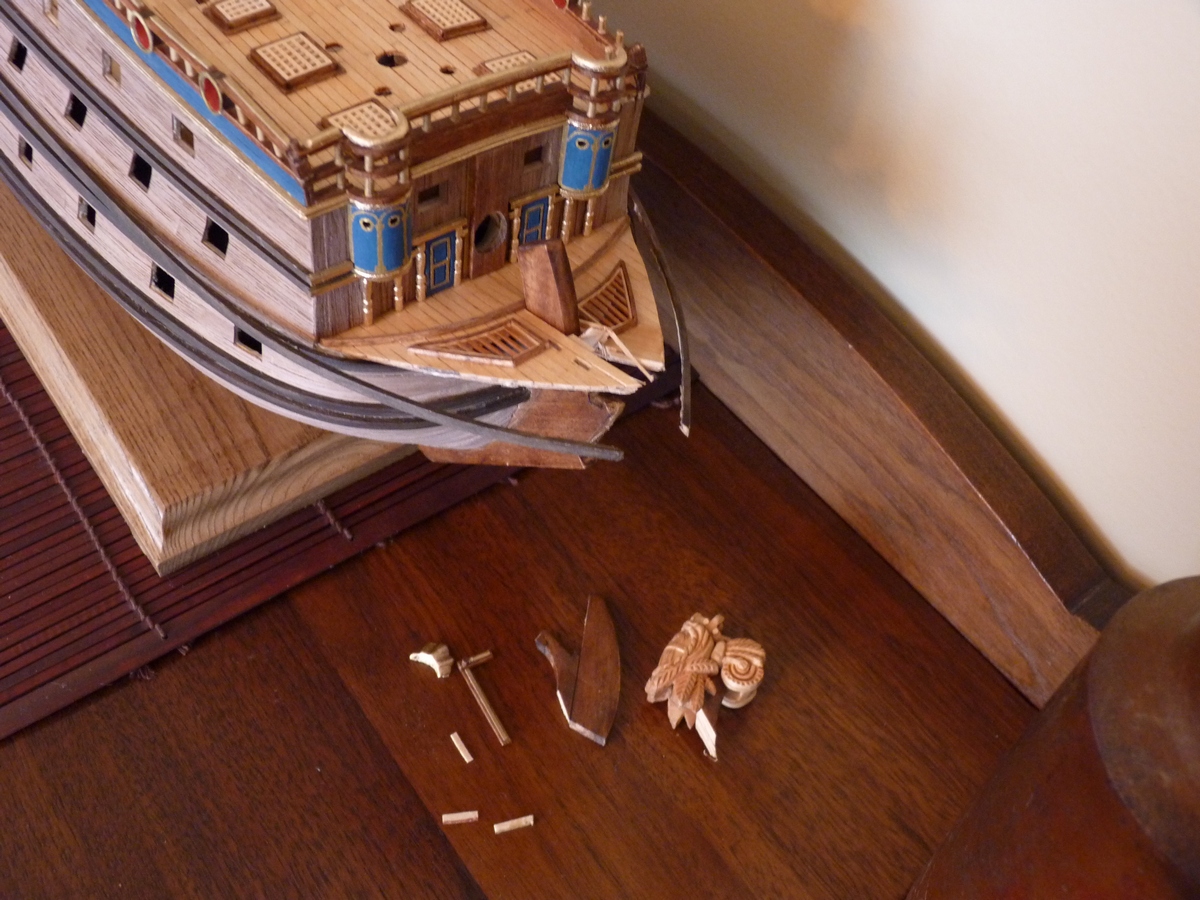
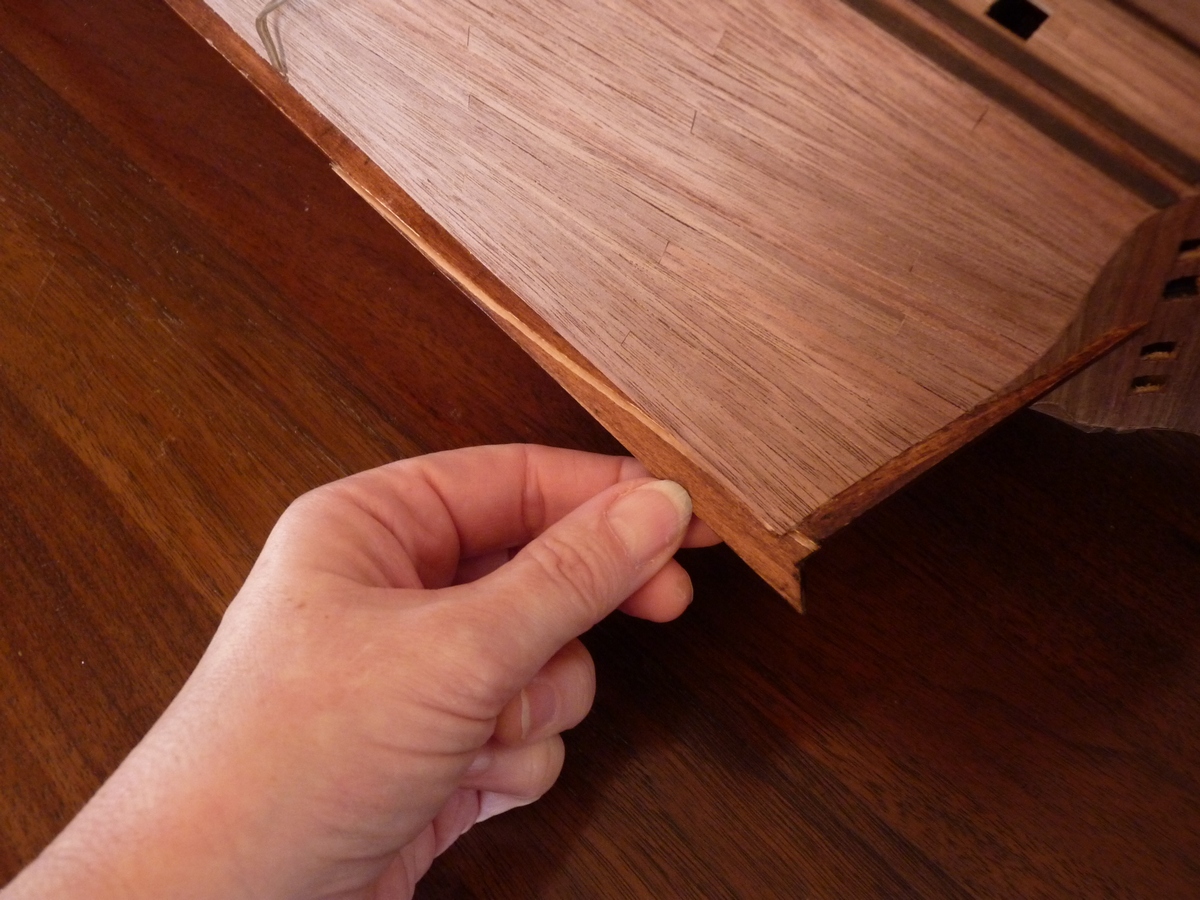
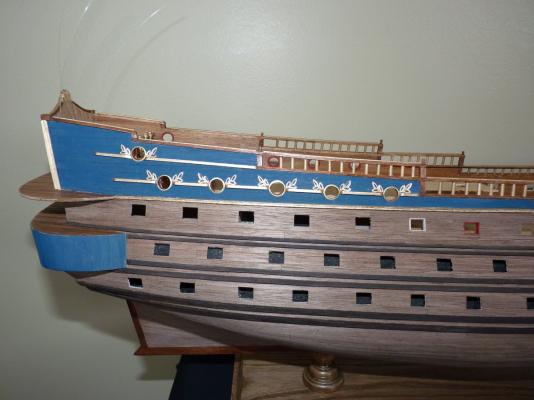
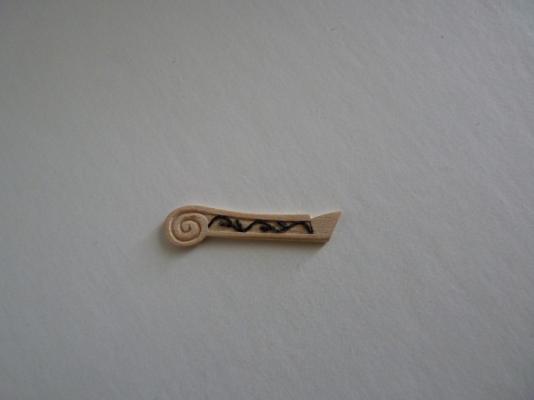
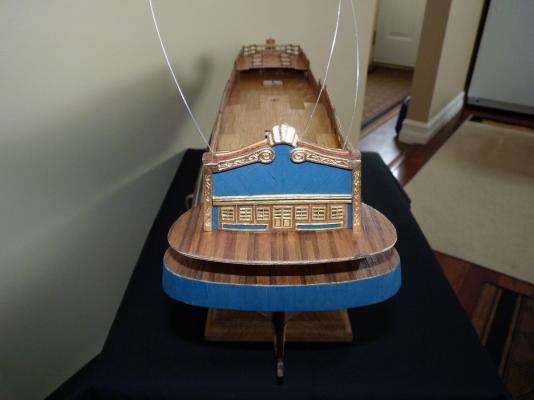
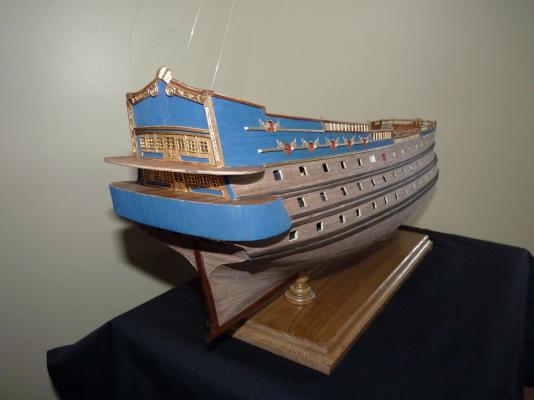
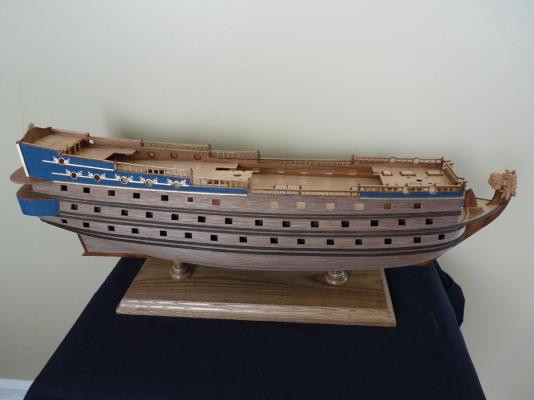
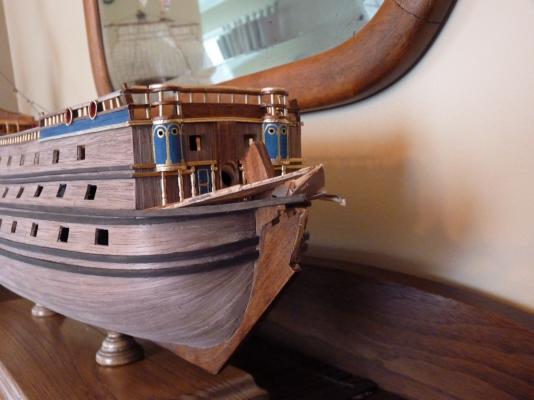
So, here is the repair. There is a very faint light line across the middle of the stem piece that is much more visible in the photo (if you click to enlarge) than to the naked eye. The repair was easier than expected, since all the breaks were extremely clean. I was so intent to get it fixed that I neglected to include the process!! I drilled both parts of the stem and used toothpicks as dowels, then glued them together. The trickiest part was measuring the receiving holes in the main stem for the broken part containing the dowels. (I used a very, very low tech and unusual method with exceptional results) I was almost ready for an update just before the "great crash". The columns were fashioned and installed along with the edge piece for the quarterdeck. Also the shell decoration was fashioned and installed at the stern top. The last of the gratings are now finished and installed. I found some wonderful bead holders in the jewelry section of Michael's then flatened them and cut parts away to achieve the desired leaf shapes for both sides of the round gun ports. The exacto knife was put into action again, carving some of the stern decorations. At 1:96 scale, the inner vine and leaf pattern I wanted was just too small to carve, so I coated fine rigging line with white glue and fashioned the vines and leaves that way. I am pleased with the end result since it was to be painted gold anyway. There you have it, repairs and a little progress too. (Forgot to add that I am now experimenting with gun port linings just in case anyone spots the two that I have temporarily test fitted and forgot to remove for the photos)


-
Mark: Thank-you! I think I agree about the curse! I am sorry that your lovely Licorne was not something that could be salvaged, but am looking forward to Licorne II. Robbyn: It's really amazing that my sweater isn't in the garbage, but I really can't blame anything or anyone but myself. (even though I wanted to at the time ) No personal injury during this incident, but I have lots of experience in that department too - not nearly as drastic as yours though! Carlosys: Thanks for the encouragement! Will we see another update on your San Felipe soon? Sjors: Just for you ------- pictures on the way!
-
Thanks everyone for all the ideas, tips and links! I'm now waiting for my supplies to arrive in the mail.
-
Sjors: The sweater is in the closet now. I don't know about the fix being better than the original, but I am happy with it. Hopefully there will be pictures tomorrow. Bob: Actually, when it happened I couldn't make a sound - in shock I guess. John: Thanks for words of support and encouragement. I'm discovering that a lot of members here have had similar mishaps. Popeye: Thanks! Happy to report it's fixed!!
-
Wow! All that detail is resulting in a beautiful ship!
-
I echo all the above comments - very nice indeed!
- 2,191 replies
-
- 1
-

-
- confederacy
- Model Shipways
- (and 1 more)
-
Sorry to hear of yet another accident....I truly do know the feeling. Terrific work, she really is a beautiful ship! Augie: I think it's the waning of caution and attentiveness....at least on my part. Isn't the old saying: "bad things come in threes" ergo, we should be all finished with this now!
-
Edwin: Thank-you for the vote of confidence! I don't know about a "masterpiece" but I hope it will at least be as good as before. Andy: Thanks! I didn't expect her "maiden voyage" to be quite like this. The sailing was smooth, but the docking was a little rough. Crackers: Thanks. I always thought I was careful around my model, but this has taught me that I have to be even more so.
-
So sorry Mark that things worked out this way. It must have been very hard to finally come to this decision. I have enjoyed following along and will be looking forward to your new log.
-
Thanks everyone for the words of encouragement and support. Augie: This is a club I'd rather not have joined, but onward and upward. Steve: You're wrong about one thing....she flew quite well...it was the landing that wasn't so great. The carving was unscathed, thankfully. Vivian: Painful it was! When you do get to the scratchbuilding stage - you will love it. Anja: It did hurt, but the repairs are going better than expected. Michael: If it had been any more serious I might have put it in the closet for a while.
-
Thanks Grant. Repairs are already under way.....and actually, I had Danny's inspirational repair in mind when I started the fix.
-
!!!!!!!!!!!!! I was feeling a bit chilly while working on my model and stood up to put my sweater on, which somehow managed to attach itself to the ship!!!! The crack and crunch of wood as she hit the floor was a little sickening to say the least. Now I have to go and sit down, take some slow deep breaths, and figure out my plan of attack for repairs.....


-
Super job on the ratlines - and all the rigging for that matter! Keep the great updates coming!
- 1,279 replies
-
- 1
-
-
- agamemnon
- caldercraft
- (and 1 more)
-
Absolutely beautiful!
-
Great job! Your method is resulting in lovely planking. Looking forward to more updates!
- 2,191 replies
-
- 1
-
-
- confederacy
- Model Shipways
- (and 1 more)
-
Without all those frames on my build, I had no where near the sanding, but it still seemed like I was doing it in my sleep. If we gain anything from this hobby it's repair/re-work and sanding skills! Posted this and then realized I forgot to say how great she's looking!
-
Great to see more progress Russ. She's really looking very nice!
-
Doris: Thank-you for your generous comments! I am honoured - especially since the comments are from such a skilled modeller as yourself!
-
Thank-you to everyone for the responses and links! John: What was the resin you used? I realize the product will be different here in North America, but it will give me an idea where to start. Chuck: Good idea. I had thought about buying a few masters for the 3 sizes required on my model. I even stopped by your web store, but wasn't sure if any could be used at 1:96 scale?
-
I have a daunting task in my very near future, and that is fabricating 100 plus cannons at 1:96 scale. Although metal ones would be preferred, I neither have the budget to buy or the proper lathe to turn them. I have considered turning some from wood with a drill lathe, but even that will prove tricky at this small scale. I am wondering if anyone out there has made cannons using non-traditional materials such as the polymer clays Fimo or Sculpey? I was thinking of starting with a finely detailed base cannon and making a mold from that and then mass producing the rest? Any thoughts on this or any other materials? If so, please go to the following link: Cannon Question, to comment, where more members will be able to see it. Who knows it may help someone else too.
-
I have a daunting task in my very near future, and that is fabricating 100 plus cannons at 1:96 scale. Although metal ones would be preferred, I neither have the budget to buy or the proper lathe to turn them. I have considered turning some from wood with a drill lathe, but even that will prove tricky at this small scale. I am wondering if anyone out there has made cannons using non-traditional materials such as the polymer clays Fimo or Sculpey? I was thinking of starting with a finely detailed base cannon and making a mold from that and then mass producing the rest? Any thoughts on this or any other materials?
-
Glad to see terrific an update! She really is looking wonderful...I don't see the mistake either.
-
You said in an earlier post that you are still learning and can always make it better???!!! I do not know how it could be any better, or any more perfect!!! Beautiful!
- 883 replies
-
- 2
-
-
- royal caroline
- ship of the line
- (and 1 more)