


G.L.
-
Posts
1,553 -
Joined
-
Last visited
Content Type
Profiles
Forums
Gallery
Events
Posts posted by G.L.
-
-
Hello Nils,
I am just discovering your zeesboot log. I signed in to follow. Wishing you a pleasant build.
-
-
-
Beautiful diorama, Jon. Congratulations.
It feels also good to see that there is taken care so well for the real Bowdoin. A brave ship as it is deserves that.
-
The shipyard was closed for a week due to a holyday trip to the south (Portugal) to seek the sun. We had indeed two and a half day in the sun, for the rest of the week the weather was cloudy with a lot of rain. But to be honest we had a beautiful trip. Portugal is a beautiful country and the Portuguese are a very gentle people. Probably we will go back next year.
Now a summary of what I did with the cross section during the week before our departure.
Part 21. The boat
Before rigging the mast I want to do something different.
Although there is a boat slide next to the main hatch, the practicum does not provide a boat. The reason is probably that the boat is too long for the cross section and would stick out of the cut away.
Still I would like to fill the empty space on the deck with a work boat. Thus my boat will have to be small enough to fit on my deck. I find the lines of a suitable rowing work boat in an old edition (1998) of the French magazine 'Le Chasse Marée'. It is a small 10ft rowing boat, just the size that I need. The boat was used as work boat on French fishermen in the Saint Malo region during the period of the smacks. (drawing from le Chasse Marée)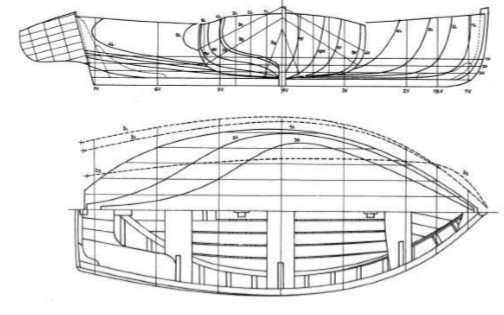
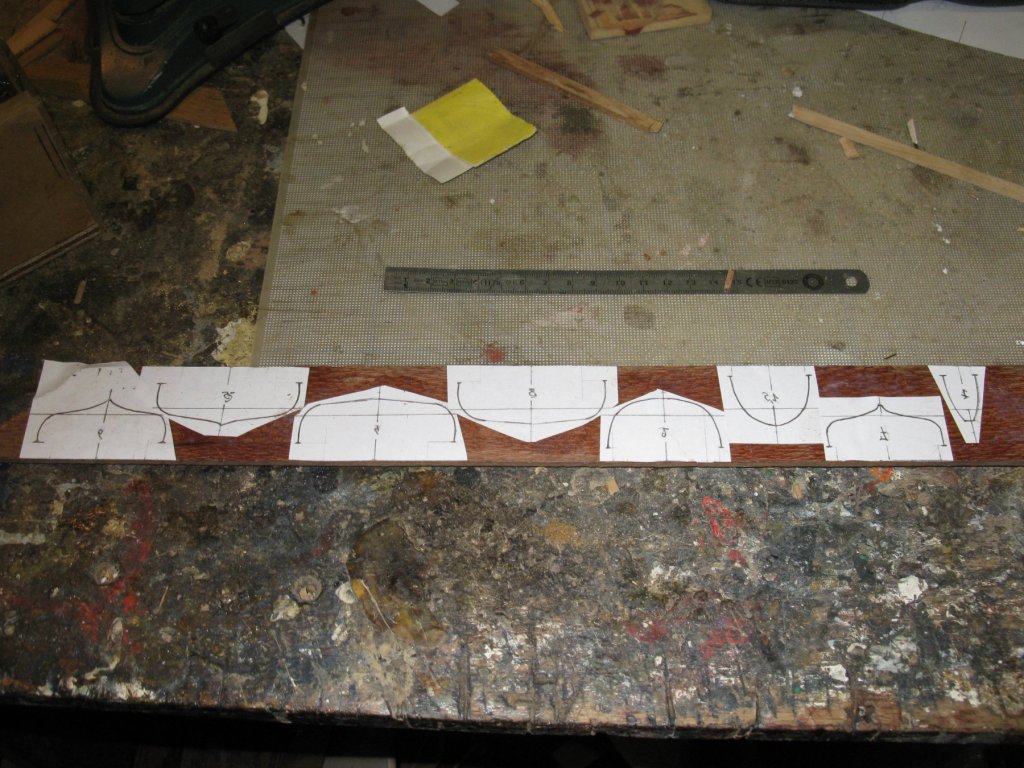
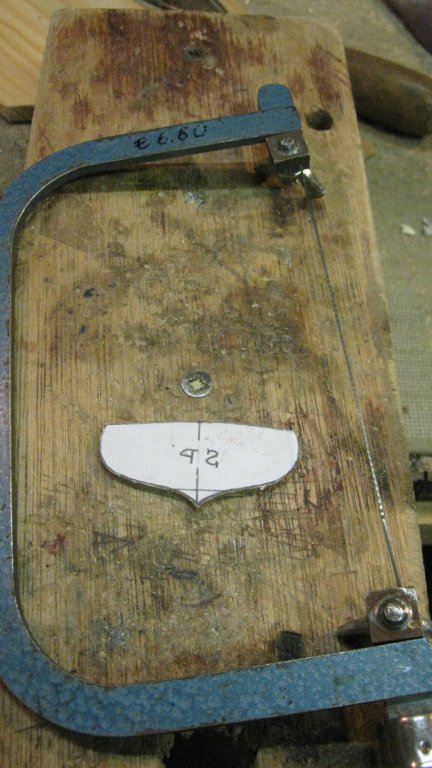
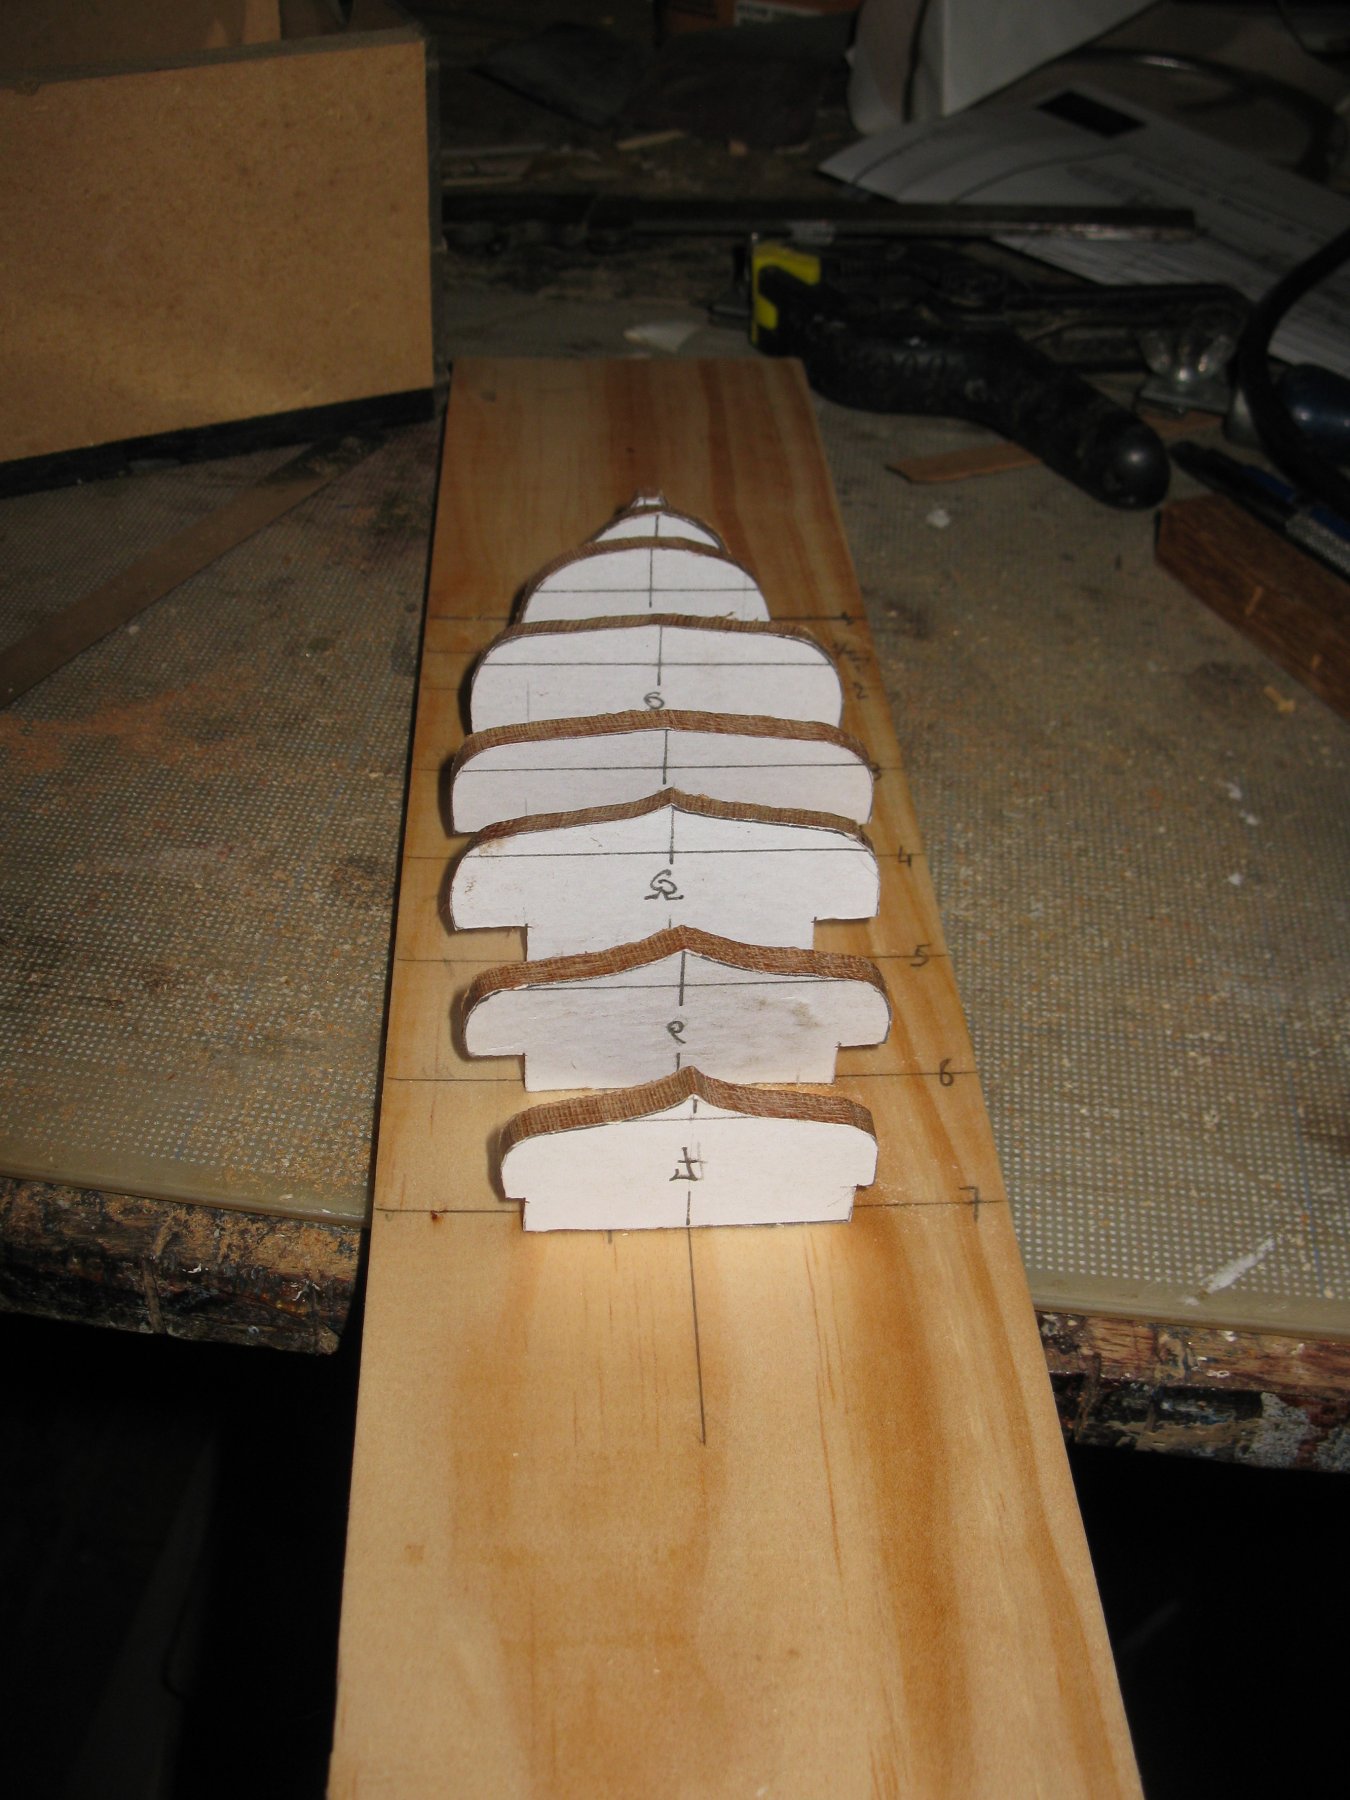
I start with sawing out the stations.
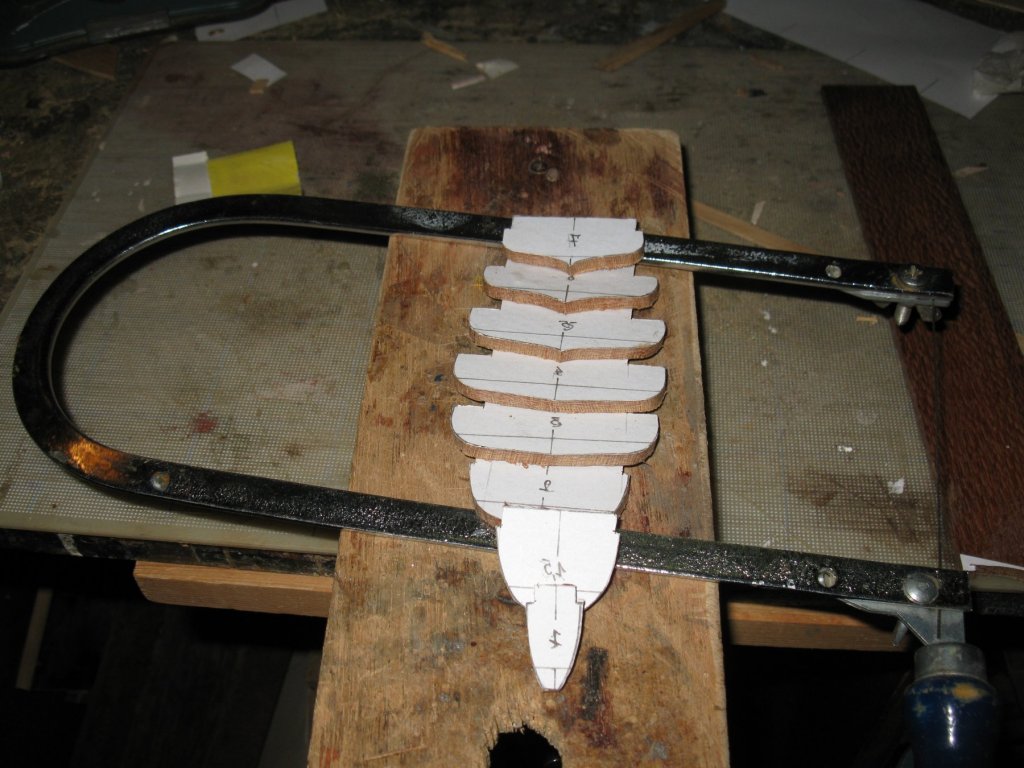
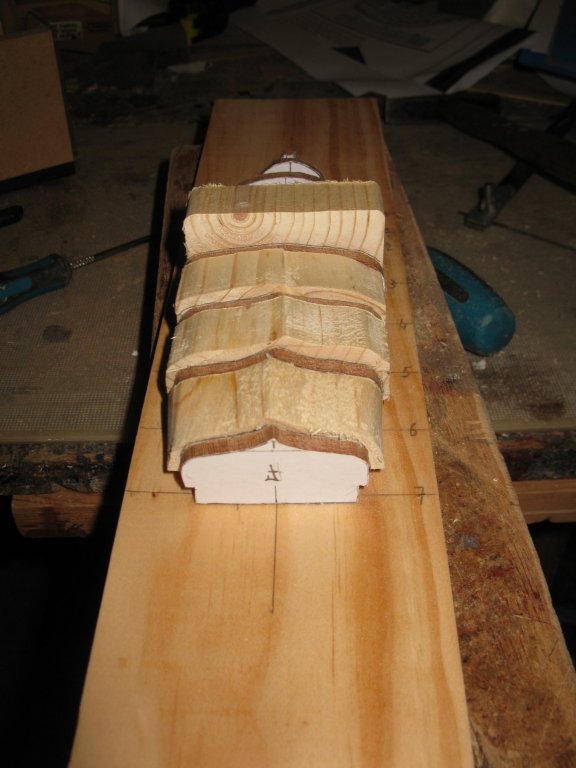
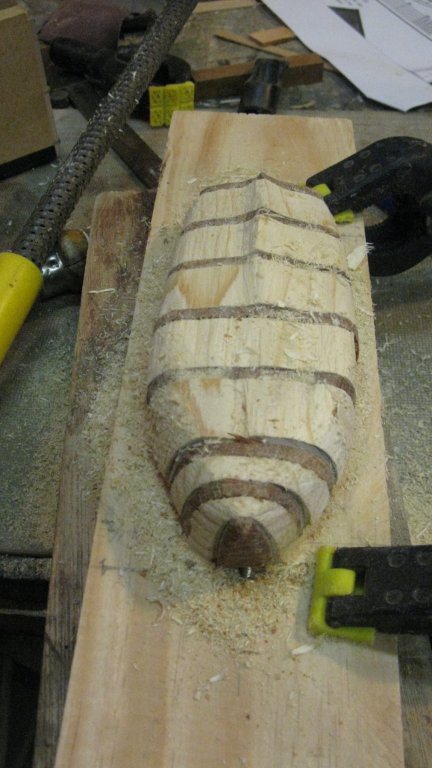
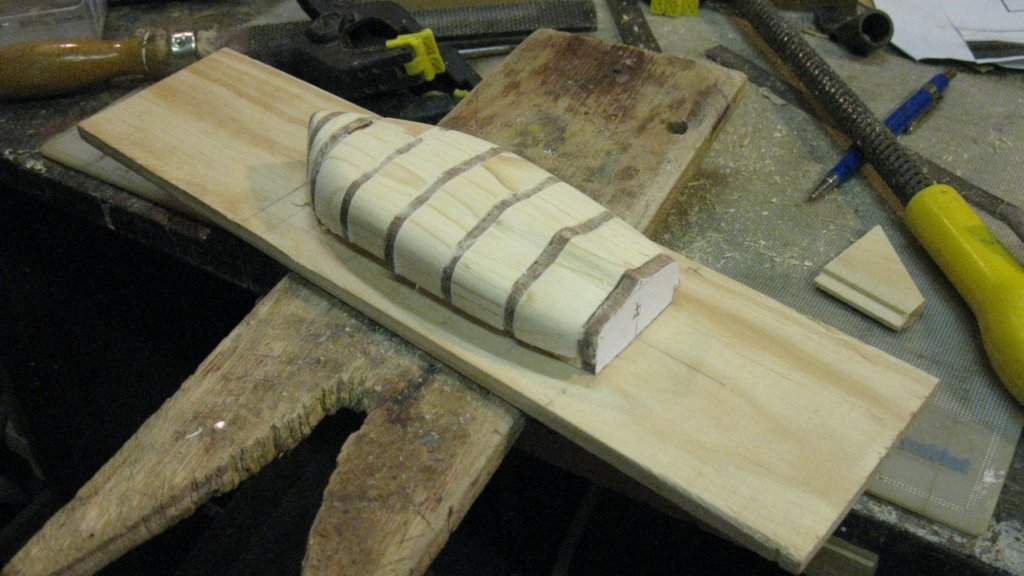
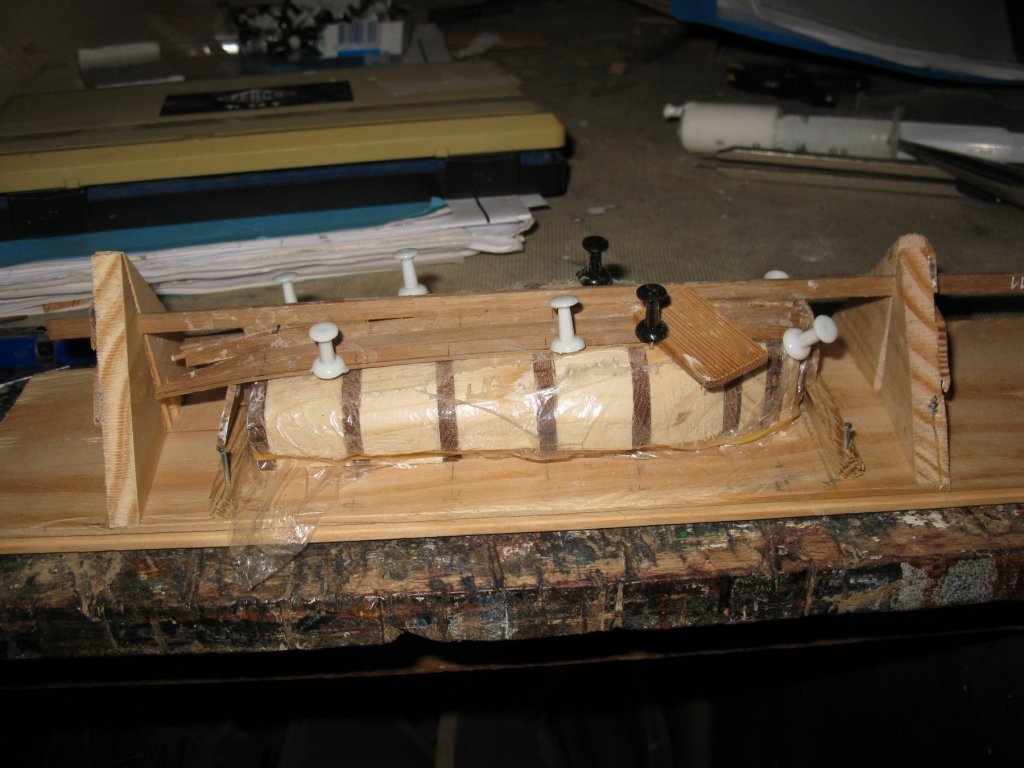
I screw the stanchions on a base plate...

... and fill the space in between with soft wood (pine). That will give me a good holding ground for thumbtacks when I am planking.
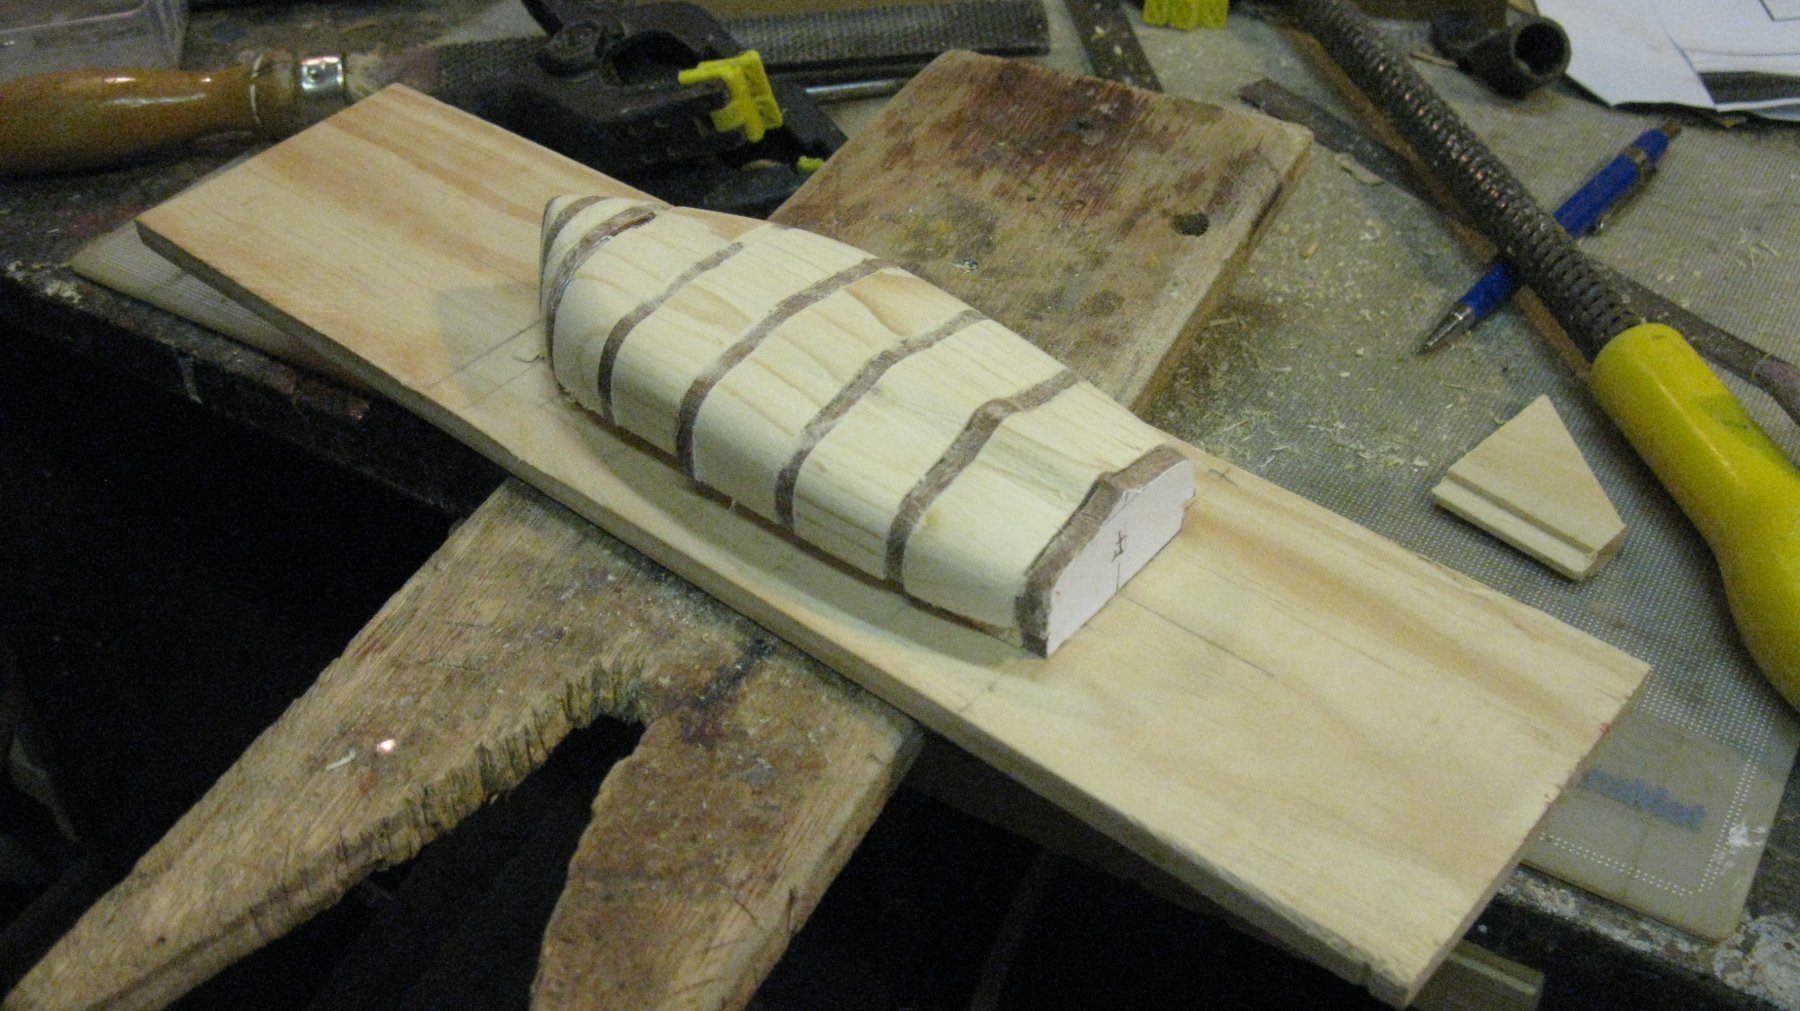
Filing, scraping and sanding the mold.

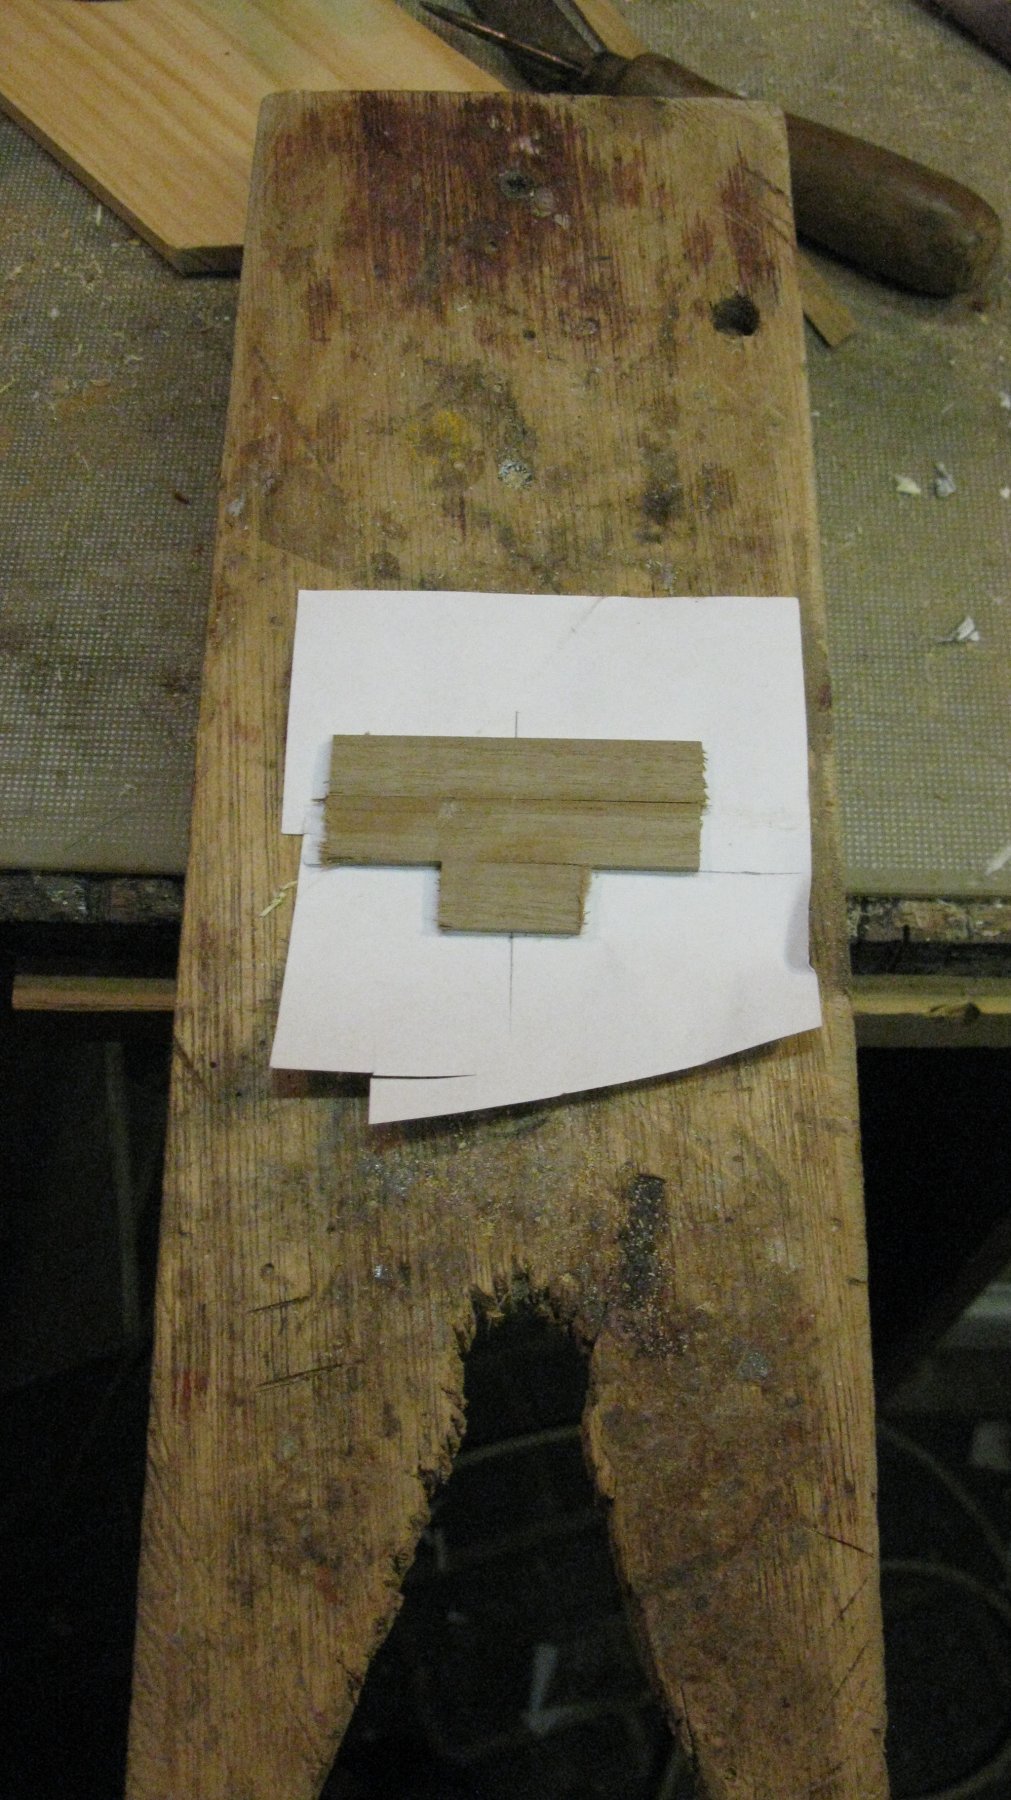
The keel and stems.
Making the poop

And gluing it to the sternpost.
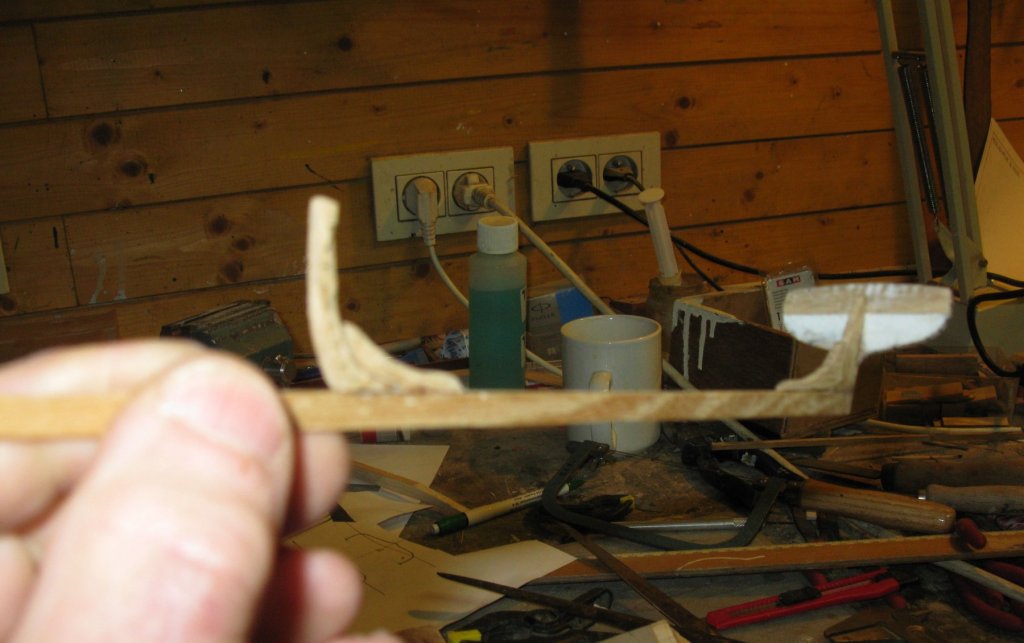
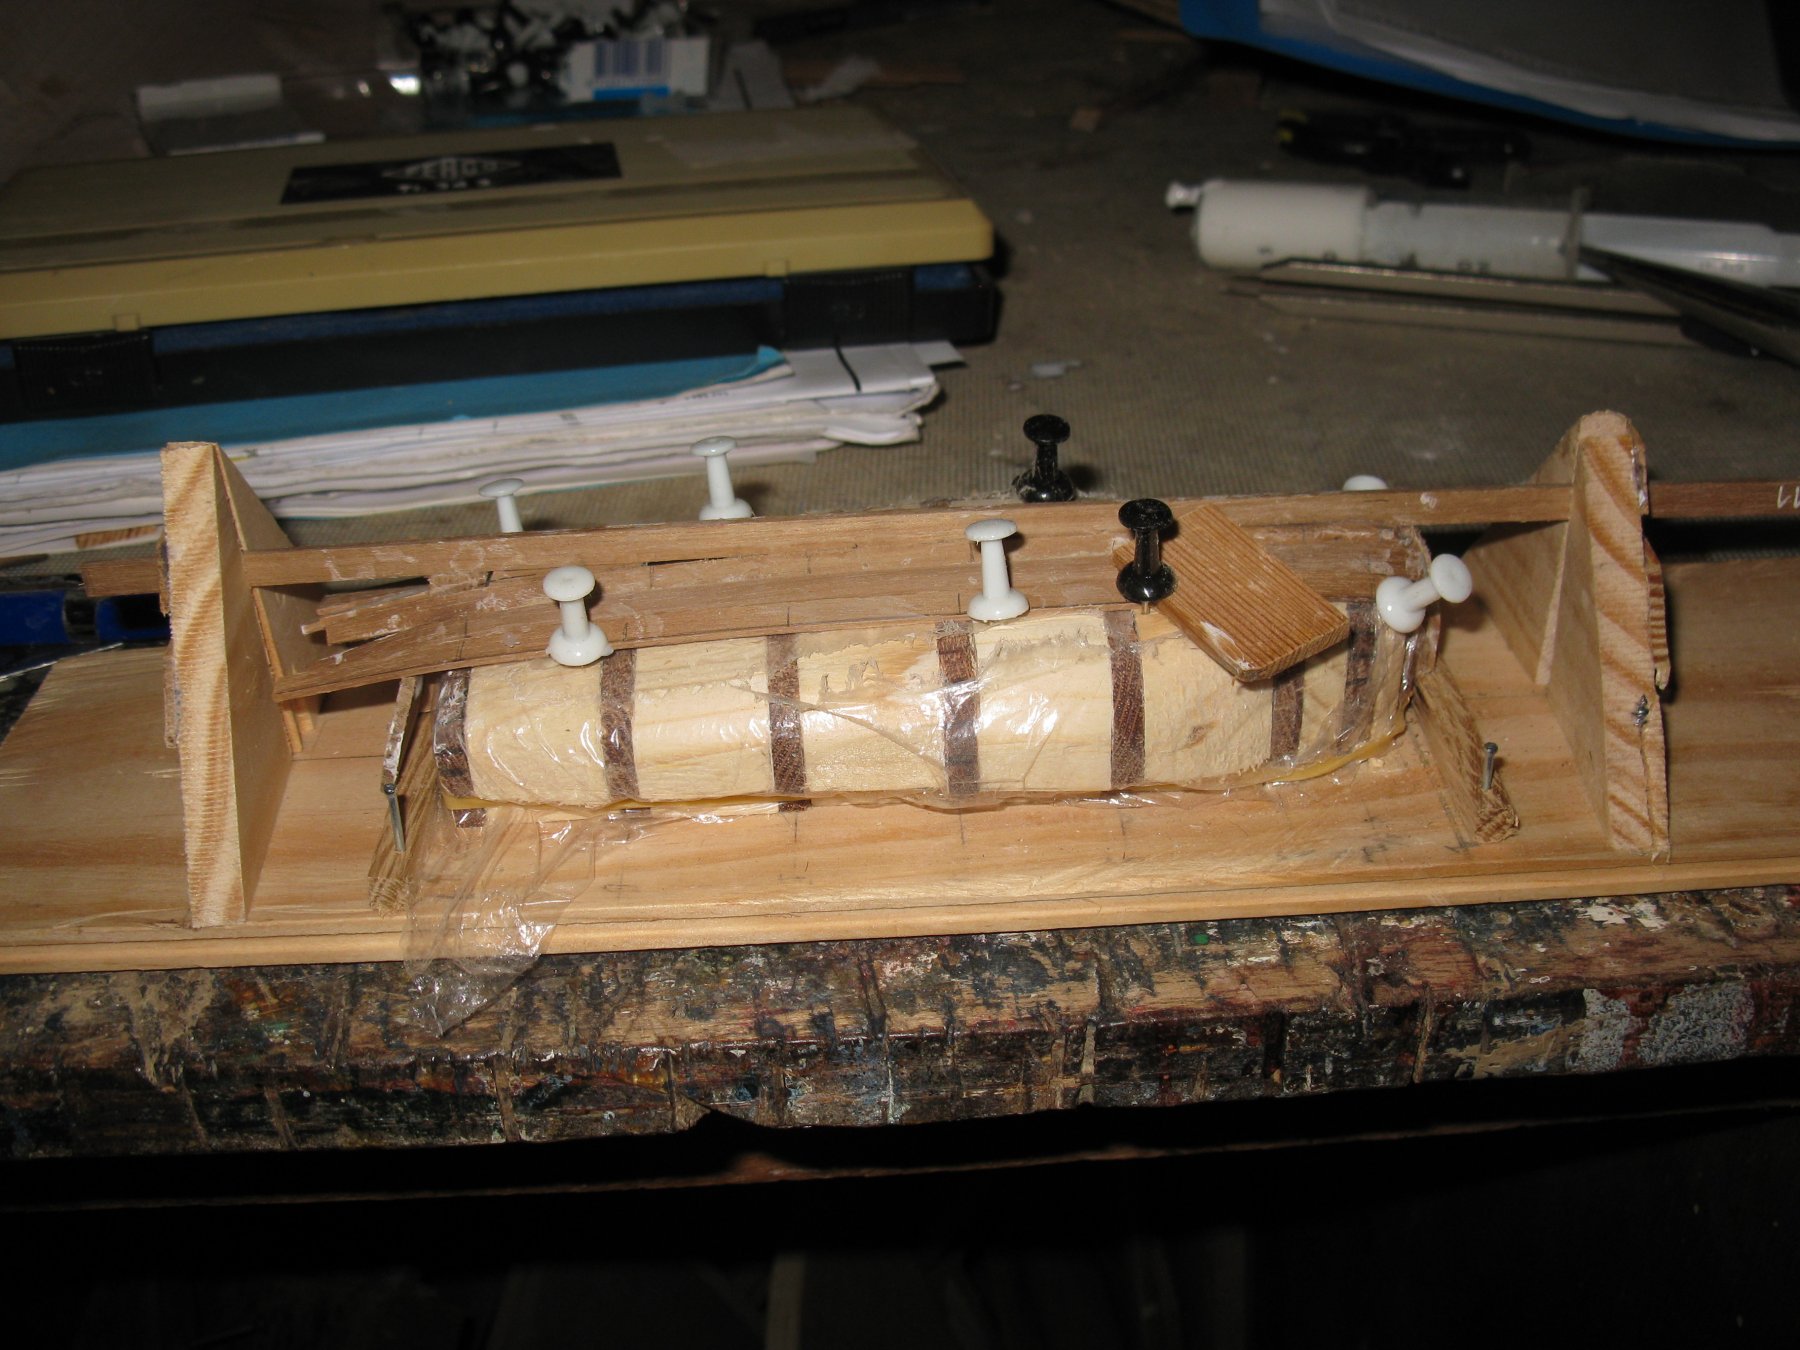
Now the planking can start. I first cover the mold with kitchen cling film to prevent the gluing of the planks on the mold and then place the whole of keel stern and stem on the mold. The planking is a slow business, I can only glue one plank each side a day. This week I only place three planks each side.
-
-
Neat work, Vaddoc. Those are nice chain plates. Thanks to explain your methods so into detail.
- FriedClams, mtaylor, Omega1234 and 1 other
-
 4
4
-
-
Congratulations, a beautiful model!
- mtaylor and thibaultron
-
2
-
That was really a very enriching intermezzo.
When you make another diorama in the future, please post a log of it on this forum I will be the first to follow.
- mtaylor, druxey, Keith Black and 1 other
-
4
-
-
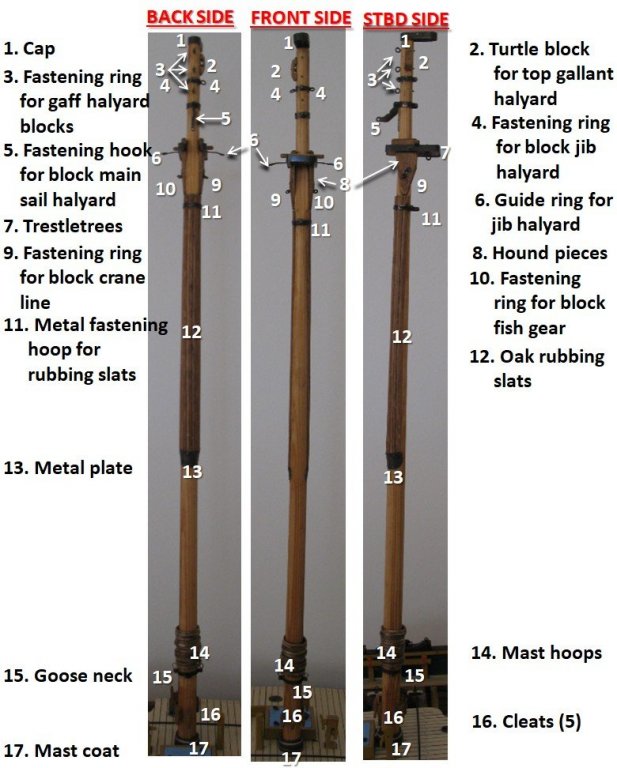
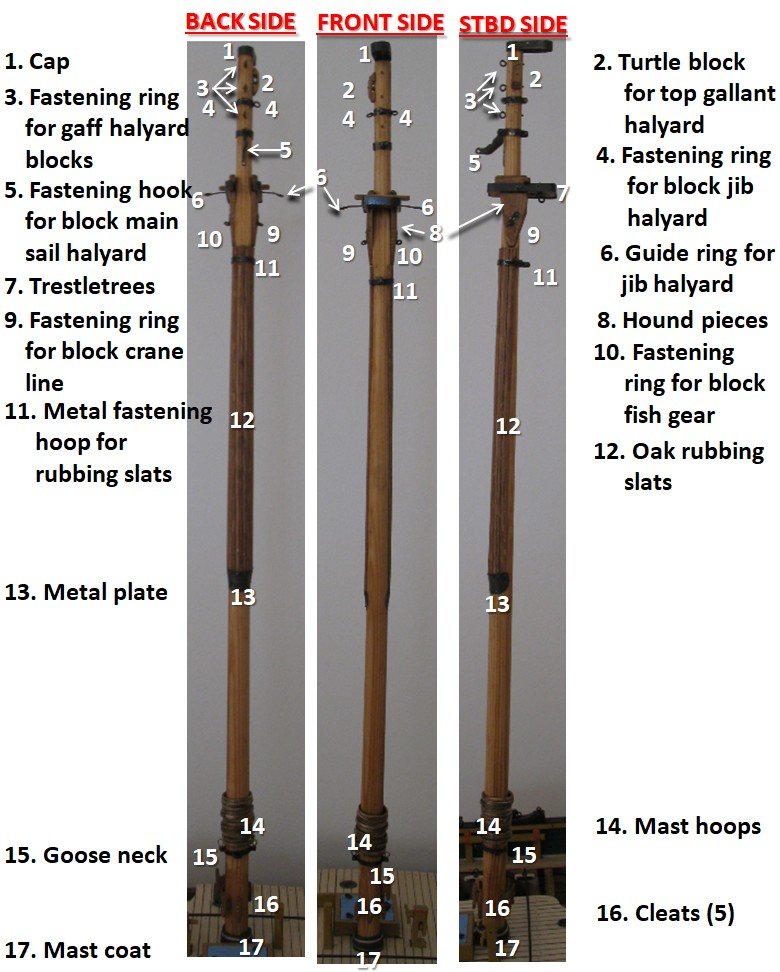
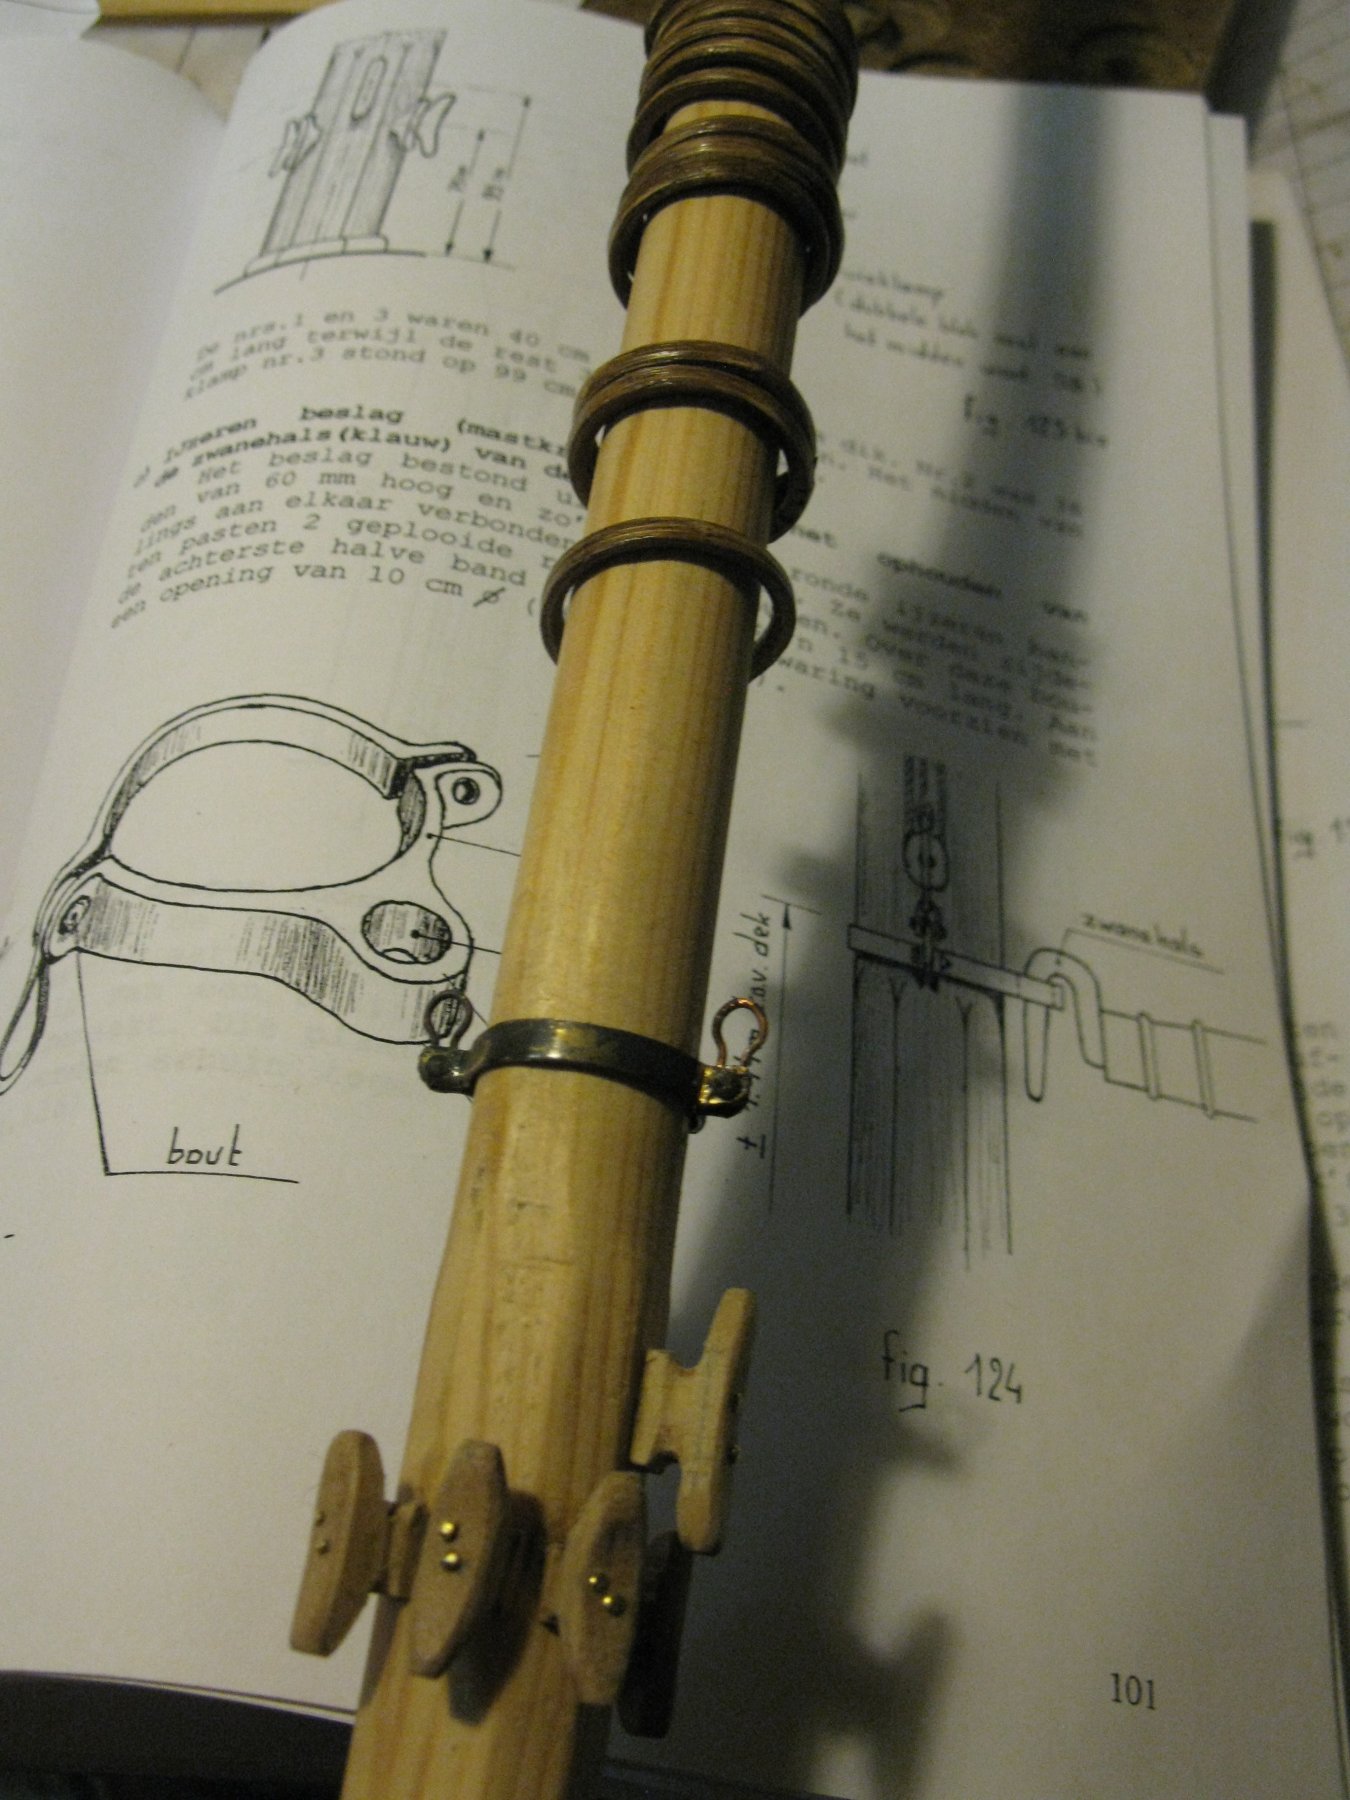
For those who lost the thread of my story; an overview of the mast fittings:
- mtaylor, MikeB4, FriedClams and 6 others
-
9
-
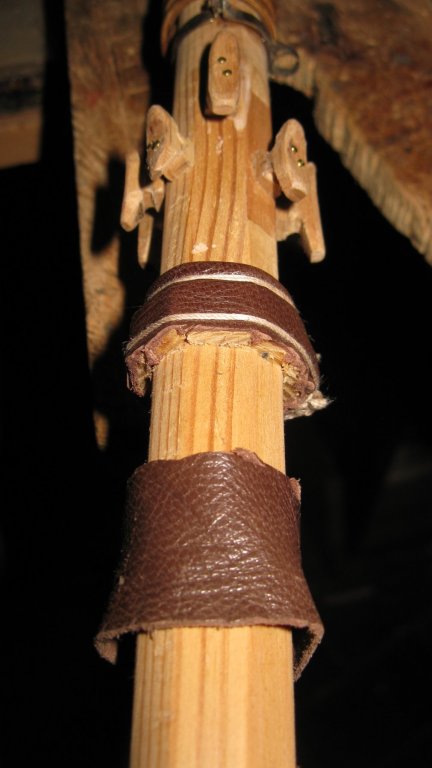
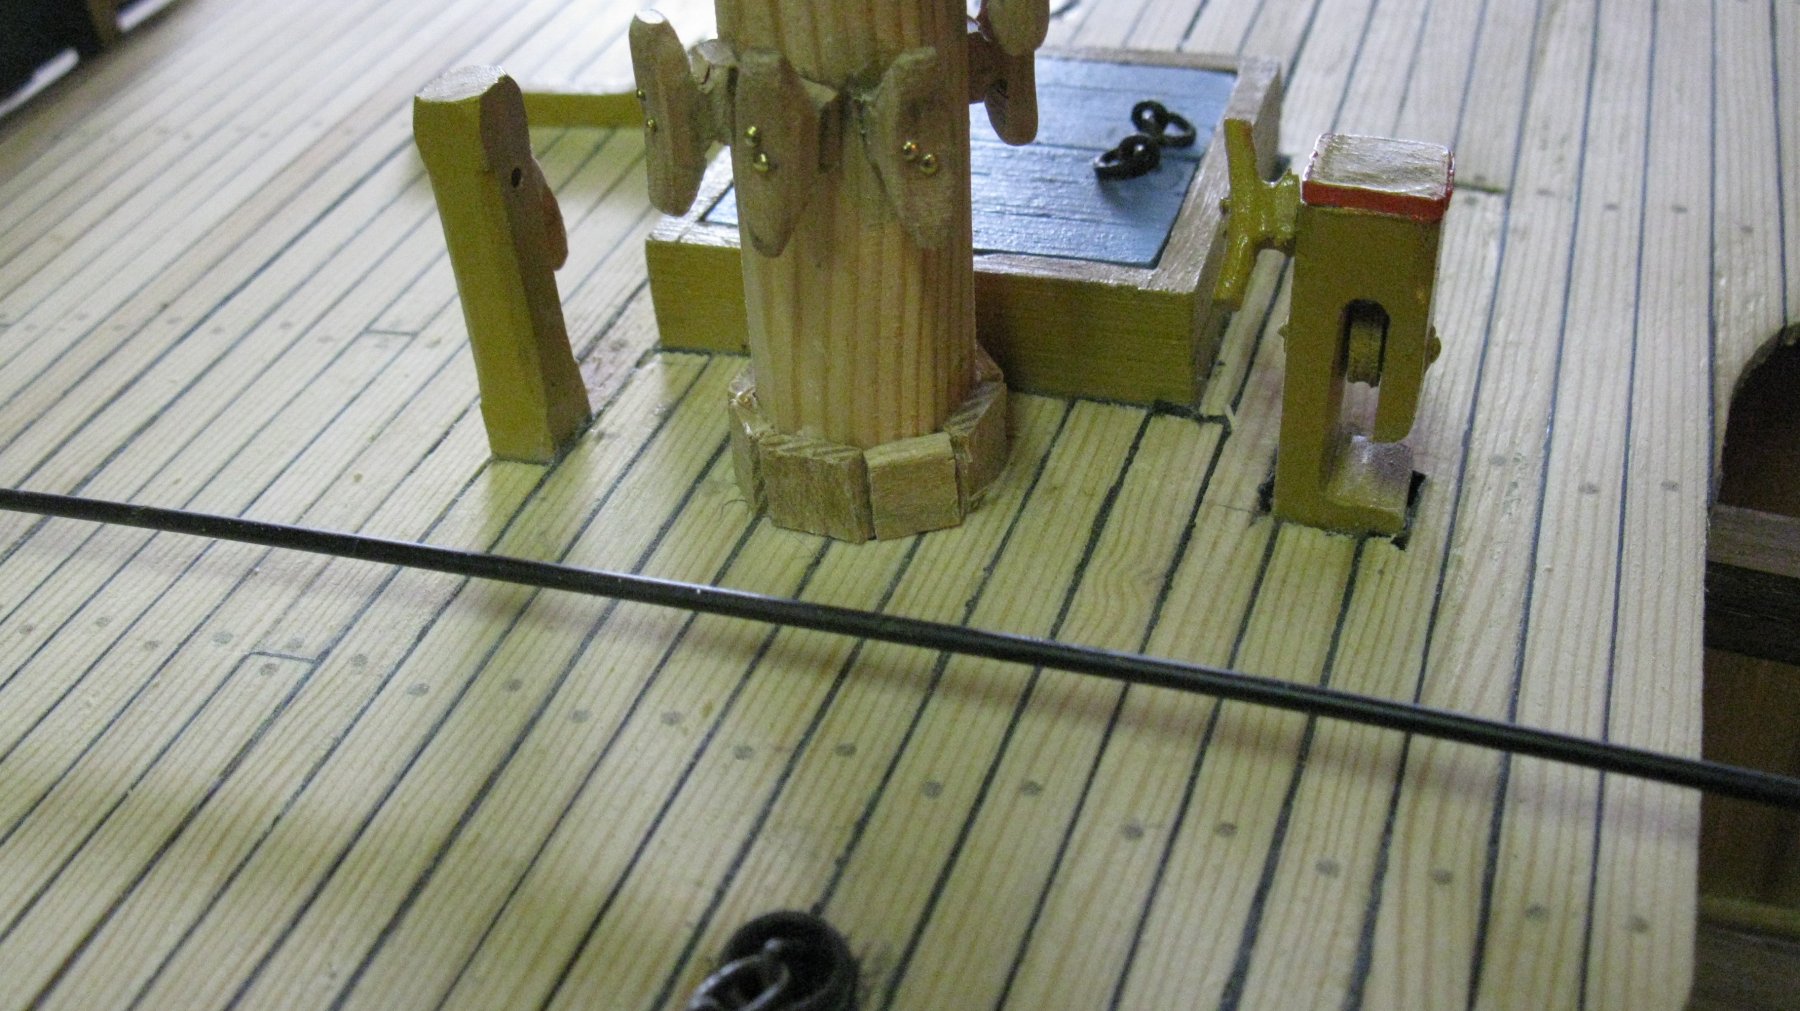
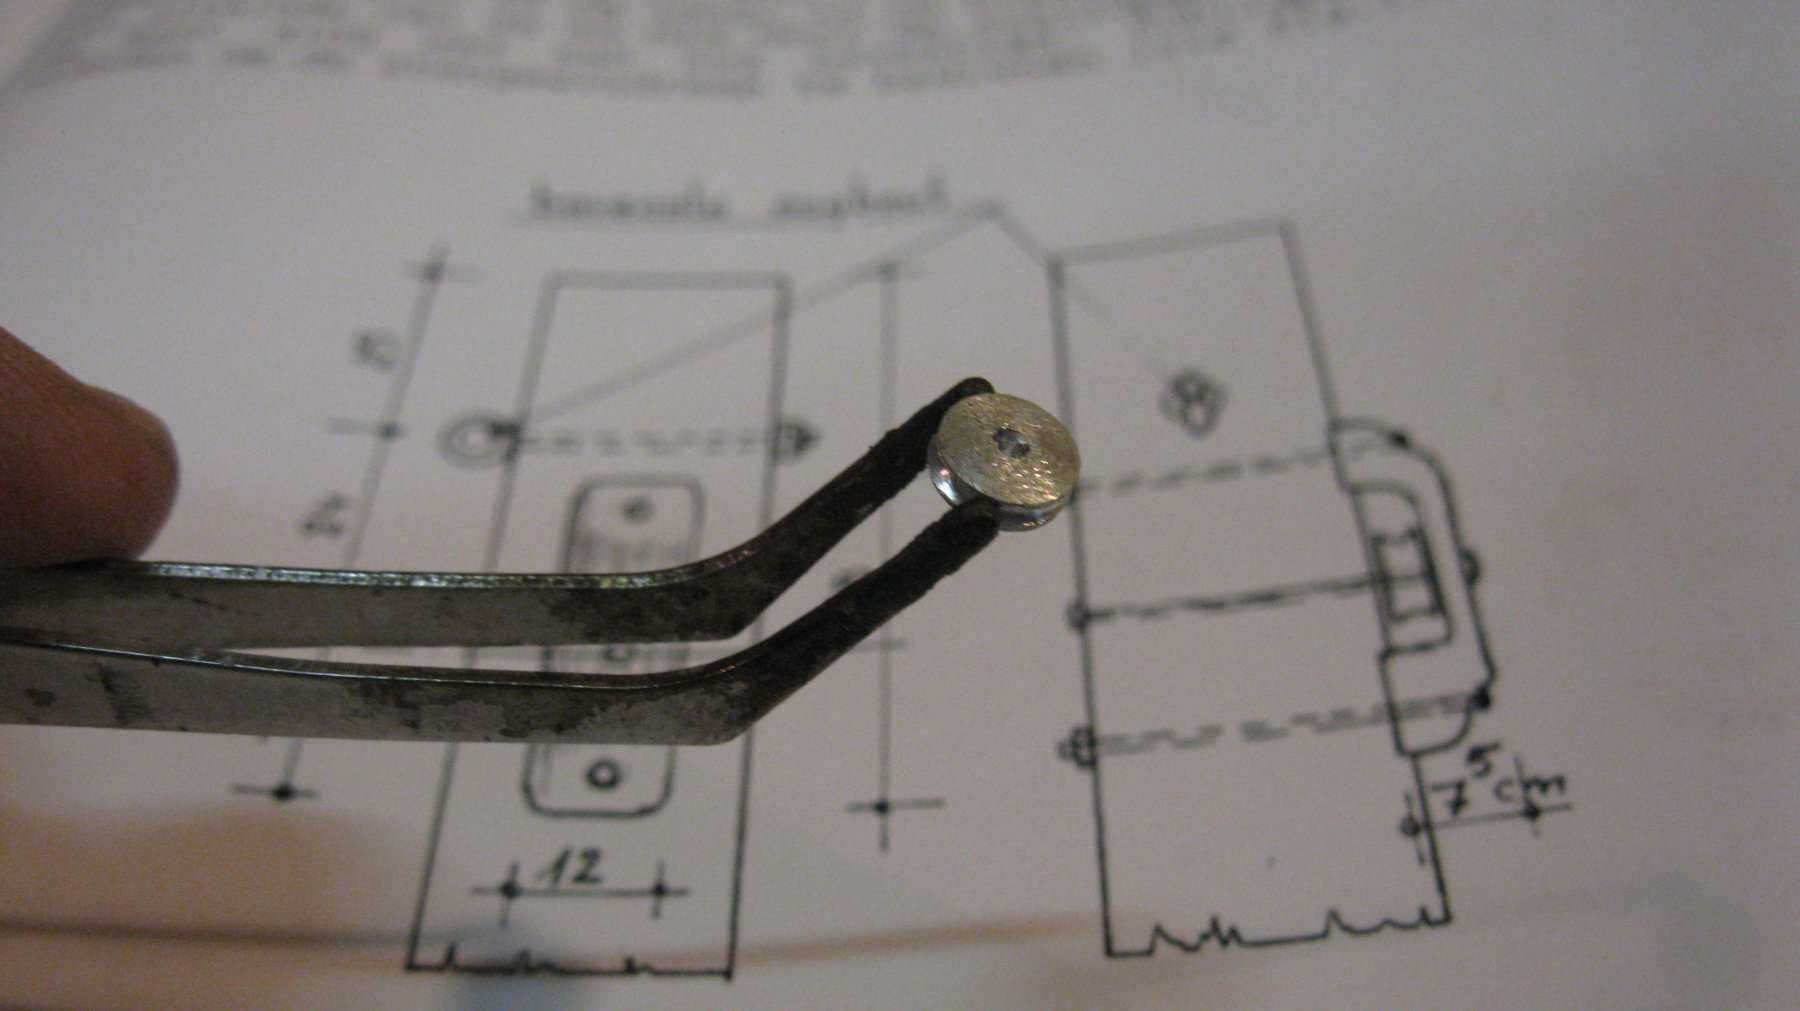
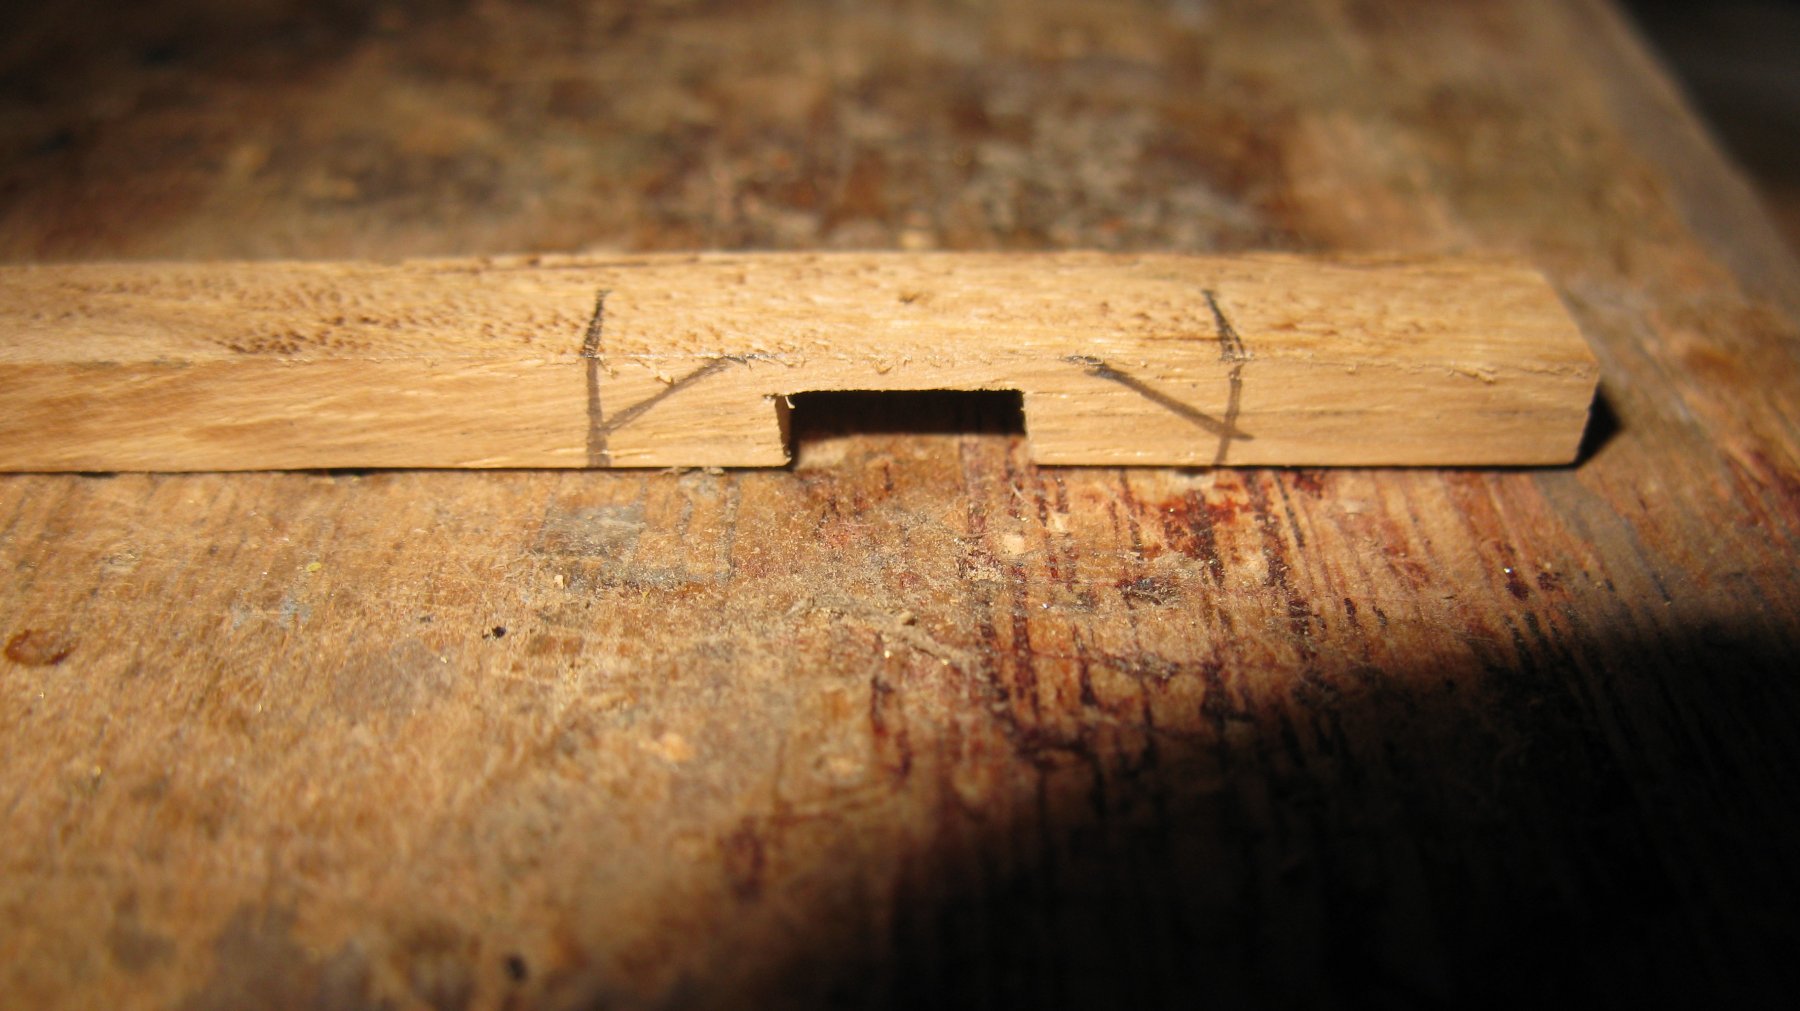
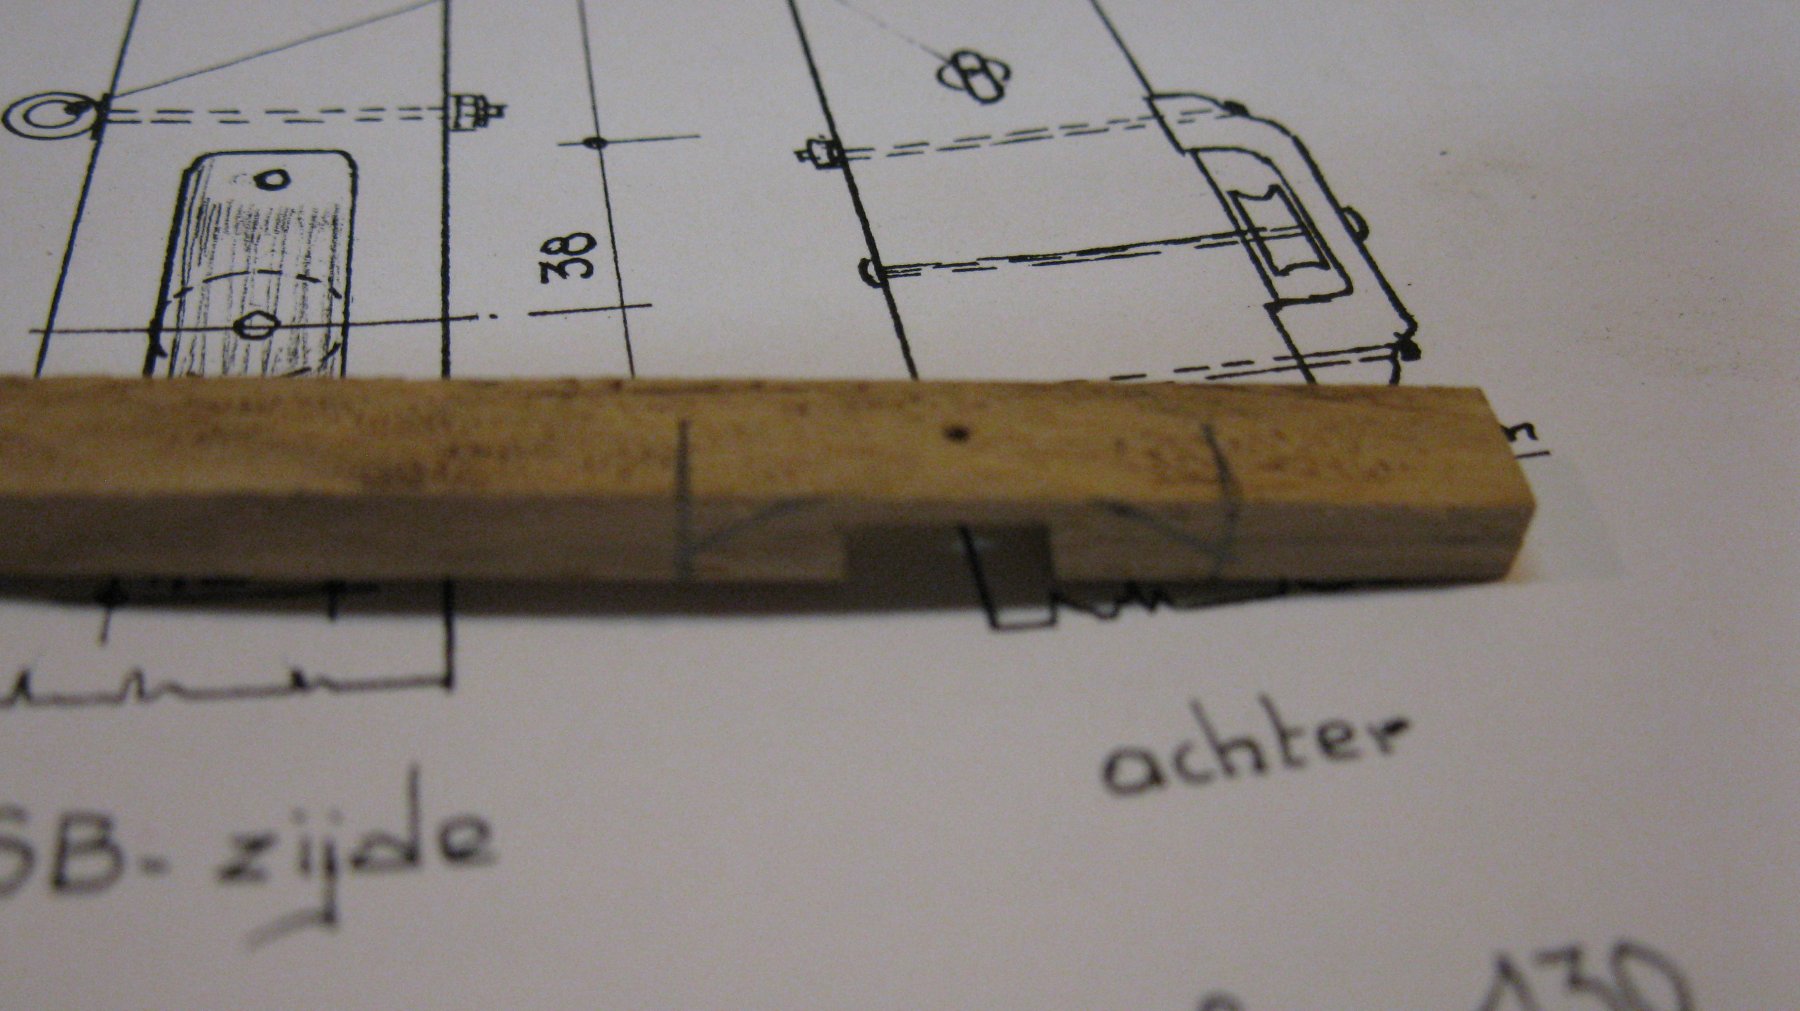
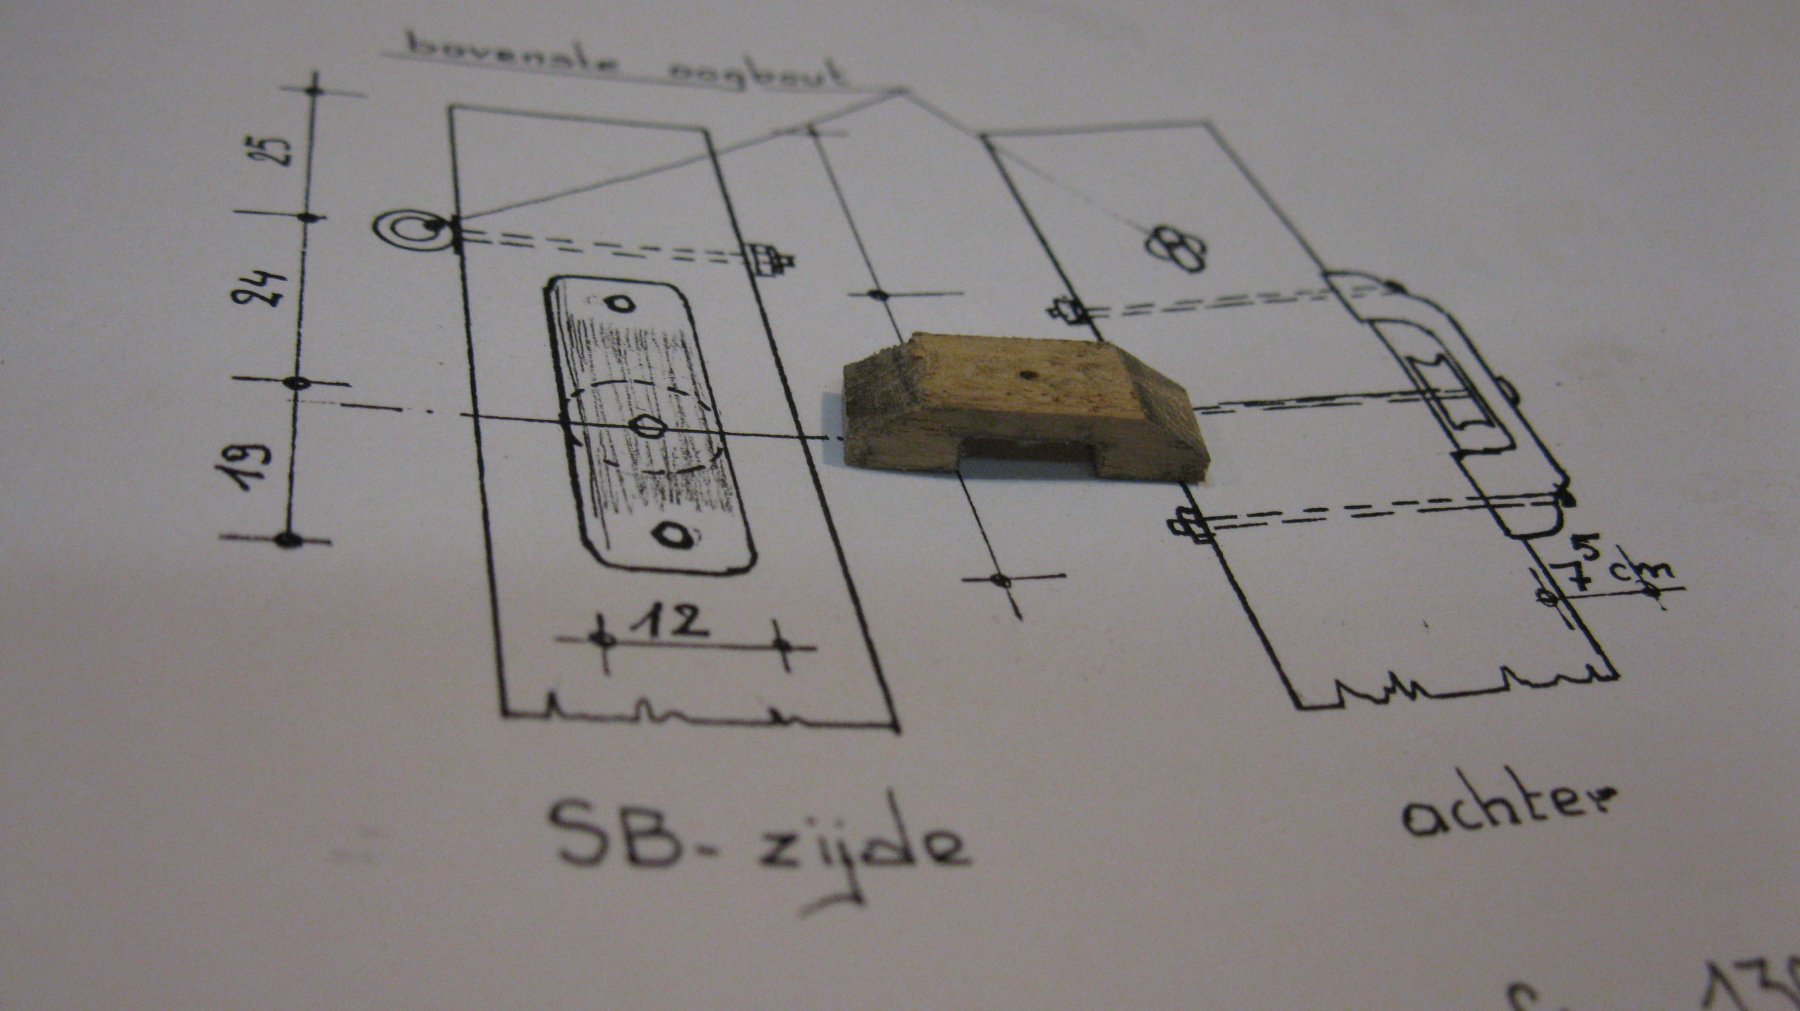
19.2.9 The mast sealing
The mast will have a leather sealing. I glue first some wooden blocks at deck height to simulate the mast wedges.

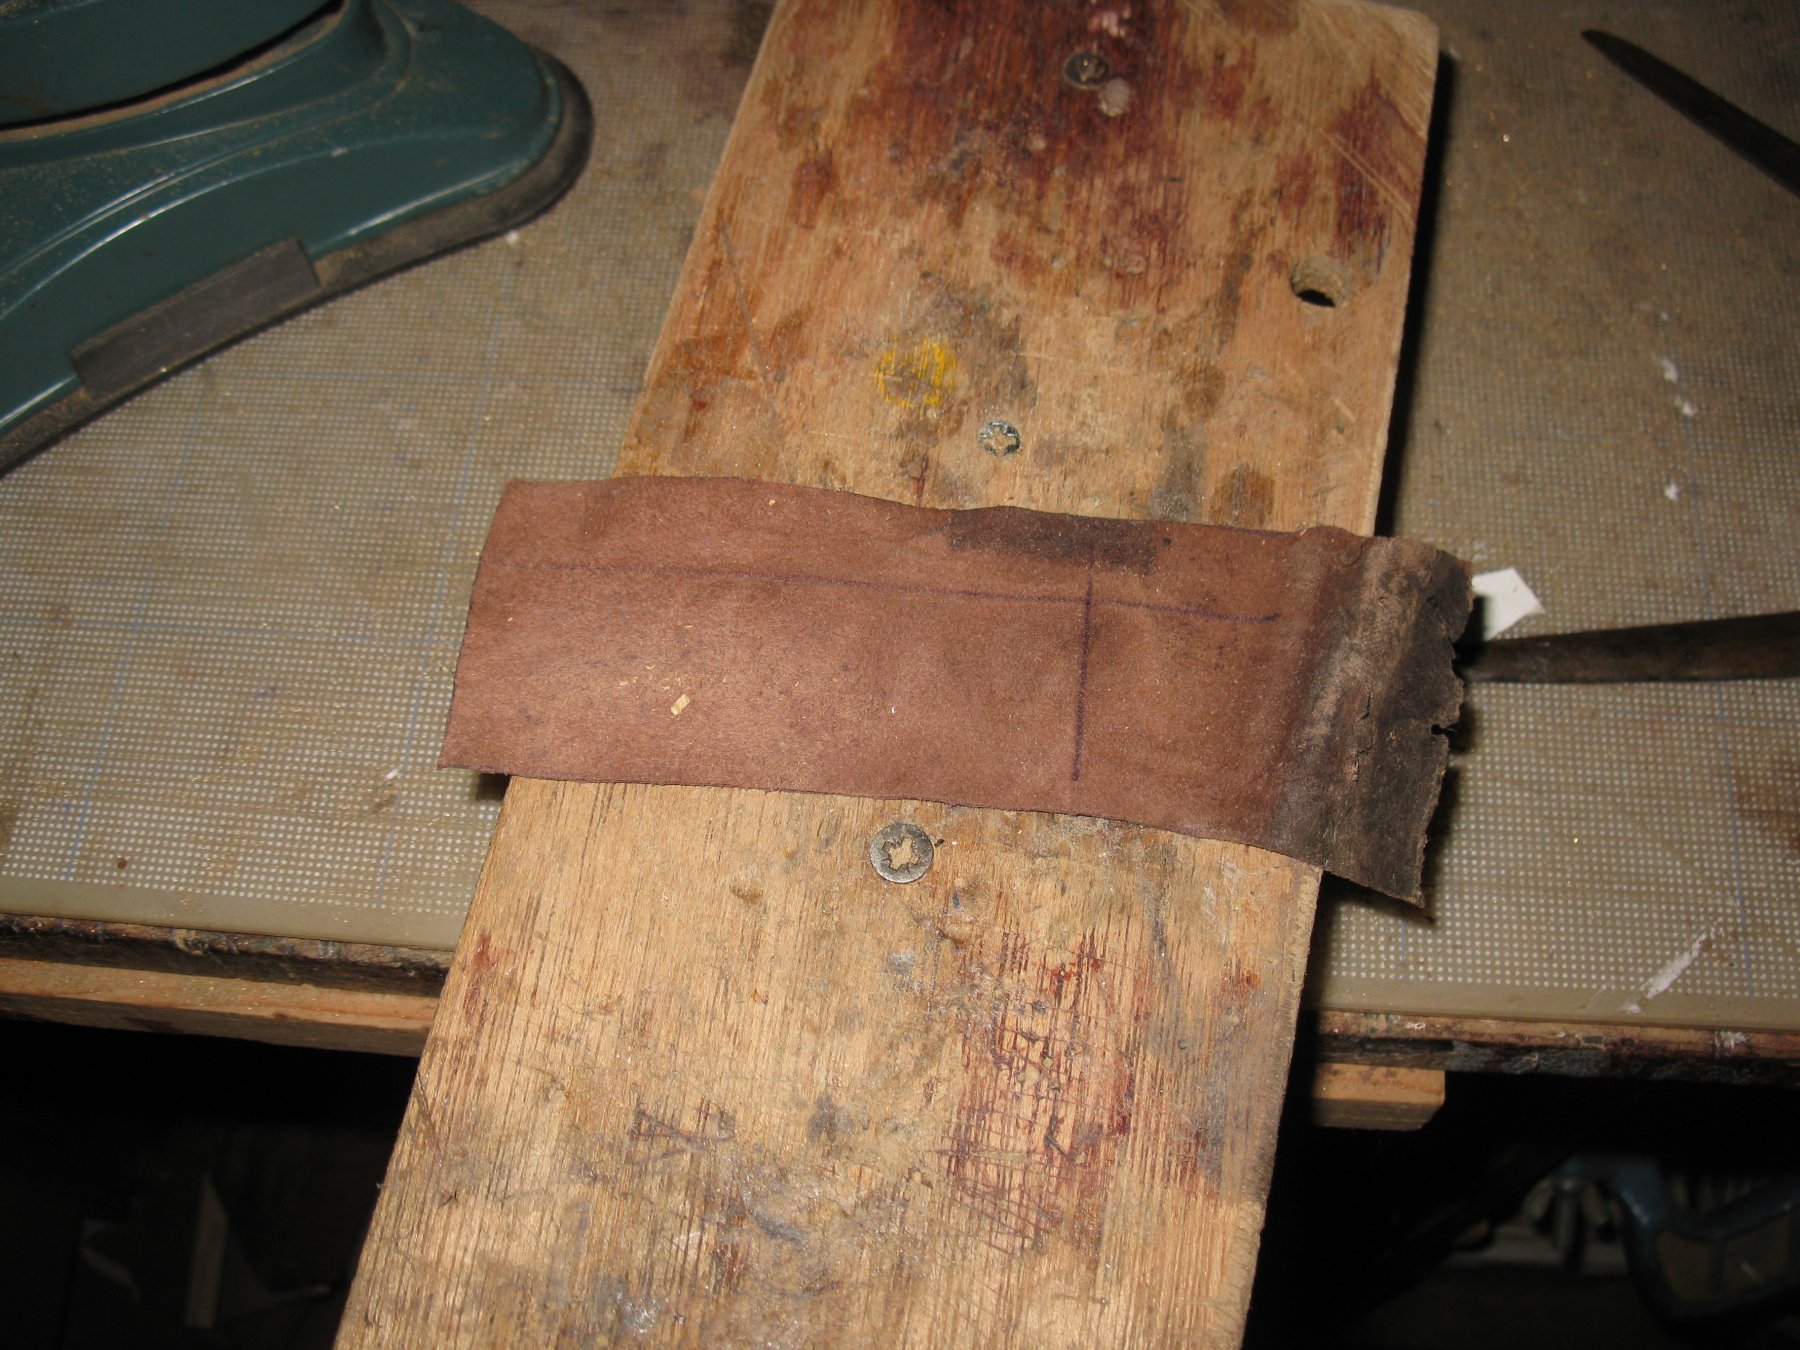
I cut a piece of the leather of an old discarded shoe.

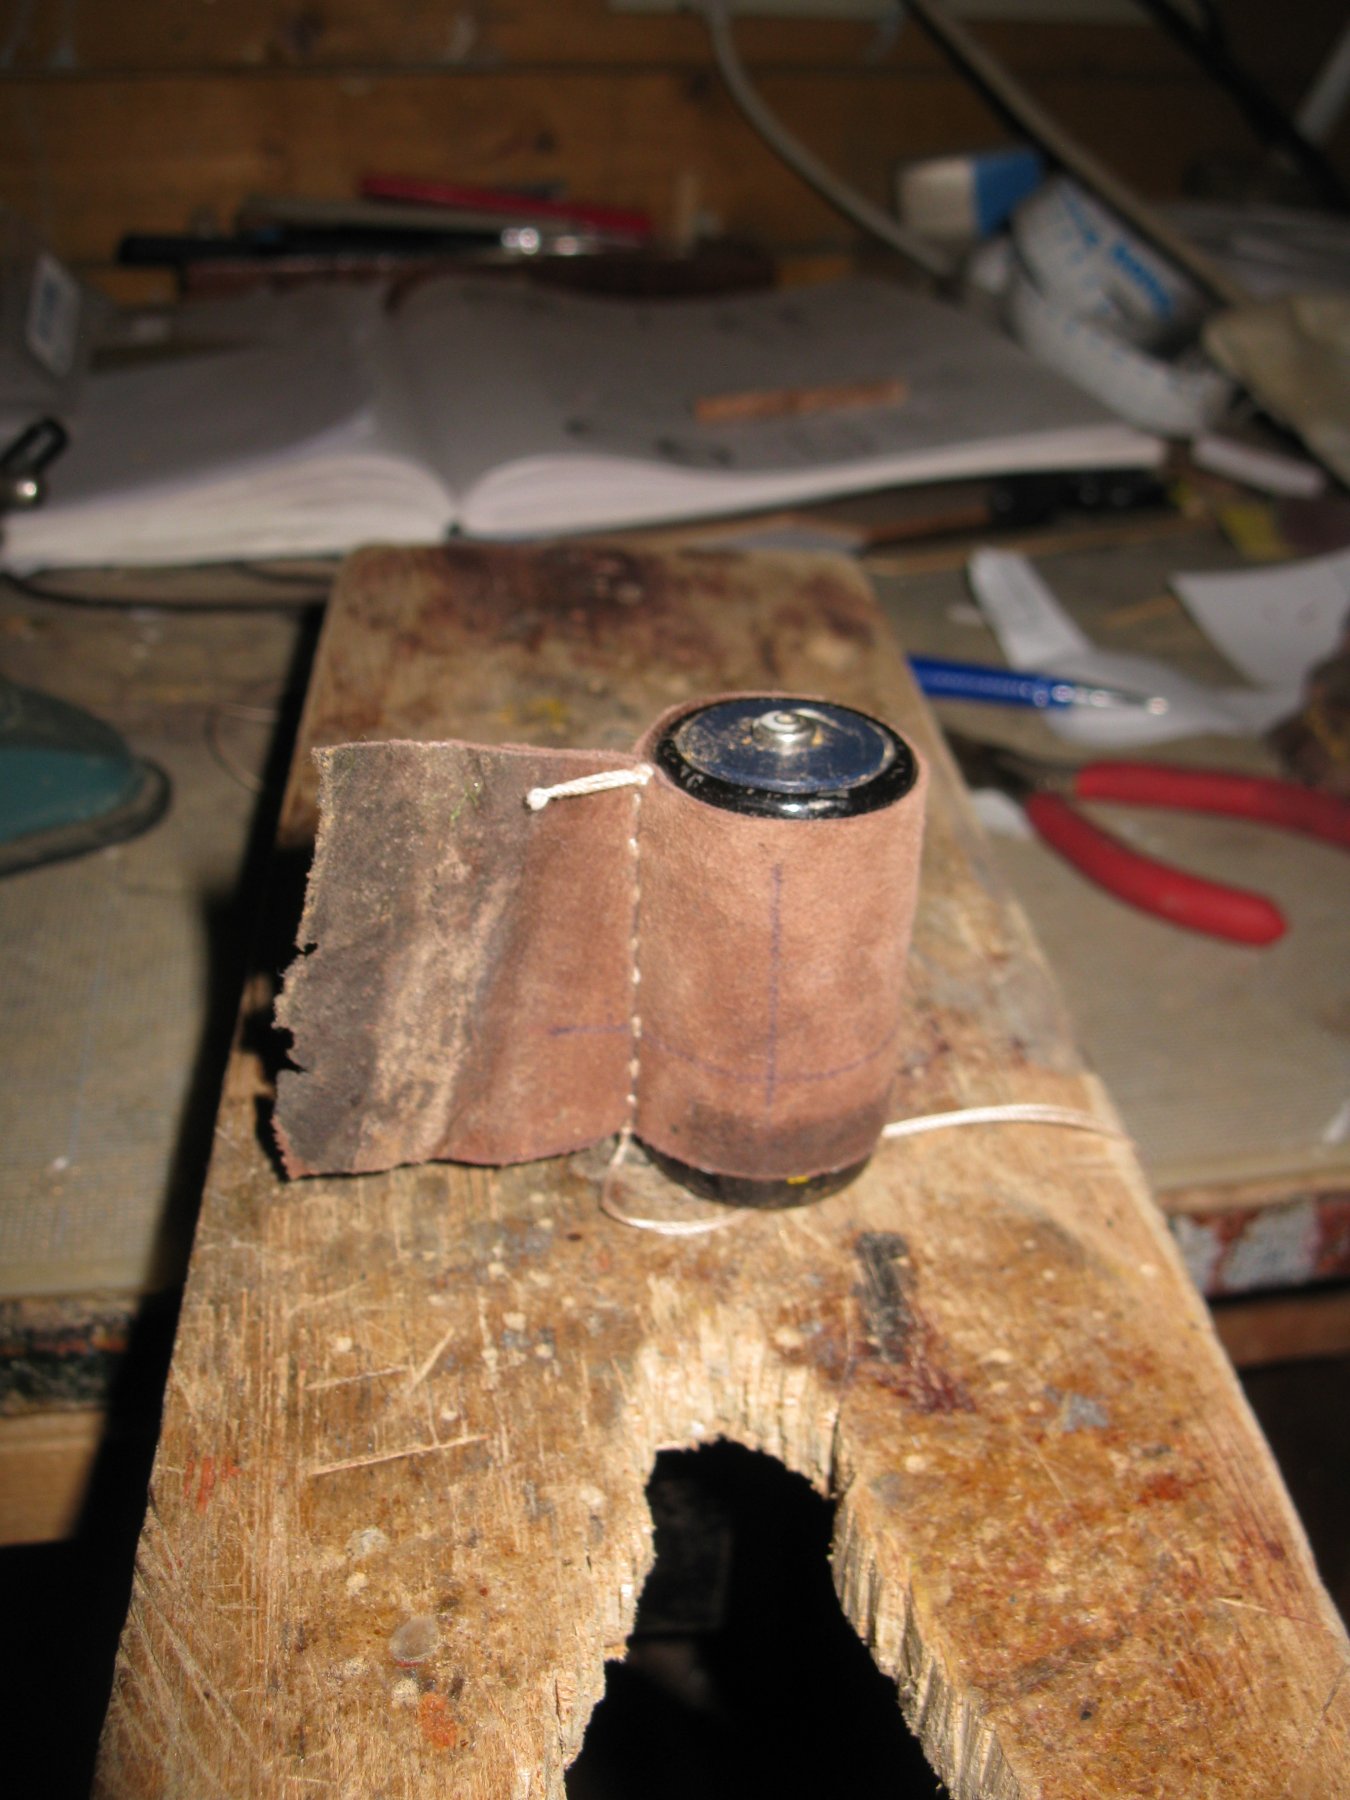
I sew a sleeve with it. I use a 1.5 Volt battery as jig.

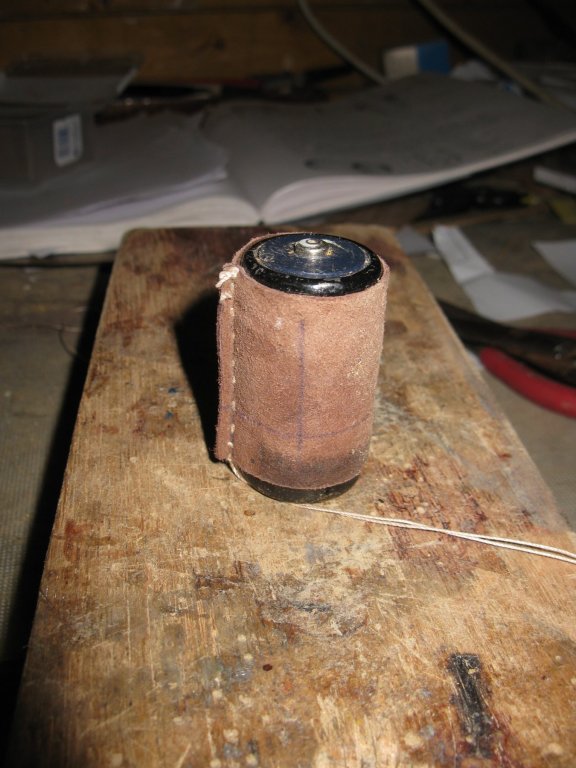
I slide the inside out turned sleeve over the mast...
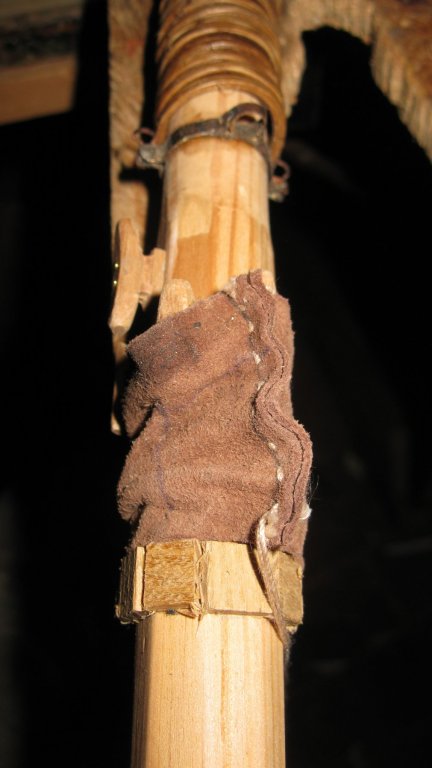
... tie it up just above the wedges and slide it down again.
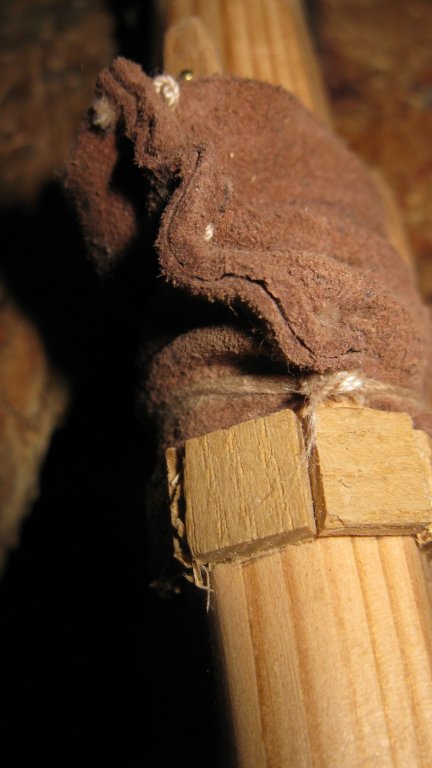
I tie it up again just below the first binding and again just above deck height. The binding is cut equal with the deck line.
-
19.2.9. Turtle block for the top gallant halyard
On top of the mast the is a turtle block though which goes the top gallant halyard. I make first the sheave.

Making the block

The block into its place.

- Moab, GrandpaPhil, mtaylor and 4 others
-
7
-
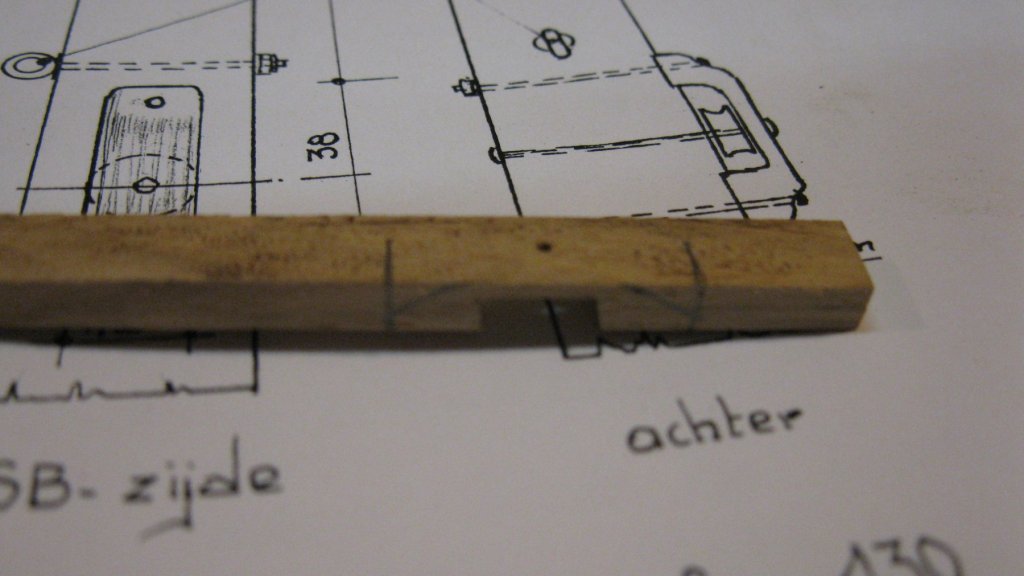
19.2.8 The mast cap
The avoid that the mast cap can turn around, the forward side of the mast top is flattened.

The making of the mast cap.

The mast cap into position, not yet definitively because it will have to be removed during the rigging of the shrouds

- mtaylor, FriedClams, Moab and 3 others
-
6
-
-
-
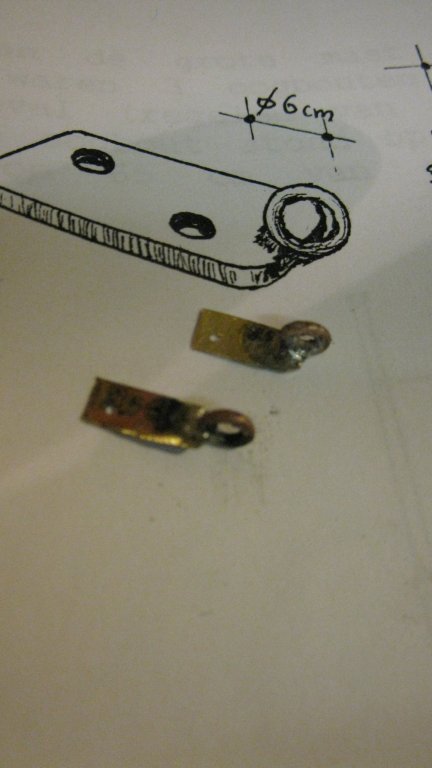
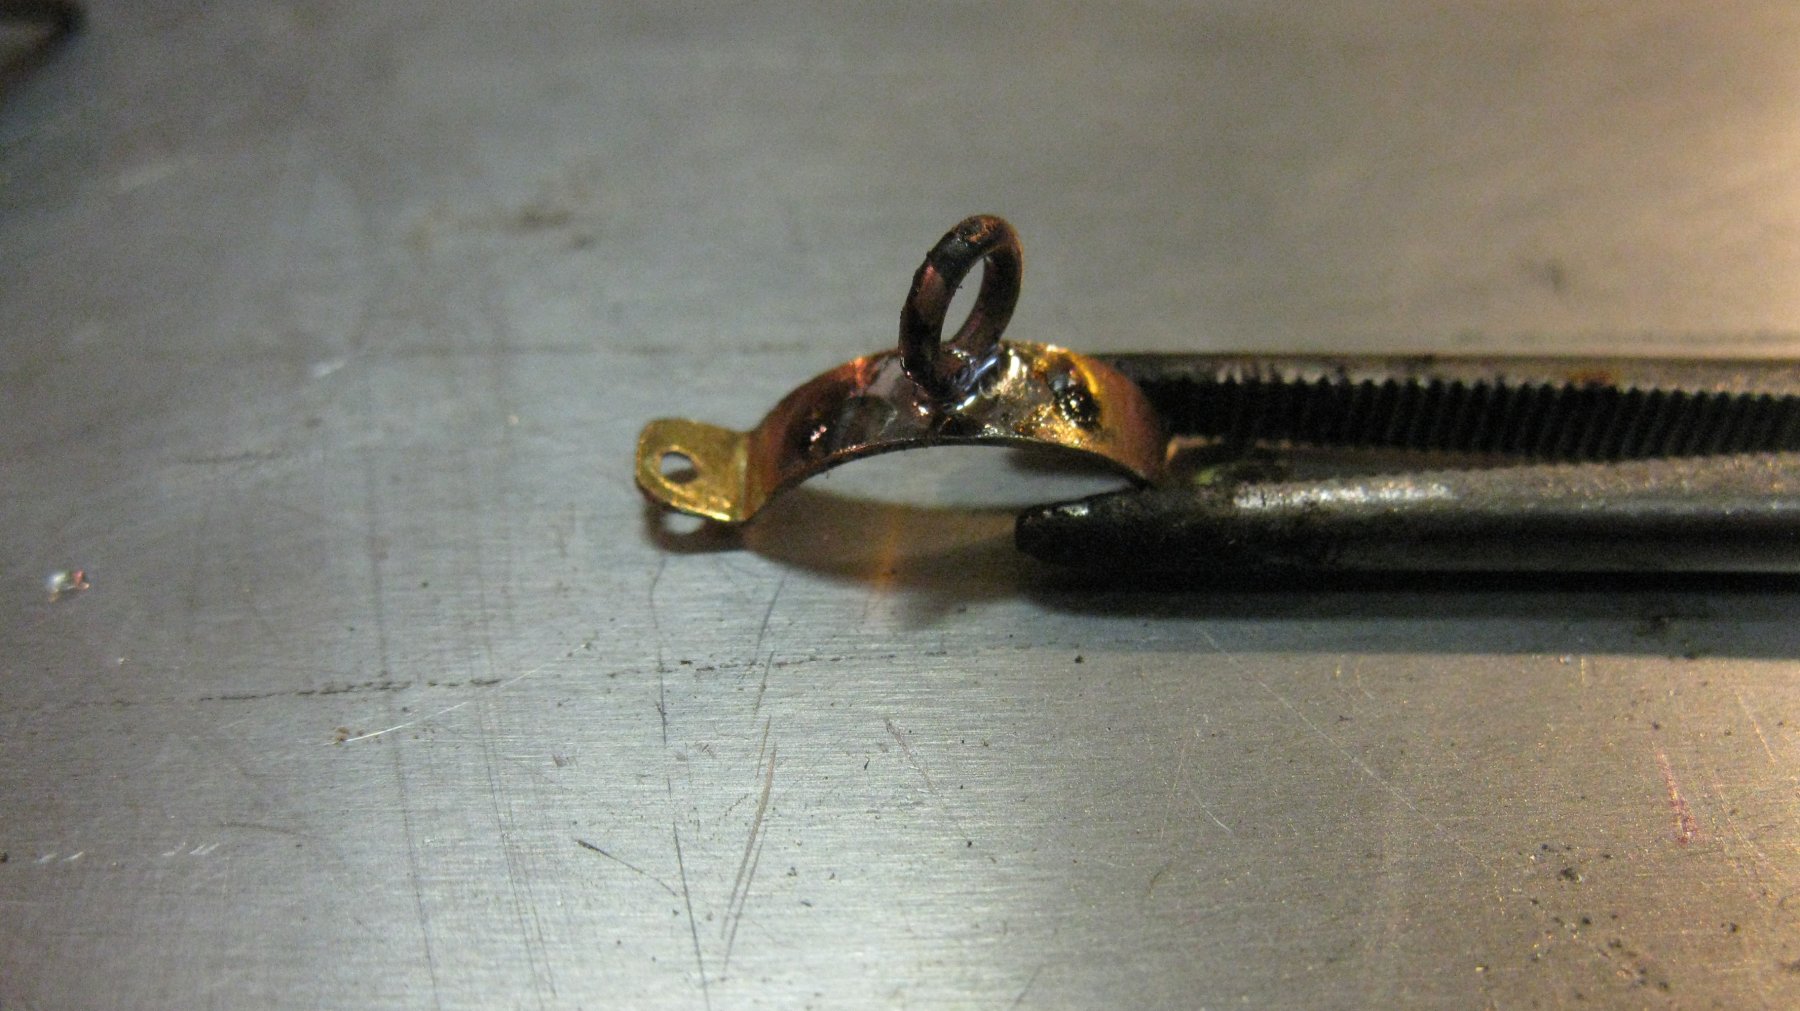
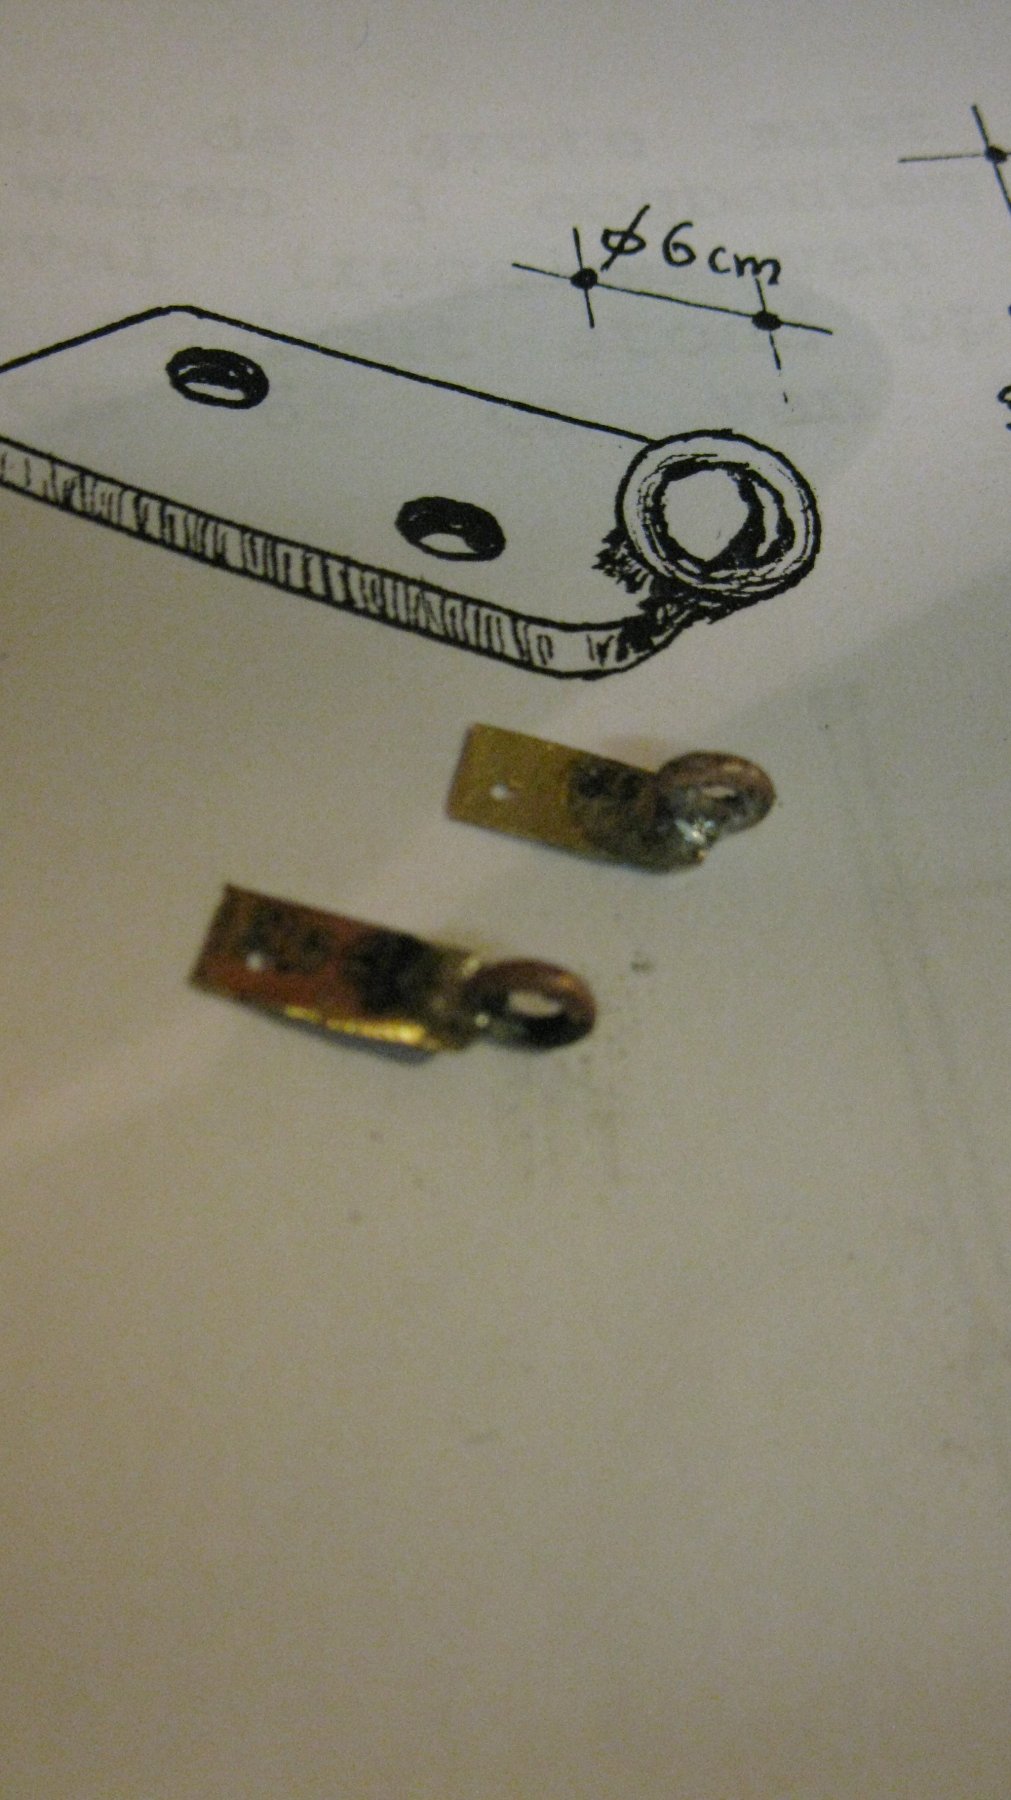
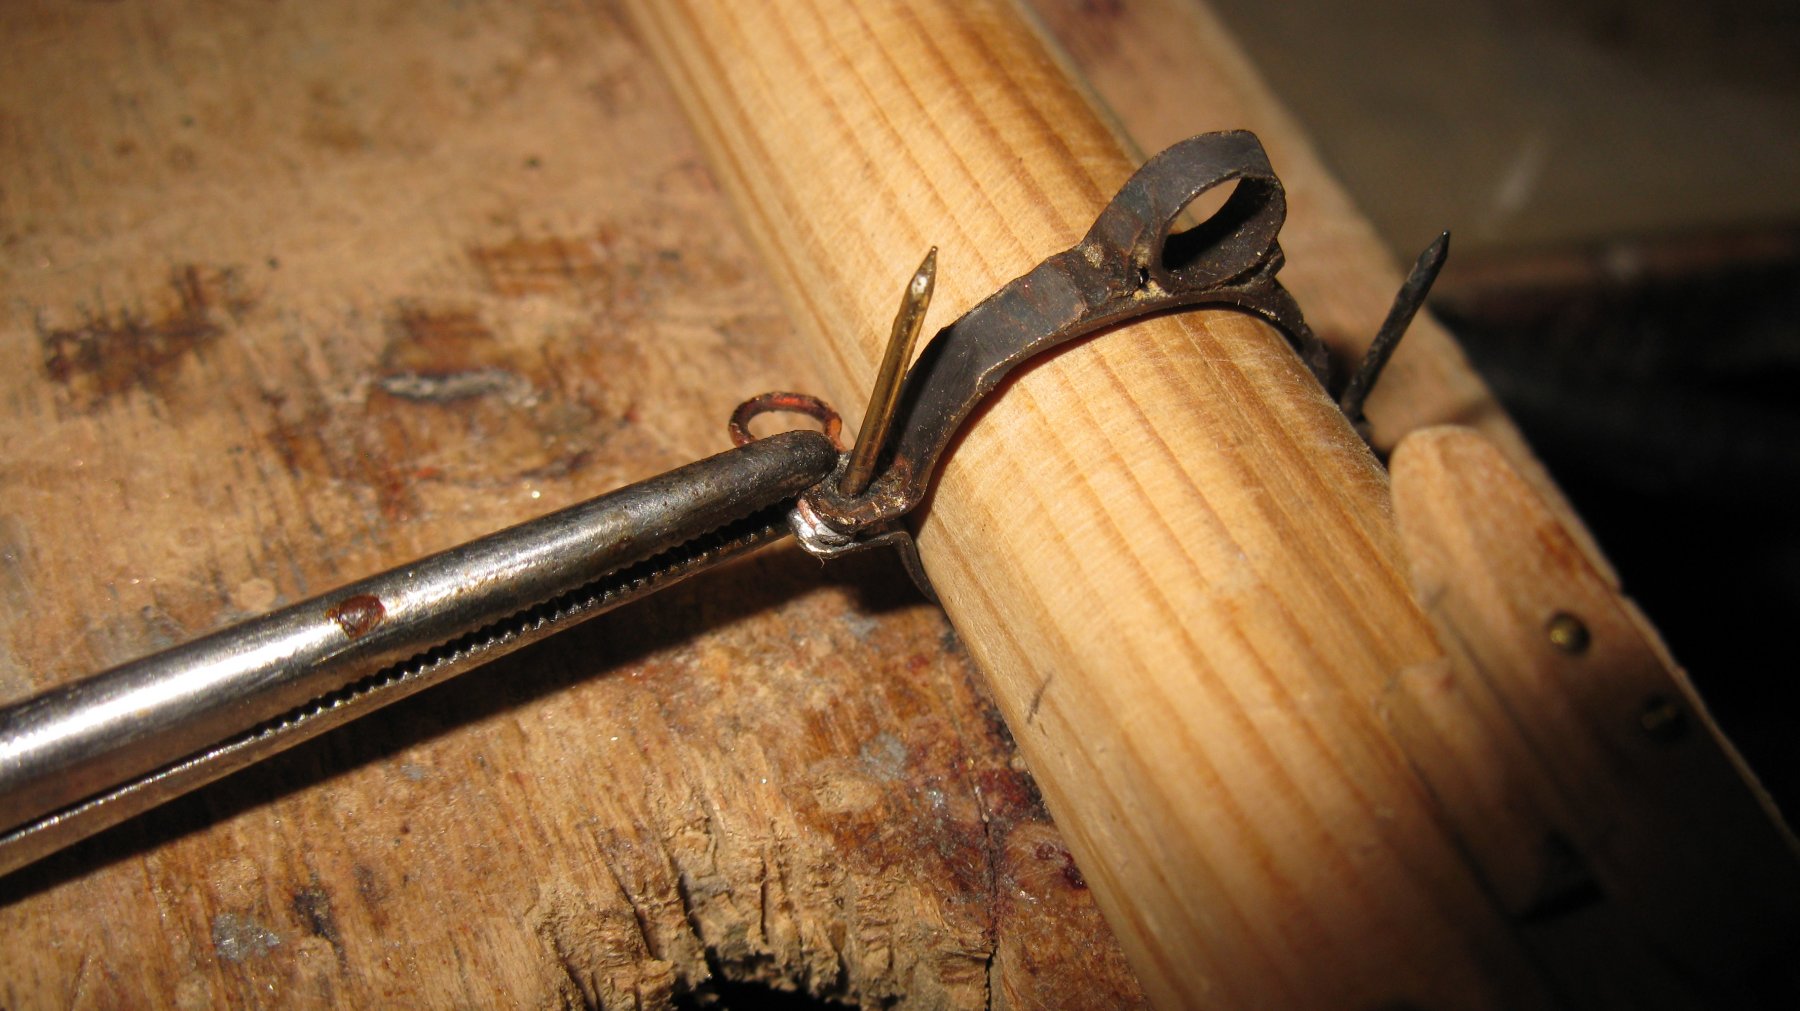
19.2.5 Finishing the hound pieces
On each of the hound pieces there is a ring for a block. At starboard side for the crane line, at portside for the trawl warp.

- FriedClams, MikeB4, mtaylor and 5 others
-
8
-
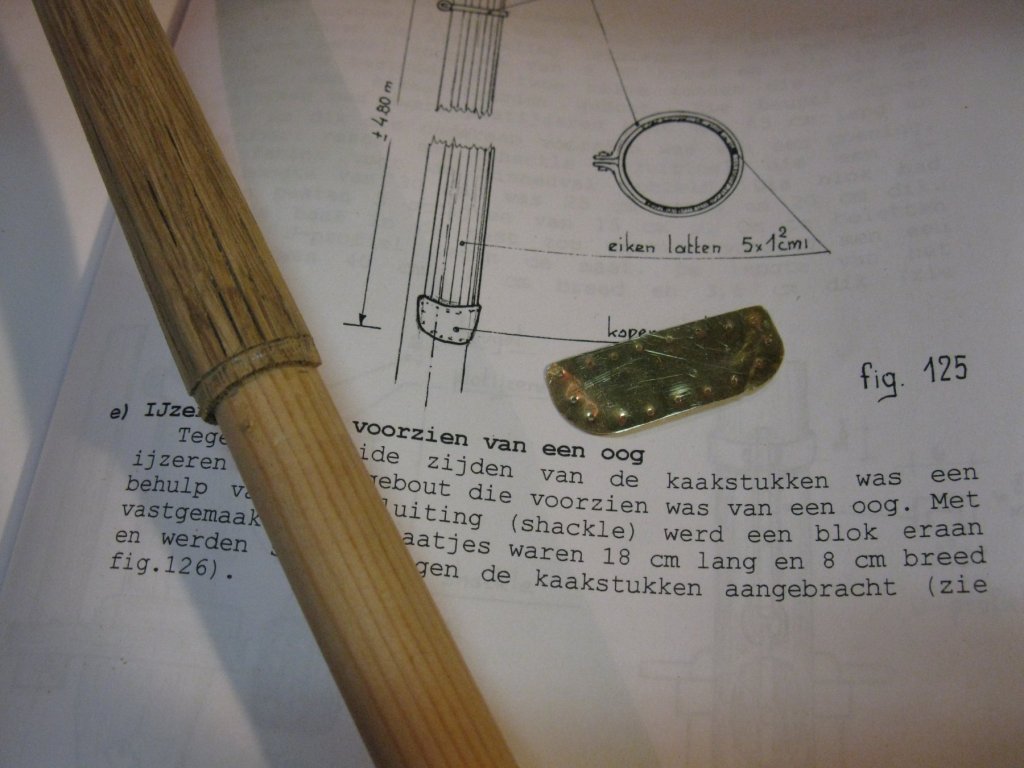
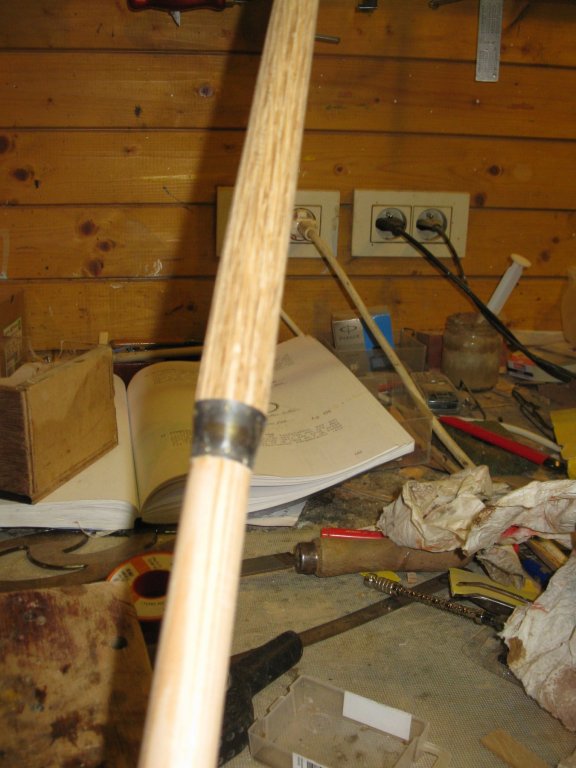
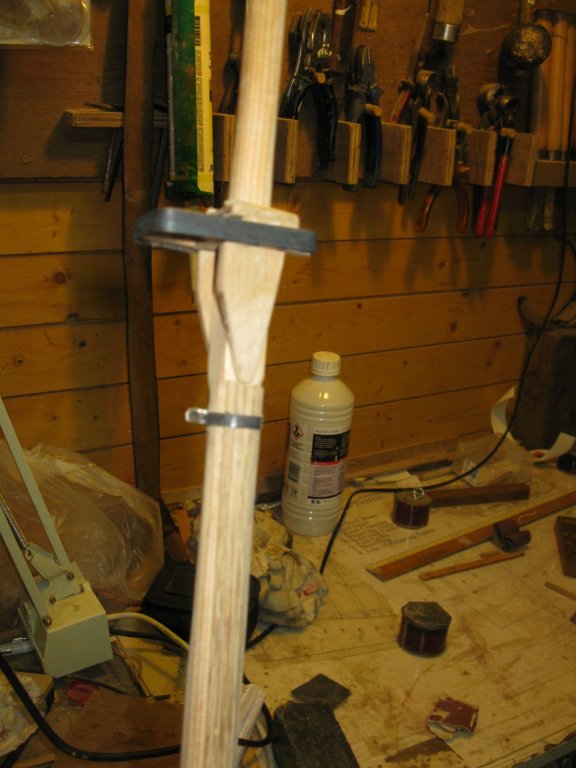
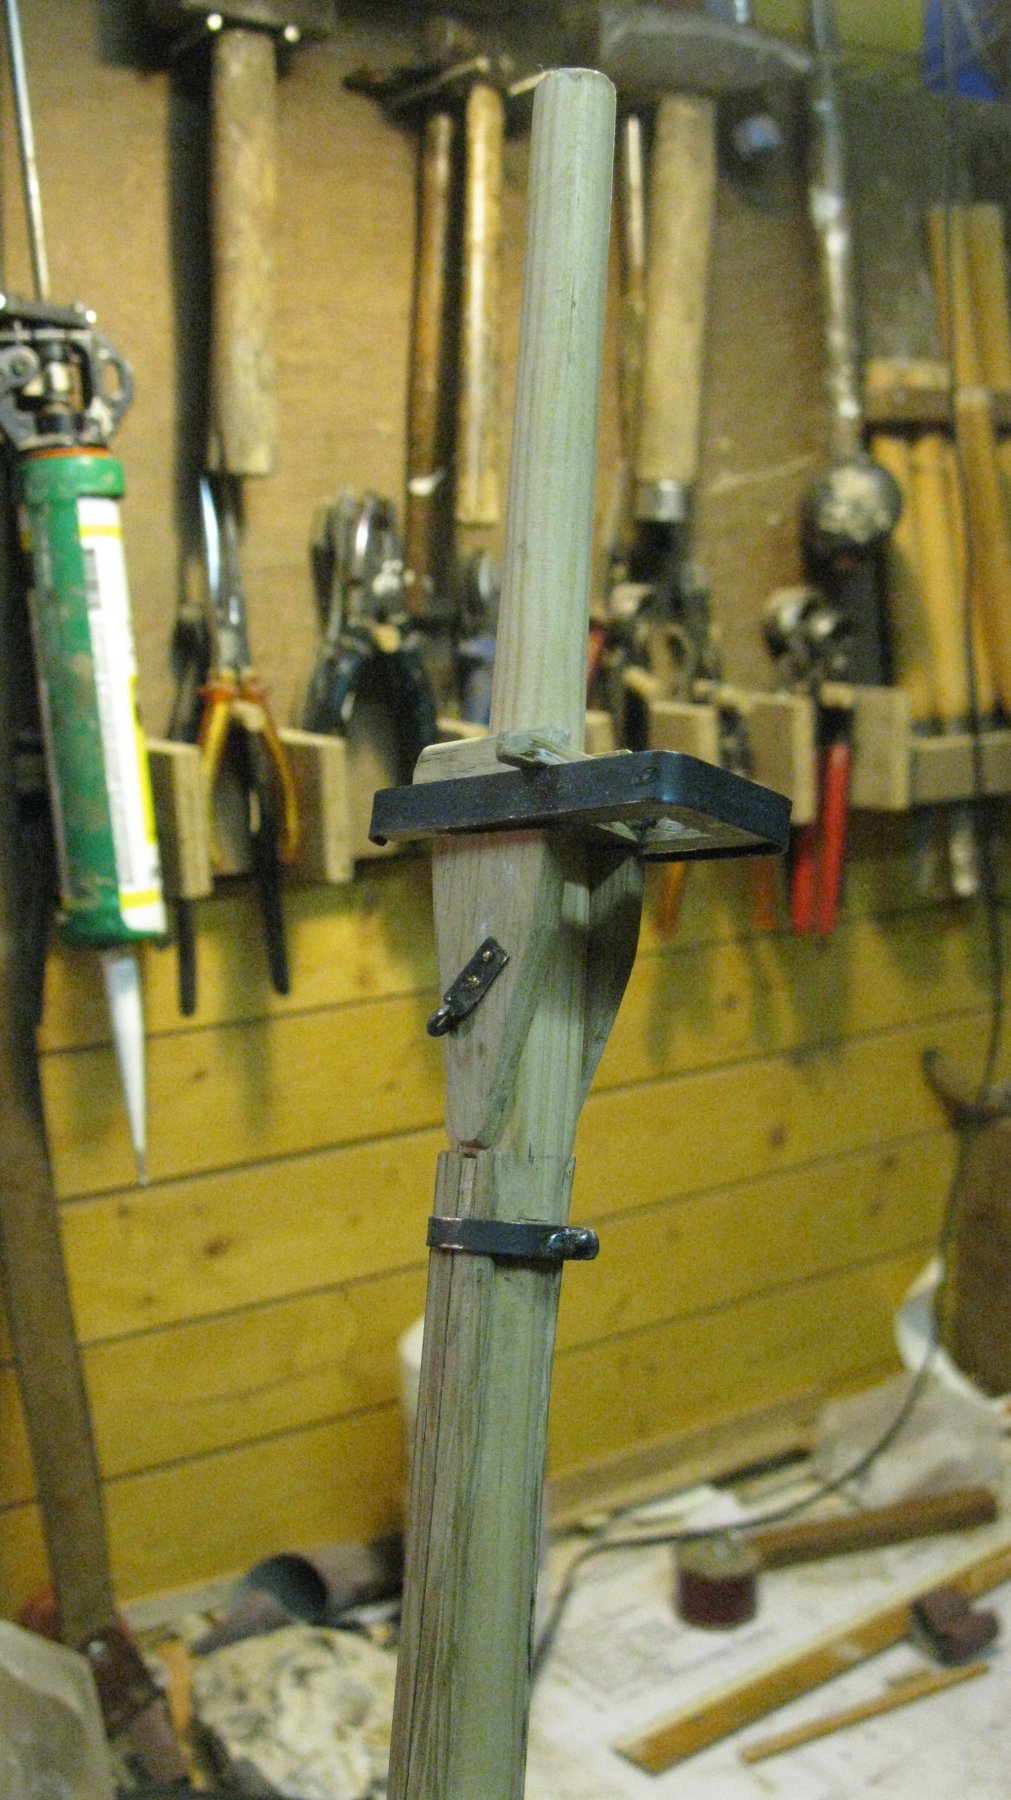
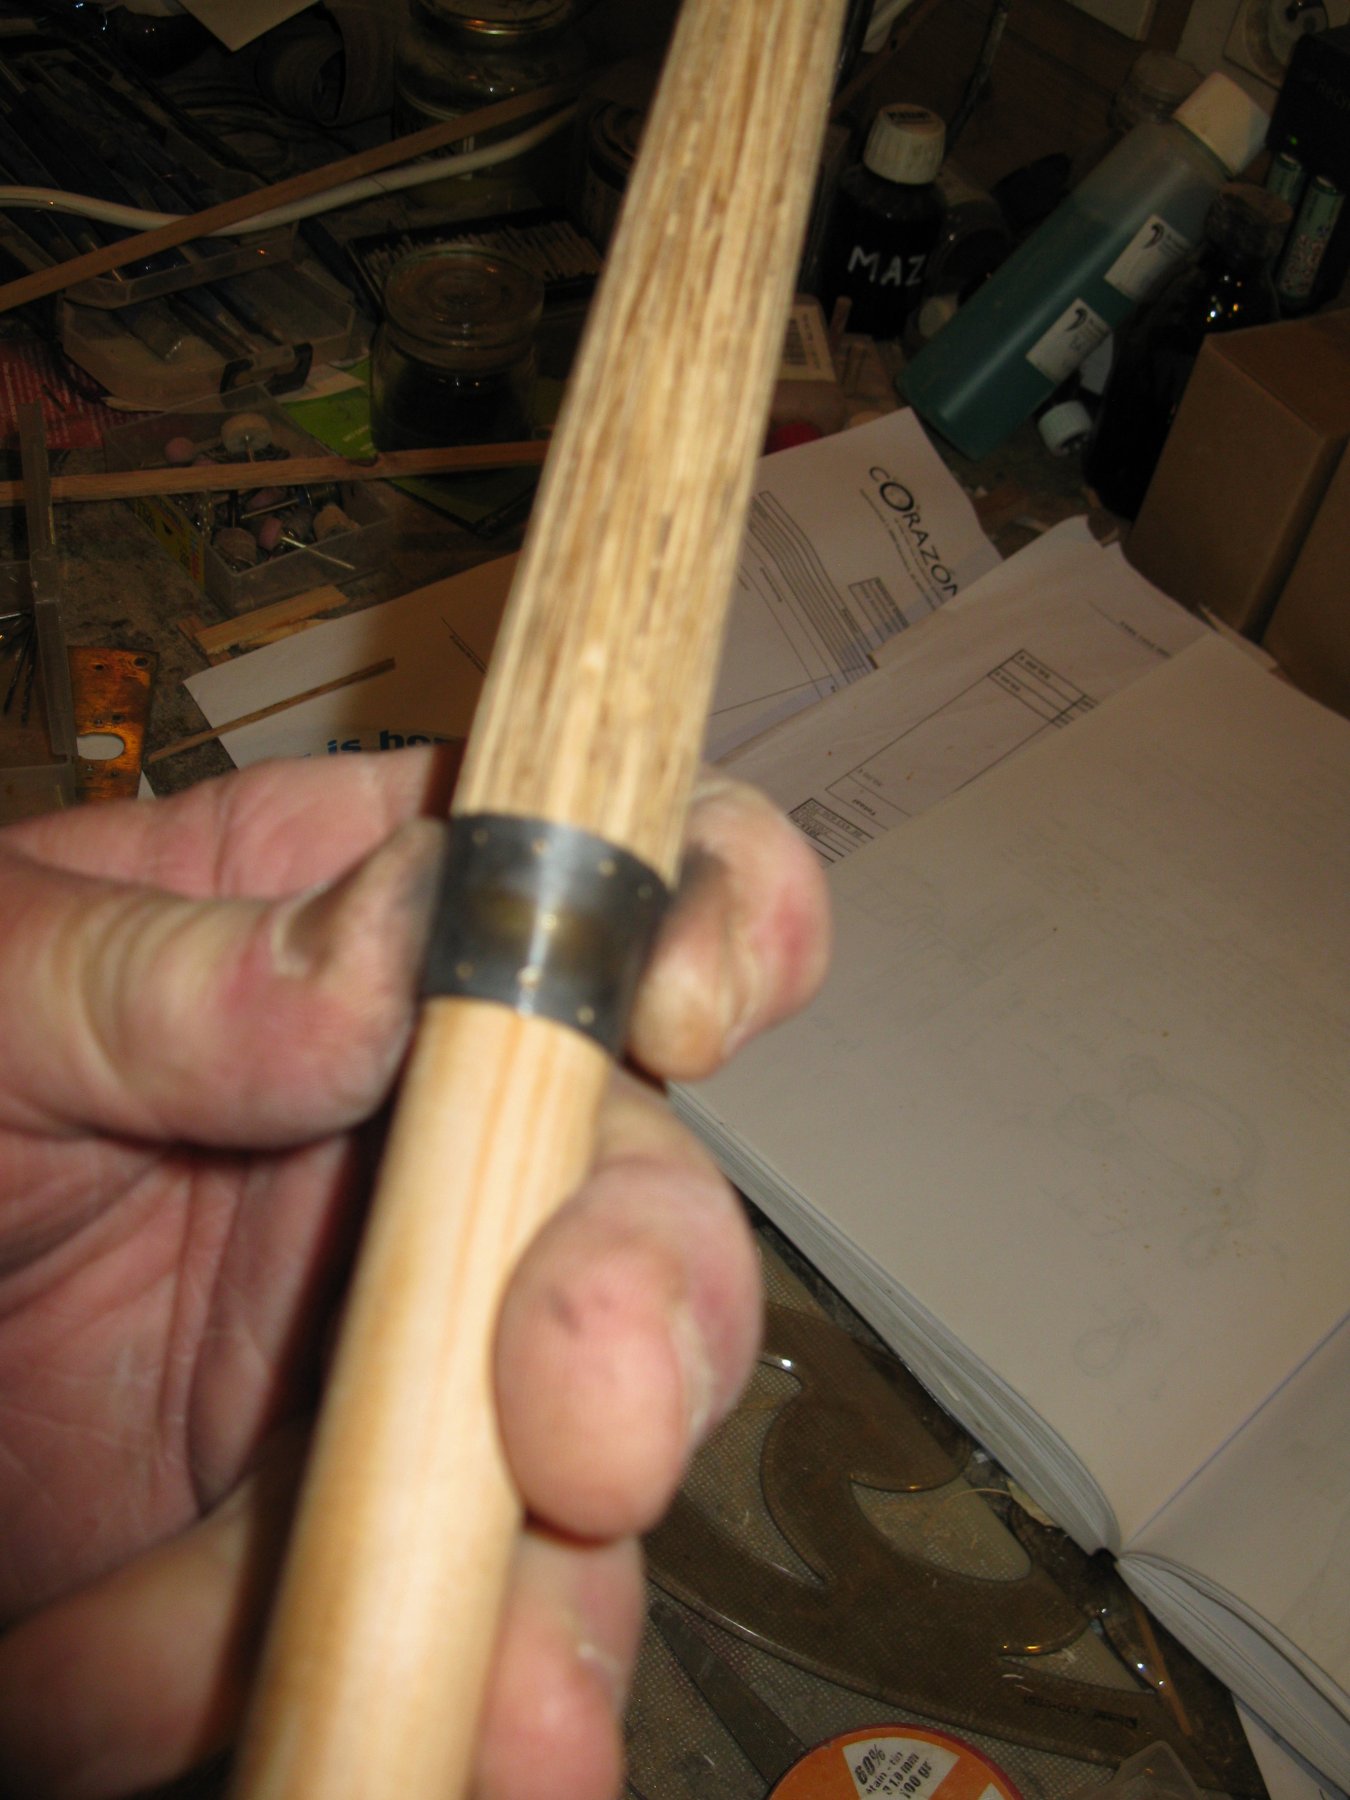
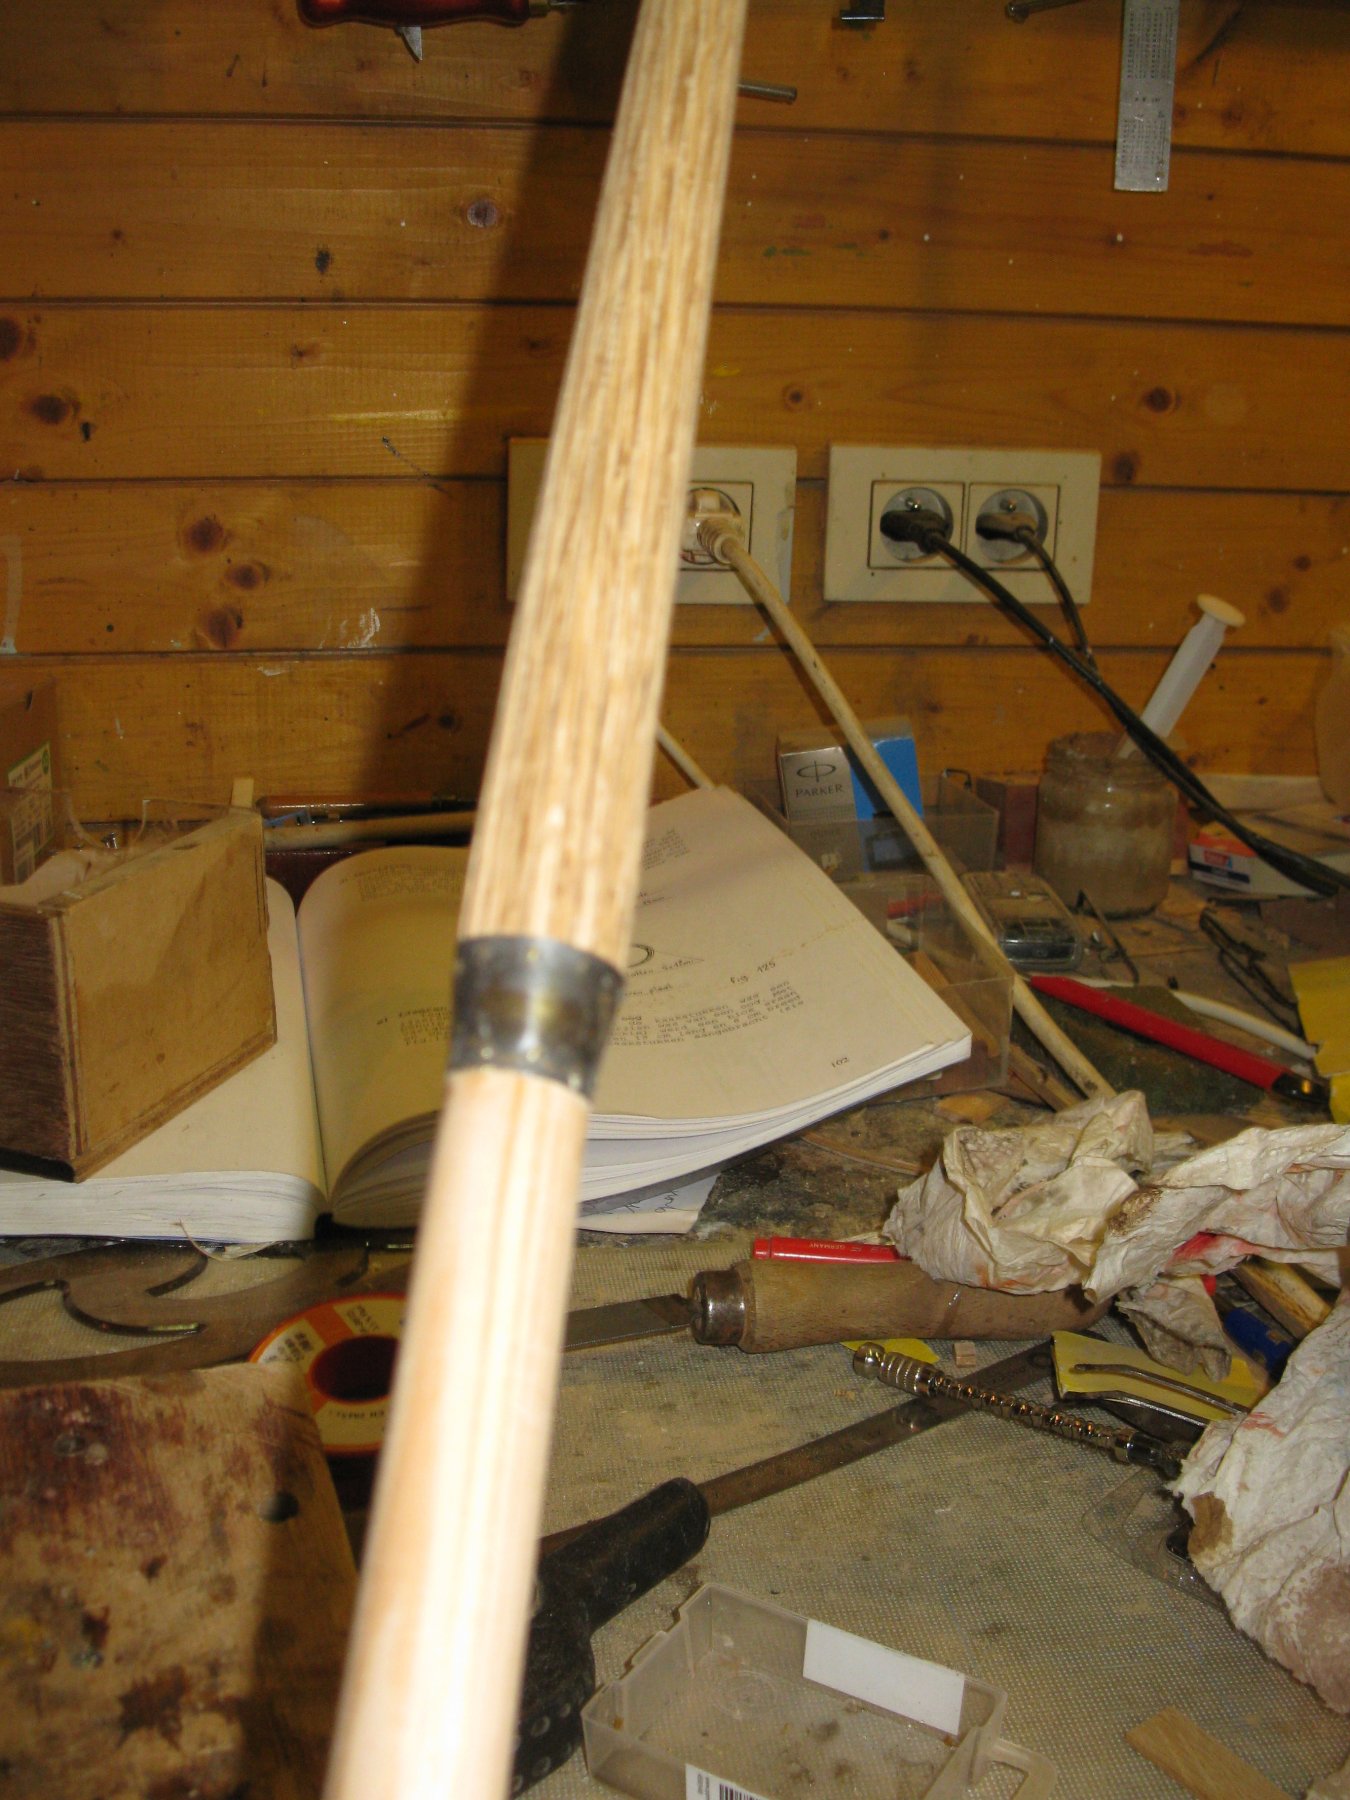
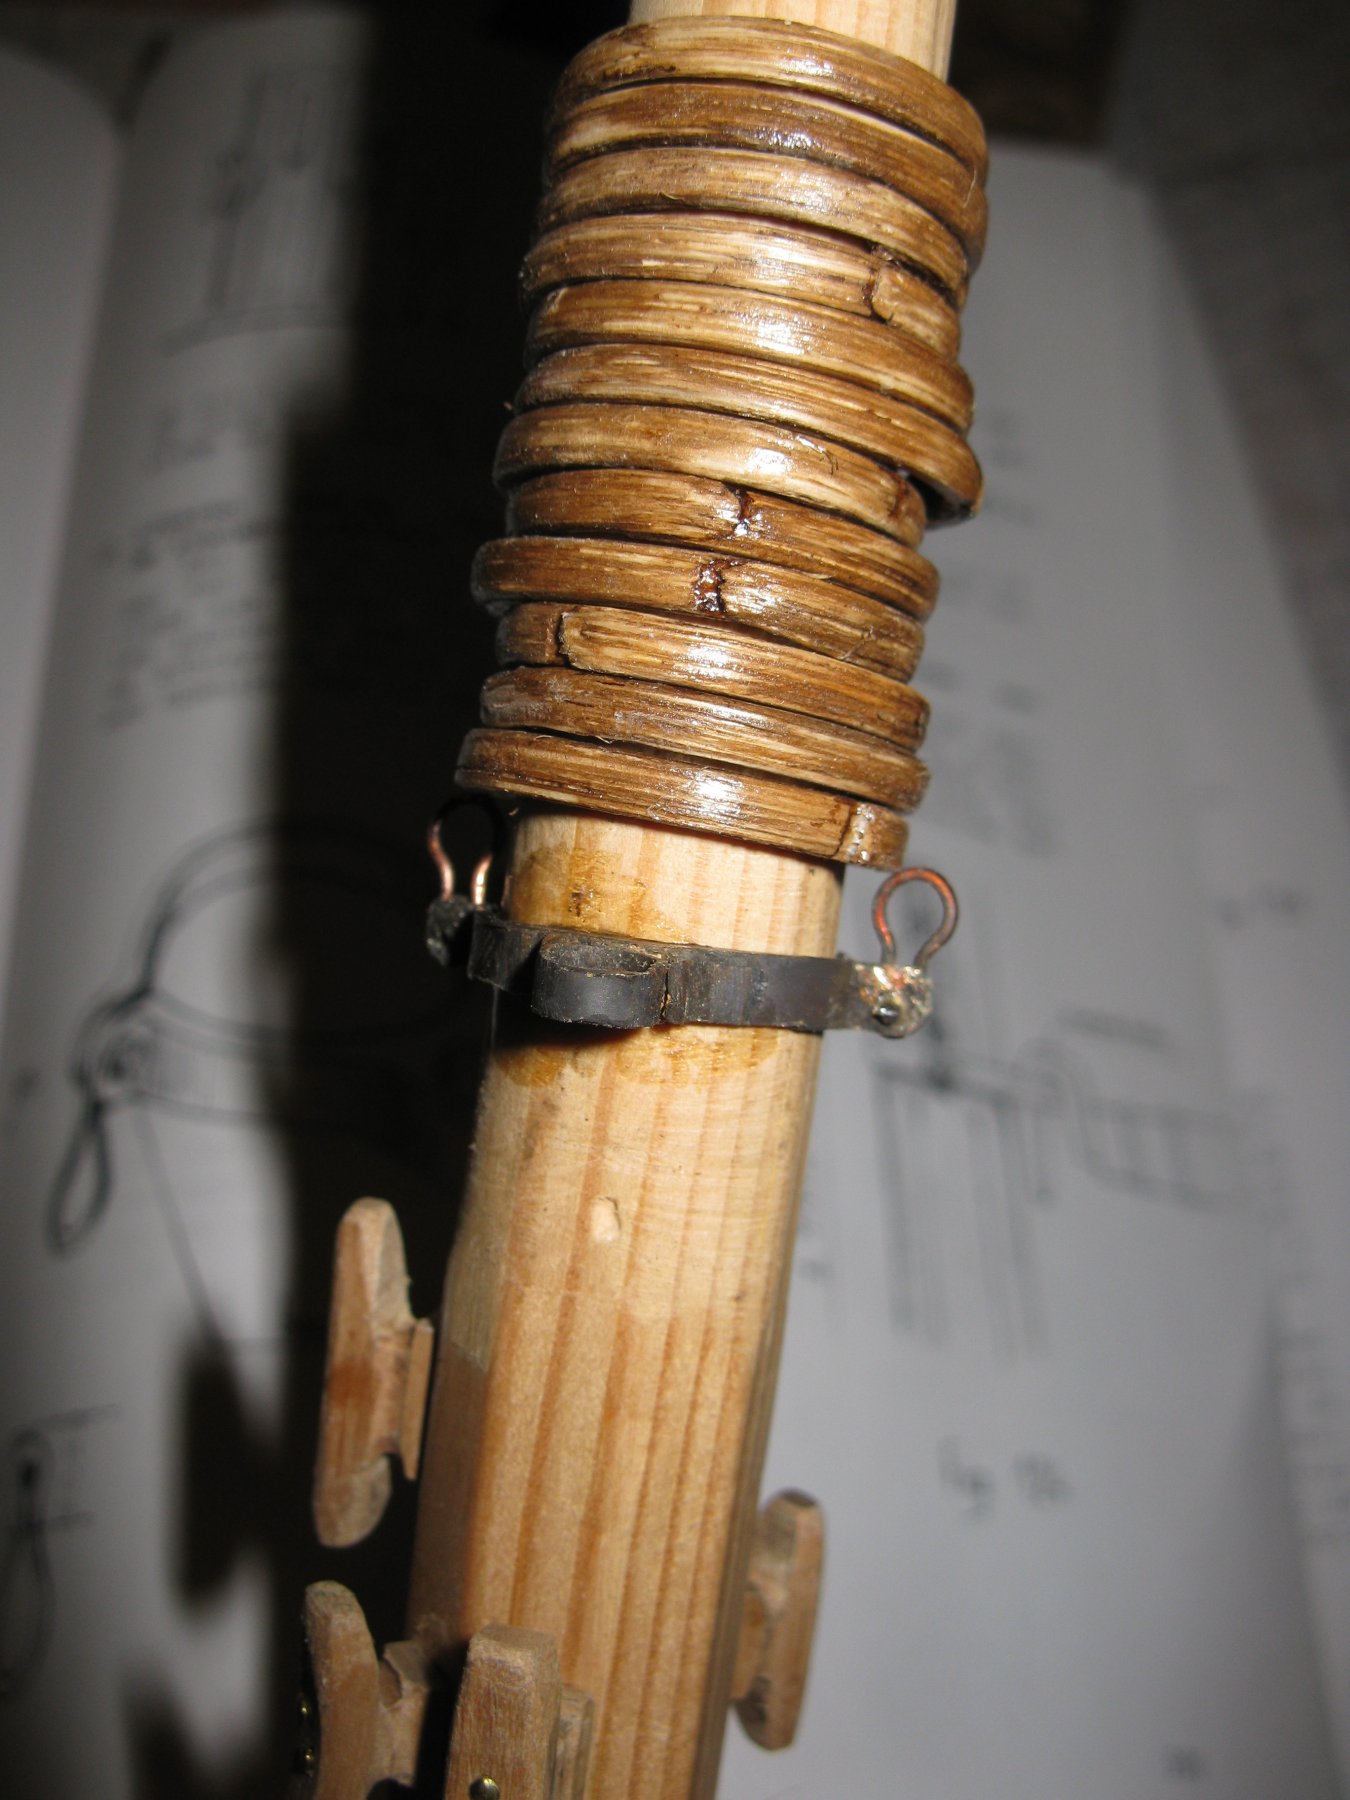
19.2.4 The Mast slats
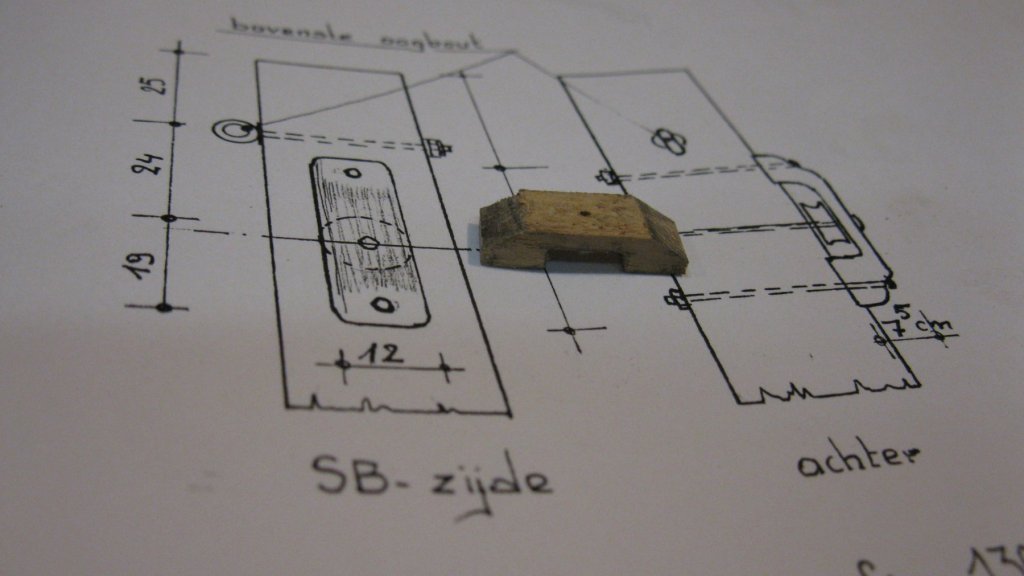
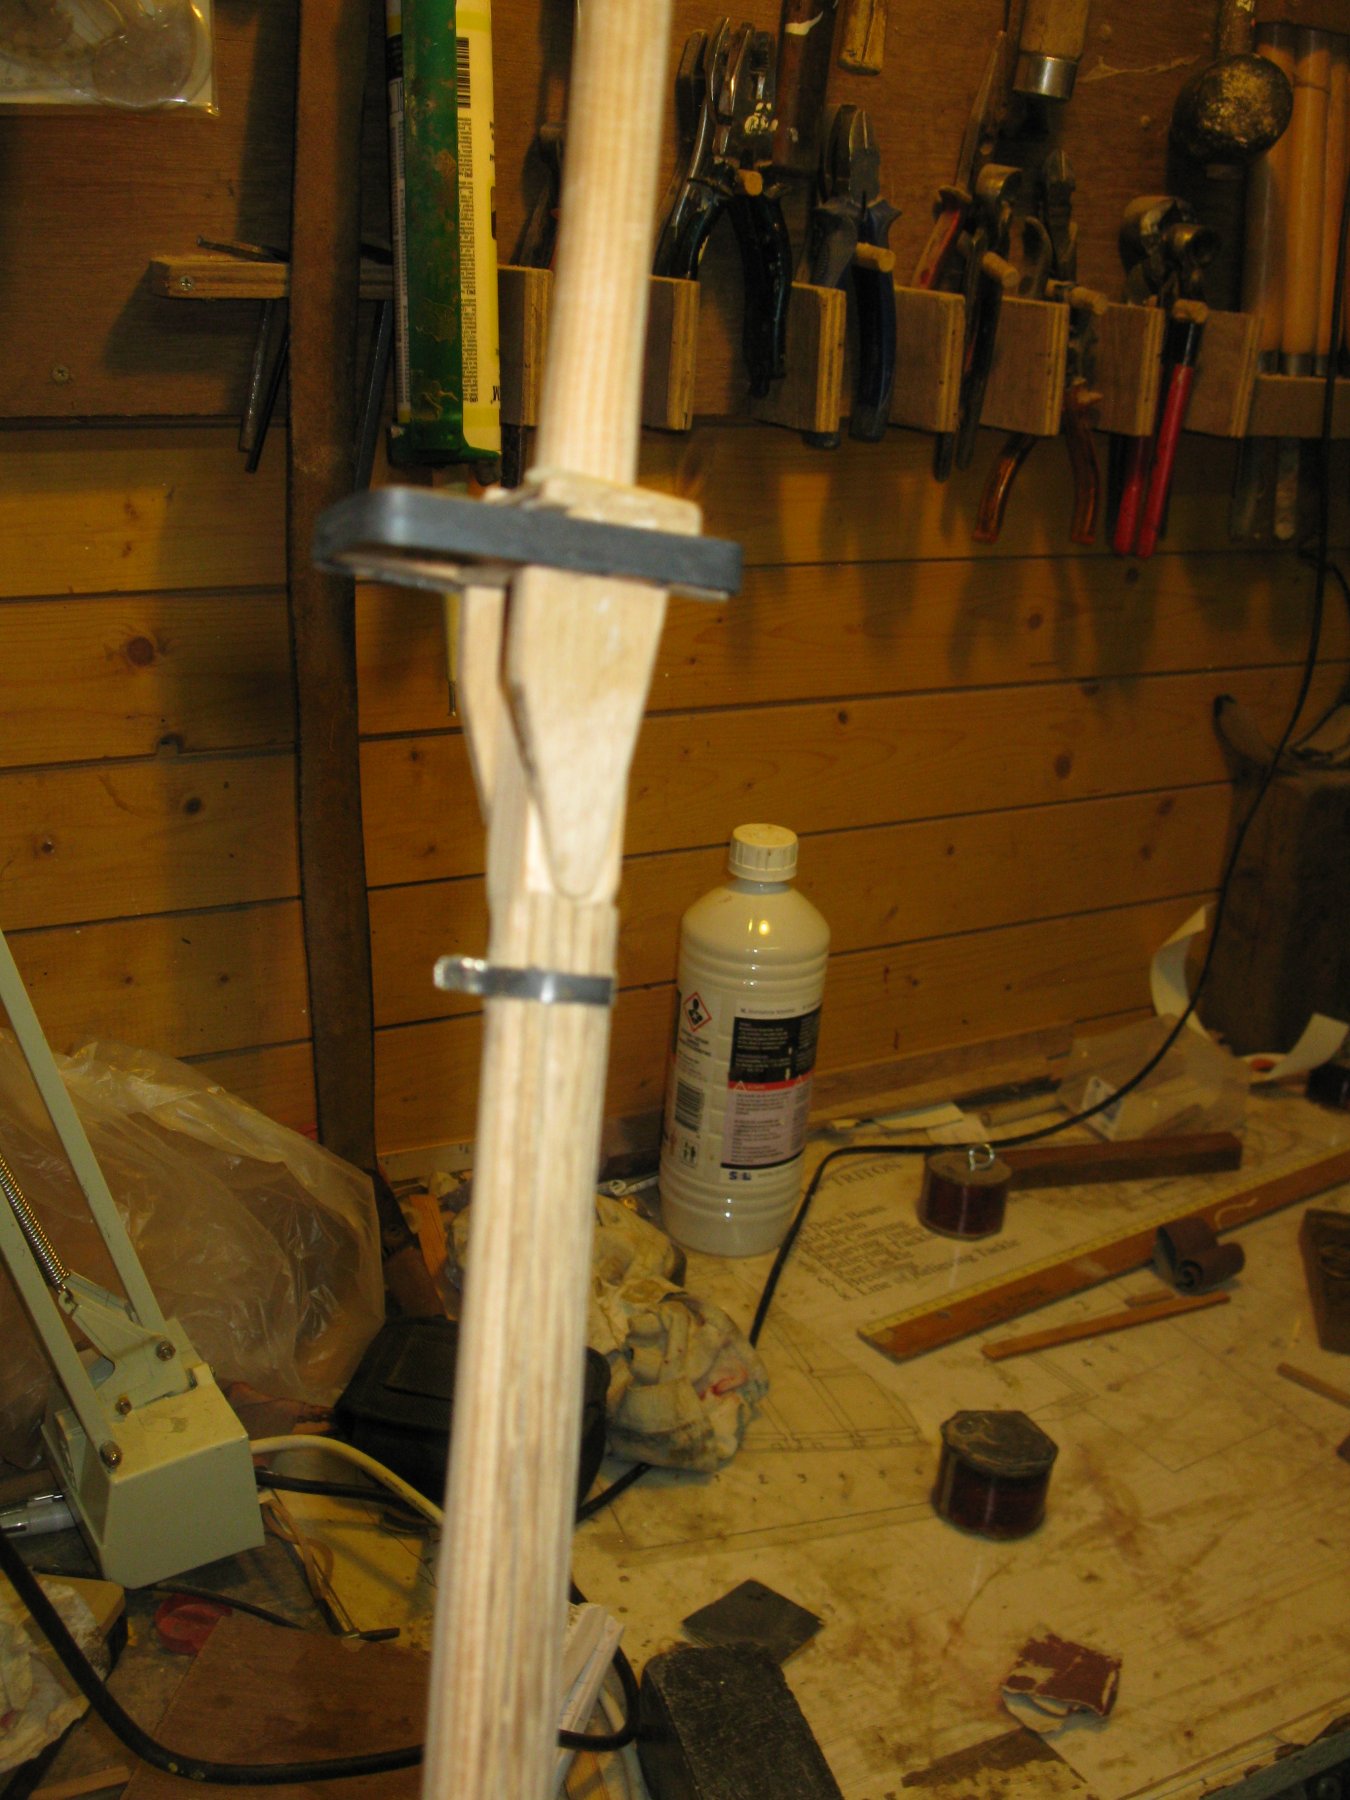
The back of the mast was protected by a series of oak slats for the rubbing of the gaff jaws. The slats extend from the upper position of the gaff jaws to the lowest reef position. At the top they were kept together by a steel ring, at the bottom by a copper plate.
Gluing the first slat.

All the slats into place.

Making the copper plate. At the bottom of the slats I made a groove for the plate.
Fitting the plate.

Plate nailed into place, seen from behind.
Seen from the side.
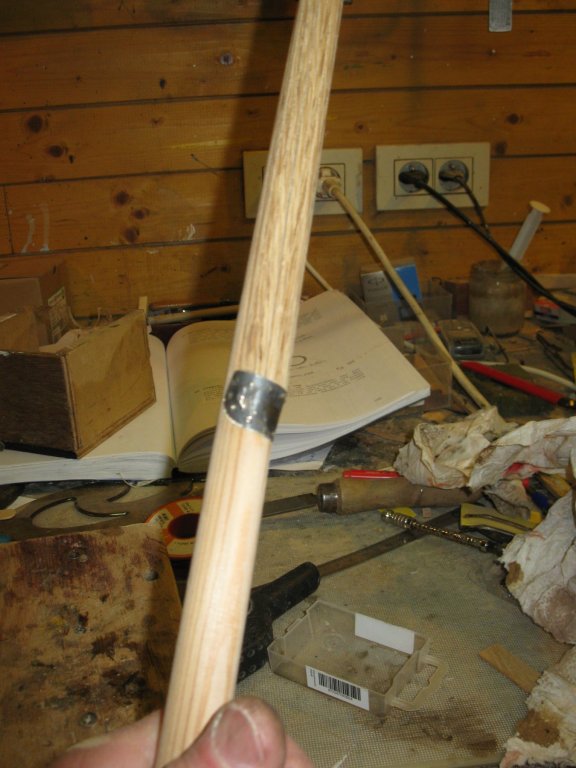
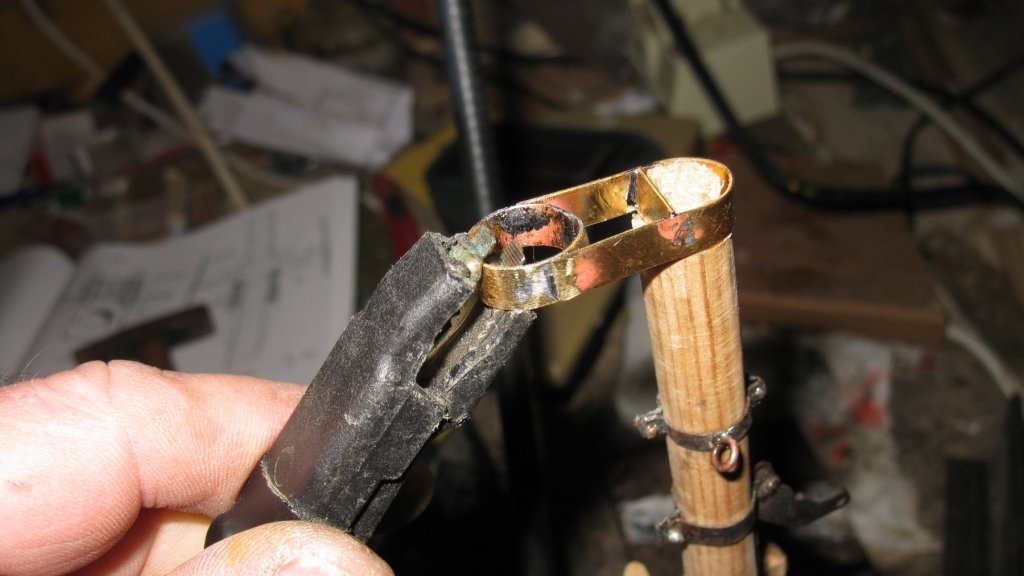
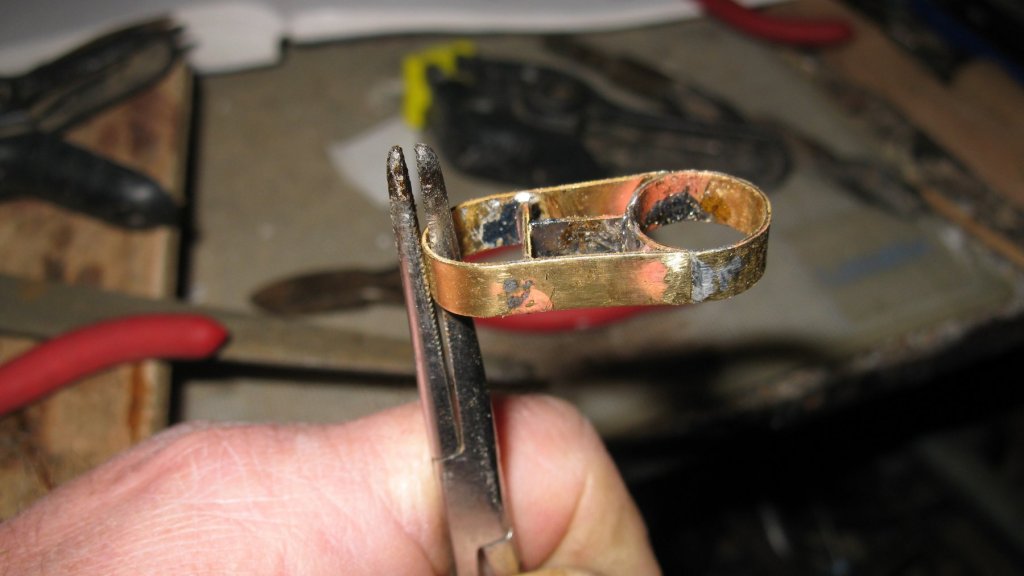
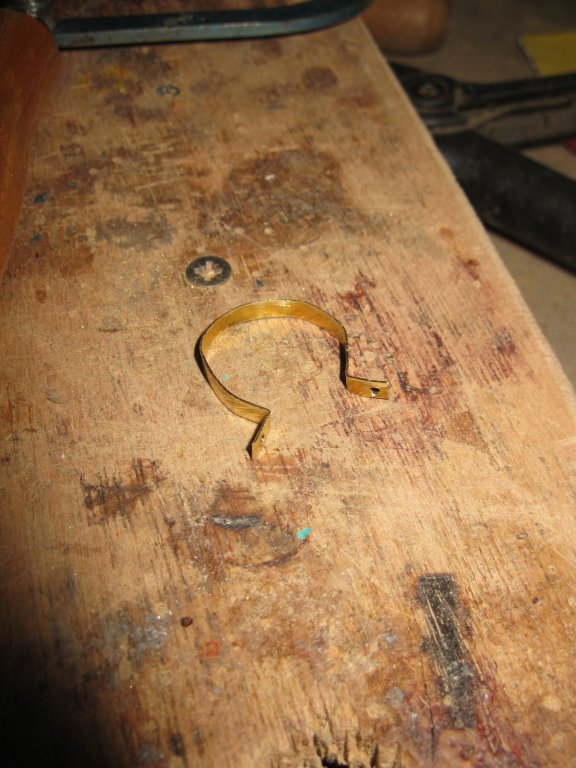
Making the steel ring out of brass.
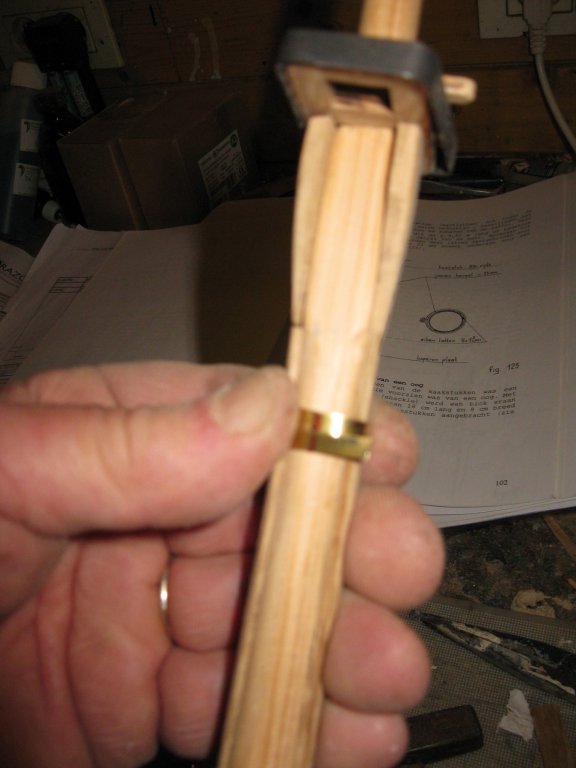
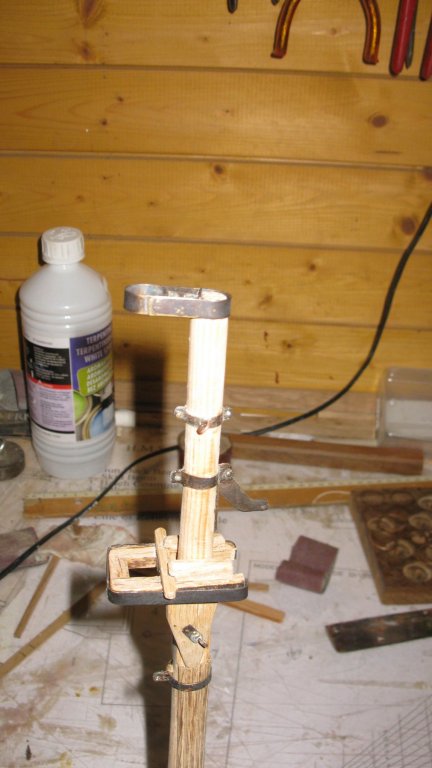
Ring into position.
- Tigersteve, FriedClams, GrandpaPhil and 4 others
-
7
-
-
Very nice joinery on the deck beam arms, Dave.
- FriedClams, mtaylor and Canute
-
3
-
11 hours ago, cog said:
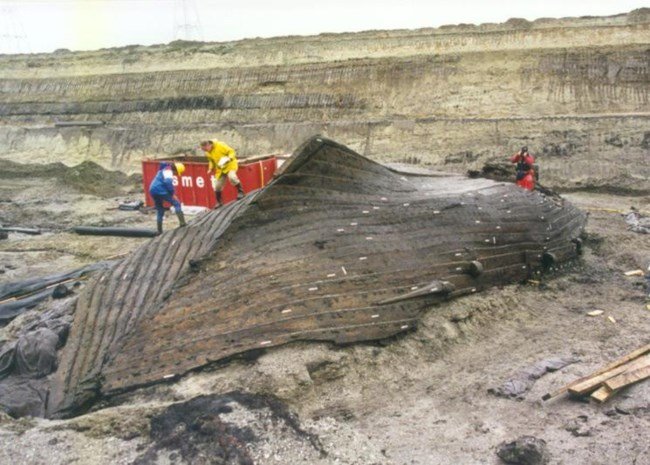
So that's where I came from, dug up
")
Interesting bits of information
Well Carl,
if you look a bit like this, it was you:
- EricWilliamMarshall, mtaylor, cog and 1 other
-
4
-
-


Fishing Smack c. 1920 by G.L. - FINISHED - Scale 1/20 - POF - cross-section
in - Build logs for subjects built 1901 - Present Day
Posted
Thank you for nice comments Patrick and Gary. And also thanks for the likes.
This week I went on with the boat.
The whole hull is planked now.
Once removed from the mold, it is a fragile shell which has to be handled with care. It fits on its chair.
Now the boat has to be finished. First I place the frames to give it more strength. To form the frames (2x2mm walnut sticks), I immerse them for a while in boiling water.
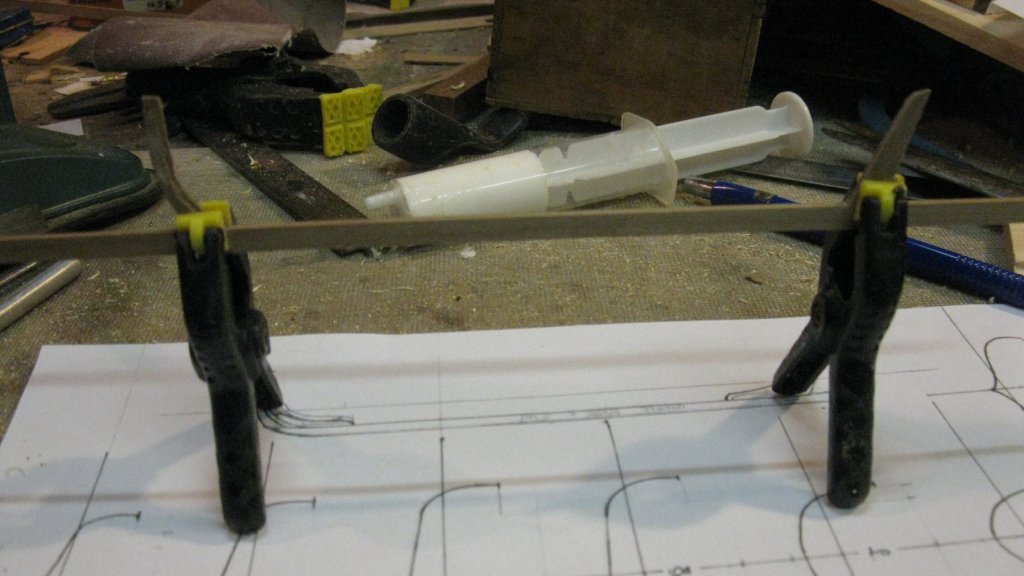
I am afraid that pushing the frames now in the hull could damage it, therefore I pre-form them round a PVC pipe.
Then they can be placed into the hull. I do not glue them yet. When they are dry they keep more or less their shape an can be sanded before gluing definitively. Due to lack of space to place the clamps, today I skip everyone a frame.
The following day I place the remaining frames.
All the frames and the rub rails placed. The port rub rail is coming loose a bit, it will have to be glued a bit tighter.
The bottom boards.
Gluing the risings.
I make paper templates to determine the shape of the thwarts.
The other thwarts.
I saw the gunwale out of 1.5 mm thick walnut veneer.
To make the gunwales following the sheer of the boat, I put some weights on it while the glue is drying.
The finished boat; the hull is stained dark and the thwarts and gunwale are painted in green.
The boat secured for sea on the deck.