G.L.
-
Posts
1,553 -
Joined
-
Last visited
Content Type
Profiles
Forums
Gallery
Events
Posts posted by G.L.
-
-
-
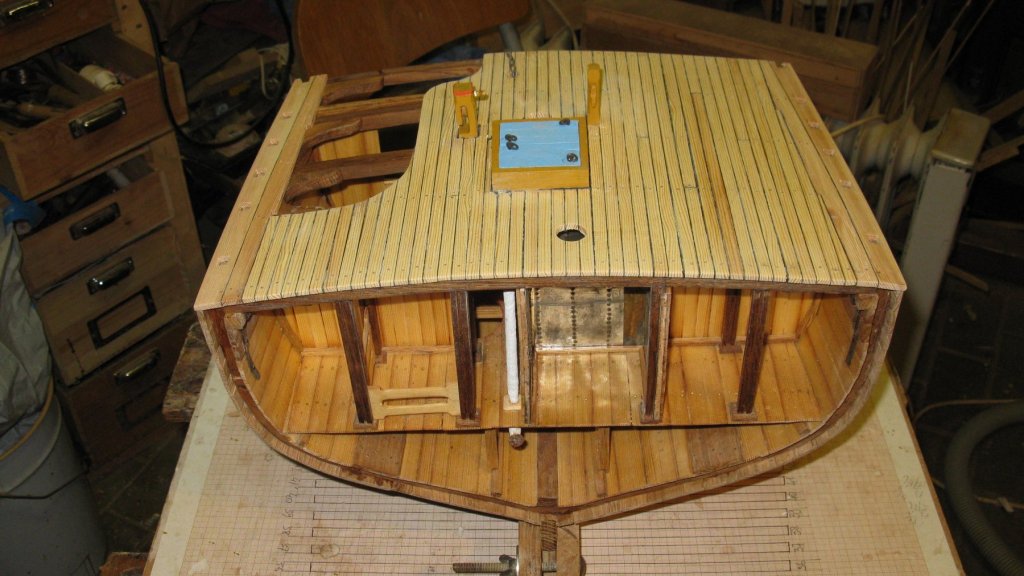
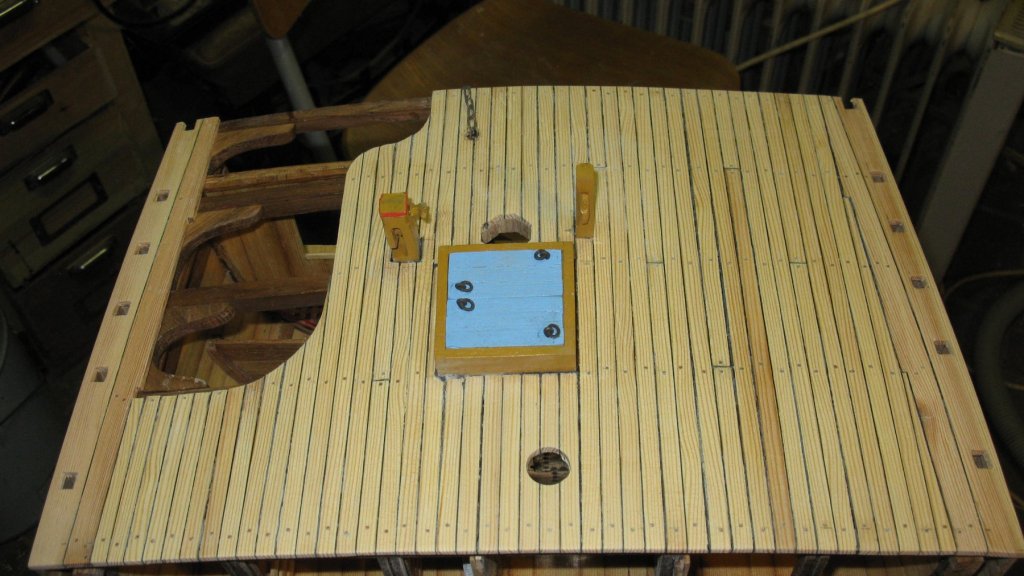
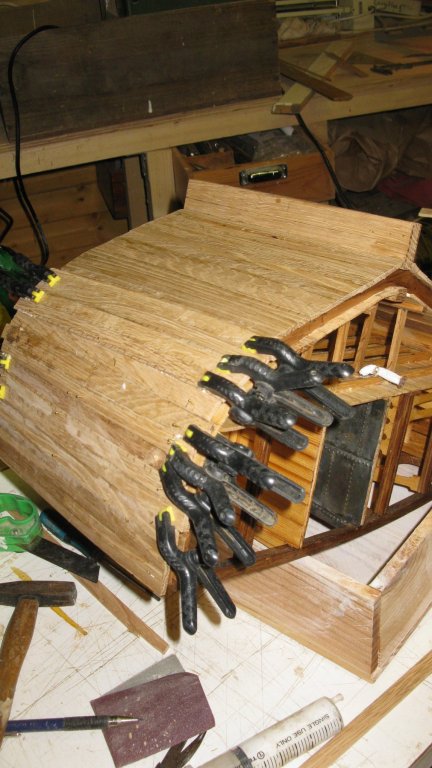
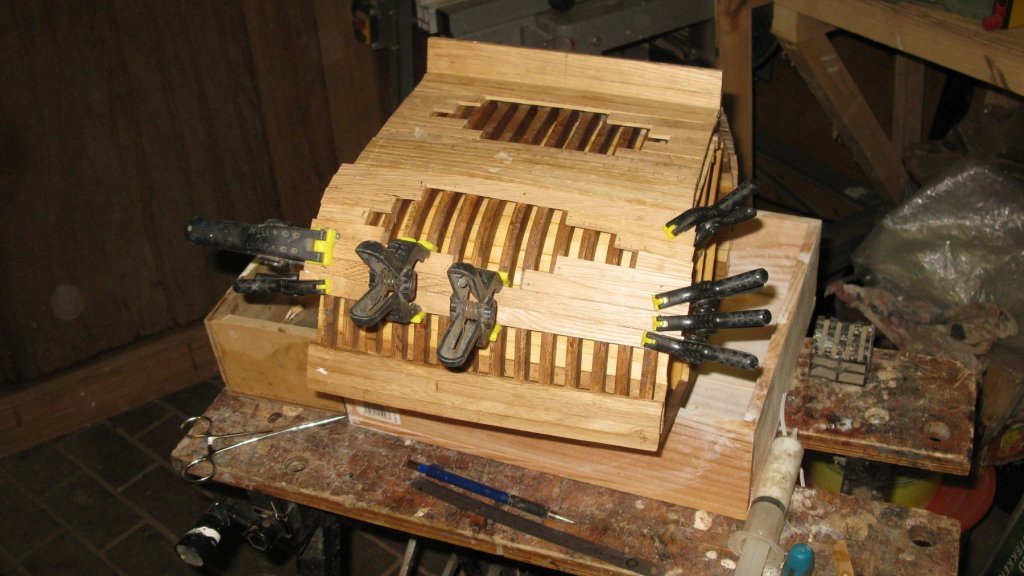
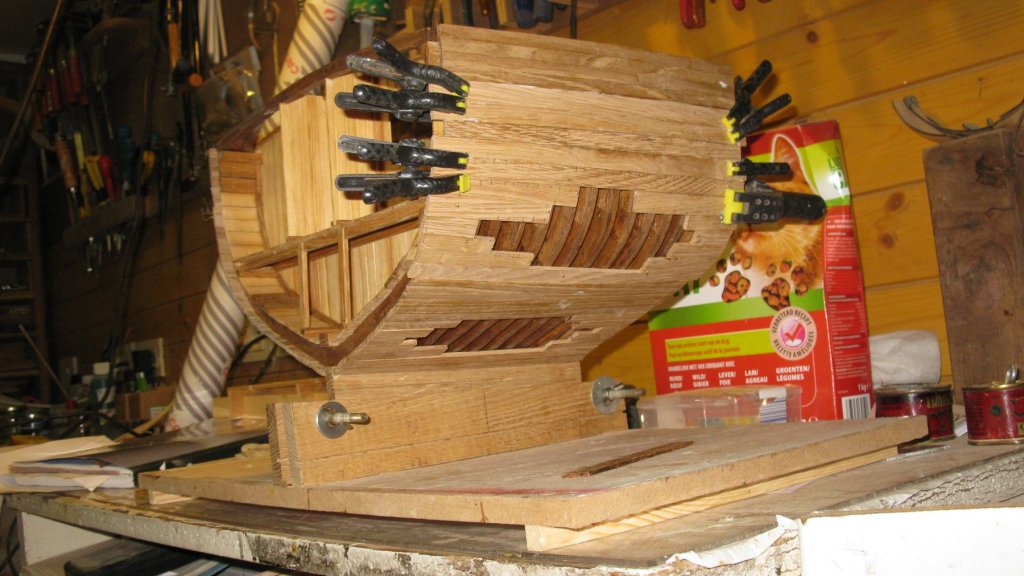
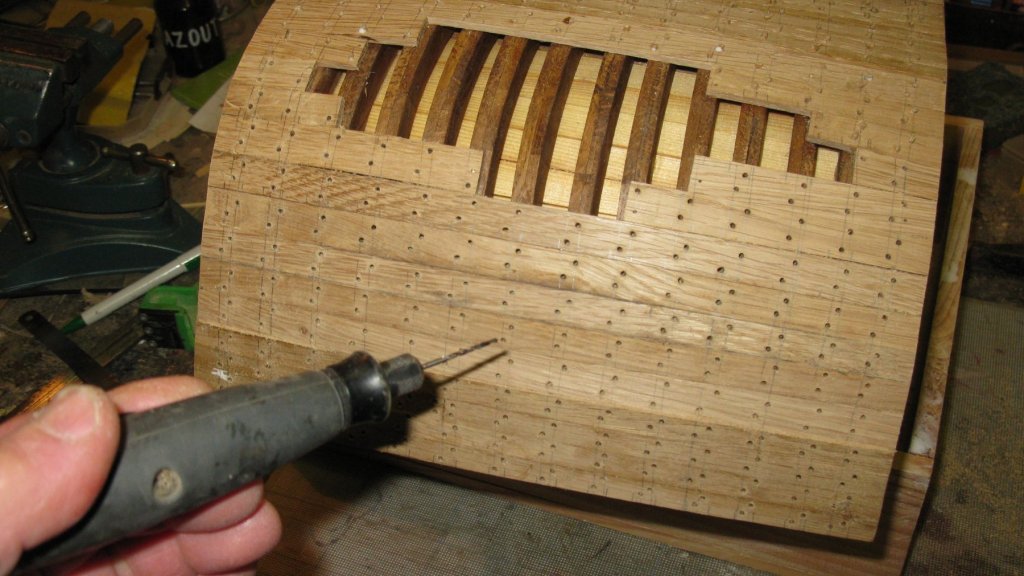
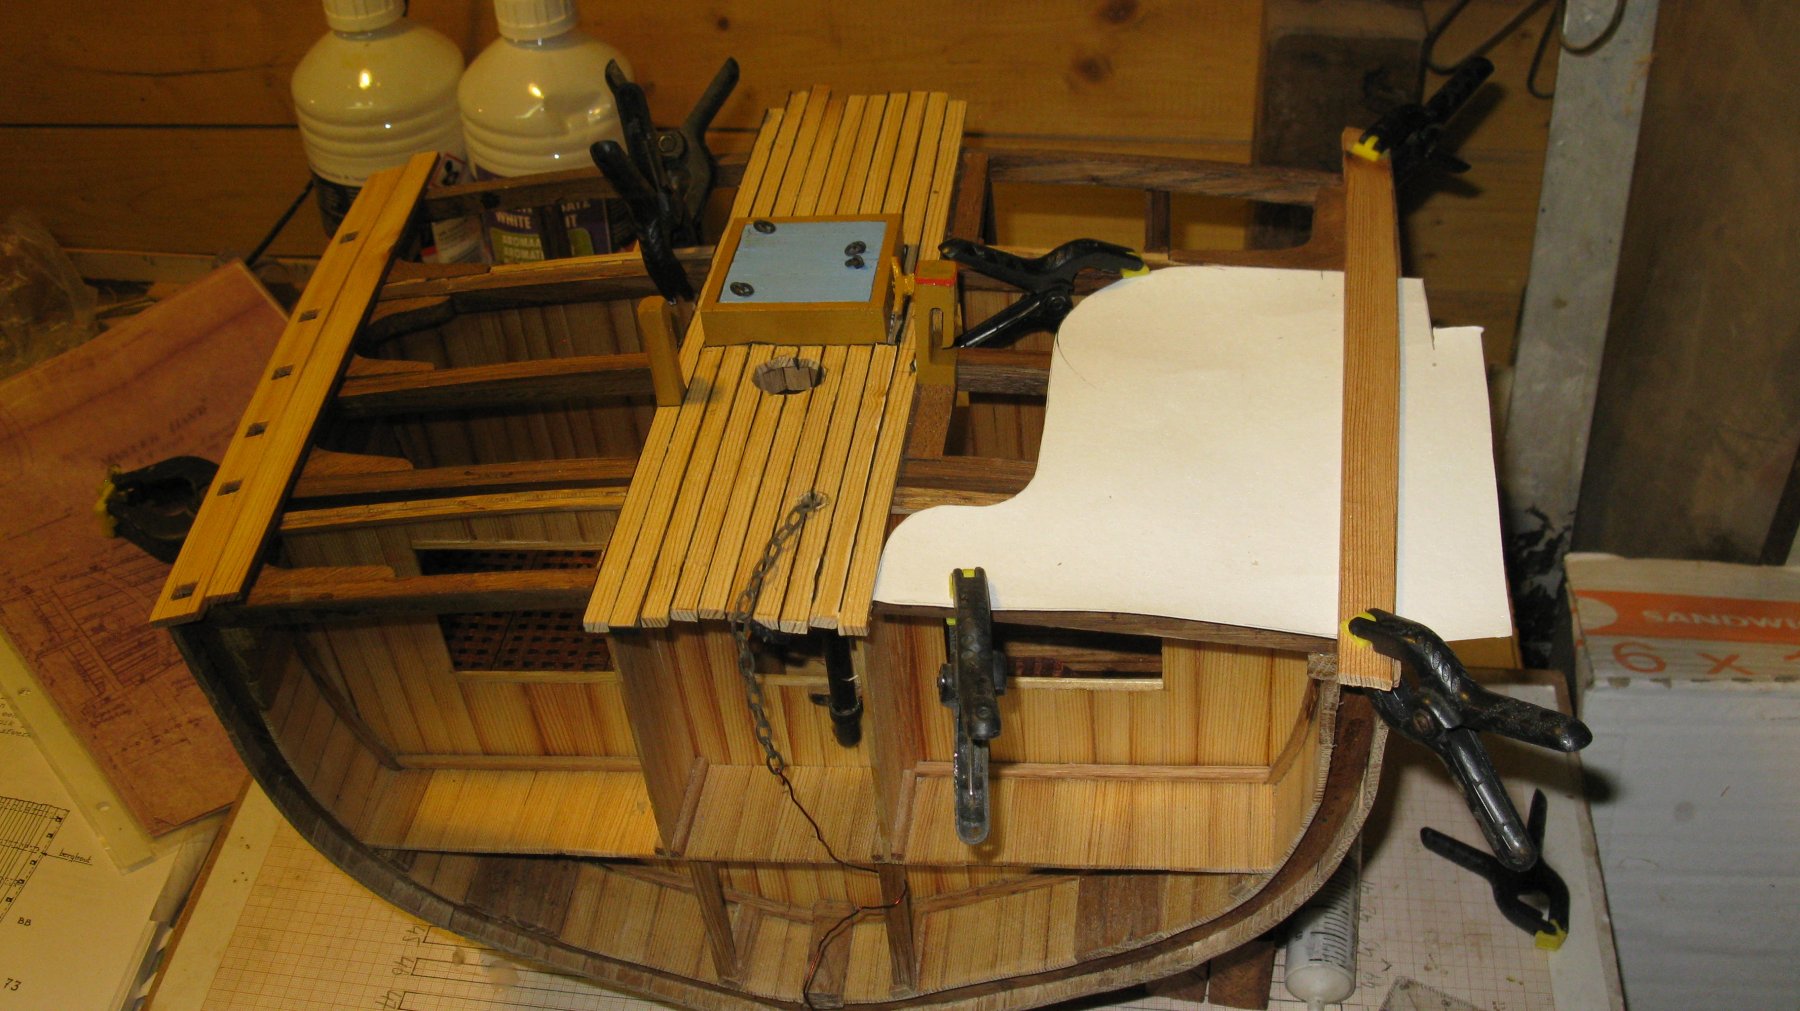
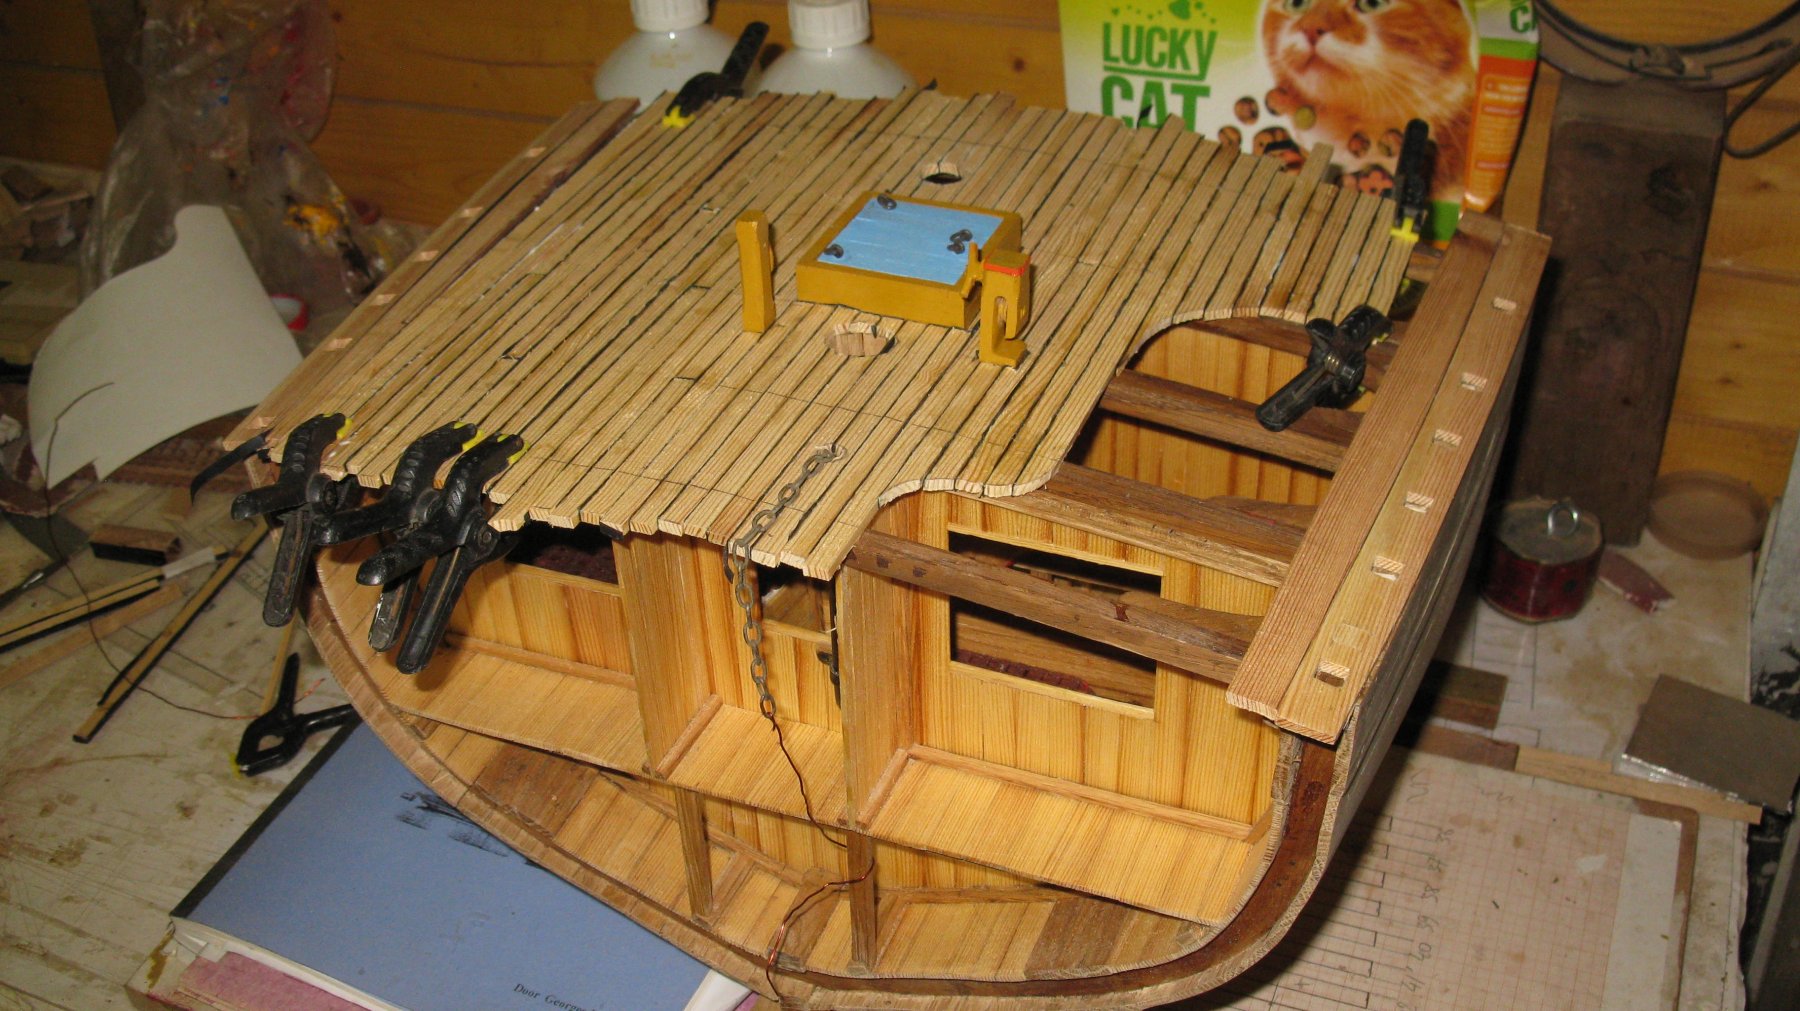
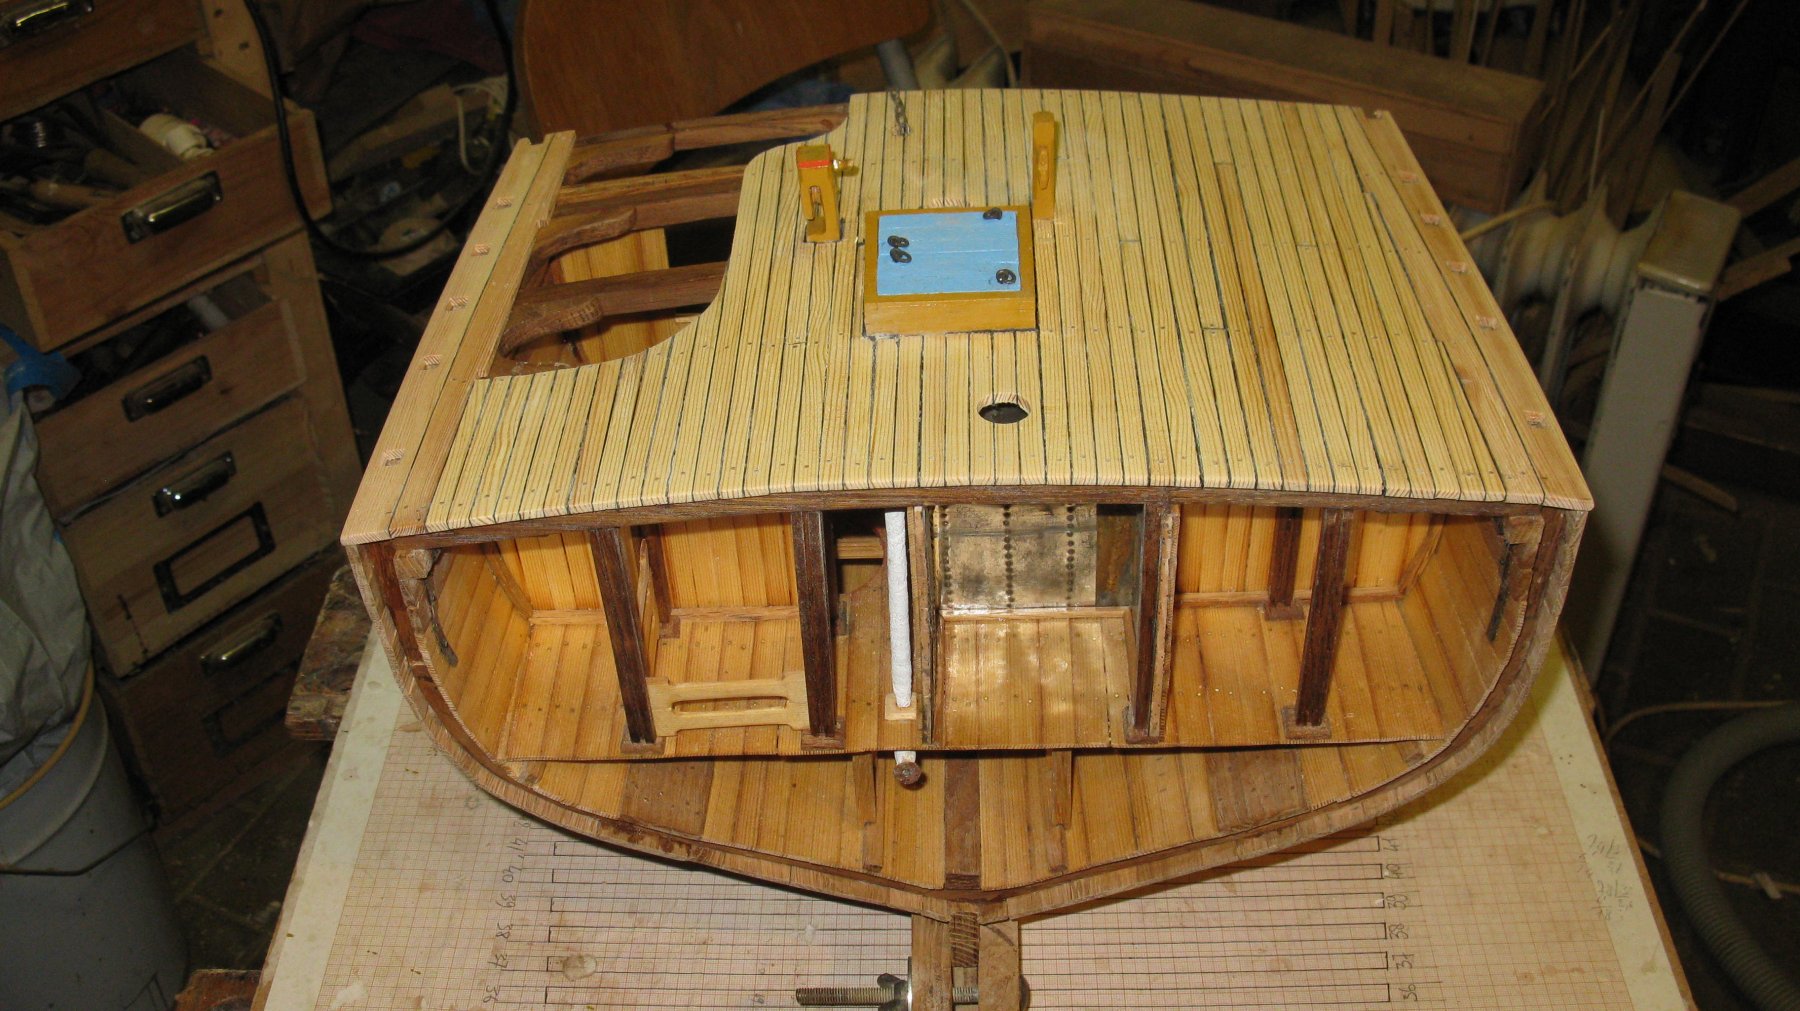
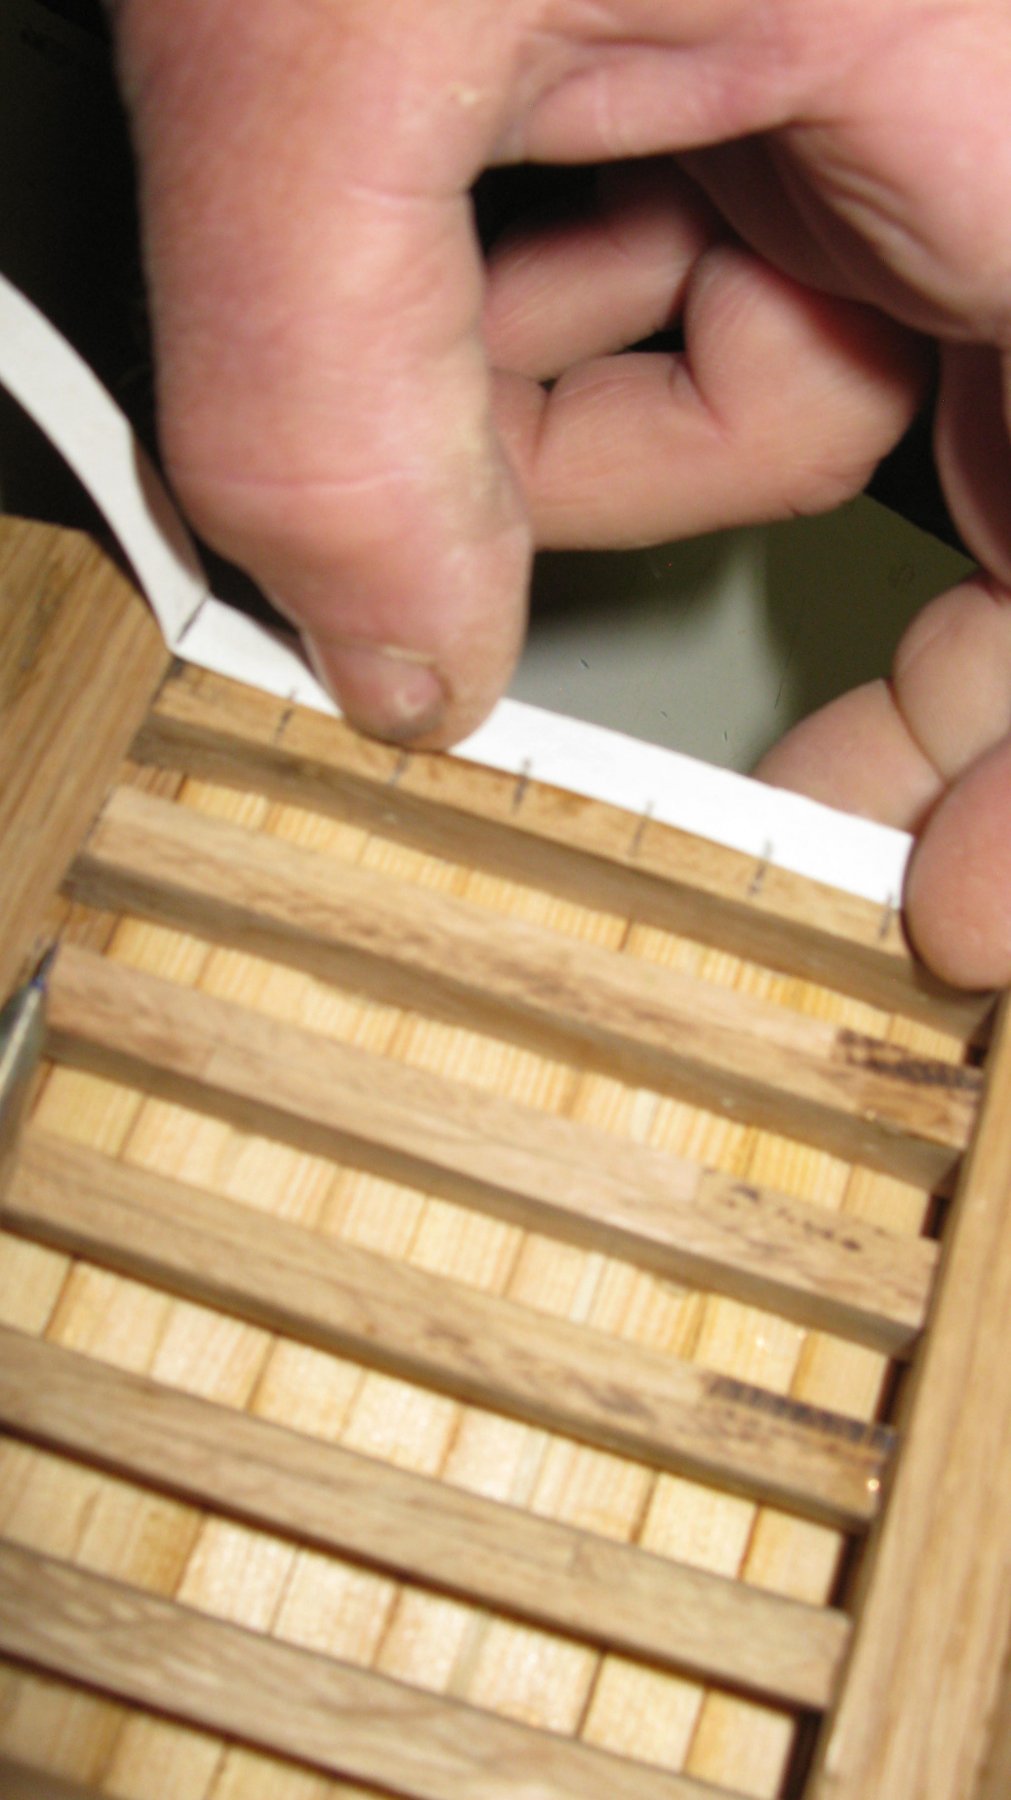
18.5. Laying the deck
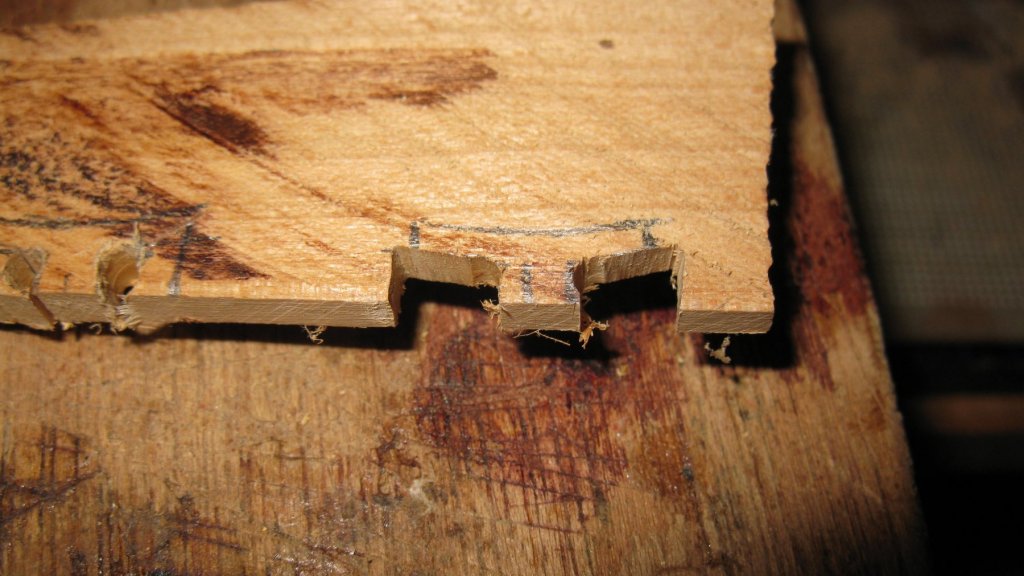
I start with the making of the covering boards
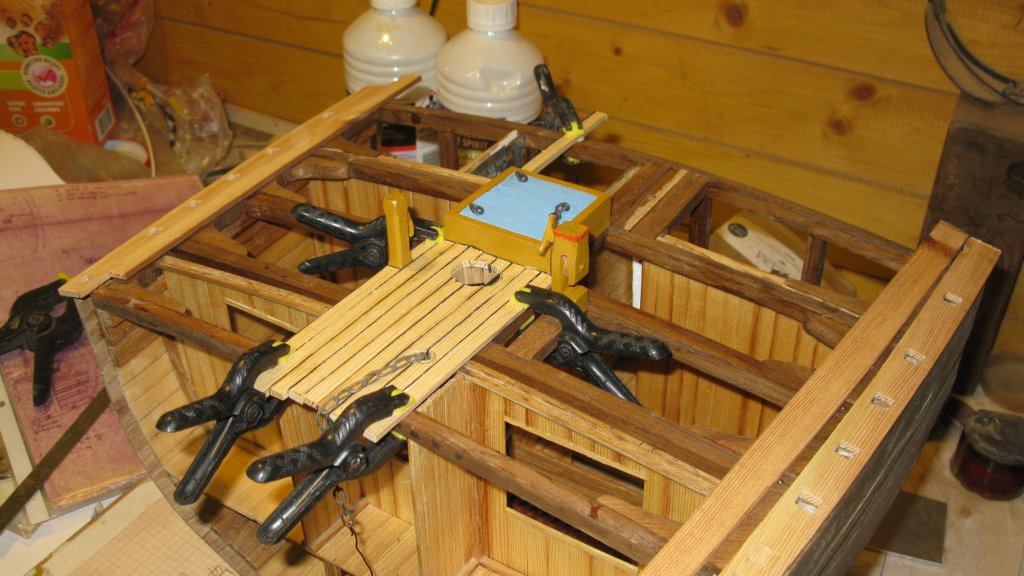
Starting to lay the deck on the midline.
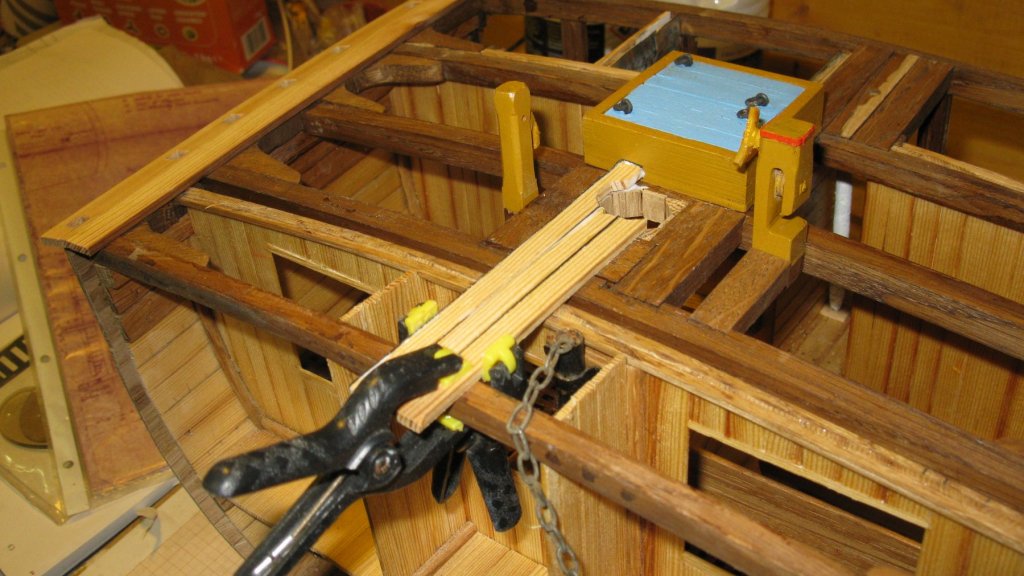
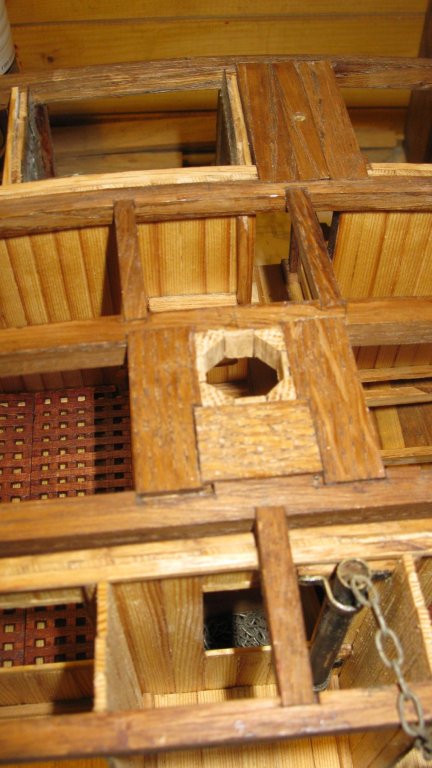
At portside I will leave a part of the deck uncovered to give view to the inside of the hull, the deck beams and the knees. The paper template shows the shape of the opening.

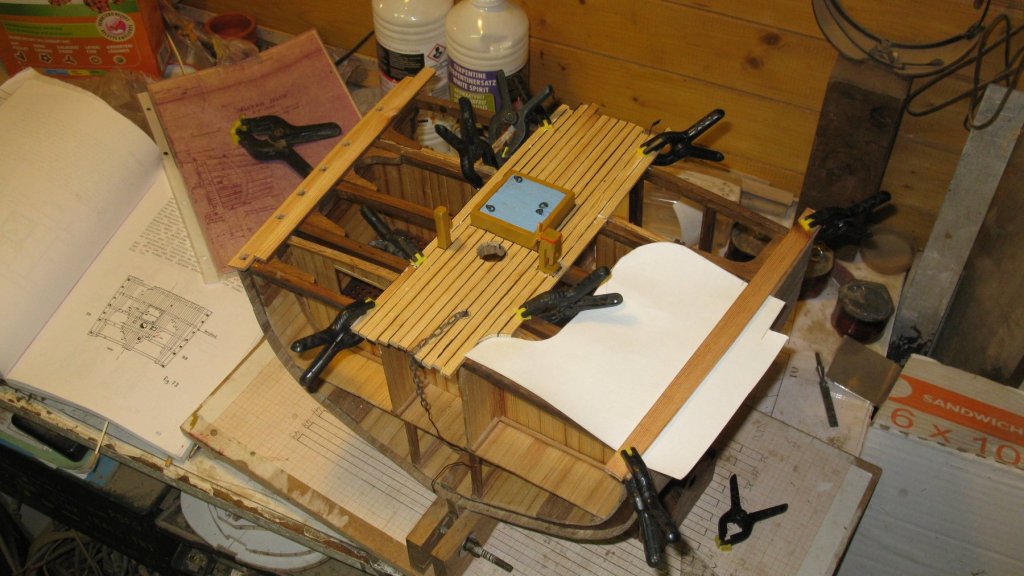
After a couple of hours.
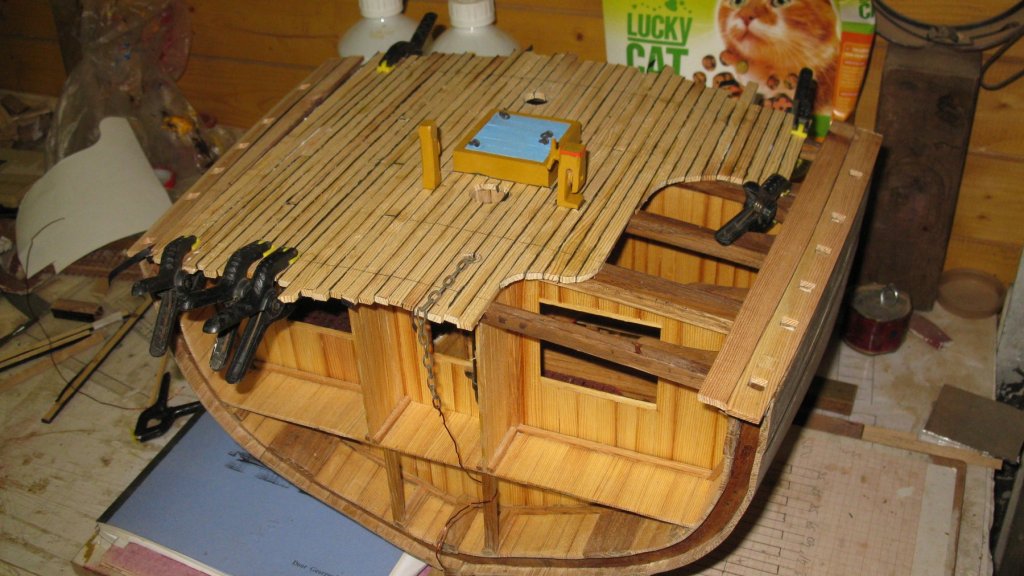
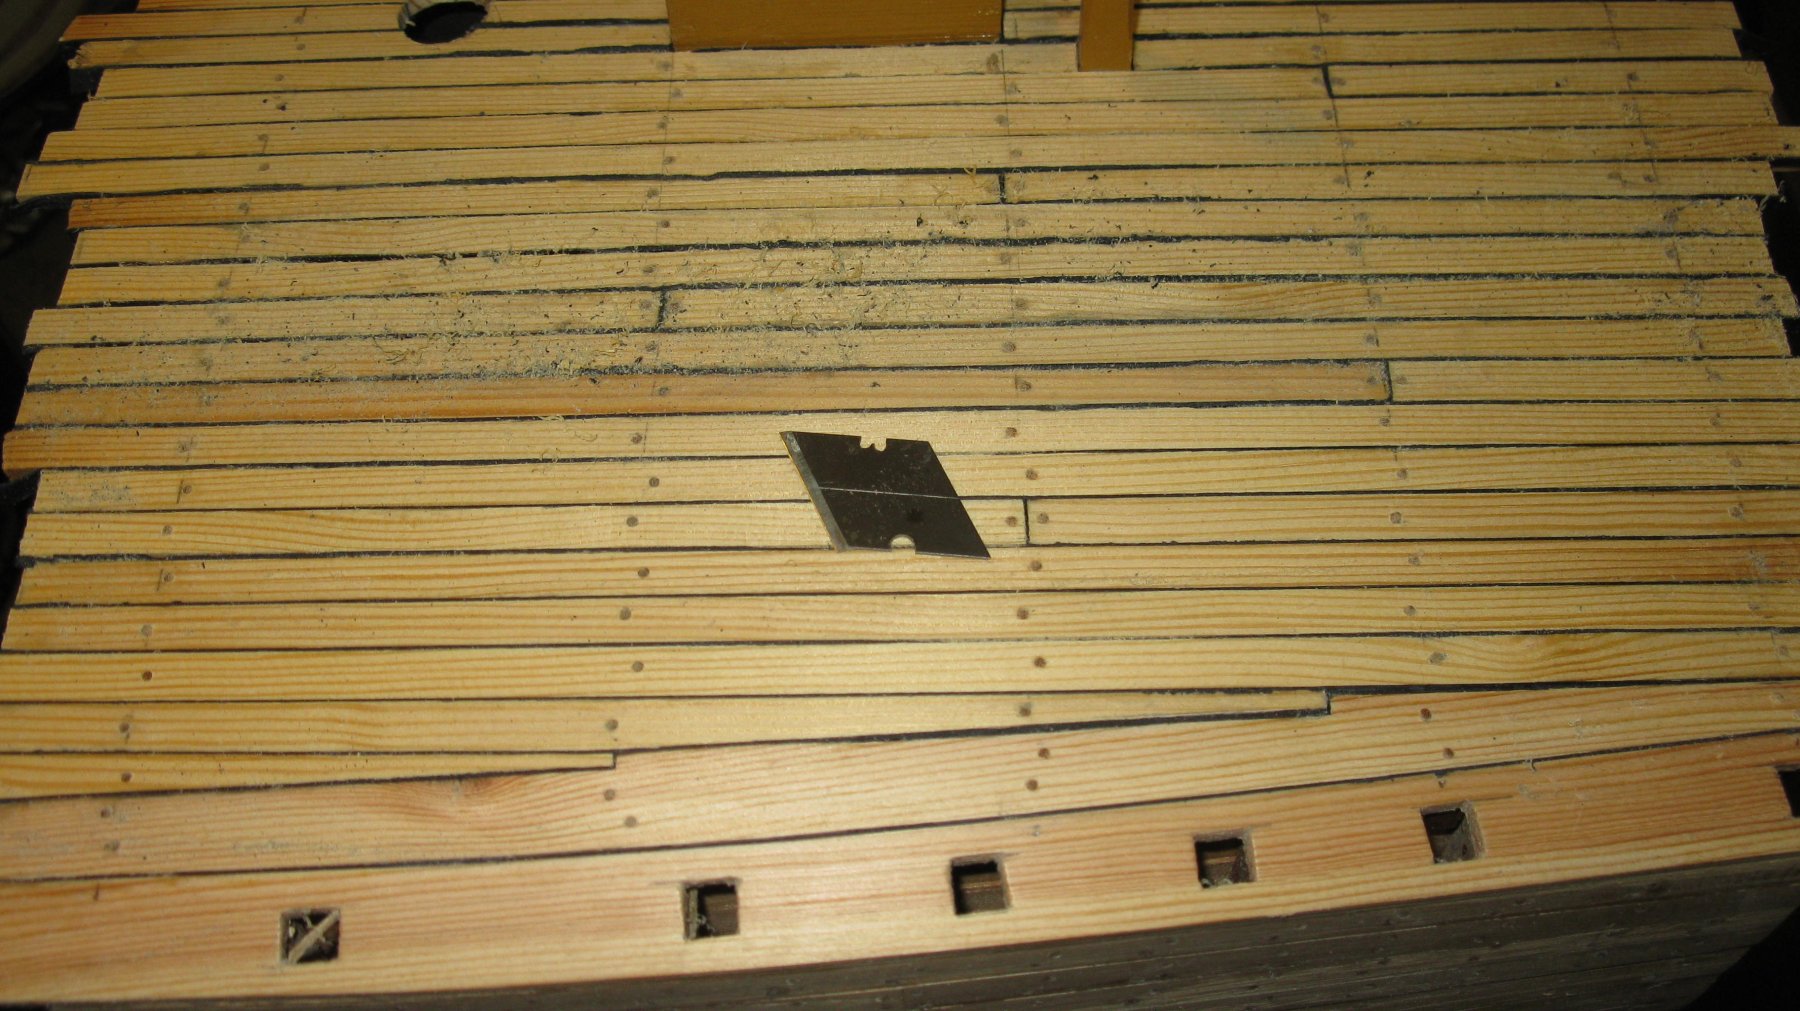
When the deck is completely laid and tree nailed, I scrape it with a piece of cutter blade.
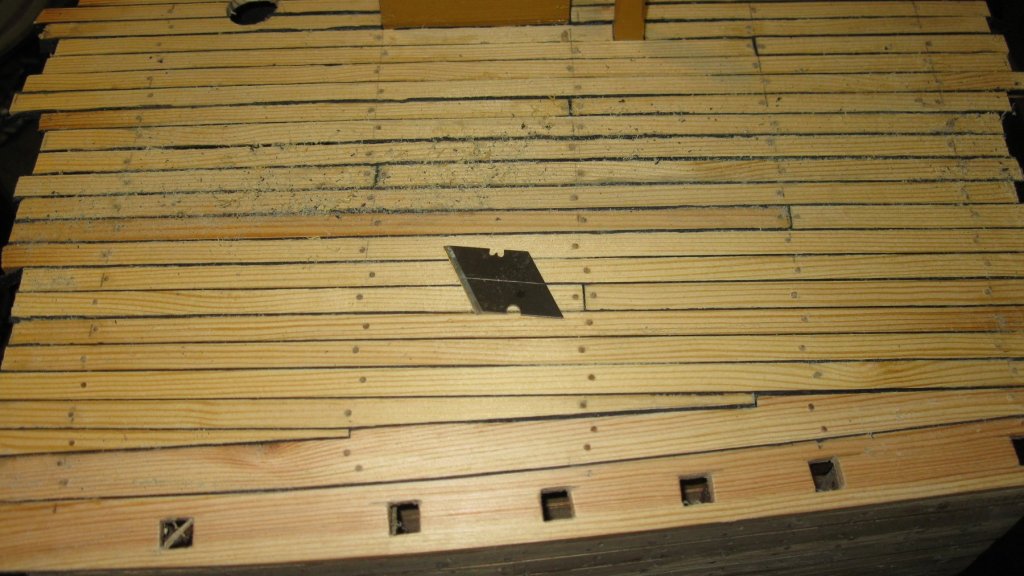
The deck after scraping and sanding and making the edges straight.
-
Nice precision work, both the woodwork and the soldering.
Well done!
- EJ_L, mtaylor, FrankWouts and 3 others
-
 6
6
-
Happy birthday Jung!🎂
- aviaamator and John Allen
-
2
-
1 hour ago, aviaamator said:
If I'm going to paint the boat - it should be done now. Then there will be difficulties.
Aviaamator,
I would stain the boat dark. It will be a good contrast with the varnished hull of the Jacinthe. I would use a color system that leave the woord grain visible and apply a matt varnish afterwords.
-
-
On 2/2/2019 at 11:18 AM, cog said:
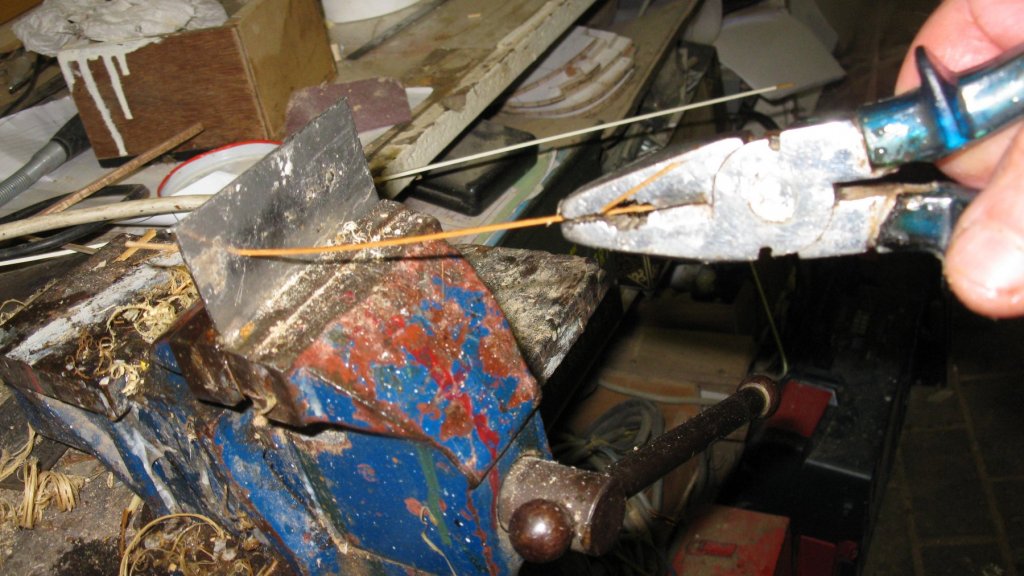
glad you discovered your "error" with the knees in time. Beautiful workmanship again on the wooden parts. How did you "solder" the hatch rings? It looks almost like welding when I see the clip on the scisors ...
Thank you Carl.
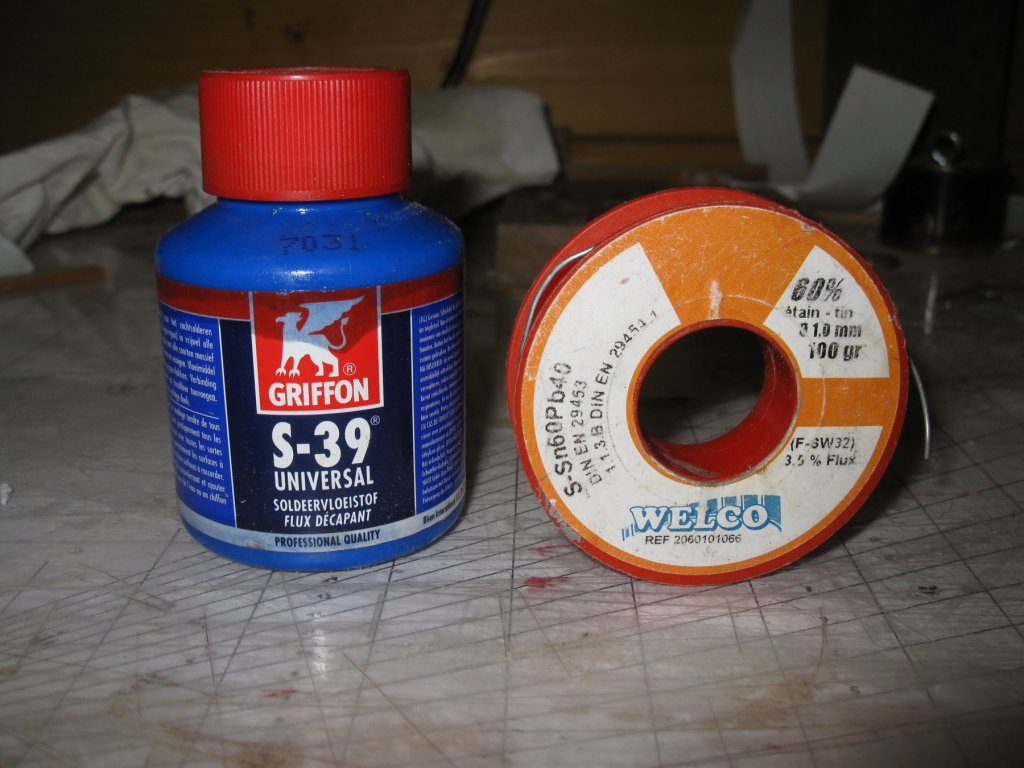
I use the resistance soldering method and I use common soldering flux and soldering tin.
-
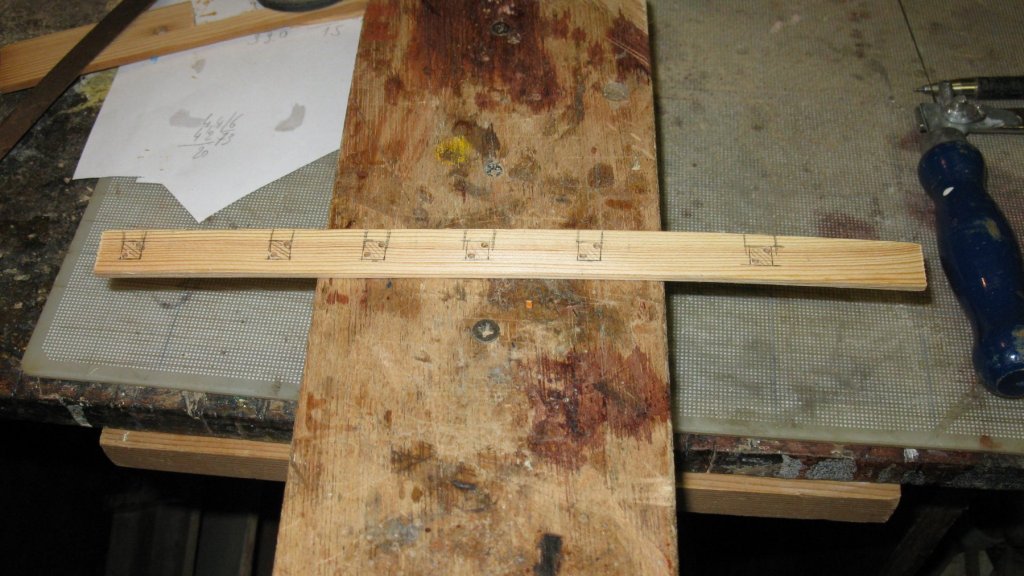
18.4. Preparing to lay the deck. Prepairing the mast opening
The mast opening, now quadrangular, has to be octagonal. Four keys in the corners ...

... and four boards in between.
- paulsutcliffe, tadheus, John Allen and 9 others
-
12
-
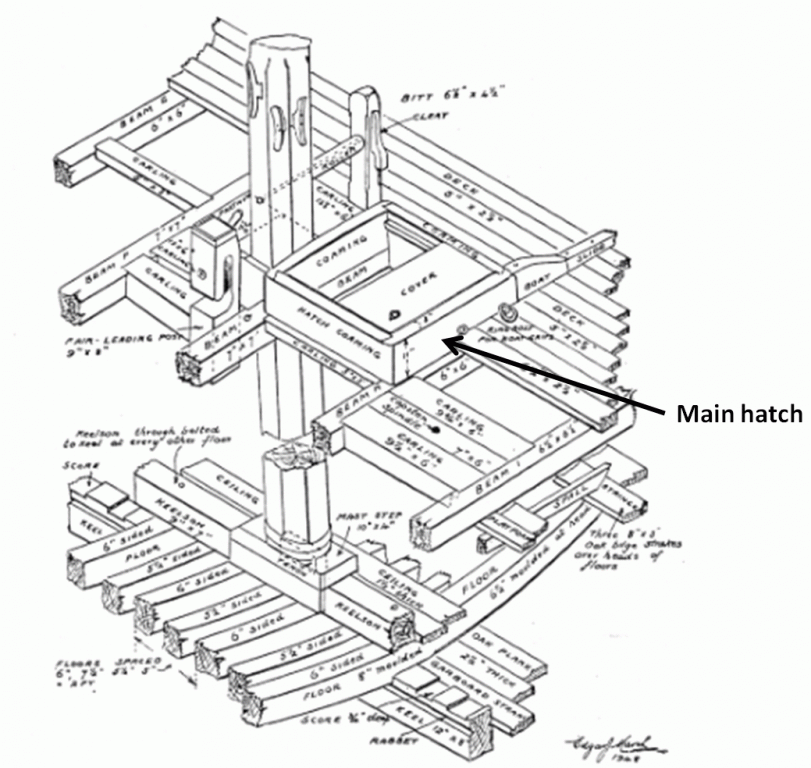
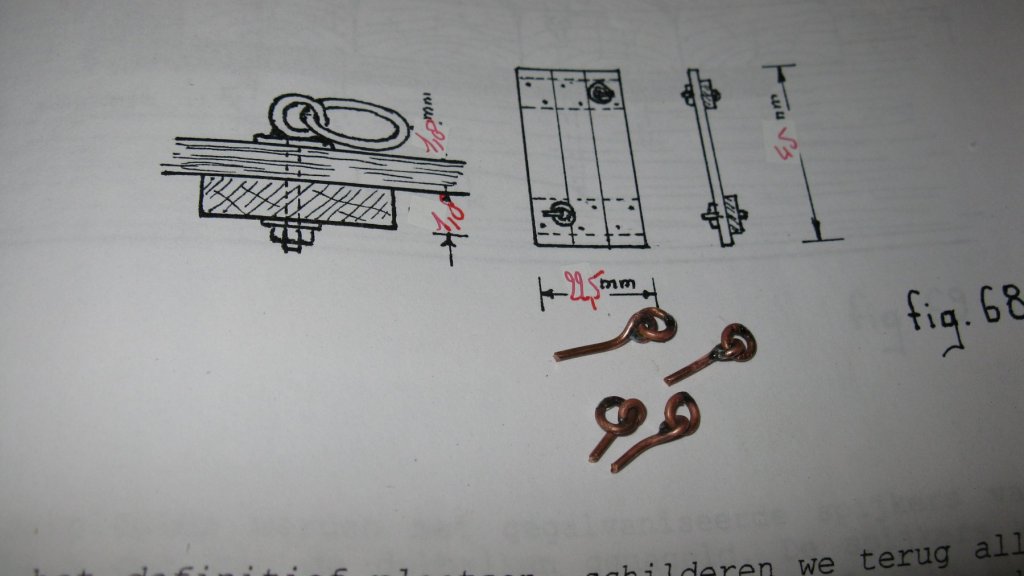
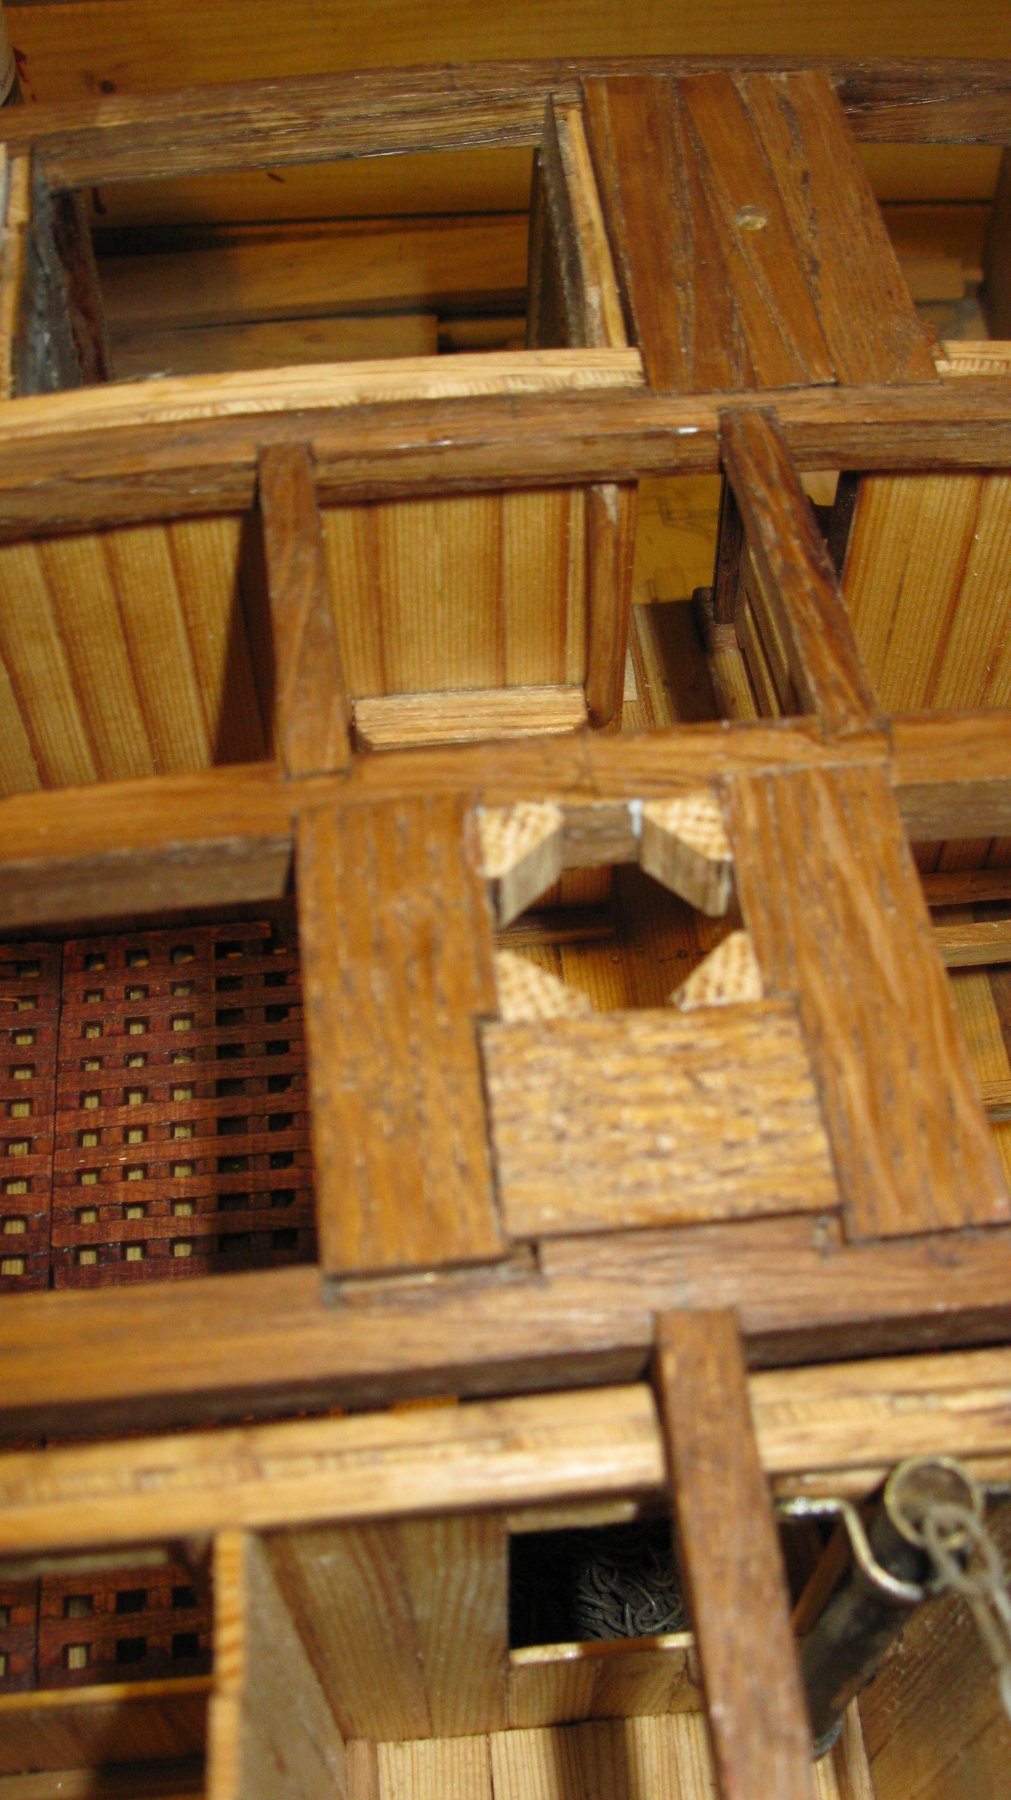
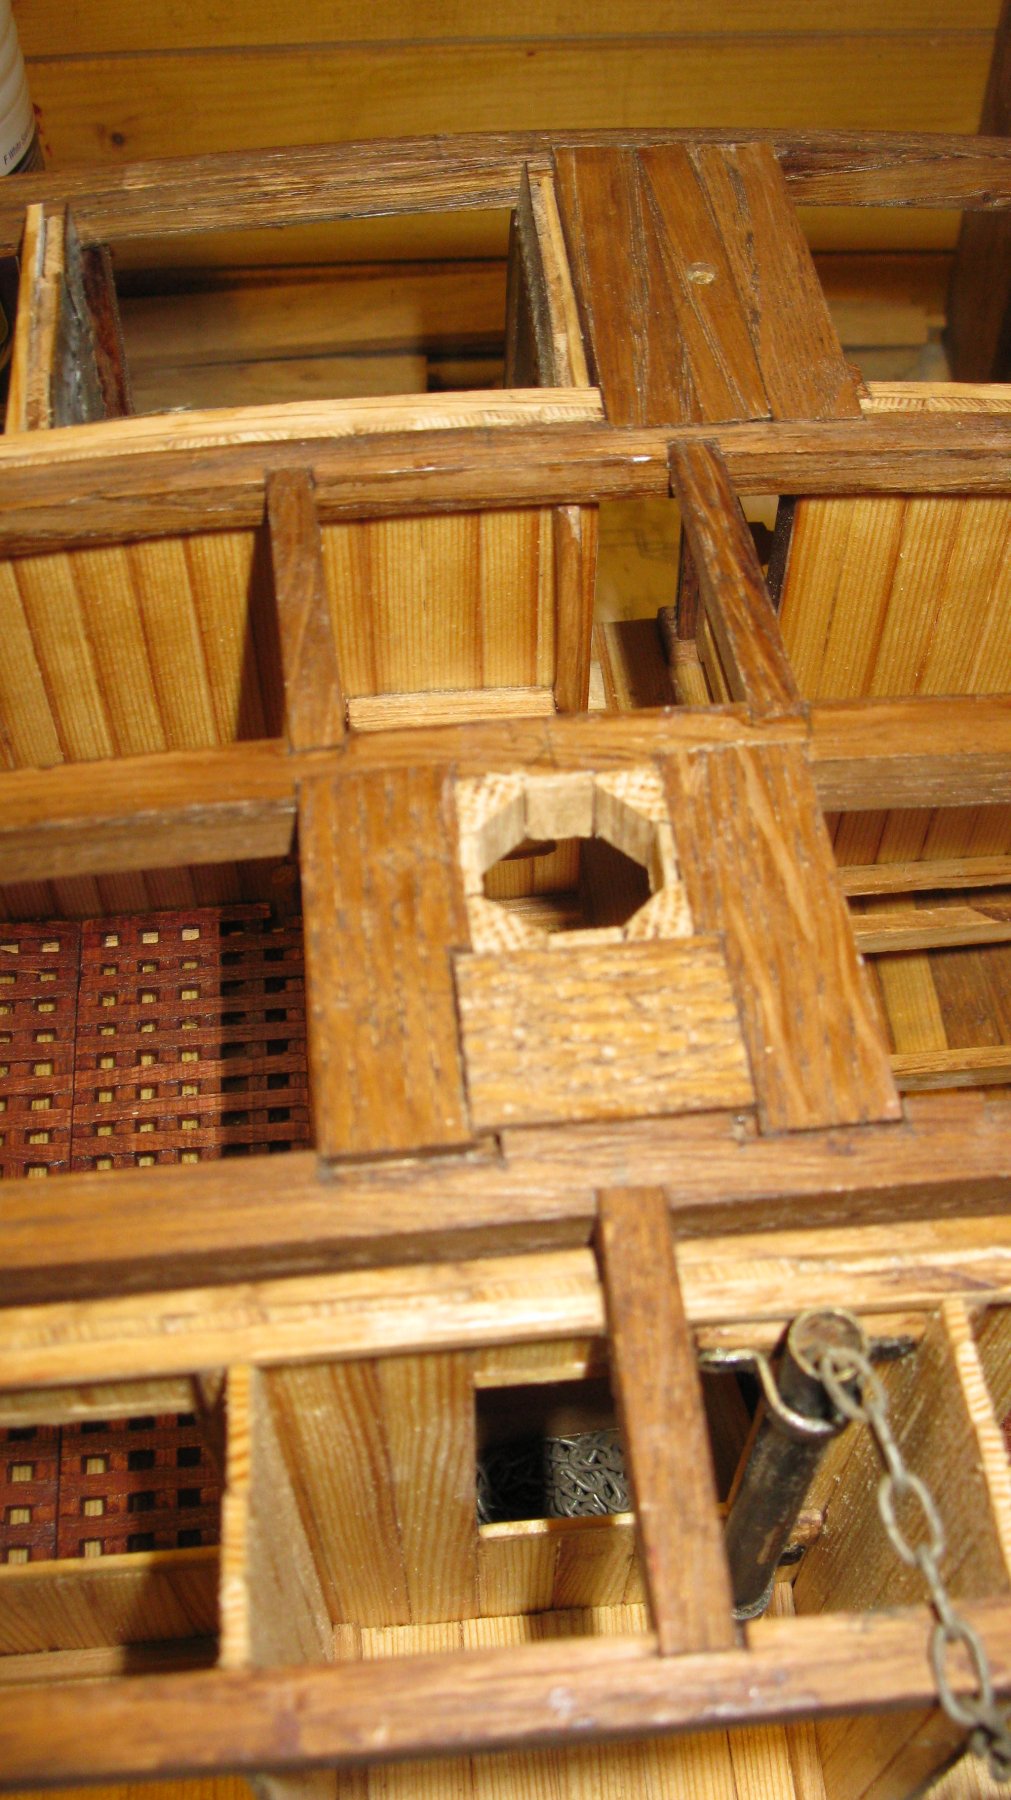
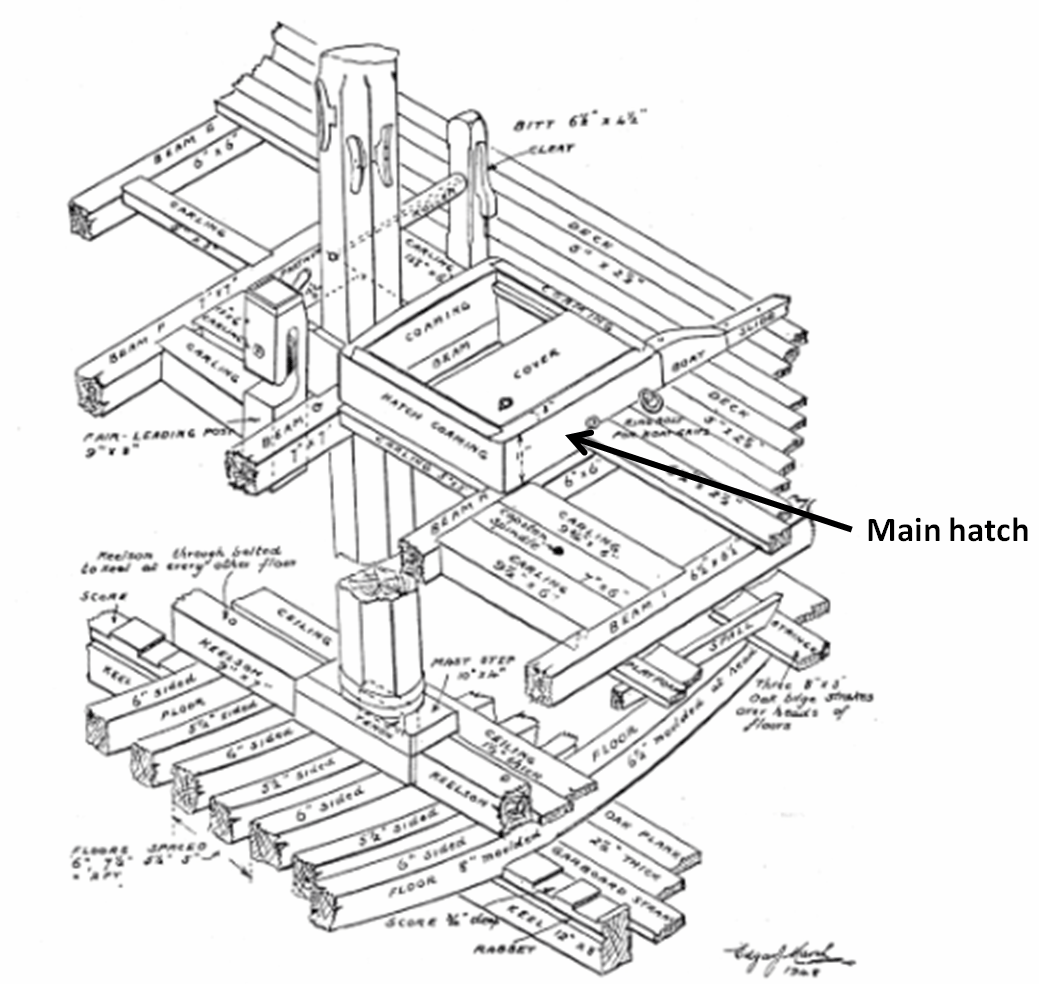
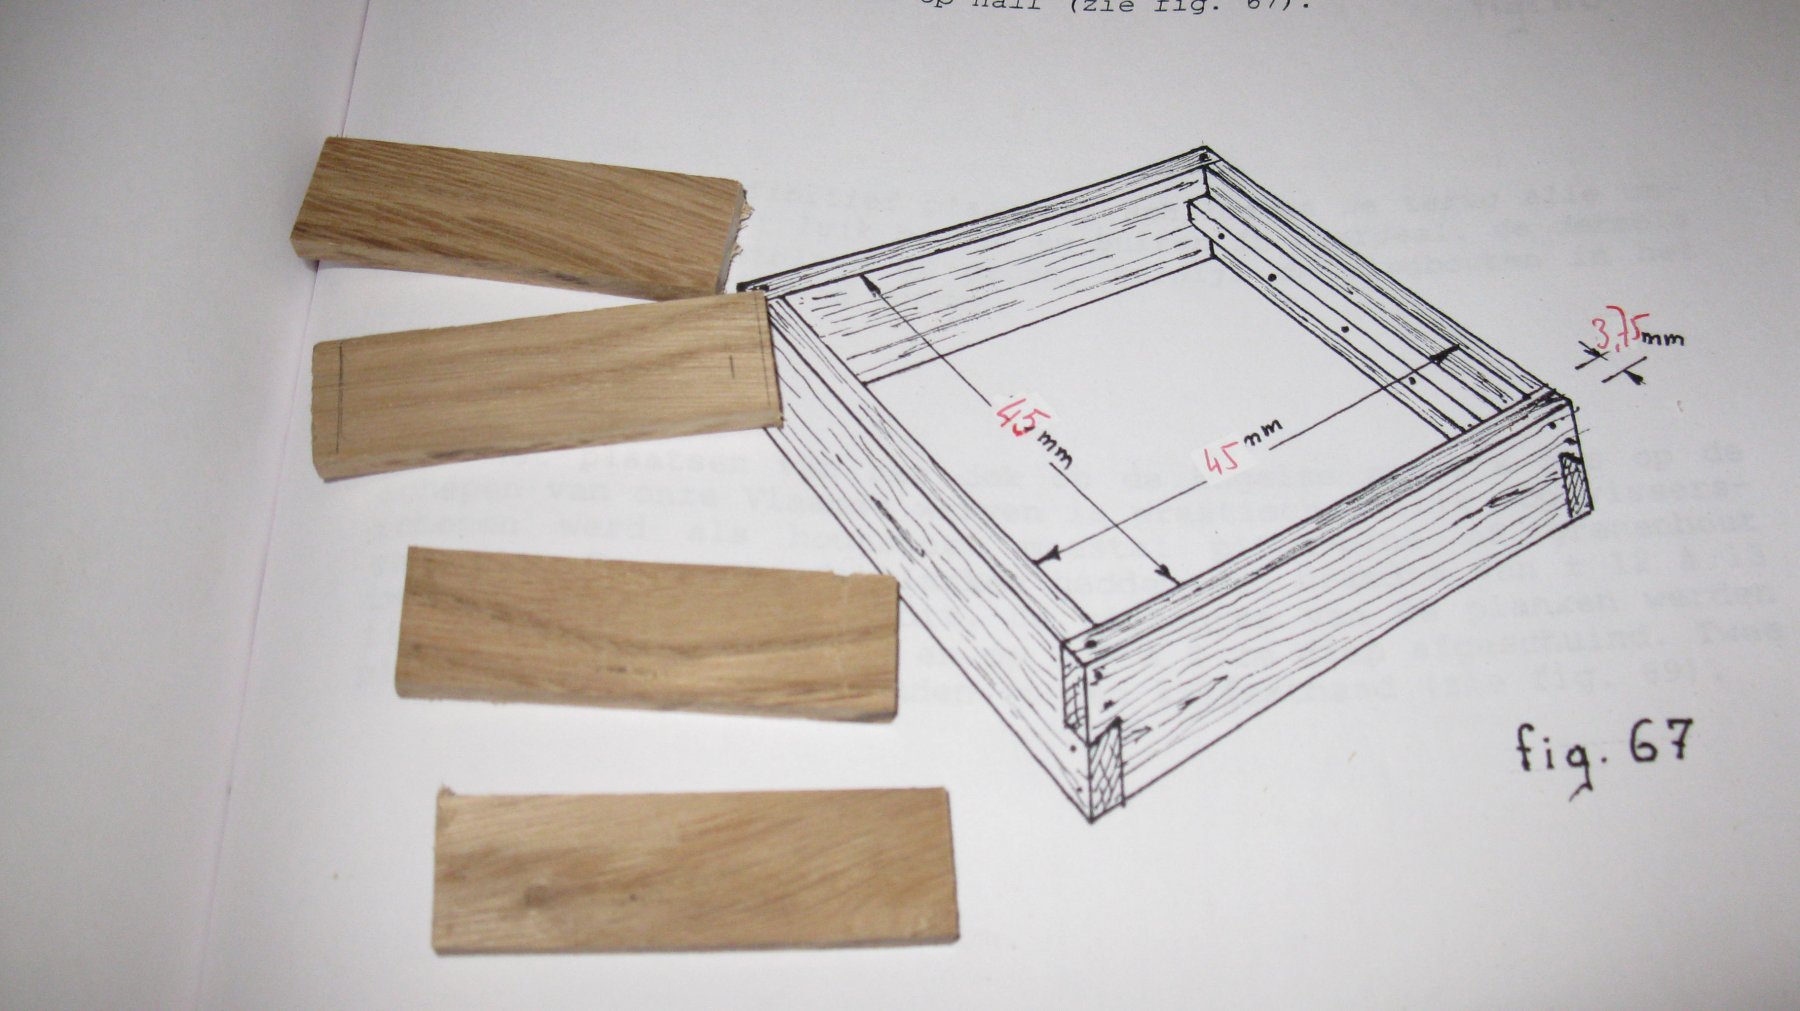
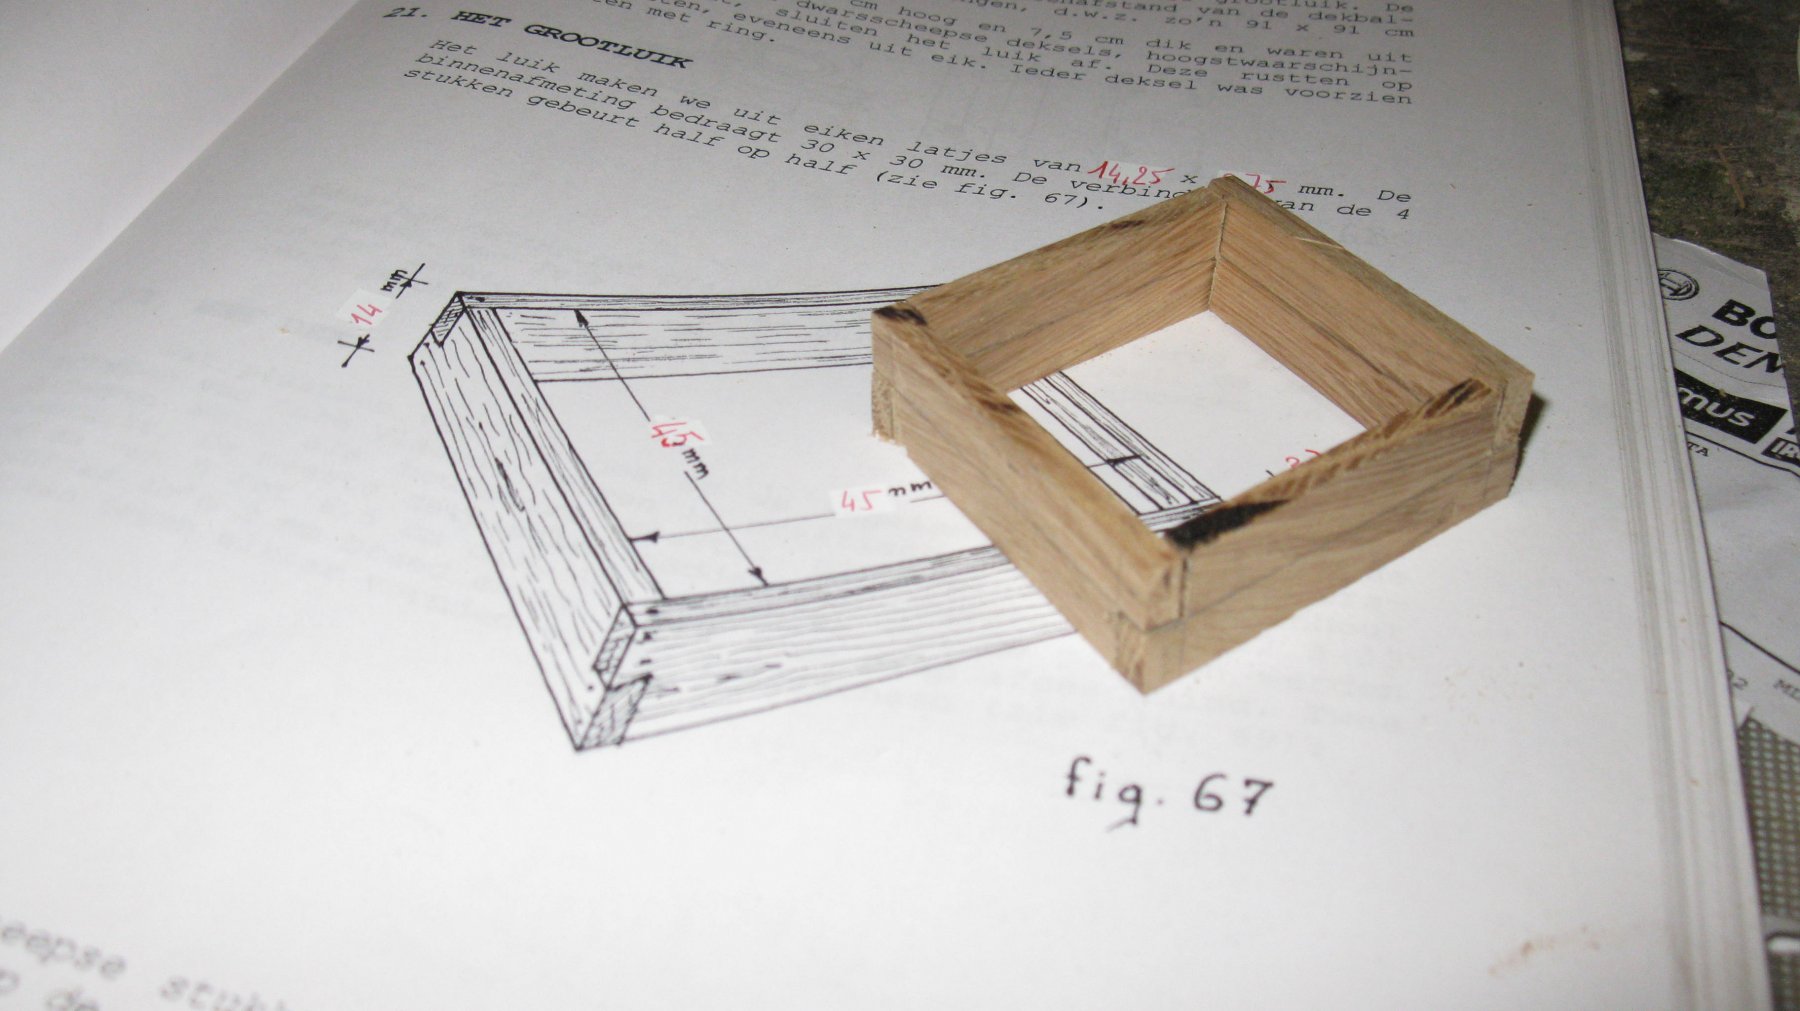
18.3. Preparing to lay the deck. Making the main hatch
Just behind the main mast is the main hatch (Drawing: 'Sailing trawlers' Edgar J. March).
The four hatch coamings.
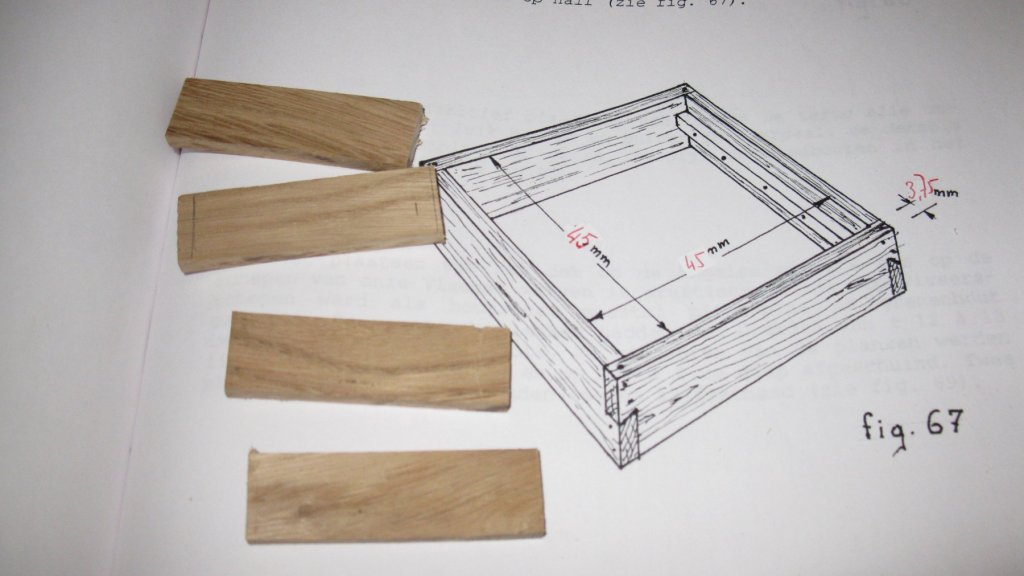
The coamings placed together with the dovetails sawn out.


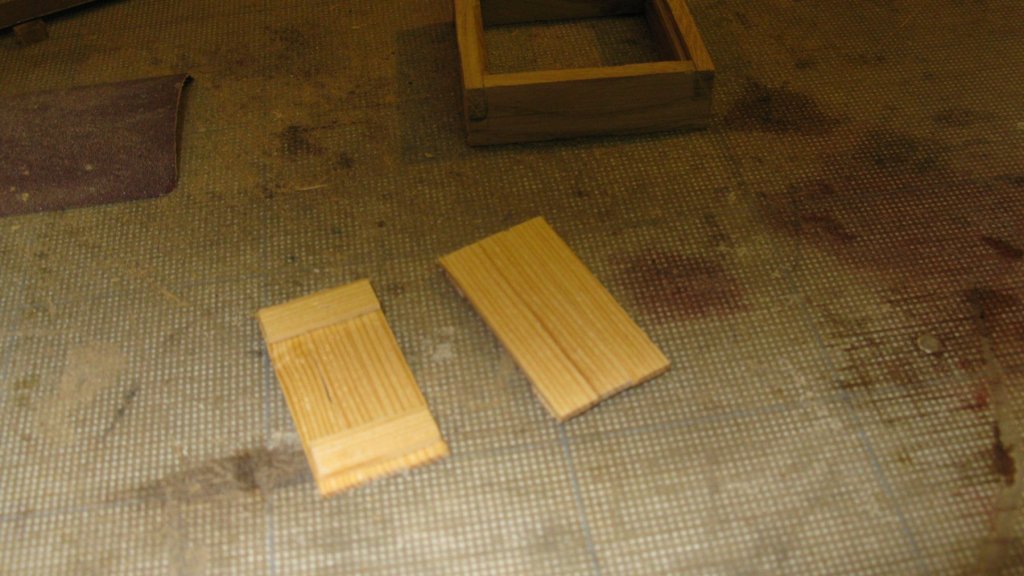
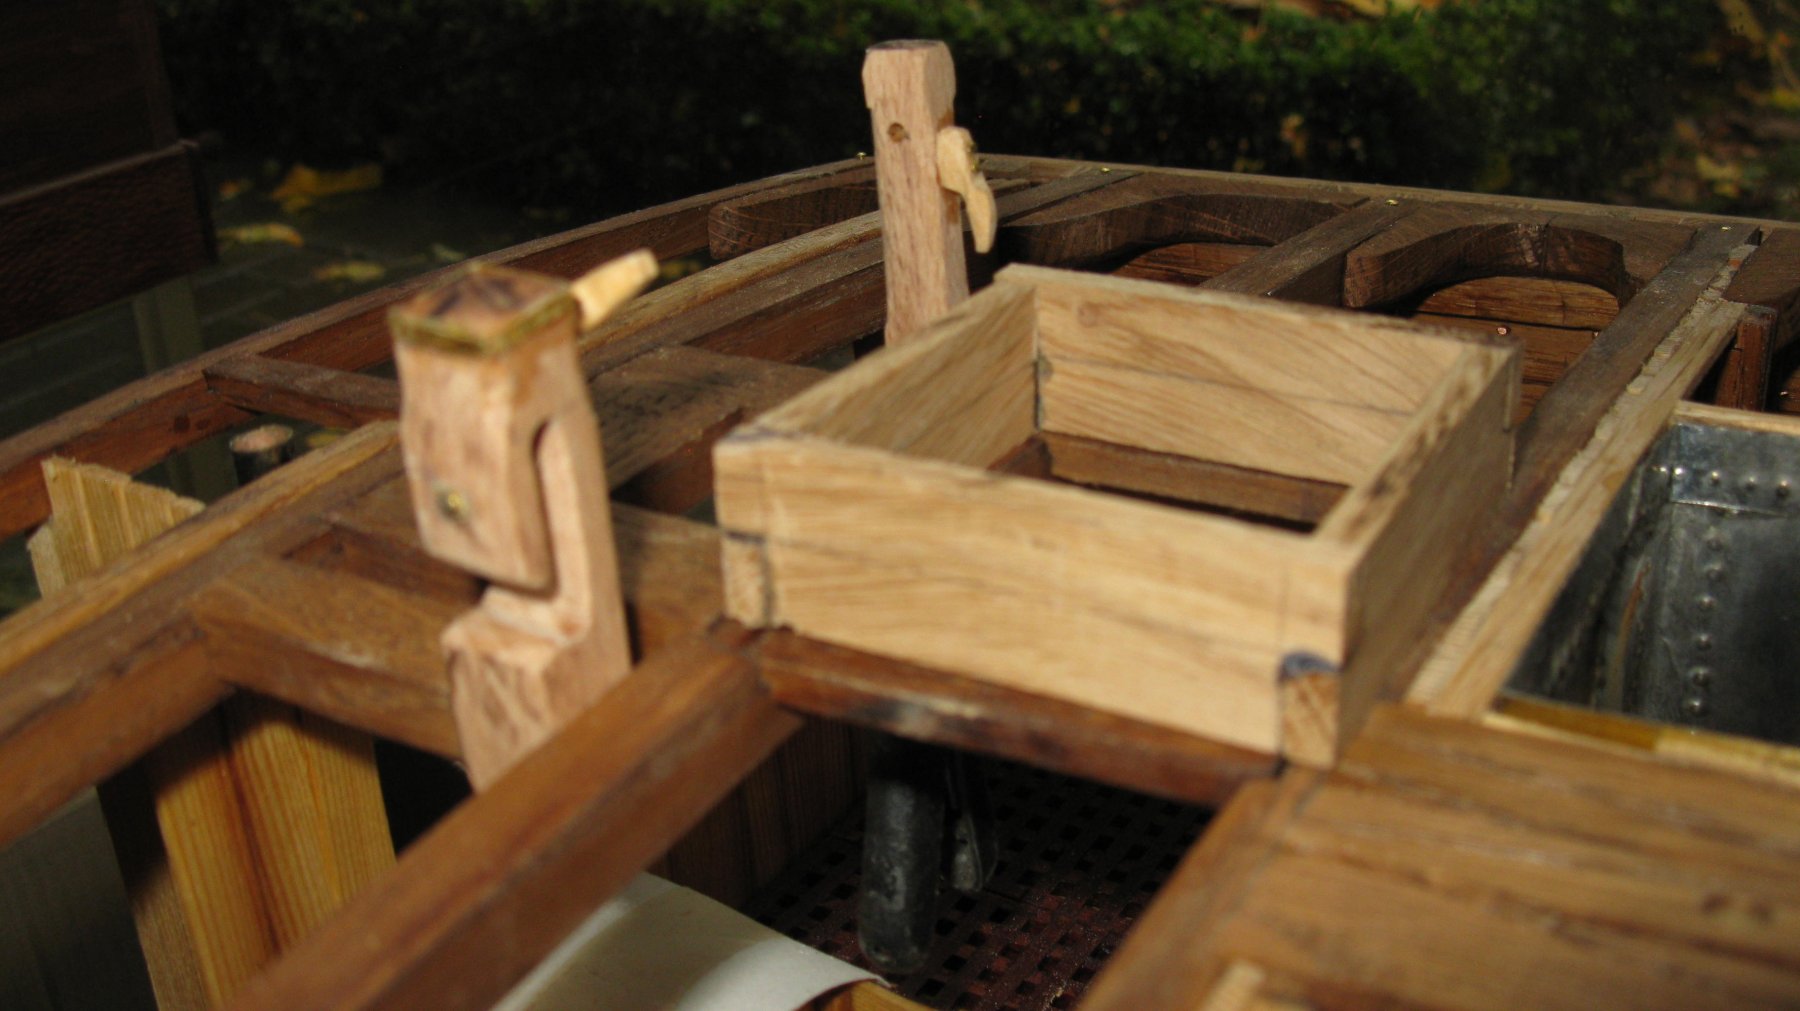
The hatch covers
The hatch has to be painted in ocher and the covers in light blue. I paint also the fair leading post and the bit for the jib boom roller.
I use acrylic paint from my wives paint box and varnish it when the paint is dry.

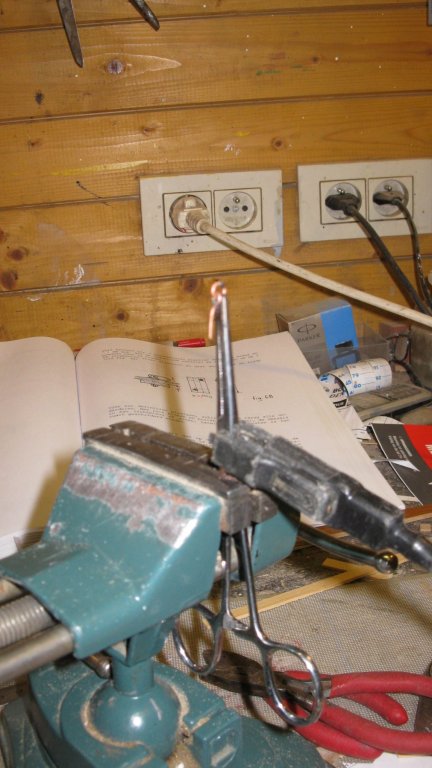
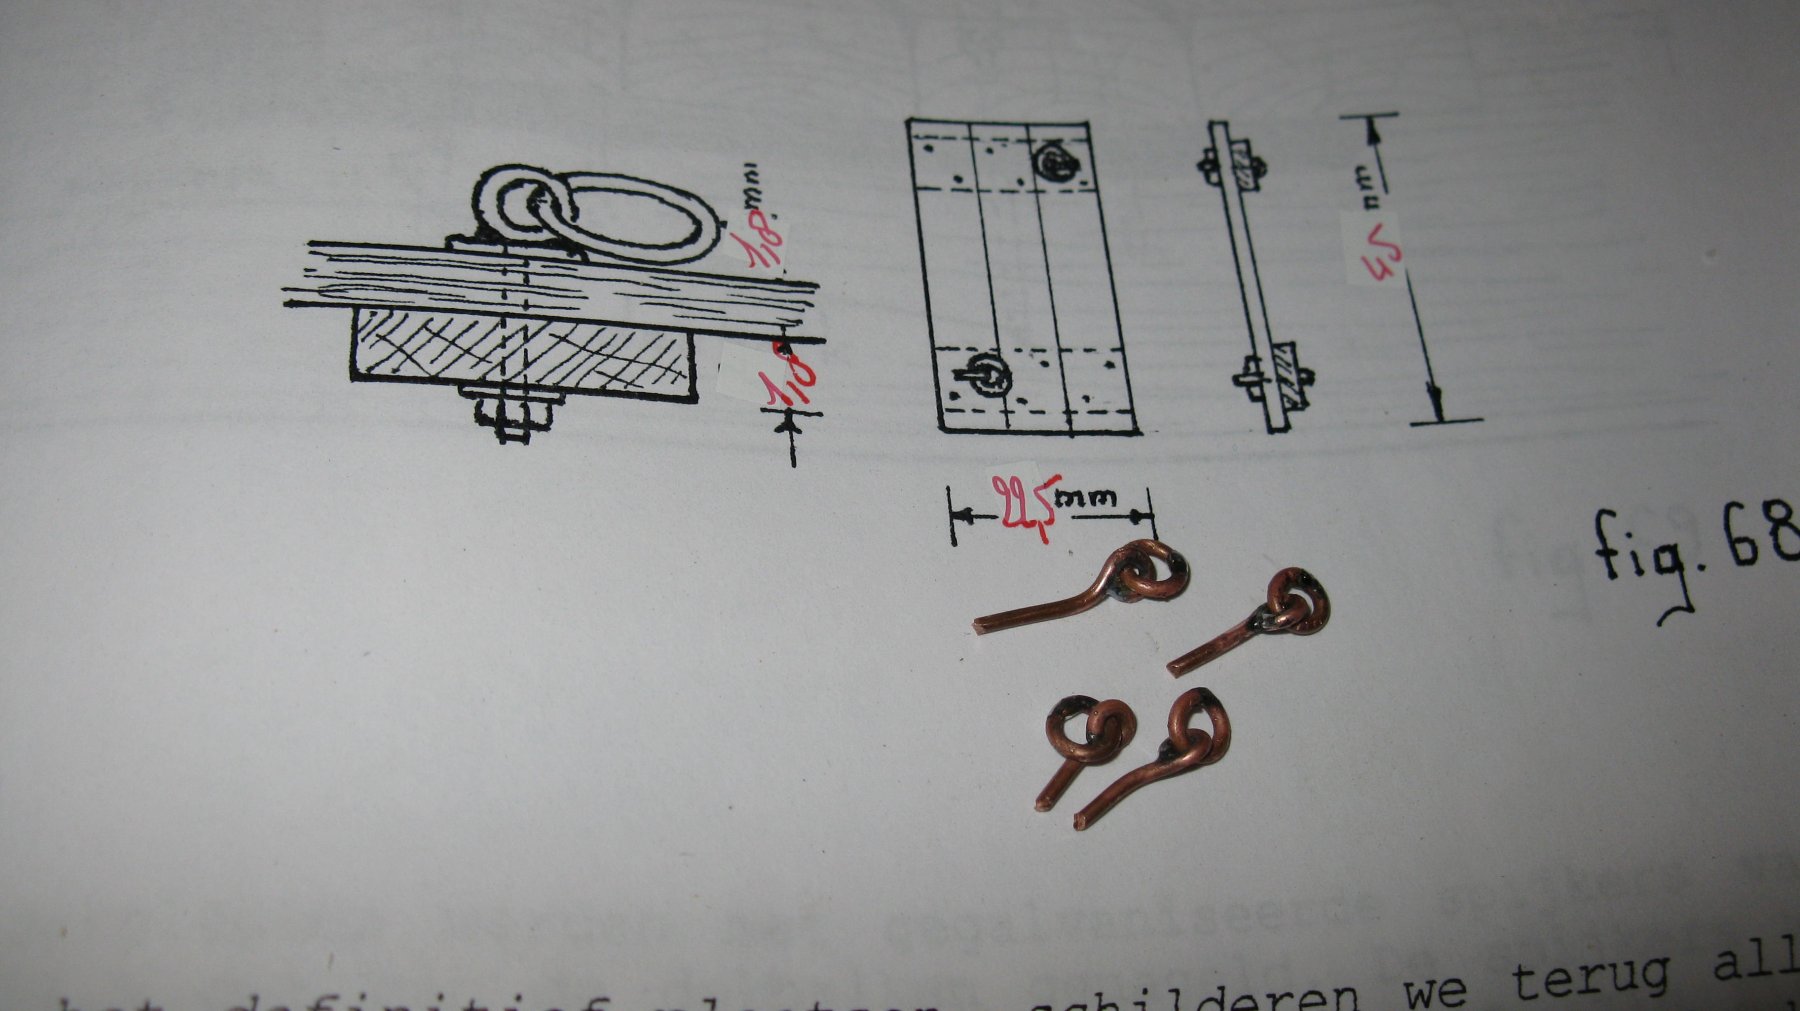
Making the hatch rings
-
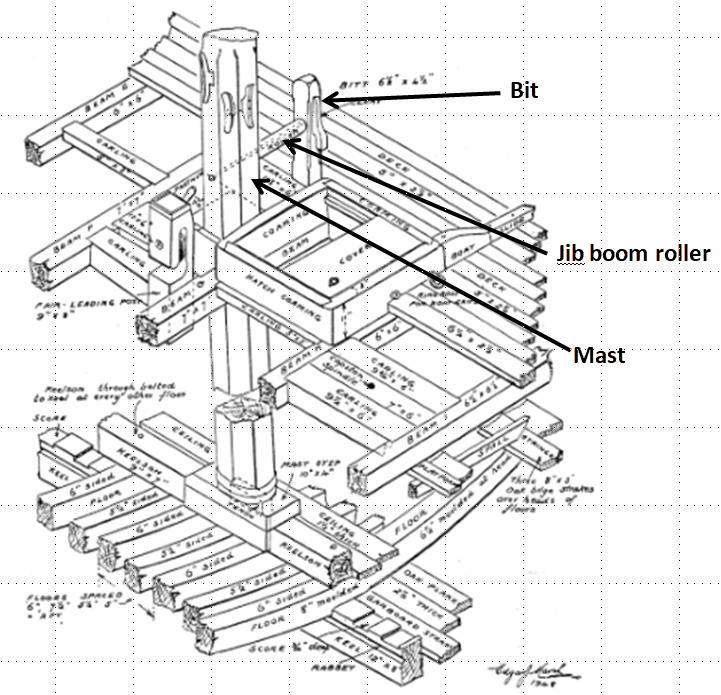
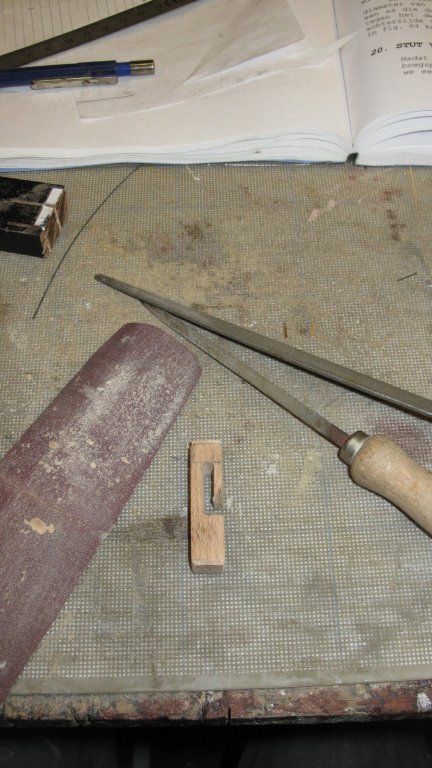
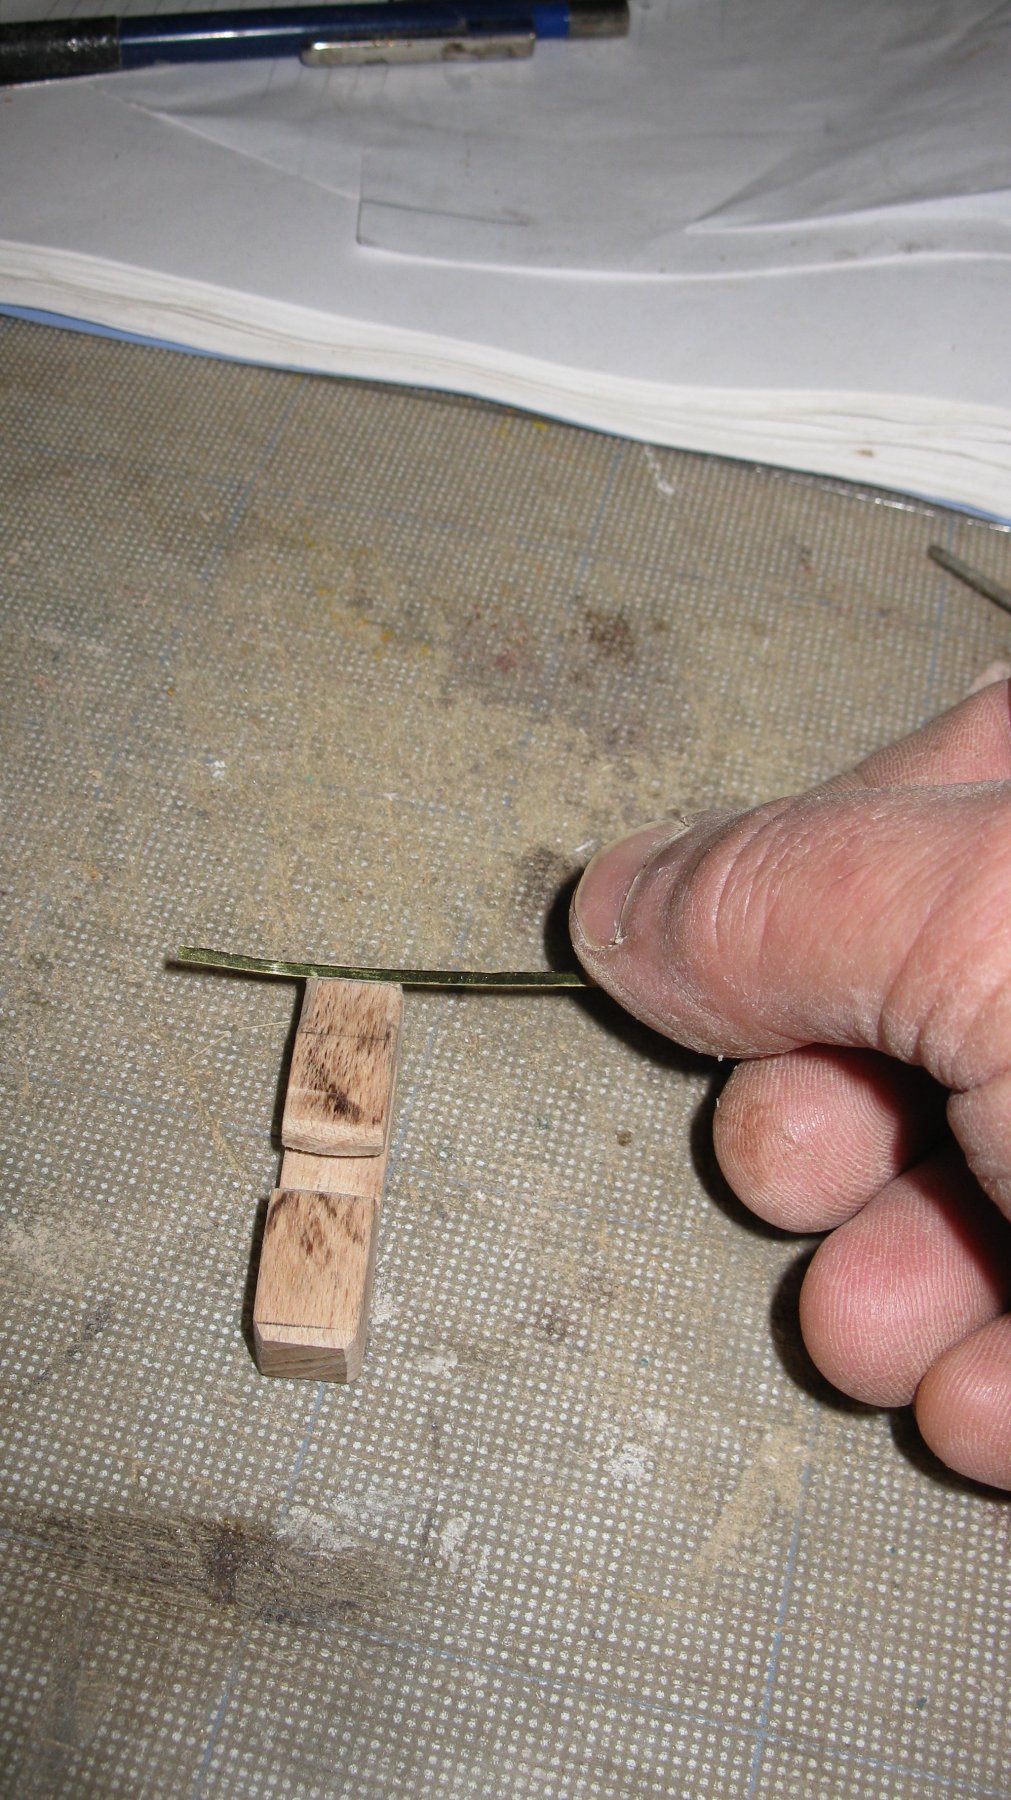
18.2. Preparing to lay the deck. Making a bit for the jib boom roller
At the right side of the mast stands a bit with a cleat. Between the bit and the mast is a roller on which the jib boom is brought in (Drawing: 'Sailing trawlers' Edgar J. March).
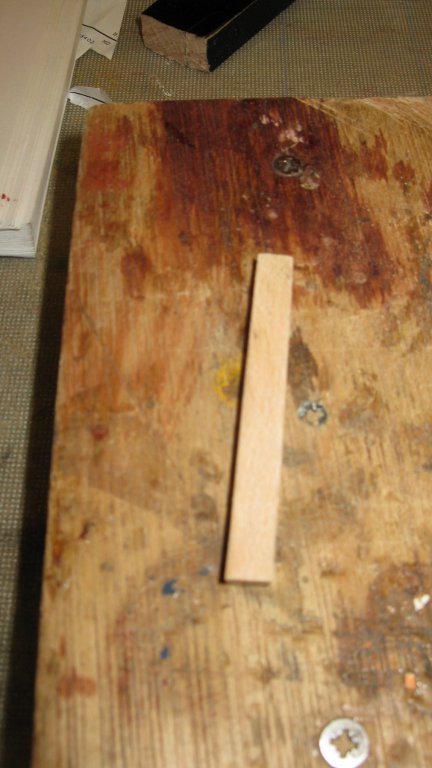
Making the bit.
The fair leading post and the bit presented into their position.
 .
.
-
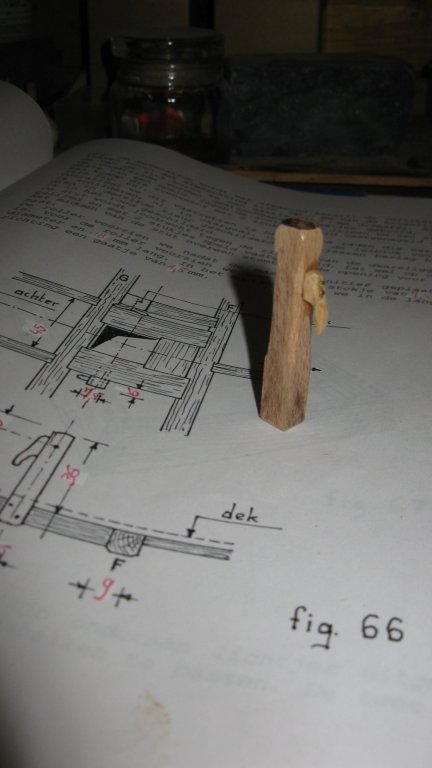
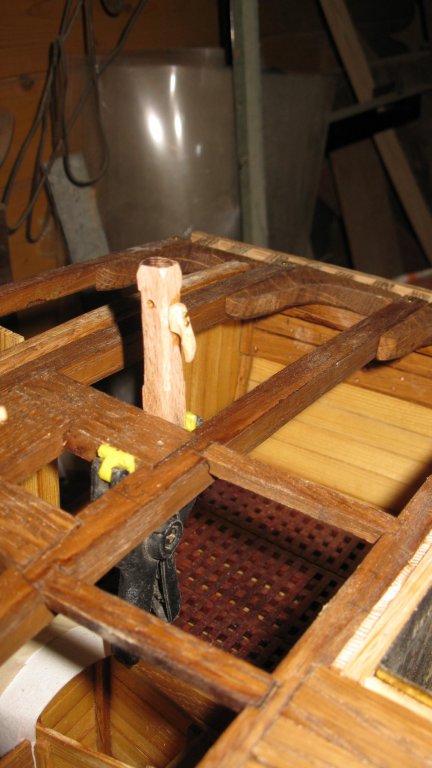
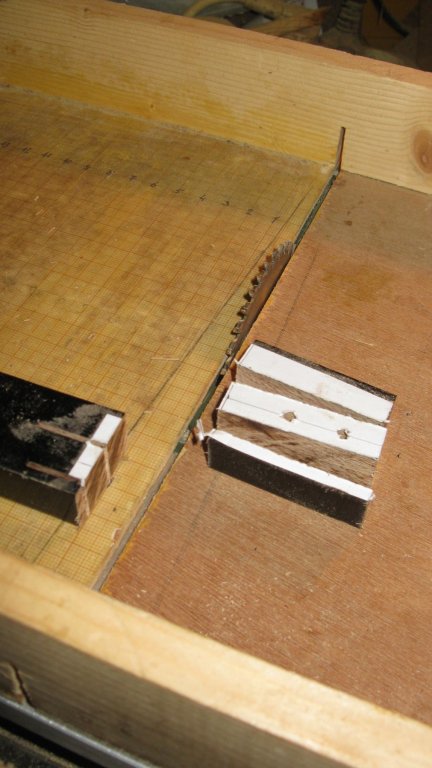
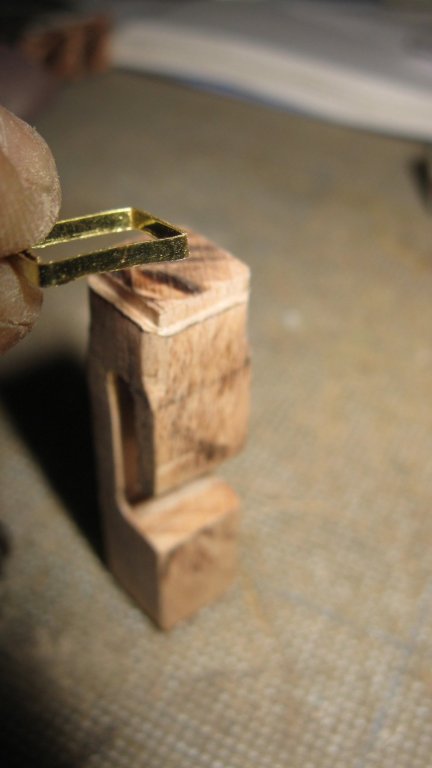
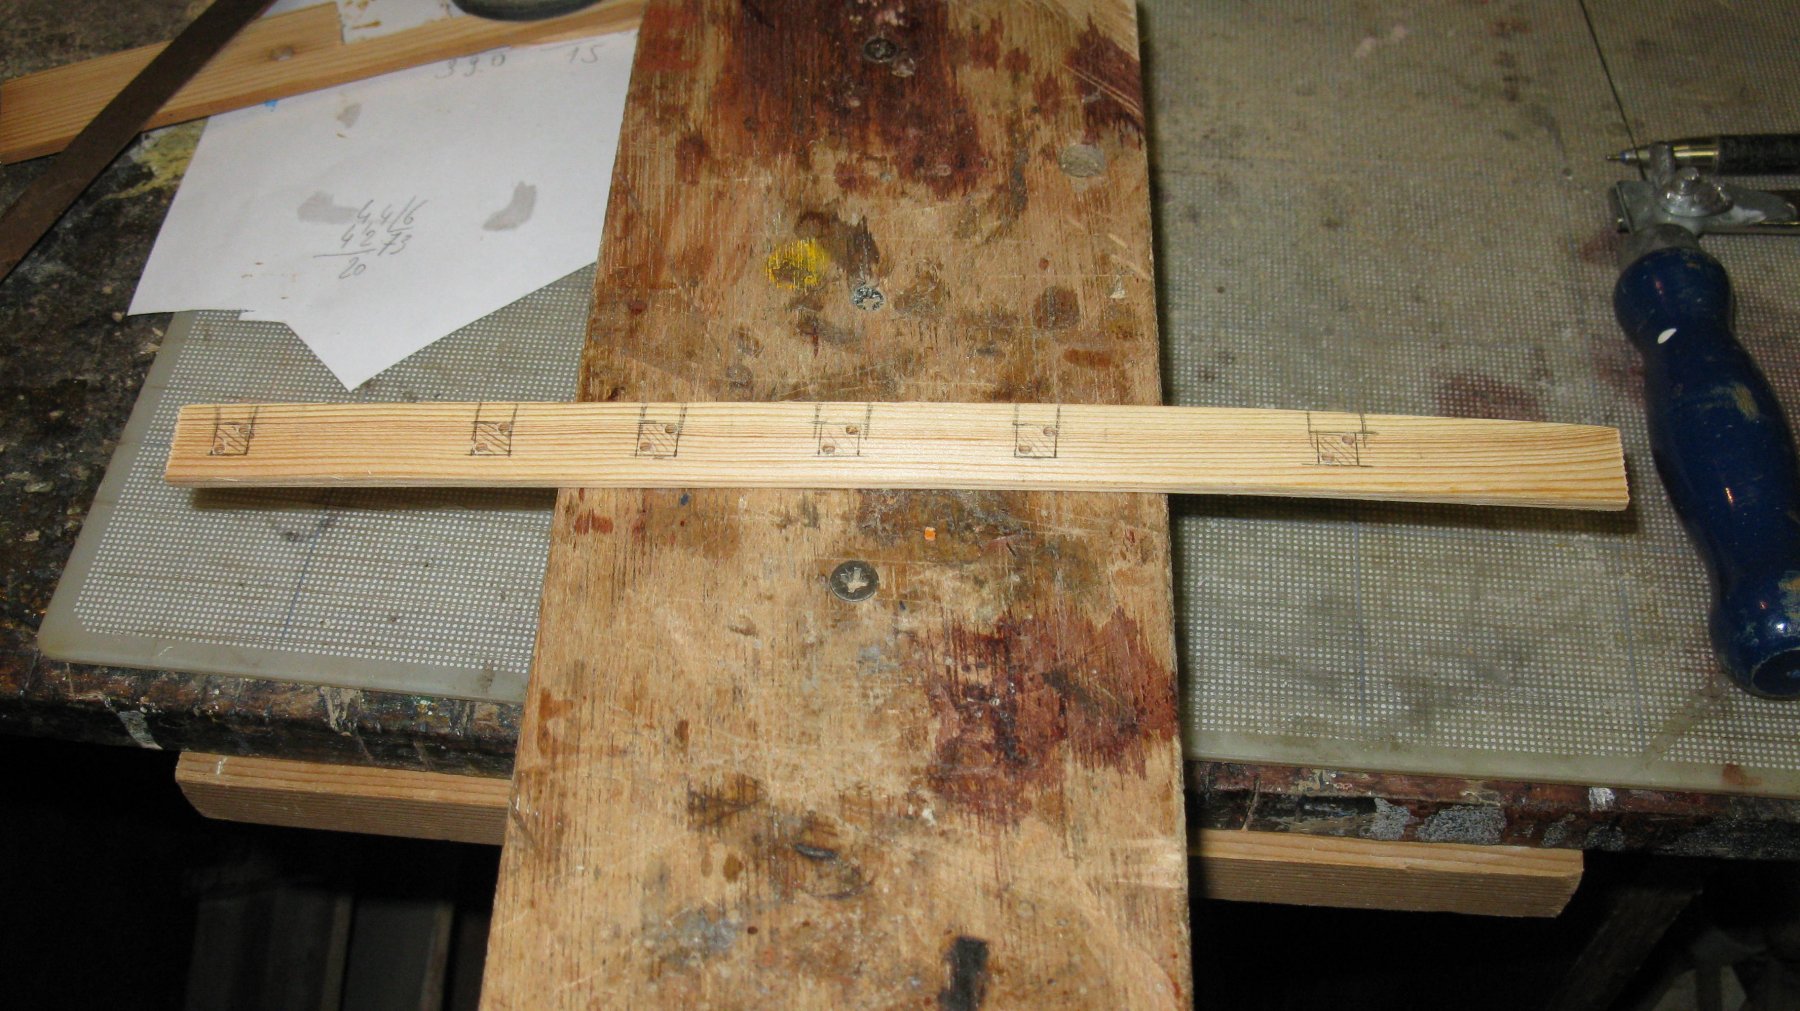
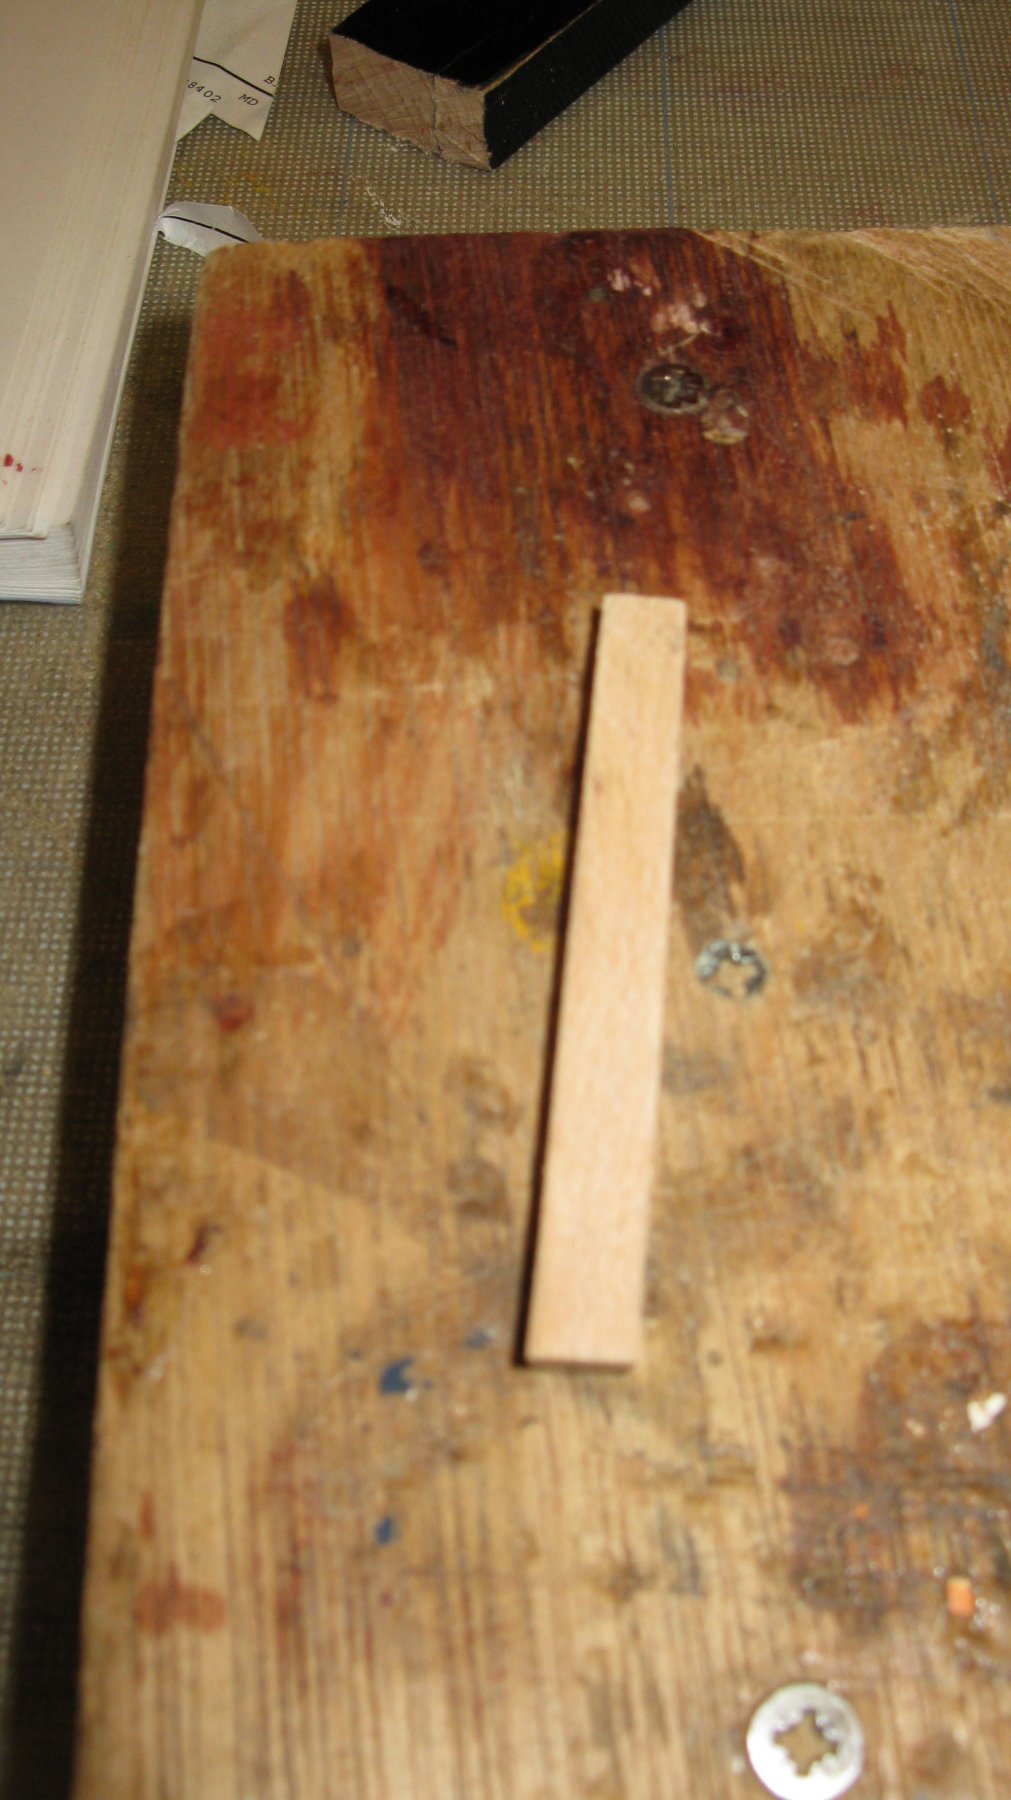
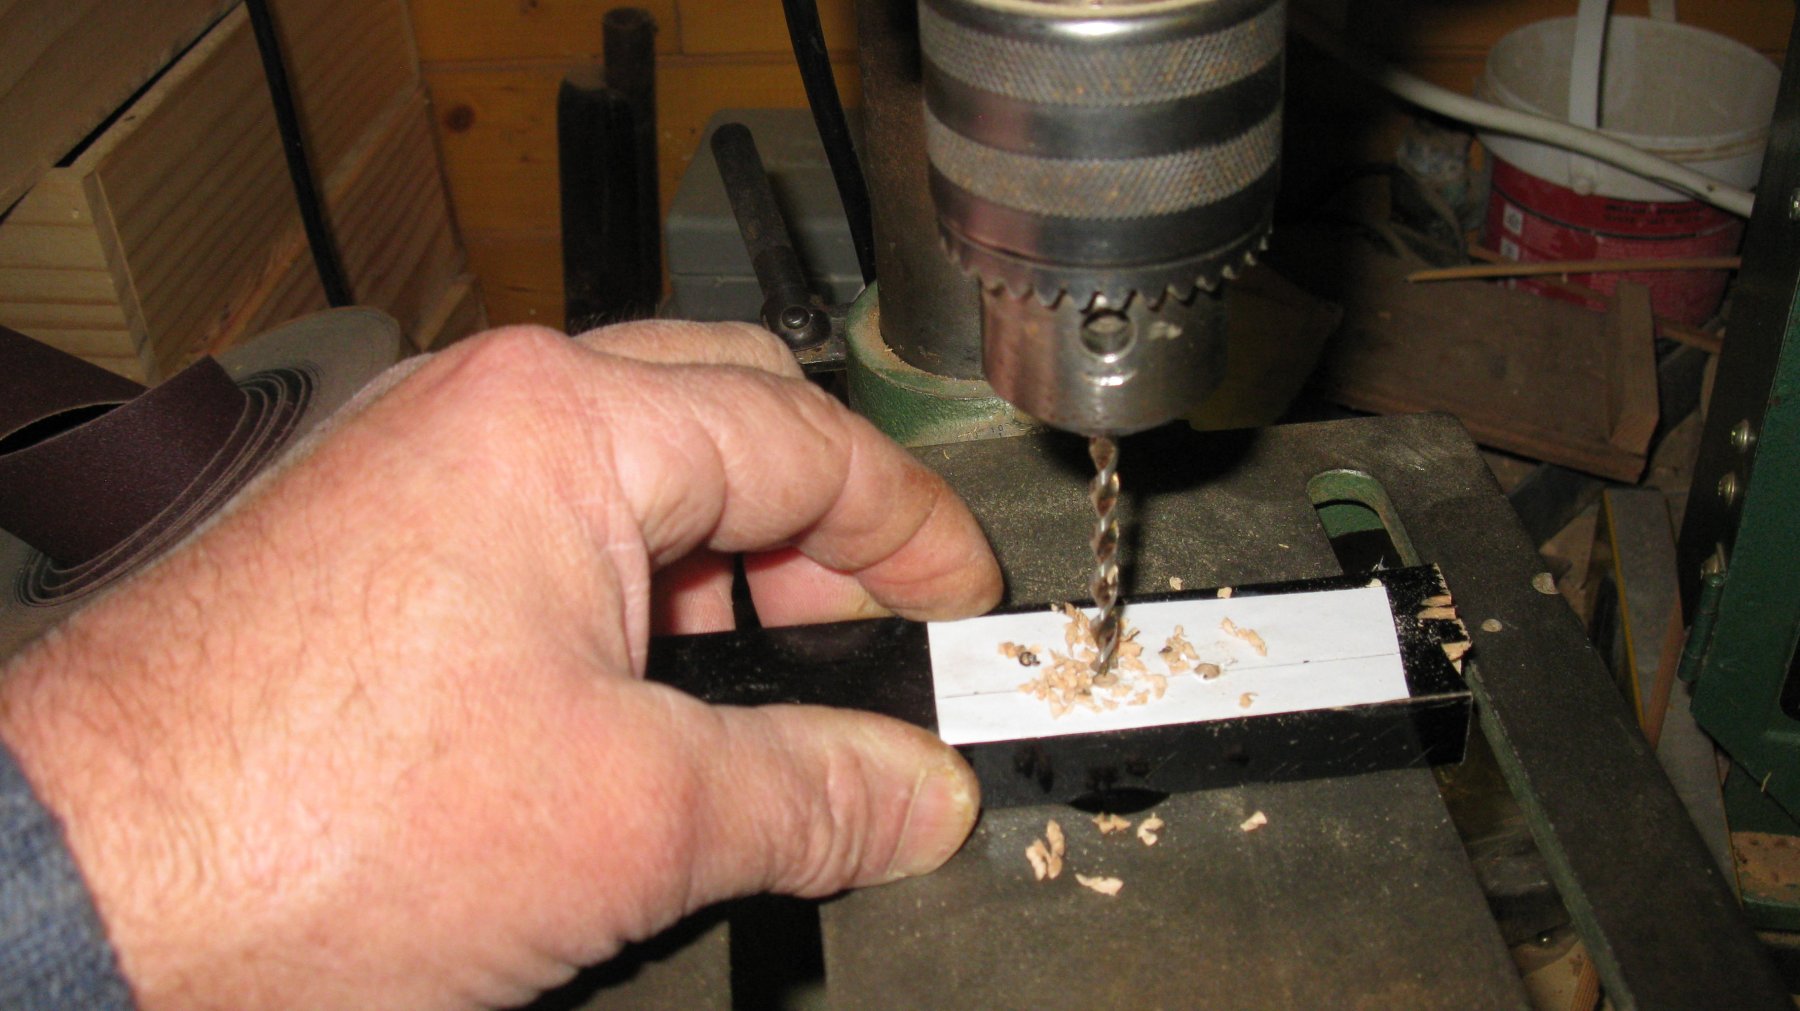
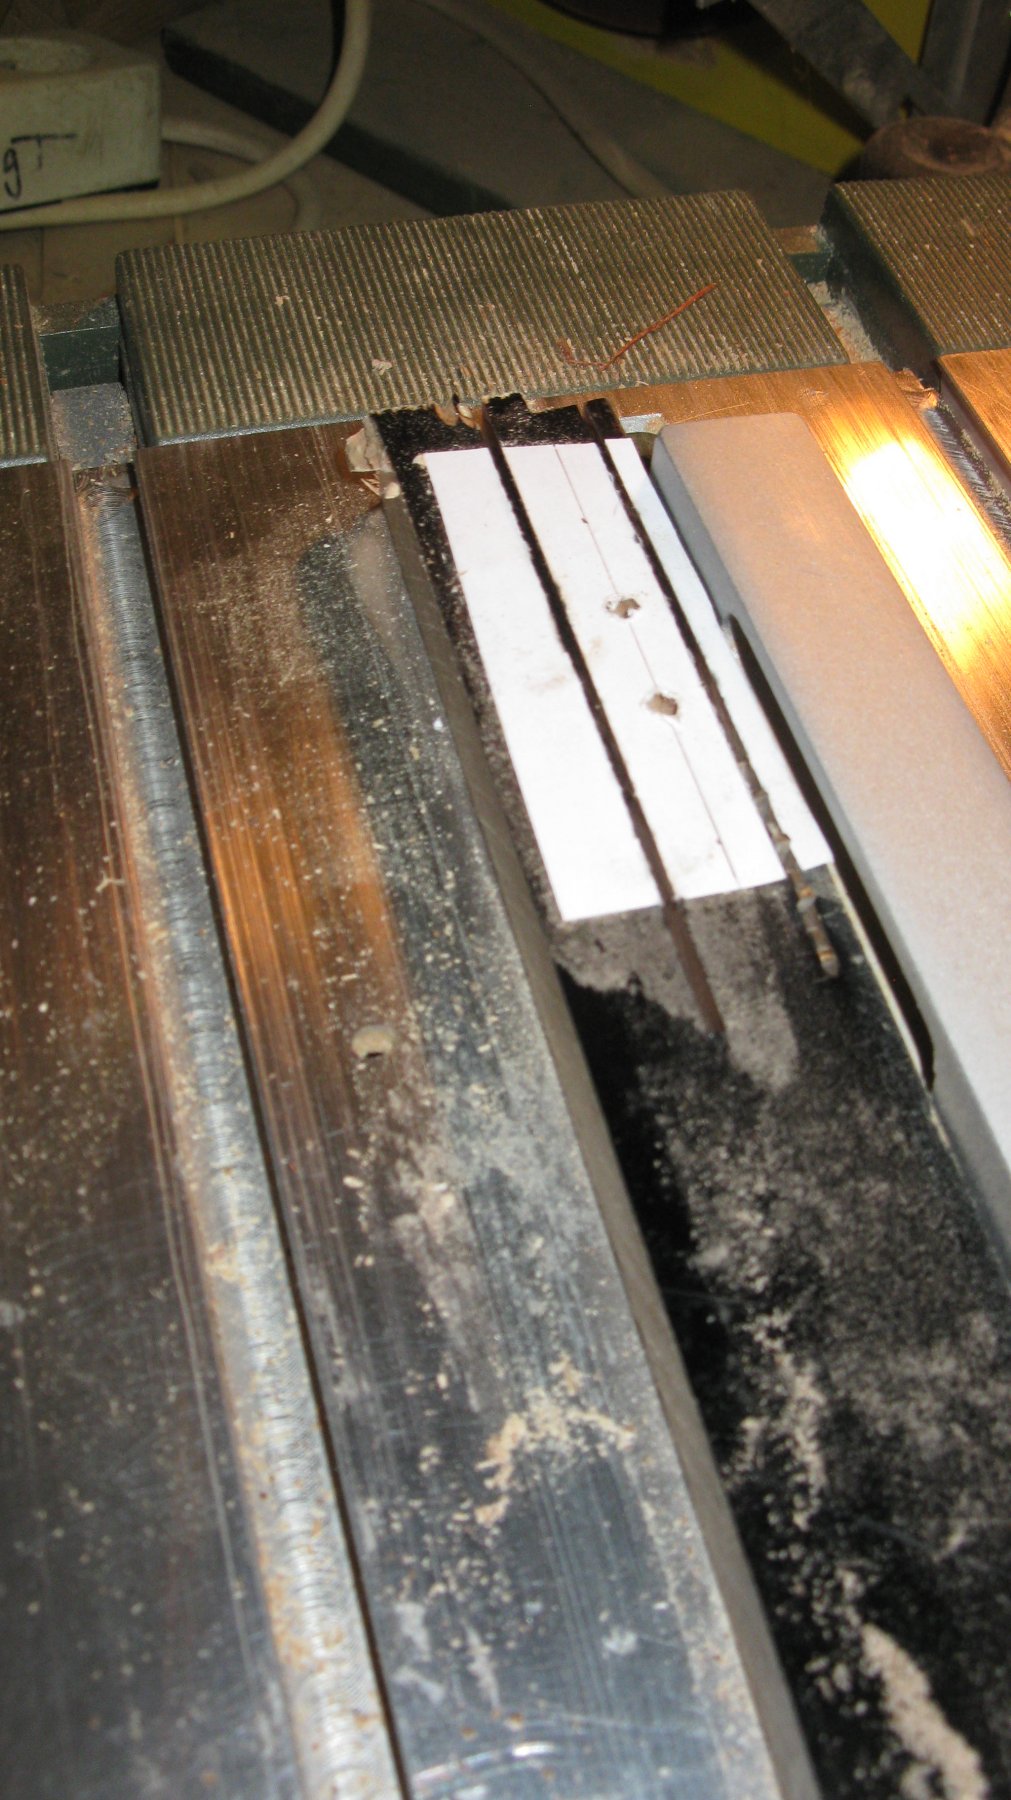
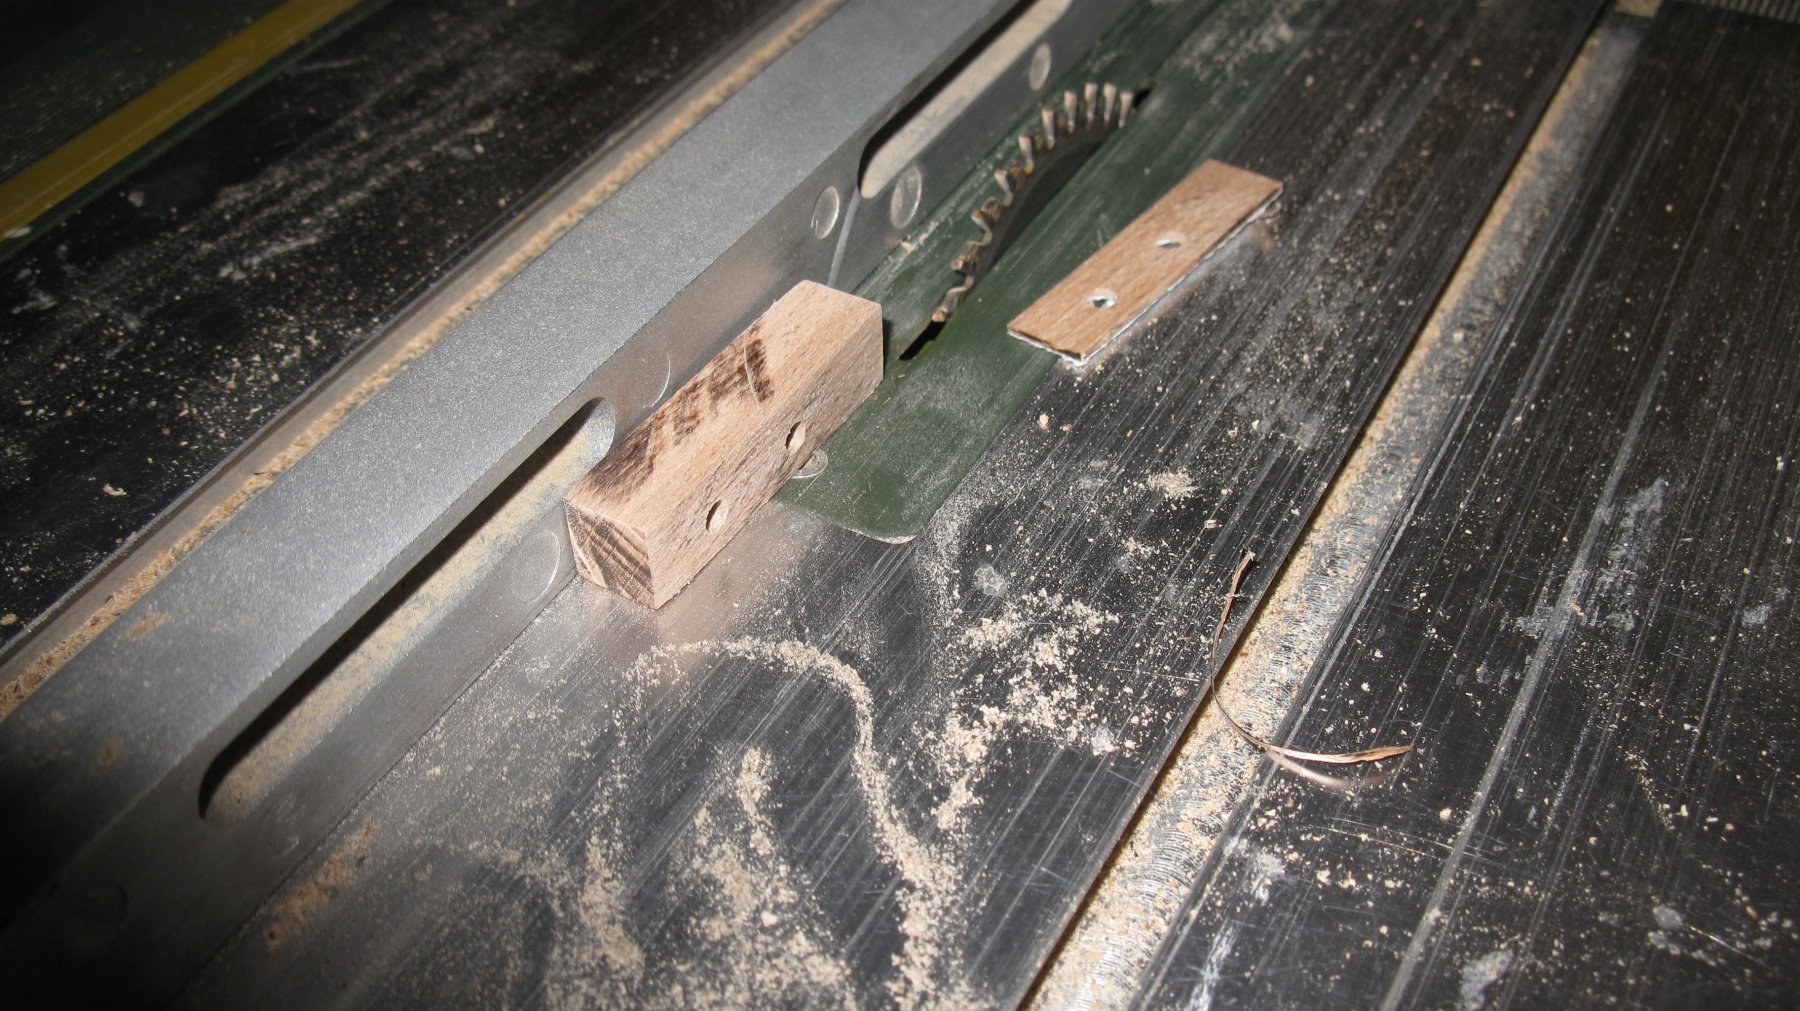
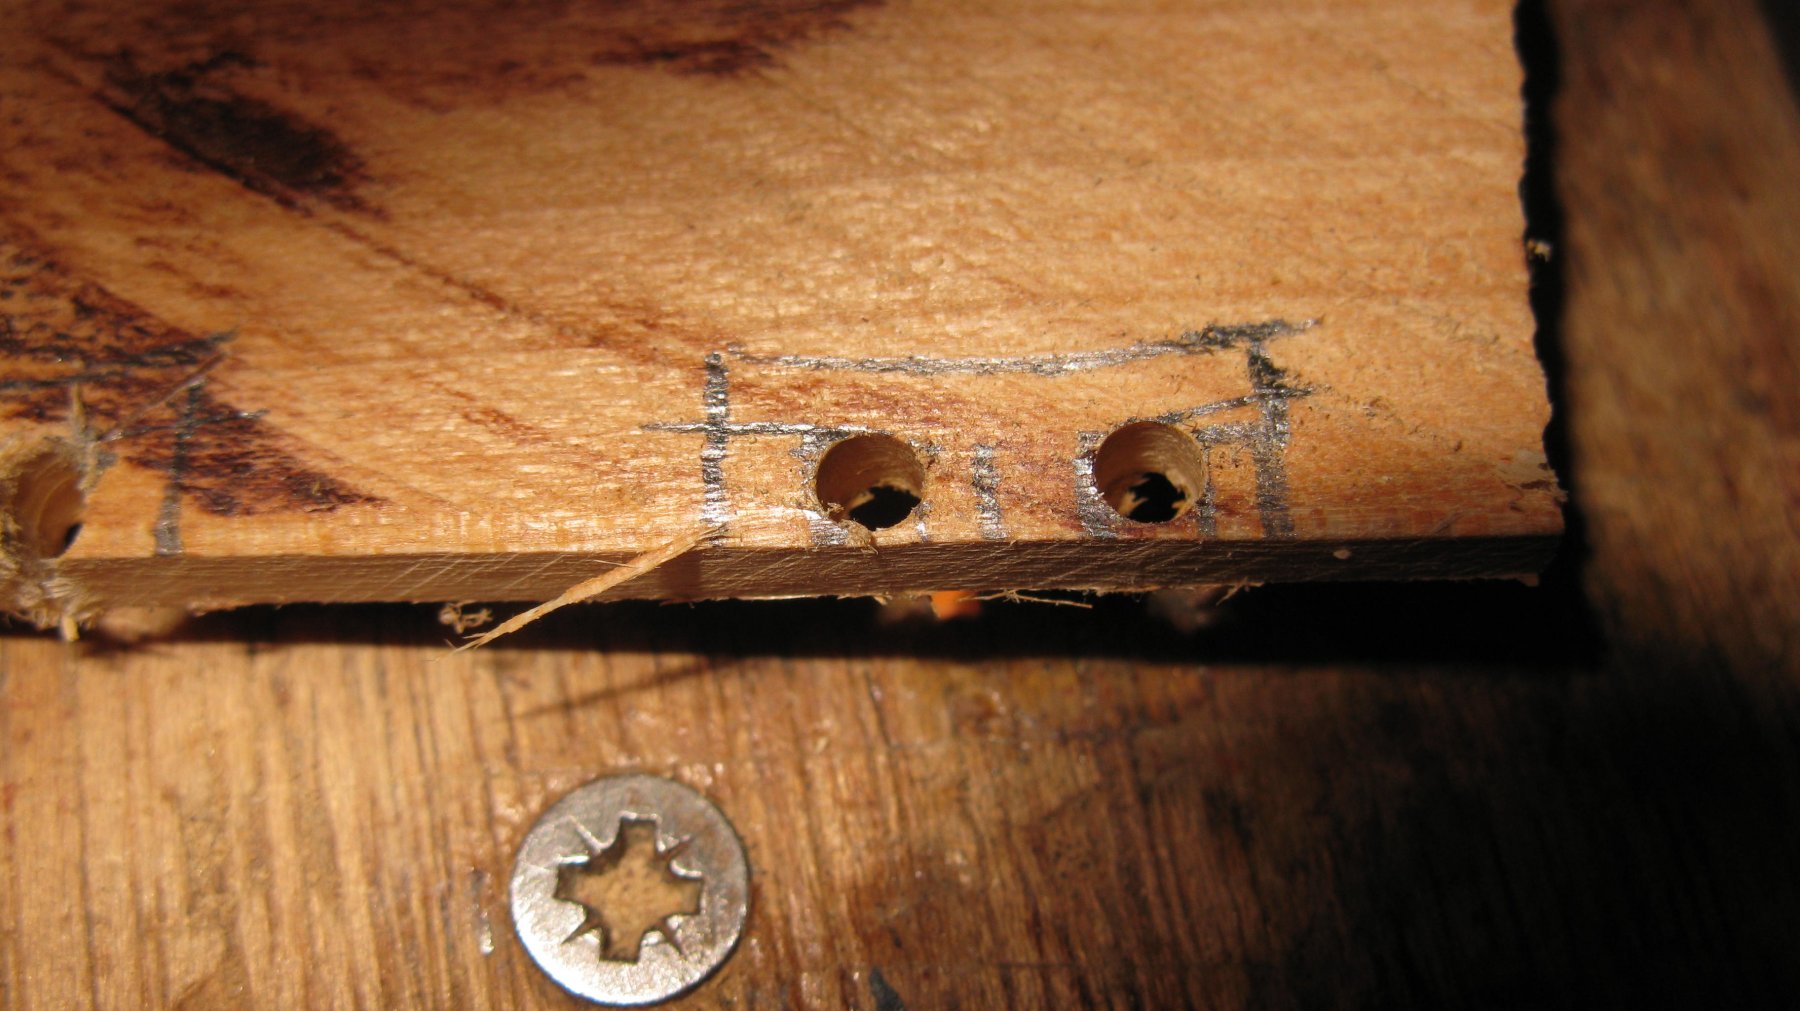
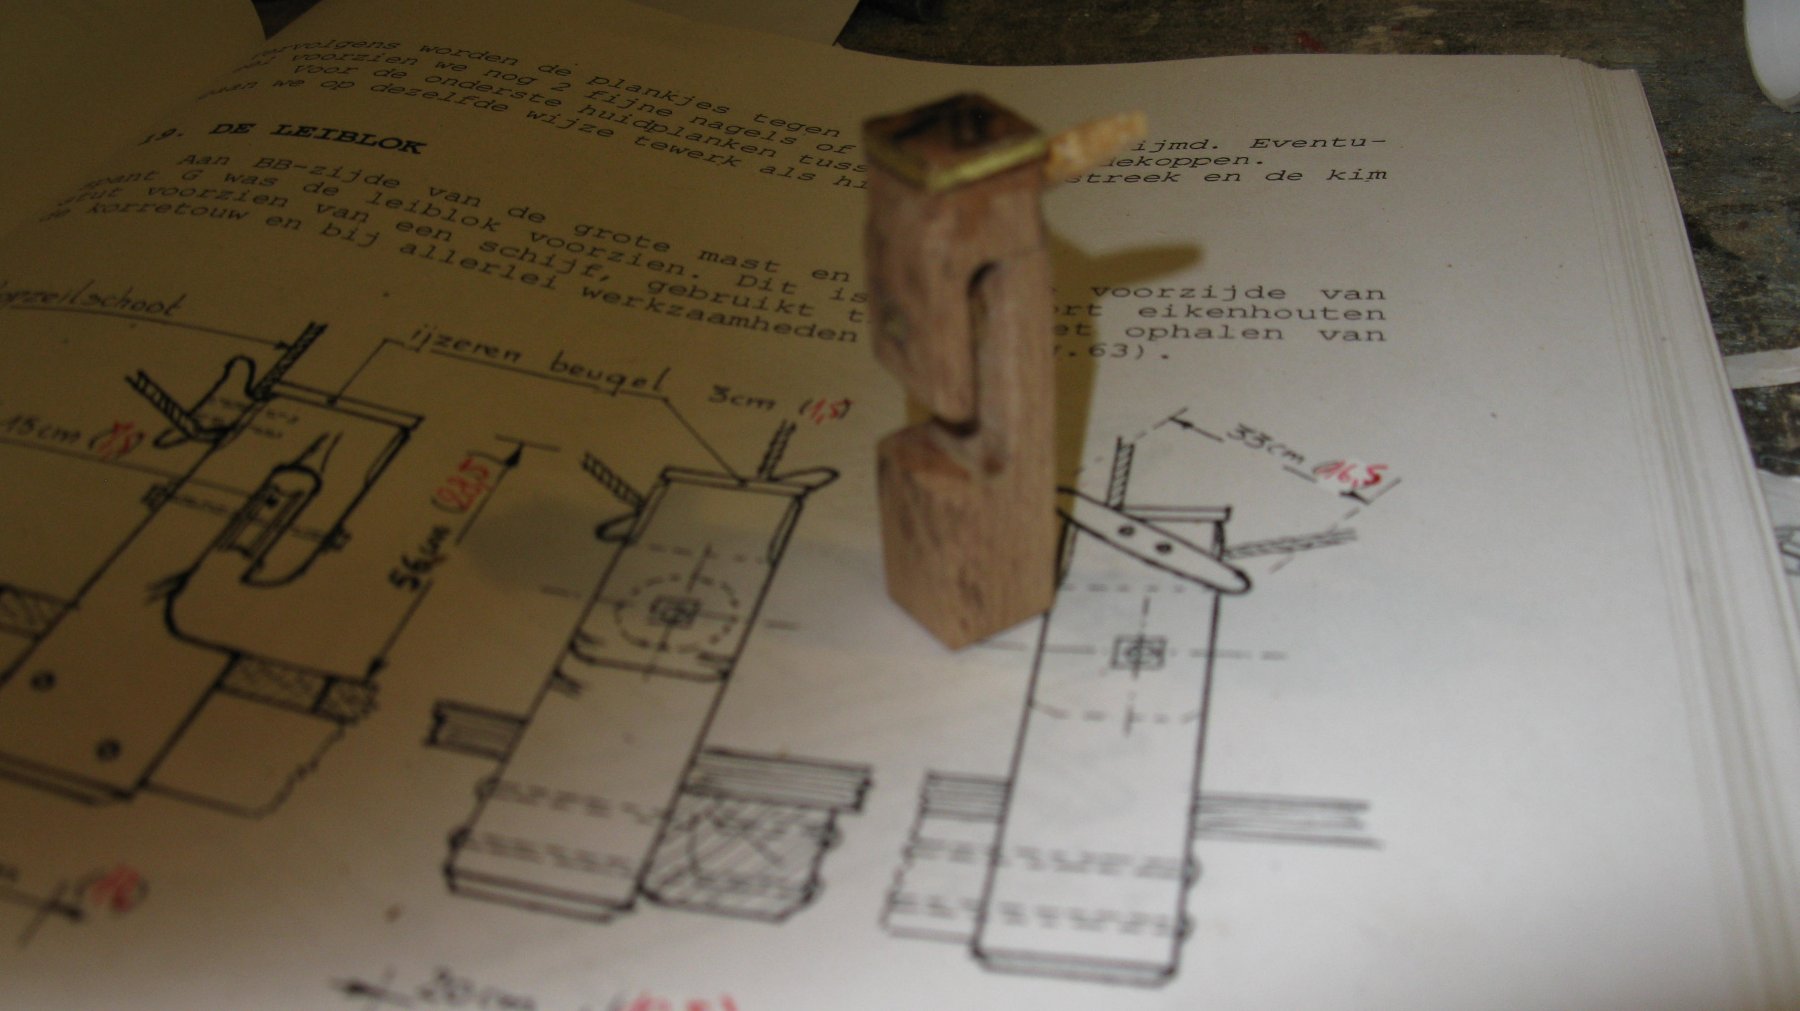
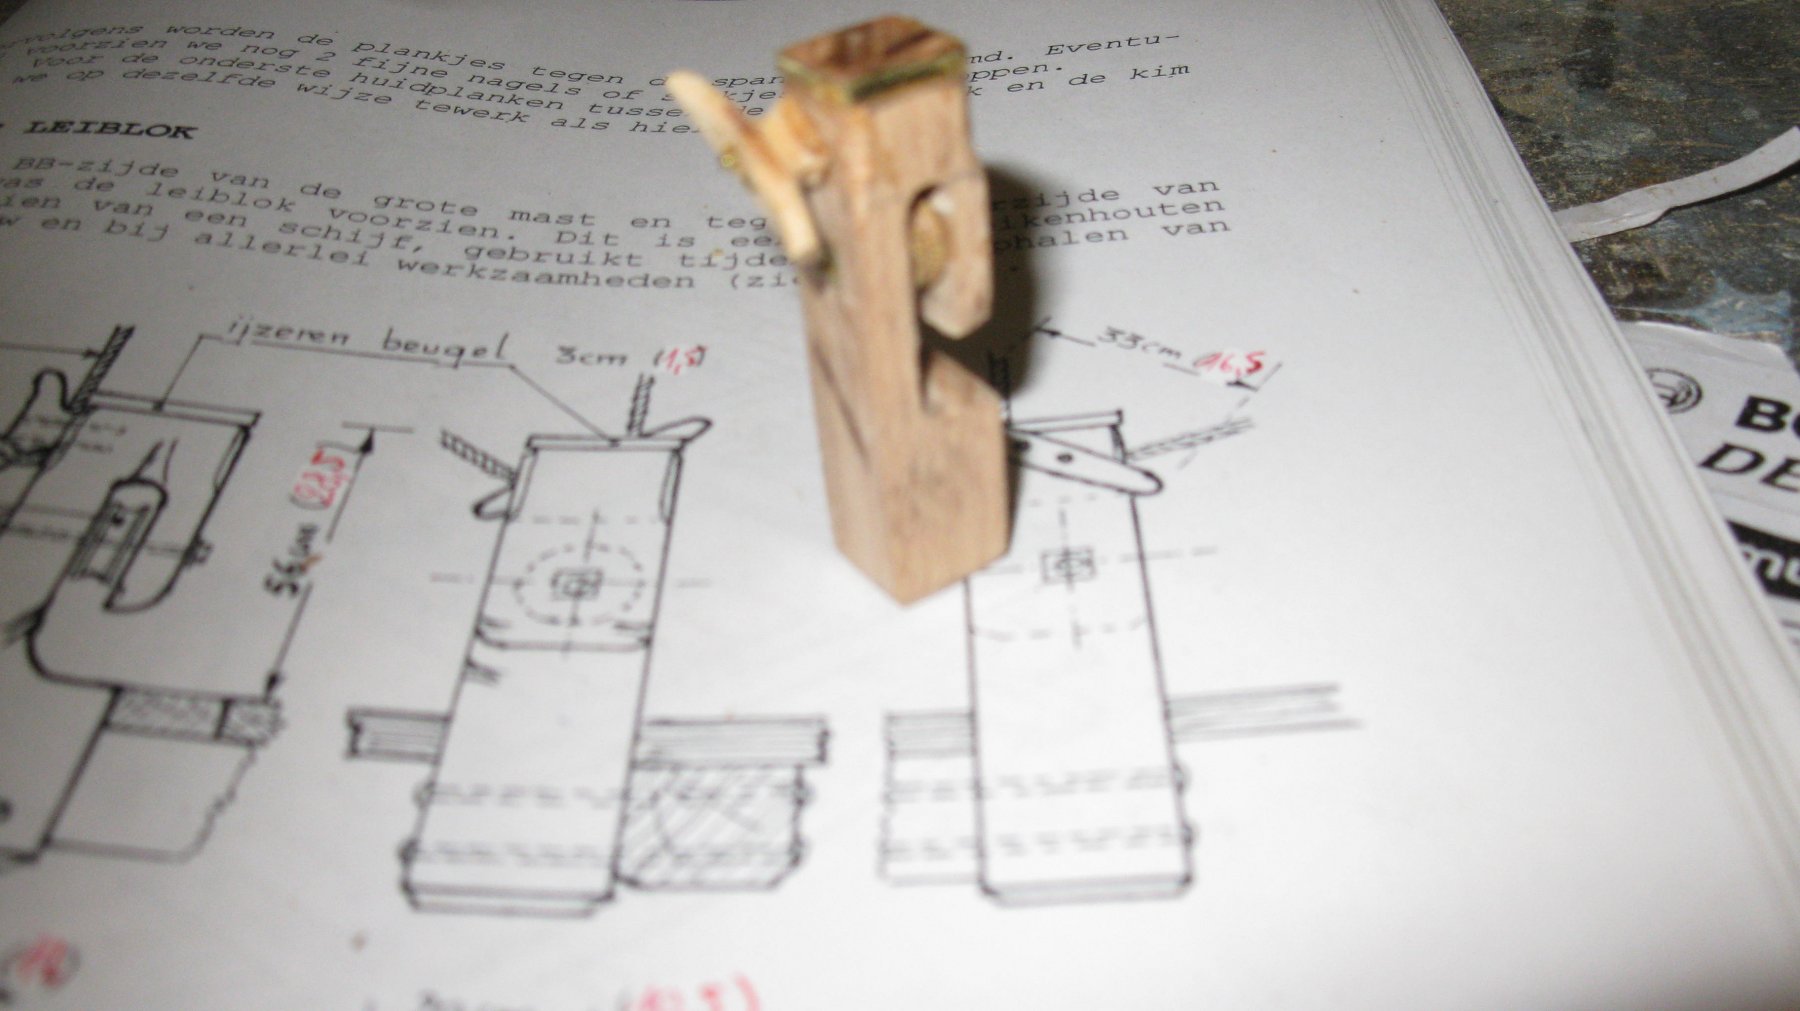
18.1. Preparing to lay the deck. Making a fair leading post
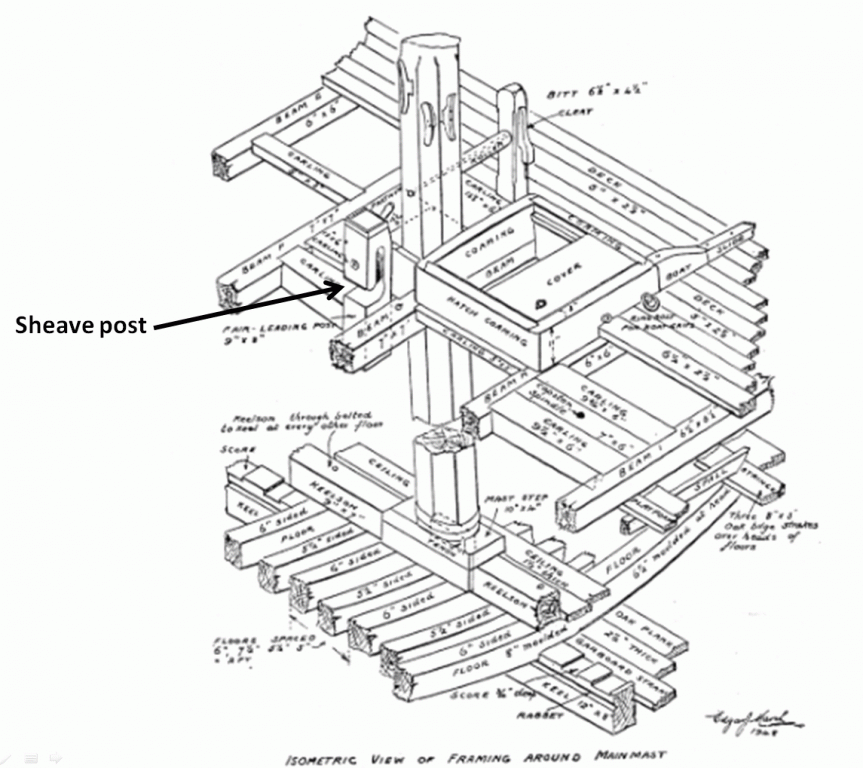
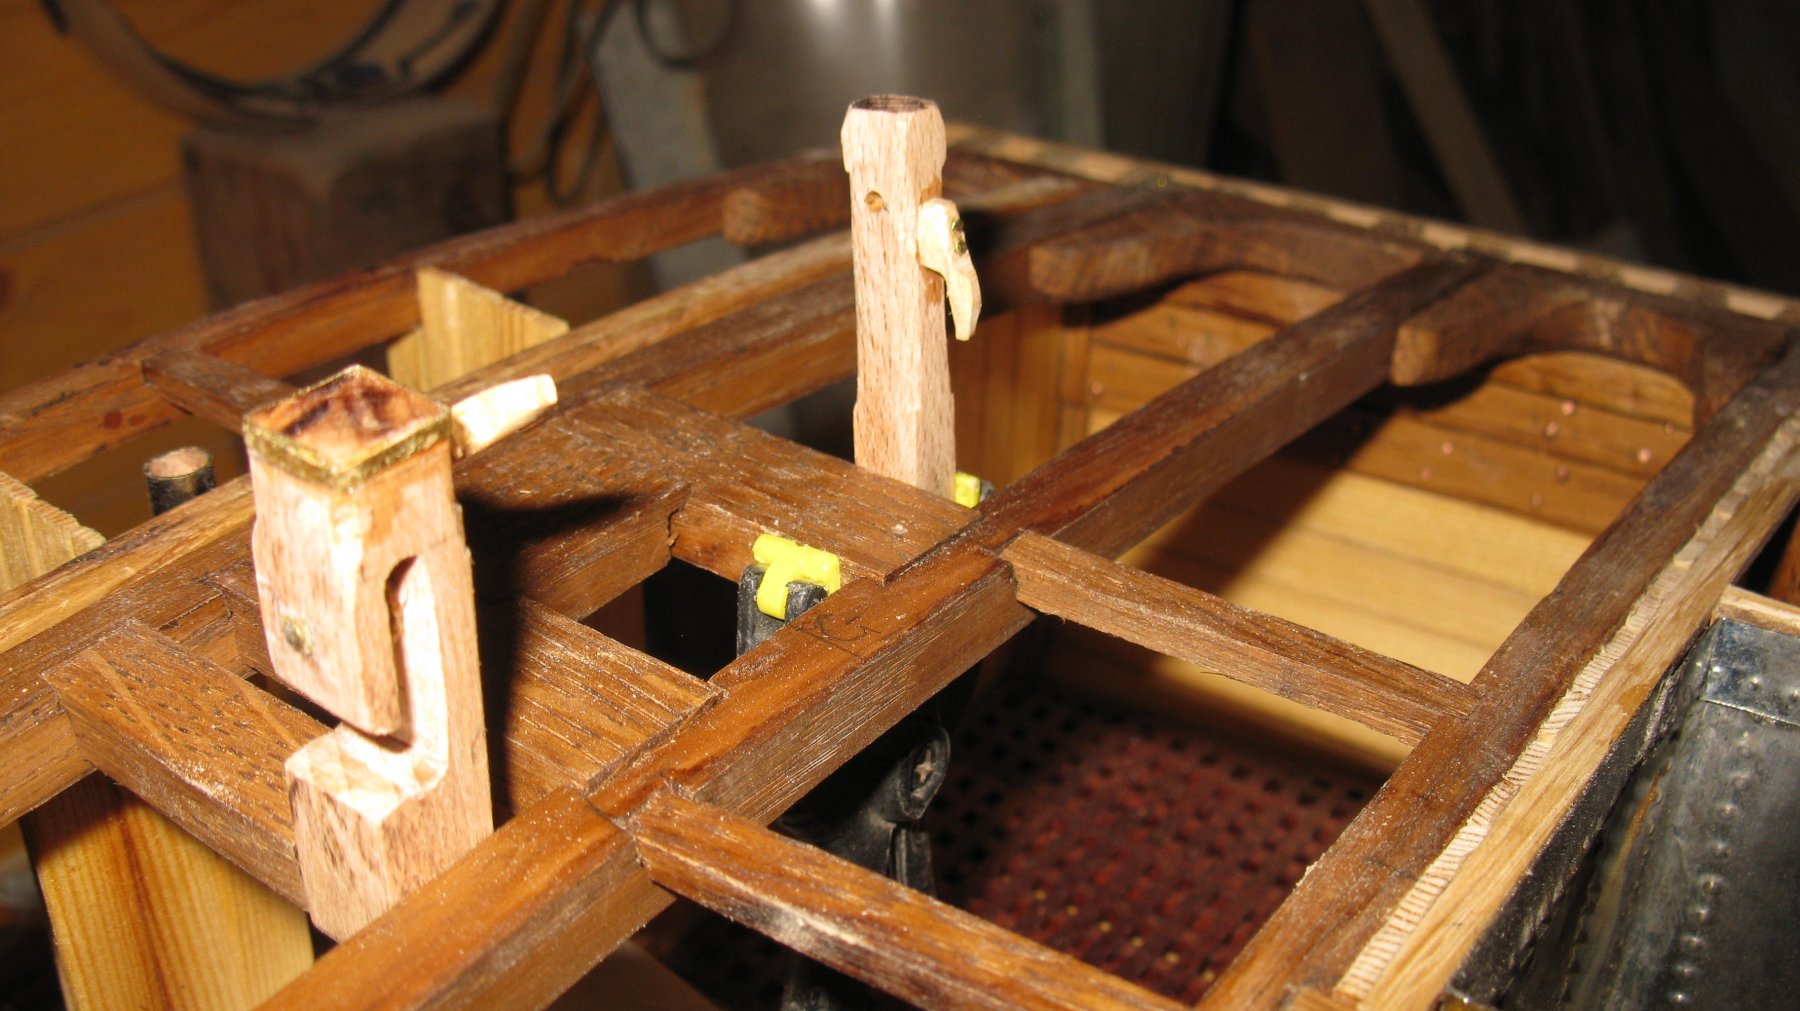
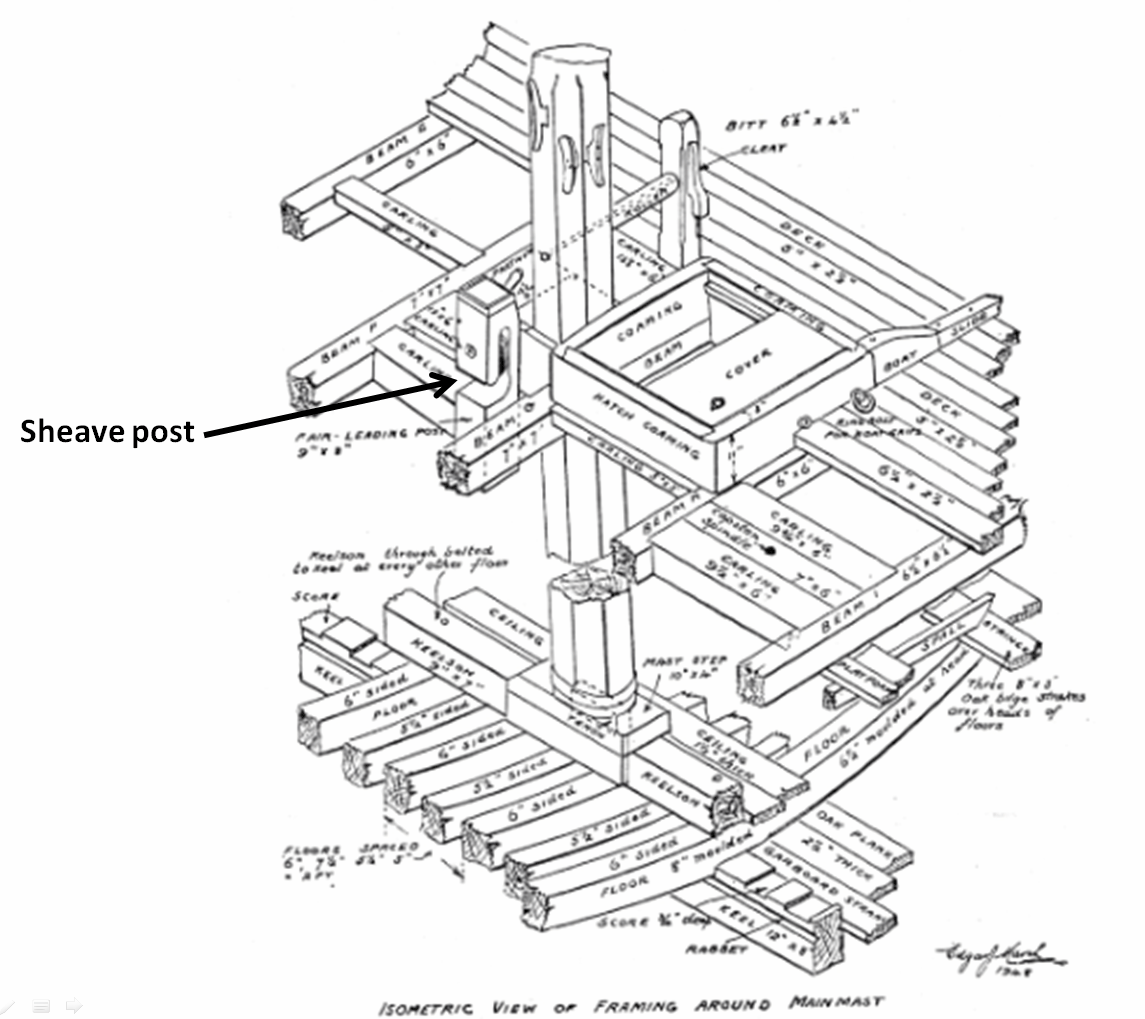
Before laying the deck, some deck gear has to be made and to be placed. I start with a sheave post which will be standing left of the mast (Drawing: 'Sailing trawlers' Edgar J. March).
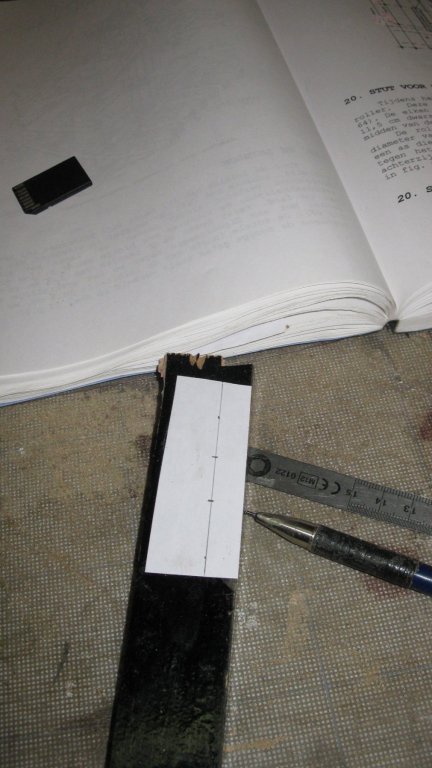
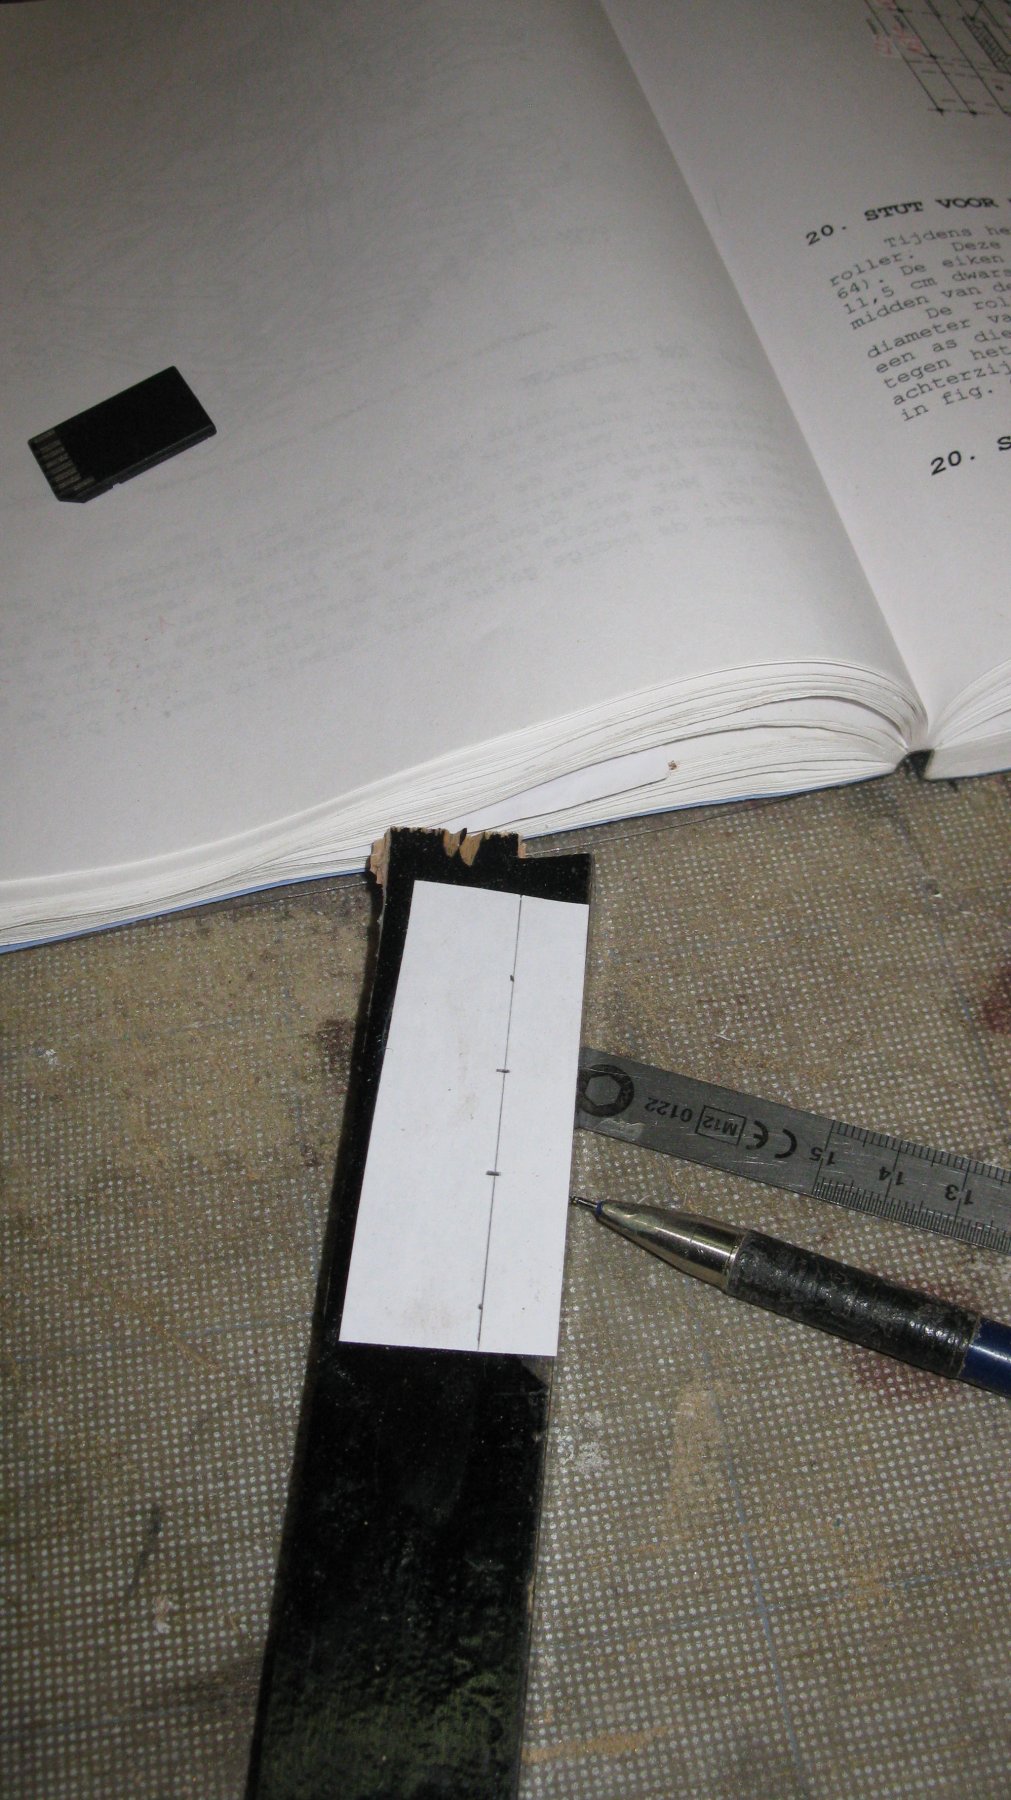
Afterward the post will be painted so the practicum advises to use beech because it shows less grain then oak. I have a beach plank, but it is painted black. I saw al slice of it and glue a piece of paper on it because I can't draw with pencil on the black paint.
I drill two holes for the recess of the sheave.

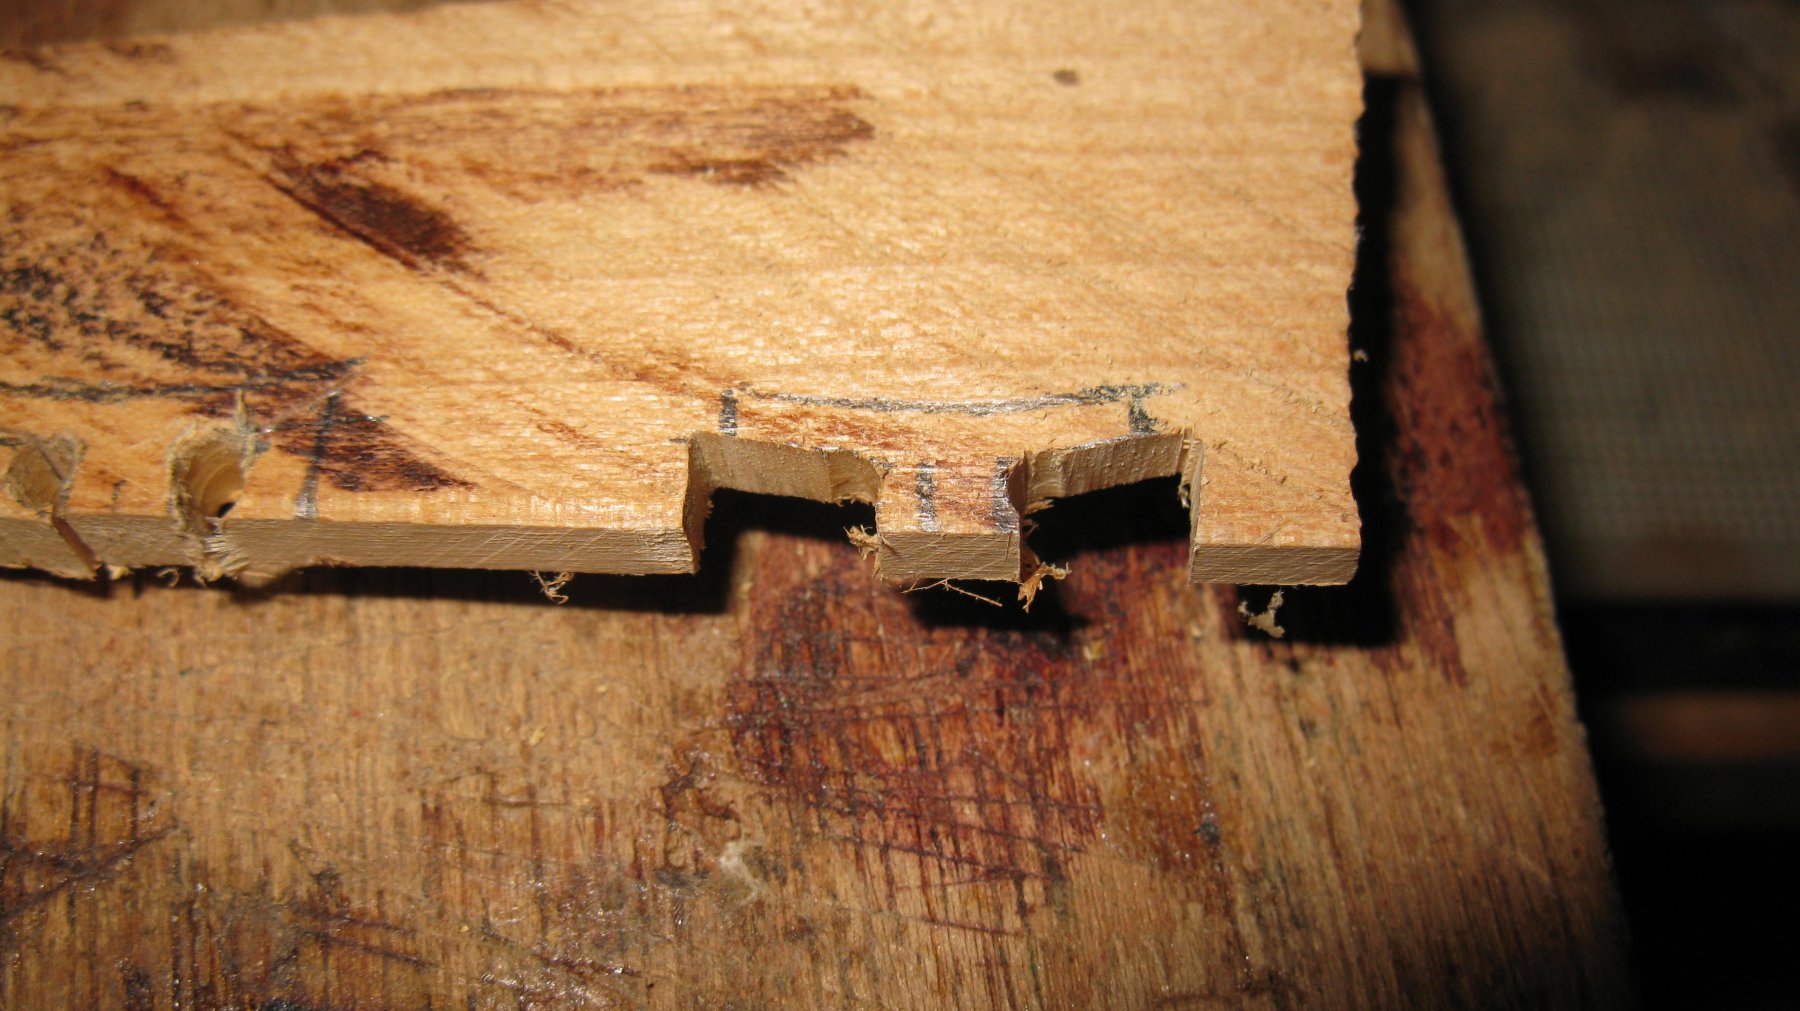
Sawing out the post.

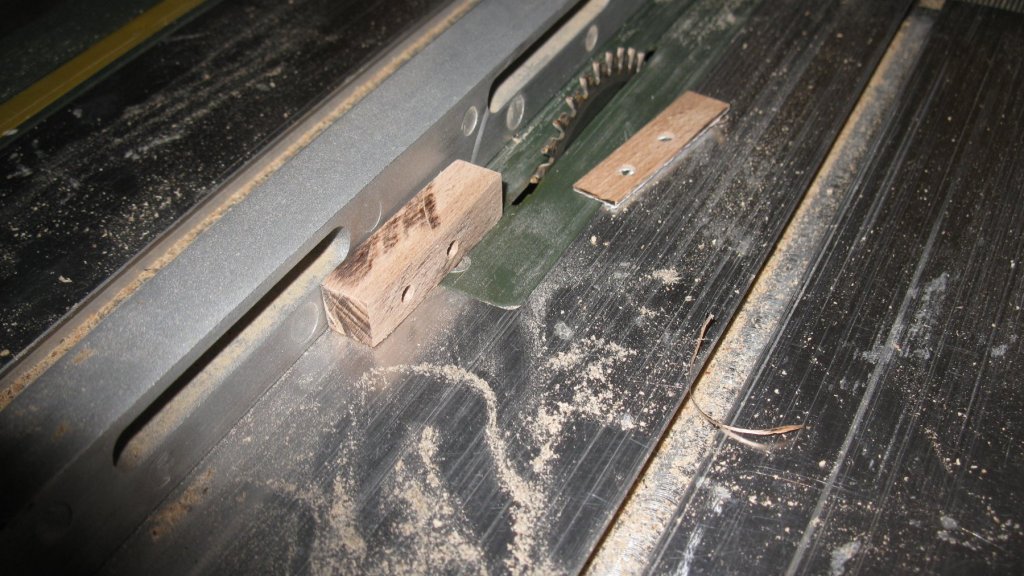
Sawing the recess for the sheave.
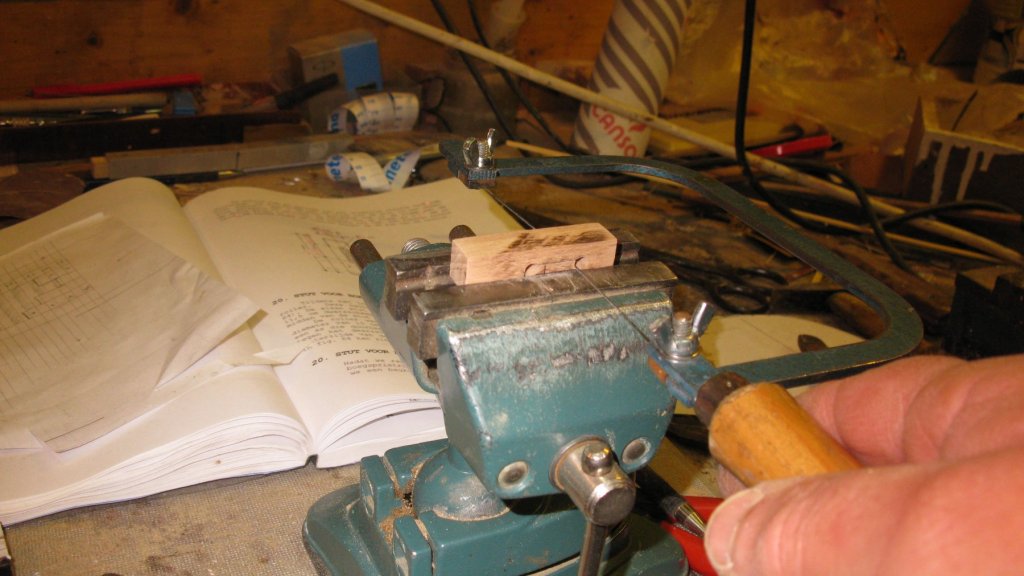
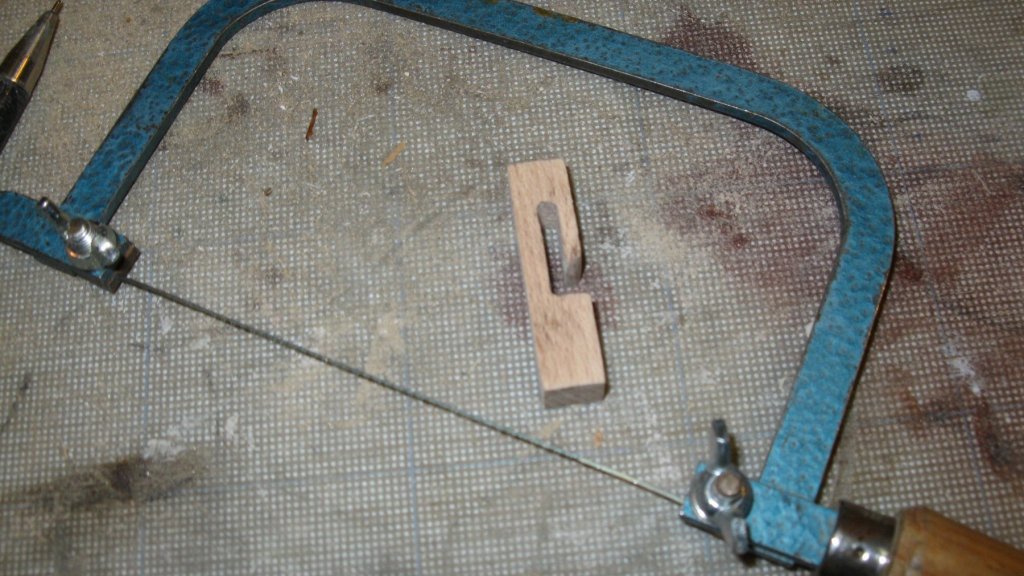
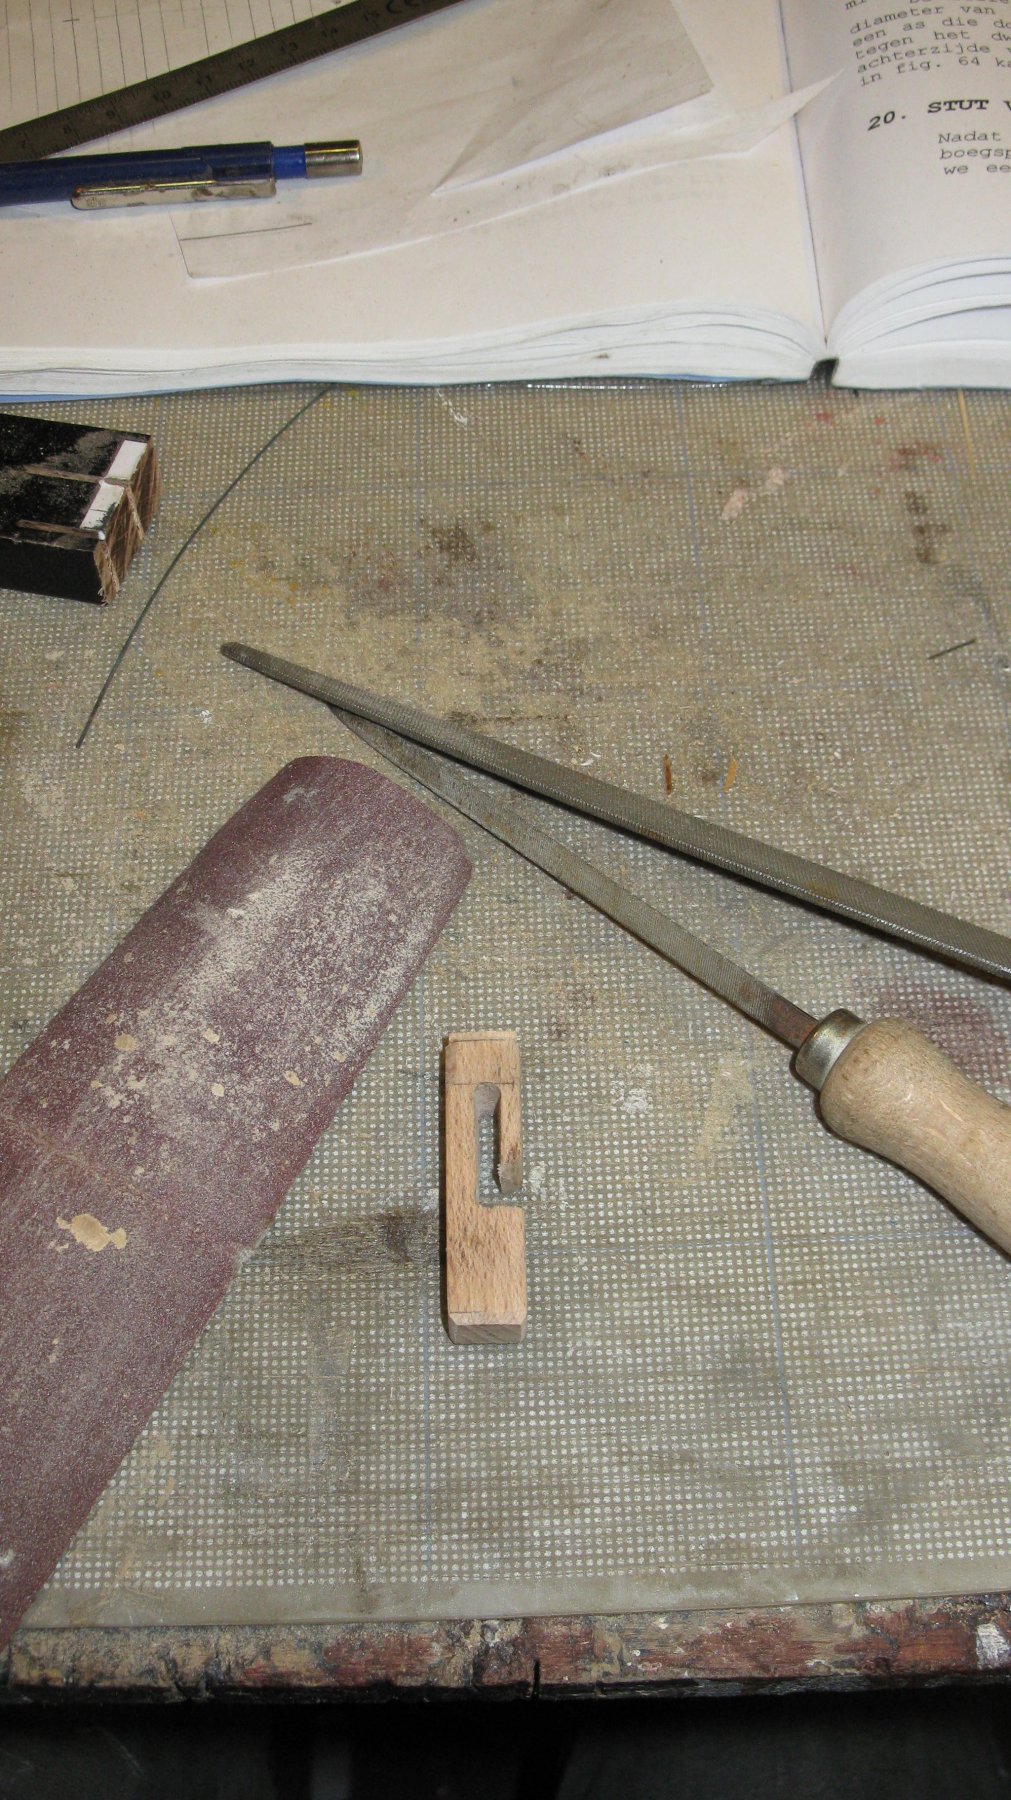
Shaping the post by filing it.
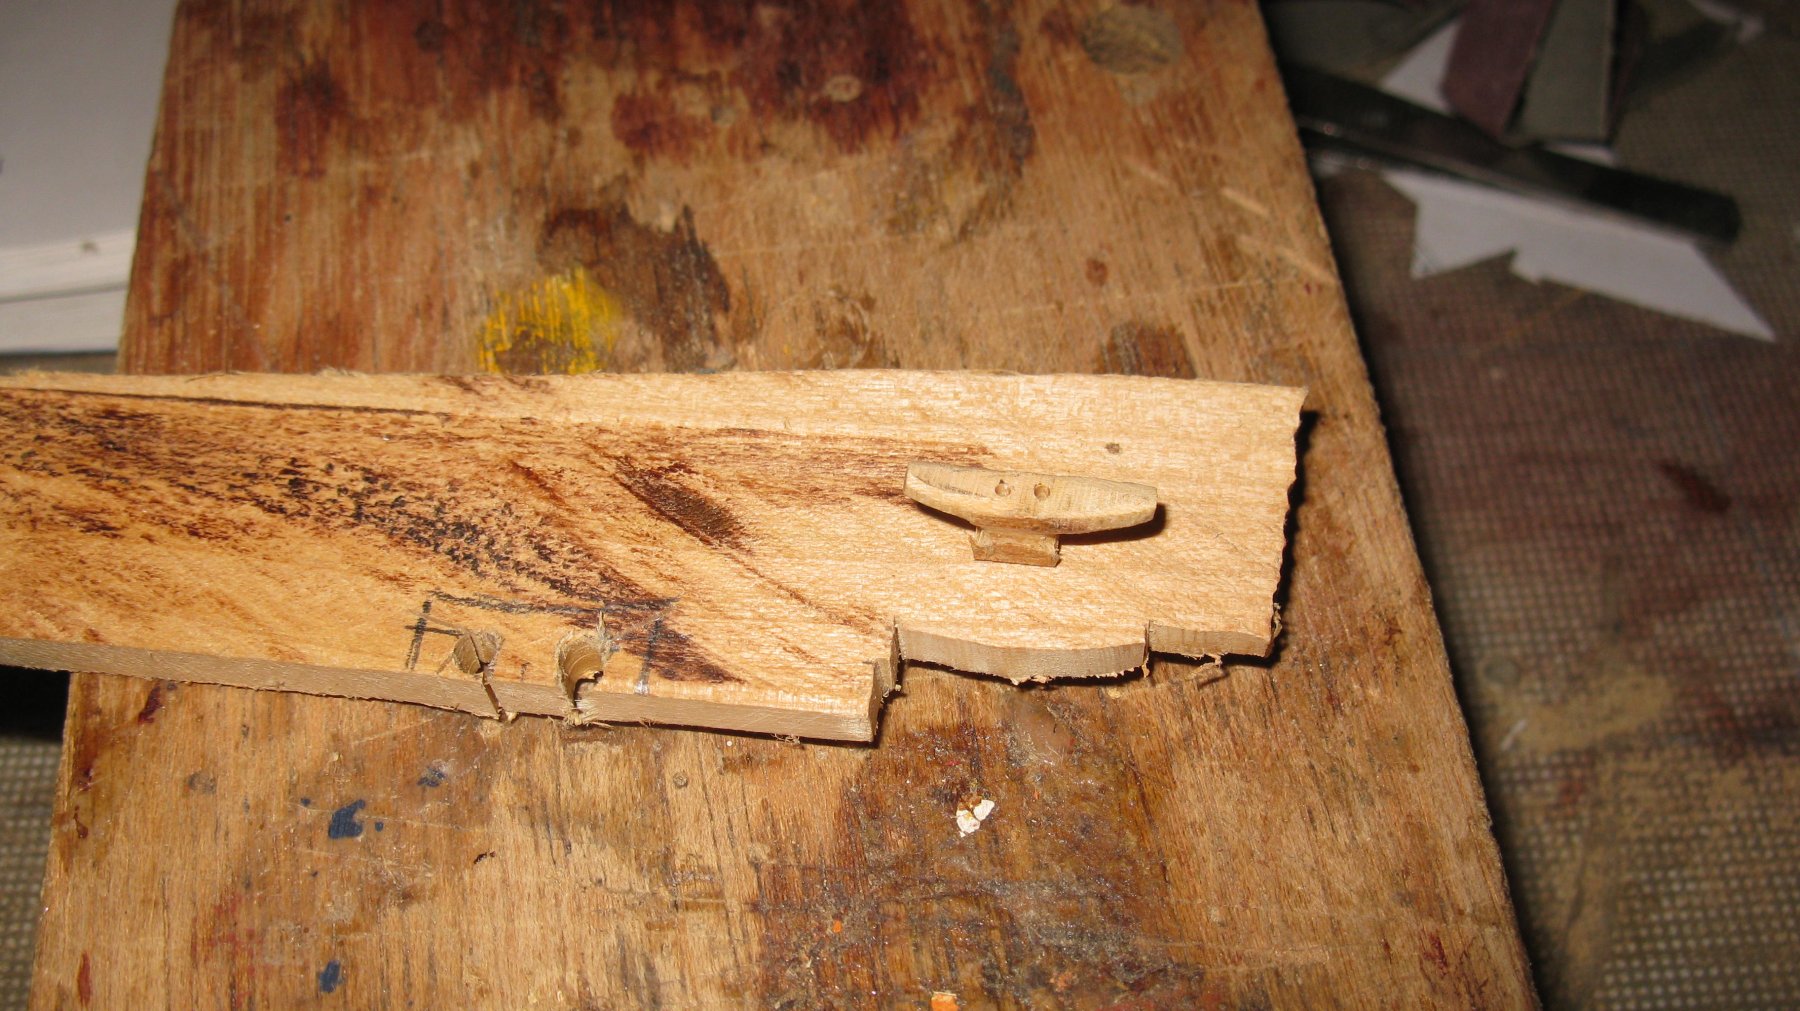
The top of the sheave post is strengthened with a metal band. I cut a strip of a tin plate to make it.

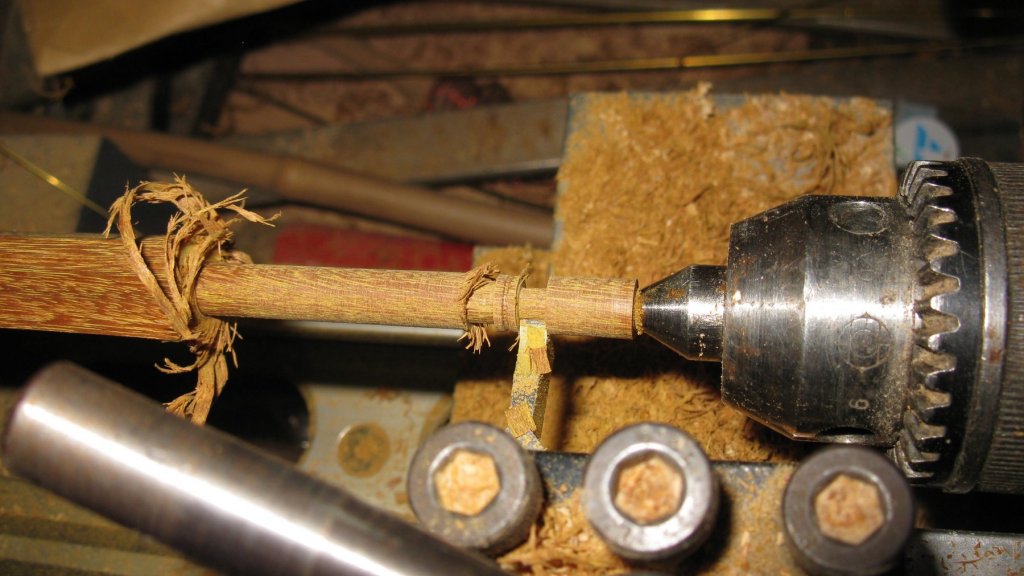
Turning the sheave with the lathe from a piece of hard wood.
Making the cleat.

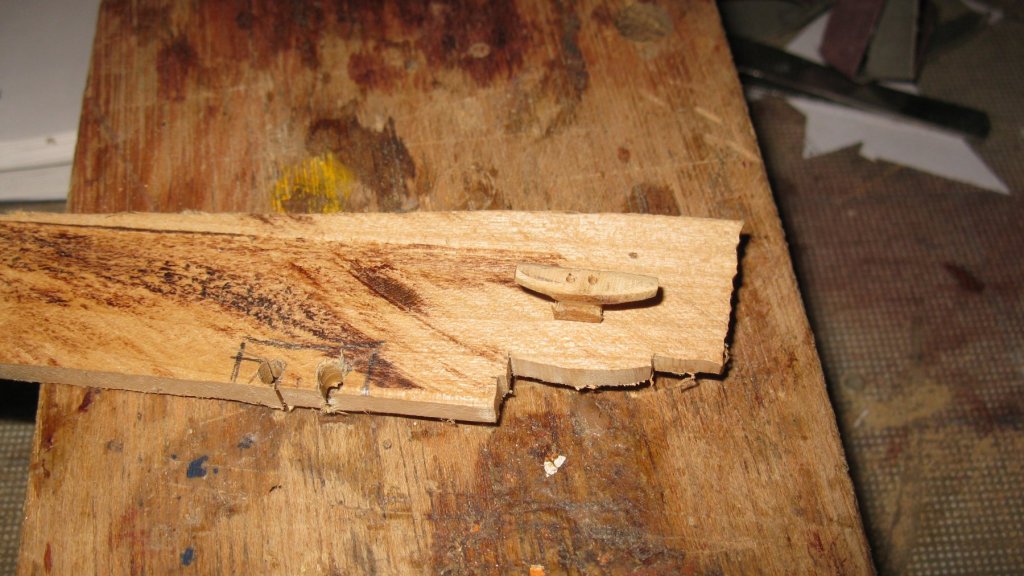
The finished fair leading post.
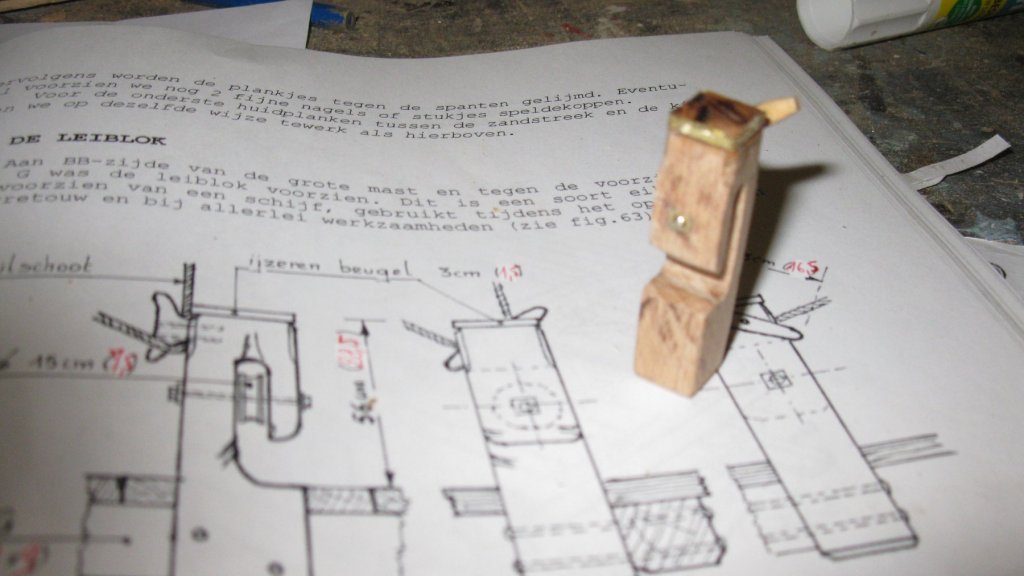

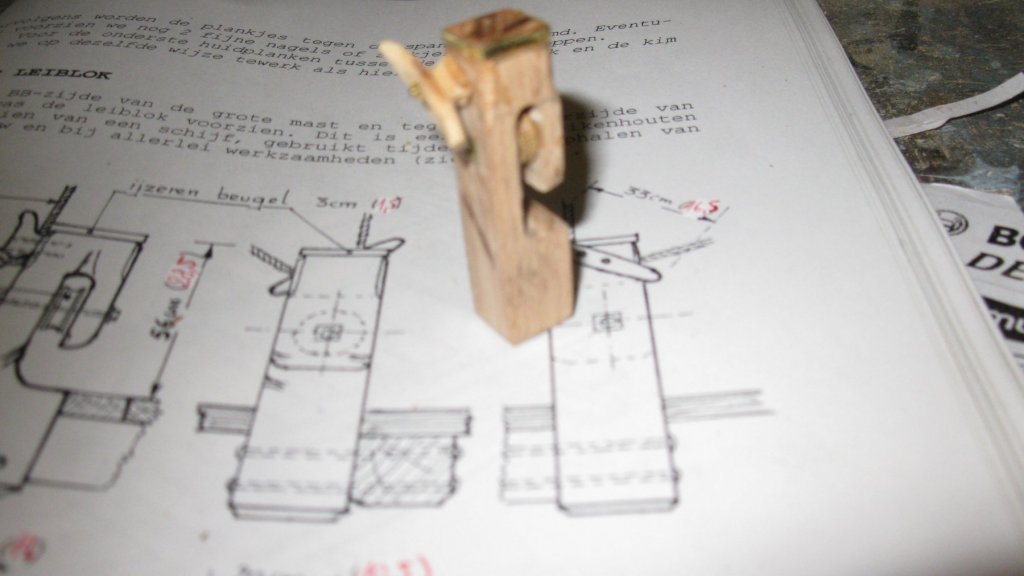
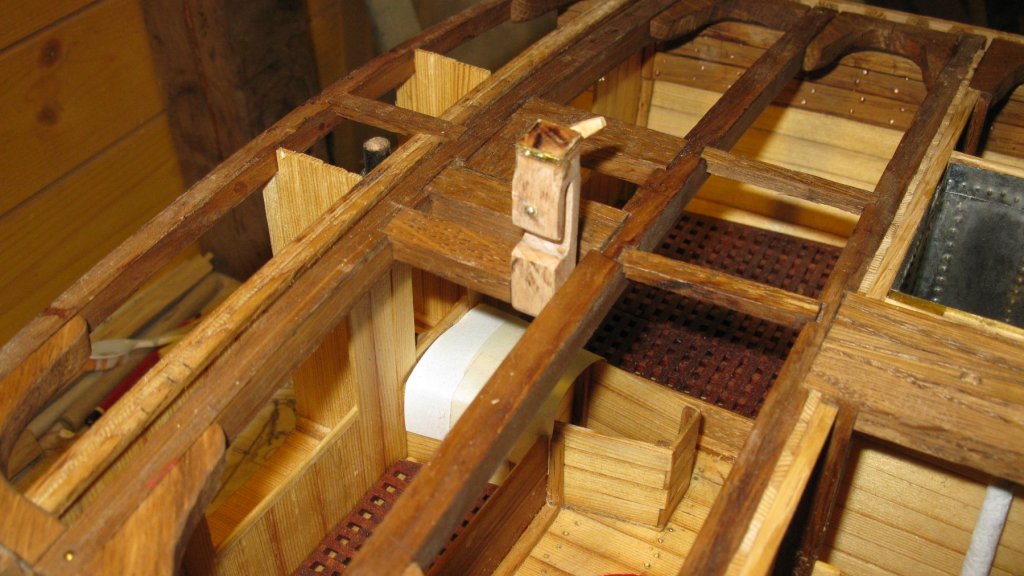
The fair leading post, presented into its position. Under the deck it is supported by a carling.
-
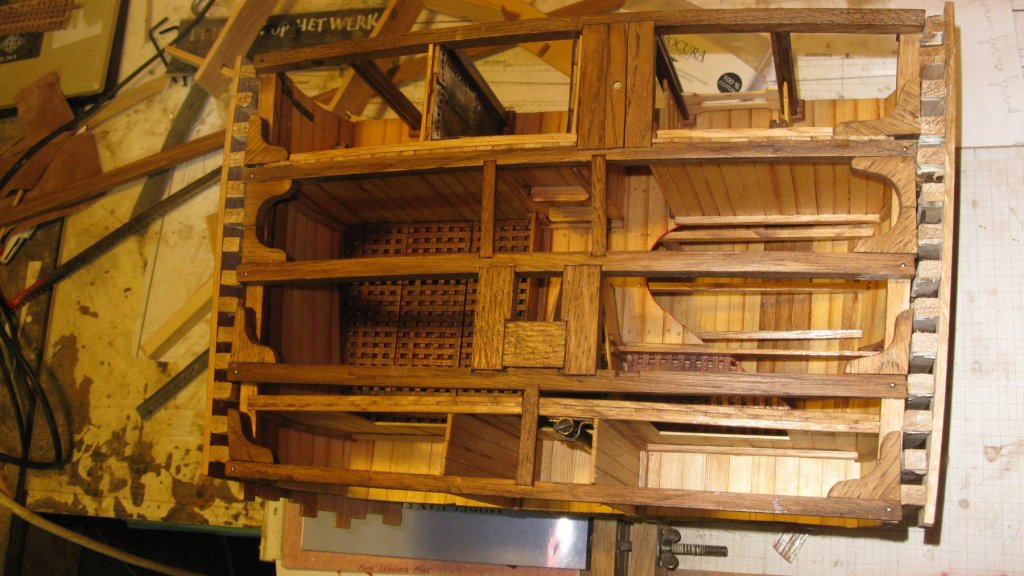
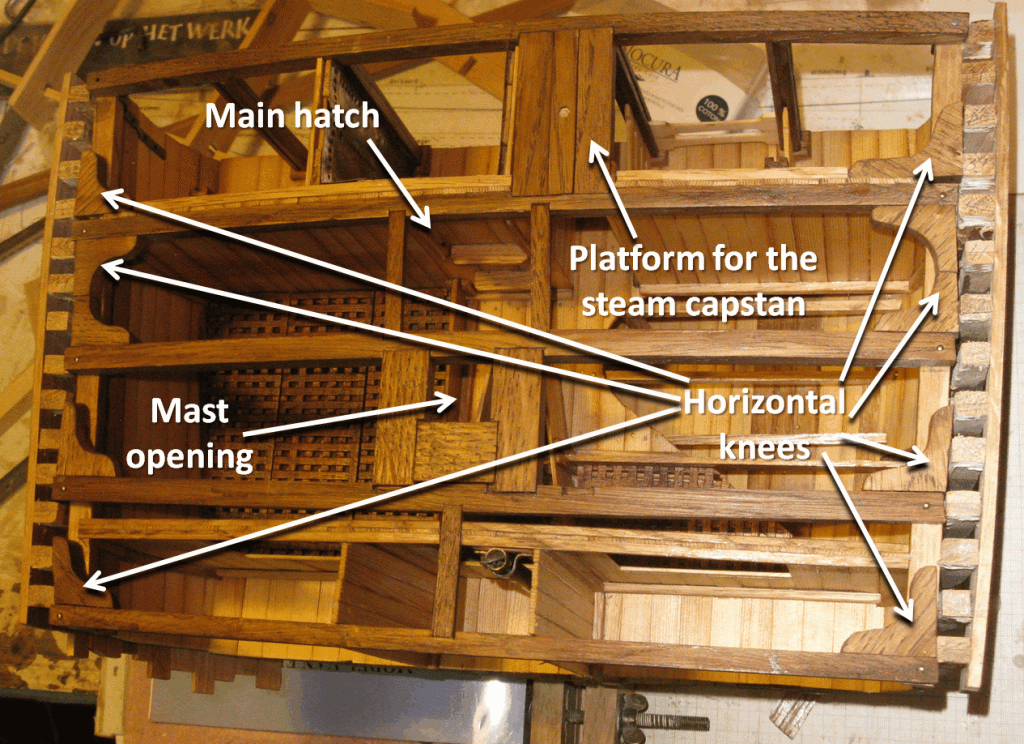
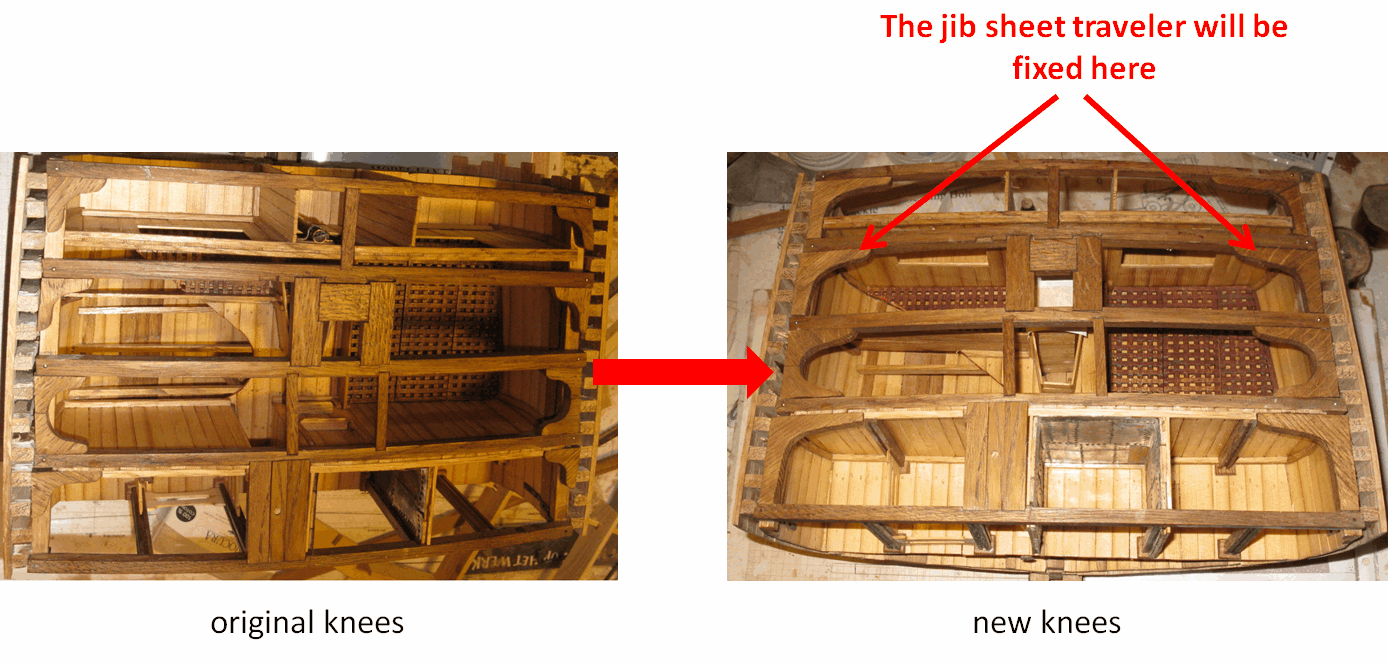
Part 18 Laying the deck
Before starting to lay the deck, I read a bit further in the practicum and learned that the traveler for the jib sheet is at both sides mounted on the horizontal knees and not on the deck beam. That would not be possible with the knees like I made them, they are too small. Fortunately I discovered that before it is too late to replace the knees. I replaced my first knees by larger ones.

-
-
Doris,
I fully agree with all the above comments.
Thank you very much for showing this.
- Piet, popeye the sailor, mtaylor and 3 others
-
6
-
-
-
6 hours ago, cog said:
my russian is somewhat inexistent aviaamator ...
Very well done G.L. - dat ziet er schoon uit! - why didn't you make it so you can look through the hull inside, if I may ask?
Thank you Carl,
Because there are enough openings in the bulkheads to see the inside.
-
7 hours ago, aviaamator said:
Amazing!
изумительно · восхитительно · бесподобно · обалденно · умопомрачительно · божественно · сногсшибательно · потрясно · ошеломительно · головокружительно · удивительно · поразительно · на удивление · впечатляюще · разительно · невероятно · необыкновенно · очень · исключительно · сильно · офигительно · несравненно · фантастически · сказочно · грандиозно · великолепно · замечательно · чудесно · прекрасно · превосходно · дивно · чудно · волшебно · на диво · на славу · до чего · шикарно · роскошно ·Thank you very much Aviaamator, but I do not understand a word of it.
- cog, aviaamator, mtaylor and 1 other
-
4
-
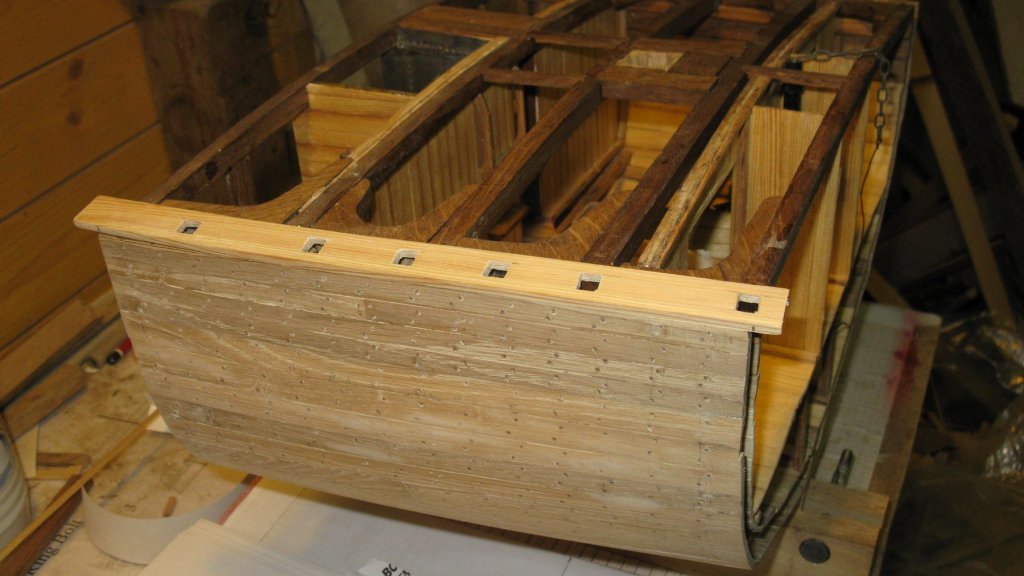
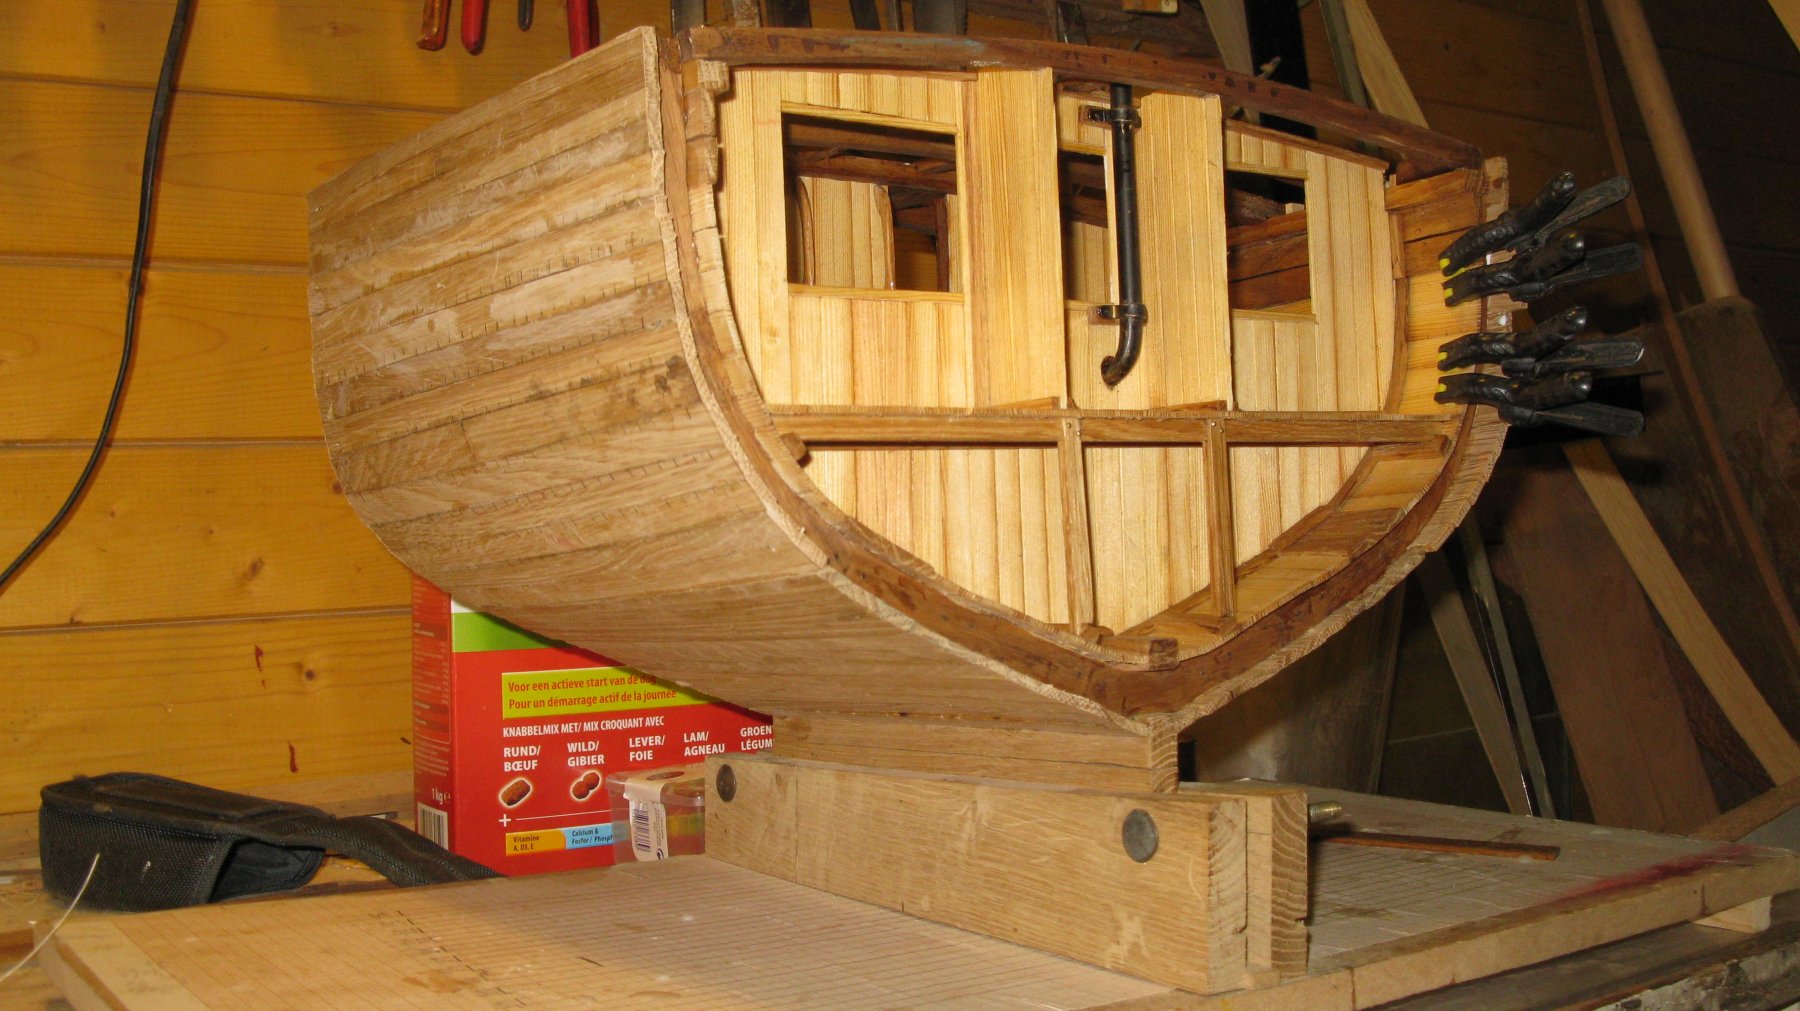
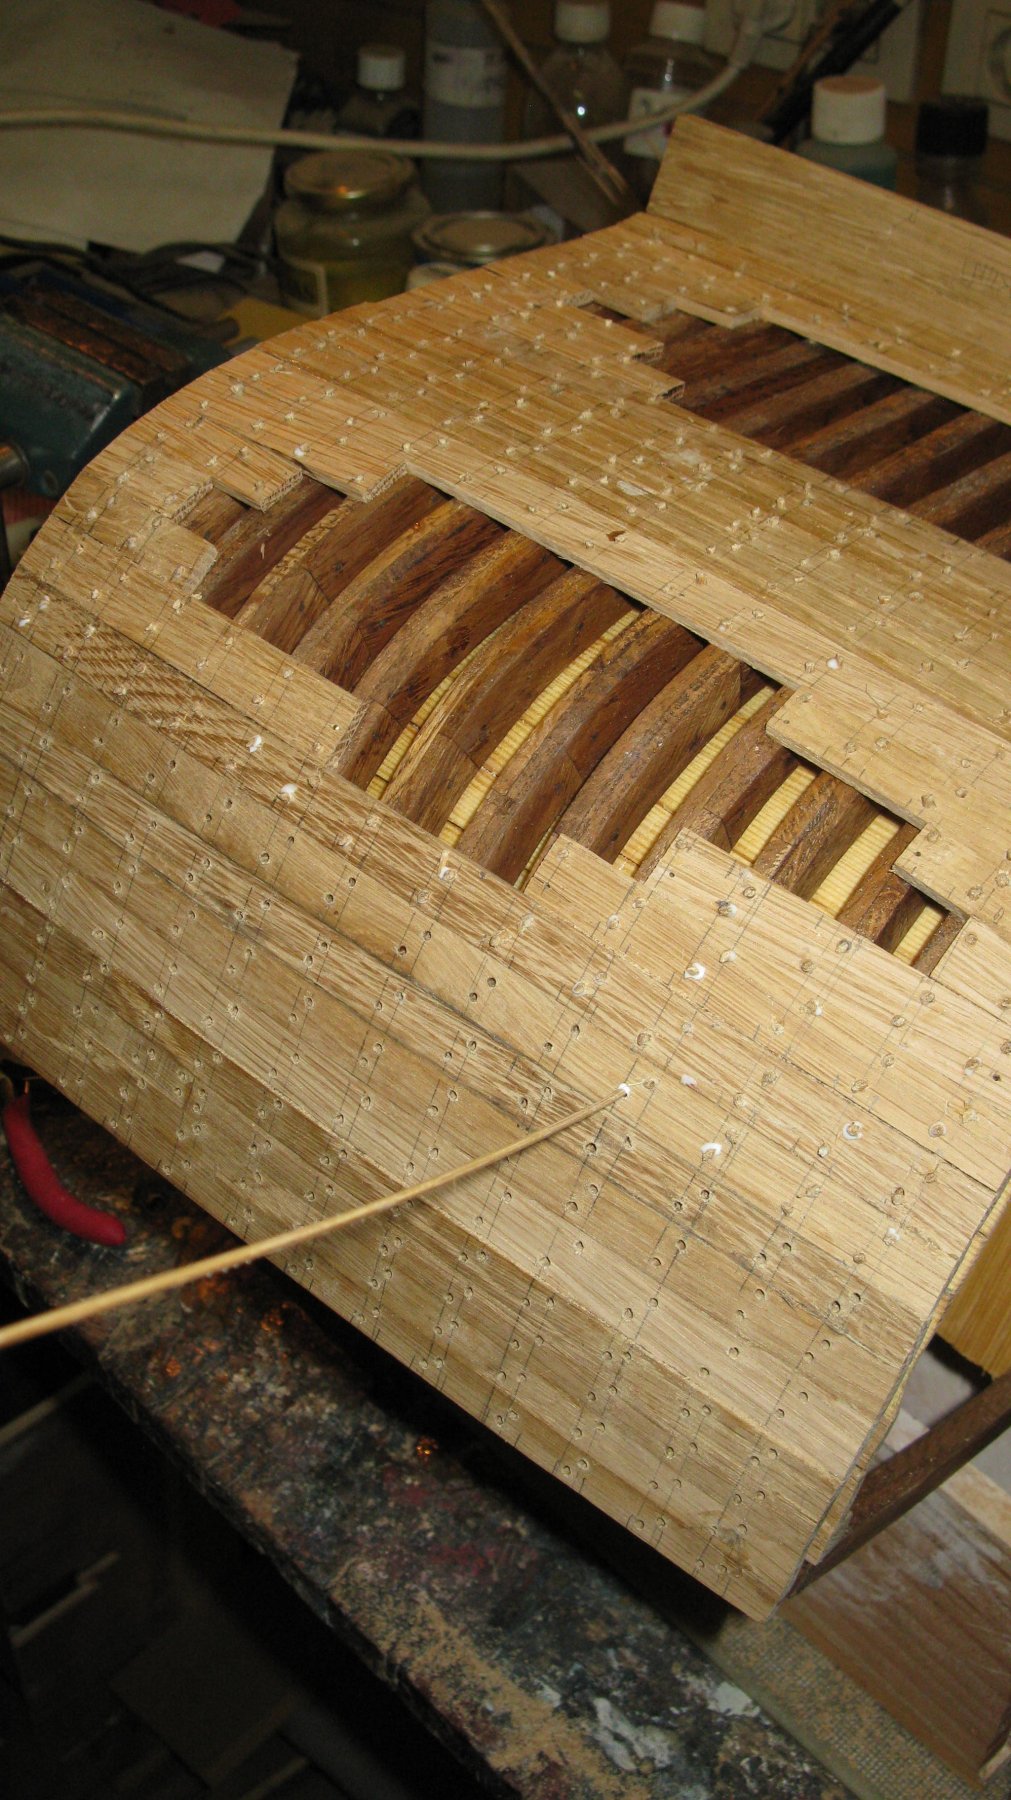
Part 17:The outside planking
Time to plank the model at the outside.
I make the division between the garboard strake and the stringers. There will be seven planks, so I measure the distance on the forward frame between the two with a strip of paper.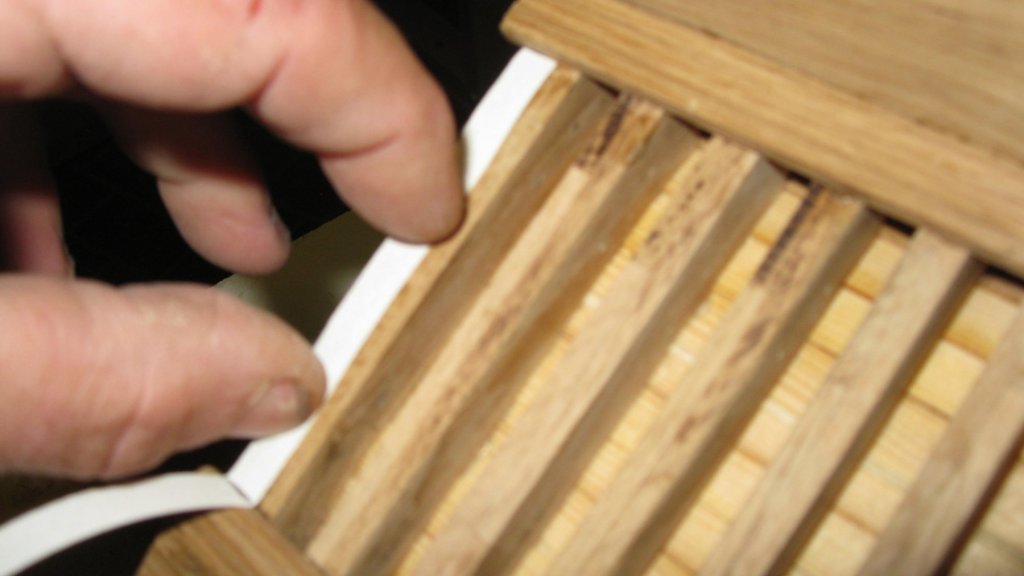
I use a fan planking template to determine the seven plank widths on this frame...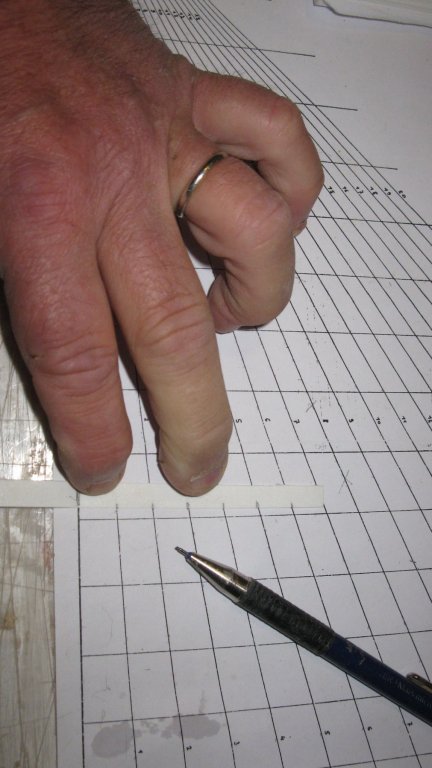
... and mark the division on the frame.

I do the same on the after frame and start to plank. I work from the sides to the middle and mark the position of the frames on each plank. That will help me later to determine the positions for the tree nails.
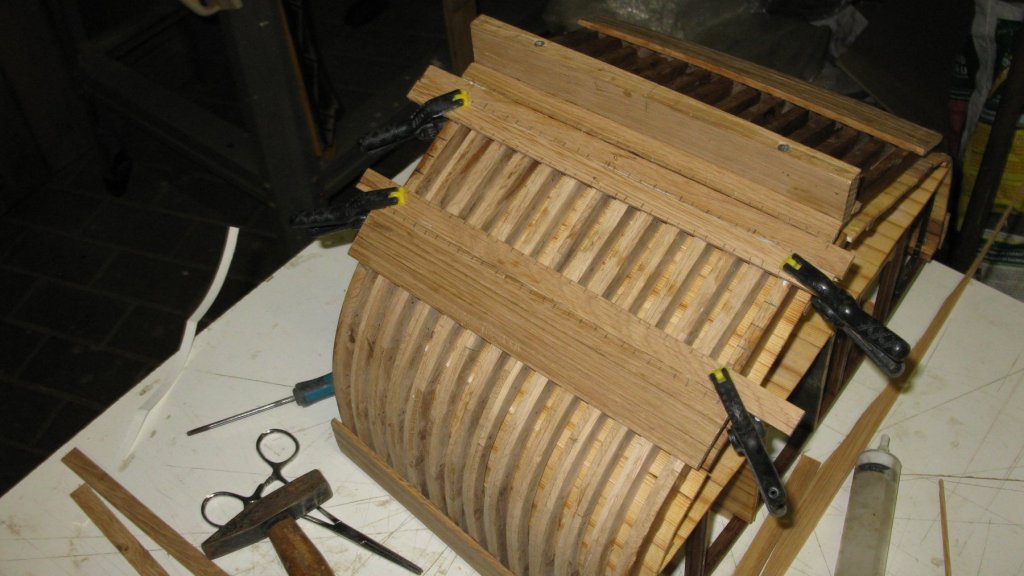
First part completed.

The whole starboard side planked
I will leave open two holes in the planking of the port side to give sight on the frames.
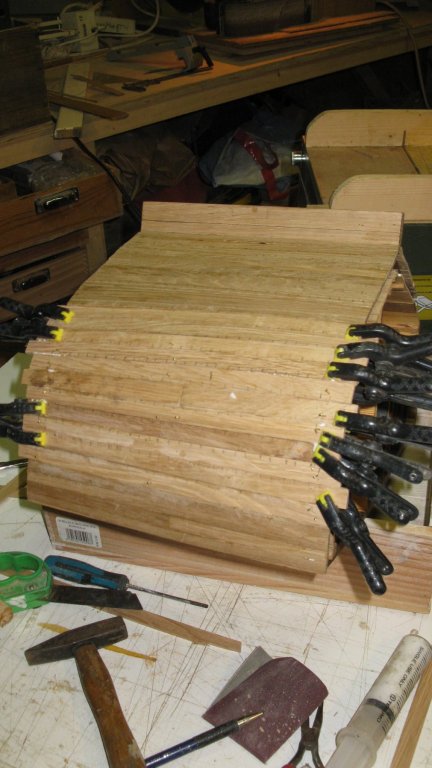
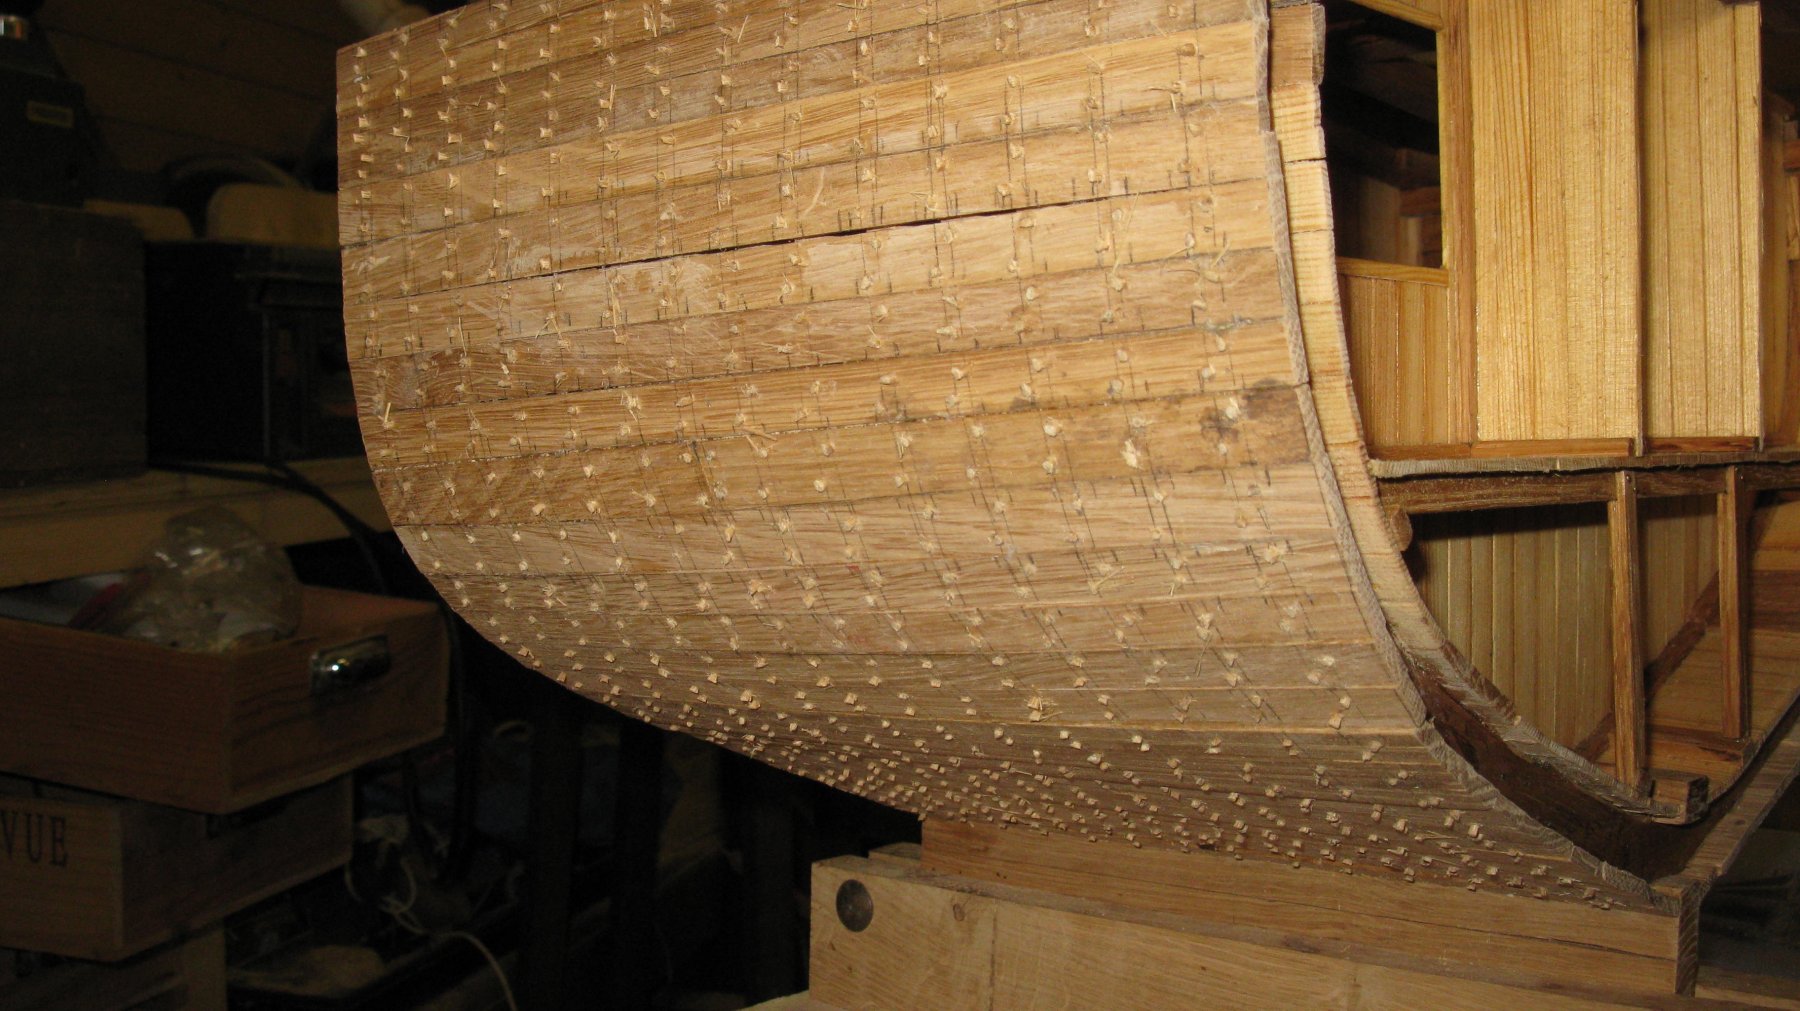
Outside planking completed.

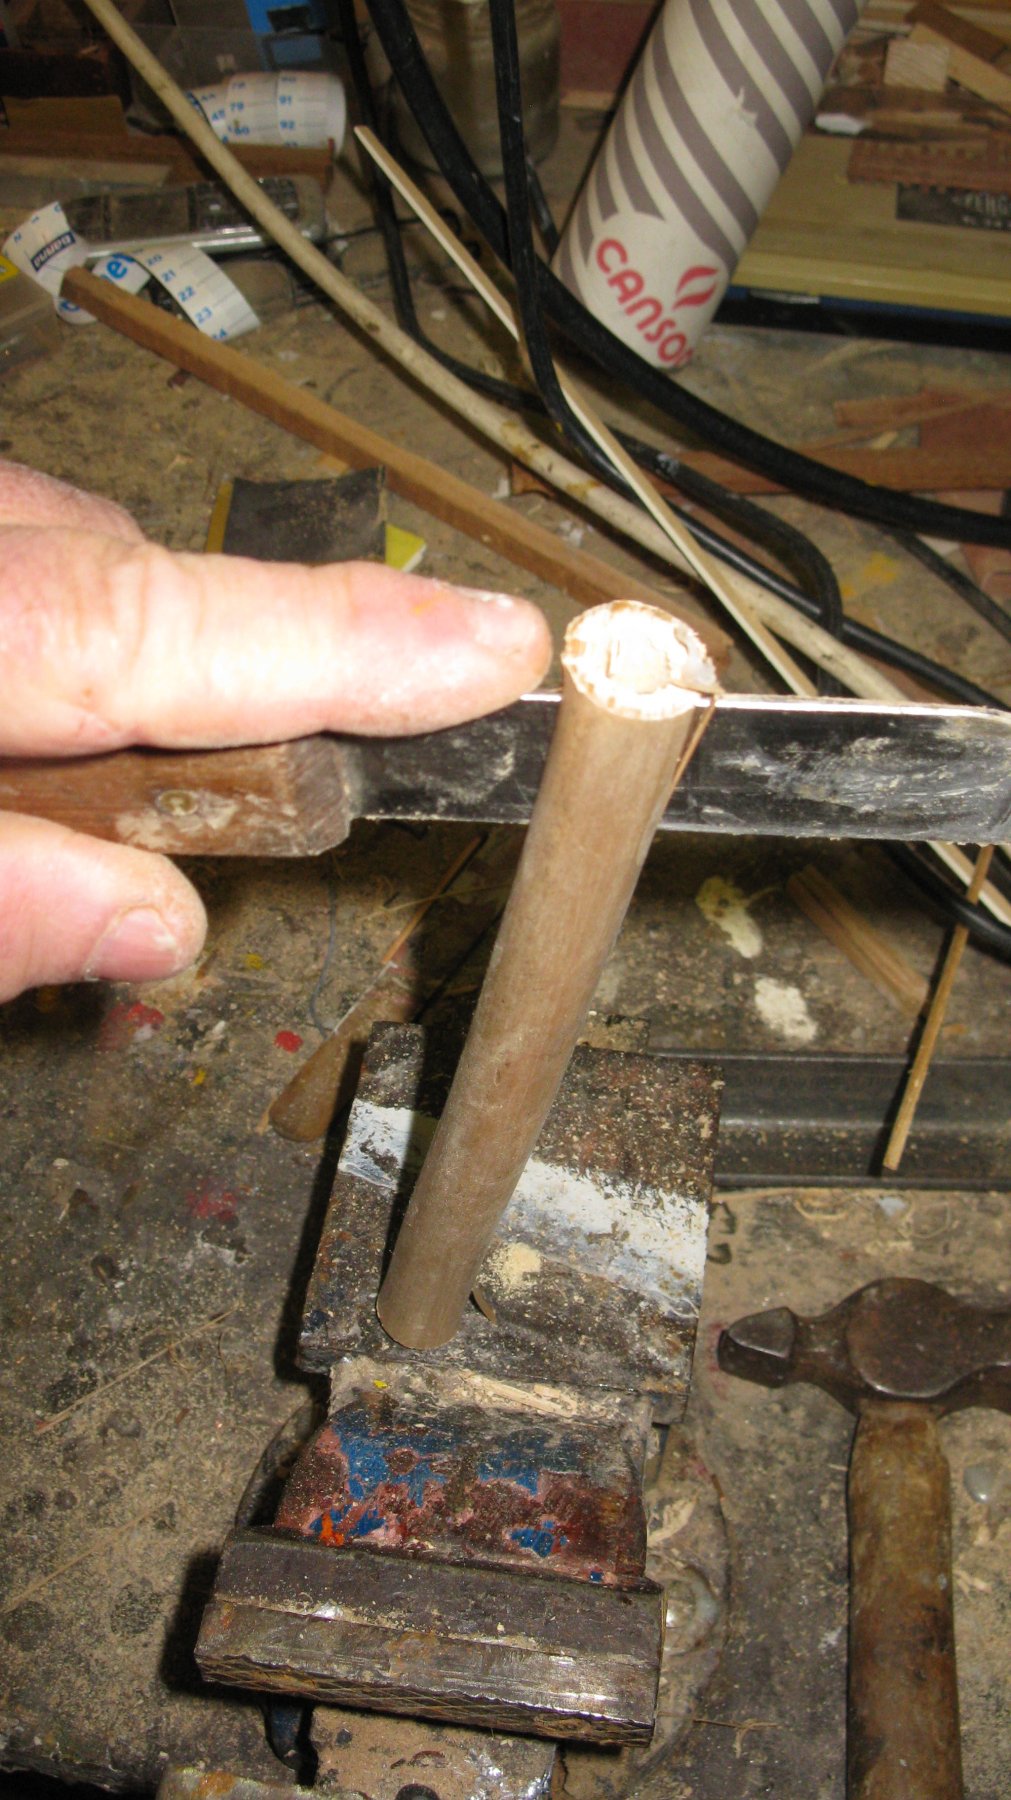
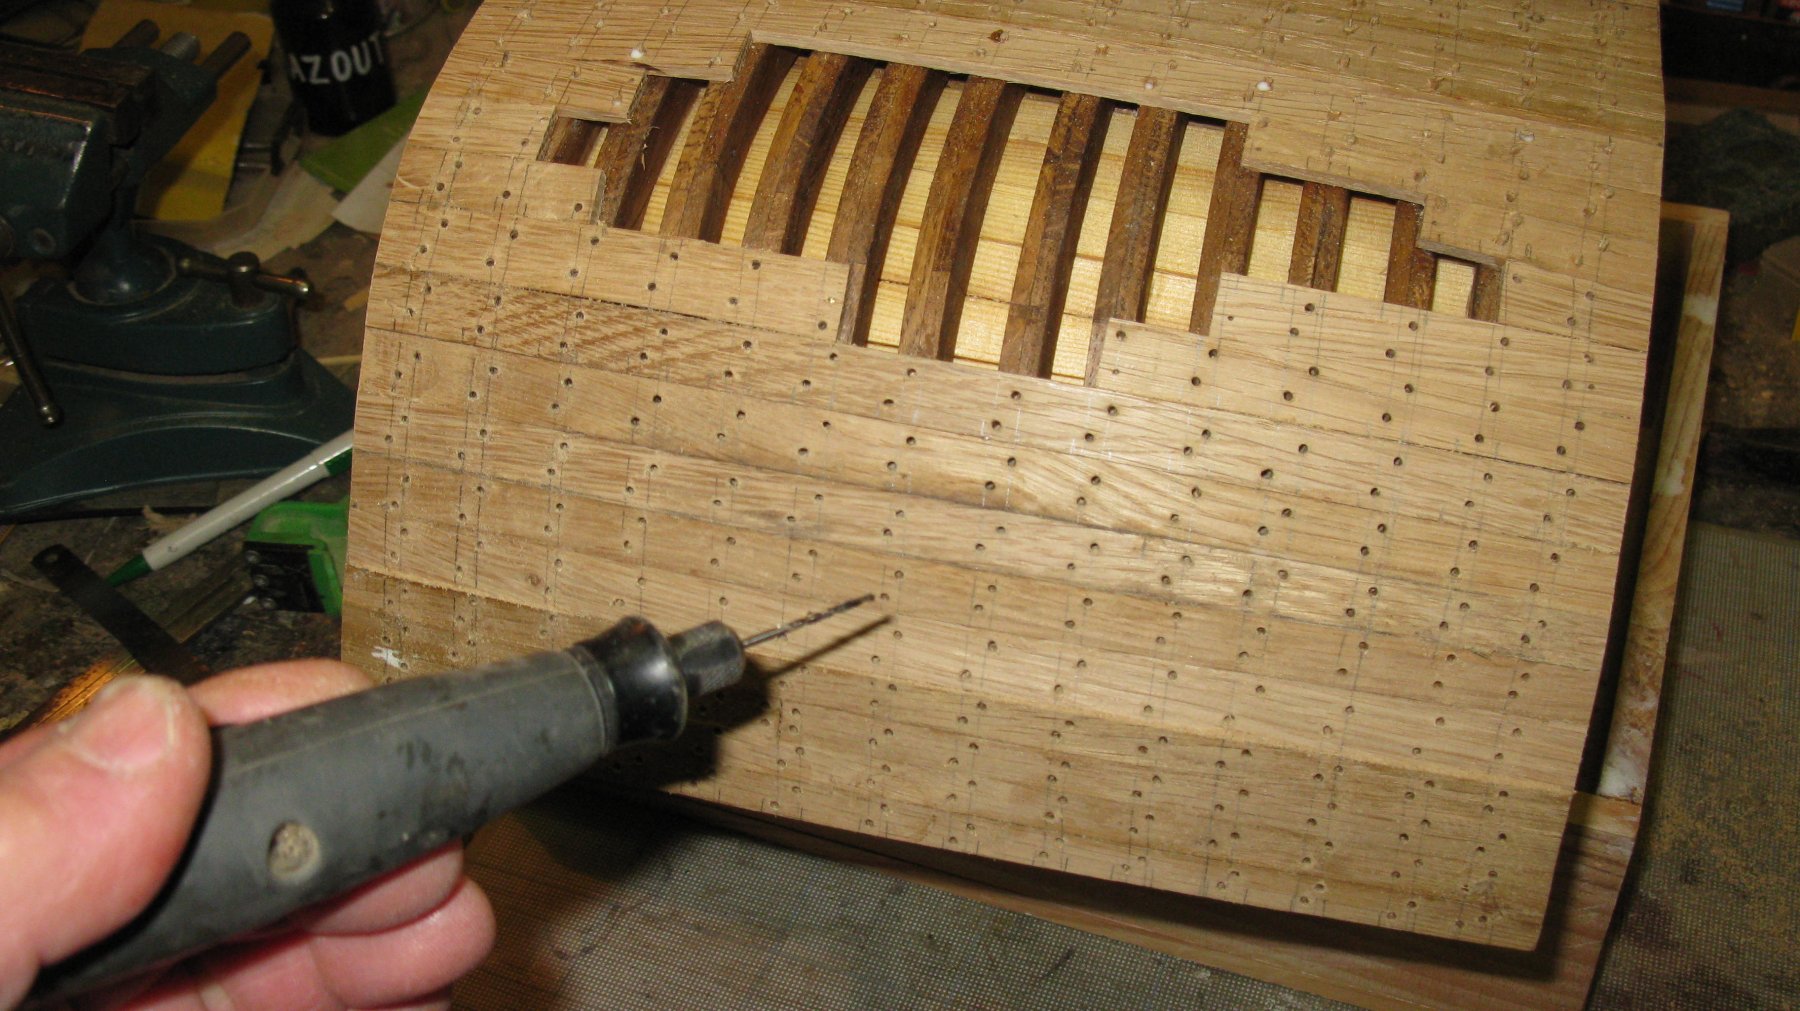
Before I can start to tree nail, I have to spend an afternoon splitting bamboo and pull the sticks through the draw plate to supplement my stock of tree nails.

Drilling the nail holes
and inserting the bamboo nails

The nailed hull

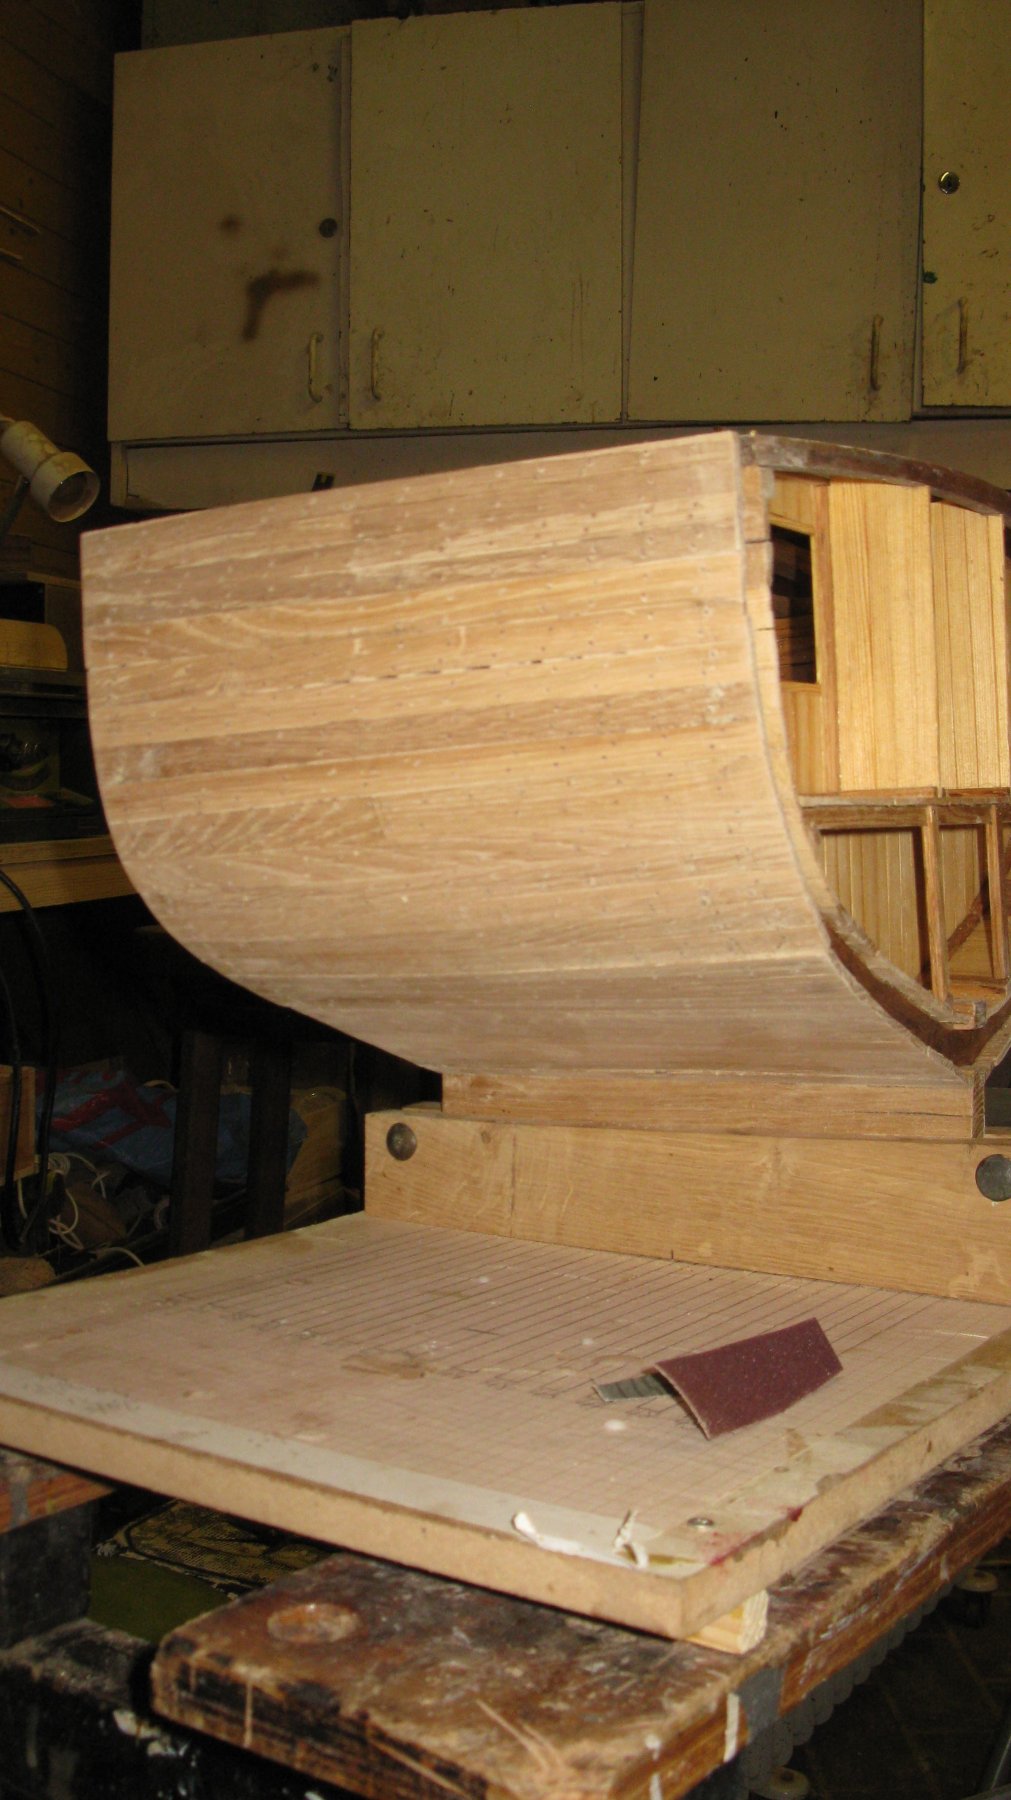
After sanding

-
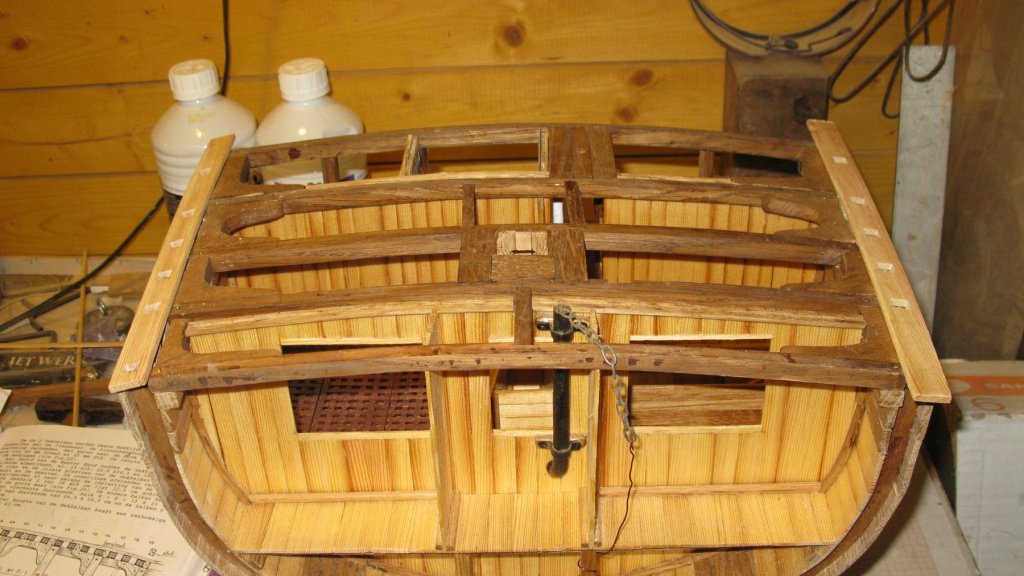
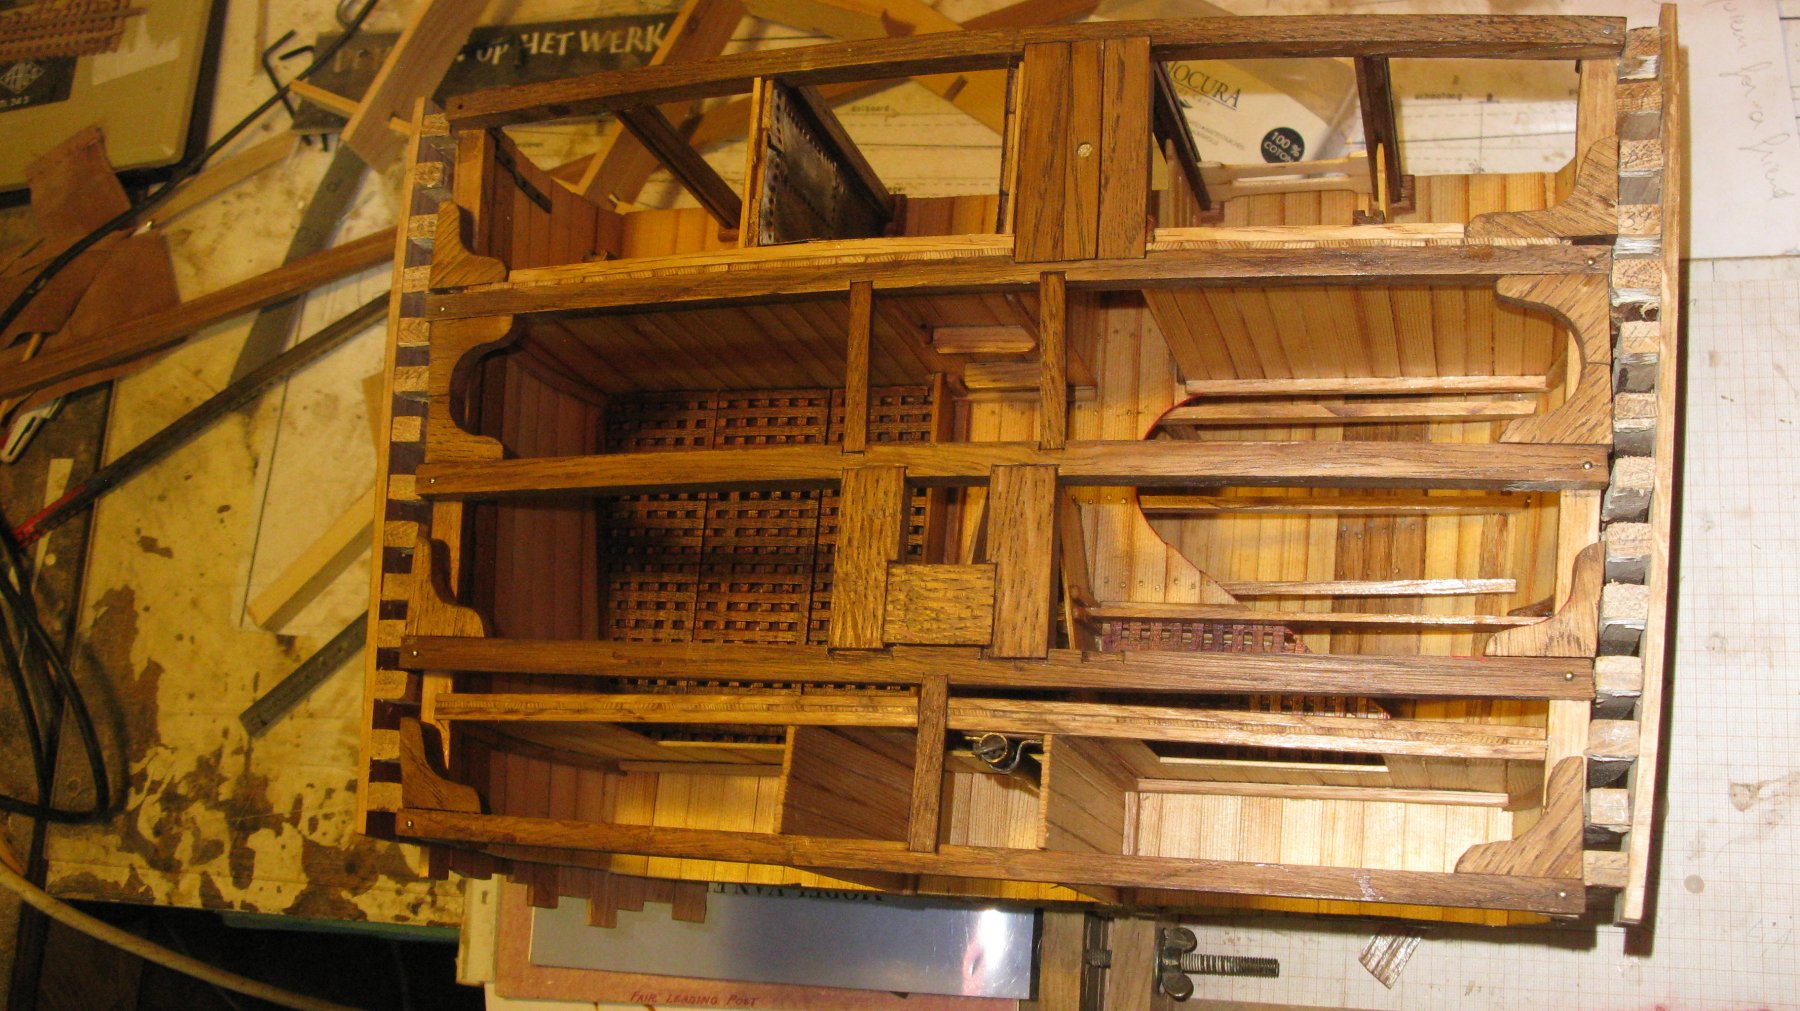
Part 16: Finishing the main deck structure
The deck beams are prepared. The only remaining job is making the carlings and the horizontal knees.
Sawing the knees with the fretsaw and finishing them with the Dremel.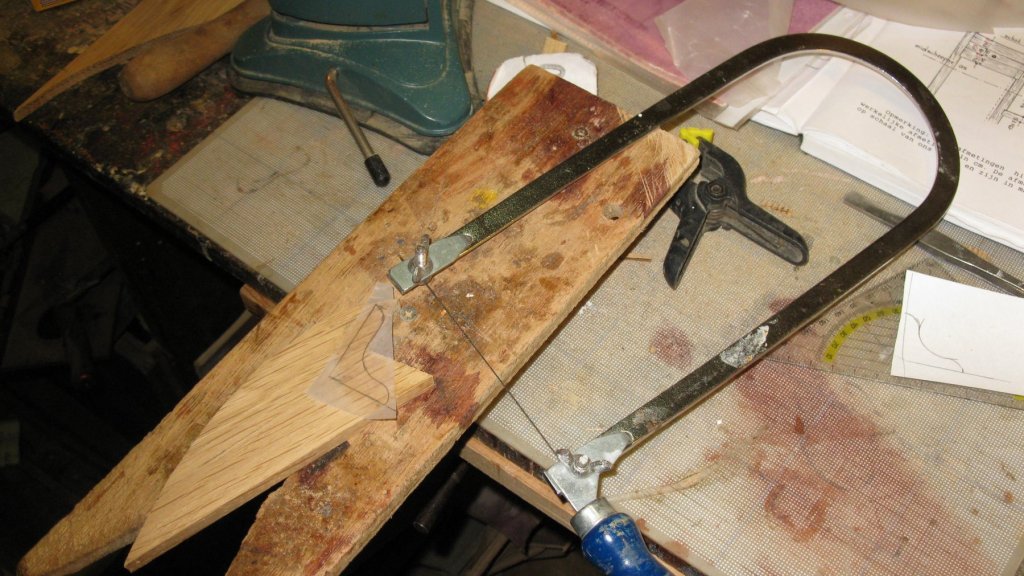

Knees and carlings placed.
Some explanation
- BenF89, cog, michael mott and 10 others
-
13
-
On 1/19/2019 at 2:31 PM, cog said:
Well done! Hollow brass really is a bitch to bend. I might have tried copper and fabricated a jig like the pipe tool a plumber uses
Thanks Carl,
I didn't think about copper, but it would indeed better bend. Another lesson learned.
- mtaylor and michael mott
-
2
-
12 hours ago, KORTES said:
Masttop.
I couldn’t find a Dutchman name, but it’s probably a weathervane.
Kortes,
The Dutch name is 'windvaan'.
Beautiful work, a real museumpiece!
- Keith Black, mtaylor and cog
-
3
-
Is that a paper gun? Amazing, it looks like bronze one!
- BETAQDAVE, DORIS, CaptainSteve and 3 others
-
6
-


Fishing Smack c. 1920 by G.L. - FINISHED - Scale 1/20 - POF - cross-section
in - Build logs for subjects built 1901 - Present Day
Posted
Here she is, at least one of the three. In winter they prefer the warmth of the central heating in the living room above my cool workshop.