


G.L.
-
Posts
1,553 -
Joined
-
Last visited
Content Type
Profiles
Forums
Gallery
Events
Posts posted by G.L.
-
-
Kortes,
Your blocks are impeccable.
- druxey, mtaylor, billocrates and 2 others
-
 5
5
-
-
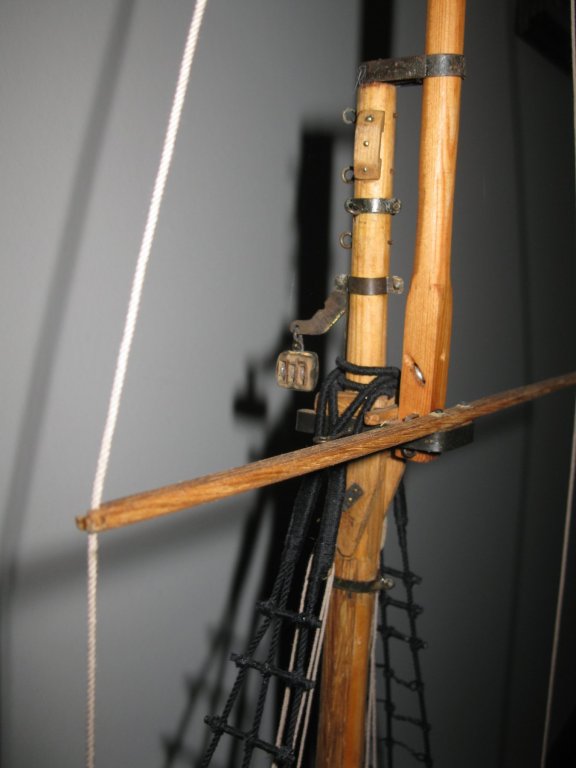
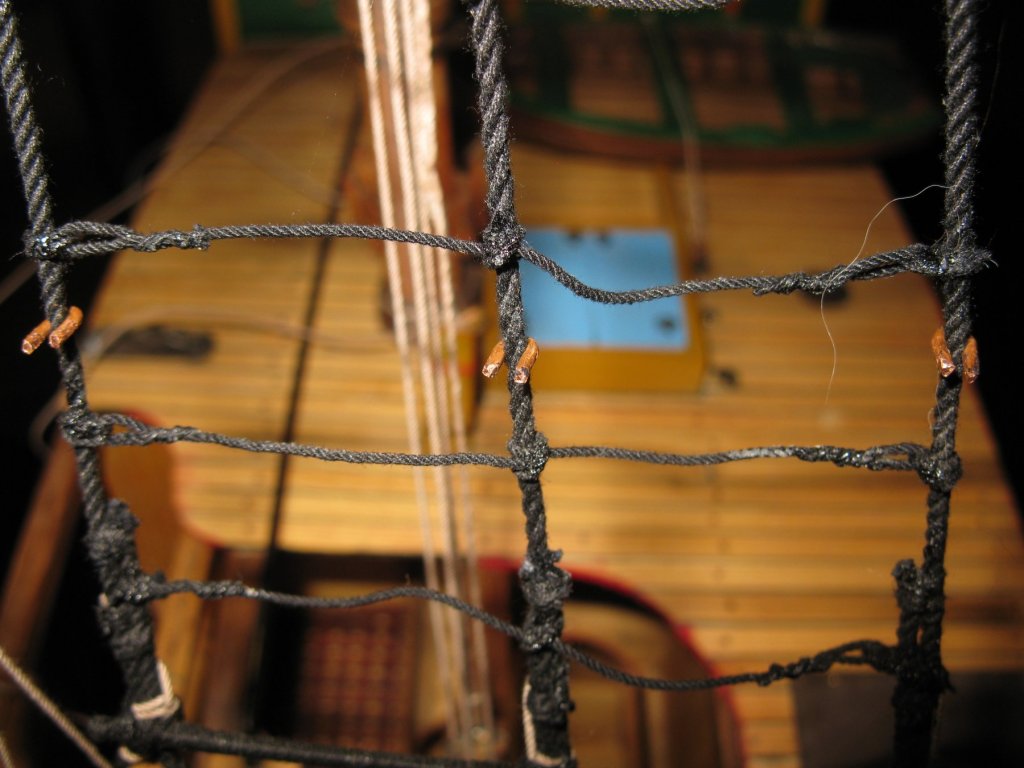
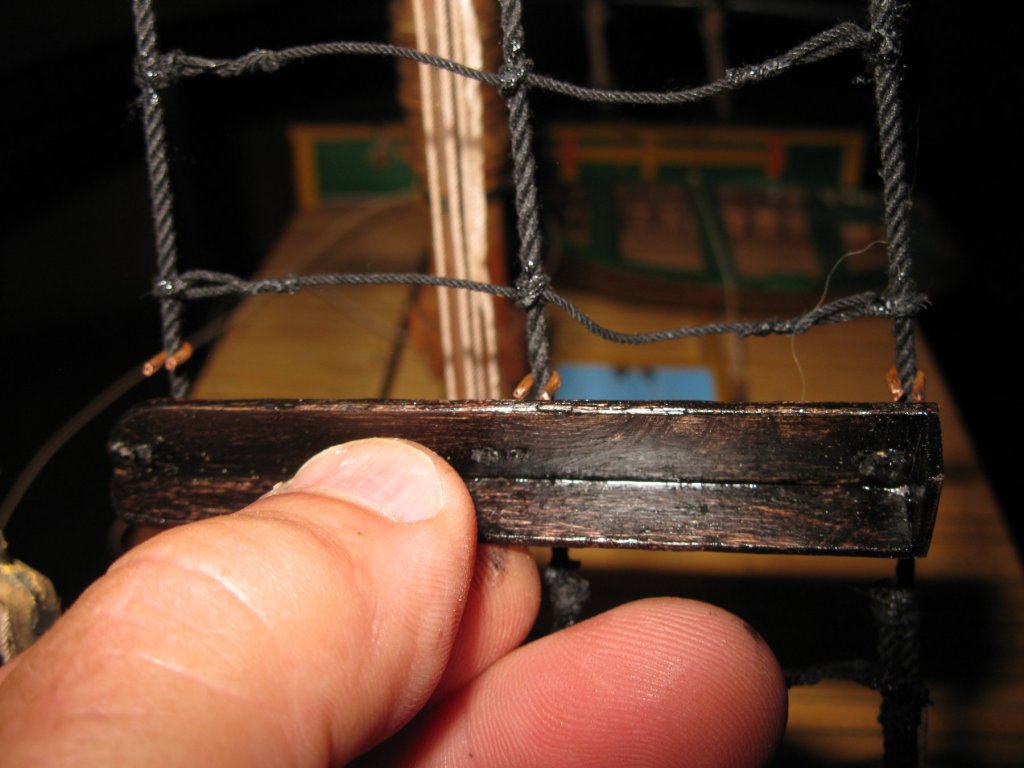
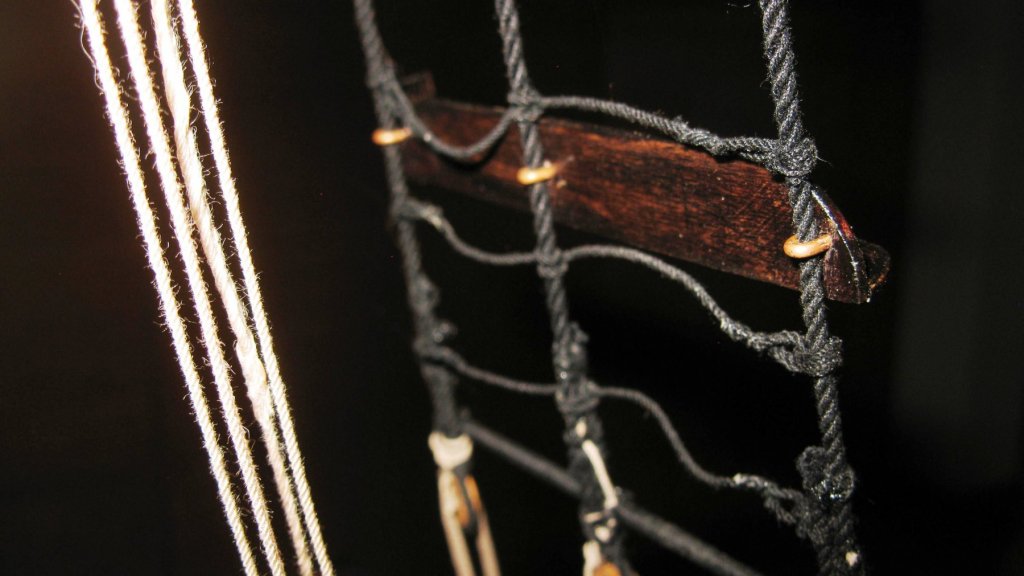
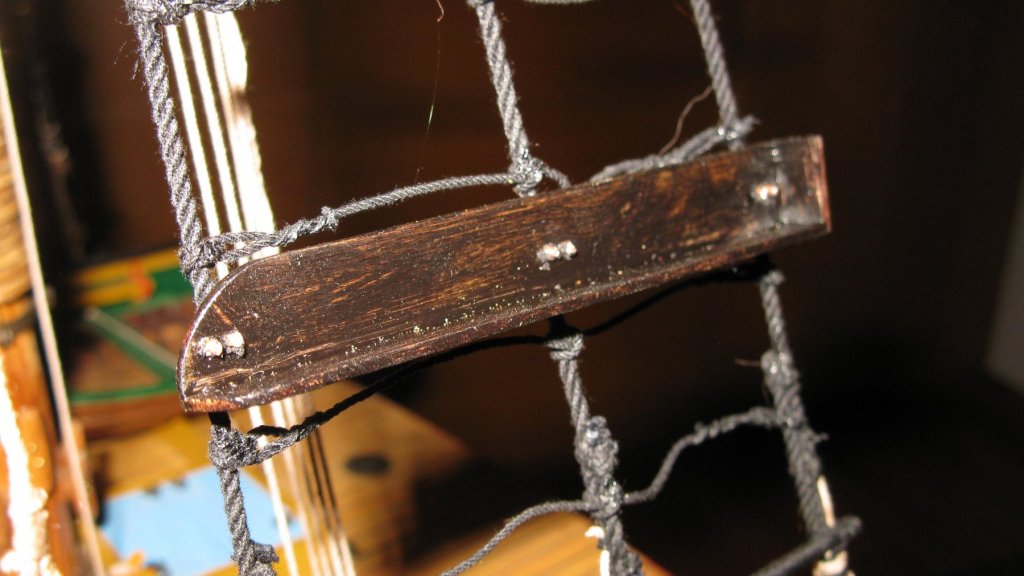
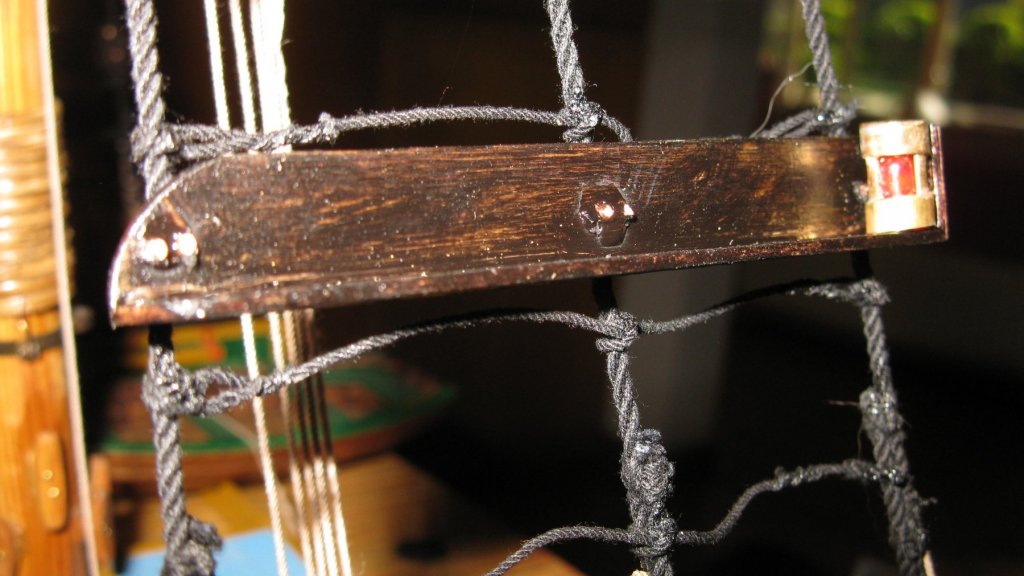
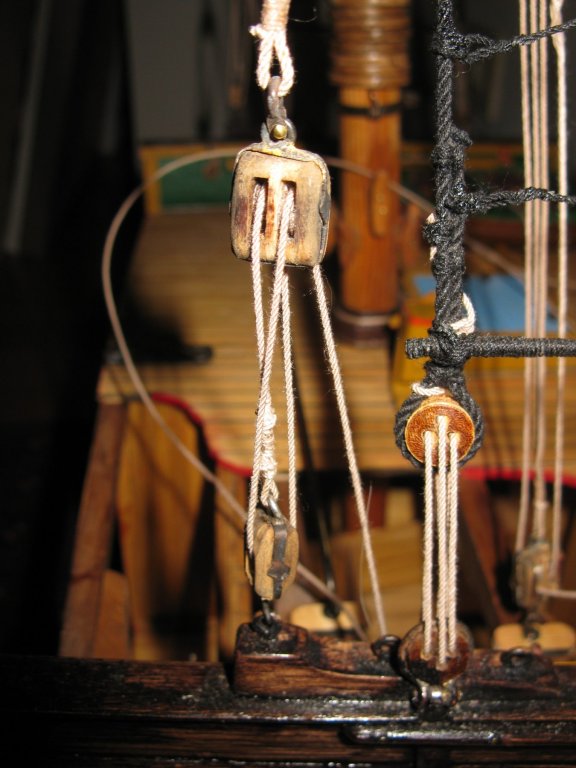
22.3 Blocks and lines.
At each side of the hound pieces is a block attached. A double sheaves block at the starboard side for the boom topping lift and a triple sheaves block for the hoisting line for the cod end of the trawl.
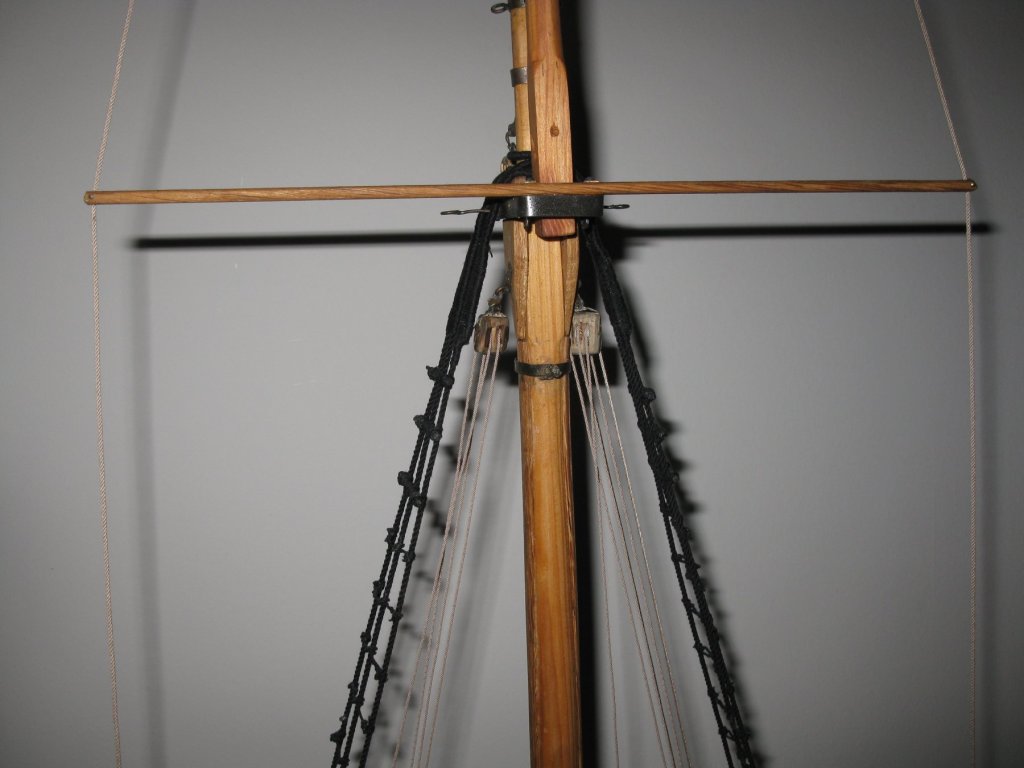
At the bottom the hoisting line is going through a double sheave block, hooked on a deck ring at the port side and I lead the loose end through the sheave post, wind it a couple of times around the capstan and belay it on the sheave post.
Due to the lack of a boom on the model, I hook the lower block on a deck ring besides the bow of the boat and belay the loose end on the pin rail.
To make the use of the strange hook at the mast above the shrouds clear. I attach a three sheaves bock on it. That block is meant to guide the main sail halyard.
- mtaylor, amateur, Duanelaker and 9 others
-
12
-
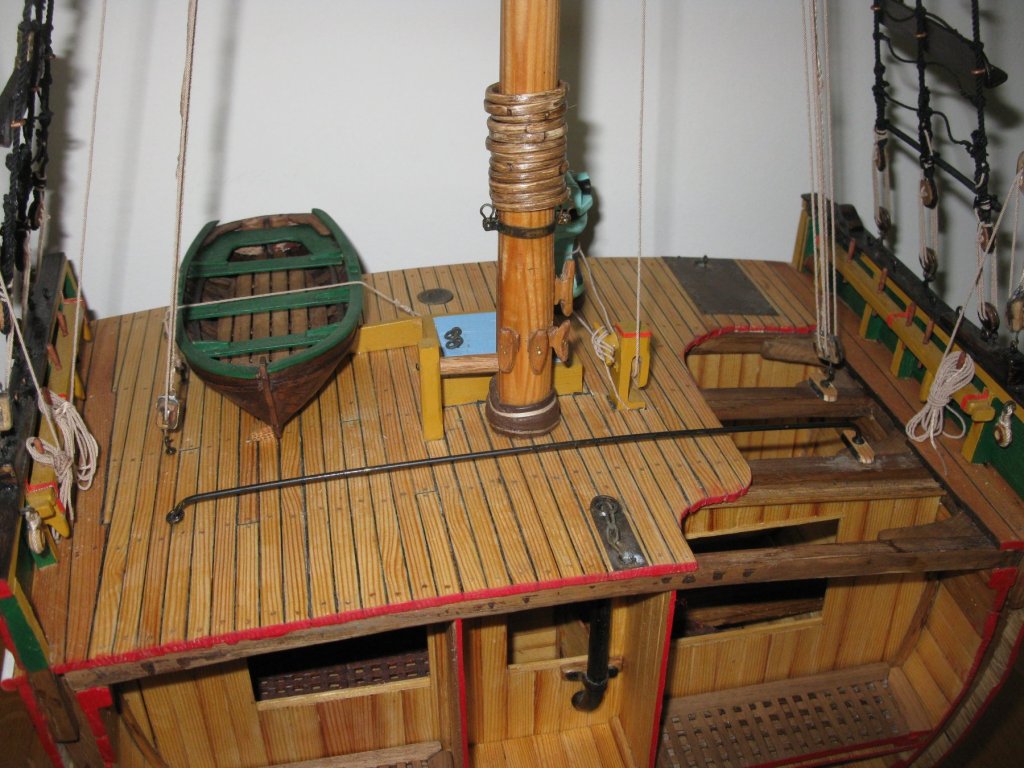
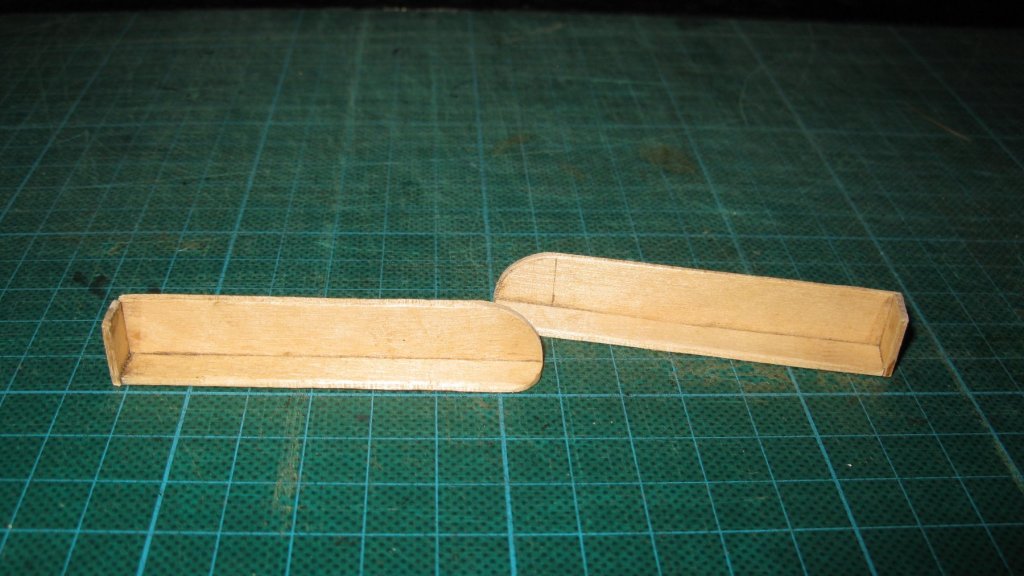
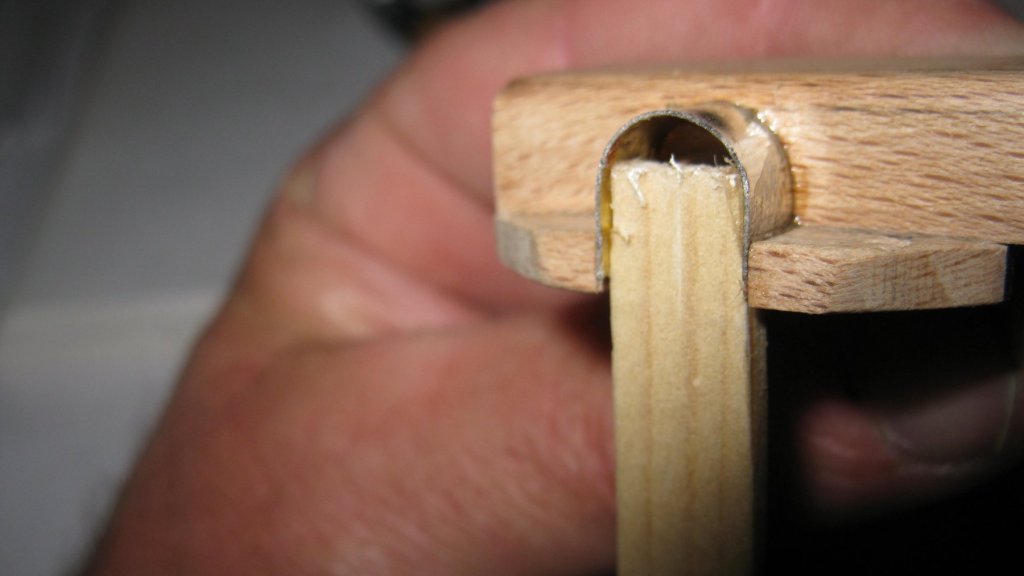
22.2 Gratings
The two compartments at both sides of the middle passageway are net- and rope stores. The ;trawl warp - and rope fender storage in the center of the cross section are provided with gratings; to be consequent I make also gratings for those forward stores.
-
22. All kinds of stuff
The cross section like it is described in the practicum is now finished. Before considering my model as completely finished, I will add some small things to give it a more personal touch.22.1 Navigation lighting
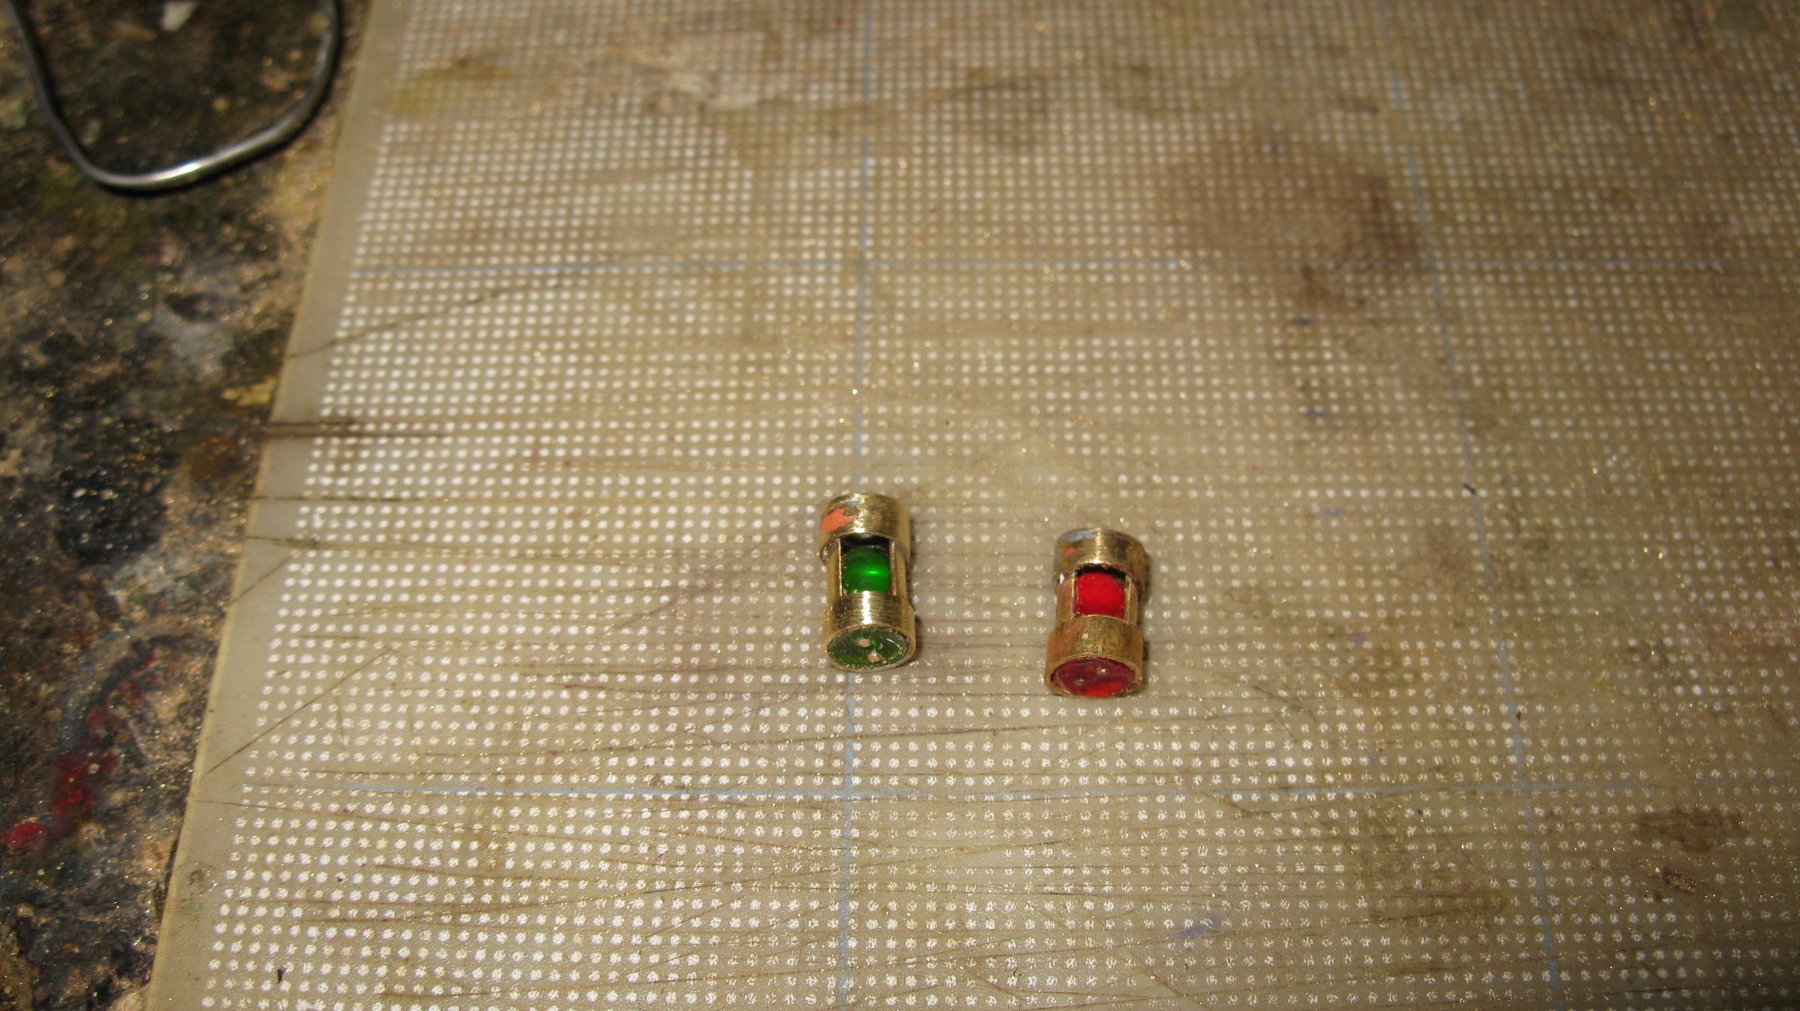
Navigation lights are shown on several pictures of smacks, so I will make an attempt to make also a starboard and port light.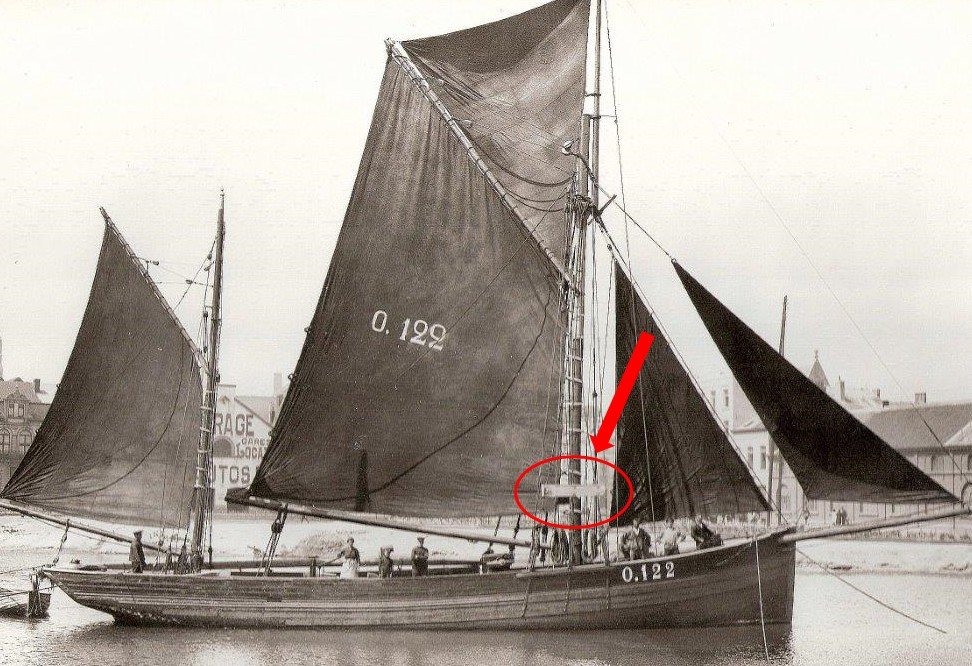
I am not a metal specialist like a lot of you, so it will be a bit improvising. I hope the imperfections of the lights won't catch the eye to much in the whole of the model.
The different parts, I will use a disused red and green led light (they will not be able to light).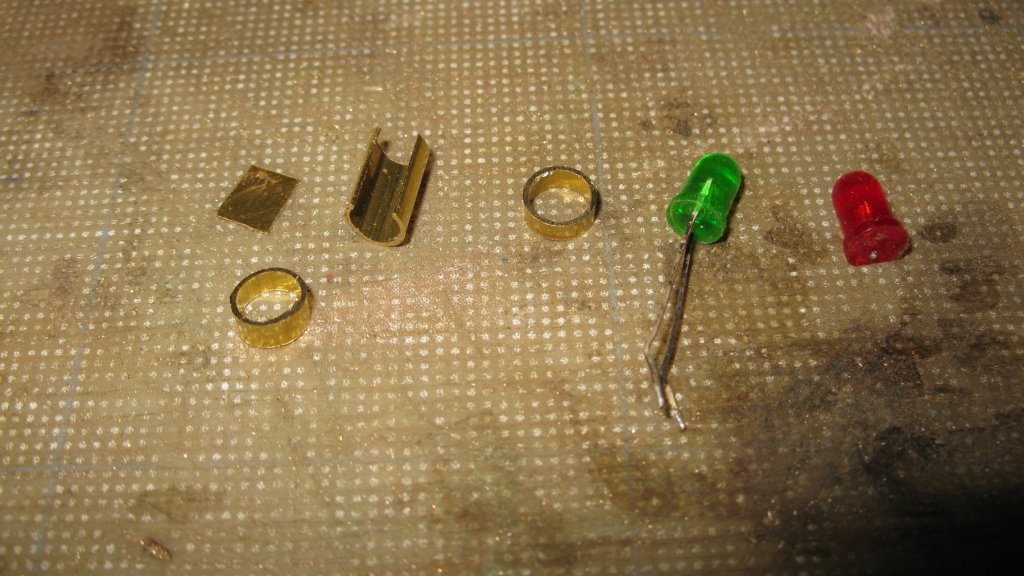
The led light in its brass housing.
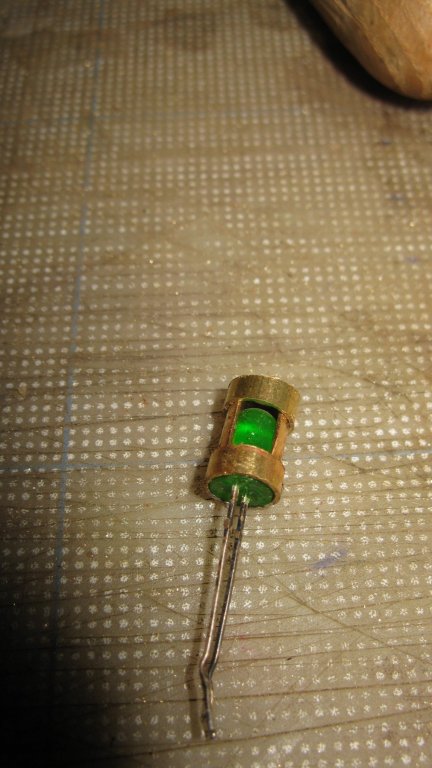
The roof of the lamp soldered on top of it. The excesses will be filed off.

The starboard and the port light.

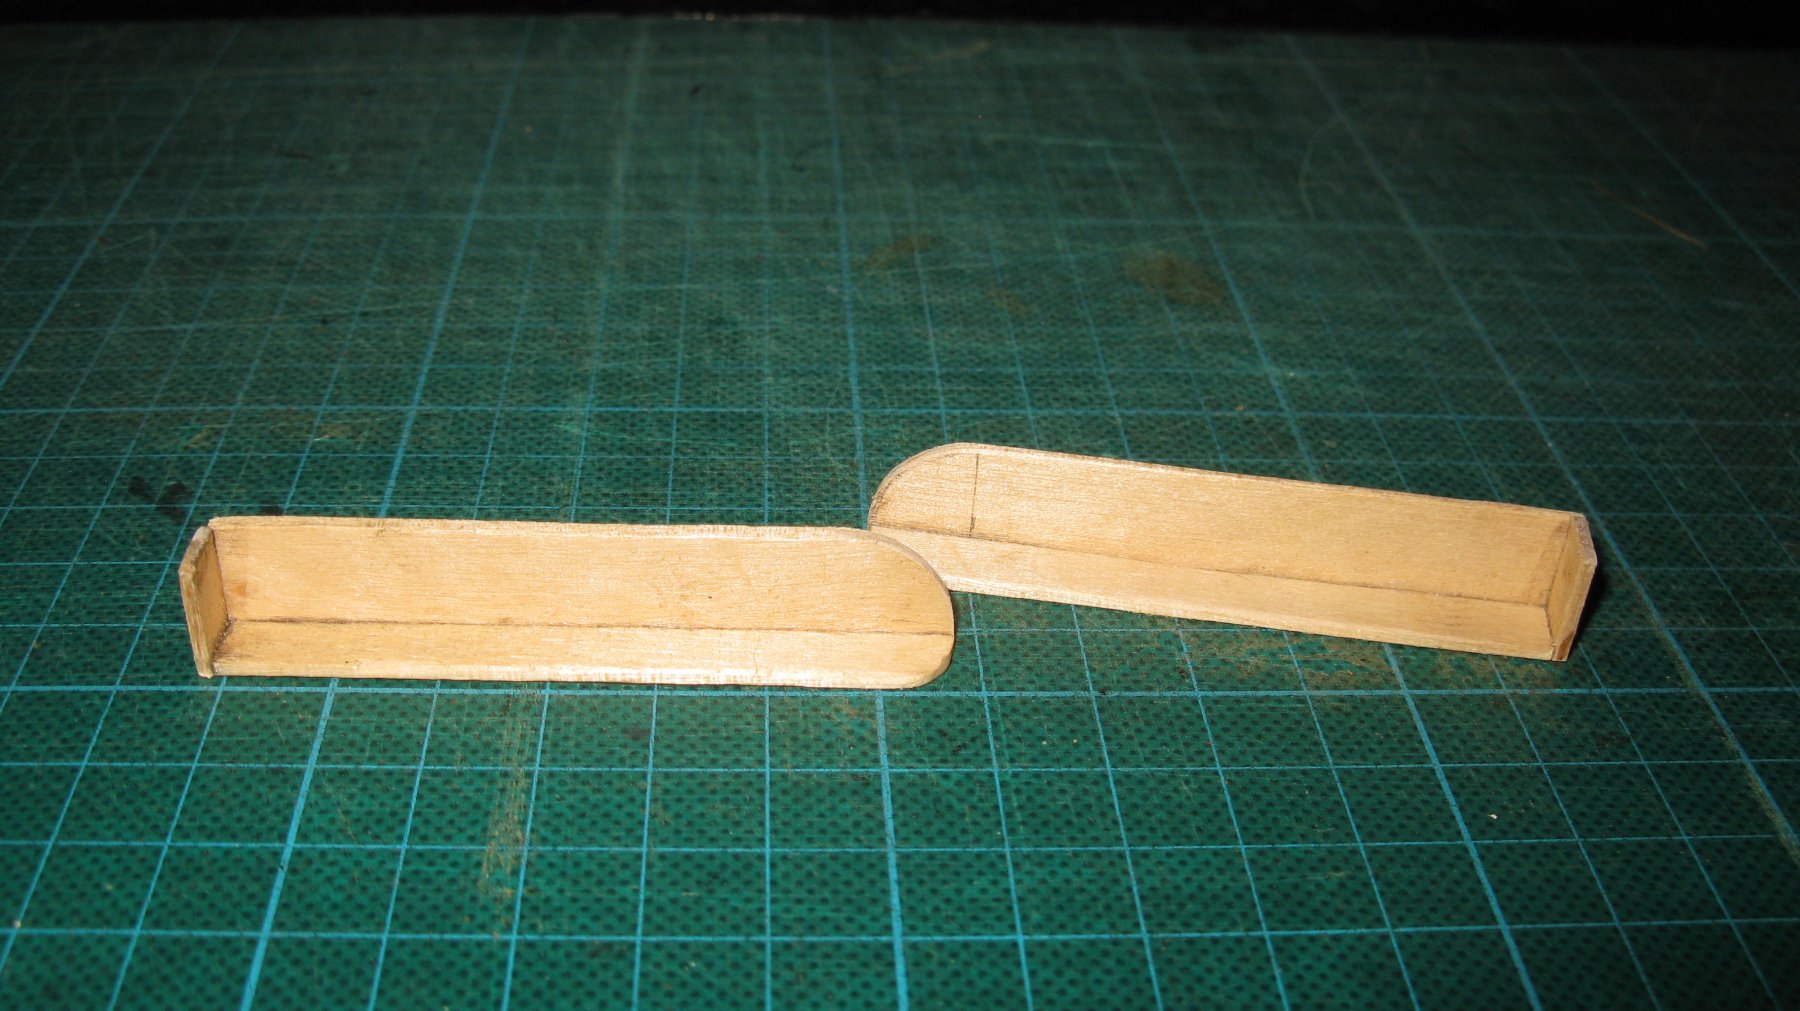
The navlight boxes are made of ice-lolly sticks.
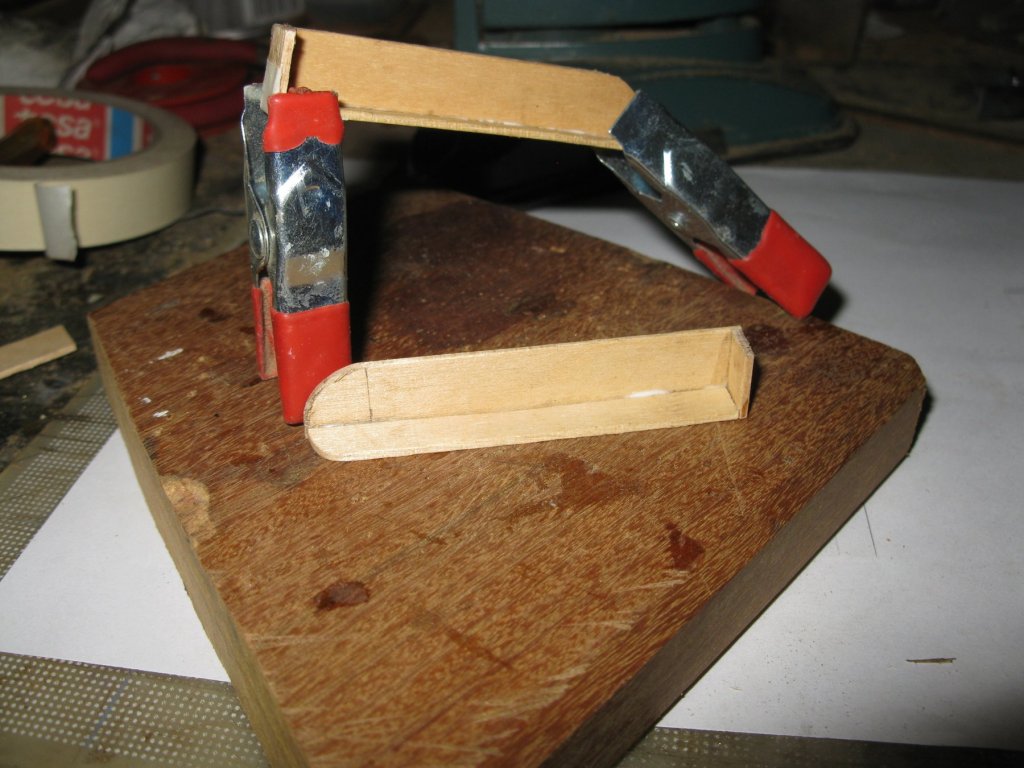
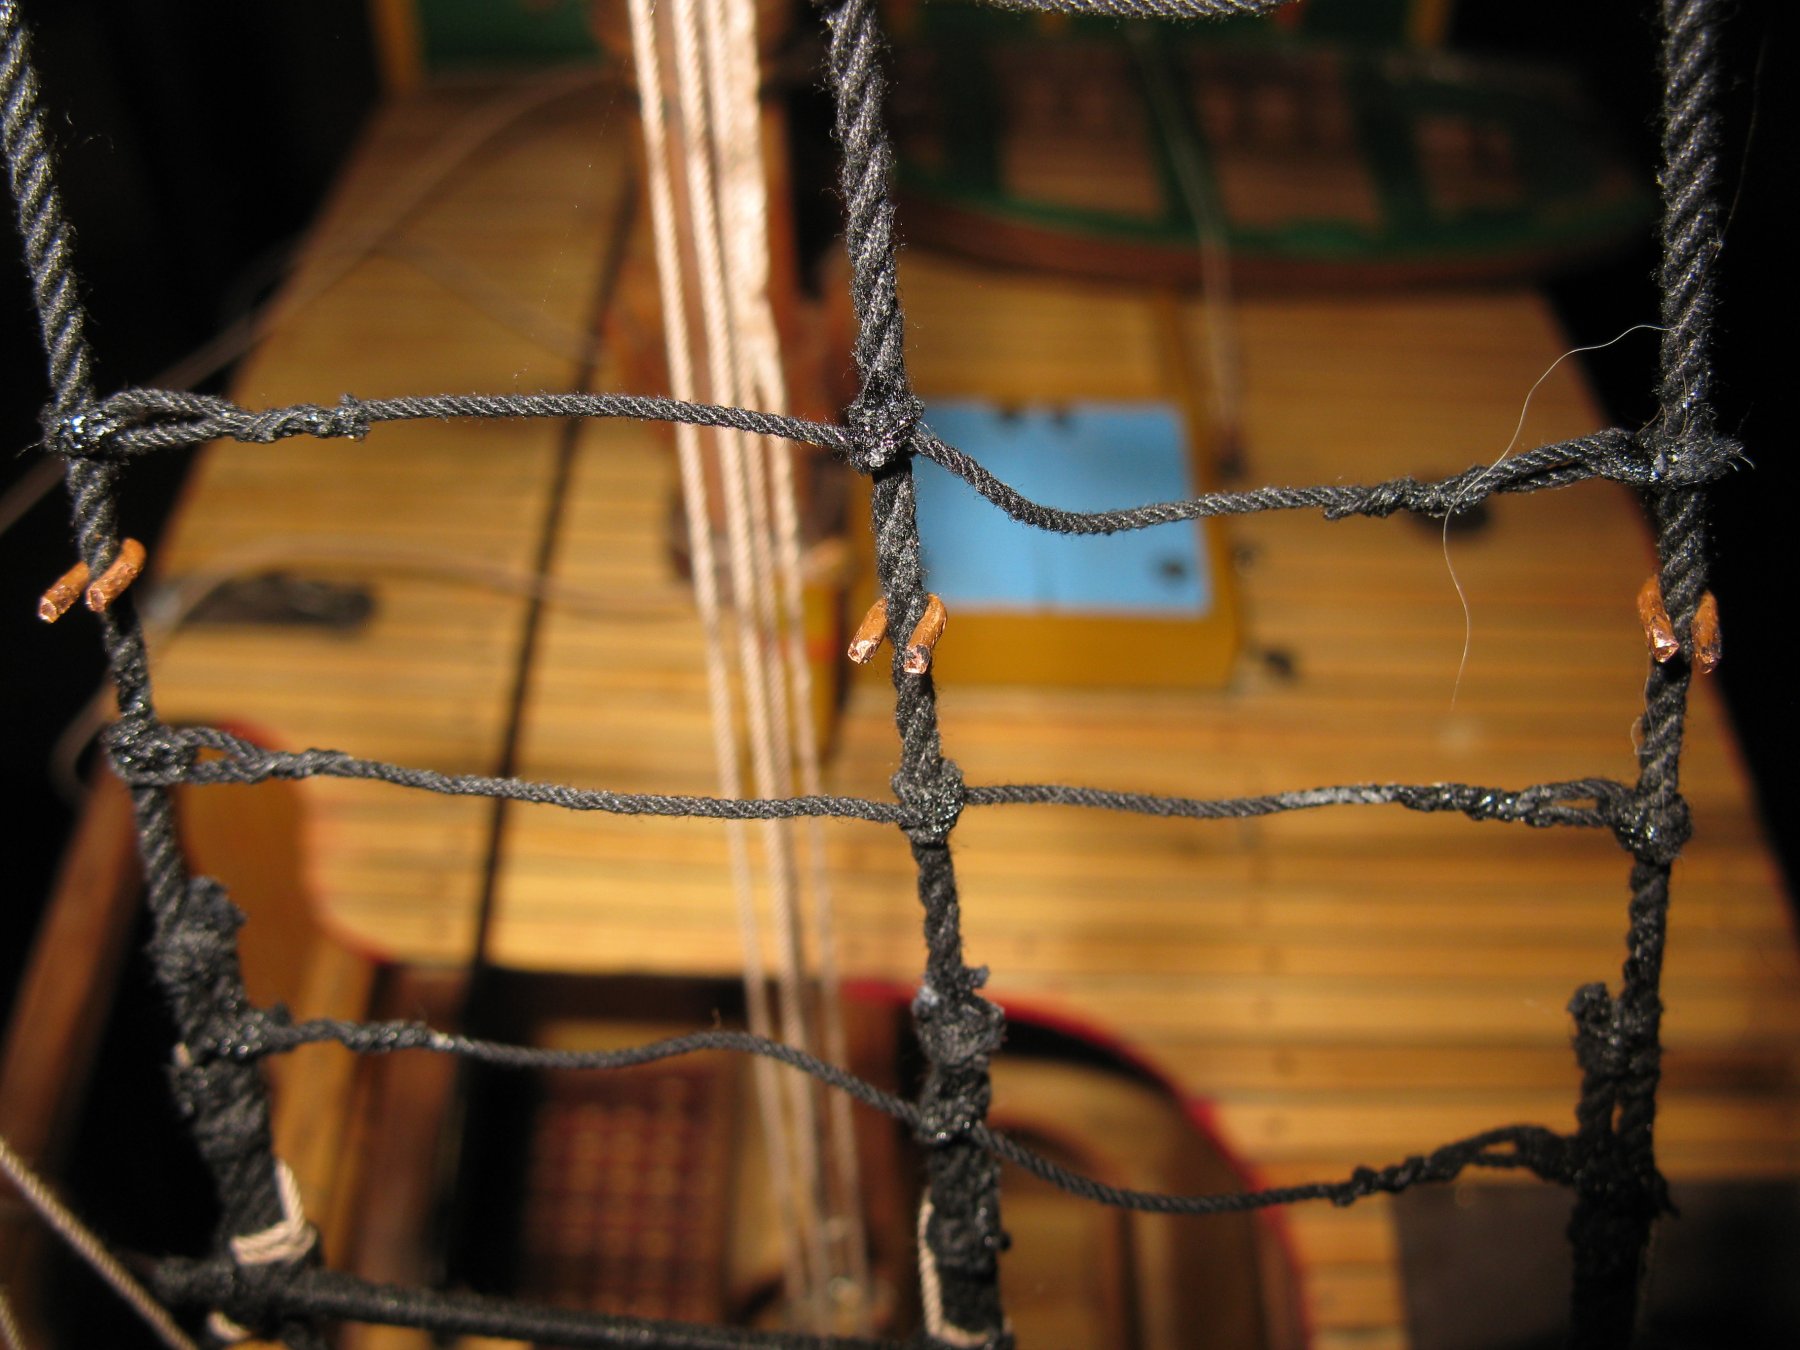
I attach them at the shrouds with copper clamps.
The port navigation light:
- tadheus, Duanelaker, hexnut and 7 others
-
10
-
-
Clamping during the planking is always a challenge.
- Jorge Diaz O and mtaylor
-
2
-
-
Nice work with the ribs, Nils. They are really good.
-
-
You have a good method to make blocks. What is the liquid in which they are soaked?
- Keith Black, FriedClams, mtaylor and 1 other
-
4
-
Very nice maintop.
Is that oil paint for artist painters that you use to make your color?
- EJ_L, FrankWouts, mtaylor and 2 others
-
5
-
Many thanks Gary and Patrick.
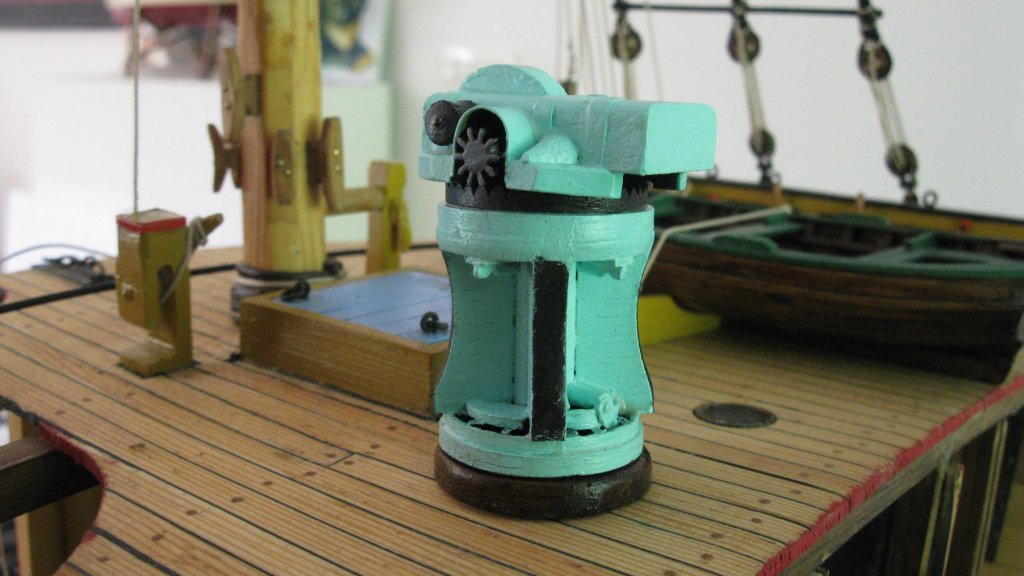
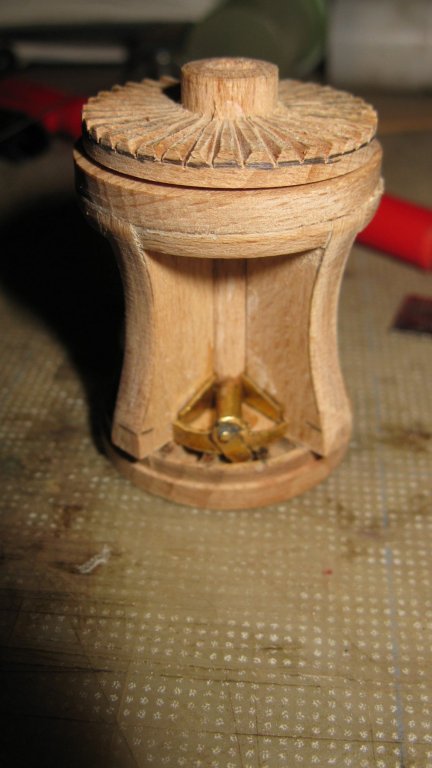
This week I finish the capstan.
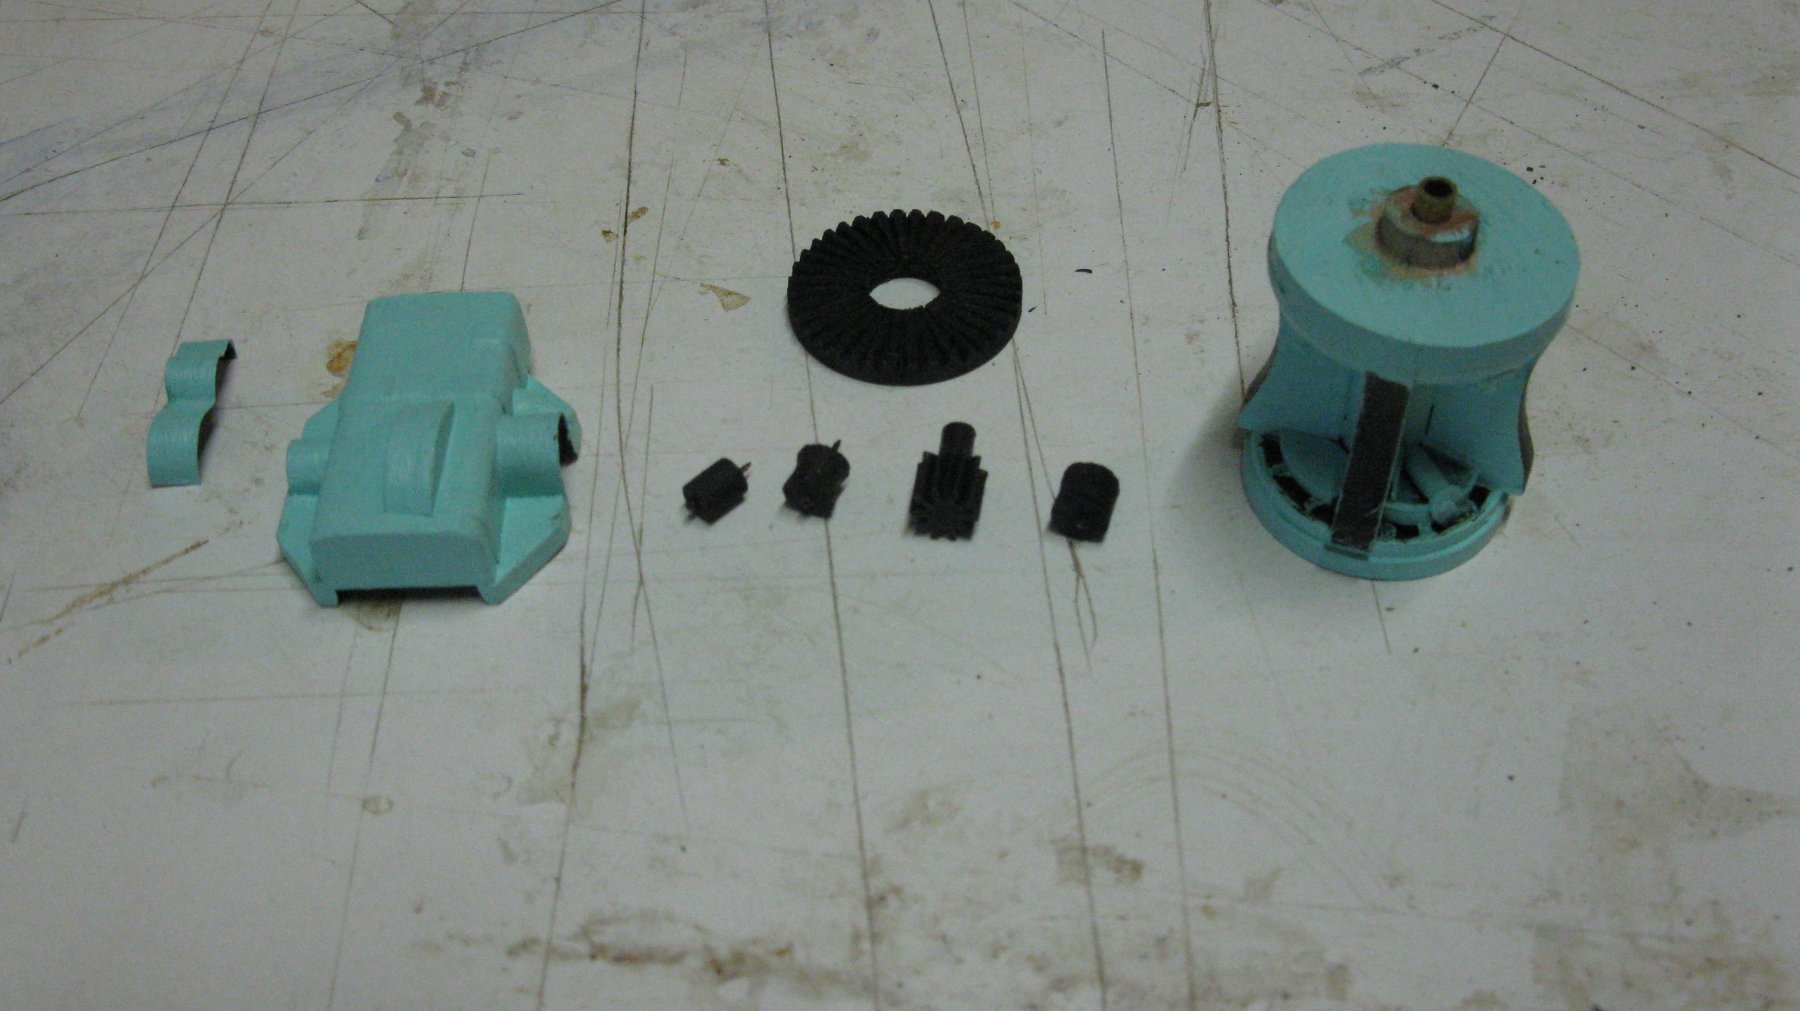
The cap of the small gear wheel is made of a piece of tin. I clamp it with a piece of wood while the glue is drying.
The rotating parts of the capstan are painted in black. In case of my capstan they will not be able to rotate.

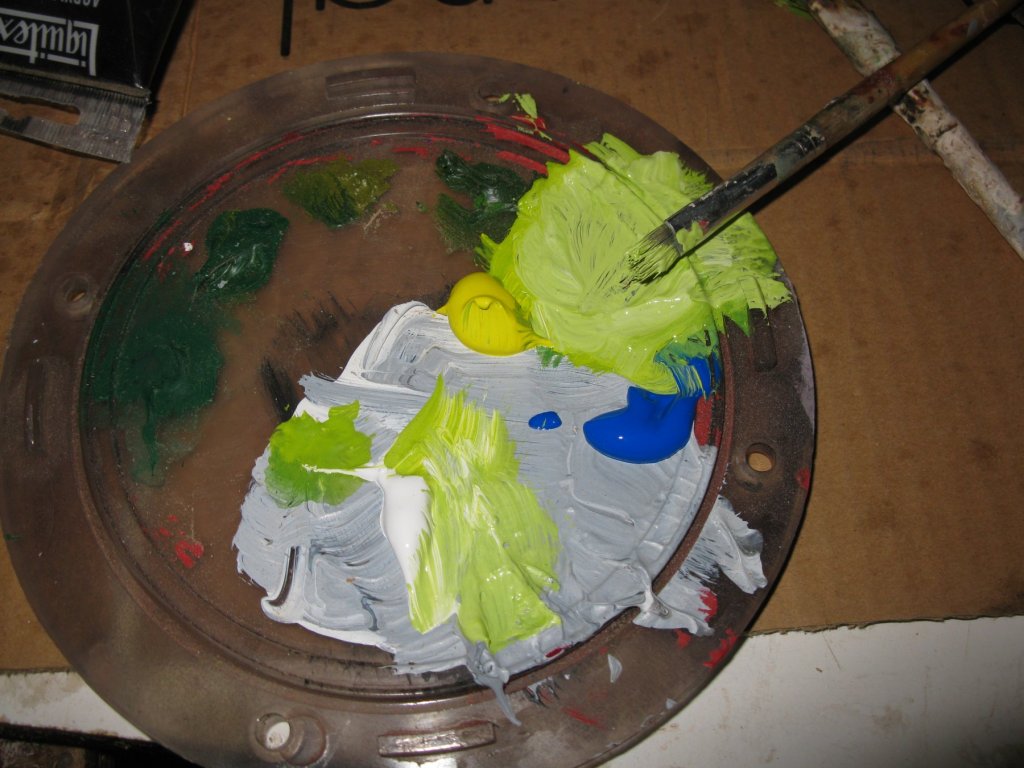
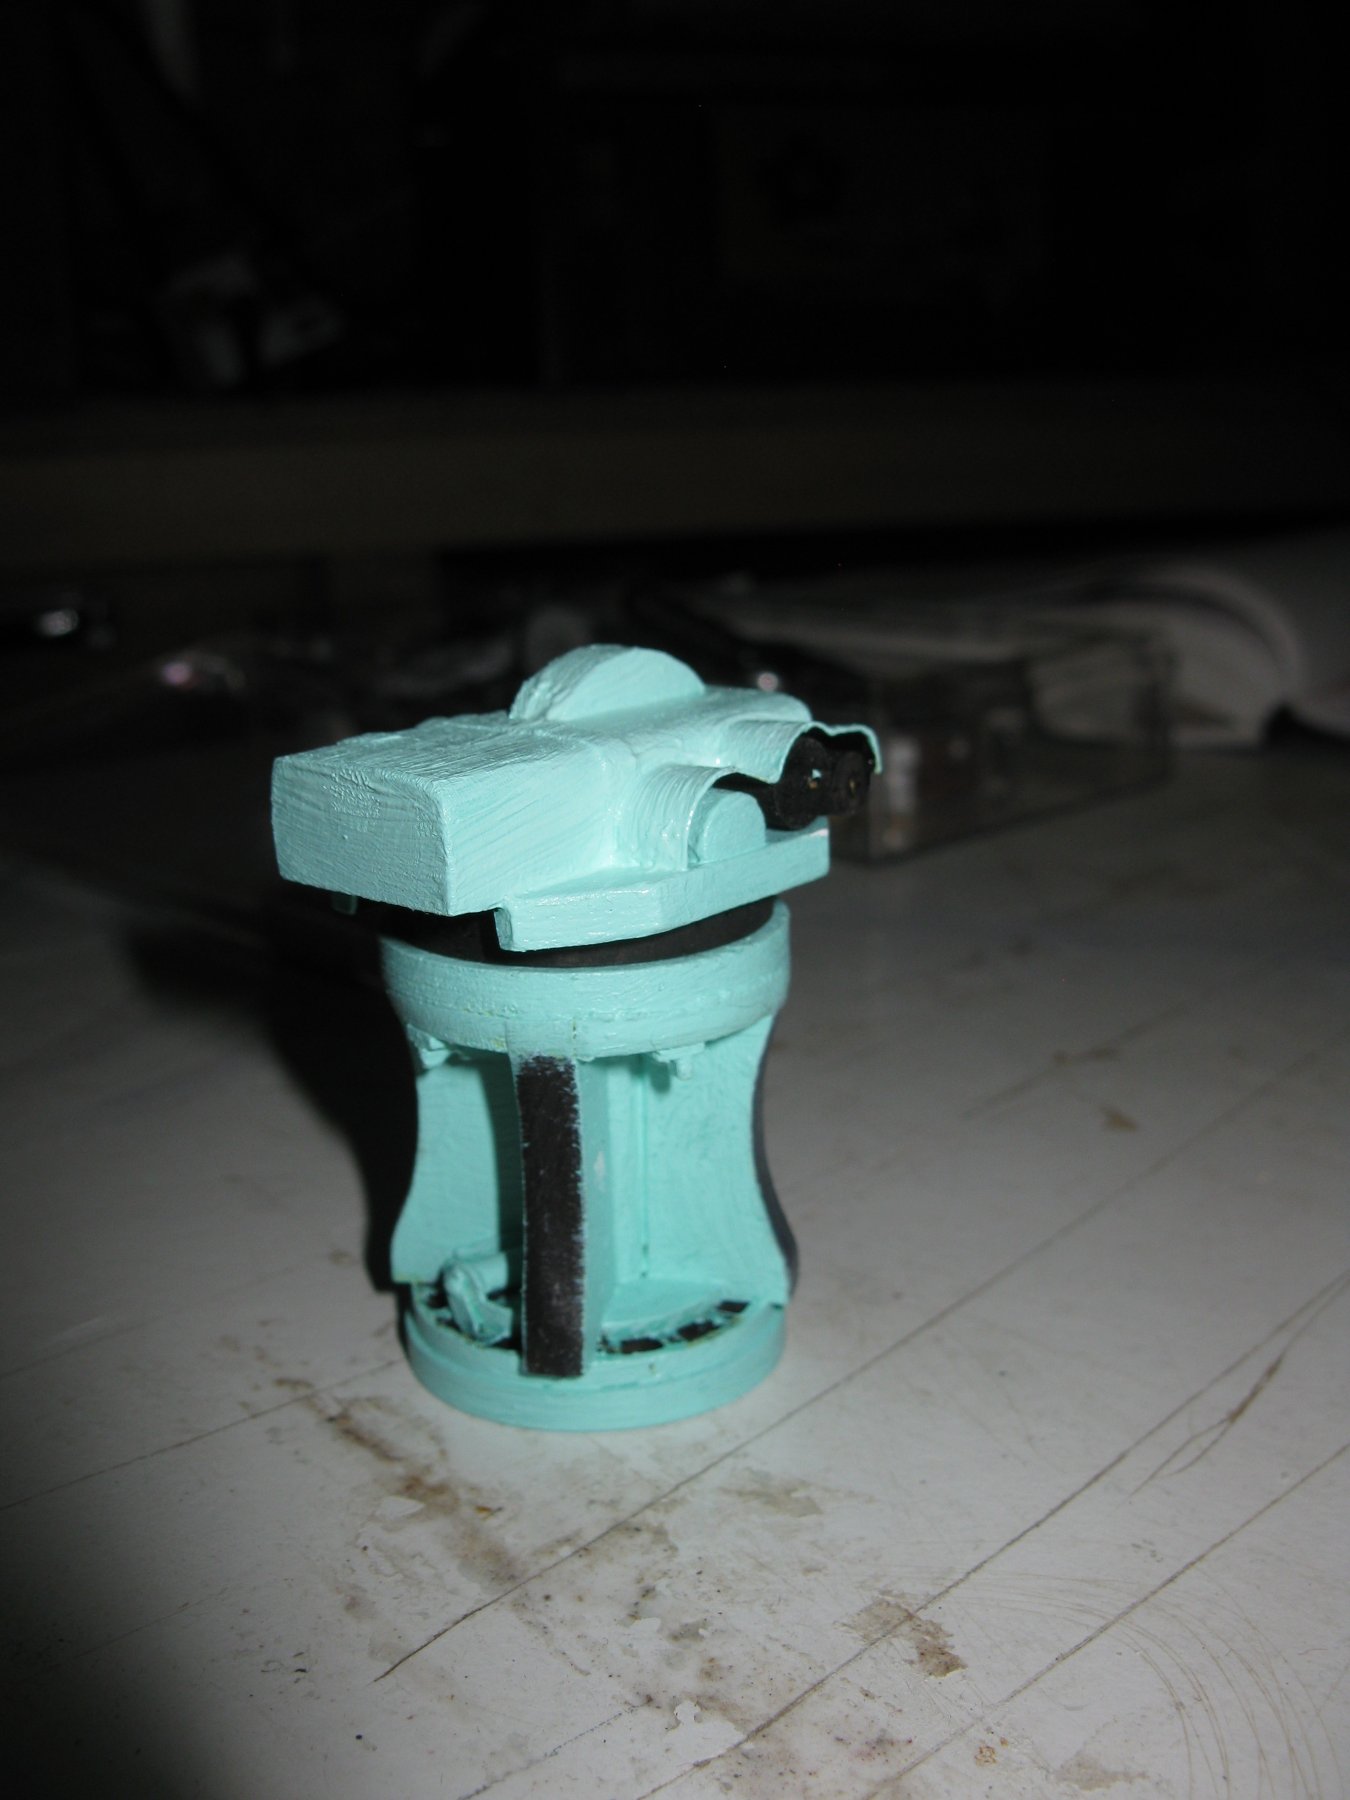
In his the book 'Sailing trawlers' Mr. Edgar J. March describes the color of the capstan as light green. I try to mix a suitable color with acrylic paint.
The painted and assembled capstan.
The deck surface is curved and the capstan is situated slightly to the portside. When simply placed on the deck, the capstan would stand a bit askew. To avoid this I will place it on an oak pedestal.
The finished capstan:
-
Tricky job, but it looks that it works well.
-
A nice little friend you have there, Nils.
-
Glad that you are back Giampiero.
Your stern carvings are outstanding.
- giampieroricci and mtaylor
-
2
-
-
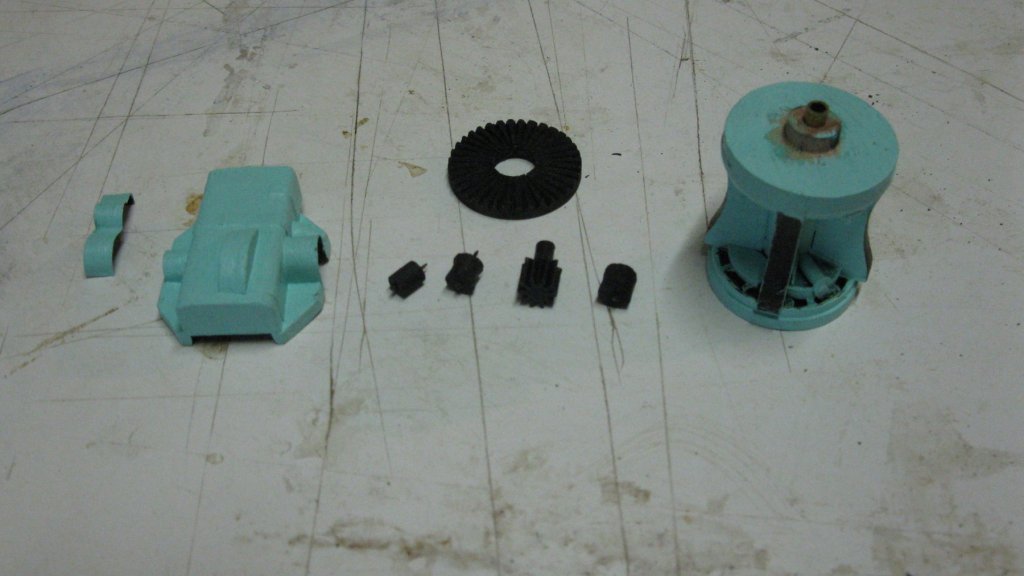
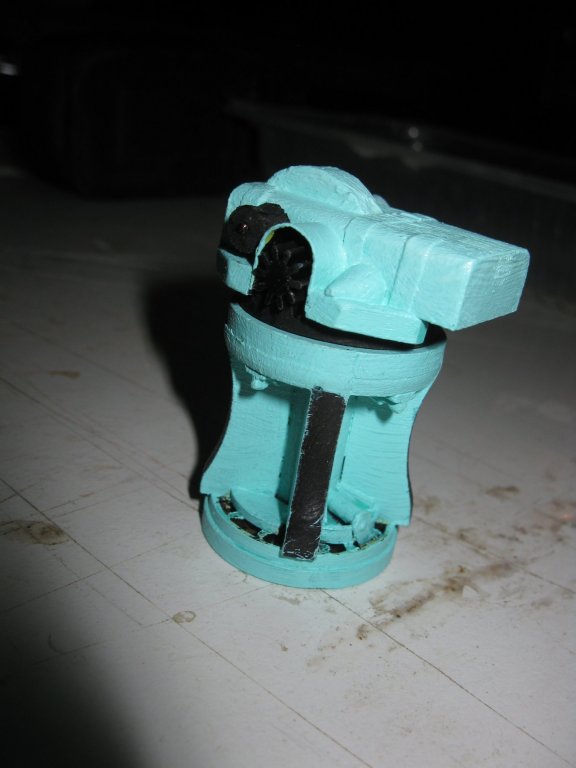
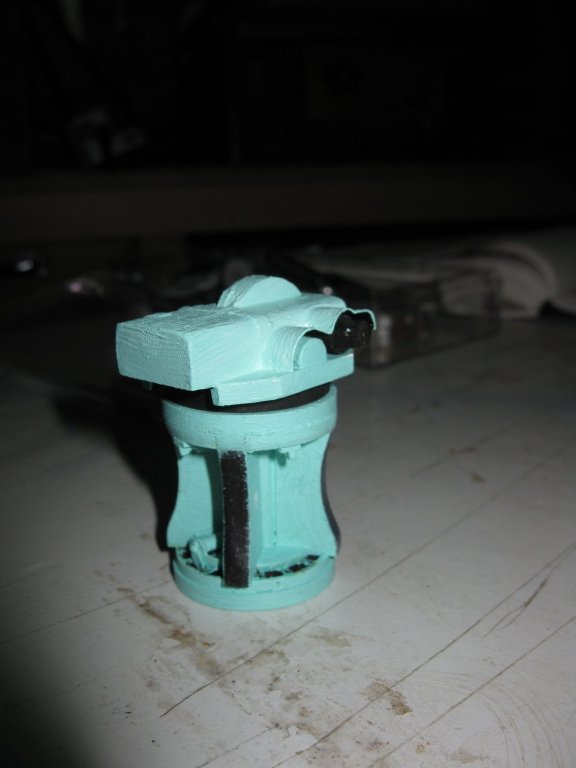
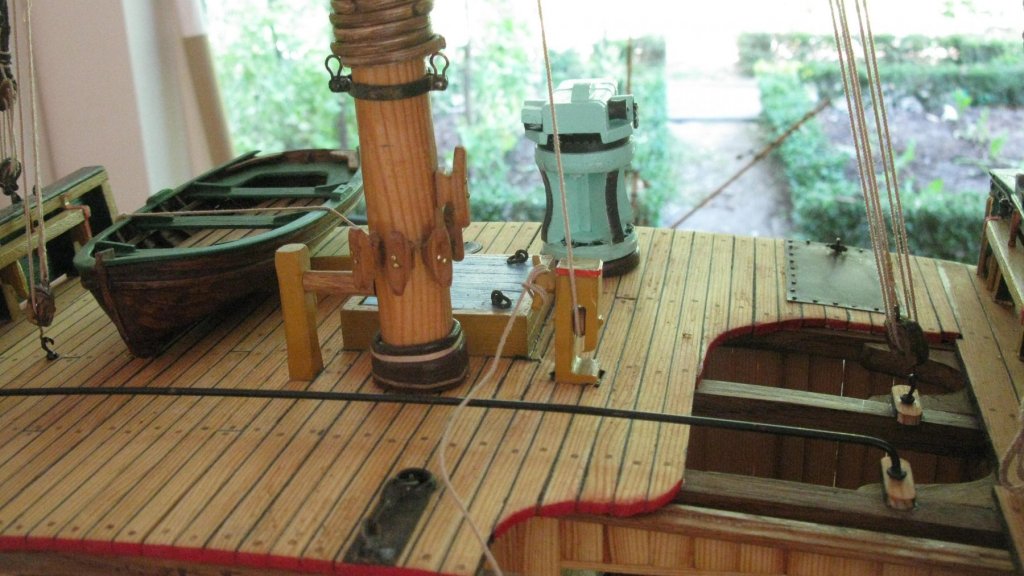
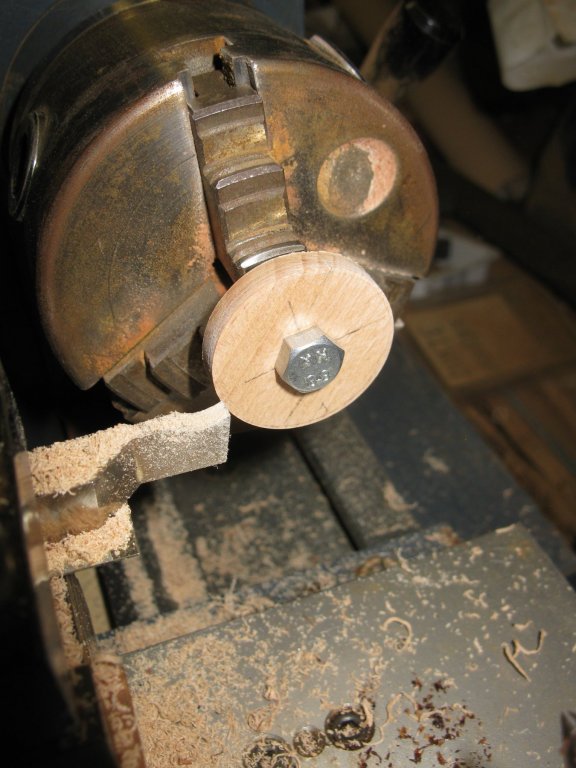
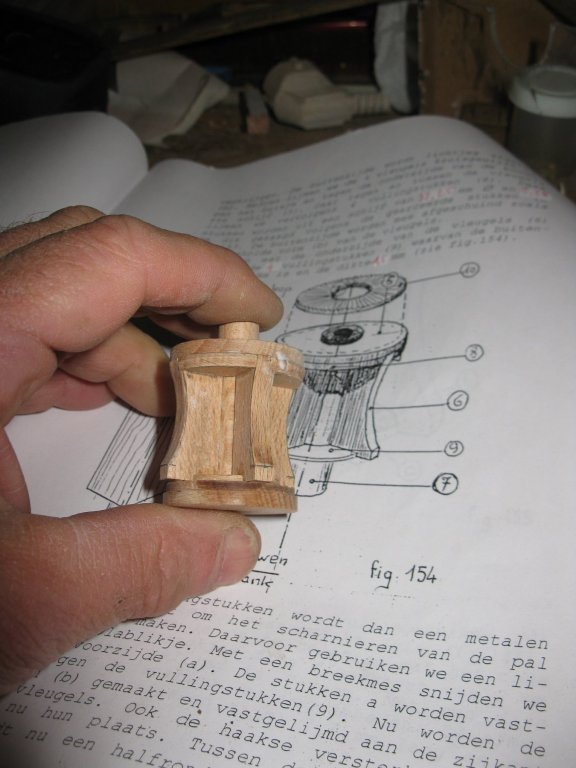
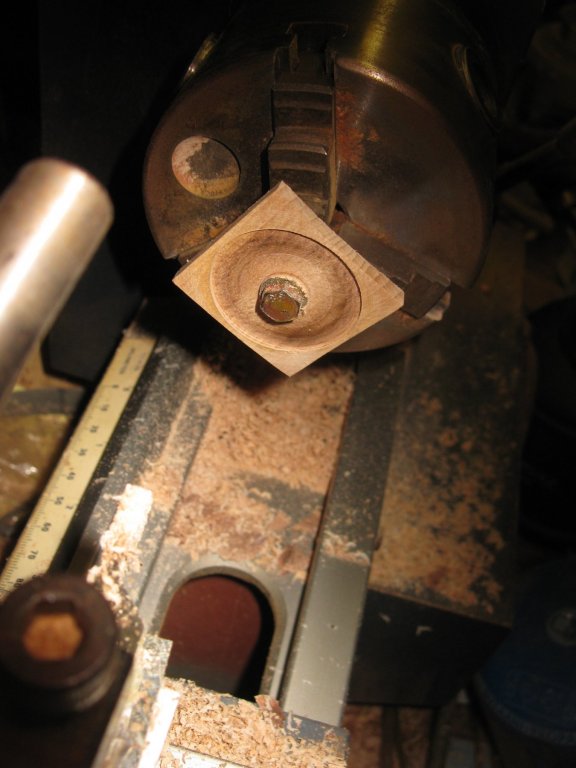
23. Steam capstan
With the steam capstan I reach the last chapter of the smack cross section practicum. Most of the smacks in our region were equipped with an Elliot & Garrod's steam capstan (Drawing: 'Sailing trawlers' Edgar J. March).
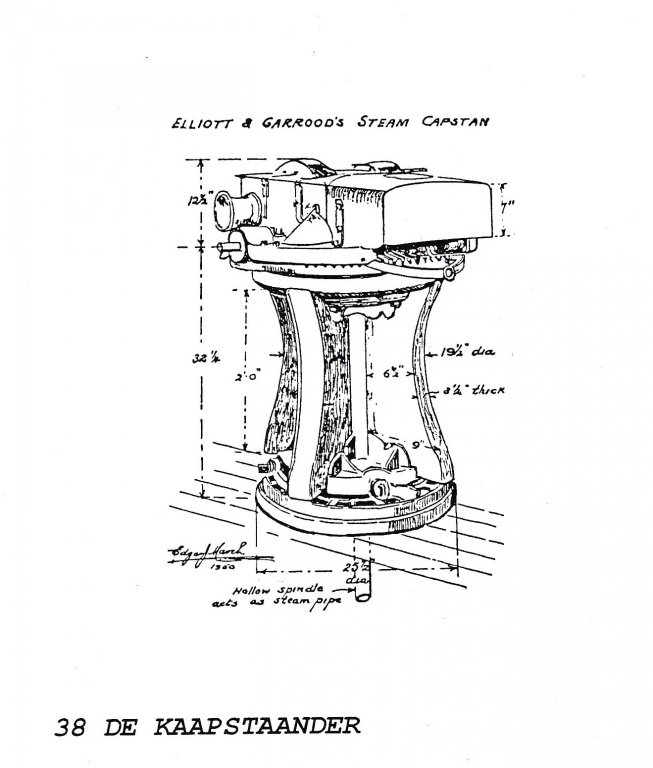
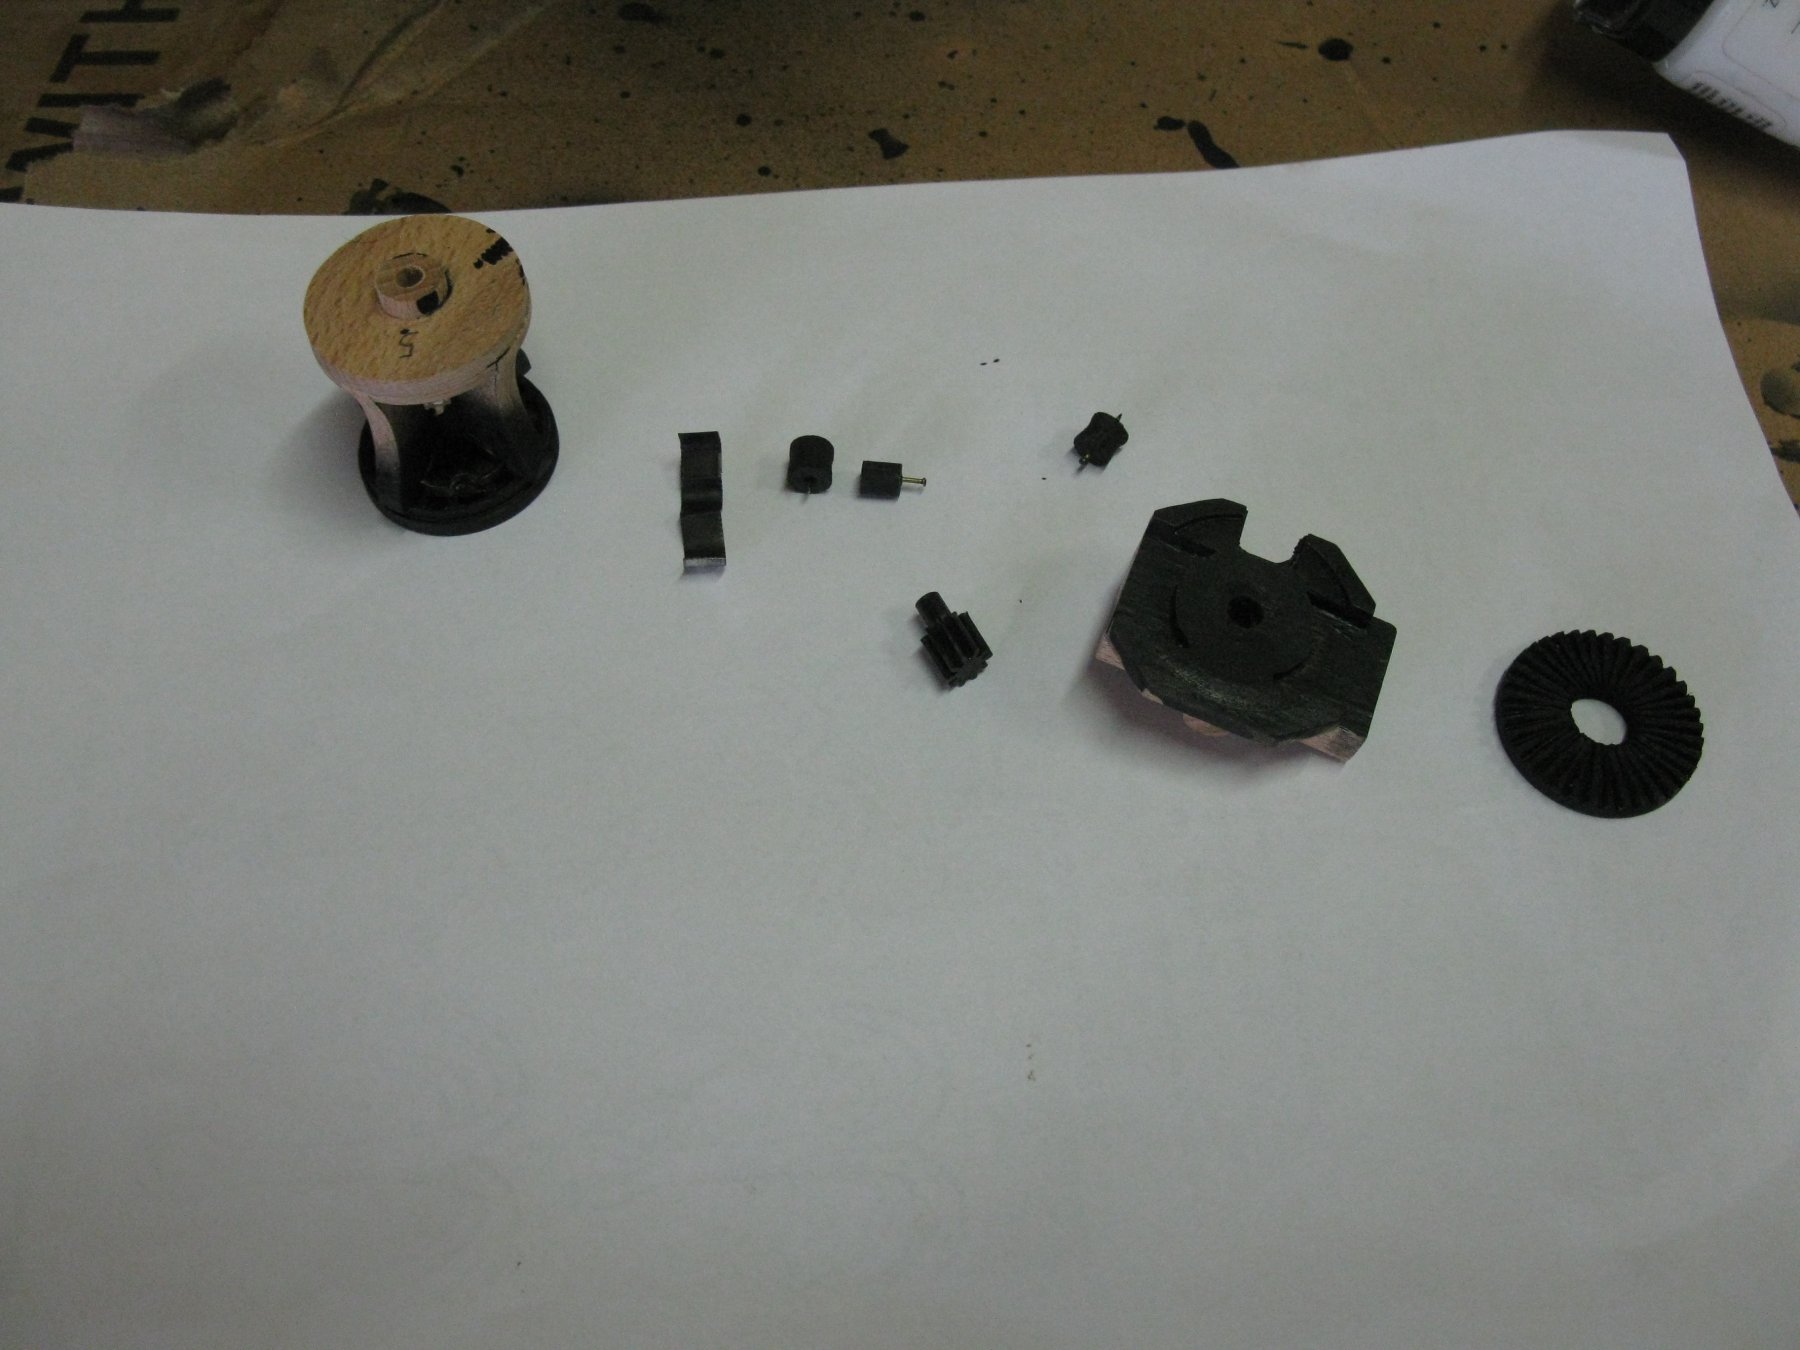
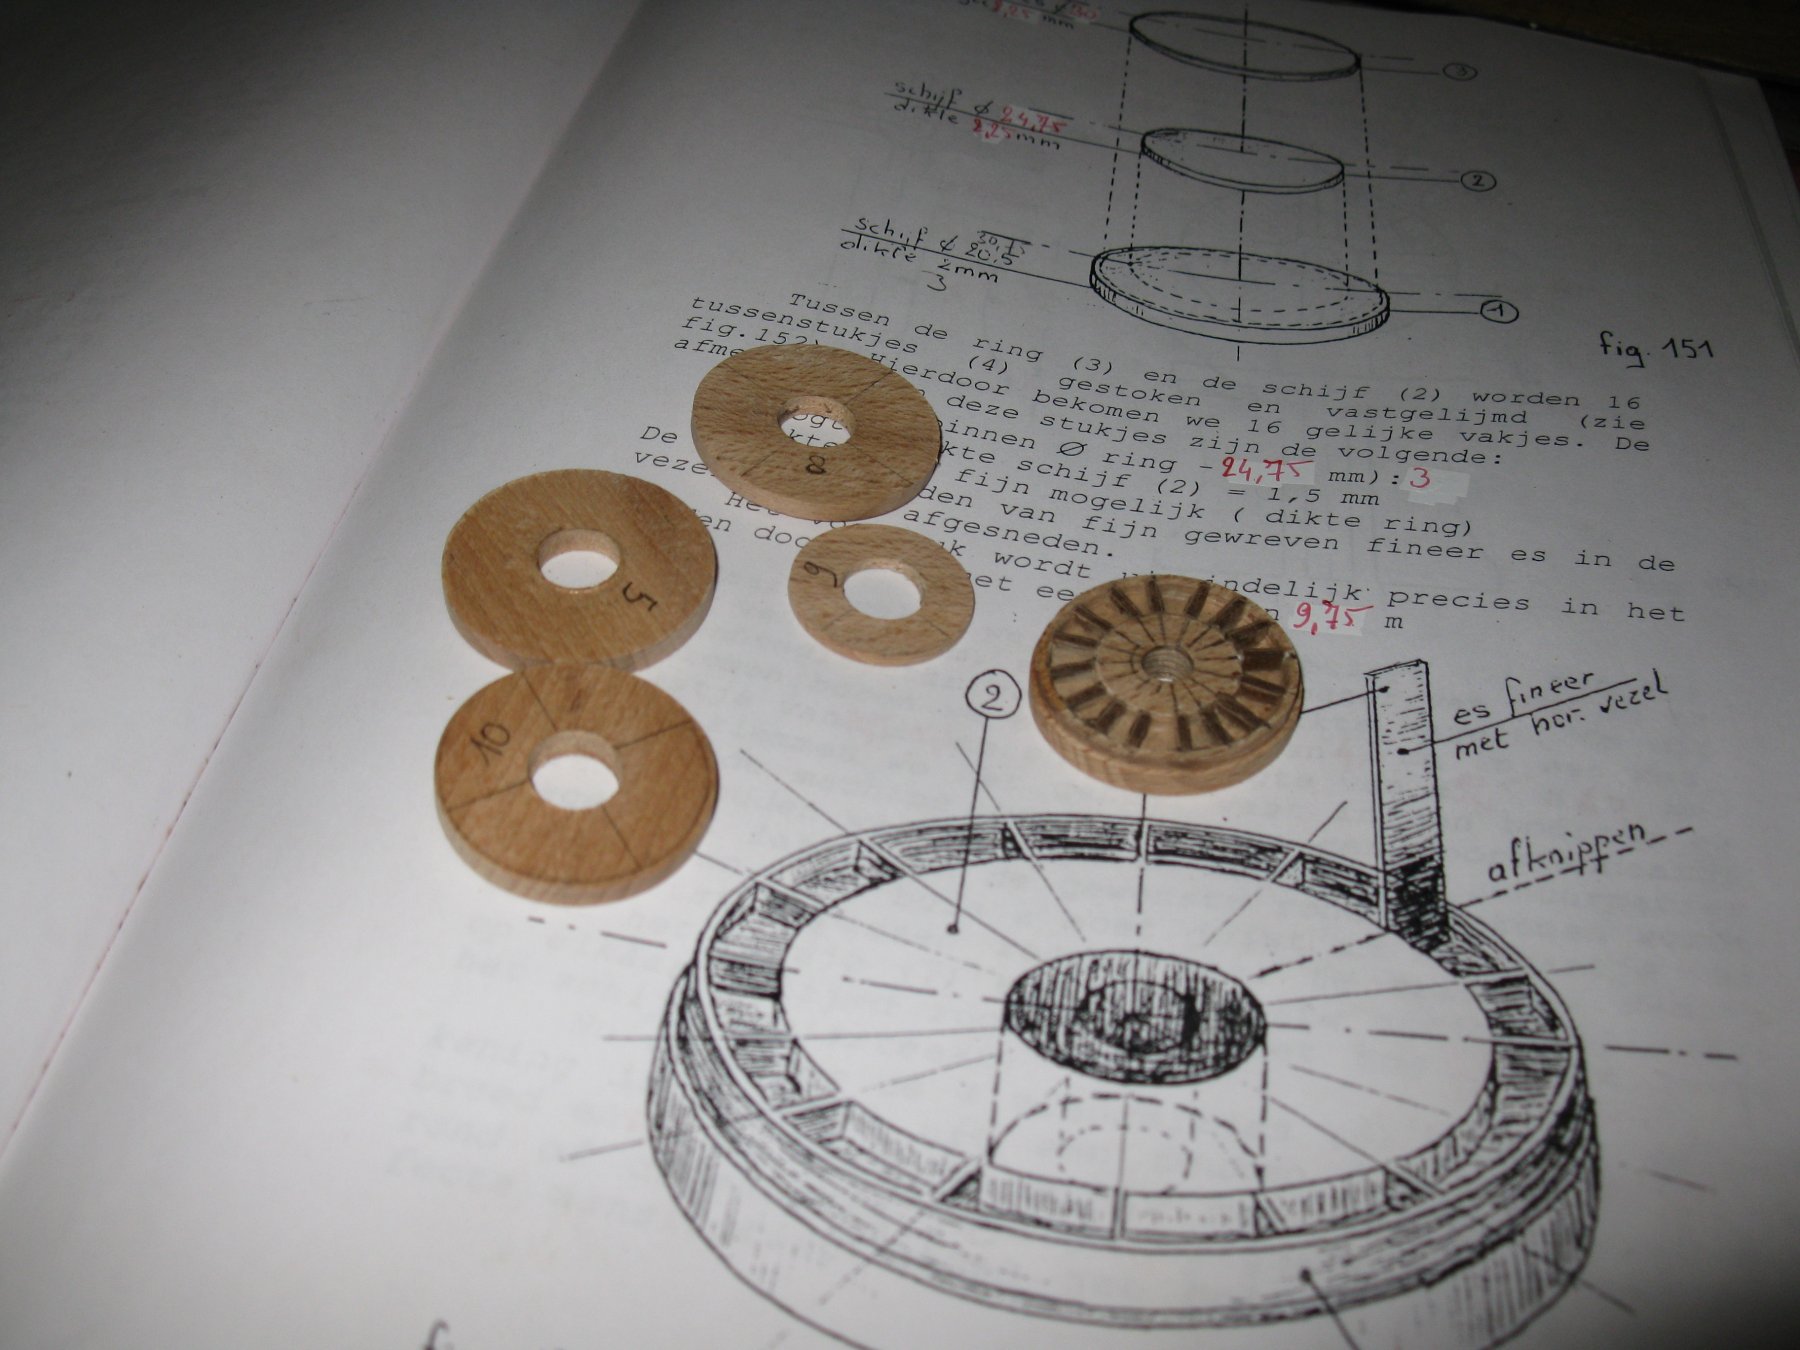
I never saw such a capstan in reality, but I believe that it is mainly made of steel and cast iron. In the practicum of Mr. Verleene is described how to make it of wood. I will make it of beech.
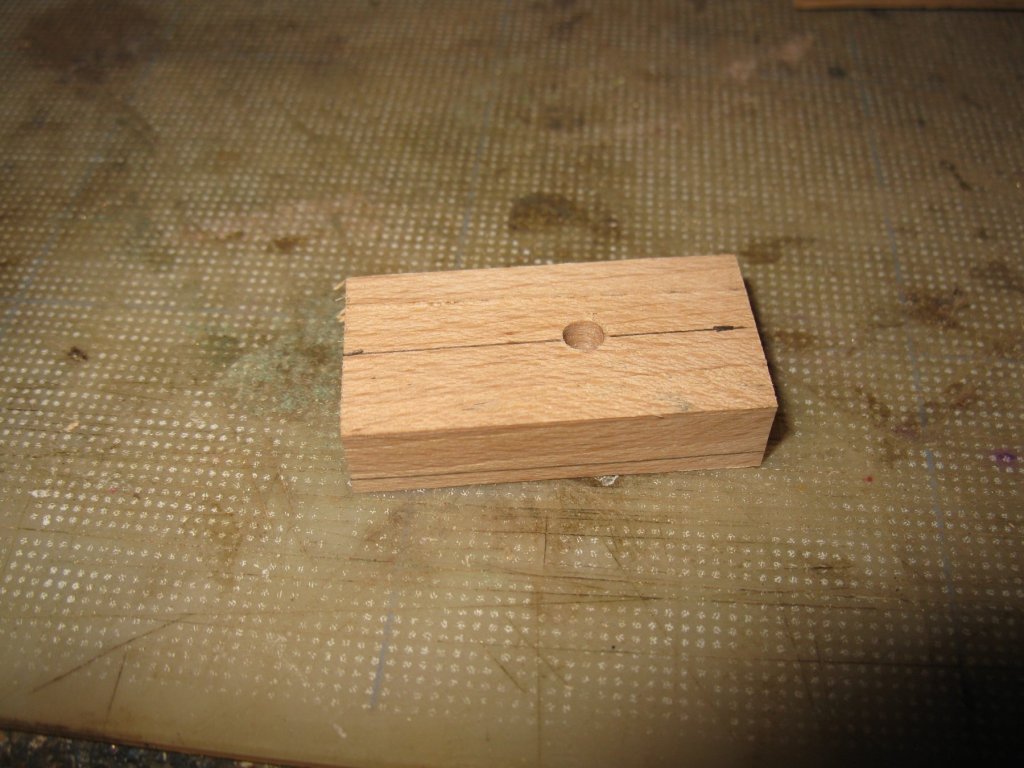
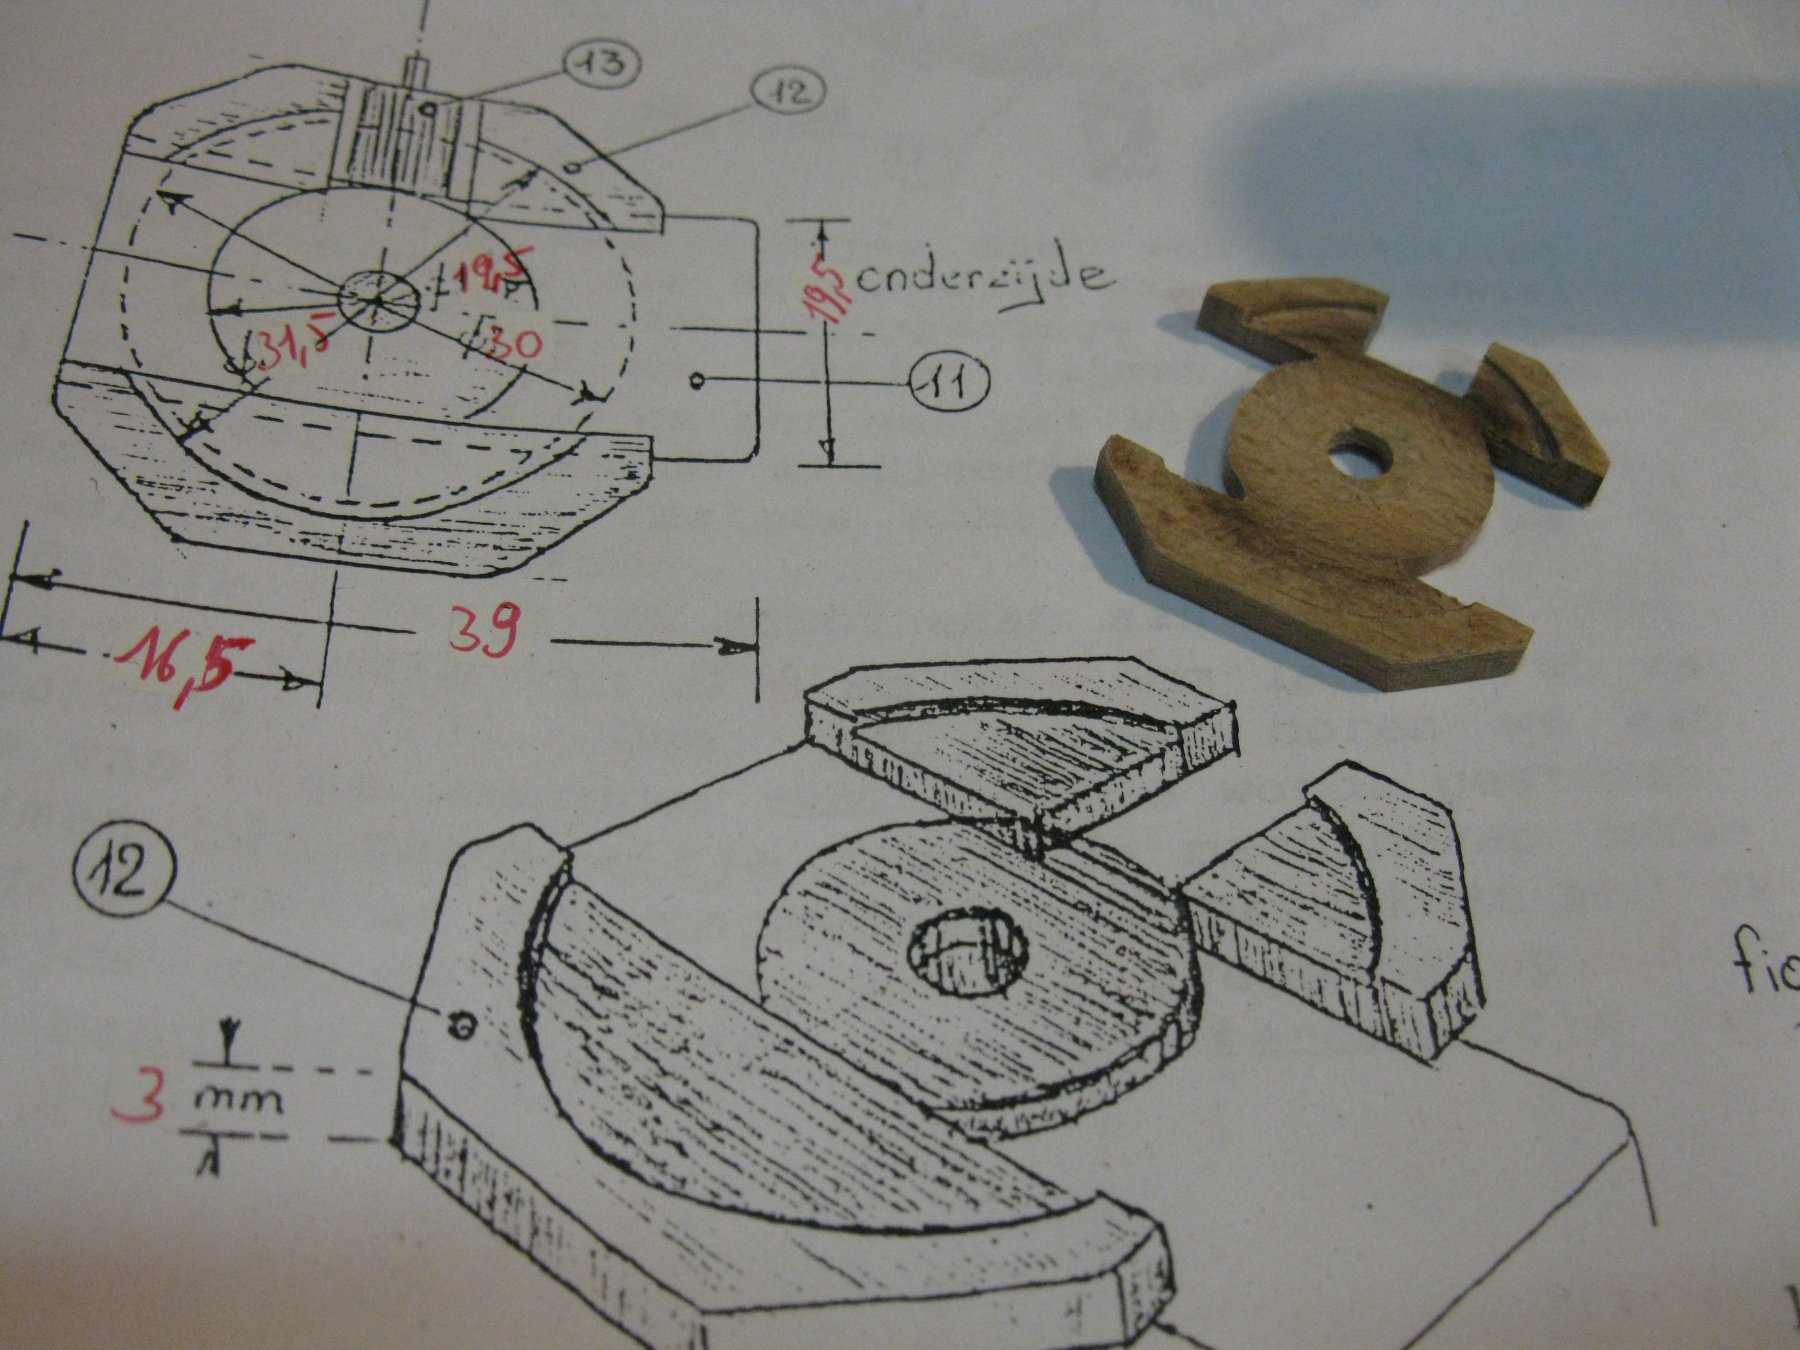
Making the base plate:
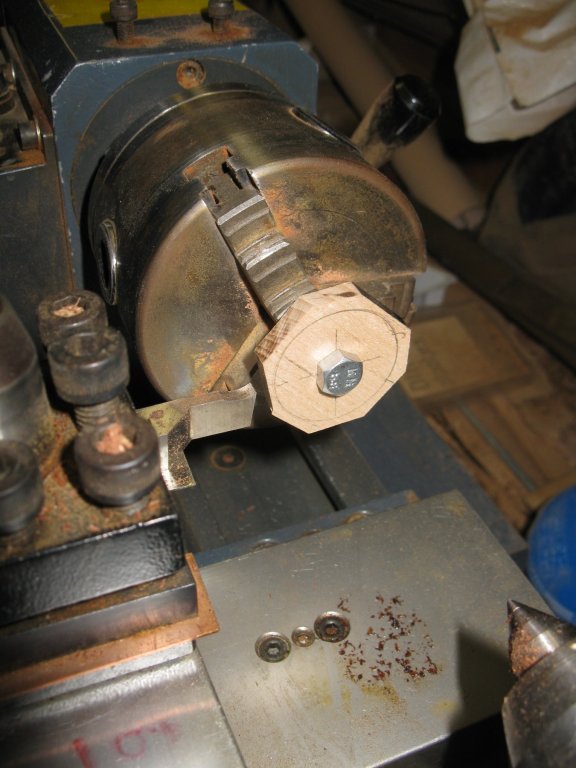
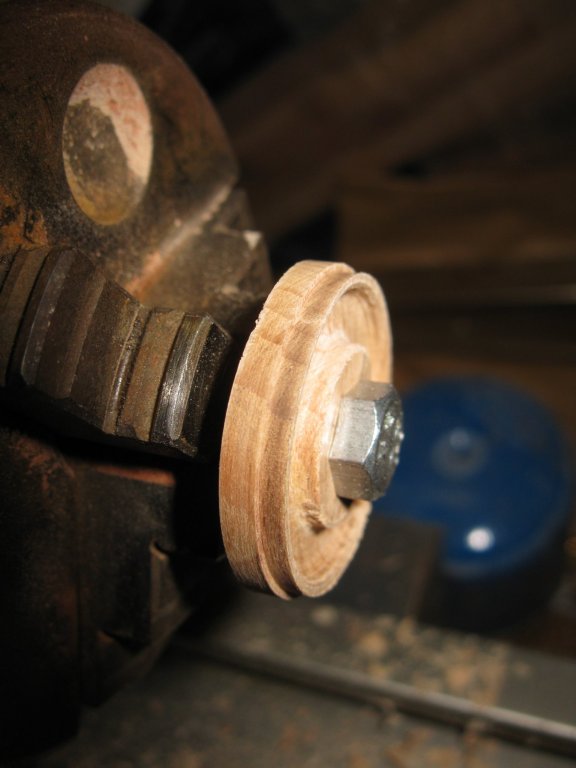
The groove around the base plate is divided in 16 segments. It is done with small pieces of walnut.

The base plate and the other beech rings which have to build in.

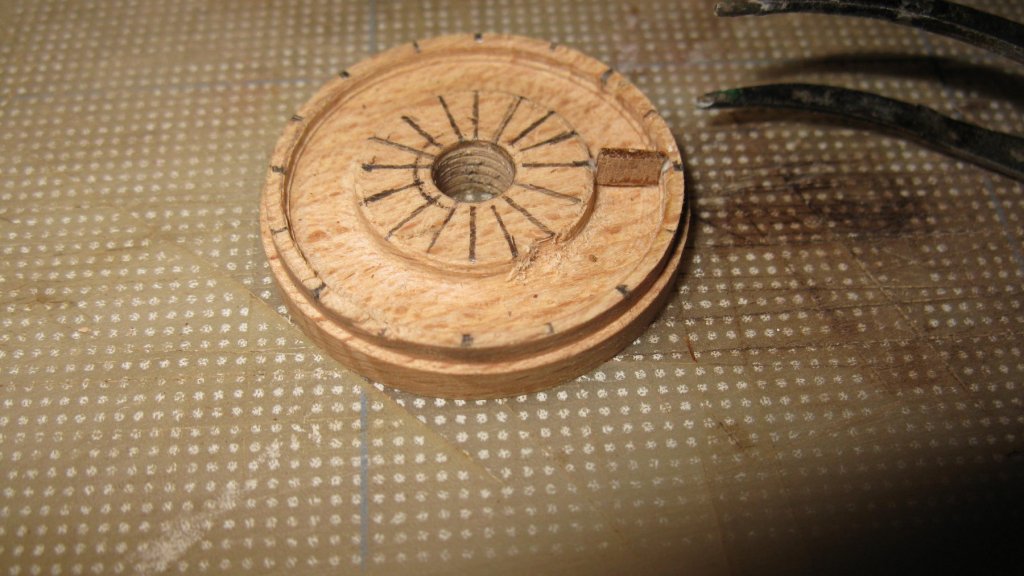
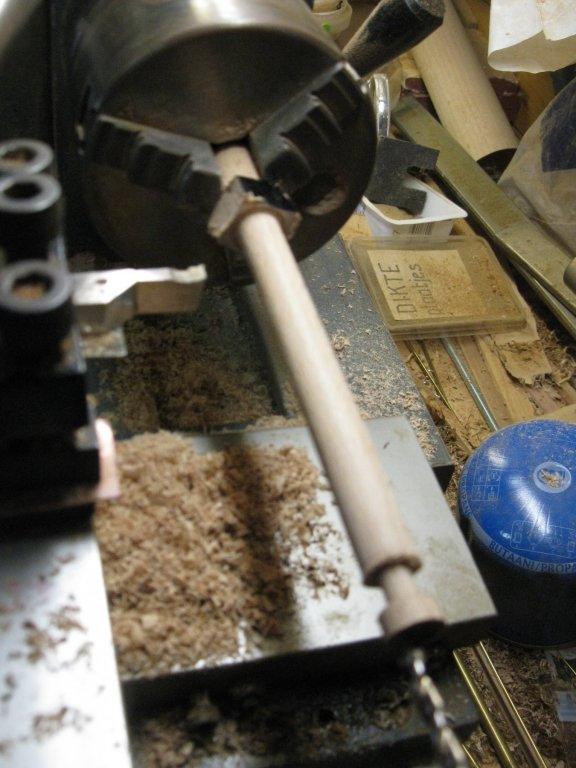
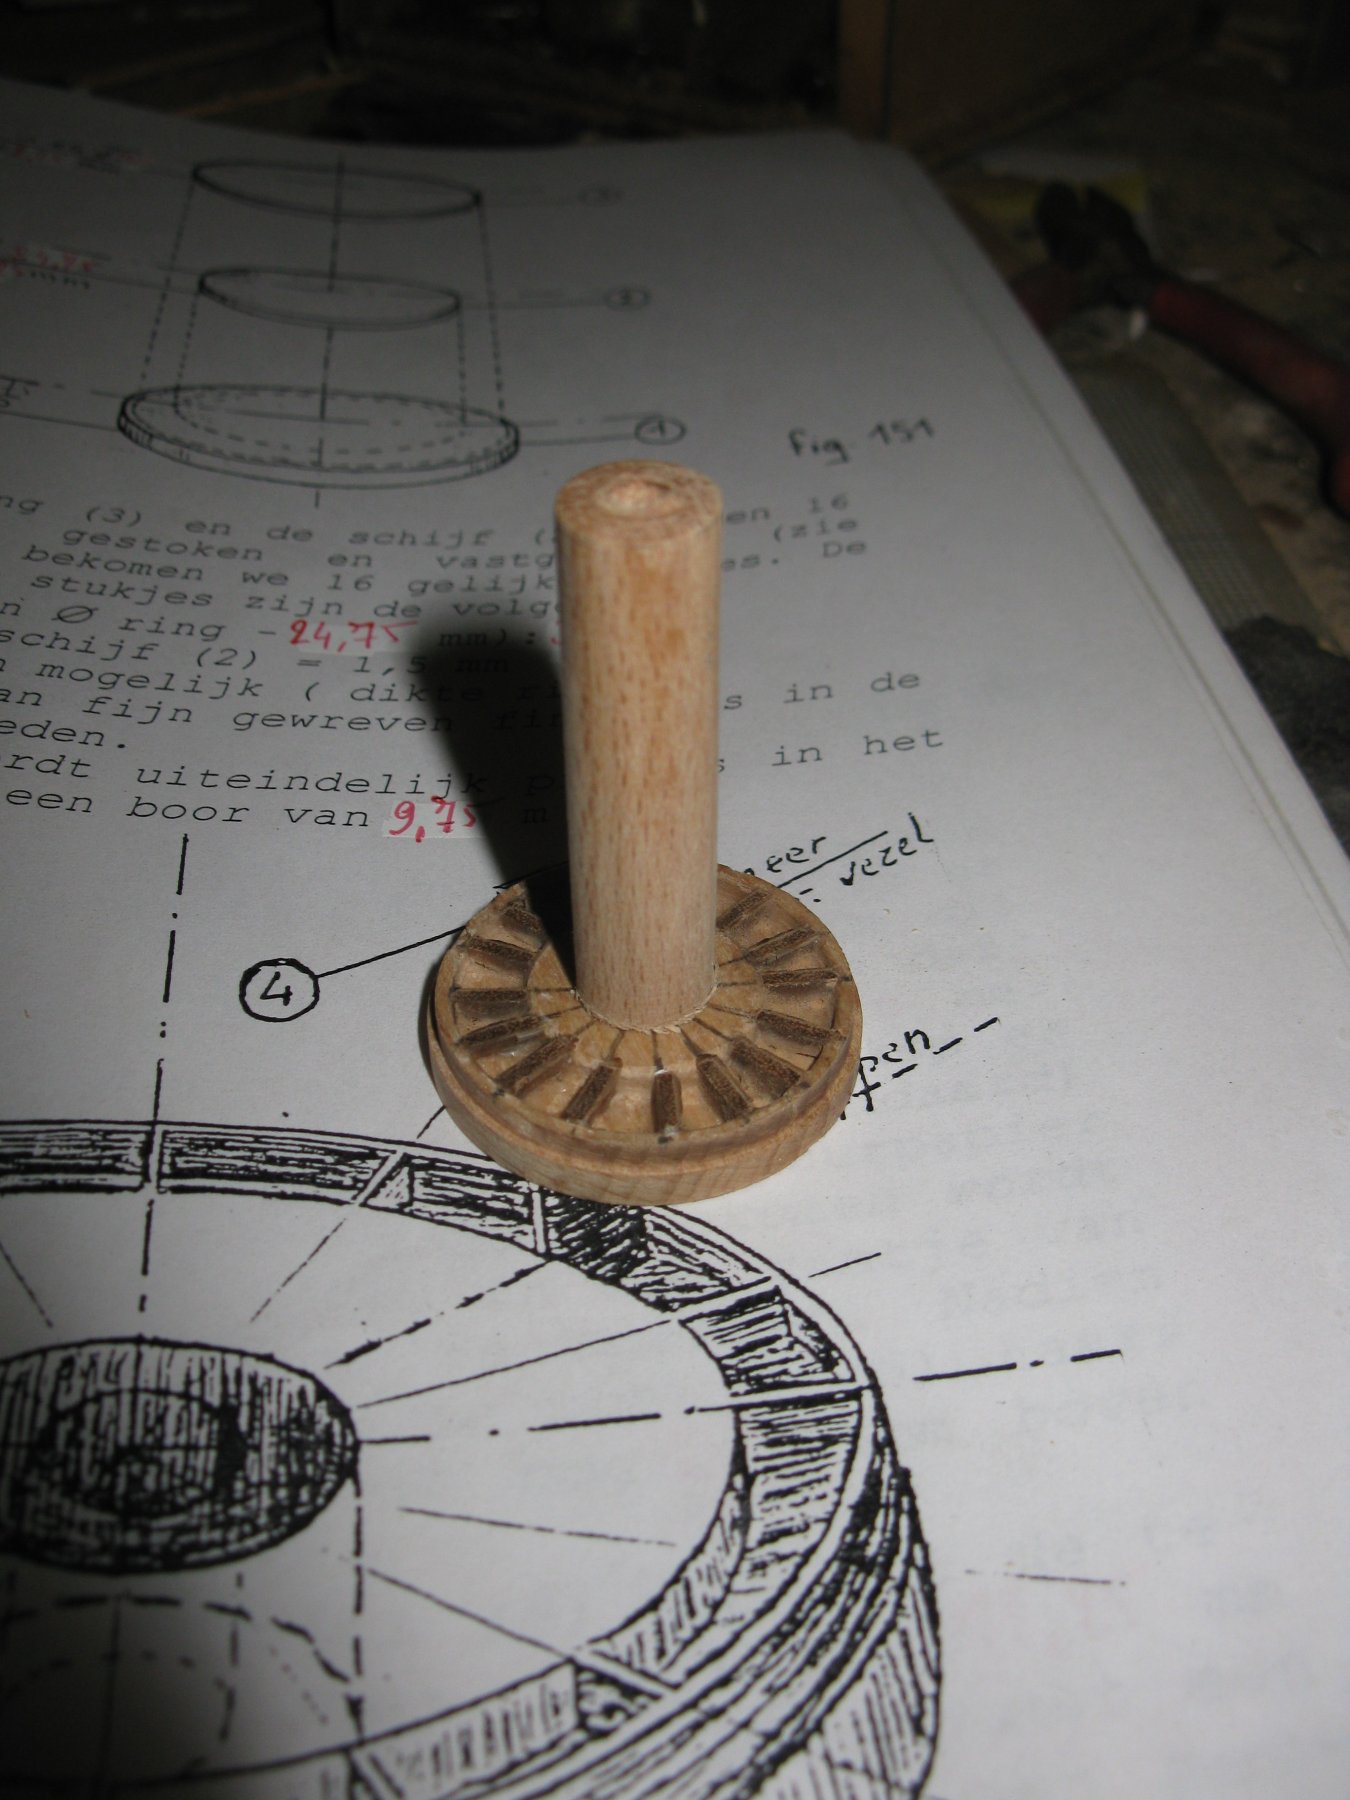
In the center of the capstan stands a beech pipe. Making the pipe:
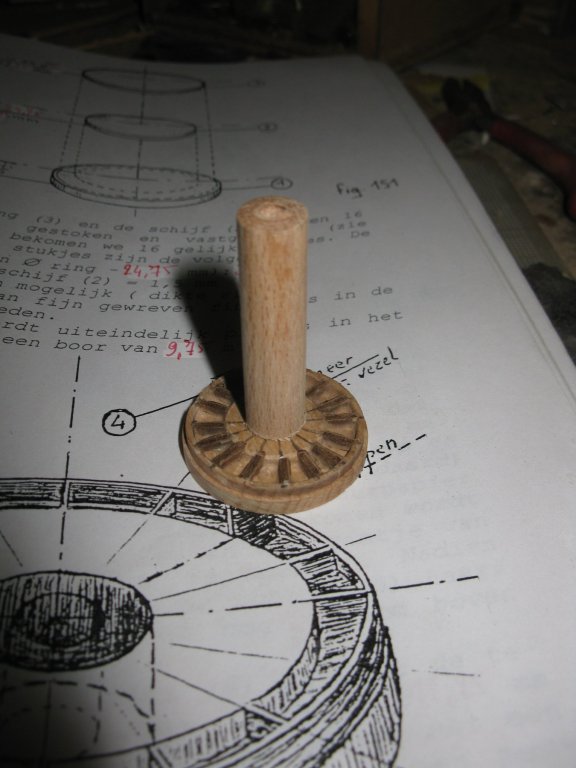
The base plate, the pipe and the top plate fitted together.
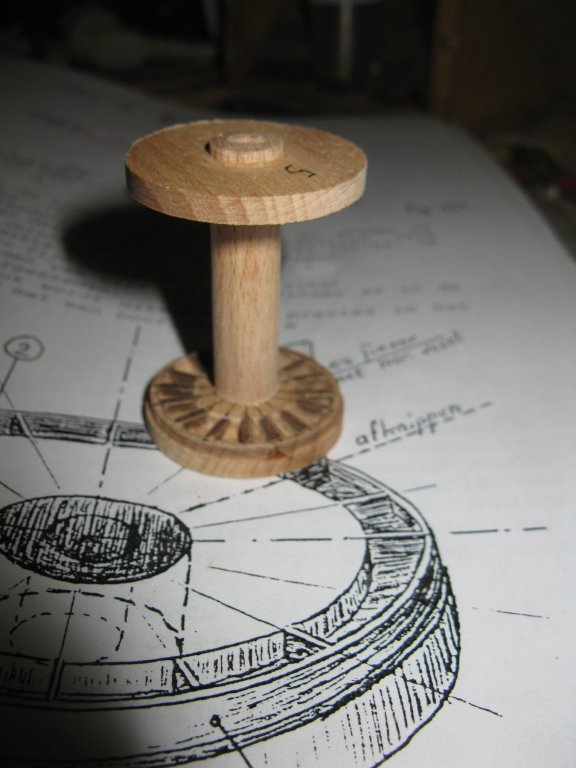
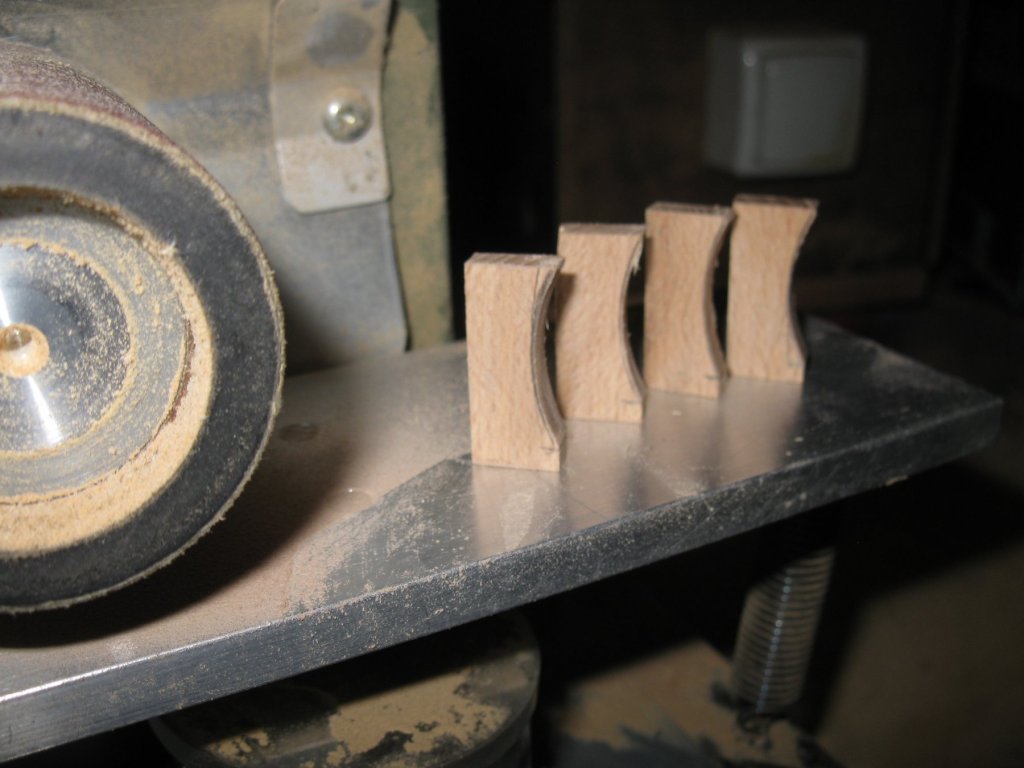
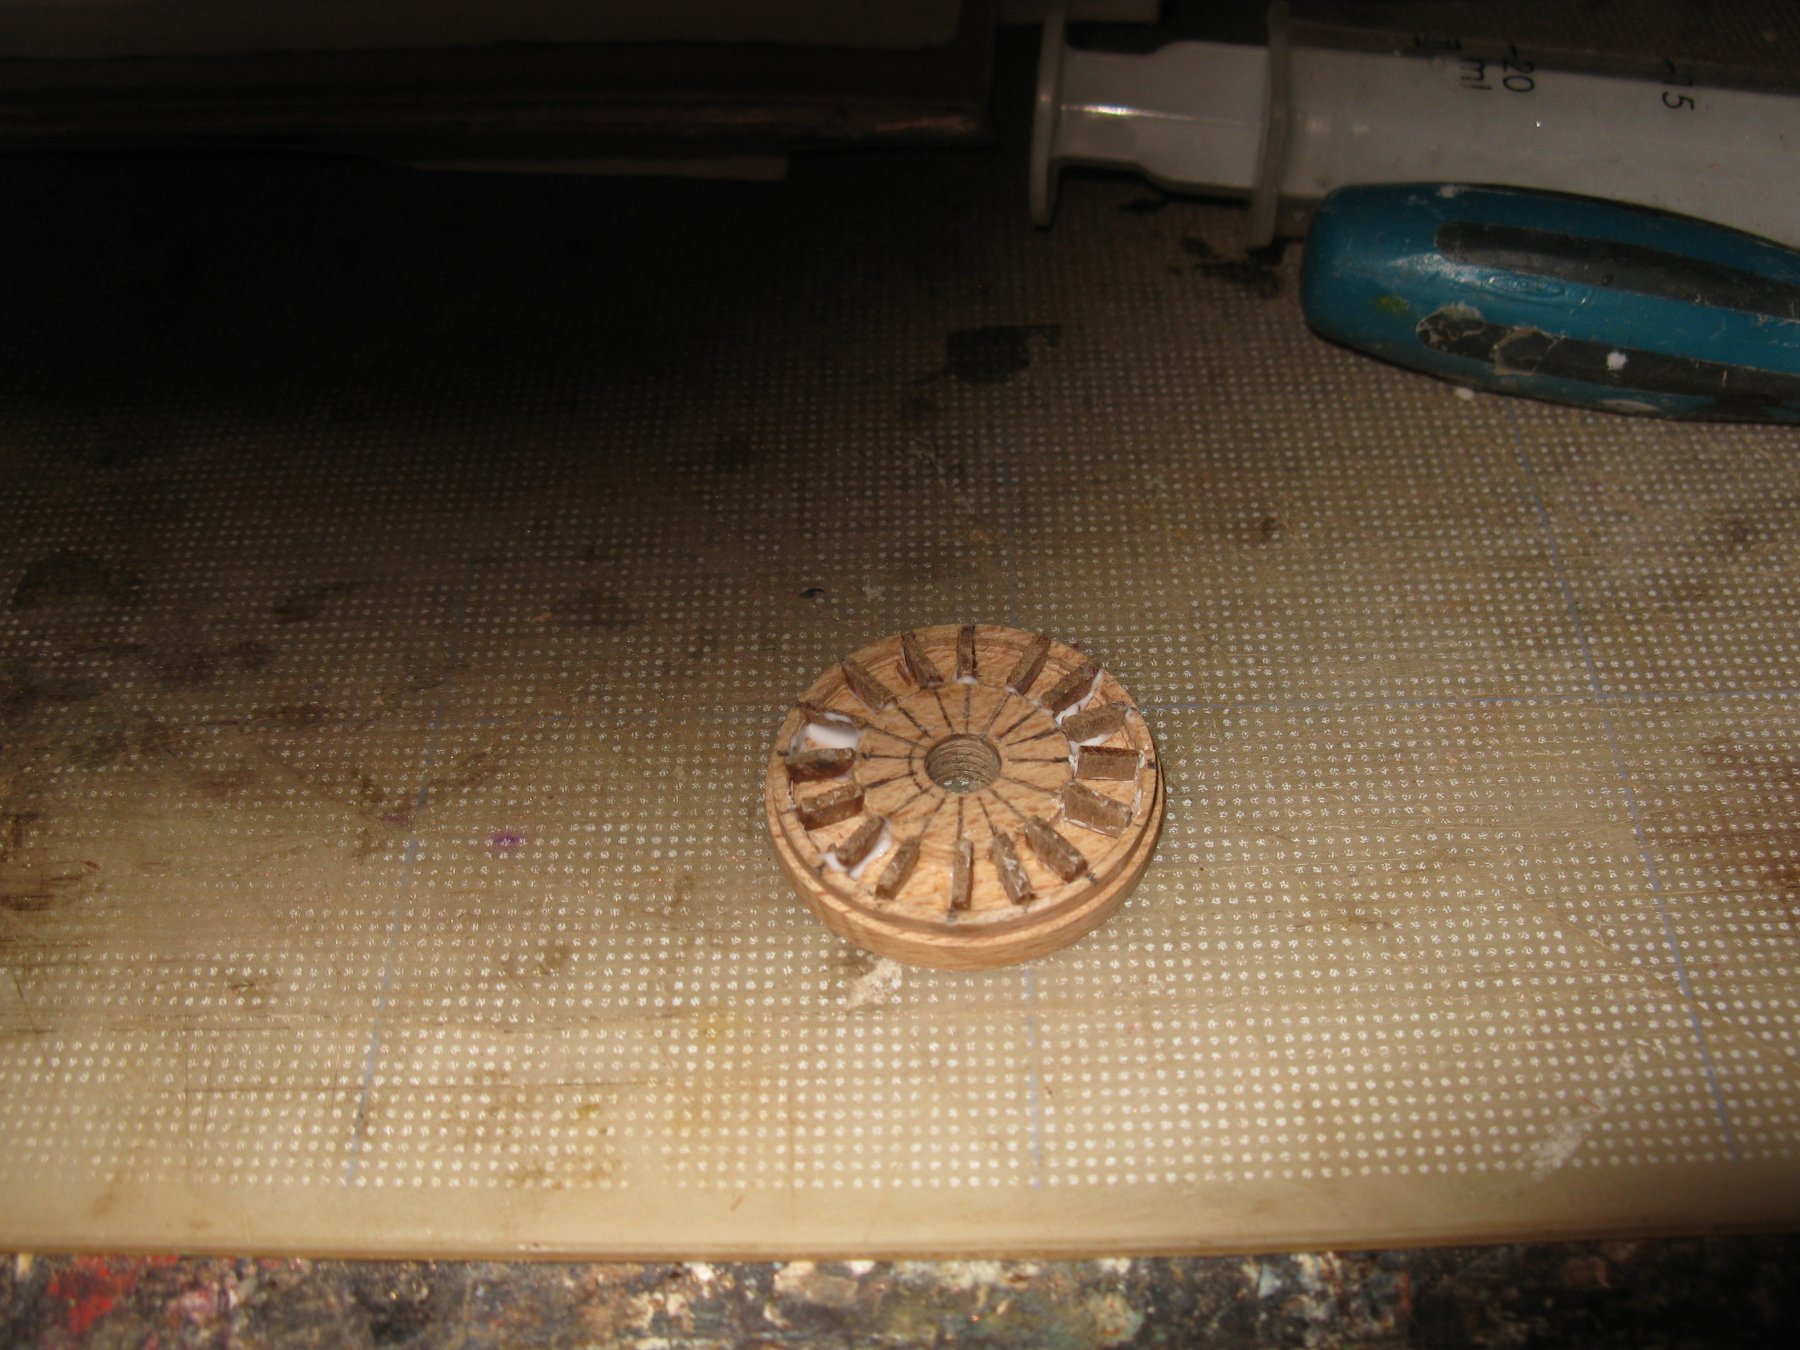
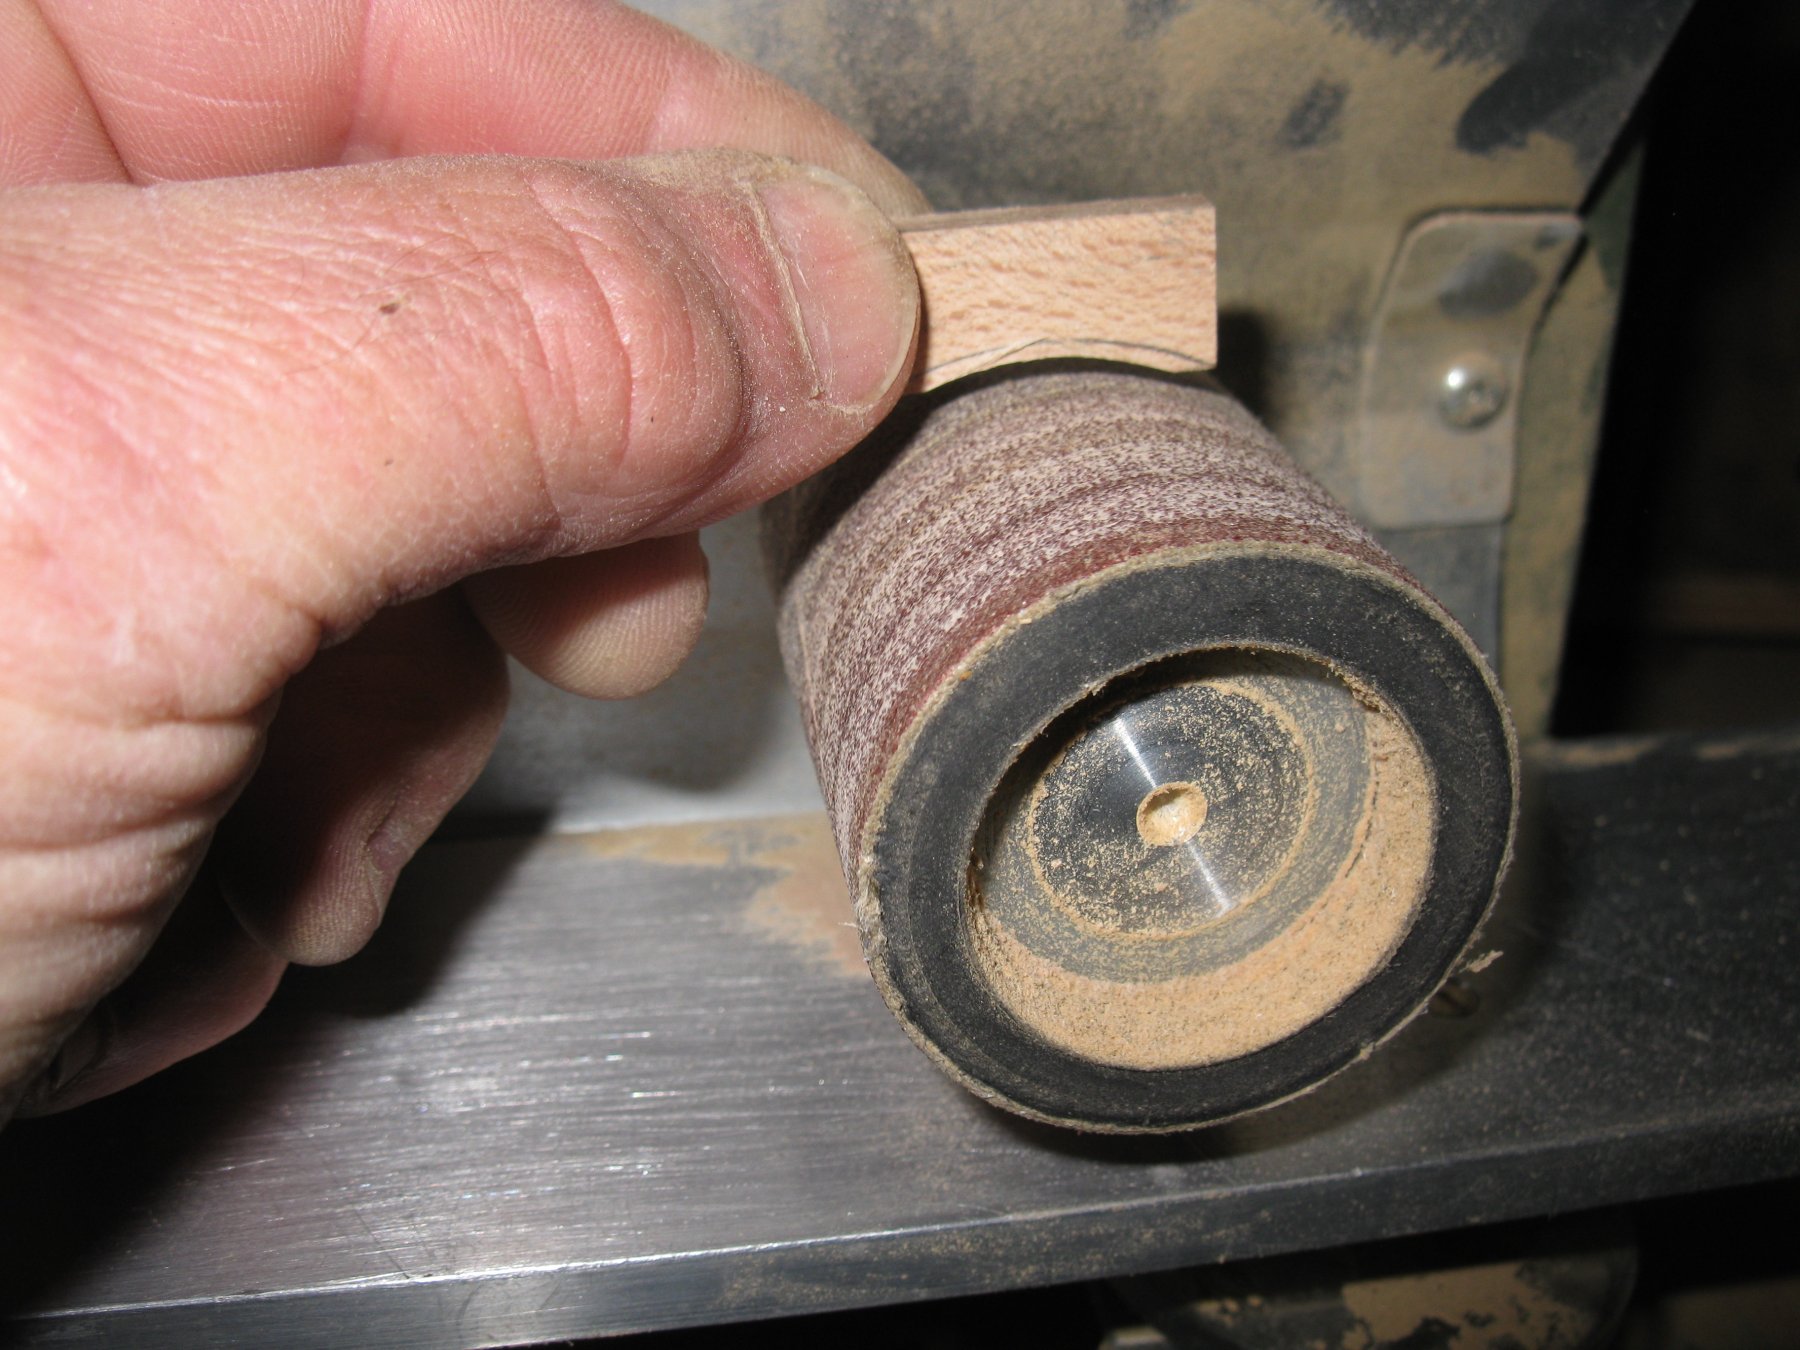
The capstan has four wings around which a cable or rope can be twisted. I make them also of beech. The camber of the outer side is made with the help of the sanding drum.

The wings fitted on the capstan
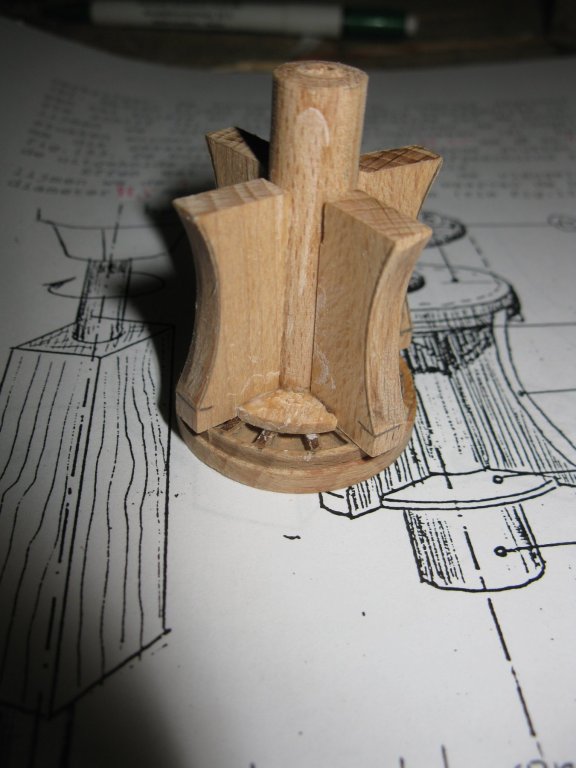
Top plate and filling pieces between the wings placed.
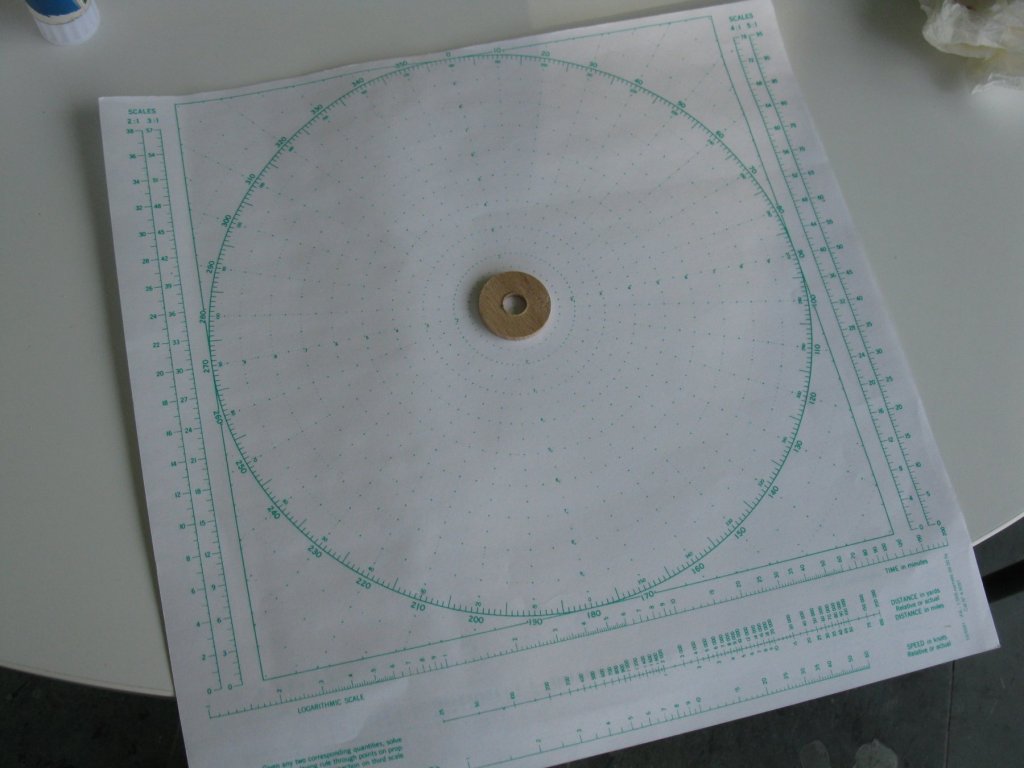
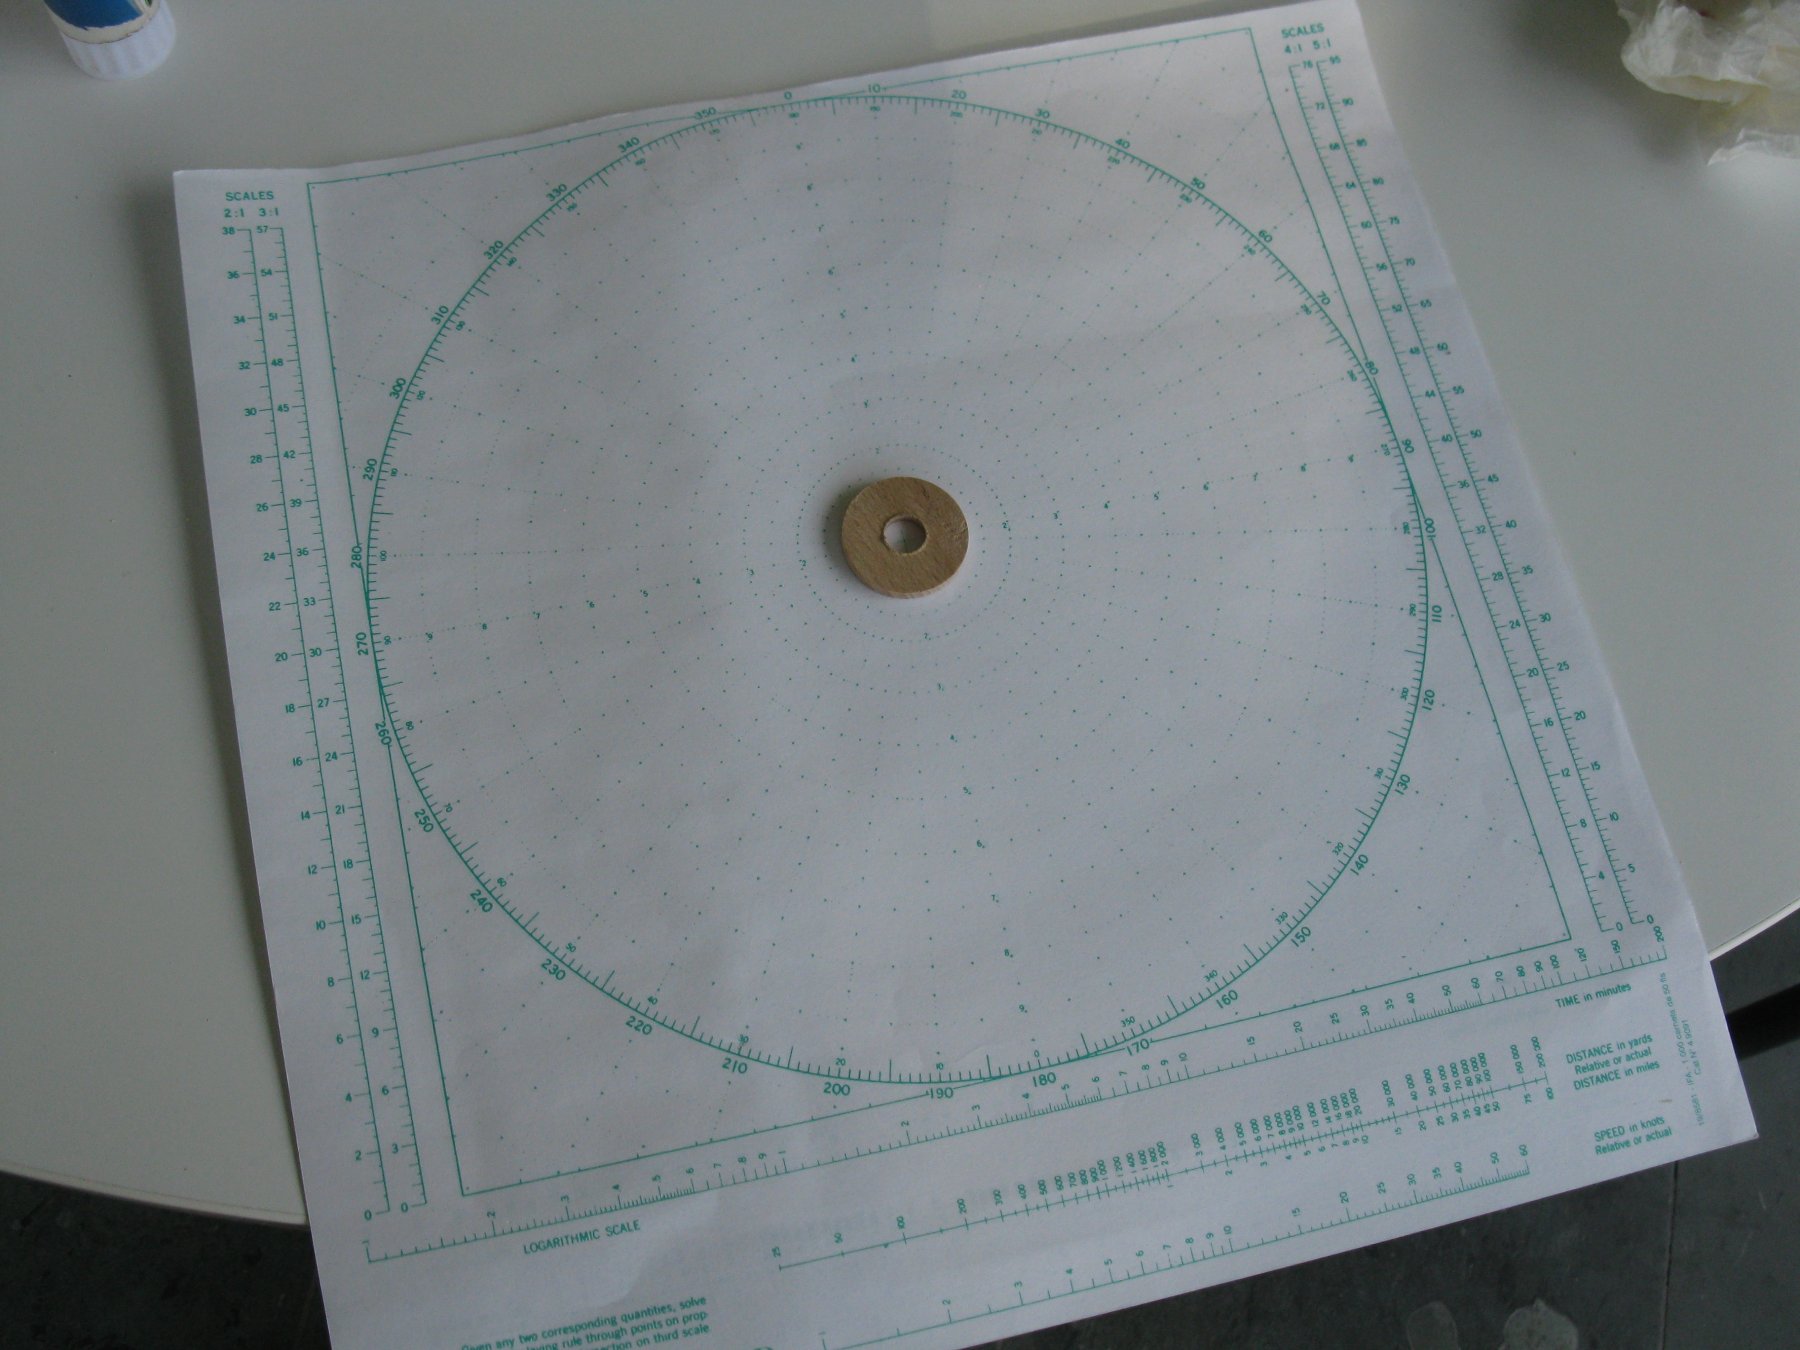
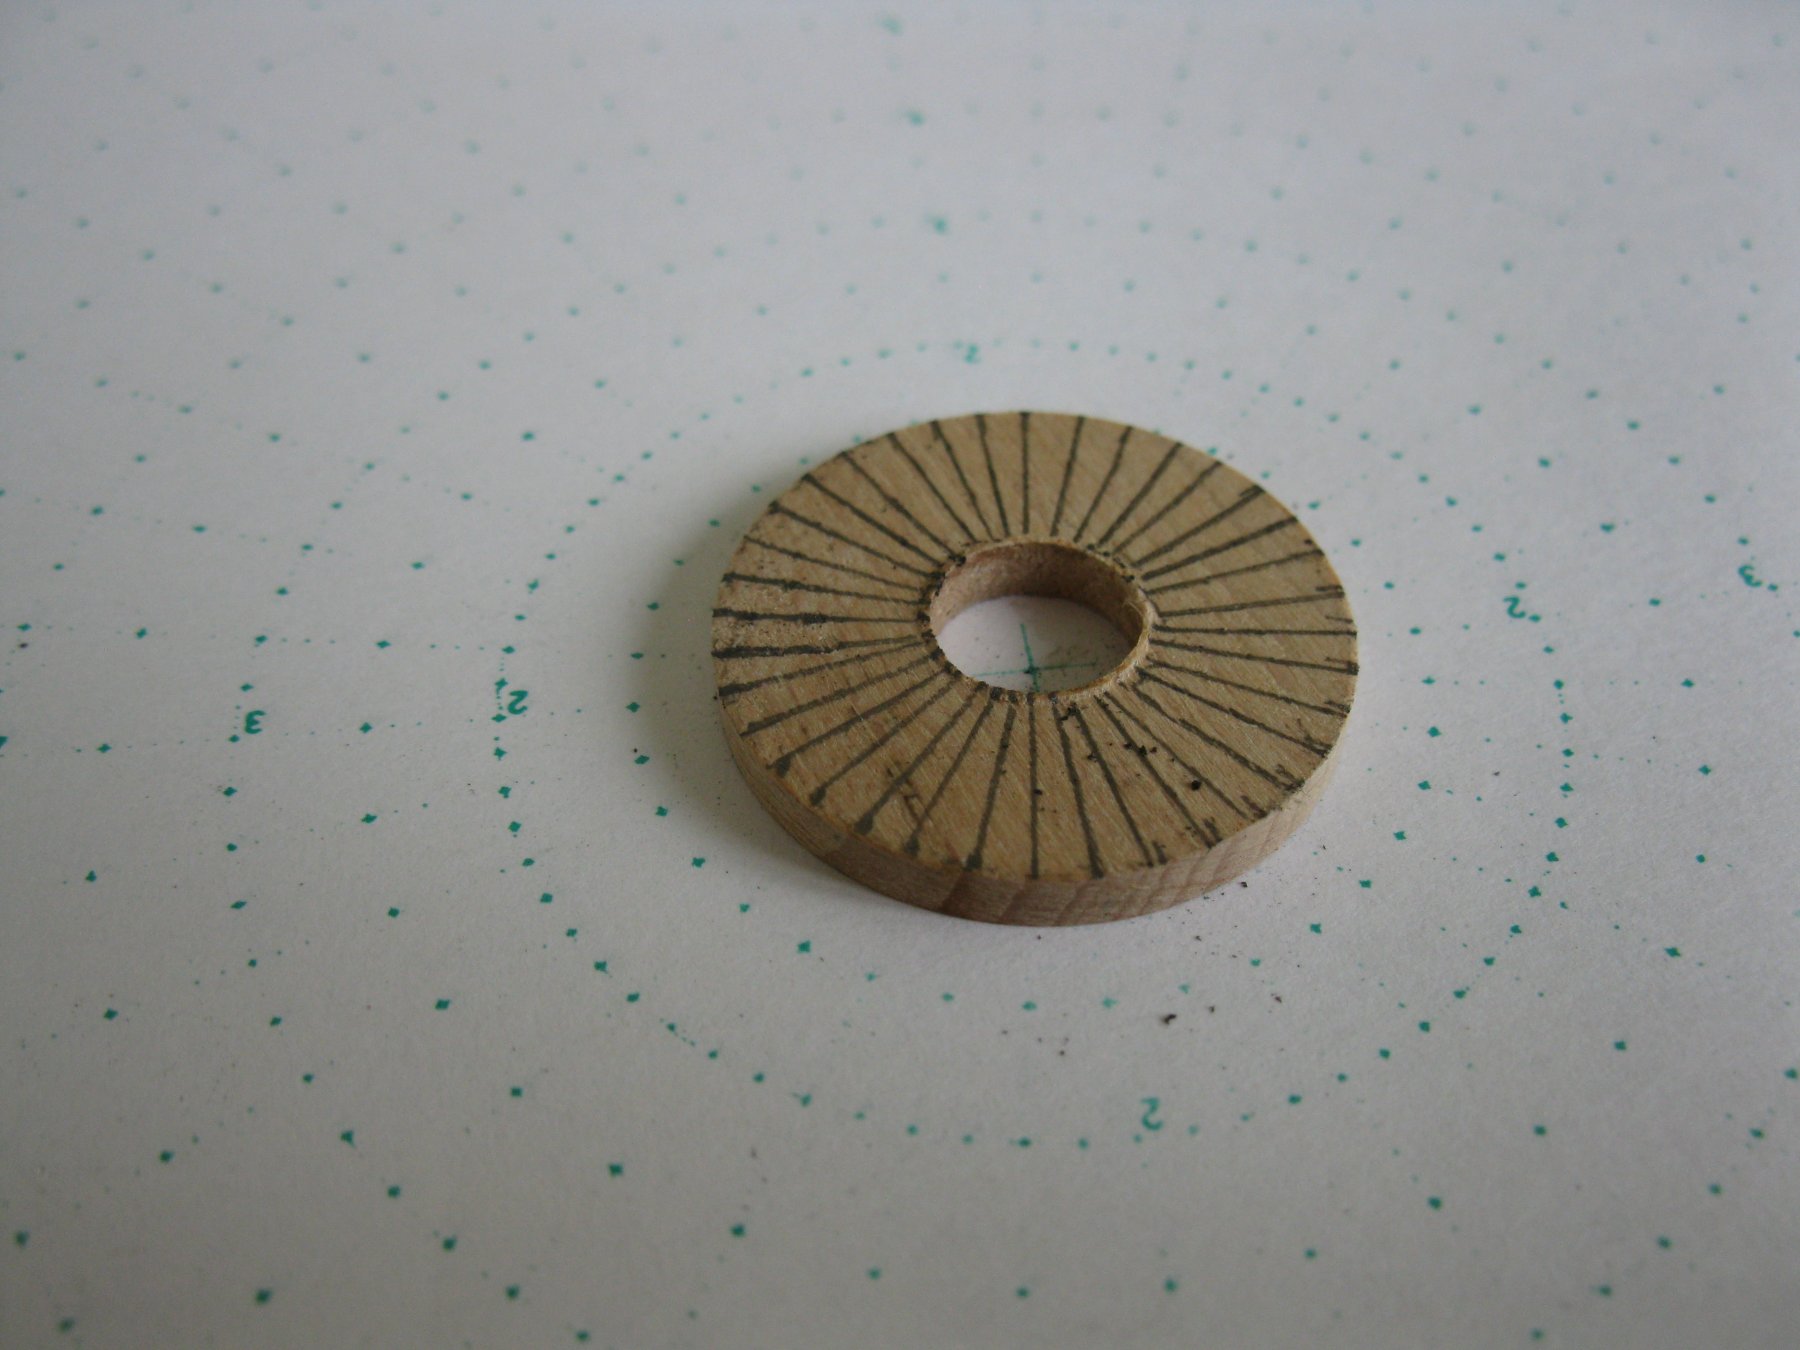
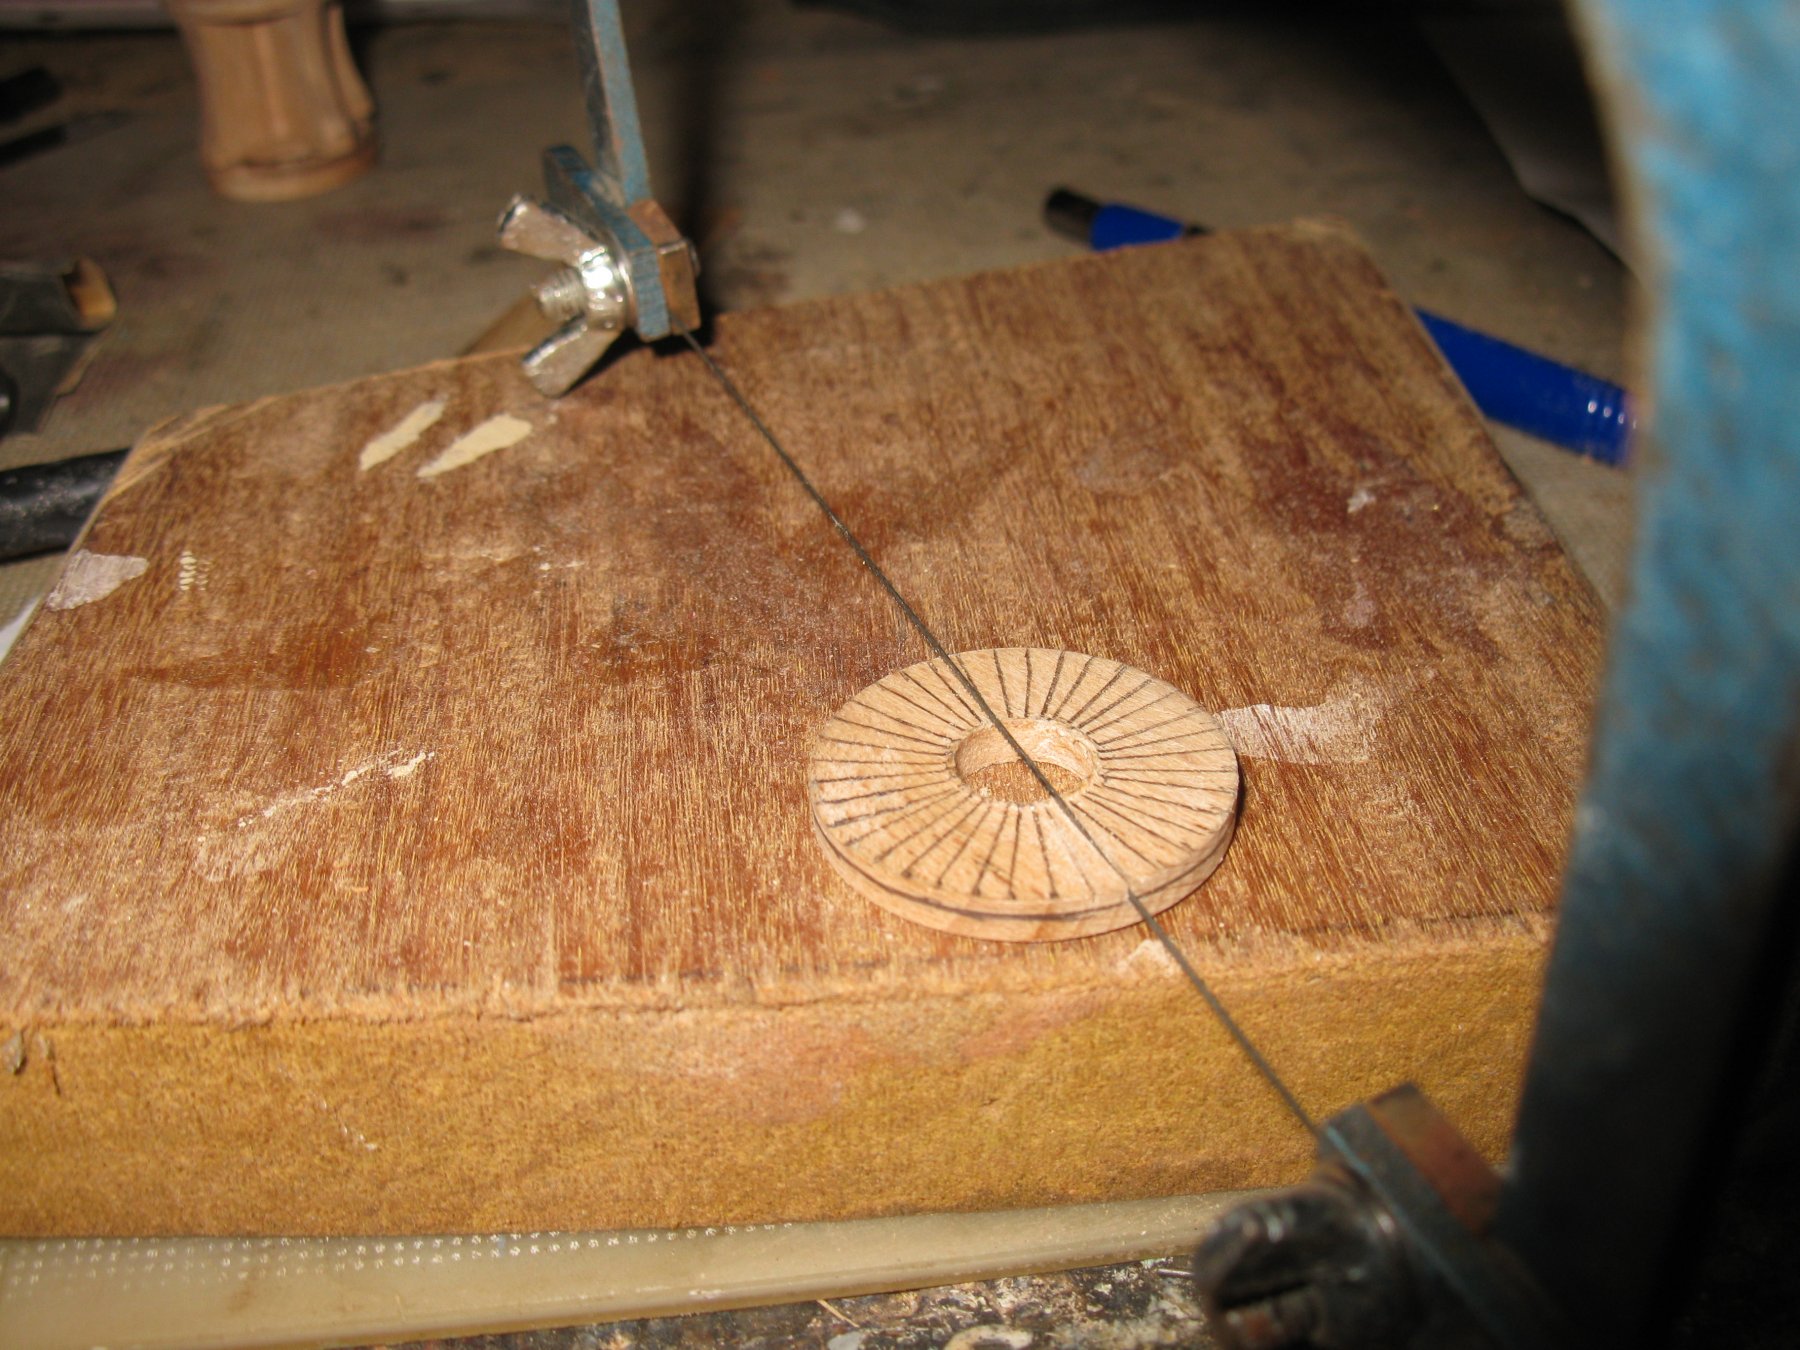
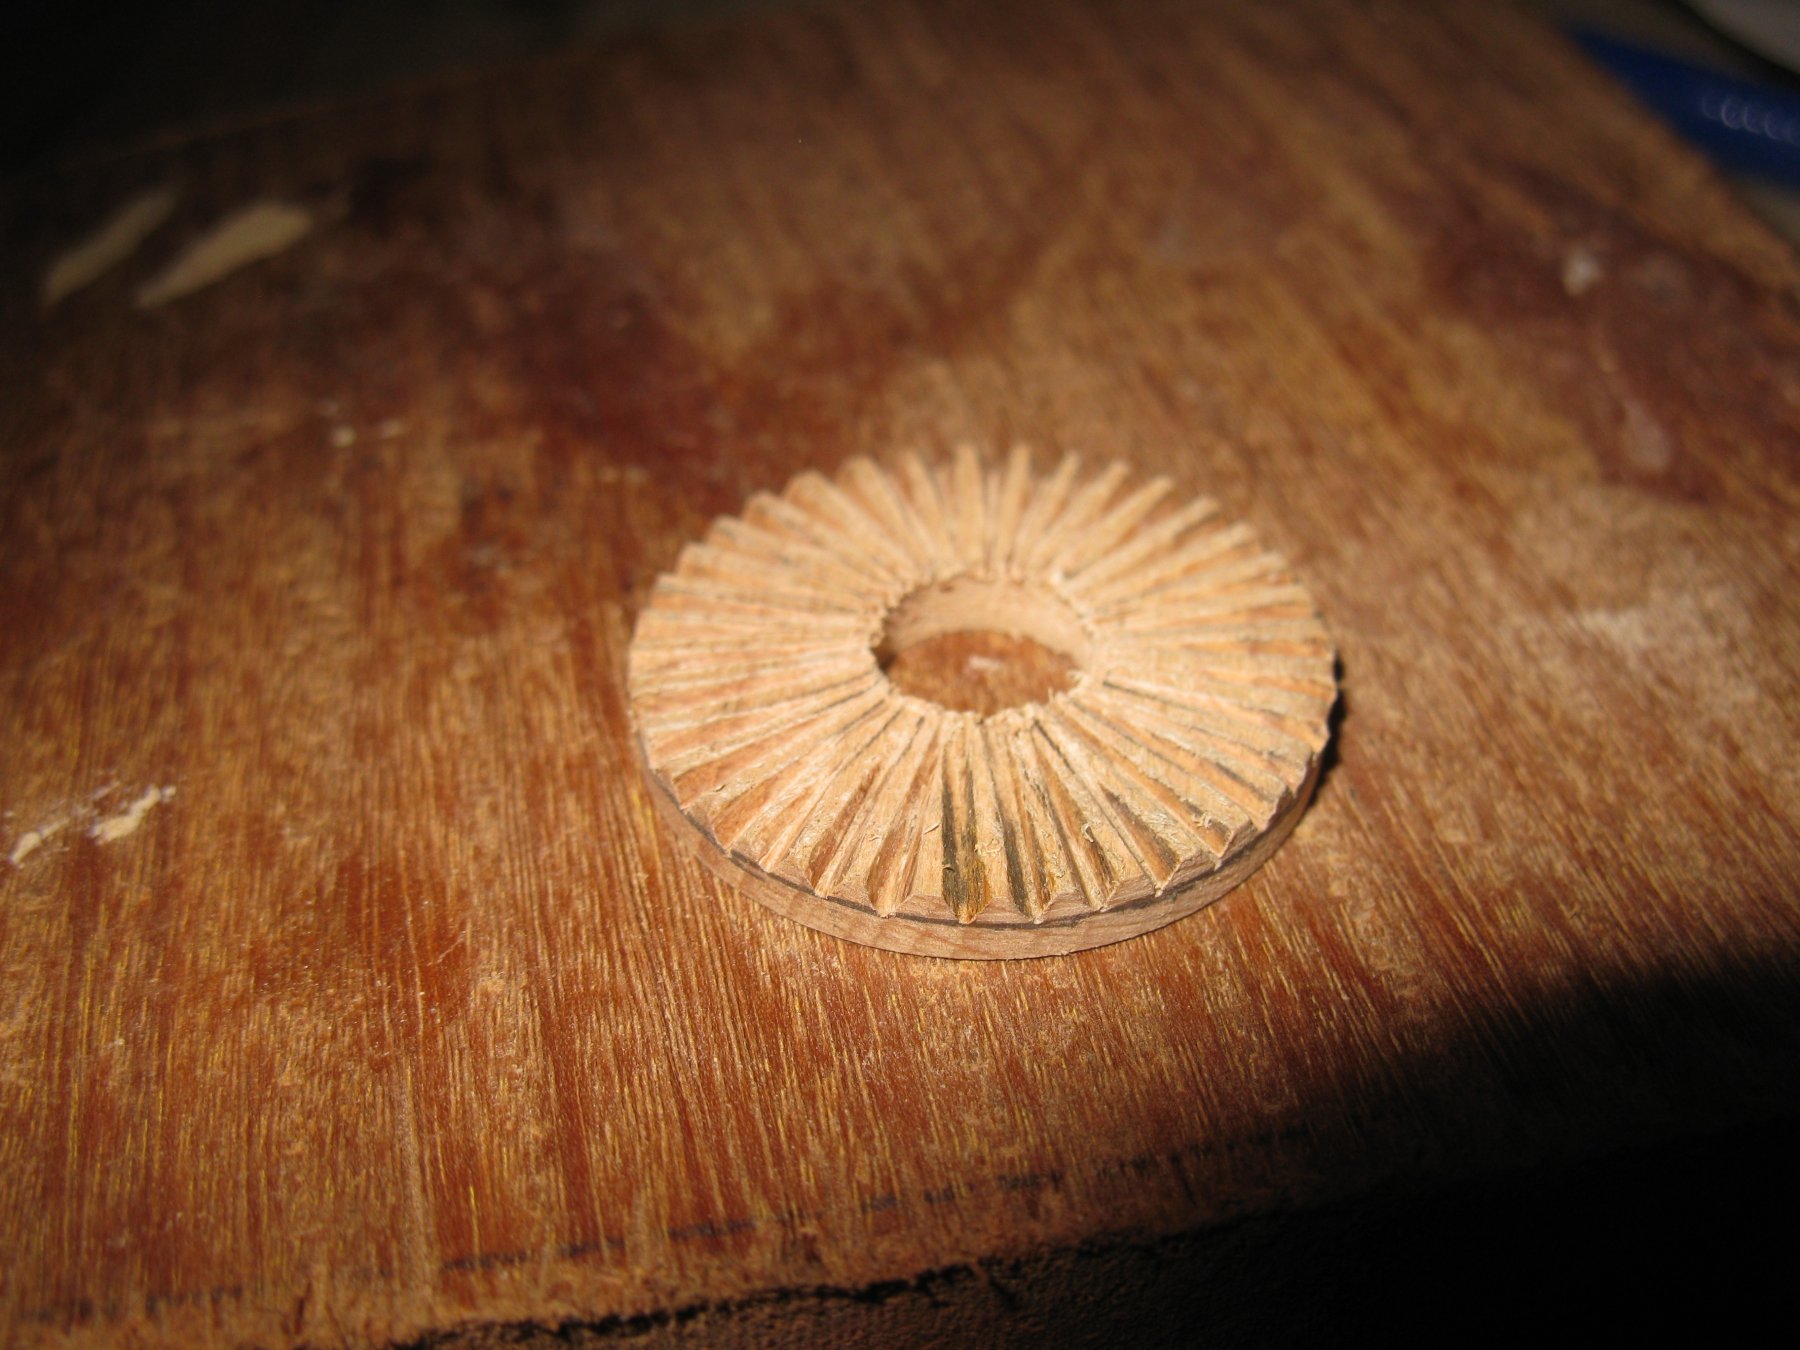
The upper disk is a big gear wheel. I use a paper maneuvering board from my navy time to make the ten degree subdivisions on the disk.
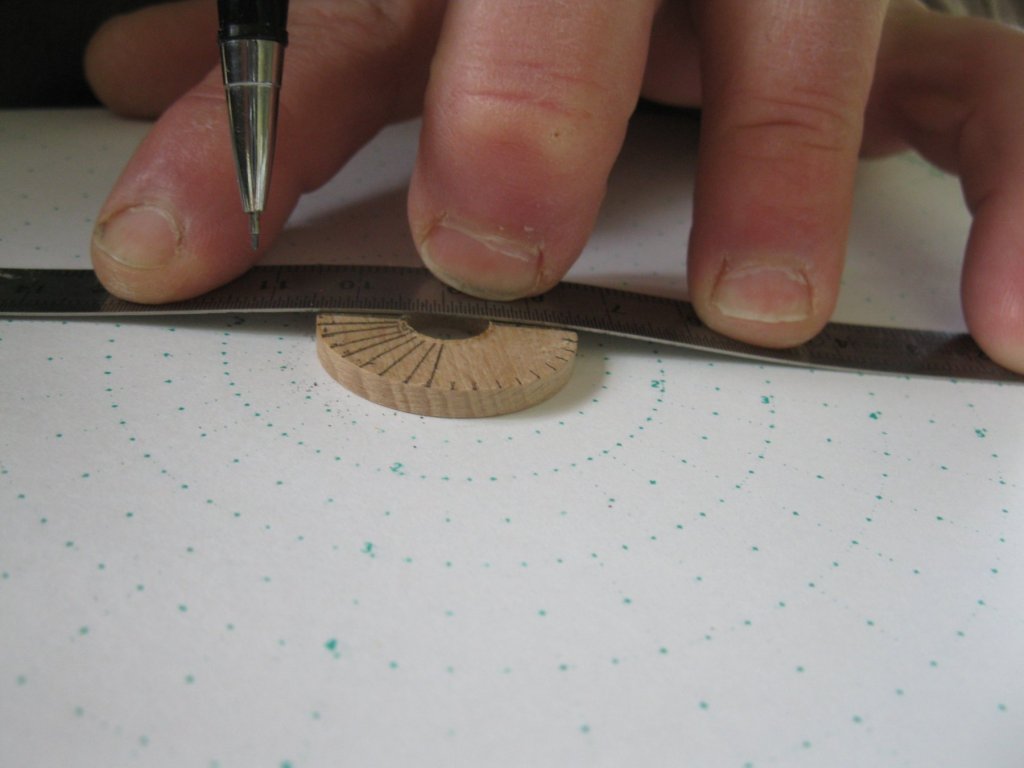

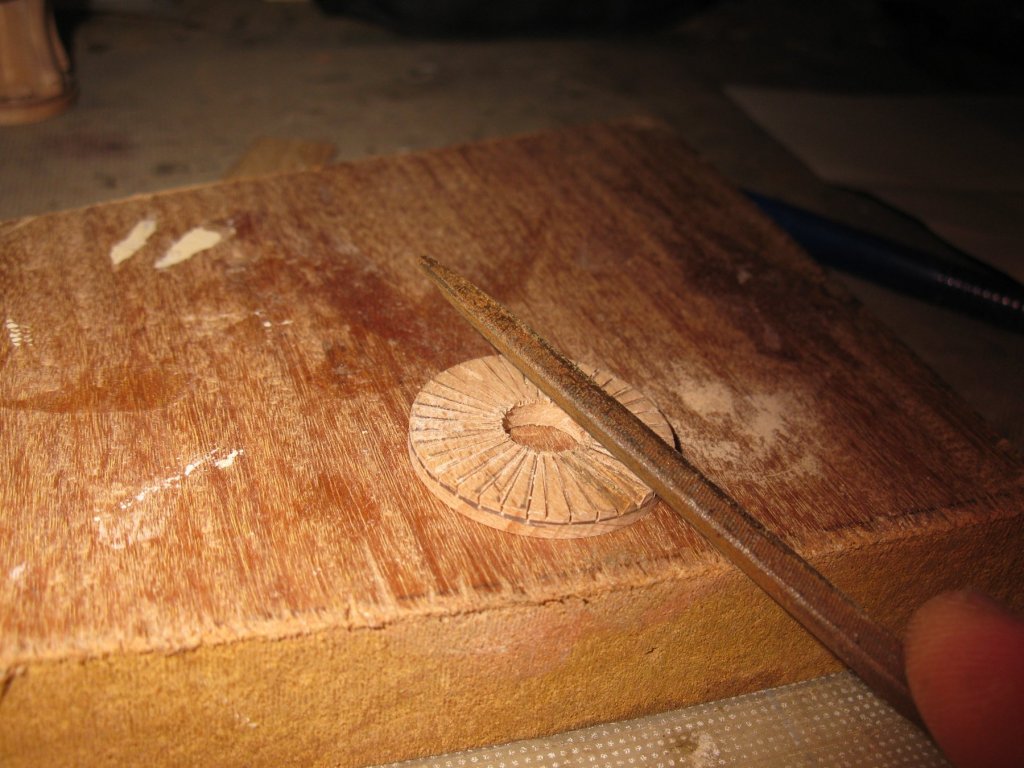
I make a saw cut every ten degrees.

Then I file out every saw cut with a triangular file.

The gear wheel on the capstan.
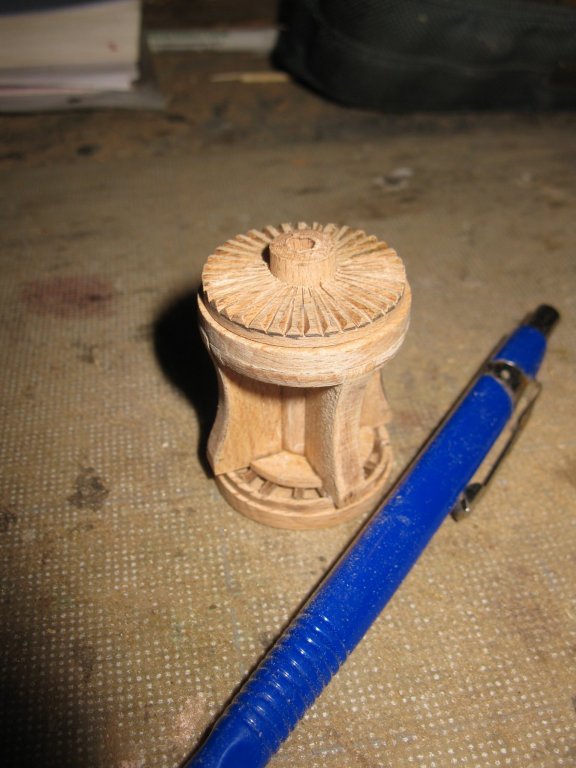
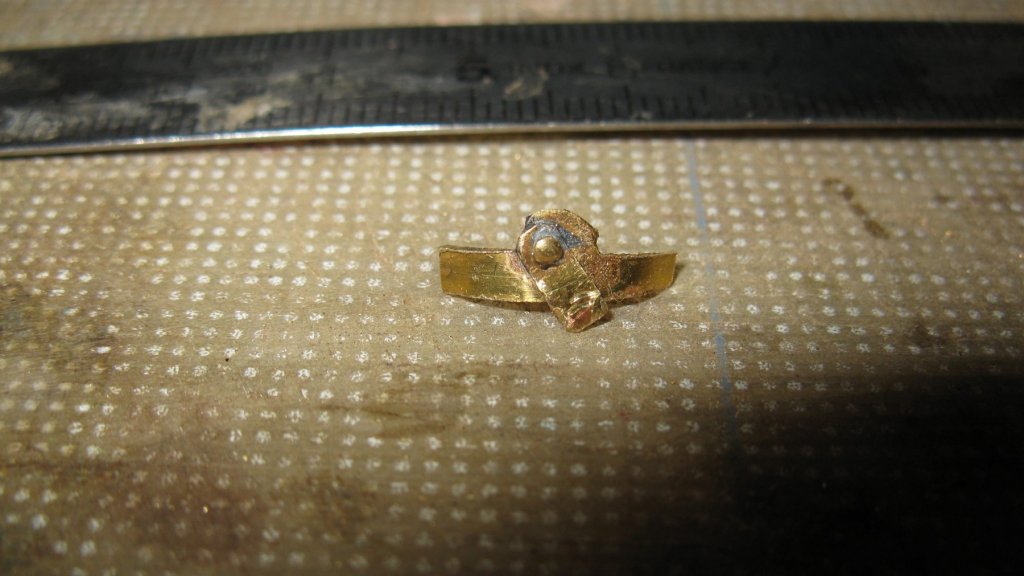
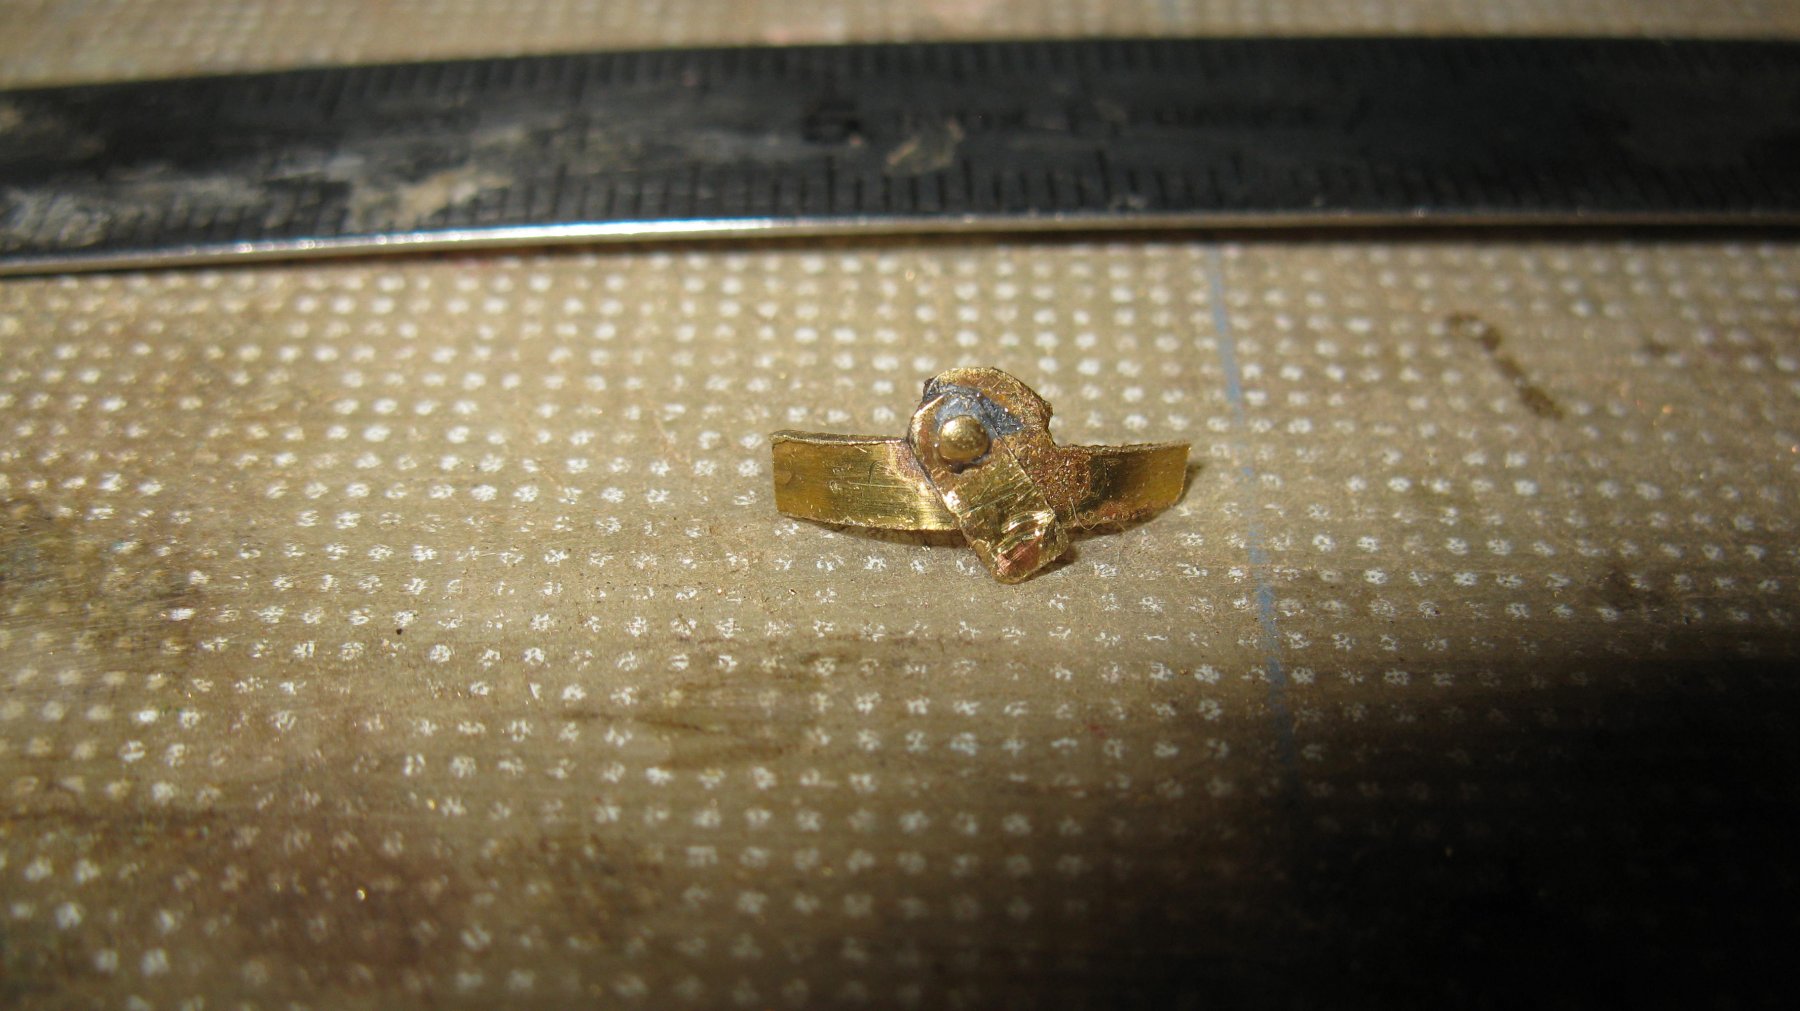
The blocking pin is made of brass.
Making the machine cover.
Making the base plate for the machine cover:

The capstan so far. The smaller gear wheel on top of the big one is recycled from a disused clock.

- Moab, Captain Poison, Nikiforos and 19 others
-
22
-
Thanks, Patrick.
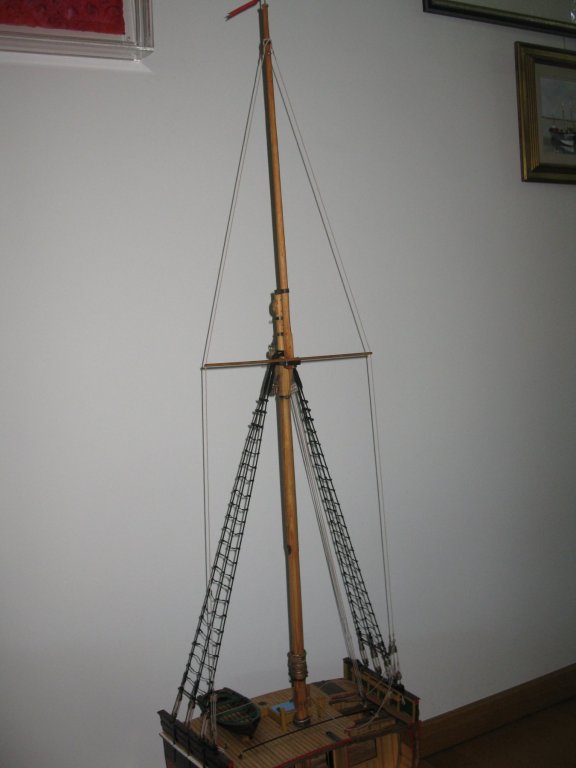
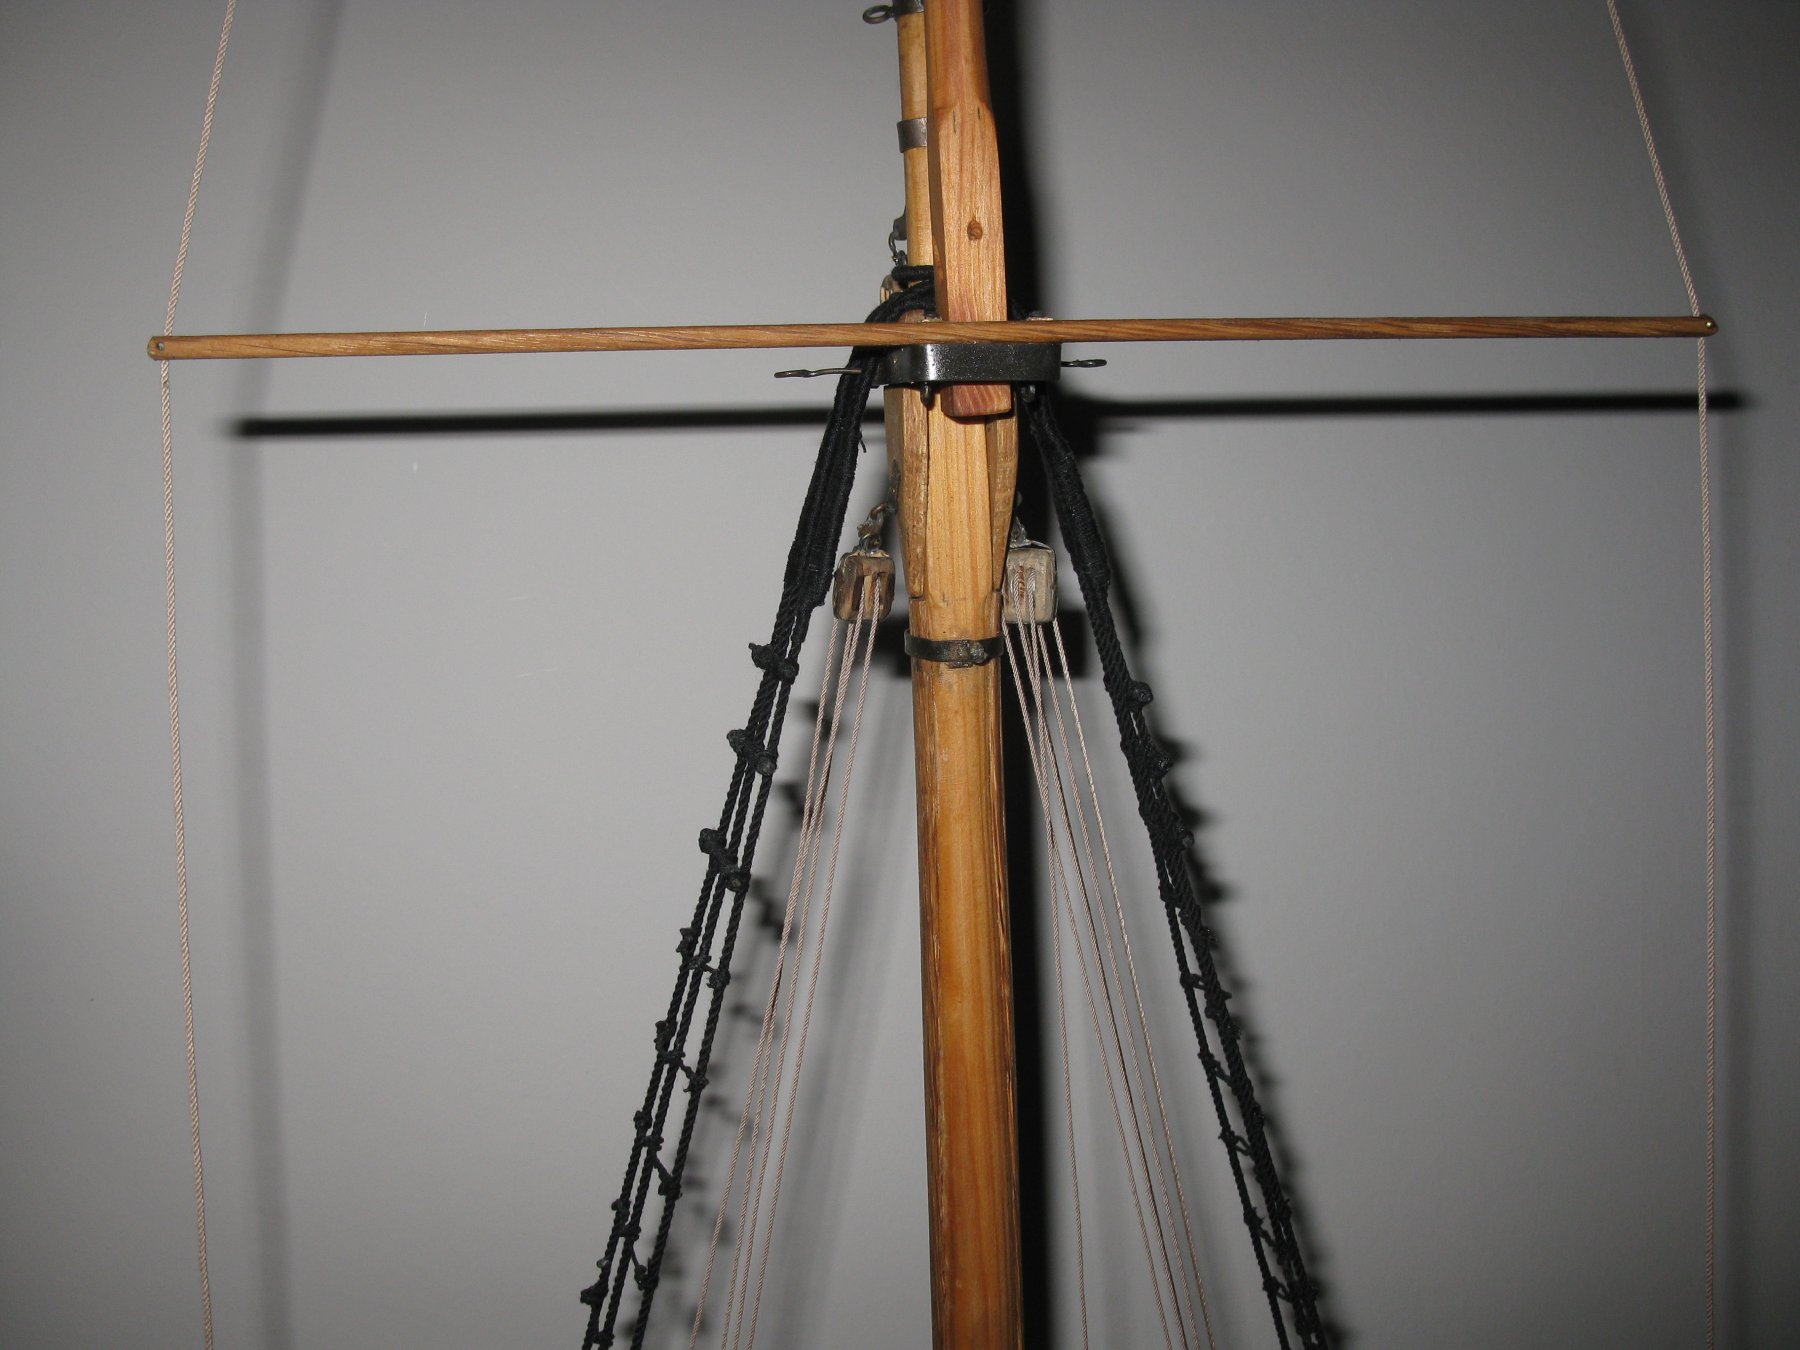
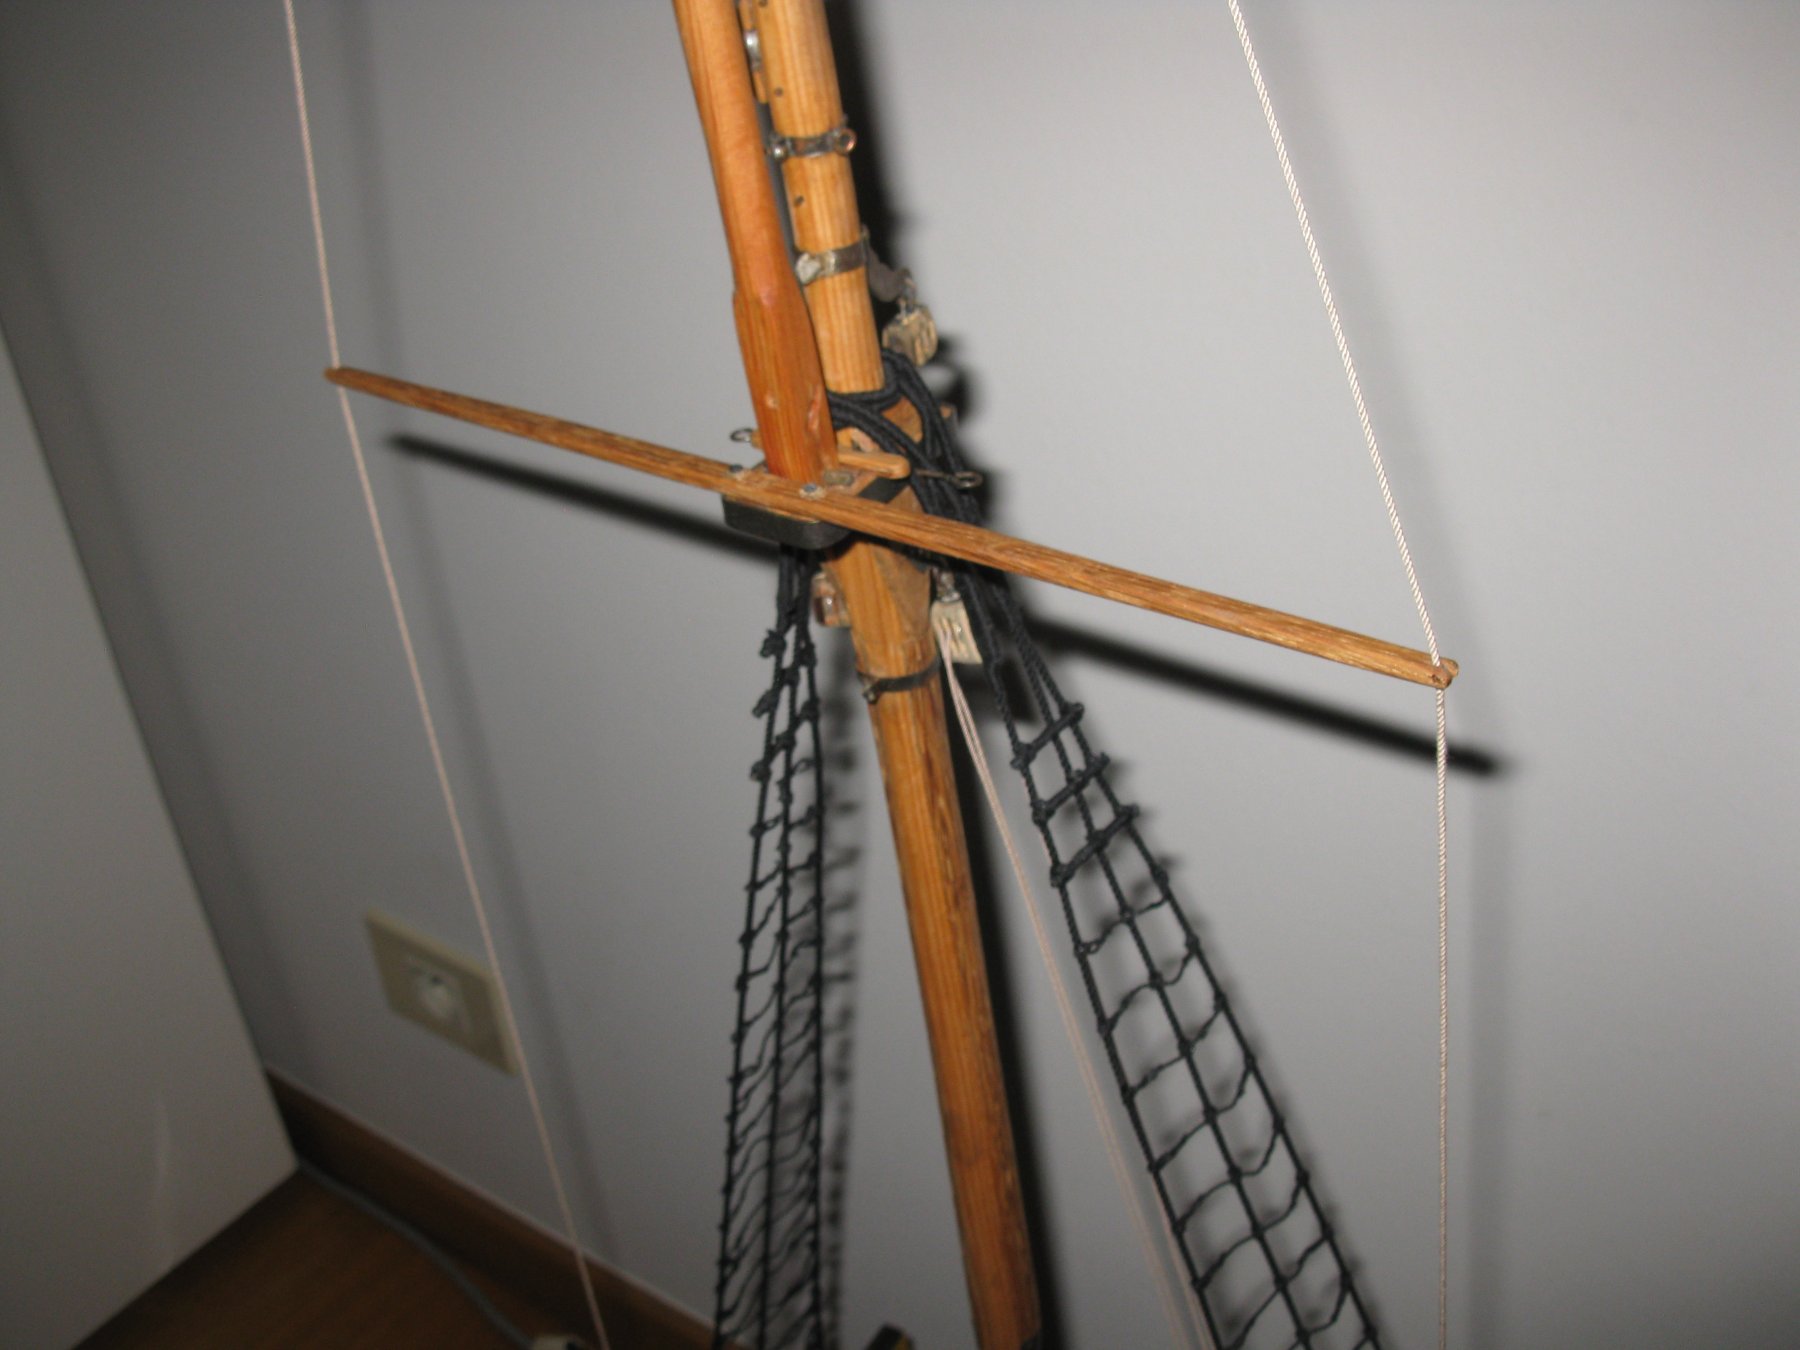
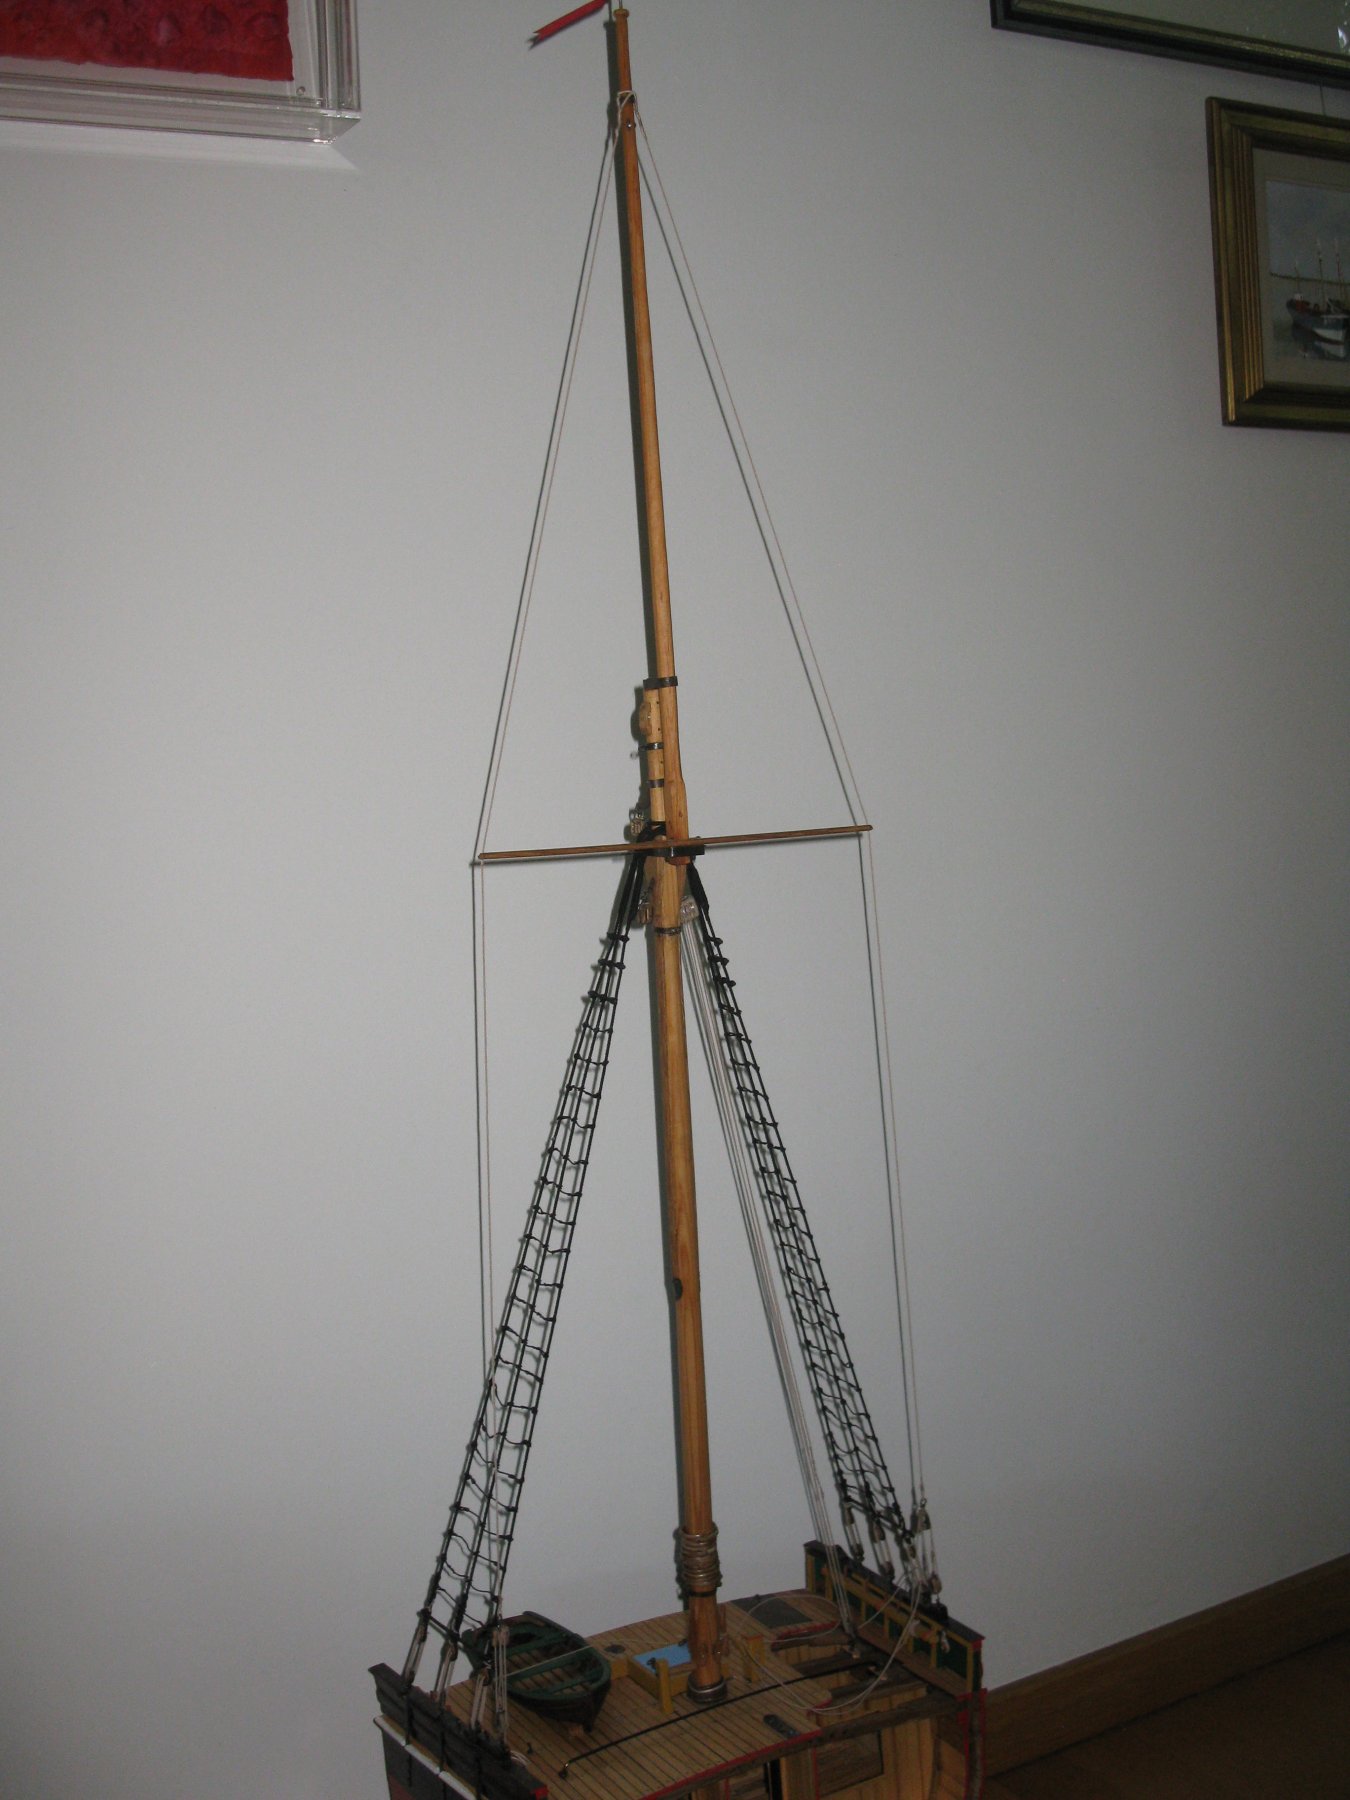
19.5 Rigging the topgallant
Both backstays have a served loop. The port backstay is resting on top of the starboard backstay.
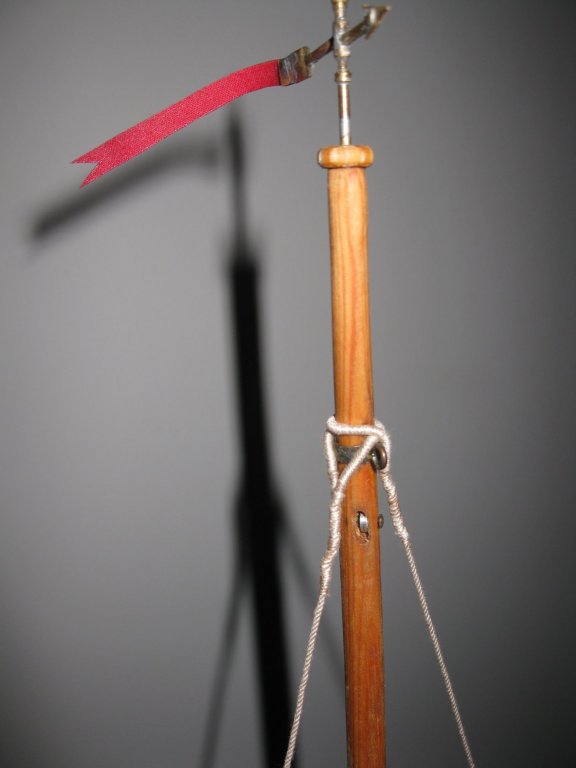
They pass through the grooves at both ends of the spreader.

And end with a double block at about 1.8 m above the deck.
A tension line is going from a single block on the bulwark, twice though the double block and fixed on the pin rail inside the bulwark.

The whole mast
-
Kortes,
You are a metal wizard.
- JpR62, billocrates, Keith Black and 4 others
-
7
-
-
Thank you Mark,
I will certainly try to make some more.
- mtaylor and Keith Black
-
2
-
Mark,
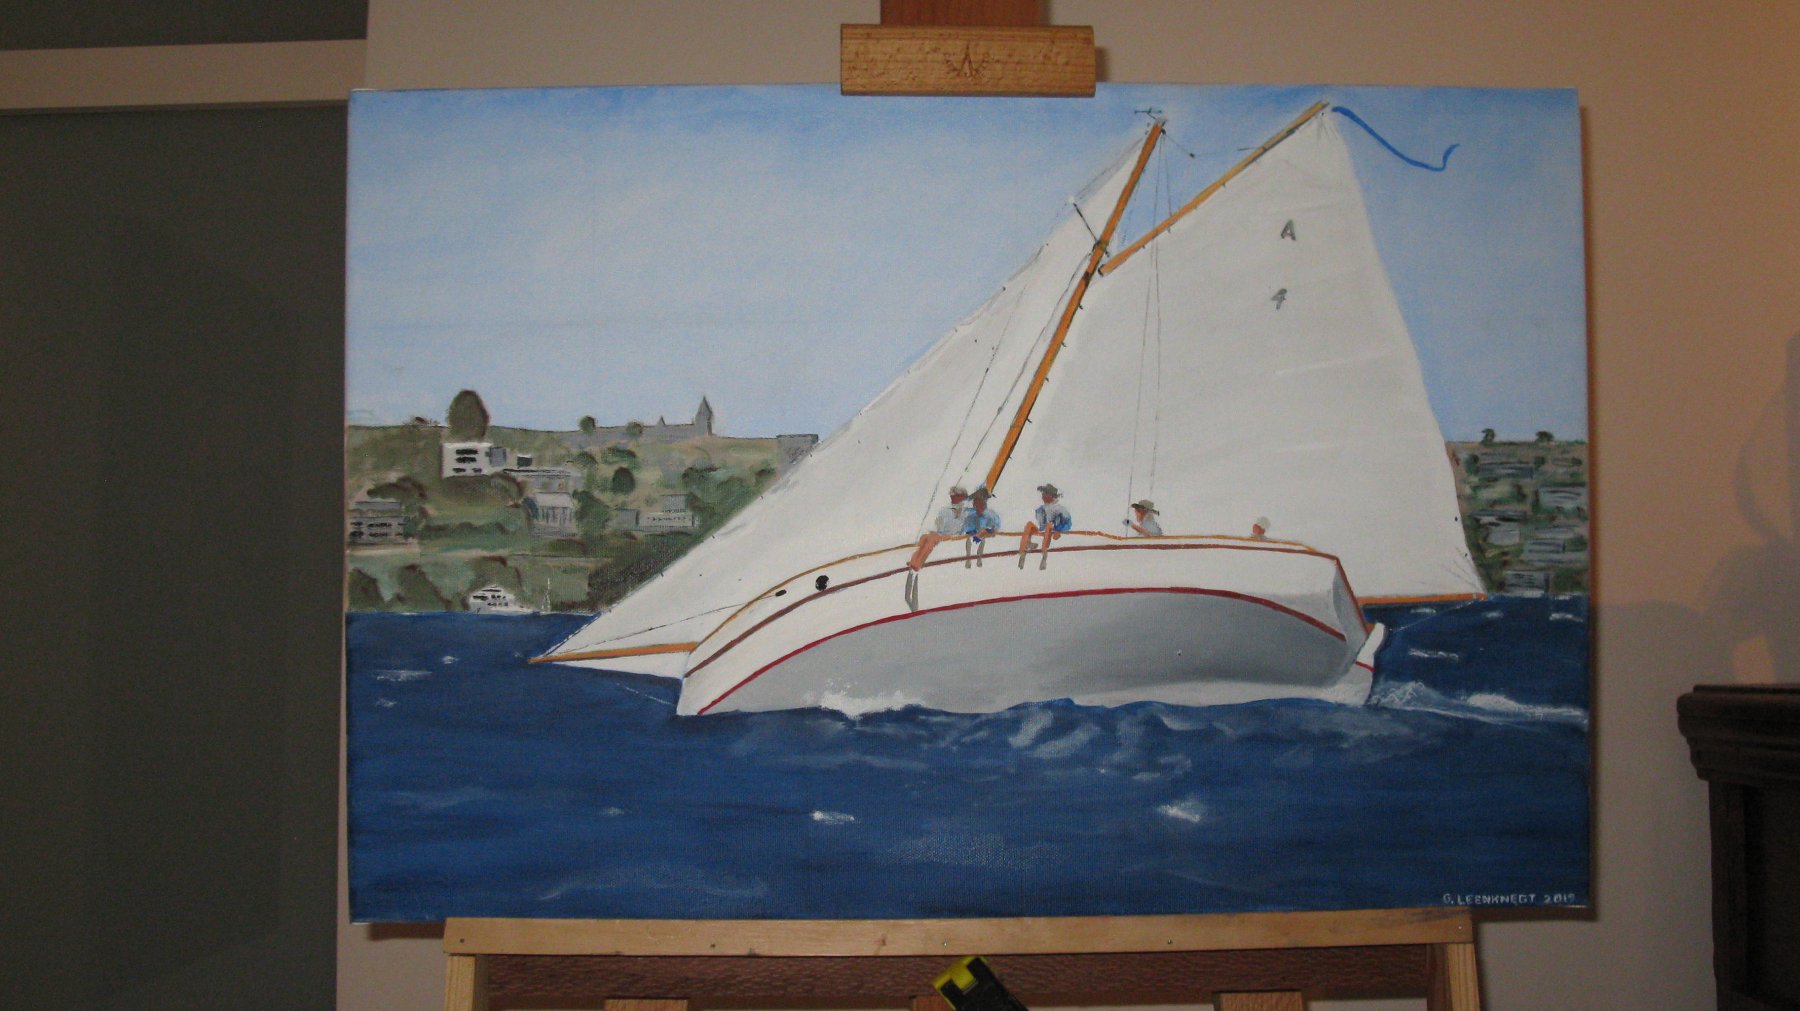
I like very much the classic style of your yacht and you made a marvelous model of it.
In one of your posts you showed a beautiful action picture of the 'Stella'. I am experimenting a bit with oil paint to learn to paint and used that picture as model for my first marine canvas.
I hope you don't blame me for the use of your picture before asking permission.
- Keith Black, Omega1234, cog and 1 other
-
4
-
19 minutes ago, Ab Hoving said:
Nice boat!
I read in your report that you use white glue for the planking. White glue often causes stains that are very hard to remove and especially show up once varnish is applied. In the days that I worked with pear wood I used epoxy glue, which dries quicker, is easier to remove and leaves much less stains. Or do you have better results with other sorts of glue?
1 minute ago, Mirabell61 said:Thanks Ab,
yes, you`re right, I also experienced stains on the wood due to use of white glue. I`m still intending to check with every visible plank (outside) to remove the stains by sanding carefuly. I tried to avoid larger stains by using the white glue sparcely and also because the horizontal overlapping lines will be nailed and quench locked from the inside hull, but that will be done after the inside framework is put in place
Nils
I also use mainly white wood glue for modeling. After applying the glue I remove stains with a wet rag. I works well in my opinion.
On the other hand I do not have experience with epoxy. Don't you have to mix two components in an exact ratio an aren't there temperature restrictions to use it?


Golden Hind (ex-Pelican) by Baker - FINISHED - scale 1/45 - Galleon late 16th century
in - Build logs for subjects built 1501 - 1750
Posted
Nice job at the gun.
And also at the house, I guess that it is something you don't have to do every year 😁.