michael mott
-
Posts
5,200 -
Joined
-
Last visited
Content Type
Profiles
Forums
Gallery
Events
Everything posted by michael mott
-
 Bedford, Tom, Denis, thanks for your kind words. Al those who added likes thank you they are appreciated. Tom the ends were making me cautious as well. This ought to calm you down Denis the idea of an adjustable slip actually seems like a great one, it had not occurred to me that way. There will be some leather wrapped over the wood block., I am pleased with the way they work. They are part of a new way of supp0rting the model to replace the little stand it is presently sitting on. Denis there is definitely another build on the horizon. I have the plans for an 8 foot Shamrock V, by Rene Sarao of Nova Scotia as one option. Michael
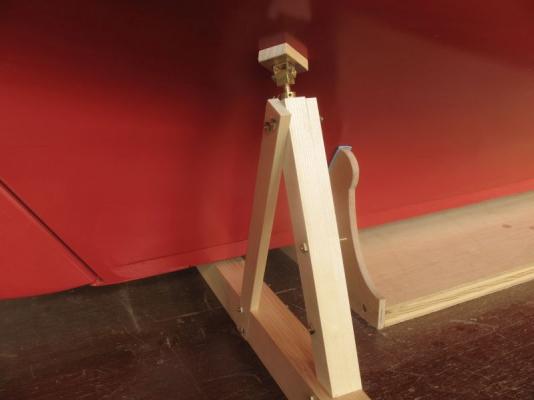

-
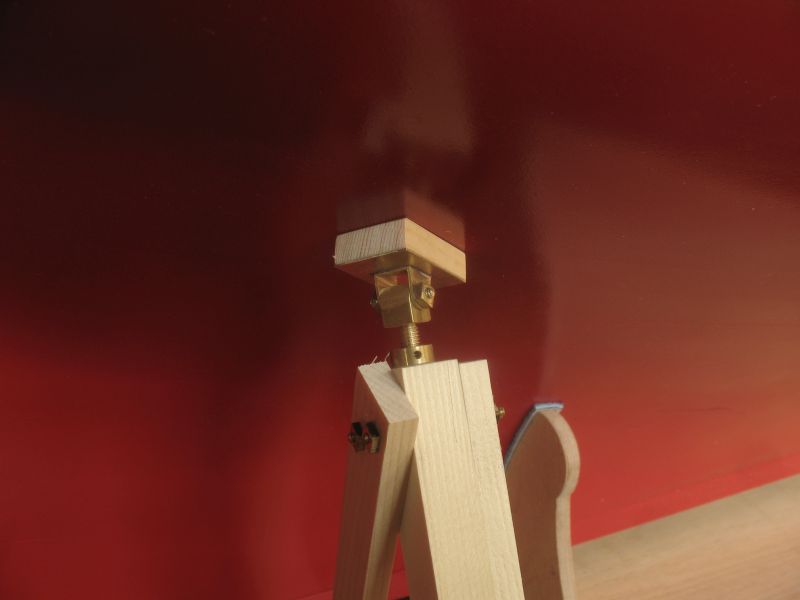
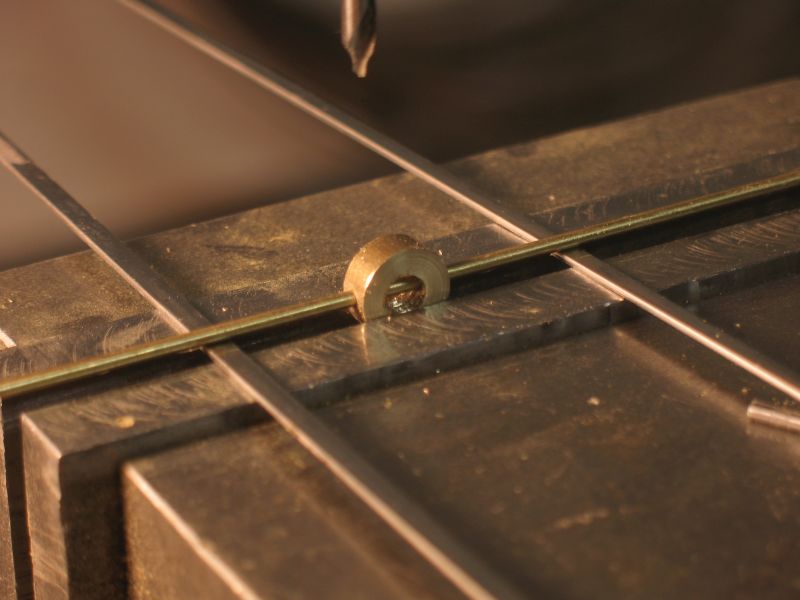
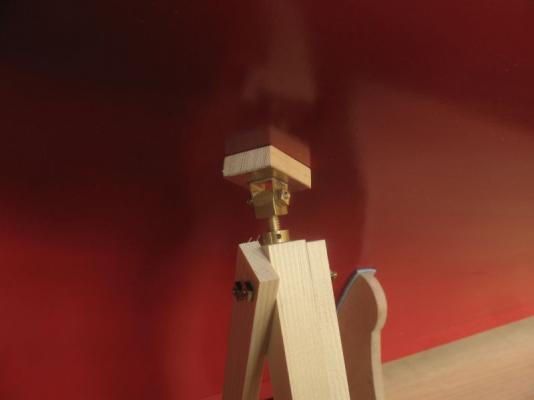
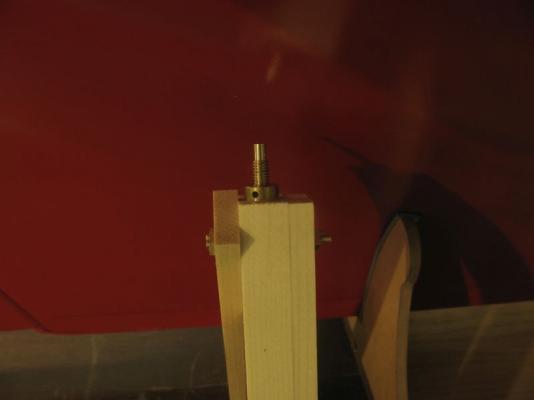
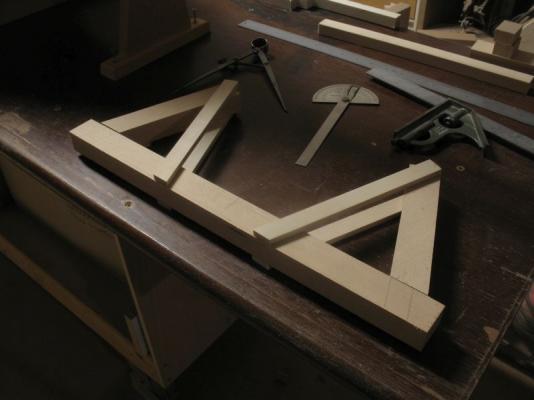
Thanks for all the likes managed a little more work on the supports this evening. The first picture shows the adjusting screw it is 1 1/2 inch in diameter and the threaded collar is rotated with a 1/2 inch bar inserted into one of the 4 holes. In order to ensure that the holes were at right angles to each other I set up a couple of bars (scrap stainless steel out of a used wiper blade) to support the 1/2 inch bar before drilling the other hole. The stern support are only needing the swivel pads and then a bit of clean up on the bolts then I can move on to the bow supports Michael

-
Just found this and a great job of bringing the kit up to snuff. A beautiful looking model Michael
-
Cutty Sark by NenadM
michael mott replied to NenadM's topic in - Build logs for subjects built 1851 - 1900
Nenad My thoughts are with you at this time. Our journey through life weaves an intricate path of joining s and losses sadness and joy, the wonderful thing is there is usually much more joy than sadness. great news about your family successes. Michael- 4,152 replies
-
- 1
-

-
- cutty sark
- tehnodidakta
- (and 1 more)
-
Very Nice work on the spars Elia, I agree that once you get the hang of shaping the masts from square stock it is so much easier , I think it is because you begin with knowing absolutely where you are with the material. Michael
-
Well it depends on whether you add the claw and ball or just the simple plain type Michael
-
Beautiful work as always is apparent from your last pictures, Wow 25 years ago! you are a patient man sir. Michael
-
beautiful work as always Ed. Just looking at that last shot the hull looks rock solid. Michael
-
Go to the first post of this log and you can edit everything including the title. Michael
-
Omega, I concur with Jud and Dave, the lines of Ticonderoga look pretty close, given your ability to build the interior I believe that you would be able to create a great interior from the limited information shown in the first image, I would also consider giving her your own stamp by choosing a unique name. Michael
-
Hi Joe just found your build, what a lovely job you are doing! Judging from the airfoil sections in the background you do some fairly large RC aircraft. Michael
-
Looking super Pete, also that last photo of a full size boat clearly shows the swing keel to windward. Michael
- 220 replies
-
- 1
-
-
- finished
- volvo open 70
- (and 1 more)
-
Nicely done Mark it will be great to see the hull again when you have finished all the fairing, I am sure that you feel the same way. Michael
-
Nils I too am amazed at how small your ship is I also expected it was much larger. I think that with the quality of our photographic tools these days and the clarity of the images it is so deceptive when looking at the superb quality of the workmanship that we see consistently by you on this forum. Regards Michael
-
Bob I have a very old liquid flux called Duz-all and the label on it has fallen off as well. Michael
-
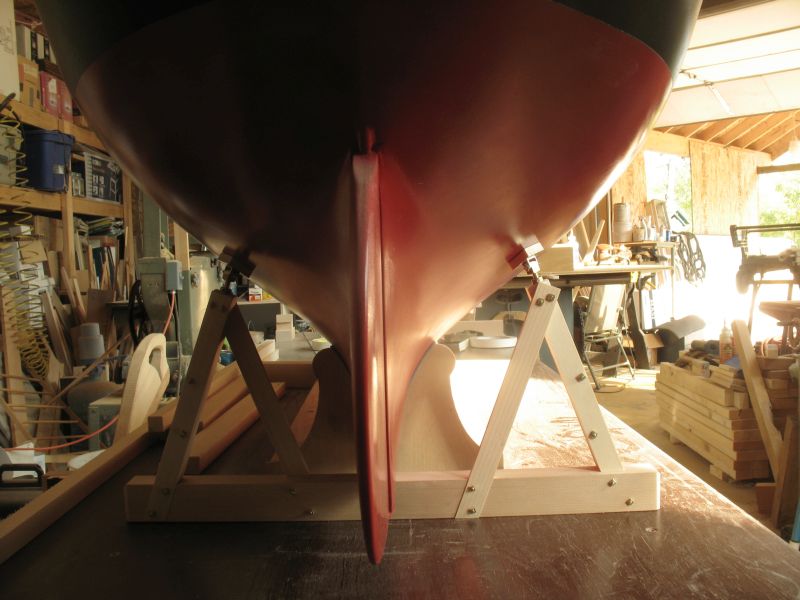
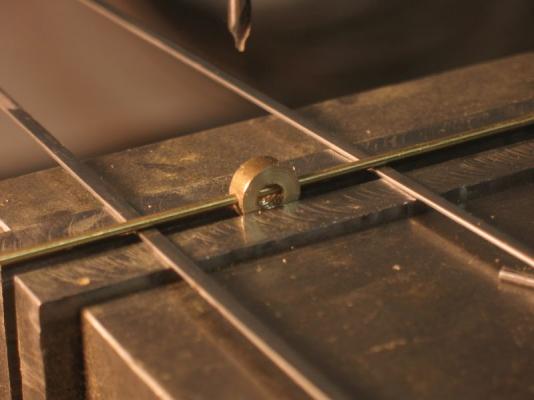
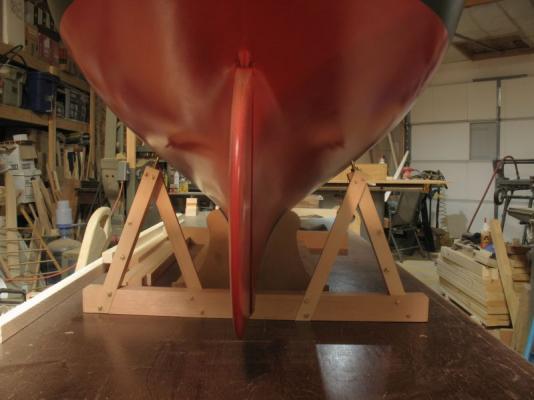
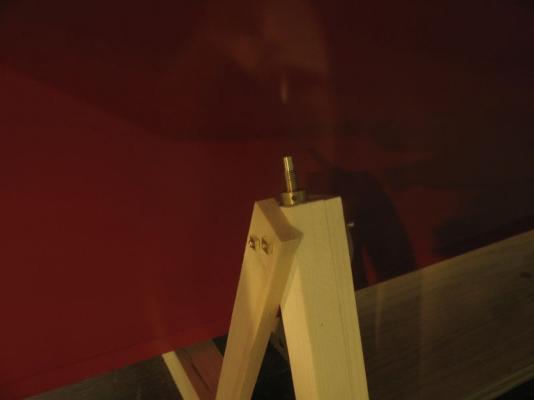
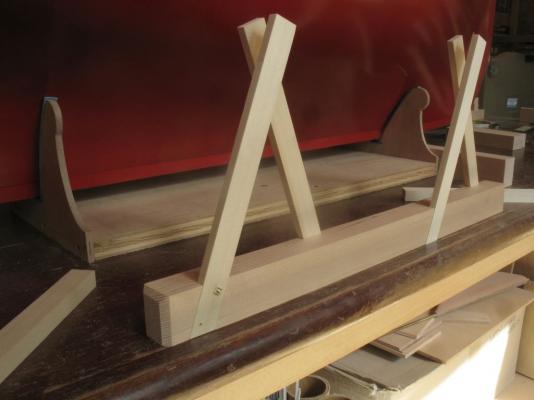
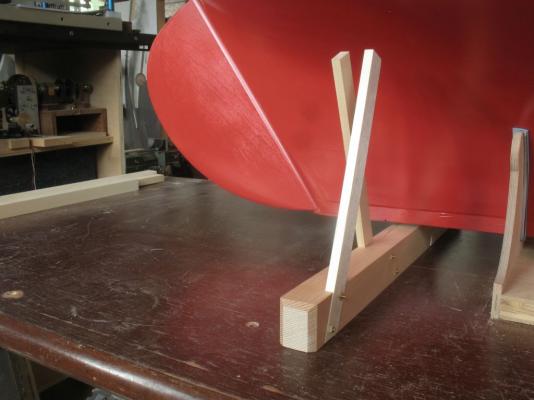
Nils sorry I missed answering your question. I have almost made up my mind to leave the cutter as a free sailing boat. Set the sails and rudder and let her go. Bob you nailed it. Today was still cold it did get up to 5 degrees and the sun was shining for a bit this afternoon. the new support cradle is refining up nicely, I made some 3/4 inch bolts with square nuts to begin assembling the structure the thread size is 3x48 the nuts were made by milling up a strip of 1/16 brass to .156 or 5/32 wide, then drilling a series of holes tapping them and then cutting then off the strip with a jewelers saw. doing a final clean up with a file. The first picture shows the more simple configuration with opposing verticals rather than pairs on both sides. the bottom timber is clear fir and 8 1/2 wide by 10 inches high the uprights are pine and are 6 inches x 2 inches these are full dimensions. there will be a further timber partnered next to the upright 6 x 2 closest to the camera this will have the swiveling pad that will be adjusted to fit up against the hull. The second shows the bolts and the position at the stern looking from the stern Michael
-
You are a busy man sir, looks good.. The additional period is for insurance. Michael
-
Alexandru, thank you for the pictures of the museums they are really interesting. Your work on the bricks is absolutely brilliant, using slightly different red coloured woods and mixing in the softer colours is a touch of genius. I shall remember this method. Michael
-
Thanks one and all for following along. Our snow here is minor compared to what is happening in Calgary, I just got off the phone with my son in Calgary it has damaged a great many large old trees in that city. Tom I live just above the 54th parallel which is about the middle of the Province of Alberta and 3 hours east of the Rocky Mountains. It is raining so I am off to work on the cutter. I hope to get the cradle finished today. Michael
-
Thanks John, The great thing is that I will be able to get her ready for the spring, I know how she looks in the water and what is needed to bring her down to the line. I can now concentrate on all the areas that were started and not completed like the detail of the seizing on the other three shrouds, and so on. there is a lot of work to complete all the details in the rigging, the deck furniture running lights, I'm still stuck on the finish on the sides of the cabin, the top will be like the deck it is the sides that I am ruminating on, I am leaning toward painting them white. Yes winter is just around the corner, so it is great gearing up for the final push to get her finished. Michael
-
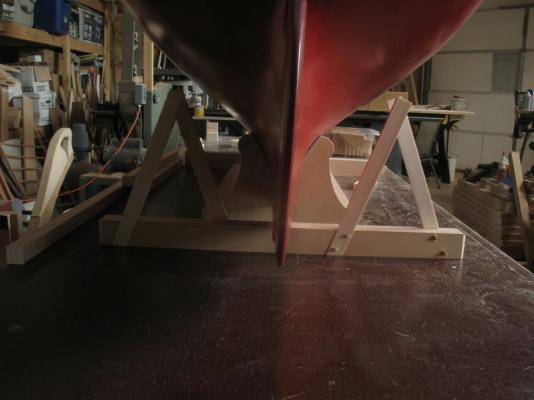
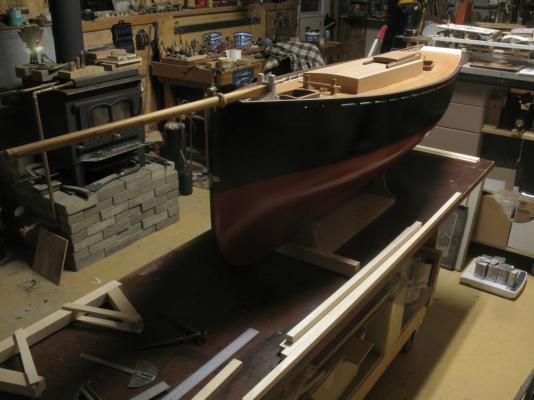
Thank you all for your wonderful encouraging comments, and for the likes. Since it was cold and snowing most of the day I started tidying up the shop I started at the pilot cutter bench which had been used for a while as a wide shelf while the cutter was on the launch trolley. I cleaned and used some past floor wax on the bench then polished it up. After putting the cutter back up on the bench I decided I needed to make a different stand. so made a start on it. It is more like a cradle that might be constructed in a yard than a fancy stand, I think it will be more effective and more solid, there will be some adjustable pads to seat against the hull. The stern cradle parts are the first ones, depending on the weather I might have a full day at the yard tomorrow It was nice to get her up on the bench again. Michael
-
Good suggestion Bob, the bottom part can just be painted leaving the top clear. Michael
-
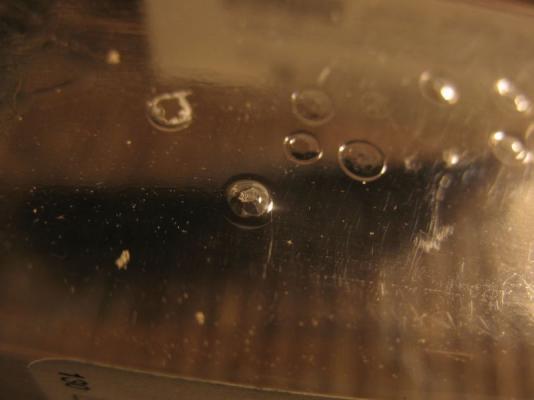
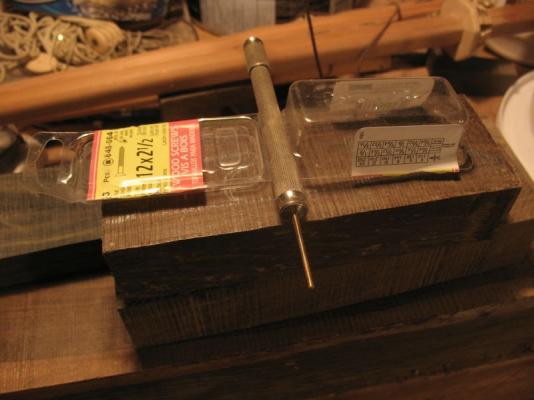
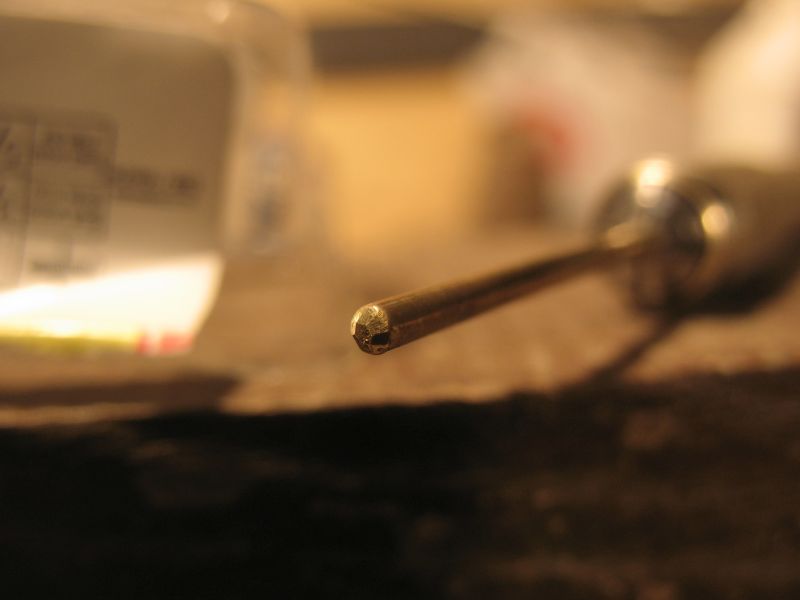
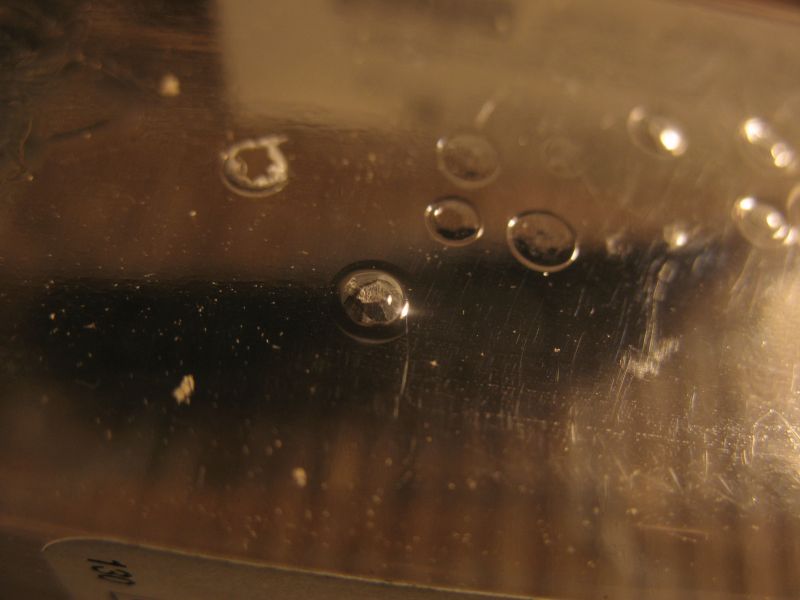
Hi omega I definitely think that you could do something with this method. The first pic shows a blister pack and some .062 brass rod held in a pin vice A quick rough shaping with just a file on the end of the brass rod and the closest impression is the last one I did. I held the pack in my left hand and slowly pushed the form up from the bottom so that I could see the impression forming, I held it there and cooled the plastic by blowing on it with the form in place. Although the dome is crude I am sure that i will use this method for some items in the future. The hole was the first try. then a few more with varying results, I found that you need to keep the form in place till the plastic is cooled. Michael