HOLIDAY DONATION DRIVE - SUPPORT MSW - DO YOUR PART TO KEEP THIS GREAT FORUM GOING!
×


Trussben
-
Posts
1,999 -
Joined
-
Last visited
Content Type
Profiles
Forums
Gallery
Events
Everything posted by Trussben
-
 Some great shots Gaetan, looks awesome. Ben
 -
You certainly sorted out the exposed frames, they look great now! Now a big warning!!! On that stern framing take it really slow, look at every build log you can find, and reread the instructions twenty times! I had MAJOR issues here! Angle of the stern for one that didn't show up until I tried to install the Quarter Galleries etc.... Honestly take your time here just like fairing the bulkheads for hull planking, if something is off in this framing then the stern won't come together just as it should. PM me, Augie, Chuck, Rusty or any other Confed builder for help and I'm sure we will all try and help you get this perfect. Ben
-
You are still The master at painting Chuck!! Wish you would do a painting techniques at the next NRG conference, I'd travel just for that!! Ben
- 1,051 replies
-
- 1
-

-
- cheerful
- Syren Ship Model Company
- (and 1 more)
-
Ha and damn it! I wish I had the chisel skills you do! Ben
-
Very Impressive build, I look forward to seeing more. Ben
-
Well there you go Toni, I opened my trap too quickly. As for the planking scheme, David stated in TFFM that the plan had been lost by NMM but it appears that they found it again as I ordered a copy and it arrived with no problem. Ben
-
Now that just takes the cake, great stone work Gaetan. Ben
-
She really is coming along Chuck! Your laser cutter looks like it had a work out with those bulkheads and fillers. Will continue to watch your development with interest. Ben
-
Very Very nice Toni, That bend round the tuck of the stern must of been fun? And the Holly really does look awesome as lower planking, I've seen a few modellers use it and I like the contrast against the framing, maybe on Pegasus. And I also love the hooked scarph at the bow, are you following the planking outlay of the Hornet? It's available on NMM again! Ben
-
Glad to see you back at it Man! You have now passed my progress on her, I now look forward to looking at your log for help whenever I get back to mine. BTW that deck looks superb! Ben
- 2,191 replies
-
- 1
-
-
- confederacy
- Model Shipways
- (and 1 more)
-
Hey mike, A couple of the double frames appear to have a gap in them?? Or is it just the photo? If it's really there you should try and fix that before doing anything else. And as Augie noted, be careful staining the end grain of those parts, it will normally come out darker than you think. Ben
-
Congrats on completion again Grant. So you and Mobbsie are going down the rabbit hole eh? I look forward to watching your scratch building career on the Bomb. Ben
-
Hi Mark, I'm glad I stopped by and caught up on your log, I have been working on my Indy plans and wondered what the dotted line abaft the rabbit was meaning, now I know!! Great work. Ben
-
Superb as always Ed. Ben
-
Nice. Ben
-
I enjoyed seeing the Plans at the conference Chuck, I'm sure it will be a very successful and beautiful build for anyone. Ben
- 1,051 replies
-
- 2
-
-
- cheerful
- Syren Ship Model Company
- (and 1 more)
-
Have a good vacation Rusty, we have to keep those Admirals happy. Ben
-
Sorry, didn't mean to say I dislike the color you chose at all, I just wanted to bring up the blotchy issue that i came across with the basswood. I also remember that somebody had an even worse effect with using dark stain on the end grain of basswood parts for the frame reveal parts. Ben
-
Hey Mark, What stain did you use? Looks pretty dark from the photo. I had issues using darker tinted shades of stain on the kit basswood with very blotchy results, so I used lighter shades cut 70/30 with a natural stain and did not have any blotchy issues. Ben
-
Hey Michael, Next years conference is going to be in Mystic CT, 3rd week of October. Ben
-
Hi Mark, Good start and I shall watch with interest. Ben
-
Look forward to your update Al. Ben
-
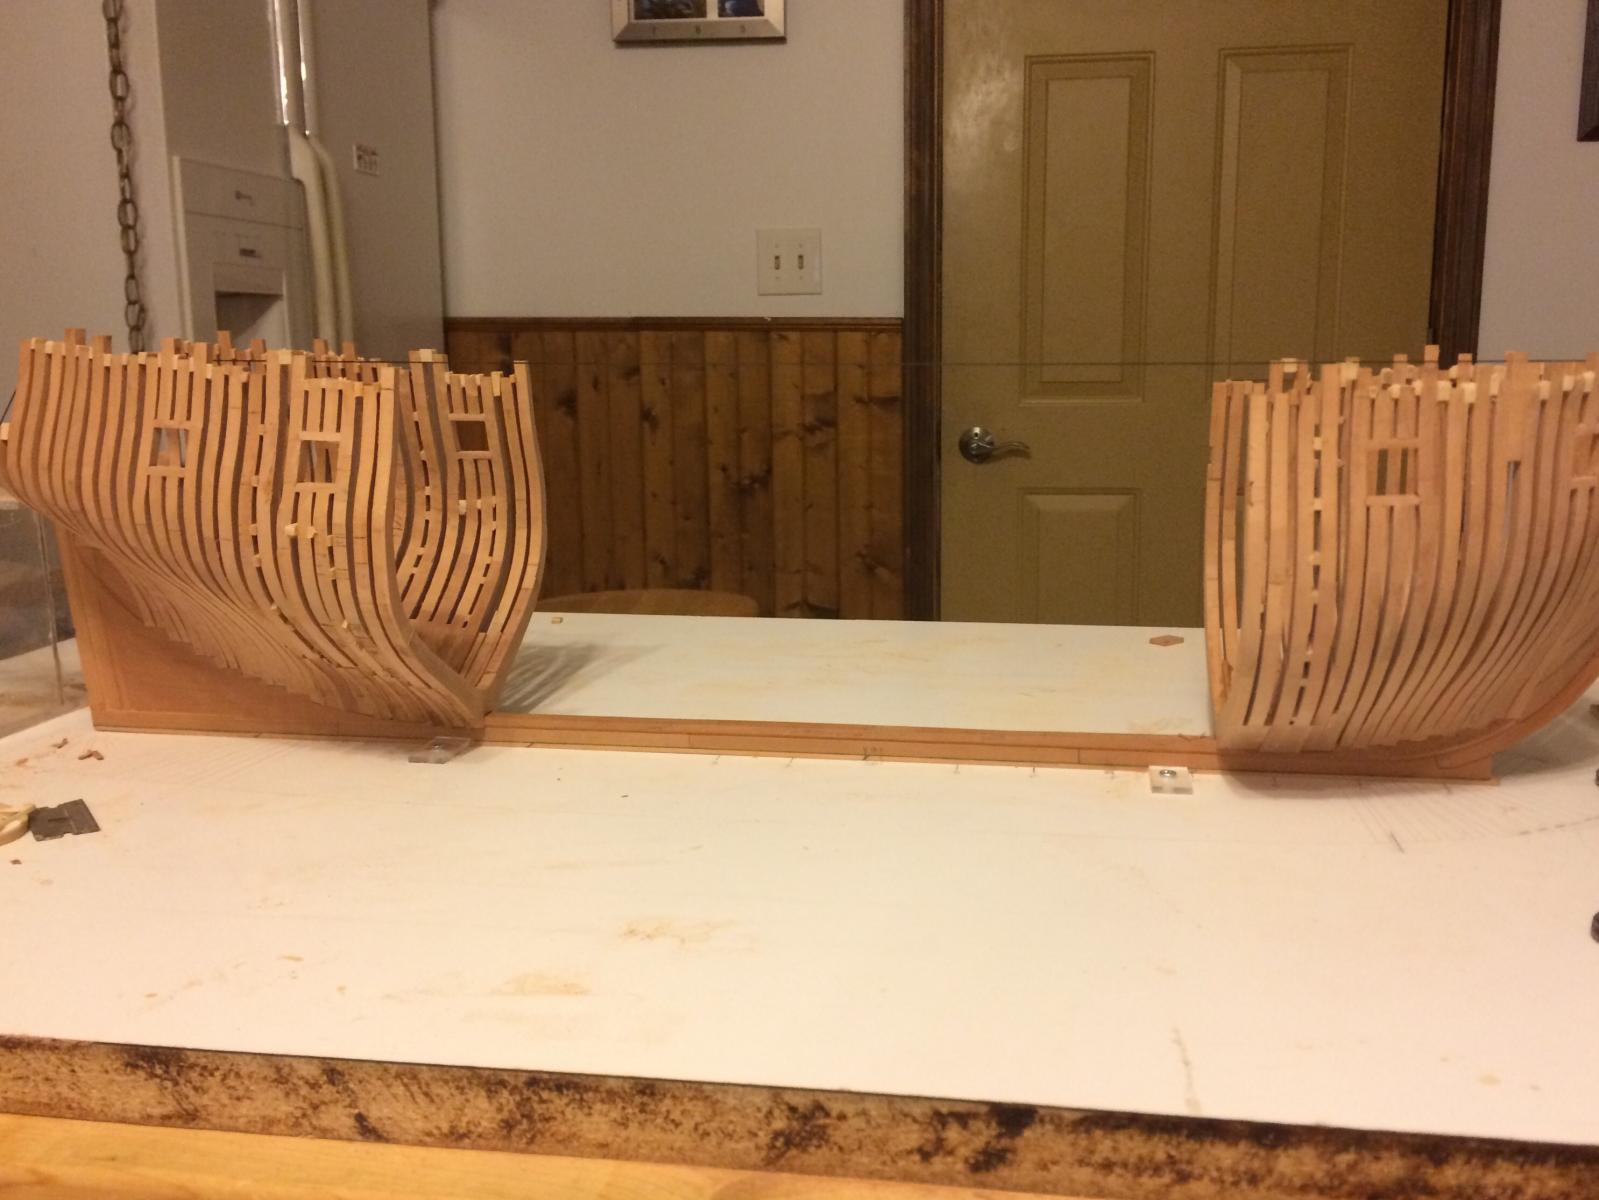
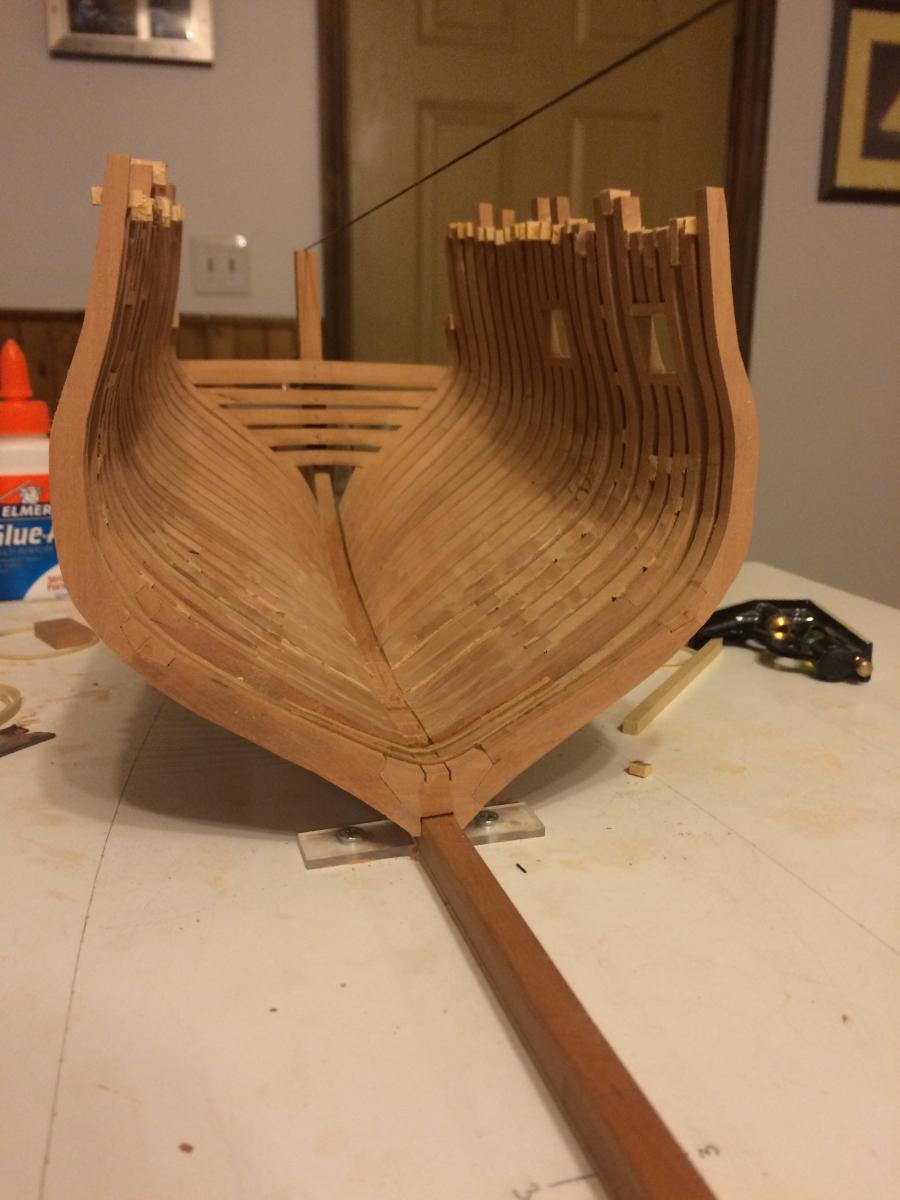
Thanks Alan, I'm looking forward to it. As for your question, the rough fairing gets me within a 1/32" to 1/16" of final dimension, got to be careful at this point not to take too much off and breakthrough a chock joint! If that happens the frame has to come back out and be replaced. You making any progress on your Echo? I'am showing mine at the conference and look forward to seeing some beautiful models. Ben