gjdale
-
Posts
4,894 -
Joined
-
Last visited
Content Type
Profiles
Forums
Gallery
Events
Everything posted by gjdale
-
 Gee Mark, this is reading better than a "whodunnit"!!! Glad to hear you've solved the mystery though. Great work.
 -
I'm with Colin on this one Mark. Of course, I'm sure you are now going to come up with something totally inspirational, that does not require the use of stealers!
-
Little by little we creep inexorably closer. Not long now John until string is in the air. Great job my friend.
- 2,250 replies
-
- 2
-

-
- model shipways
- Charles W Morgan
- (and 1 more)
-
Nice job on the cleats Bug. I've just been grappling with a similar issue for my Vic - Shroud Cleats to be exact. I've come up with a similar method, though slightly different. I'll post pics in my log tomorrow if successful. If not, I might just have to copy your method.
-
She dresses up very nicely Augie! As for the lower planking, I'm sure you will do an outstanding job. Between your skills and Chuck's jig/guidance, there can be little doubt as to the outcome.
- 2,191 replies
-
- 1
-
-
- confederacy
- Model Shipways
- (and 1 more)
-
Wow Danny! Already it's hard to believe that's the same model. Can't wait to see the full set of pics. You're doing a great job (as usual), and all jokes aside, your generosity of spirit towards almost total strangers sets an example to us all. Well done.
-
Absolutely fantastic work on the stove Gary! I'm salivating already just thinking about the roast pork you're about to serve up!
-
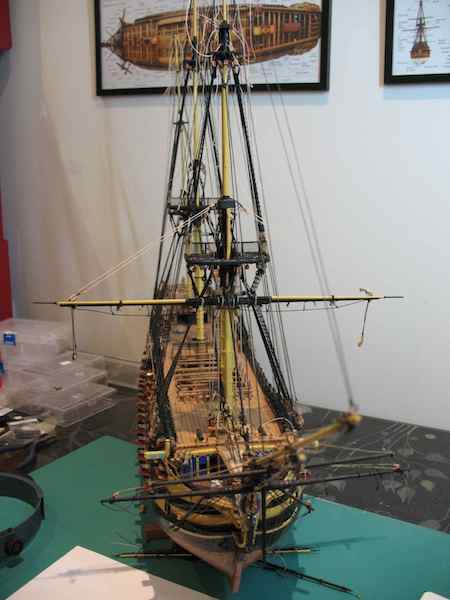
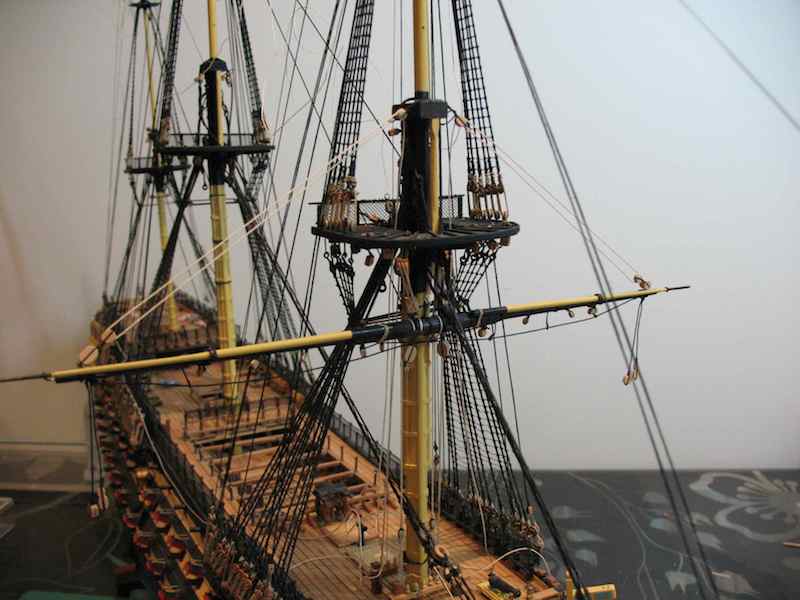
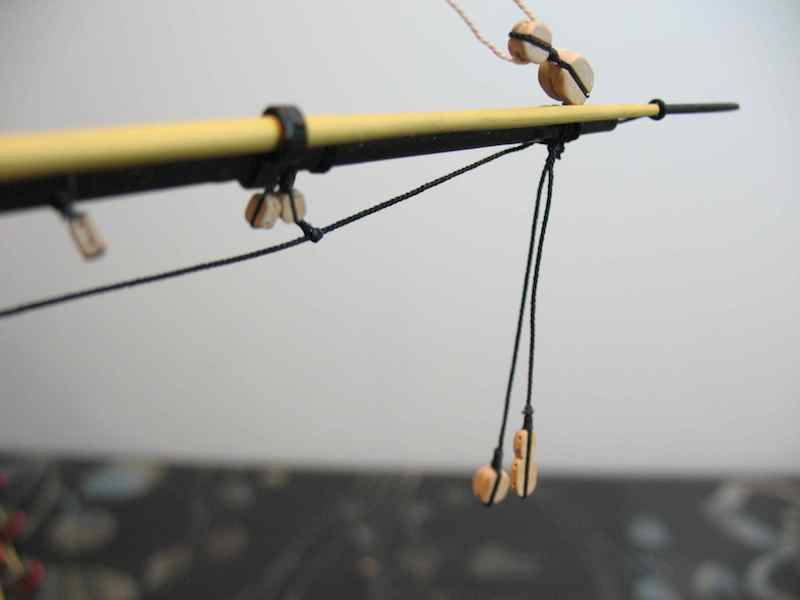
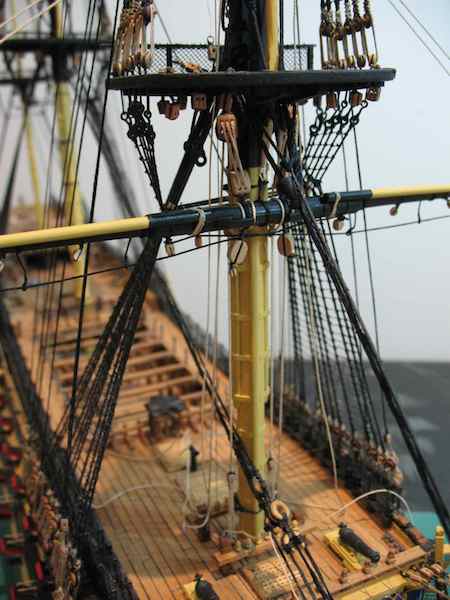
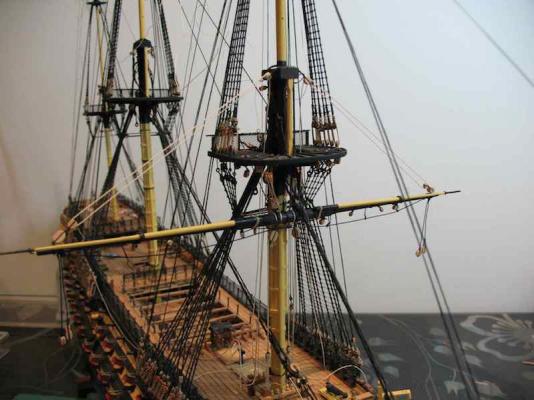
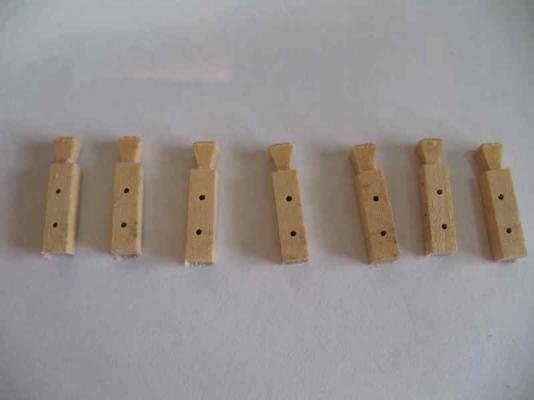
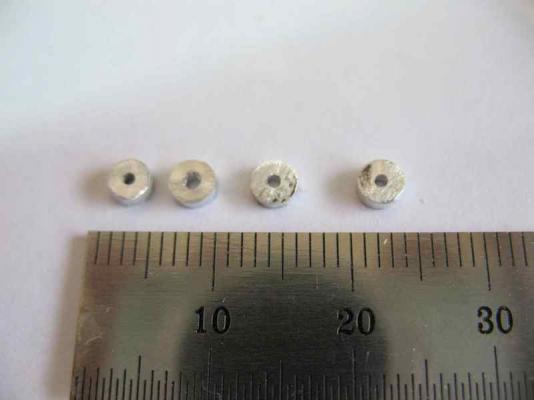
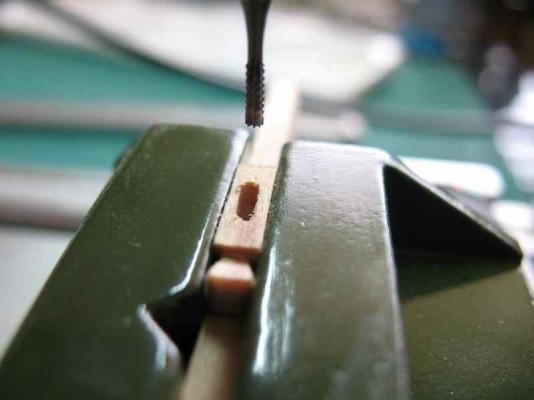
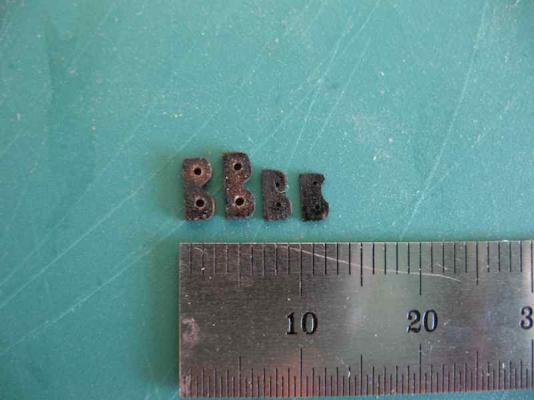
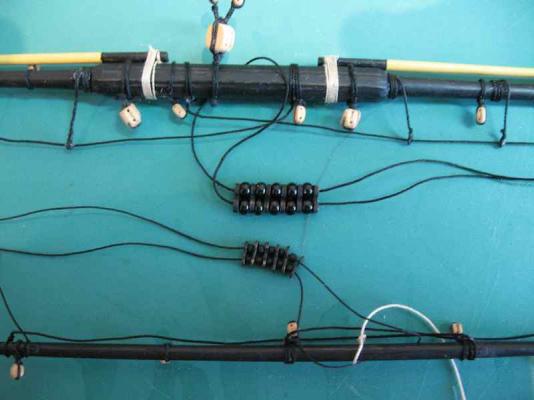
Now I was ready to fit the yards, or so I thought........... Re-fitting of the Fore Lower Yard went pretty much according to plan. Here's a few shots showing how it looks now. Note the the addition of Brace Pendants, and also the change of the Yard Tackle Pendants to include Long Tackle Blocks in lieu of standard double blocks: It doesn't really show in the pictures, but two 7" (3/32" scale) blocks are attached to the first shroud at the futtock staves on both fore and main mast. These are the tricing line blocks that we discussed some posts back. Still haven't finally decided on how the Yard Tackle Pendants will be displayed, but now I have some options and will have a play with these in the next few days. The lifts are not yet belayed as when I re-read Longridge on belaying, it seems that the Kevel blocks to which these are belayed had been omitted by my kit, the kit instructions suggesting they be belayed directly to the timber heads. Having thought about it overnight, I decided that I would just have to manufacture some Kevel blocks and do it right. The basic design is pretty simple - I took the dimensions from the diagrams in AOTS as Longridge is scanty on dimensions for these. Initially, I just drilled some holes to represent the sheaves: Then I thought, what the heck, why don't I have a bash at making some working sheaves - another opportunity to play with some of my toys I had some 6mm diameter Aluminium bar stock on hand, so I turned this down on the lathe to approx a 3mm diameter and then bored a 1mm hole through it for the sheave pin. Then I sliced off sections about 1.3 mm thick: The Kevel blocks were then adjusted by milling out the full sheave space using a 1.5mm end mill mounted in my Proxxon drill press: And here are the resultant pieces waiting for final finishing and assembly. Now I'm ready to continue with the yard re-installation.


-
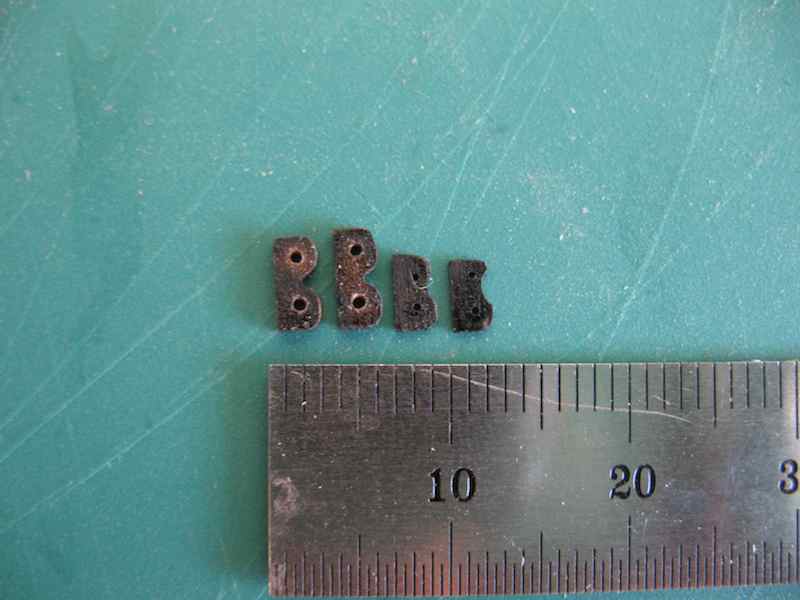
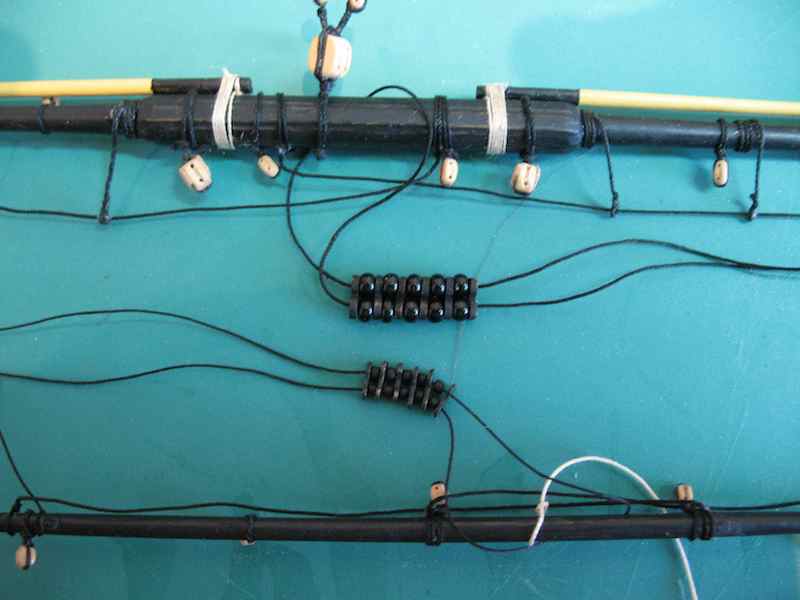
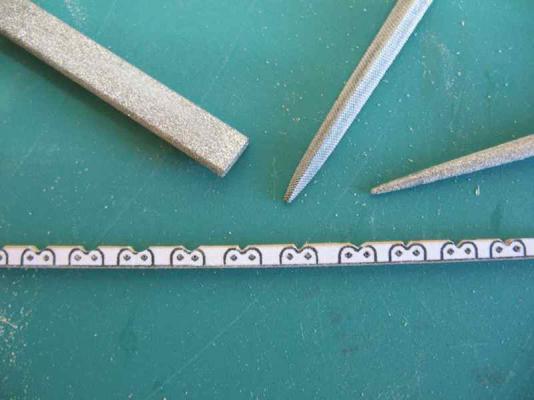
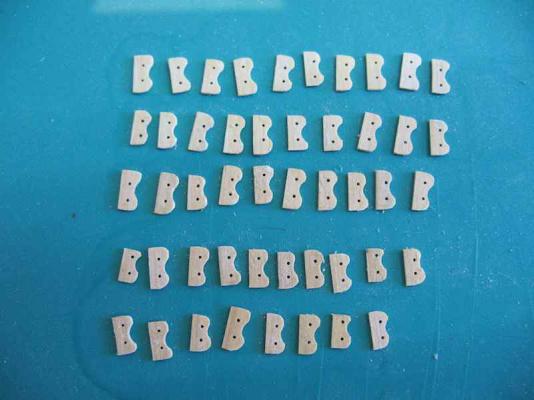
Thanks John and Ben, and also all of those who "liked" my earlier posts. I mentioned previously that in re-doing the yards, I had decided that the parrals for the Topgallant were too large, so a visit to the local beading shop turned up some nice very small beads, and with the aid of Turbo CAD, I redrafted some patterns for the parral ribs at a more appropriate size, printed them on sticky label paper and stuck them onto some 1/64" boxwood stock: I then drilled the holes for the parral ropes and filed the general "B" shape into them using first a triangular file, and then a round file: The resultant ribs look like this: And beside their big brothers for the Topsail yard: And here they are ready to go:

-
Victory by mikec - FINISHED - Mamoli
gjdale replied to mikec's topic in - Kit build logs for subjects built from 1751 - 1800
Mike, This also from Lees (pg62): "Halliards were used for hoisting up the flags. Usually a sheave was fitted on each side of the truck and the Halliards hitched to any convenient point on the bulwarks". He also mentions that this arrangement was common to Fore, Main and Mizzen masts. Cheers, Grant -
Victory by mikec - FINISHED - Mamoli
gjdale replied to mikec's topic in - Kit build logs for subjects built from 1751 - 1800
Hi Mike, Really nice work on the davits my friend! I may (read definitely will) copy your method with these. Re your flag attachment question,I would simply make the halyard in a similar fashion, with a loop in one end and a toggle in the other, making attachment of the flag quick and easy, and being able to secure on itself when the flag is not in use. I think I said in a previous post that my understanding is that the haliards were rove through sheaves in the mast trucks. The only refernce for this I can find in Longridge is on pg 182 (about the middle of the last paragraph). He is describing the making of the Fore topgallant mast and says, "... then fit the truck...and bore in it two small holes for the flag haliard." Hope this helps. -
Thanks Bug and Mike, it's nice to know I'm not the only klutz in the class! Mike - that looks like an interesting fix. I considered using a brass pin, but was just too scared to start trying to drill more holes in situ, especially with rope in the way. Clearly, you found a way to do so! So far, the epoxy repair looks to be holding up well - I have a lot more confidence in this joint than I would using CA or other glue types - and the repair itself is hardly noticeable. I managed to get the Fore lower yard reinstalled yesterday, but was dragged off to take the Admiral out for dinner before I could take extra photos and post pics for an update. It seemed a little easier doing this the second time around (rigging, not dinner, that is ). I guess it's the benefit of all that practice! One thing I did discover in re-doing this bit though. Re-reading Longridge's instructions on belaying, I realised that the kit had completely neglected to use/provide Kevel blocks, incorrectly belaying the lower lifts directly to the timber heads instead. Guess I'll be making a few of those today (nine in total required by my count). I have a cunning plan.................... I will try to ensure a full pictorial update tonight before you-know-who comes bashing on the door.
-
Yep, me too Anja! It's a New Year - time to get back in the shipyard, tell Sjors to move over (after he's made the coffee), and get on with your lovely build. Looking forward to an update soon
-
Very nice work on the pumps Bug, very nice indeed!
-
Great work Sherry. I like the way you approached the curved railings - I've filed that one away for future reference (pun intended )
-
Very nicely done Augie - looking really sharp.
- 2,191 replies
-
- 1
-
-
- confederacy
- Model Shipways
- (and 1 more)
-
Thanks Lawrence, Patrick and Colin, Got distracted with household duties yesterday, but did manage to finish off the new parrals. All fore and main yards now ready for fitting - hopefully today.
-
Sean, Patrick is right, you'll need to complete the outer hull planking before you install the guns, otherwise they will get in the way while you're trying to plank. If you insist on using those metal gunport frames, you should be able to locate your gunport frames correctly by dry-fitting the decks temporarily and using a made up canon as a height check. Just remember to make allowance for the thickness of the deck planking and you should be okay. Hope this makes sense.
-
Great work on the masts there Colin.
-
Okay Sean, not sure if I understand your question about "frames and planking". Are you referring to gun port frames and inner bulwark planking? If so, you will need to install both of these before installing the guns. If you are going to rig the gun tackle, you will need to provide your own blocks as the kit does not provide for rigging any of the guns. You'll need 2mm blocks for this and some eye bolts and rigging thread to suit. If I've misunderstood your question, can you rephrase it please?
-
Looking good Mobbsie. Those catharpins look really swish.
- 1,279 replies
-
- 1
-
-
- agamemnon
- caldercraft
- (and 1 more)
-
Sean, This is the point where you really need to depart from the sequence in the instructions. Whatever your intention is for finishing this section of deck, you need to do it now, and fix the cannons in place. Personally, I would not bother attaching rigging to those that will be out of view once the quarter and poop decks go on, but that's your choice.
-
Thank you one and all for the sympathy/empathy (for those who have been here themselves!) and general good wishes for the repair. I'm pleased to report that the bosun has done a thorough inspection of the repair job and declared it fit for sea (sorry, no pics yet). All of the Fore and Main yards have now been re-fitted to include Brace Pendants, and the Fore and Main lower yards have been fitted with long tackle blocks for the Yard Tackle Pendants. Additional tricing line blocks will be added to the shrouds prior to re-installation of the yards. While I had the yards off again, I decided to revisit the parrals for the top gallant yards. I decided that the previously made parral ribs were over scale for the topgallants, as were the beads used for the parral trucks. So, I bought some new beads today from a local beading supply shop, and made some new, smaller parral ribs for the top gallant yards. I'll post some pics of these, along with the method of making them, tomorrow. B.E. - thanks for the extra info re Yard Tackle Blocks - now I think you're just messing with my head I had all but made up my mind to show these triced up, and now you show me pics of them secured to the channel.......... I also note the absence of Brace Pendants in these pics....... At least the pics are consistent with the book. Dafi - extracts from ships log: "05 Jan 2014. Fore Topgallant Mast sprung as a result of lighting strike. Fished the mast where it was wounded. Employed people to repair the rigging." "06 Jan 2014. Fore Topgallant Mast repairs surveyed and deemed fit for sea. Double rum ration issued to bosun and carpenter's crew."
-
Looking good Meredith. Looking back over your log reminded me that you use MyUS for postal orders, so I bit the bullet just now and signed up. Wish I'd remembered a month or so ago!