


gjdale
-
Posts
4,825 -
Joined
-
Last visited
Content Type
Profiles
Forums
Gallery
Events
Posts posted by gjdale
-
-
Some very nice progress there Sea Hoss.
-
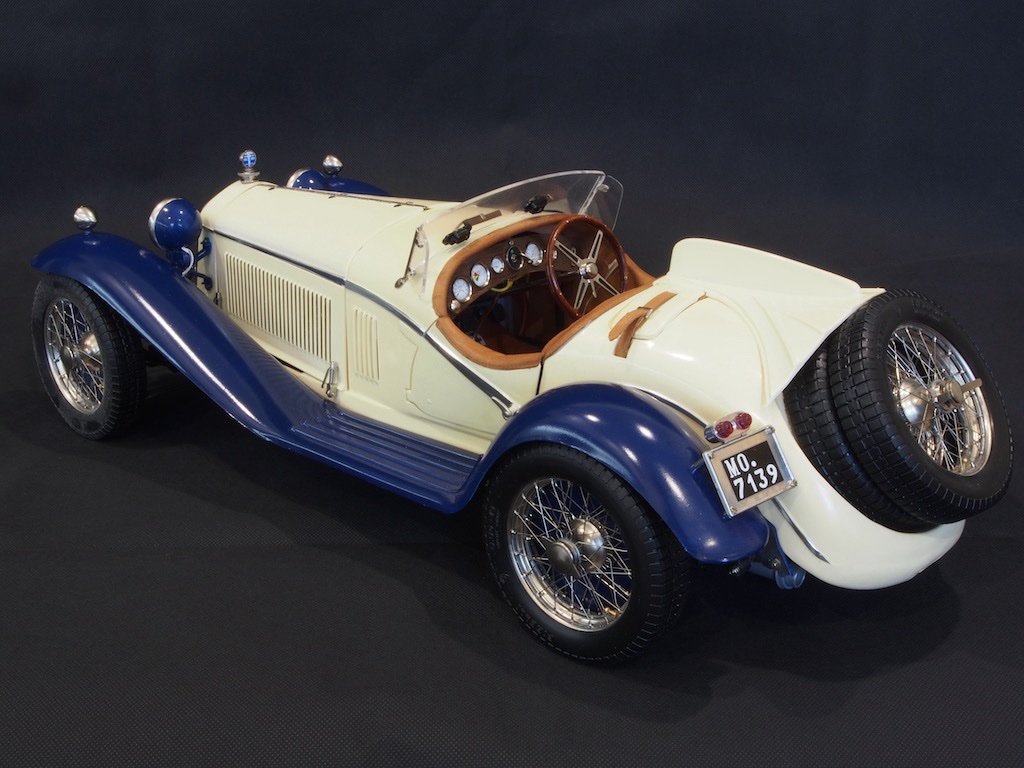
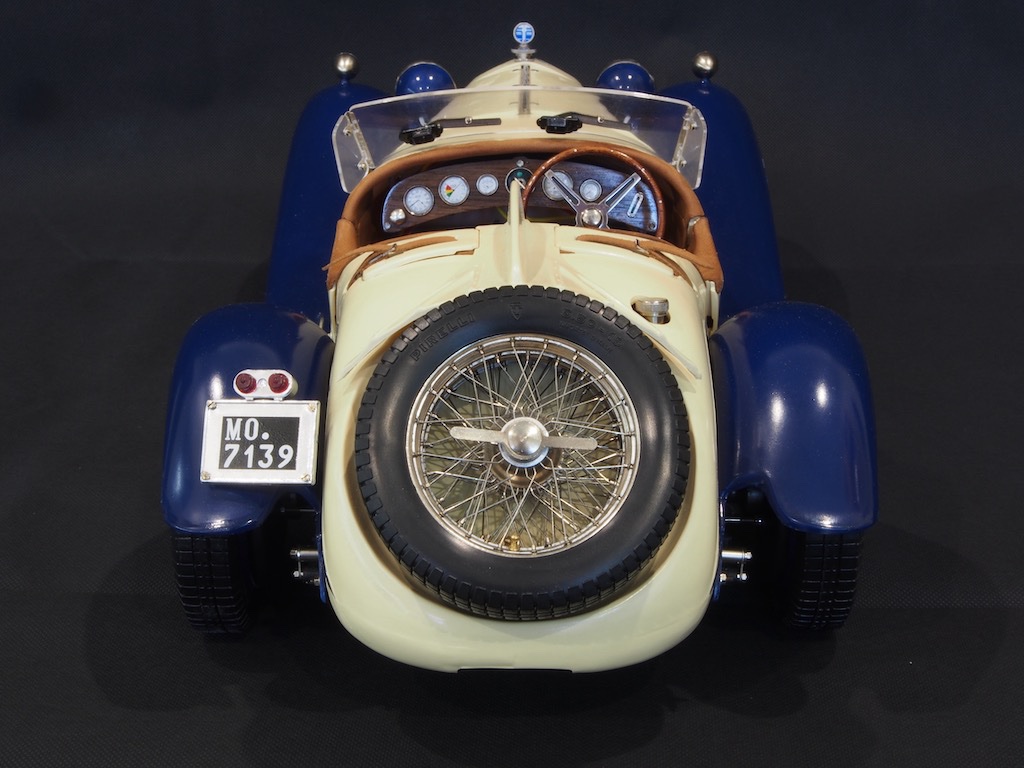
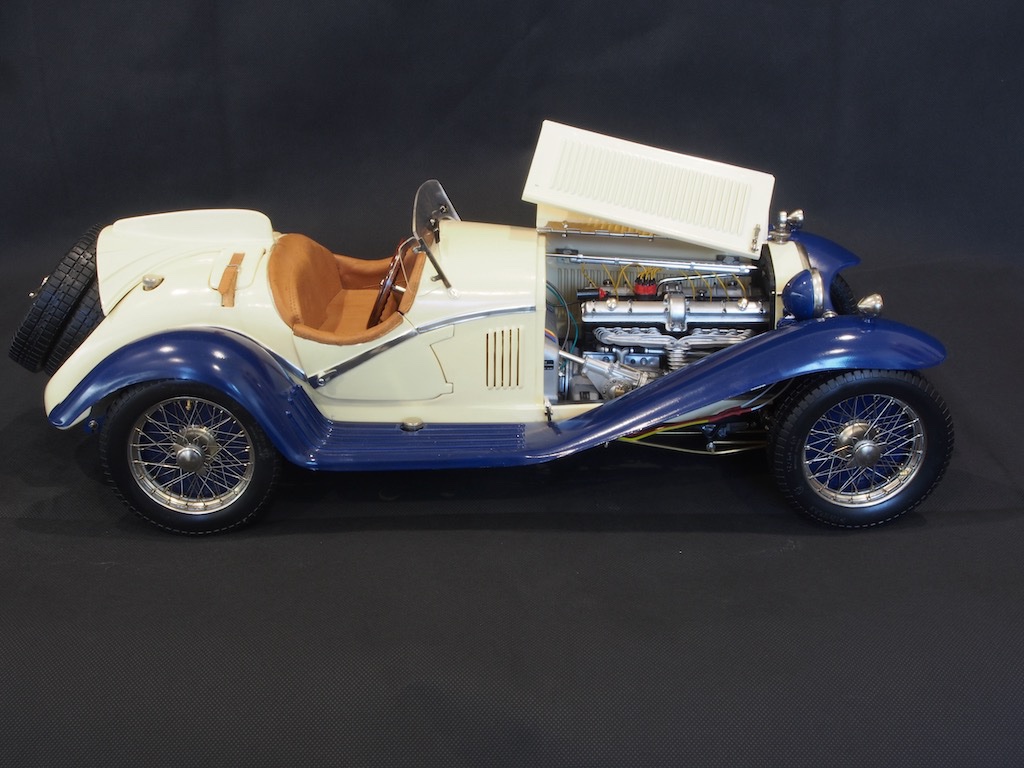
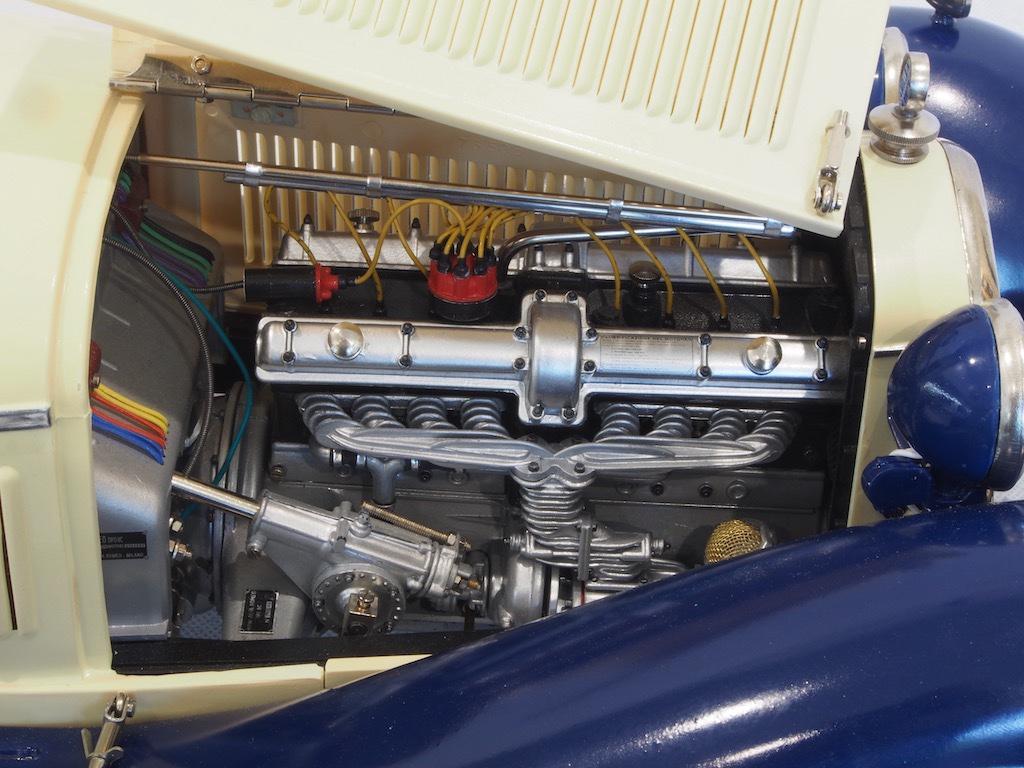
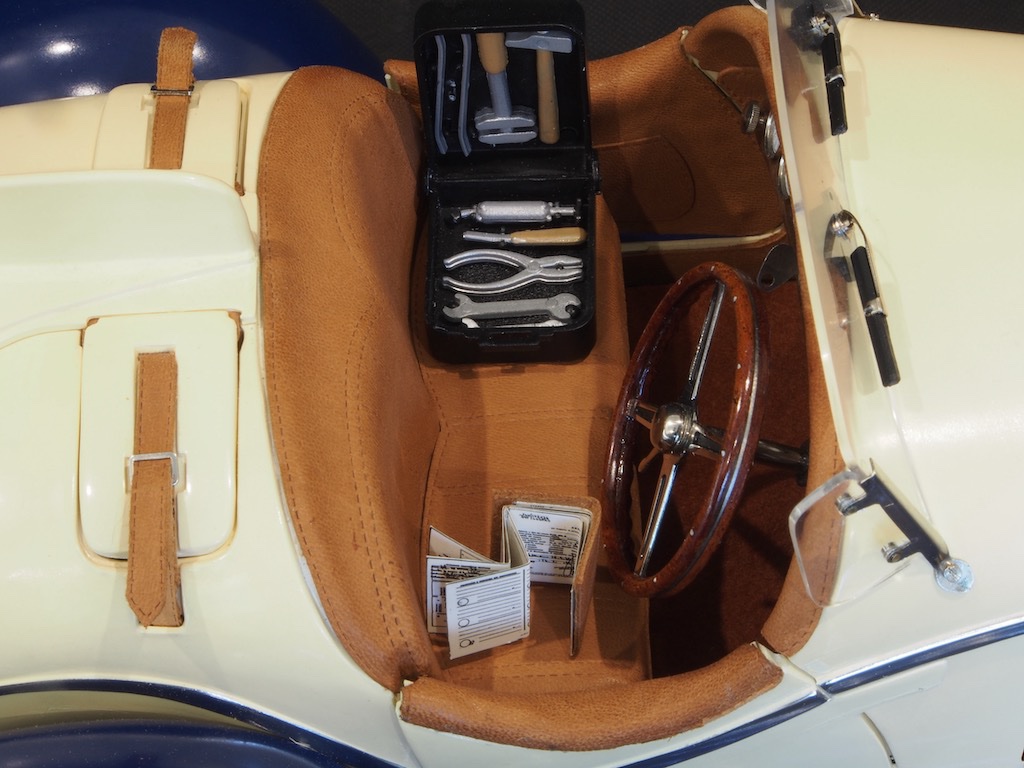
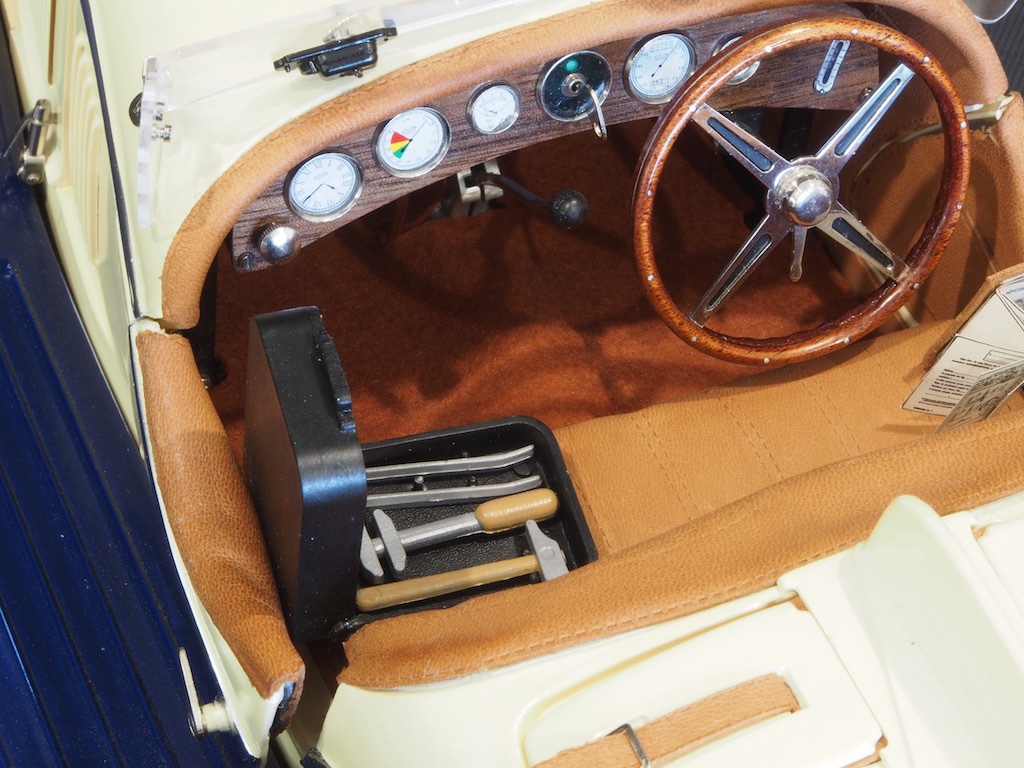
The long-awaited steering hub has finally arrived, almost two months after ordering! All that was required for completion was to install the steering wheel, and then re-install the coachwork and complete the headlight wiring. I also replaced the damaged Alfa decal on the front nose. That took me no more than a few hours yesterday afternoon. Today I did a final glam photo shoot. I would have taken the model outside for this, but it’s been raining here for the last two weeks and showing no sign of easing up. Had to settle for an indoor shoot instead. Here are the final results.

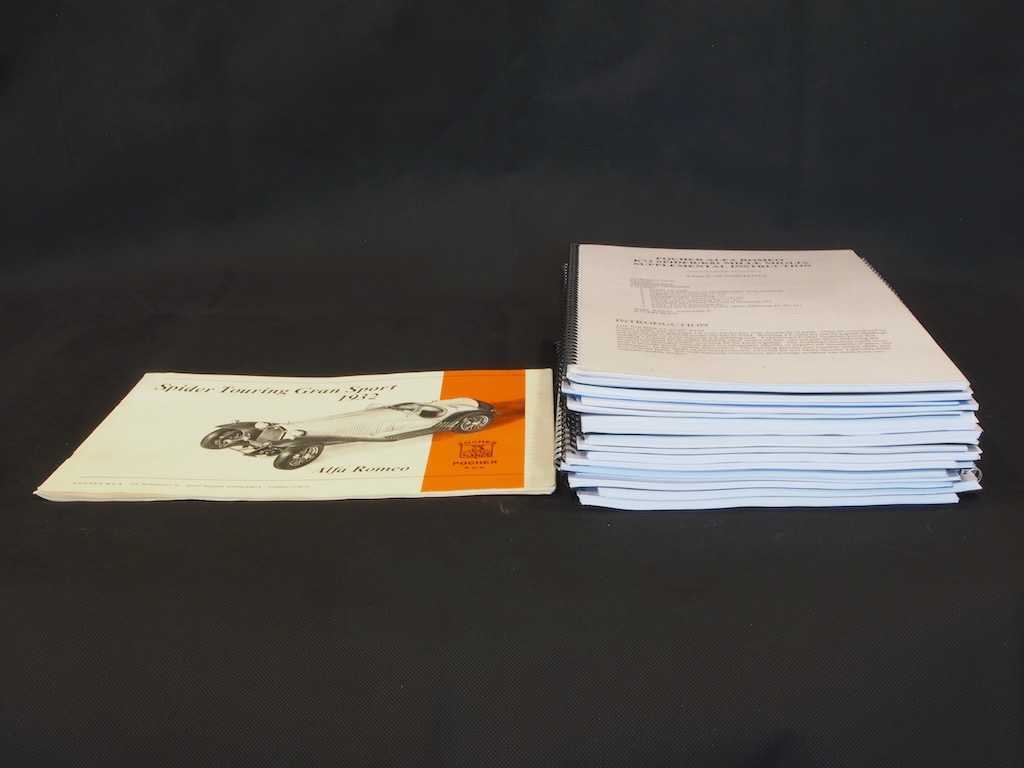
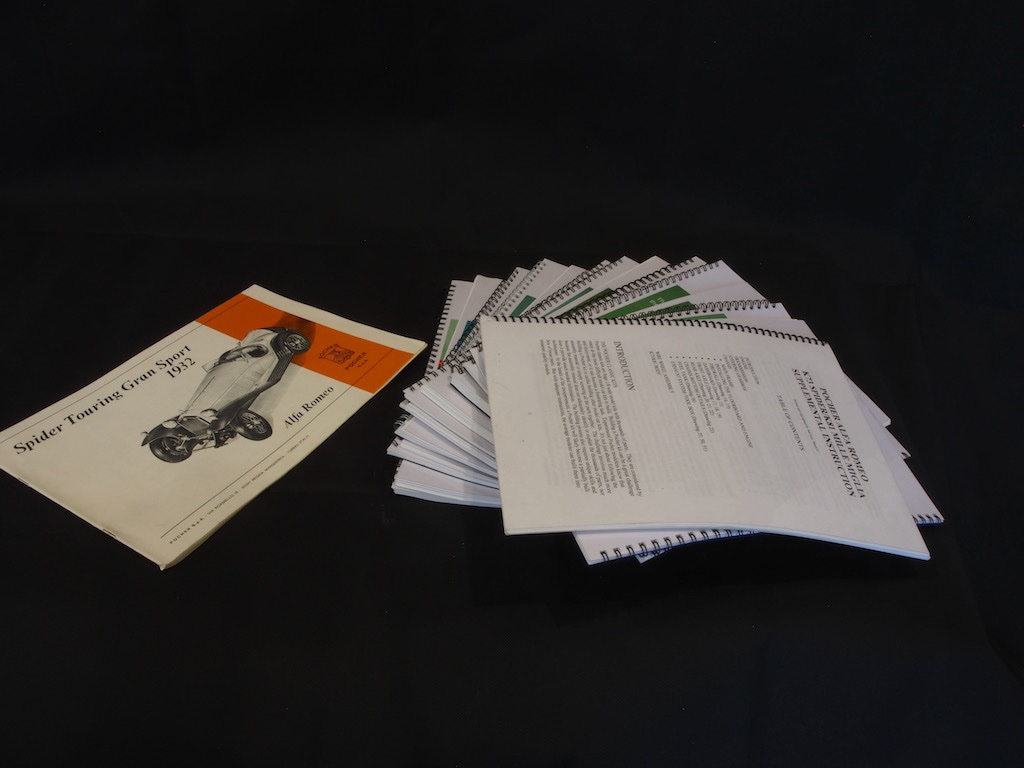
One final comment. This build would not have been possible without the guidance of the wonderful supplementary instructions and photos from Paul Koo. Here is a couple of photos to show the difference. The Pocher instruction manual is on the left: 26 pages, mainly of exploded diagrams. On the right, the 16 booklets of instructions and photo essays from Paul Koo, and that’s not counting the hundreds more photos of inventory parts, completed models, and reference photos.
Thanks to all who have followed along and provided encouragement and support. I hope you have enjoyed following the build as much as I have in doing it. Now I can focus on completing my Medway Longboat for a while.
-
Excellent results on the steam capstan BE - though we expect nothing less from you! She’s looking fabulous.
- Martin W, BobG and Blue Ensign
-
 3
3
-
-
I think it would be worthwhile doing it again with the correct number of planks Floyd. Even if you don’t do that, at least use Chuck’s templates for the bow and stern - they provide a really good guide as to how you’re going as you progress with planking as they are based on his pre-cut planks.
Chuck mentions in the instructions that he used a #77 drill for the 10 lb monofilament on planks. He also notes that these represent iron nails in this boat, rather than treenails.
-
-
Nice progress Sea Hoss - looking good.
-
Thanks Bob - yes, the pre-spiled planks sure do make it a lot easier. There's still plenty of challenge there though - especially if you're as ham-fisted as I am!
- Ryland Craze and Canute
-
2
-
Thanks Ryland. Yes, I'm conscious of that point too. Tight edges is certainly the aim.
- Canute and Ryland Craze
-
2
-
-
Nice job on the repair Floyd. Fairing also looks great. Looking forward to seeing you tackle the planking now.
- Ryland Craze and Canute
-
2
-
Thanks for the likes folks.
Bob - I did consider adding the monofilament as you suggested, but decided that might cause more headaches with handling the model while placing planks, so will defer that until the planking is all in place.
Minor update today. Planking progresses cautiously with the first four strakes now complete. Using Chuck’s methods for both bending and gluing is paying dividends. Nevertheless, I have not been afraid to debond planks that I have not been satisfied with. One plank came off three times before I was happy. The last plank on the starboard side (Plank #8 ) went on late one evening. I didn’t trim it because I wasn’t sure about it. Having slept on it overnight, it came off again the next day. I took some extra care with bending it to make it fit properly at the last frame and transom, then reglued. Was much happier with the result. So far the strakes are all aligning nicely port/starboard at both bow and stern. It’s not perfect – there are some very minor gaps along some seams, but overall I’m happy with progress so far:
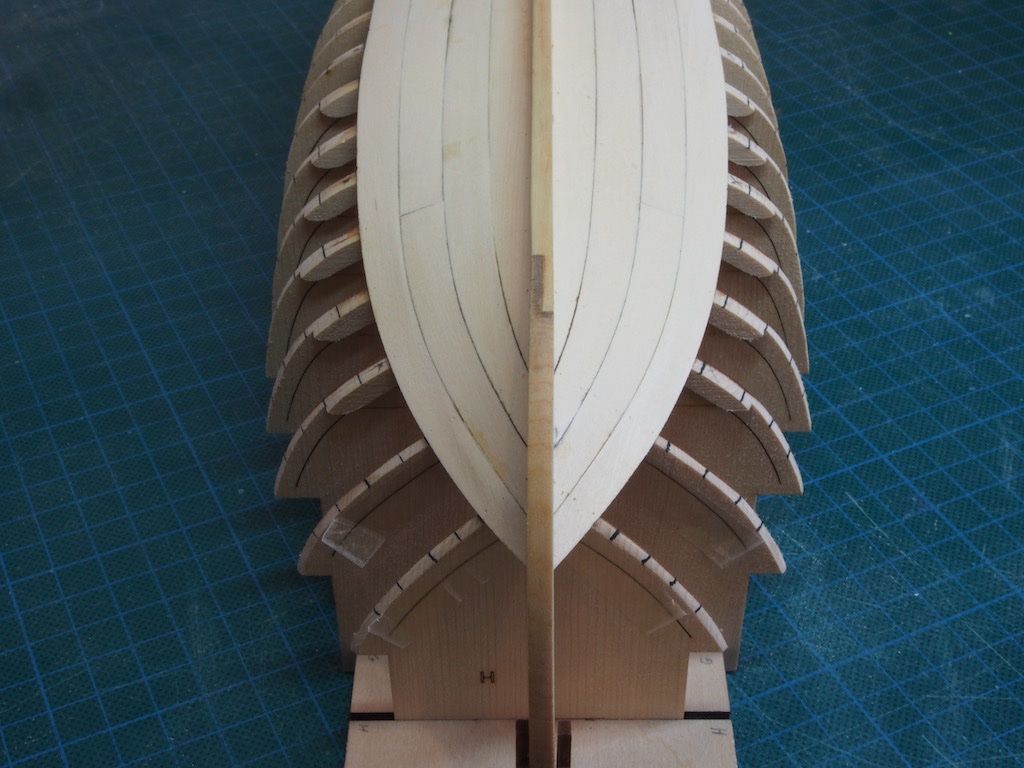
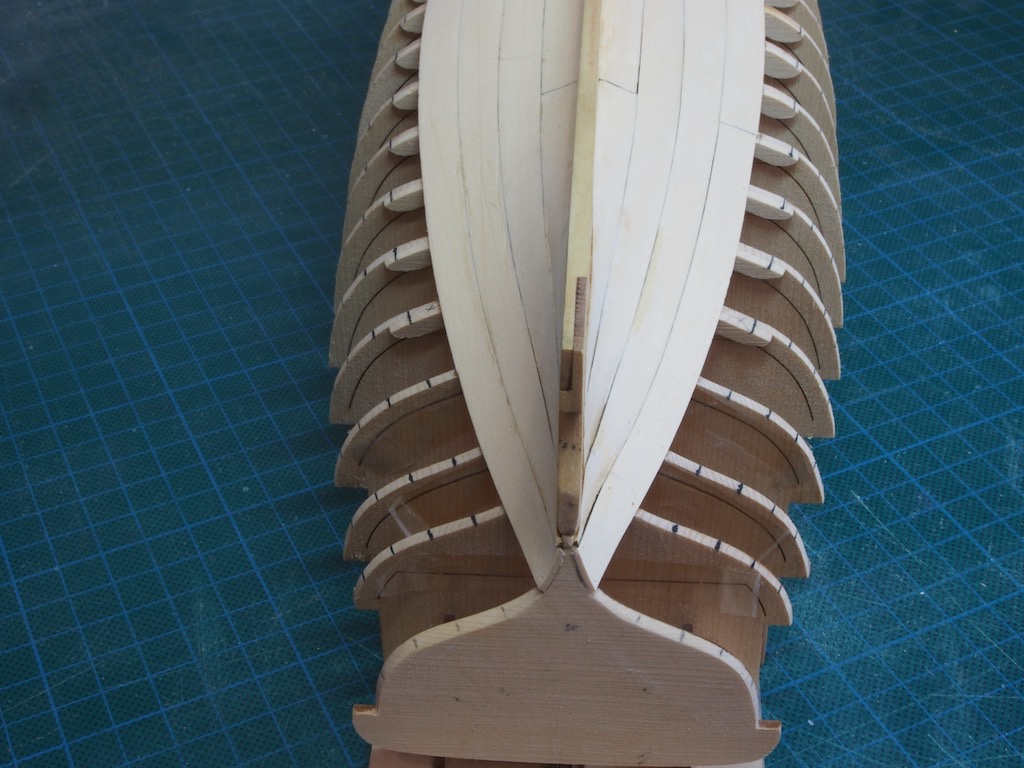
I'll be back when once the planking is complete...
-
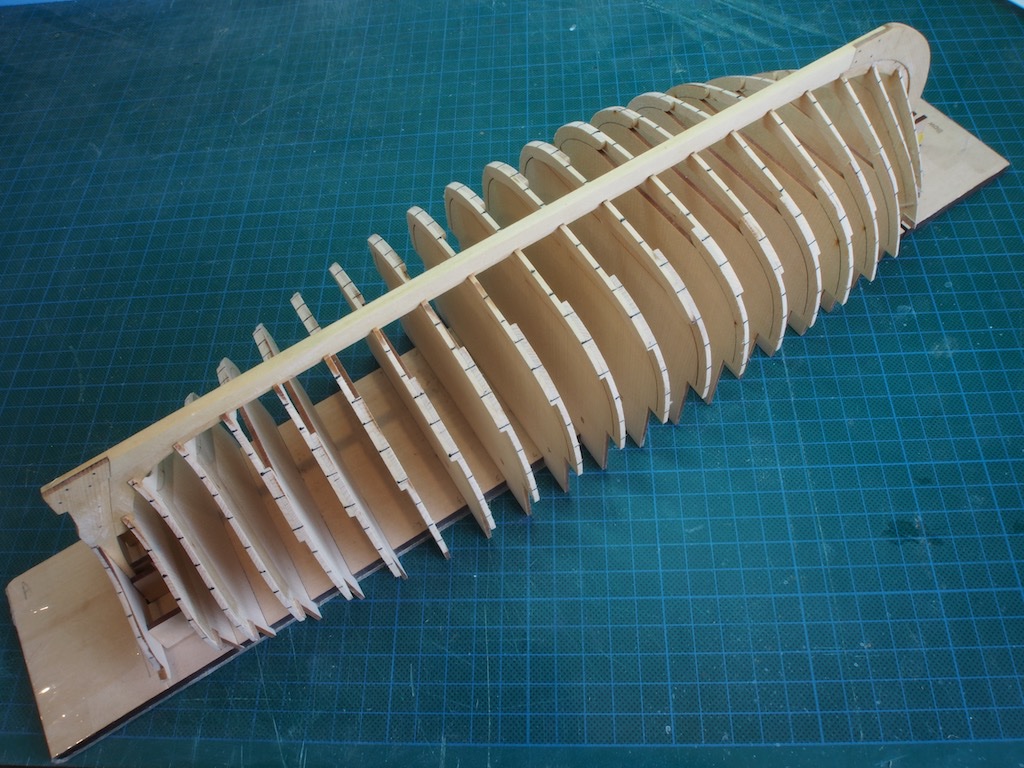
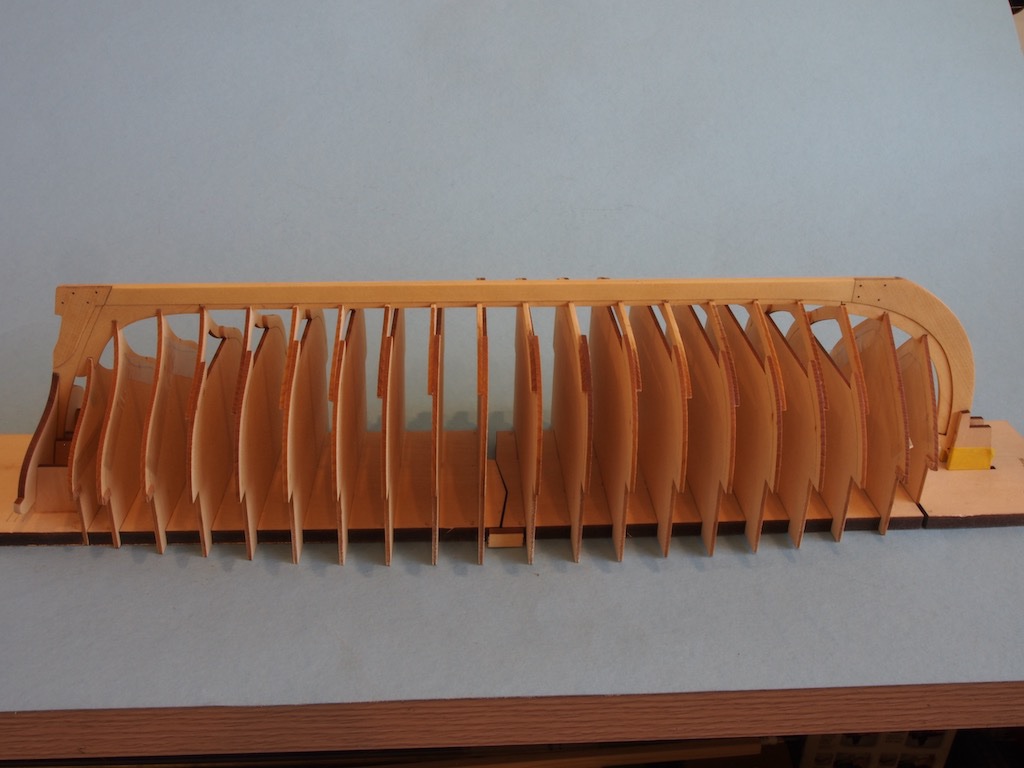
The frames were glued in place per the instructions and left to cure for a few days. The frames were then gently faired using 240 grit sandpaper on a variety of foam backing blocks.
The hull was then lined off using tick strips and the bow/stern templates provided by Chuck to place a pencil mark on each frame with the exception of the first and last three frames. Thin strips of tape were then used to adjust the line.
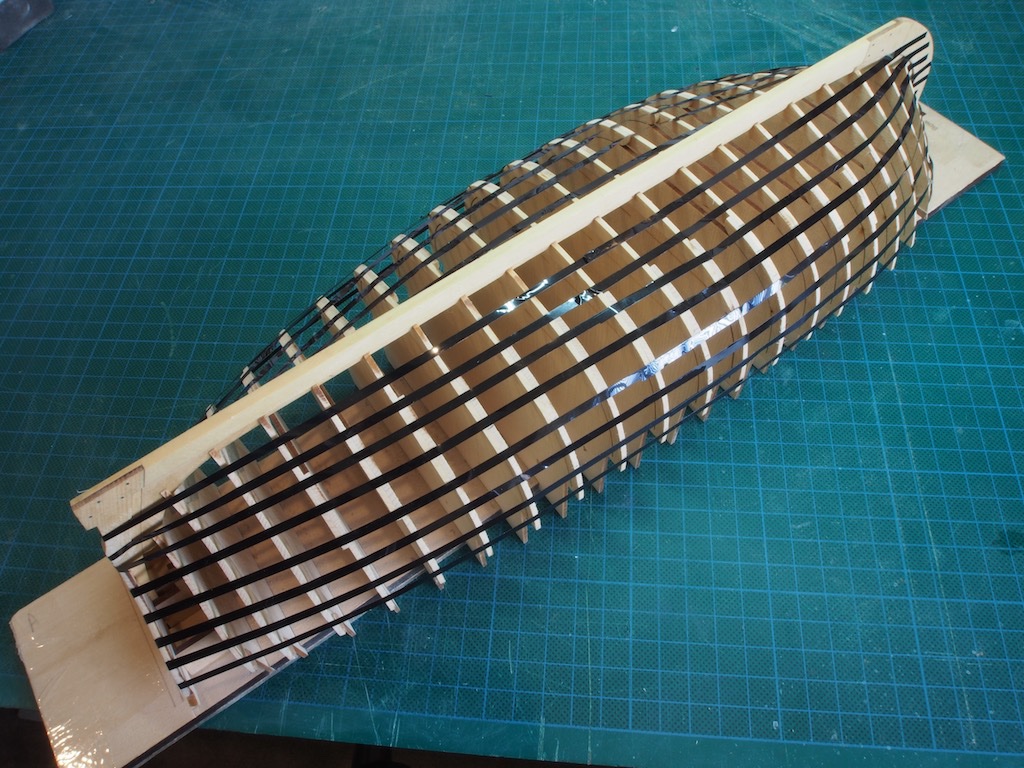
The frames were then marked again along the edges of the tape, this time using a thin black pen. Once the tape was removed, the original pencil lines were erased to avoid confusion.
Then it was time to gird the loins and commence the planking. This time around, I decided to use Chuck’s method for bending planks, only instead of a hairdryer I used my Proxxon heat gun (on the low setting). I was pleasantly surprised at how easy this was to do compared to my previous method of using a small steam iron. I also followed Chuck’s advice and used CA glue for attaching the planks and again following his advice, just placing a small amount on each frame. I used a gel CA for this. I was again pleasantly surprised at how easy the process was compared to using PVA and trying to clamp things in place. OK Chuck, I’m a convert on using CA for planking!
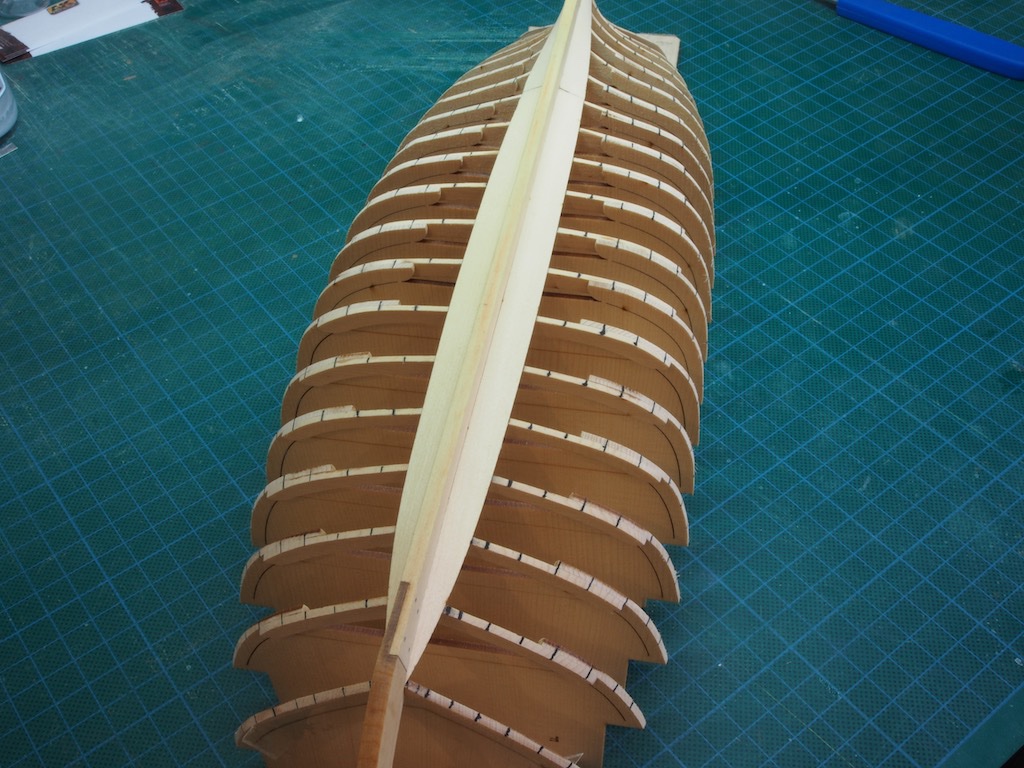
I’ve decided to depart from the instructions slightly and follow the lead of some others by drilling holes for the “nails” as I go, rather than waiting until all planking is completed. Figure I might stand a reasonable chance of actually hitting the frames this way! I'll be back when planking has progressed some more.
-
Those trail boards look great Jeff- well worth the time and effort.
-
-
This is a fun build Dave and Jeff's plans are first class. I'll follow along for the ride and the memories!
- JpR62, thibaultron and Elijah
-
3
-
Grant's Medway Longboat Ver 2.0
At long last I have returned to this build, starting afresh. A few months of working on a completely different project, along with a little extra time for building, has allowed my mojo to return for this build.
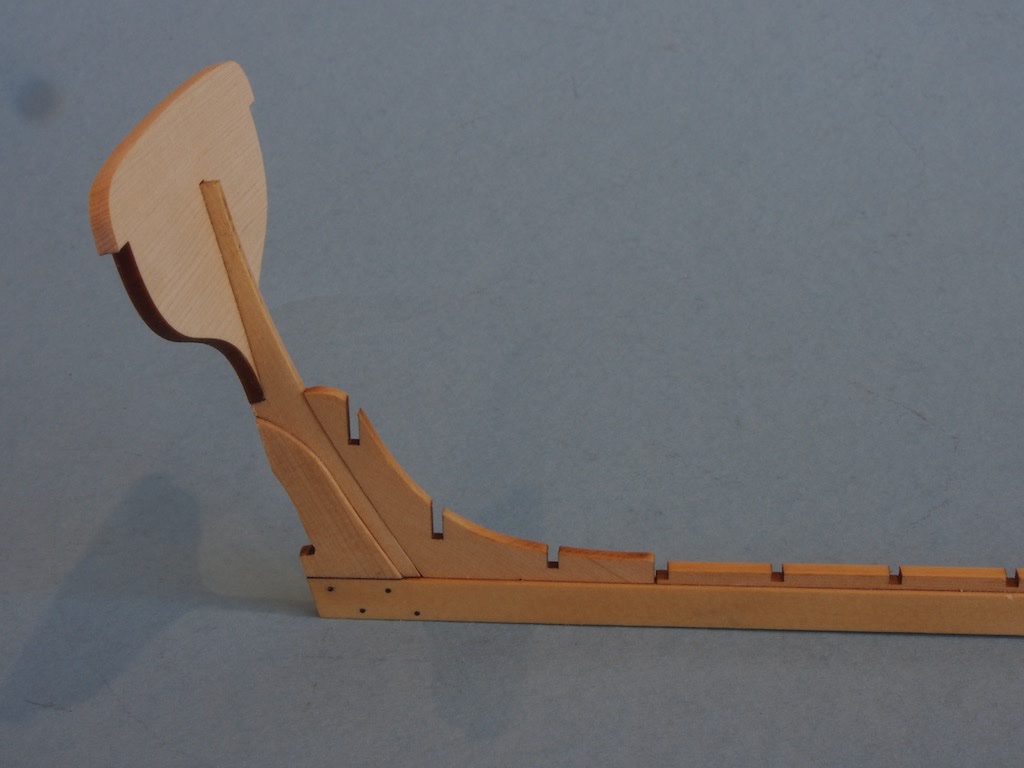
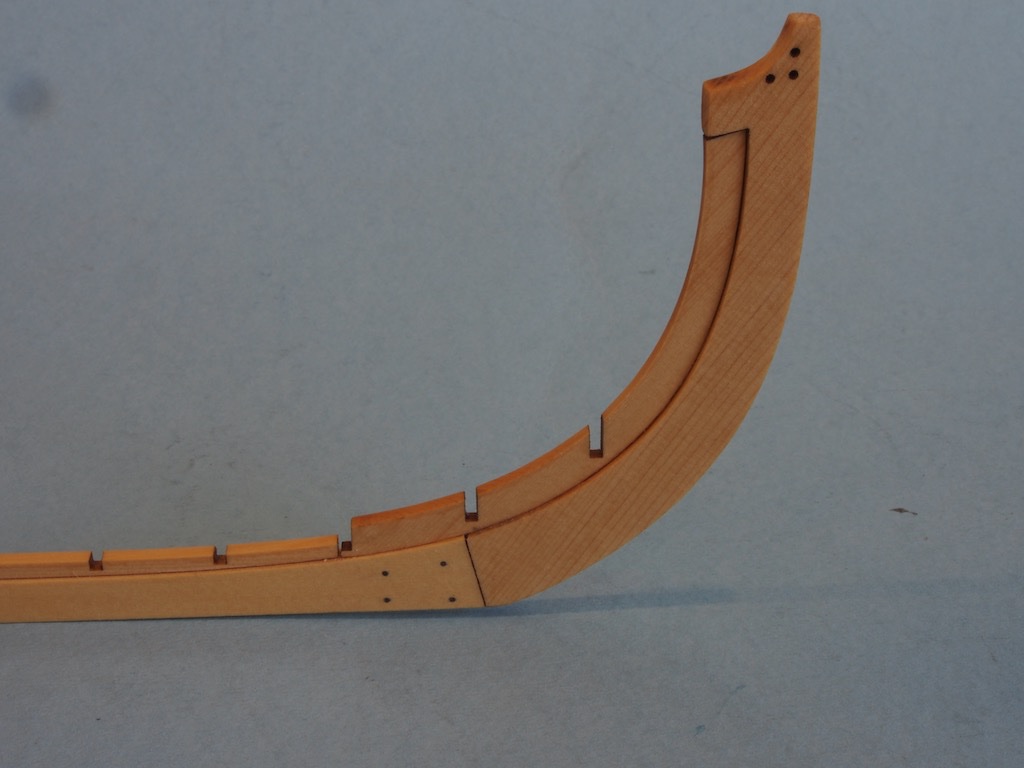
I again opted for the more complex keel design; however, my approach to the keel assembly this time was to use the Byrnes saw to hog out most of the waste and then fine tune with a miniature chisel and a sanding block. I then went ahead and glued the four additional 3/32” keel pieces following the advice in Chuck’s instructions again. I made a couple of 1/32” spacers, as others have done, to help centre the parts on the keel. I then marked the locations for the keel bolts from the plans, drilled using a #70 drill bit and inserted the provided 25lb monofilament fishing line to simulate the bolts. These were trimmed and sanded flush and the whole assemble given a coat of Wipe-on Poly. Finally, the transom piece was fitted, taking care not to repeat my mistake of the first time around! No in-progress pics of this work as it simply repeats work from earlier in the log. Here is the finished keel assembly.

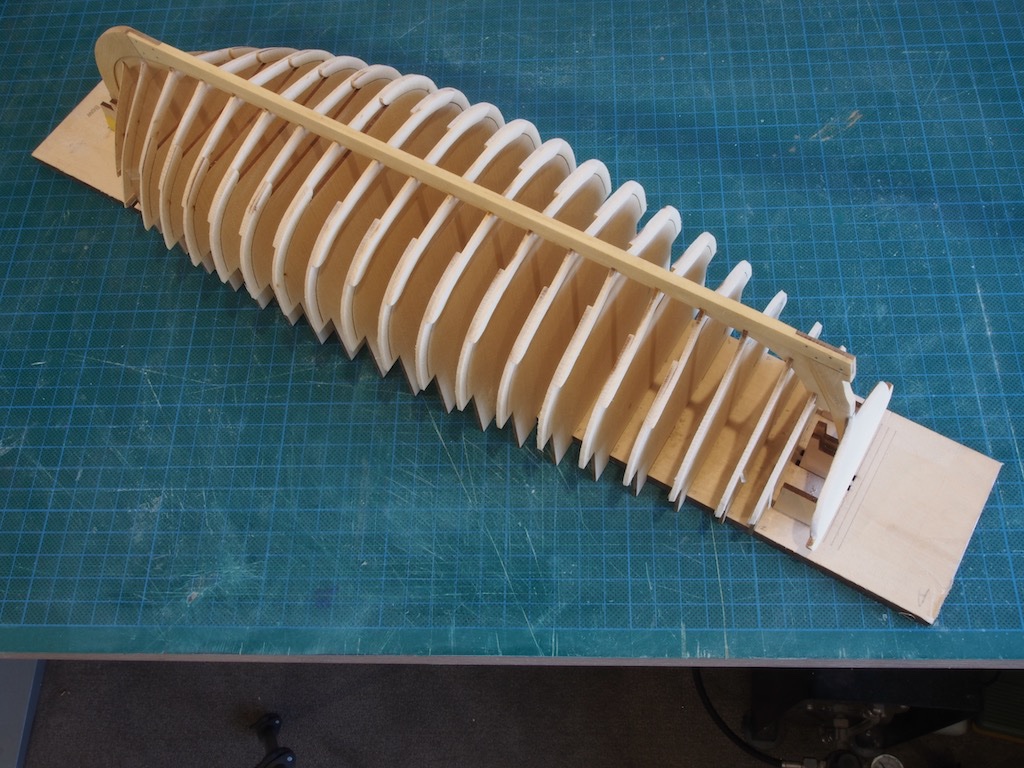
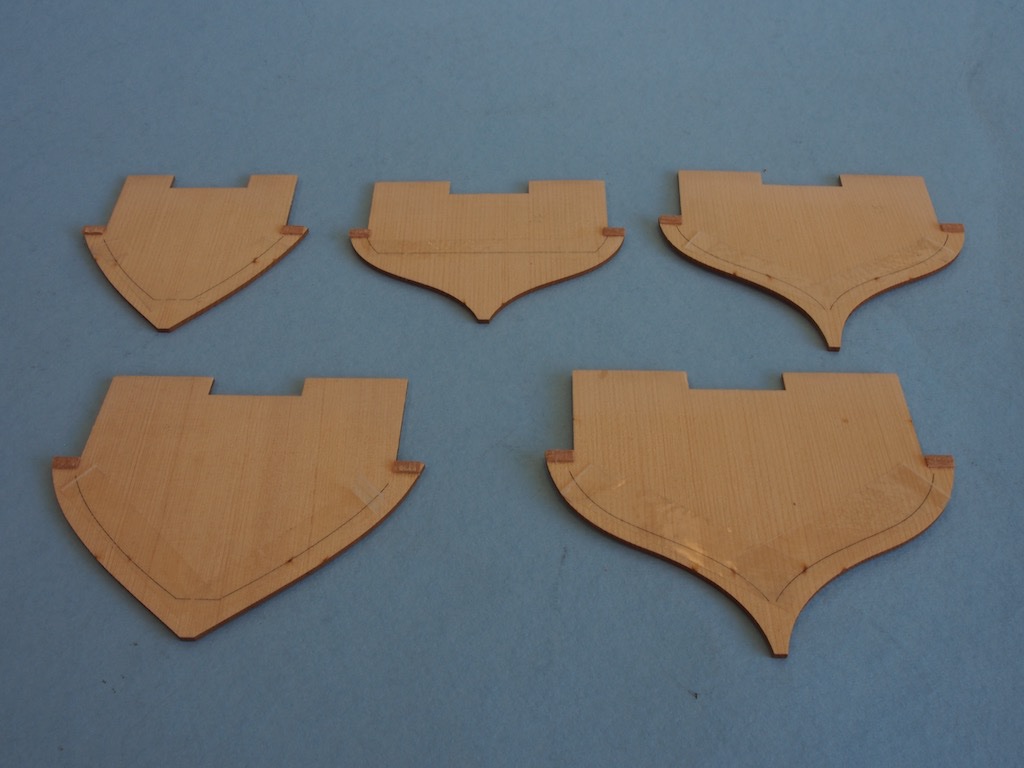
The single frames were prepared as per Chuck’s instructions, with some packing tape and some reinforcing strips.
These were then test fit along with the keel in the building board.
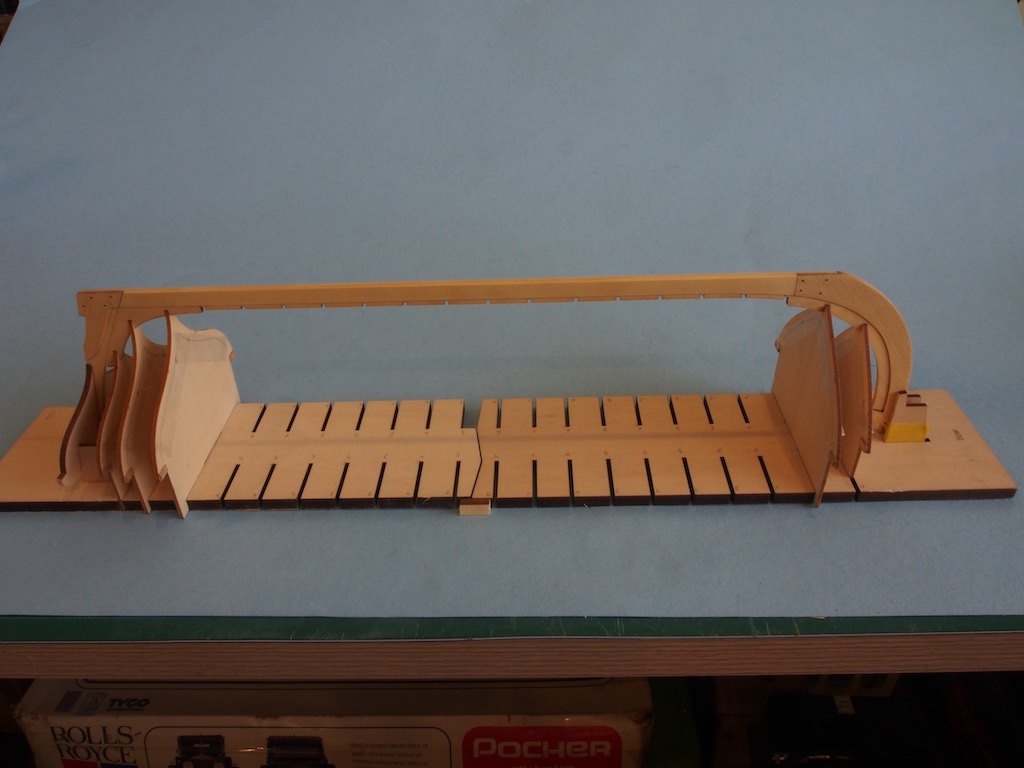
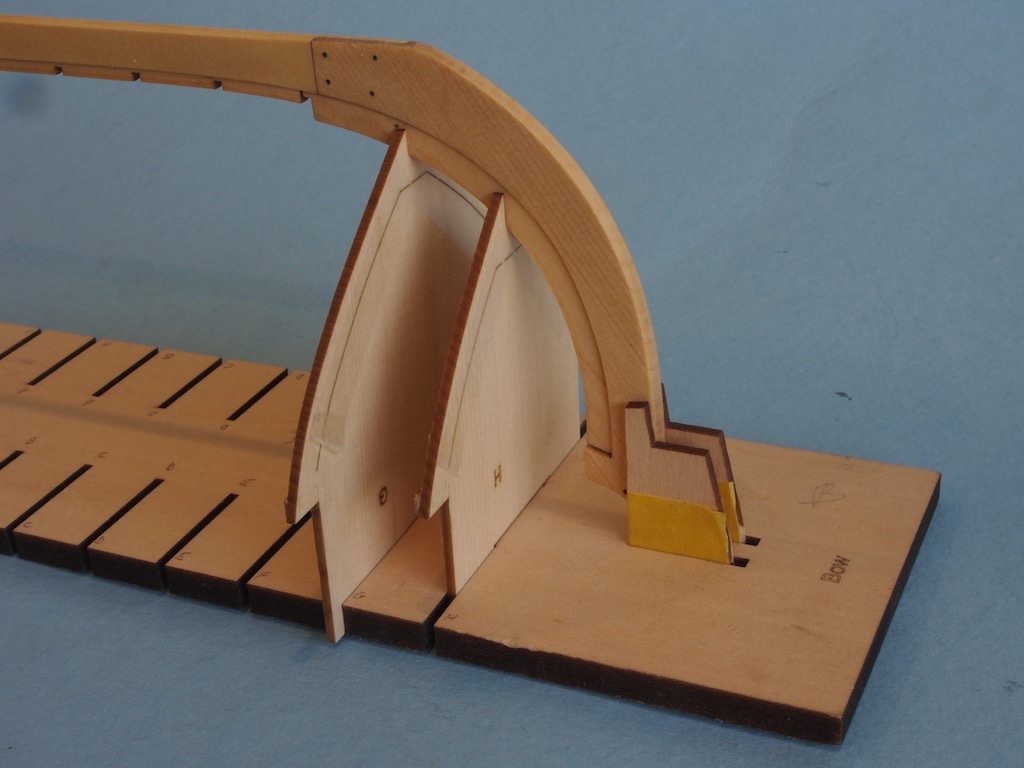
The two additional bolsters were also added to the build board at the stern as per the instructions.

The double frames were then prepared following the instructions. The way Chuck has designed this kit makes this a particularly easy task.
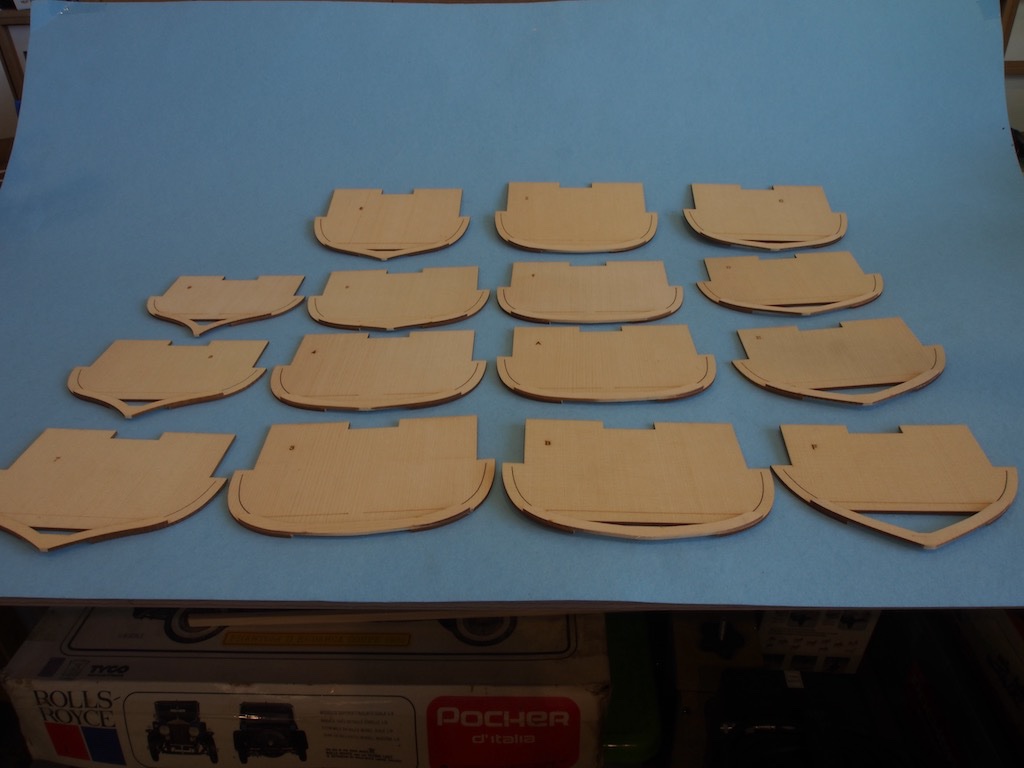
The frames were then all test fit into both the build board and the keel slots. To adjust the fit in the build board required only a few light passes with some 240 grit sandpaper. The keel notches all needed a light pass with a file to provide a snug fit.
The frames are now ready for gluing.
-
Thanks Johan,
I recommend you start your own build log. It doesn’t matter that you’re already well into the build. A build log is the best way of seeking advice from others and to show us your progress. You will find no judgement here, only helpful advice and encouragement. I look forward to following your progress when you do.
-
Congratulations on a fine build Glenn.
- Glenn-UK, Canute and Ryland Craze
-
2
-
 1
1
-
-
Johan,
This was my first foray into fibreglass. A detailed explanation of my experience and the process I followed starts on page 5 of this log. I also made references there to an excellent “how to” guide written by Pat Tritle over on the RC groups forum. The actual process you use may vary slightly depending on the type/brand of resin you are using. I used West Systems. To answer your specific questions:
1. I did not have to do any specific was removal process - I just sanded.
2. Yes, you will need a clear finish - many coats - over the resin if you want a highly polished finish. I used three coats of resin over the fibreglass and then four coats of spar marine varnish on top of that. I applied graphics after the first coat of clear and then sealed them in under the following three coats. I used a spar marine varnish as it has UV protection to stop it yellowing. You need many coats to allow the sanding/polishing process, which essentially is removing layers to get to a very even final finish. Is it tedious? Yes. Is it worth the effort? Absolutely.
My advice is, take your time, be patient, and trust the process.
Oh, and make sure you do some test pieces first......
-
I’ve just found your build John. As I have this kit in my “stash”, I’ll follow along with interest as you tackle the various challenges. Looks like you’re doing a great job so far.
-
Sorry to hear about all the fires over there Bob. As you know, we experienced a similar thing here in Australia during our last summer. The smoke rolled in here at the beginning of December and pretty much put a stop to all outdoor activity for a couple of months. The fires here got close enough that we actually evacuated one night - fortunately that scare didn’t eventuate into anything more serious but we had quite a nervous few weeks. I think the smoke finally left when we received an almighty hailstorm that did record damage across the city - narrowly missed our house though. And it seemed we were just getting on top of that when COIVD joined us. What a year!
I’ll certainly be continuing to follow your excellent build as and when you have time for it.
- BobG, egkb and Ryland Craze
-
3
-

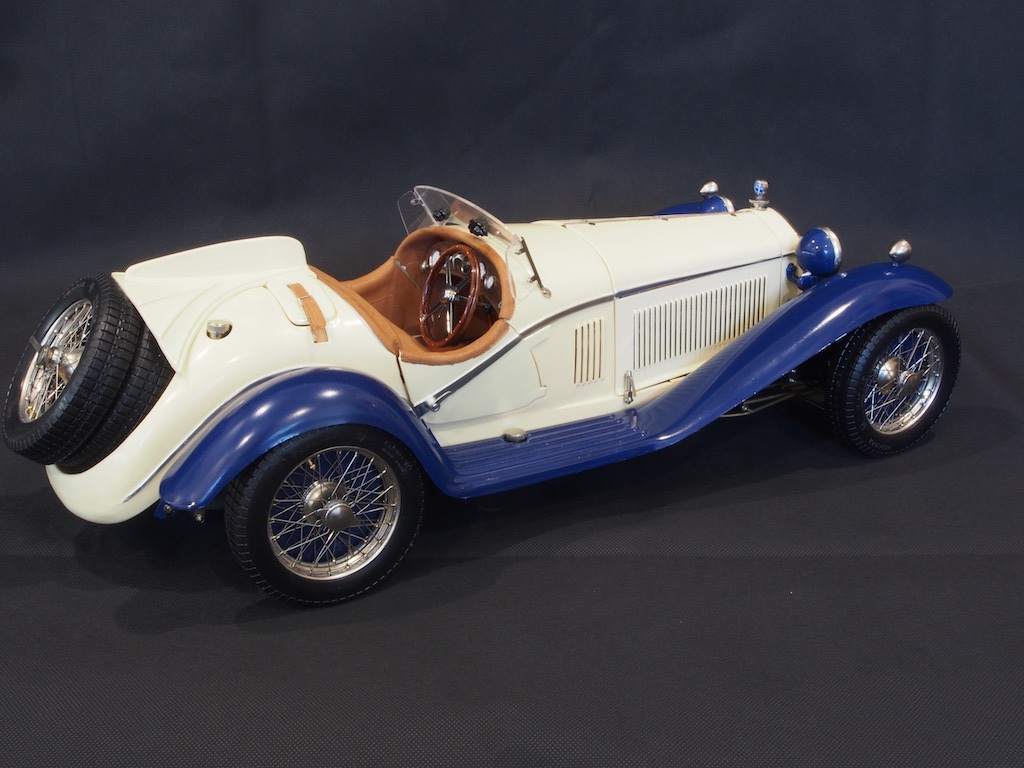
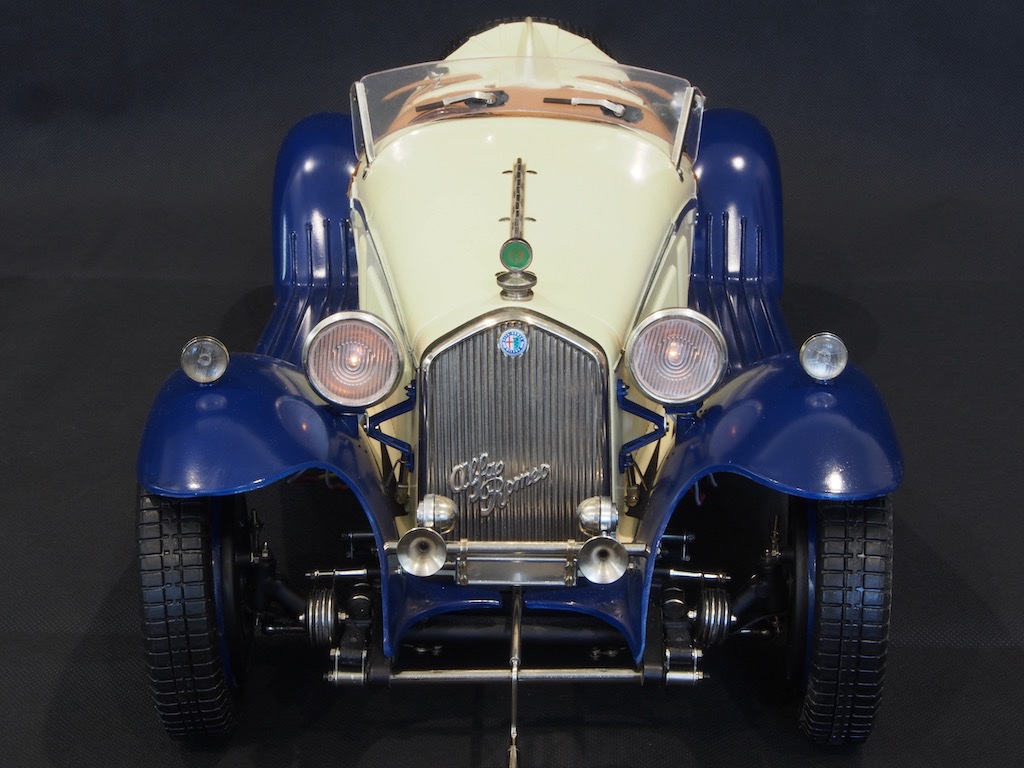
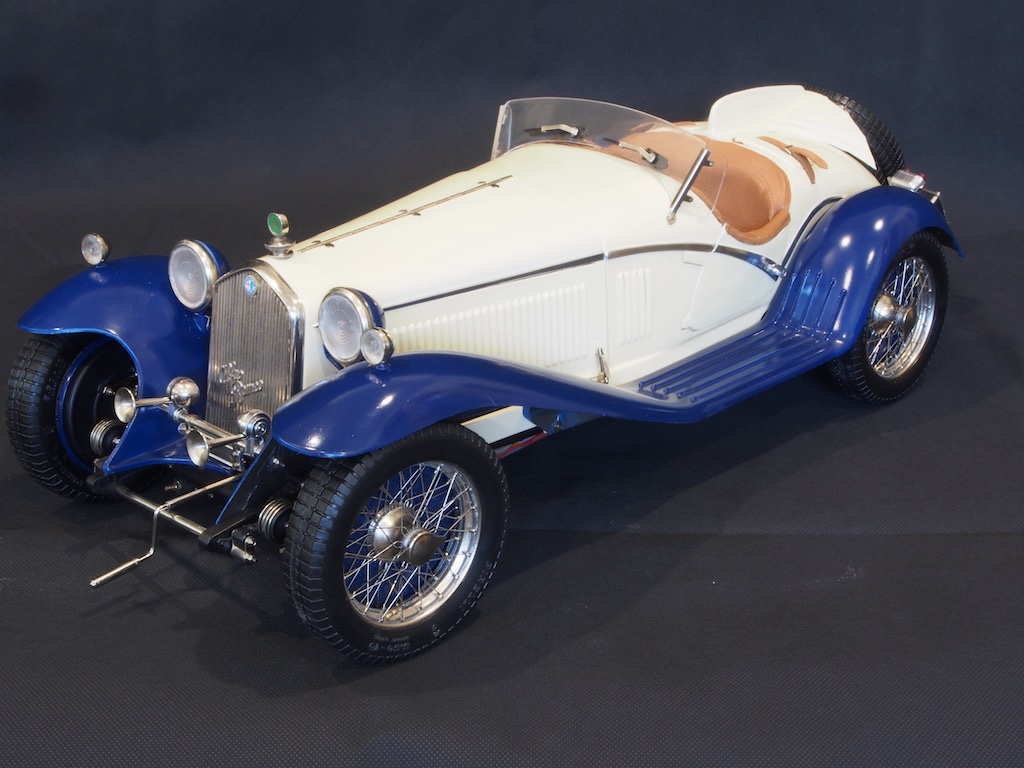
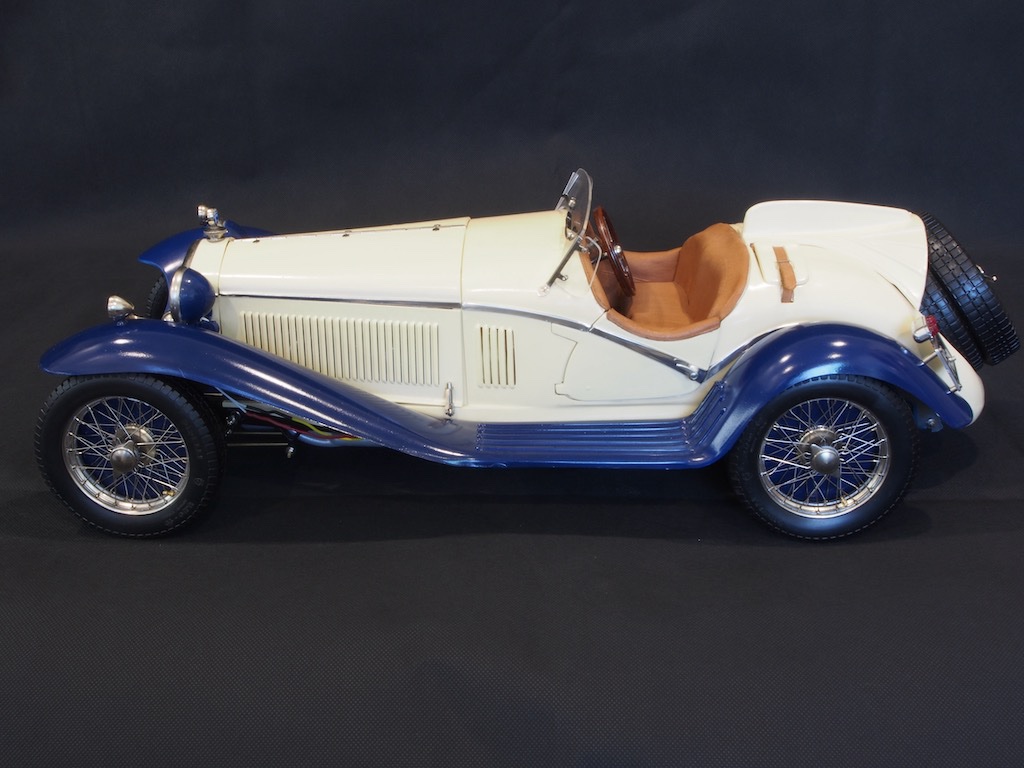
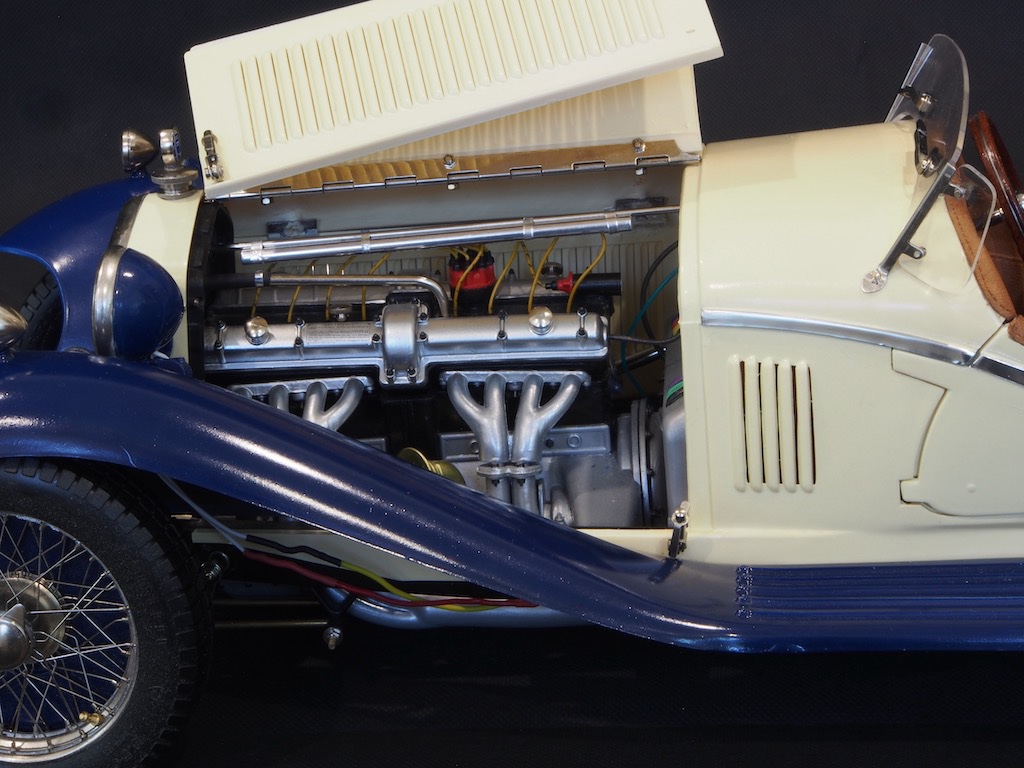
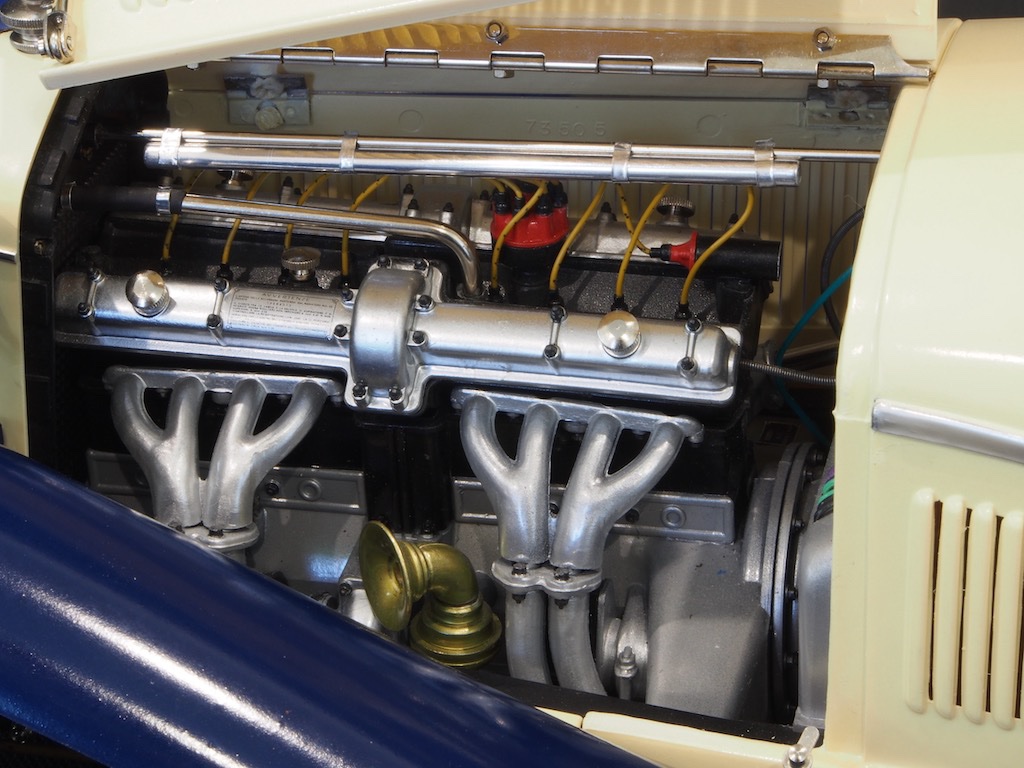
Alfa Romeo Spider Gran Touring by gjdale - FINISHED - Pocher - Scale 1:8
in Non-ship/categorised builds
Posted
Thanks for all the kind comments folks.
Mike - yes, the bodywork is painted. I chose colours as close as possible to the kit parts as I liked the colour combination. I wasn’t entirely satisfied with the paintwork in the end. I used Vallejo acrylics with Pledge/Future as the gloss clear coat. I think for the next one I will use enamel paints instead of acrylics as I believe these can be polished, whereas the acrylics just came off if I even showed them the polish! Current thinking is enamel paint with a 2K clear (probably Zero Diamond finish 2K clear). I’ll certainly be doing a lot of testing anyway.
I’ll likely be doing a few more boat builds before the next Pocher though....