


gjdale
-
Posts
4,871 -
Joined
-
Last visited
Content Type
Profiles
Forums
Gallery
Events
Posts posted by gjdale
-
-
Sorry to hear about the health issues Bob - particularly with the whole COIVD thing happening in the background around you as well. Take your time coming back - we'll be waiting when you're ready, some of us more patiently than others.....😉
Glad to hear you've picked up your guitar again in the meantime. One should always have music in one's life.
-
-
Thanks Rusty and Bob, and also all of the likes.
The new stock of monofilament fishing line has finally arrived, so I’ll now be able to complete the “nailing” of the hull. While I was waiting for the post to arrive, I went ahead and completed the bolsters and the thinning of the cap rail and frames. The bolsters were quite tricky, as anyone who has reached this point before me will attest. Chuck even went so far as to provide six blanks in the kit to make the two bolsters required – and it’s just as well that he did. I started on the starboard side and blew two attempts before getting the third to a point that I was satisfied with. The port side only took two attempts, so learning clearly took place! I even had one blank to spare!!!😁
Here’s what they looked like after I glued them in place initially.
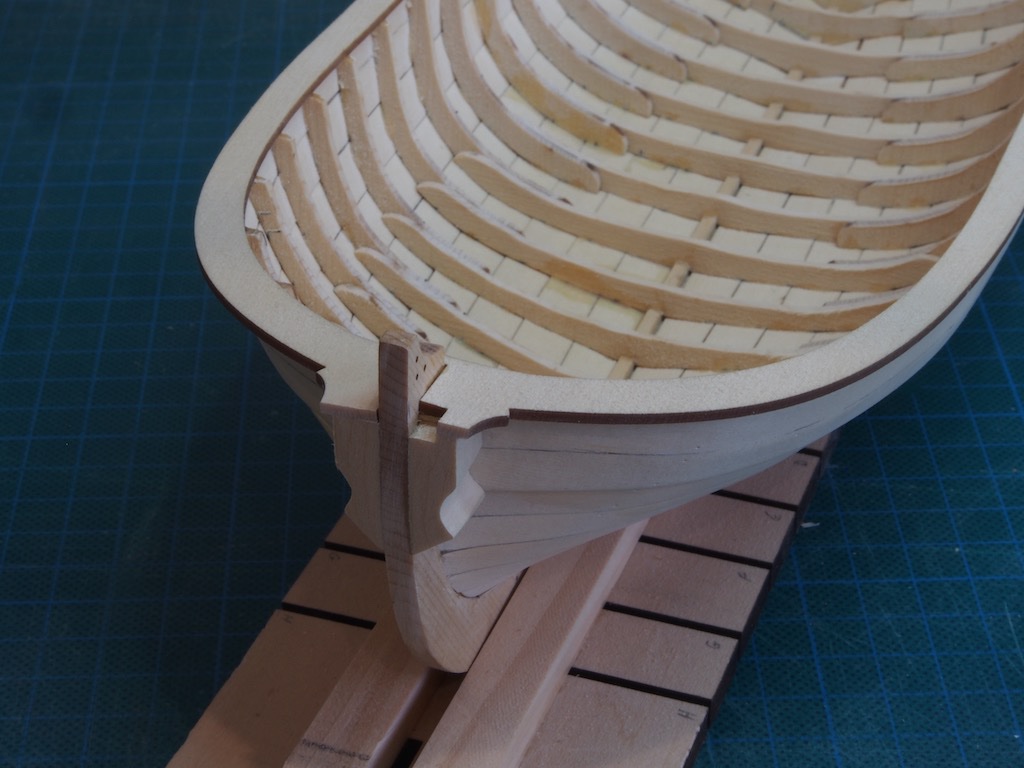
I then realised that the lower edge should have been tapered/bevelled considerably, so was faced with the challenge of achieving this with the bolsters in situ. Fortunately, with the assistance of Mikhail’s wonderful micro chisels and some sandpaper, this actually turned out to be easier to achieve than I’d first expected. Here’s the subsequently modified bolsters.
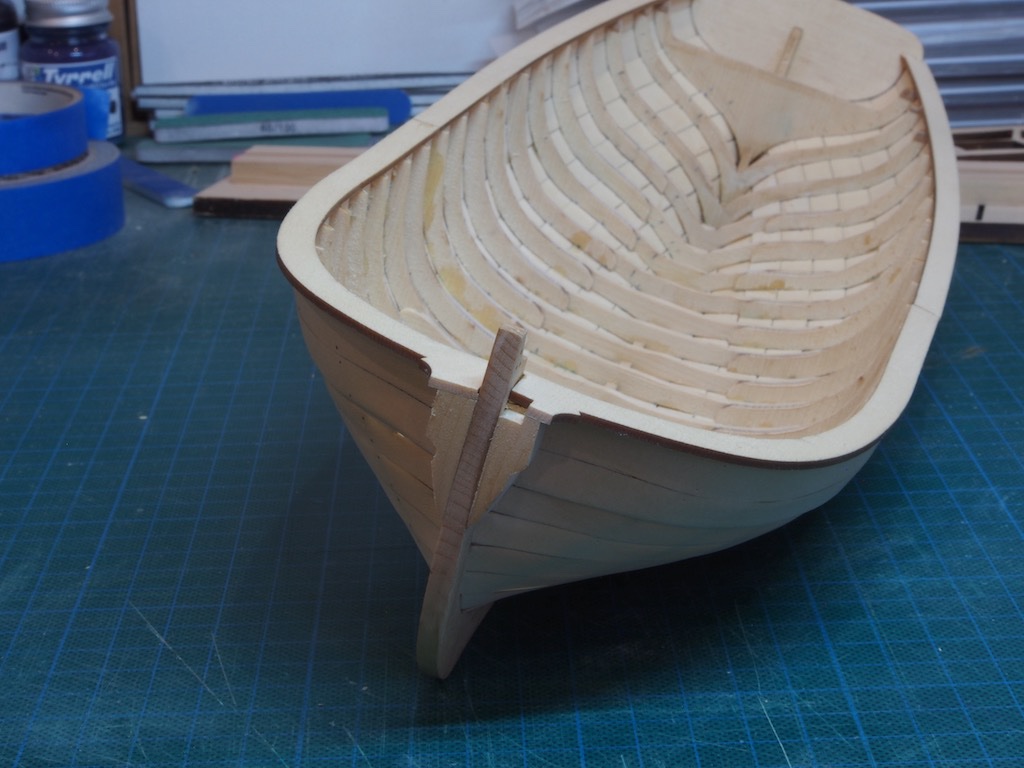
With the bolsters in place, I was then able to go ahead and thin the cap rails. Using the technique described by Rusty in his log, I used a scrap of 1/32” material to guide the formation of the outboard edge to a uniform overhang, then using a pair of compasses marked a line 5/32” from the outboard edge to guide the thinning of the inboard side.
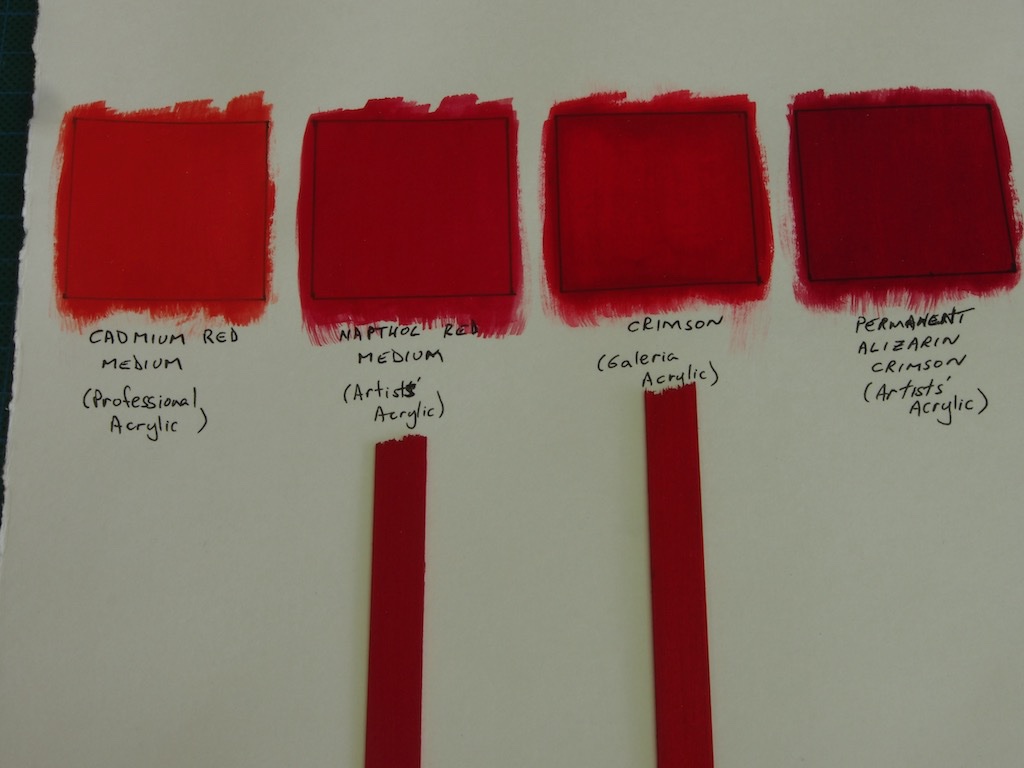
At this point, I had to wait for the fishing line to turn up before going further, so my final task here was to decide on the paint colour for the cap rail etc. I had remembered reading somewhere what brand/colour Chuck had used but couldn’t find it again, so I PM’d Chuck and asked him directly. Chuck said that he used the Winsor and Newton Galeria Acrylic range of paints and the colour was Crimson (for anyone else wondering). I also noted that some others had chosen slightly different variations. For example, someone (can’t remember who) used Cadmium Red. There is an art supply store nearby, so I popped out and bought some of the Galeria Acrylic Crimson, and some Cadmium Red (Winsor and Newton Professional Acrylic range). I also had a couple of other reds in my existing range, including Naphthol Red (medium hue) and Permanent Alizarin Crimson – both from the Winsor and Newton Artists’ Acrylic range. I then did some test swatches on some art paper for comparison. The results are below, and I’d appreciate any thoughts from others on my eventual choice.
What I noticed straight away was that the Artists’ Acrylic / Professional Acrylic range behaved very differently from the Galeria range – they mixed with water on the wet palette in a very different way that is hard to describe, and also laid down on the surface material quite differently, going on with much more even coverage and also seeming to dry more quickly. I guess there’s a reason this range is double the cost of the Galeria range.
I quickly discarded both the Cadmium Red (too orange) and the Permanent Alizarin Crimson (too purple) from the choices and was left with the Crimson (Galeria) or the Naphthol Red (Artist’s Acrylic). The Naphthol Red appears slightly darker and more subdued than the Crimson and I think I like that colour tone slightly better, though it’s a very close race in my mind. Being much nicer to work with tipped the balance for me in the end, so my current choice is the Naphthol Red. I know that photography and computer monitors will impact the way things appear on screen, but I’d appreciate any thoughts on my colour choice.
Now I’m off to finish the “nailing” and prepare the inboard sheer strake…
- Ryland Craze, JpR62, BobG and 5 others
-
 8
8
-
-
-
-
-
Sorry to hear of your accident. Always remember that every power tool in your workshop is actively trying to murder you!
- Matt D, Kevin, Ferrus Manus and 1 other
-
4
-
-
Nice to see you start on this one Ken. I’ll follow along too as I’m not too far ahead of you - at my usual building pace, you’ll overtake me in no time!
- BobG, Old Collingwood and Canute
-
3
-
Sorry to hear of your personal troubles Tom - hope things get sorted soon for you. On the CA glue side of things, try using a respirator with an organic vapour filter - it’s about the only way I can use the stuff without making myself seriously ill for several days.
- mtaylor, Canute, popeye the sailor and 1 other
-
4
-
-
The best laid plans....
Having intended to complete the monofilament nails prior to removing the hull from the build board, I found I only had enough monofilament to complete one side. Perhaps I drilled the holes waaaay to deep…. I thought I had previously tracked down some more monofilament but what I had in the drawer turned out to be a braided line and of no use at all. For some reason, black fishing line does not appear to be a popular choice in Australia as I could not find a single supplier of it within Australia. I did, however, manage to find a shop in New Zealand with an online presence, who happened to stock exactly the right stuff. I’ve ordered that, so hopefully I won’t be faced with the two-month delay I’ve been experiencing with other international orders lately.
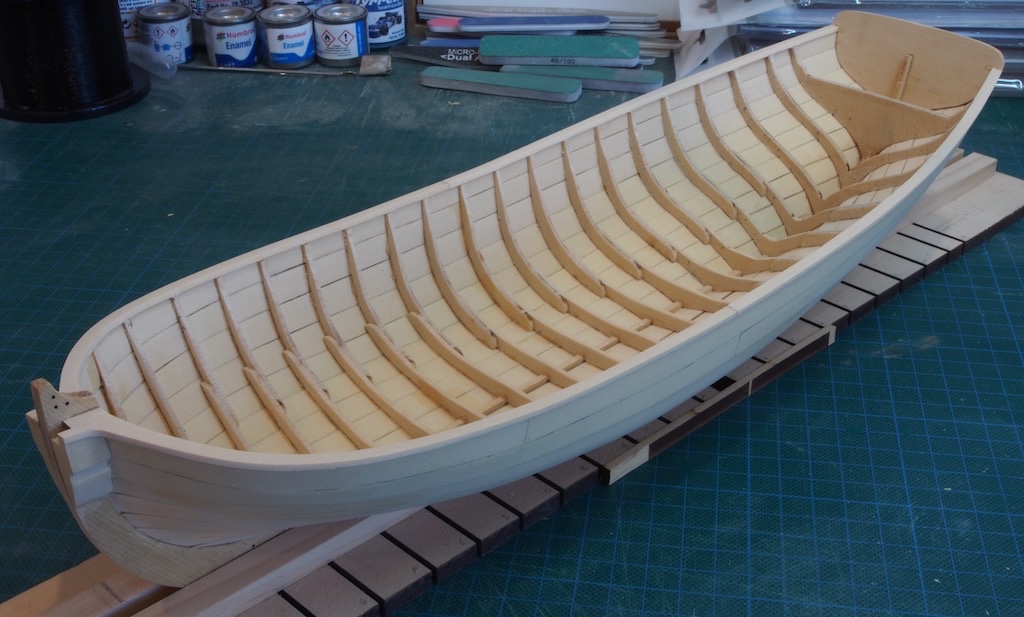
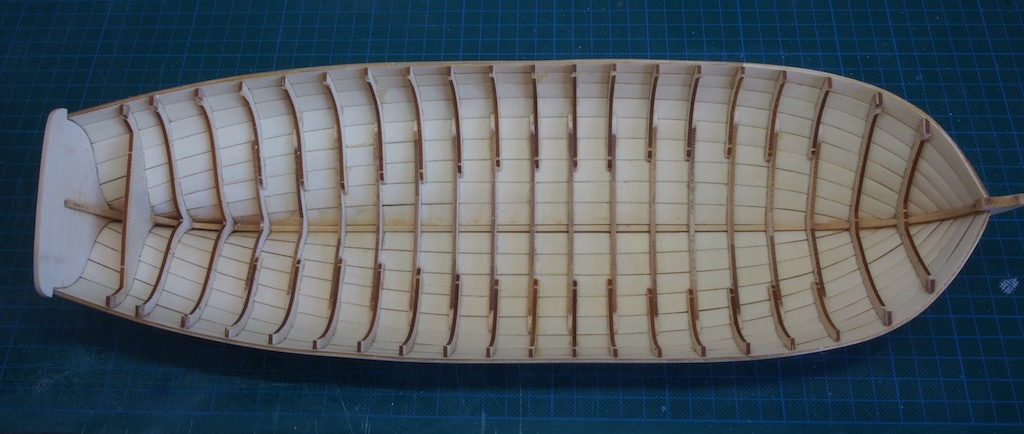
So here’s where I got to before exhausting my kit supply:
A quick re-think of the strategy and I decided to go ahead and remove the hull form the build board. This I did following Chuck’s instructions and encountered no problems. Similarly, I removed the frame centres following the instructions and again encountered no problems.
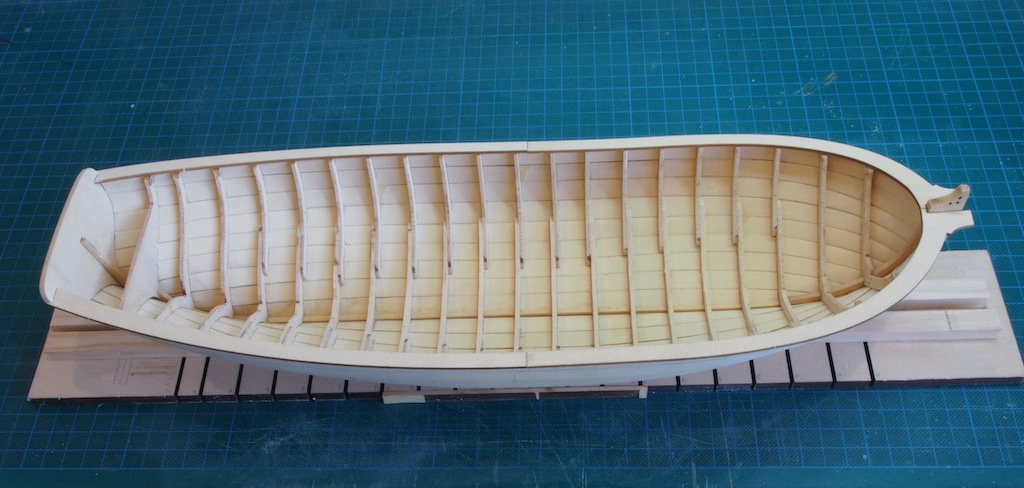
Next up was to install the cap rail. The only issue I ran into here was that according to the instructions, I should have been left with a 1/16” gap between the upper strake of planking and the “ears” on the transom. For some reason my planking went all the way up to the ears on both sides. After fairing the sheer, I simply cut a notch out of the lower part of the ear to make room for the cap rail. The cap rail then went on easily. While I was fairing the sheer, I also did an initial clean-up of the frames – really just removing the laser char.
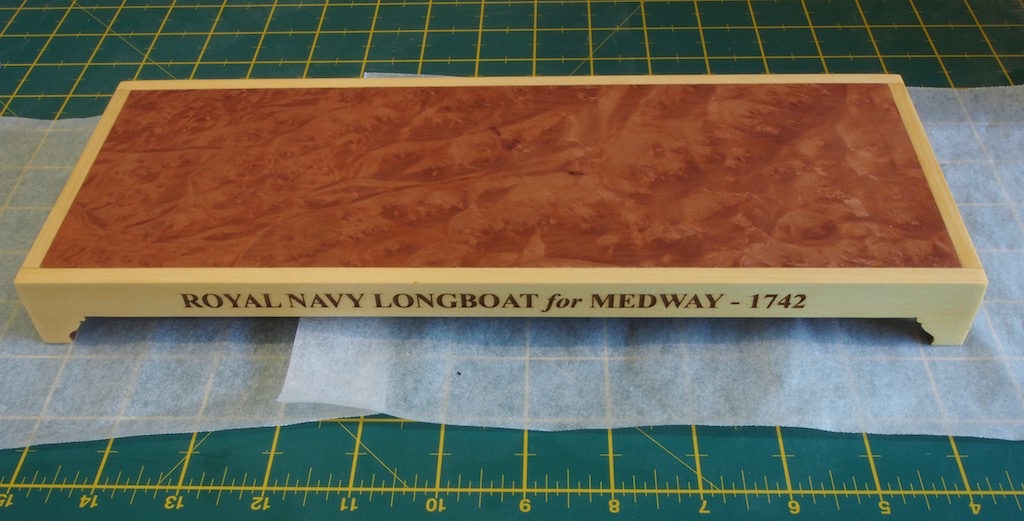
Ryland kindly gave me a tip to fit the pedestals to the hull at around this point as well, noting that this would be much easier at an early stage of the build – a point well made. So, I decided to make up the display base this weekend. I initially thought the substrate for the burl veneer was undersized, but after a quick PM exchange with Chuck realised that I was over-thinking things and there was no problem at all – in fact, it’s designed this way. Makes perfect sense when you actually put it together….
Anyway, here’s the display base completed with just one coat of satin WOP at the moment. Will apply further coats in due course. The pedestals have also been assembled and coated. I’ll fit them properly to the hull once the finish is dry.
I’m now officially past the point where I canned my first attempt. While this one is not perfect, it is so much better at this stage than the first one, that I’m really pleased I decided to bite the bullet and start over.
Next up will be the challenge of the bolsters…next weekend….
- rafine, MEDDO, Nunnehi (Don) and 10 others
-
13
-
-
Another interesting subject James - I’m in for the ride.
- Canute, Egilman, Old Collingwood and 3 others
-
6
-
Thanks Ryland, and thanks for the tip re the display pedestals - I hadn’t even considered that aspect!
- Ryland Craze and Canute
-
2
-
Thanks Mike,
I'd be very interested to hear/see how you go with the Zero paints and 2k clear.
- Canute, popeye the sailor, lmagna and 4 others
-
7
-
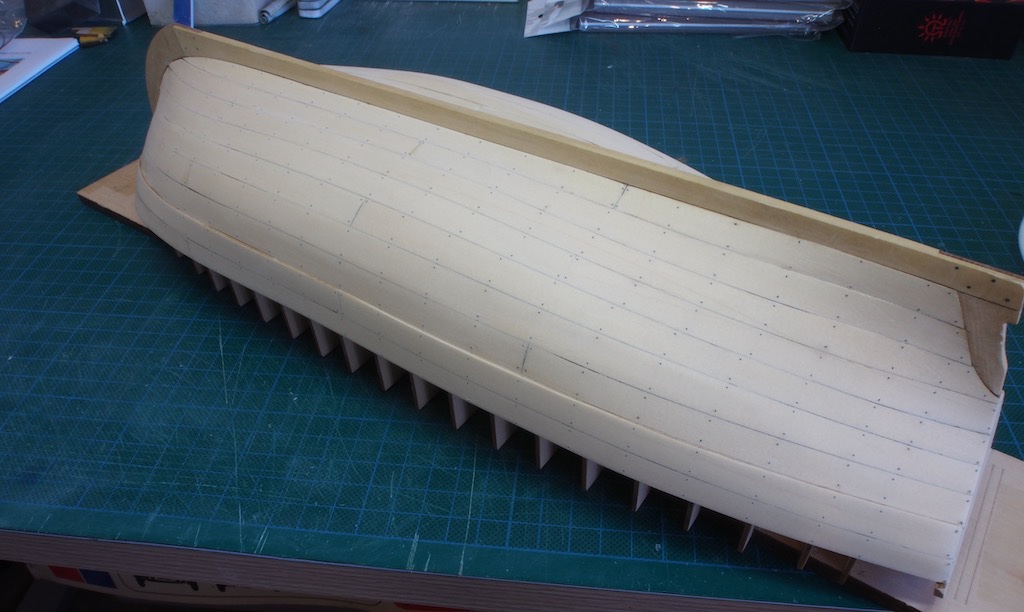
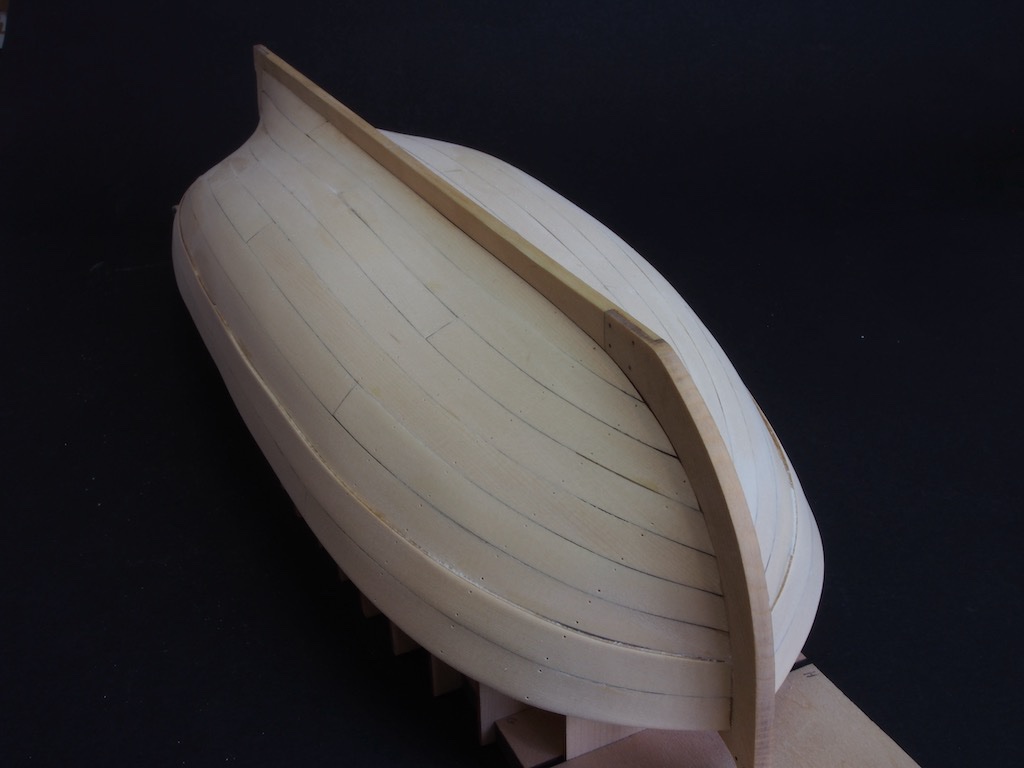
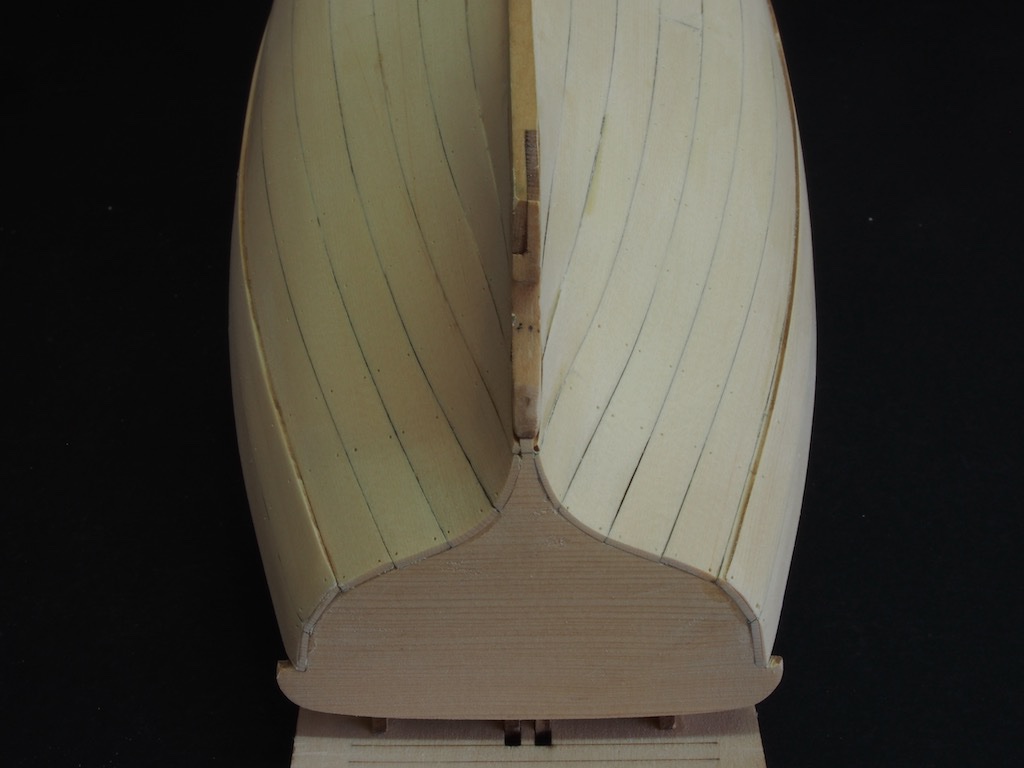
Planking has been completed. Although this was much easier using Chuck’s methods for bending and gluing, I still had some very minor “staircasing” at the bow, although this was nowhere near as bad as on my first attempt. Here is the first layer completed after an initial light sanding:
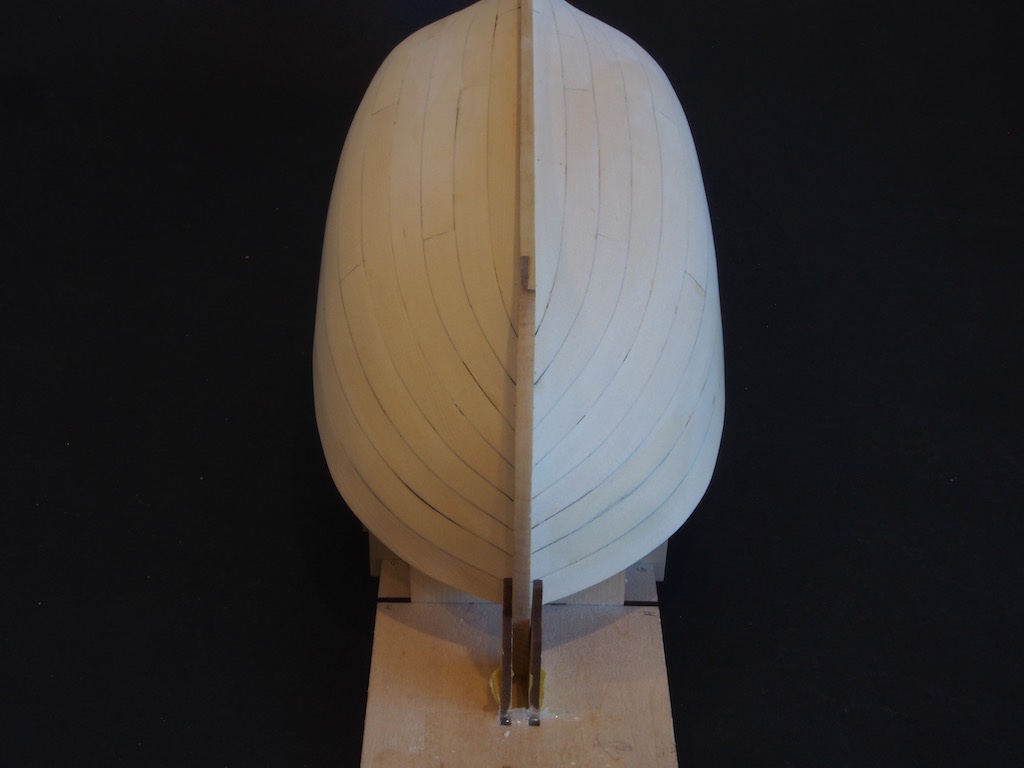
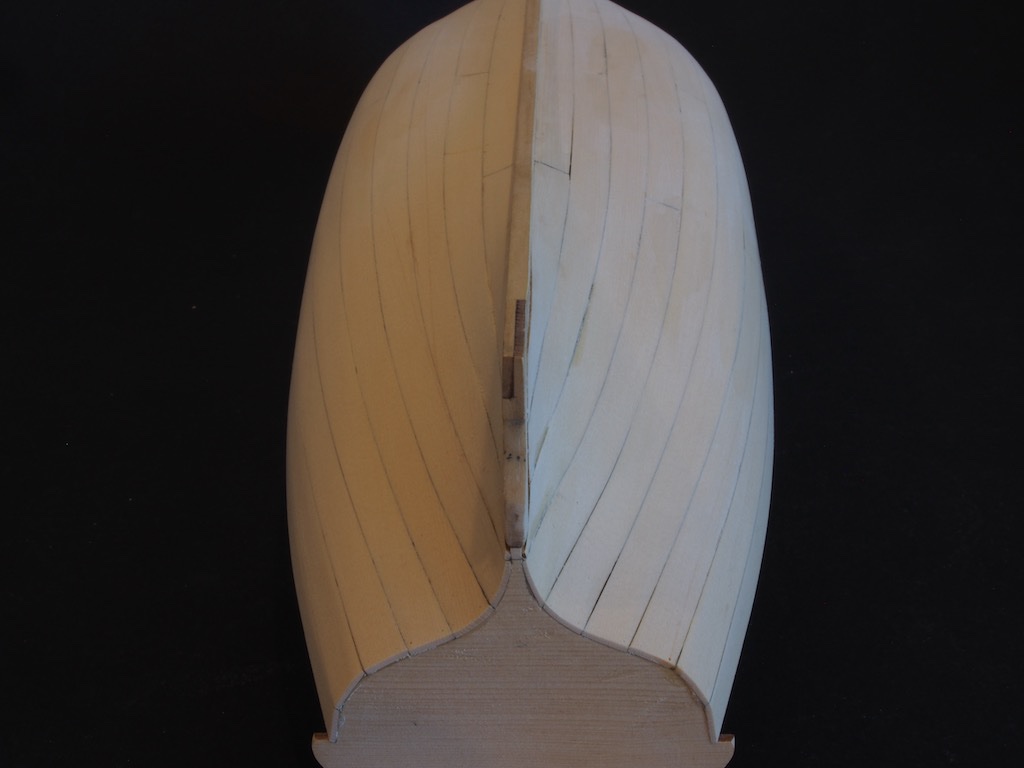
The whales were then added. I did these in reverse order, working down from the gunwhale in order to correct any minor misalignment at the bow. Following Chuck’s advice, I used a sharp chisel to pare down the forward end as it approached the rabbet. The aft end was simply sanded thinner for the last half inch or so. All of the holes have been drilled in preparation for the monofilament “nails”. I think I will complete this task and do a final sanding before removing the hull from the build board.
- GuntherMT, oneslim, Ryland Craze and 9 others
-
12
-
Thanks for all the kind comments folks.
Mike - yes, the bodywork is painted. I chose colours as close as possible to the kit parts as I liked the colour combination. I wasn’t entirely satisfied with the paintwork in the end. I used Vallejo acrylics with Pledge/Future as the gloss clear coat. I think for the next one I will use enamel paints instead of acrylics as I believe these can be polished, whereas the acrylics just came off if I even showed them the polish! Current thinking is enamel paint with a 2K clear (probably Zero Diamond finish 2K clear). I’ll certainly be doing a lot of testing anyway.
I’ll likely be doing a few more boat builds before the next Pocher though....
- Landlubber Mike, Canute, Egilman and 7 others
-
10
-
Some very nice progress there Sea Hoss.
-
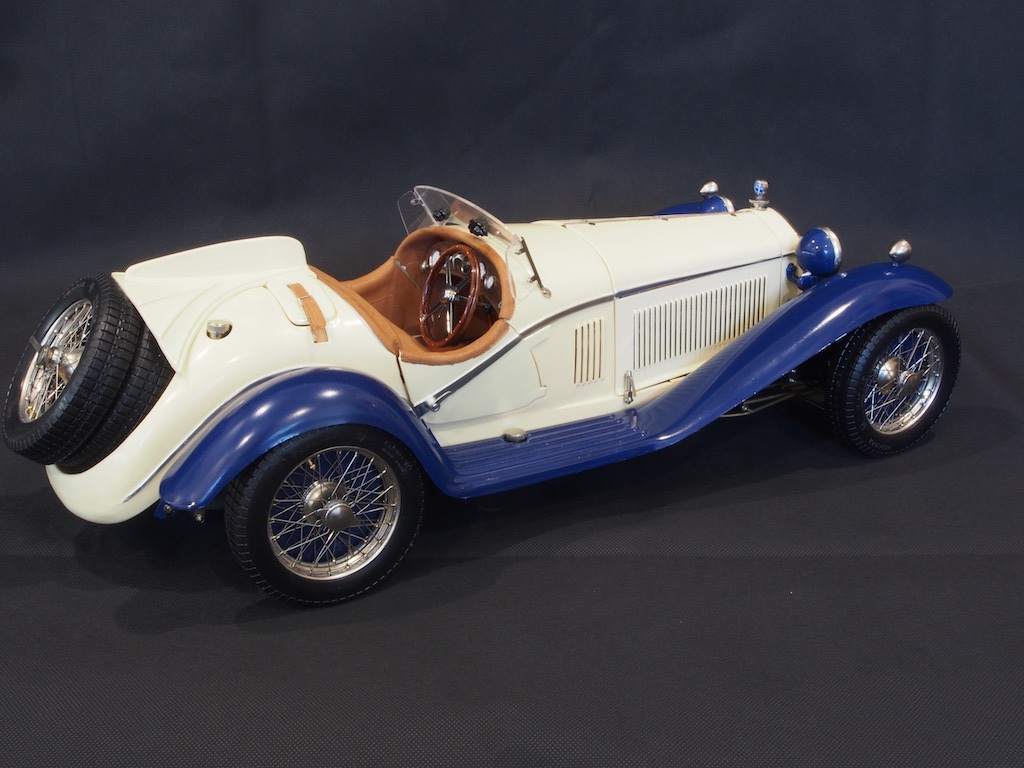
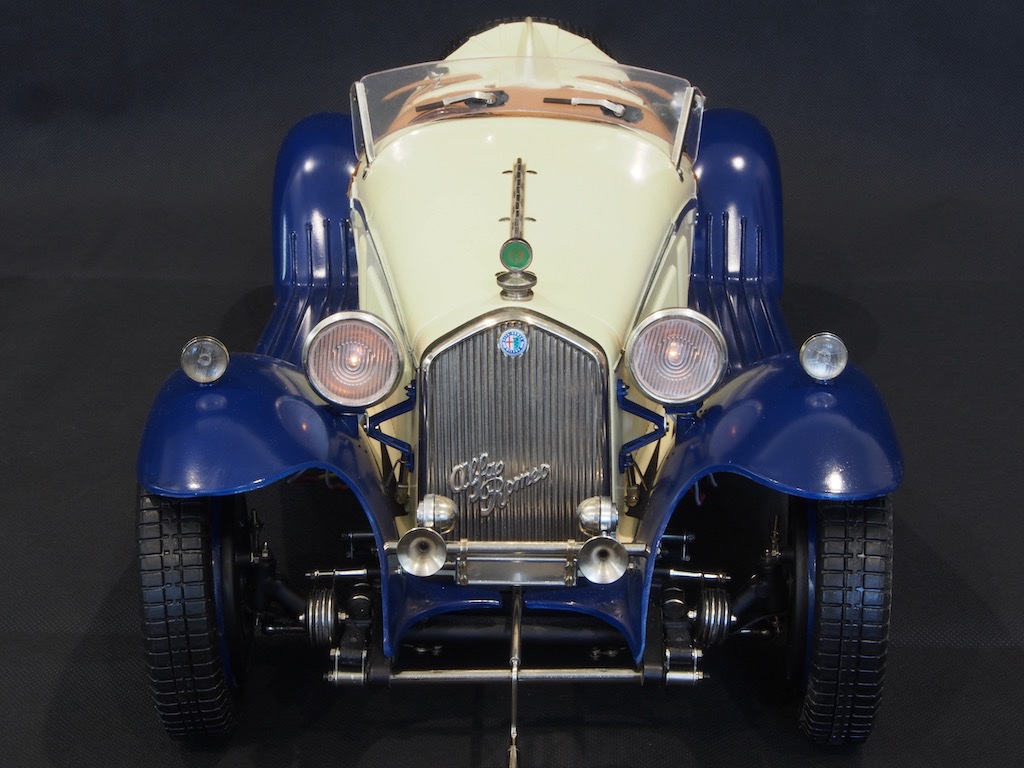
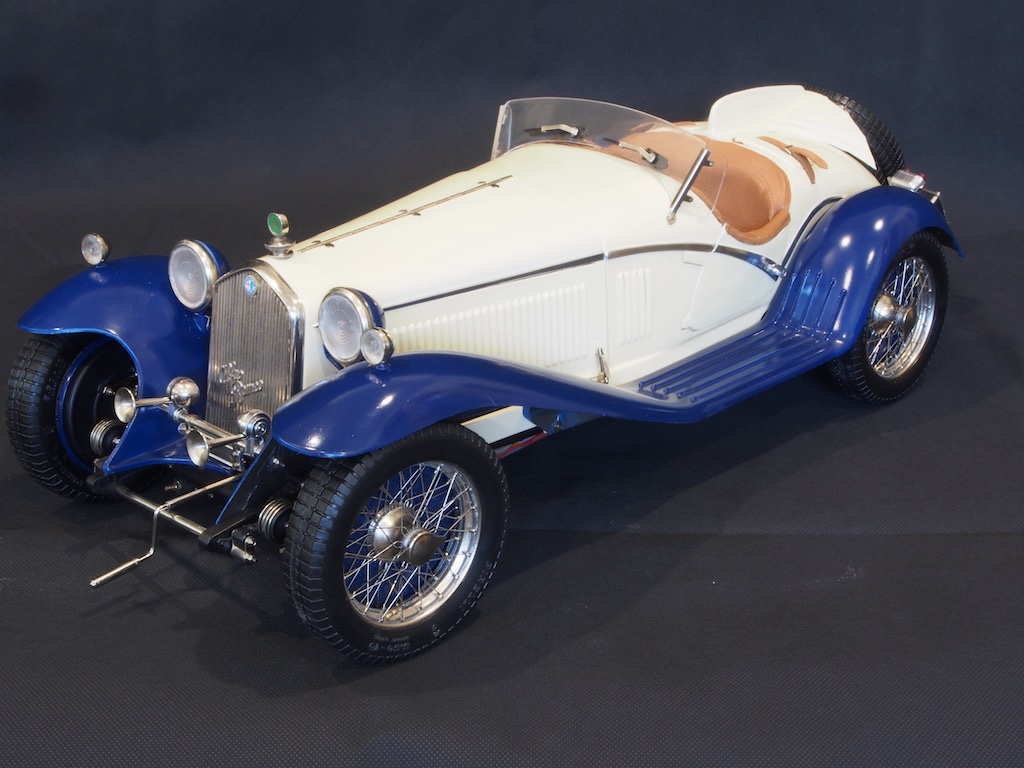
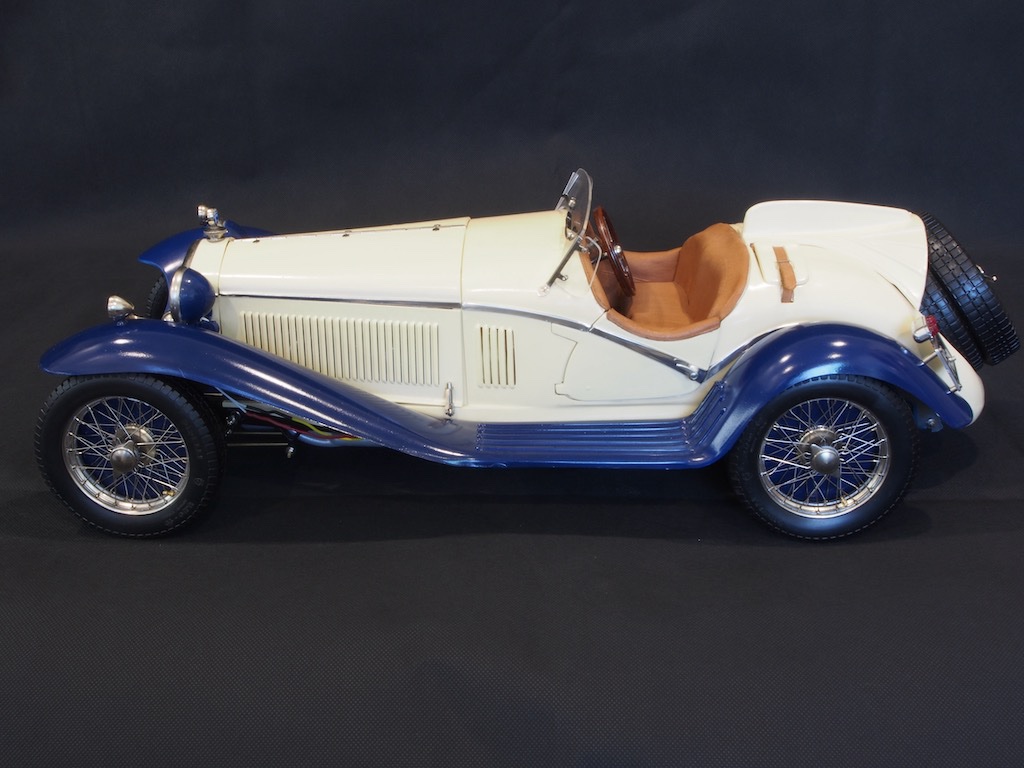
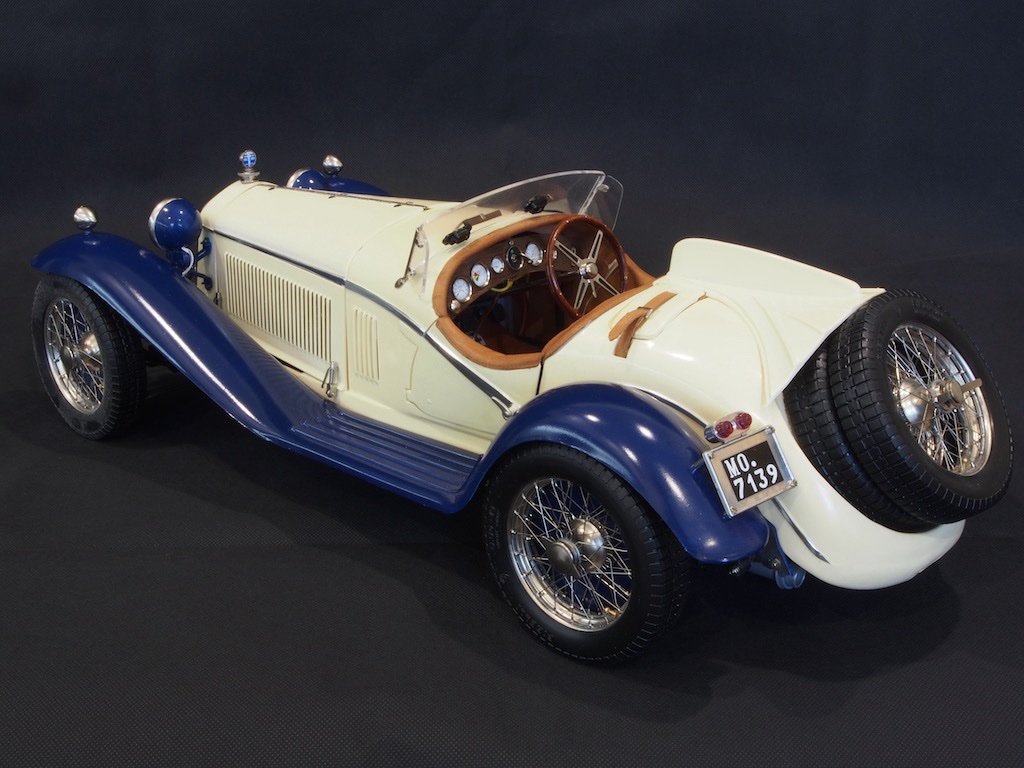
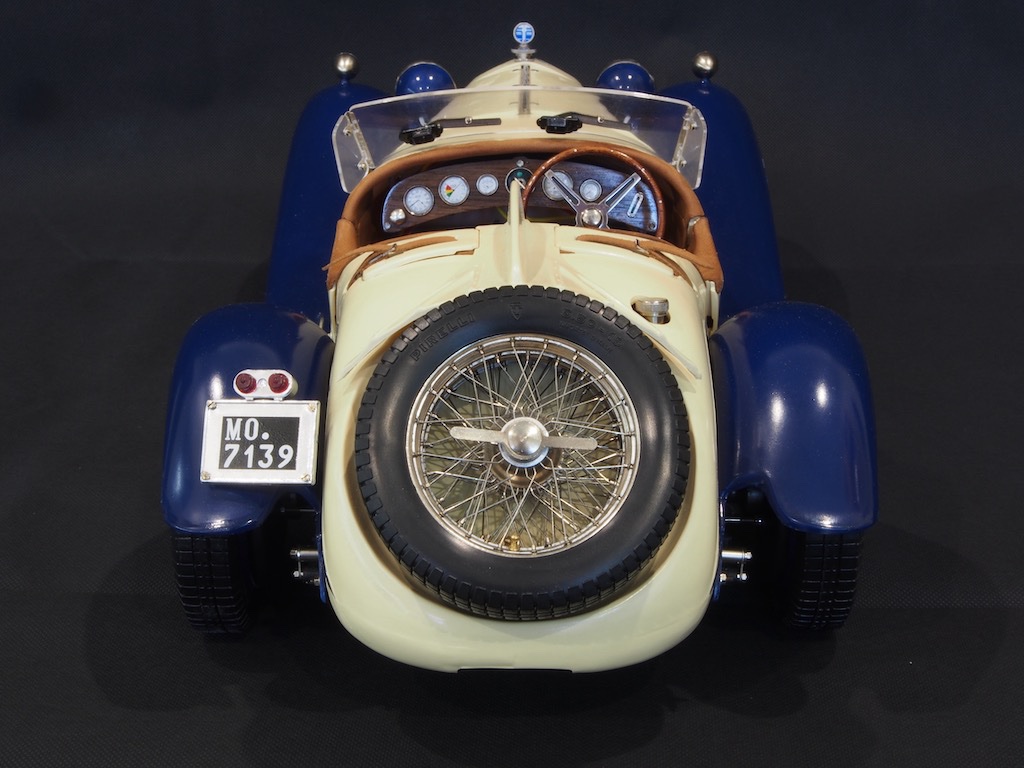
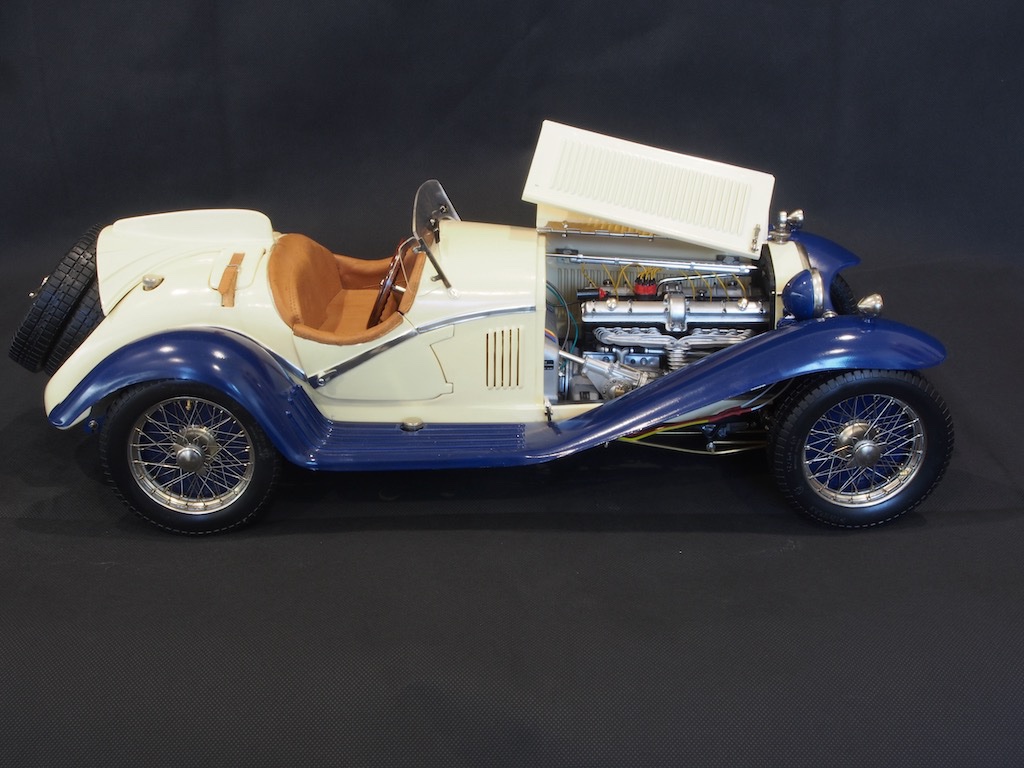
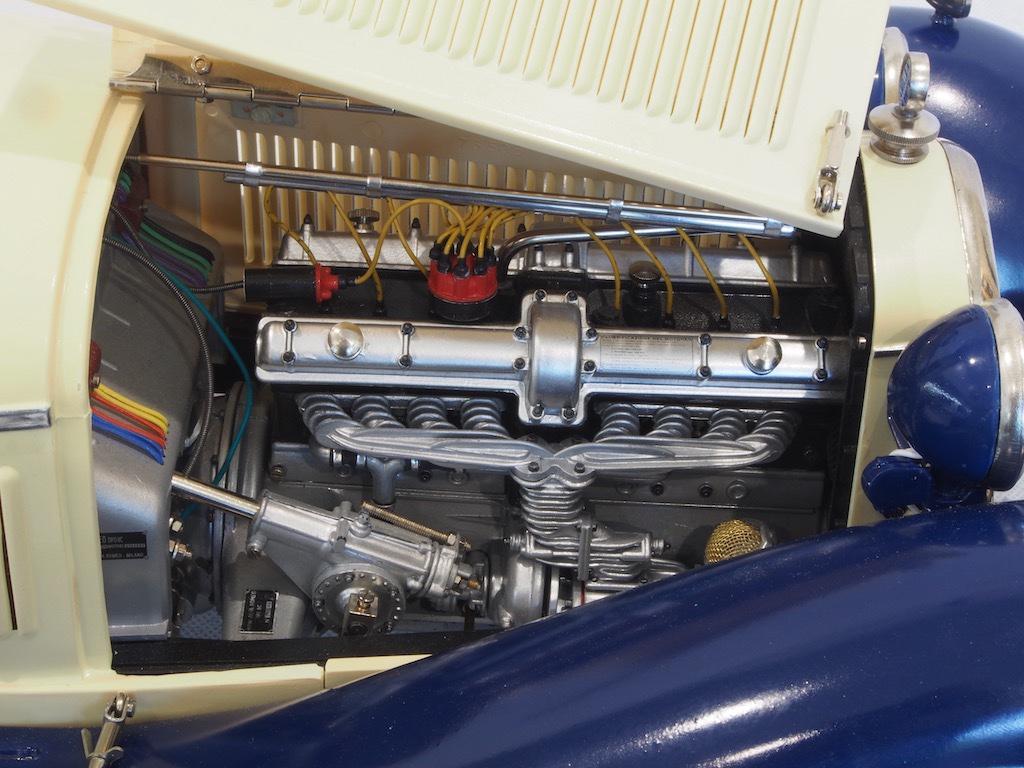
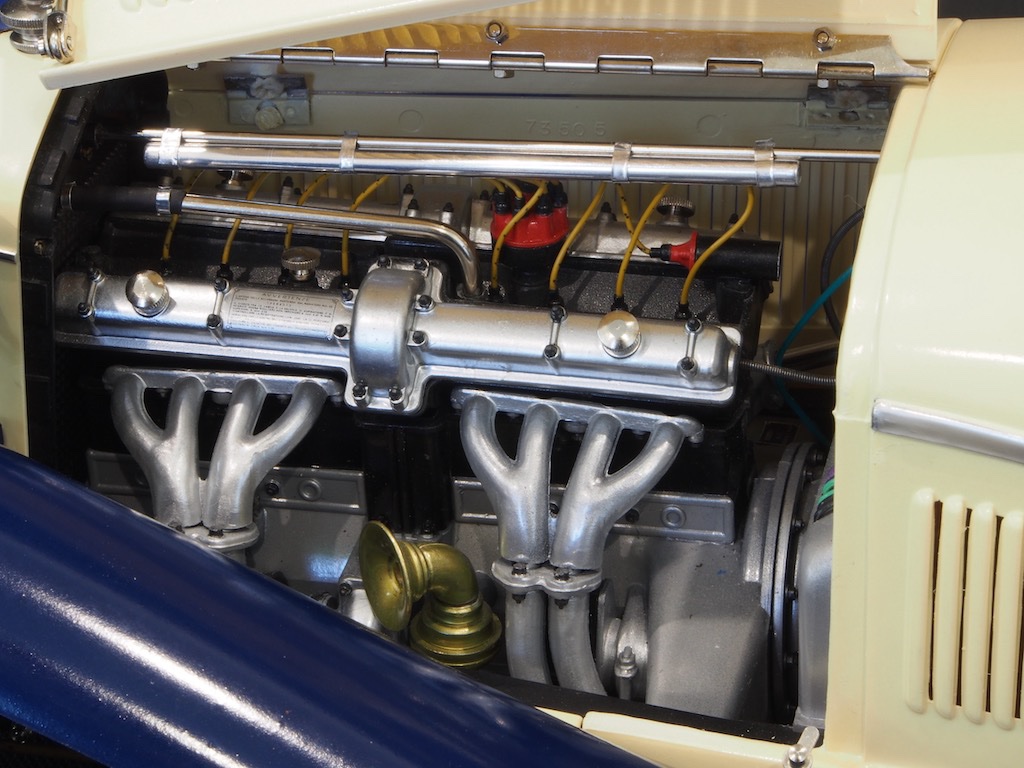
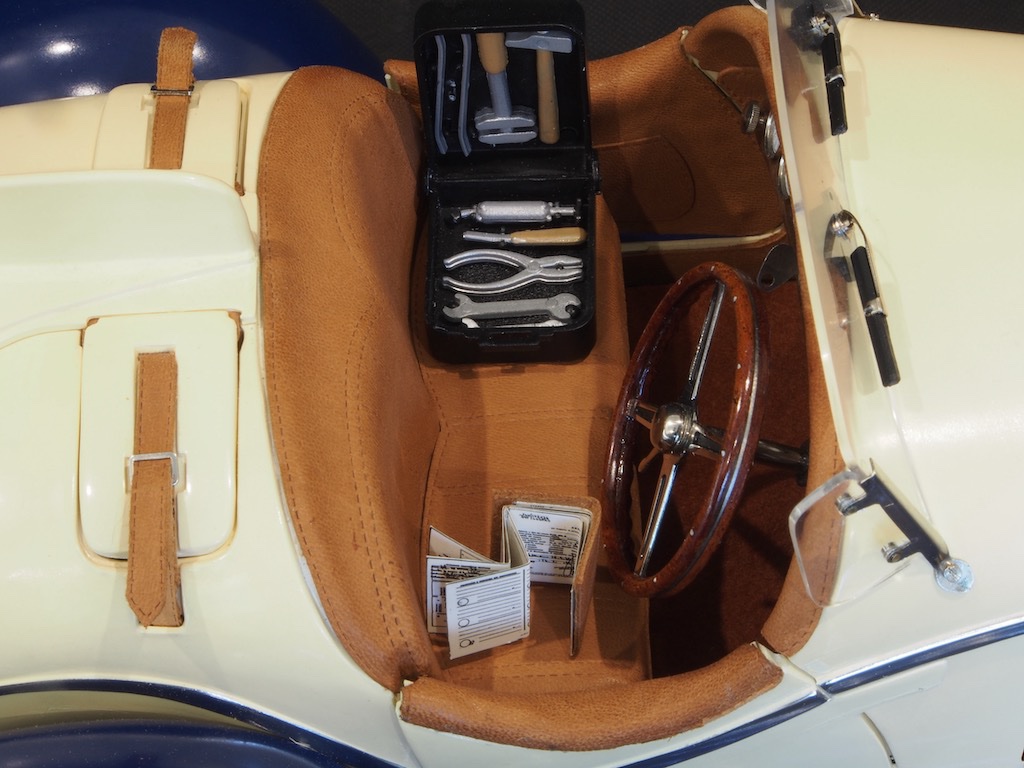
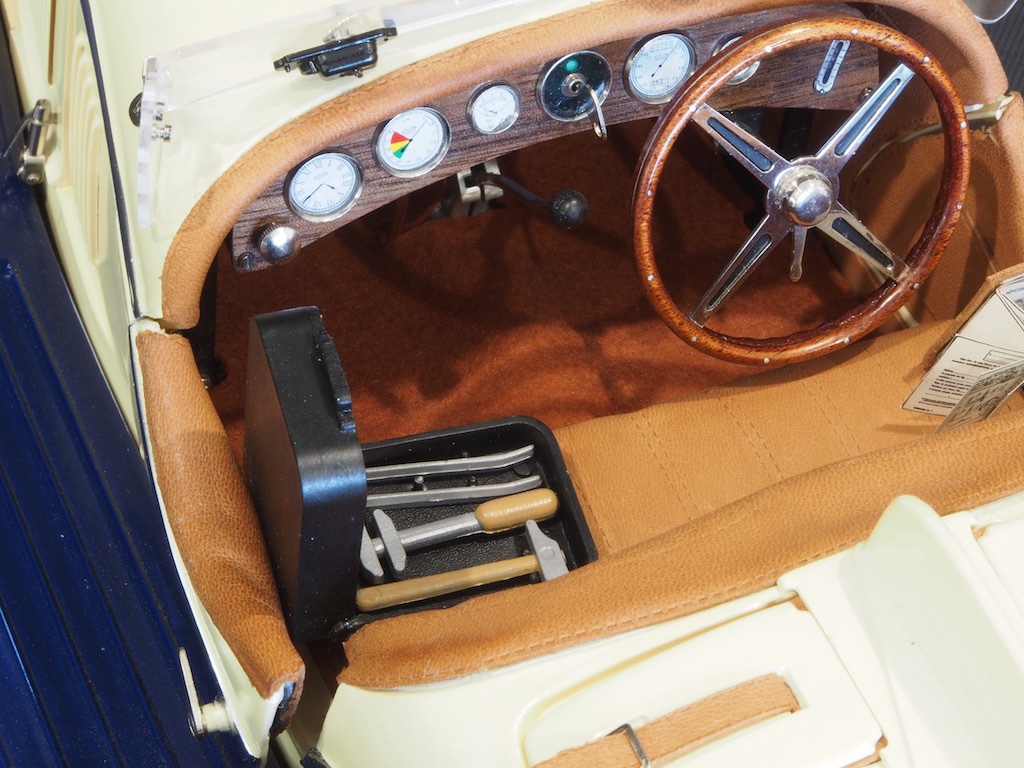
The long-awaited steering hub has finally arrived, almost two months after ordering! All that was required for completion was to install the steering wheel, and then re-install the coachwork and complete the headlight wiring. I also replaced the damaged Alfa decal on the front nose. That took me no more than a few hours yesterday afternoon. Today I did a final glam photo shoot. I would have taken the model outside for this, but it’s been raining here for the last two weeks and showing no sign of easing up. Had to settle for an indoor shoot instead. Here are the final results.

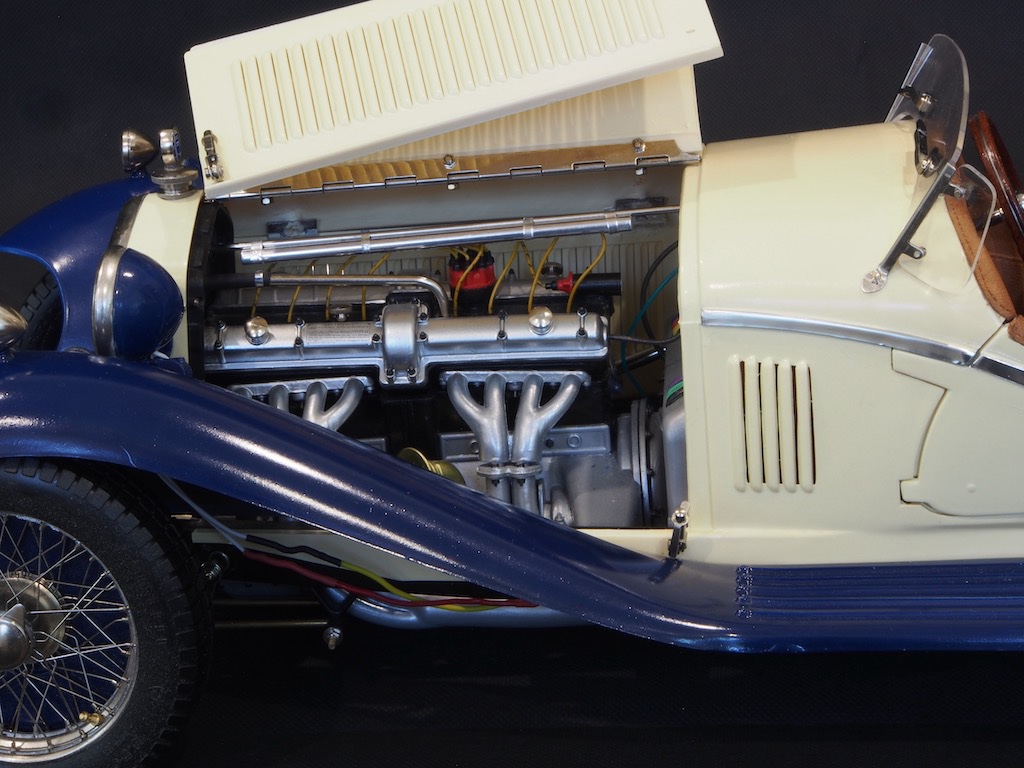
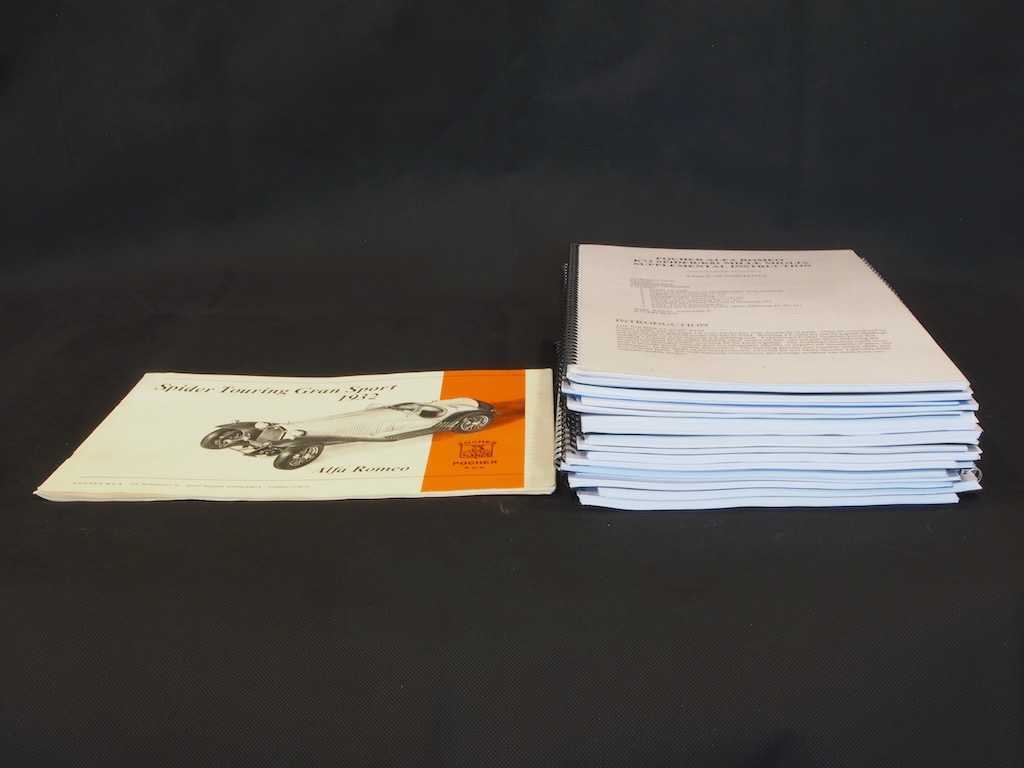
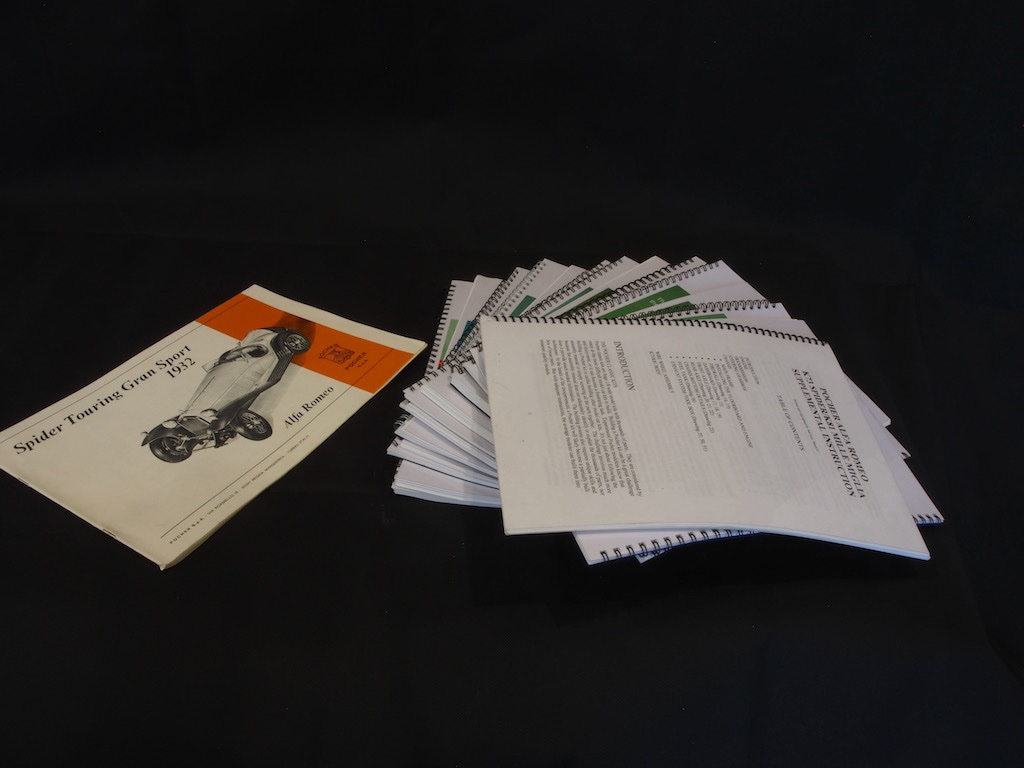
One final comment. This build would not have been possible without the guidance of the wonderful supplementary instructions and photos from Paul Koo. Here is a couple of photos to show the difference. The Pocher instruction manual is on the left: 26 pages, mainly of exploded diagrams. On the right, the 16 booklets of instructions and photo essays from Paul Koo, and that’s not counting the hundreds more photos of inventory parts, completed models, and reference photos.
Thanks to all who have followed along and provided encouragement and support. I hope you have enjoyed following the build as much as I have in doing it. Now I can focus on completing my Medway Longboat for a while.
-
Excellent results on the steam capstan BE - though we expect nothing less from you! She’s looking fabulous.
- BobG, Martin W and Blue Ensign
-
3
-
Thanks Tony.
I just received notification from Australia Post that the parts I ordered from Model Motor Cars back on 08 Sep are due to be delivered today. I should be able to finally finish off this build on the weekend. 😃
- mtaylor, Canute, Old Collingwood and 8 others
-
11
-
I think it would be worthwhile doing it again with the correct number of planks Floyd. Even if you don’t do that, at least use Chuck’s templates for the bow and stern - they provide a really good guide as to how you’re going as you progress with planking as they are based on his pre-cut planks.
Chuck mentions in the instructions that he used a #77 drill for the 10 lb monofilament on planks. He also notes that these represent iron nails in this boat, rather than treenails.


Medway Longboat (1742) by gjdale - FINISHED - 1:24
in Medway Long Boat - 1742 - Public group project.
Posted
Thanks for the kind comments and opinions on colour choice. I've almost finished painting the cap rail - lost count of the number of coats, but it's somewhere between 12 and 20..... I would never have thought of this painting technique before but it certainly works well and is not at all hard to do once you get going. I've been using a "wet palette", which I think really helps as well.
I have a quick question (actually two questions) for Chuck and/or any of you who have been down this path already.
1. Once the cap rail painting is completed (using acrylic paint), is it necessary to use a clear finish over the top of it (for protection)? If so, what do you recommend for this clear coat?
2. In applying WOP to the exterior of the hull, is it advisable to put this over the printed frieze (again for protection), or will the WOP likely destroy the frieze?
Thanks in advance for any and all advice.