gjdale
-
Posts
4,894 -
Joined
-
Last visited
Content Type
Profiles
Forums
Gallery
Events
Everything posted by gjdale
-
 A brief update to say that Sea Trials were successfully conducted today! The good news: 1. She floats 2. She runs DRY - I checked the internals thoroughly after we'd been running a while and there was no sign of water ingress. 3. She performed quite well - but needs some fine tuning. 4. Battery life was quite good. We had several runs over a 90-minute period and the battery died just as I was bringing her back in - just made it! The not so good news: 1. For some reason, the servo for the steering was running in reverse, so I had to turn the control to starboard if I wanted to turn to port etc. Found out that this is an easy fix with the remote control set-up, and have now resolved this one. 2. I seem to have been a bit too clever with my steering wheel that turns with the rudder - it actually turns the opposite way to the way it's supposed to (not related to the problem above). Not sure if I'll be able to fix this one. 3. I couldn't get her going fast enough to get up on the plane. The local club guys reckon I need a larger propellor (I think they're right). Might also need to add a little ballast to the stern to help lift the bows out of the water. She runs nicely level at the moment, which is great for slow speed work, but hey, this is a RACING runabout..... I took a brief video of the Sea Trials (the Admiral was driving at this stage - it's HER boat after all). The crew members were not allowed onboard for Sea Trials, but now that certification has been achieved, they will be added for the next spin (with a new prop!). The video was taken with my iPhone. I take no responsibility for the quality of the video..... [video deleted - see later post for updated video on second round of sea trials.]
- 339 replies
-
- 11
-

-
- dumas
- Chris-Craft
- (and 3 more)
-
Fabulous work Patrick. I’ll follow along from here too.
-
Dan, one trick you might try for painting the line... Use masking tape the thickness of your final line to define where the line will be, then place another piece of masking tape (as wide as you like) either side of this. Remove the original piece from the middle and you have a nicely masked line to paint. To prevent bleeding under the masking tape, apply a coat of clear first. This will seal the edges of the mask, thus preventing bleeding under the tape. Hope this is helpful.
- 287 replies
-
- 5
-
-
- michelangelo
- ocean liner
- (and 1 more)
-
Beautifully done Bob - that’s one sweet looking transom.
- 682 replies
-
- 4
-
-
- halifax
- lumberyard
- (and 1 more)
-
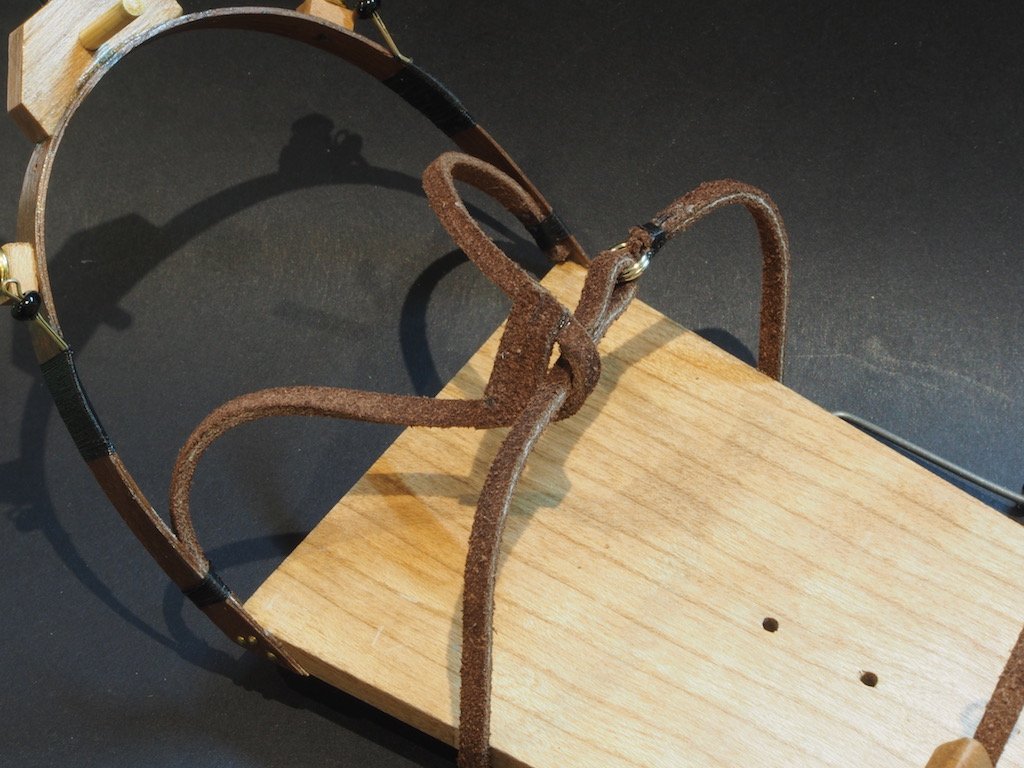
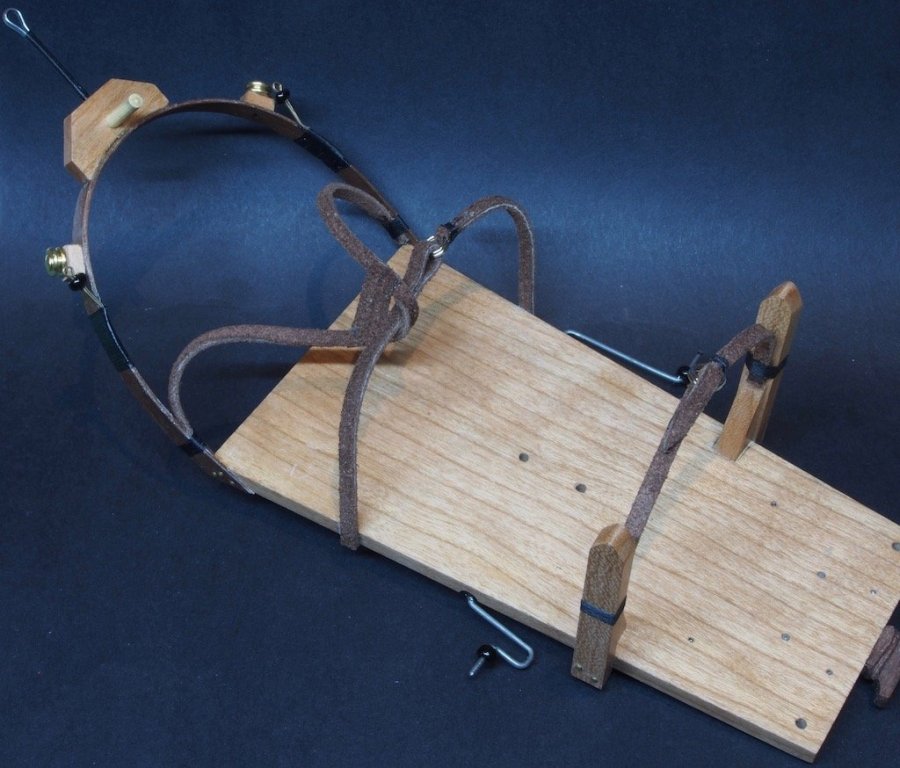
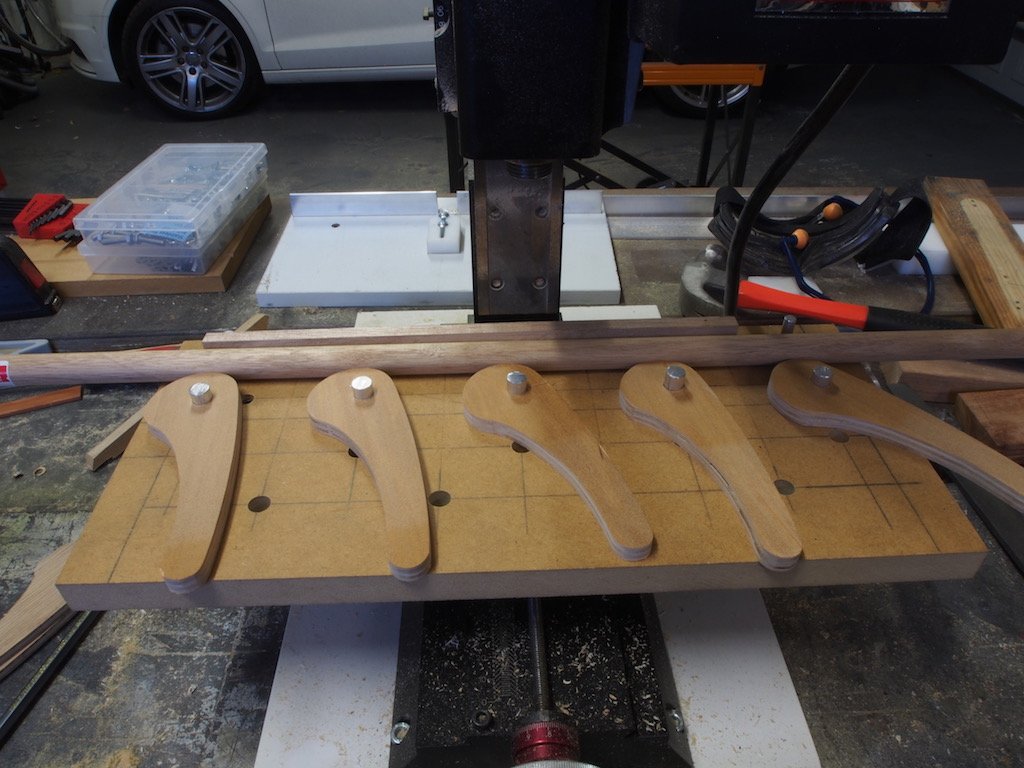
Thanks John and Danny, and also to all of the "likes". Not a lot of progress on the "mousetrap" this weekend as I spent most of the weekend making a Router Table and Holding Jig for my mill. However, some progress is better than no progress.... The installation of the harnesses commences with making the two rear wing attachment posts. These are fairly straight forward, and once again I replaced the kit provided parts with scratch-made parts from cherry. The lower back belt is then made from strips of leather and a small ‘key ring’ (for want of a better term) as the buckle. The leather straps are glued to the base of the rear wing attachment posts and then wrapped with thread. The shoulder harness is made in much the same way, although slightly more complex. It is fixed to the base of the neck ring, again wrapped in thread, and also the sides of the fuselage, where the straps are only glued in place. Here is an overview of progress to date: I have commenced work on the fuselage cross-bar, but will hold off on pictures until that section is complete. Suffice to say that my mill holding jig that I made this weekend worked a treat.
- 68 replies
-
- 15
-
-
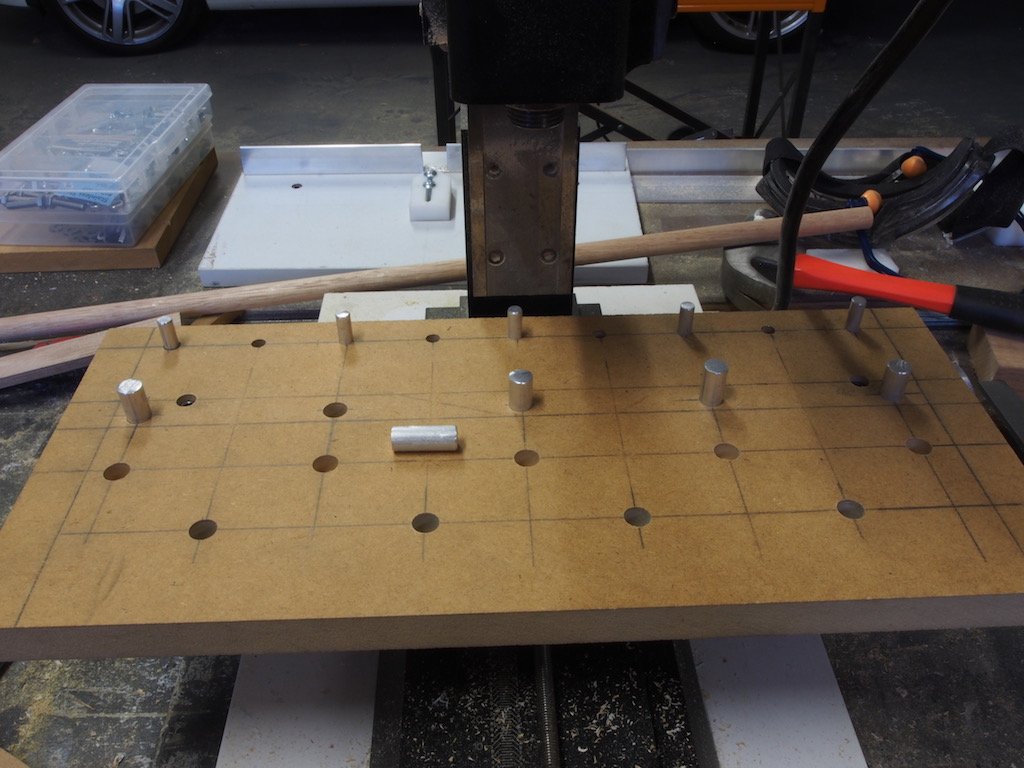
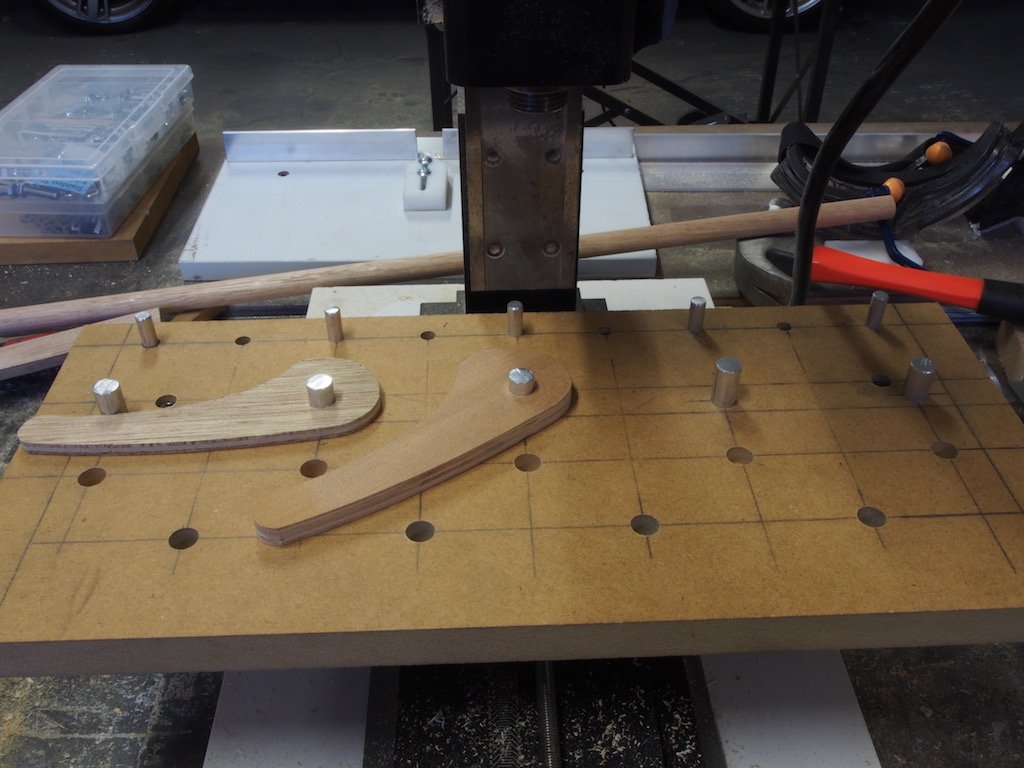
Thanks Keith for your original post on this, and thanks Bob for the link to the Cam clamps. I've combined these two ideas to make my own holding jig for the mill table. The base is 19mm MDF - some scrap I had lying around. I modified Ketih's design slightly by using 1/4" aluminium rod instead of wooden dowels for the rear support. These are a nice fit into the T-slot channel in the Sherline Mill Table, so I've kept the original design idea of having these go right through the bed of the jig and into the Mill Table T-slot channel (for the same reasons that Keith gave). Two Sherline T-nuts/bolts are recessed into the table surface and secure the jig in the other T-slot channel. Then I incorporated the ideas in the video link provided by Bob, to create a series of "dog holes" on the jig base, to provide a range of options for positioning the cam clamps. In the video, he uses 18mm copper pipe - just because he had some lying around. Instead, I used some 3/8" aluminium bar stock - just because I had some lying around..... In the picture below you can see the layout. The 1/4" pins at the back are 1 1/2" long, while the 3/8" "dogs" are 1" long. The "dog holes" do not go all the way through the base - they bottom out at a depth of about 12mm. Then I made some cam clamps from the downloaded patterns provided as a link from the video. I made these in two different thicknesses in case I needed something thinner for small stock. Here's a pic of one of each. Again, these were made from some scrap plywood I had lying around. And finally, here's a shot showing the jig in action. The cam levers work surprisingly well. They are quick and easy to use, and the work piece is held extremely securely. The cam clamps show no inclination to back themselves off. In the picture, I've shown five clamps in use - in reality, two or three would likely be sufficient. The use of spacers, as shown in Keith's original post, is still a good idea. I may get around to making the upgraded cam clamps with built-in adjustable spacers - see the link following the video above if you're interested in this. Thanks again to Keith and Bob for showing the way here. This is going to be a really useful addition to the workshop.
-
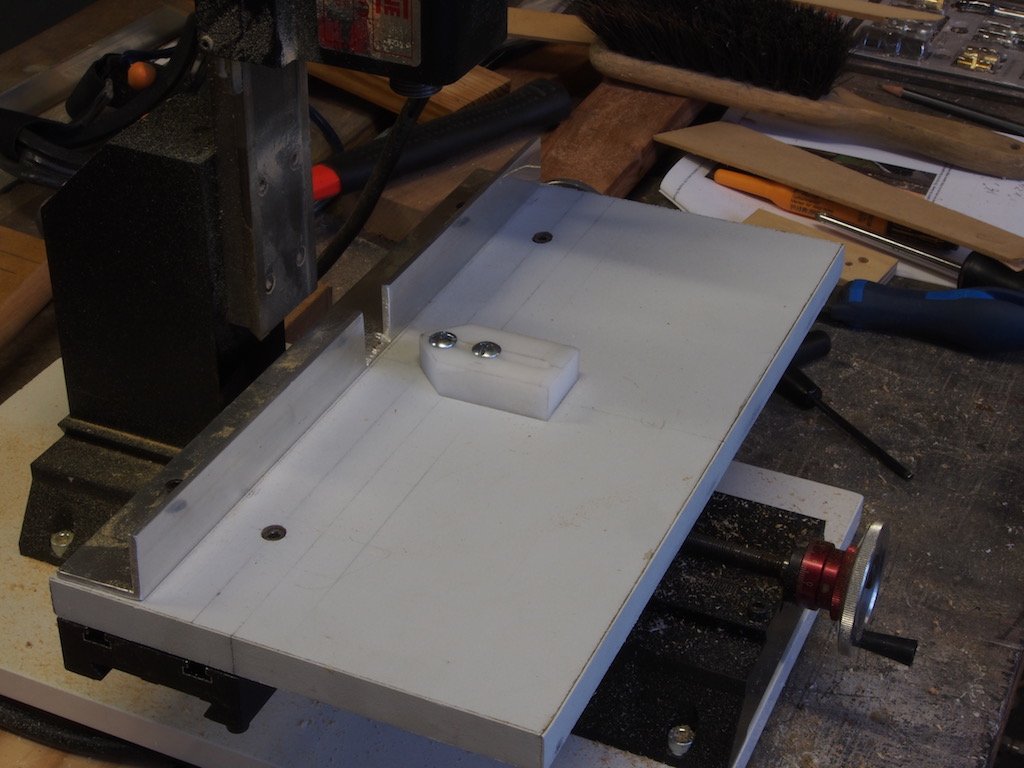
.....two years later, I finally got around to making my own router table for the mill. I have basically copied Frank's (Mahuna) and Jay's (Modeler12). I used a piece of Melamine covered shelf for the base as it will give a nice slick surface to push stock over. The fence is 3mm aluminium angle. There are Sherline cap-screws through both the fence and on the main board that go into the mill table T-slots. For the "finger board" I used a piece of Delrin - the two screws go into T-nuts as per Frank's design. I didn't get around to adding the ball bearing "hold downs" as Jay has done, but I may get that soon. It works like a charm. Thanks Frank for your original post on this - sorry it took so long to get around to copying it!
-
Looking forward to watching another masterpiece evolve B.E.
- 91 replies
-
- 4
-
-
- 18th century longboat
- model shipways
- (and 1 more)
-
Nice to see this one back on the table Wayne - looks good from here!
-
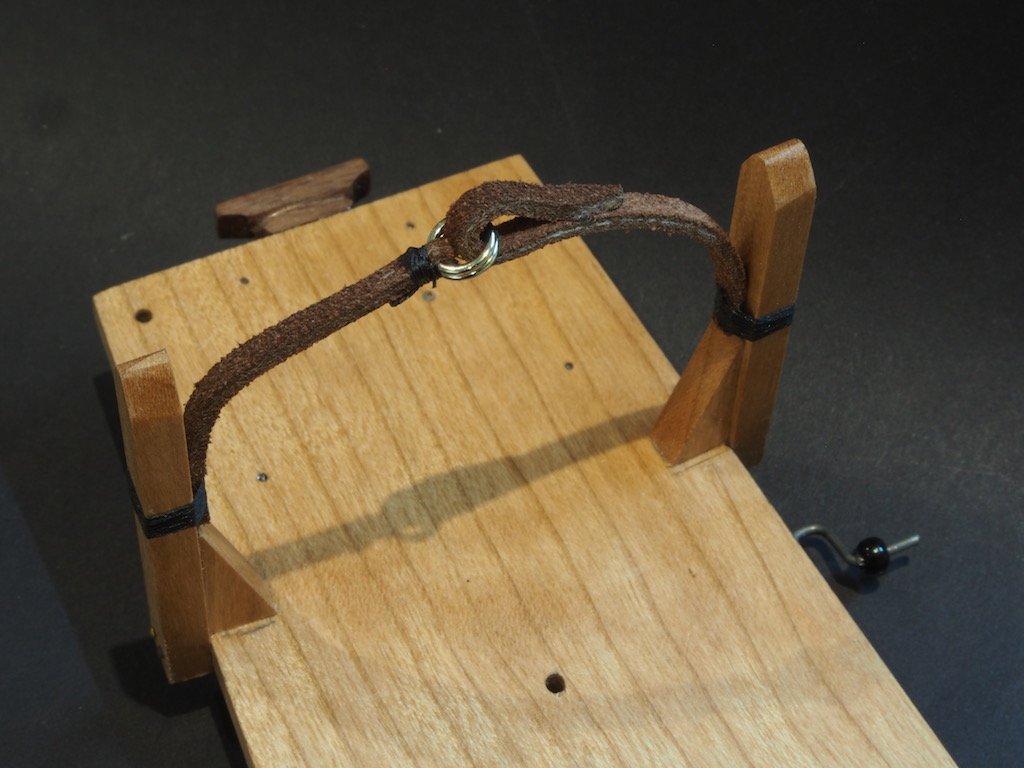
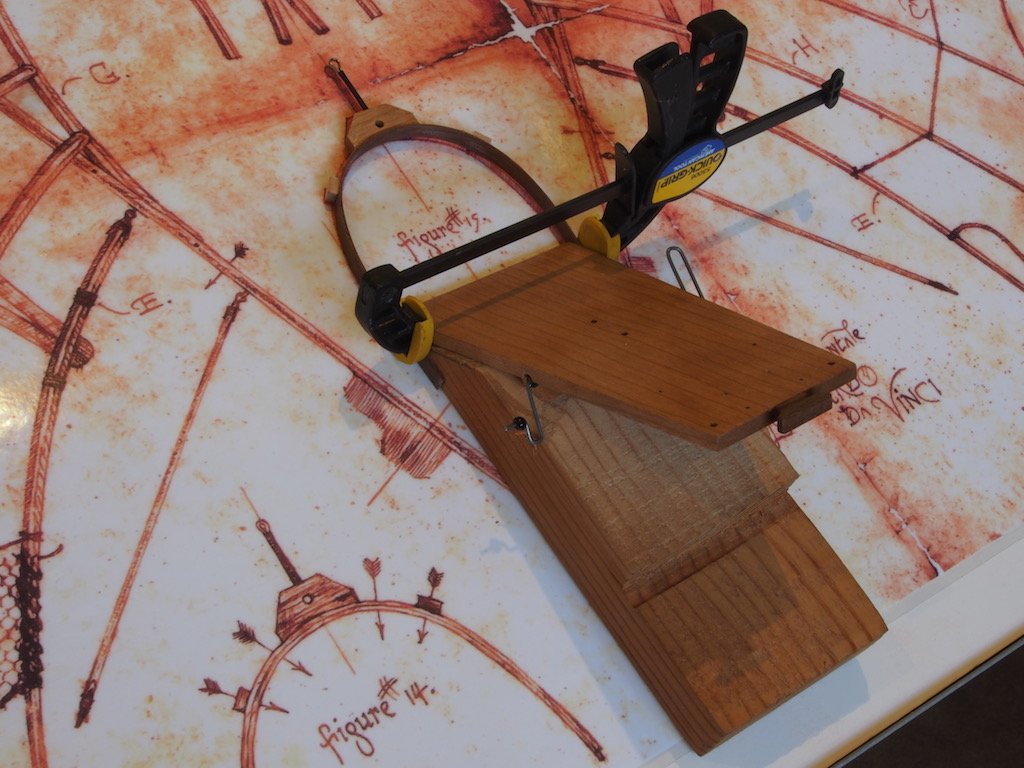
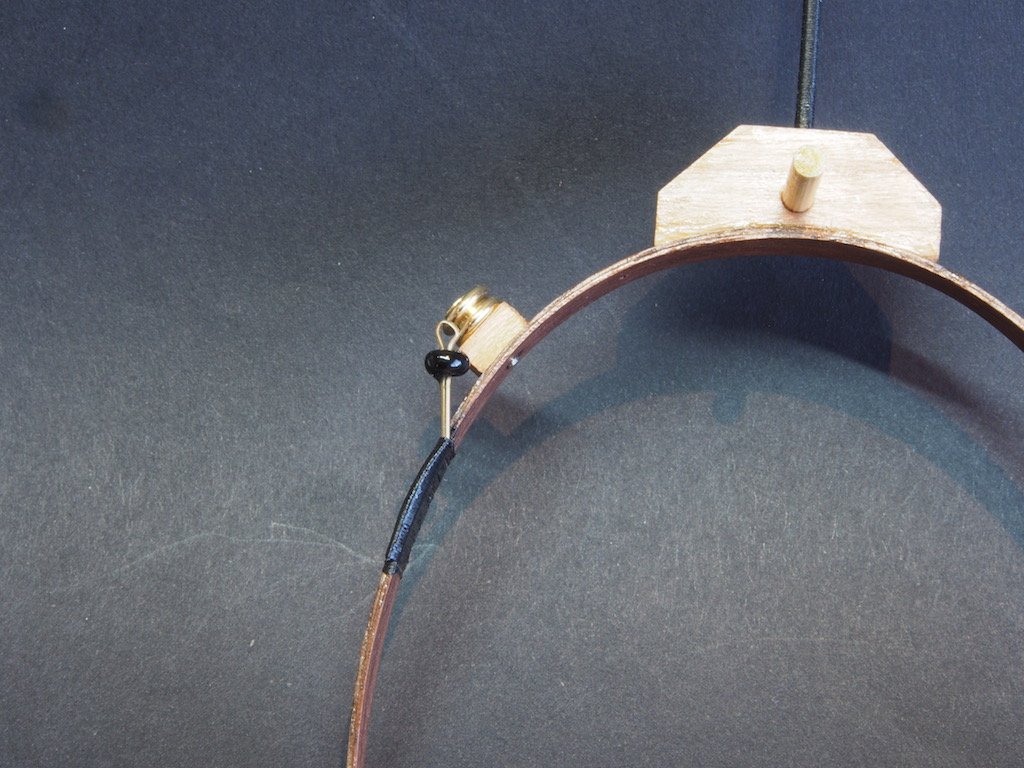
Thanks Mobbsie - good to see you back my friend. Thanks also to all the likes - it seems there is a bit of interest in this unusual kit. Continuing with the Fuselage..... The Neck Ring needs to be fitted to the Fuselage at a specific angle. To achieve this, the kit provides a template and instructs you to glue this to a piece of stiff card and then position the fuselage over the wing plan. Once in place, you are advised to: “prop the part at the correct angle with books etc so that it is unable to move”, then glue and clamp in place to allow the glue to dry. Hmmmm…….. I decided to try a slightly more robust approach, using a solid former. I used the kit provided template to define the angle that I cut on a piece of scrap timber, which just happened to be almost the perfect size to fit across the width of the fuselage. I had already had my wing plan laminated, so I stuck my former to the wing plan with double sided tape, and then stuck the Fuselage to the wing plan, also with double sided tape. That sucker is going nowhere in a hurry! That made attaching the Neck Ring very simple, and the next pic shows the whole set-up glued and clamped. The next components to fit to the Neck Ring are the pulleys and cable guides. The pulleys were fairly straight forward, being attached in the same way as the earlier ones on the underside of the fuselage. The cable guides are formed by gluing a bead on the shank of a cotter pin, then bending the cotter pin to the angle provided in the scale drawing in the instructions. So far, so good. Then you are invited to glue the newly constructed cable guide to the aft edge of the Neck Ring, such that the eye of the cable guide is aligned with the groove in the pulley. Once in place, the legs of the cable guide are wrapped in thread. To achieve this, I had to resort to using CA glue (which I generally avoid as I have become sensitized to it). The CA glue was just a temporary hold until I could get the thread “seizing” in place. I used some diluted PVA glue under the thread to help keep it in place as I was wrapping it, and then once the “seizing” was complete, I gave the whole thing another coat of diluted PVA. Here is relative close-up of the pulley and cable guide on one side. And here is an overview of the completed Neck Ring: And finally, here is an overview of the fuselage as it now stands. In this shot you can see where the Neck Ring has been trimmed flush with the fuselage and three nails (left over from a previous ship kit) inserted to “finish” the join. Leather straps are next on the agenda!
- 68 replies
-
- 15
-
-
Congratulations on yet another fine piece of work B.E.
- 156 replies
-
- 2
-
-
- pinnace
- model shipways
- (and 1 more)
-
Great work Danny, and as always, instructional too. Looking forward to following your Bismarck build.
- 295 replies
-
- 3
-
-
- amatsukaze
- halinski
- (and 2 more)
-
Chris, I think the material you are referring to might be Ezy-line - Greg Lester uses it on his magnificent builds. I believe it comes from the model rail road community.
- 295 replies
-
- 4
-
-
- amatsukaze
- halinski
- (and 2 more)
-
I'm taking a seat in the front row too, Nils - always instructional to follow your builds.
- 692 replies
-
- 5
-
-
- eagle of algier
- chebec
- (and 2 more)
-
Thanks Rusty and Mike. Rusty - I'm looking forward to sea trials too - won't be long now as the weather is starting to warm up down here. Mike - overalll, I think the kit is quite good. The use of Sintra (plastic) for the sub-planking is a little unusual for this type of build, and there are both pros and cons for it. You could make this model straight out of the box and have a reallly nice looking boat at the end. Or you can bash to your heart's content. Me? I couldn't help myself. I blame the CDO (that's like OCD, only with the letters in the right alphabetical order!!!!)
- 339 replies
-
- 6
-
-
- dumas
- Chris-Craft
- (and 3 more)
-
Great to see you bring this one home Mobbsie. She looks terrific and is a credit to your workmanship - be proud my friend. I look forward to the commencement of Pickle.
- 129 replies
-
- 7
-
-
- armed launch
- panart
- (and 1 more)
-
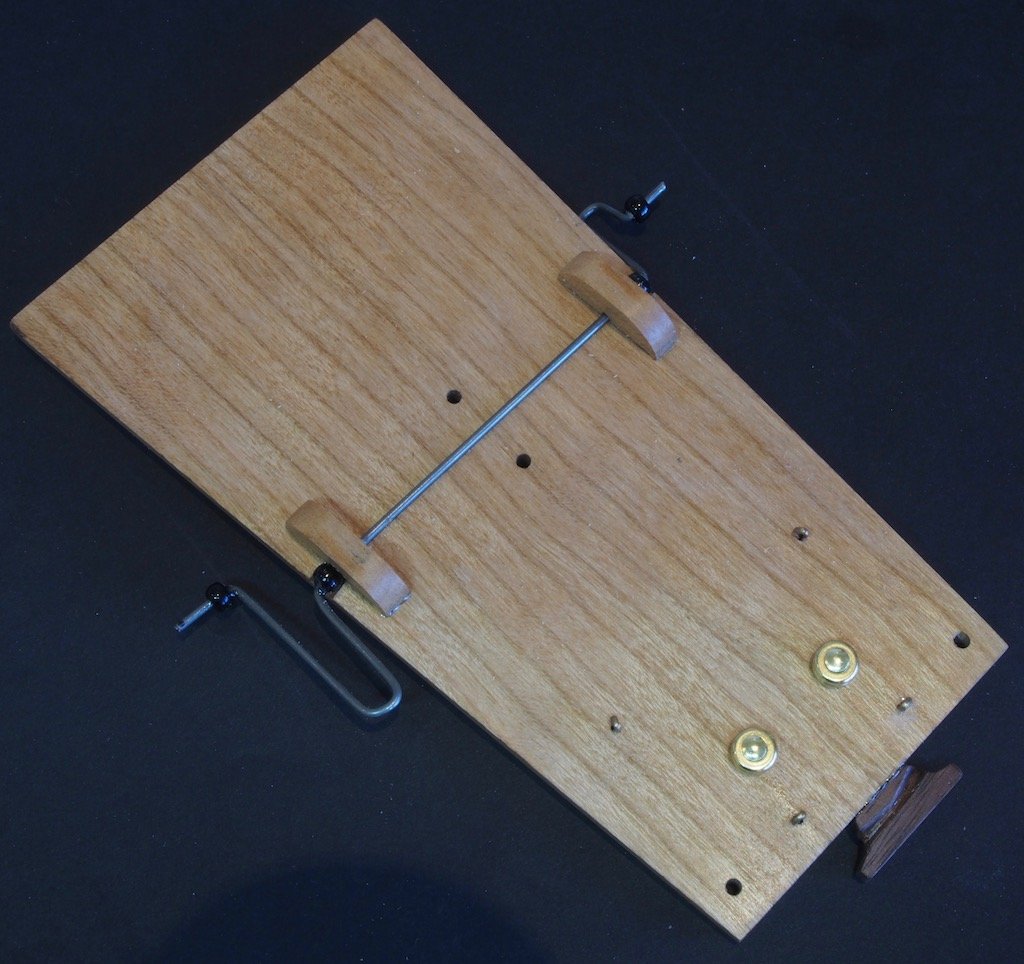
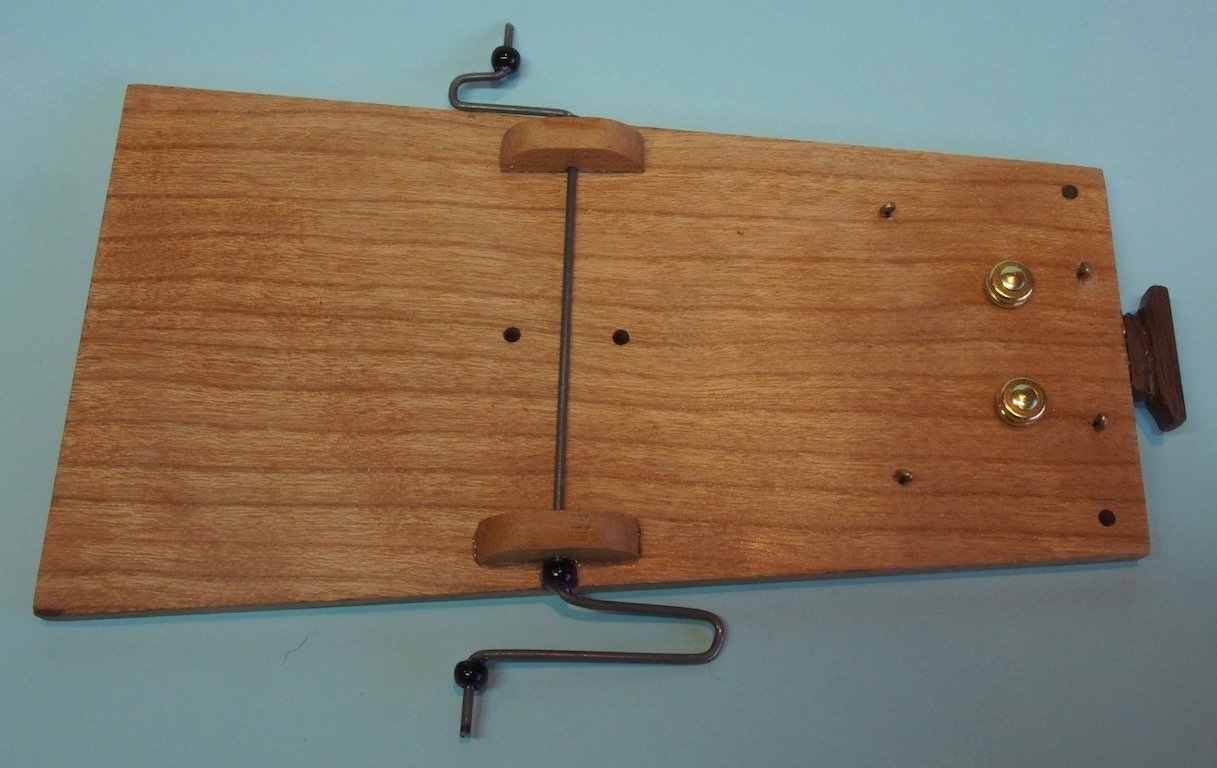
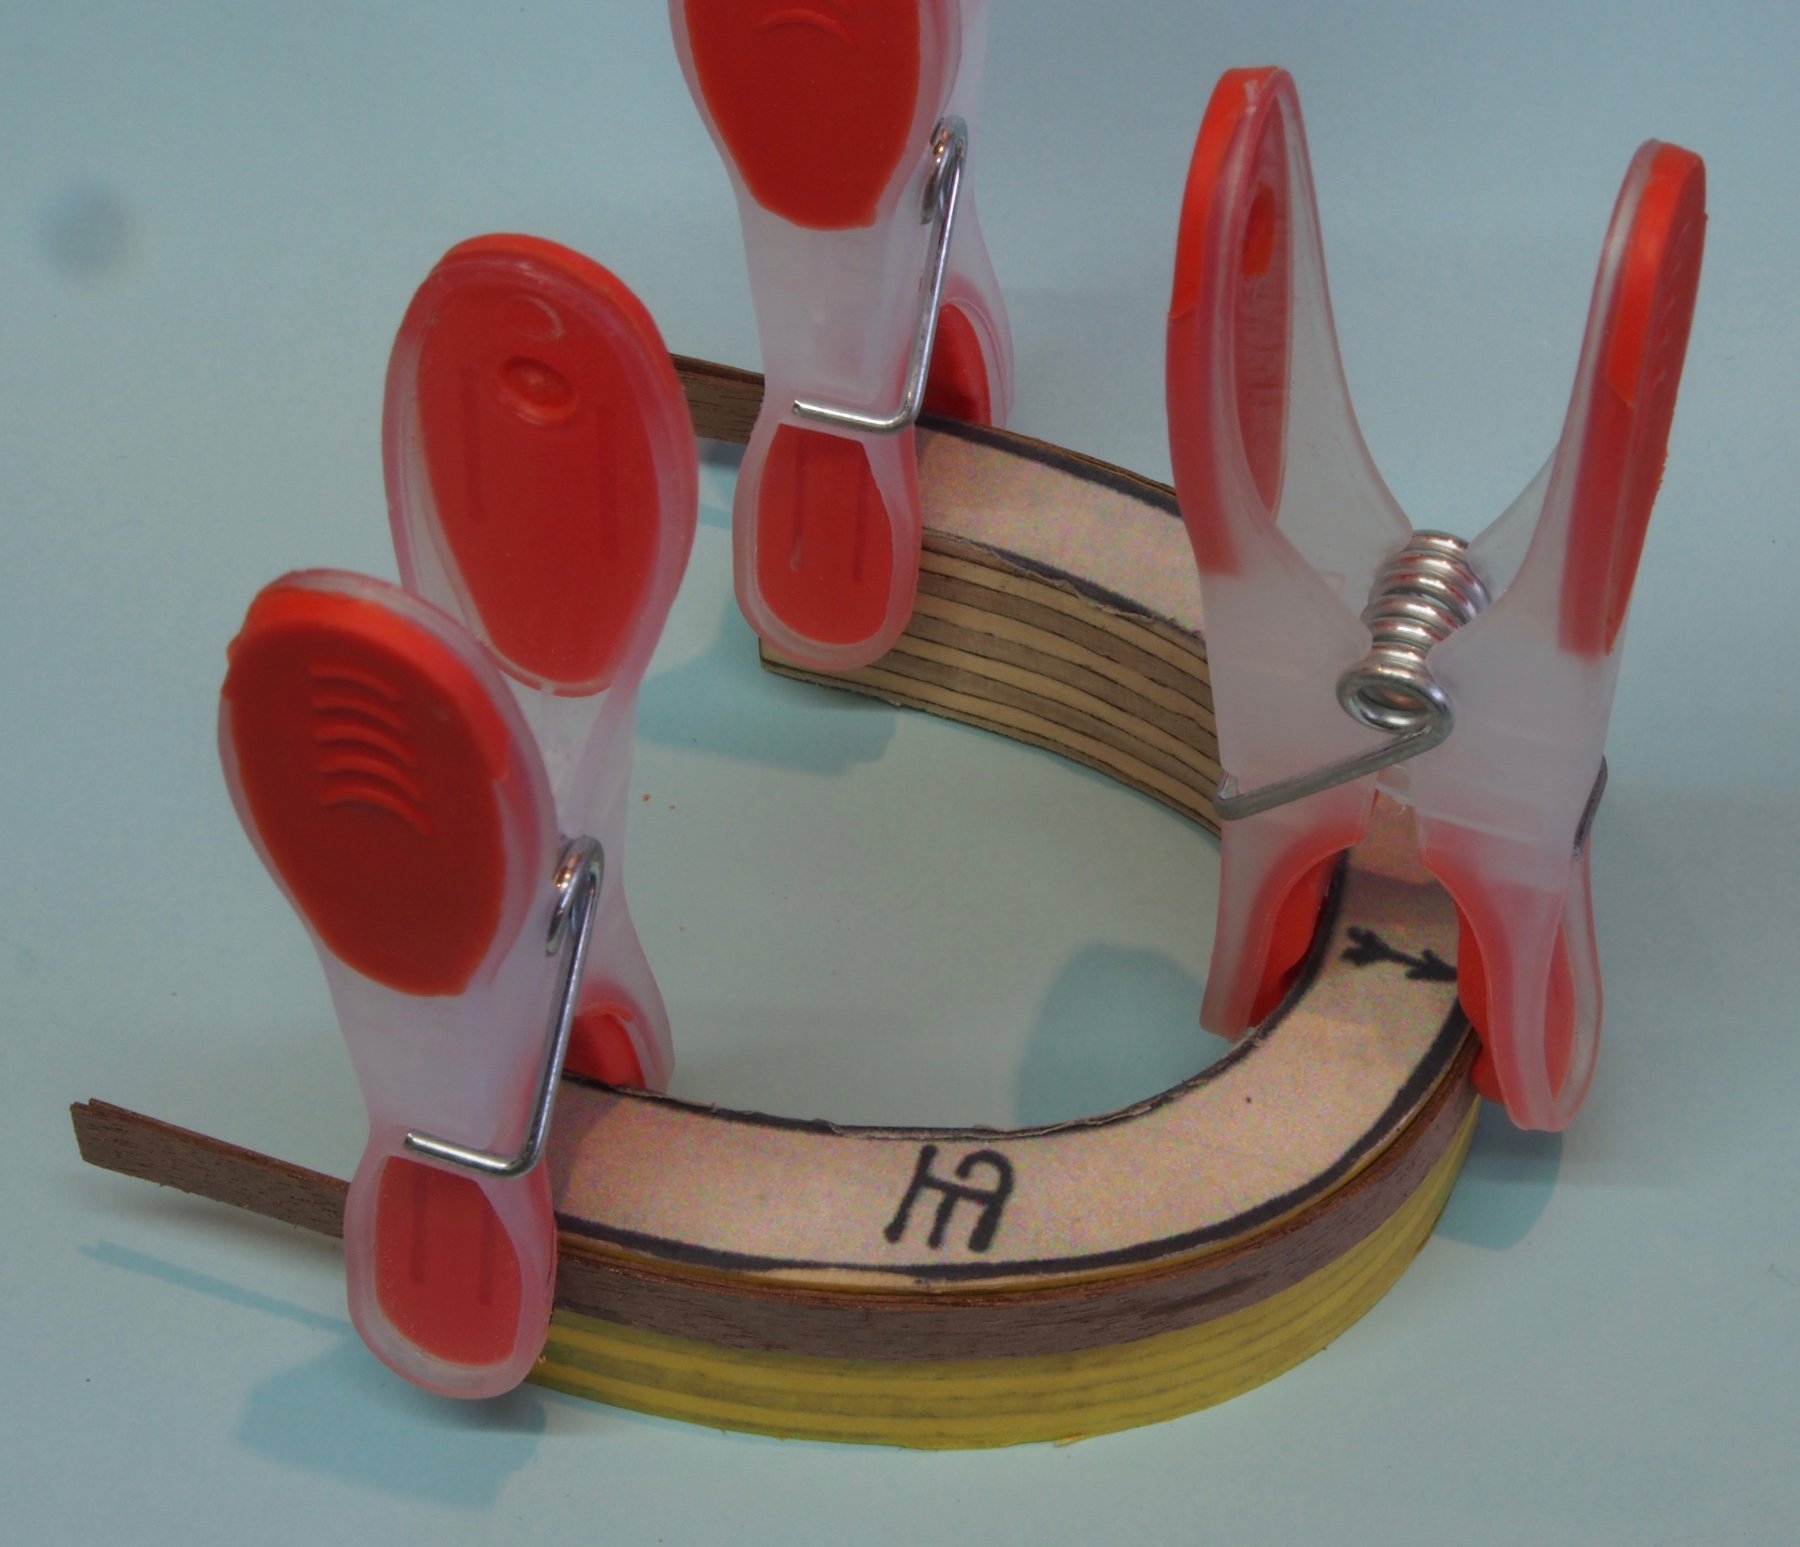
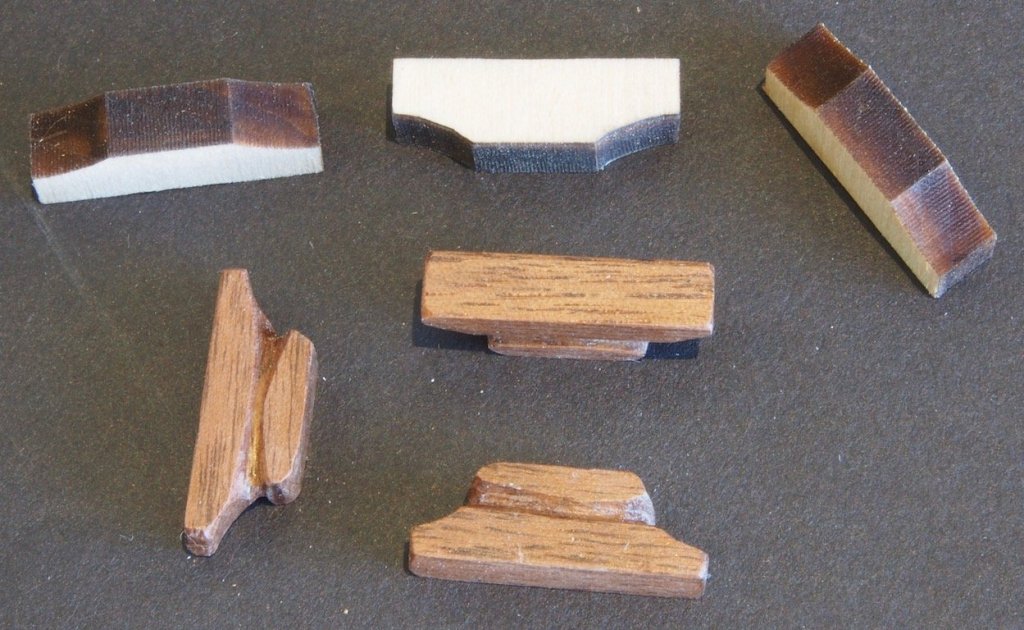
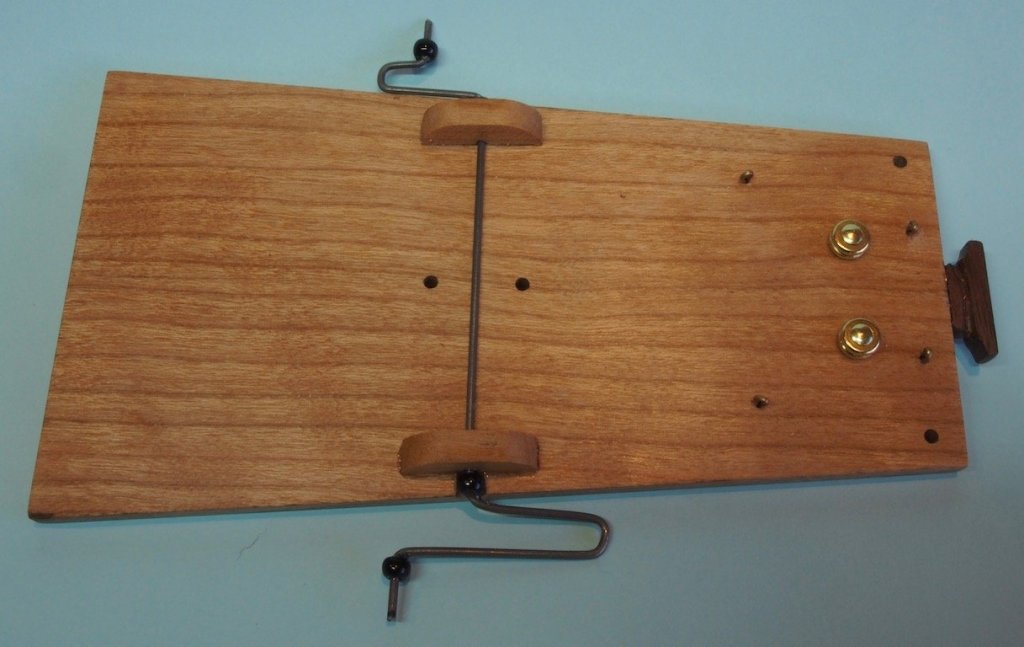
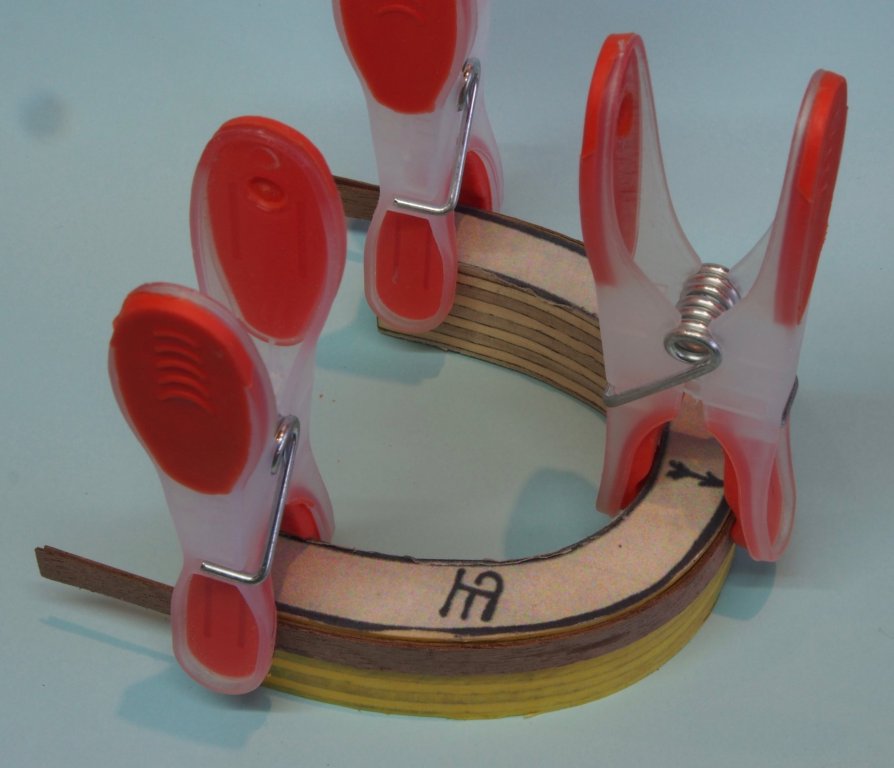
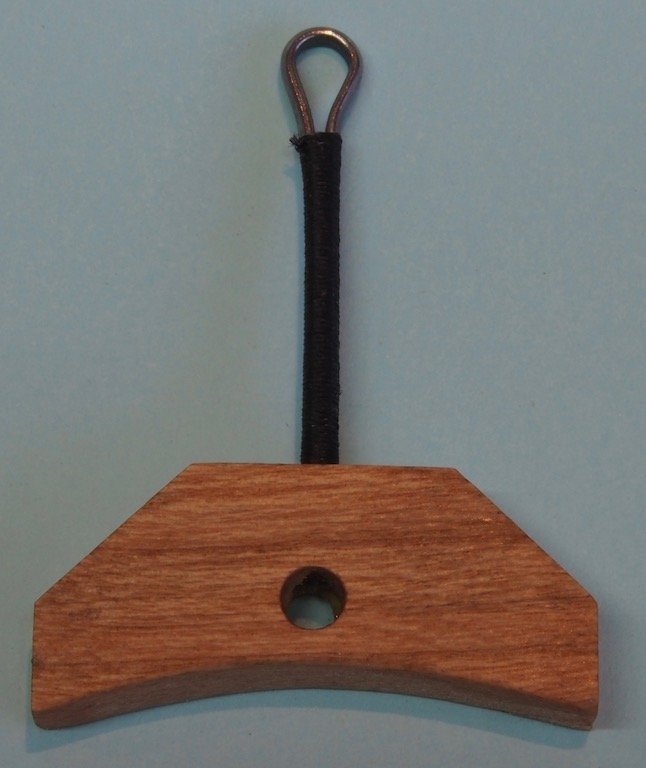
Thanks Steven, Nils, Sam, Ken, Richard and Carl for your interest, and also to the "likes" for looking in. Fuselage Construction Construction begins with the Fuselage. Here is a picture from the Instruction Manual of the overall completed assembly: My first task was to cut a new piece for the fuselage base, replacing the kit-provided wood with Cherry of the same thickness (3/16”). Prior to cutting to shape, I laid out all the markings per the instructions and drilled the holes (4 x 2mm and 6 x 1mm diameter). I finished the surface with two coats of shellac and a coat of furniture wax. This is something I’ve picked up recently from doing some 1:1 scale woodwork. The advantage of shellac is that it dries very quickly, is dead easy to apply, and provides a repairable finish. It also highlights the natural beauty of the timber. Here are the prepared base and the kit provided part side by side. Next up was making some cleats. The kit provides some stock wood cut roughly to shape and then instructs you to finish the shaping with files and stain them walnut. I replaced these with straight walnut, which again got the shellac/wax treatment after final shaping. Here’s a shot showing the raw kit parts and my finished parts: The next step was to fit one cleat, four cable guides, two pulleys and the crankshaft. The cable guides are simply cotter pins, cut off so as not to protrude through the base to the other side. The pulleys are small brass parts that are secured with a small brass nail, again cut to length. The crankshaft is made from a piece of piano wire that is first bent to shape following a template in the instruction book. Four beads are glued in place on the crankshaft as seen in the pictures below. A small recess was filed into the fuselage base to allow the beads to seat and the crankshaft to sit flush against the fuselage. The two clamps holding the crankshaft in place were again replacement parts made from cherry, using the kit parts as templates for sizing. Here’s another view using a different background: Forming the Neck Ring is the next step. The kit provides some cherry veneer to this, which it then tells you to stain walnut. I used walnut instead. Two pieces of 1/64” thick by ¼” wide walnut strip are laminated by bending around a former cut from a scrap piece of 1/2" plywood, using a template provided in the kit. I wet these and then hit them with a heat gun to set some initial curve in them. Then I applied some PVA and re-clamped to the former and left them to set. Next up is the Fulcrum Mount. Again, simply made from Cherry using the kit part as a template. The bottom edge is filed to a curve to match the Neck Ring. A large cotter pin is then then inserted in the centre of the top edge, and finally the cotter pin is wrapped in thread. That’s as far I have progressed to date.


- 68 replies
-
- 17
-
-
Nice to see an update Gil - she sure is looking sweet.
- 60 replies
-
- 1
-
-
- dragon class
- billing boats
- (and 2 more)
-
Just superb Nils, and what a collection!
- 2,625 replies
-
- 4
-
-
- kaiser wilhelm der grosse
- passenger steamer
- (and 1 more)
-
I'm in too Ken - always interested to follow your thoughtful solutions to the inevitable challenges ahead.
-
Thanks Popeye, I'm looking forward to the weather warming up so that we can go for "sea trials".
- 339 replies
-
- 6
-
-
- dumas
- Chris-Craft
- (and 3 more)
-
Thank you very much Lawrence - you are very kind to say so.
- 339 replies
-
- 3
-
-
- dumas
- Chris-Craft
- (and 3 more)