


RGL
-
Posts
5,388 -
Joined
-
Last visited
Content Type
Profiles
Forums
Gallery
Events
Posts posted by RGL
-
-
If you are using a stick down deck, the stain will not work (I tried), as they are really waxy for some reason. I suggest either paint it or use the AK wash for wooden decks as it will bring up the planking and will be heavier at the edges. I was going to stain my Yamato deck black using a commercial black stain which worked on real wood but it failed on offcuts. The stick down decks are so thin you can't sand them back.
-
-
-
-
-
-
-
No mate, something simple but complex, I can't face the equivalent of the HMS Victory yet
- hexnut, popeye the sailor, Canute and 4 others
-
 7
7
-
Thanks folks, I have a new kit!
But,
I'm going to practice some new techniques on a spare hull first....
its a pretty basic kit which needs a bit of a makeover and there is very little reference material to....
all the aftermarket is amost bought
watch this space
- hexnut, Jack12477, Old Collingwood and 4 others
-
7
-
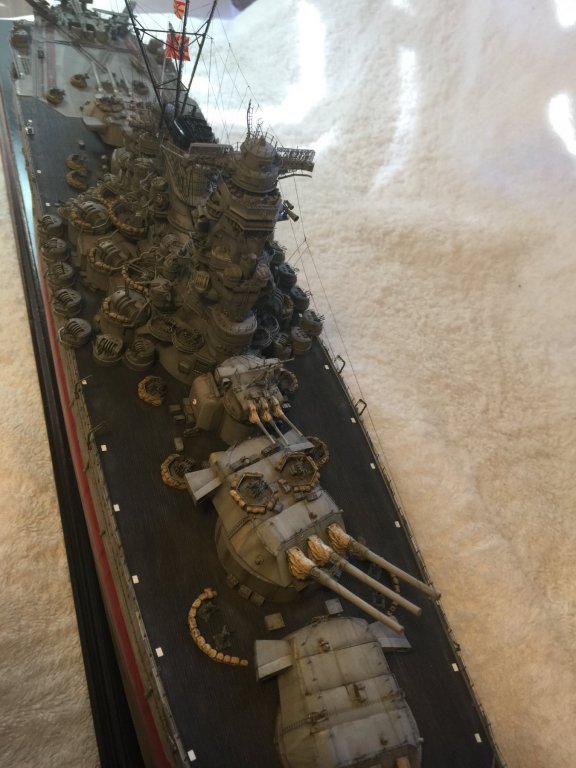
AND BANG, finished.
Thanks for the likes and support, to the followers who suffered the 8 month build. 20K views on a plastic model is flattering to say the least.
The next build will not be so complex, there is so much detail it just gets lost. You can see from my previous builds, it is a magnitude more involved, but I have learnt to use an airbrush (thanks Banyan) and that Dutch people have a very similar sense of humor to Aussies (Cog).
Off to the digital graveyard.


-
-
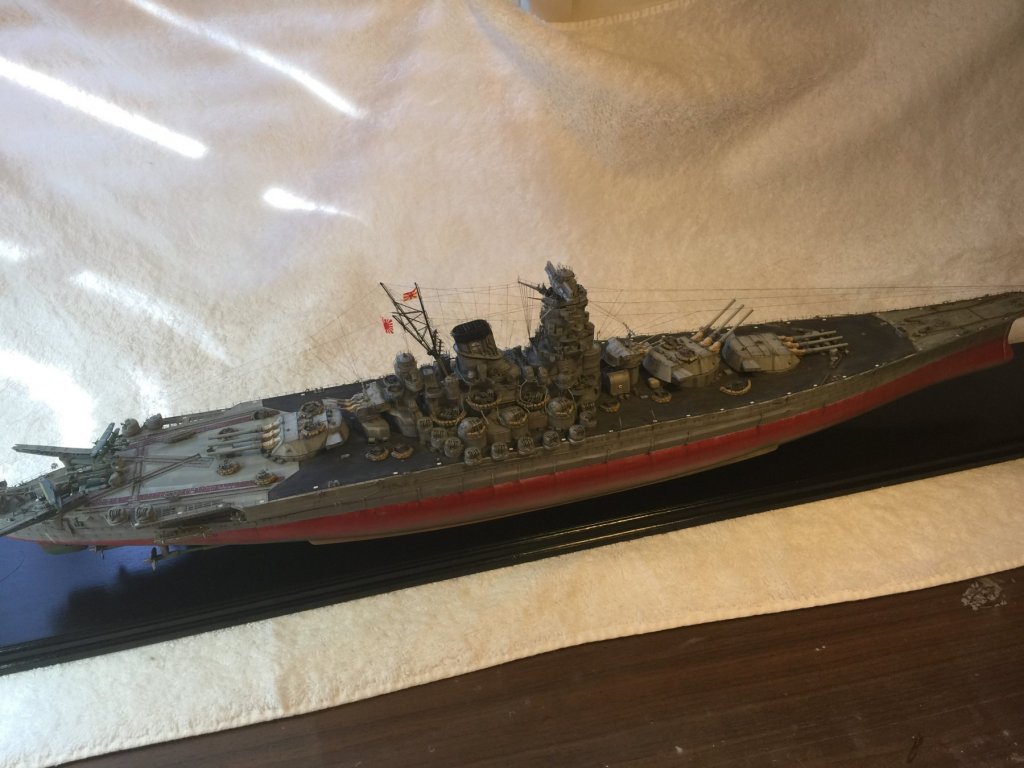
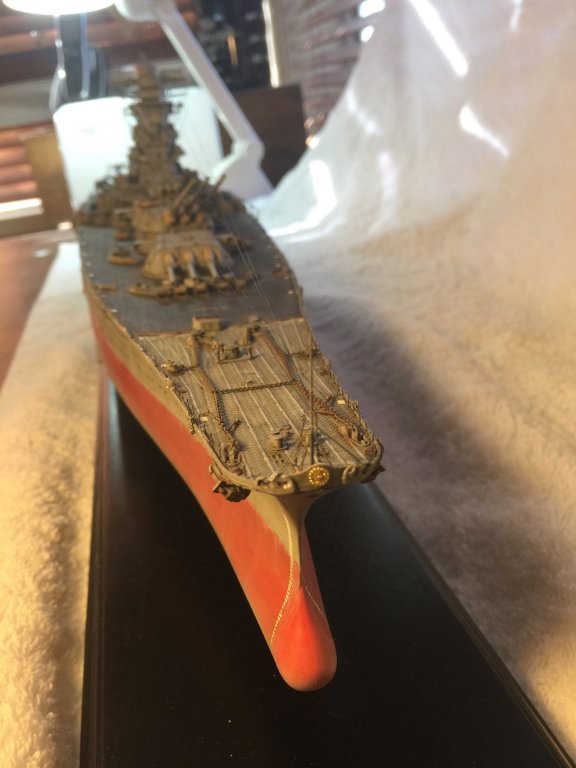
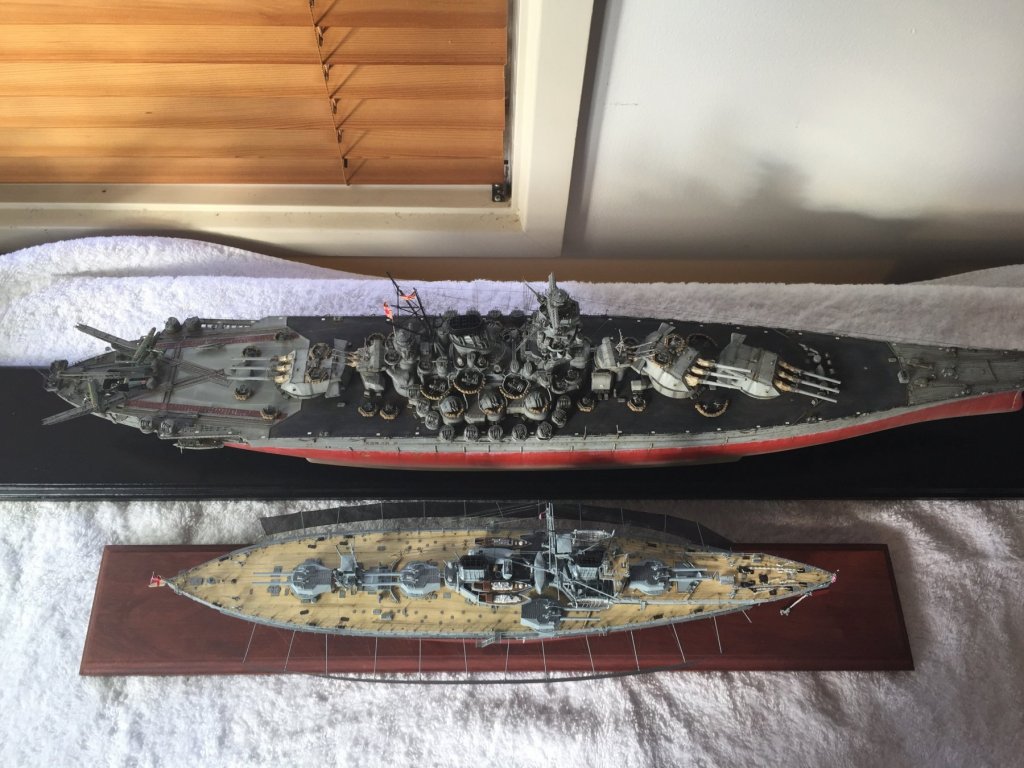
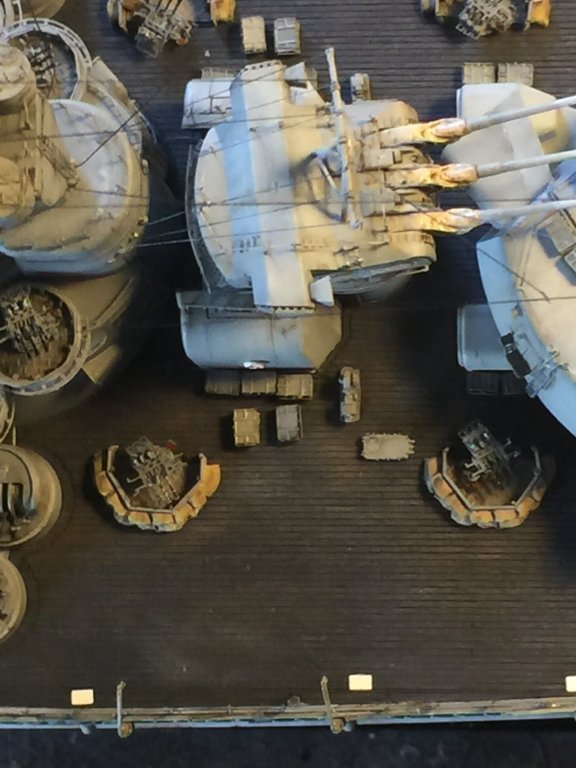
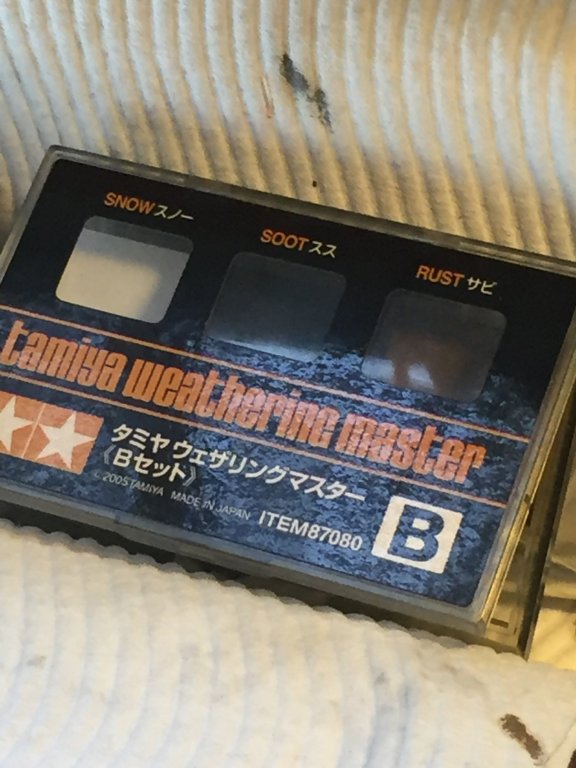
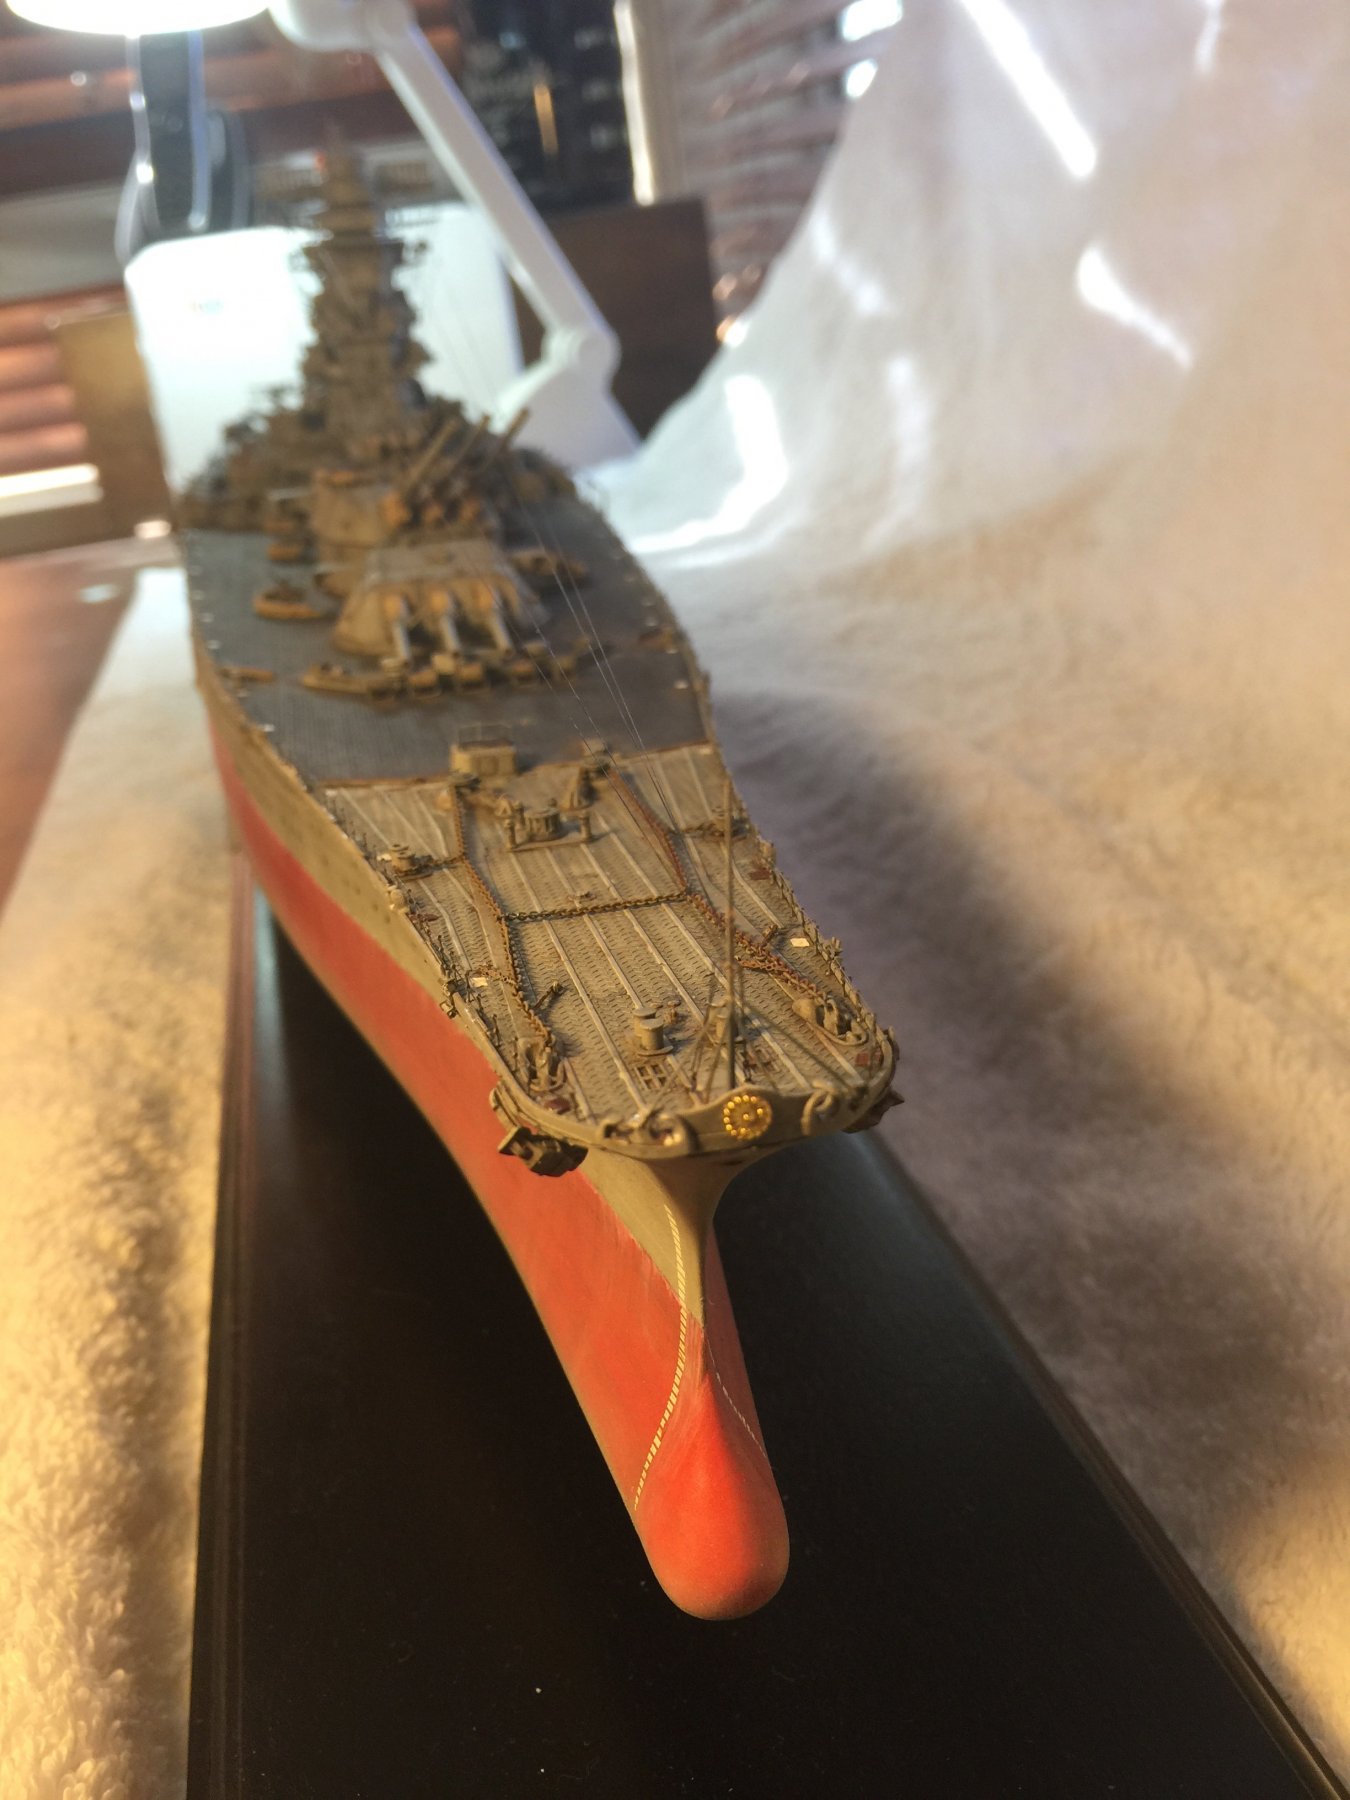
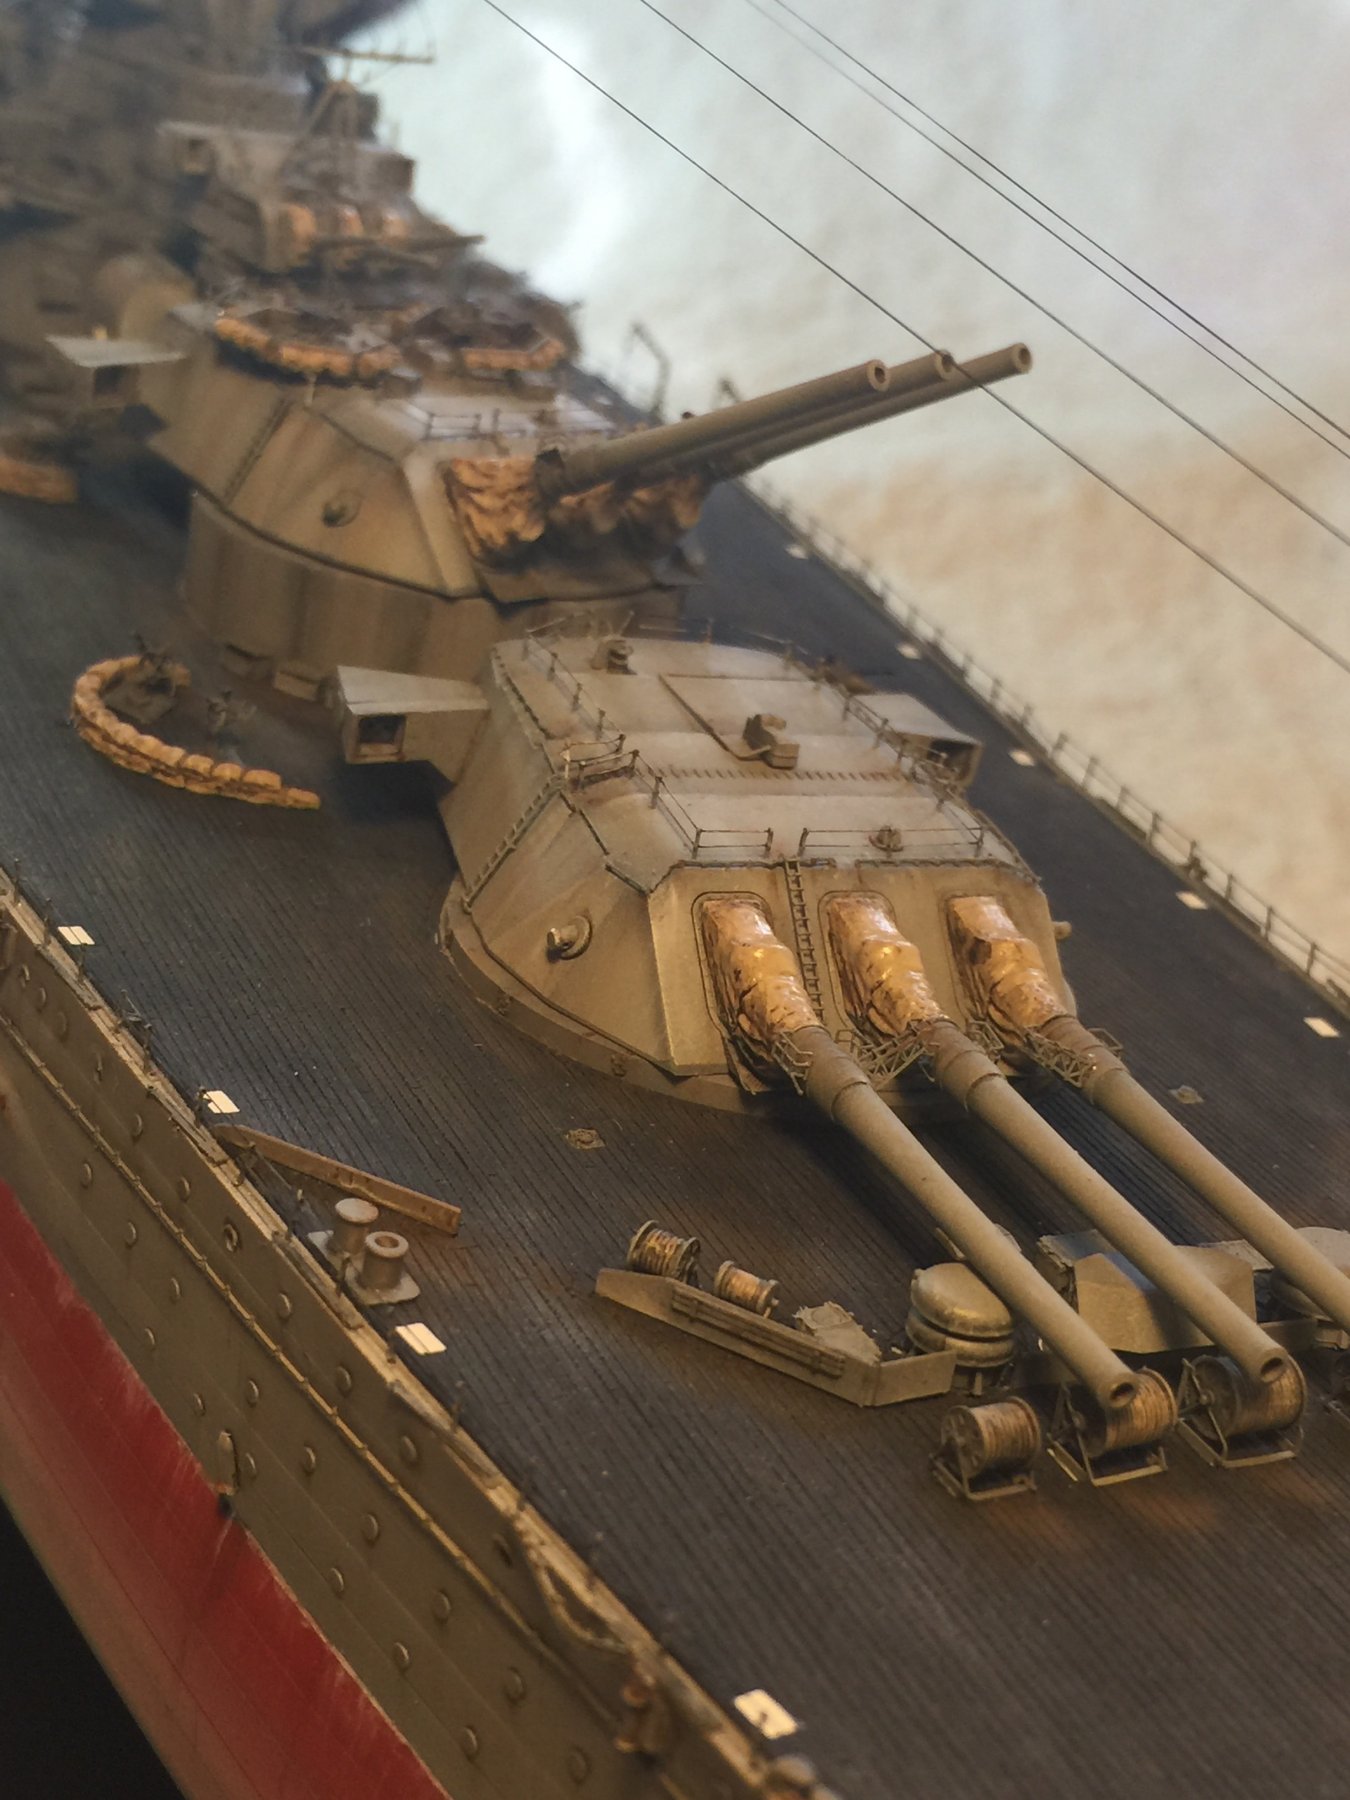
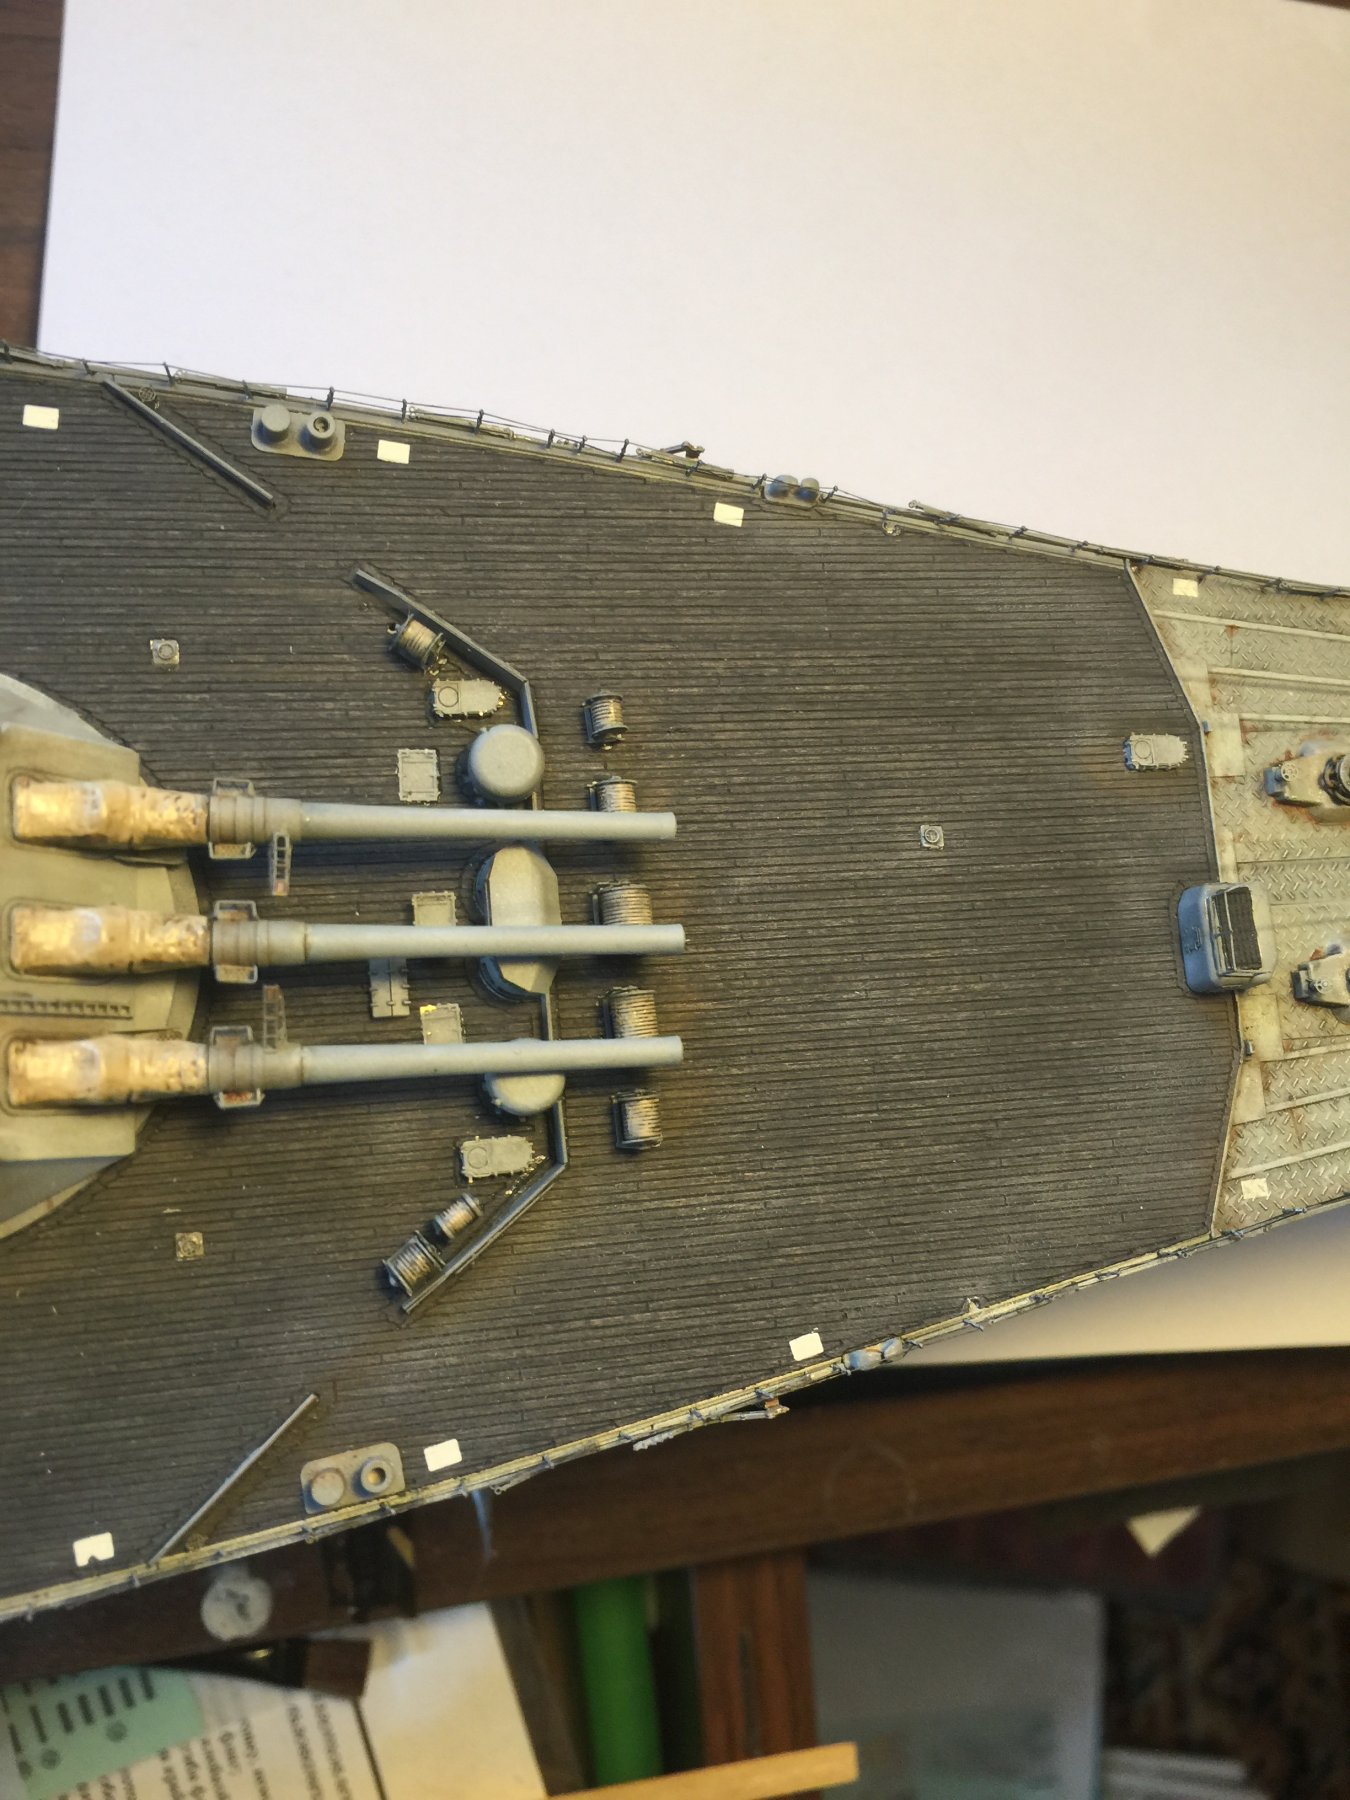
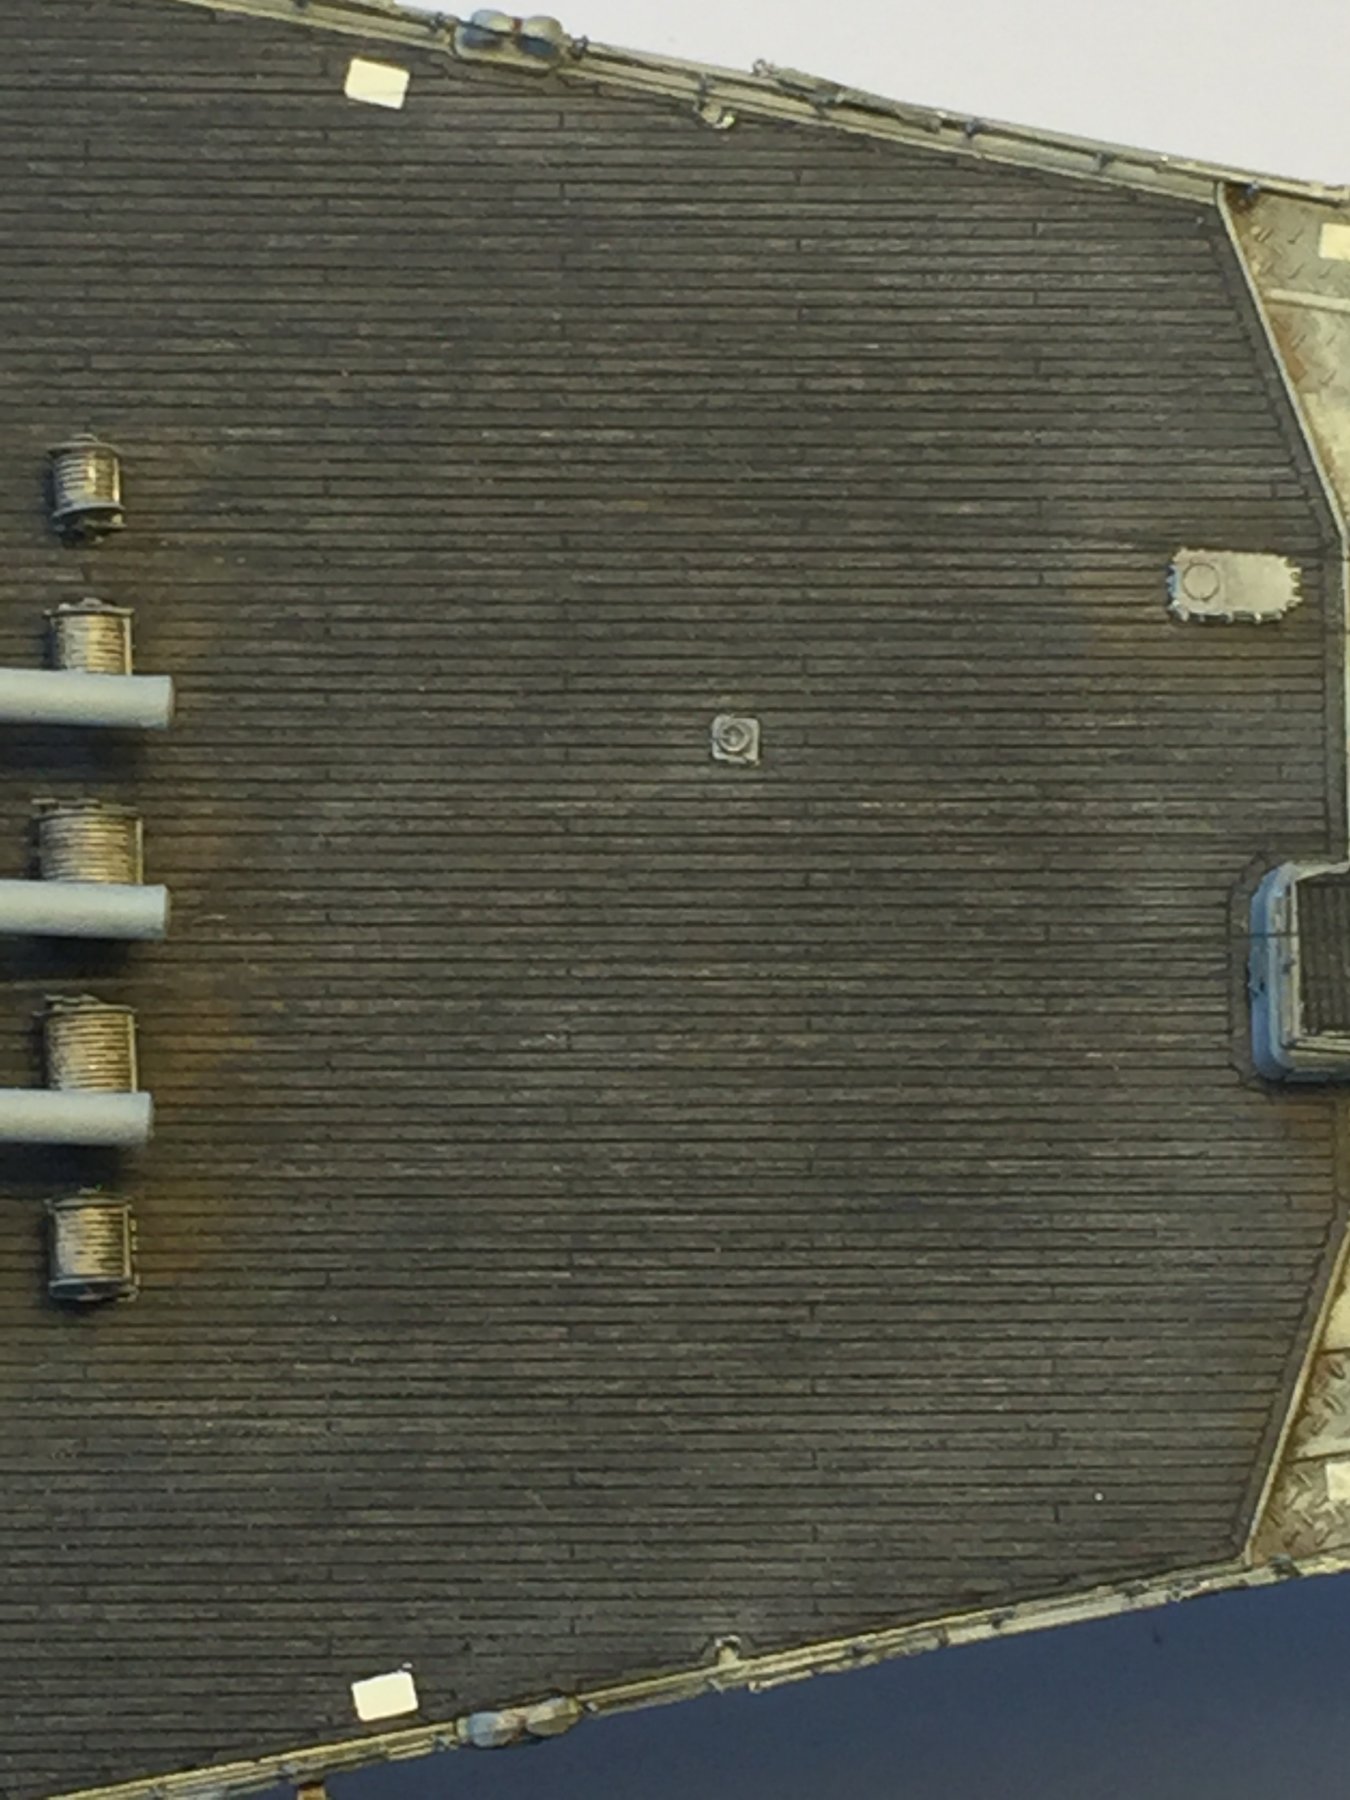
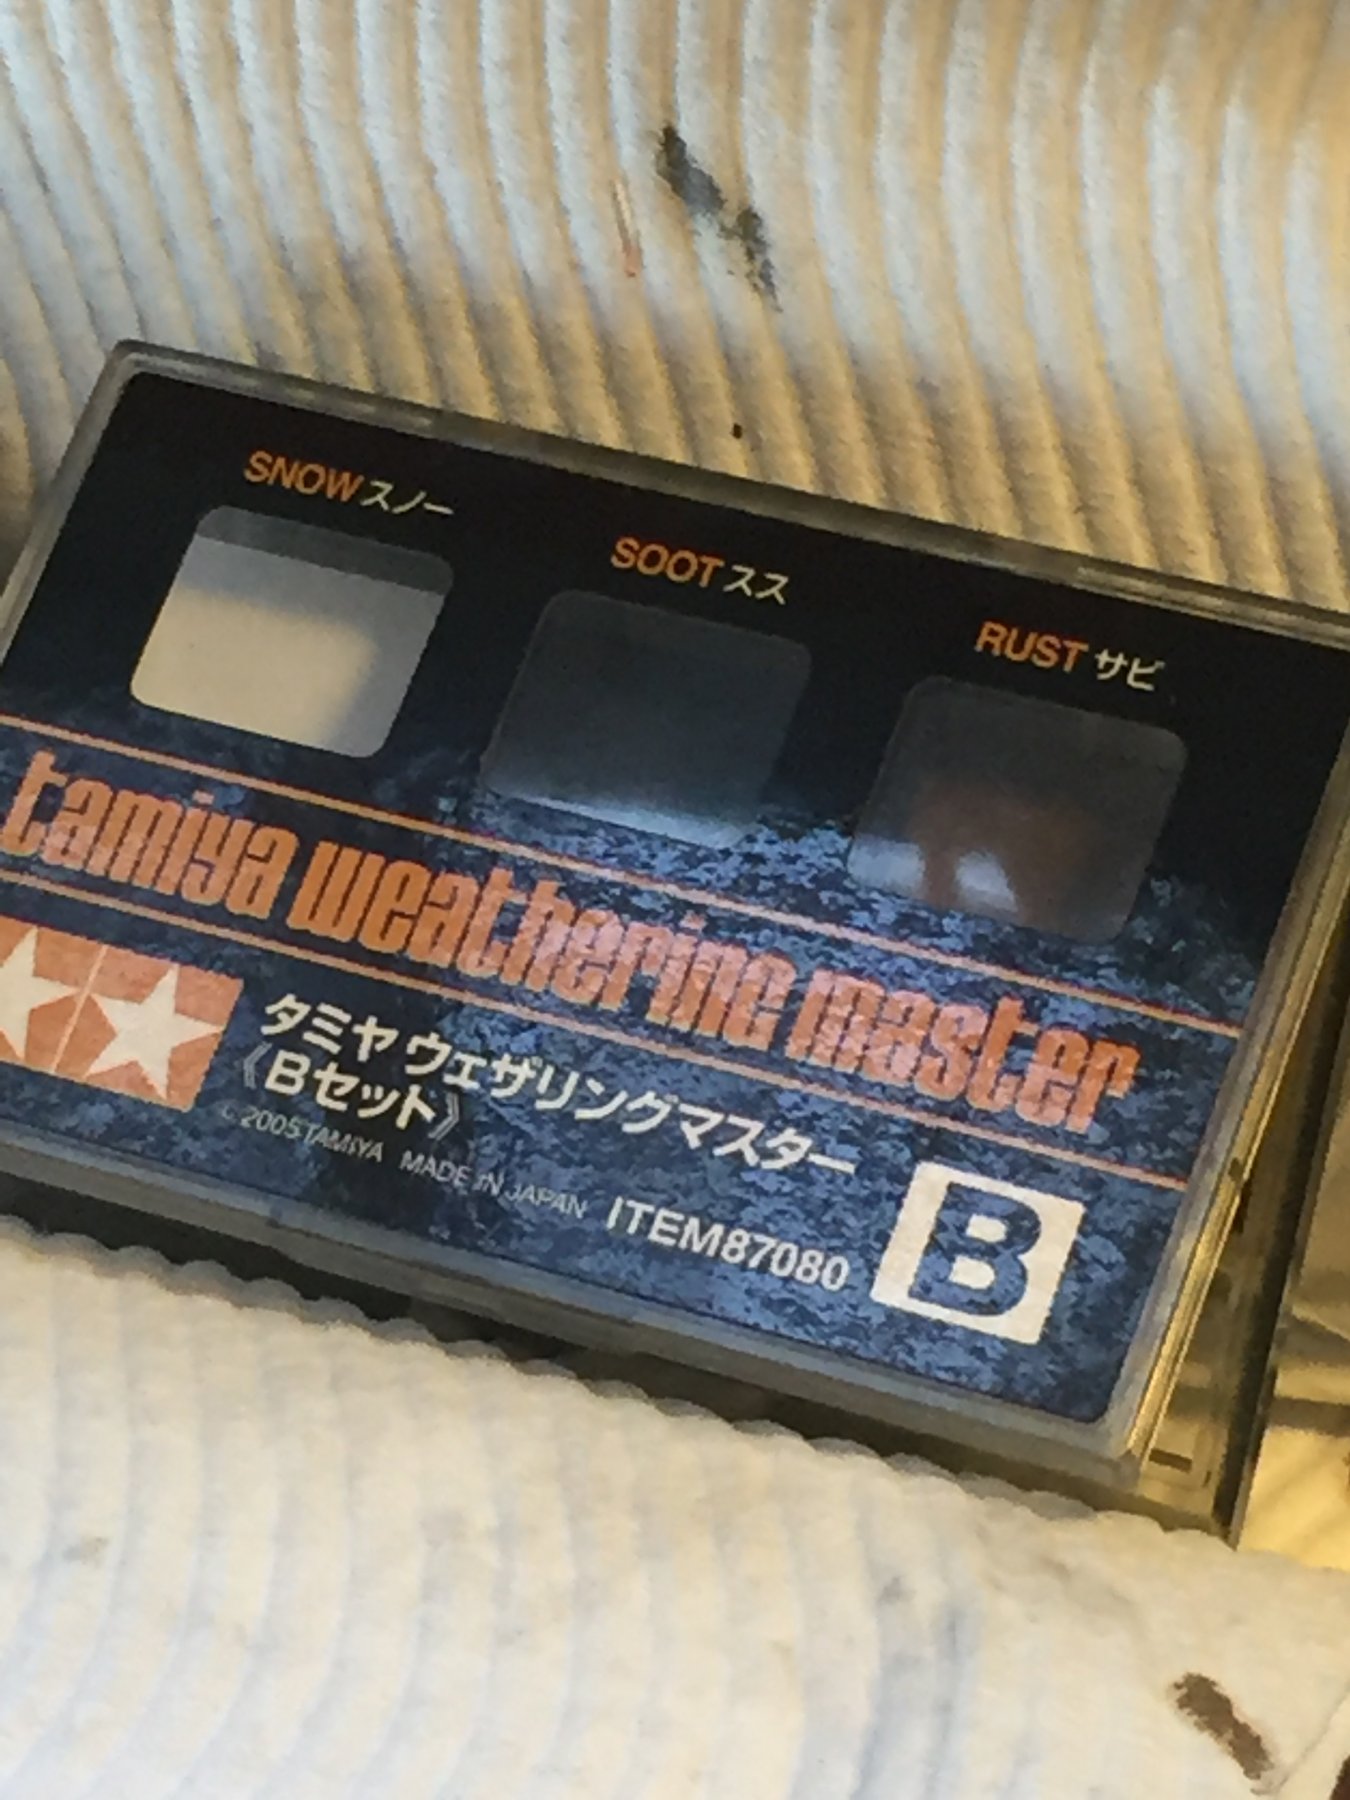
The final part, the black deck. It looks brand new and the rest of the ship is filthy. So, using some Tamiya makeup in the guise of Rust, soot and snow, I have commenced using the "snow" as salt near the areas I believe the salt would have accumulated at sea and "rust" for scuffmarks where the deck hatches and equipment are.
Bugger me, it works, it does not have to be extreme just enough to break up the uniform black and it brings out the planks.


-
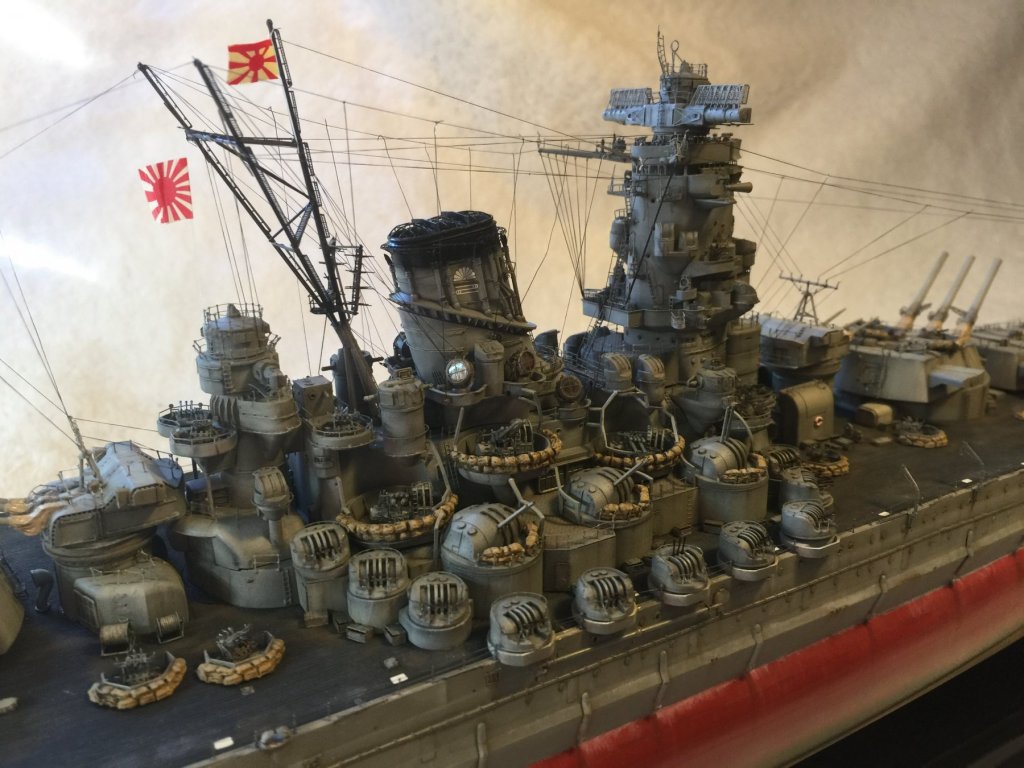
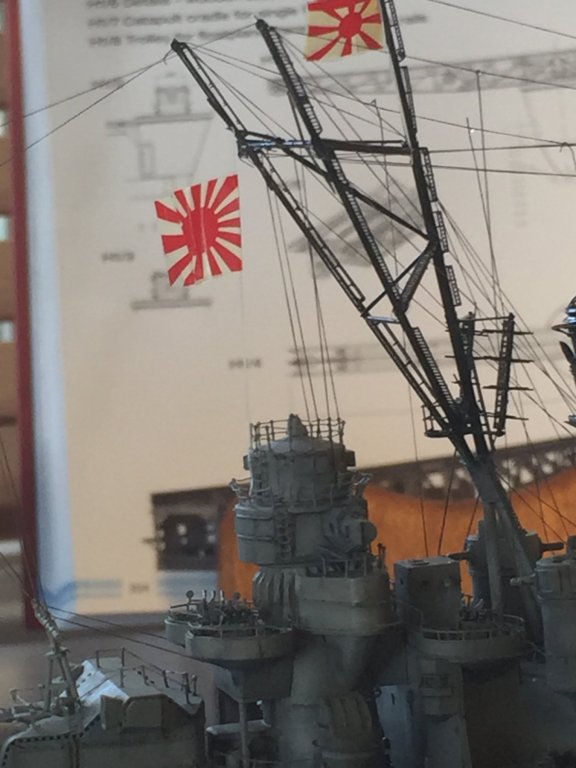
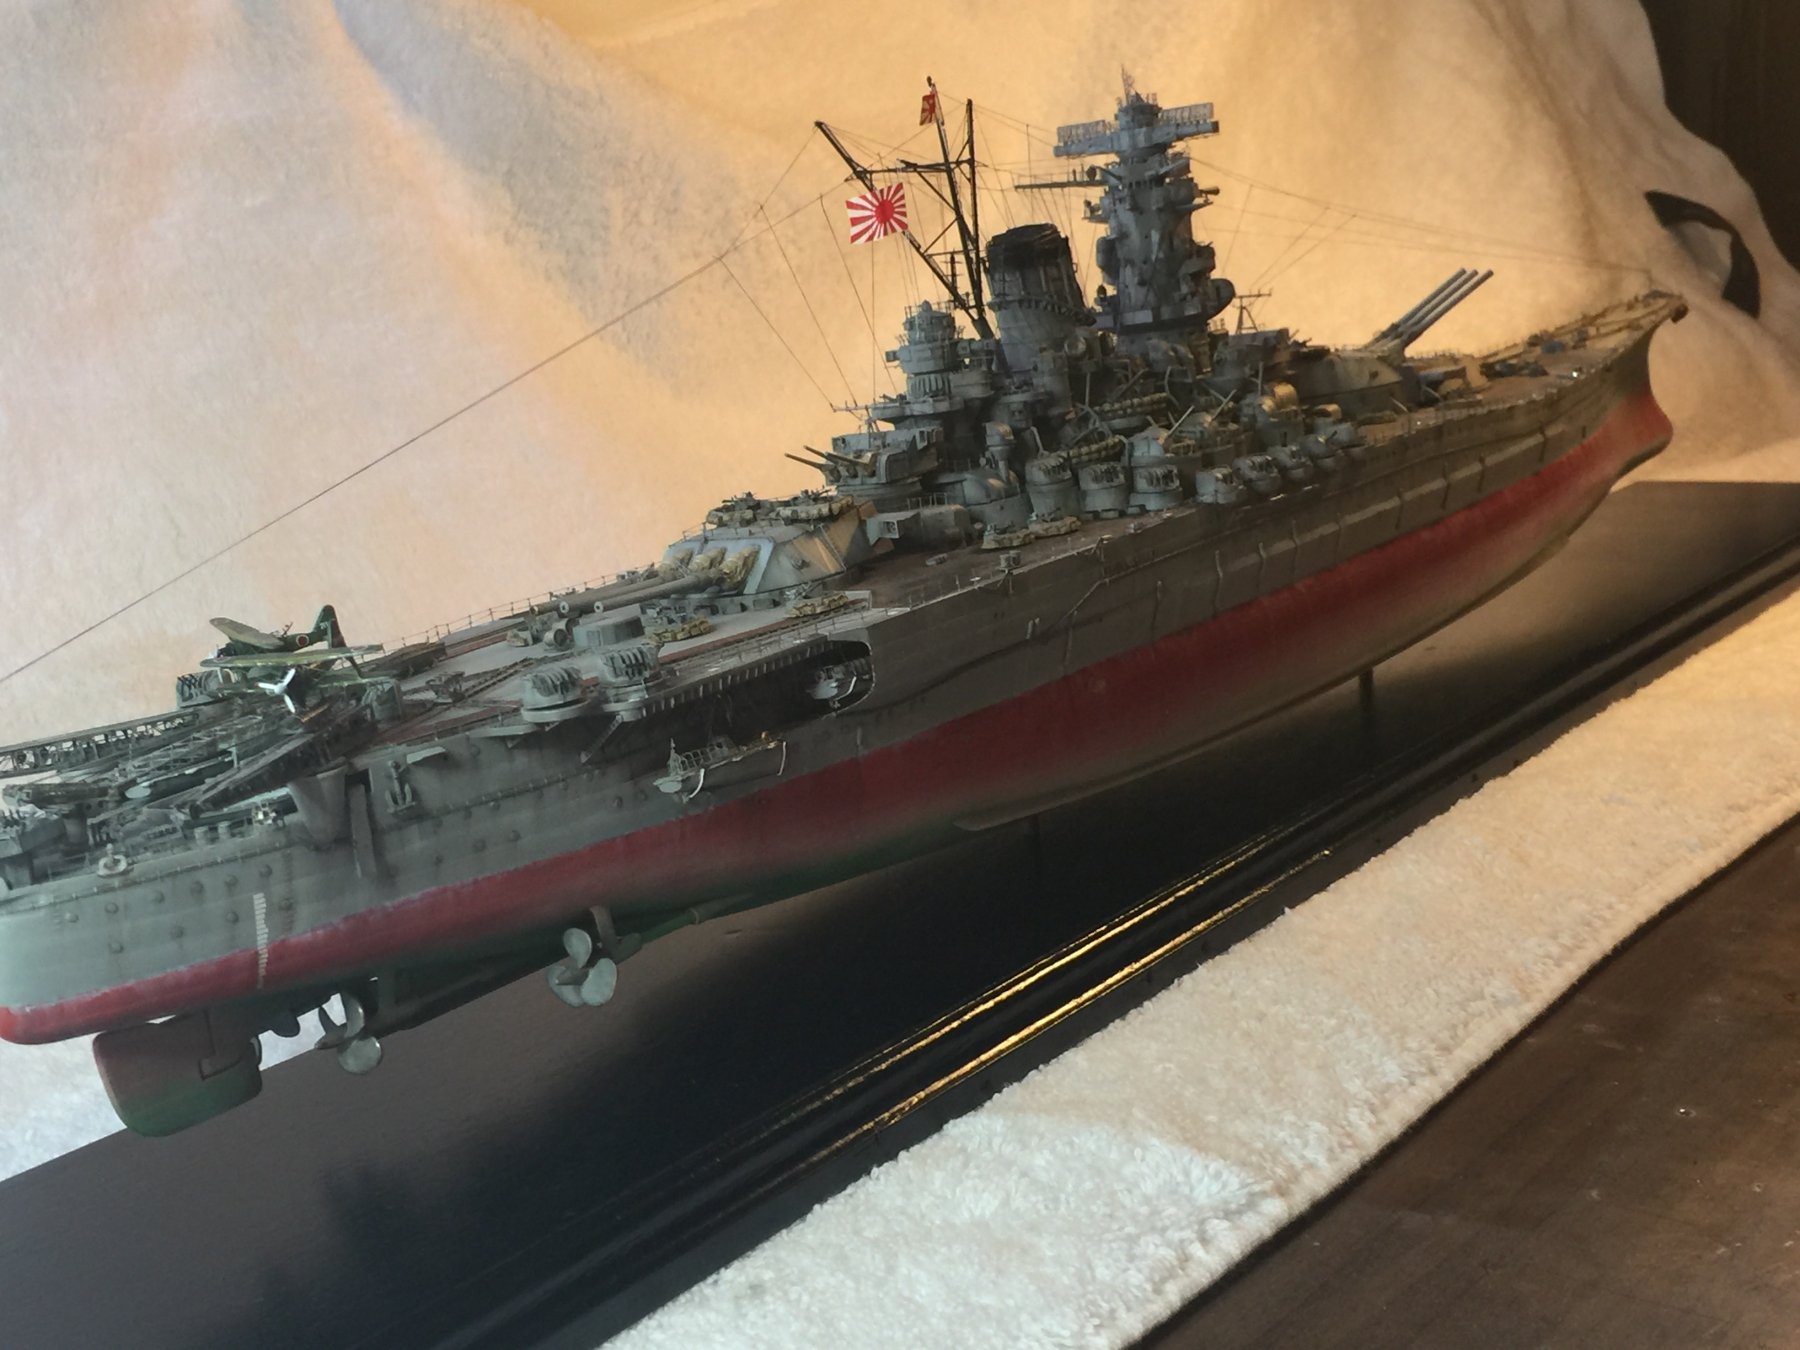
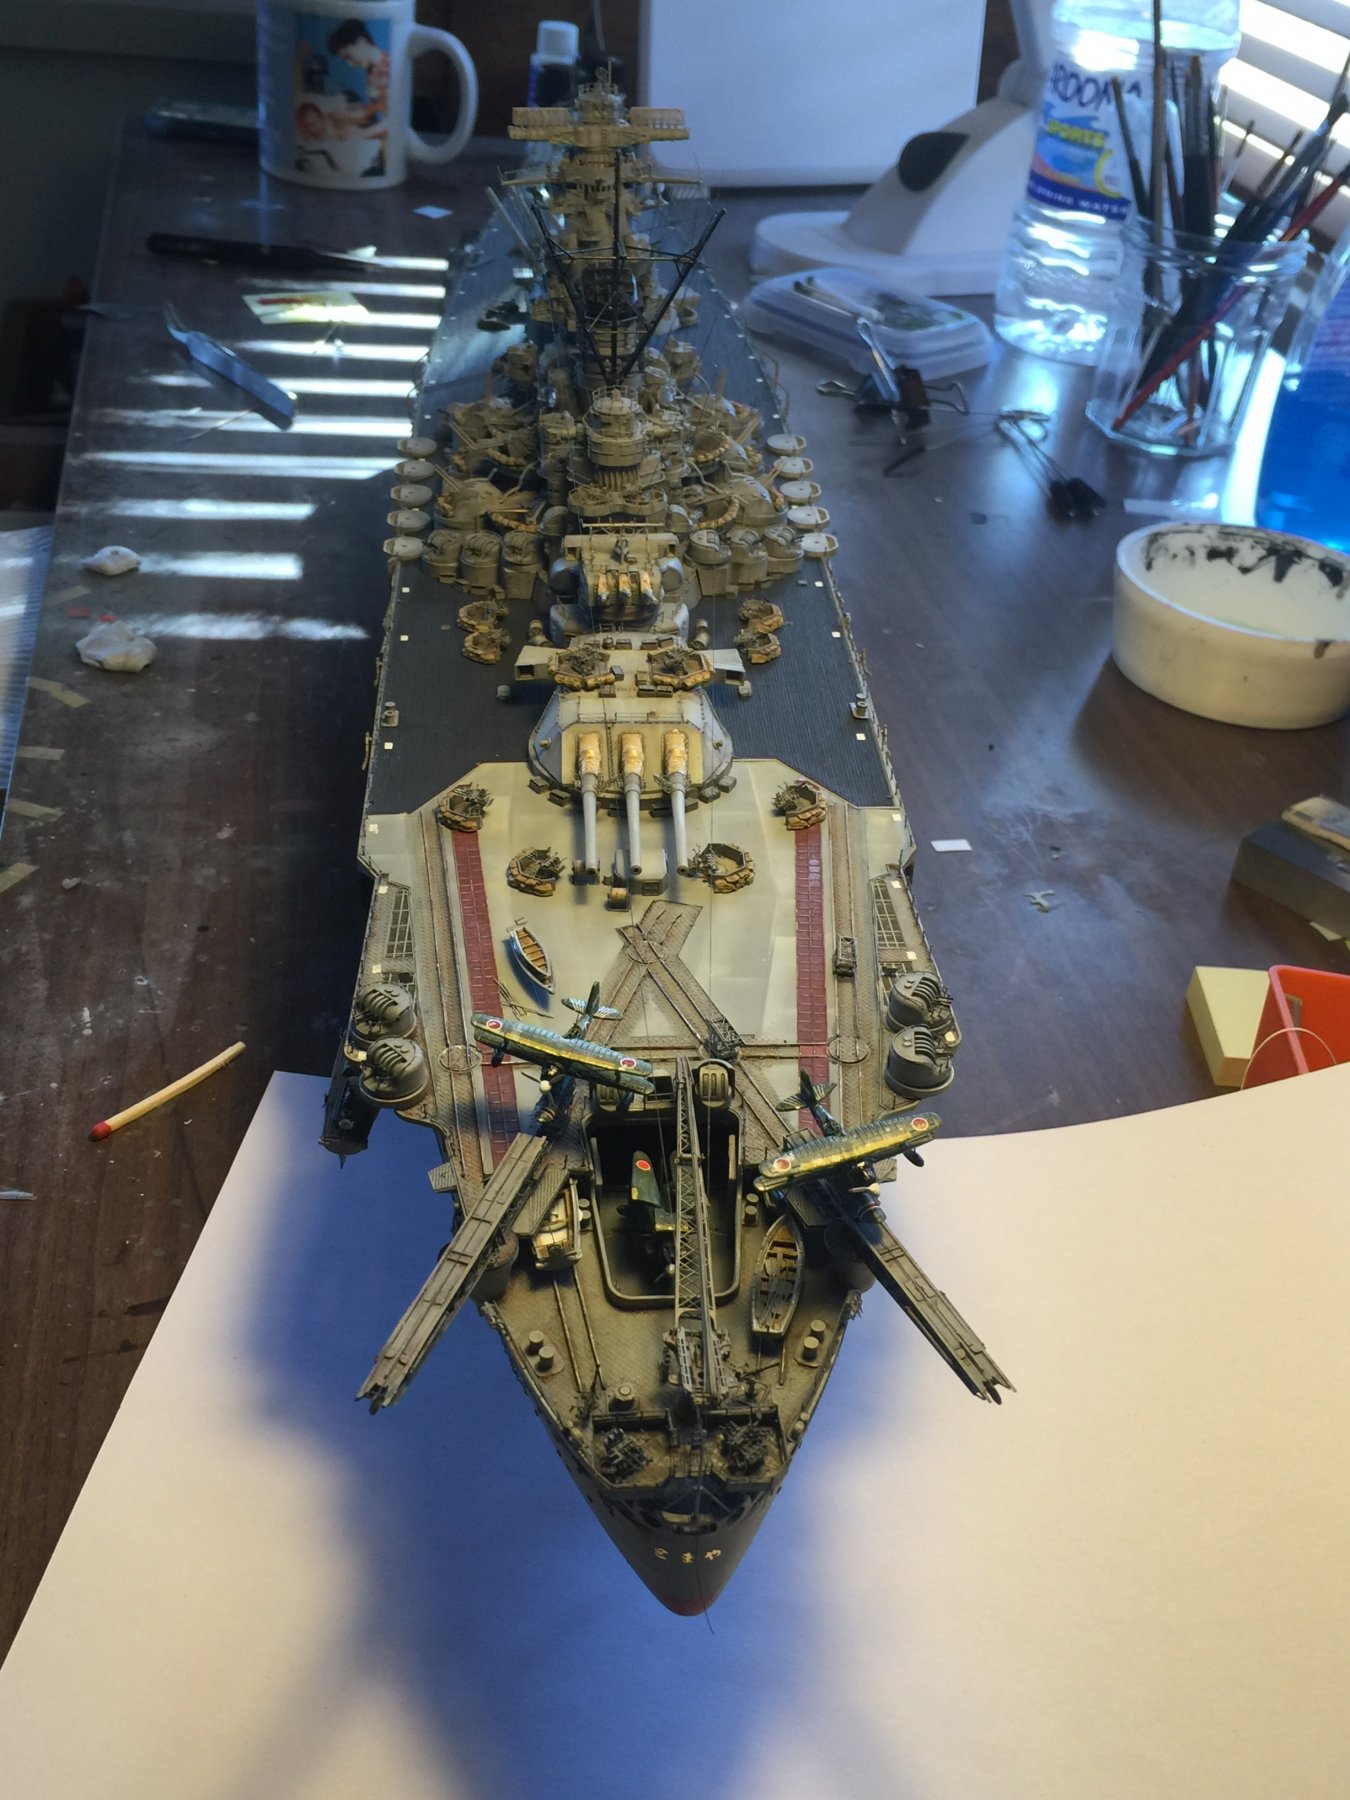
Nearly there, flags added
- Captain Slog, Dubz, CDW and 9 others
-
12
-
Everything was pretty much done up already, just had to throw them on in order. Not sure about the Matt varnish as it's not too bad in the flesh.
- popeye the sailor, Canute, Elijah and 1 other
-
4
-
-
-
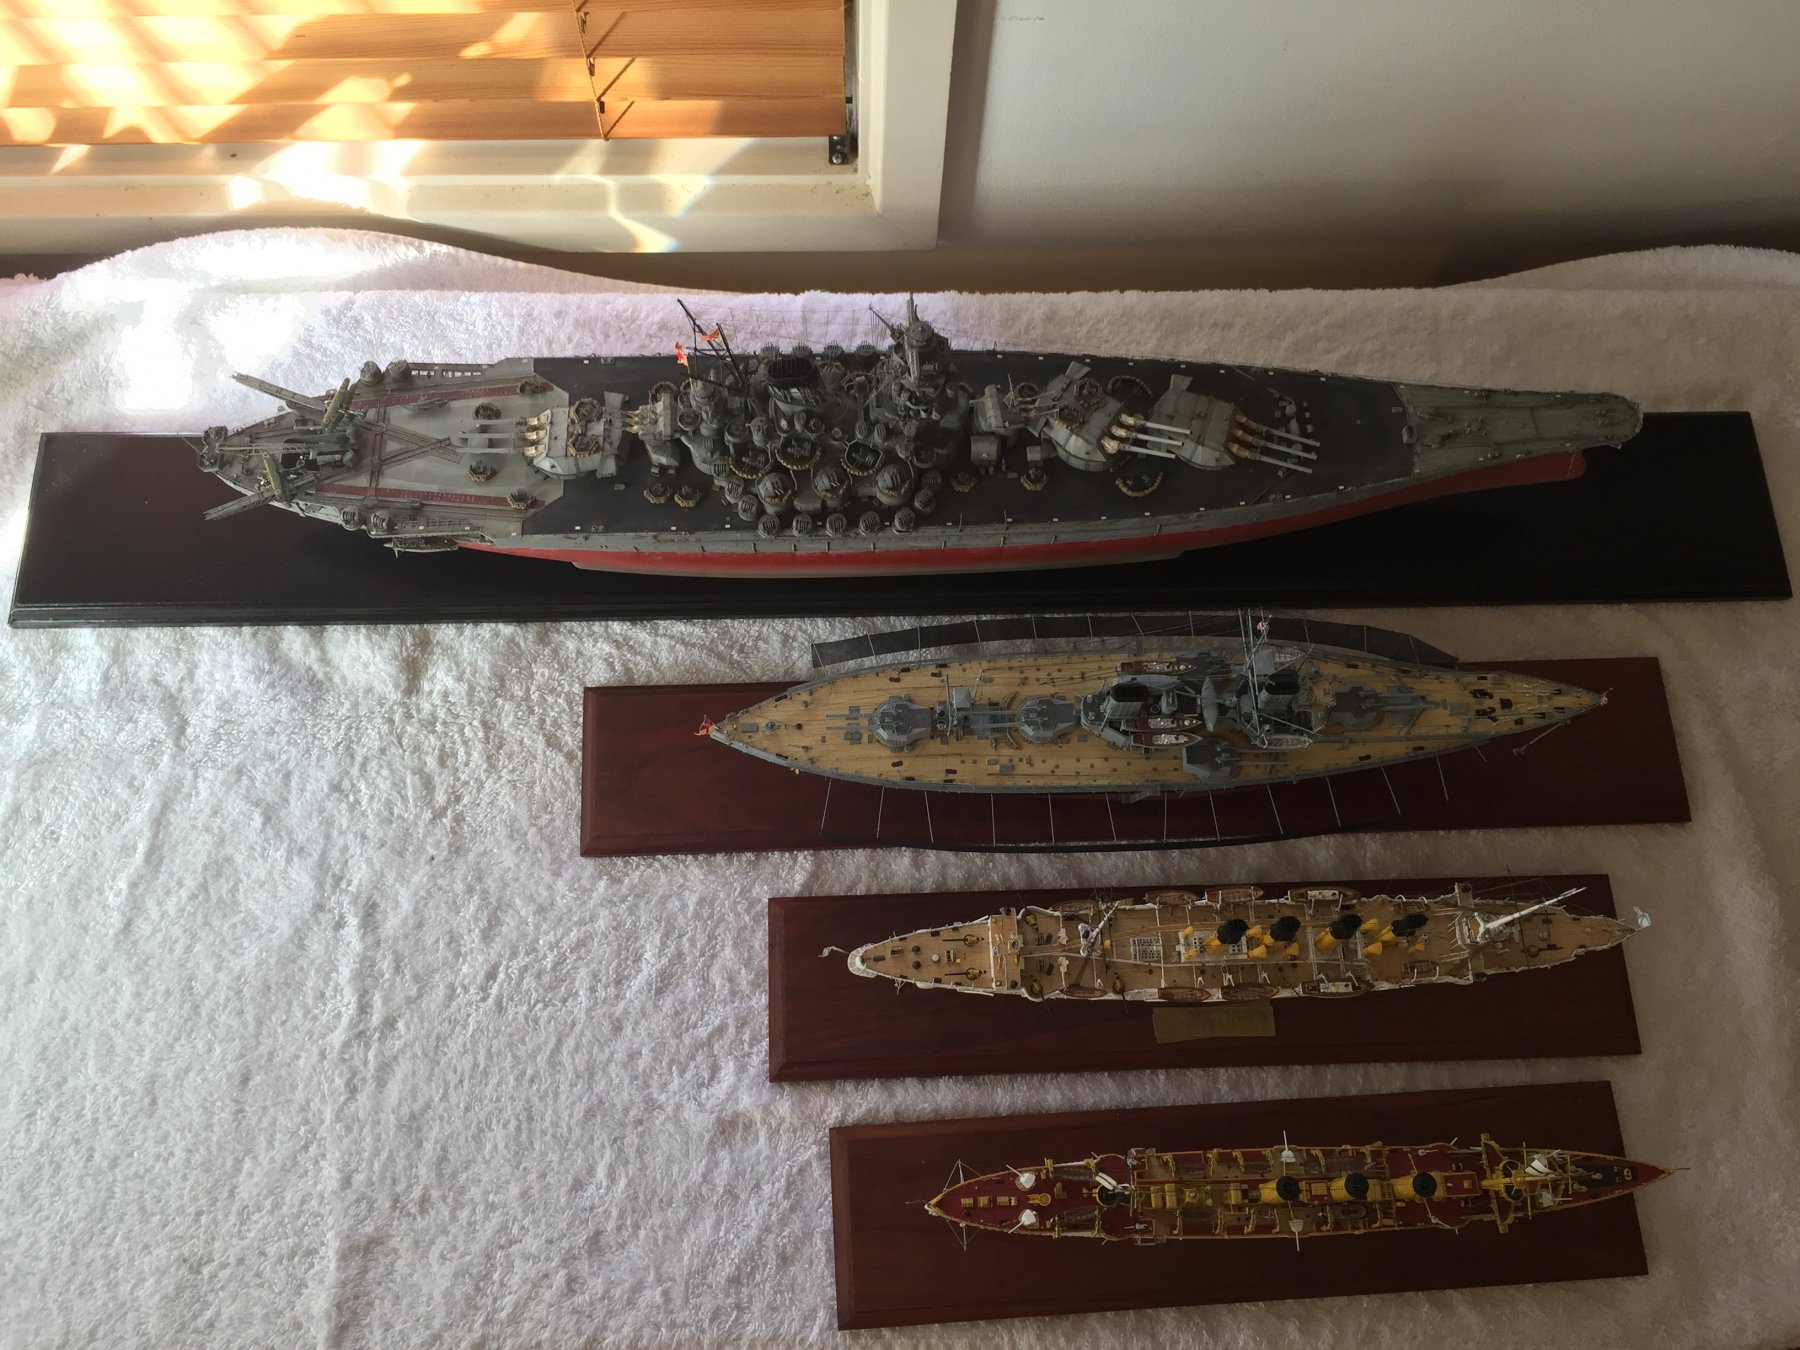
If it's a wooden base won't it float?
- CDW, Canute and popeye the sailor
-
3
-
I had the base made up by a bloke before I started the build, and recently painted it black so the contrast matches the deck, but it sits fairly flush to the sides, so I'd be stuffed anyway!
- Canute, popeye the sailor and Elijah
-
3
-
I thought about that popeye, but it came down to risk v reward, it would mean I'd have to extend the boat boom as well, which would mean it extended past the base and as such risked braking it every time I moved it and it would not store well.
- popeye the sailor, cog, Canute and 1 other
-
4
-
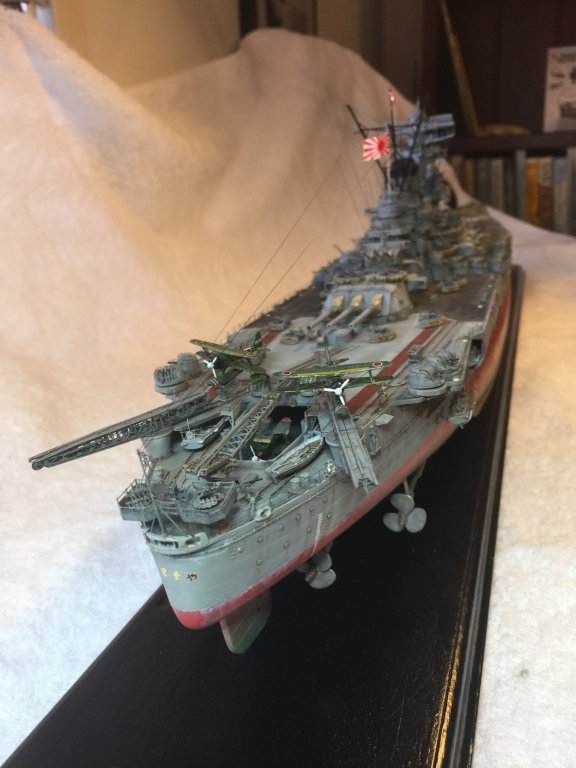
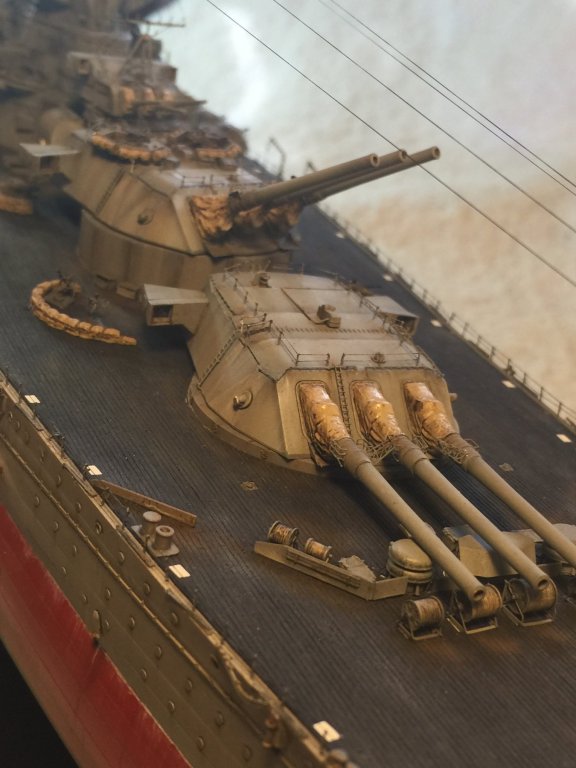
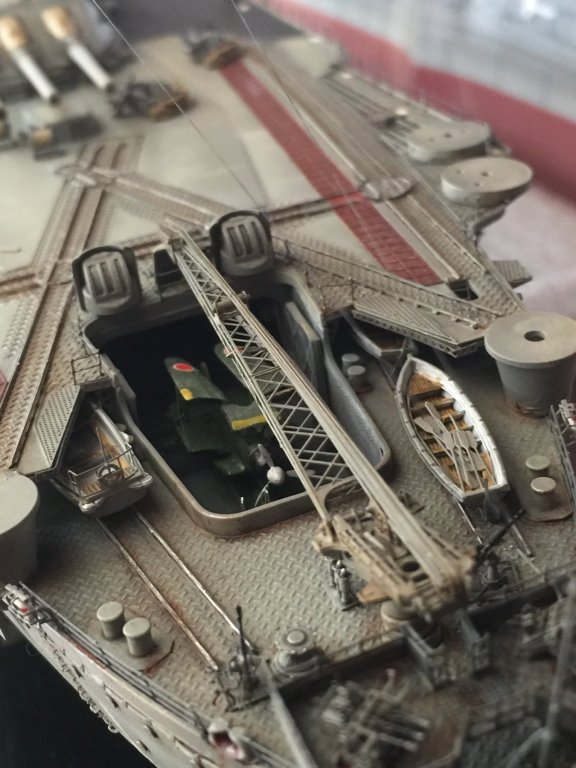
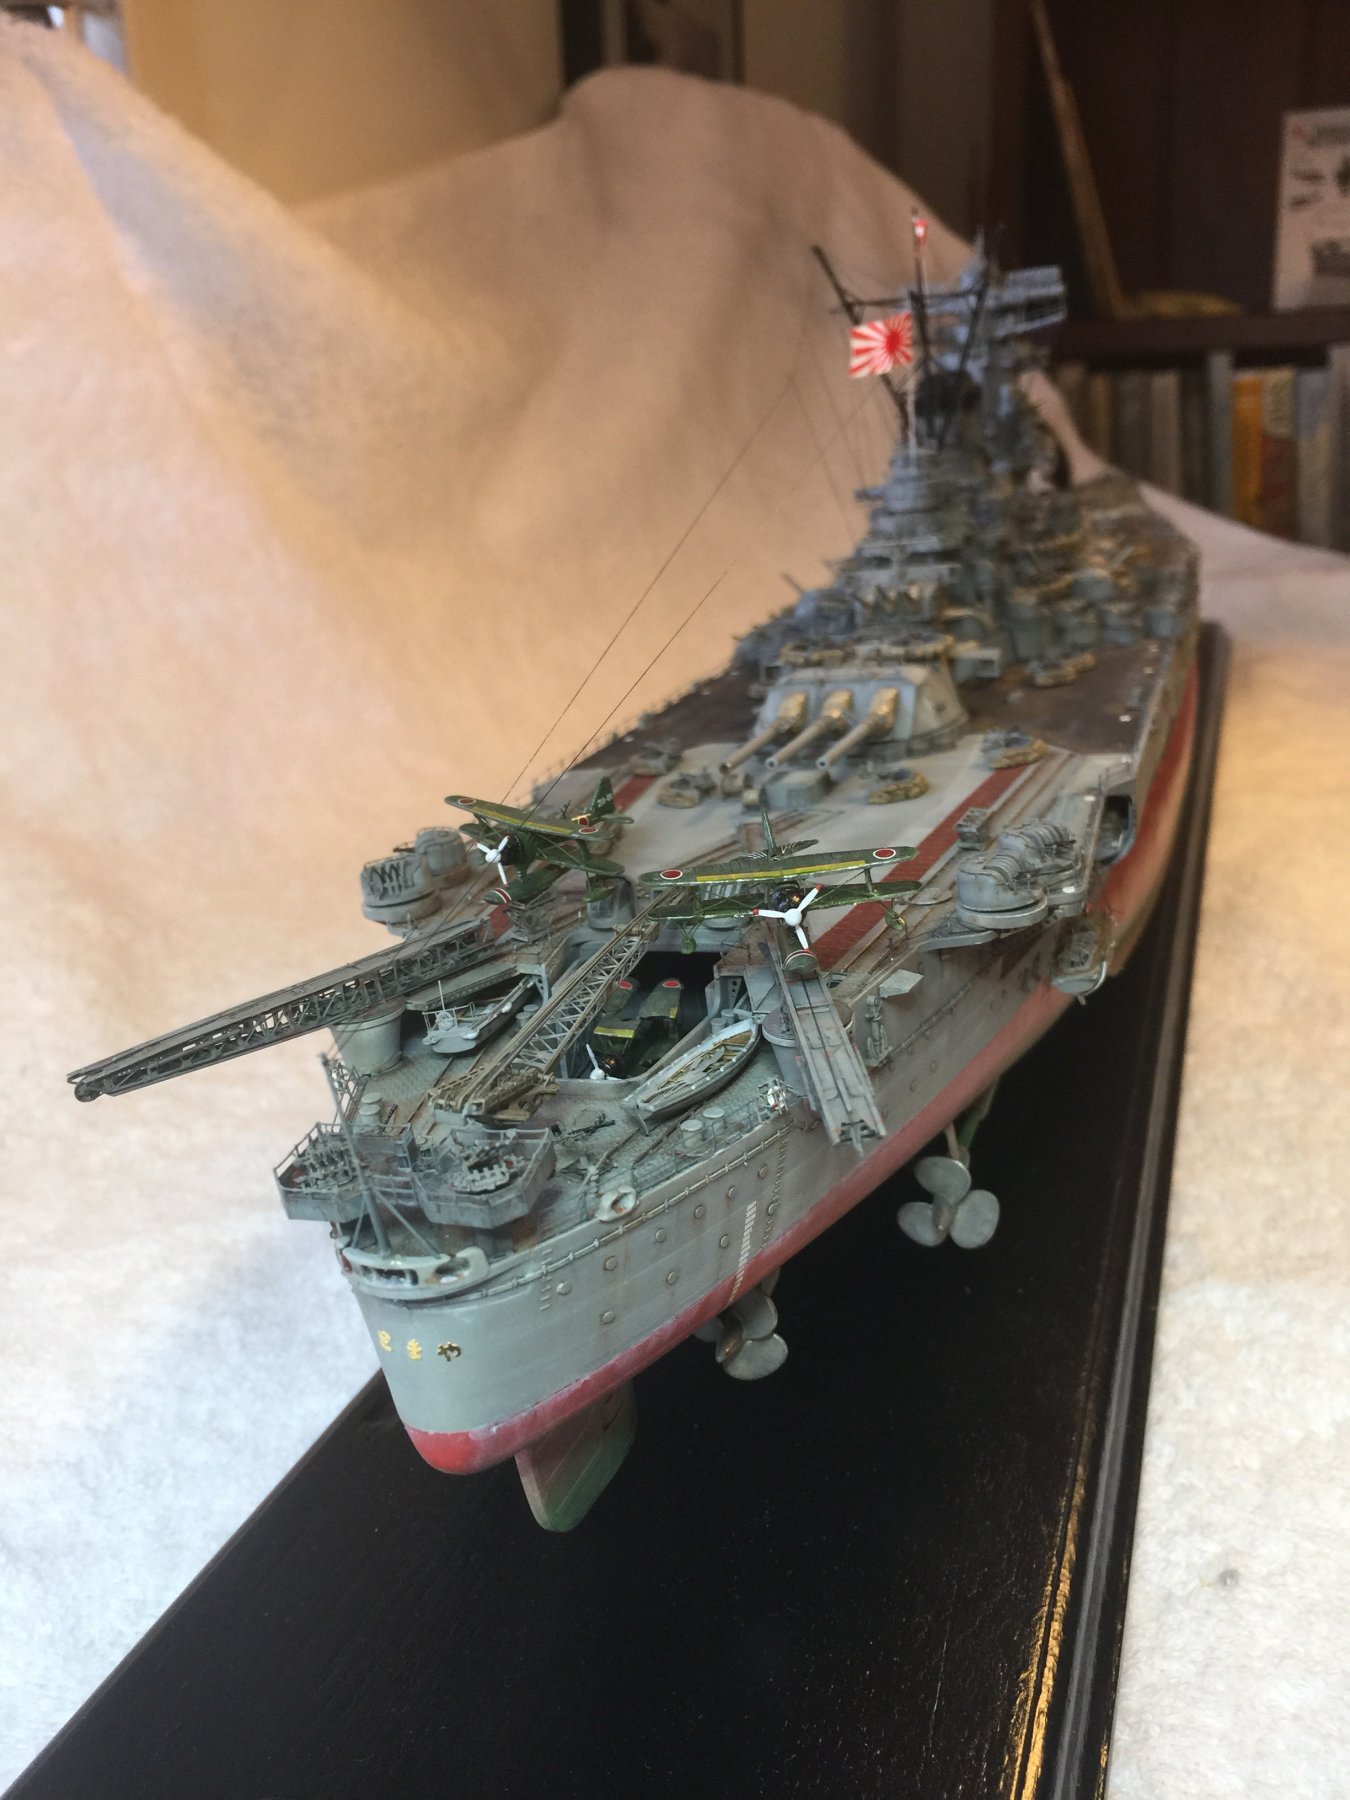
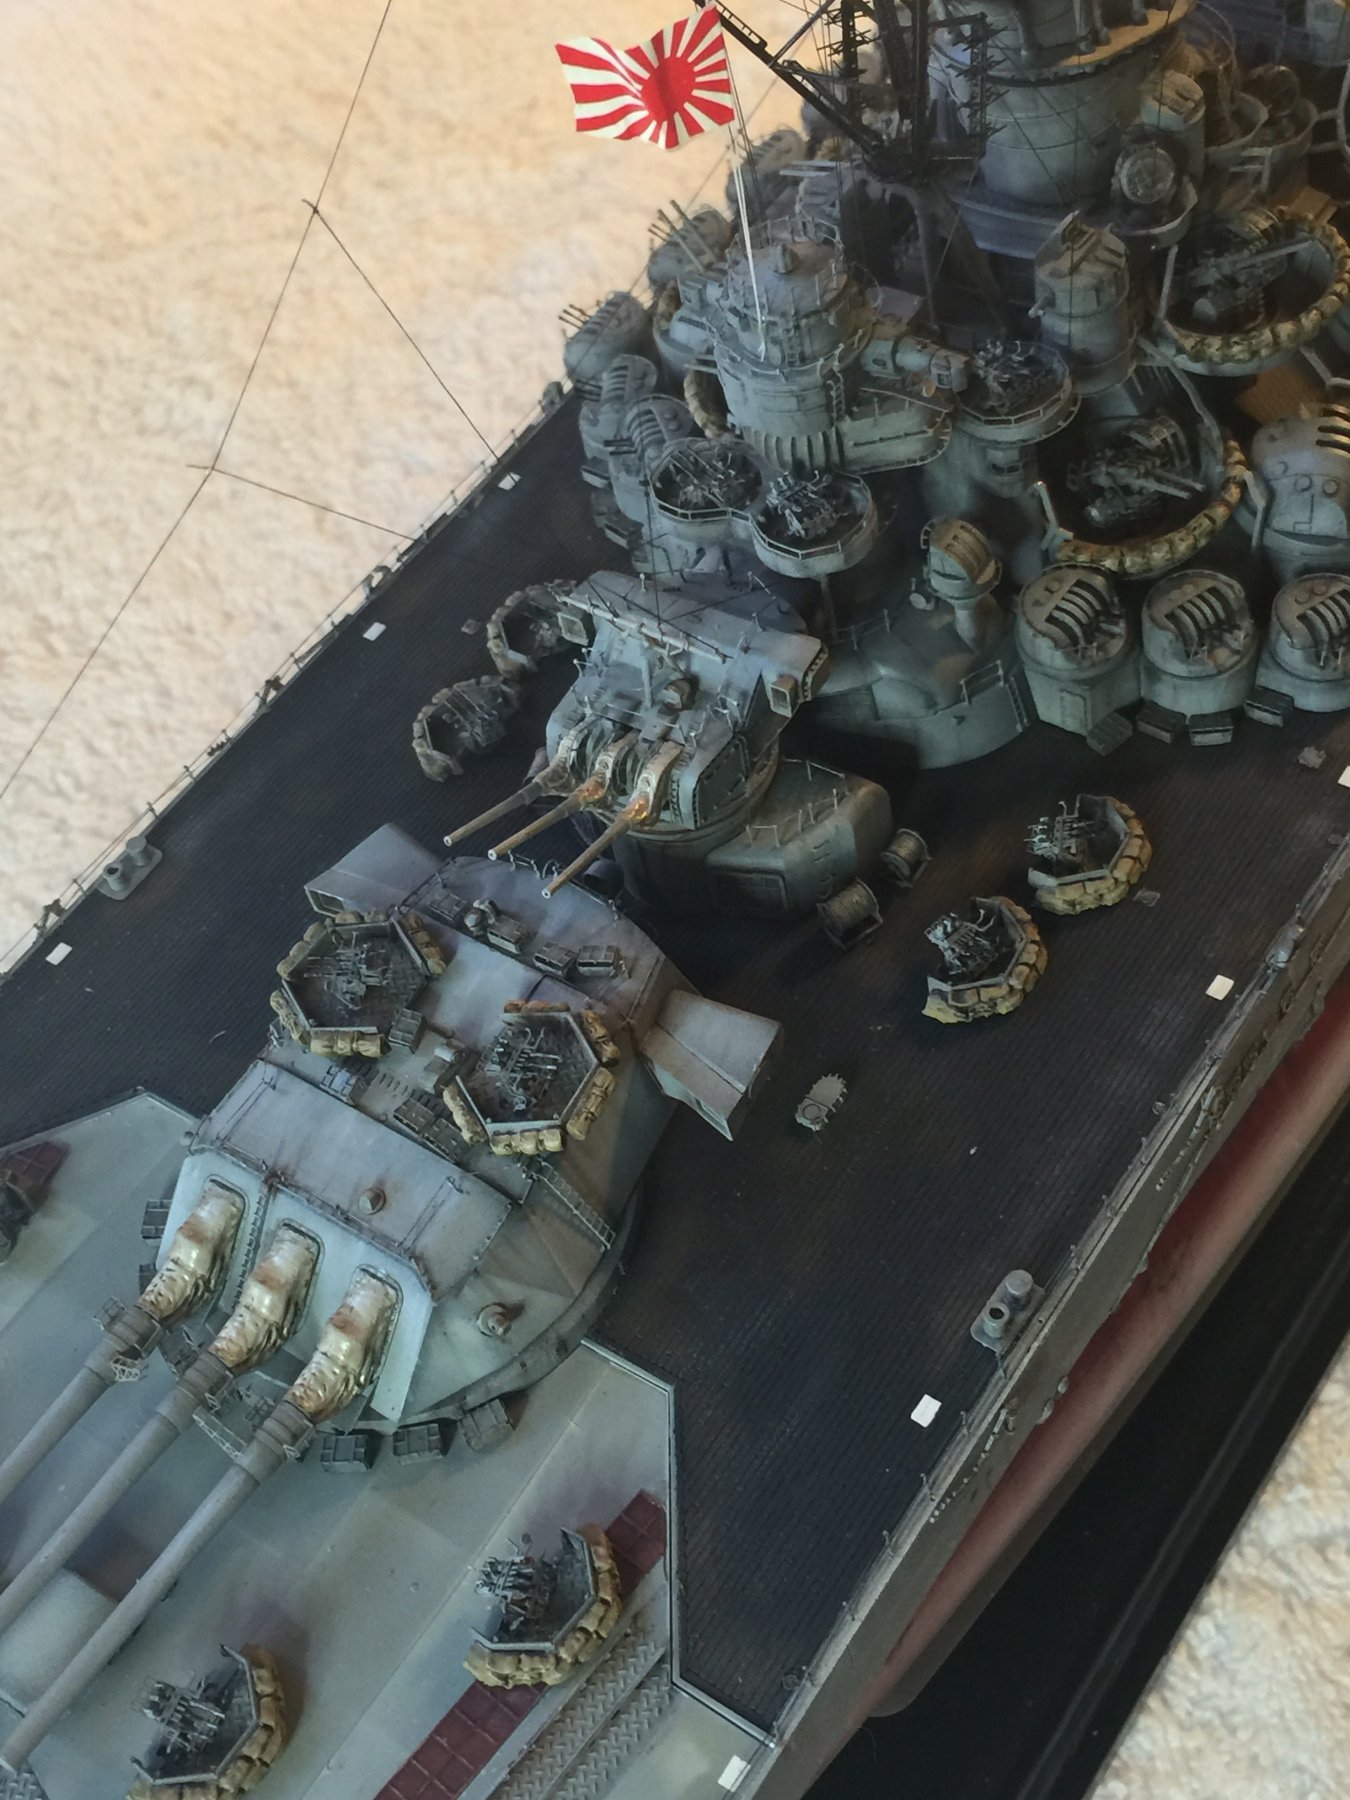
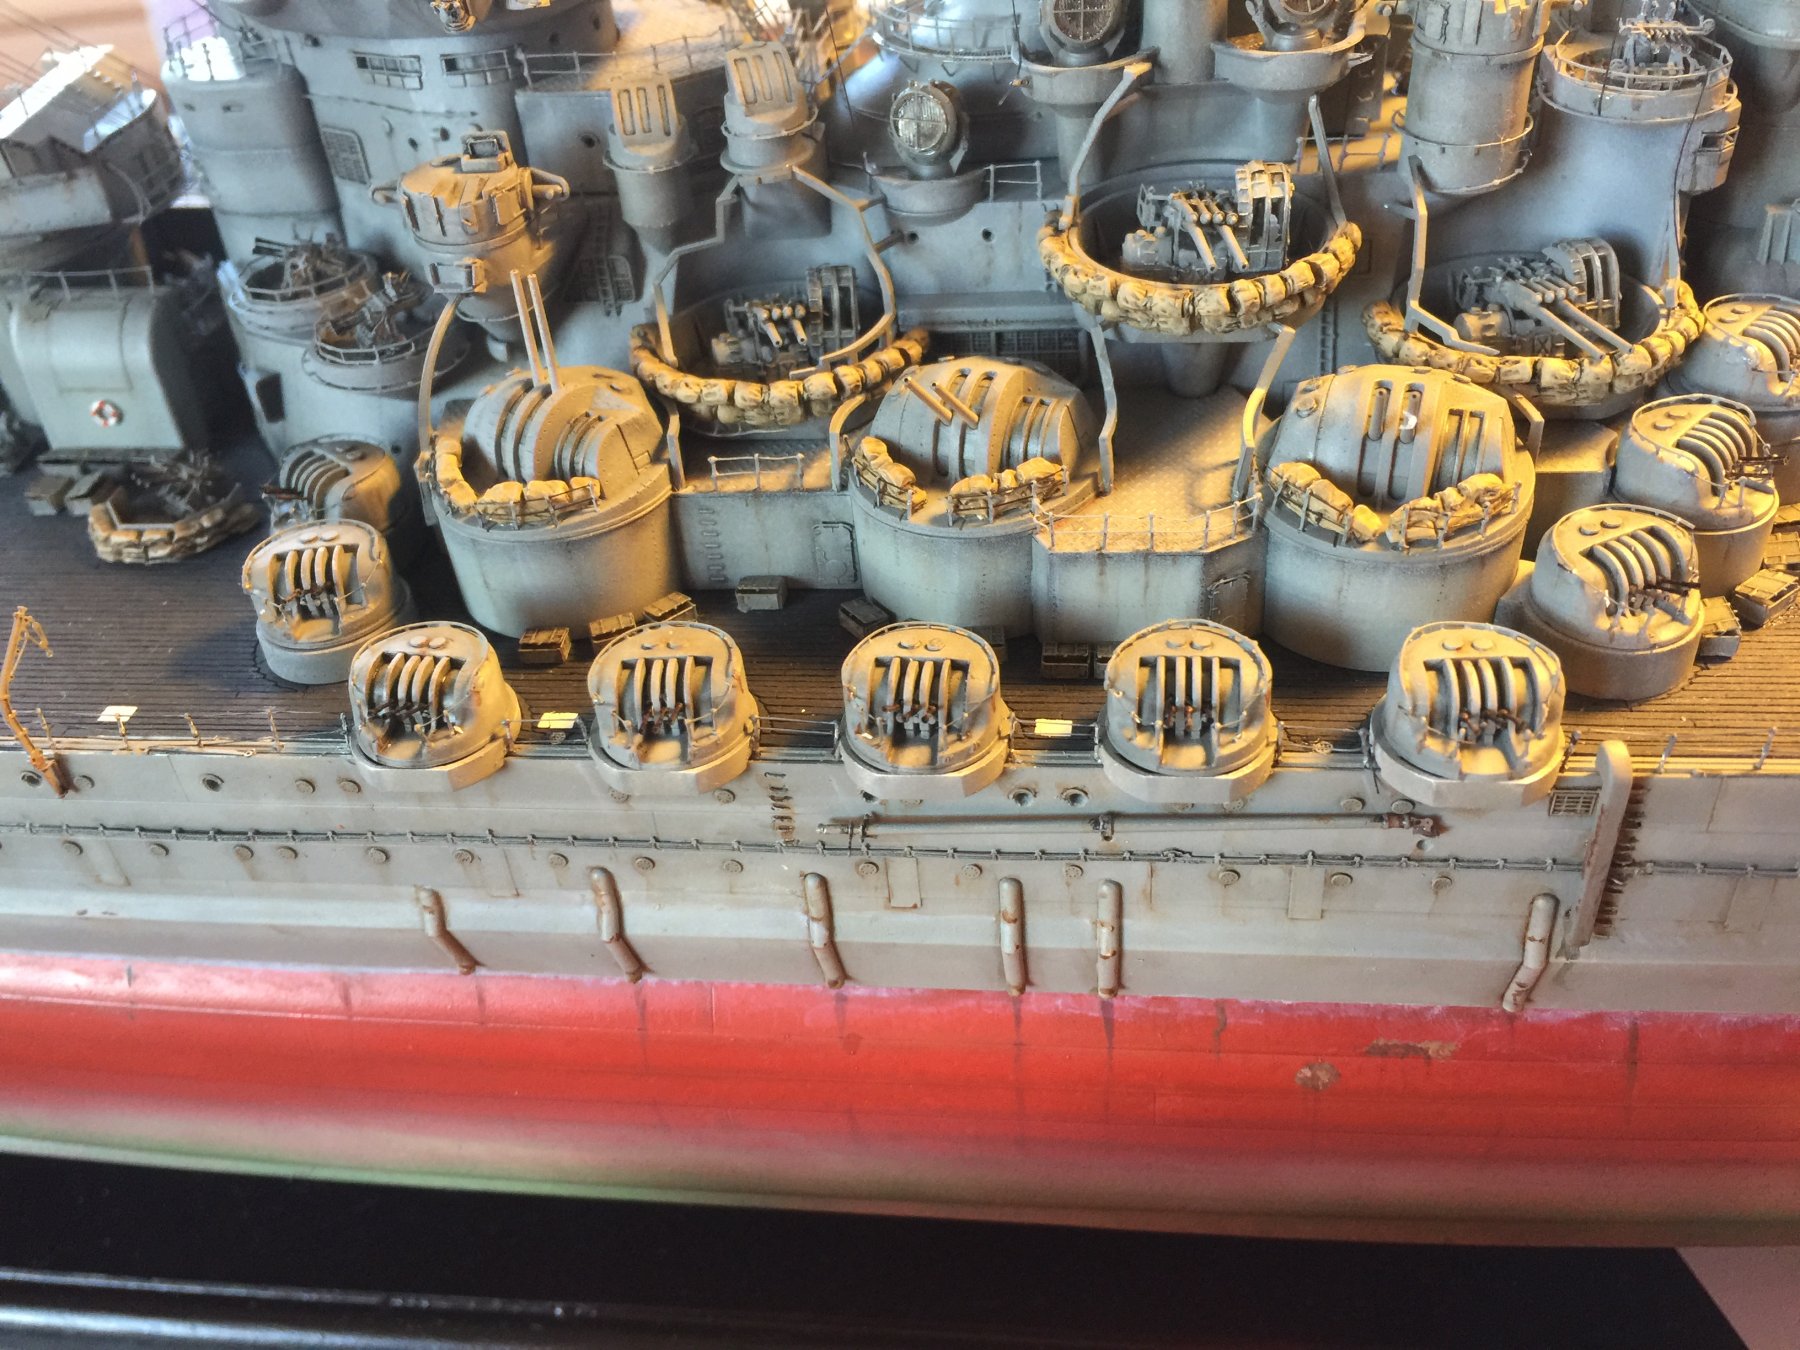
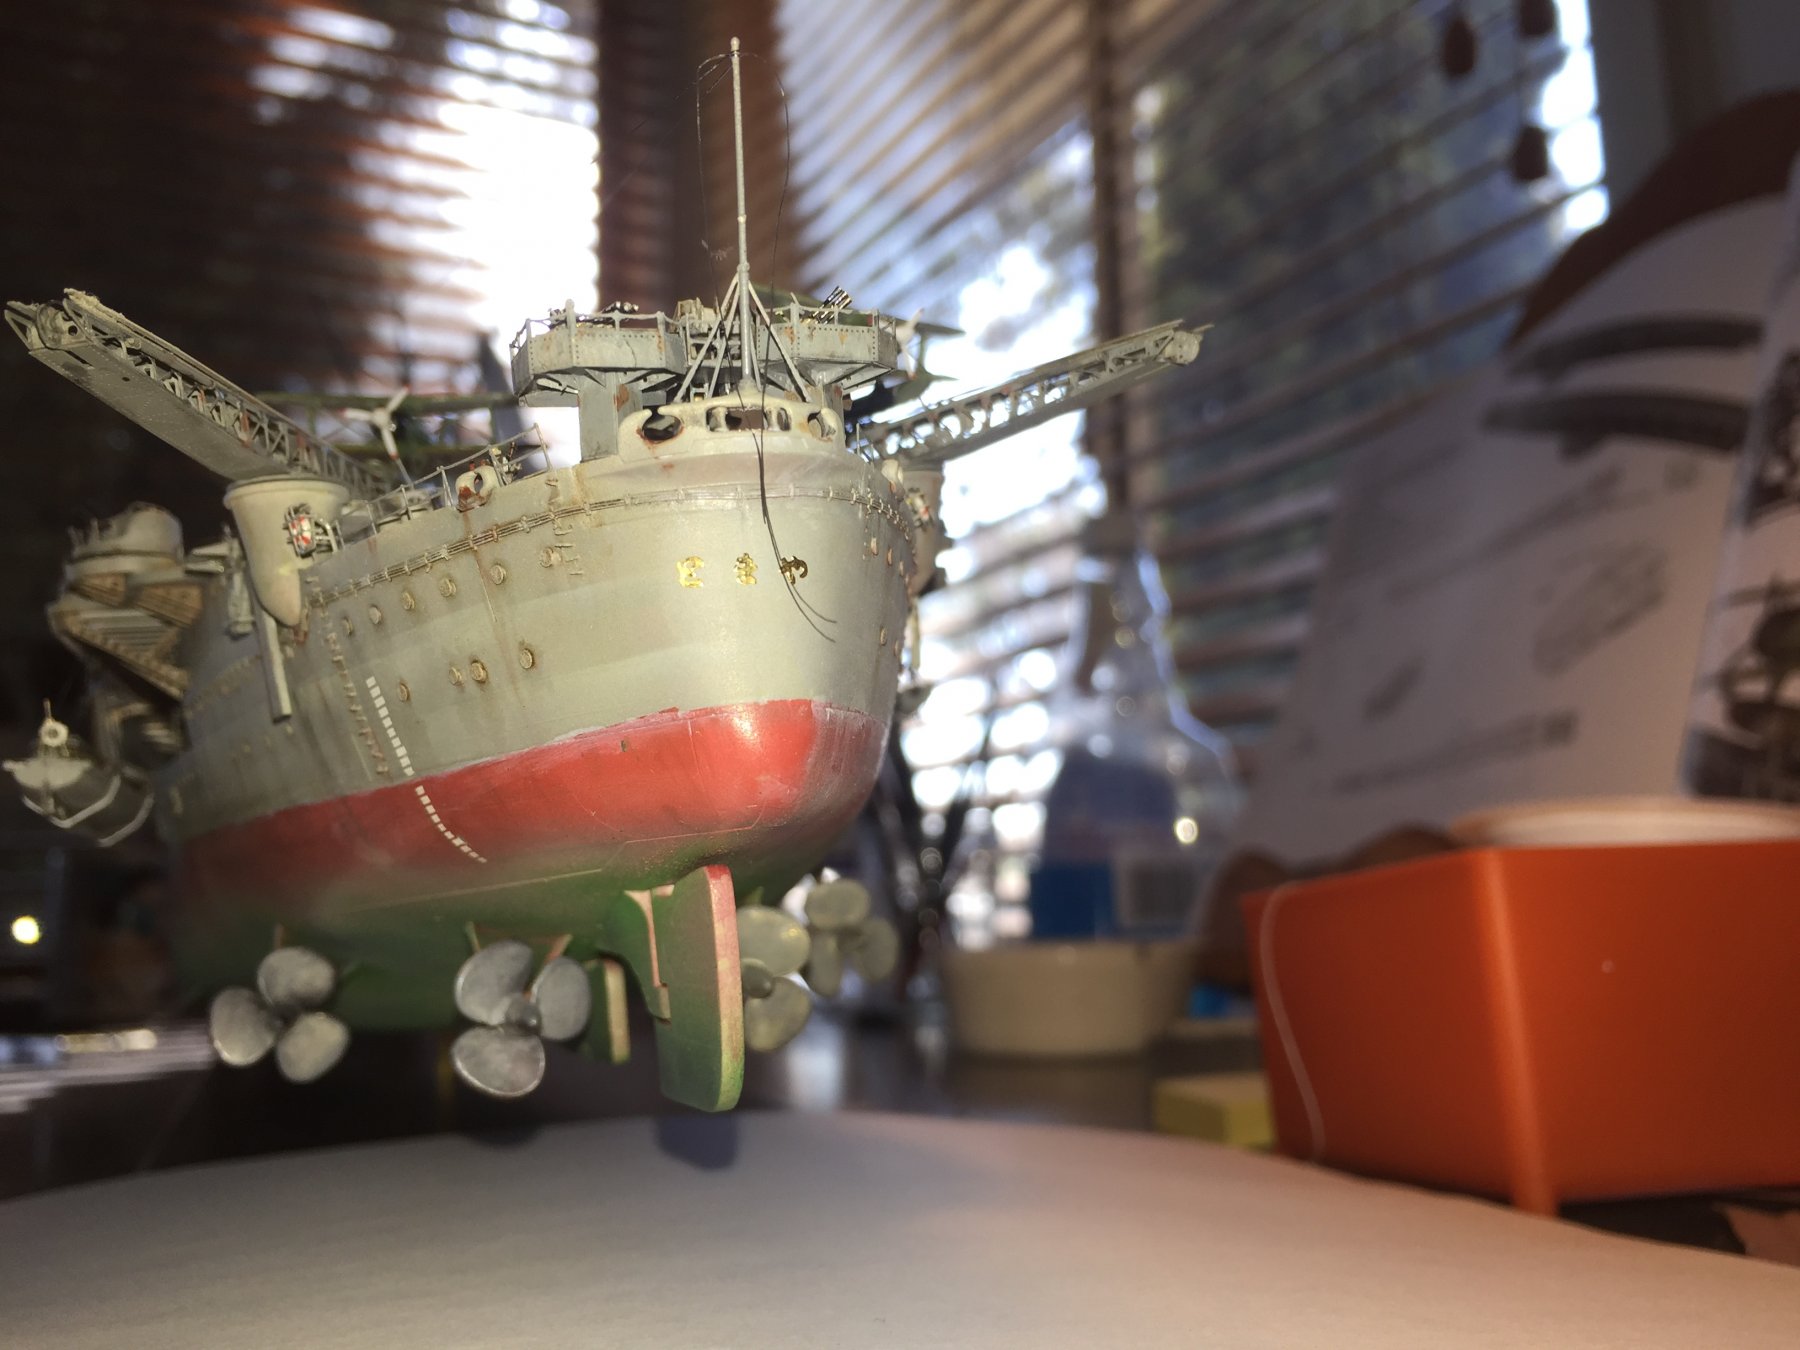
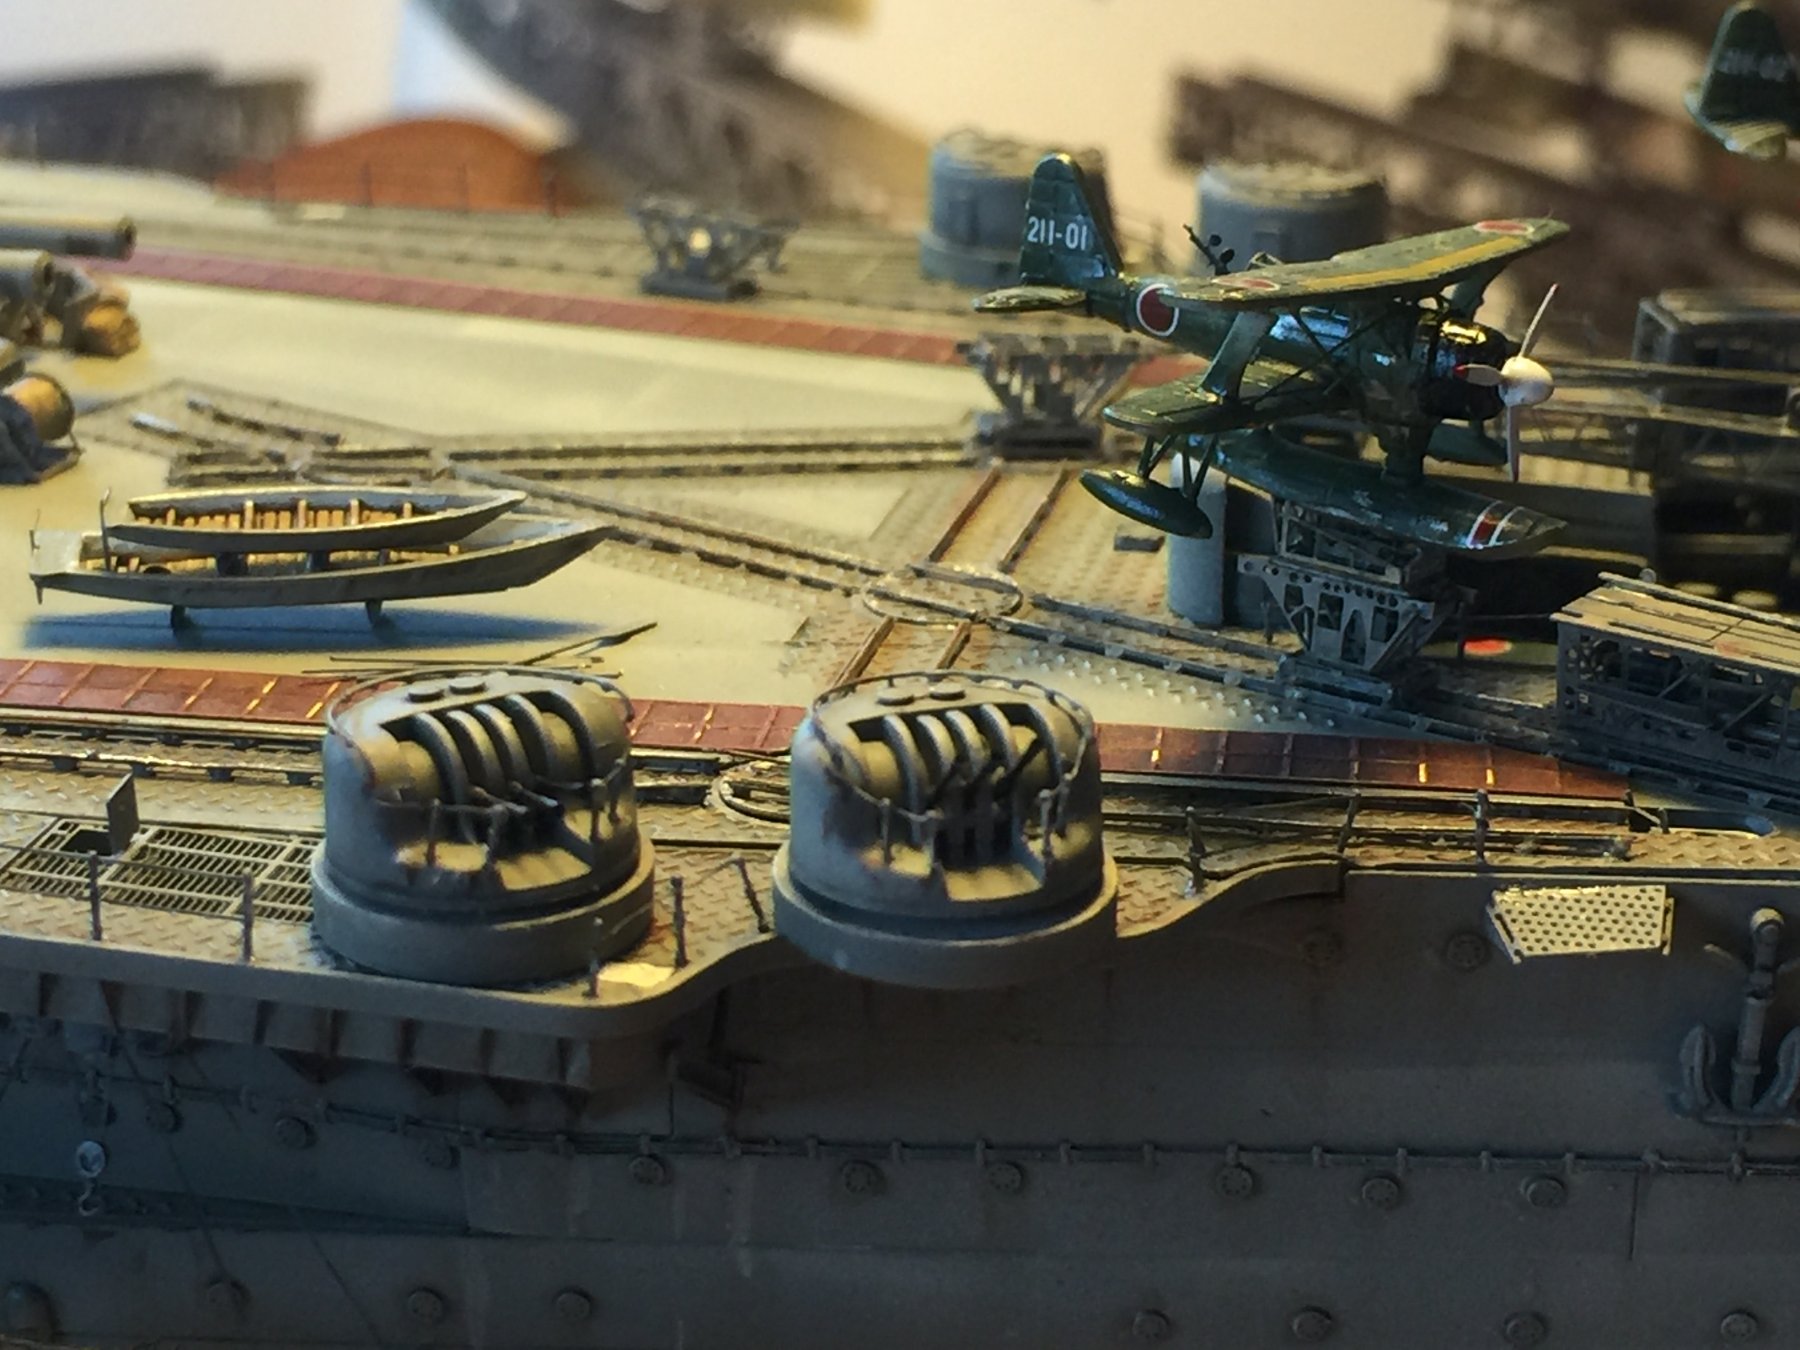
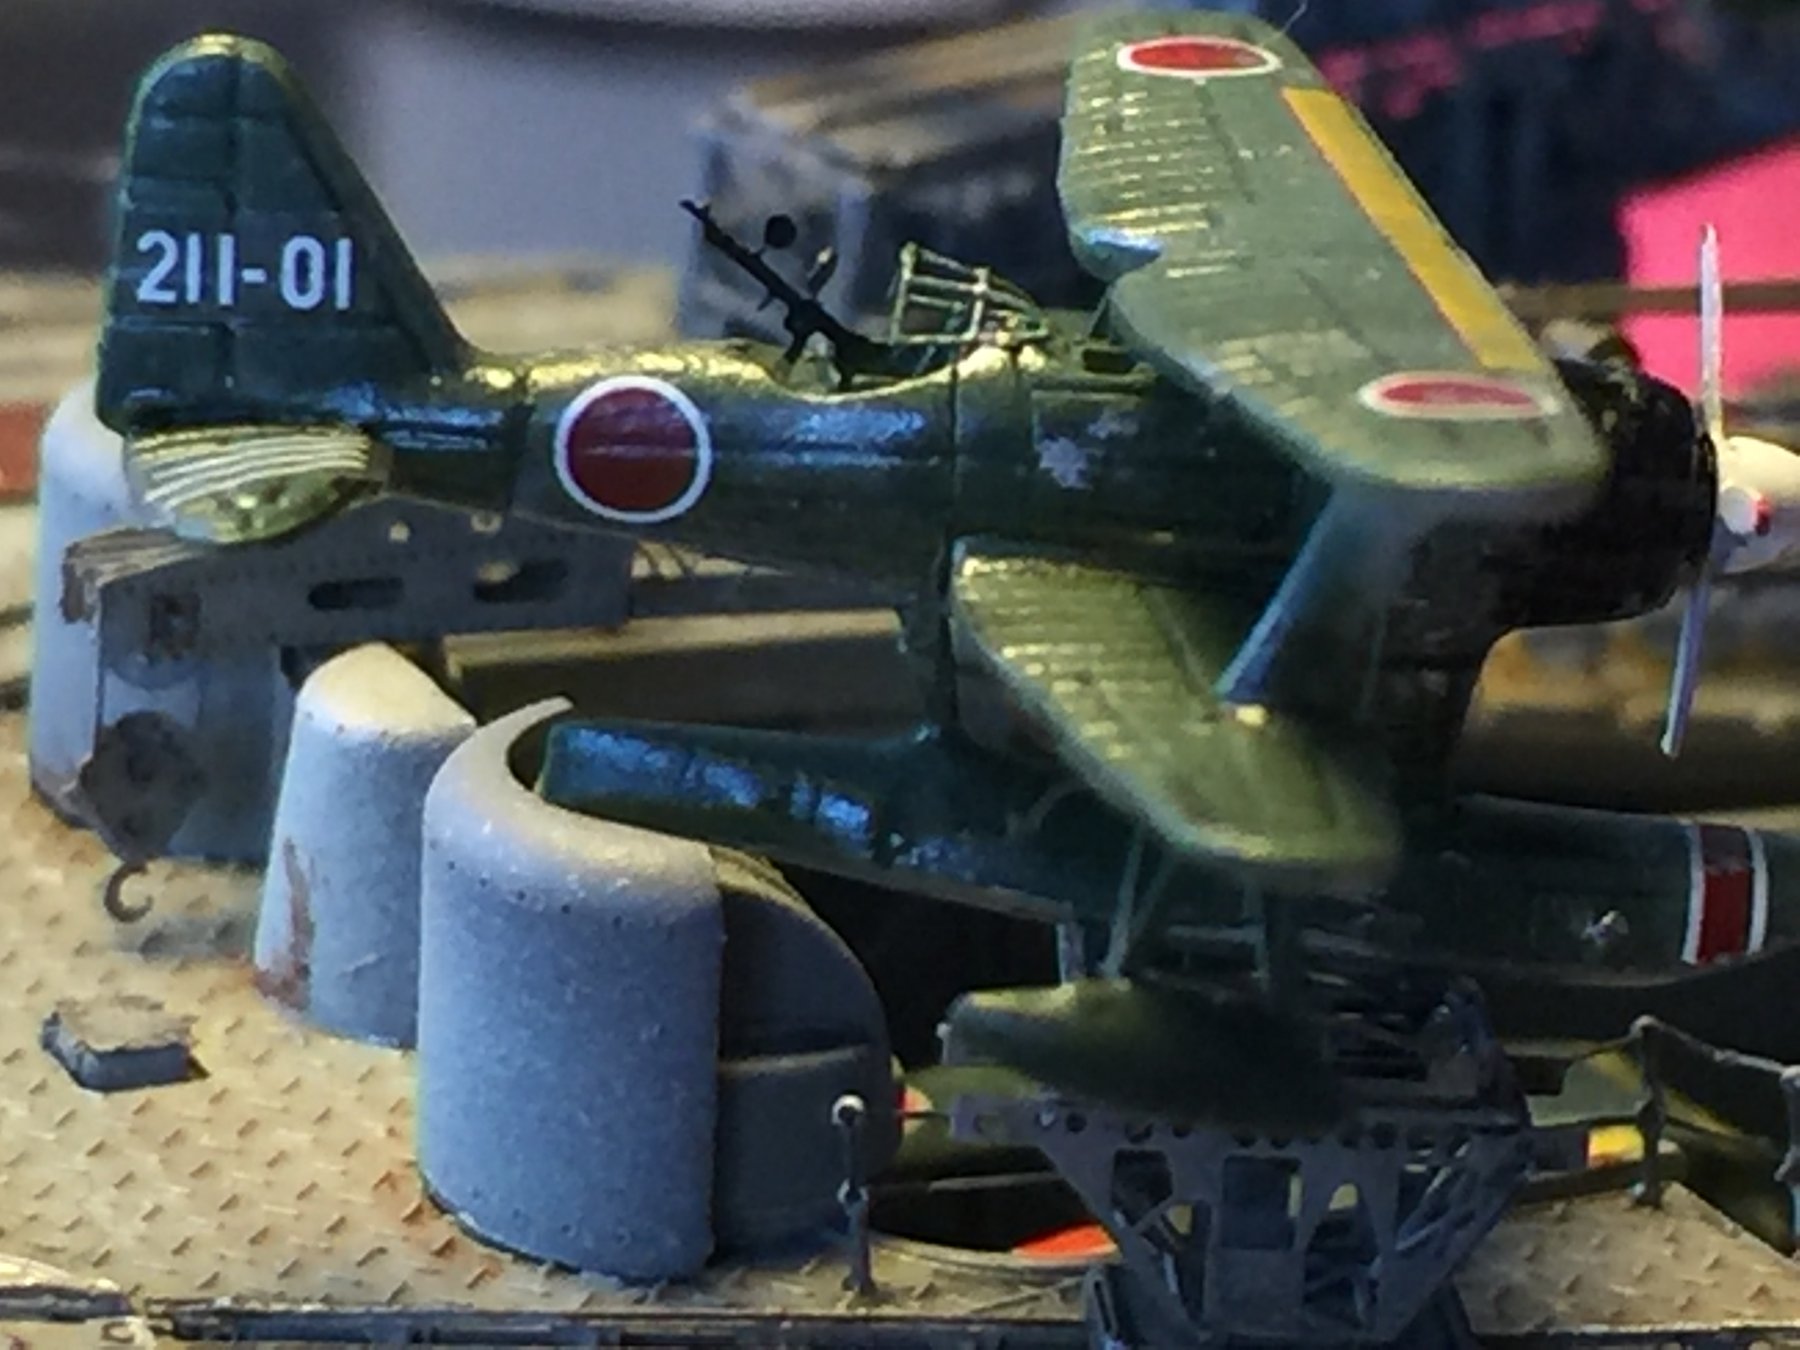
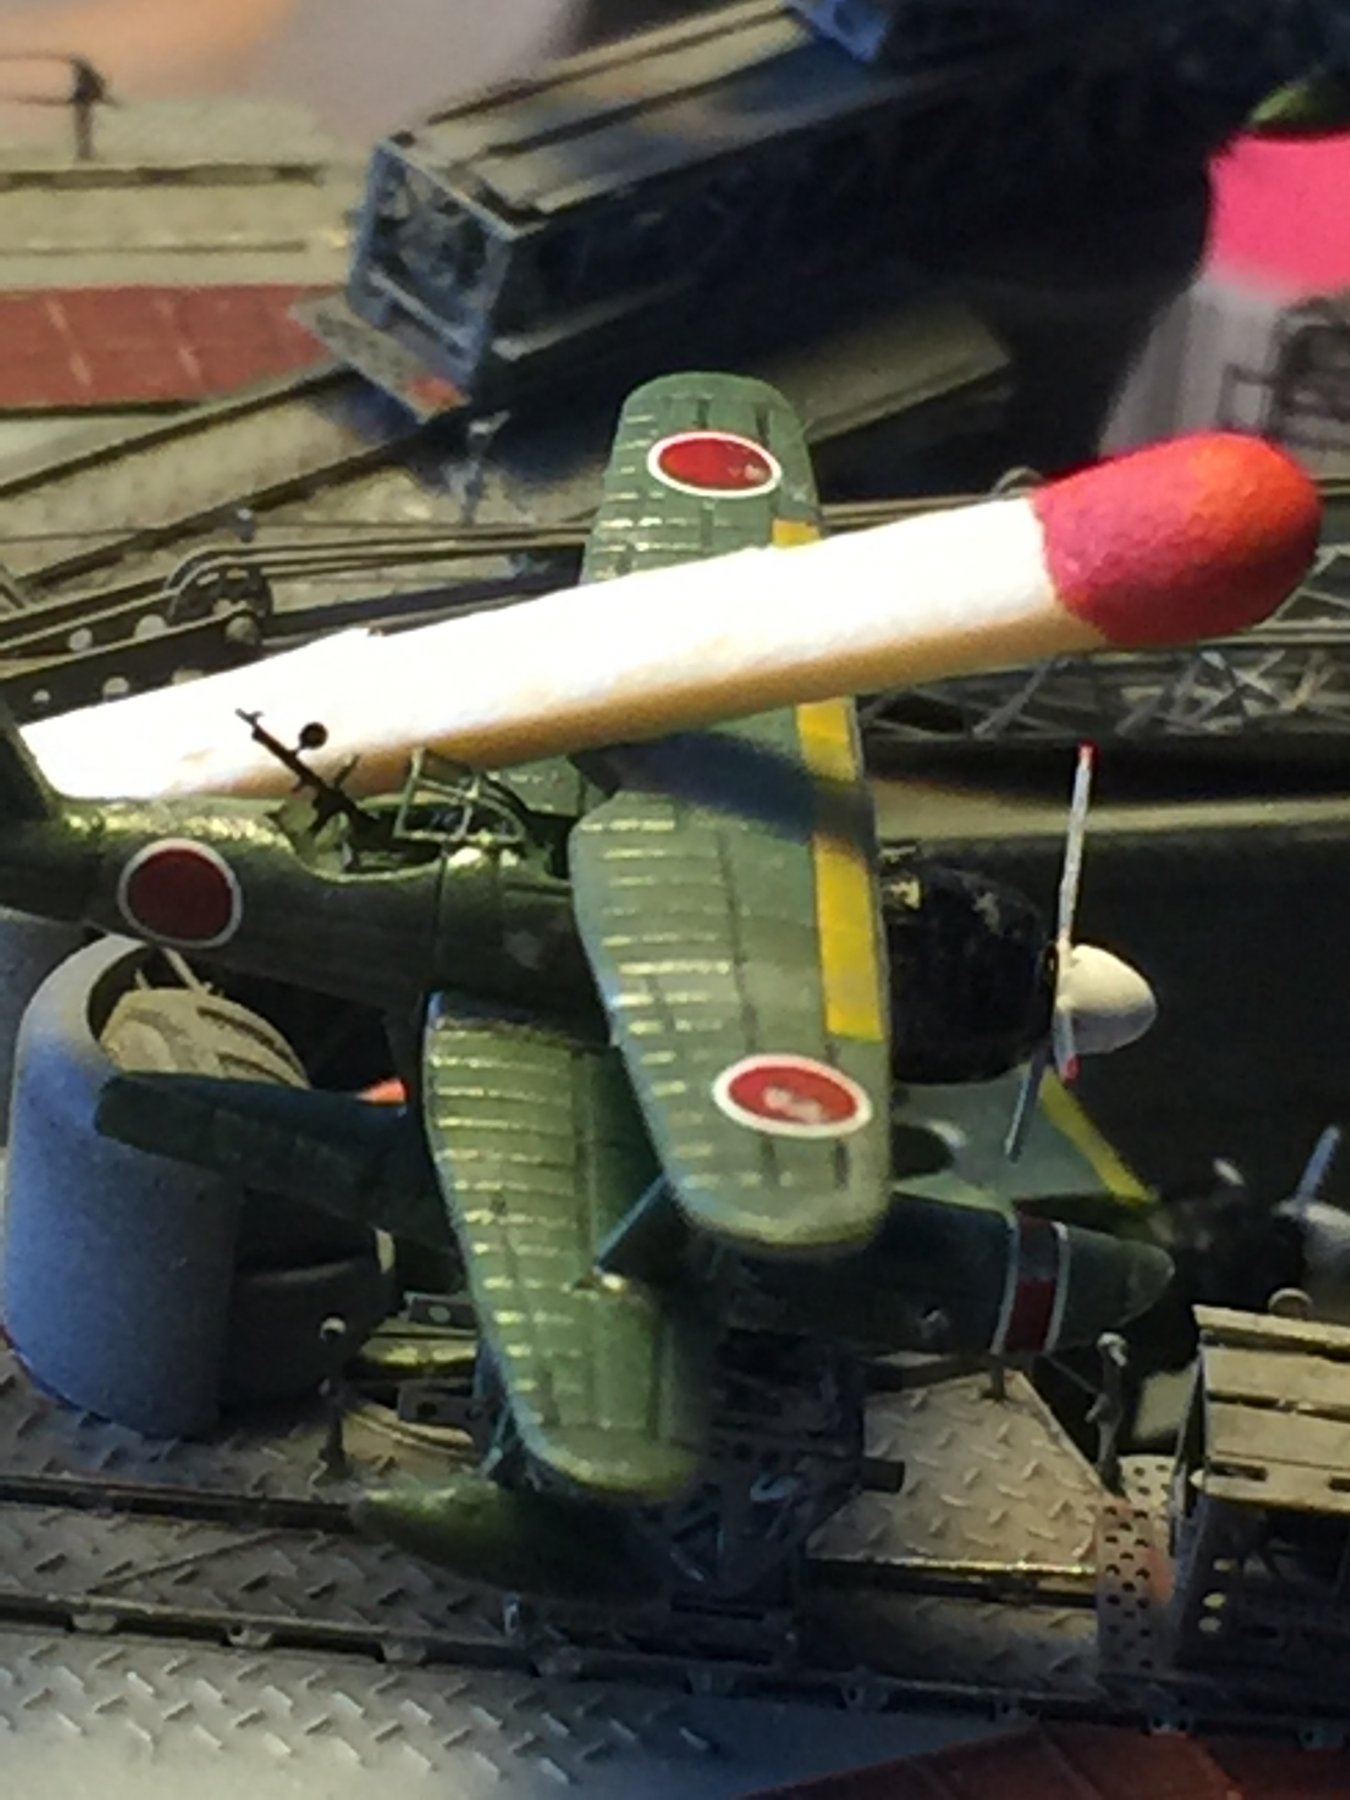
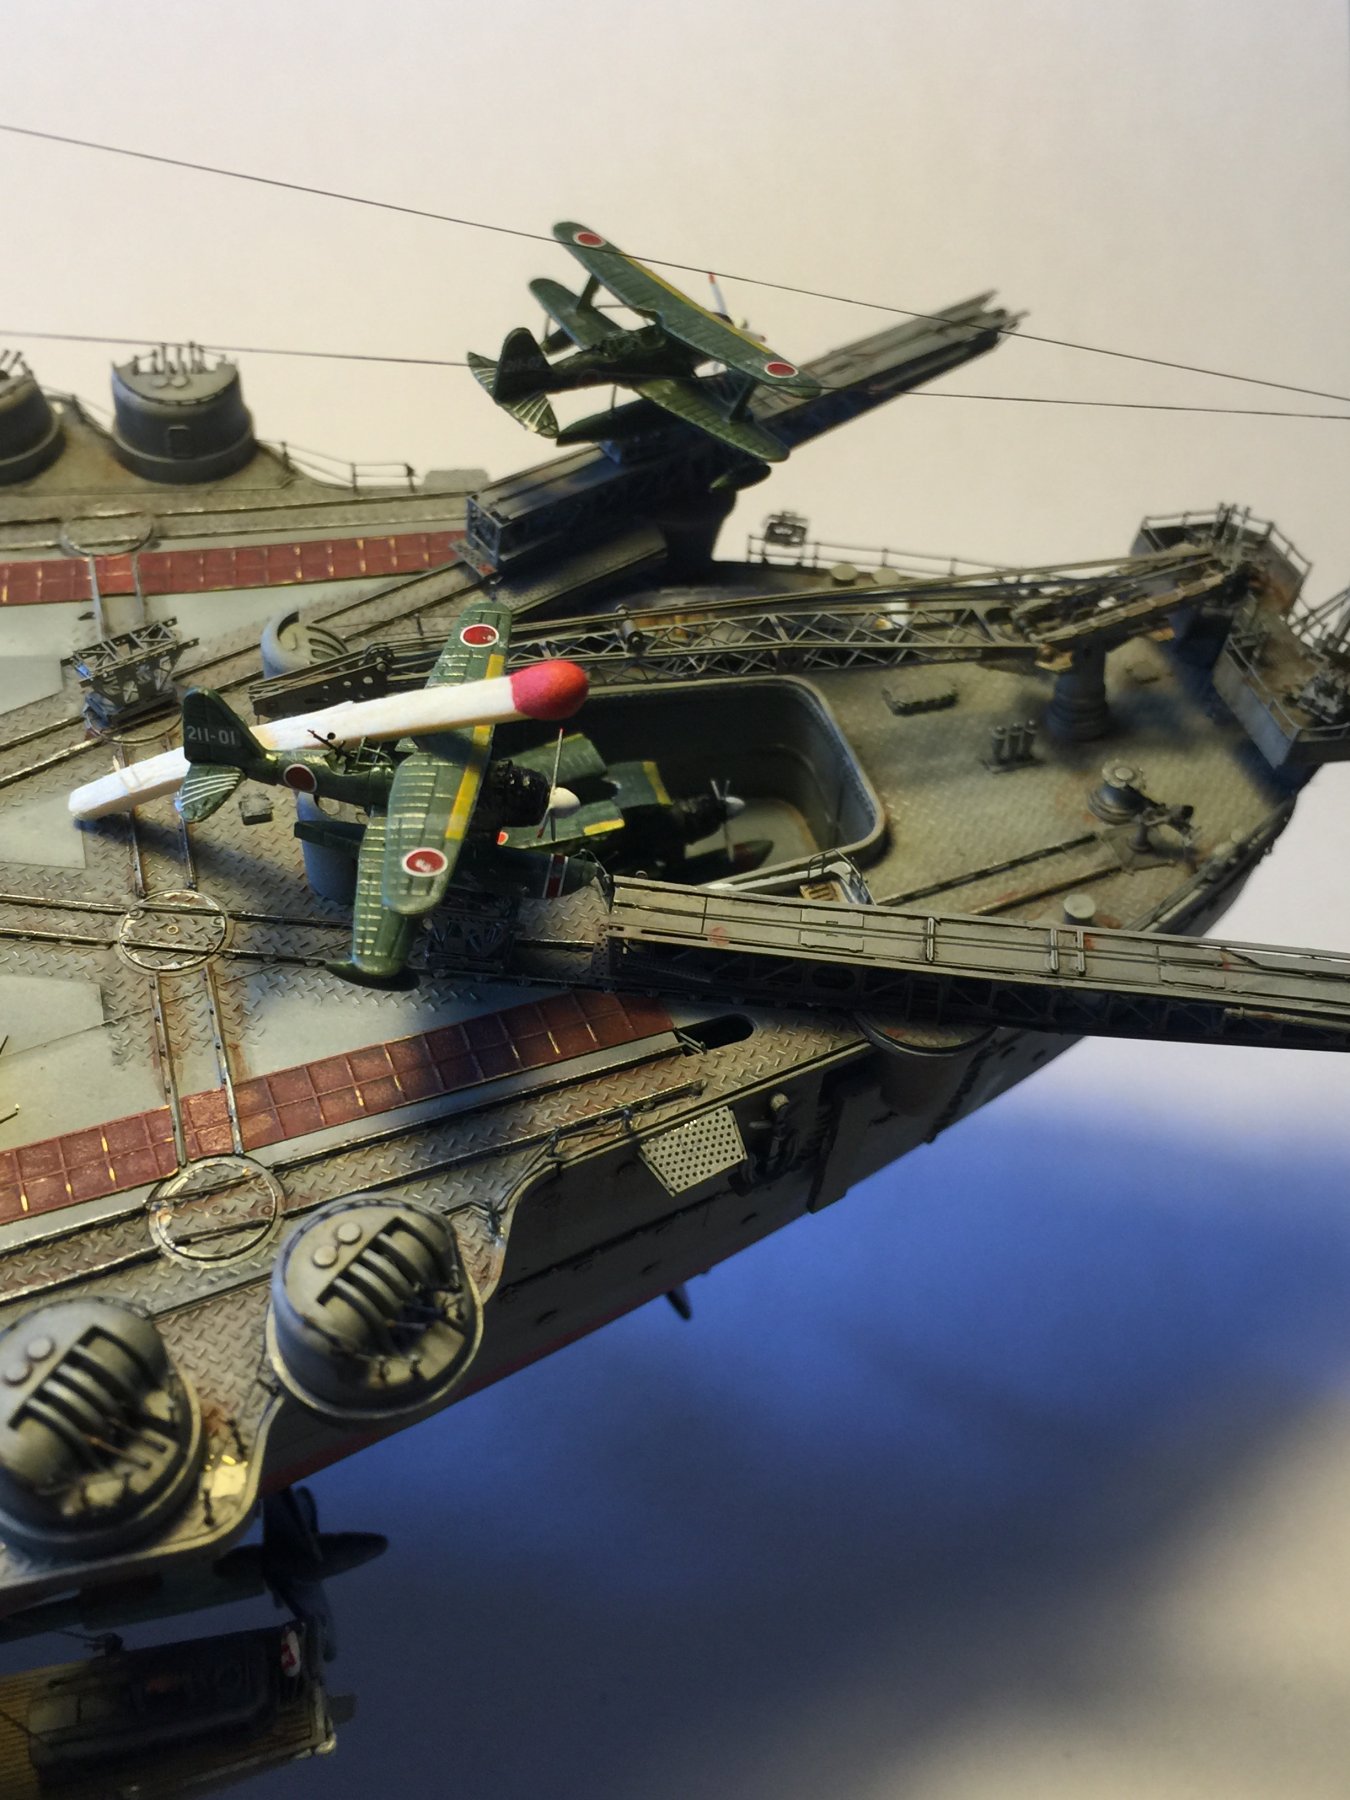
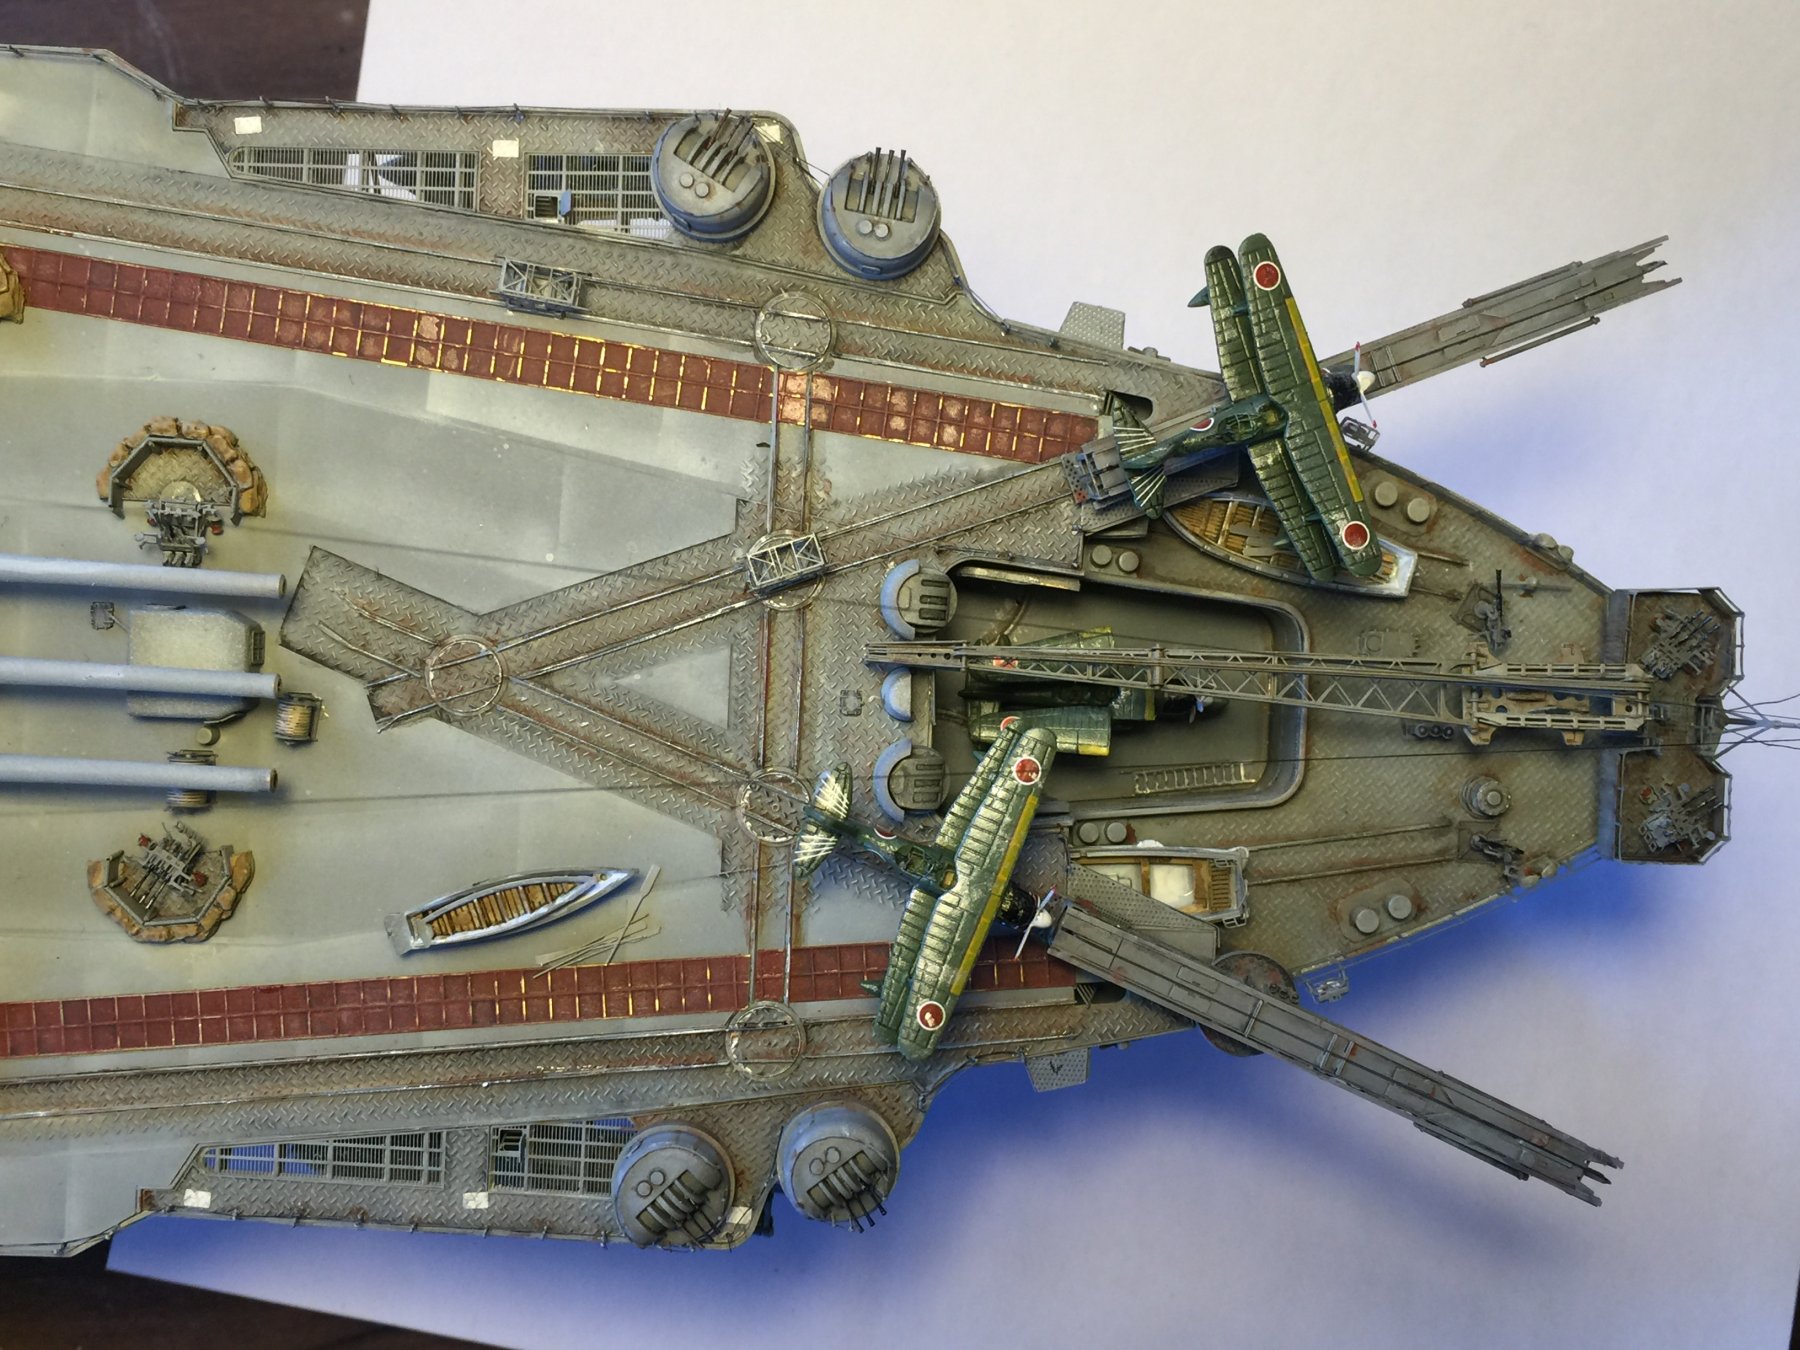
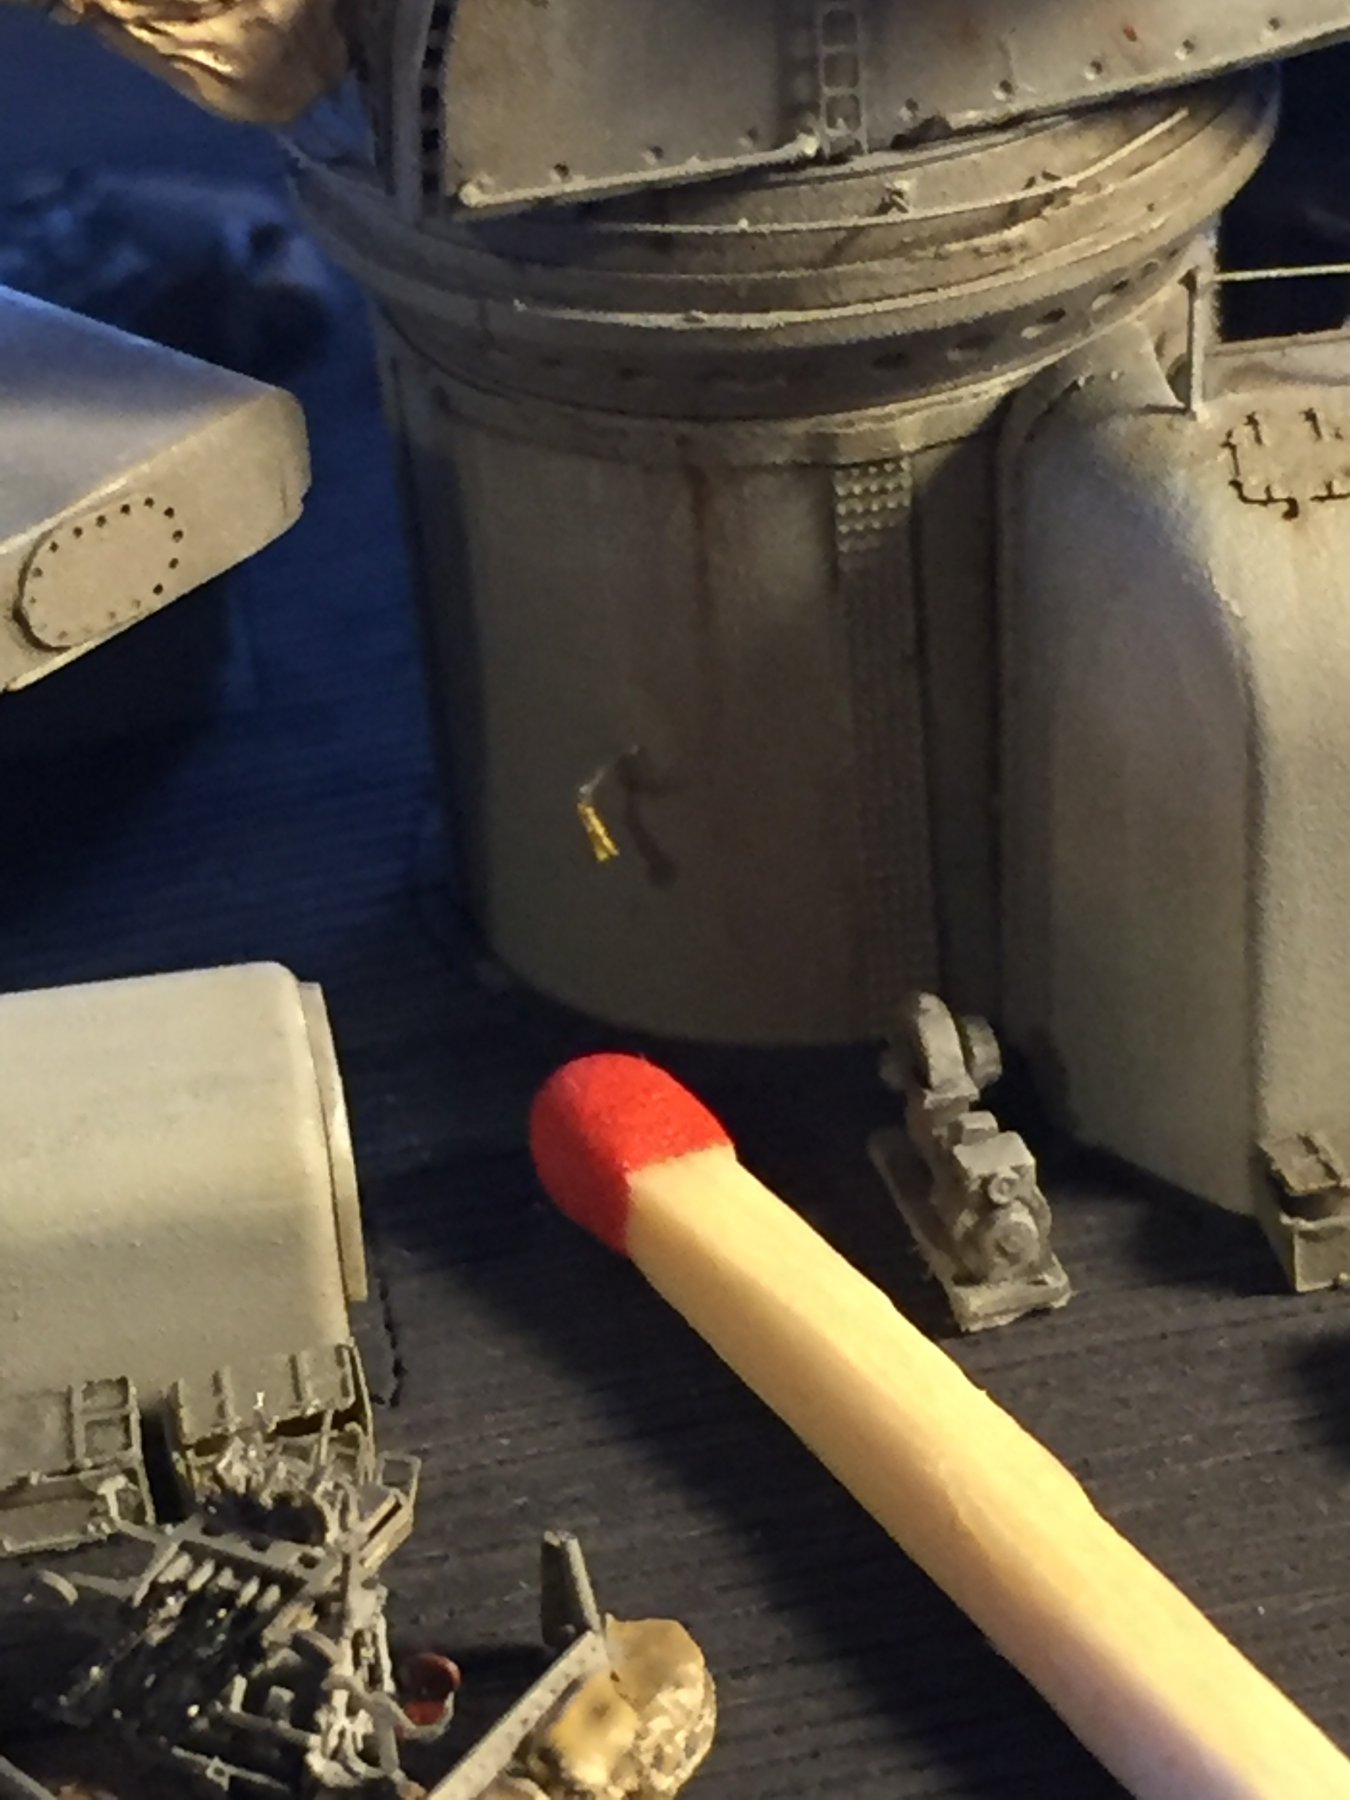
They're just a little fragile, that's the last major hurdle for this build, two floatplanes to go, fix the rigging, then the flags etc I think. Then throw on the last 25mm turrets.
- src, Jack12477, popeye the sailor and 3 others
-
6
-
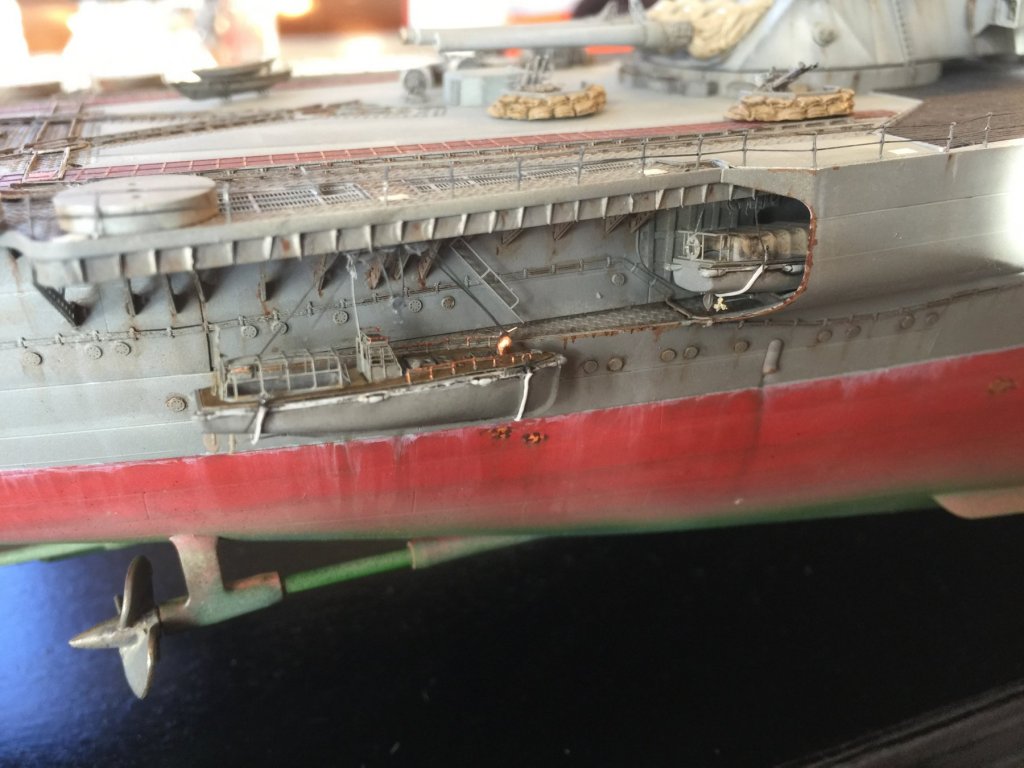
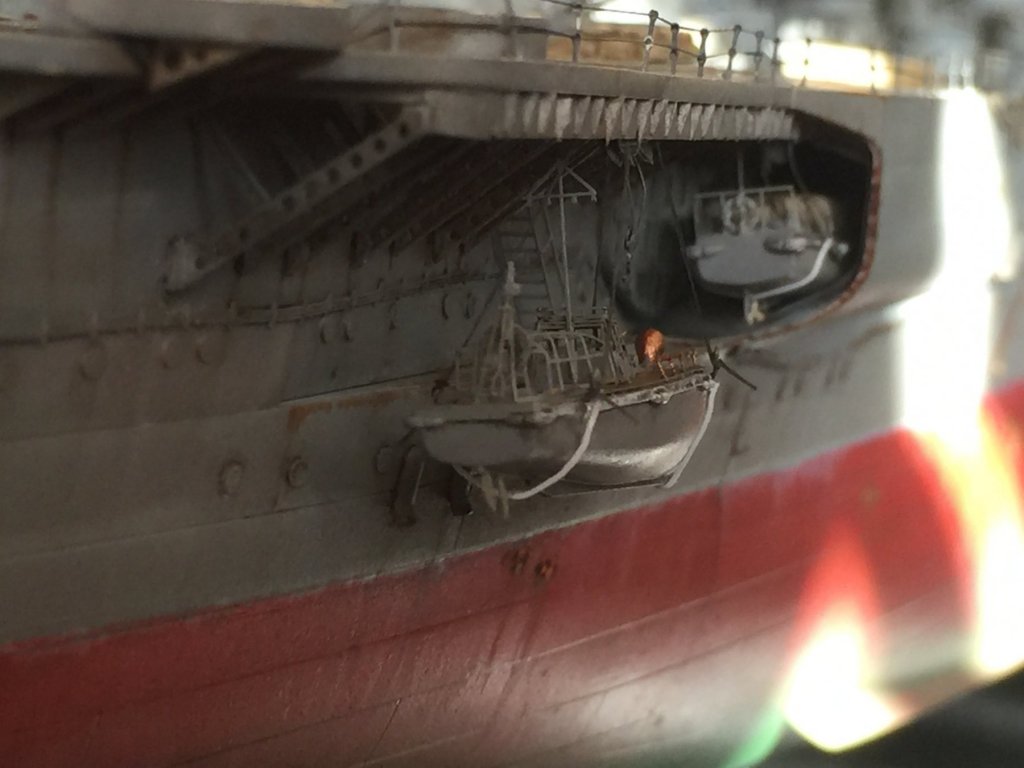
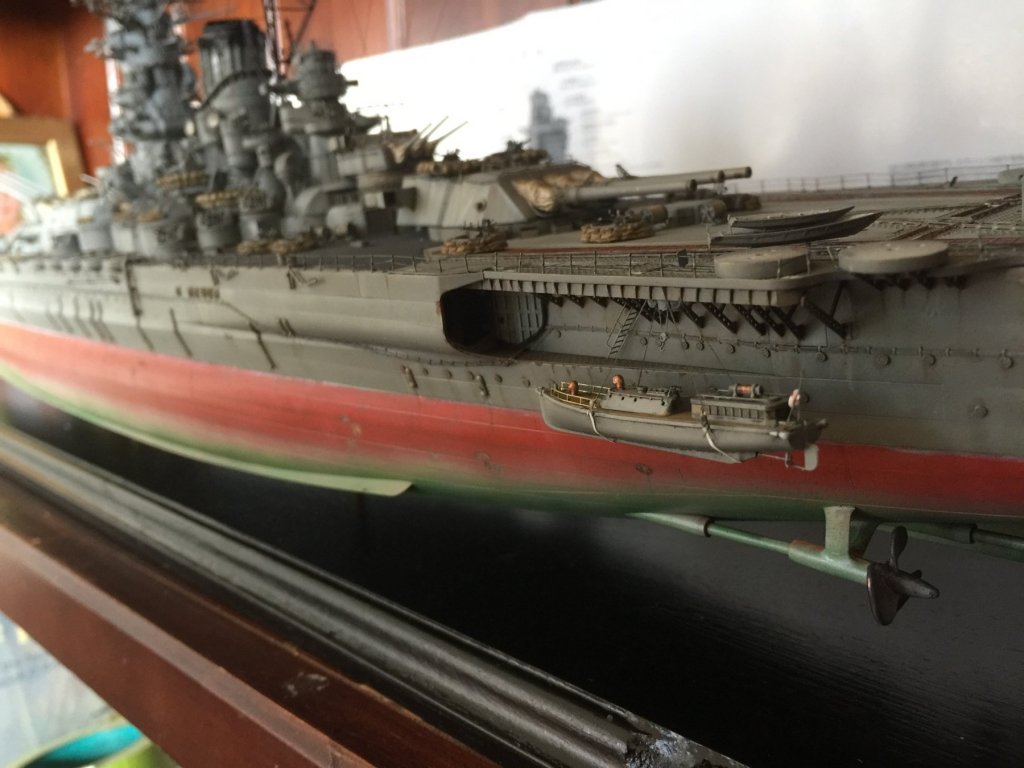
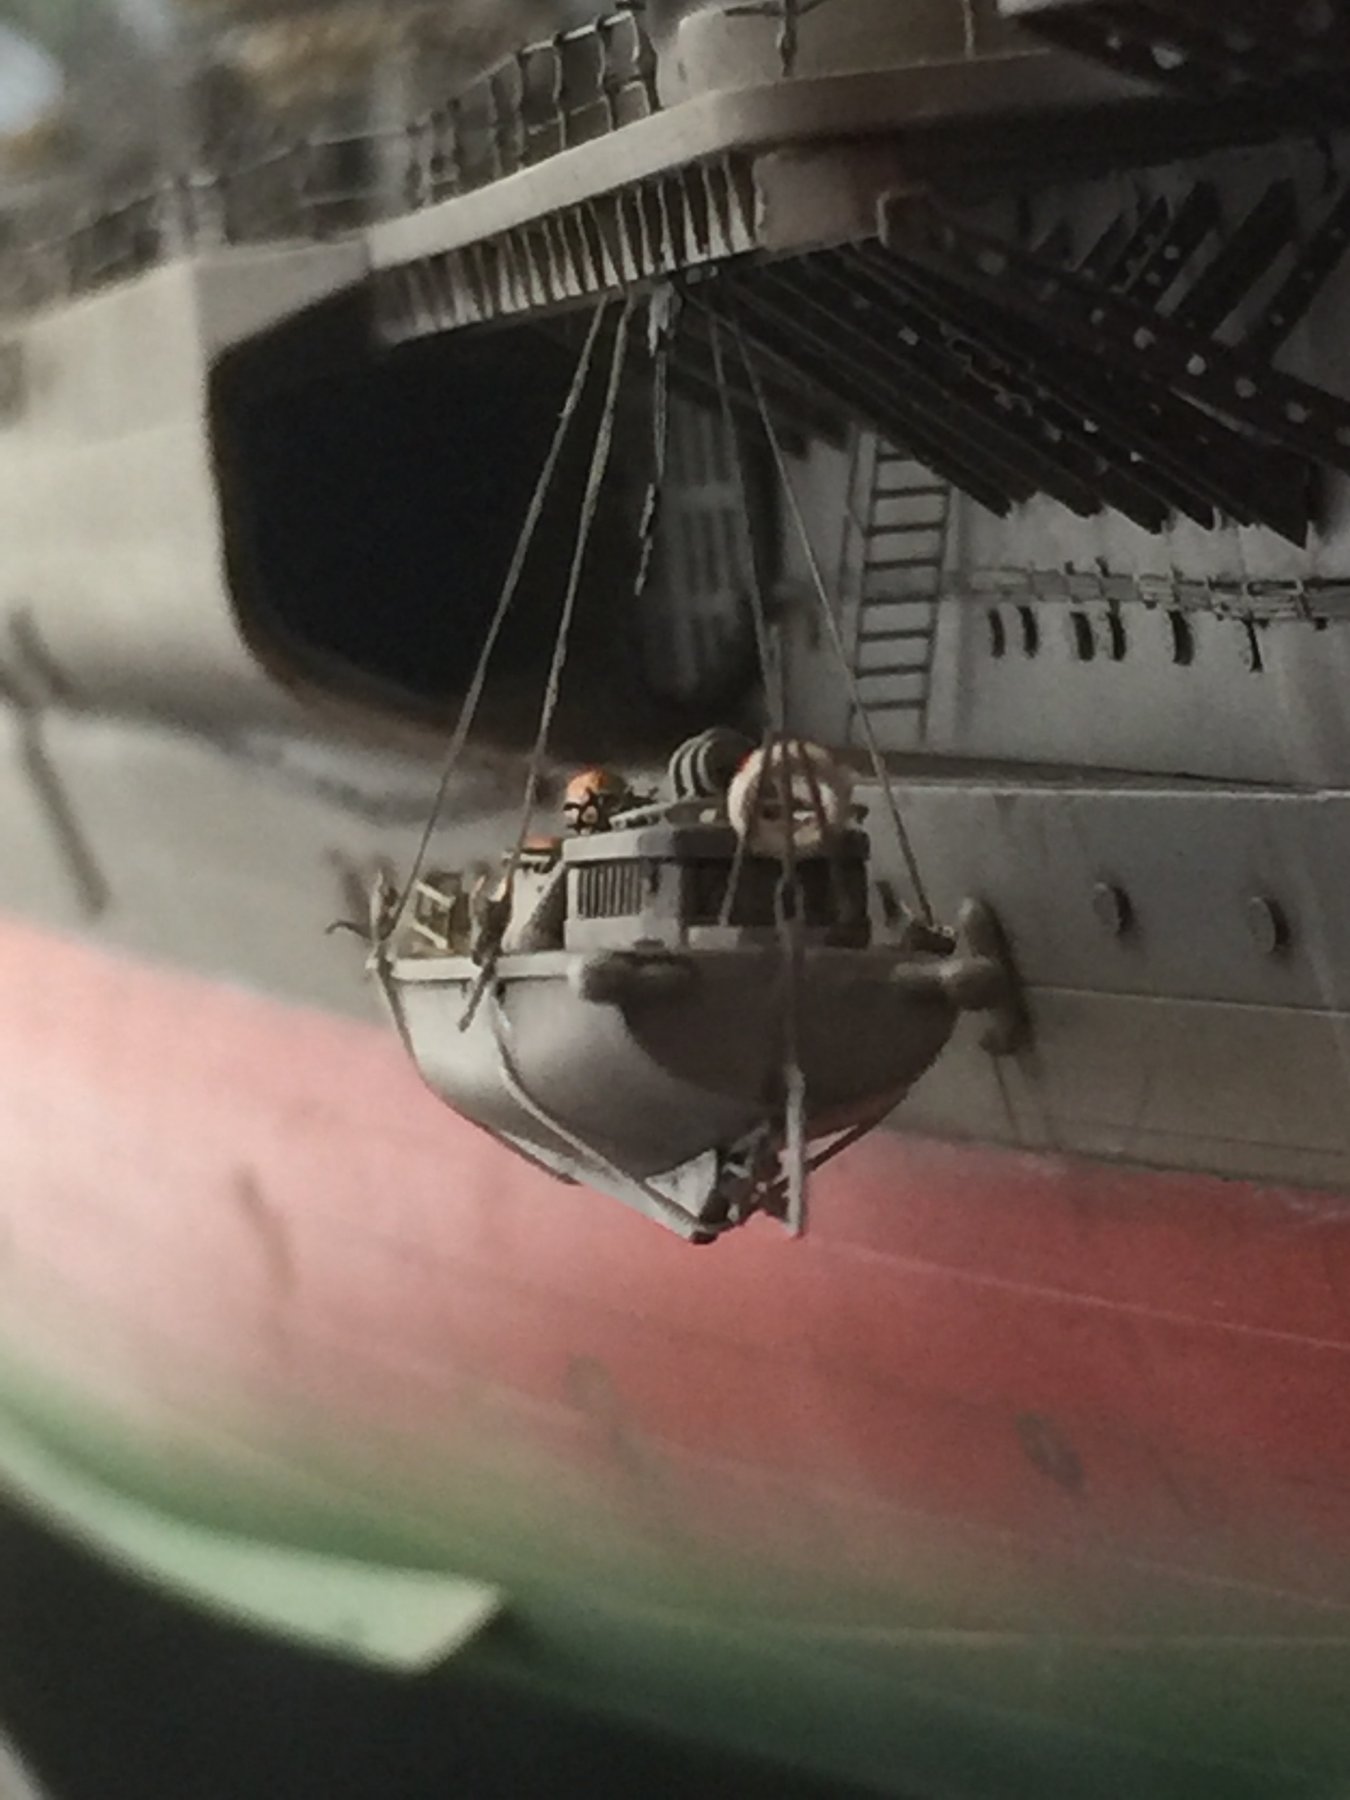
Thanks folks, I've finally (almost) finished the ships boats. I'm pretty much crap at them but they'll suffice. No references provide any advice on the slinging of the boats so after much trial and error I made up some winches and slung them as if they are being retrieved or deployed. I have a bit of tidy up to do yet but that can wait till the end. I tried to lower them with copper wire but could not get the tension right so I used ezline. Parked a few longboats on the back deck and will put the 2 sampans on the flight deck.


-
-
I think that putting a crew on can diminish it. There are some wonderful resin crews out there now but I even if they are professionally painted, they look like little dolls drawing the eye away from the build which we try and get as realistic as possible.
It would cost me several hundred $ to put the crew on and time I could not be bothered painting. There's around 30 crew for 25 euro, Yamato had around 2000 crew, that's a bit of a stretch even for my addiction to aftermarket, mind you if I win the lottery.........
- Landlubber Mike, src, hexnut and 6 others
-
9
-


HMS Duke of York by CDW - FINISHED - Tamiya - 1:350 - PLASTIC
in - Kit build logs for subjects built from 1901 - Present Day
Posted
Sorry, I'm back, been to the netball. You could try diluted acrylic paint. I think as these decks are a bit like pre chewed chicken they really don't have a grain per se, and as they are holystoned anyway, there is no grain to see. I was pretty happy using a pastel powder on my black deck and you could really develop that technique with different shades which should in theory work very well, but leave it to last.