


RGL
-
Posts
5,388 -
Joined
-
Last visited
Content Type
Profiles
Forums
Gallery
Events
Posts posted by RGL
-
-
I expect they are bedrolls used as splinter shields.
- Old Collingwood, mtaylor and Canute
-
 3
3
-
-
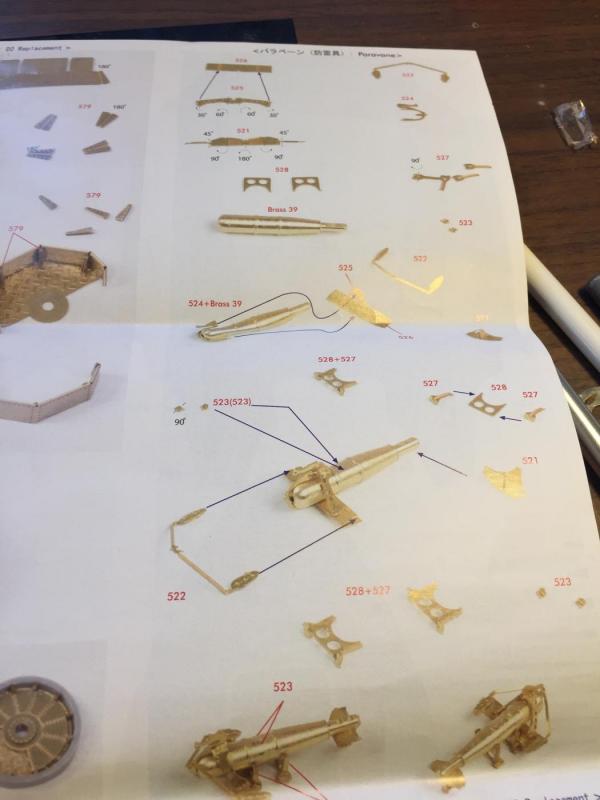
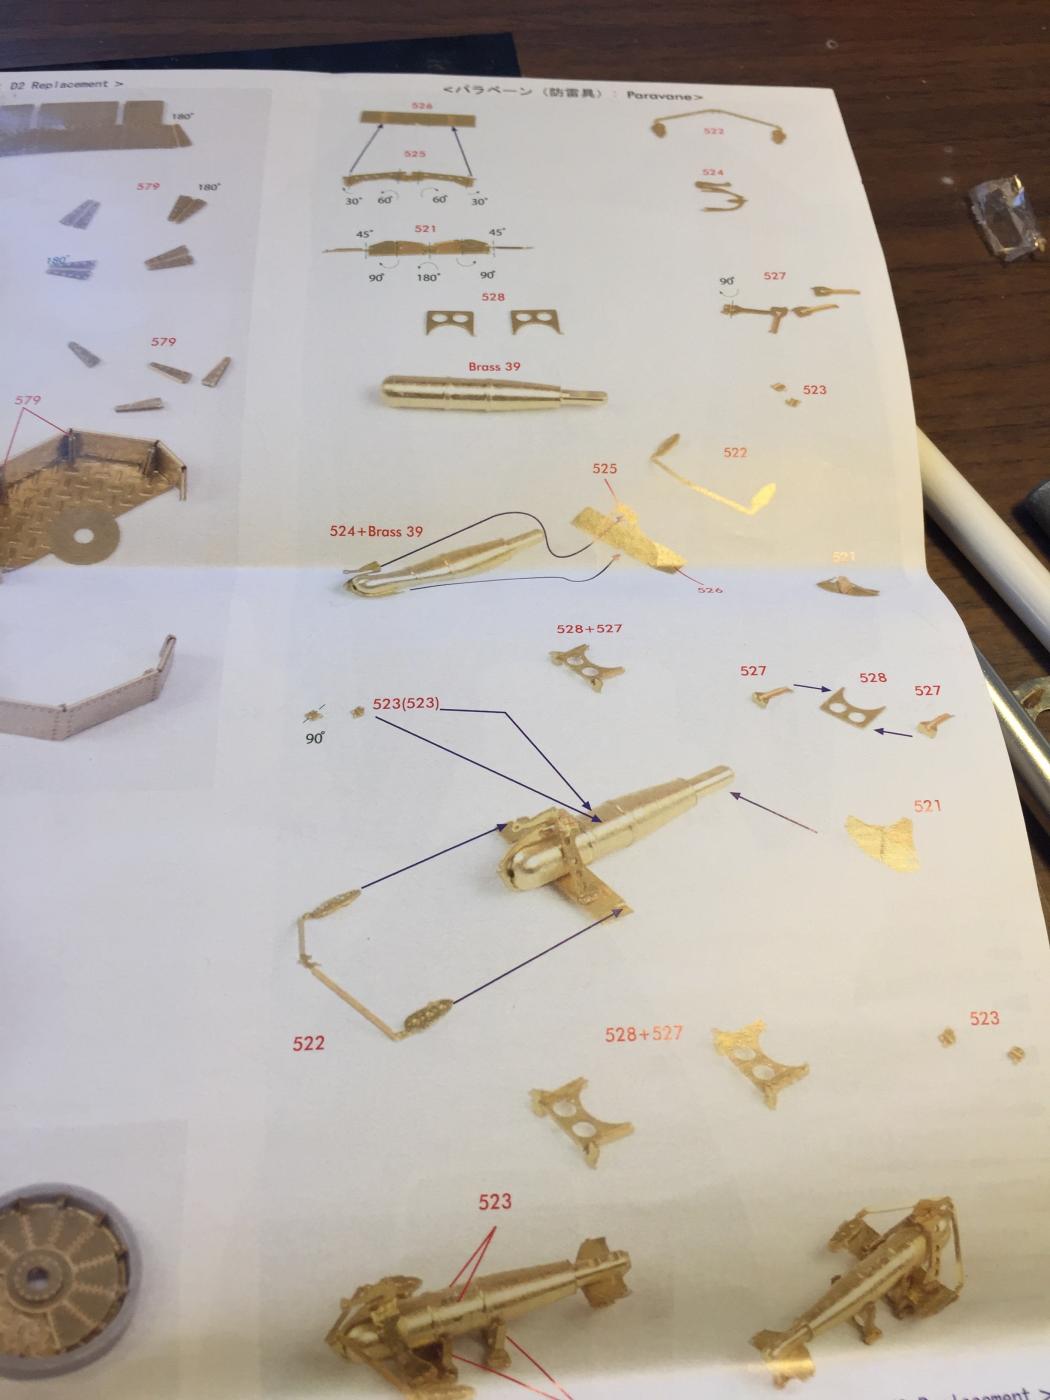
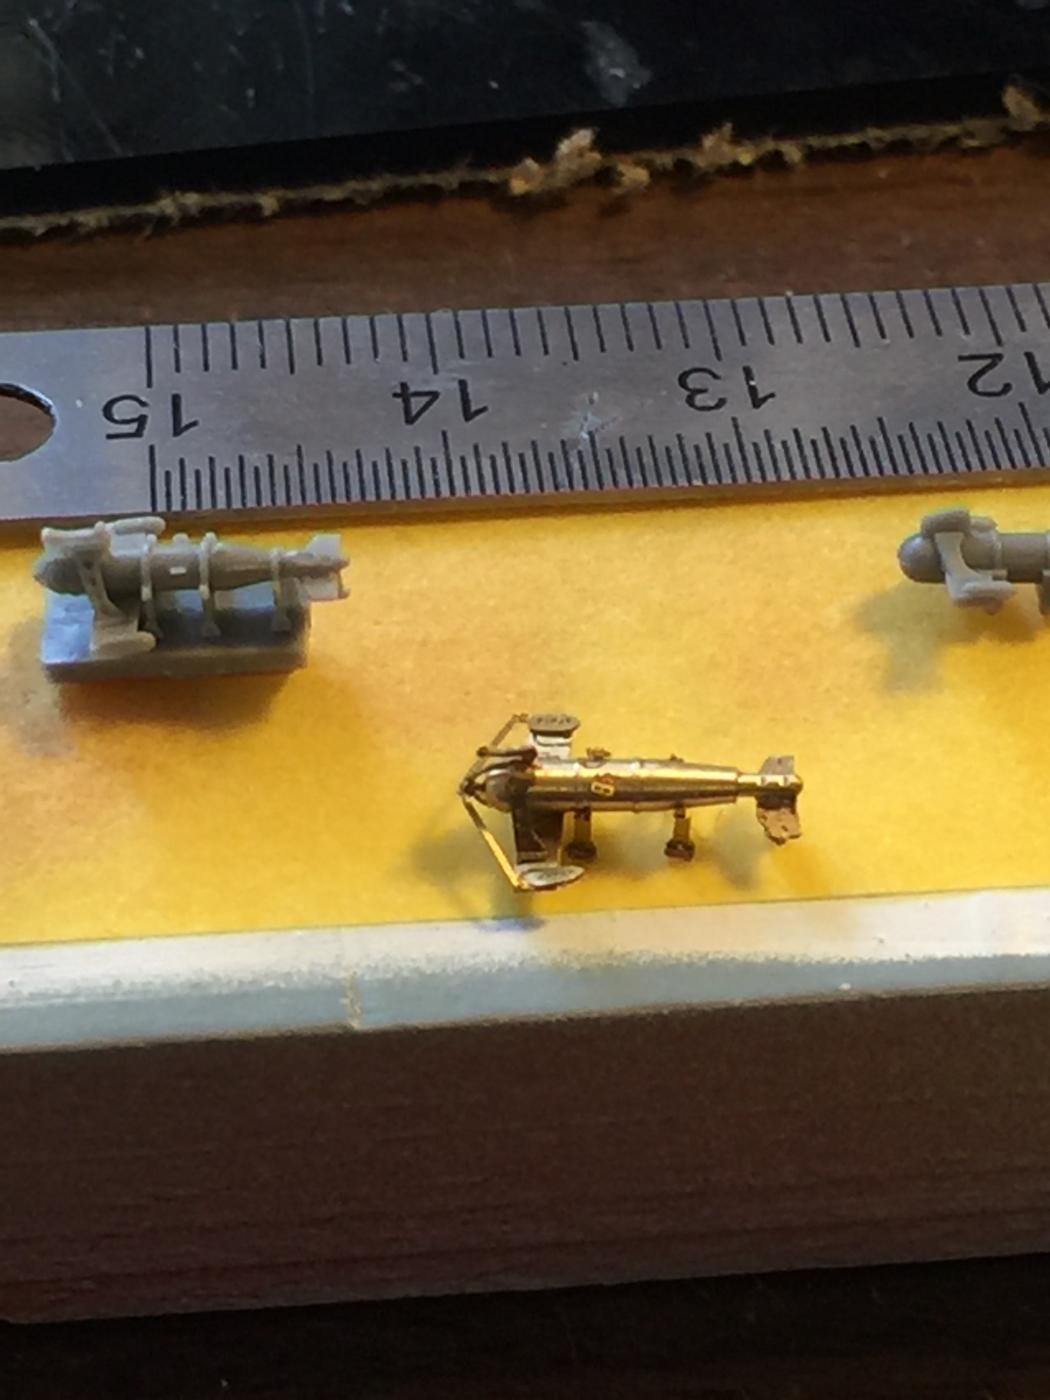
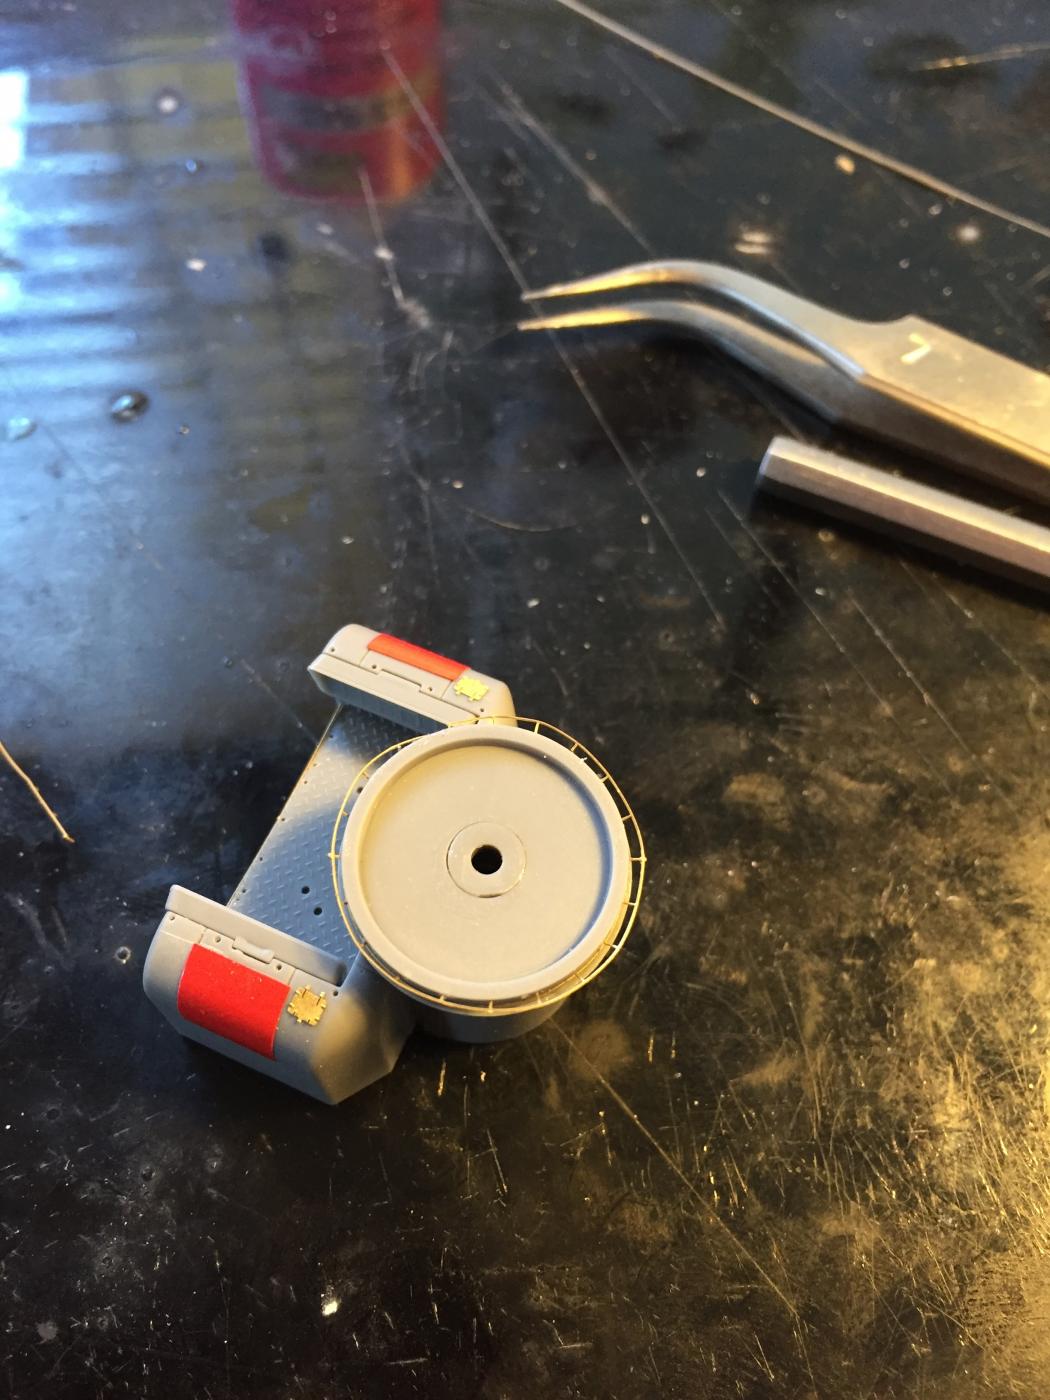
Next are the paravanes. The kit ones are basic, then the resin ones that got thrown in with the deck equipment are nice, but the Pontos ones are amazing. They come with a complete set of extras for the carpet monster, of which I lost none.

-
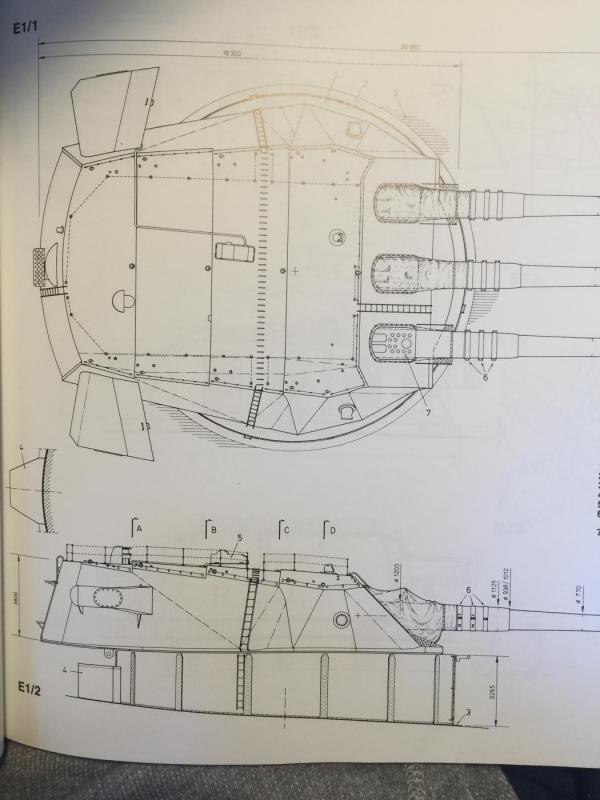
The secondary guns come with large superstructure, and the AOTS and the Tamiya instructions differ. According to Tamiya this is where the Paravanes are stored, but the AOTS states they are in closed magazines, which I expect the quad doors are for.
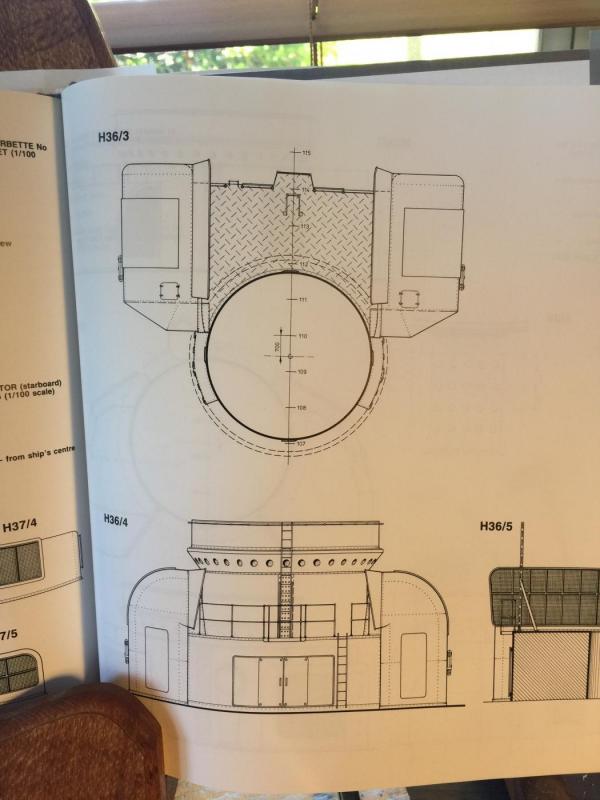
The door and the ladder configuration is different between the kit and reference, so I went with the reference and sanded down the door and will move the ladders and again add stanchions later.


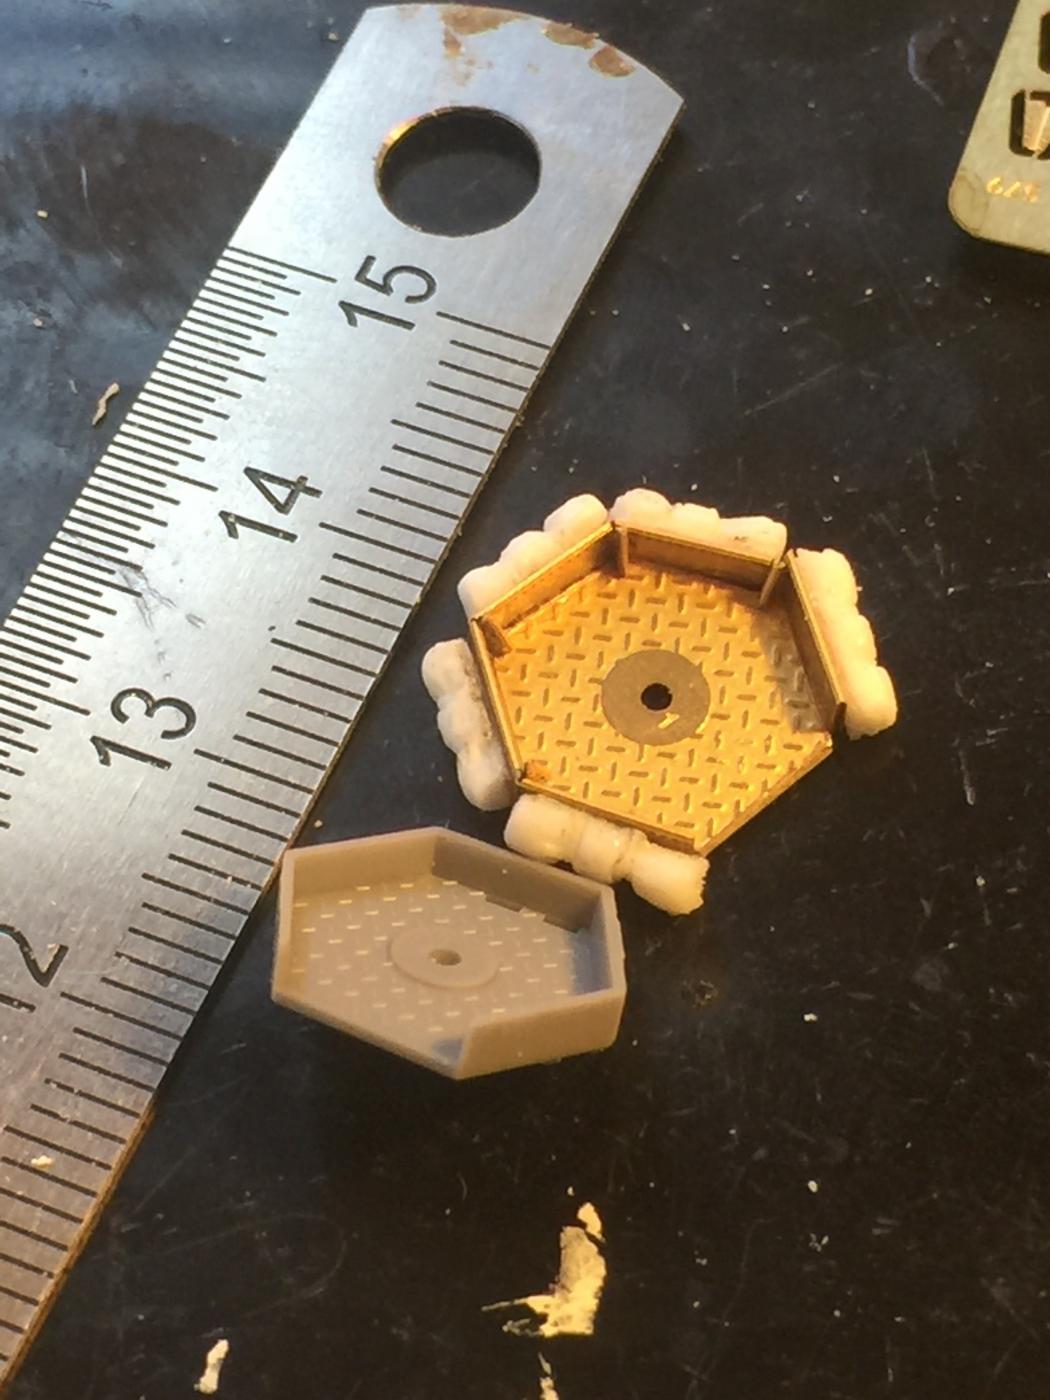
I have also included extra rivet strips and handrails around the bottom of the turret ring from a set of cut down hand rails from spares.
The red things are a panel that is included by Tamiya as a decal, and there are two hatches no mentioned by tamiya. When painted it won't matter.
- src, CDW, Old Collingwood and 9 others
-
12
-
I only think in metric as imperial left Australia in 1965, before I was born
- Captain Slog, mtaylor, Robin Lous and 3 others
-
6
-
Do you want the measurements?
- Old Collingwood, Canute and mtaylor
-
3
-
-
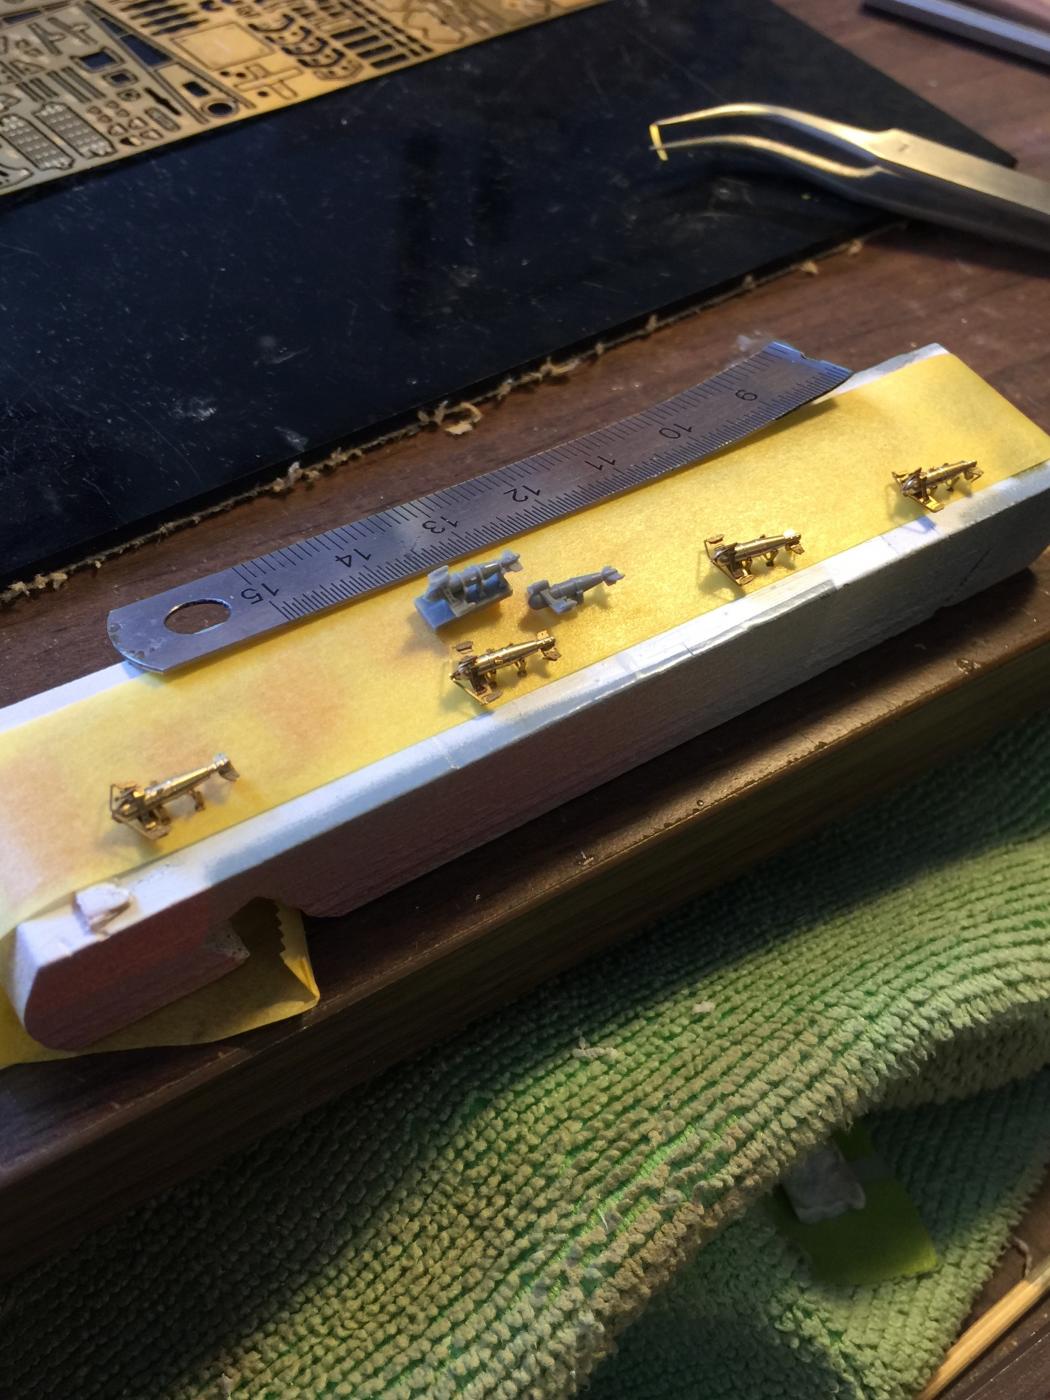
Its a matter of access Cog, I don't want t lose detail under paint. I did up the gun tubs that go on top of the main guns. The Tamiya piece is 1 piece.
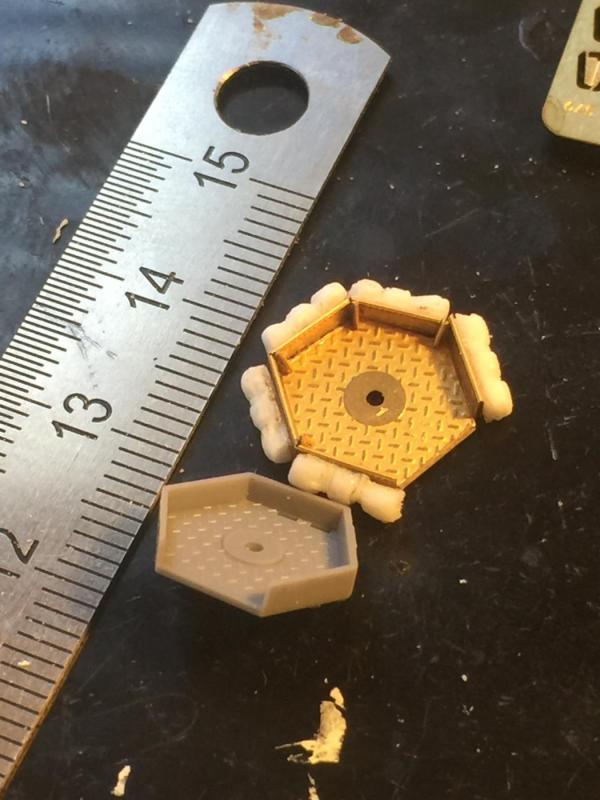 The pontos is 14pieces.
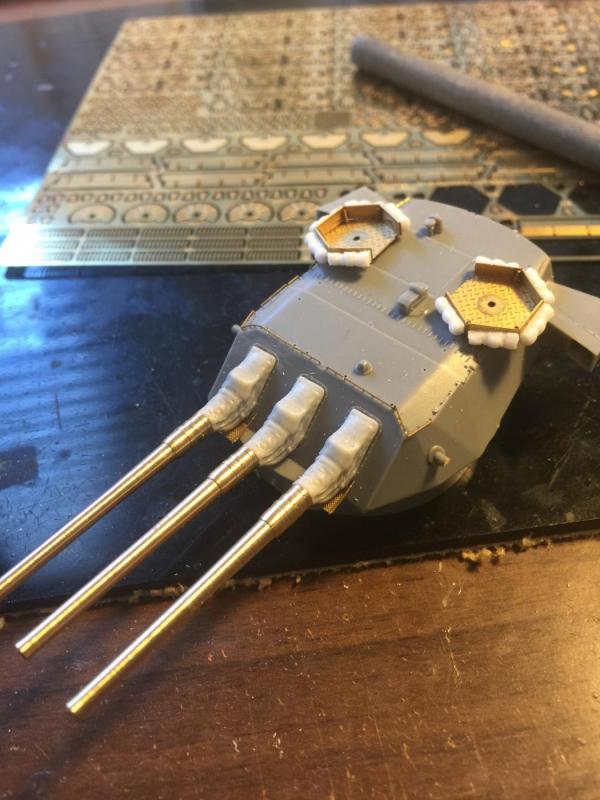
-
-
Try using Lindt chocolate wrappers around a wooden mold
- cog, Captain Slog, Canute and 1 other
-
4
-
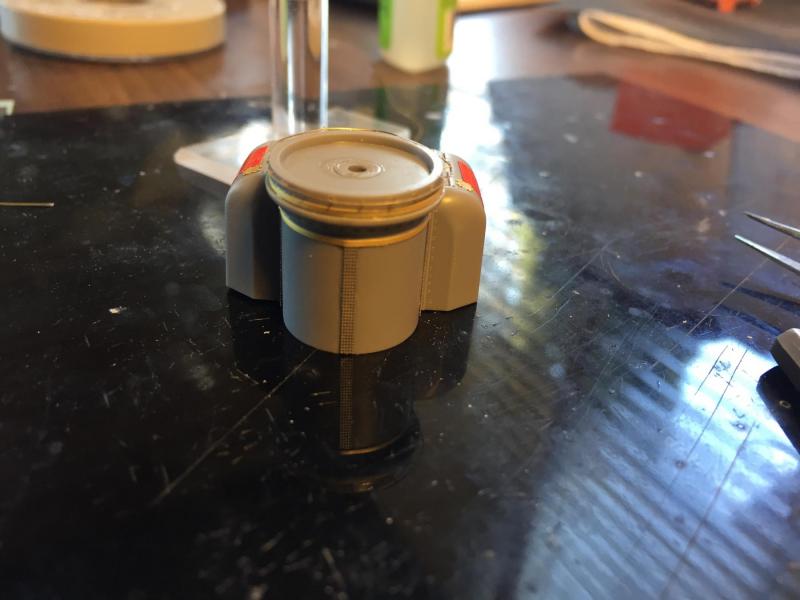
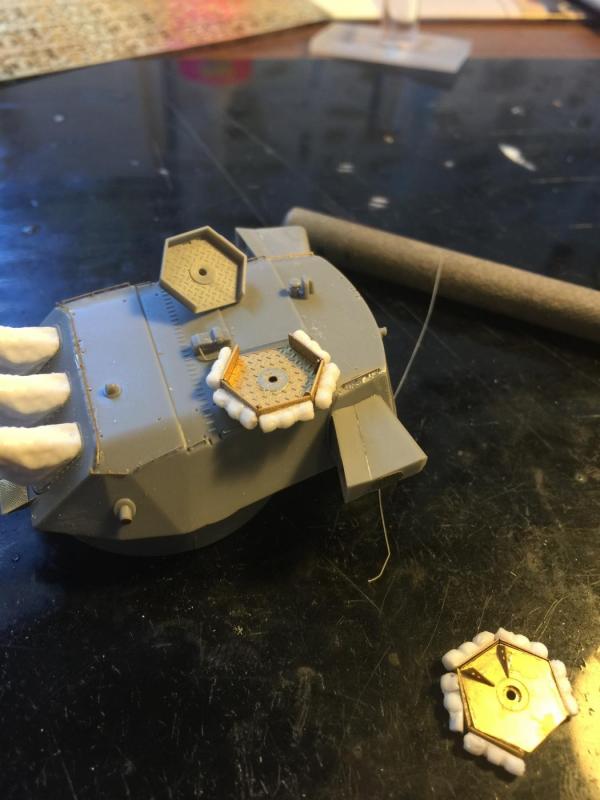
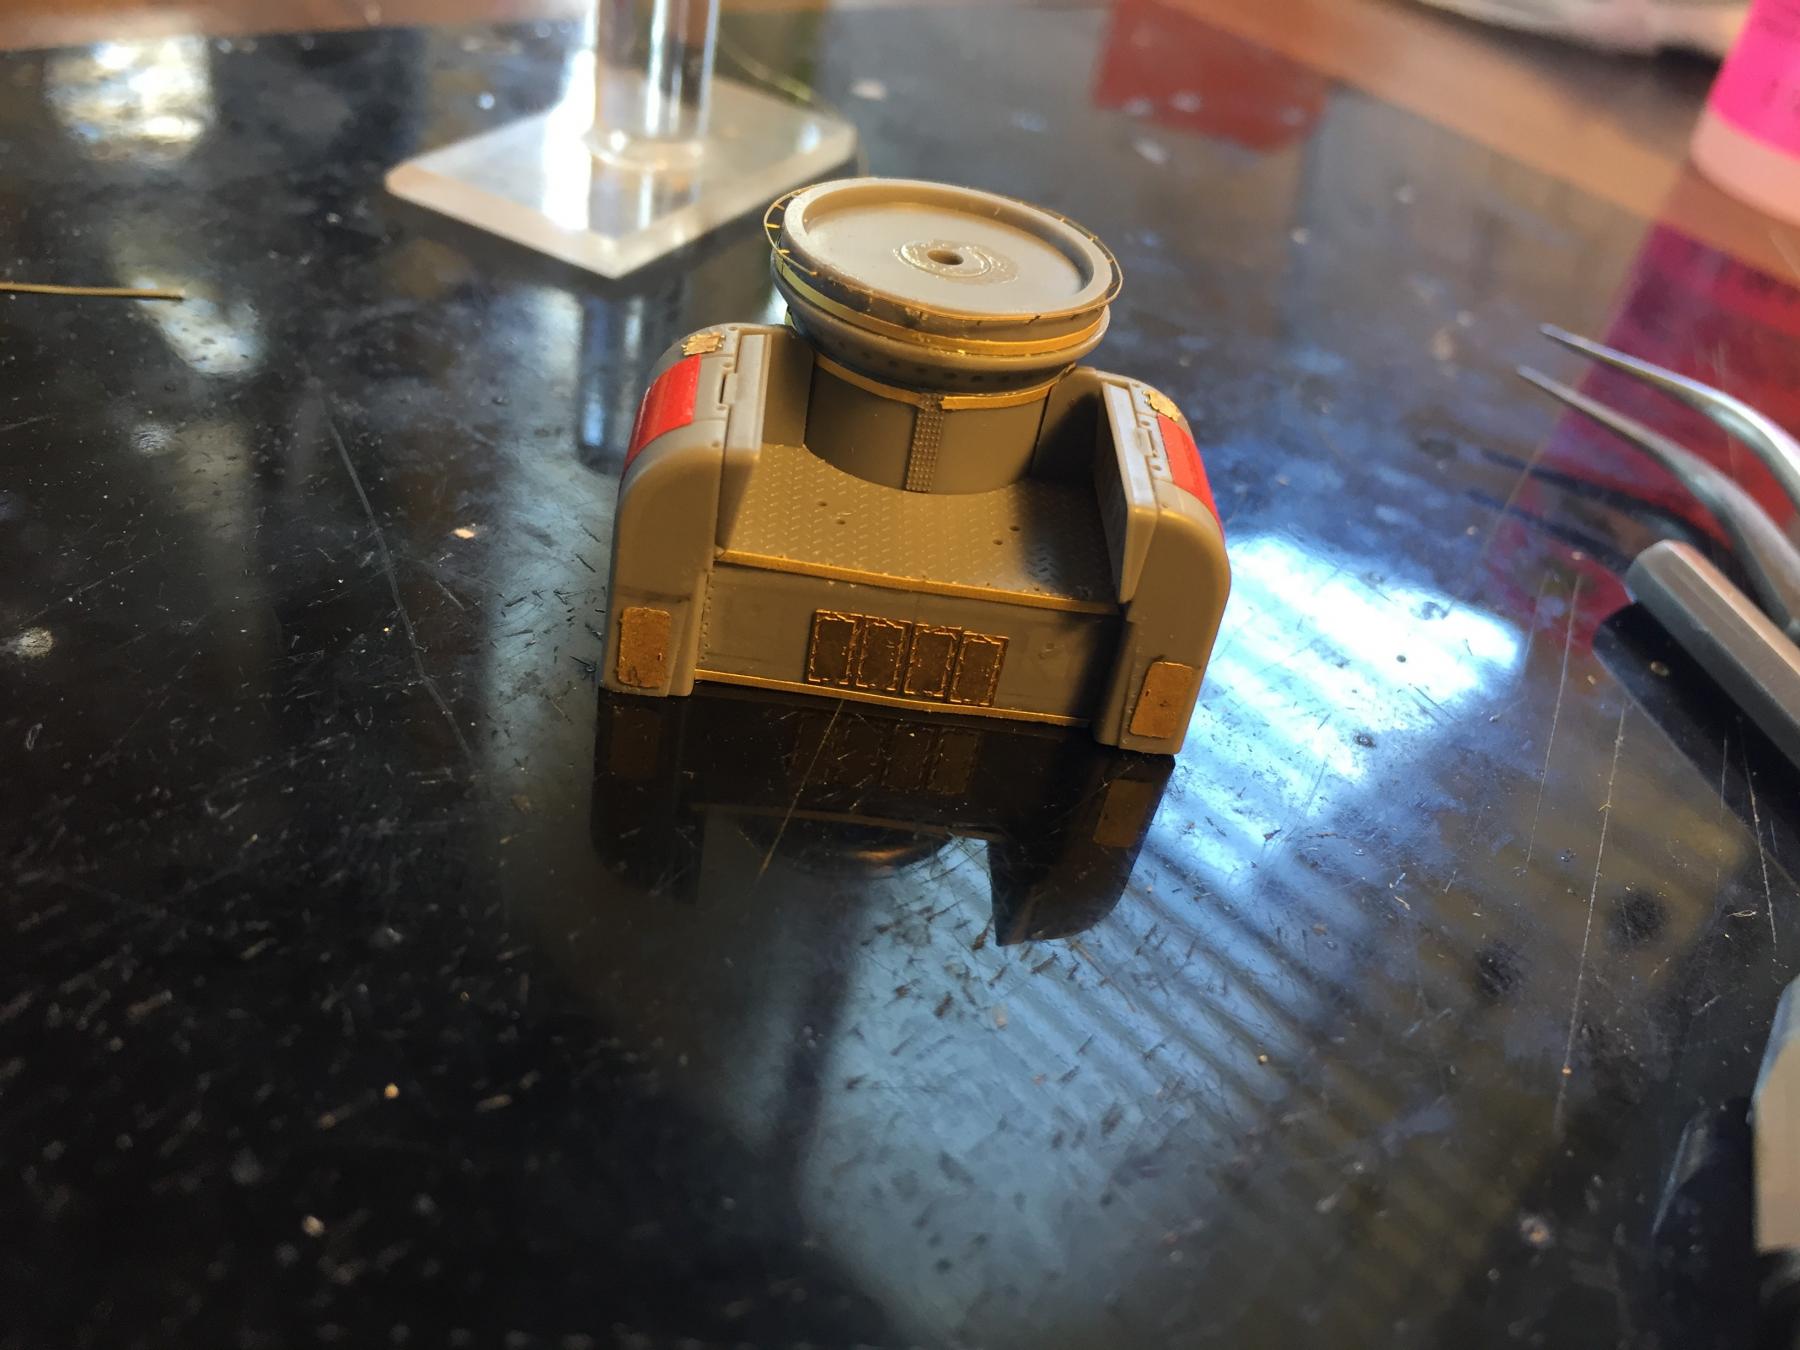
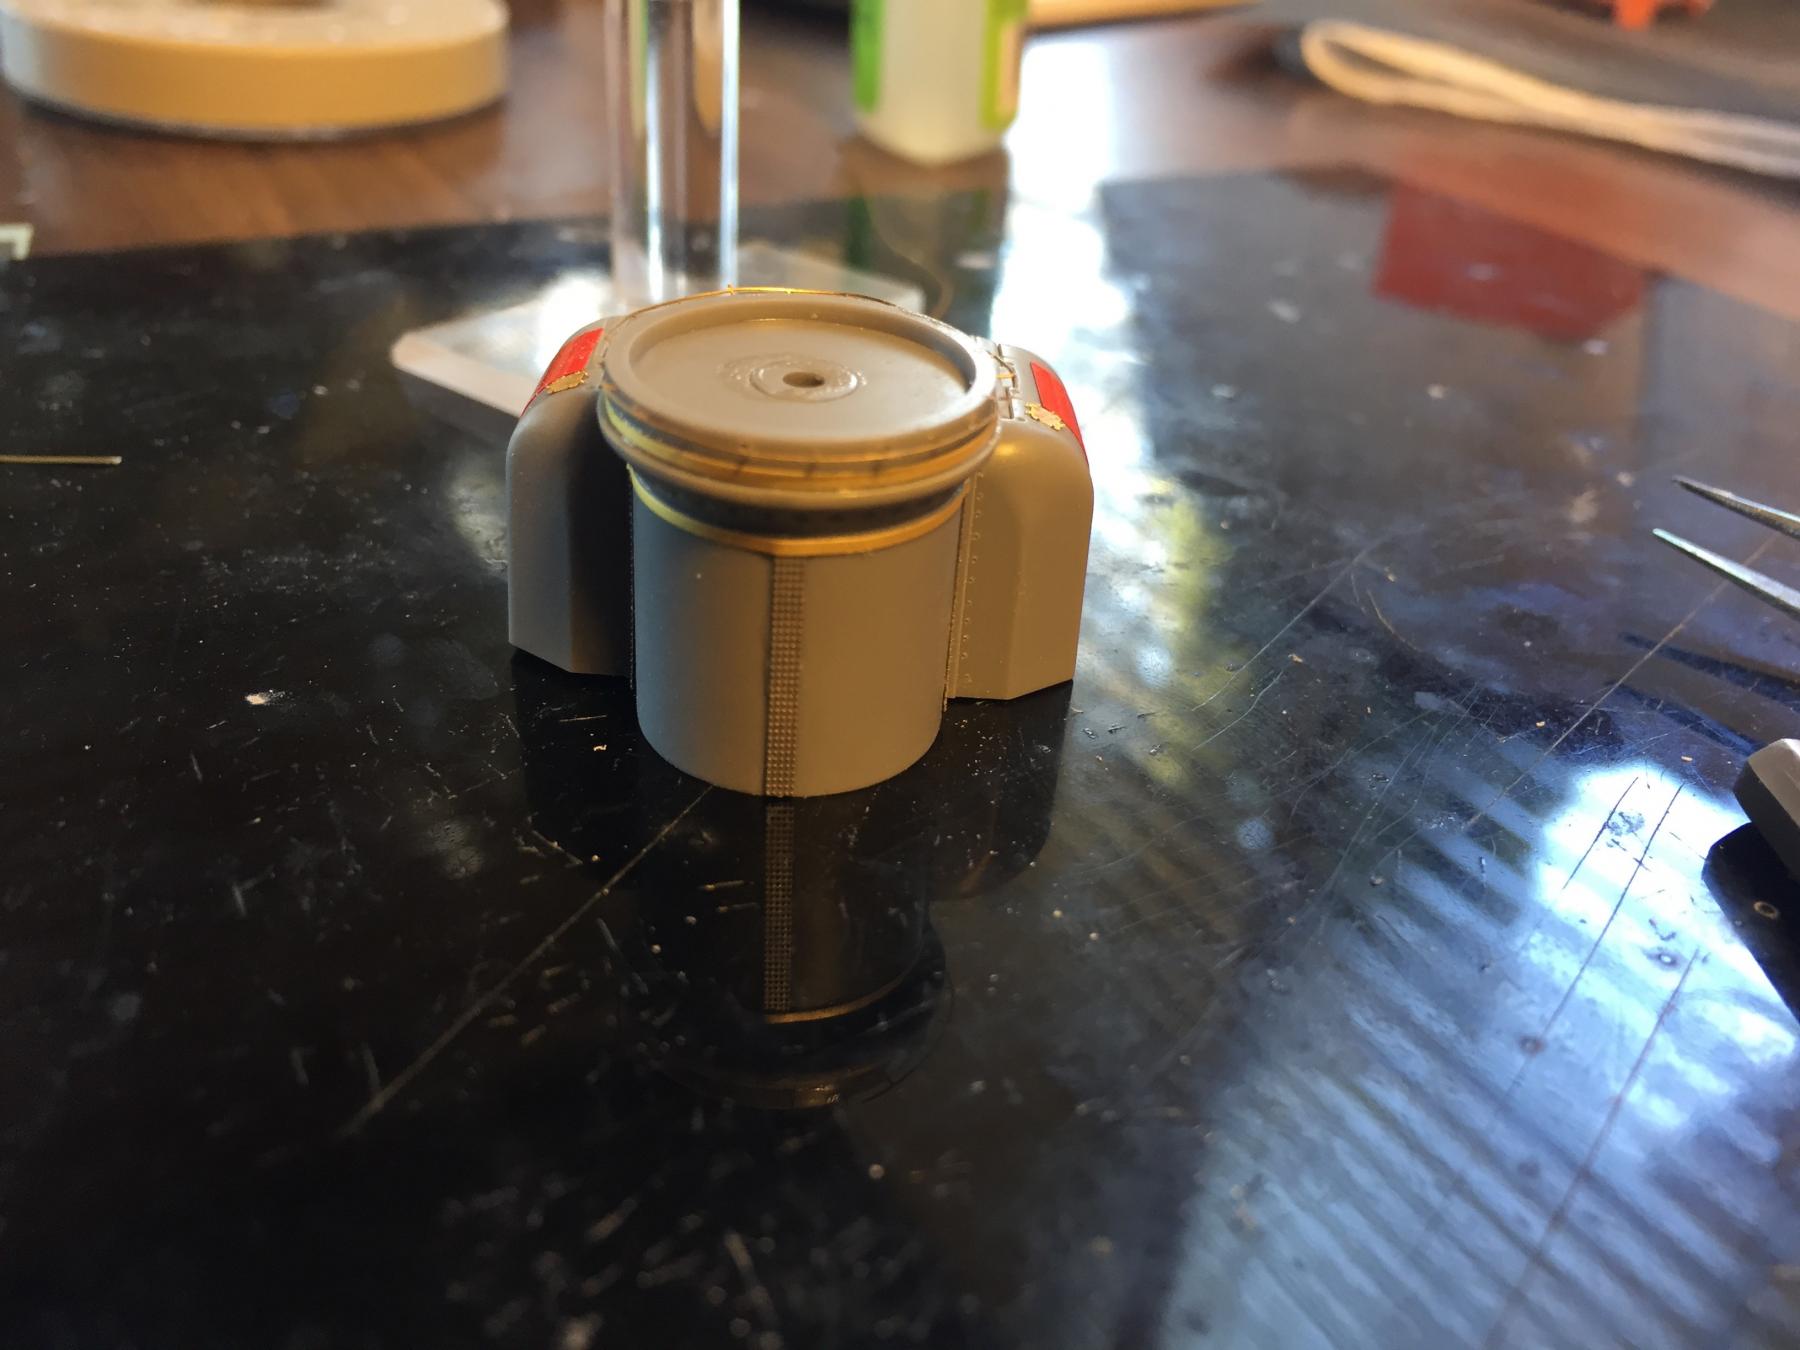
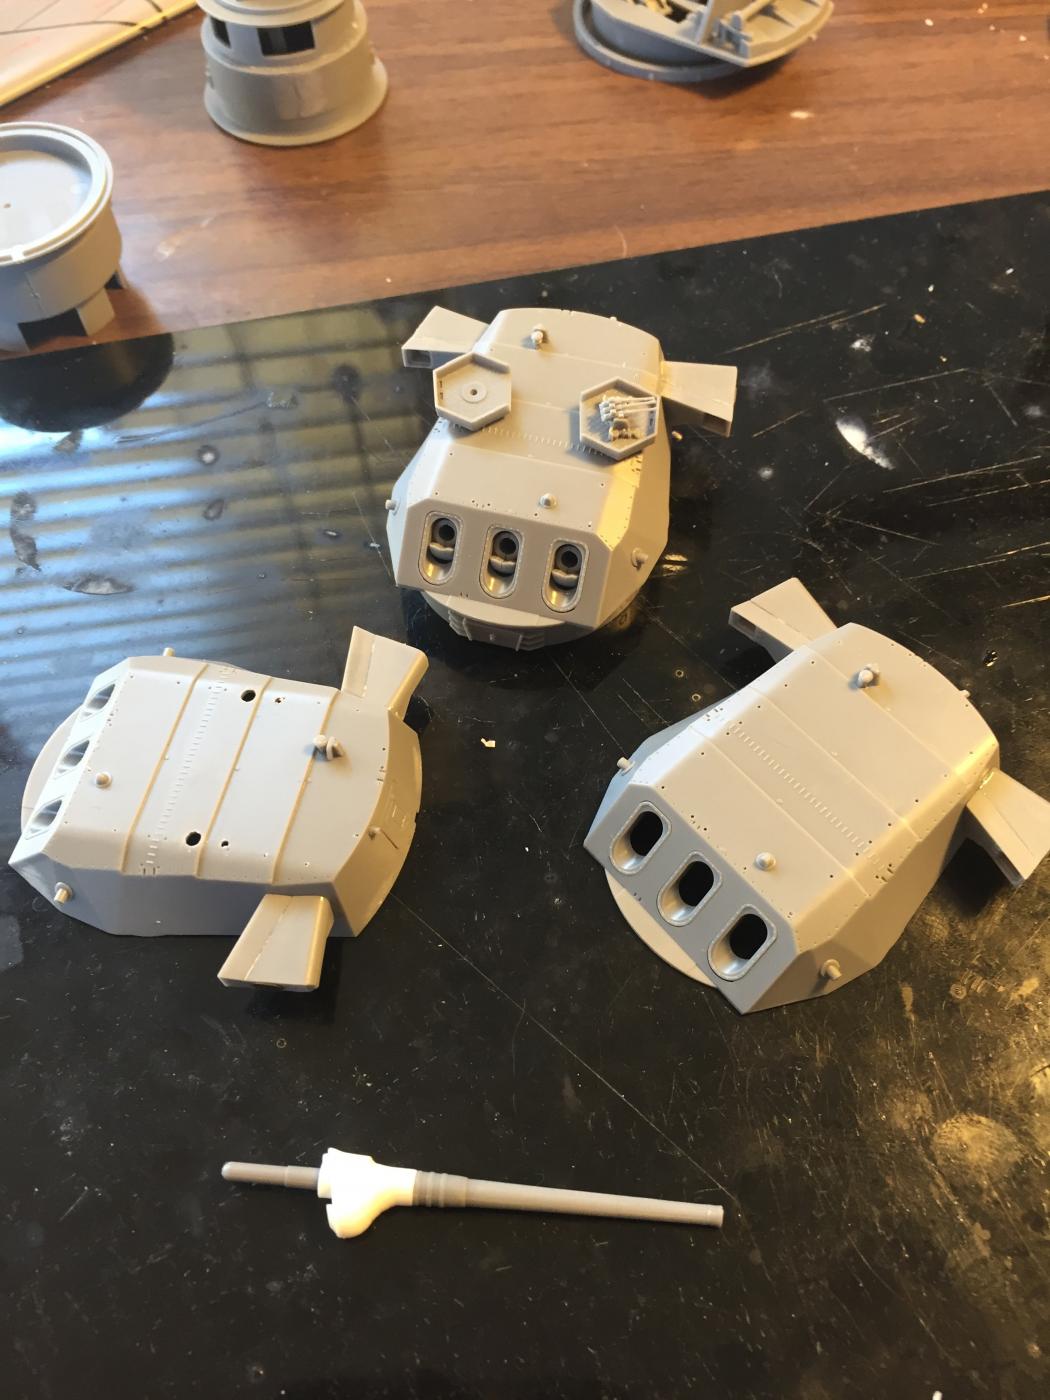
Moving on to something different, the main guns.
 Lots of internal (irrelevant) detail, and Tamiya provides some etch as well.
 Goes together very simply. The kit supplied AA guns on the roof will be replaced with Pontos.
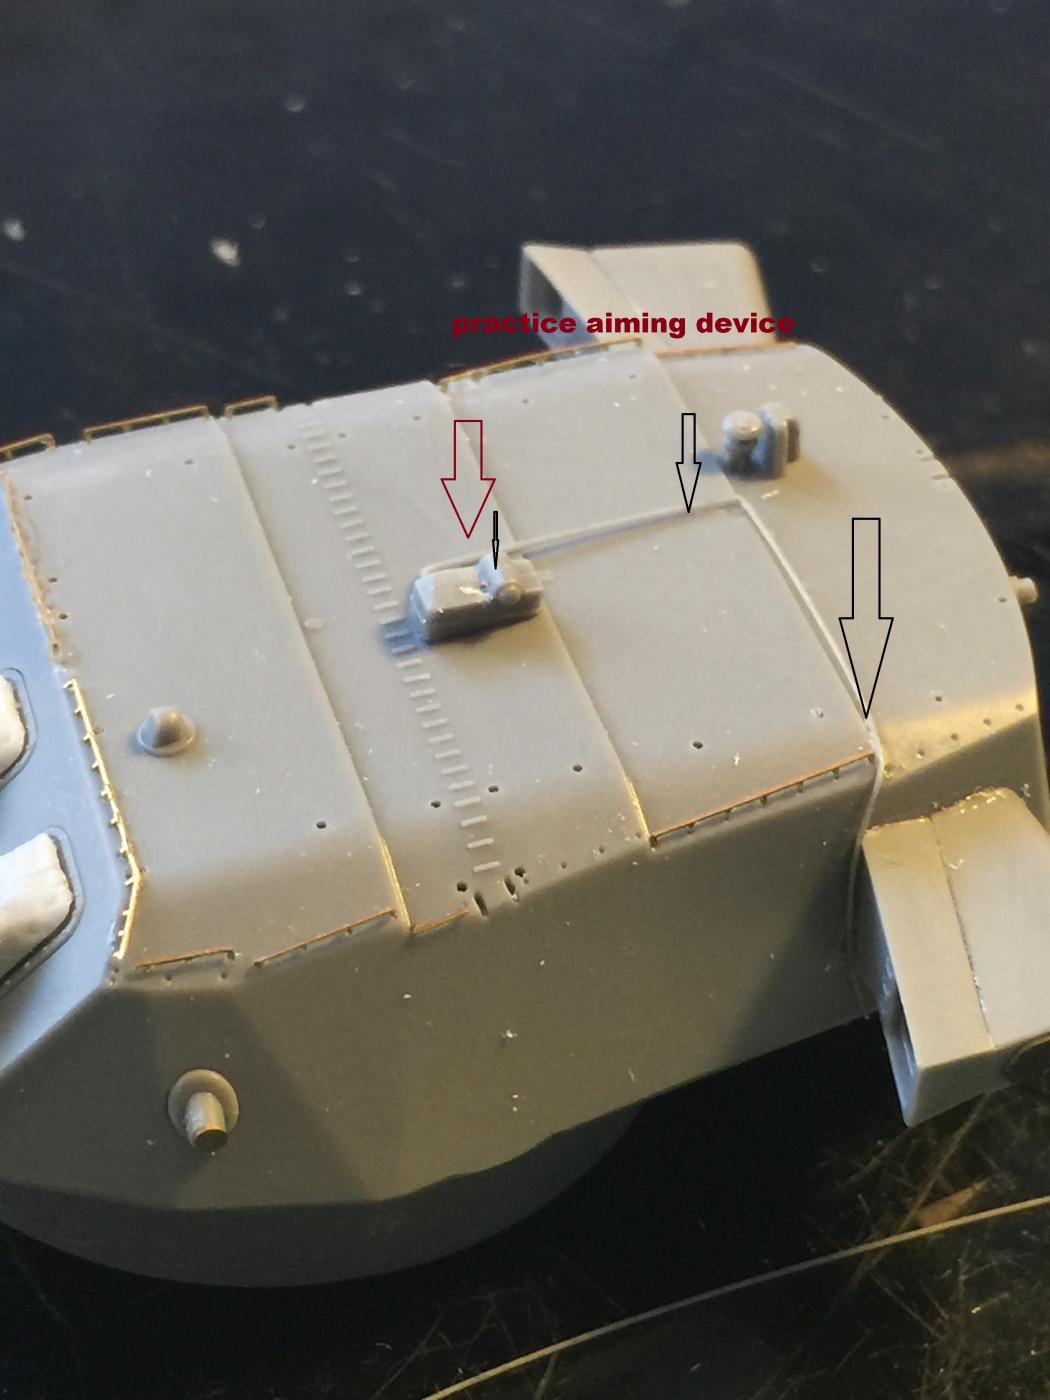
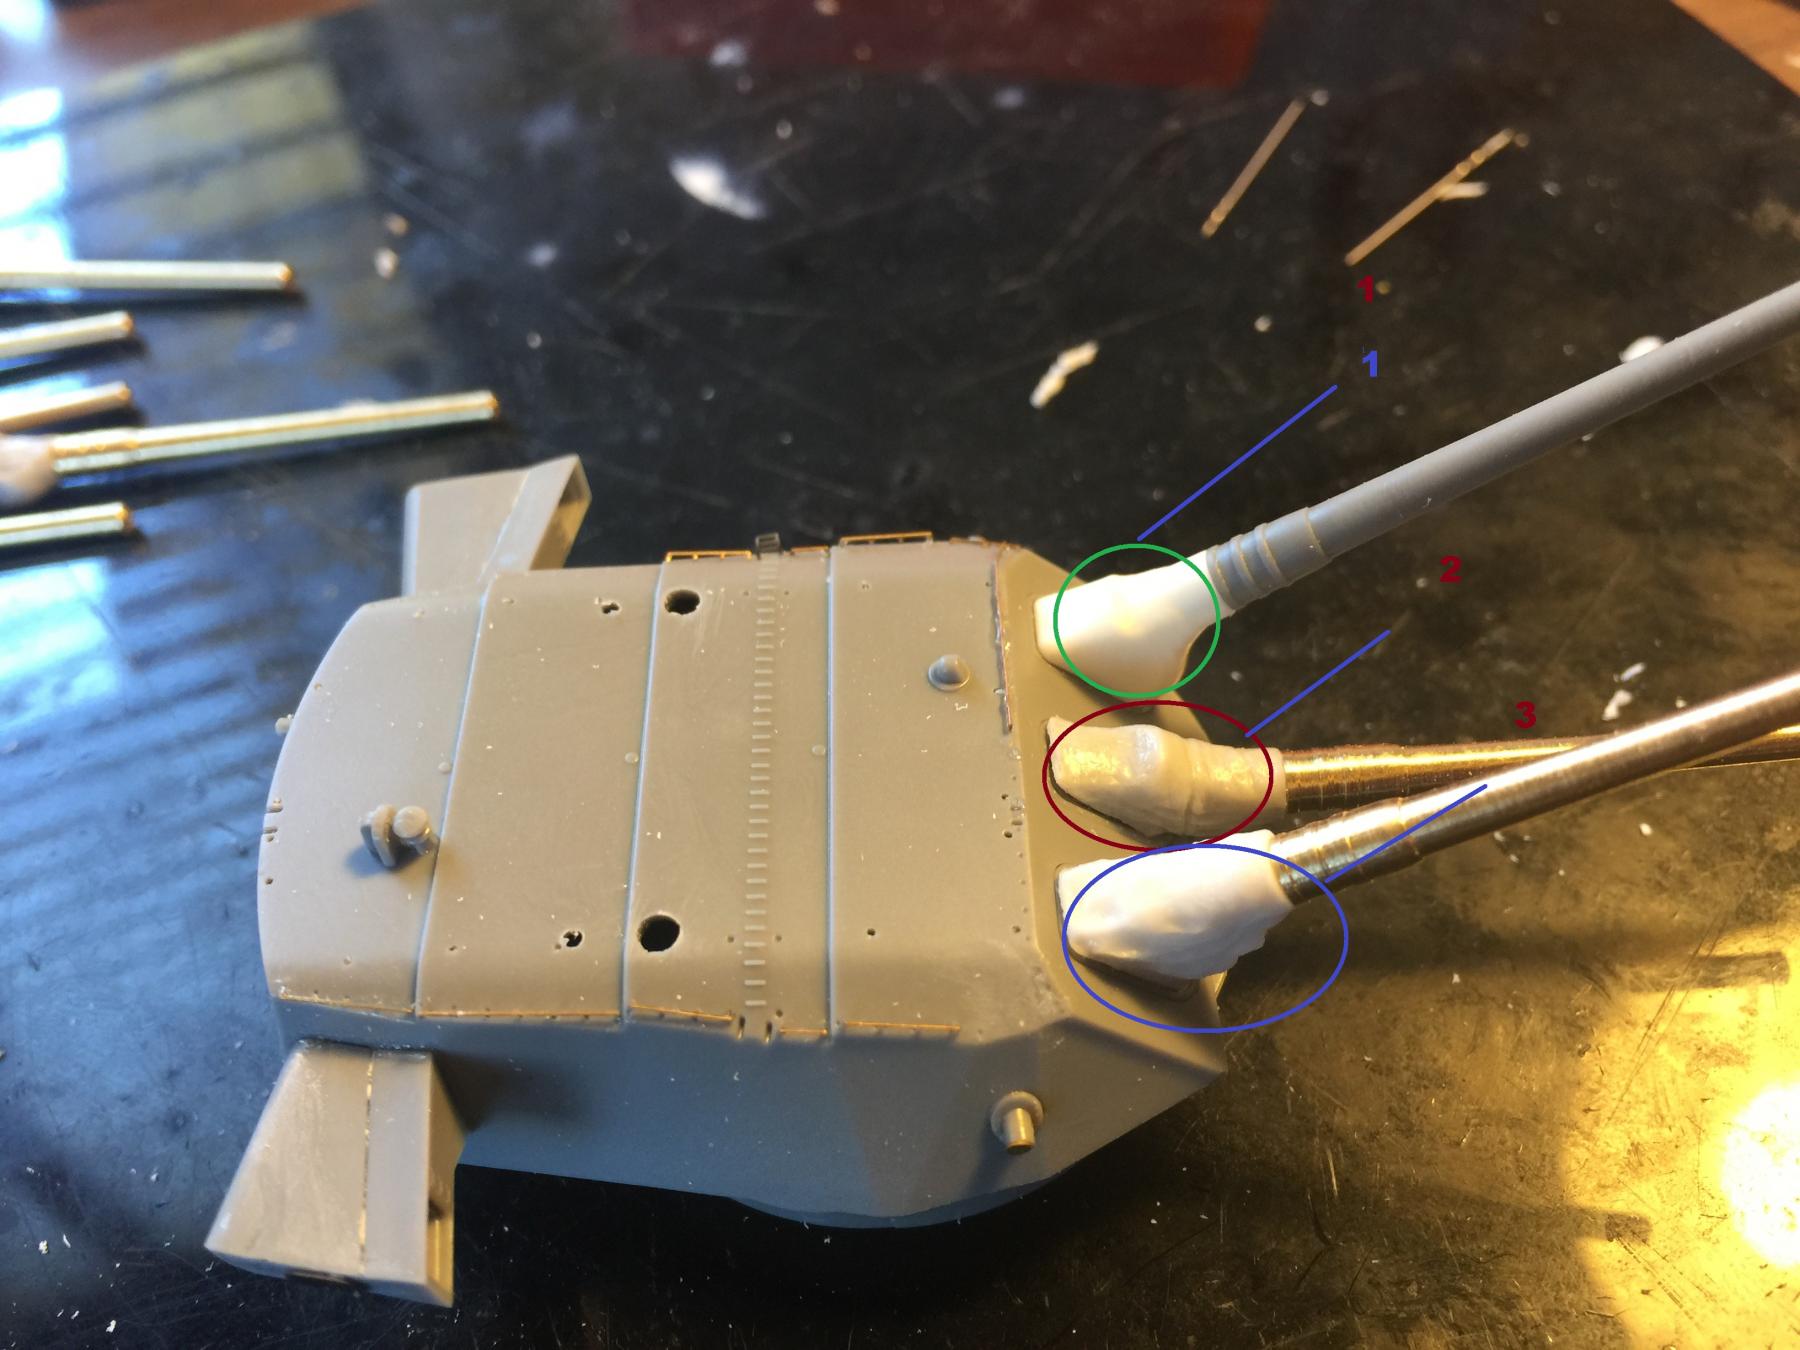
There is a heap of detail I will not add until after painting, such as ladders, stanchions, AA guns, but first up I had to add the exercise aiming device which is provided by Tamiya but not referred to in the instructions but in every other reference book. I used stretched sprue as the cables.

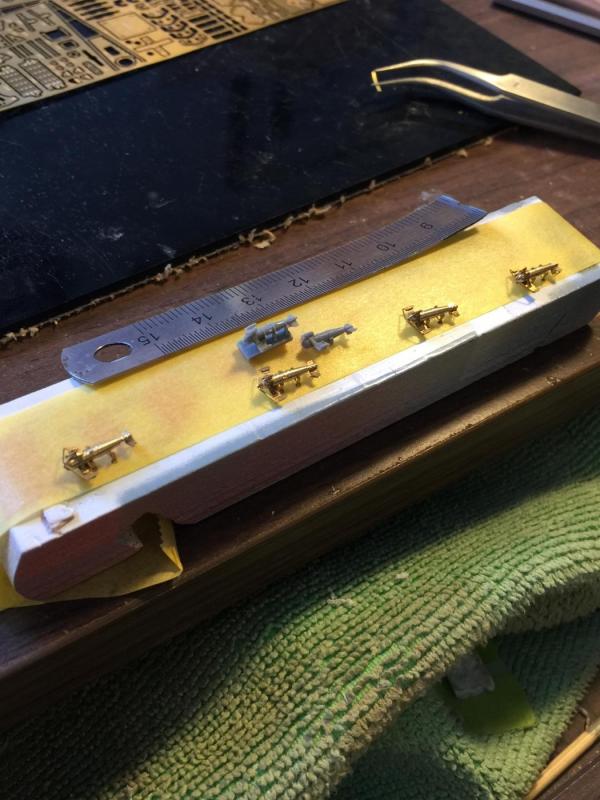
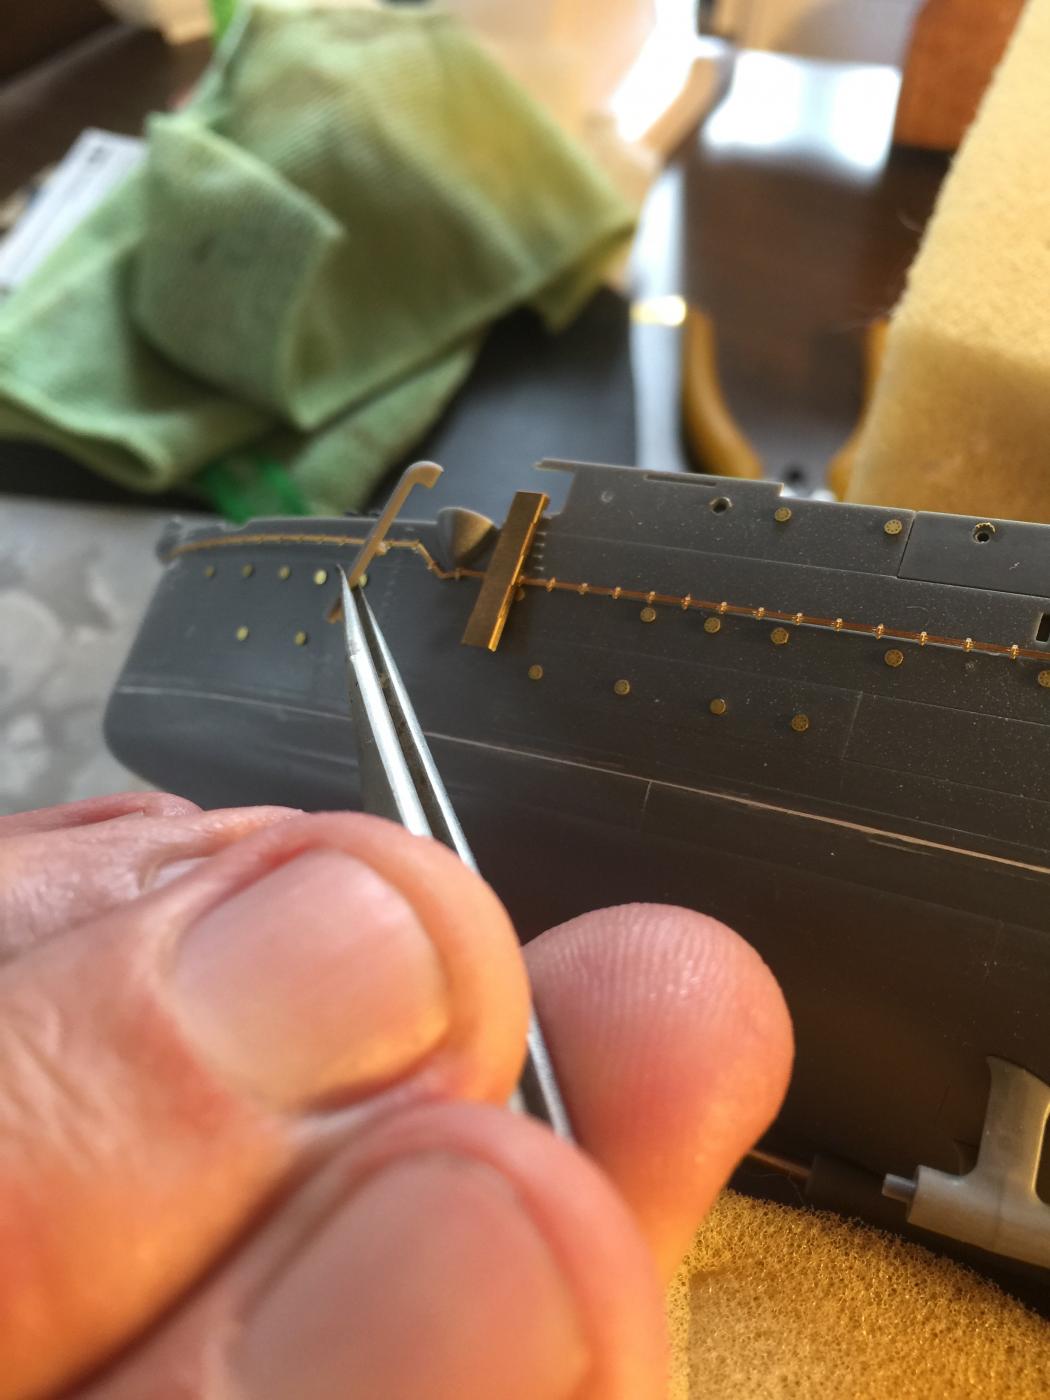
The handrails were an absolute nightmare as they are 1mm high, and were a full days work to add then 50% of them full off. Luckily Pontos gives you extras.
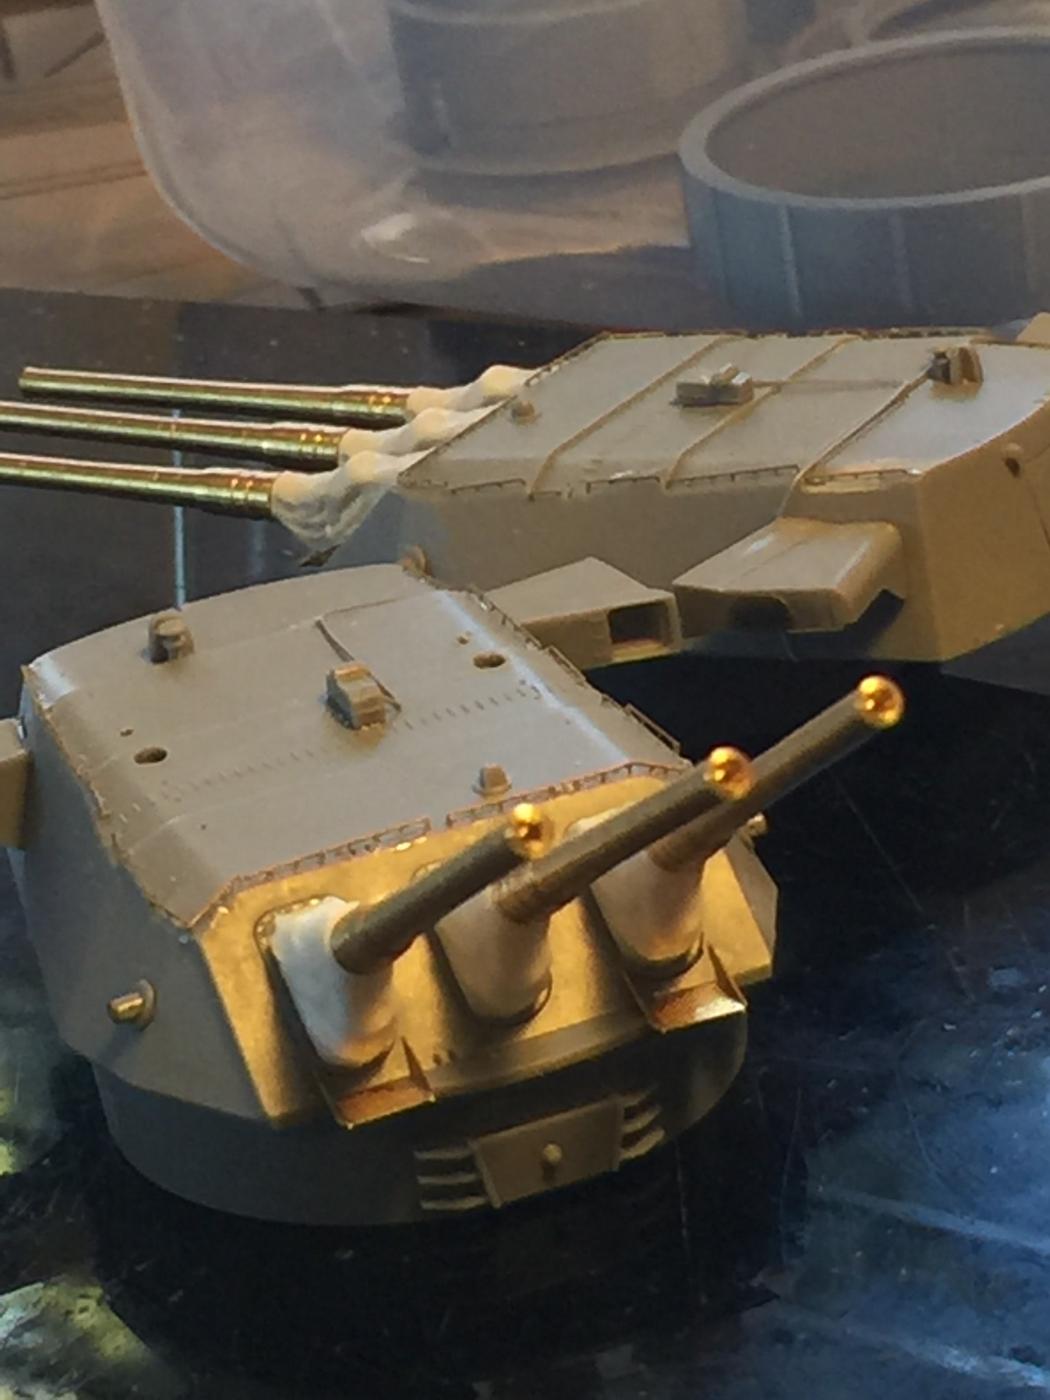
The blast bags, there are some provided with the kit, but are very bland. 1 is the tamiya barrel and blast bag, 2 and 3 are the pontos provided bags being elevated and flat.
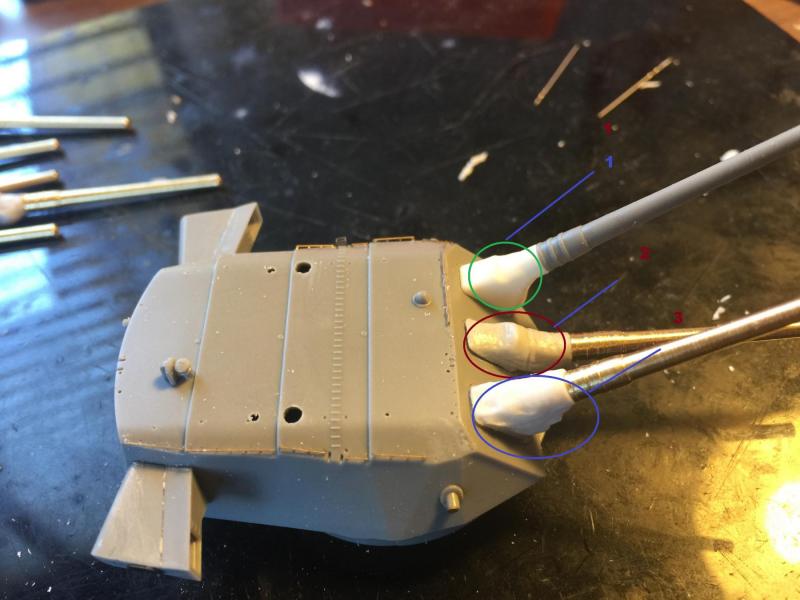
For anyone building this kit, there are lots of extra provided if you stuff up, but the secret is to drill out the front of the bag, the widen the back end as much as possible so the barrels will slide into the breach and allow you to keep the base of the bags within the correct area on the hull piece.

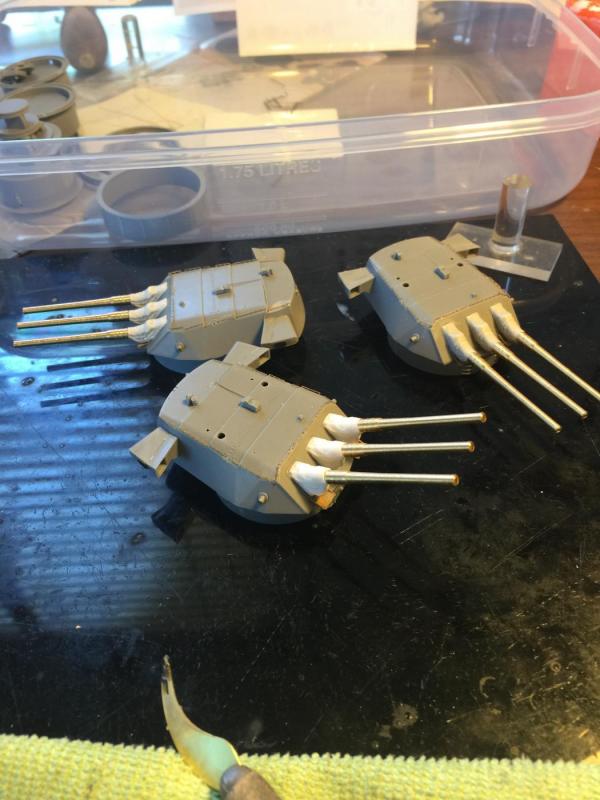
There is a heap of detail to go, but I will not even cut the off the fret until I am ready to paint. The local supermarket's cheap tupperware is now their home for a while.
-
-
-
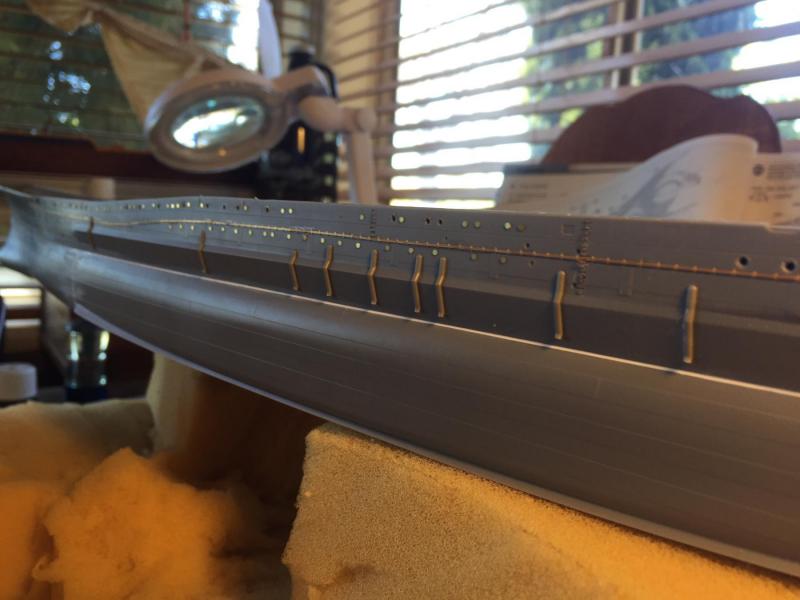
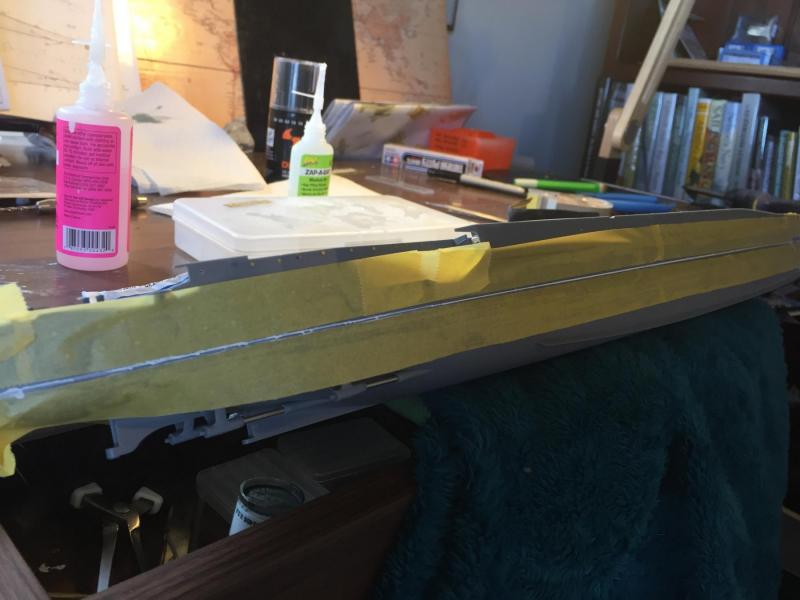
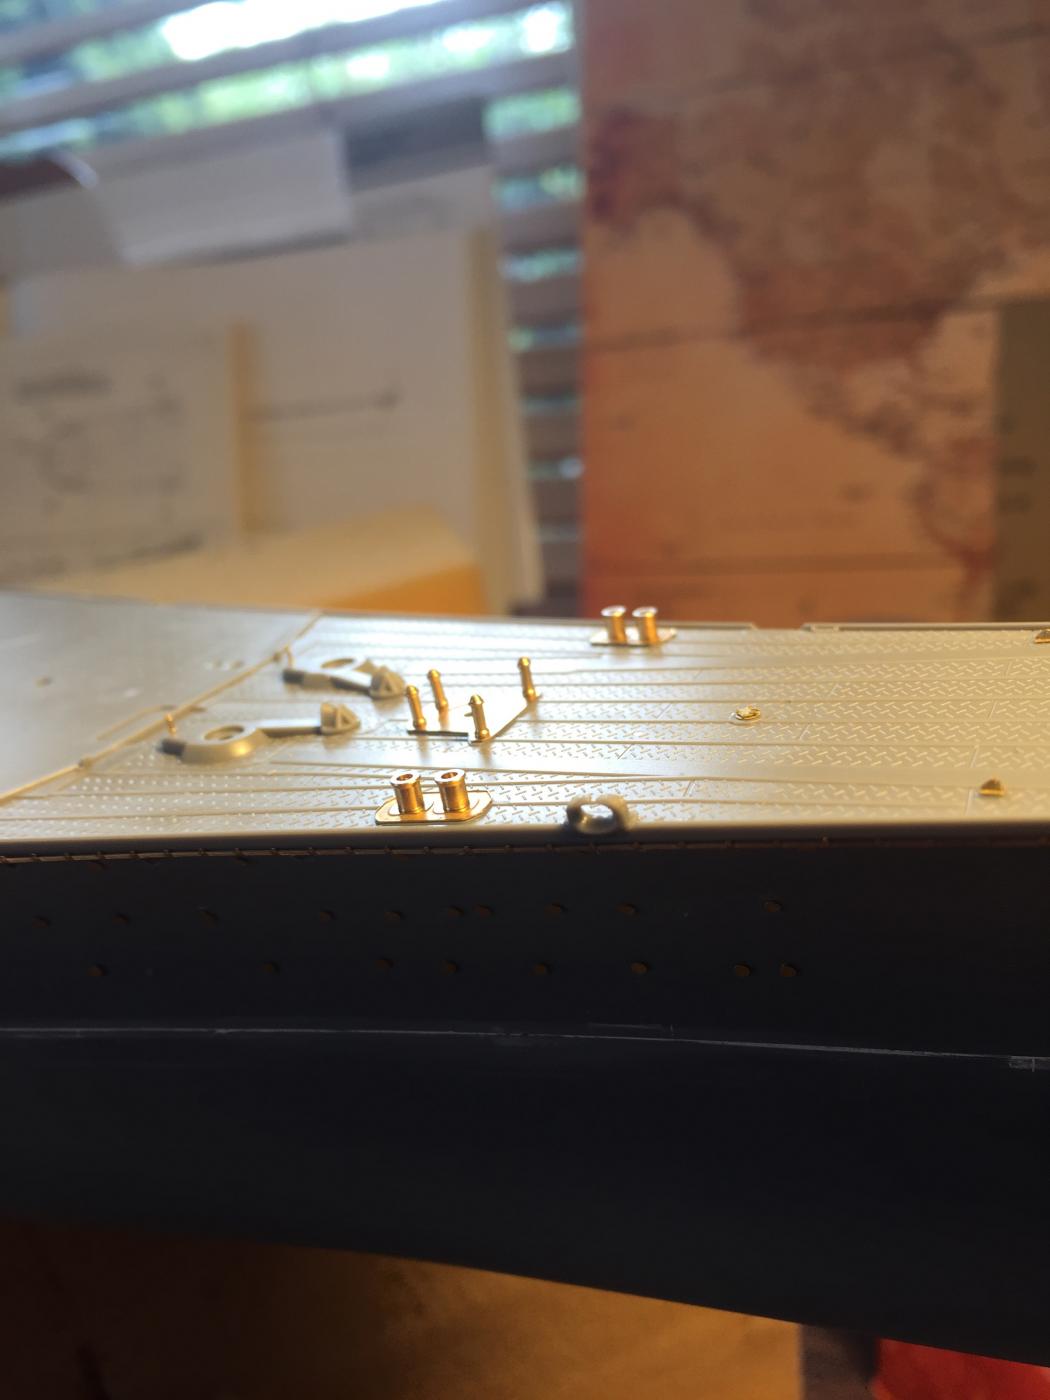
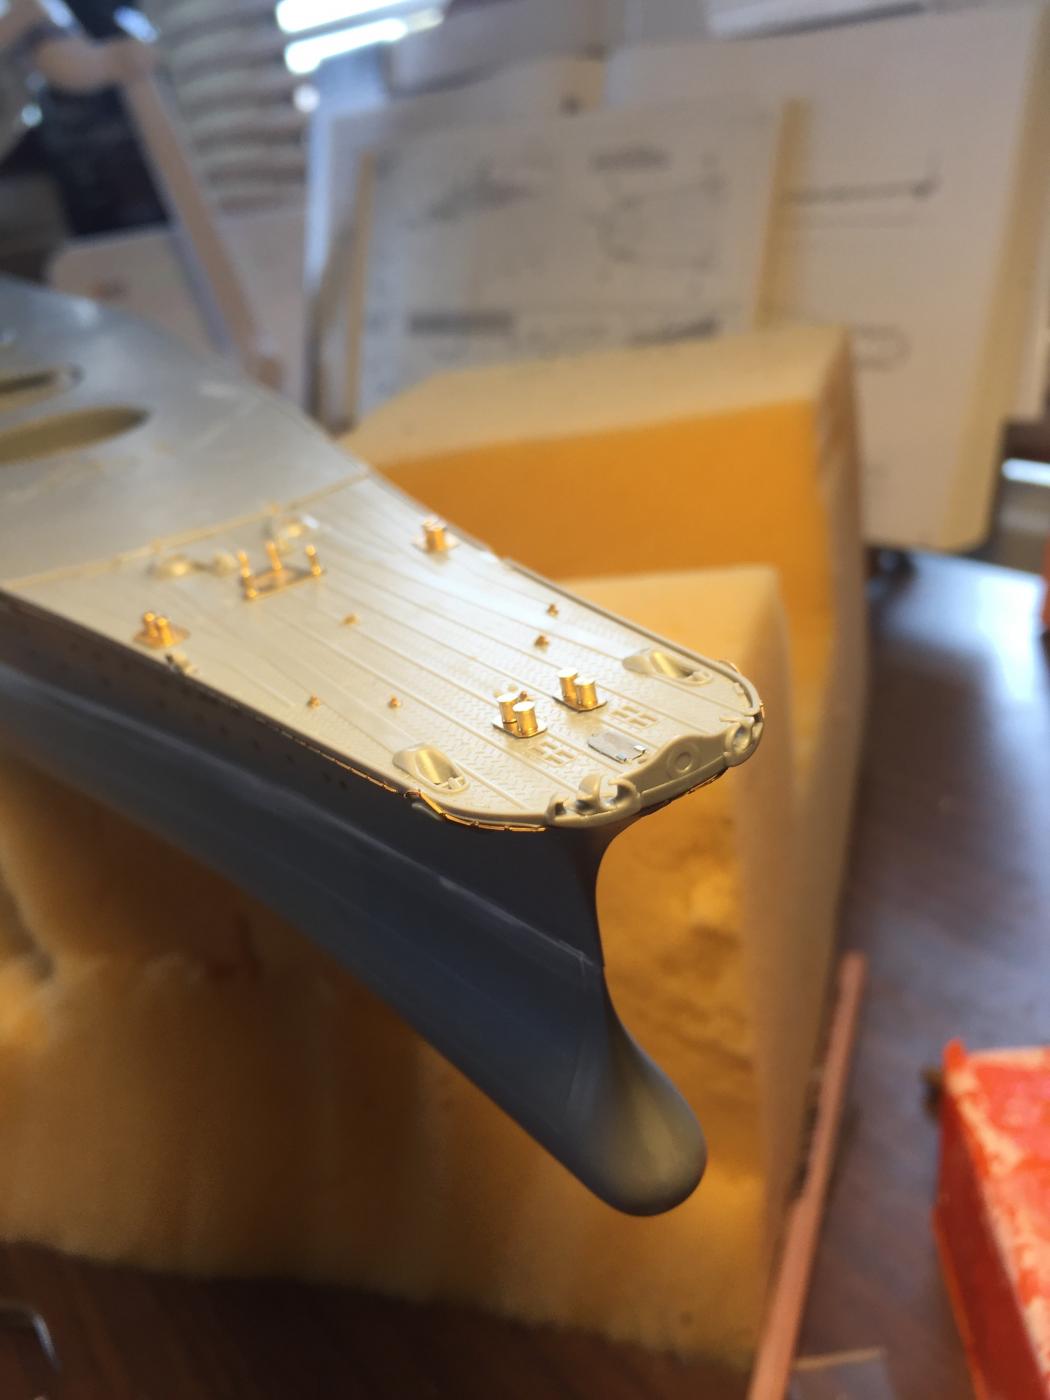
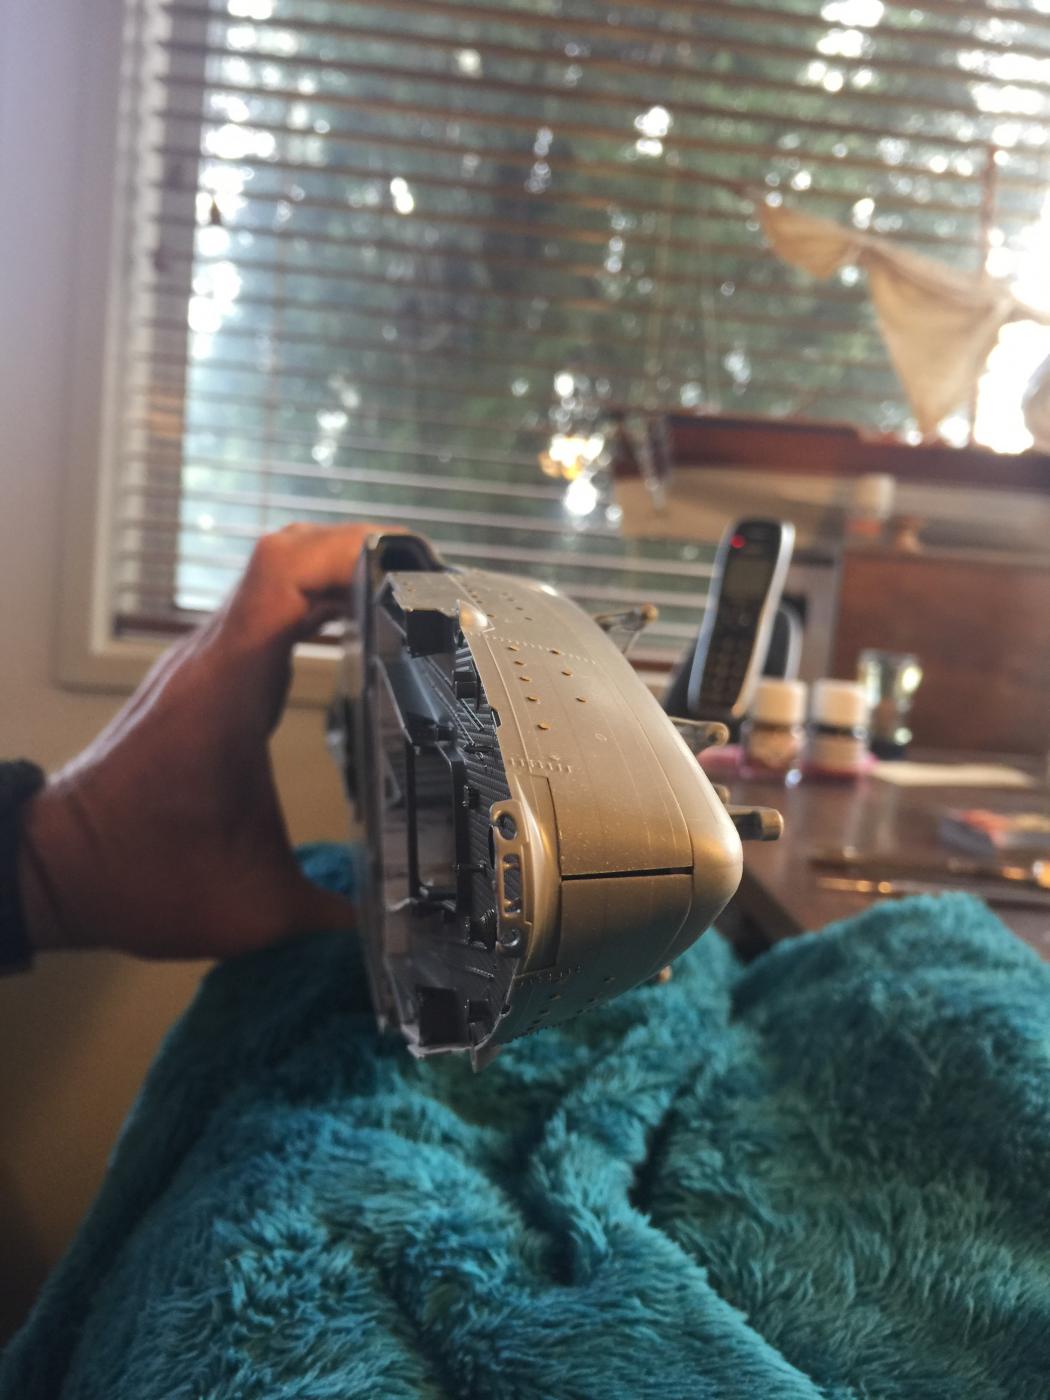
Next is applying the forcastle so I can add the fairleads. Once that is complete I can replaced the deadlights that fell off and a couple of eyelets, then it is ready for painting, but I will start off other stuff first. Back to work this afternoon so delays expected.


- mrshanks, BANYAN, FatFingers and 17 others
-
20
-
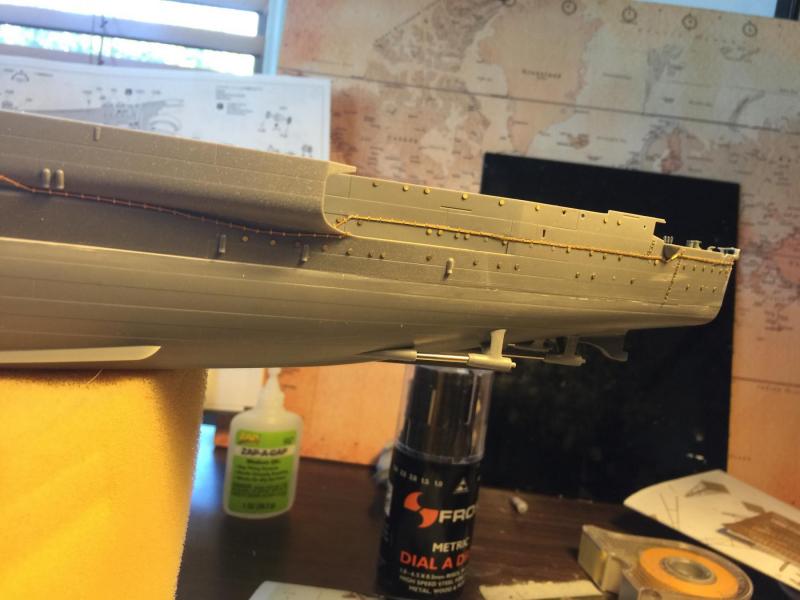
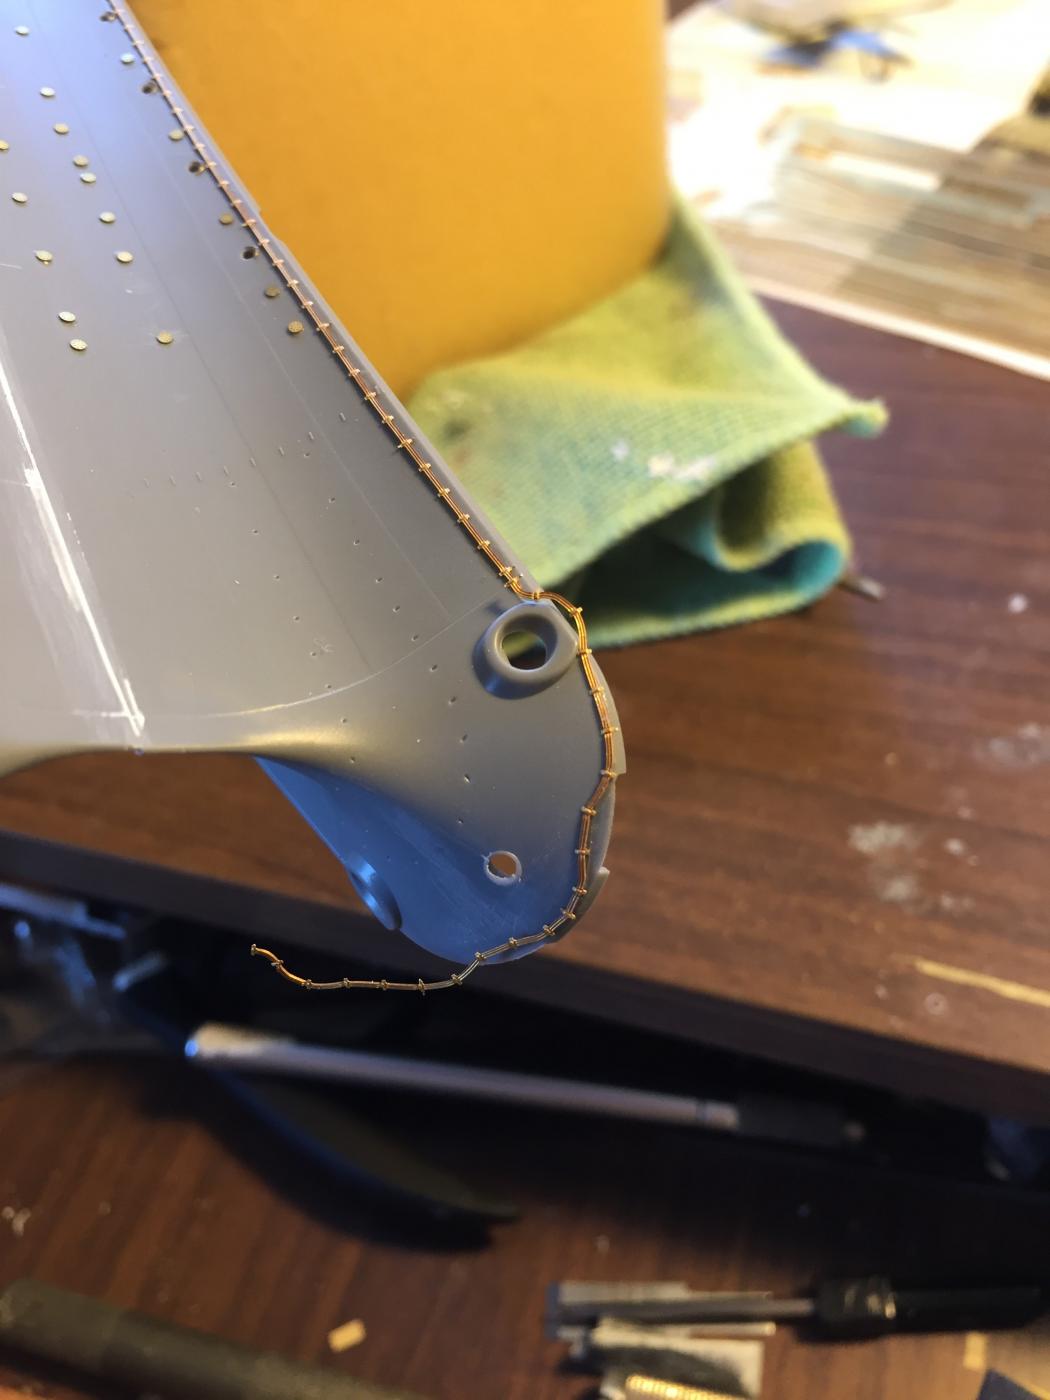
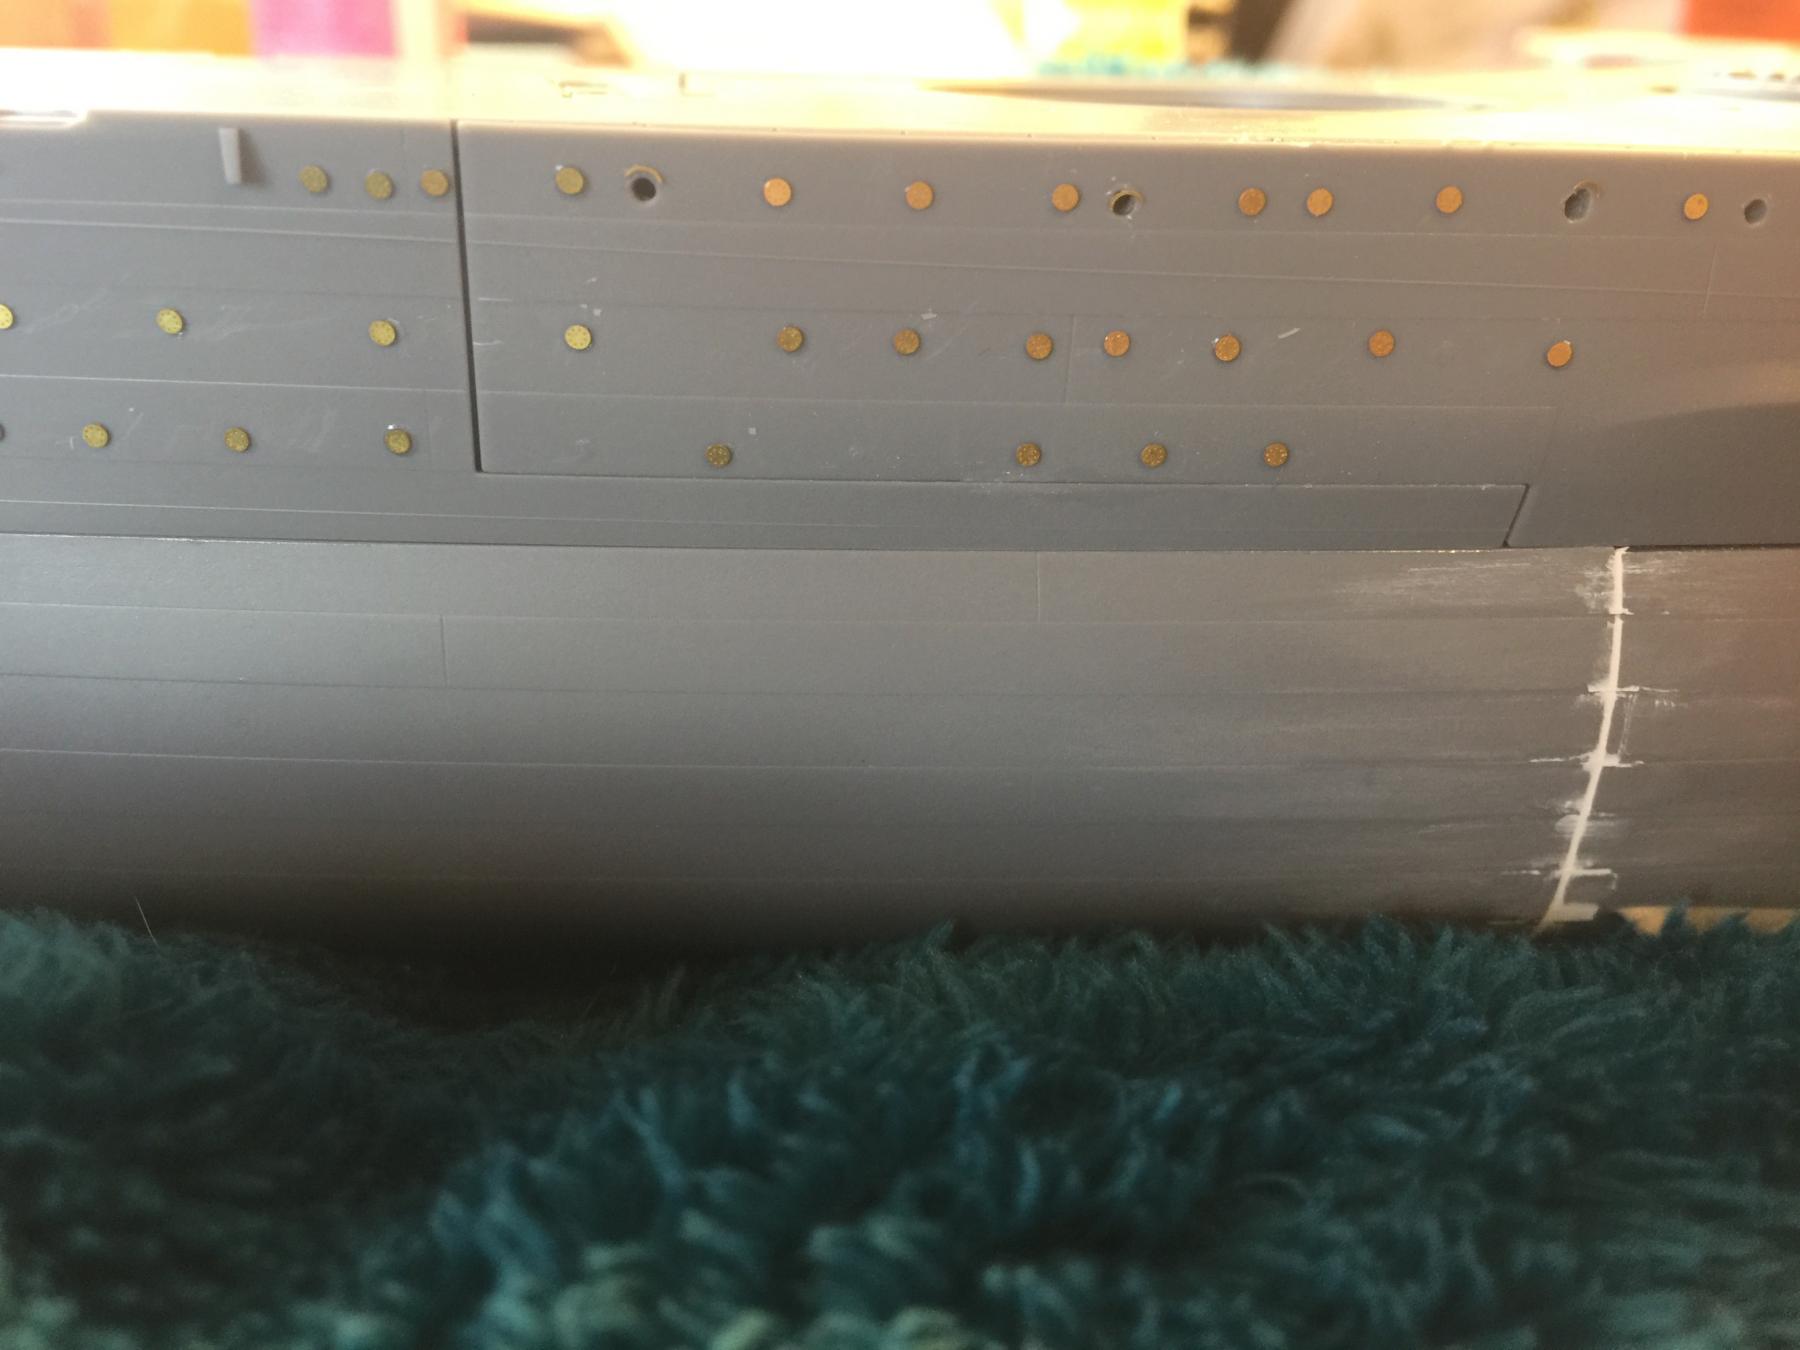
As you can see I have also added the kits supplied scupper pipes and replaced the two big ones from the Pontos set. I have not attached these yet as they will get in the road of the painting.

-
Moving along with the hull, I have placed the degausing cables. You are given two options, one closed and one open. I used the open one as it looks better and I suspect Tamiya got the idea from the photos of the wreck
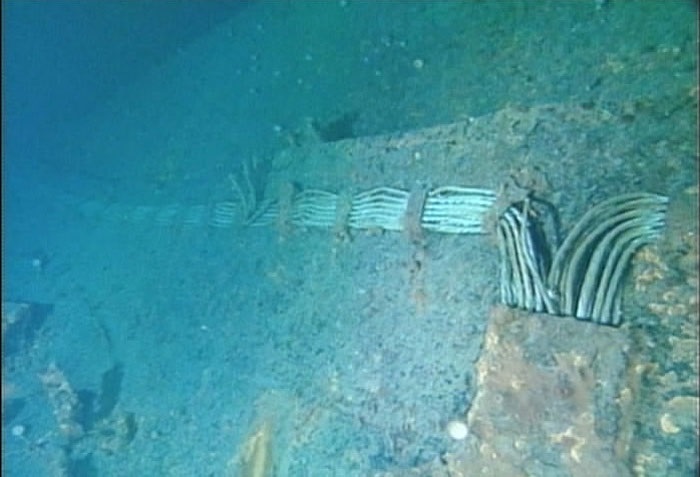 but I suspect the keyboard warriors are correct when they say the covers have rusted off. Still, looks nice.
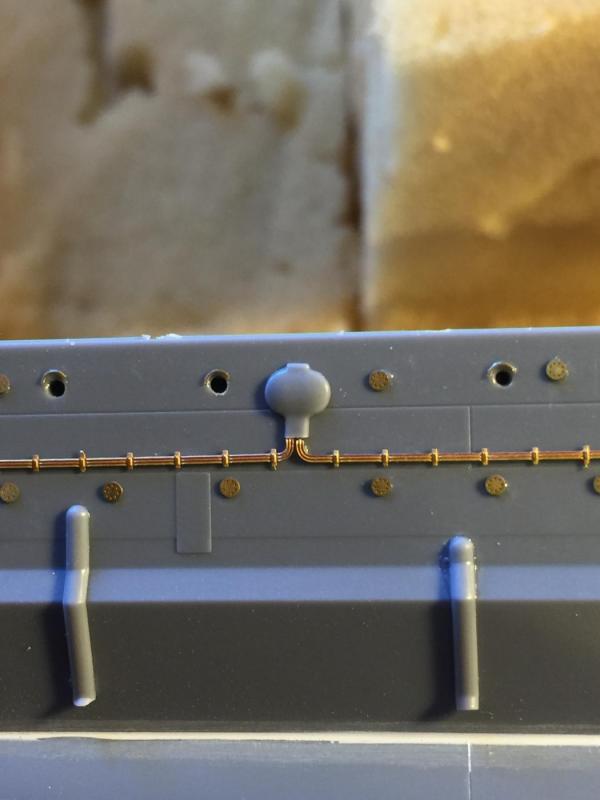 .
.
So all up there is about a metre of it, which at 1/350 is a lot.
- Old Collingwood, cog, Canute and 15 others
-
18
-
-
-
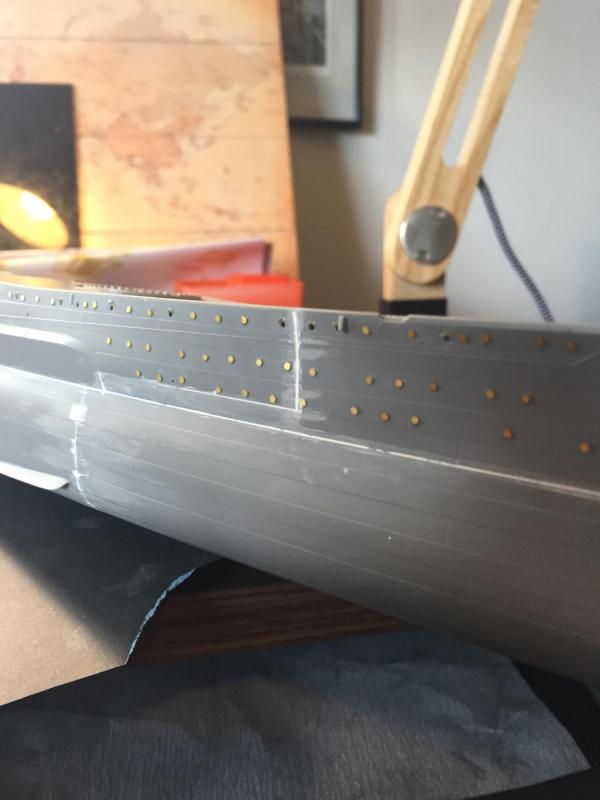
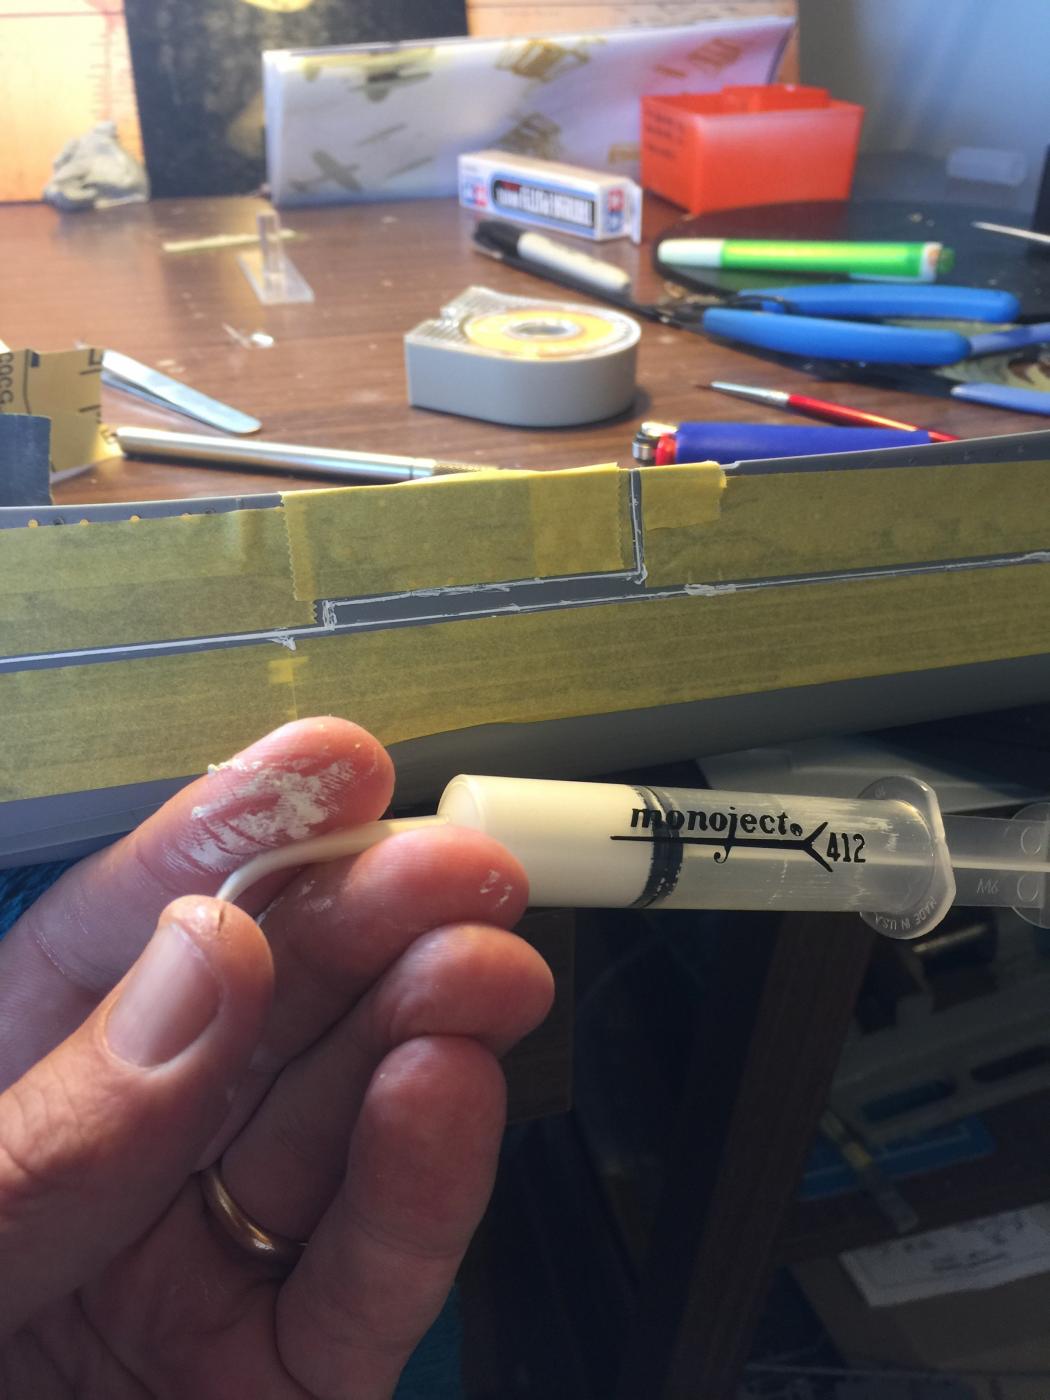
No doubt it's all about packaging and shipping fees. Just would have been more simplified on a zig zag patter along panel lines, meh, too late, move on. Its a nice kit limited only by my own ability. The putty syringe seems to have solved it and nothing masking and overspray can't fix. Don't blame the tools etc. any faults will be my own.
-
-
-
-
Bugger me, it worked! I expected having to spend days fixing this, but it was just a couple of hours work.
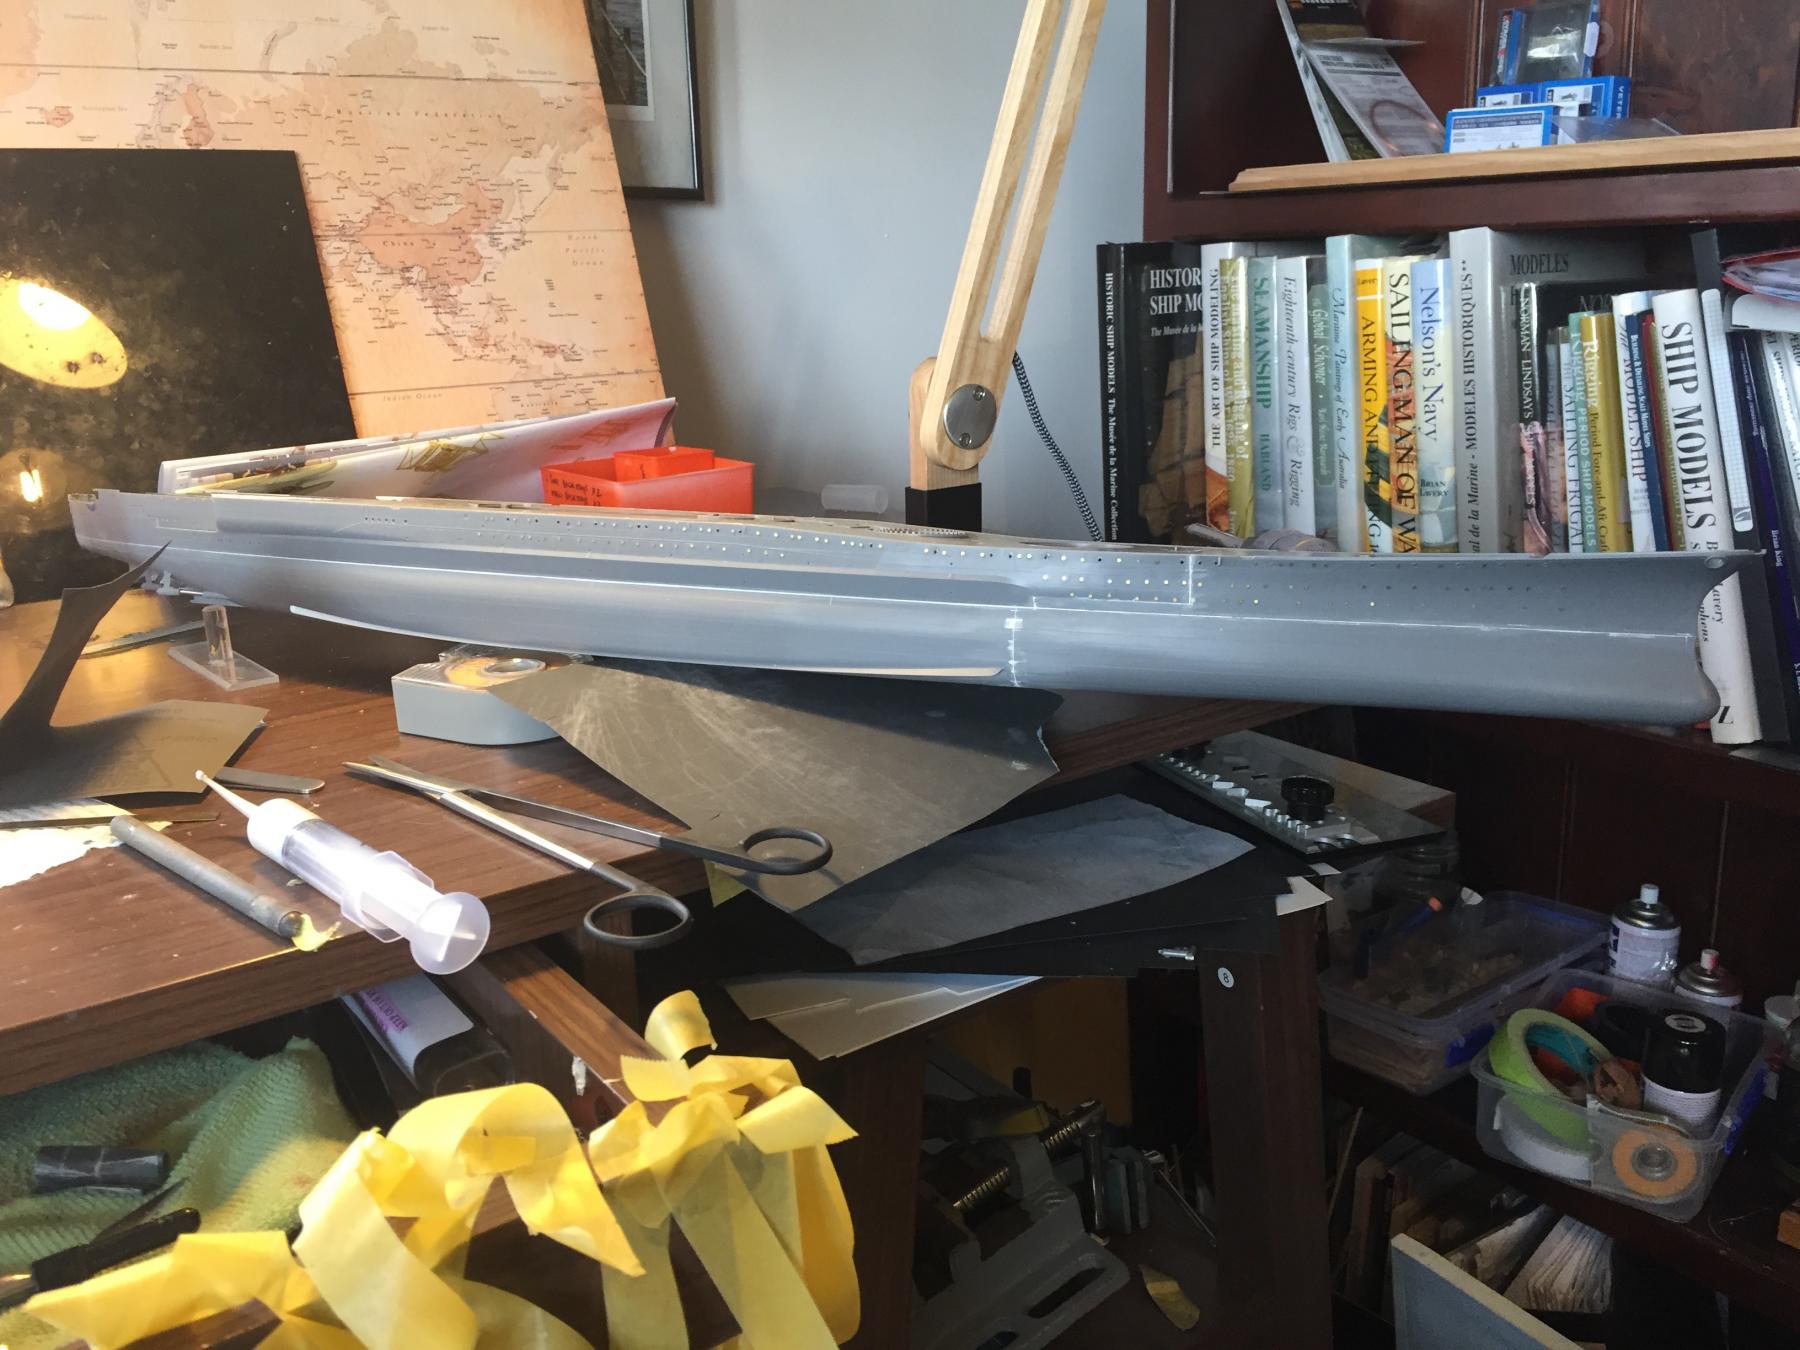
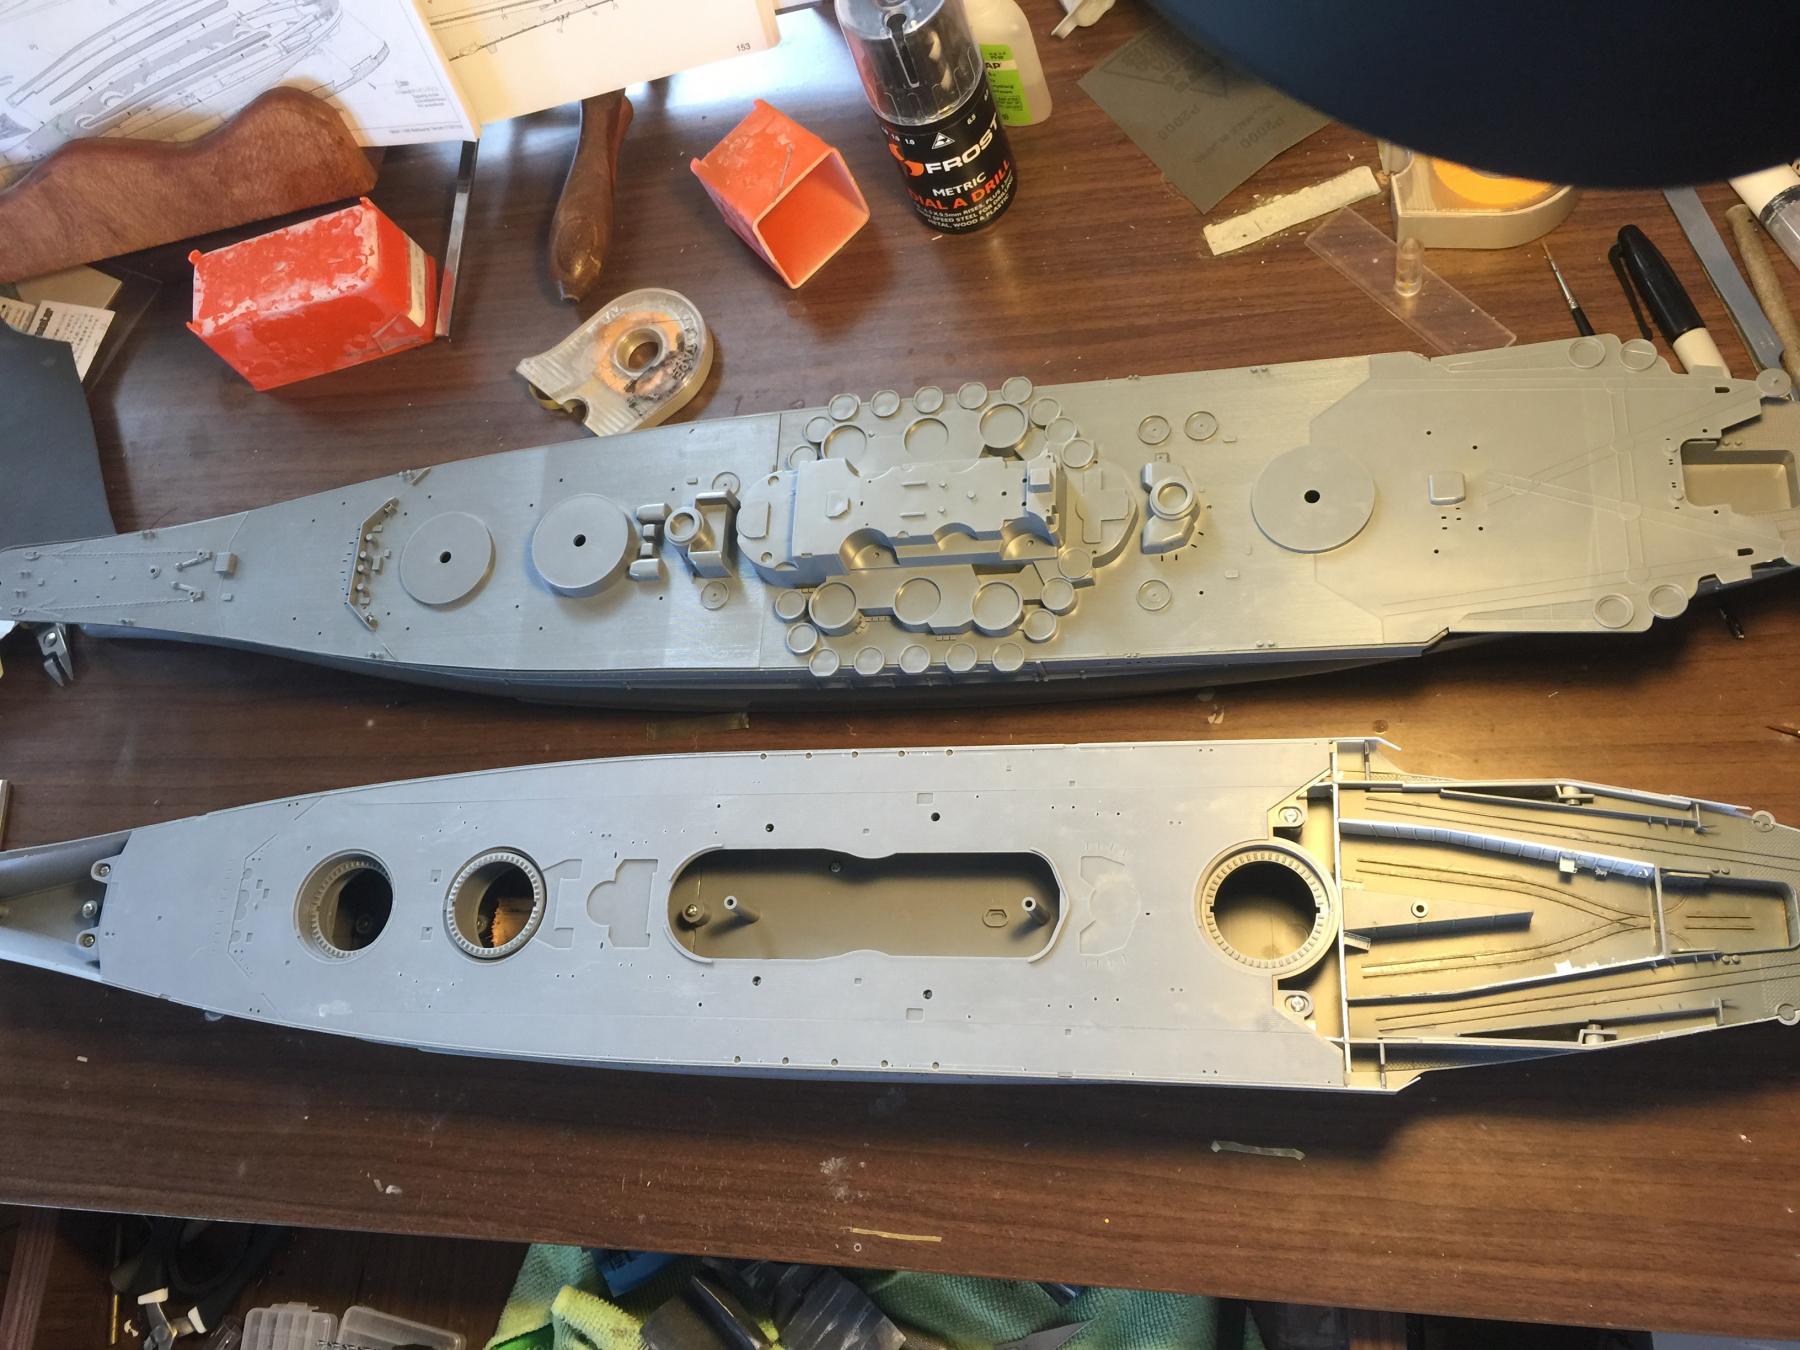
I threw the old tool hull together so you can see the comparison. This swill be my practice piece for painting. Given how much I have spend on this thing so far I think it is worth having a mistake zone.

- dgbot, Farbror Fartyg, hexnut and 16 others
-
19
-
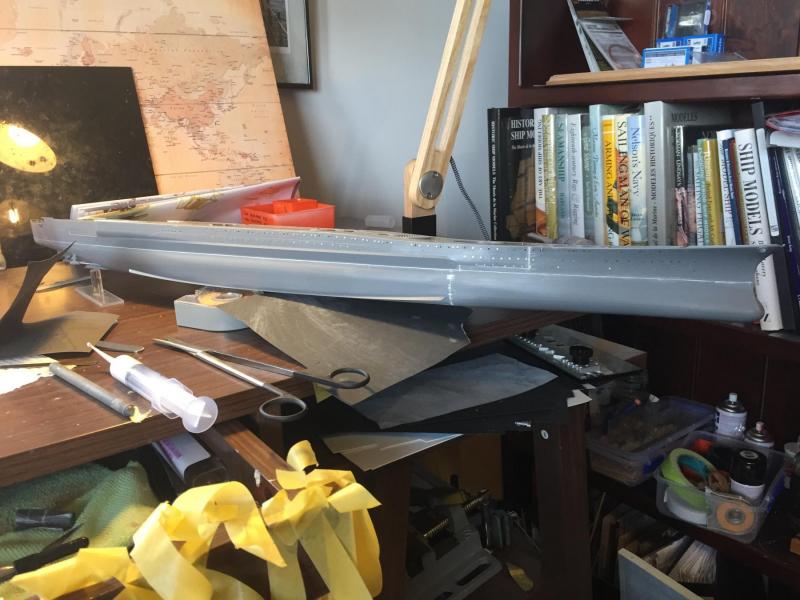
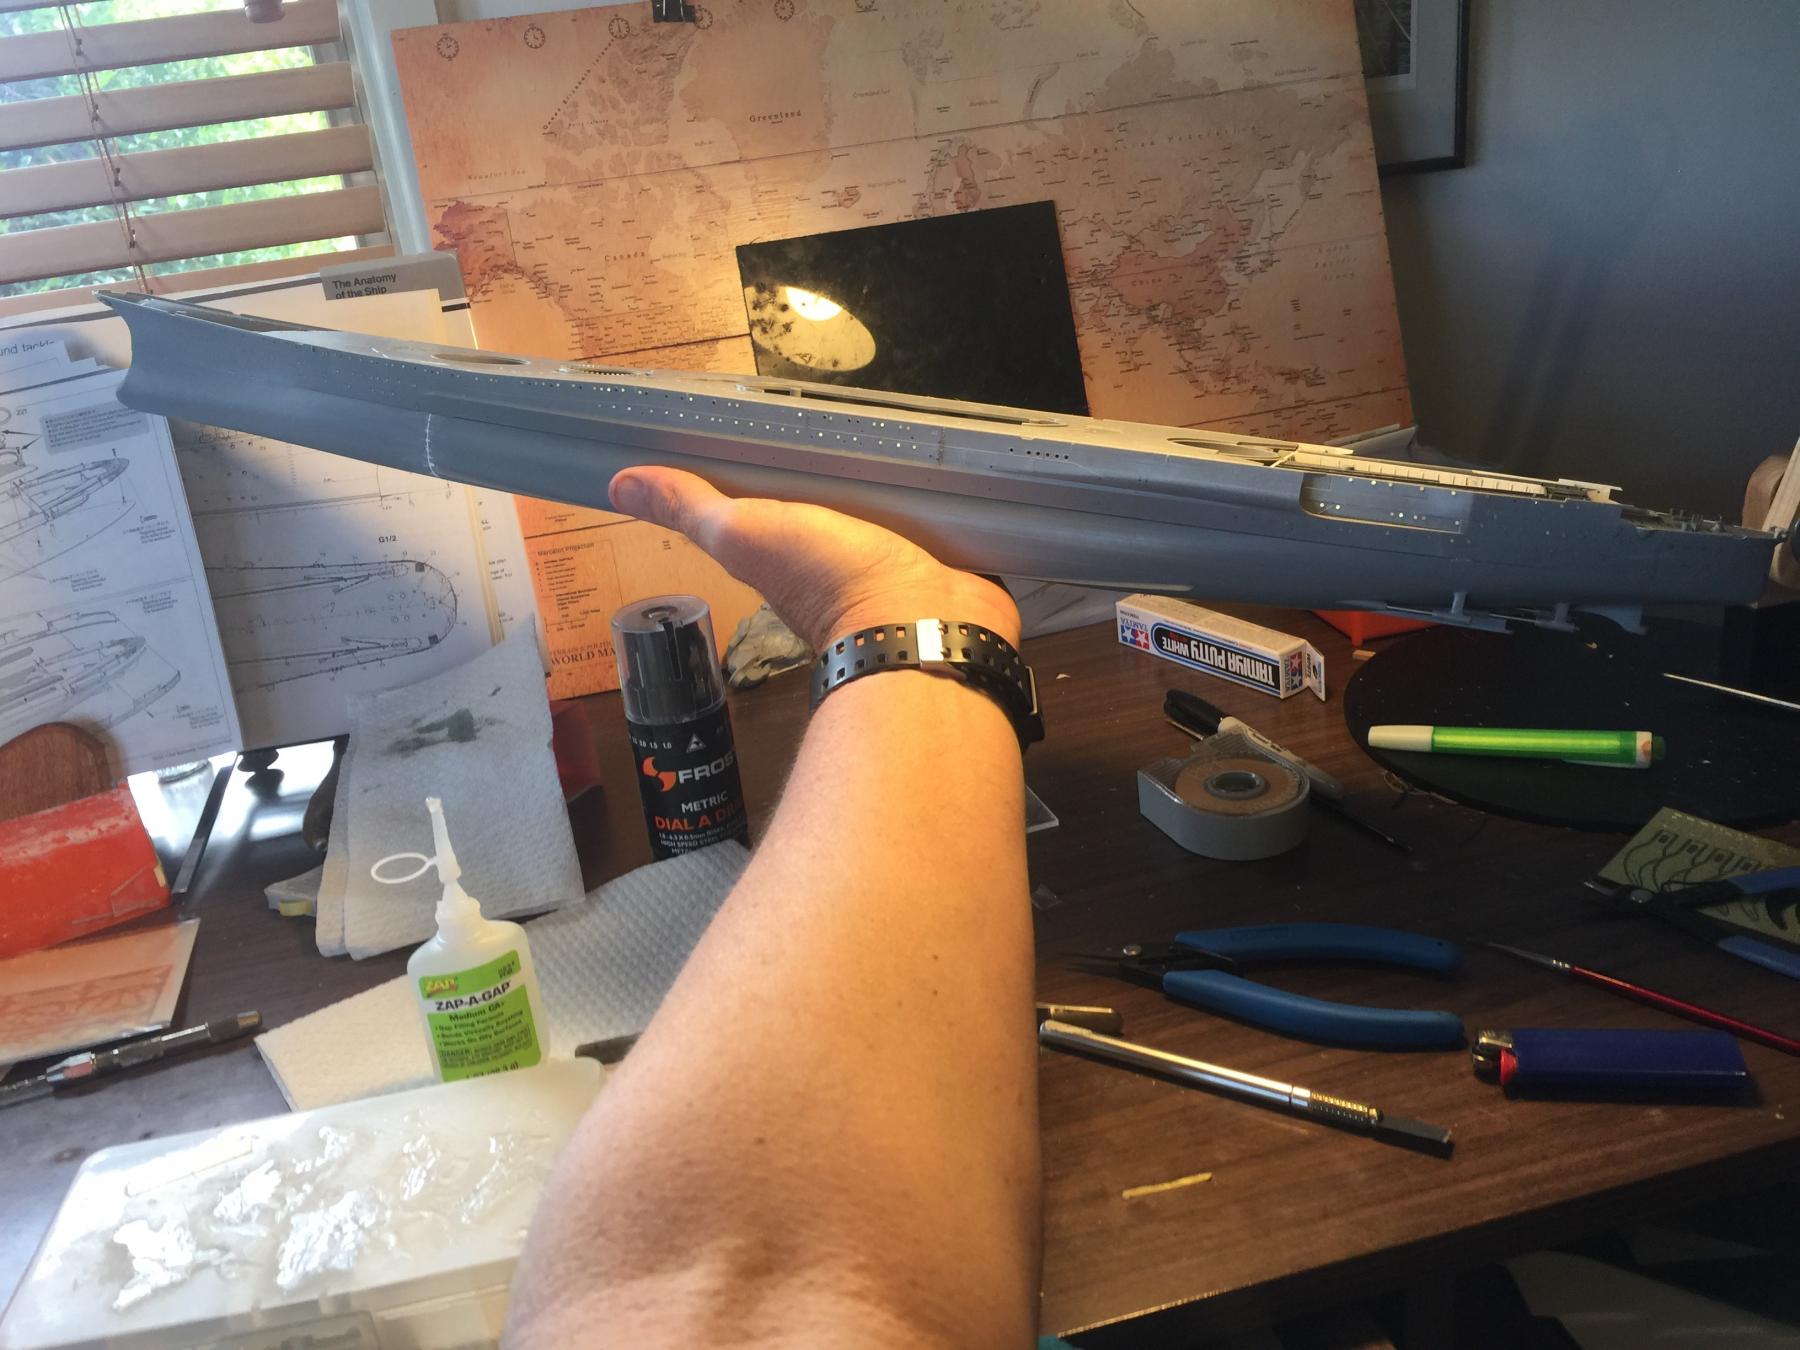
Finally some days off! The hull is now joined up, but I have no idea what Tamiya were thinking making the upper hull in 5 pieces as the gaps are huge. Given the size of the ship, it needs a LOT of glue, and it requires a fair bit of spot glueing with off cuts of PE to slide into the gaps. The centre deck area (I'm sure the ex mariners will have a name for it), comes in three pieces which join up to the hull nicely with some thin PE.
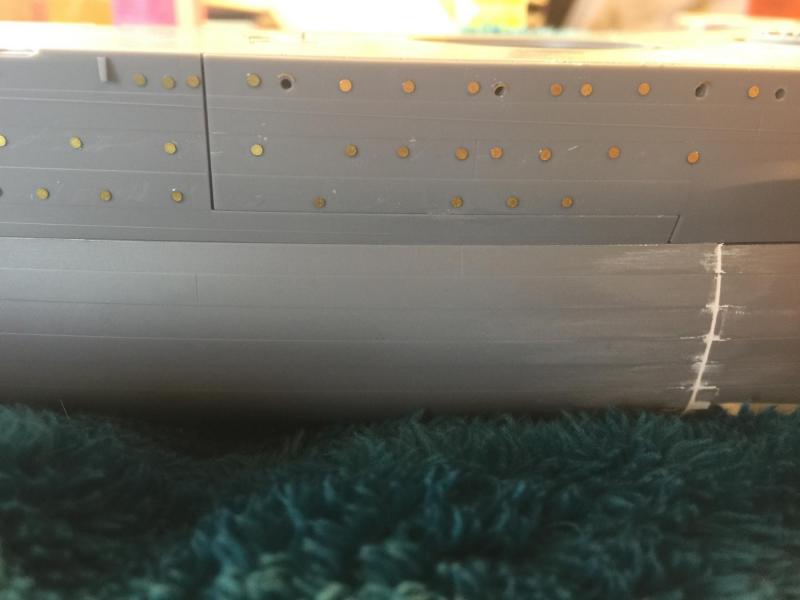
In a moment of inspiration I found a syringe which I filled with Tamiya putty and ran along the gaps which will hopefully avoid a lot of sanding to avoid loss of molded seams. This is backed up by the prodigious use of masking tape
Quite a few of the dead lights have fallen off due to this handling but can easily be replaced. Once all the seams are fixed up I can add all the drain pipes on the side, drill out the stanchion holes and fix up everything I can before even thinking about adding the forecastle and rear flight deck.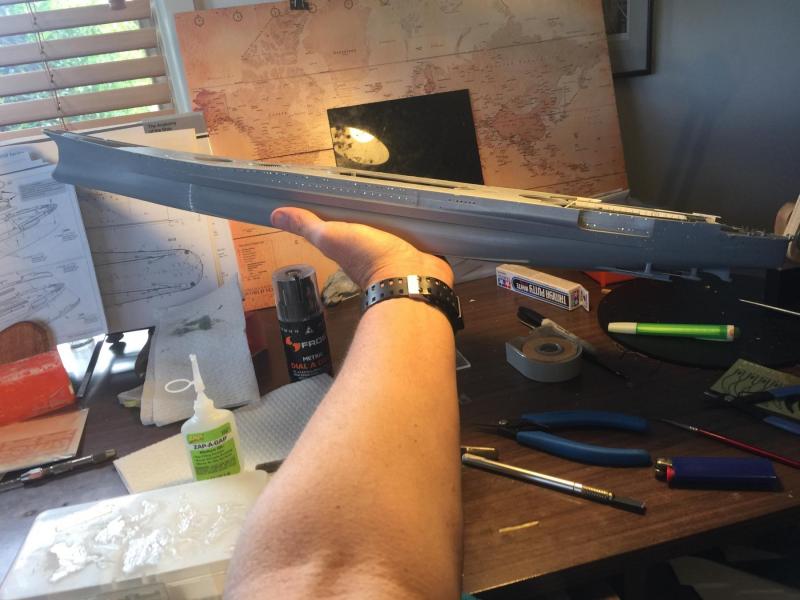


- hexnut, Keith_W, Captain Slog and 18 others
-
21


IJN Yamato by RGL - FINISHED - Tamiya - 1/350 - PLASTIC
in - Kit build logs for subjects built from 1901 - Present Day
Posted
I imagine lessons learnt and increasing air power