tlevine
-
Posts
2,015 -
Joined
-
Last visited
Content Type
Profiles
Forums
Gallery
Events
Everything posted by tlevine
-
You mentioned initially that you are restoring this model. Now you are talking about changing the model to match a known ship. Looking at the model in question, I believe it was never meant to be an accurate scale model of any specific ship. It is a souvenir or folk art model, probably made in the Far East. If this is a restoration, then do just that...restore it to how it was when purchased, regardless of accuracy. I am in the process of doing the same thing for a friend who wants his deceased father's clipper ship model restored. You will learn valuable skills which could be used on a future, historically accurate model. If your intention is to create an accurate representation of Tennessee then the only thing you might be able to save is the hull. I do not mean to put a damper on your enthusiasm but you will find that this is a big project and I would hate to see you abandon it because it is more complicated than you expected initially.
-

Meet Your NRG Directors and Officers
tlevine replied to tlevine's topic in NAUTICAL RESEARCH GUILD - News & Information
Mitch Michelson I have been an NRG member since 1989 and a Director for the last 8 years. In my professional life I spent 40 years as a petroleum engineer and part-owner of a family-owned oil & gas business in my home town of San Antonio, Texas. My interest in the nautical world began as a teenager on a visit to the Hyde Street Pier in San Francisco. As is true of many of us, I was a confirmed model builder in my youth and began to return to the hobby as a young adult. I discovered the NRG on a return visit to San Francisco during a discussion with a park ranger at Hyde Street on my 30th birthday. It took me a few more years to get up the nerve to actually join. My actual model building has been limited due to the usual professional and domestic distractions. I became interested in the early American Navy, primarily the War of 1812, and have spent a lot of time researching the era. In doing this I have accumulated a fairly extensive library along with the requisite must-have volumes on building models of sailing vessels. I have attended almost every annual NRG conference since Boston in 1997 and doing so has really broadened my knowledge and expanded my horizons. Because of conferences I have met and become friends with some really outstanding people. My NRG Board experience has been very rewarding and I am (so far) most proud of how each member of the board has become a fully integrated part of the Guild’s operations. My user name is “mmichelson”. -
Thanks for posting the step-by-step process for the capstan. Fantastic work.
- 649 replies
-
- 6
-

-
- dunbrody
- famine ship
- (and 2 more)
-
Consider replacing the plastic sails with cloth. I have used fine weave cotton saturated in starch and used the plastic sails as a mold to form new billowing sails.
-
Guidance, Encouragement, or just a Sanity Check
tlevine replied to RFP's topic in Wood ship model kits
Definitely, go for it. The worst case scenario is that you wasted a little money for the kit purchase. But I think you will find that your skills are up to the challenge. -
This is also a great way to store rolled up sets of plans and strip brass. Because I am not a trusting soul, I also have two pieces of electrical wire wrapped around the outside in case the cement fails.
-
Another suggestion would be to take some PVC pipe and cut of sections 12-18" long. Glue the sections together with PVC cement, forming a honey comb. This can be stored either vertically as the previous posts demonstrate or horizontally. I prefer horizontal for long-term storage to prevent warping.
-
Do you have central vacuum in your home? If so you can run a line to your new work space. Since the unit is in the garage (typically) the noise is minimal.
-
In the past I have always stained the wale planks. Chuck uses several layers of thinned artist's acrylic paint on his models. I tried the same thing on Atalanta and am very pleased with the result. After fours coats of paint I burnished it with 4000 grit sand paper to make it stand out from the matte finish of the rest of the hull. What is very nice is that touch-ups are easily blended into the rest of the wale.
- 943 replies
-
- 5
-
-
- hahn
- oliver cromwell
- (and 1 more)
-
Those gears look great. I hope you are not planning on covering them up with too much planking.
- 525 replies
-
- 2
-
-
- anchor hoy
- hoy
- (and 1 more)
-
Thank you gentlemen and thanks for all the likes. I hope to get a few more beams in place this weekend.
-
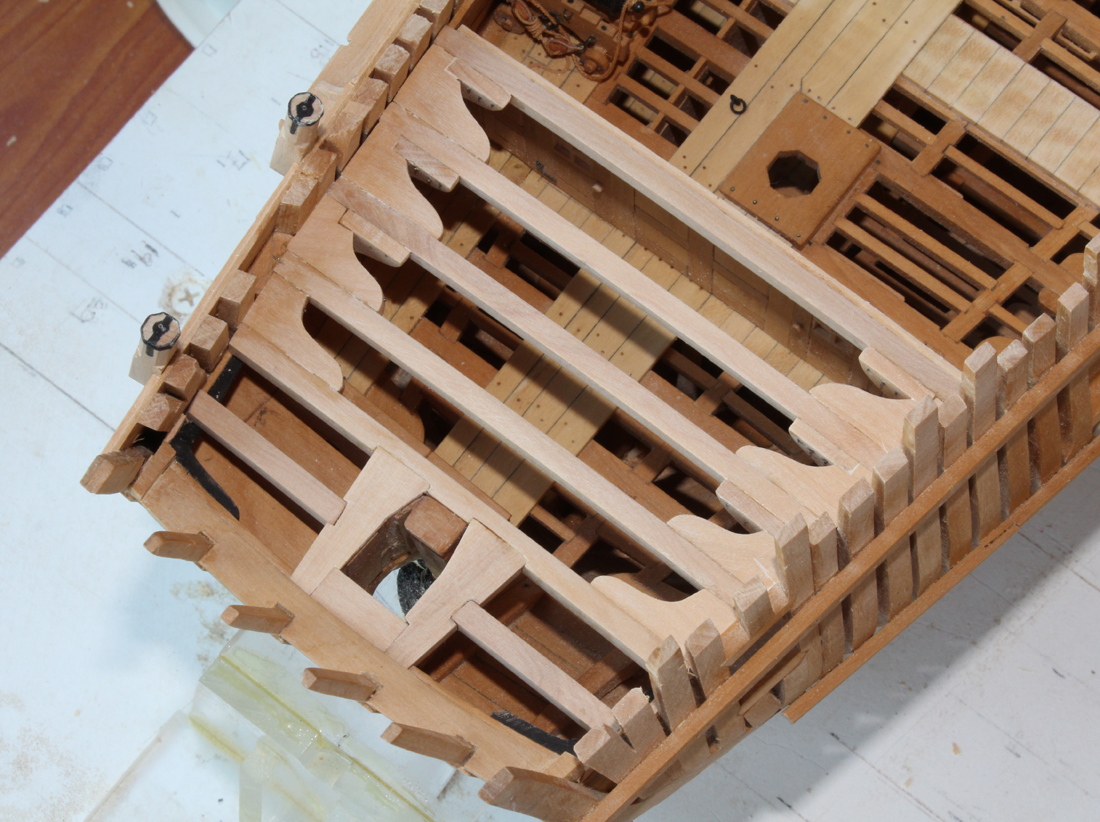
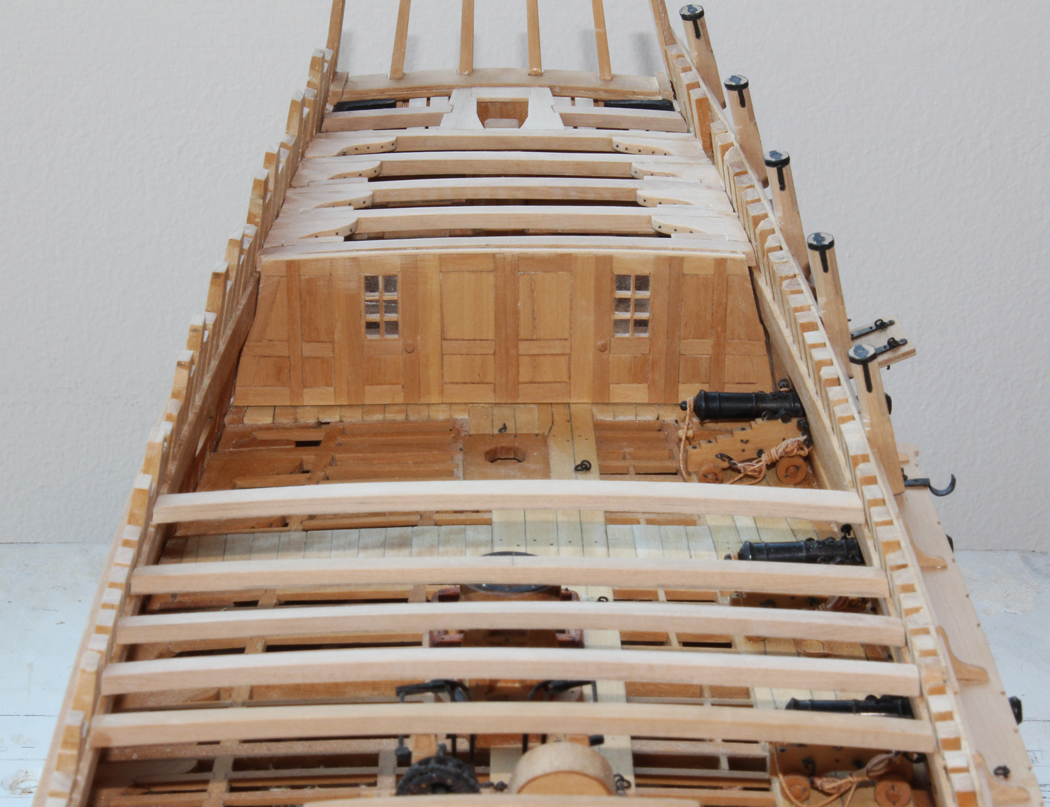
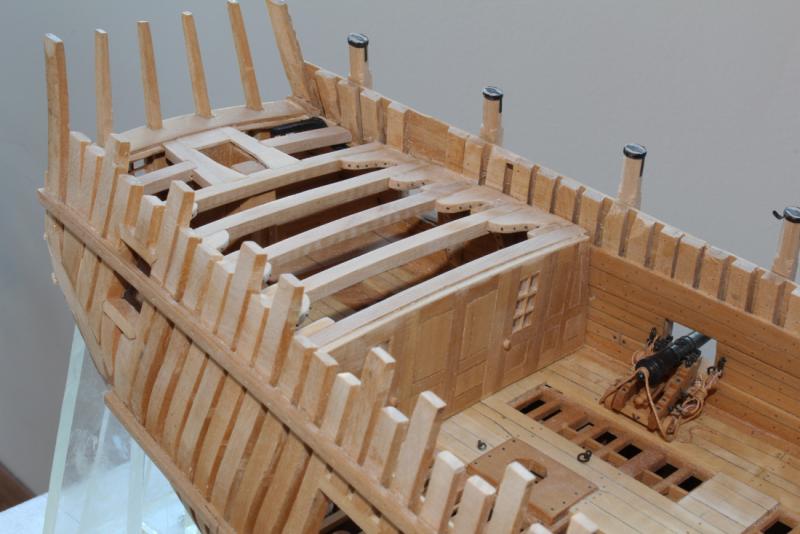
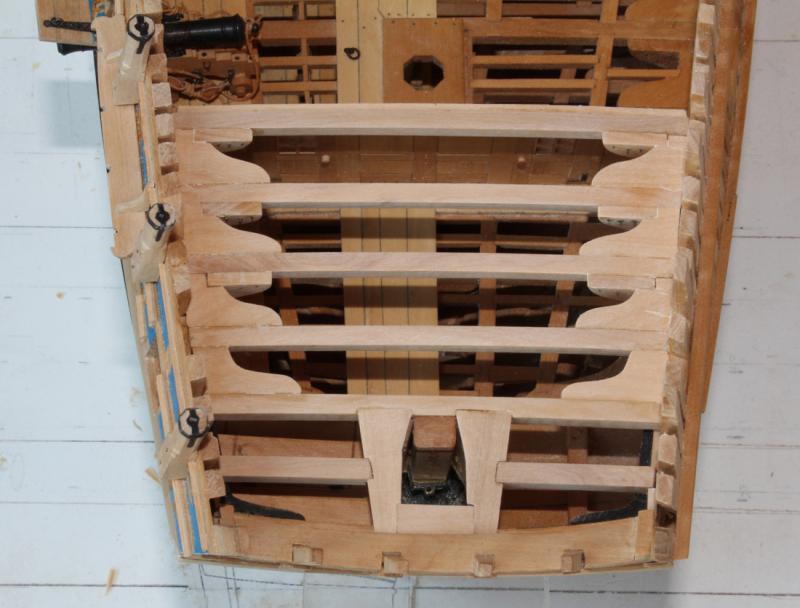
I cannot believe it has been so long since I posted. Amazing how life gets in the way. I was finally able to get some work done this weekend. There is an iron knee connecting the transom with the inside of the hull. This is not a simple "L" shape. It needs to twist inferiorly to clear the undersurface of the quarterdeck half-beam. I made the knee out of castello and then painted it black. There is nothing unusual in the construction of the quarterdeck. There are no stanchions. The only carlings are related to the capstan step and the deck fenestrations. I find it easier to begin aft and work forward (ie narrow to wide) for better access. There are hanging and lodging knees for each beam except there is no hanging knee at beam 14 as this would have interfered with the quarter light. The framing above the sternpost appears to be at a different angle than the rest of the deck in the last picture. This is an optical illusion. The plans show the bulkhead on the fore side of the beam, not underneath. Because this is a laminated structure I glued a thin shim on top so it would look neater.


-
Just be sure to "borrow" the stuff we want to replace with something nicer anyway!
-
Thank you so much. Just seeing the step-by-step for the shield makes such a difference in understanding the technique.
-
The 3-D definition is lovely. Please share the tutorial.
-
Beautiful figurehead. Tell us more how you designed and fabricated it.
-
Chuck, I would love to see something on polymer clay. I was considering making my figurehead with it (when that time ever comes). There is also a regular #12 blade (aka tonsil knife) with the cutting surface only on the inside. Personally, I would rather load two scalpel handles to get the same effect as the #12D (#12 and #15 or #10). Much safer.
-
I want to be in your club! But then I'd have to move to Jersey...
- 452 replies
-
- 6
-
-
- cheerful
- Syren Ship Model Company
- (and 1 more)
-
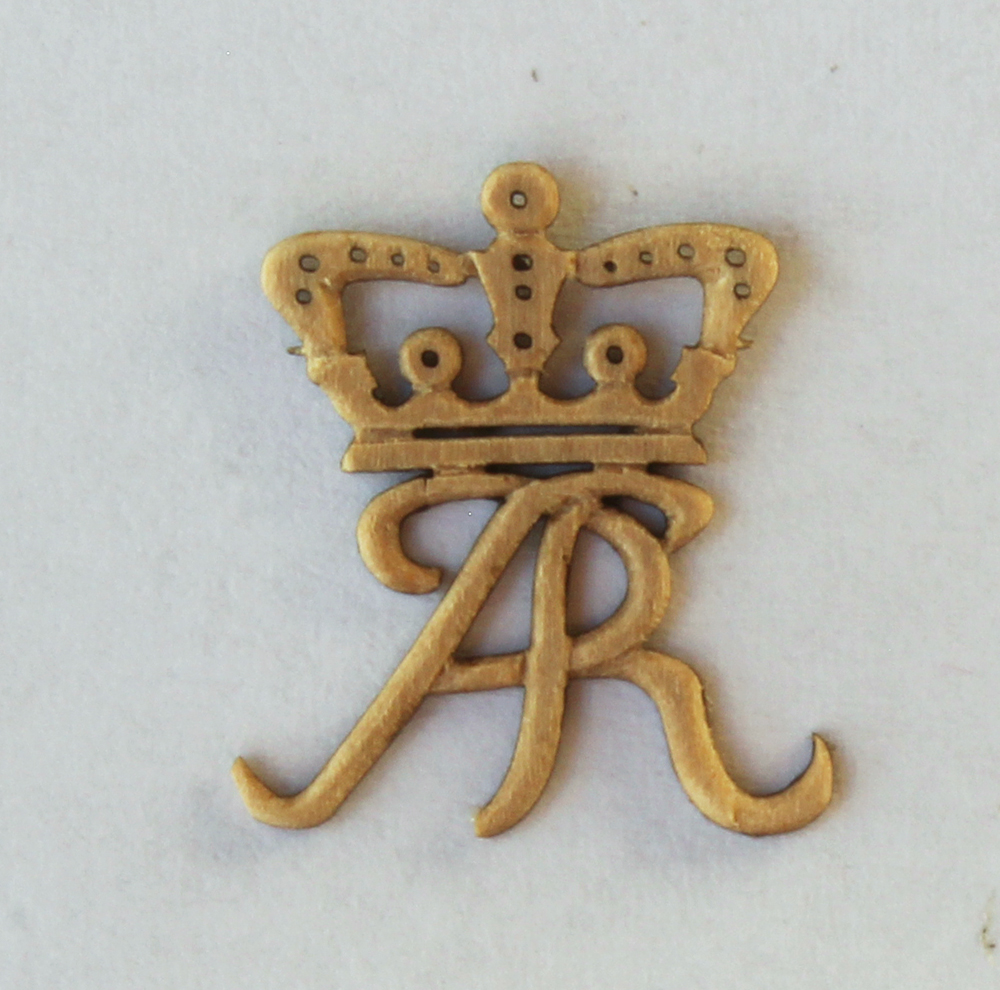
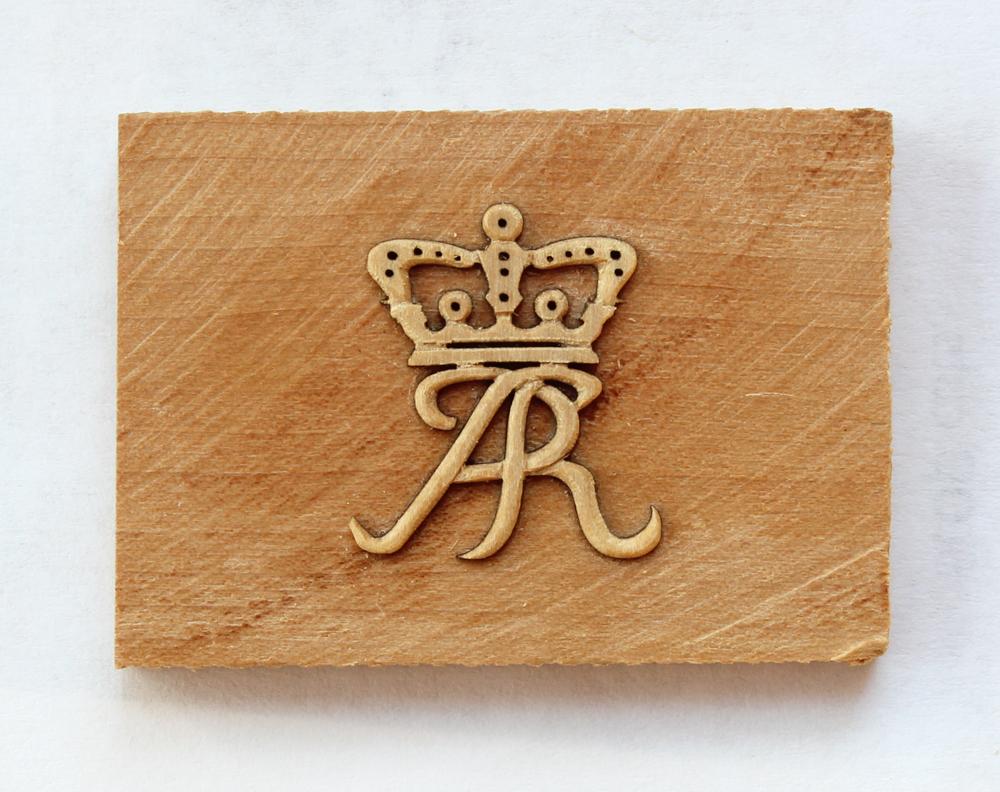
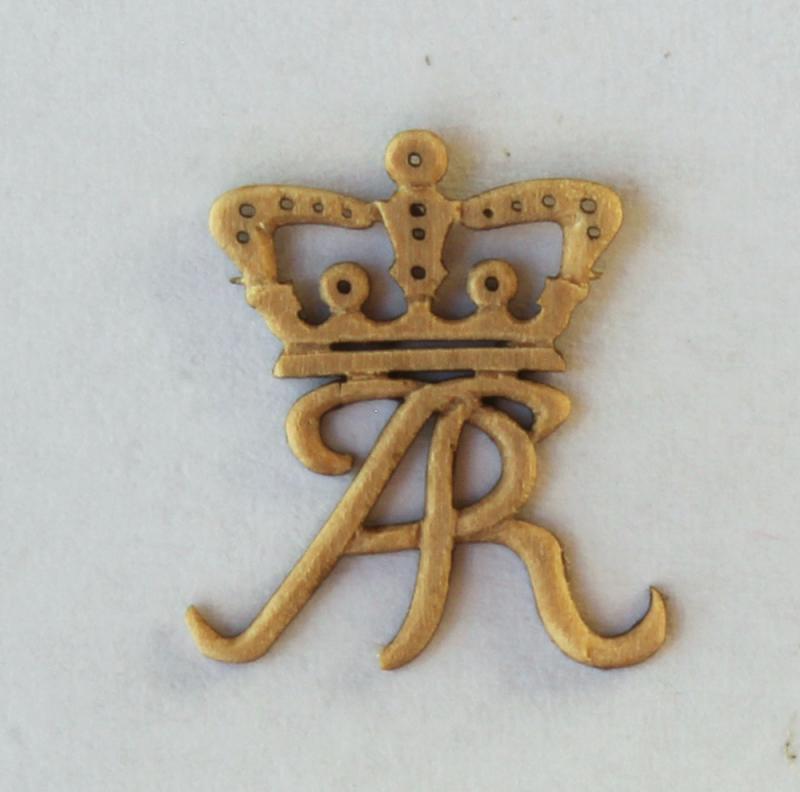
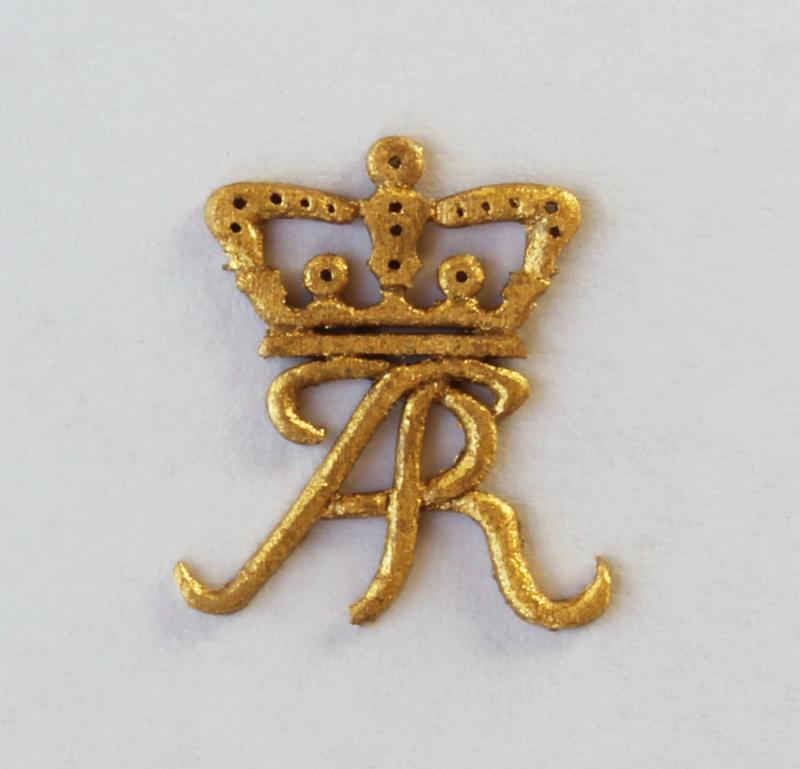
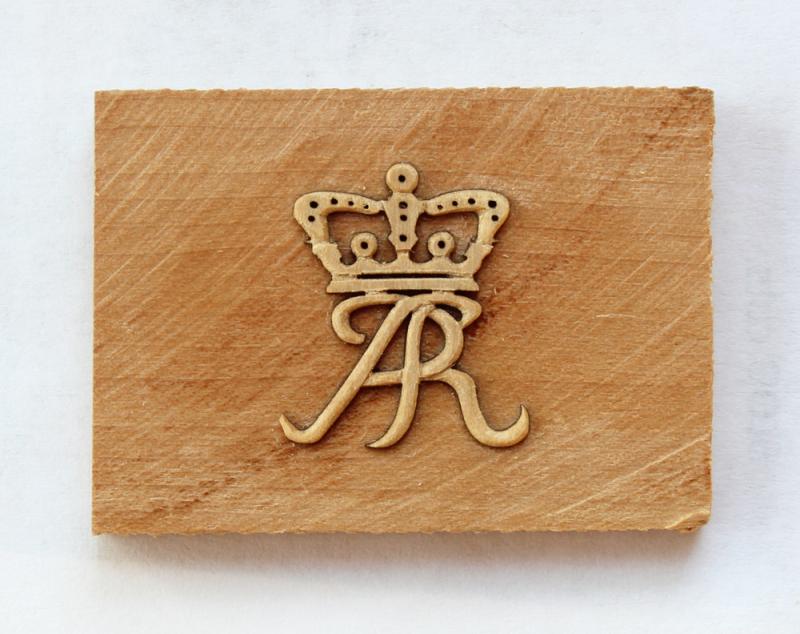
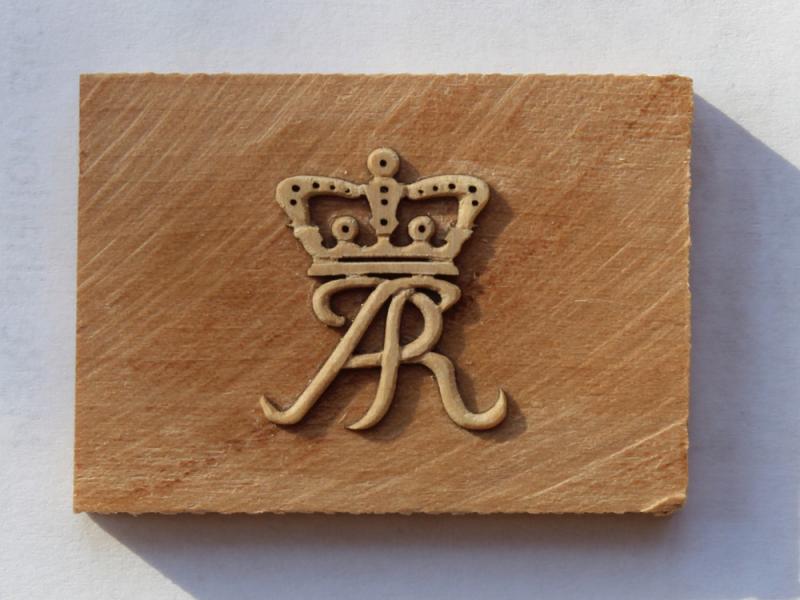
I cleaned up the carving with some 400 grit wet-dry sandpaper and removed the carving from the blank by soaking in isopropanol for an hour. As you can see, I lost the tip of the bottom of the "R". Next, I gold leafed it and applied a satin sealer. I'll try the other carving in a few weeks.
- 9 replies
-
- 12
-
-
Chuck, I have not removed a gall bladder since 1982! Talk to me about tonsils or sinuses... Once I burnish it (hopefully Thursday) I'll give it a good soak. I don't anticipate any problems.
-
Jack, the carving looks great. I just added my cipher, so you guys no longer have to feel alone.
-
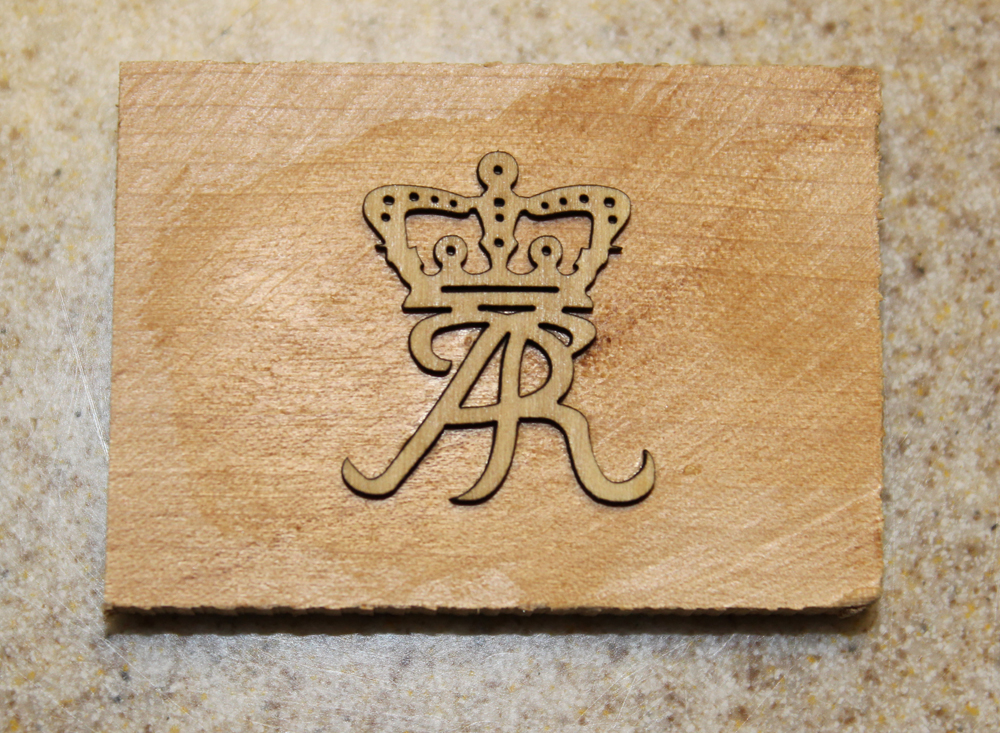
As I have never done any carving, I have decided to join this Group. I am using a combination of a #11 scalpel blade and a 1.5 mm micro-chisel. My first step was to glue the blank onto a piece of scrap wood with yellow Elmer's. I clamped it in place for an hour before getting to work and then scraped off most of the laser char. As recommemded, my first task was to make the stop cuts. The key here is to only take off a tiny piece until one is happy with the effect. In addition to the red lines shown in Chuck's sketch, I added stop cuts on various spots of the crown, looking at what Chuck did for guidance. Finally, I have started to smooth down the corners. The last picture was taken to better illustrate the depth of the cuts. Next, I will make up some 400 grit sanding sticks to improve the surface finish.

- 9 replies
-
- 22
-
-
HMS Naiad 1797 by albert - FINISHED - 1/48
tlevine replied to albert's topic in - Build logs for subjects built 1751 - 1800
Beautiful work! -
Mr. bigcreekdad everyone does stuff that they are unhappy with. It is part of the learning process, whether it is your first or 91st model. The key is to learn and enjoy the ride. You are lucky that it is easy at this point to rectify the problem by sanding and applying a new veneer of planking. Consider making a template of the deck and assemble the planks off the model. That way you can take a straight edge and align the treenails properly. Or leave them off completely because of the scale you are working in.
-
What is your preferred work height?
tlevine replied to Nirvana's topic in Modeling tools and Workshop Equipment
You are right Bob, surgeons typically work at elbow height. But the reason for this is because the sterile field extends only between the surgeon's waist and shoulders. For certain operations, hand, ear and tonsil surgery for example, we usually are seated, with the patient still at relative elbow height for the same reason. It has nothing to do with ergonomics.