

tlevine
-
Posts
1,937 -
Joined
-
Last visited
Content Type
Profiles
Forums
Gallery
Events
Posts posted by tlevine
-
-
Contact cement works very well in these situations where you have two dissimilar materials to join. Apply a tiny bit to the pintle/gudgeon and to the model. Let dry according to the directions and then mount the hardware. Just remember, you only have one try with contact cement. The advantage is you do not have to worry about glue seepage.
-
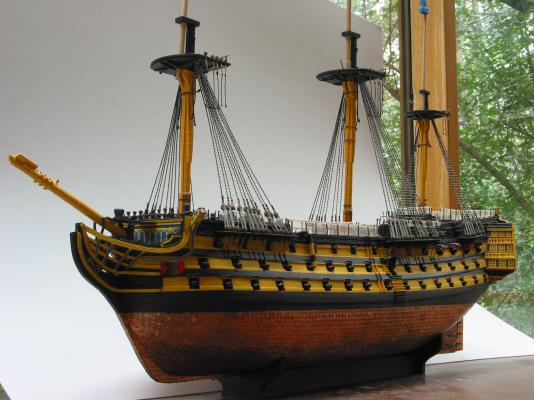
As several people have already stated, this is a hobby that balances historical accuracy and aesthetics. Victory is the only ship I have modeled that is painted. Although I originally intended to leave it natural, it "spoke to me" and informed me that it needed to be painted. This also gave me the opportunity to learn a new skill, airbrushing. I have added my best picture showing the run of the wales and gunports and how they do not follow the ochre striping. Good luck with your decision.
- radrick21 and mtdoramike
-
 2
2
-
-
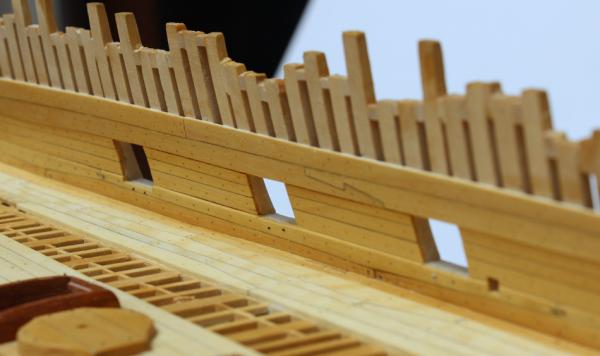
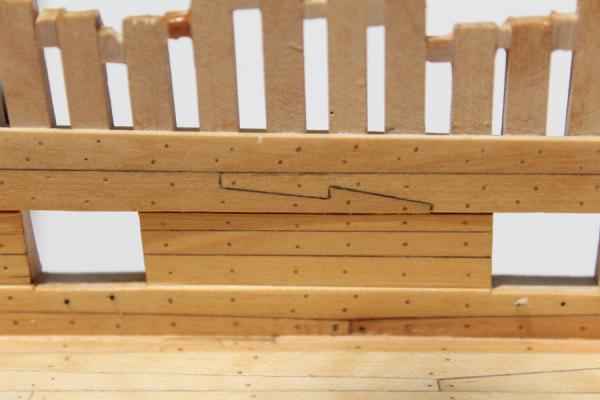
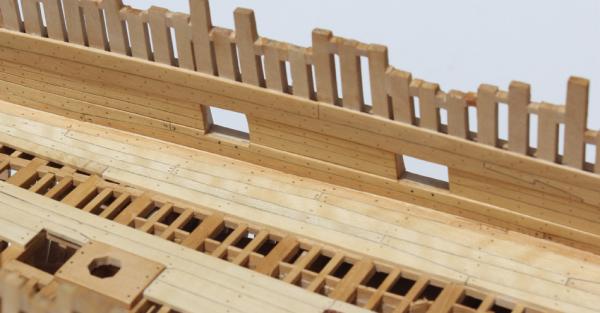
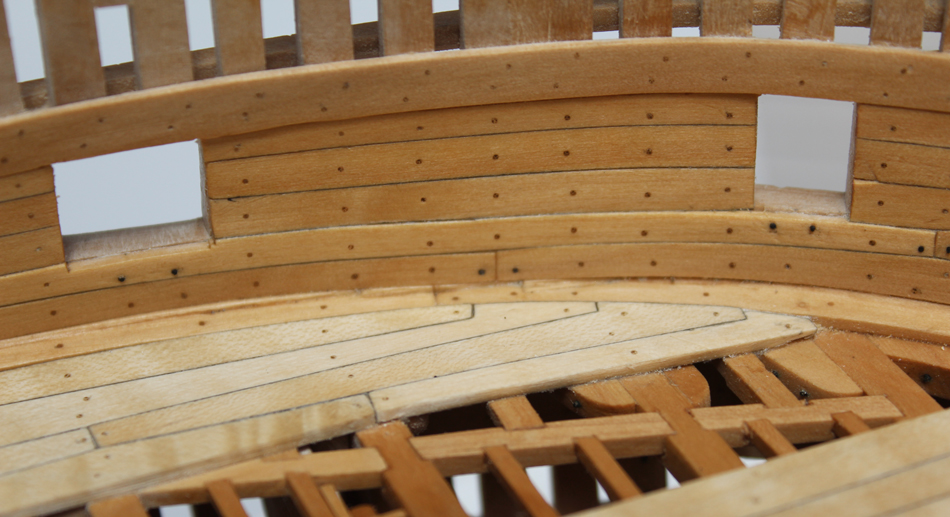
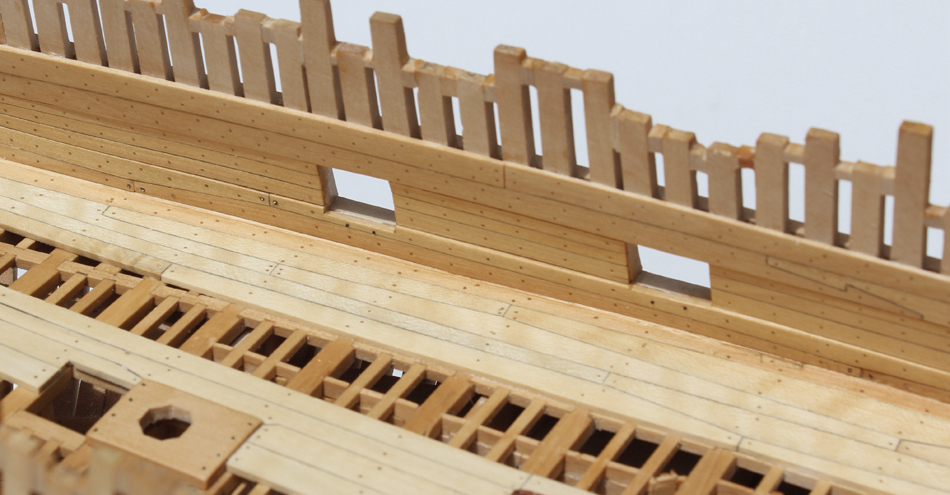
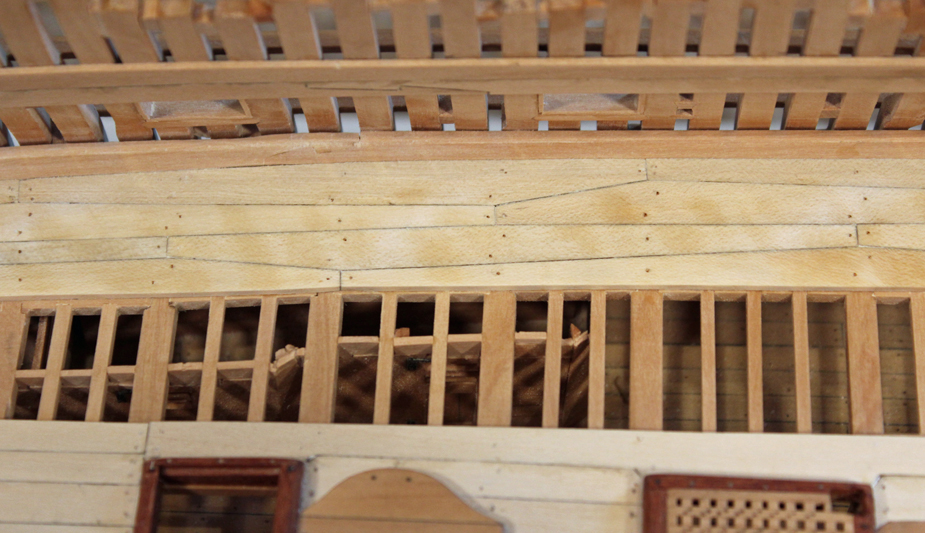
The spirketting and the quickwork have been installed. The spirketting is installed top and butt fashion, just like the outer rows of deck planking. It is 3" thick and the top edge of the upper row is champhered . The quick work is 2" thick and extends to the edge of the sill lining. I have not finalized the size of the hawse holes yet, so this area is not finished. Both the quickwork and the spirketting are treenailed to every frame. There is a single bolt at the butts and two bolts under each gun port. I was unhappy with the appearance of the bolts and so removed as many as I could without damaging the planking. I dyed some treenails with archival ink and used them instead of blackened brass for the bolts. The appearance is much cleaner, as can be seen in the photos. Compare the appearance of the brass with the dyed wood. Unfortunately, the rest of the brass bolts are in for keeps.
I then applied a coat of Watco's, let it soak in for 30' and wiped everything down. The next day I sanded it with 600 grit and put on a second very thin coat of finish. The striations in the holly decking are in the wood and did not sand or scrape out. The lighting was poor so I did not have the opportunity to take before and after the finish pictures.

- WackoWolf, Martin W, SawdustDave and 18 others
-
21
-
Take a peek at page one of my build log (link below my signature). I used 11 strakes of planking and I spiled them...no lateral bending. Look at where the fore end of the garboard strake terminates. If it rises up into the stem then the fore ends of the rest of the strakes will be too narrow. A good exercise would be to draw in the line of planking on the bulkheads. Do not let the width of any of the strakes get narrower than 50% at the stem. Then, make a template for the garboard strake based on the lowest line you have drawn in. You will end up with a strake that is shaped more like your upper drawing that terminates just anterior to the keel scarf.
- gjdale and Ryland Craze
-
2
-
-
I used Testor's reflectance reducer to topcoat my friezes. There has been no yellowing after a year.
-
Let's see. Fiberoptic headlight with Xenon light source. OR light. Where are the fiberoptic telescope photos inside the hull?
-
Are you planning on edge-bending the planks or spiling them? If you are using basswood, edge bending will work. Castillo is much more difficult to edge-bend, even with these thin planks. If you are planning in spiling them you will need to plan on wider planks so that they can be fit in place.
-
Pete, Ben, Greg and John thanks for support. I hope to get a little modeling time this weekend but I also have two water gardens that need cleaning. Maybe it will rain and I'll be forced to stay inside!
- SawdustDave, mtaylor, dgbot and 1 other
-
4
-
Ed and David, thanks for your comments. Mike, the anchor stock planking gives extra strength to the decking. It is also used in some of the ceiling planking as well as the wales for the same reason. See page 6 of the log.
- SawdustDave and Mike Y
-
2
-
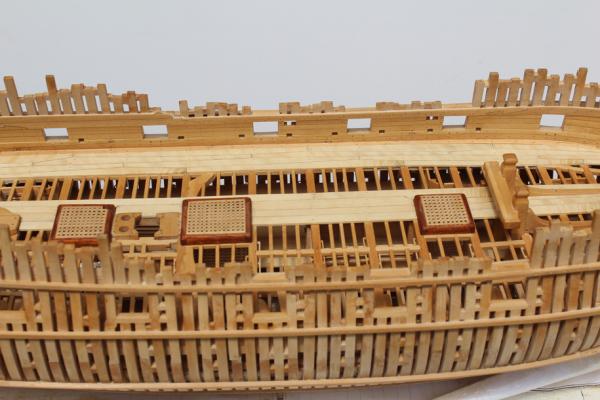
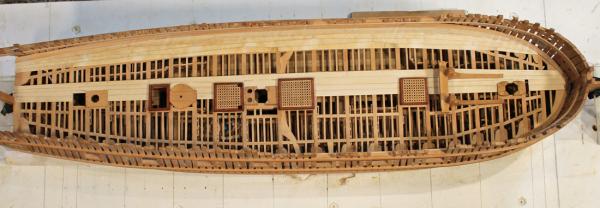
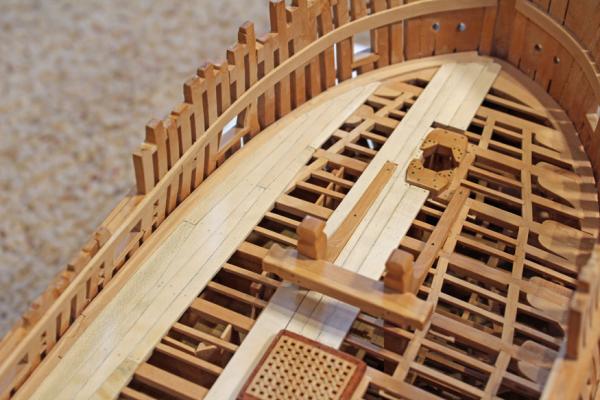
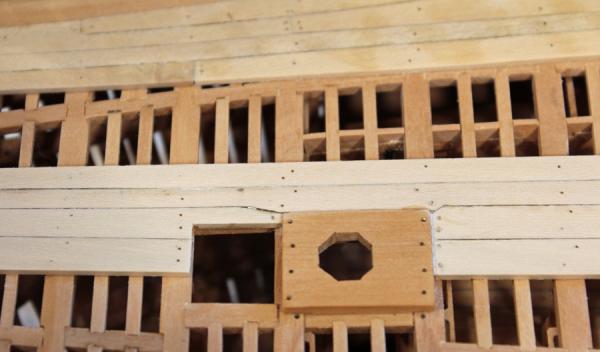
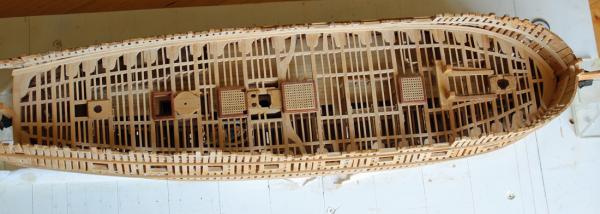
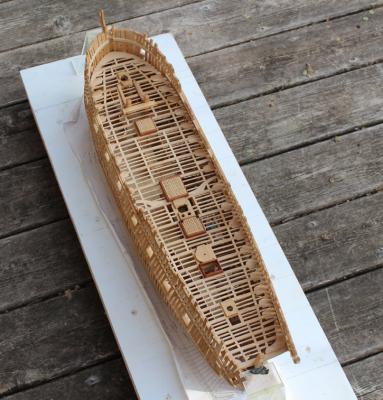
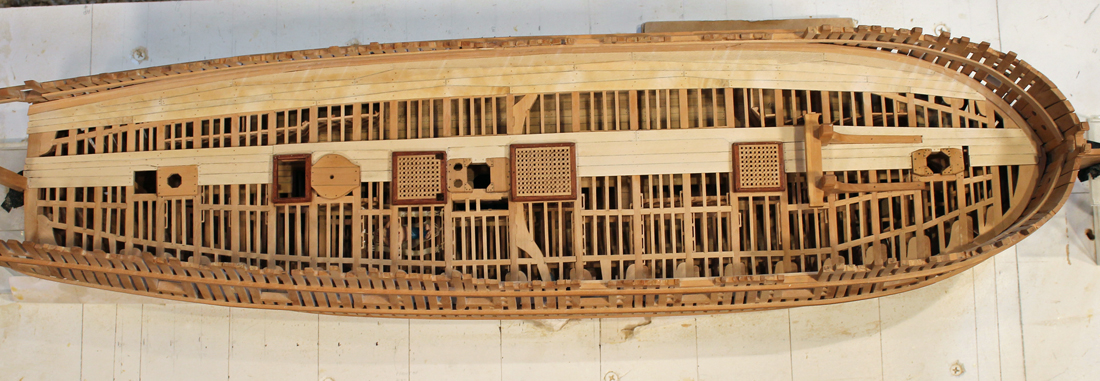
The upper deck planking has been installed and the first bit of sanding is complete. It still needs more scraping and find sanding. I used 3" holly for the planking throughout. The binding strake would have been inset into the deck beams but since that detail is not visible I do not model it. After looking at a lot of models, I decided to only plank the port side and the midline plank. I wanted to be able to look into the lower deck cabins and so I only installed decking between the binding strake and the midline and the four outside strakes. The central planks are fairly straightforward. The open area in front of the foremast step for the bowsprit step. The plank located by the well has not been glued in so that can be removed during installation of the bitts. The plank edges were "caulked" with a pencil. The treenails are bamboo, drawn down to a #77 drill and inserted into a #76 hole. I prefer to pressure fit these rather than use glue. The finish will bind them all together. The blotchy color on the pictures is not real. I had just washed the deck off for the pictures and did not give the wood sufficient time to dry. Compare the color contrast between the inner and outer planking. This all came from the same billet of holly.
-
Hannah was my first attempt at scratch building and I think it is a good choice. It is a small ship and there are no carvings or friezes. But if you are looking to build an exact copy of Hannah...choose another ship. This subject has been addressed in the various logs for Hannah but basically these plans are representative of what Hannah may have looked like. There are no as-built plans. If it matters to you, there is no below-decks detail.
-
The entire journal is a good read (even if you can't read Spanish). There is a great article on a boat made by a five year old with assistance from adults. the squid recipe looks tasty too.
-
-
I cut the sills for the gun ports on Atalanta after all of the frames were erected for fear of having the ports out of alignment. And overall I am happy with the results. I was also lucky enough to attend David's and Greg's Echo symposium after the framing was completed. David showed my how to make the perfect birds-mouth and it looks a lot more refined than my approach. The next model will be made as Druxey suggested. The frames that require gun and/or oar ports will me mounted temporarily and the notches cut off the model once all the frames have been erected.
-
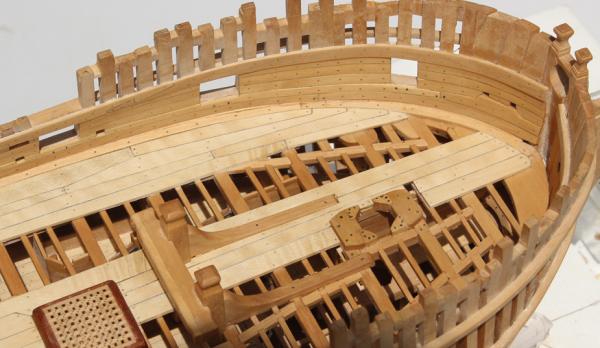
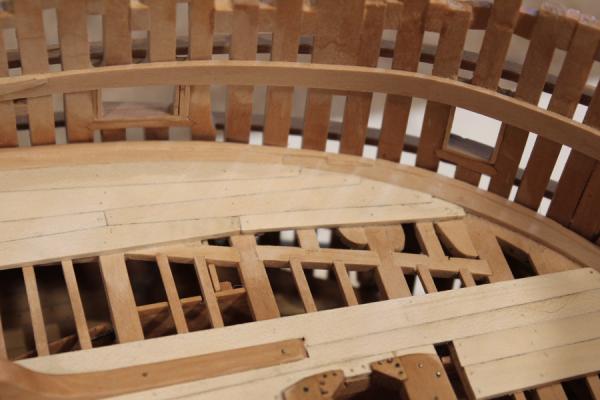
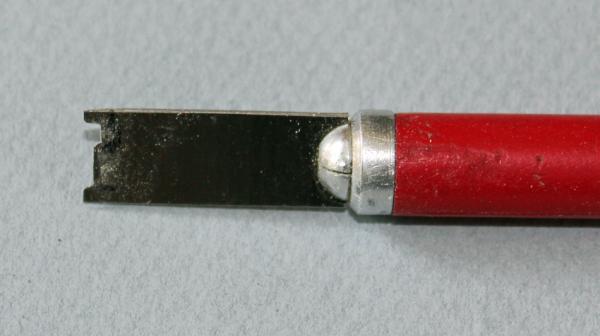
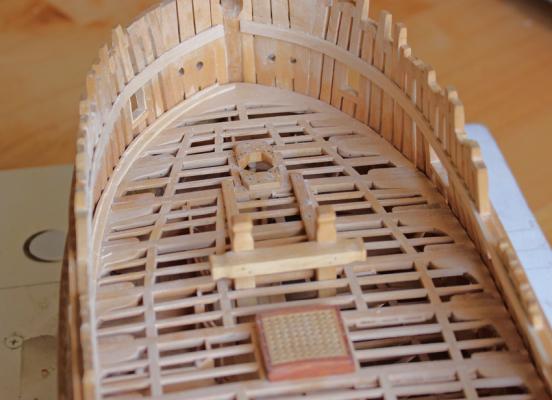
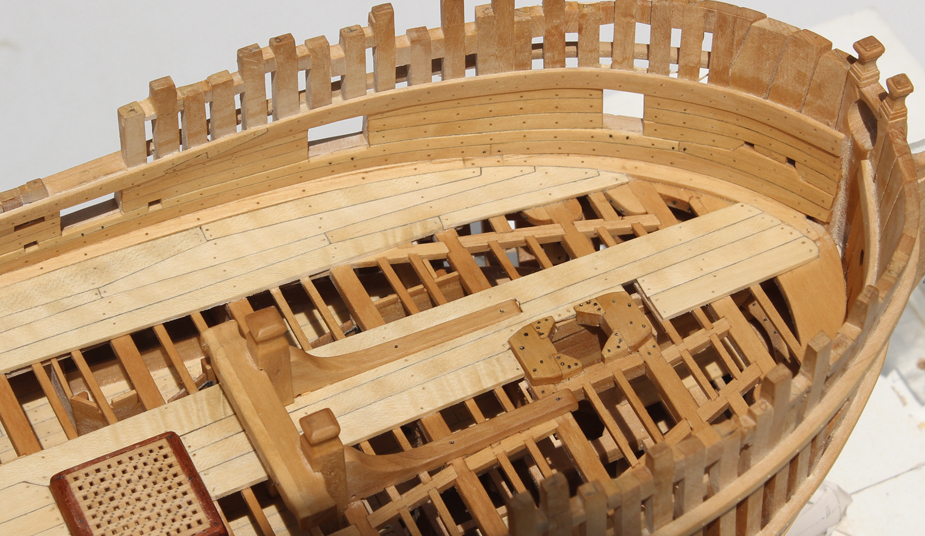
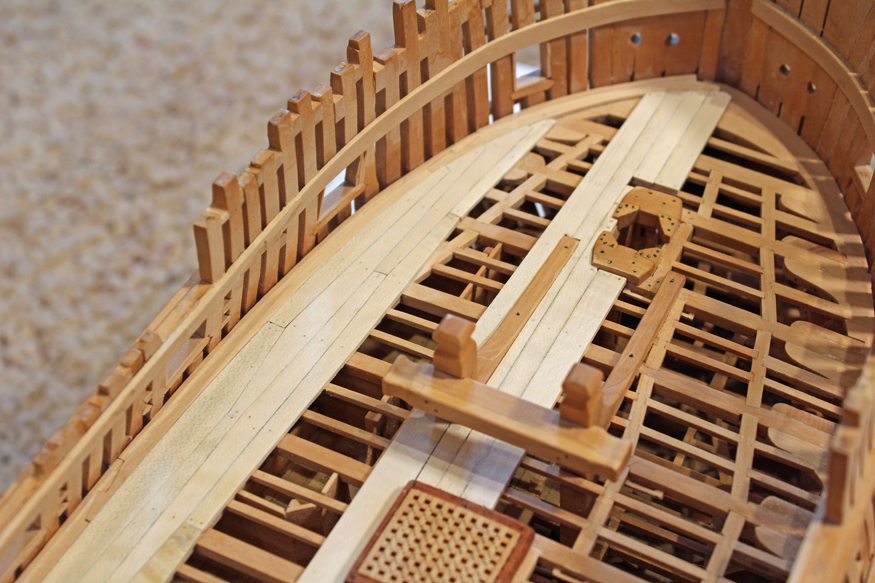
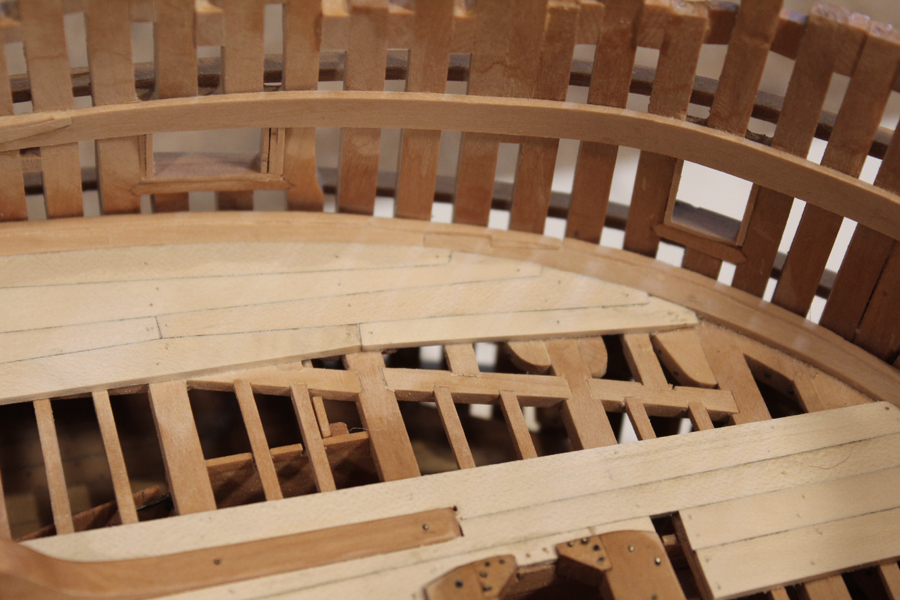
I have made and installed the waterways. On this deck the waterway looks like a chair resting on its back. To make the shape I took an old Dremel chisel blade and carved the shape into the end of the blade with thin cut-off discs. The scraper was then cleaned up with a Swiss file.
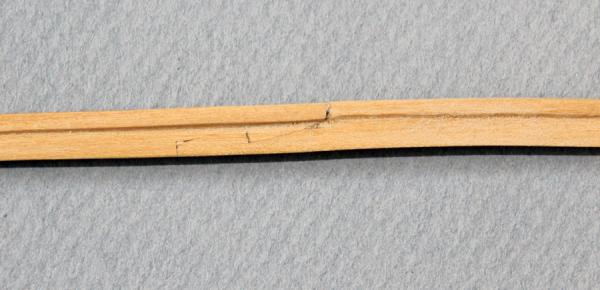
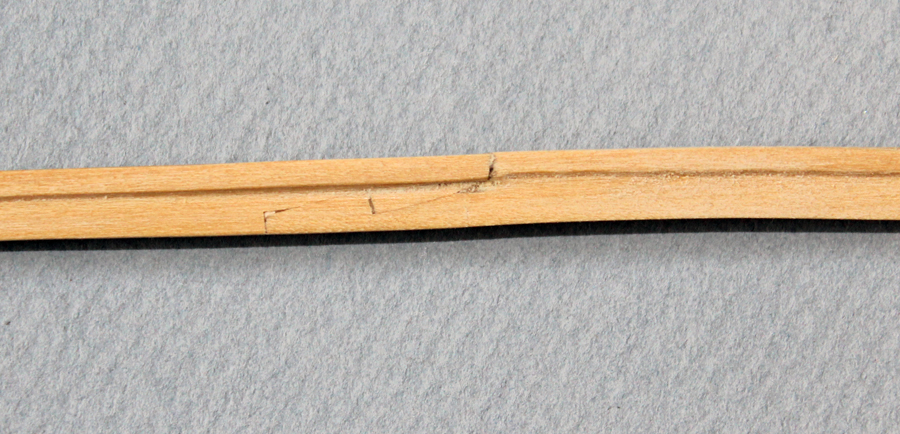
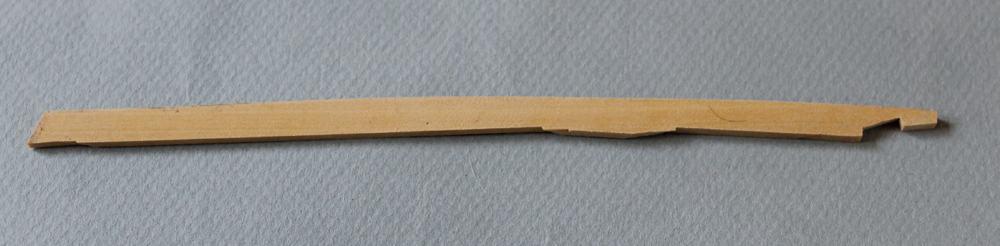
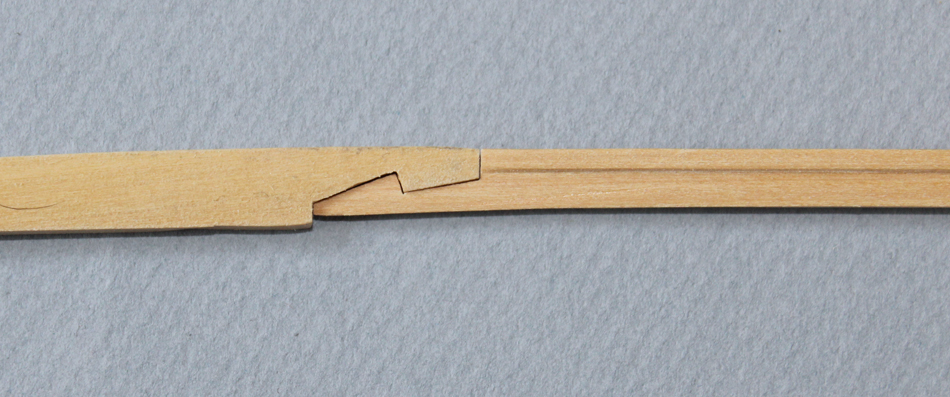
I forgot to take pictures until I was almost finished, so I will describe the sequence. I used drafting paper to make a template of the inside of the hull. This was transferred to 5" thick stock and the segment was roughly cut out. The waterway is only 4" thick but I made the stock over-thick in case I made an error with the scraper and gouged the surface. The outer edge was then fit to the interior of the hull and the scarf was cut. I used the scraper to scribe the inner edge of the waterway. A sanding disc cut away the excess material on the inner edge and the scraper was used to form the top edge. Various grits of sand paper smoothed everything out. I was more concerned with a fair line on the inner edge since the spirketing will hide the outer edge of the waterway. I started at the bow and worked aft. After the first plank was installed, I made the next two planks, gluing them together at the scarf before installing them on the deck.
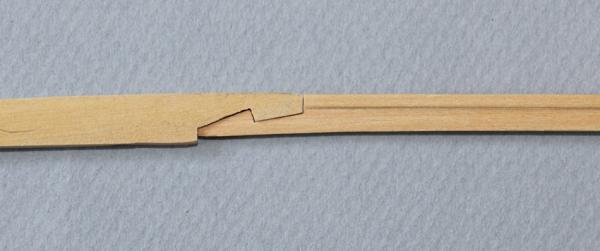
Finally, I made the aft plank. The next three photos show the sequence of fabrication of the plank.

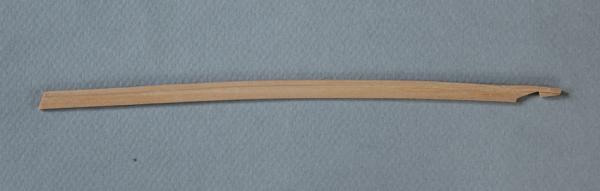
These photos show the waterway installed.
- jaerschen, dvm27, Elmer Cornish and 17 others
-
20
-
-
-
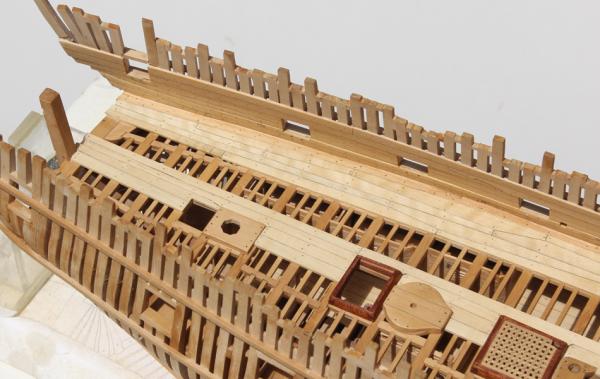
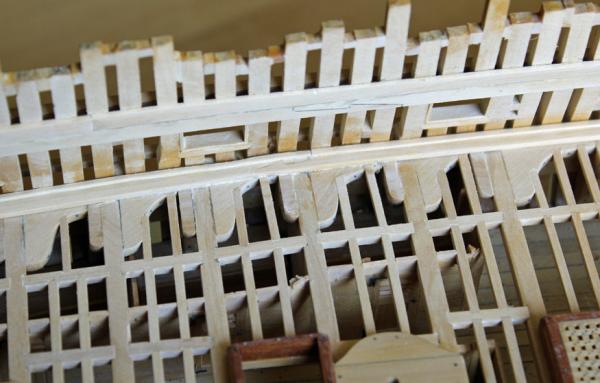
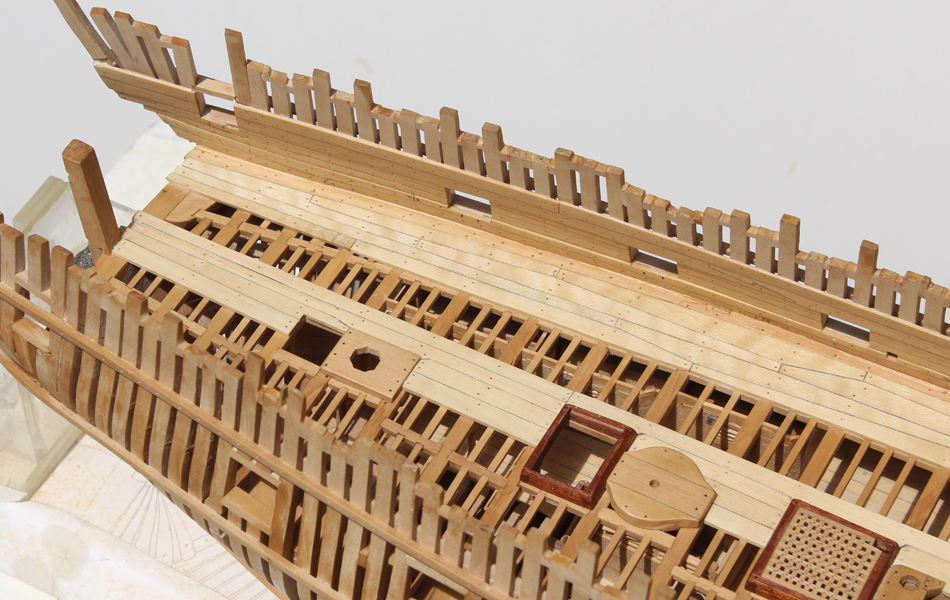
Martin and David, thanks for looking in. Thanks for all the likes as well. I am installing the port stops on the port side only since the starboard side will be left almost completely unplanked The stops for the gun ports are 1.5" thick and the stops for the sweep ports are 3/4" thick. The exterior planking will come up to the outside edge of the stop and the interior planking will cover the stop completely. I am using this as an opportunity to fine-tune the size the port openings. The foremost gun port was too wide and so an extra layer of 1.5" plank was applied to correct the width. I did not take any pictures as this is pretty straight forward. I am still trying to decide how much planking to put on the upper deck. The starboard side will be left unplanked (as on the lower deck) but I am thinking of leaving the port side partially unplanked as well to improve visibility to the lower deck. I have been looking at various build logs and photos to help in my decision but am leaning towards planking the area between the hatches, the first binding strake and the outer rows of planking to provide support for the gun carriages.
-
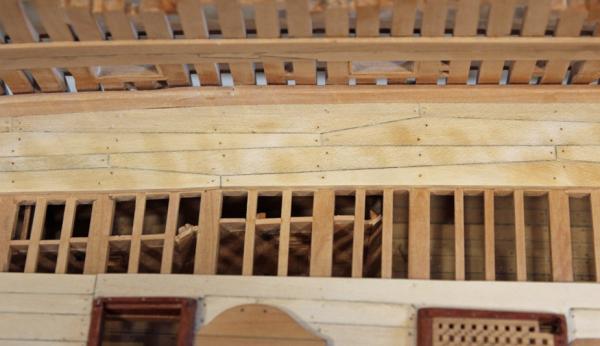
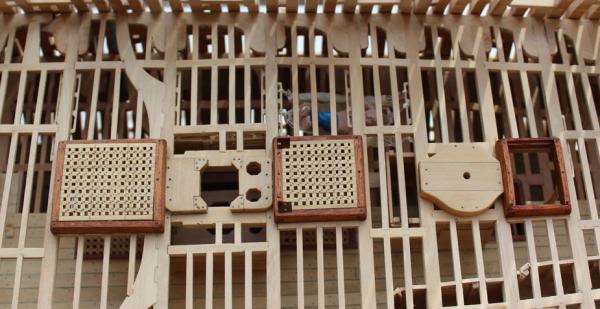
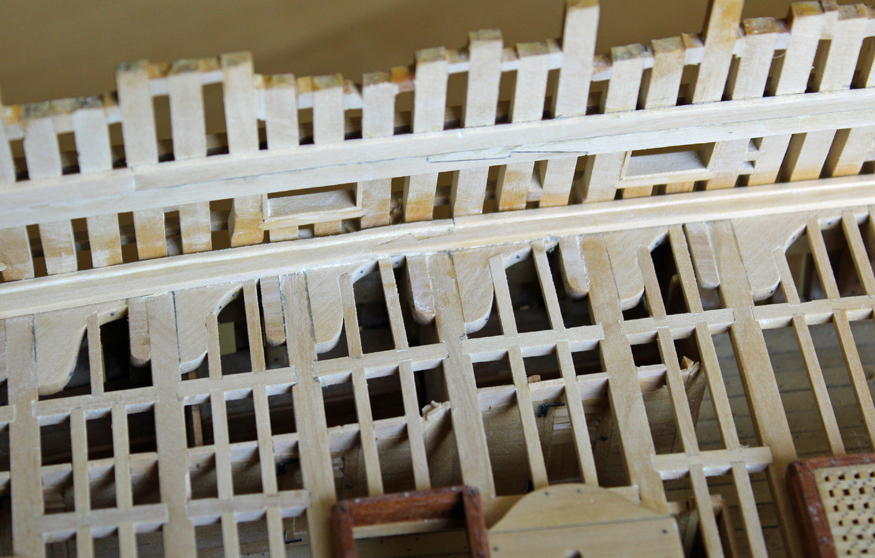
Not much to show for last weekend's work. The garden has taken over most of my free time. I have completed the upper deck hatches and ladderway. The head ledges are bolted to the deck and the coamings are treenailed. Even though I used a light colored wood for the treenails (bamboo) they are barely visible. The nails securing the grating battens to the ledges were made by making a dimple with the point of a compass and then highlighting it with pencil. I scribed the main hatch cover to simulate a three piece cover.Openings have been cut into the aft hatch cover to accommodate the main jeer bitt pin. This will not be installed until I am ready to work on the quarter deck beams to prevent damage.

-
The moldings look great, especially with the curve. Did you free-hand it or make a scraper?
-
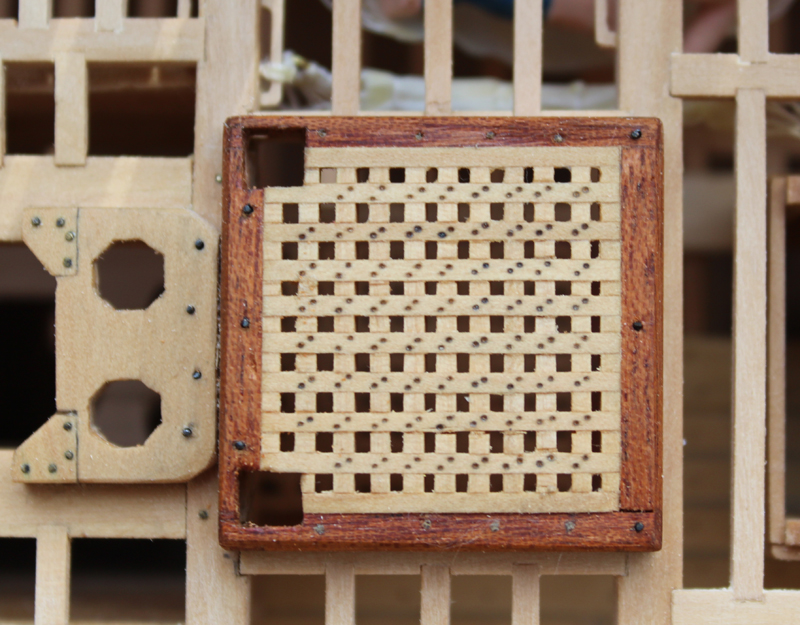
David, the color contrast of holly is too stark with the cherry coamings. Since these pics were taken I have added the treenails and bolts. New pictures this weekend.
-


HMS Atalanta 1775 by tlevine - FINISHED - 1:48 scale - from TFFM plans
in - Build logs for subjects built 1751 - 1800
Posted
Pete, John and Ben, thanks for your comments. Danny and Greg, the striations were trivial in the unfinished wood. My only option was to rip out all the decking. Because the cannons will cause a visual break-up of the deck, I decided to leave it alone. I will be very careful with holly in the future. Danny, I have some holly from HobbyMill that is very white but I went with this older stock because it had a more muted tone.
The stern is a lot of fun (not!). Hope to have some pictures by the end of the week. Danny, several years ago I actually abandoned a build (Amati's 1:60 Prince) because I could not figure out the headworks. I'm past that now but every time I walk into the living room that model is there to remind me how I need to keep improving my skills.