


garyshipwright
-
Posts
901 -
Joined
-
Last visited
Content Type
Profiles
Forums
Gallery
Events
Posts posted by garyshipwright
-
-
Alan there is a good article by John Franklin in Model ship Wright, HMS Egmont(74) 1768 41/4 and 42/29 that will give you some help on building your stern. I used his article's and David Anscherl such as Drawing Techniques for the Modeller and his 64 gun ship Polyphemus. If you don't have them let me know and I will copy them and send them to you. They always had such wonderful article's it a shame they stop producing them. Gary
-
Thank you folk. I seen them before just can't remember were and they are called a whale. Very interesting. Gary
- Jack12477, Canute, thibaultron and 1 other
-
 4
4
-
-
Hi good folks. Have a friend who is trying to figure out what this Blue tool is in the picture and what it's called. I have seen it used but for the life of me can't figure out what's it called. Maybe I have seen it in one of my books some place. Look forward to finding out what it is and thank you in advance. Gary
- Canute, thibaultron and mtaylor
-
3
-
Ben if you was going to buy some Holly for you building where would you go to get some? Am not sure if I have enough and figure maybe I would get a couple of pieces before I start that part of the build. Thank you. Gary
-
Ben I have some good holly with no gray streaks and probably have had it for a few years. Not sure if I have enough to plank the hull but we will see. I also have some silver maple which is probably just as white. so maybe I see if I can find more of both. Well good sir you got it right and wood now days is quite expensive. Thanks again. Gary
-
Hi Frank. No sir I painted the wale after adding the second layer. Didn't come out to bad. When I was talking about adding more planking, it was the planking around the wale. It can get real messy trying to keep the paint and dye off of new plank's laid along side the wale it self. When I was working on Alfred I put them in two layer's but they was in anchor stock. A lot more time consuming that's for sure. As far as the outer stern frame's I just haven't got around to sanding them down yet to the finished side, but thanks for letting me know about it causing problems with the positions of the outer two stern windows. I make sure they are not to thick. Thank you good sir. Gary
-
Hi Ben. I been looking at your planking and must say it is out standing that's for sure. The holly you used for the planking below the wale is a eye catcher. Am think about using holly for the lower planking that is with your permission good sir. Keep up the great work. Gary
-
Thanks Dusan. I have three of the direct grinder around the shop. Never thought of them as grinder' but makes sense. Have one in a stand, one in a vandalay router table and one that I use free hand much like you did. Pain in the butt if you only have one and moving it around. I had a few dremel motor tools over the year's, but after buying the first proxxon motor tool I retired all of the dremel. The proxxon are really quiet compared to the dremel which screams and just got tired of the sound it make's. The only item that I still use in the dremel department is the bit's and the angle attachment which is so much easier getting in to tight places and using ear plugs to block all of the screaming. Wish proxxon made a 90 degree one, that you could mount the drill chuck to, now that would be nice. One would never have to turn on another screamer. Again thanks Dusan. Gary
- Saburo, westwood and FrankWouts
-
3
-
Hello guys and the Hog has left the building for a new home. Gary
- Landlubber Mike, Canute, capnharv2 and 1 other
-
4
-
Thank you Dusan. Have most of those item's accept the proxxon sander. Think I just may have to get one of those. Thanks again . Gary
- Saburo and FrankWouts
-
2
-
Hi Dusan. Your building is just outstanding and really look's good that's for sure. I have a question on the inside of her which has to do with the inside wall's. In post 69 you showed the inside fairing and it is even and look's great. Can you give us just a bit of info on how you got them looking so good. Maybe what tool's you may of used to get them that way. Keep up the really impresses work and will be watching your build. Gary
- Saburo and FrankWouts
-
2
-
Hi No Idea. Just so the good folks don't run out and buy what you shown in https://www.foredom.net/product/a-69224-right-angle-attachment/ you also have to get the head piece which hold what you have shown in in the angle attachment. Those are just the collect's for holding the bits. Both items together will run you around $200 .https://www.foredom.net/product/2-angle-grinder-attachment/?attribute_pa_sku-handpiece=ak69110-no-handpiece Gary
-
Thanks guys. At the moment am working on the wales and once I have them cleaned up I paint them with a black dye. Figure painting them now before I add any more planking, would keep me from making a mess. Later will paint the gun ports red but have to figure out what shade of red would fit her time frame. So many shades to pick from, makes one head spin trying to get that just right. Again thank you guys. Gary
-
Hi Glen. I always thought that the planks used was depended on what they had in the ship yard which was from 25 feet to 50 feet and were the joint's fell depended on the ship wright who was in charge of building her. I have looked at the plans but will probably go with how I want to lay them but Chuck's plan is a good start. I do thank you for the info on how Chuck laid them out and will keep it in mind. Once again thank you good sir. Gary
-
Thanks Glenn. You are right and the plank's joints should follow a consistent pattern along with a pattern for when they installed the nail's along with the treenails in to the planks, which depended on the width of the plank. As far as the bow cap rail templates, I printed them out and glue them to some pear wood to see if the bow was right. One good thing about adding the balsa blocks, one has more of a choice on where the joints go. One thing am wondering about is what is the length of the strakes them self? Well time to open a book and research that one. Again thank you. Gary
- glbarlow and FrankWouts
-
2
-
Hi Dusan and thank you. At this point am looking forward to that part, the planking and probably plank her in boxwood. Thank you and all the other's for all the nice comments and thumbs up. Gary
- FrankWouts and westwood
-
2
-
Well hello Trussben and thank you good sir.
-
-
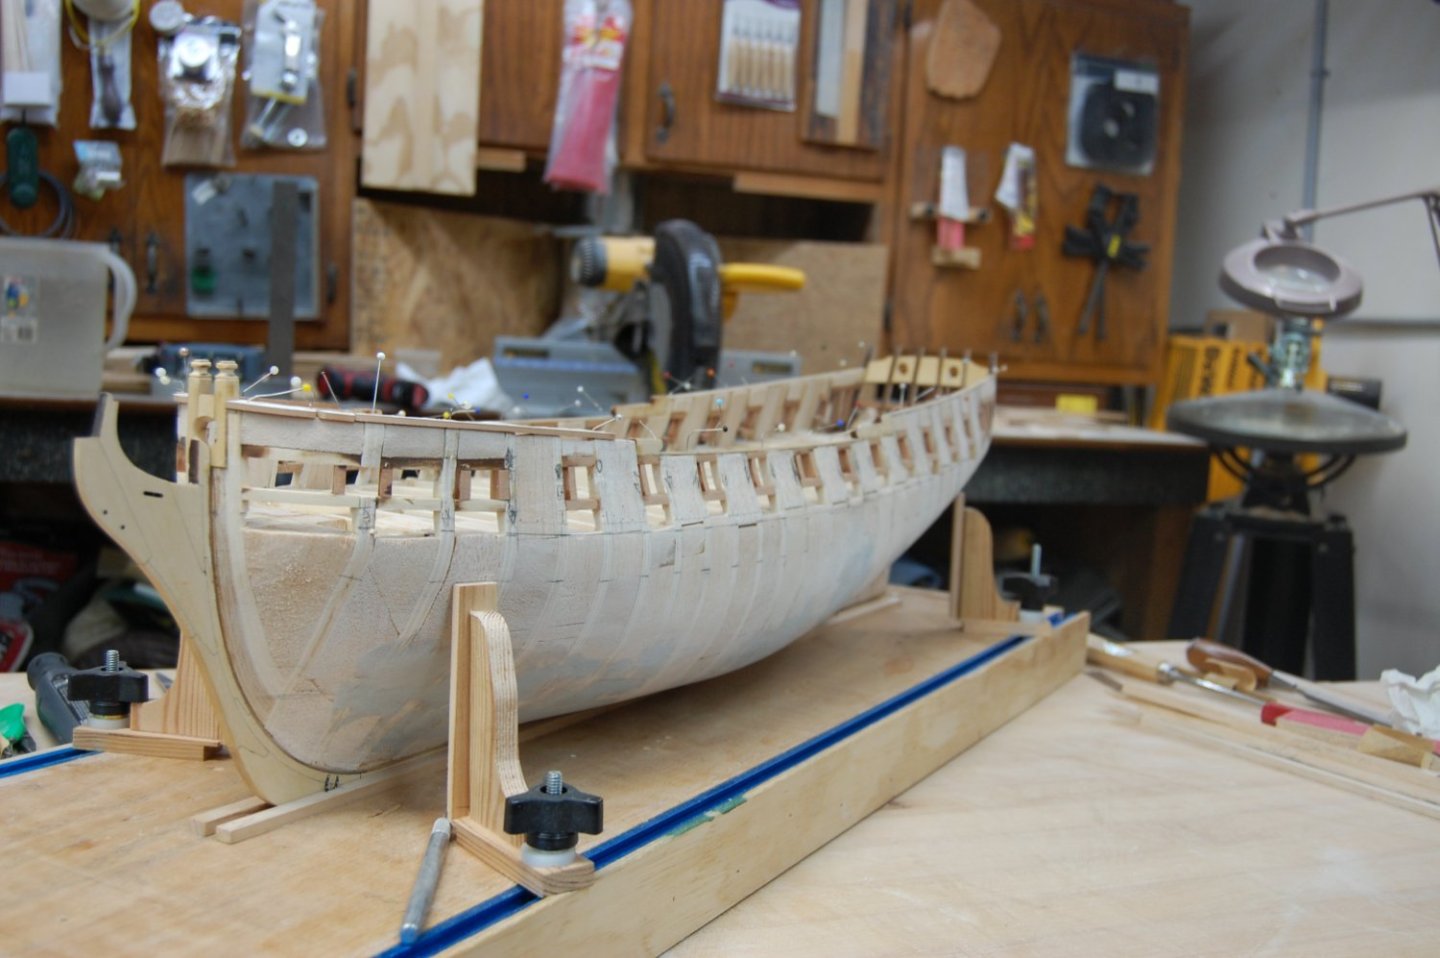
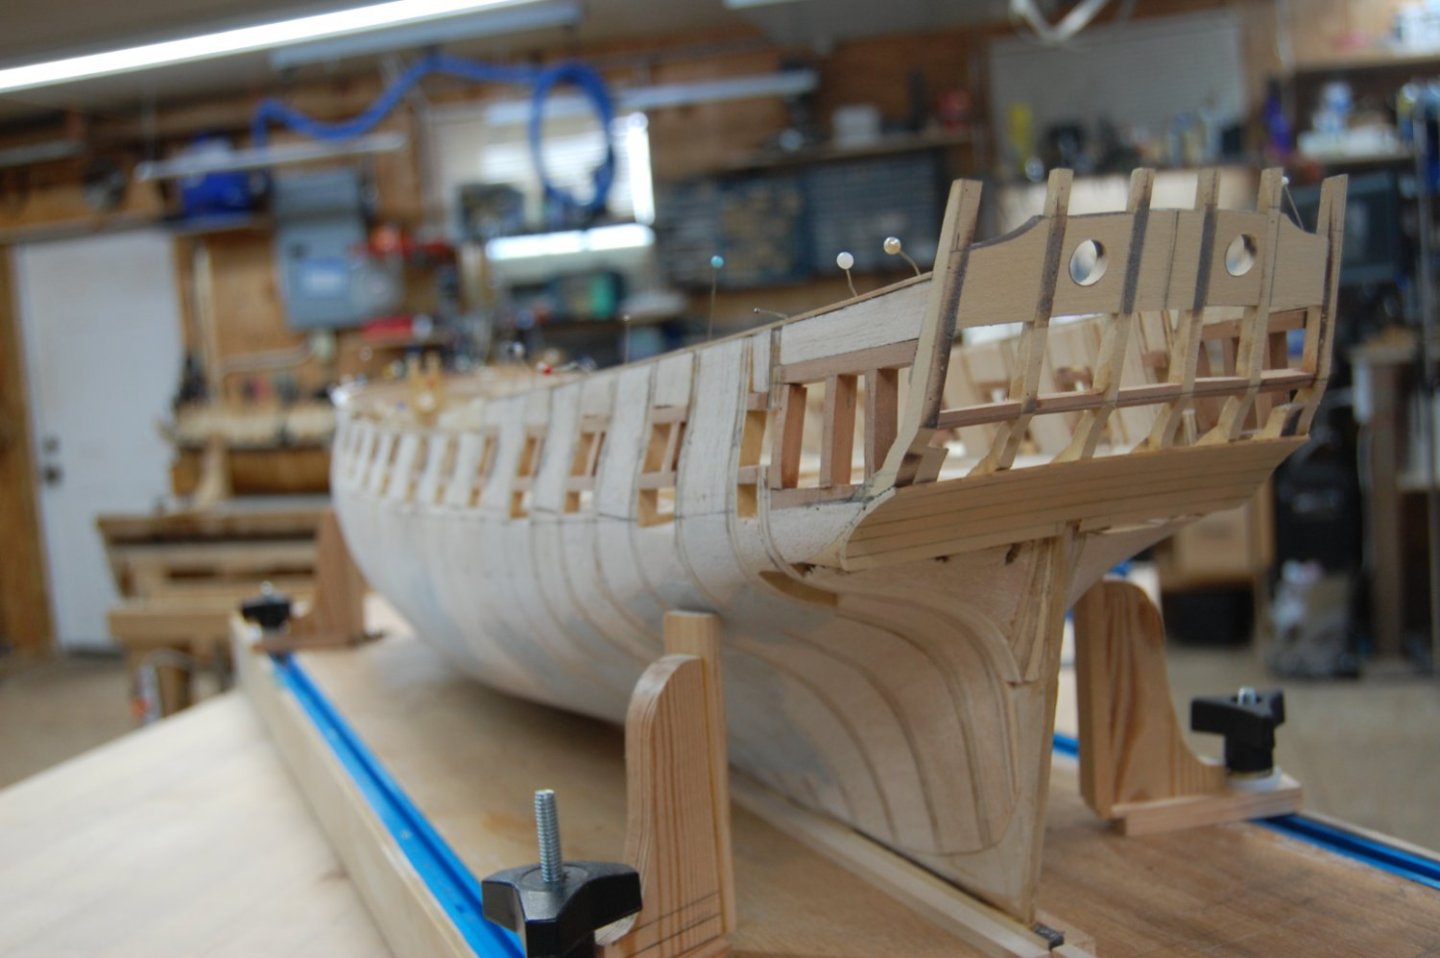
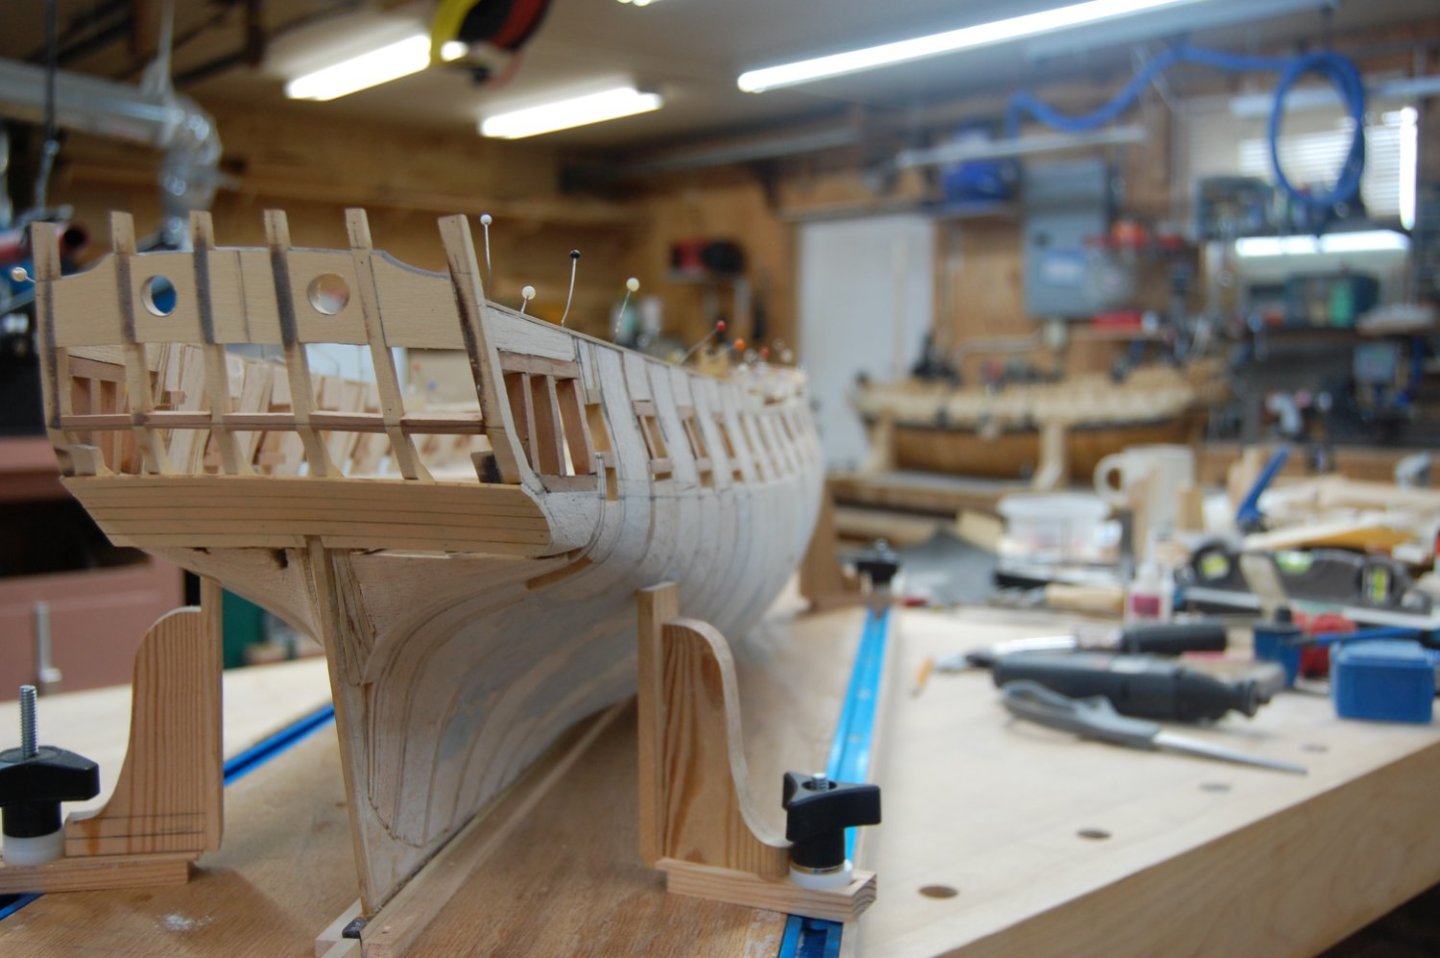
Hi Chuck and thank you very very much. Hope so, should be interesting. One thing is for sure it sure was a lot of sanding on top of sanding. I know, I know, if I hadn't added all the wood in between the bulkhead's, the sanding probably would have been done in half the time, but does make for a better landing for the planking and allow's one to put the joints in a few different places. At least that is my opinion Now it's time to get to work on the planking. The counter planking fit perfect so good job on the parts and pieces. They really do make thing's go a lot faster.
- Rustyj, Chuck, FrankWouts and 2 others
-
5
-
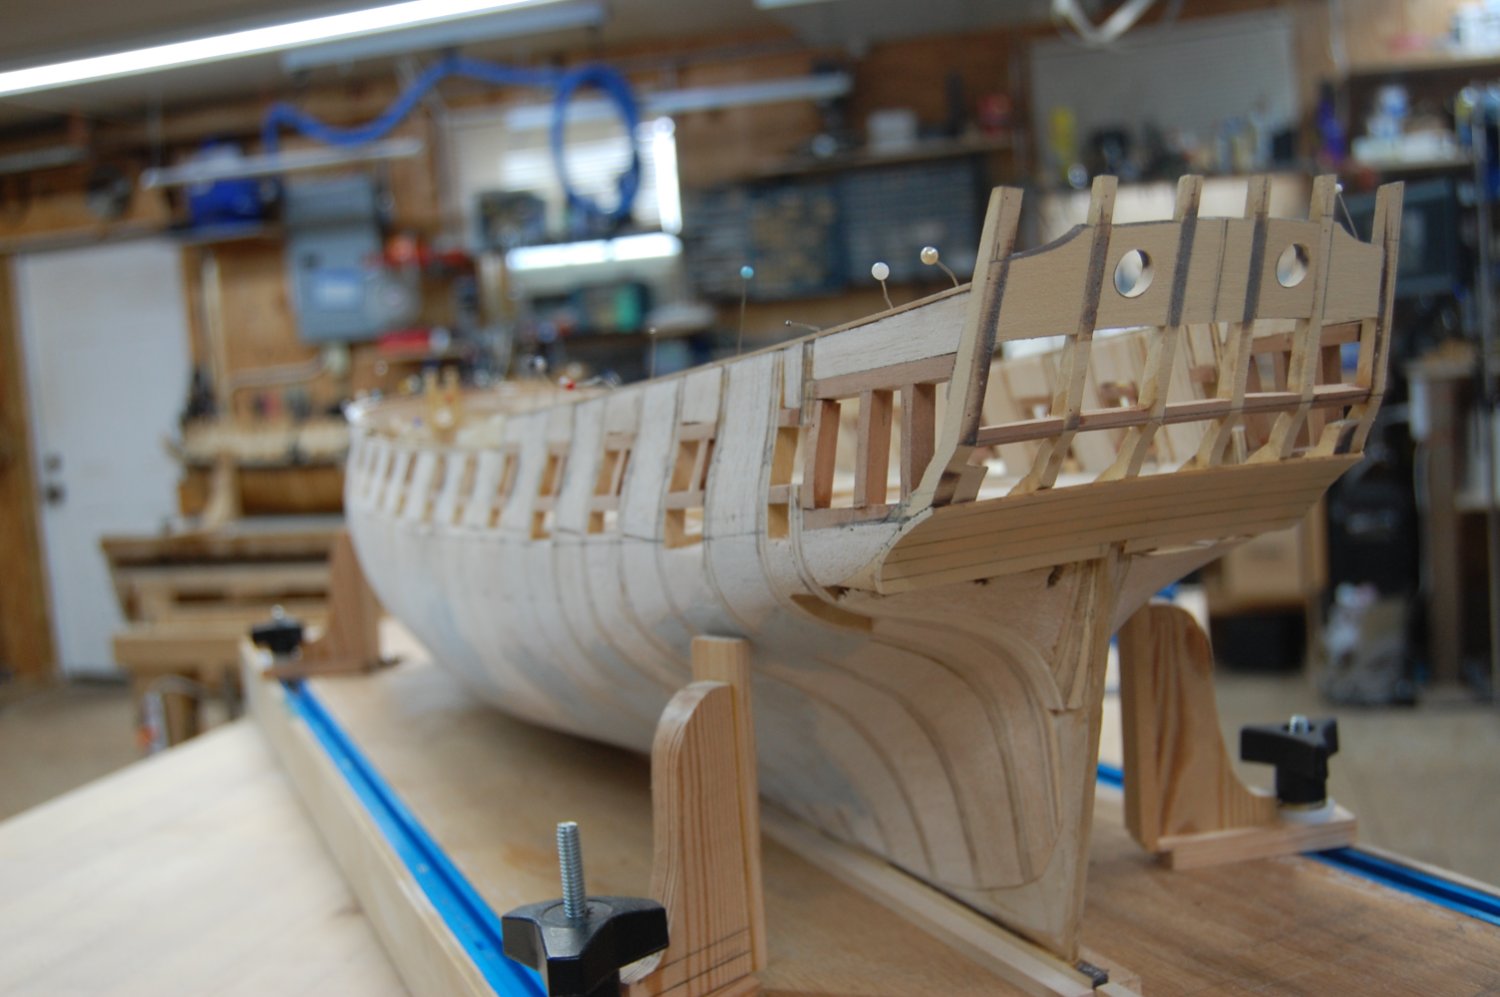
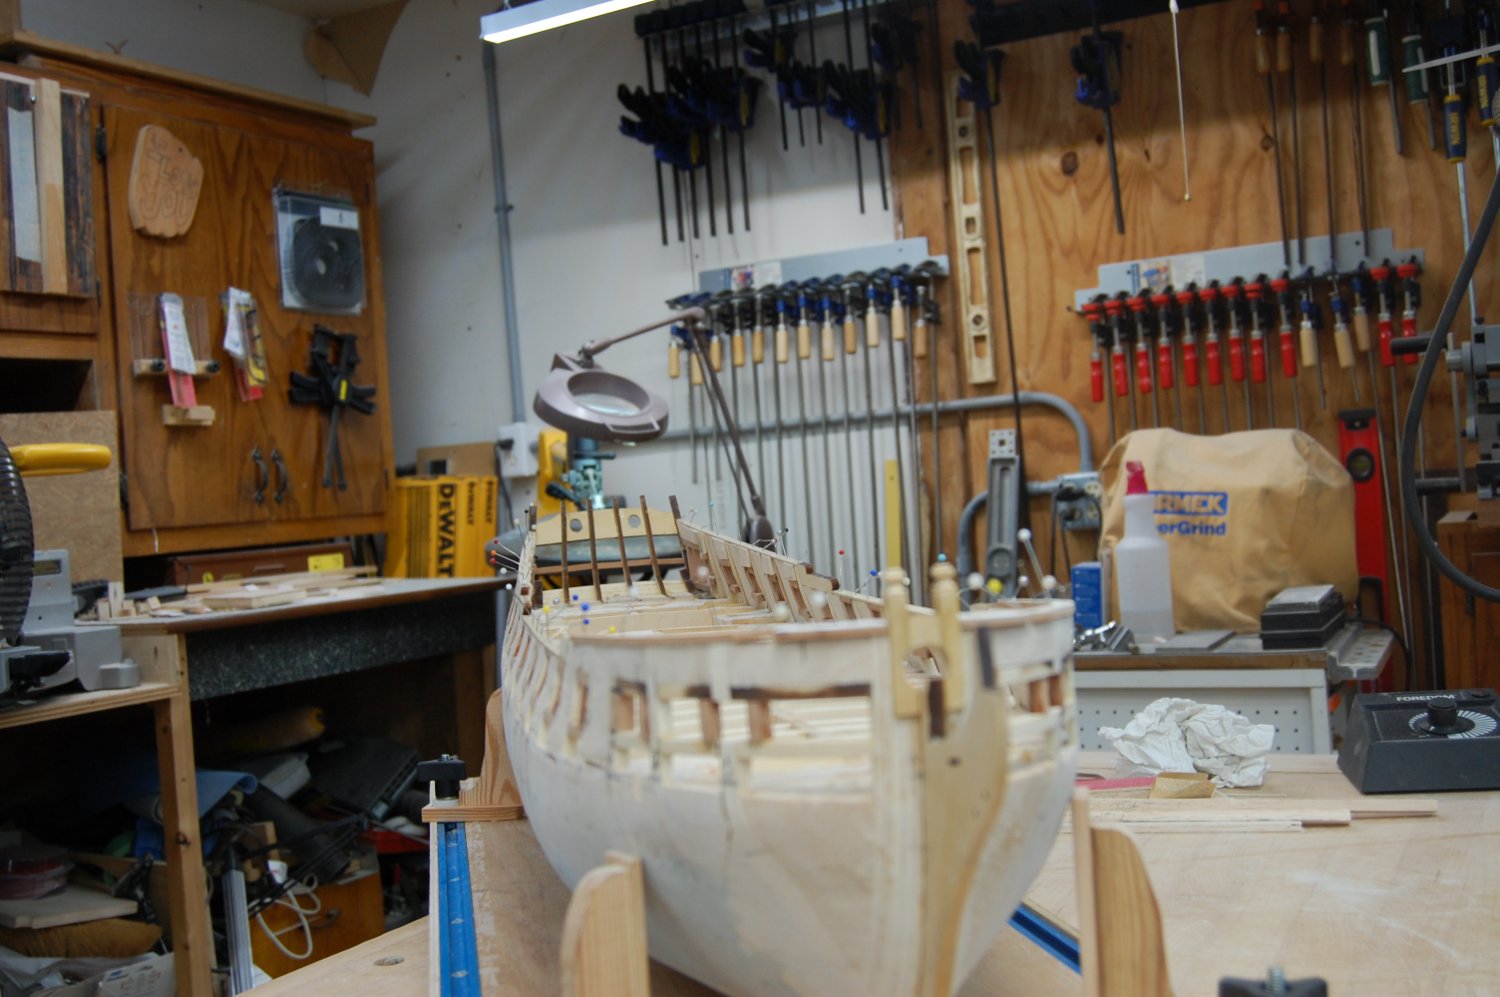
Well good folk's if any one is interested do believe that I have finished chapter one and taking a good look at chapter 2 which should be very interesting. Hope you like the photo's of her as she stand's. Didn't post to much of the gun ports and other item's with all the ones already being shown in the other member's build log's. Hope she up to you good folks very high level in your build's. She has been a joy so far in her build. Gary


-
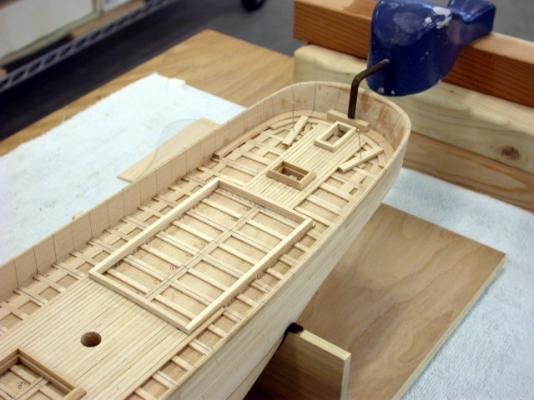
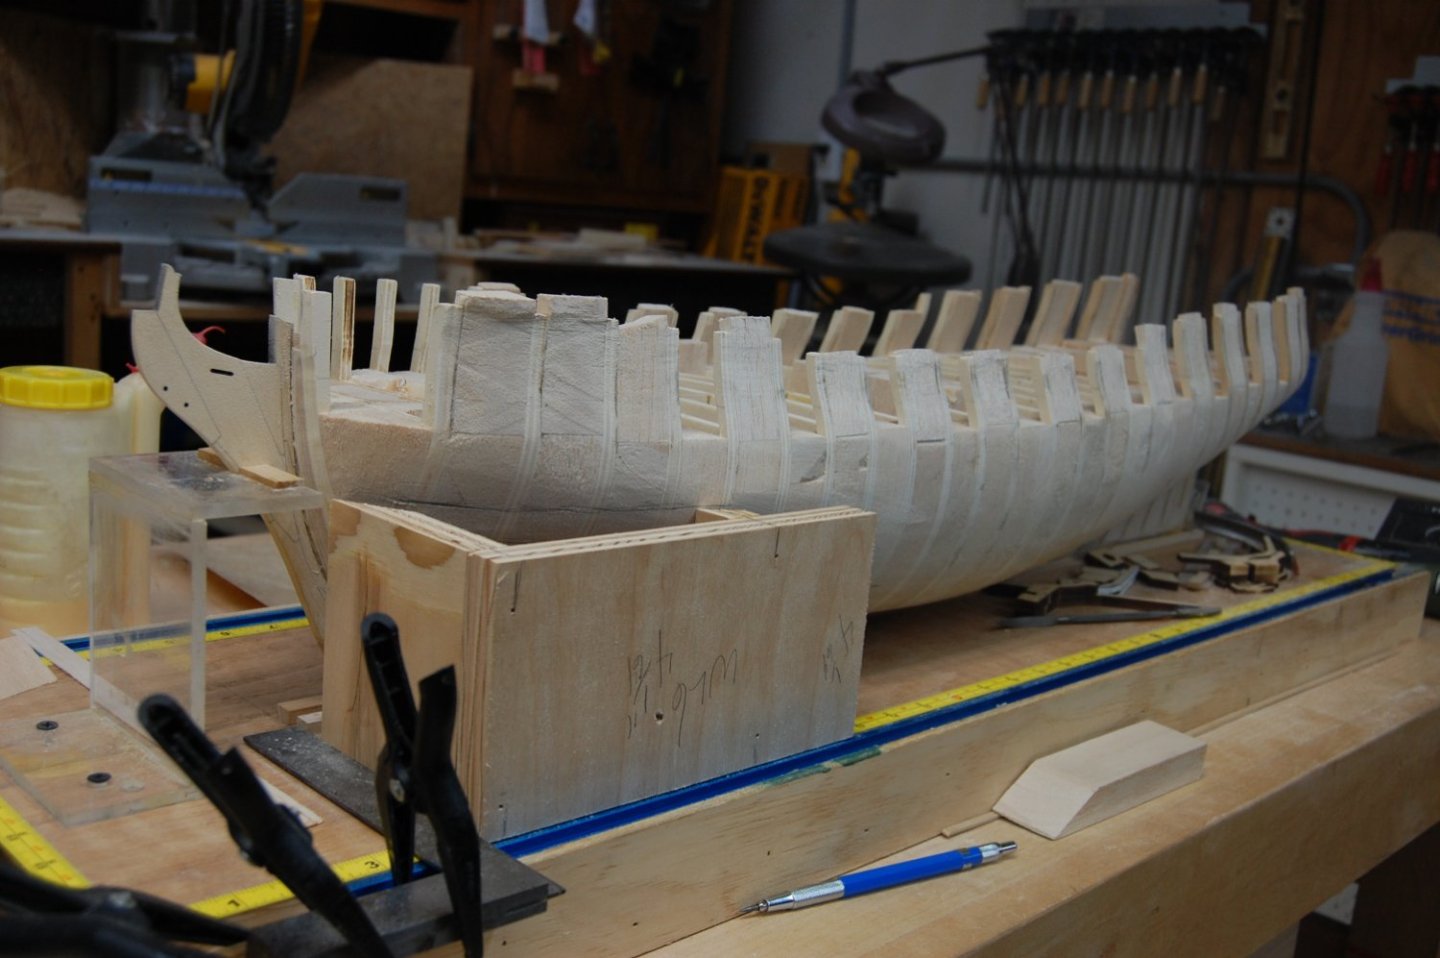
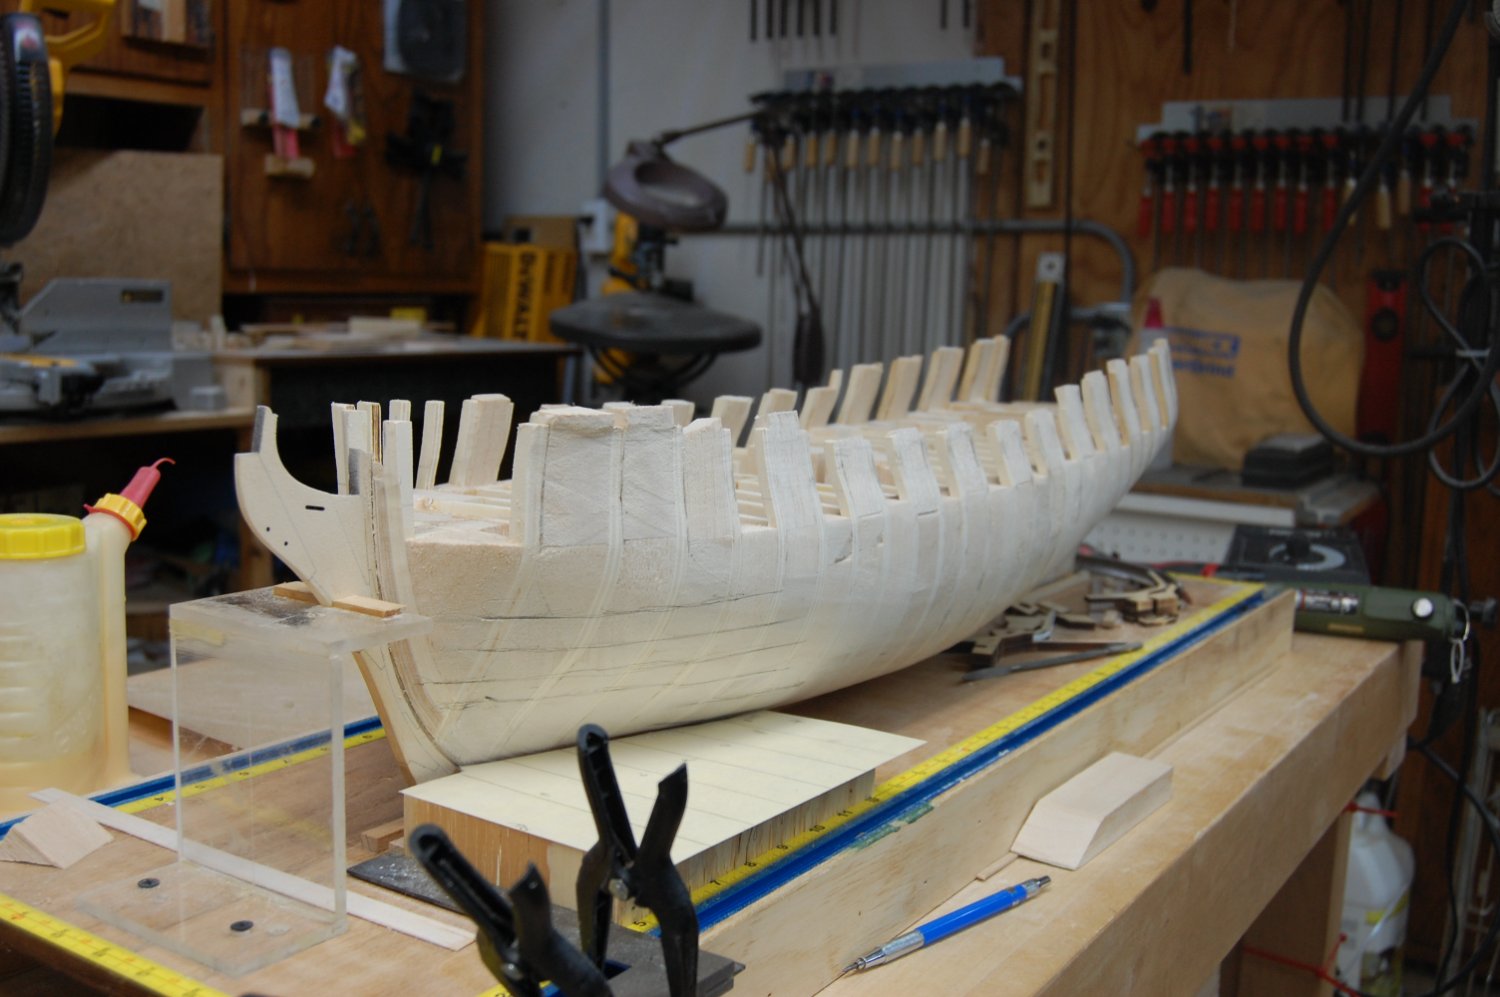
Well here is a update on my Winchelsea if any one is interested. I filled in between all the bulkheads with balsa wood and started to send the bulkheads and balsa down to shape. Once I got it close enough to the finally shape, I made some water line templates with height stand's to help put the template at its right height and then marked for sanding down. Take's a little longer but help's keep me from sanding off to much.


-
-
4 hours ago, No Idea said:
Hi Kevin - I'm also trying this needle method and I'm getting great results thanks to the thread on here originally started by vaddoc.
I have found that by taking his advice and using body piercing needles instead of hypodermic needle's the results are much better. Just google body piercing needles and you will see what I mean. Here's and example - Also I have found that just putting a 30 degree angle or there abouts on the end of the needles works great.
Hi No Ideal. Just wonder where you can find the right size needle's of 1.5, 1.75. or .021,.03 and .036 or .56mm, 78mm .94 mm. I have looked for those sizes but can not find them. If you know where they are I would be happy in buying some. Thank you in advance. Gary


HMS Bellerophon 1786 by AON – scale 1:64 – 74-gun 3rd Rate Man of War - Arrogant-Class
in - Build logs for subjects built 1751 - 1800
Posted · Edited by garyshipwright
Hi Alan. I sought of got hung up with my printer. Tried to scan the picture in to the computer but kept wanting a password. O well. I took a photo of the side and aft view which may help. He does go in to more info then any thing else I found. Let me know what you think of his article. Gary