


garyshipwright
-
Posts
901 -
Joined
-
Last visited
Content Type
Profiles
Forums
Gallery
Events
Posts posted by garyshipwright
-
-
-
Thanks Druxey. I was sort of a newbe to the party and showed you a photo of my Richard. Of course some one forgot to tell me who the real ship builders were at that time. 😲It was a lot of fun and I will be glad when the NRG has another one in either place, which would make me one happy camper. Gary
-
Hi Ken. You may of already did this but what about breaking your hull up in to belt's. Am building Chuck's Winchelsea and he breaks up the hull below the wale in to 4 belt's of planking. Once you find the belts just take and using very fine tape, mark off the placement of that belt. Am using 1/64 that I got off of amazon and the belts are really making it so much easier planking the hull. Once you have your belt's located you can break each belt down to the number of plank's that will cover that belt, using a propotional divider or tick strip. Just look down the hull on that belt line and you will see where it needs to be adjusted. Take a tick strip and mark out the width of the belt, then using a planking fan you can find the number of planks in that belt. I like using a propotional divider because for me it's more accurate then using a tic strip because some times I make my tick mark's a little on the thick side. That really makes the plank a little on the wide side. Hope this is of some help to you good sir. Gary
-
-
Hi Kurt. I got my Preac in 2000 I believe at the Chicago NRG conference or was it the the Mariner's Museum can't remember which one. Charlie was still with us and we talked about his saw and getting one. Also meet David and Greg there with my daughter and misses. Believe she was 2. Do remember some one wasn't happy that we had brought our daughter to the conference, but every thing turned out ok. I also went to the 2010 which I believe was the Chicago one. What your seeing is just a piece of wood that is setting between the fence and blade which is for keeping the blade from cutting in to the fence. I did do one Mod to my Preac once I had all the pieces. My Byrnes saw came with the first mic that Jim installed on them which I got from him in 2002. When I sent my table in to Jim I had removed the old mic and rail along with its brackets from the table and mounted it to the Preac. You have to drill holes and thread them for the brackets, which keeps the rail in place, but it wasn't to bad at all. It worked good until I sold it to a good friend who brought it for his shop. I had them set up like you have your's for doing different cutting but I didn't use it much and figure selling it at a cost one could afford it, would be worth while. He also brought the hog and shipping which cost sometimes more then what you want for it just stop good folks from buying them if they lived to far away.
-
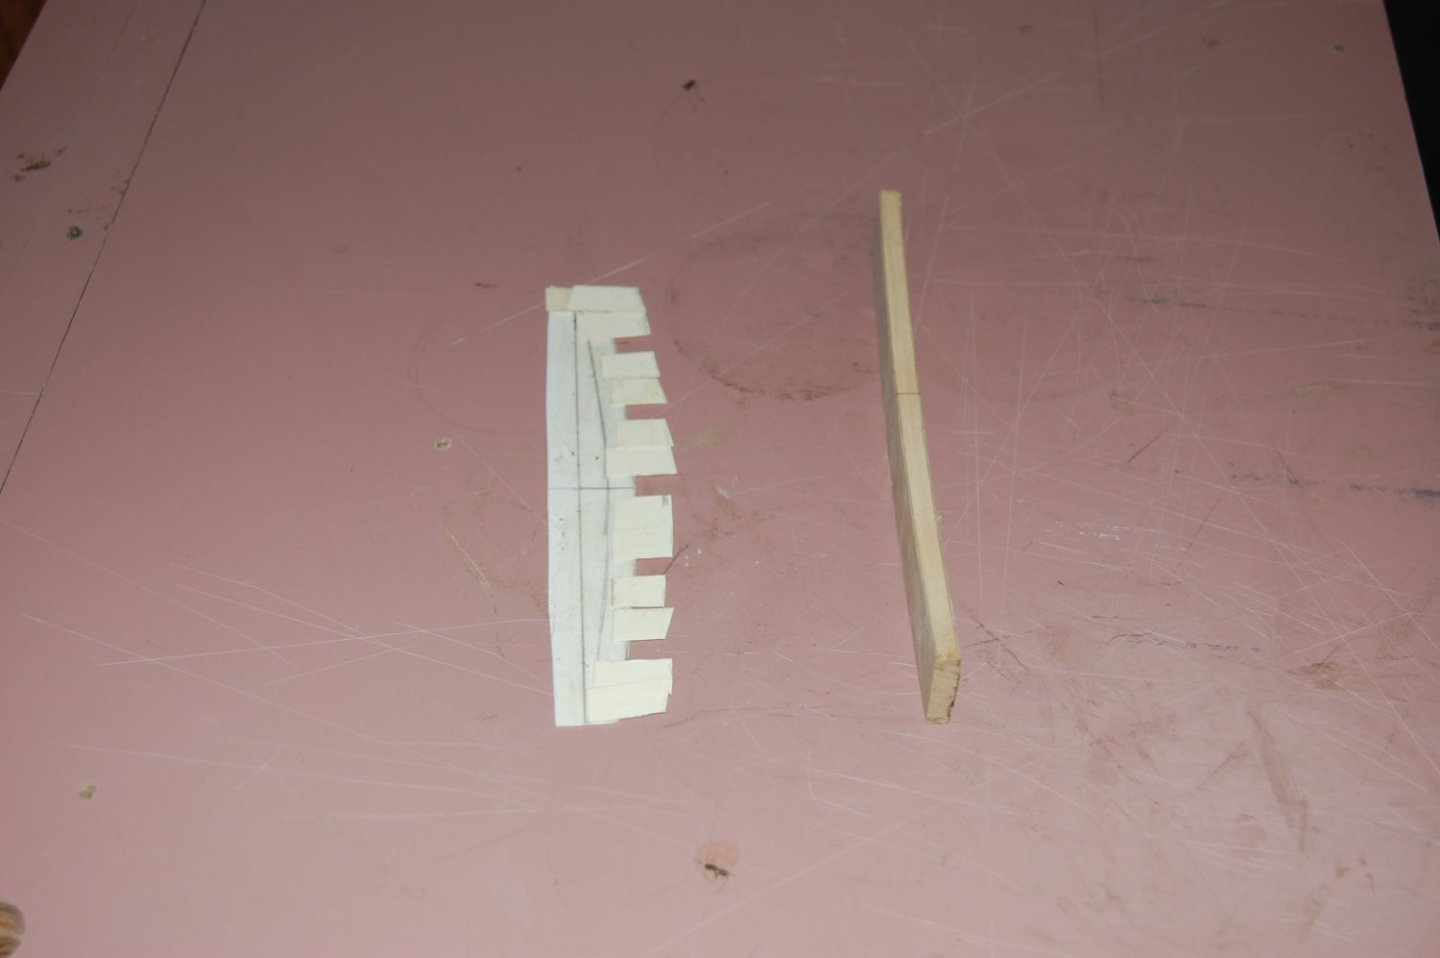
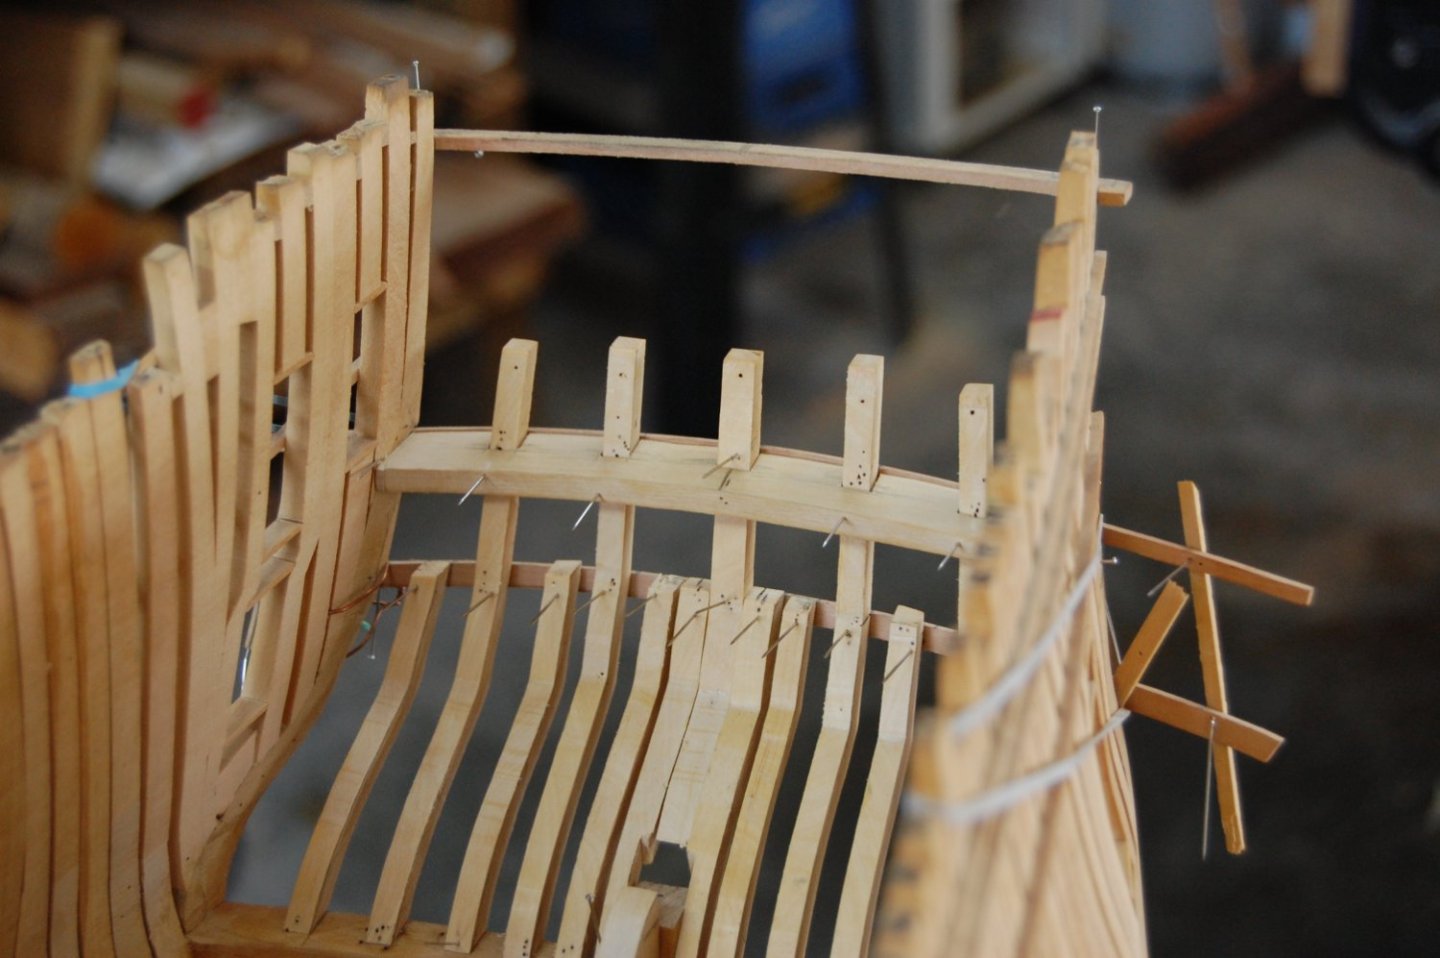
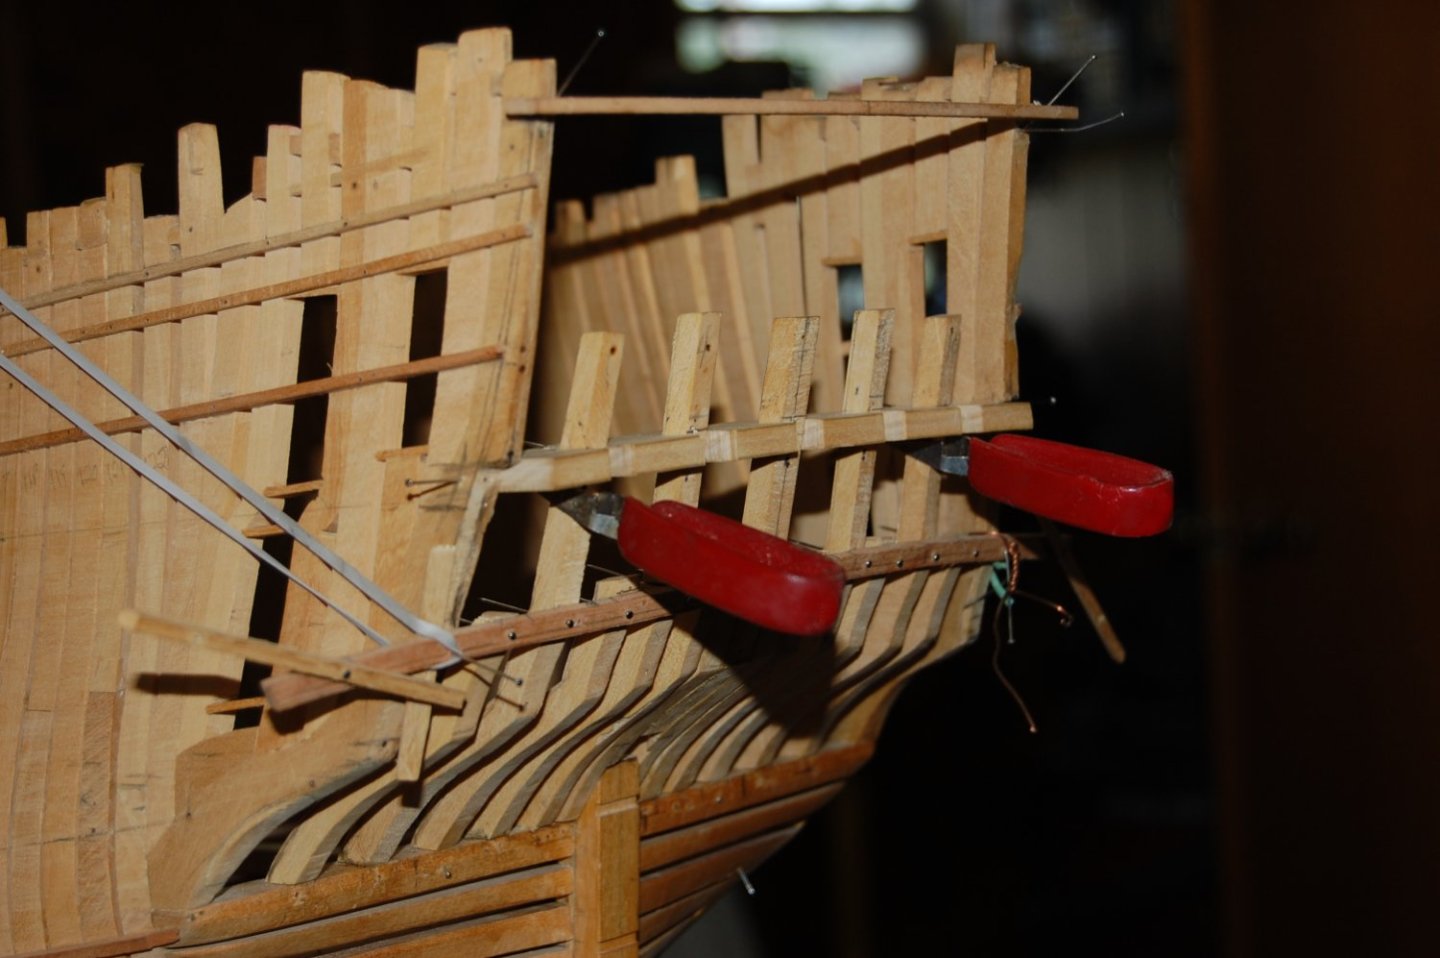
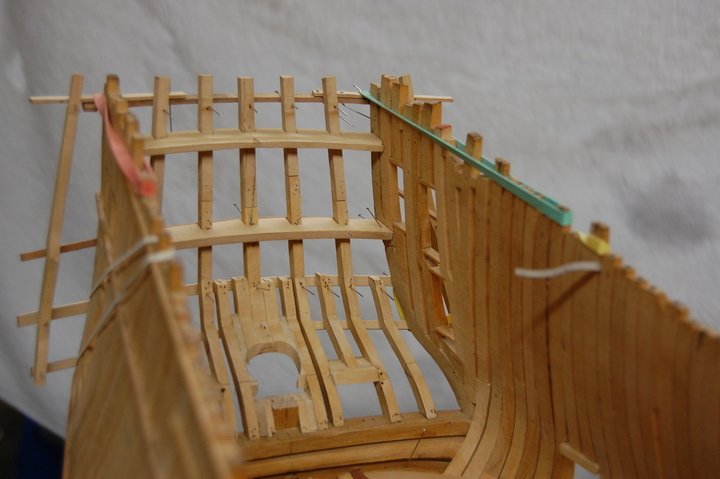
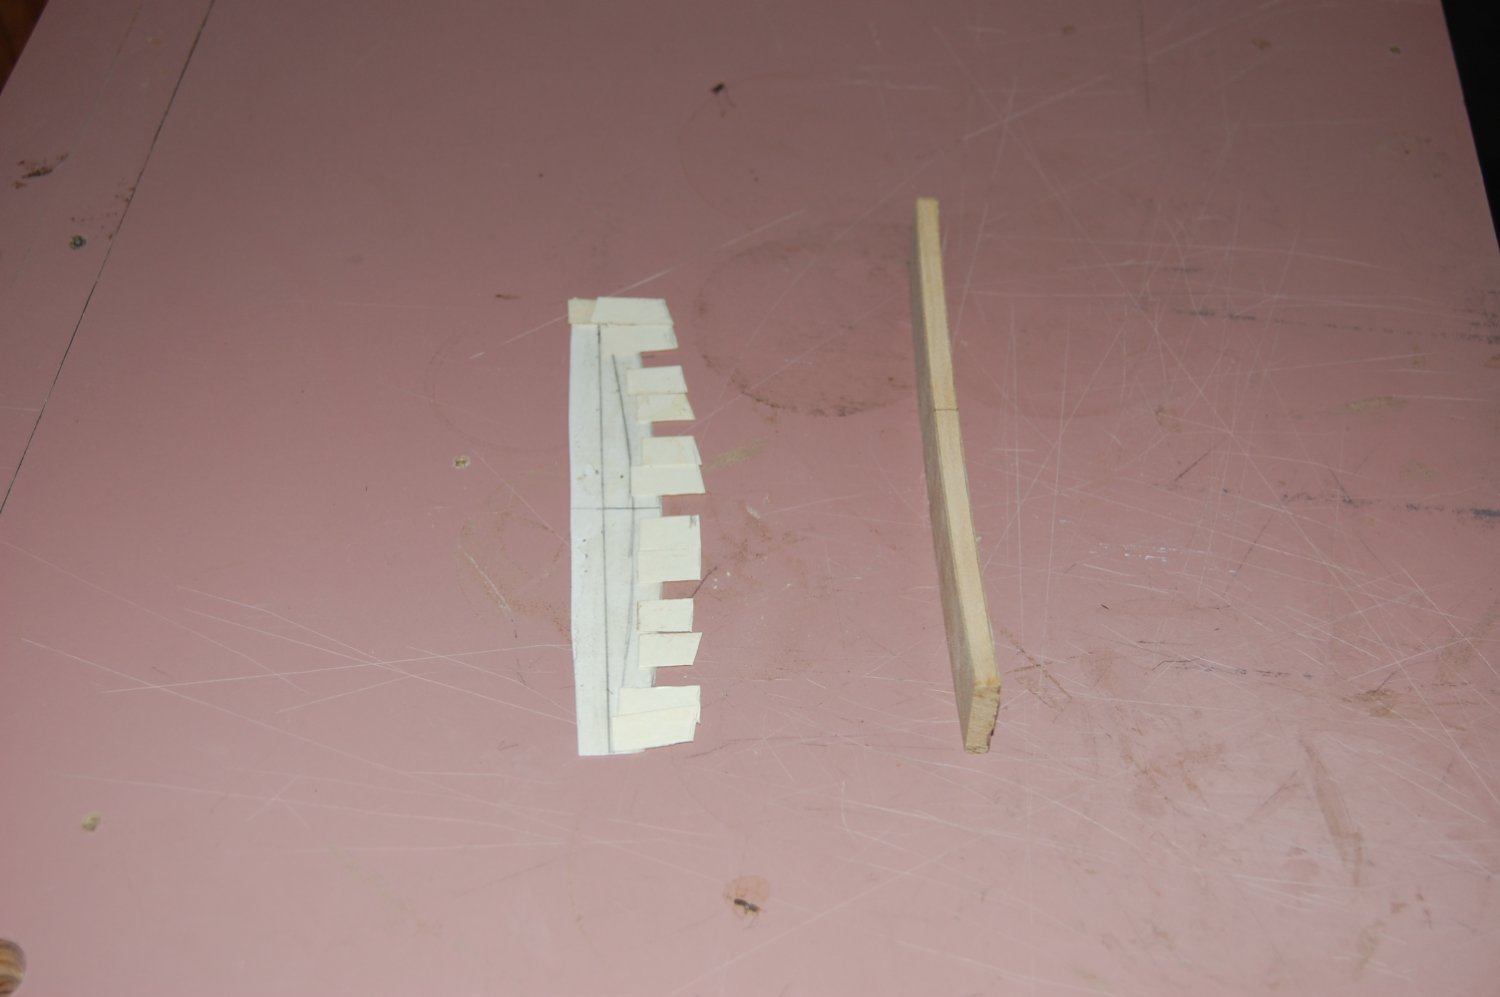
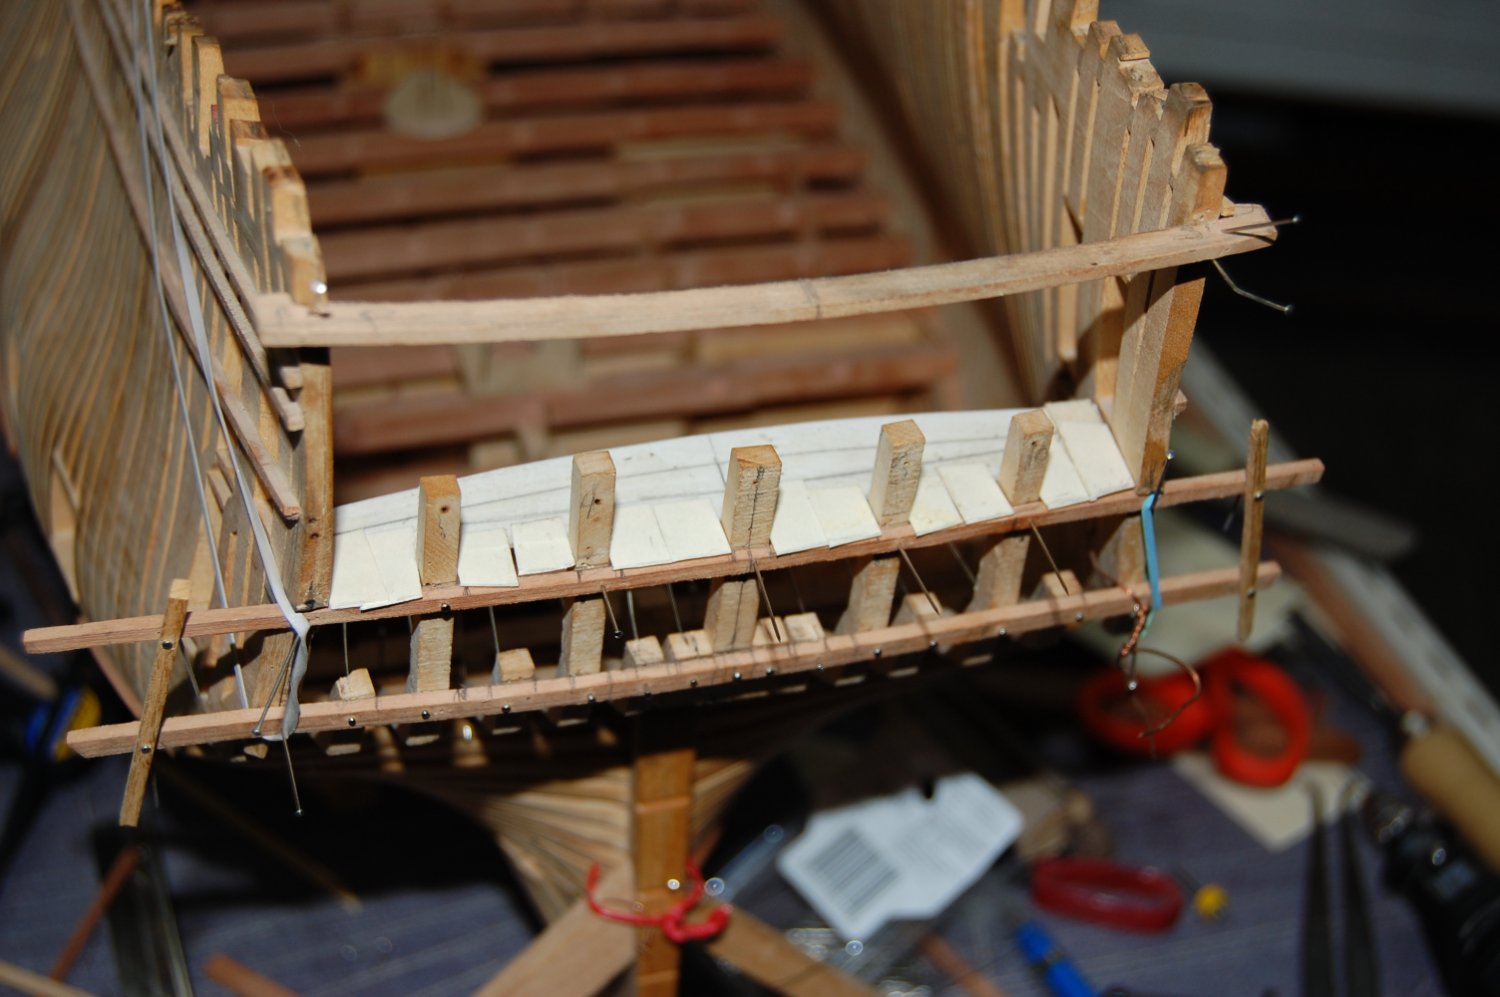
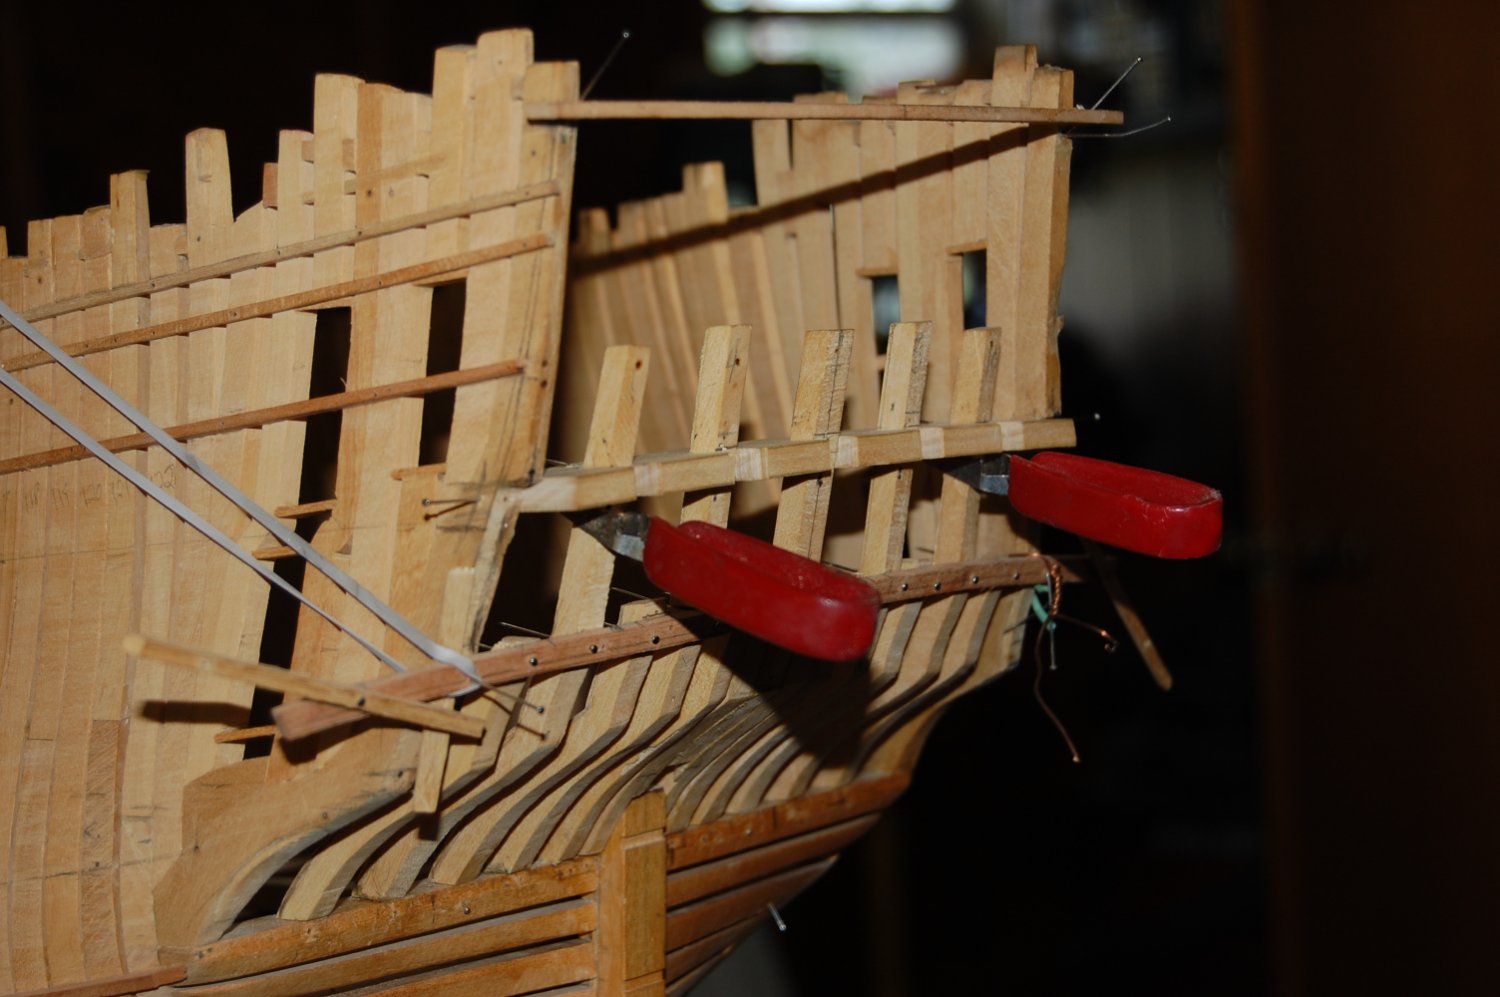
Hi Allan. You must be talking about the transom and the counter timber's David has a good article in vol 2 of his TFFM book, page 9/11. EdT also has a good article in his book of the Naiad Frigate vol two chapter 20. When I built Montague/Alfred I followed John Franklin articles in Model Shipwright Part 2 page 29. Just a ideal on how to get the curve aft and the curve up, first make the curve up on the right size piece of wood, thickness wise and then cut out the curve aft. I added some photo's that might help you. Gary

-
Hi Keith. As far as the blade guard I took mine off when I first got the saw and as you said, one has to be a lot more careful. To make up for the missing guard I use push stick's to keep my fingers a good distance from the blade. I also have a 10 inch table say but the guard stays on because it float's above the table and is also part of the dust collection. Works' great. I did just order the thin strip saw jig for my Byrnes saw. Should give me a nice cut plank using it. I don't think I have seen any one putting the top flush with the bench surface, and would like to see how they did it.
-
Hi Bob. Our prayers go with you and may God watch over you and keep you safe during these trying times. Gary
-
-
Hi Mike and outstanding good sir, she is a beauty. Now that you have her finished what's your next model going to be? Also I noticed that you have some paint on you work bench and was wondering what they are. May come in handy getting some for my Winchelsea. Look forward to your next build good sir. Gary
-
Congratulations, Chuck, on a job well done and may you next one be just as good if not better. Look forward to seeing it and have enjoy watching your Winchelsea come to life. Gary
- Edwardkenway, FrankWouts, Jack12477 and 3 others
-
 6
6
-
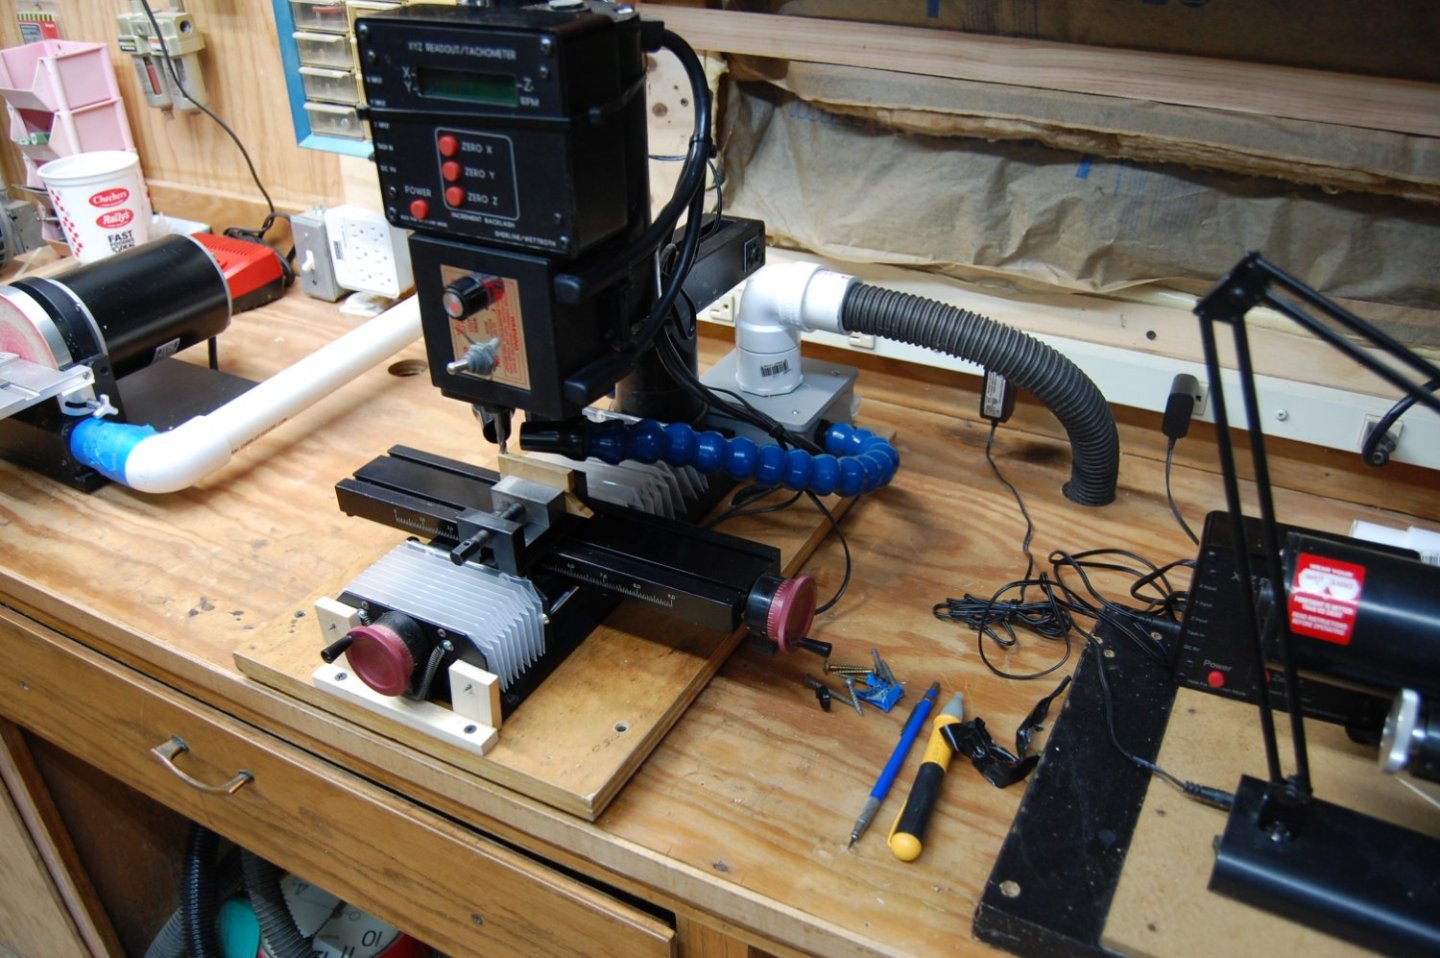
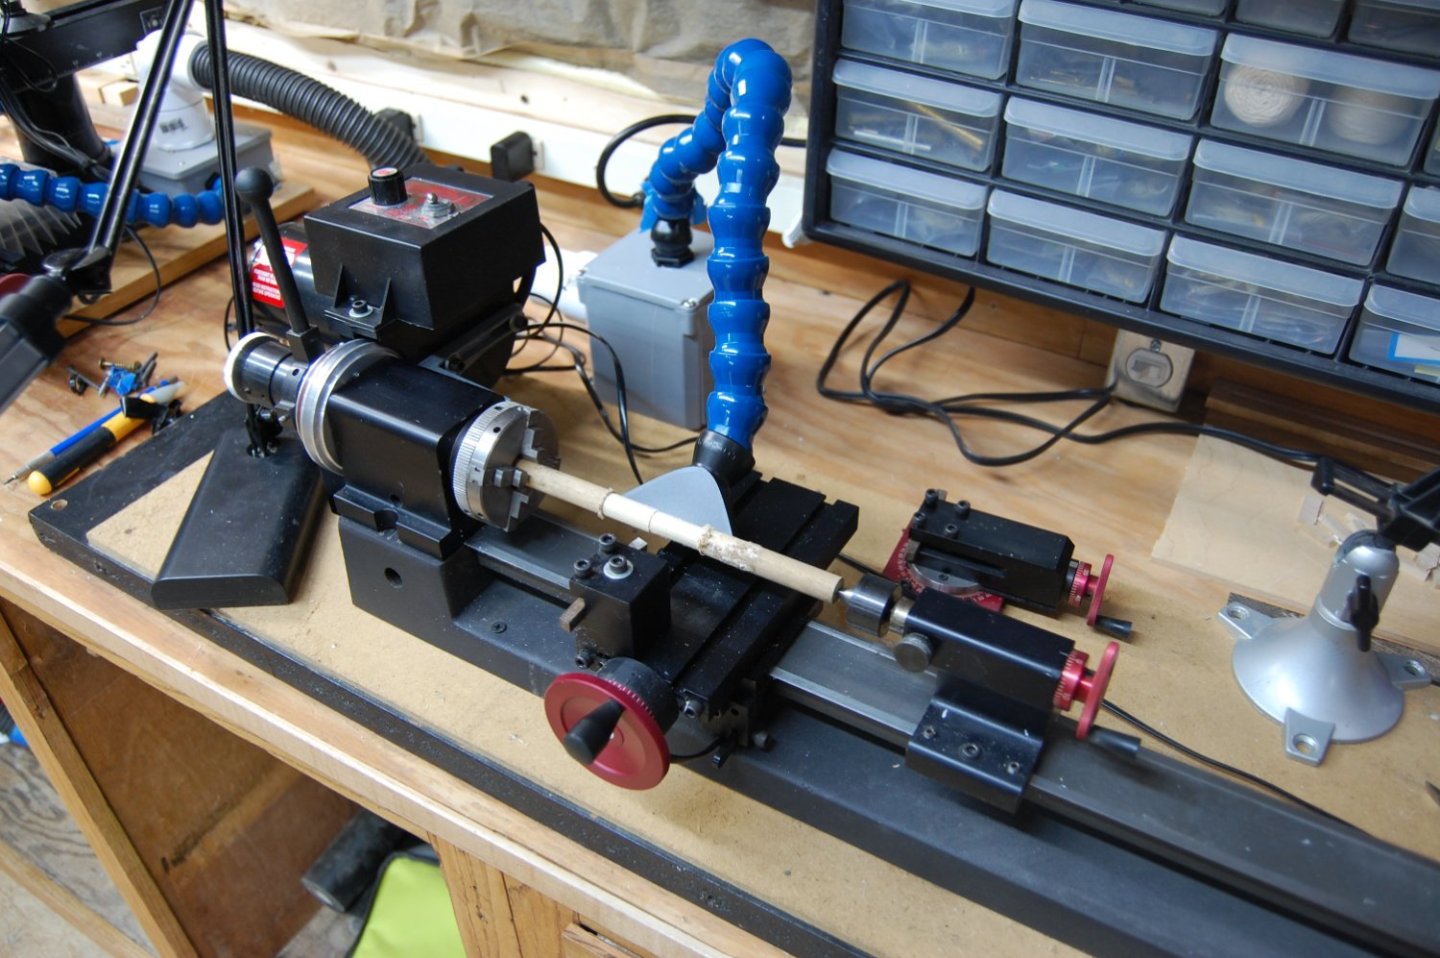
Hi ChrisL. If I had to make a choice over what mill I would still get a Sherline . It really depends on how deep your pocket's are. They have a 14" Deluxe 8- direction Milling Machine which has a 15" extended Column upgrade, believe the cost was 1500, for the base package. They have a lot of accessories to fit all of your need's. They have a tilting angle table, Manual Rotary table Milling vise, and a rotating base to hold the Vise. Digital Readout to help you with the precision on your cutting. A sensitive Drilling attachment that you could also add. Works great when your using very small bit's so you don't break the bit's. It sort of lets you get a feeling of what the bit is doing. Of course it all comes at a price but I brought mine over the last few year's to help with the cost of it and have not regret it. You could go to their site, make a list of what you might need to get started and they will give you a package deal. Once you get the base package, what ever that may be then you can get the accessories you really need and not have to put out a chunk of money. You can do that over time because you are buying a tool for a life time. Also If you purchase their lathe get the 17 inch one, you can use the mill accessories on the lathe which would cut down on the cost of the accessories.
.thumb.JPG.a5471daef40e3d08bed94a84e41ef9cd.JPG)
- Seventynet, dvm27, No Idea and 6 others
-
9
-
Hi Kris and thank you. I did find a place, the office depot does this accept they use plastic rings instead of metal. She also put a clear plastic sheet on the front cover and a blue one on the back cover. Came out real nice and now resides in my library. Was very happy how it came out that's for sure. Once again thank you very much for putting this on the site. Gary
- Kris Avonts, AON, mtaylor and 1 other
-
4
-
Looking real good. Maybe I get there one day.
-
-
-
Nice job Frank, She is looking good and look forward to seeing the whole hull planked.
-
There is a 2 part to David's Drawing Techniques for the modeler but doesn't really have any thing really on the stern other then correcting the stern tilt so you can make the parts for the ship the right length. If you want it let me know and will add it. Also if you want I can delete some of the Franklin stuff so it doesn't clutter up your log once you have down loaded them unless other's want this to. Gary
-
-
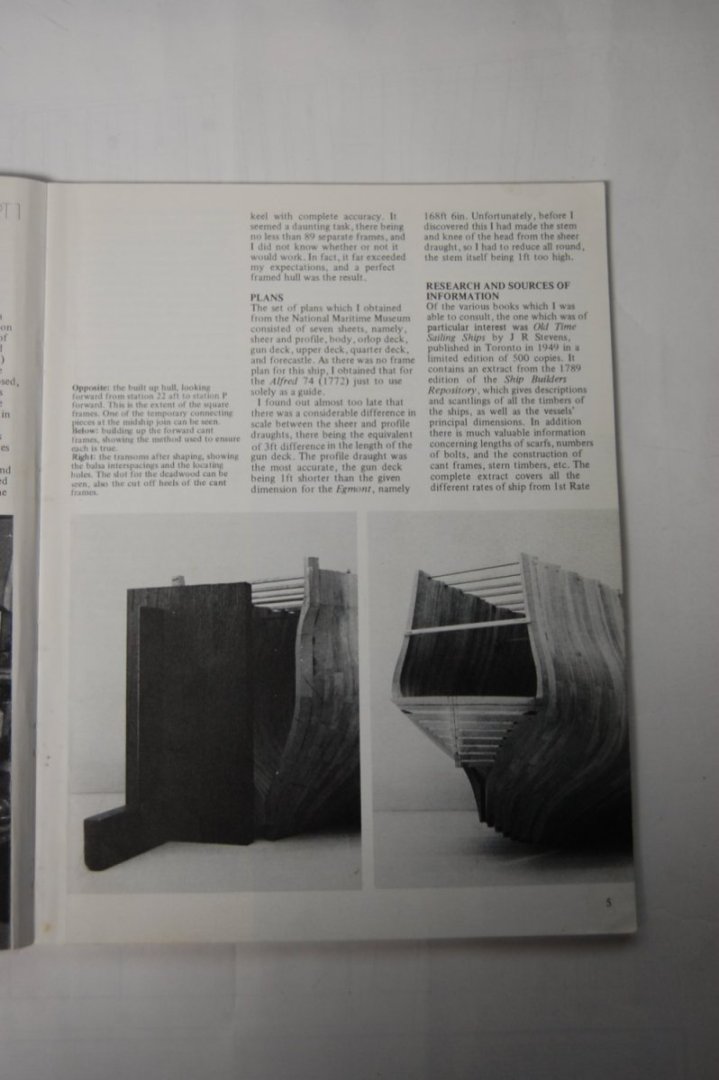
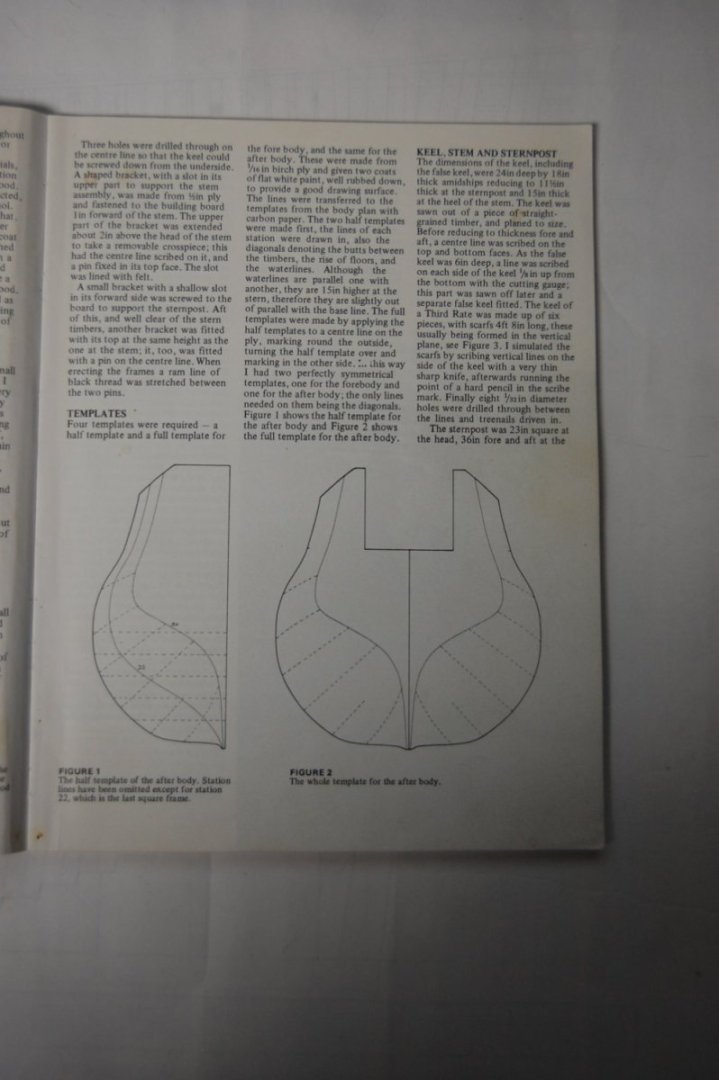
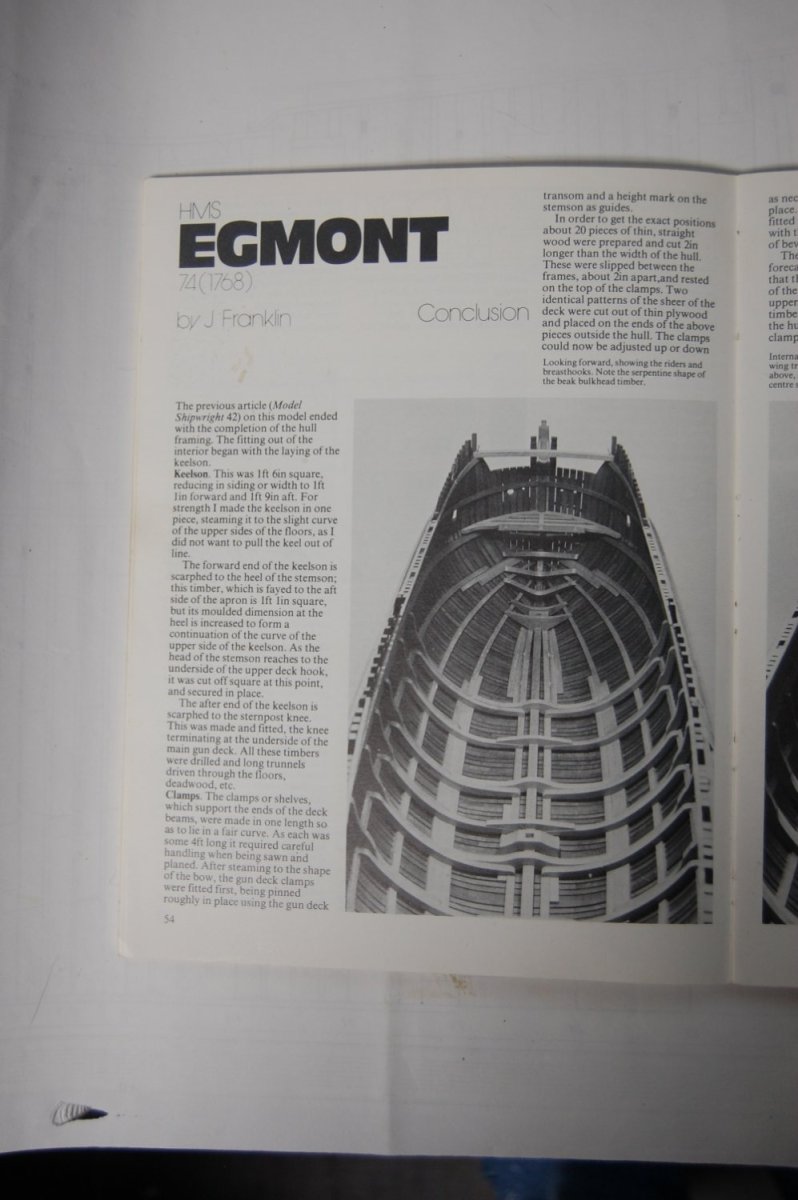
I have to look and see if I can find any more of David's drawing techniques article. I think there is one more and will take a look. Here is the start of 41 and I also found the conclusion of John's articles which I have also inclosed.


- fake johnbull, AON and mtaylor
-
2
-
 1
1
-
Hi No Ideal. When I come to hard spot's like what your up against you might take some painter's tape, take it and push it in place, then taking a pencil, mark around the planks and see what comes out. It usually a rough copy imprint of the area but it does give you a starting point. I do this a lot when I get to a place like your self. Hope this help's good sir. Gary
- dvm27, No Idea, ChrisLBren and 1 other
-
4
-
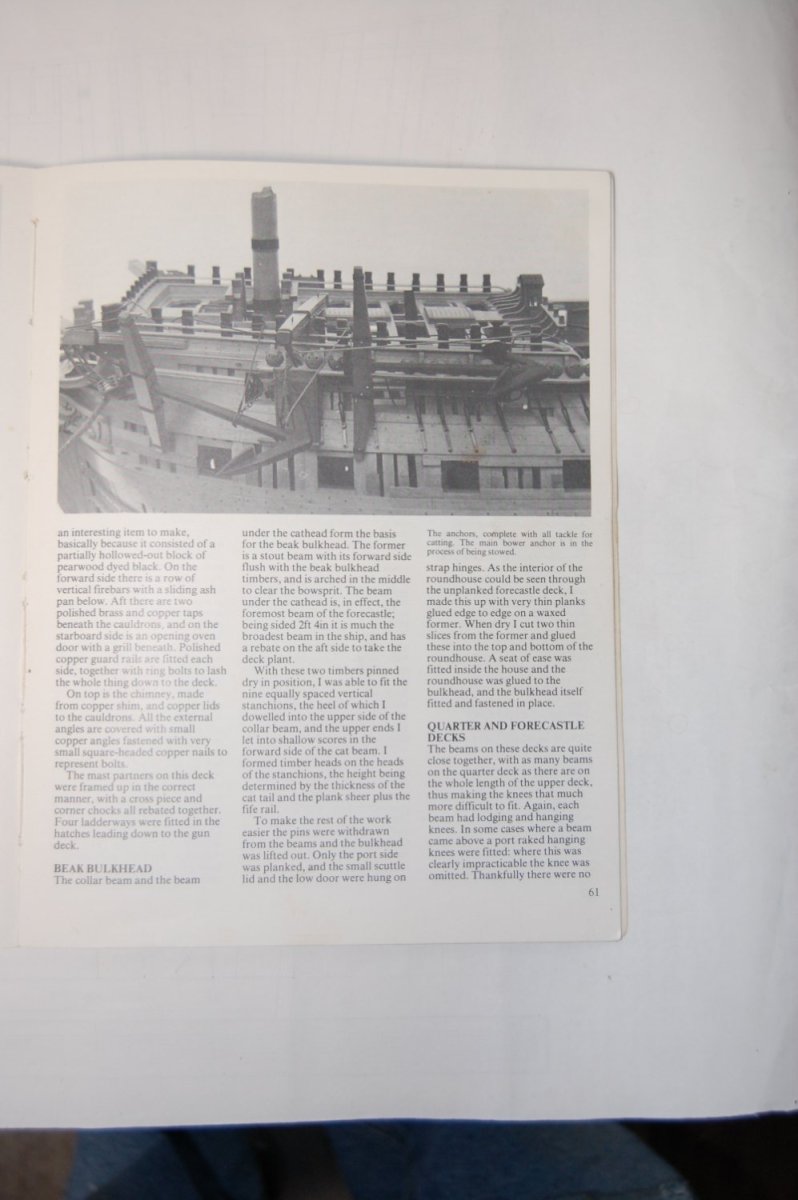
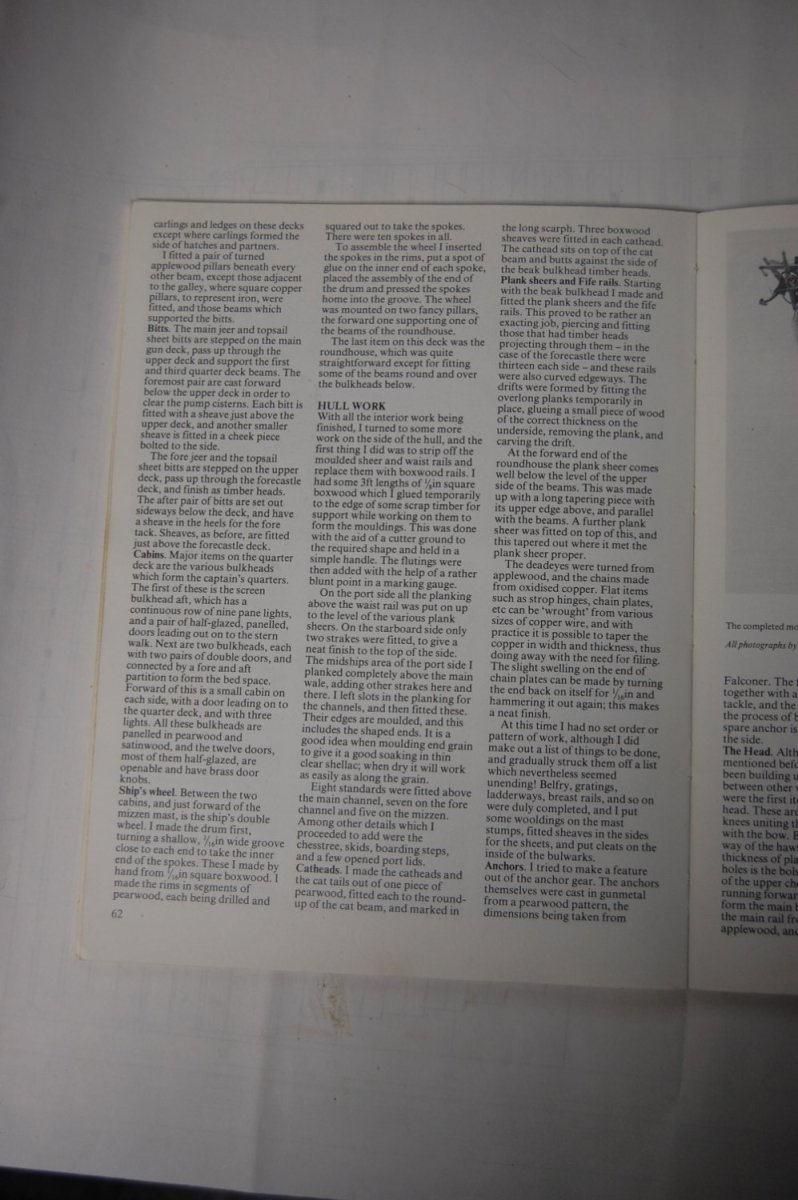
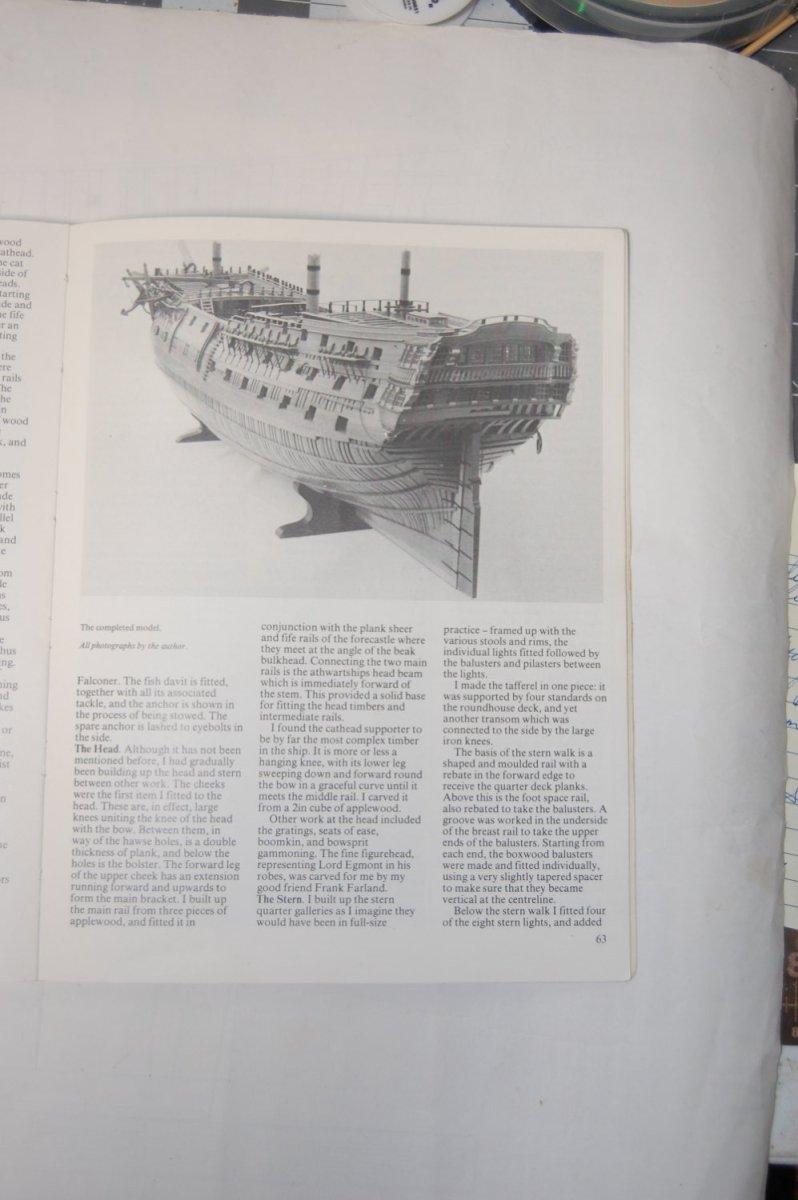
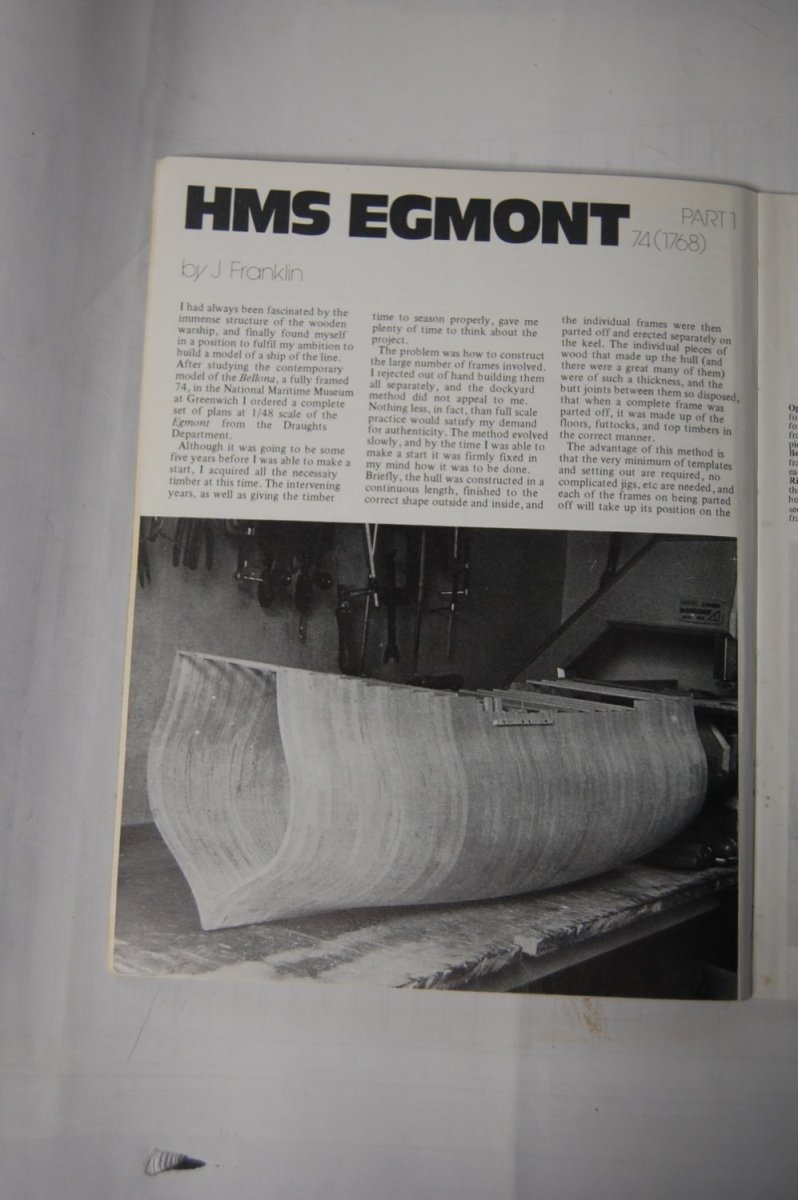
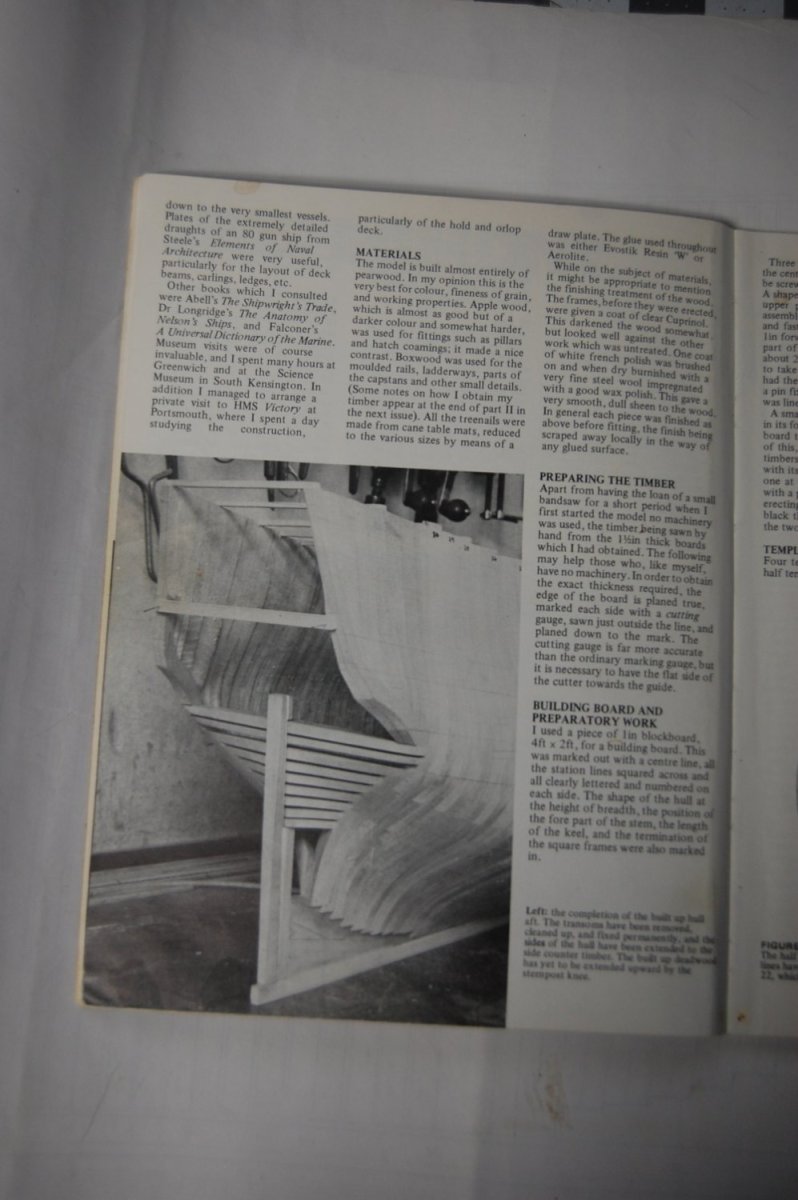
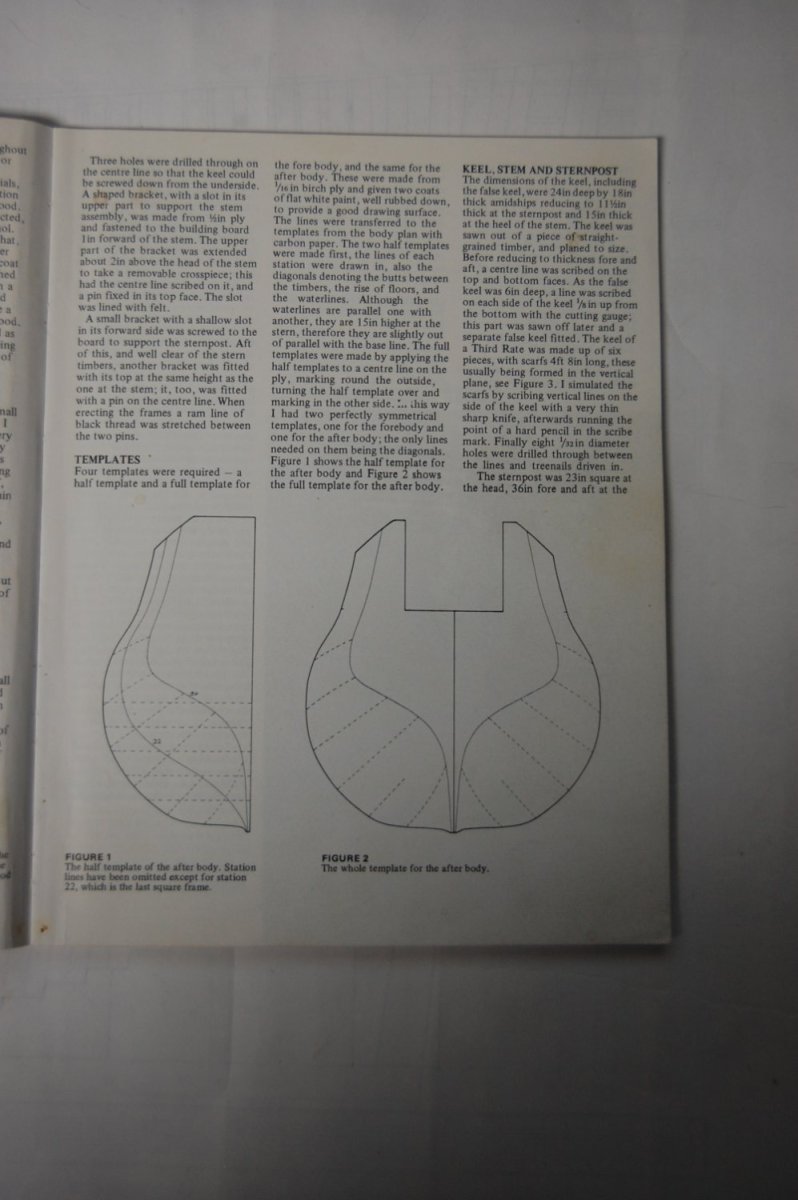
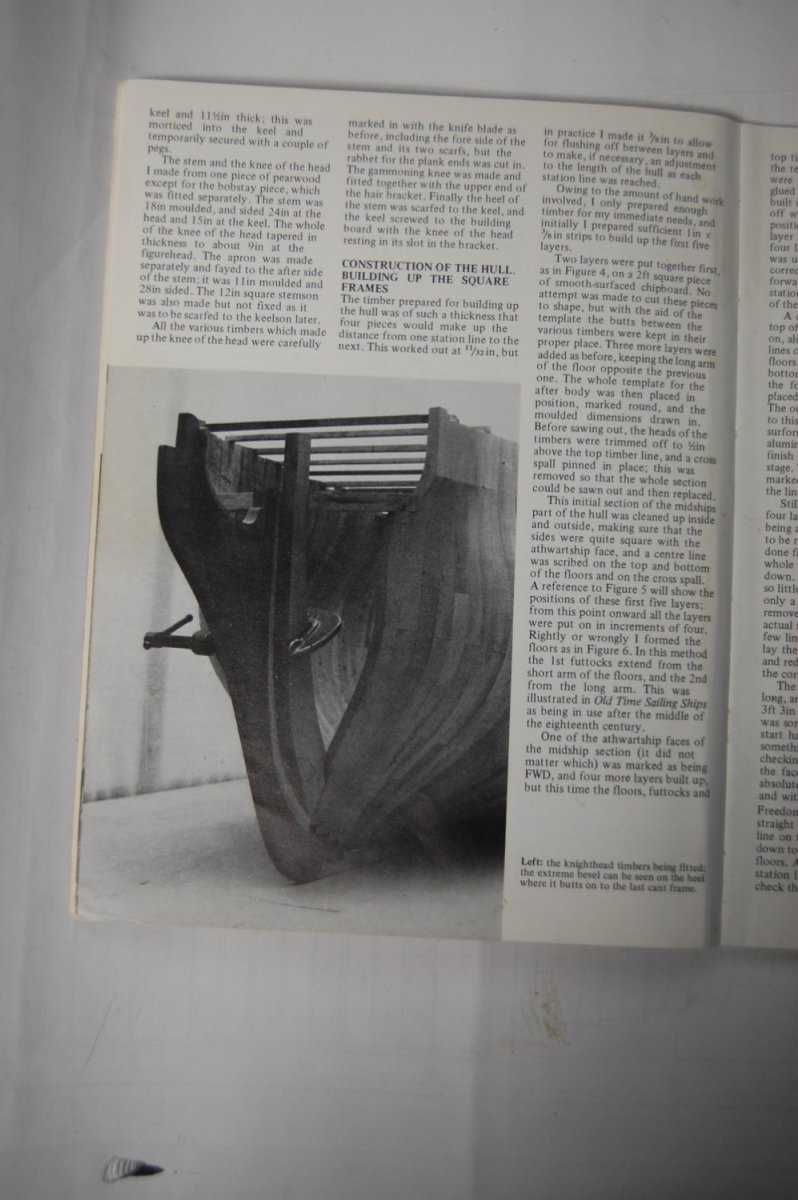
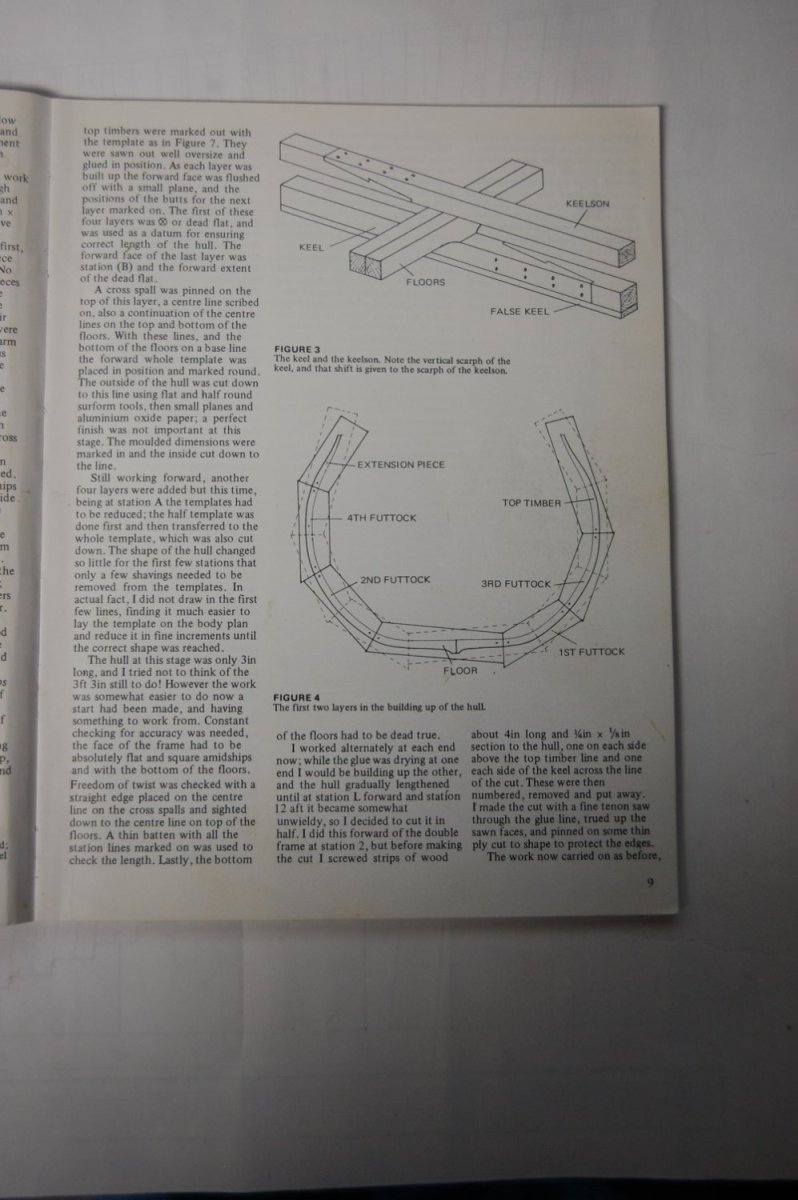
Sorry about that, I had a brain fart. Model Shipwright, Issues 41, September 1982, HMS Egmont, part 1, 74(1768) starts at page 4 and run's to page 13, author is John Franklin. Hope that help good sir. Gary
- bruce d, Kris Avonts, albert and 1 other
-
4
-
-


.JPG.7ca1cad4ae0edd3a3675093f071b316b.JPG)


Mary of Norfolk 1790 by KenW - Pilot Boat
in - Build logs for subjects built 1751 - 1800
Posted · Edited by garyshipwright
Ken usually the garboard strake next to the keel is a little on the finicky side. It widen's at the stern post and decreases at the stem. You don't want it getting to far up the stem and usually doesn't go to far past the joint between the stem and the keel, maybe 6 inches. but each boat and ship are different here. Once you get that one to your liking the rest of them should be a lot easier. If I get a chance I will take a photo of the one am doing on my Winchelsea which may be of some help to you. Gary