


Hubac's Historian
-
Posts
2,946 -
Joined
-
Last visited
Content Type
Profiles
Forums
Gallery
Events
Posts posted by Hubac's Historian
-
-
Daniel’s PE set really does add so much nice detail to the model!
-
-
Wow - that is such a peculiar “innovation”.
-
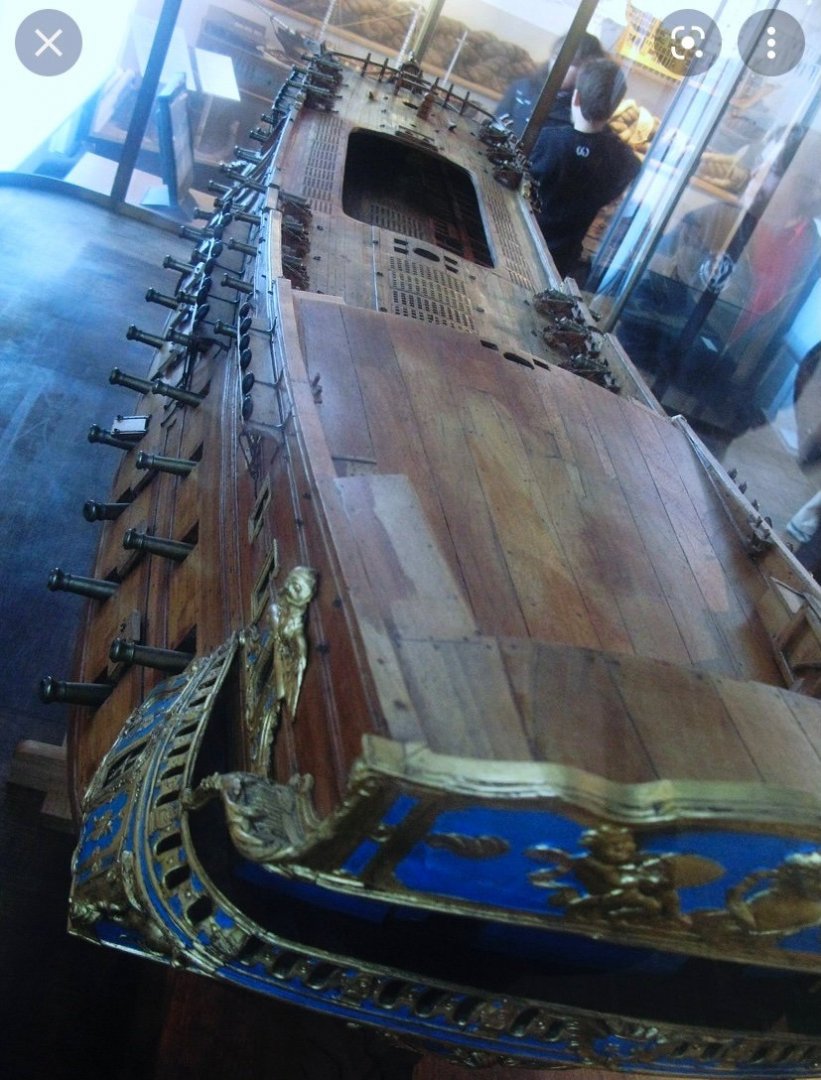
I watched you build it, in fact. I kept my spare pressing of this kit because I aborted the first version I was making of it, during one of my several moves. This was after the true paint scheme was discovered, and I had painted my upper bulwarks blue. Also, the model had been under construction for so long that many of the guns had broken off, as well as the quarter gallery turrets. This is why I am now maniacal about plastic to plastic bonds.
-
The duplicate notifications you are seeing Bill are only because I kept hitting the LIKE button, as I read my way back to present times. If you click on any one of those notifications, it will automatically redirect you to the specific post I was liking. It’s kind of a neat feature of the site.
The masts look very impressive, indeed! That is always a rewarding feeling, as she becomes a sailing ship. I noticed in one of your earlier posts, that the mastheads appear to be separate parts from the lower masts. That is interesting that Heller did that. I would think, for the sake of strength, that it would be better if the mast heads were moulded to the lower masts. I wonder why they did that.
As we clear out my father’s house, for sale, I had to figure out what to do with what’s left of my plastic kit stash. I have an Airfix Vasa, and the Heller Vic. For the time being, my sister took them over to her place because she has storage, there. I’ve been transporting that Victory to different homes since 1995! I also have the Airfix Prince, but that’s with me, in Brooklyn - that’s a gem of a kit!
-
Excellent work, Mark!
- mtaylor, hollowneck and No Idea
-
 2
2
-
 1
1
-
Life has kept me busy, so I haven’t been around much, lately. I think I’m easing back into a little more free time, though, so I should be more present.
-
I’m just catching up, here, and am enjoying the discussion of rigging sequence and fall tie-offs. It is all fascinating and there have been many practical tips shared that I will take with me when the time comes.
Bill, your log explodes with activity and I was amazed by how far back I was! I admire your fortitude in rectifying errors. It is all looking splendid!!
-
-
-
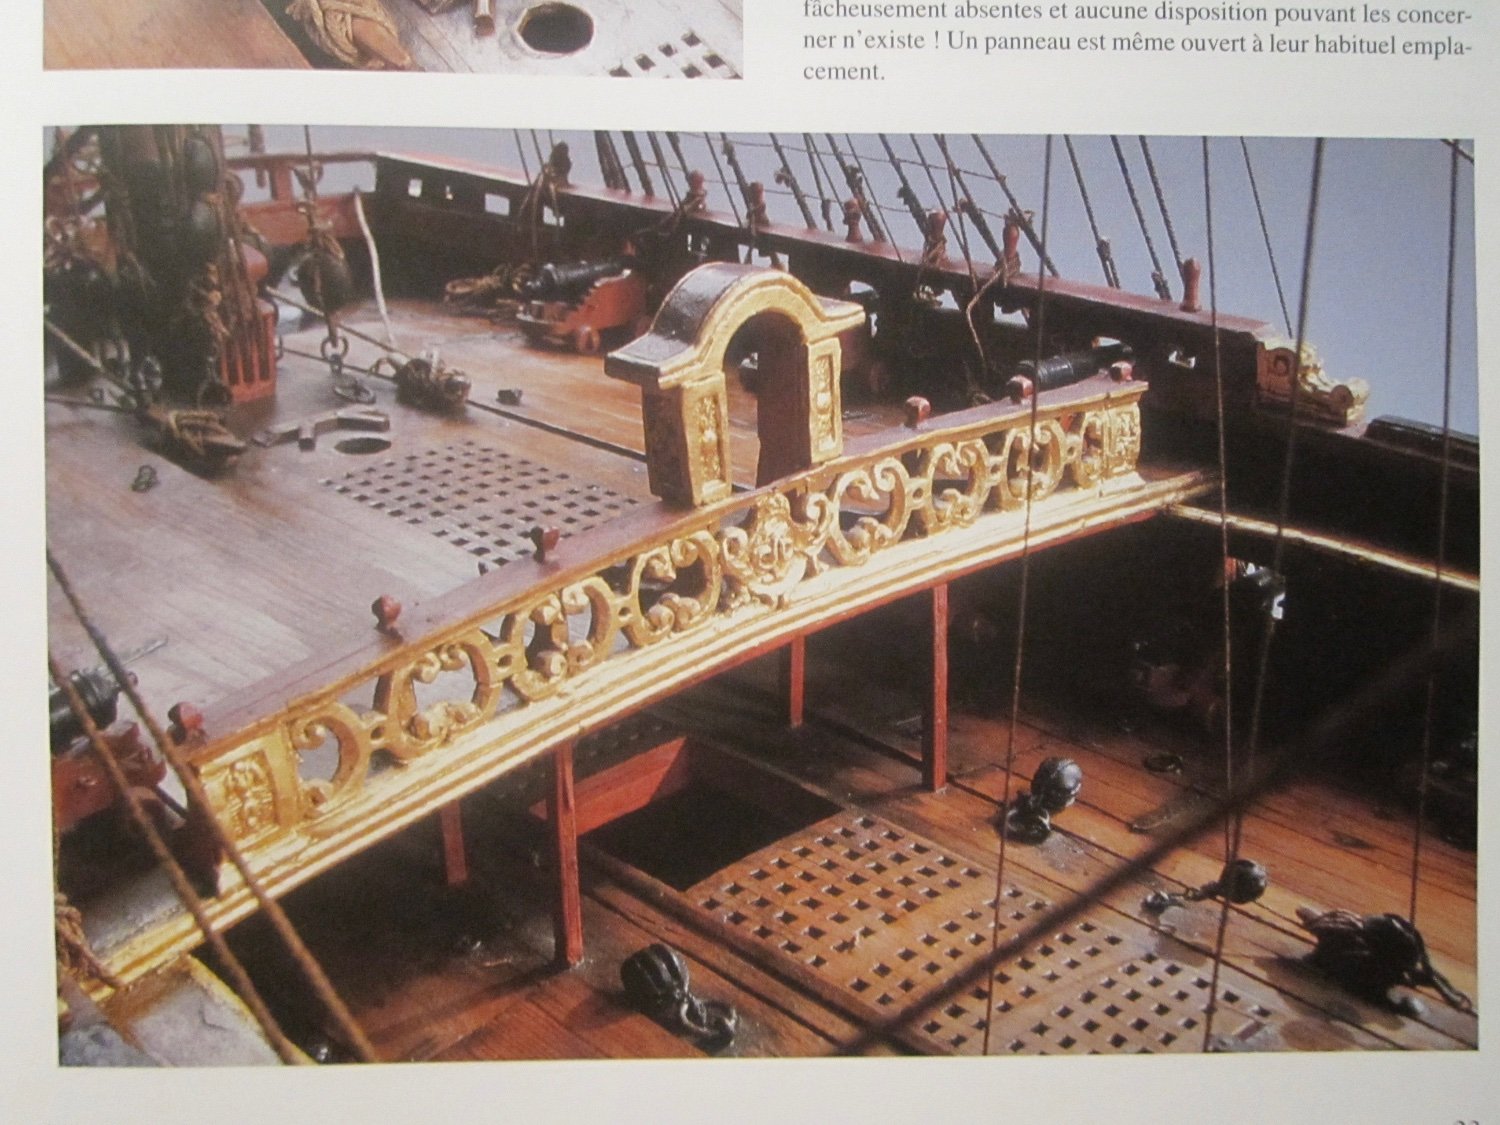
I almost forgot this other contemporary model from the circa 1740s:


No inboard ladders either
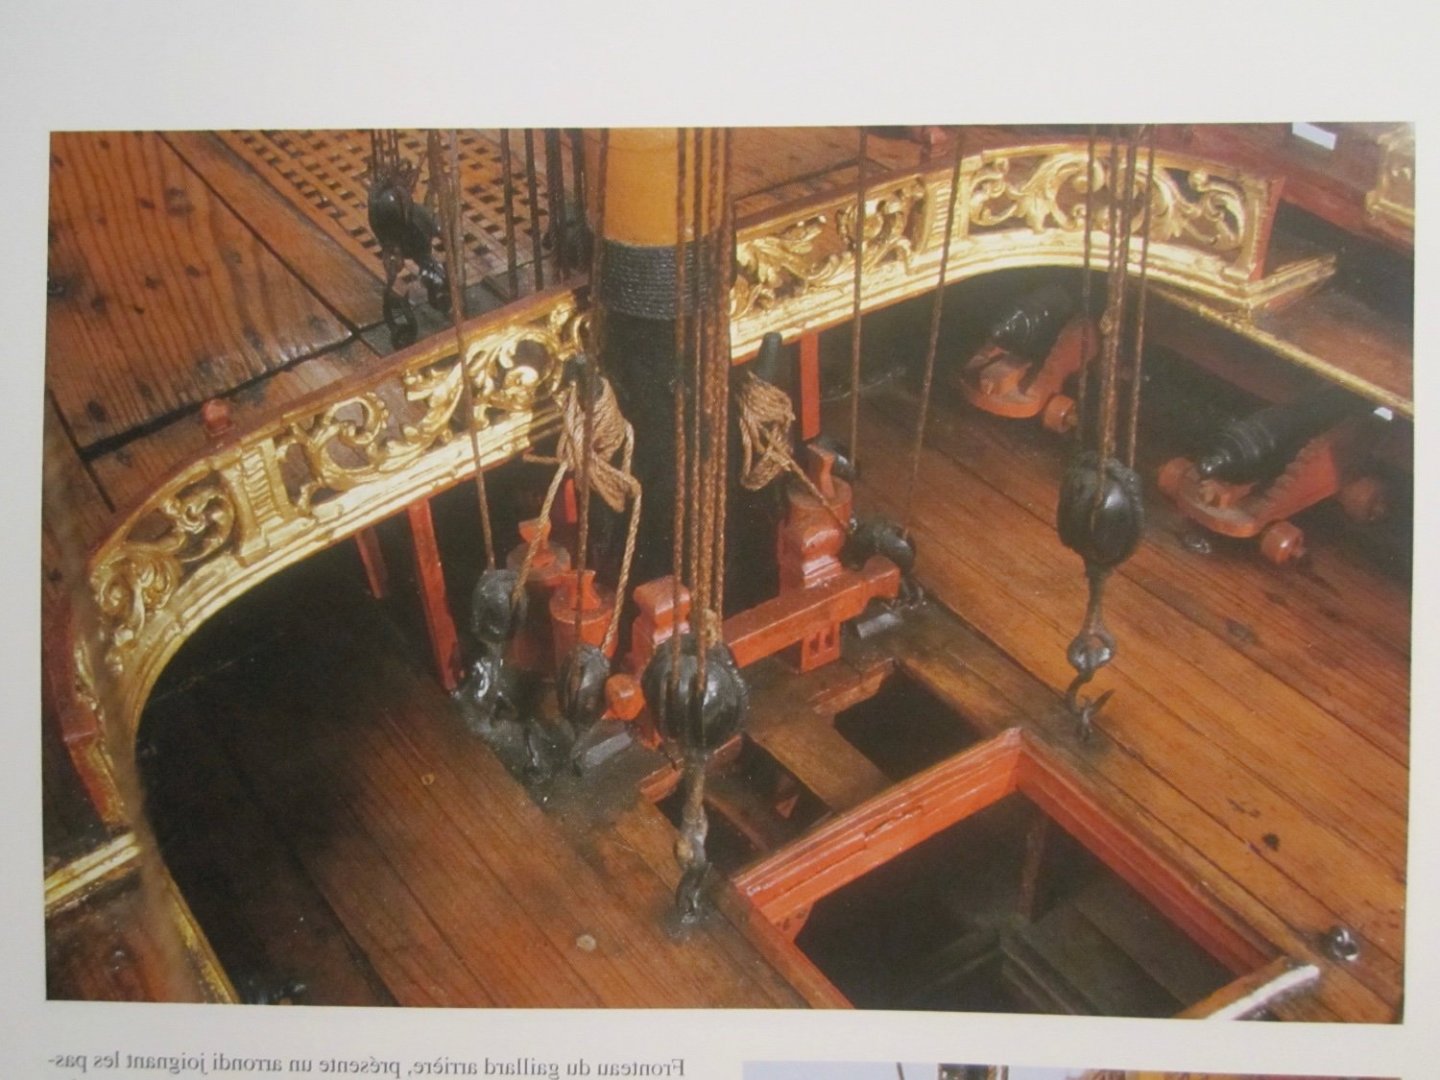
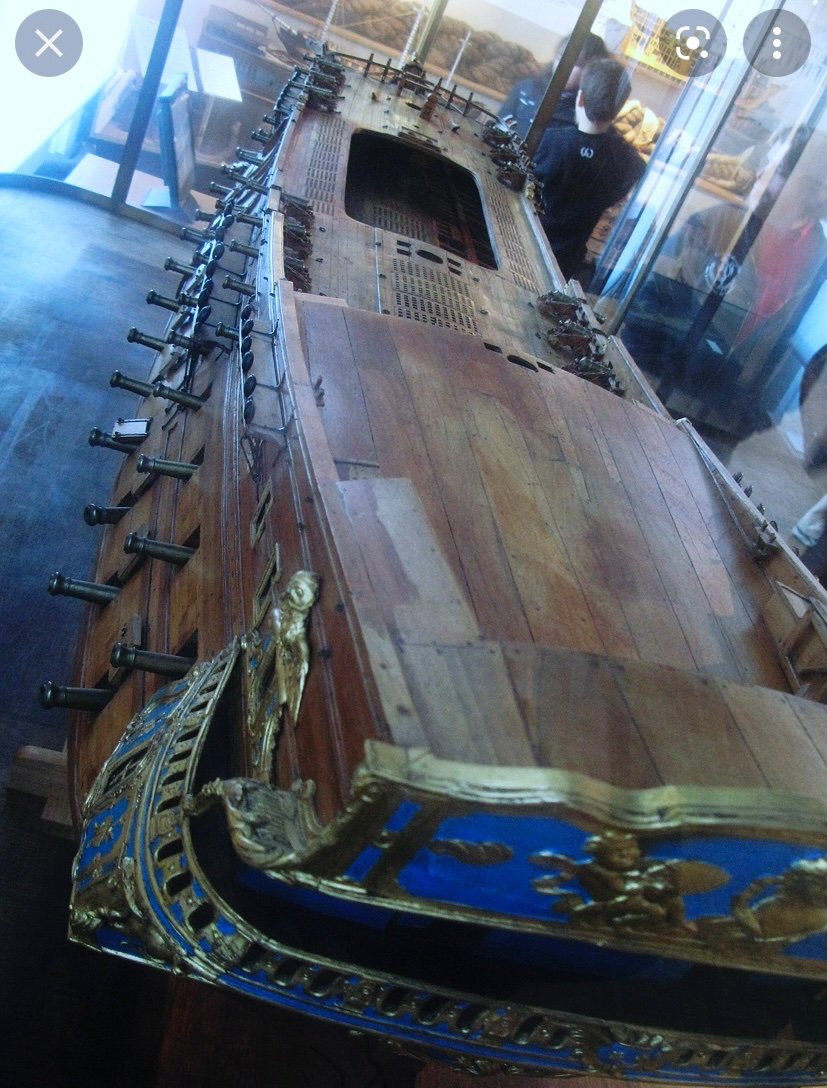
Interestingly, Le Fleuron shows an outboard stanchion railing that is higher than the waist sheer railing, but nothing in-board, along the gangway.
Also, the Dauphin Royal of 1750 does not show any inboard stanchion railings, either.
-
The closest contemporary resource I can find is the Louis Quinze model at the Musee de la Marine. These are the best pictures I have (admittedly not great), but in-board railings are not shown, along the gangways:

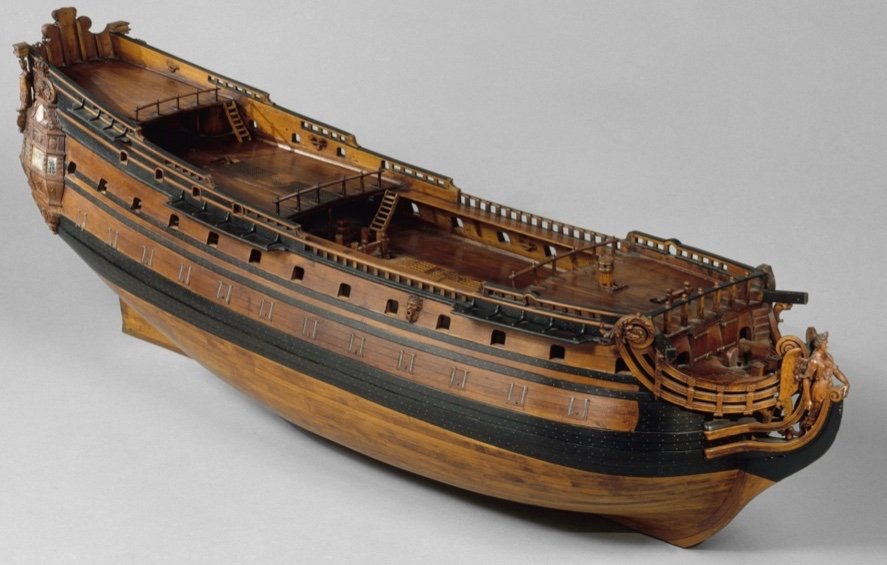
It’s another Tanneron model, from the 1830’s, but his more complete (than SR) model of Le Brillant does not show railings either:
-
Wishing all the same for you, Ondras!
- mtaylor, Ondras71 and FriedClams
-
2
-
1
-
-
-
Looks awesome! The walnut will make for nice color and finish.
-
You know, Eric - you have done a fabulous job of fairing this hull. I can really see your lines in that last pic, and it is a job well done! I’m glad to hear that all are well, after recent events and mis-adventures.
-
Open a thread and I will gladly follow. I love these Heller Victory logs!
- dafi, mtaylor and europapete
-
2
-
1
-
-
Will you cut away the lower hull for your waterline display, Europapete? If so, I will advise you to assemble the hull, whole at first, and then attach sturdy bracing beneath the lower deck, before cutting. I learned the hard way that cutting before assembly makes it very difficult to fair to a true waterline, for one, and it also introduces distortions to the upper hull that do not become apparent until much later in the process. It was nonetheless necessary for what I was doing, but for the Victory these problems can be avoided.
- mtaylor and europapete
-
1
-
1
-
Thank you Kevin - I appreciate the kind words, and I can assure you that with sheet plastic, anyway, this kind of scratch-work really is not that difficult. The main thing is staying in scale. This is the first model I have made where I have attempted any of this sort of modification. Mostly, I’ve spent a lot of time thinking about how I want to go about it, and often enough - it works out. Sometimes I have to throw away and take a different approach.
I had some prior experience with the Modelmaster acrylics when I did my first SR, so many years ago. I liked them so much, and knew I could achieve reliable results with them. The rest has been a process of trial and error. I did a number of sample mock-ups with the un-used portions of my vulture-carcass hull (that I extracted extension pieces from).
Part of the reason this has all gone on for so long is that I am very deliberative and methodical. I don’t really care too much how long it takes.
- popeye2sea, FriedClams, mtaylor and 4 others
-
7
-
-
We’re literally coming down the home-stretch with Dad. We moved his furniture and belongings, this past weekend, and we will move him this coming weekend - HUZZAH!
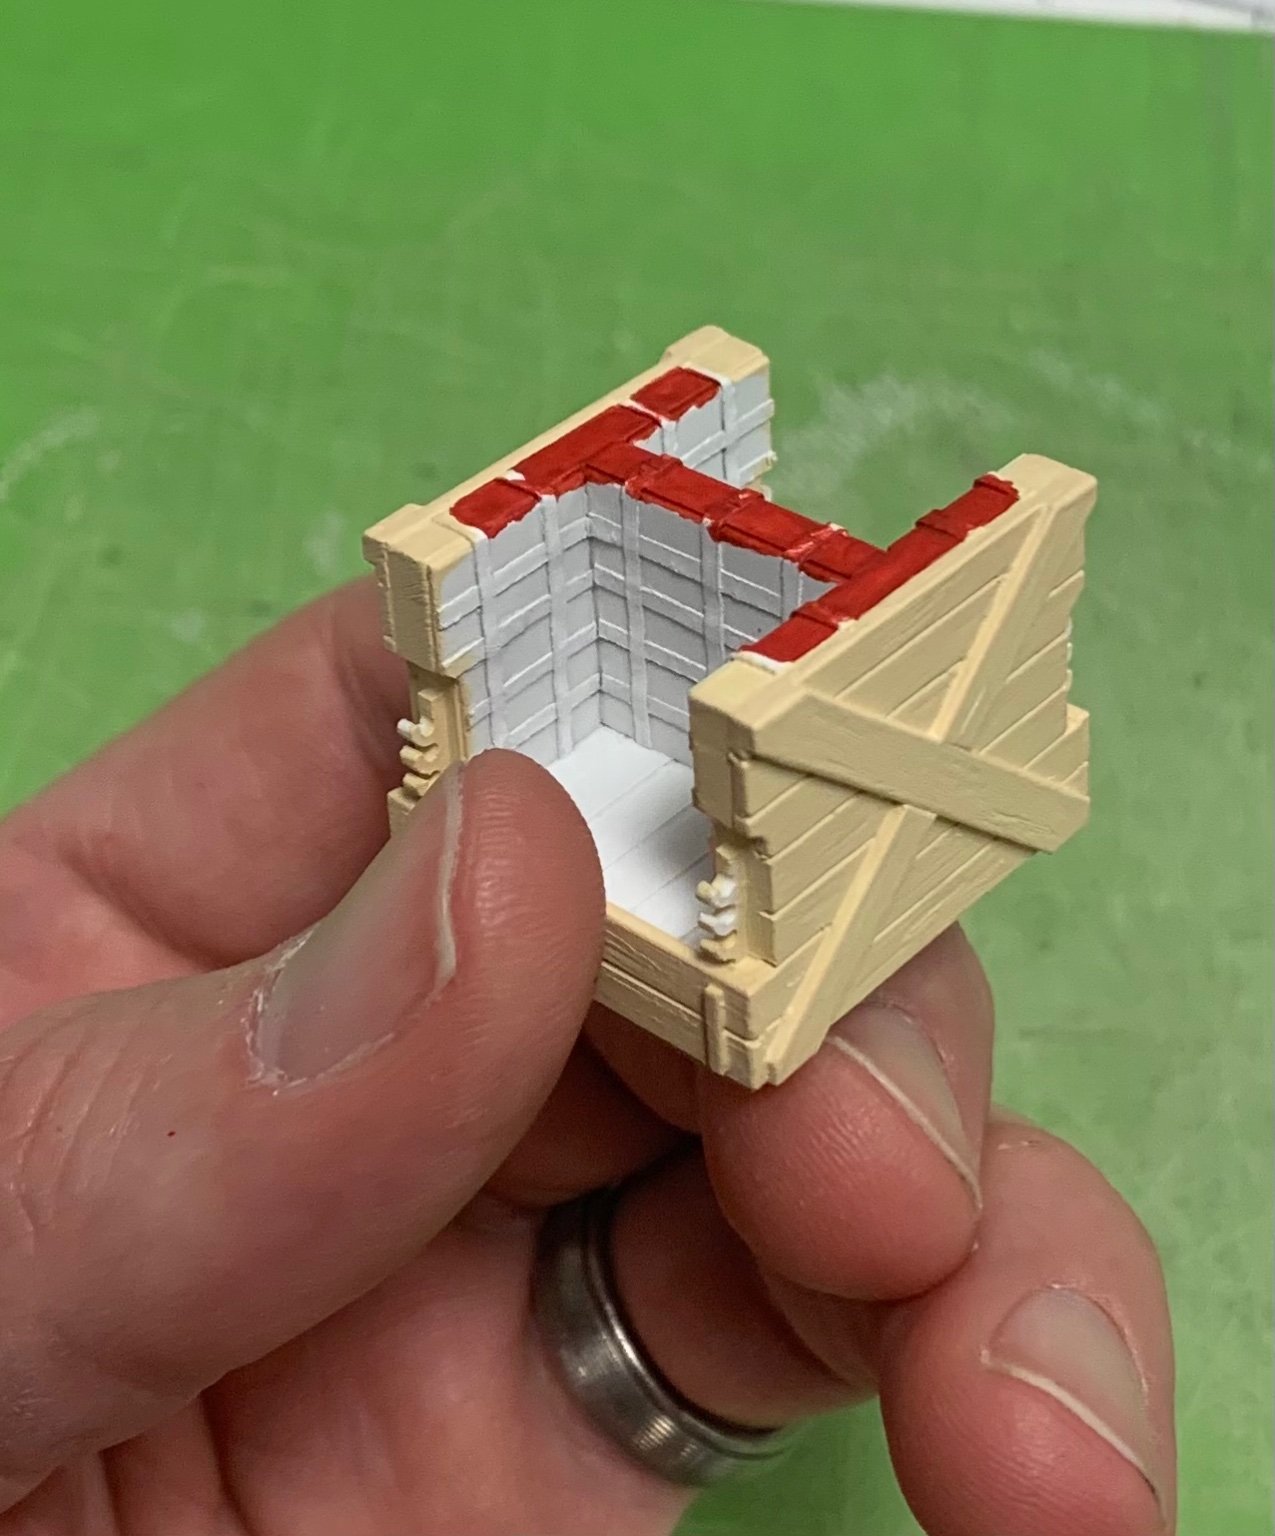
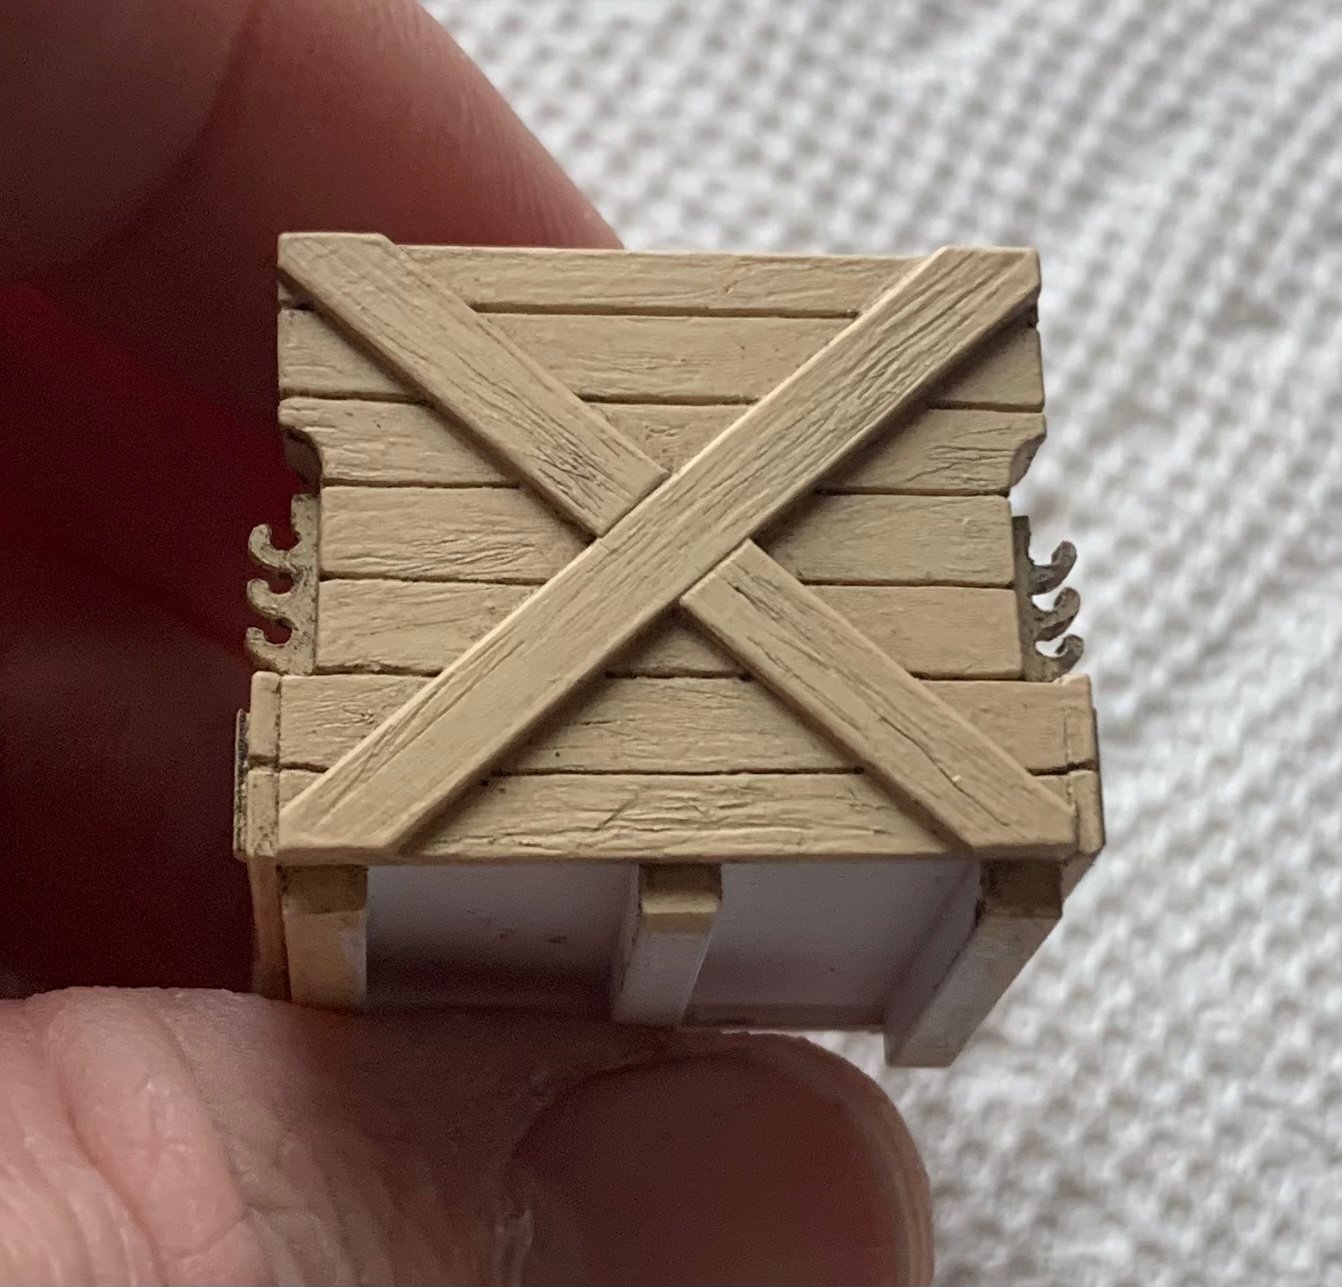
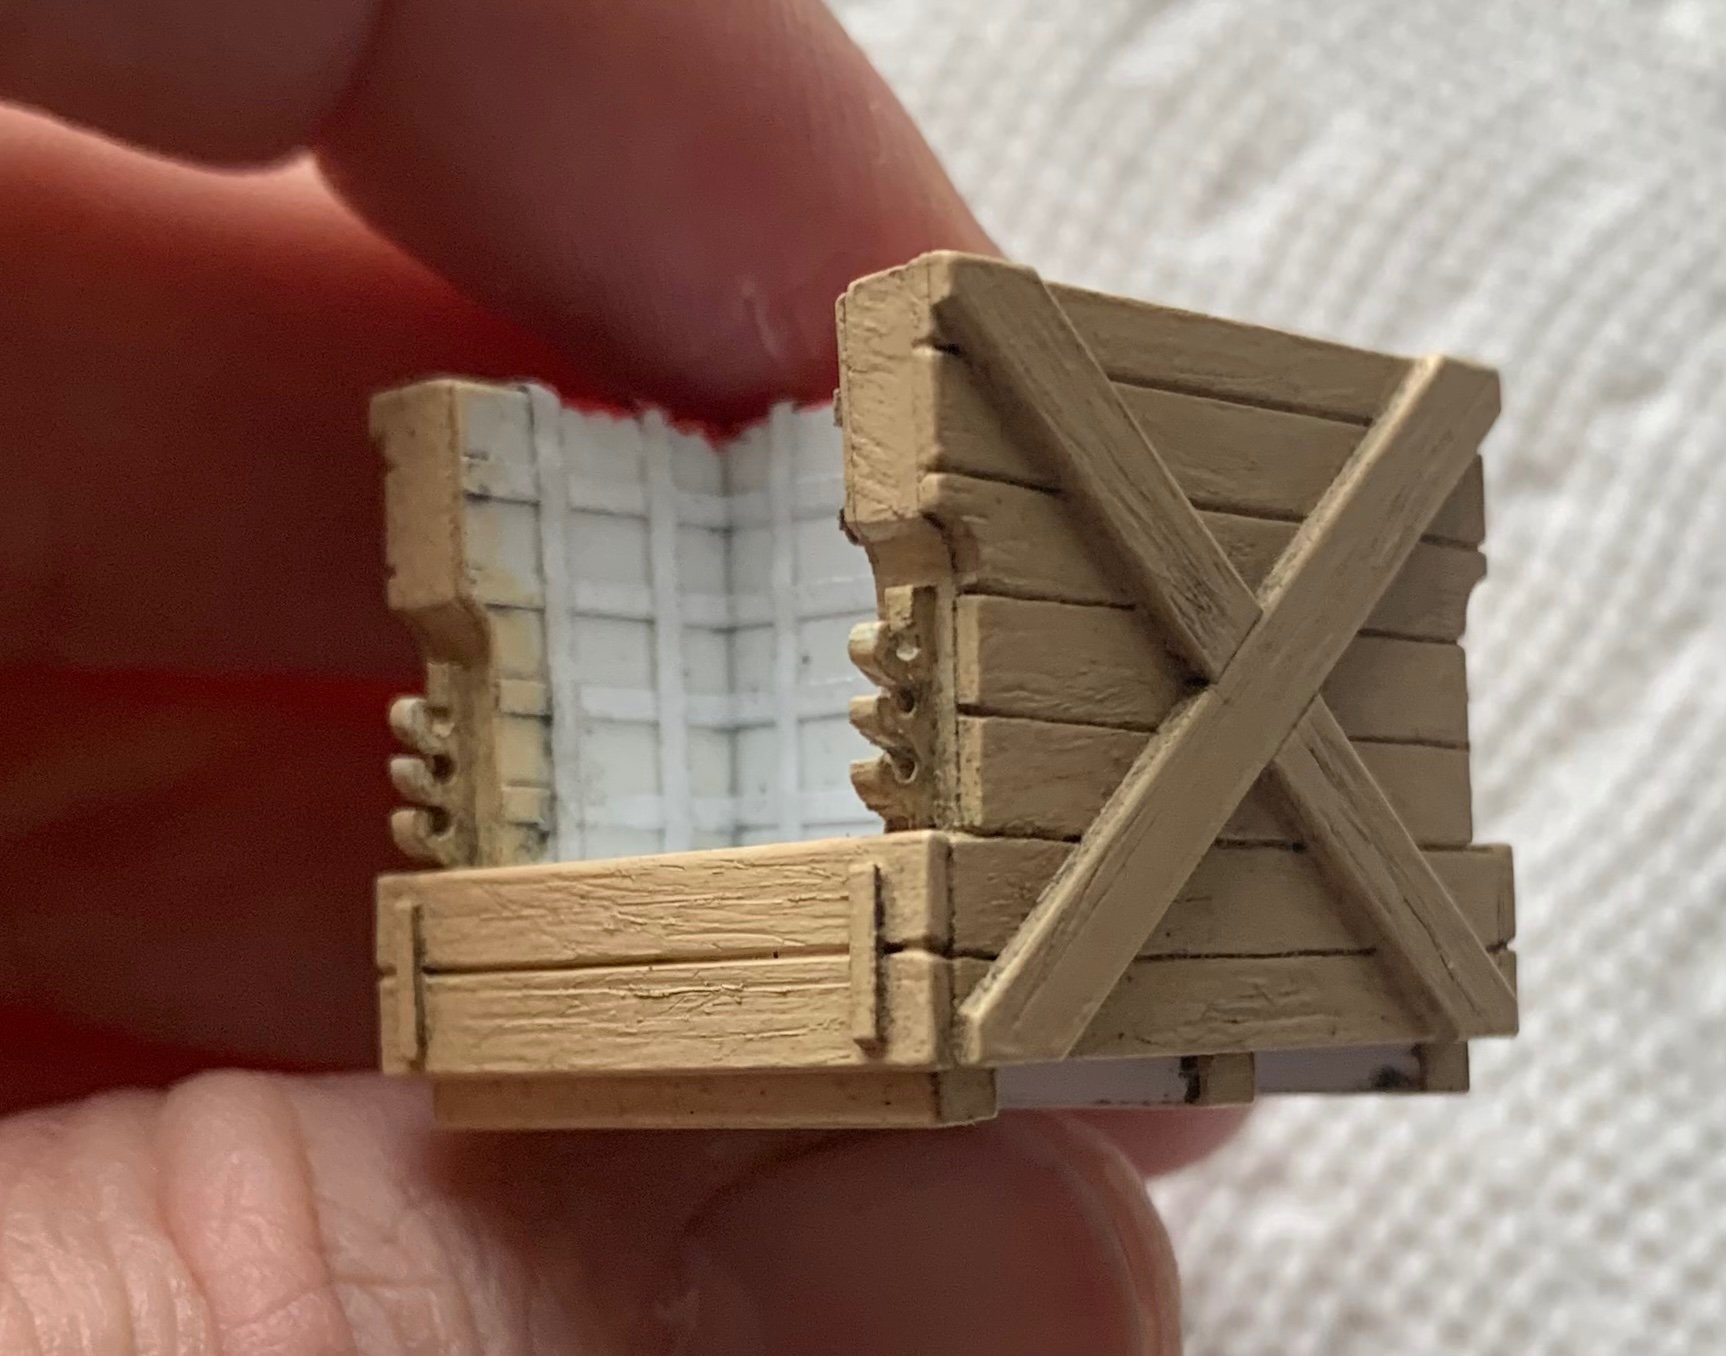
Naturally, work on the ship is fairly meager, but I did get the deck sheathing and stove painted, and I did manage to make-up and fit the forecastle beam that will be visible at the break of the forecastle deck. A montage that shows my paint processes, particularly for my natural “oak” finish:
For some reason, I can’t load the other two pics of the sheathing because of an “unknown server error”. Anyway, the process is pretty straightforward; flat black spray primer, followed by Citadel silver (allowing some black to peak through), finished with grey enamel wash. The enamel wash picks up all the nail heads and sheet seams nicely, while giving an oxidized metal finish. The white stripes are masks for where the stove glues down.
The stove begins with Modelmaster Random Tan as my base coat over white enamel primer:

Although it will never be seen, I chose to represent the brick work that is sandwiched between iron and wood.
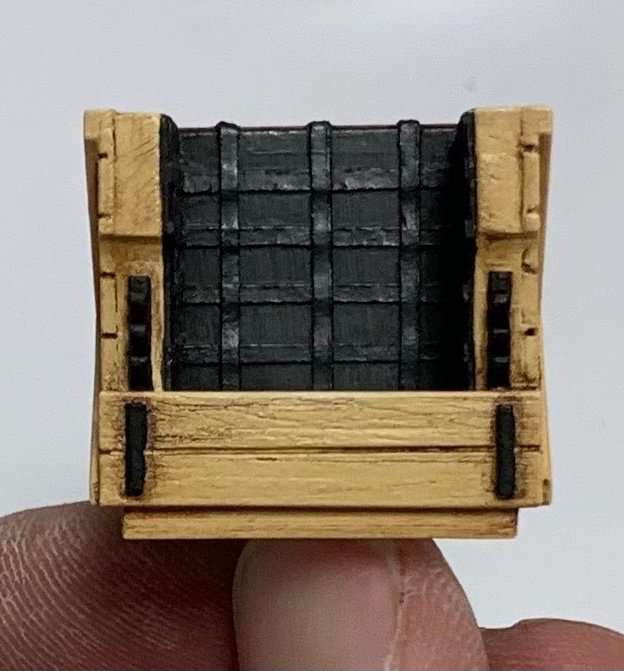
Next, I slather the whole thing in Windsor and Newton medium grey oil, and allow it to sit for five minutes, or so, before wiping most of it away. This paint gives the wood a pleasing silver-ish cast, like newly oxidizing oak, and it gets into all the plank seams and grain structure:


Next, after allowing it to cure for a few days, I do the same thing again with W&N Van Dyke Brown. This is what restores a sense of woody warmth to the surface, while enhancing texture and depth:
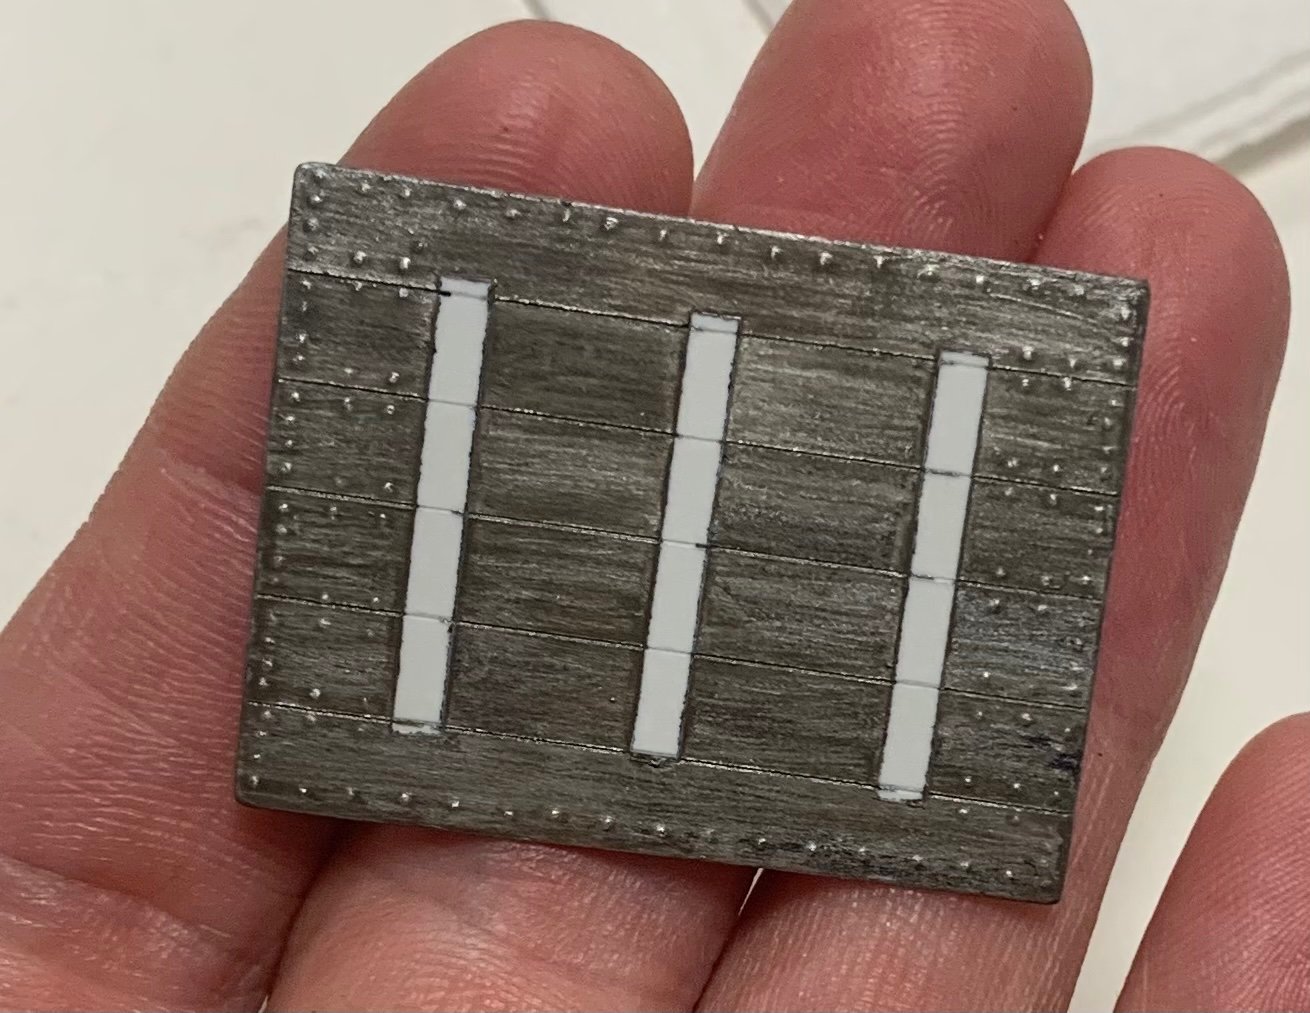
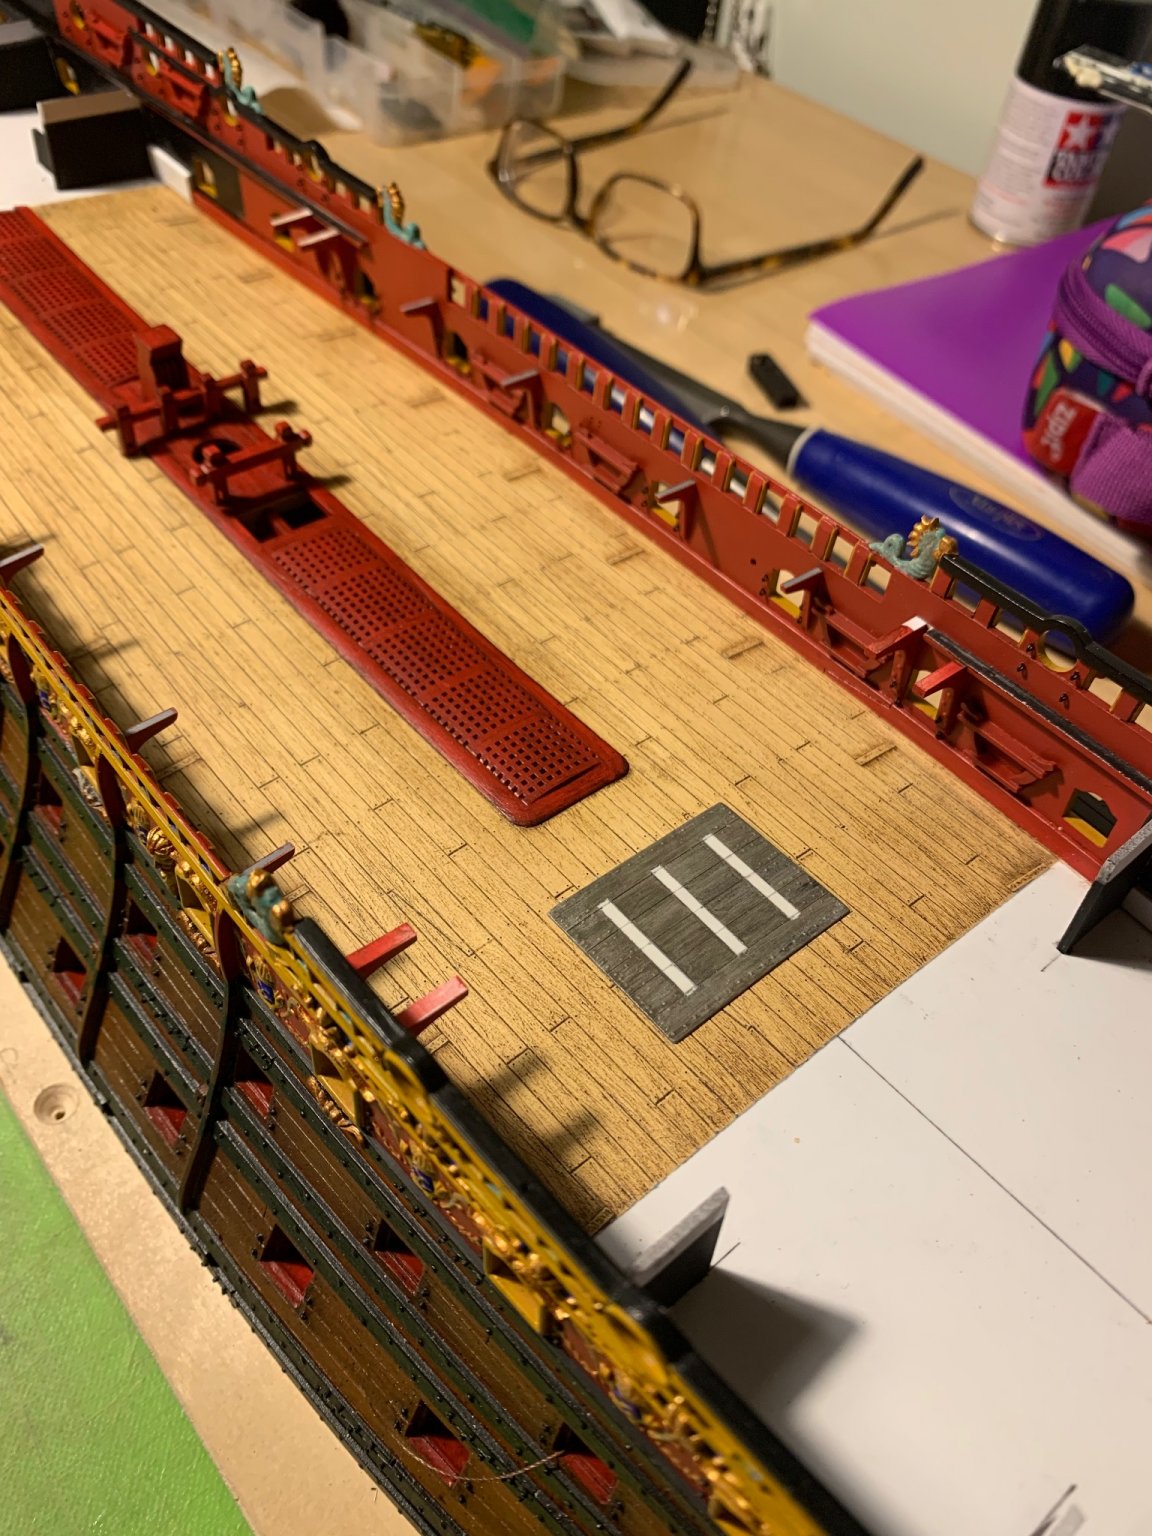
The plate mounted to the deck:
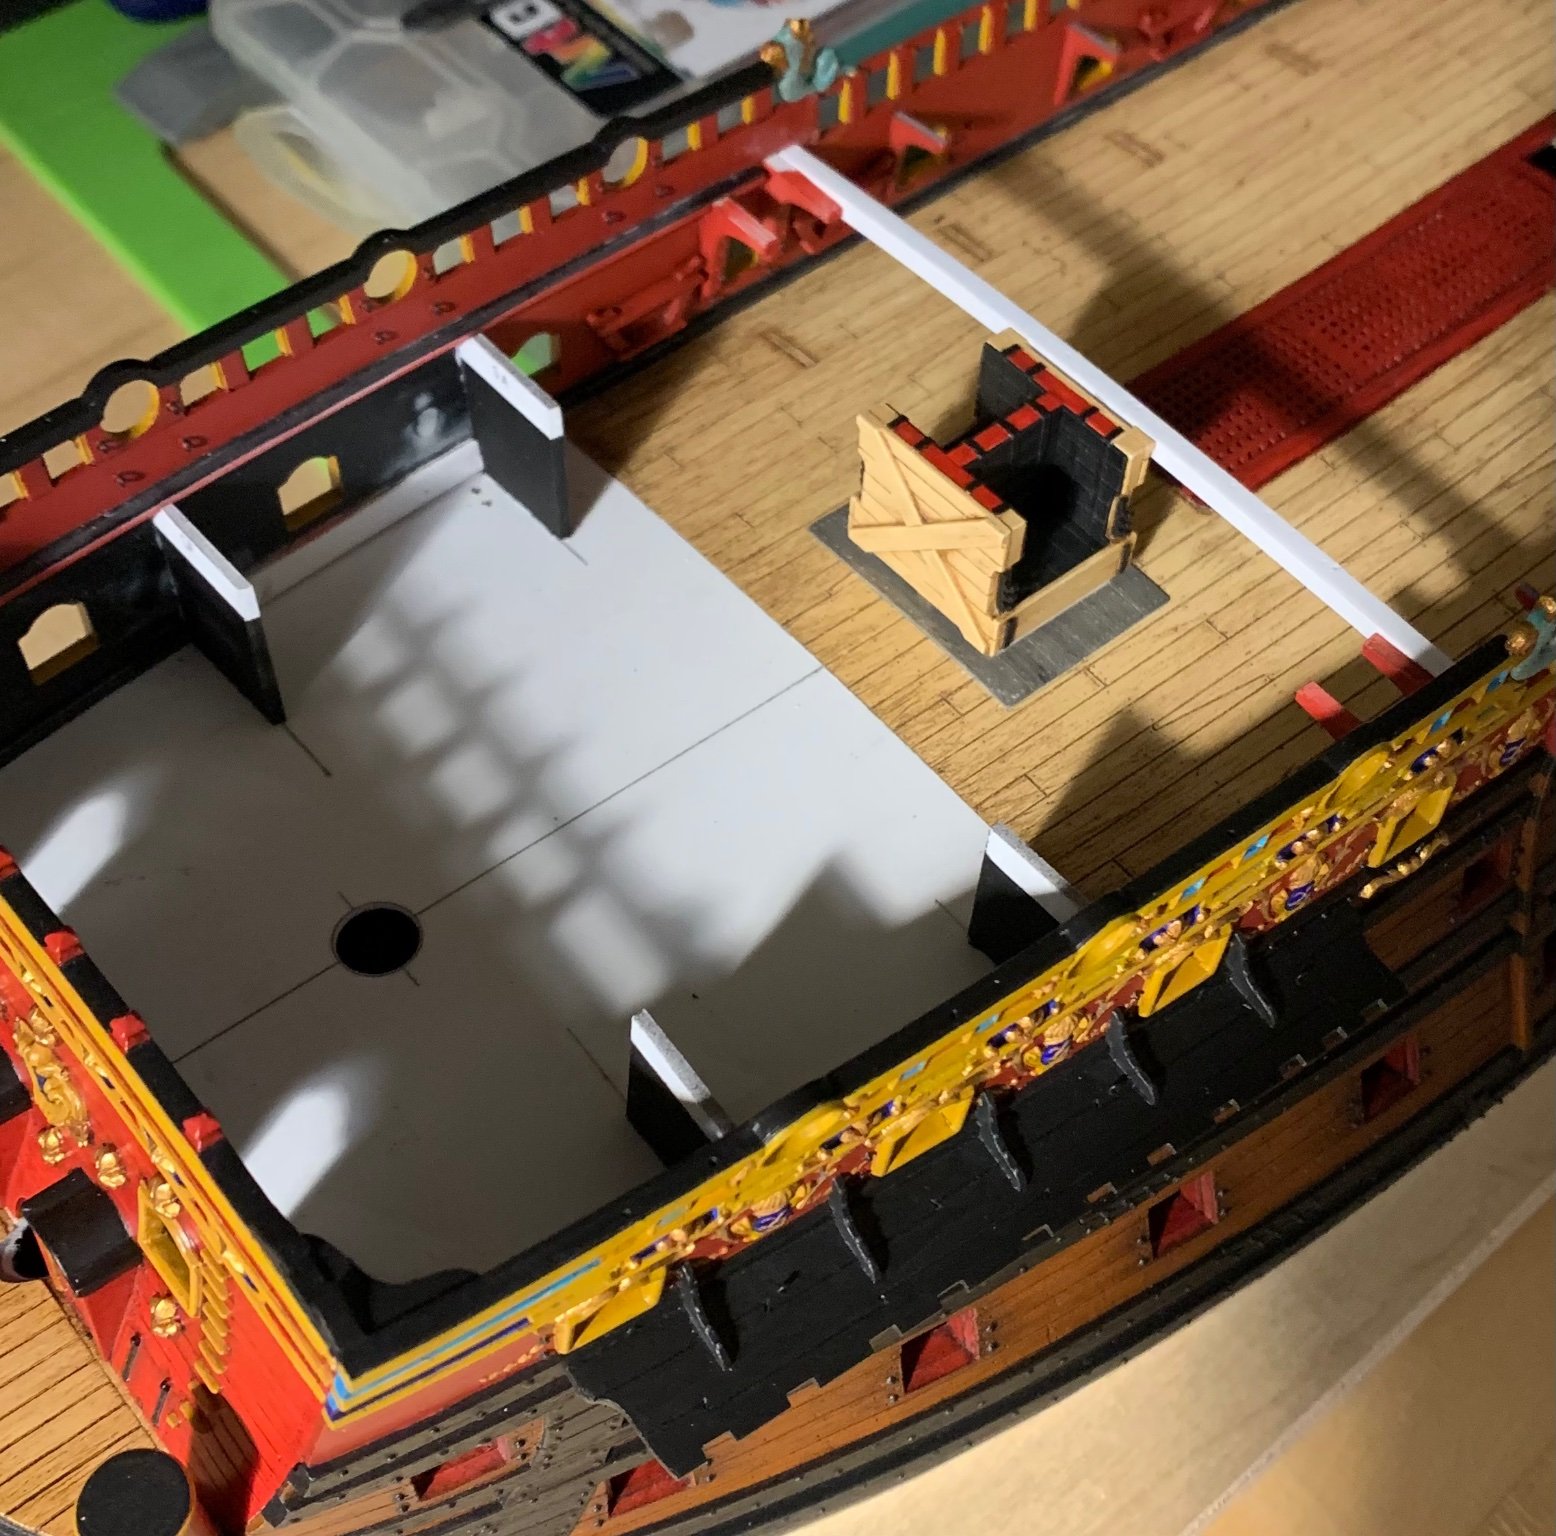
The iron blacked-in:
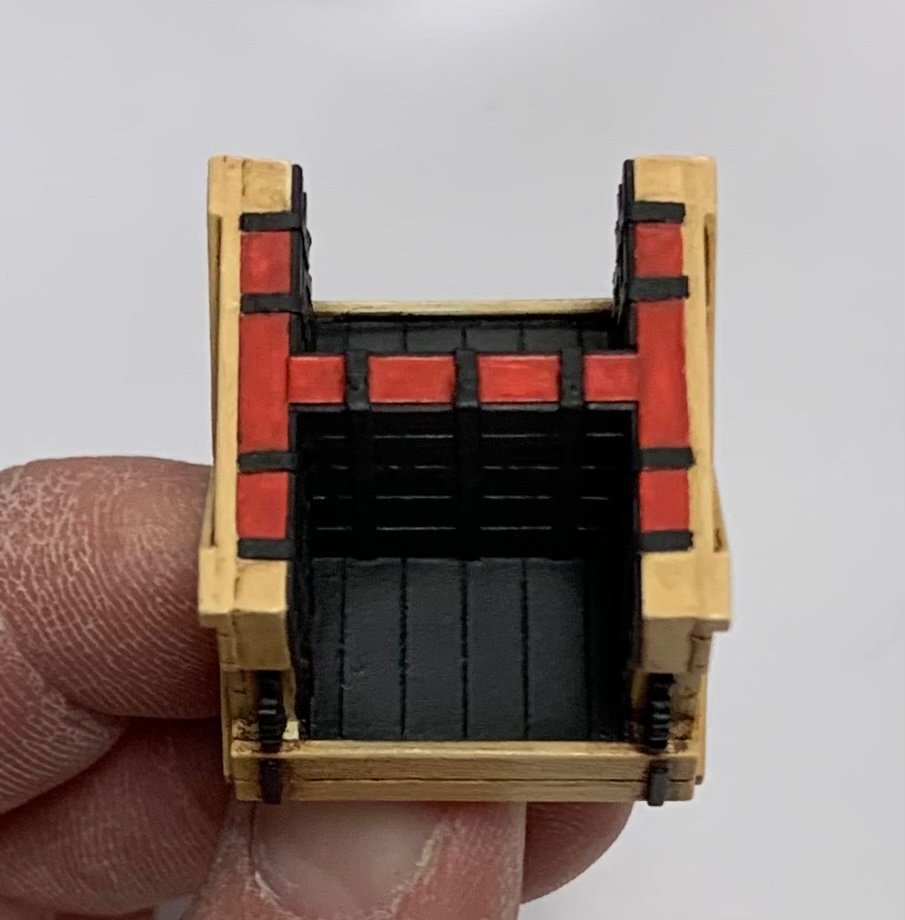
I decided to rub some powdered graphite over the black, so that the lattice would pop a little. Again, this will never be seen, but I wanted to play around with powder effects. It is subtle, but effective:

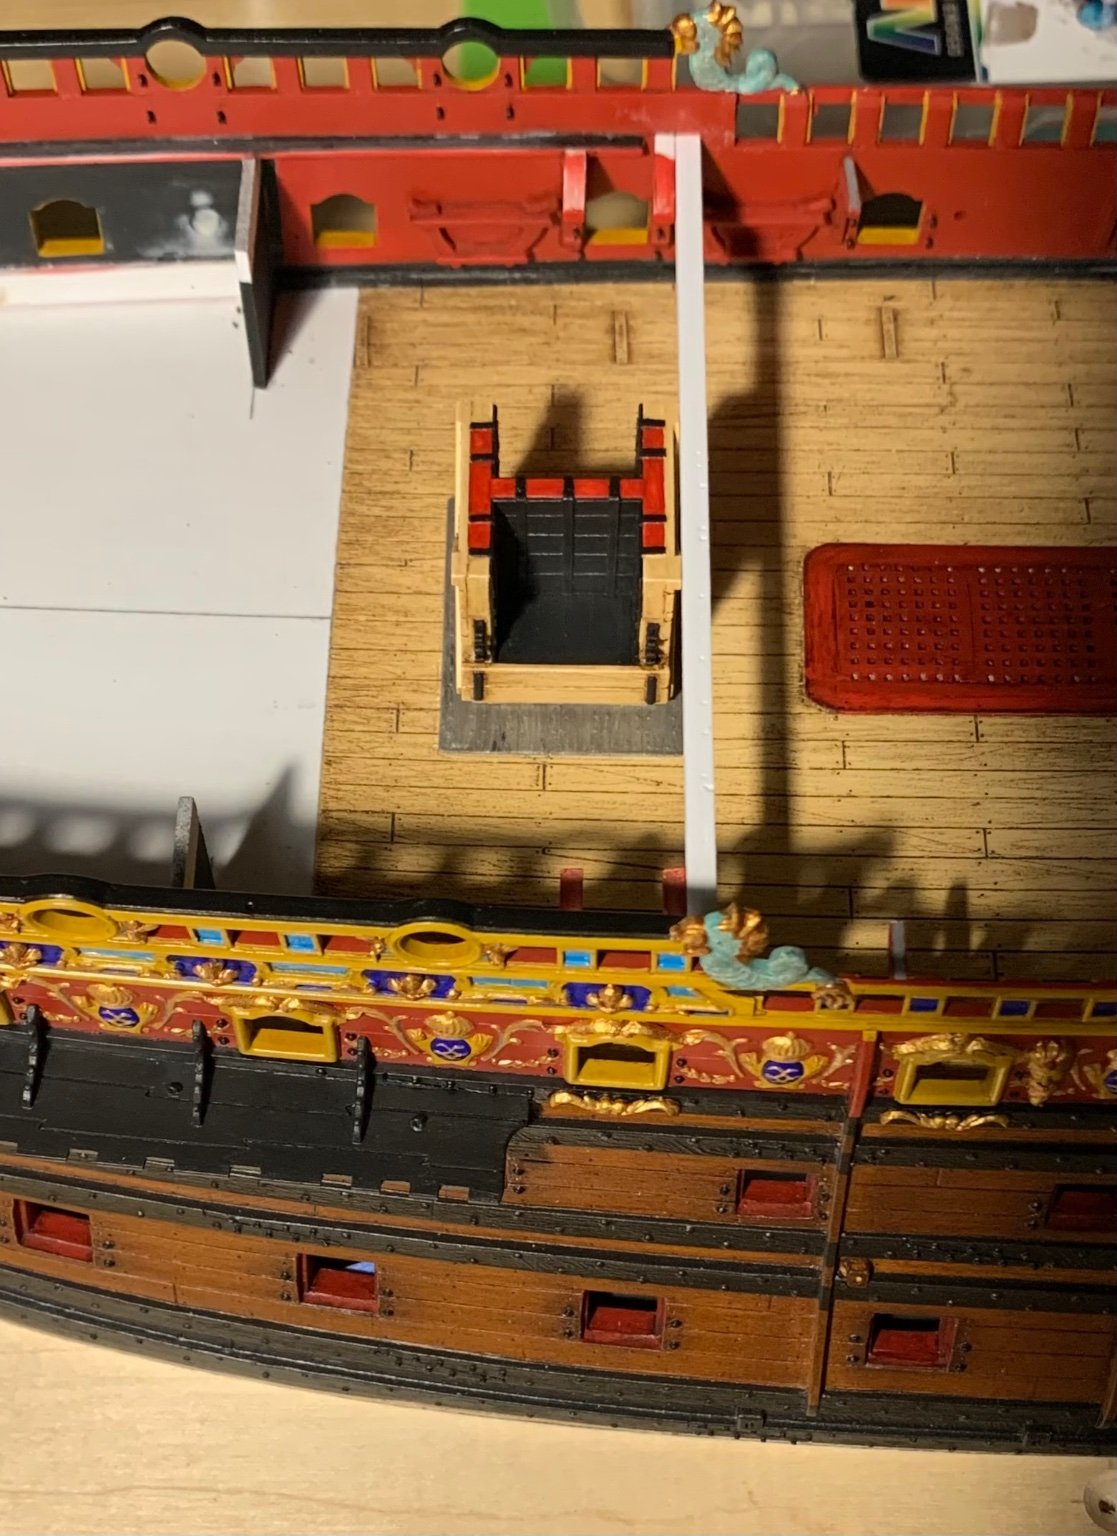
Lastly, the stove on-board:


The stove gives me a central glue connection for that beam, which will lend some rigidity to the whole deck structure.
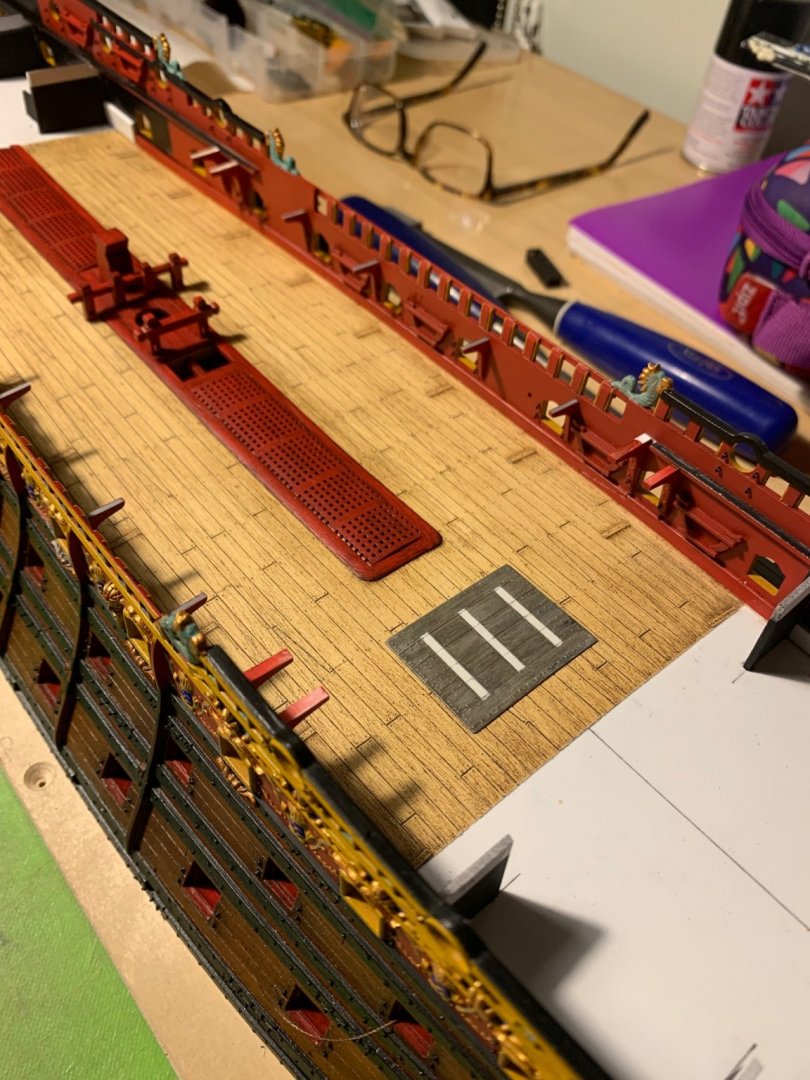
In other news, I have 2 of 3, aft bulwark gussets fitted and installed. All the prep work on the last bulwark is done, so I will resume painting soon.
I hope all are well, as the holiday approaches. Thank you all for stopping by. More to follow!
- md1400cs, GrandpaPhil, popeye2sea and 16 others
-
19
-
The only issue I can anticipate with your proposal for mapping the quarter gallery join is that - at least as far as the Heller SR is concerned - the hull wall thickness does not seem very consistent from one side to the other, nor from one level to the next. The Vic, though, is all around a better kit and less plagued by fit issues. It’s been a while since I fiddled about with my un-built Vic, but I remember thinking that the hull pressings were somewhat thinner-walled and that the quality of the moulds was very high. i know you will figure if out.

Soleil Royal by Hubac's Historian - Heller - An Extensive Modification and Partial Scratch-Build
in - Kit build logs for subjects built from 1501 - 1750
Posted
Thank you, Eric! Yes, that does seem to work whenever that server error pops up.
This is just an alive’n kickin’ post to say that work has continued, albeit at a meager pace. I am starting, though, to regain some of my former momentum.
I made the starboard channels, and I have all of the ground colors painted for the starboard, aft bulwark. I won’t bother posting pictures of those items until they are installed on the model, as it is nothing new to see.
Last night, I made and installed the lam-beams for the forecastle deck:
Tonight, I can sand them fair and then make a cardboard pattern for the forecastle deck.
More to follow. Try not to let COVID overwhelm your thoughts and emotions - despite the grind we are living through now, life won’t always be like this.
All the best,
Marc