Captain Slog
-
Posts
904 -
Joined
Content Type
Profiles
Forums
Gallery
Events
Everything posted by Captain Slog
-
 Hi Clare, Your Alert is outstanding! I enjoy doing the small fiddly components best but I know what you mean about fingers and cutting small parts. A few weeks ago I spent 4 hrs cutting out little curves. I made a sheet brass template but needed to press hard down to prevent it sliding on the paper. Once I was finished 2 of my finger tips were numb with pressing hard...3 weeks later and the very tip of one finger is still numb but apparently can be 2 to 3 months before it returns to normal. I have been working on a card vehicle and I can comfortably work with 0.8mm laser cut card nut heads. It calls for even smaller and have 0.6mm but its impossible for me to works with these...just looks like specs of dust but under magnification they are indeed hexagonal. Anyway great work and hope you do progress with it. Cheers Slog
 -
Hi Snoepert, Looks like you are off to a great start, well done. As for the deck I personally wouldn't stain it as the decks are usually light anyway. I just used a matt varnish which didn't change the deck colour at all. You are the captain of your ship so should go with what pleases you. Cheers Slog
-
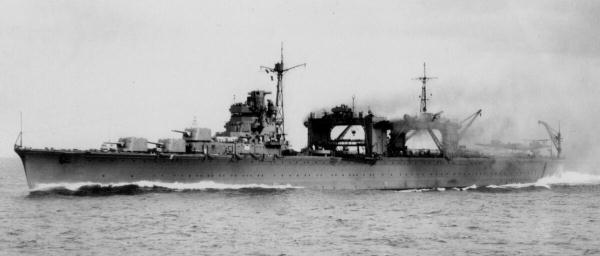
Hi, Lextin got it, it's the Fuso. Slog
-
That's the worst thing about guessing correctly, trying to find something to respond with! Okay here is my submission. Cheers Slog

-
Thanks to Davids and Menno's pointers is it, Willem Barentsz Cheers Slog
-
Hi Burnside, This looks an interesting kit and a change from all the warships. Can you list the scale as can't make it out on the box. Cheers Slog
-
Your welcome. Indeed, I will never live long enough to build all the stuff I want to! Yeah after seeing Clare's Alert I wondered about trying a sailing ship also LOL but I think you have to colour everything yourself with the Shipyard kits which I think is beyond my ability. By the way is your photo the USS Lafayetta (not sure if USS is a correct term for this though)? Cheers Slog
-
Hi Ken, I see in your signature you have a card model (Alert) in your to do list perhaps you can try your hand at the card version of Nisshin. http://sklep.gpm.pl/en/modelcard/ships/1/200/nisshin I found the link to the build of this model. It’s a German site but if you use google chrome it will translate it automatically to at least an understandable translation. I am not familiar with Answer-Angraf kits but the quality looks to be up there with the other publishers. http://www.konradus.com/forum/read.php?f=1&i=181472&t=181472&filtr=0&page=1 Cheers Slog
-
Well that lasted all of 38 minutes LOL Ken, you are correct it is the seaplane tender Nisshin From a modelling point of view the different structures on the deck make it quite appealing to me. I have only come across one build log on a different site so don't know much about the kit. Cheers Slog
-
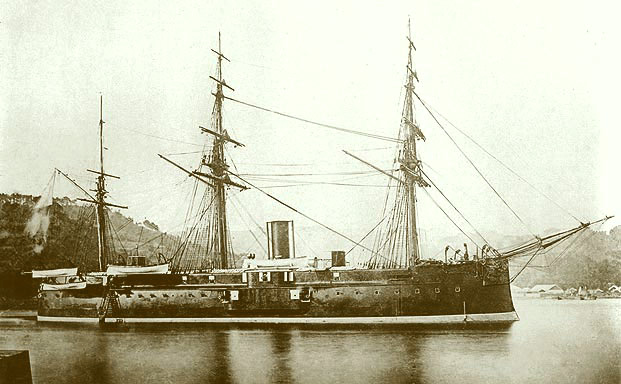
Okay its been a while since I played but here goes. I came across this one as it is available as a 1:200 scale card model. If I ever manage to work through my bucket list I think this one may be added to it as it is such an interesting looking ship. Cheers Slog
-
Is it the; Anglo Saxon Cheers Slog
-
Glad to hear you will be colouring your shrouds black. Looking very neat indeed and also notice you have served the leading shroud against wear from the sails, nice touch. Cheers Slog
-
Zip Ties - Yes or No for seizings
Captain Slog replied to homer's topic in Masting, rigging and sails
I am thinking it is heat shrink tubing rather than zip ties. Cheers Slog -
Hi Steve, Having the ports open really adds dimension to the build, nice touch. Slog
-
That's the way I did mine also. Your Endeavour is progressing nicely Ron. Slog
-
Hi Steve, Your window deadlights look very good. What colour did you paint the outsides of them? Cheers Slog
-
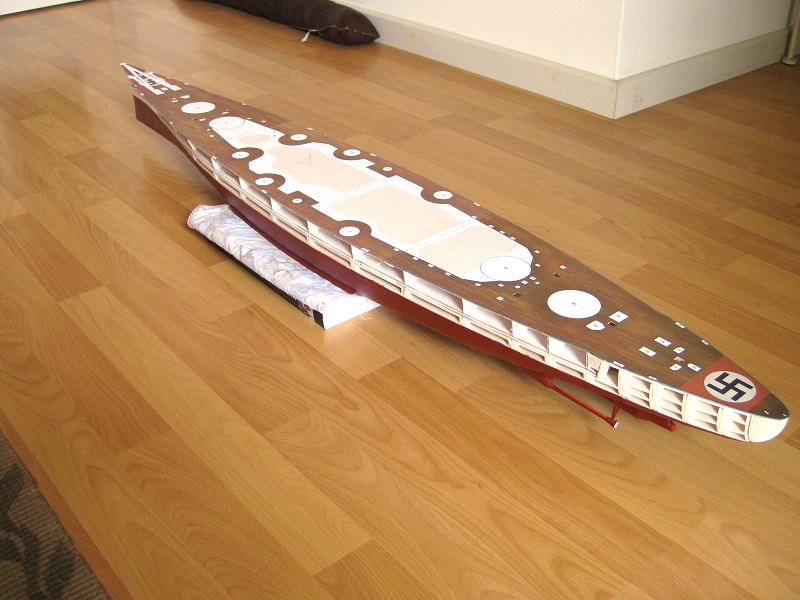
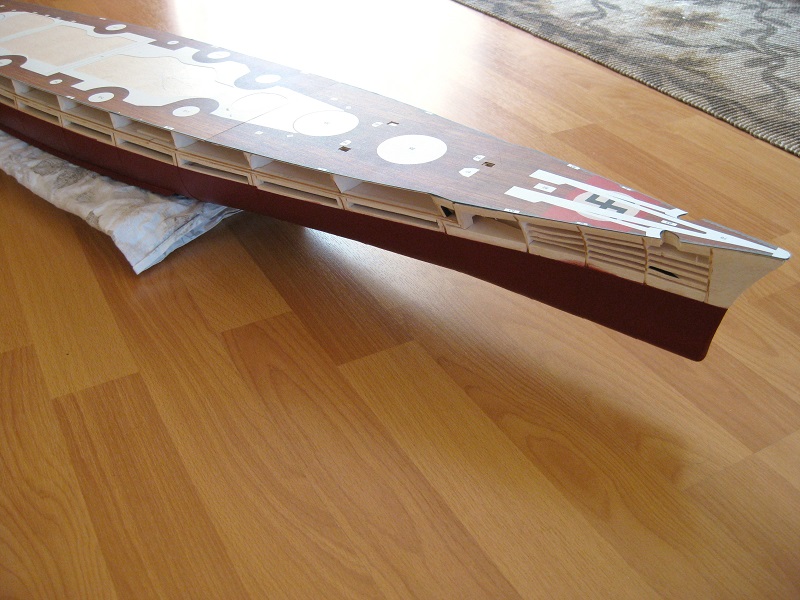
Thanks to everyone for the likes, comments and support, it really helps to get over the tough bits. Now if it would only look good from this side of the room Joking, I am moving on with it now or I would never get anything done or finished. Okay major milestone for me. Deck is finally on. As usual a few lessons learned for next time. One thing which stands out is the printed colours are all slightly different across the 3 different parts of the deck. I can’t do anything about that so moving on without further ado. Cheers Slog


-
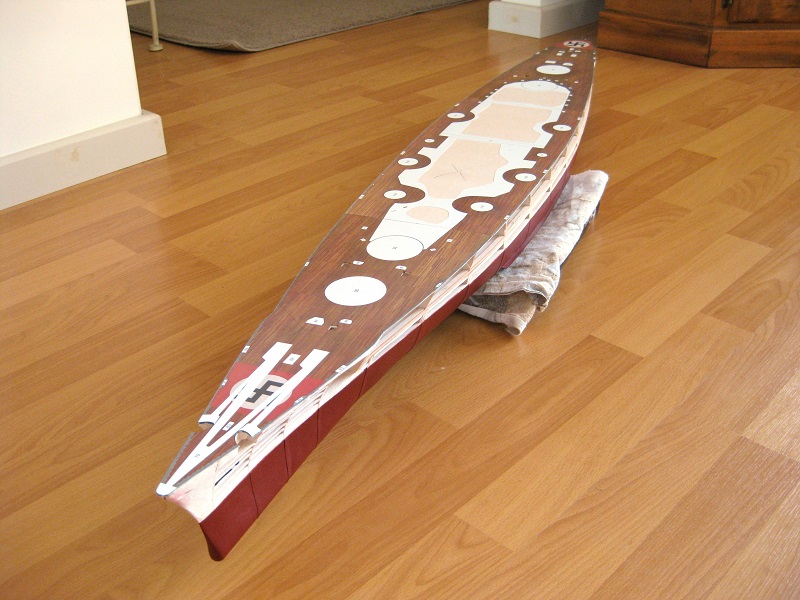
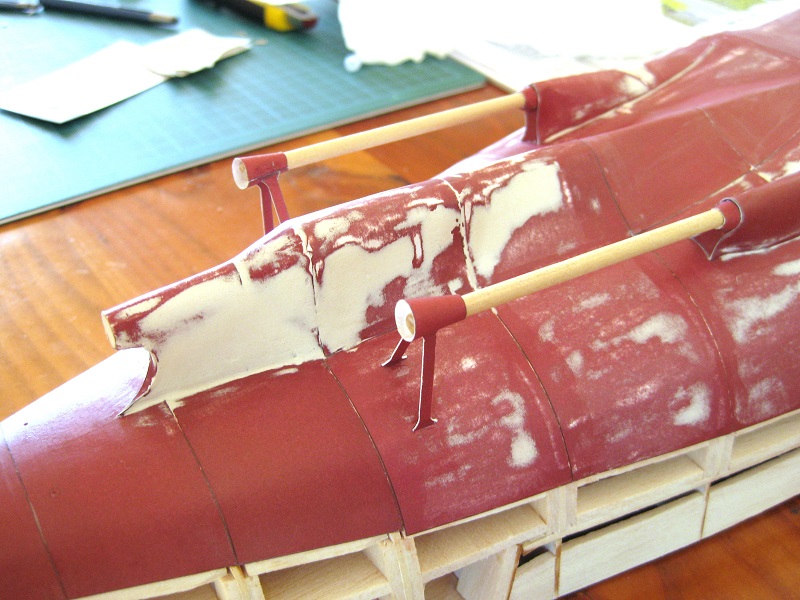
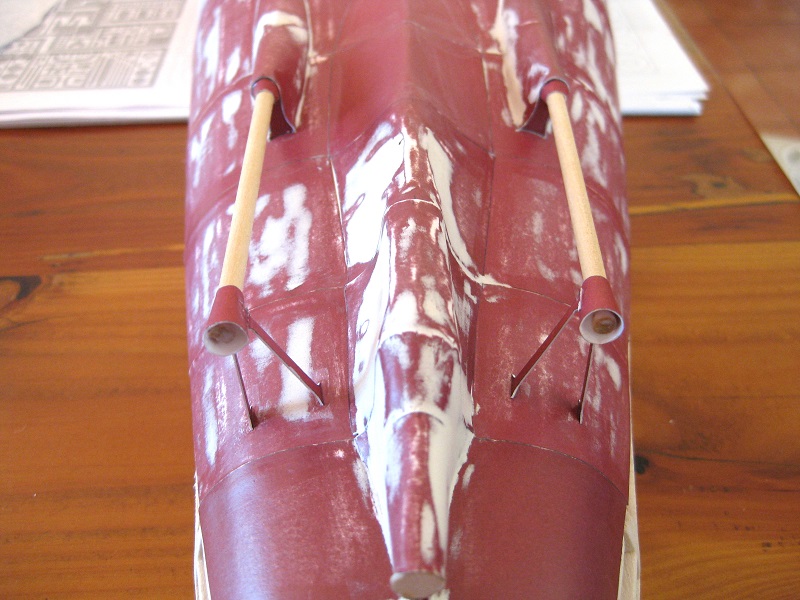
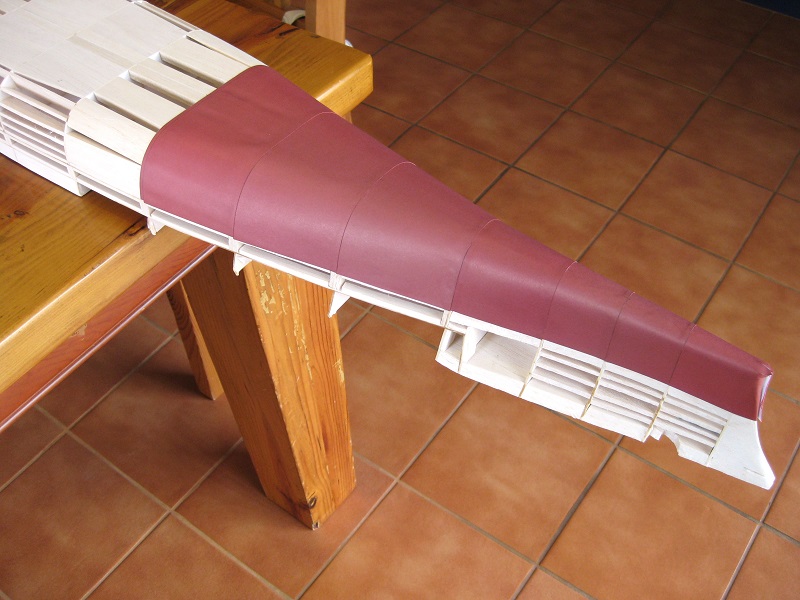
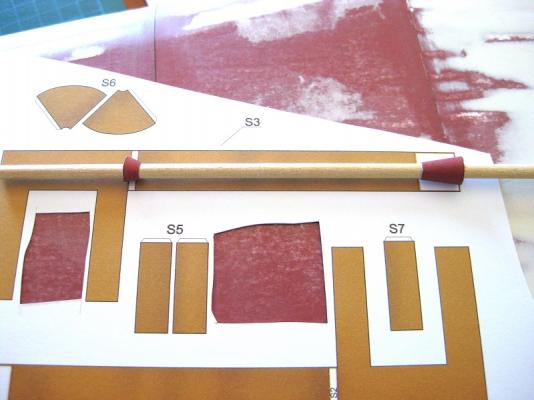
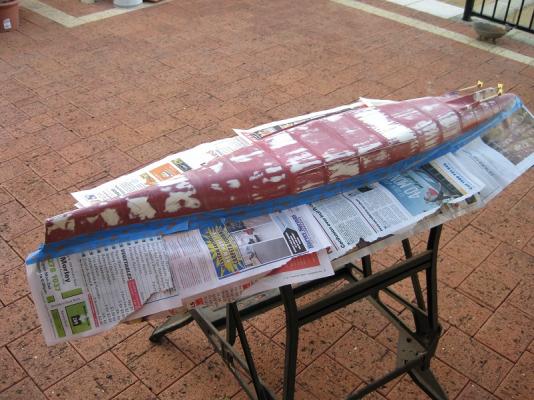
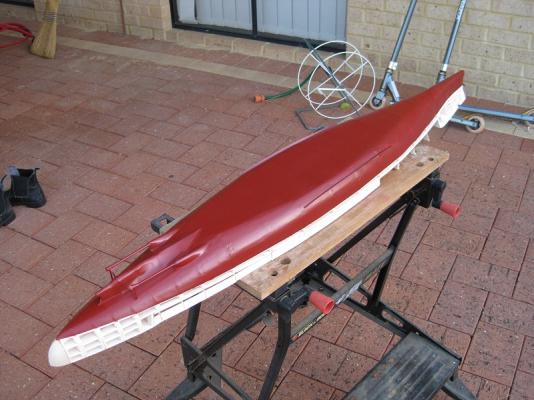
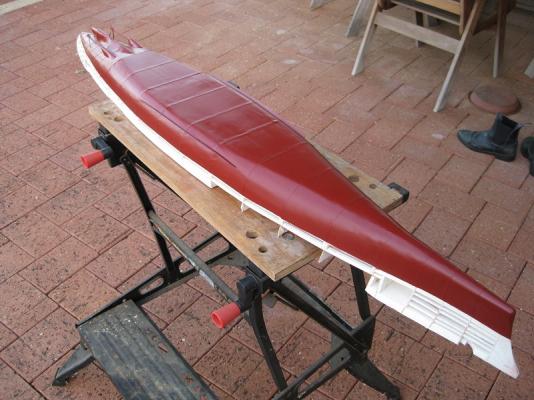
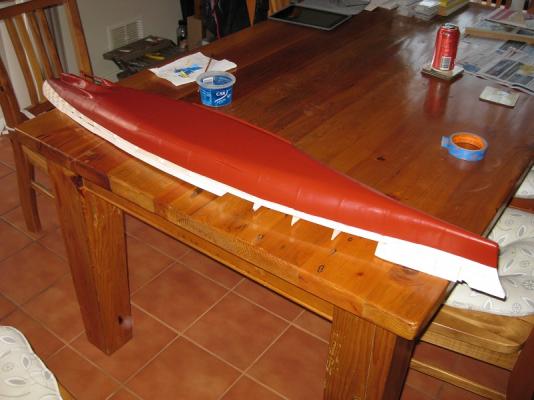
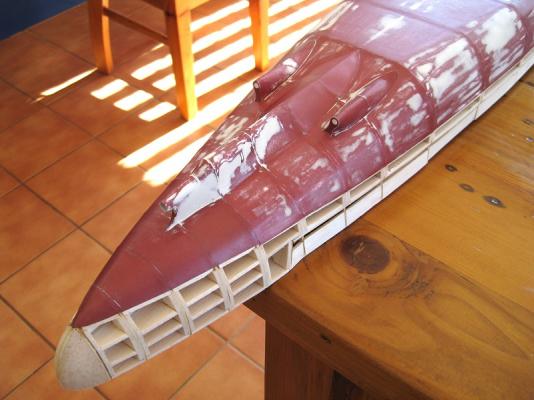
Thanks to everyone for the likes and Sam and Brian for the input and advice. Will try the ‘spot putty’ next time I need it. Yeah should definitely seal the paper first, although my concern was the jointing compound wouldn’t stick to the varnished paper well but this was unfounded. Working on the outer propeller shafts. There are a couple of cones to form for each end of the prop housing. When these are formed the smaller holes are 4mm for the prop shafts. Rather than try and roll the paper shafts (long yellow strips in the photo, part S3) I used some 4mm dowel from the Endeavour kit. The cones slipped over the dowel pretty good. The support struts were a bit of a head scratch as the diagrams only show an isometric drawing with no other advice about orientation. The parts themselves have slightly different ends and are 2 sizes, an outer and inner which I used google translator to determine which is which. A look at the AOTS shows the struts lean forward and the outer strut is vertical looking from the rear so that is what I went with. There are lines on the hull for placement of the struts but nothing on the cone housing so tried to line them up for a best fit as per the AOTS. I wouldn’t say they were a mirror image but hopefully won’t be noticeable right way up and close to the base board. Okay all masked up and ready to spray The Tamiya spray cans are pretty small at 100ml and quickly went through 1 and half cans giving lots of light coats. The white patches of filler took a lot to disappear compared to the red paper as expected. The photos below were taken right after spraying as the light was going and doesn’t look to bad as still wet. Thoughts? Well to be honest as it dies out it is still pretty rough in areas and once its fully dried and matted out it will only be rougher. I am going to just live with it and move on. I could keep going on and on with it but truth be told getting sick to death of working on the hull. I really need to get on to some other parts of it to keep my interest going and do some modelling again instead of body shop work. I think a paper hull looks a millions time better if done well and left alone instead of painting and a bit of care away back would have been more acceptable even if a bit bent and buckled. But at the end of the day its my first paper ship hull and ready for more. Cheers Slog


-
Hi David, Sorry to hear about your health and model issues. Hope you are both up and running again soon. Slog
-
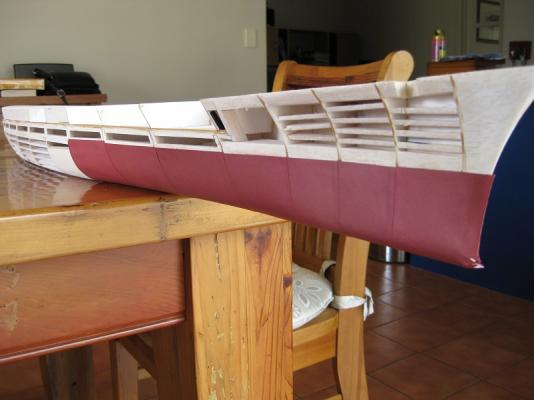
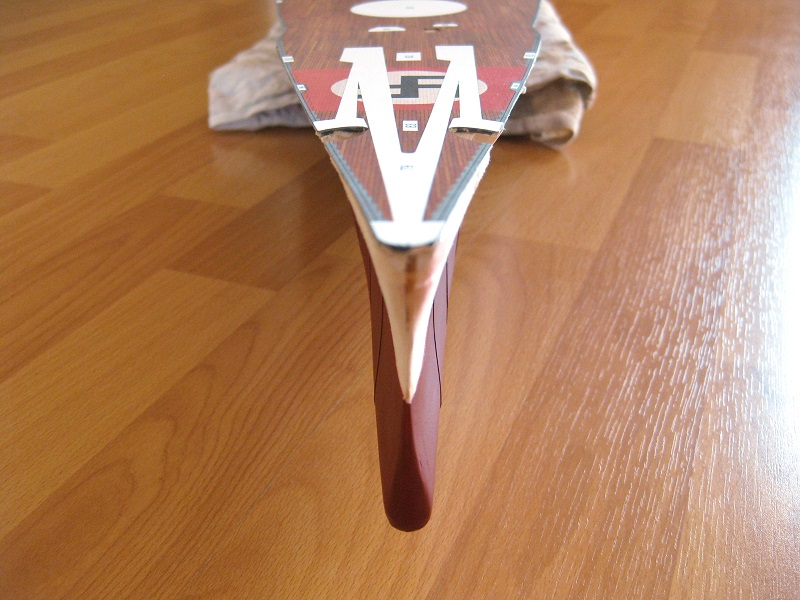
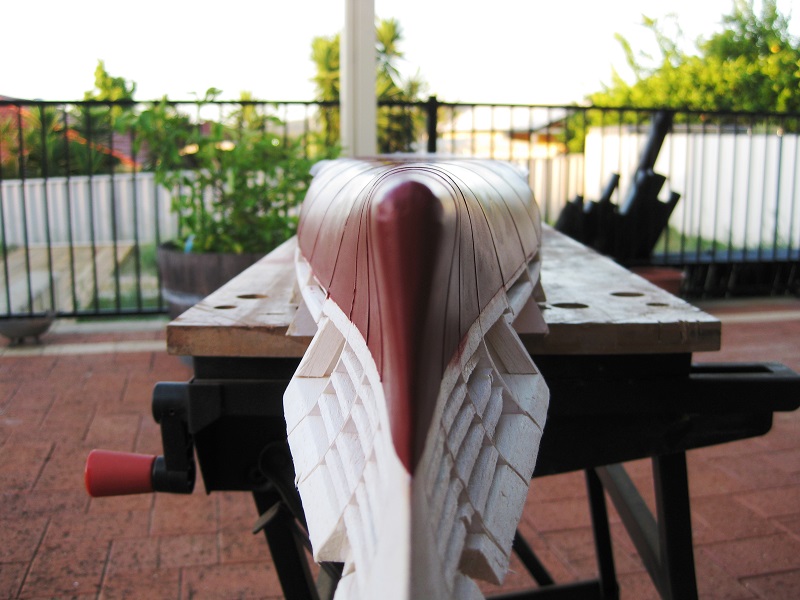
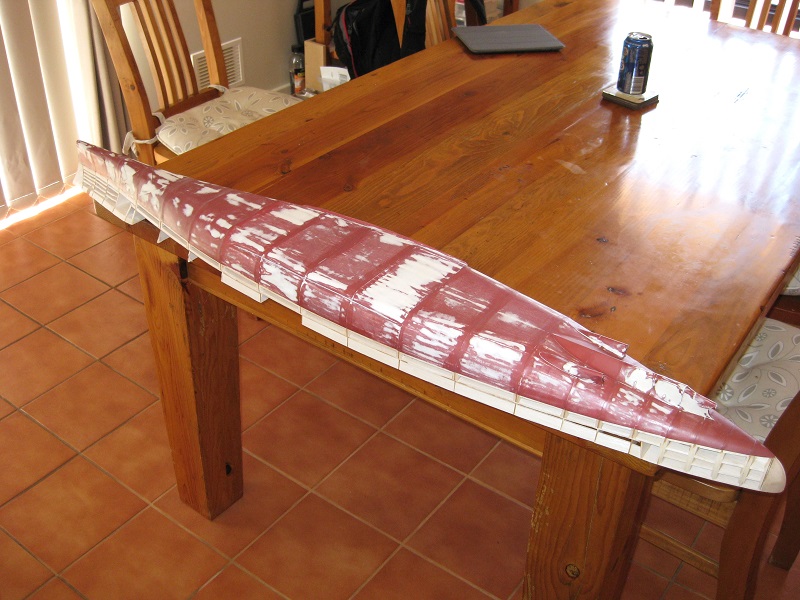
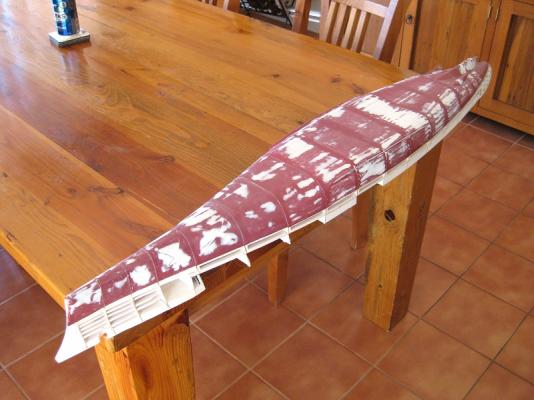
Hi Grant, I knew someone would say that but it really did have issues. LOL Hi Sam, I think you may be correct. I will have to see what I can do in the future. Hi Brian, I will have by the time I finish it. Okay it’s been awhile since my last post as time has been tight and when I did have time just didn’t want to touch it. Firstly a couple of realisations; I really liked the lower hull colour and feel of the paper skins. They had a richness about them (as can be seen in the post above) so disappointed that I will have to paint them. I mentioned previously how I didn’t like the double thickness of the overlapping skins. Actually once they were edge coloured and on I didn’t mind them at all. In an ideal world I would have been very happy to skin up the hull as the kit required, oh well hopefully next one turns out better. I decided to use some plasterboard tape joint compound instead of auto-body filler. Reasoning being it is made for gripping to the paper surface of plasterboard and can be sanded to a nice feathered edge. I was worried auto-body filler would dry to a hard tough finish which would be difficult to sand down without going through the surrounding paper. One problem with the tape jointing compound is it must have a high moisture content which doesn’t matter on rigid plaster board but did make some of the skins not supported underneath buckle up a bit but seemed to dry out okay. I believe there is a very fine body filler for scratches called stopping or butter so will try that in future. Once it was all dried and sanded, I went over and brushed on a coat of Caldercrafts Admiralty Flat Matt Varnish to seal the paper surface for spraying. Photos below show the extent of filling. Even after a second skim coat there was still a few little bits could be improved on but will get some paint on it first to see how it looks and will fill again if really needed. The centre prop housing gave me heaps of problems as it wasn’t clear (to me anyway) how it was supposed to be folded and glued so needed a fair bit of filler to build up the shape. I have already bought a couple of spray cans of Tamiya’s TS33 Dull Red that I have seen used on another web site so once I finish the prop supports will give that a go. Cheers Slog

- 107 replies
-
- 11
-

-
Hi Herbie, thanks for the kind words. I haven't done anymore work on my Endeavour since my last post. I have packed it away until I have more space which hopefully will be next April when we move to our new place. There are a lot of other great Endeavour builds to follow to give you inspiration. I look forward to following your build log when you get it started. Cheers Slog
-
Hi Clare, Glad to see you decided to start a build log of your Alert. Looking forward to more.. I was going to write a spiel on what I have found about cutting out small delicate or slender parts but see you are finding your way also. I plan my sequence of cuts trying to always cut against a good bit of waste and the element being cut is supported on the other side by more waste or the part itself. Cutting out holes first was also an answer I arrived at pretty quickly . For small edges and holes, particularly if you have hundreds (like the spaces in tank track links I grind down old No.11, 16 & 17 knife blades to the correct width and sharpen like chisels with a Dremel and use them vertically to chop down. Gives good clean sharp edges and corners and reduces tearing and dragging you might get doing a regular 'pulling' cut with a blade on tiny elements. For my tracks I was doing I had 4 knife handles each with a different width 'chisel' and chopped out 800+ holes a lot quicker and neater than trying to do each hole in turn with a normal No.11. Also used them to cut off the staggered edges as well using 2 different sizes per side. I keep them in a box and go through them to see if they are a fit when doing other stuff as well. Cheers Slog
-
IJN Fuso (Halinski) Card Model Review by Captain Slog
Captain Slog replied to Captain Slog's topic in Card and Paper Models
Hi Jan, It was martaneks build log that introduced me to the marvels of card ships and the Fuso in particularly. He has a 5 ship build log going on over at the papermodellers website but hasn't updated it in quite a while. Slog -
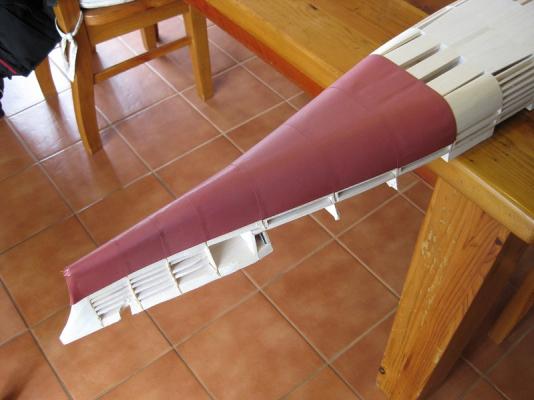
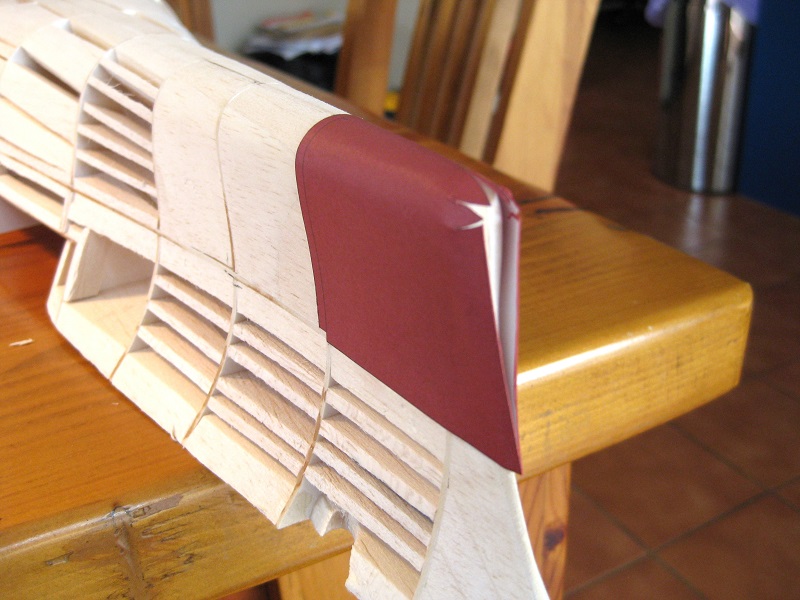
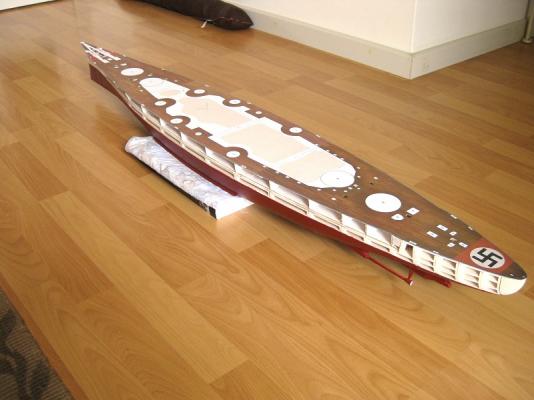
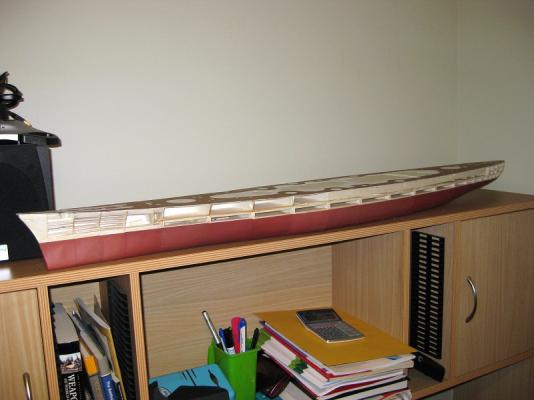
Hi Clare, thanks for kind comments. I have been following your Alert and its coming along nicely. Very clean, the printed deck also looks great. Personally I think the Bismarck deck is too dark compared to other ships. I think card models lend themselves to steel ships very well. Hi Grant, plenty of swearing, followed by gnashing of teeth, wailing and weeping and finally slumped down dejectedly. To add insult to injury, I dropped the 3 piece decks and put a couple of dents in one of them . Although not to bad and won't really be noticable once all the other bits and bobs are on. Funny, but after I submitted my last post I thought “<beep> it!” and went back and smashed in the remaining panels. Funny but knowing I had a lot of fixing work ahead of me took the pressure off and knocked them out easier than the previous ones. I even went back to the front and folded in the petals perfectly closing the bulge at the bow. I tried a glue stick previously away back without success but who knows, I thought that about watercolours for the edge colouring and that worked out well so might revisit that. I was going to wait for Chris, MSW’s resident card guru, to drop by with some advice on hull skin fixing in general as must be an easier way. The PVA usually works great but the large panels were drying out to quickly before fixing and then of course you use more to keep one side ‘wet’ whilst applying the other side and then start rushing Okay here is the latest photo. I have already started to varnish the first 7 panels. I know, from the photo it doesn’t look to bad but there are a few issues which doesn’t really show on the pic below…plus I was being selective on the angle There are a few lessons learned here. Primarily I think I may have wasted my time with all the balsa in-fills which I believe caused more problems than I expected them to prevent. I think either leave them off altogether or fully fill in between the bulkheads. One thing I did notice was the designer got the forms and skins spot on and if it wasn’t for my lack of skill would have went together seamlessly. Kudos. I might work on some of the other parts for a break. Cheers Slog
-
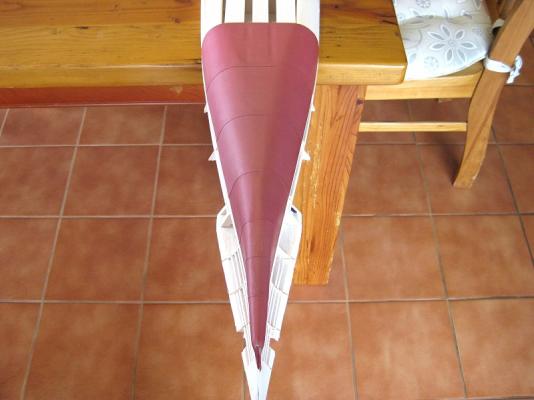
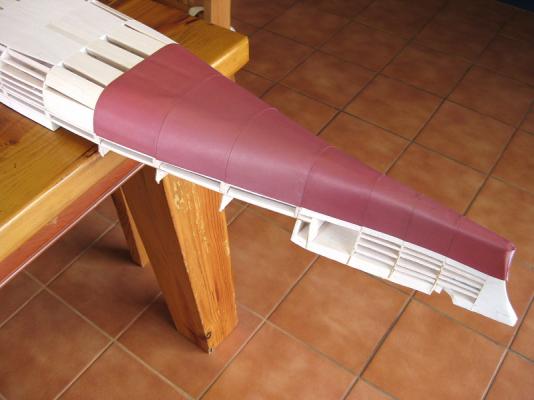
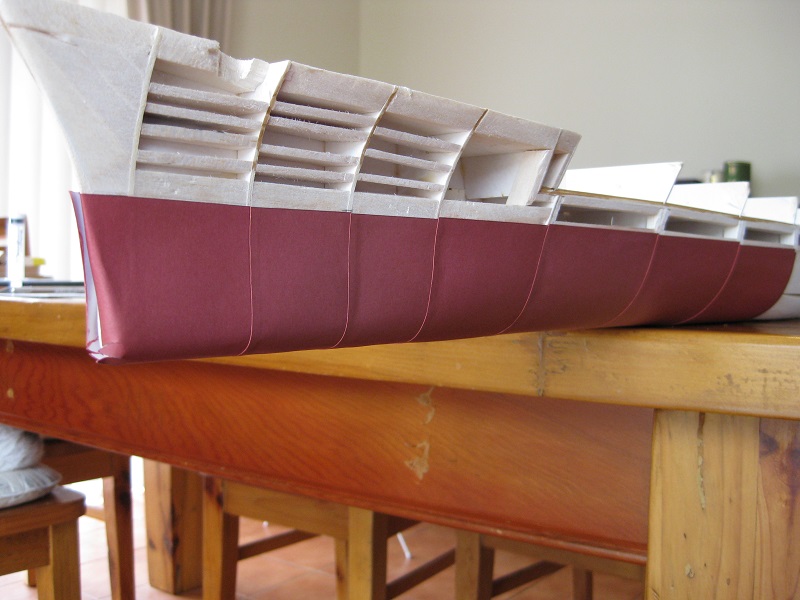
Hi Joe, I certainly have and as expected the hardest part has bitten me, more of which further down. Hi Sam, the model is printed on thick Bristol type paper and measures around 0.2mm which although doesn’t sound much does form a noticeable ridge. I was going to try the paper hangers trick you mentioned but it would mean cutting them whilst formed round the hull as the edge relationship wouldn’t be the same if pressed flat out. I decide cutting consistently round the hull wasn’t in my skill set and would have lived with the ridges. Unfortunately I encountered worse problems which have meant a whole rethink. I Started at the bow as instructed since the over lapping works from front to back and 1st panel went on fine. I decided to form the front edge progressively, gluing in a tab at a time as found fumbling about trying to form the bulge with the petals too difficult off the model. First 7 panels out of 21. Up to panel 6 I was happy enough, yeah sure a bit bumped and bashed round the very bottom edge but liveable, being my first hull skinning. Then the panels started getting bigger and gluing up was becoming a problem and started rushing and yes panel 7 got pushed between the balsa stringers giving the dreaded sunken ‘starved cow’ effect. Then it totally went pear shaped with panel 8, which I couldn’t bear to show in photos. Basically again the large panels gluing up was a problem and totally messed up the skin with creases and sunken areas etc. I decided to call it a day after that. I need to see what glues others are using and how they glue the panels on. I use white wood workers PVA exclusively so far and have tried gluing on one edge at time as well as gluing whole panels at a time but the bigger panels need speed and that gets sloppy. Moving on, I have decided to finish the skins, seal with a matt varnish and then fill with auto-body filler, sand and spray (probably with red oxide auto paint). Just had a look up above the computer where it sits and the skins aren’t to bad, I mean I sorted the edge colouring, the panels are free from glue marks, the sunken bashed and dented skins are on the underside…then see the creases on panel 8 aaarrrgggghhhhhhhhhh. Cheers Slog