

KORTES
-
Posts
557 -
Joined
-
Last visited
Content Type
Profiles
Forums
Gallery
Events
Posts posted by KORTES
-
-
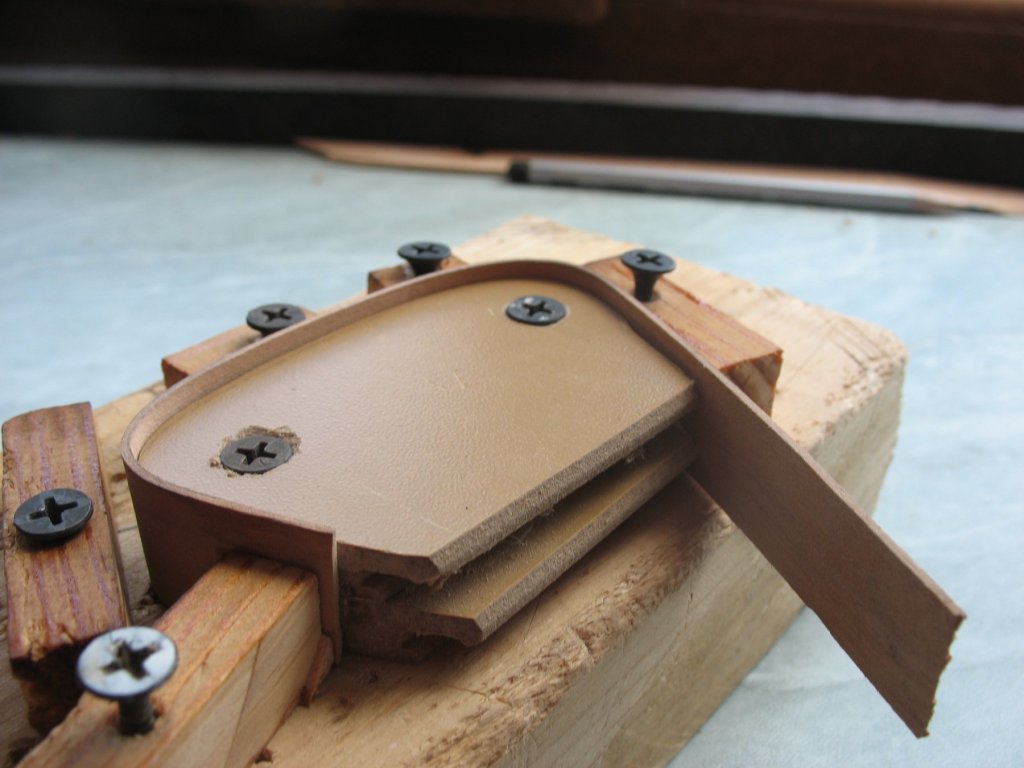
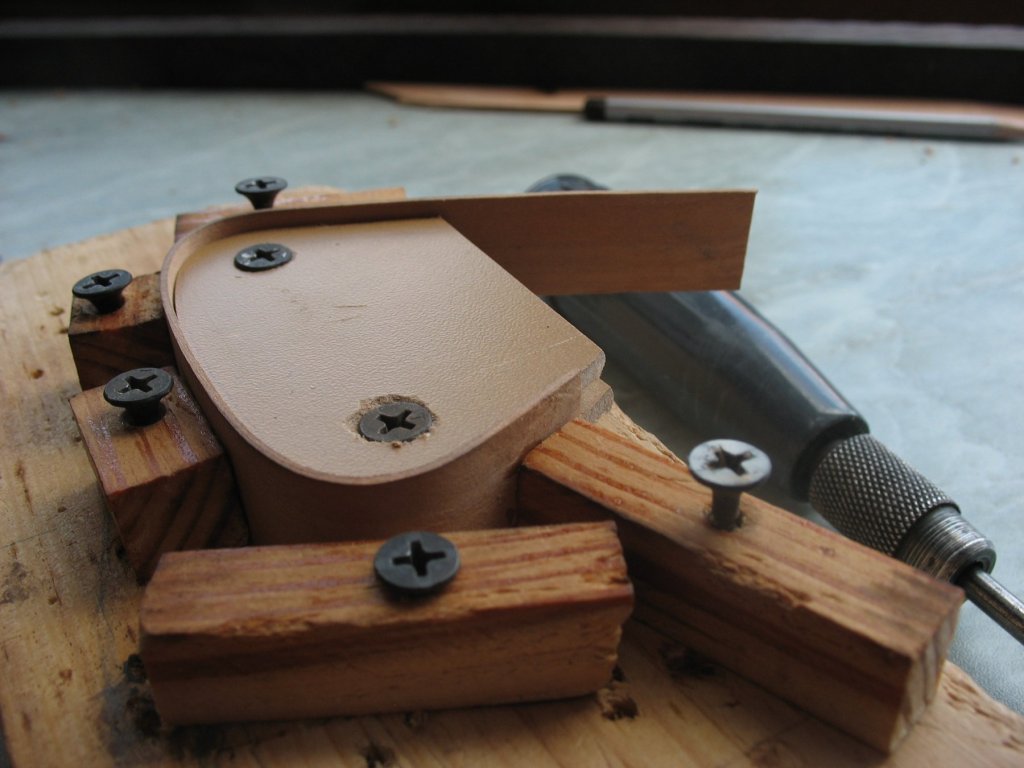
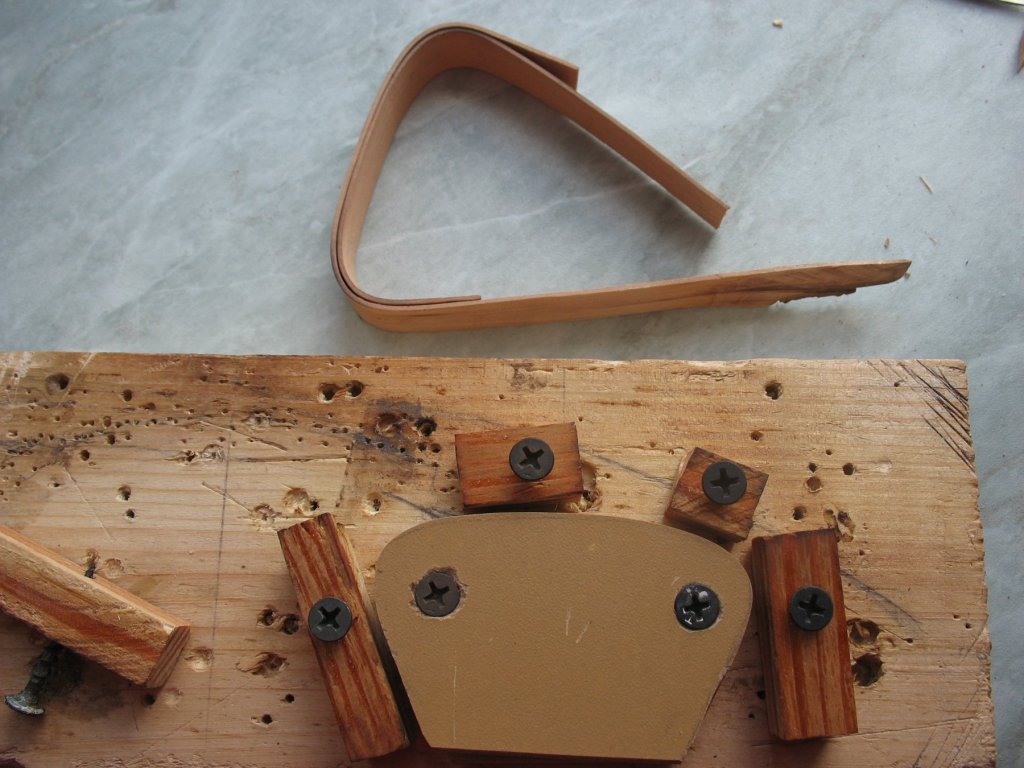
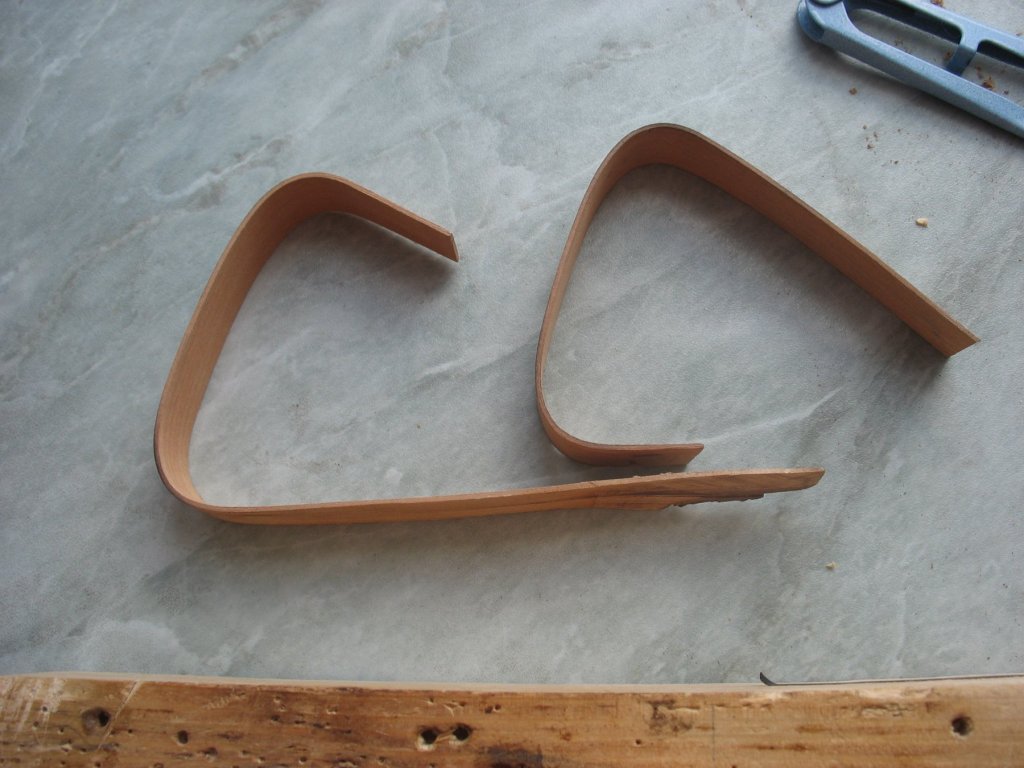
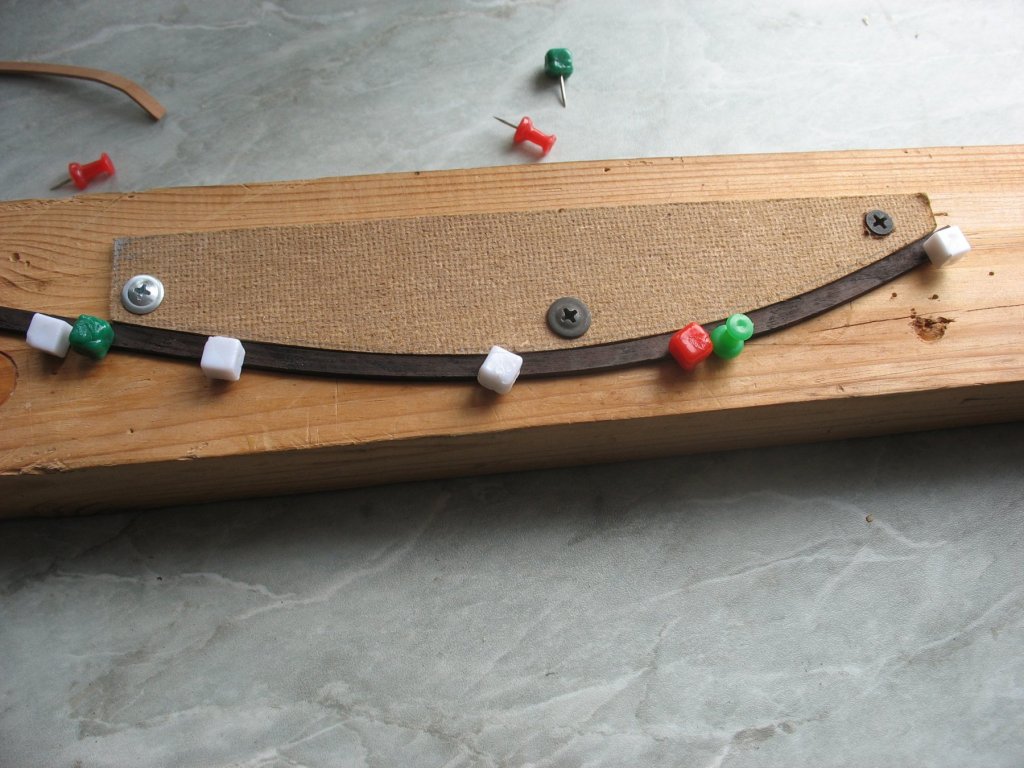
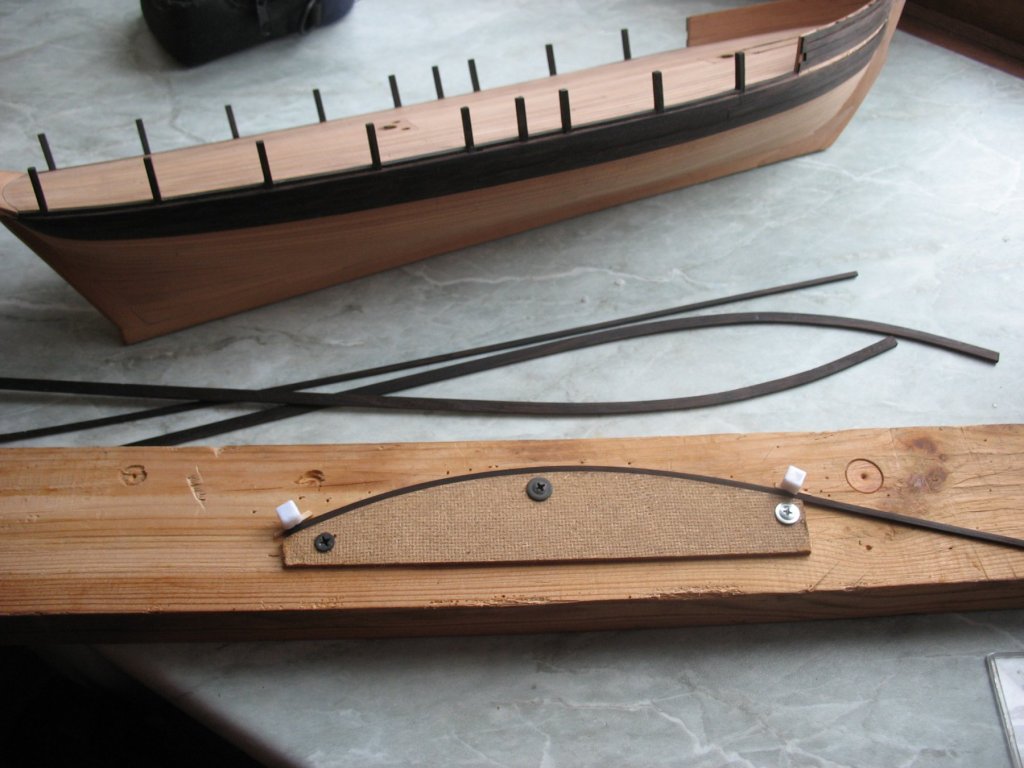
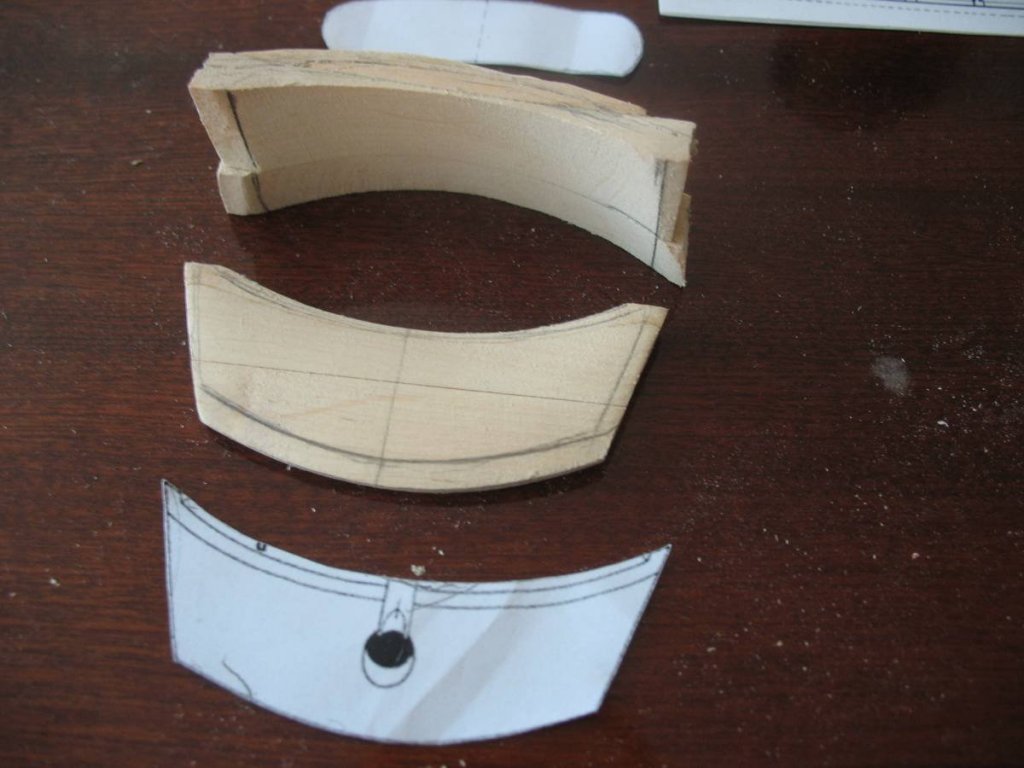
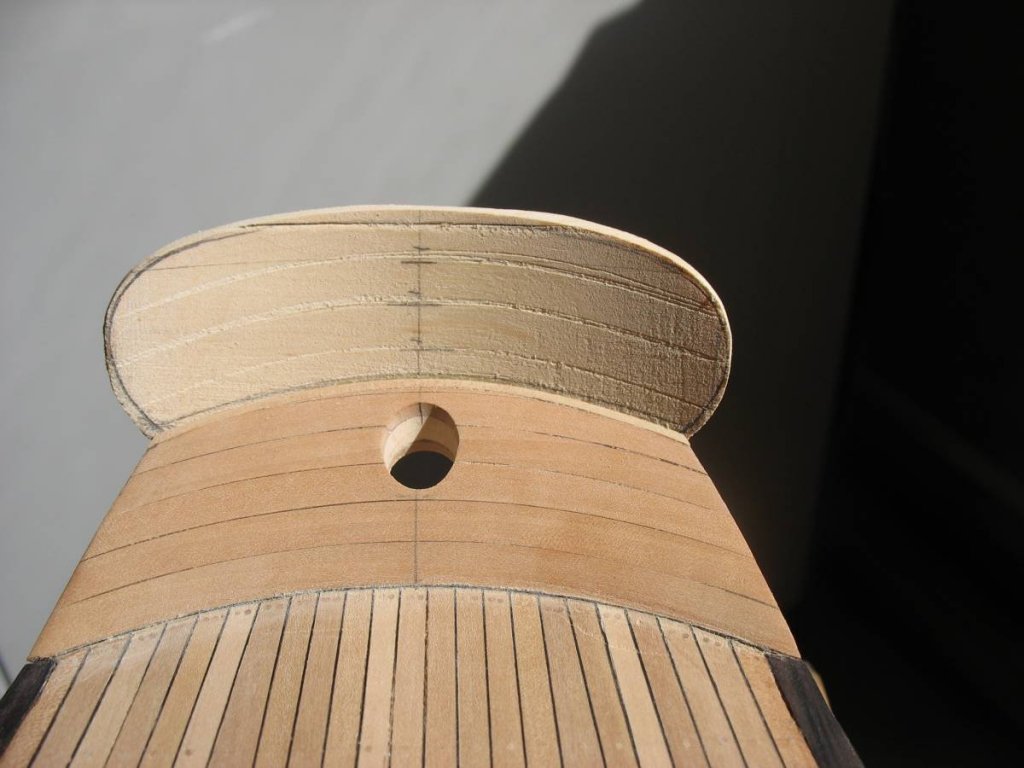
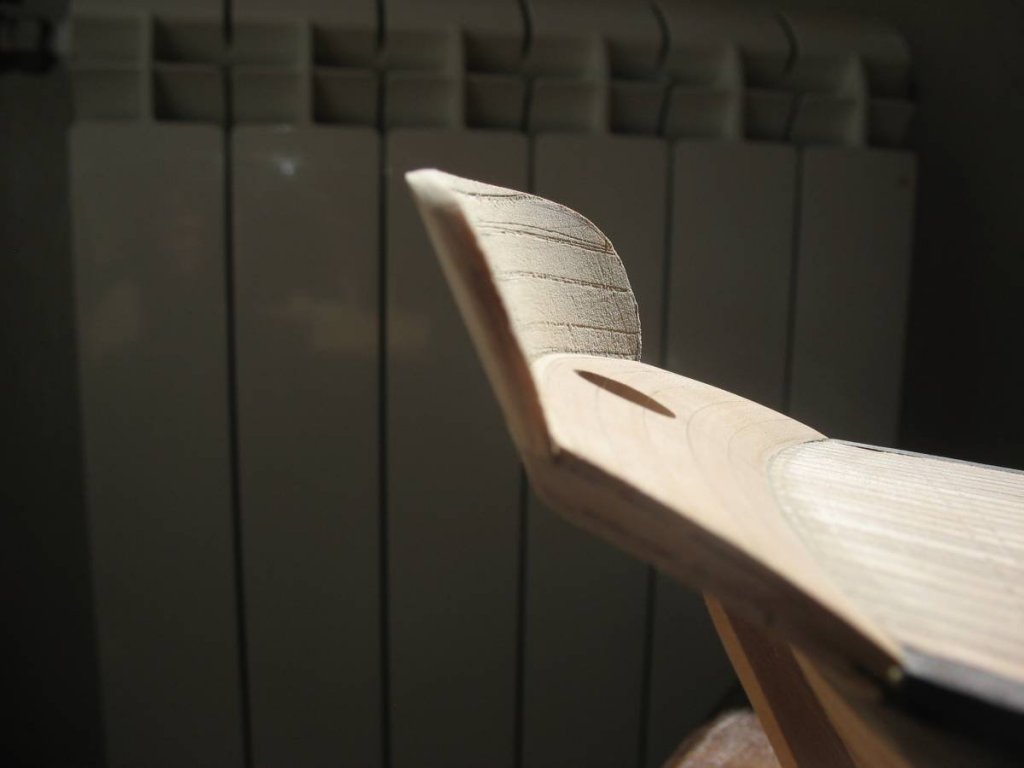
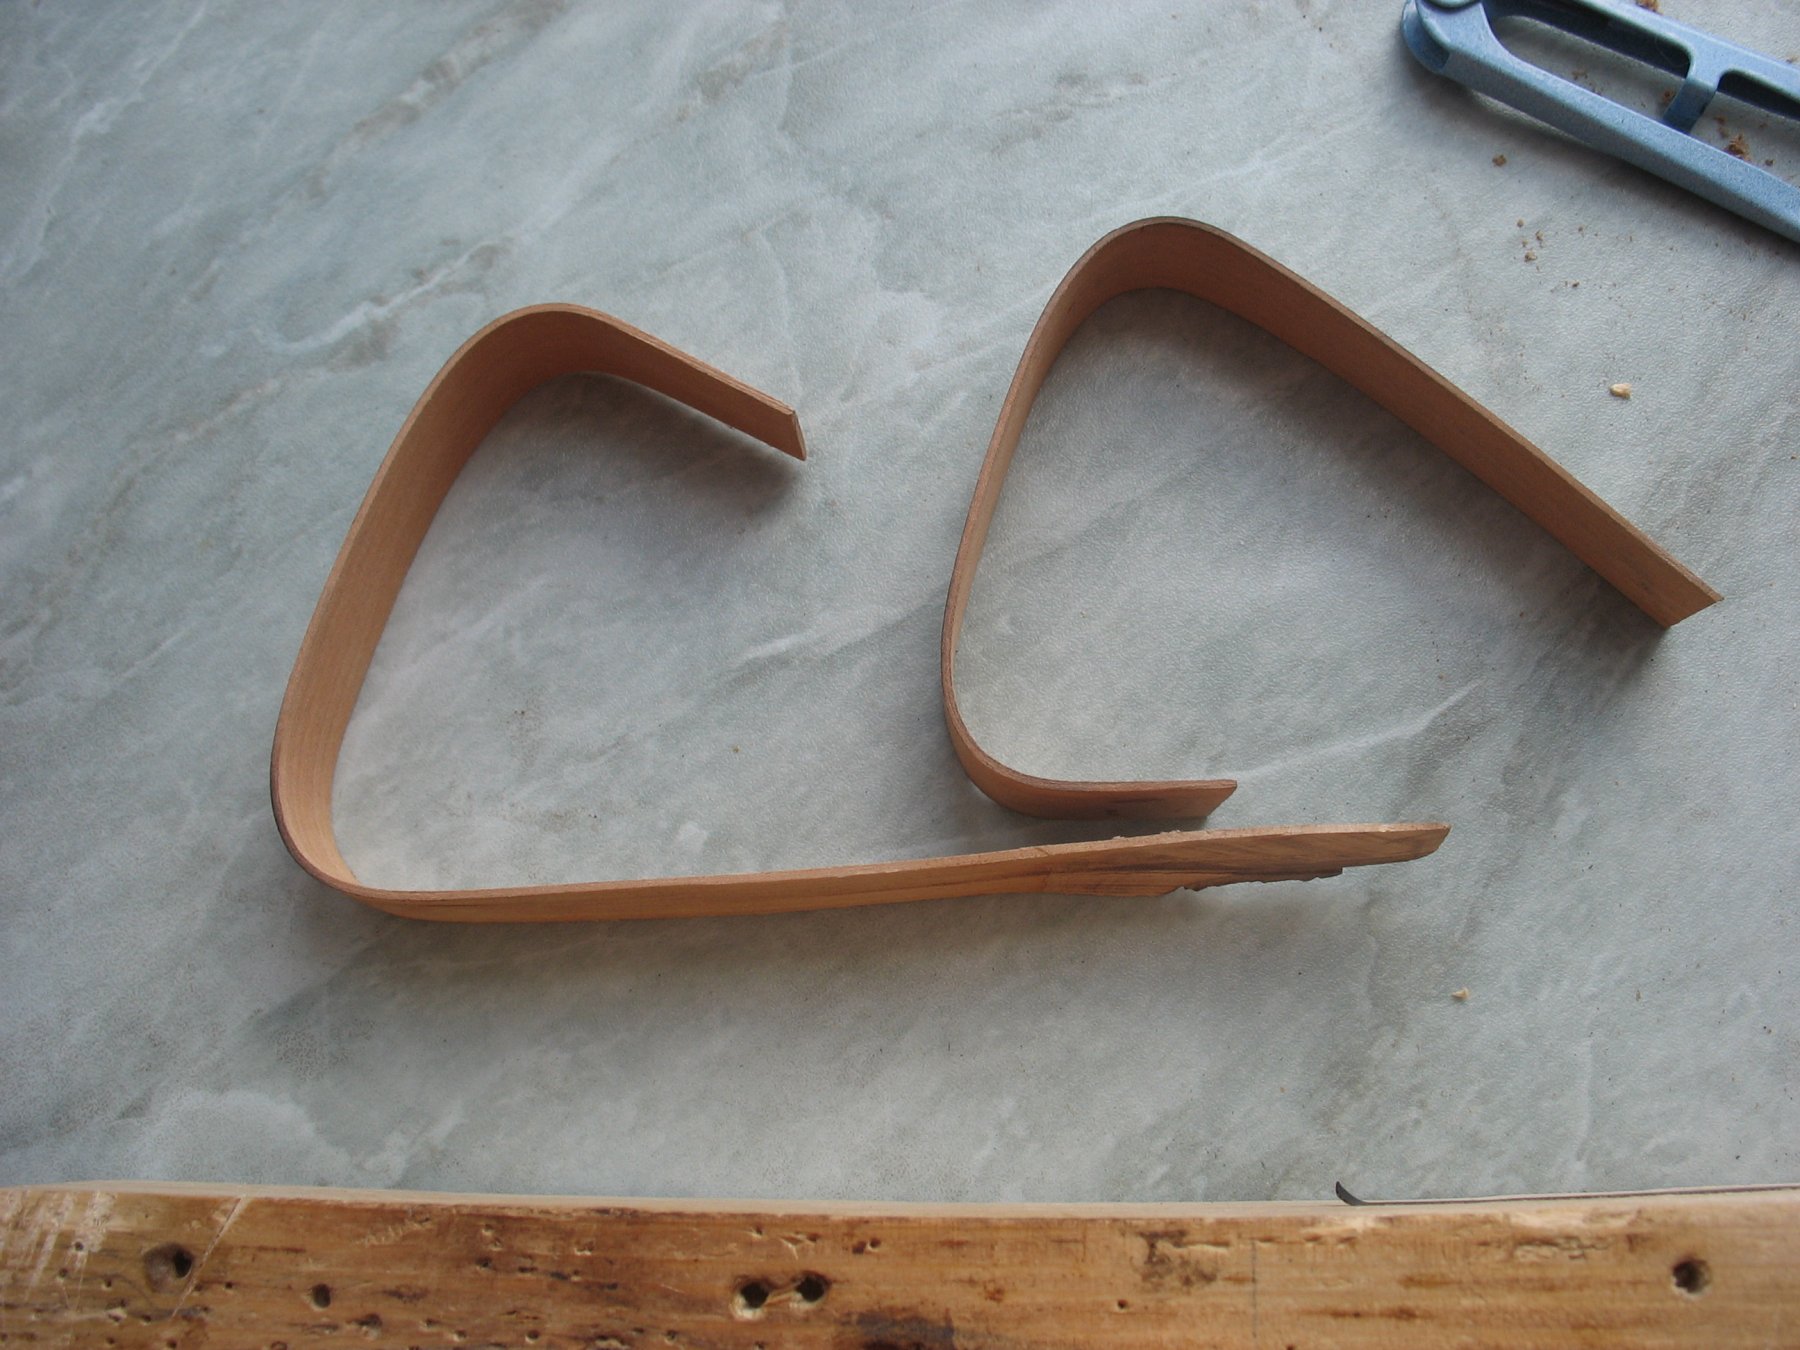
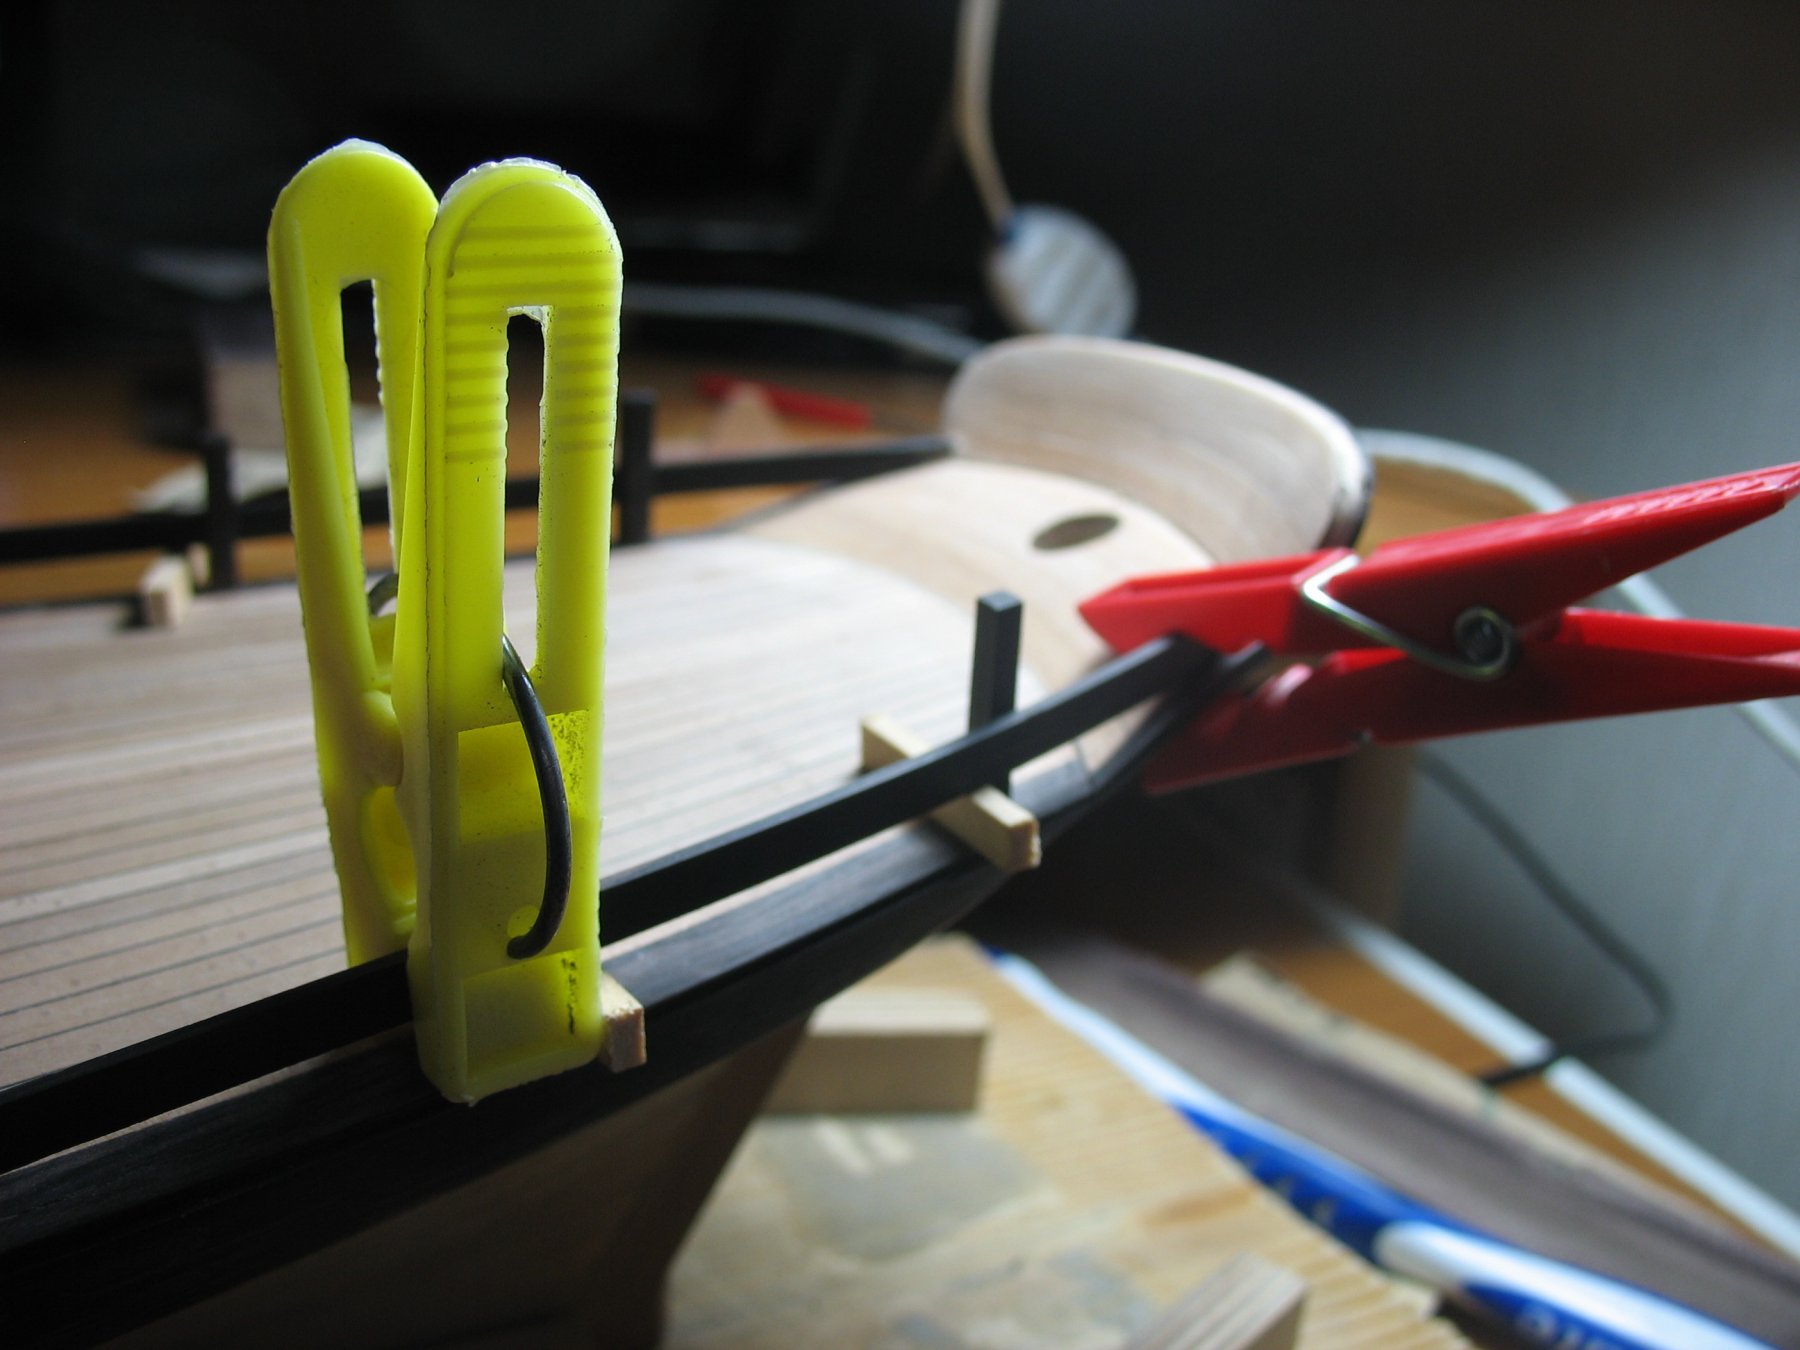
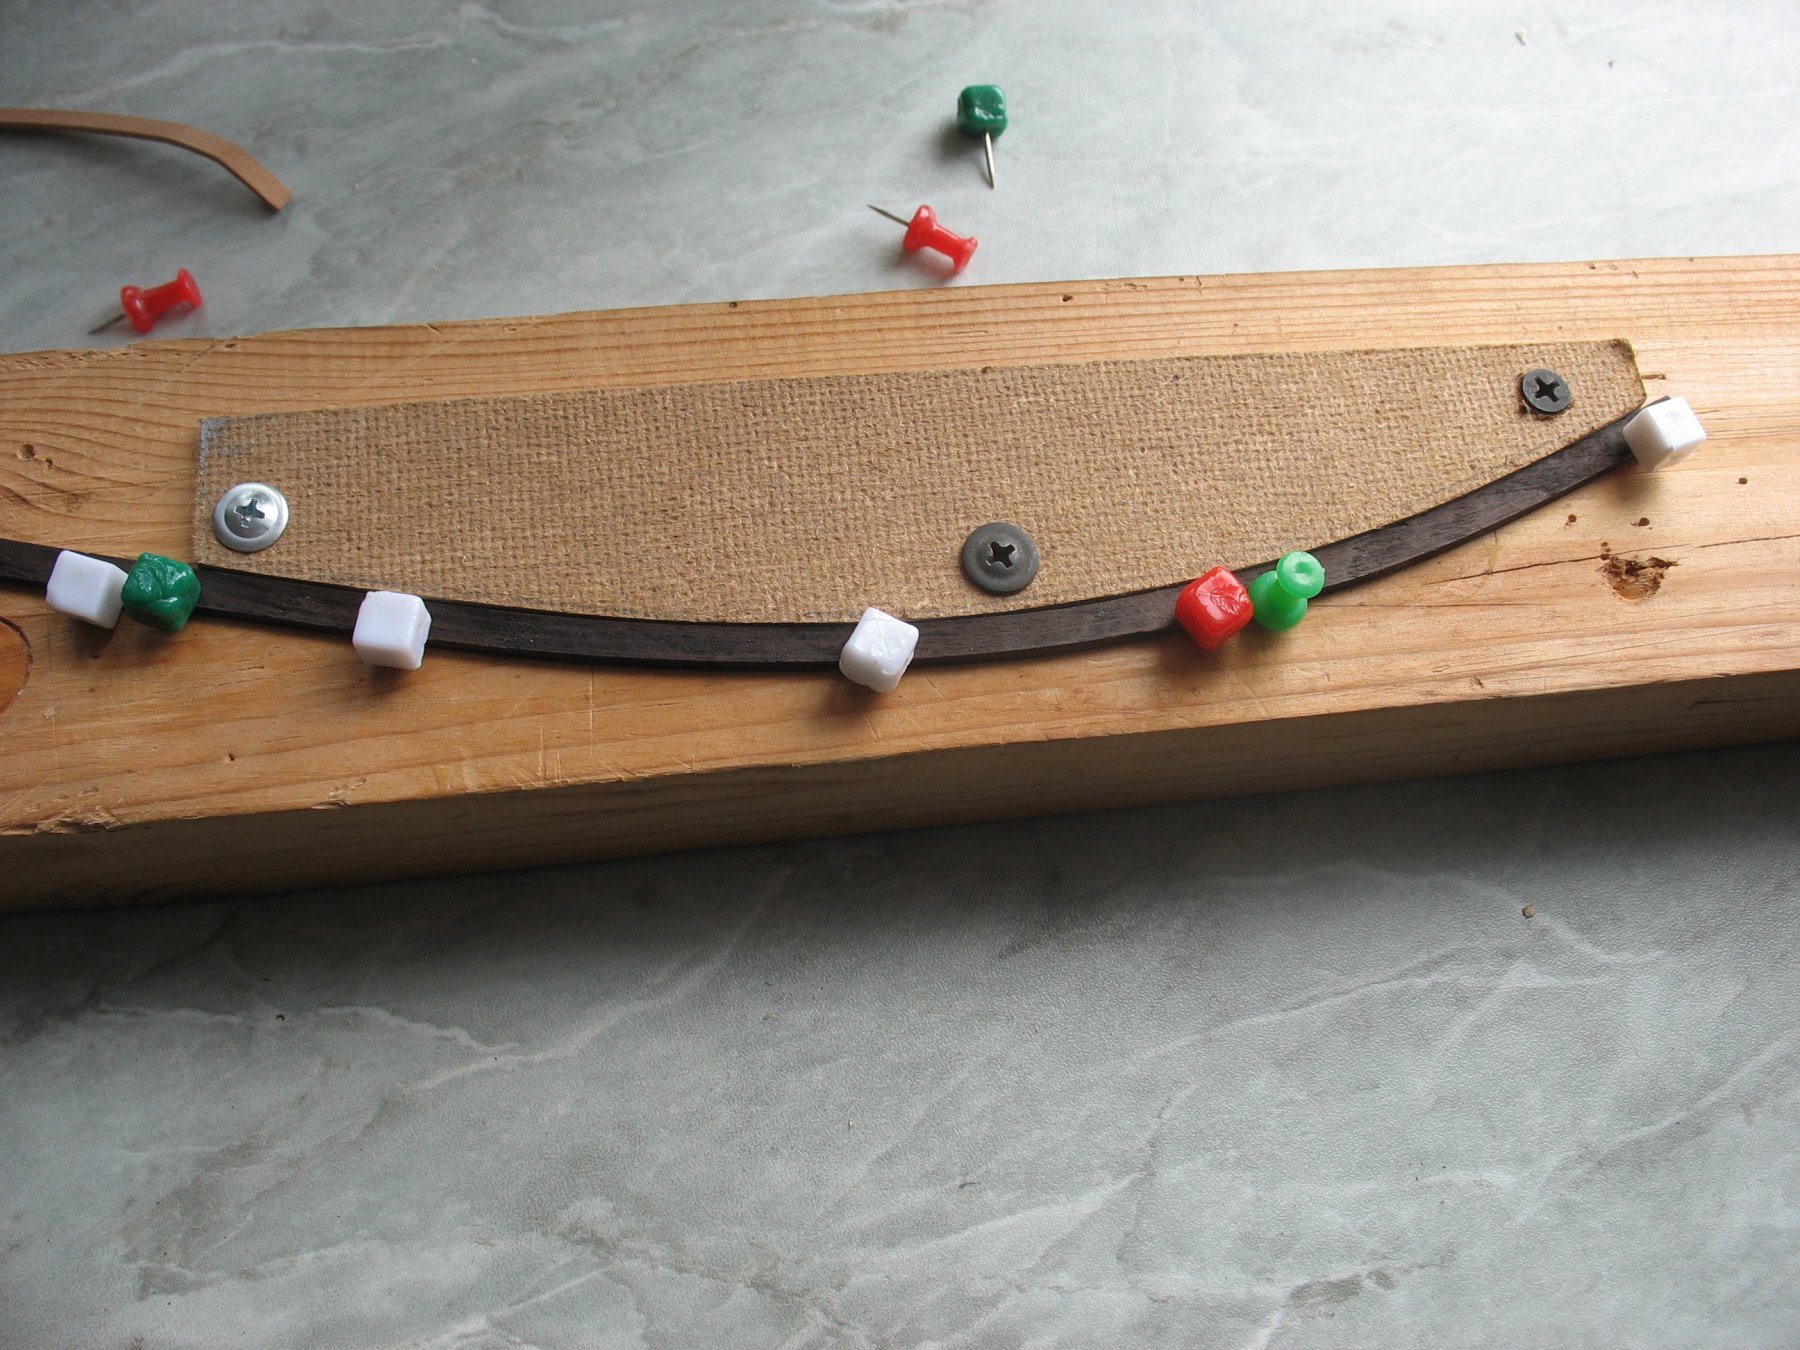
I would like to present my attempts in making cap rail taffrail.
I waited a long time to approach it, finding the right technology, finally setting for the plank bending with further refining.
To start, I had to prepare a pattern, and as I had to bend the lath with a big margin(the original size 1,5:22 mm), I had to make reinforced fixators.
I have made two samples, refining them while adjusting them in place.


- Keith Black, mtaylor, JOUFF and 6 others
-
 9
9
-
-
-
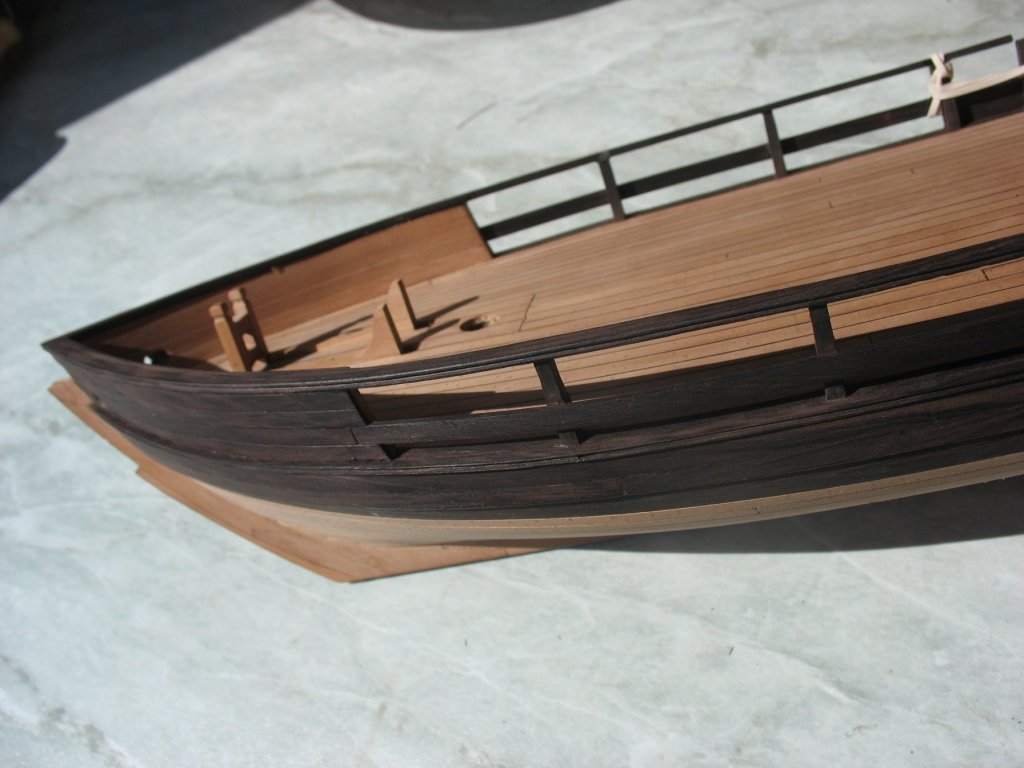
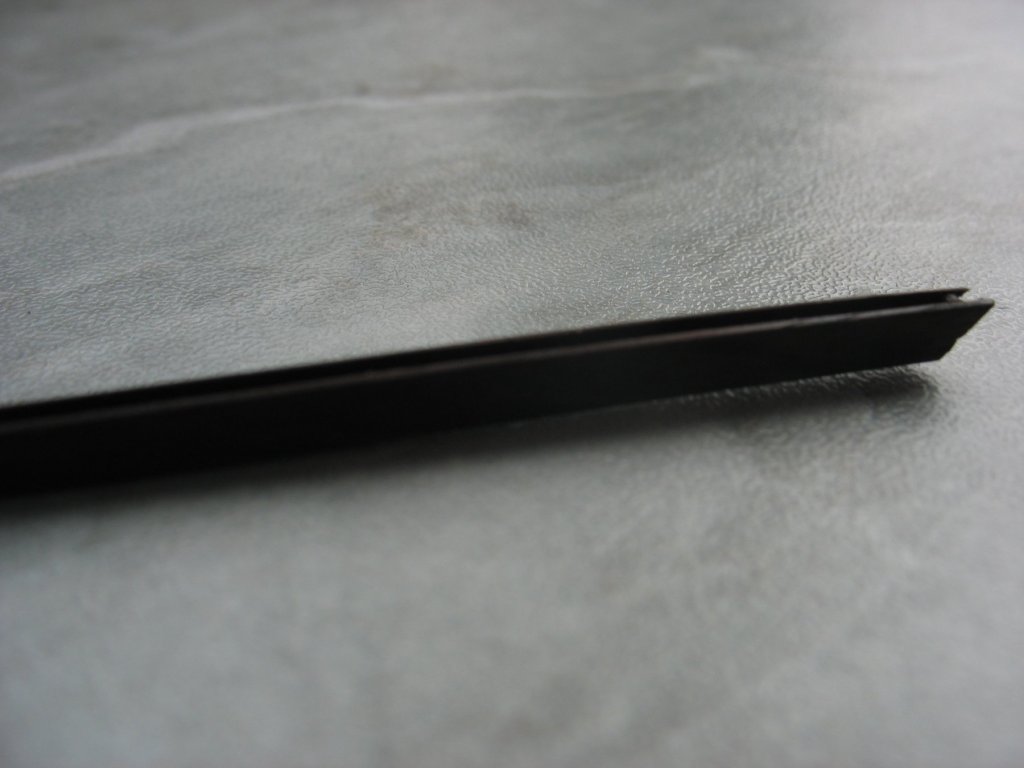
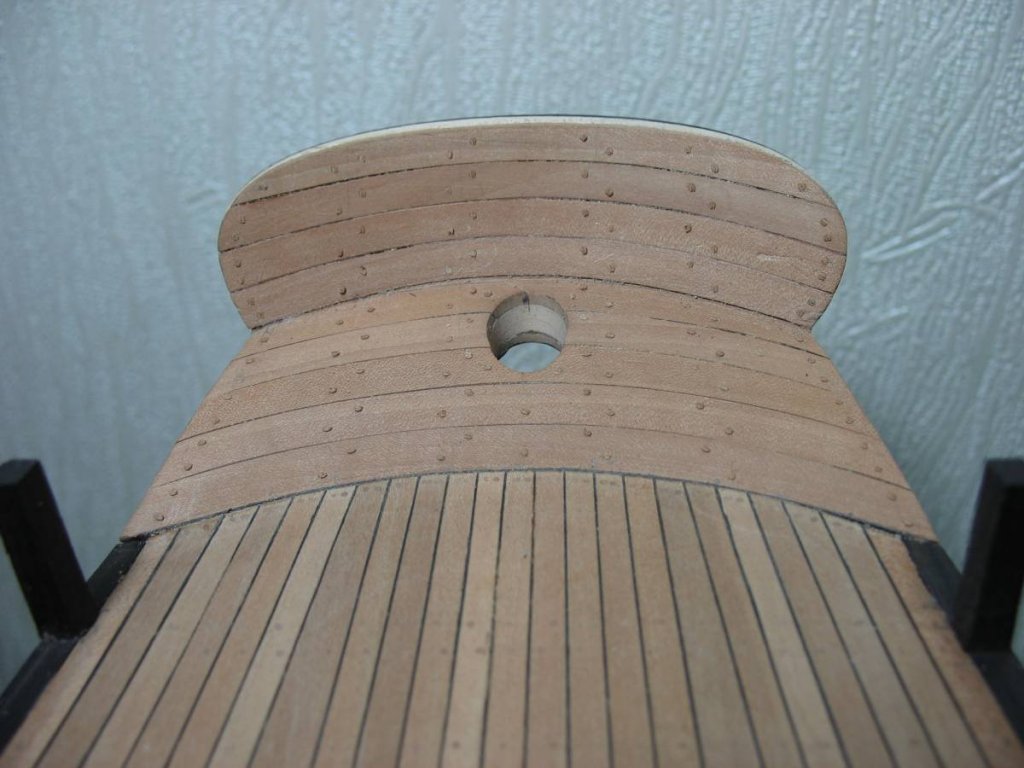
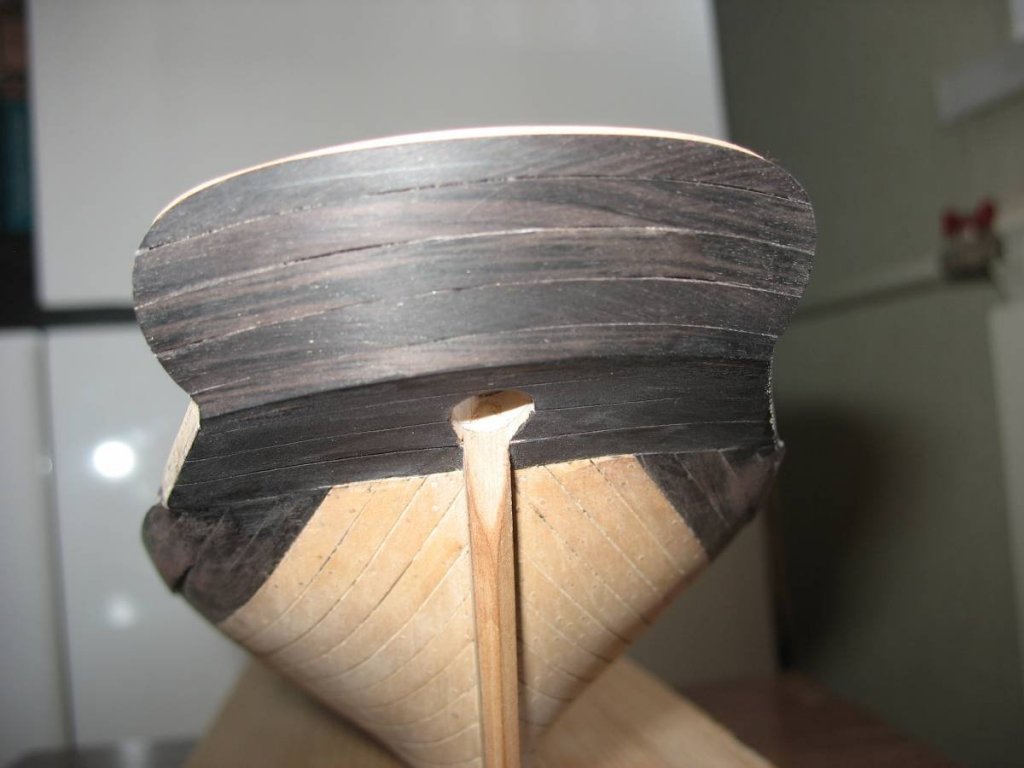
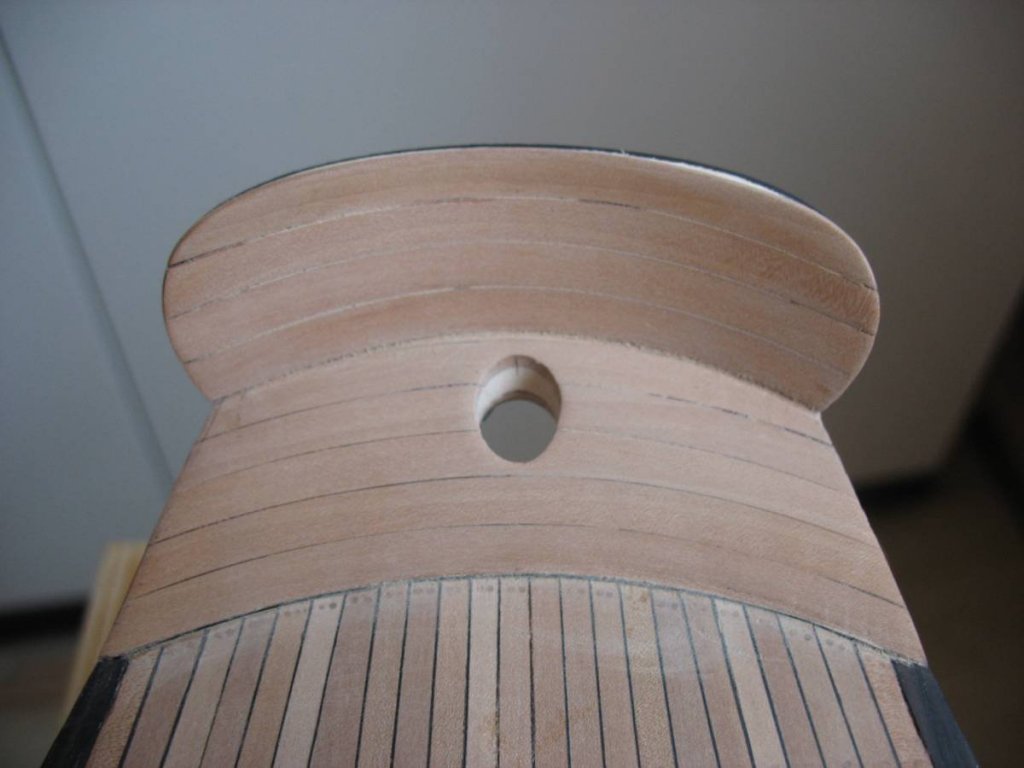
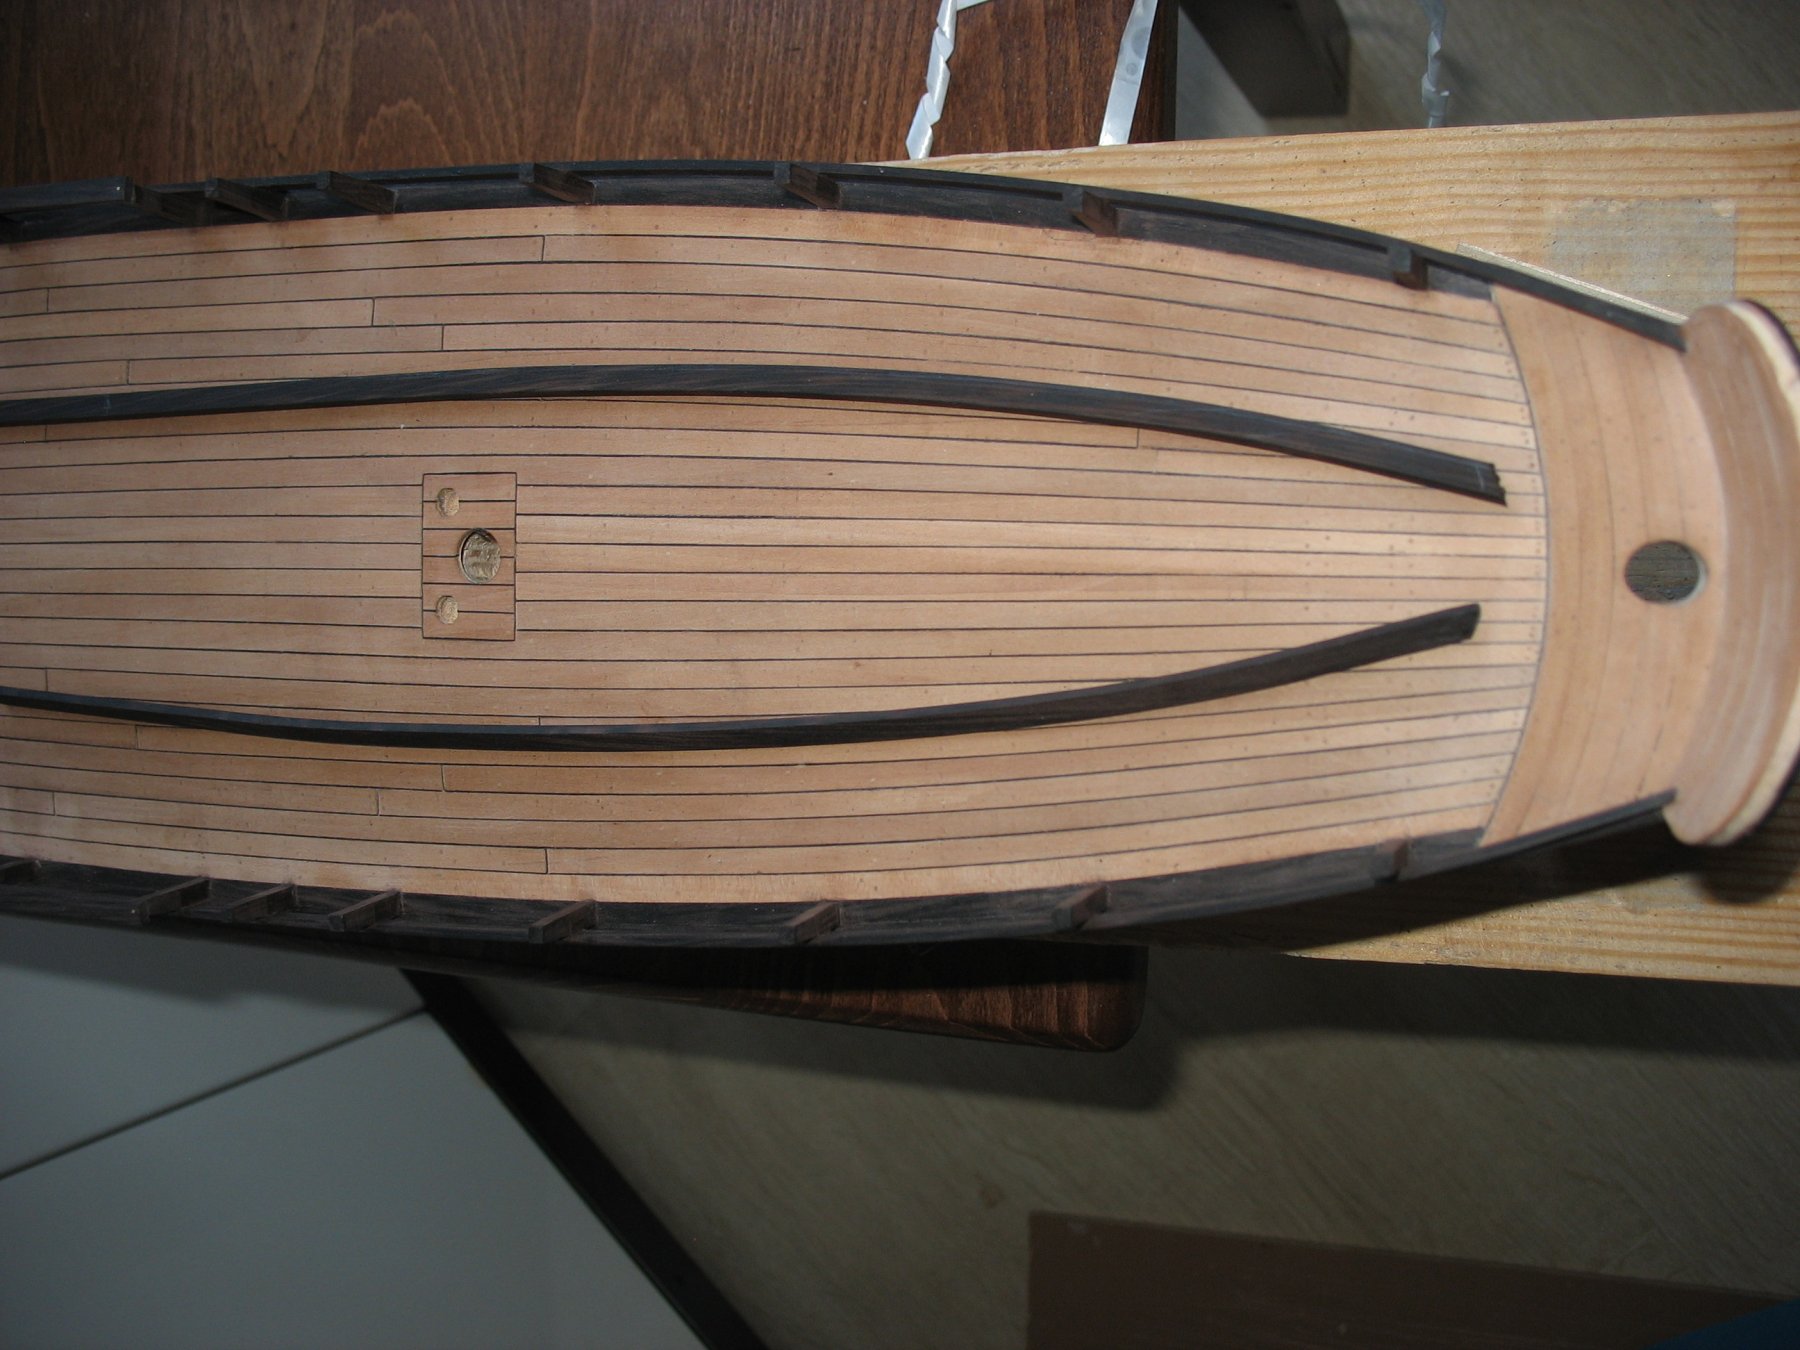
Cap rail fore body.
Material - black hornbeam, after installing, I fixed it in place with 0,6 mm brass nails.


-
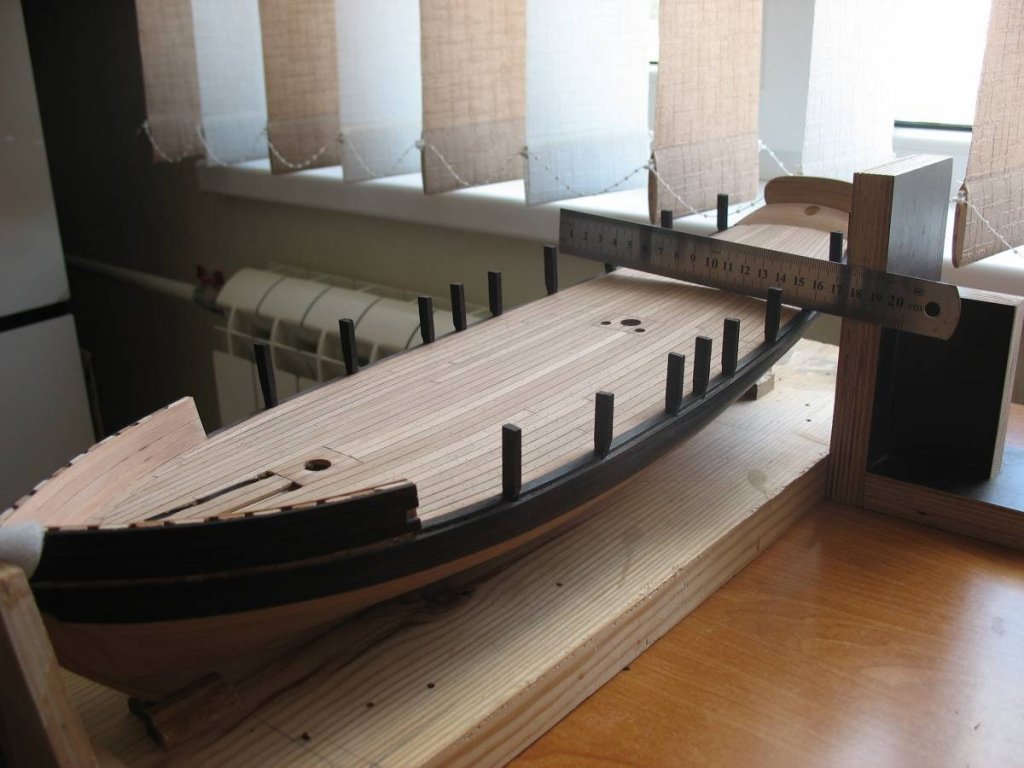
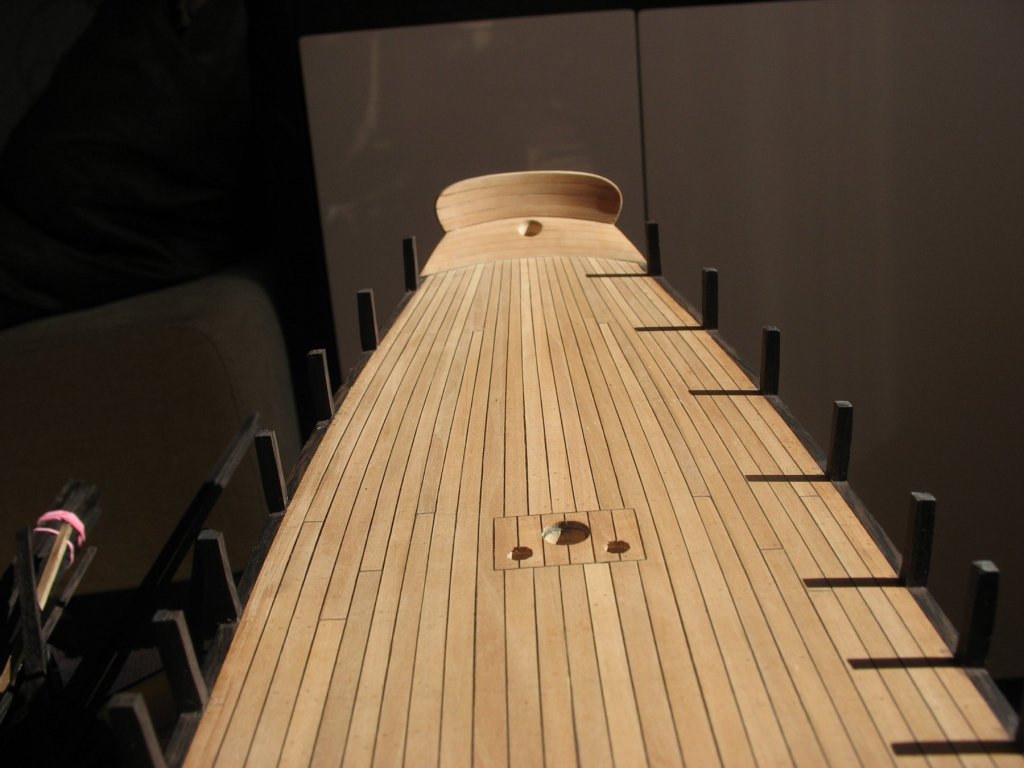
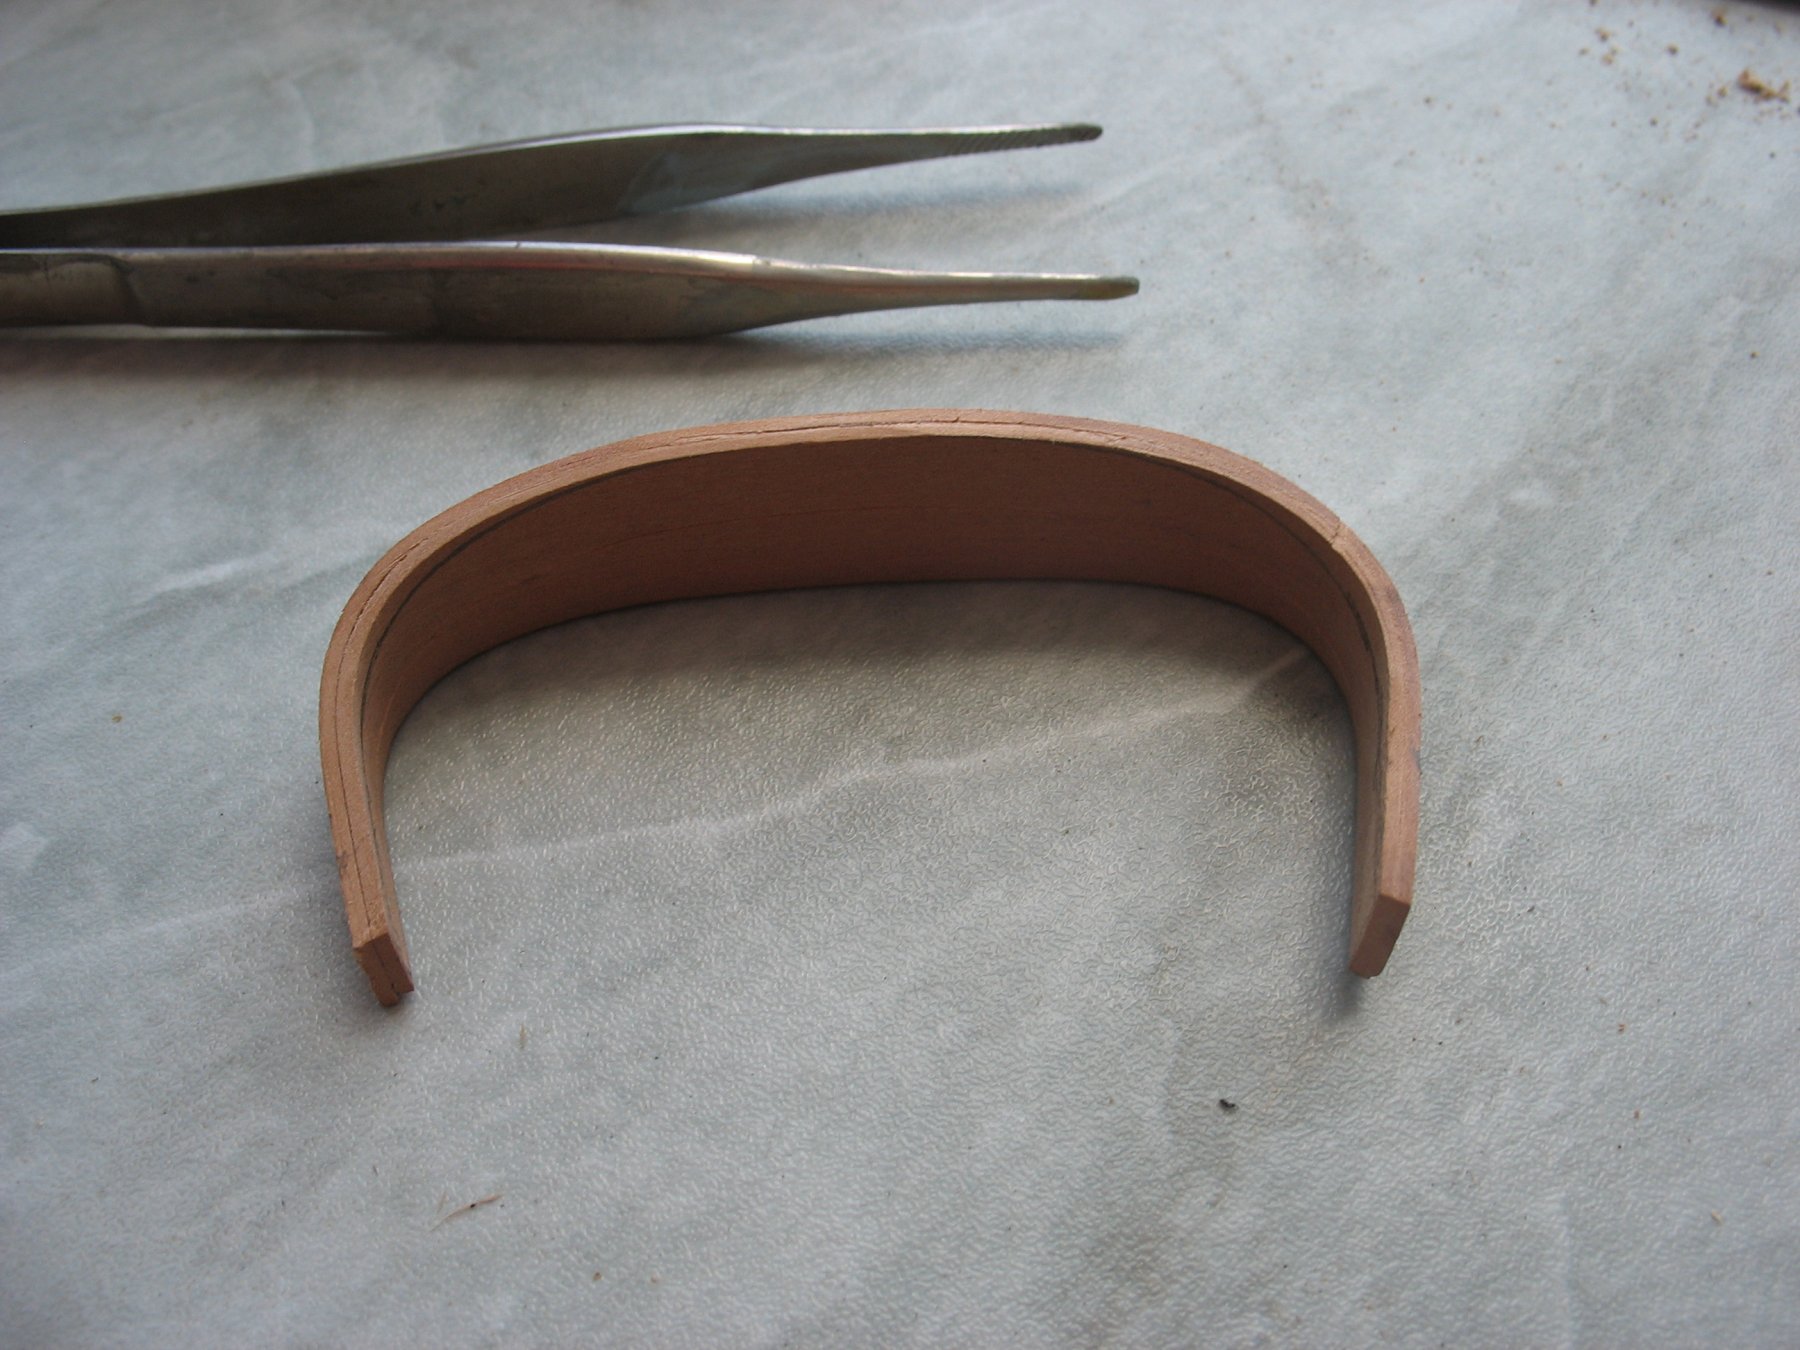
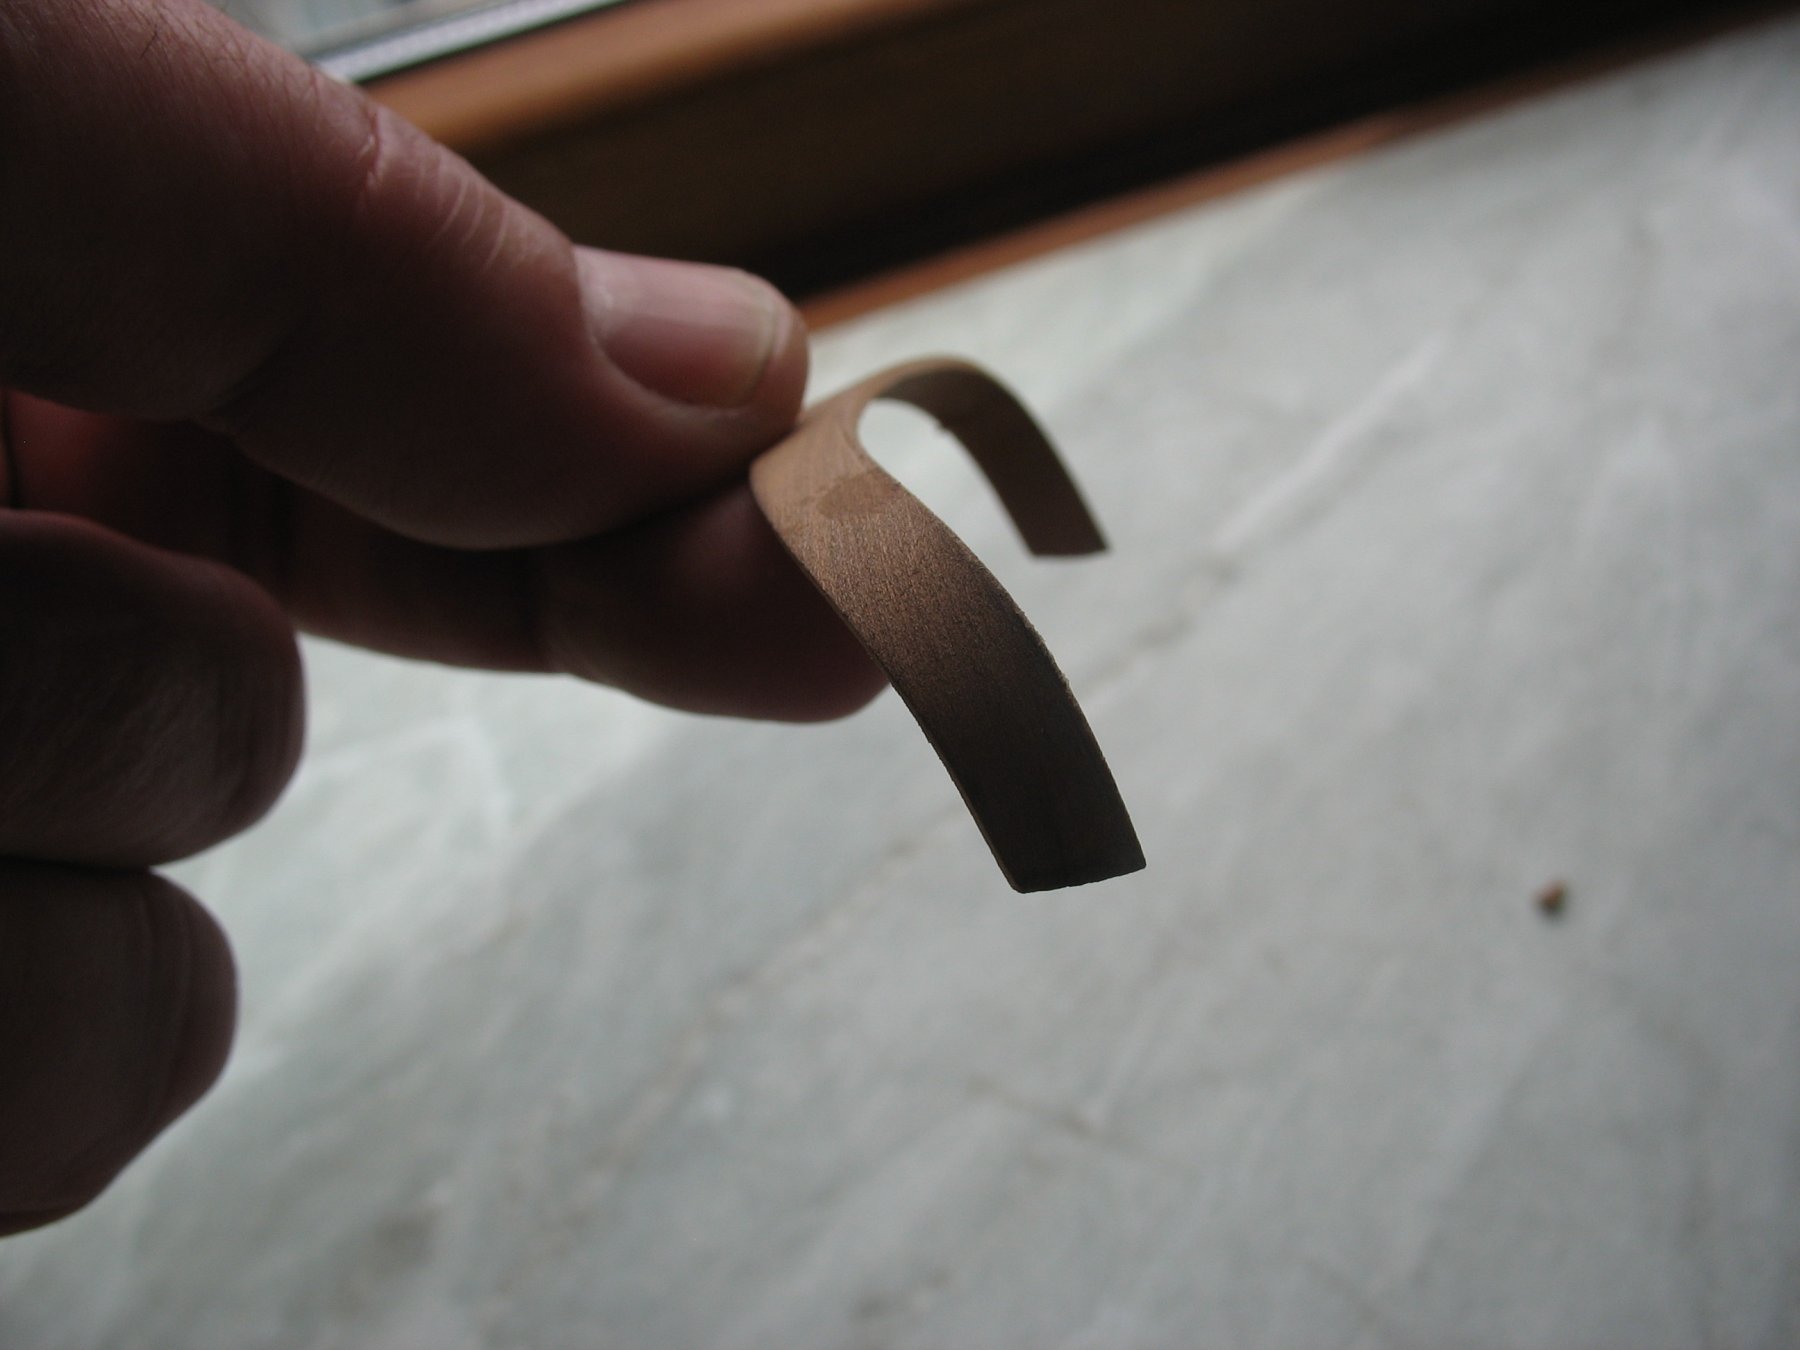
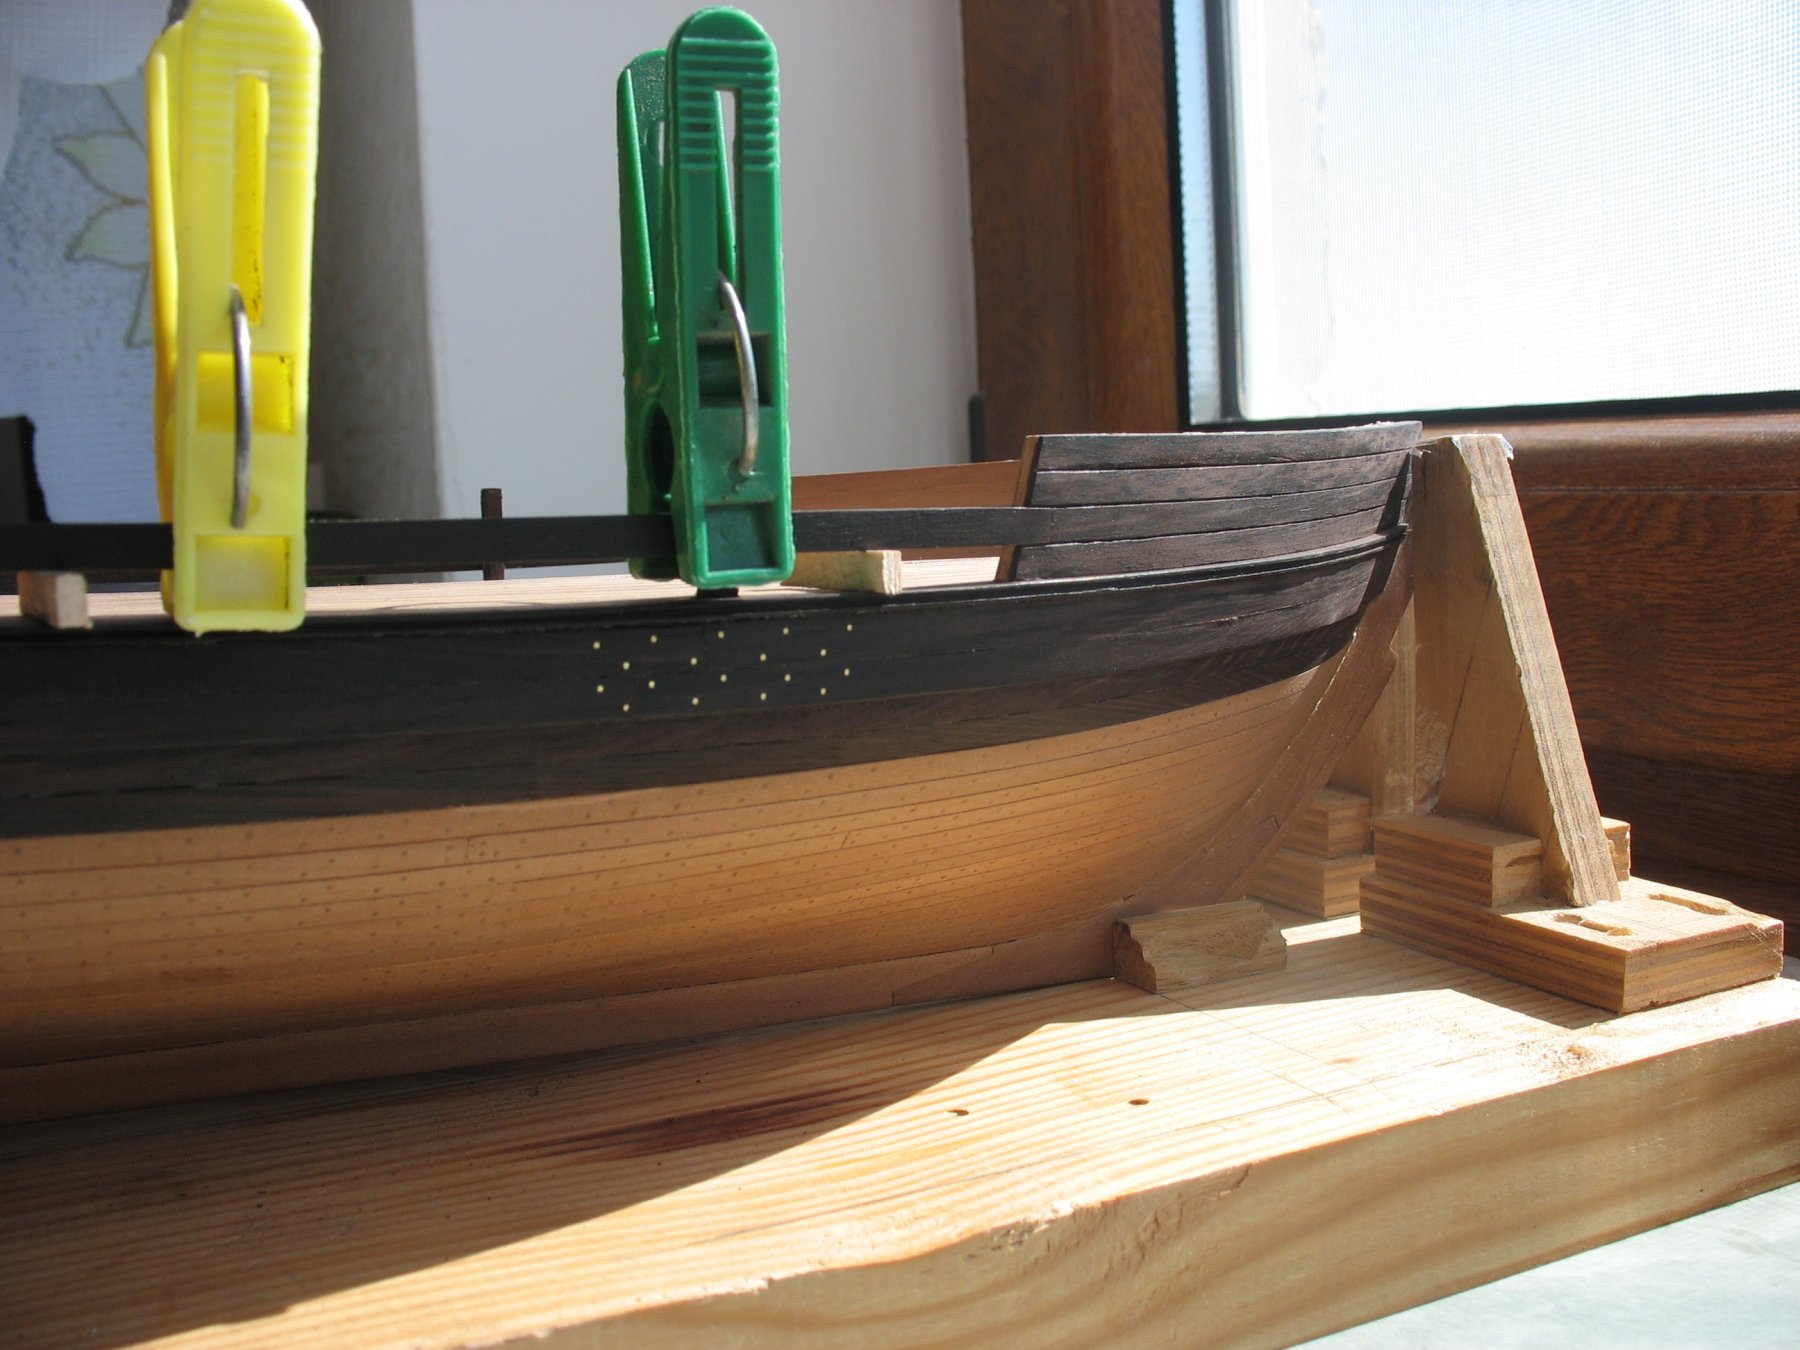
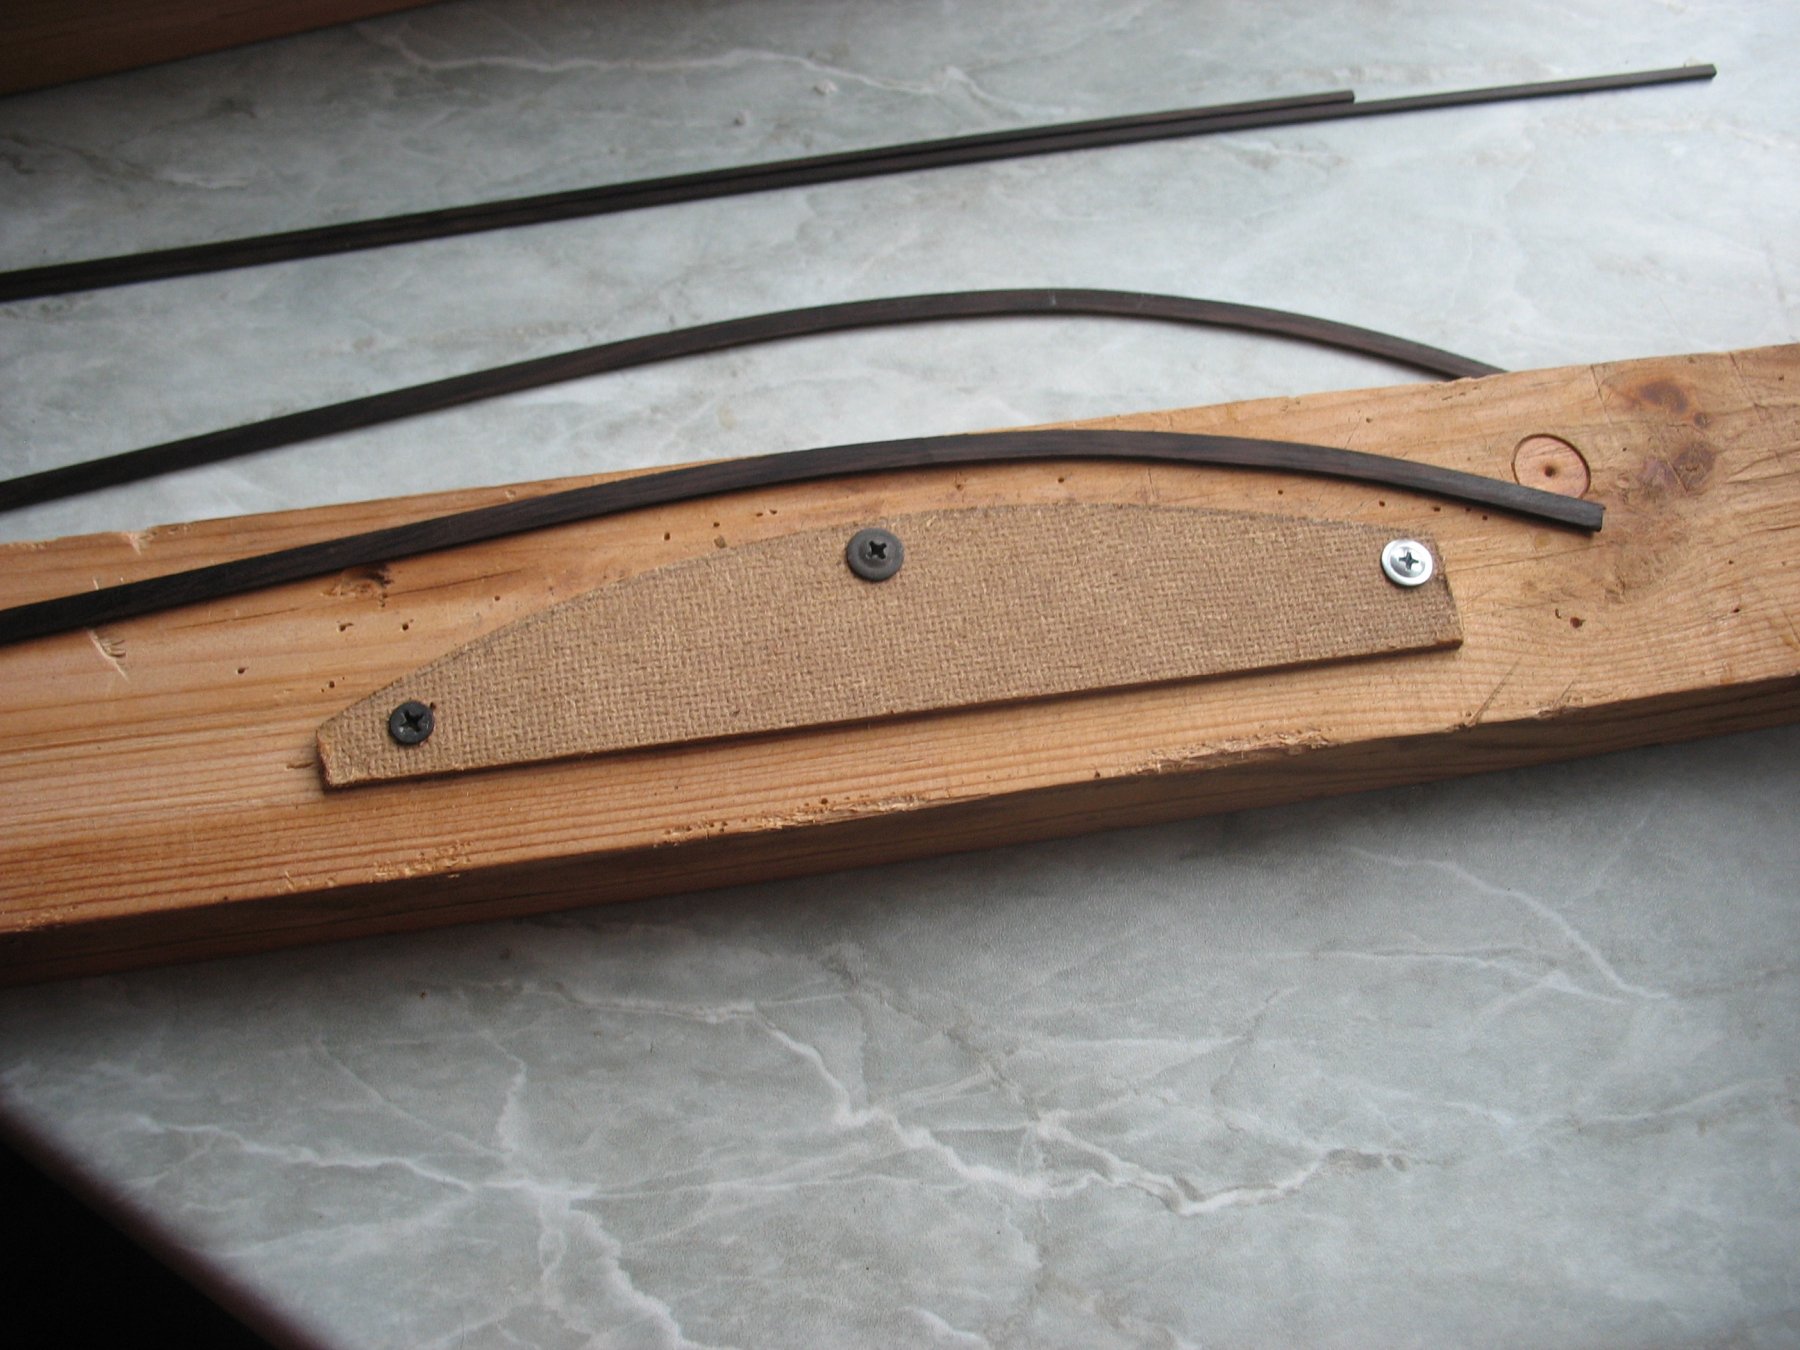
Now it’s time to make cap rail and waterways. I bent it after putting under steam, using a pattern. After fixation i dried it using a hot air gun - it speeds up the process.


- Valeriy V, druxey, paulsutcliffe and 8 others
-
11
-
Thank you very much dear Keith.
-
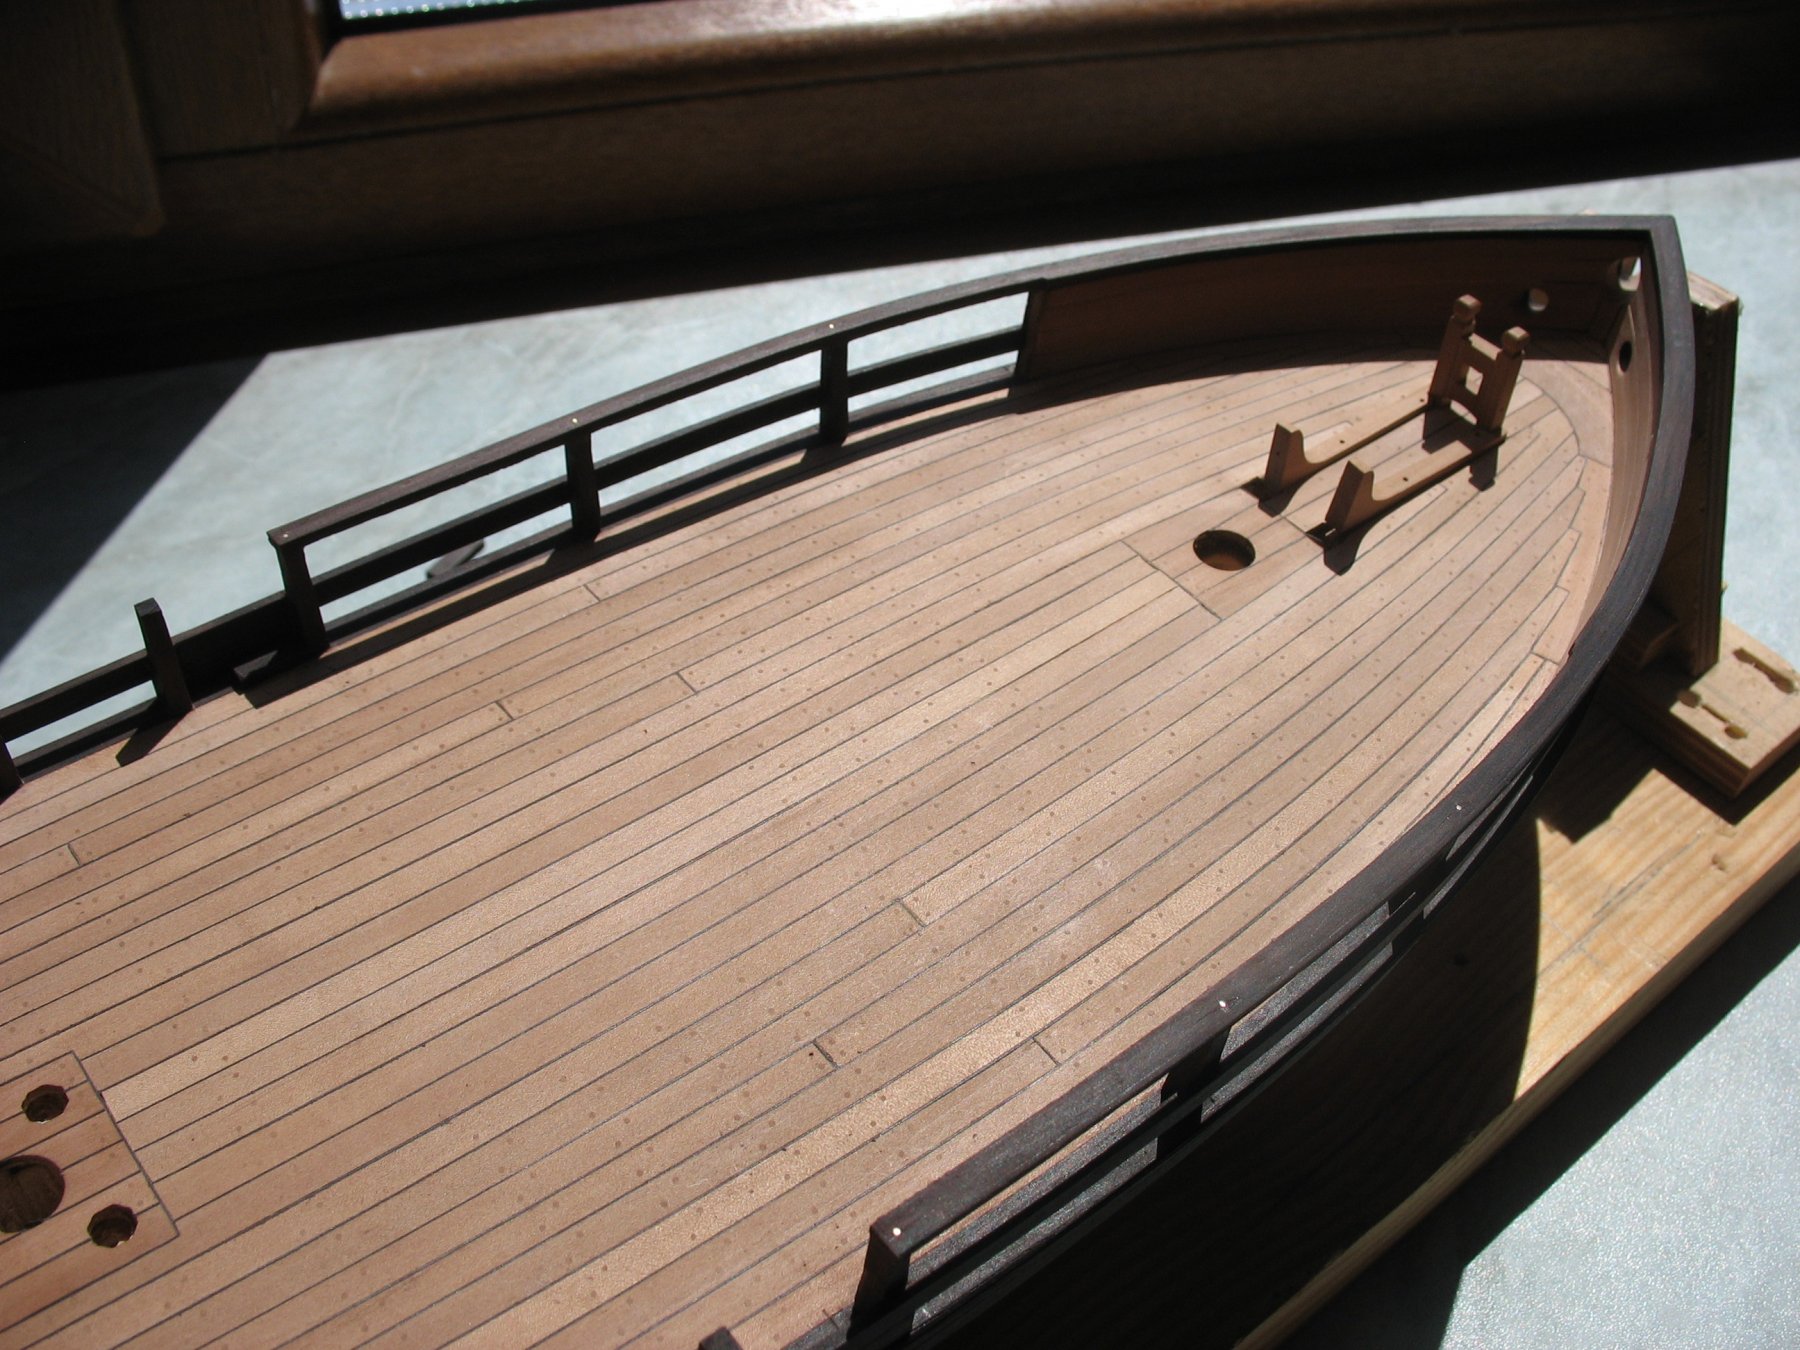
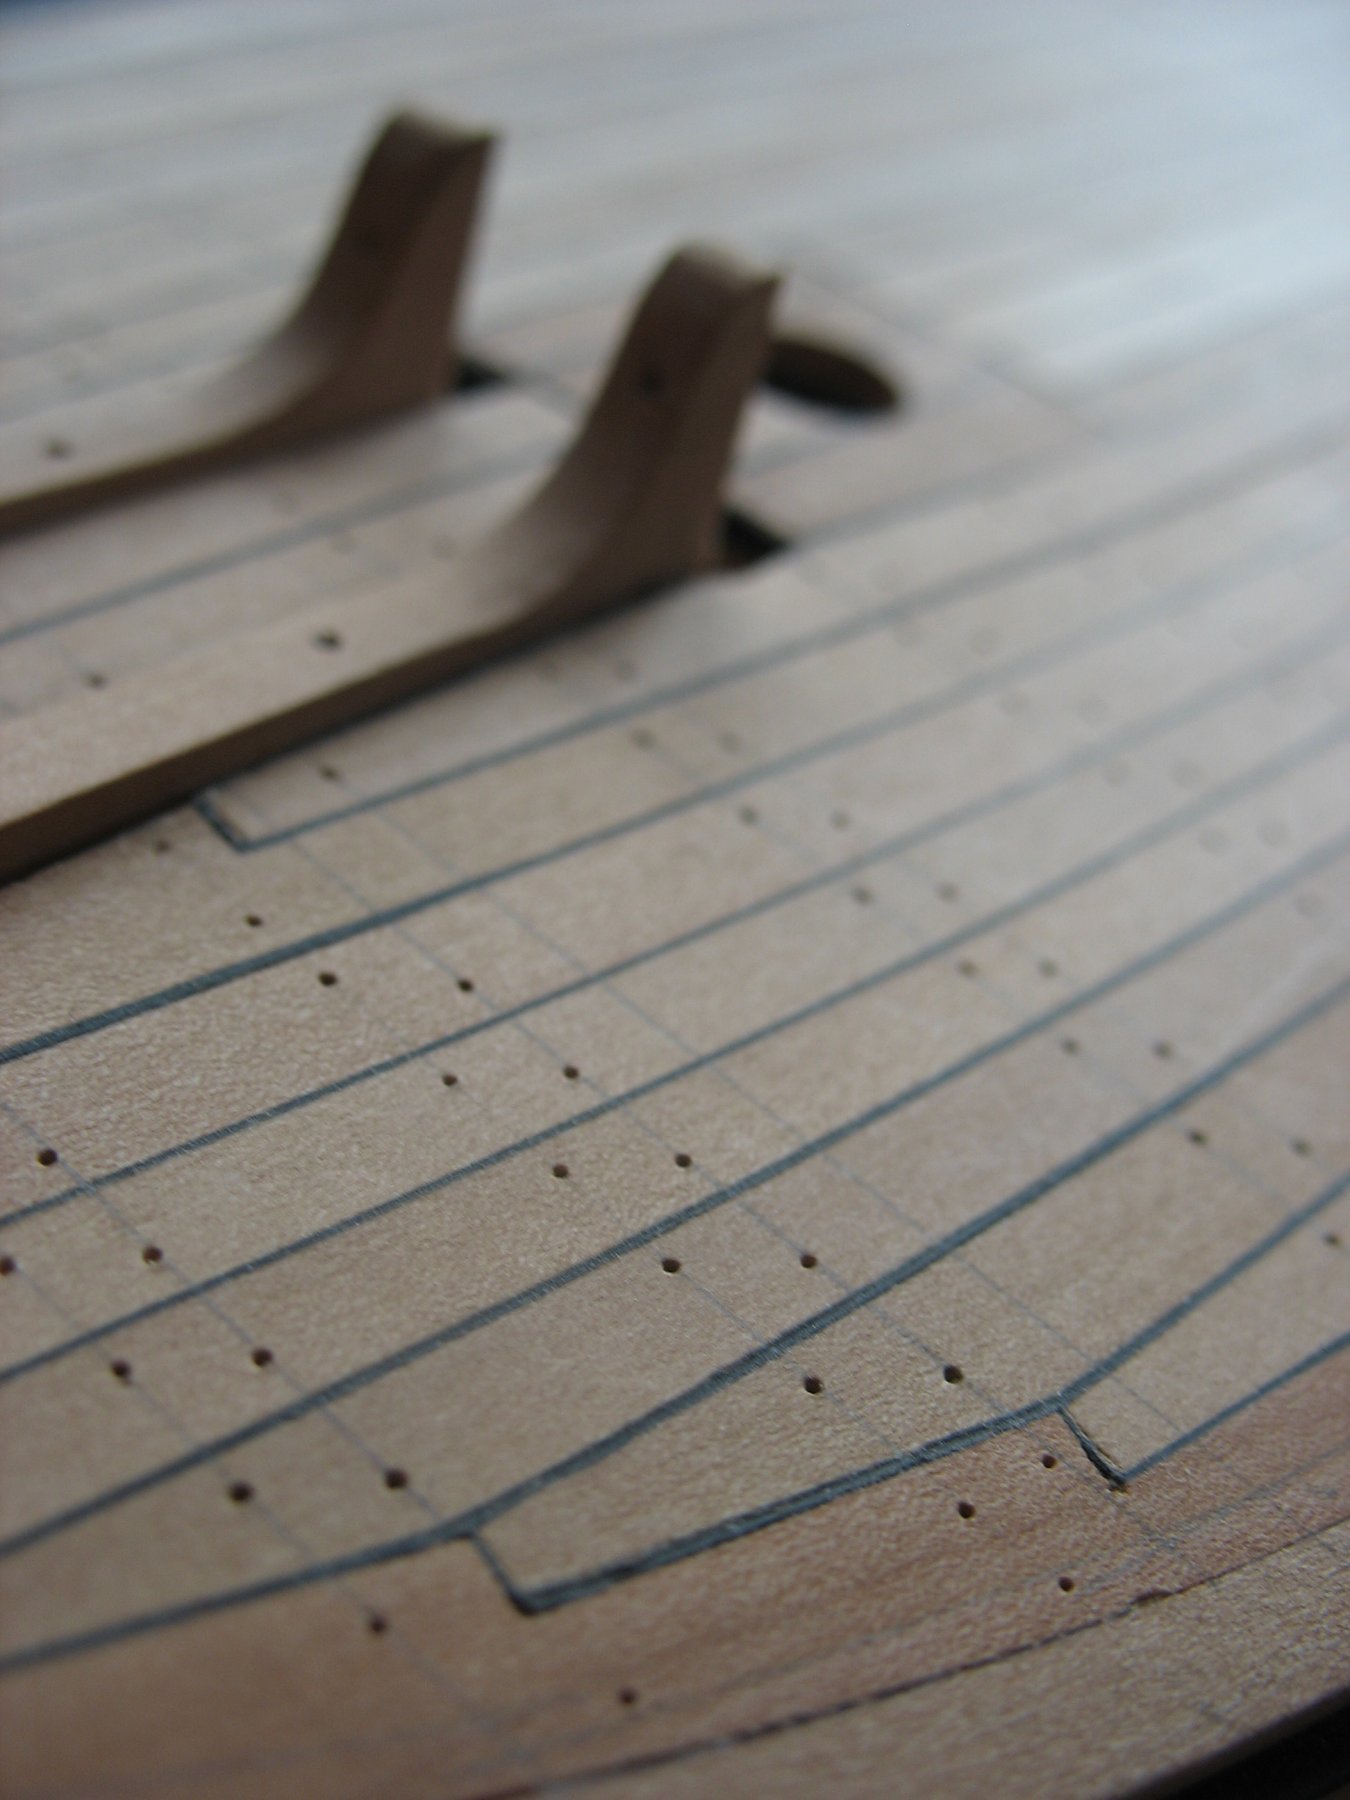
Top timbers are installed.
.thumb.JPG.0f935b65a847a255cda2dfdf1252b78a.JPG)

- ChrisLBren, FriedClams, Valeriy V and 19 others
-
22
-
-
Your handicraft is truly amazing!
- mtaylor and FriedClams
-
2
-
I have refined the taffrail a bit.

- Keith Black, coxswain, BETAQDAVE and 15 others
-
18
-
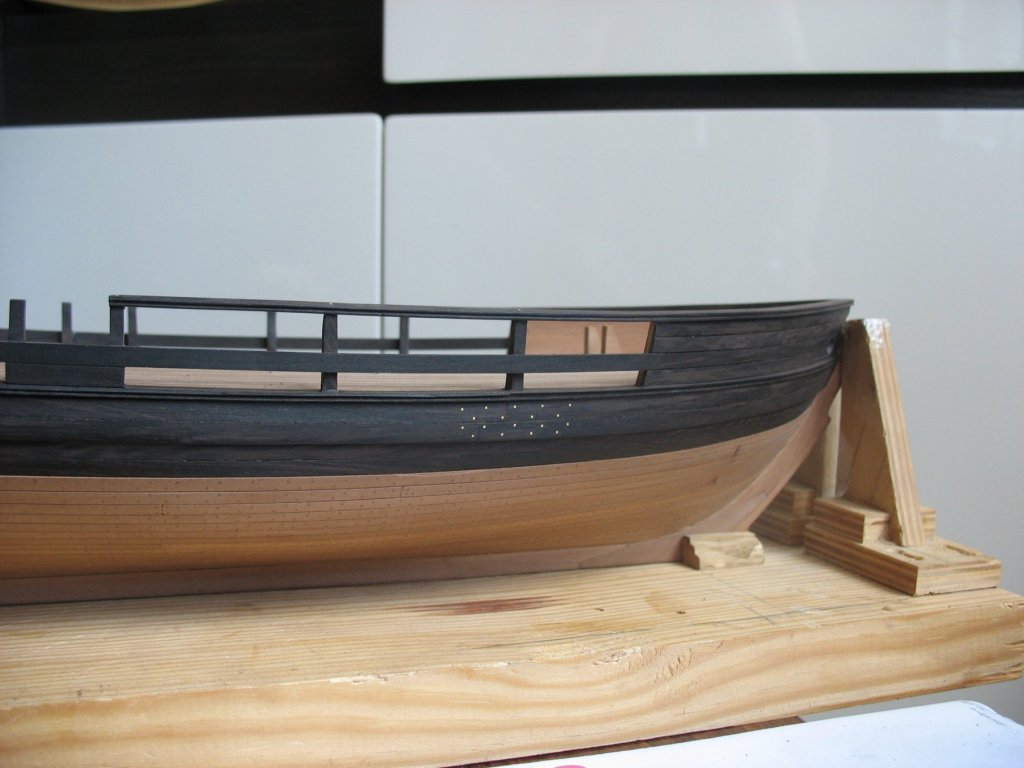
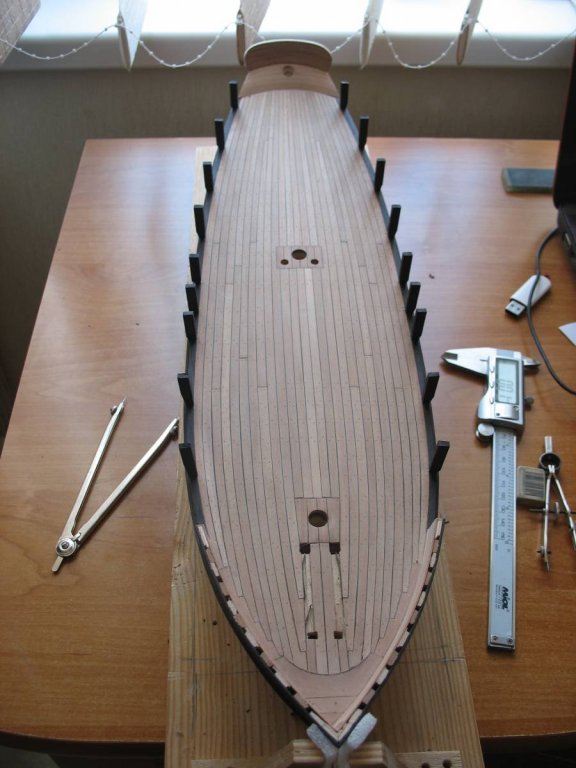
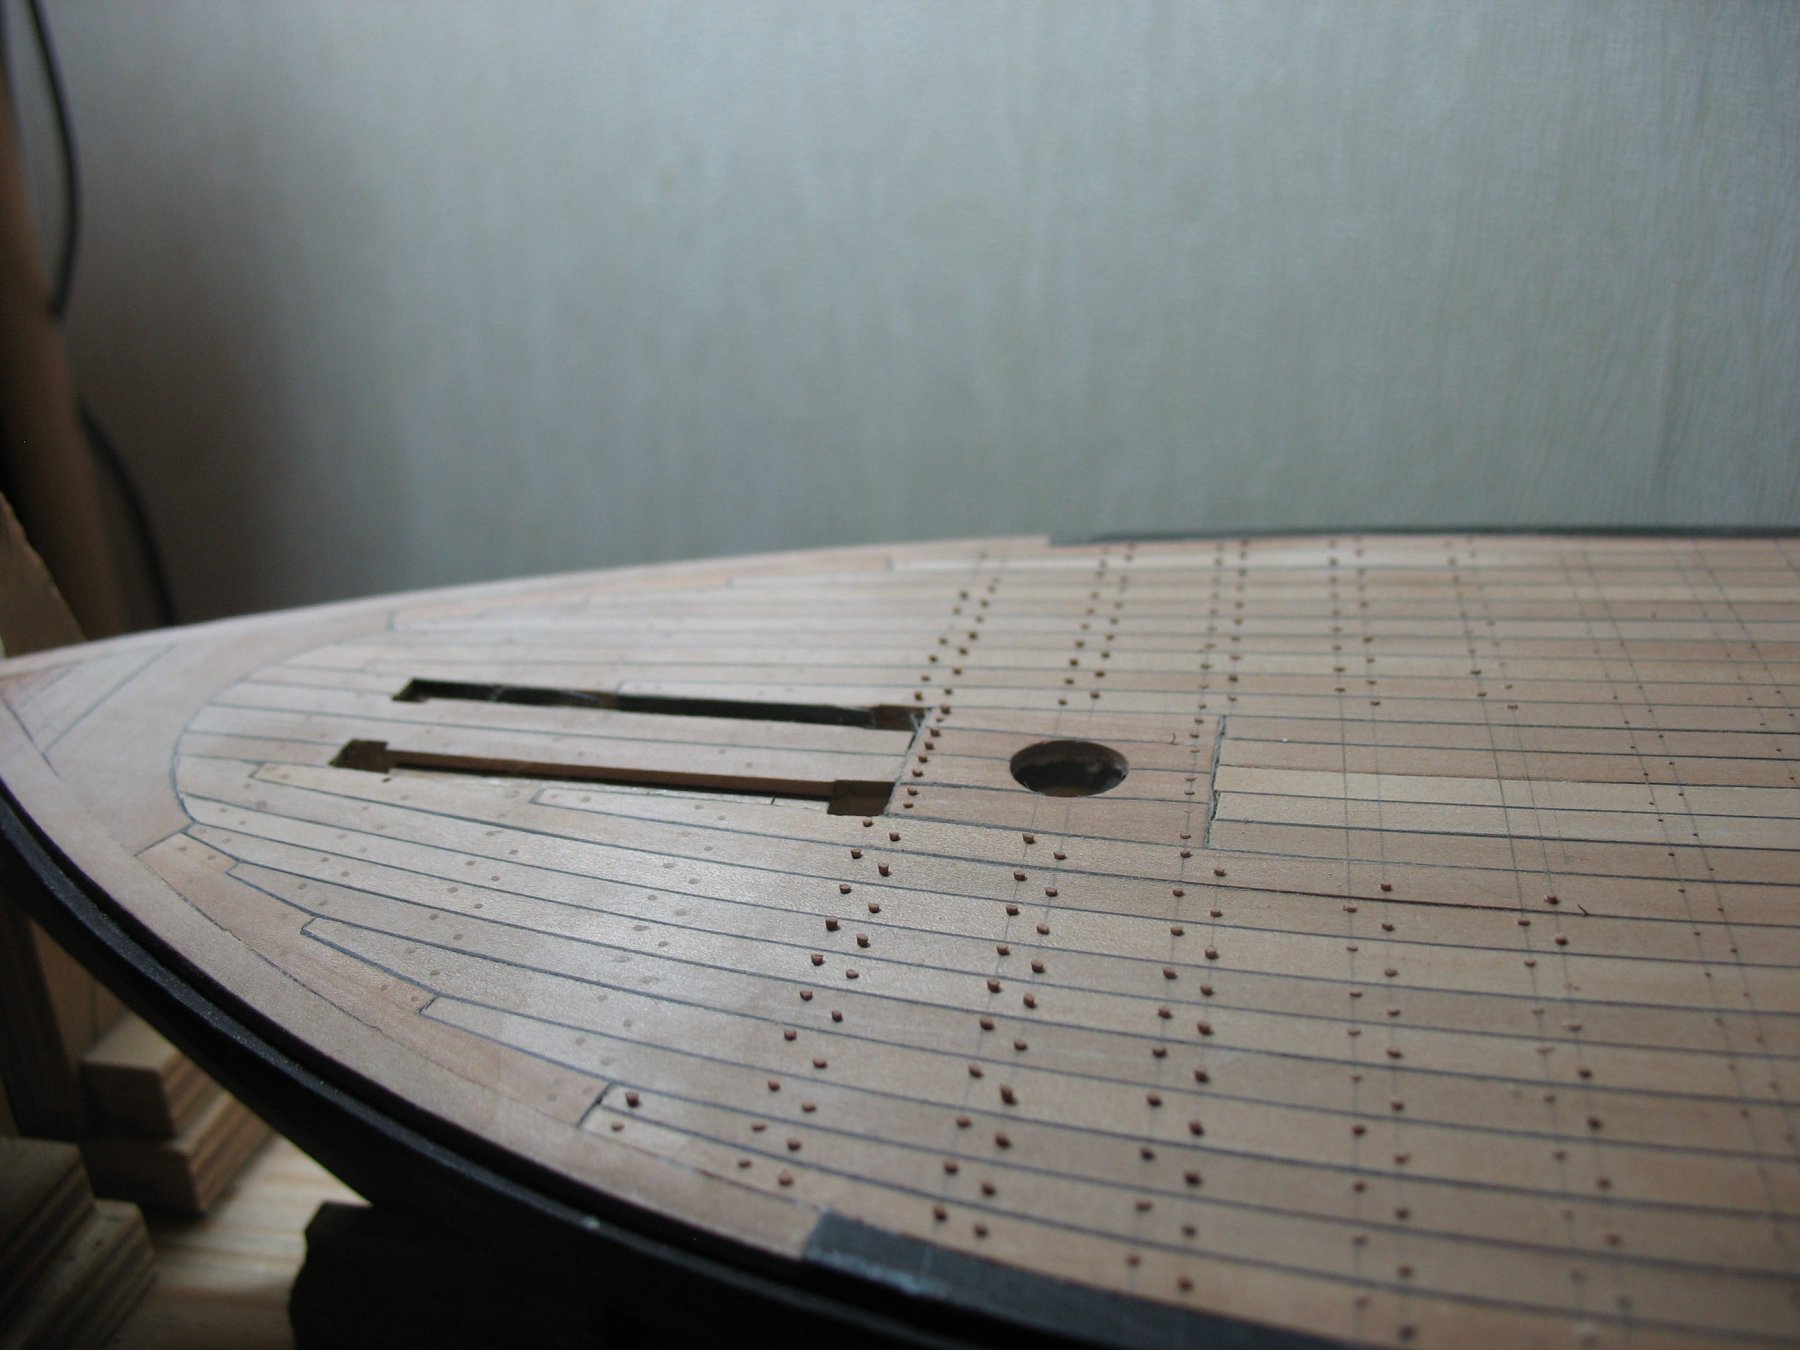
Basically I’ve finished nailing.
I finally got around to overhang. It is painted, taffrail is covered with pear tree and black hornbeam. I made it with a small margin, when the enclosures are set I will finish the taffrail.
- JpR62, paulsutcliffe, GrandpaPhil and 10 others
-
13
-
Thank you very much my dear colleagues.
Dear Michael.I have a pause in building "SPERWER" - I'm making sails. That's why I decided to show on the forum my last finished work Unfortunately I don't belong to the masters who work quickly. Once, I have apent two weeks of my vacation to make nailing.- Keith Black, BETAQDAVE and mtaylor
-
3
-
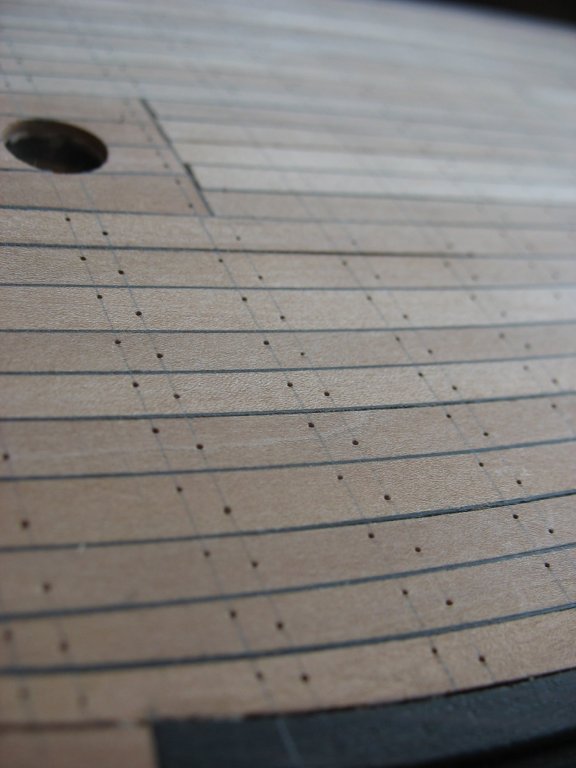
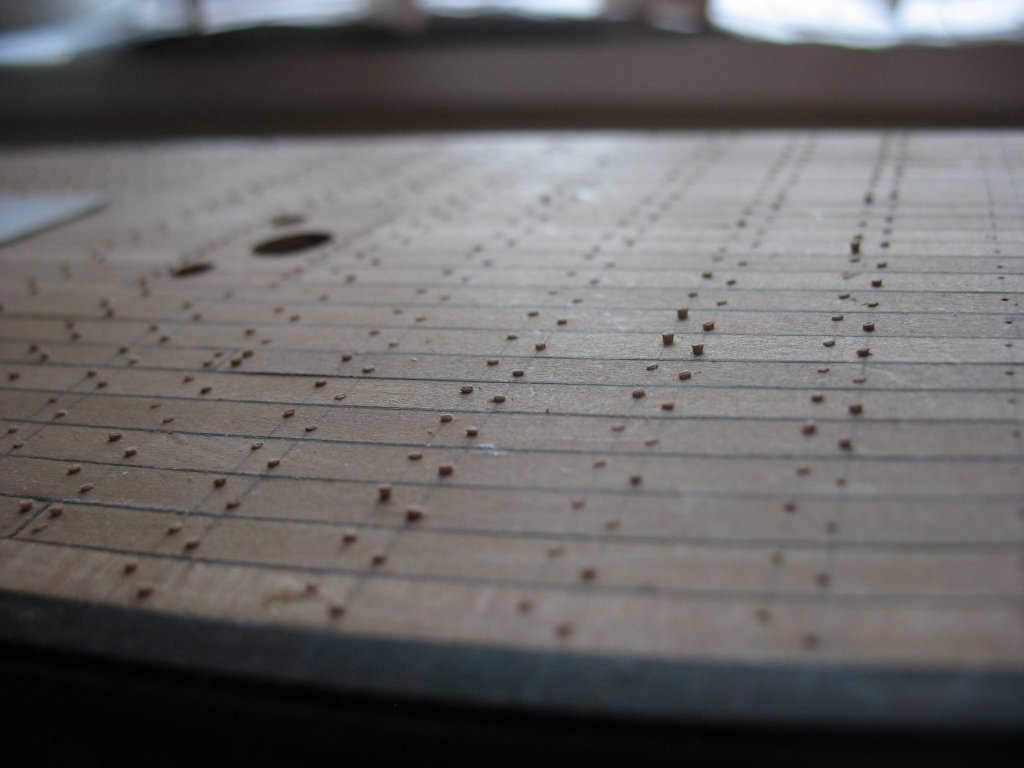
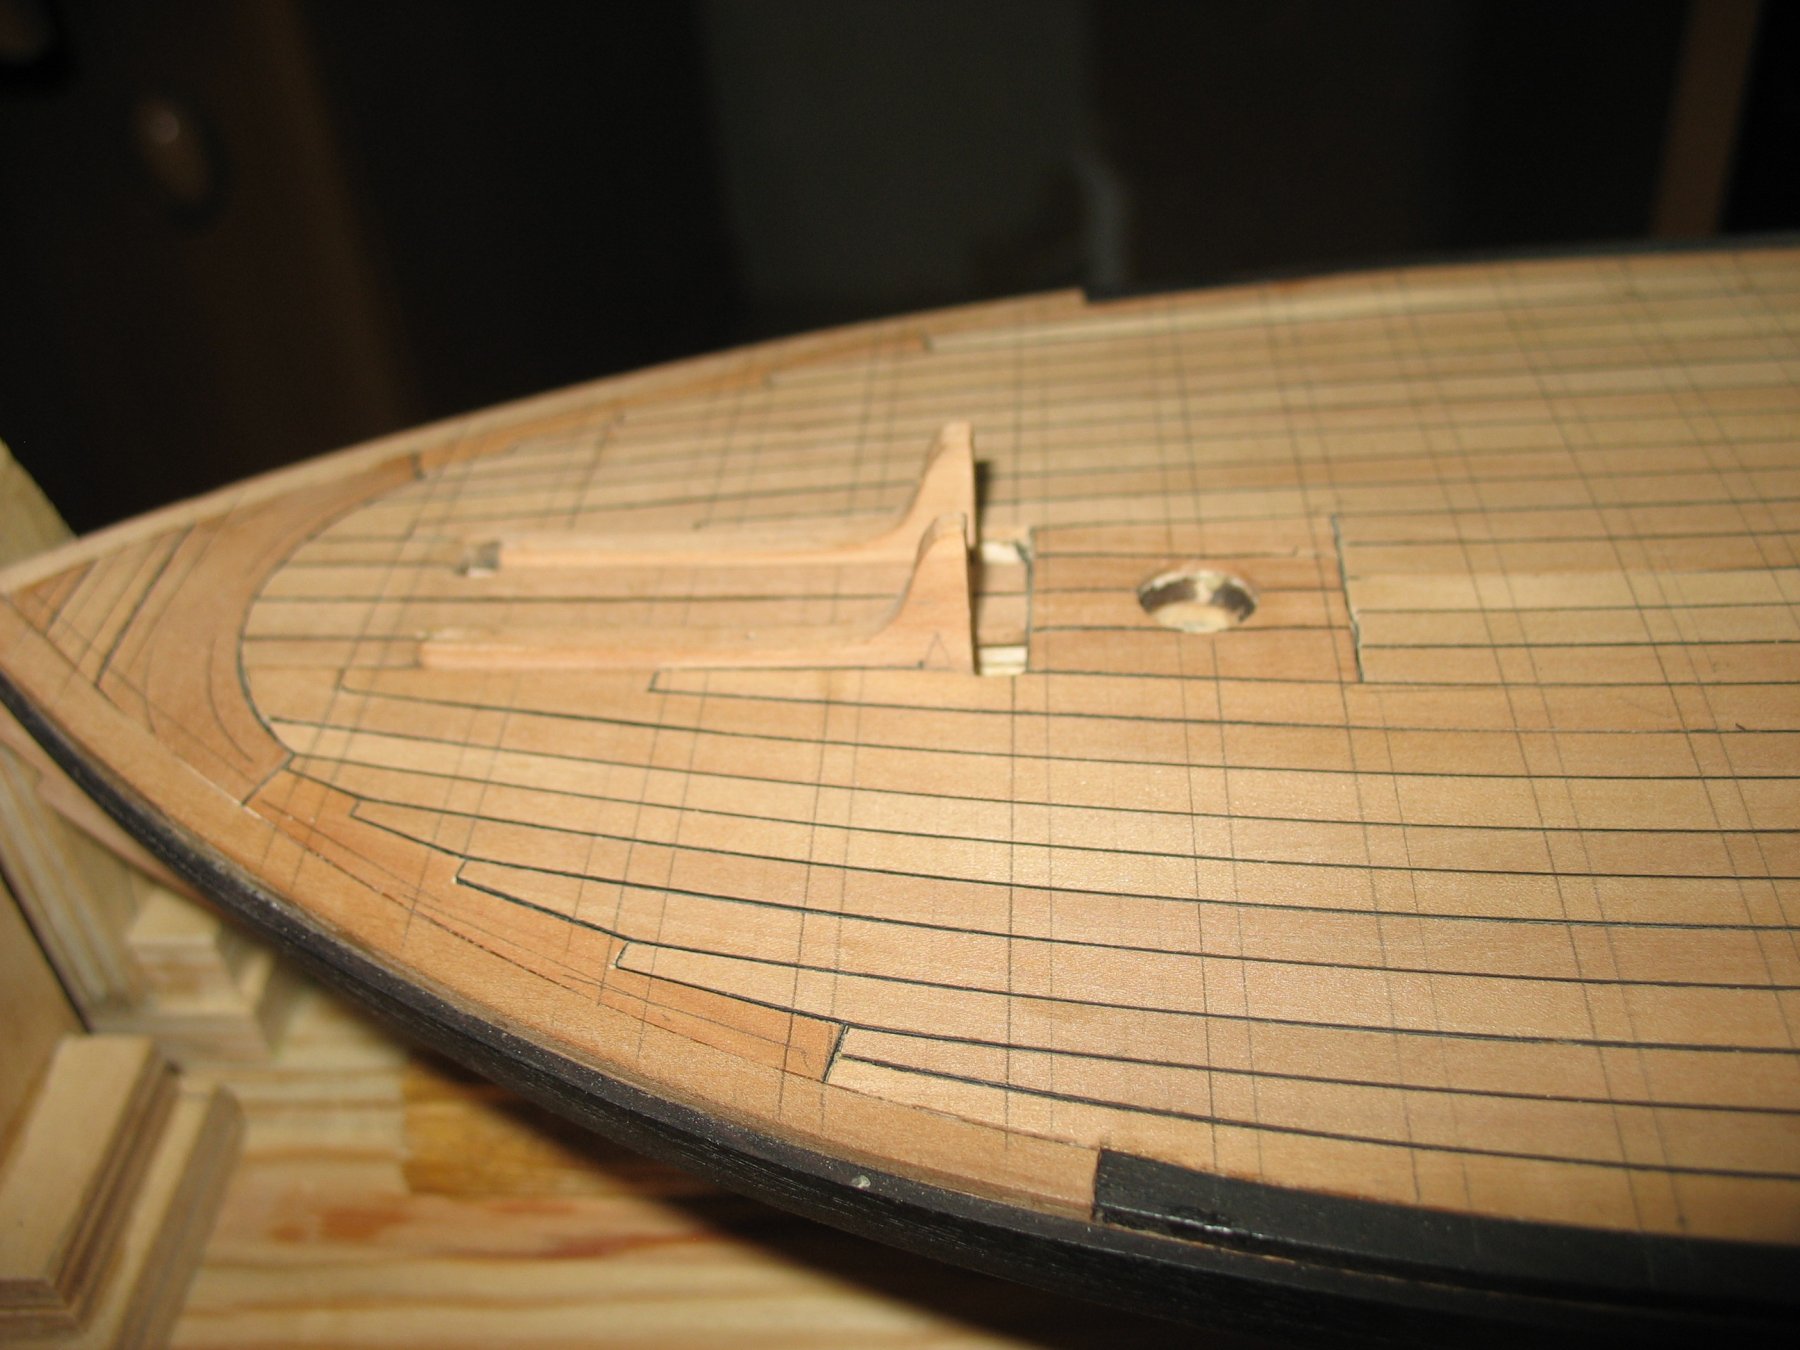
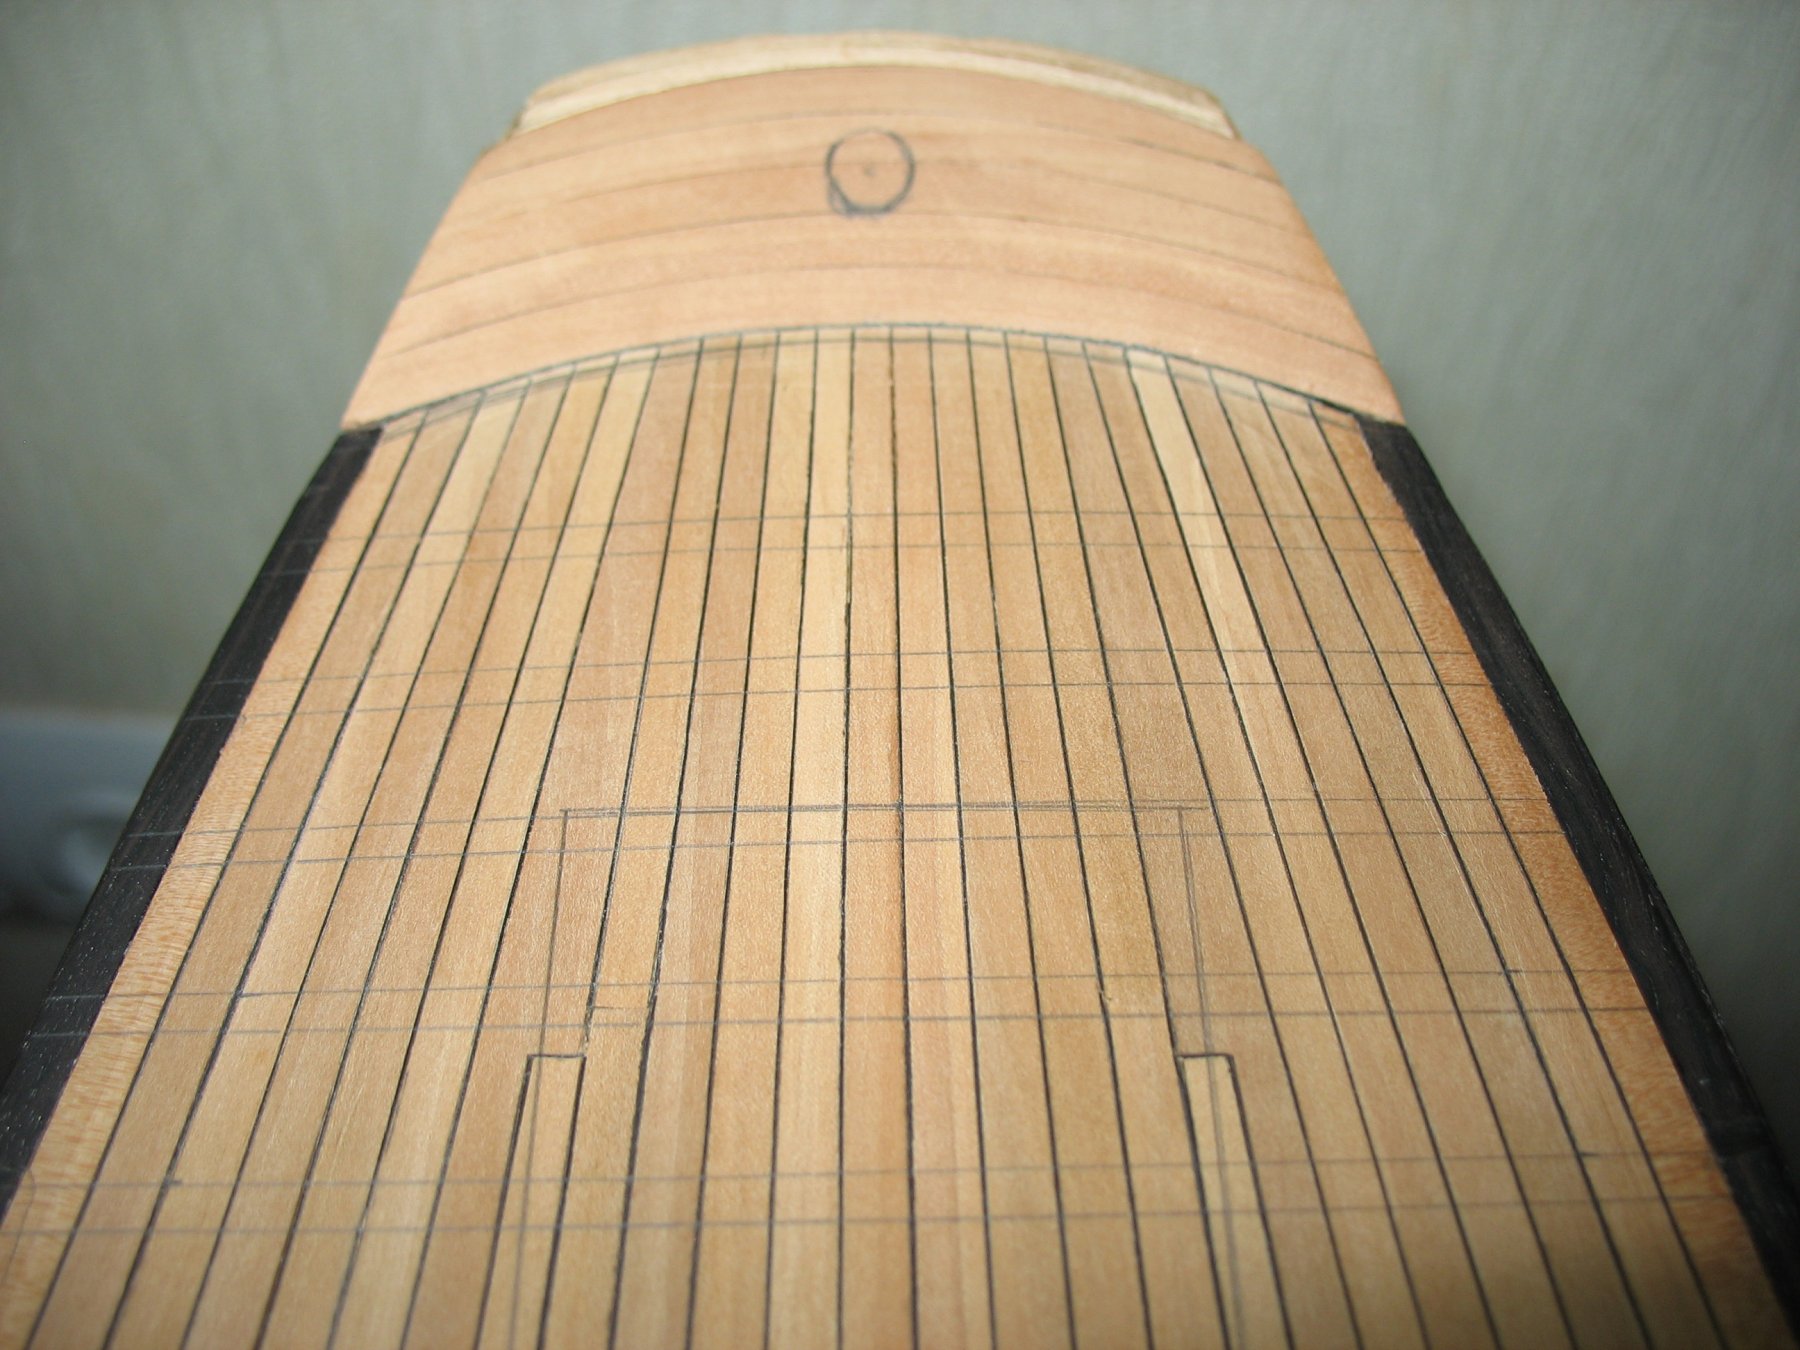
I have finished sketching, I still have half of the broadside to be filled with treenails.

- DORIS, Siggi52, Keith Black and 15 others
-
18
-
The hell is waiting to be done. For now I am making sketches.
- Keith Black, archjofo, tarbrush and 9 others
-
12
-
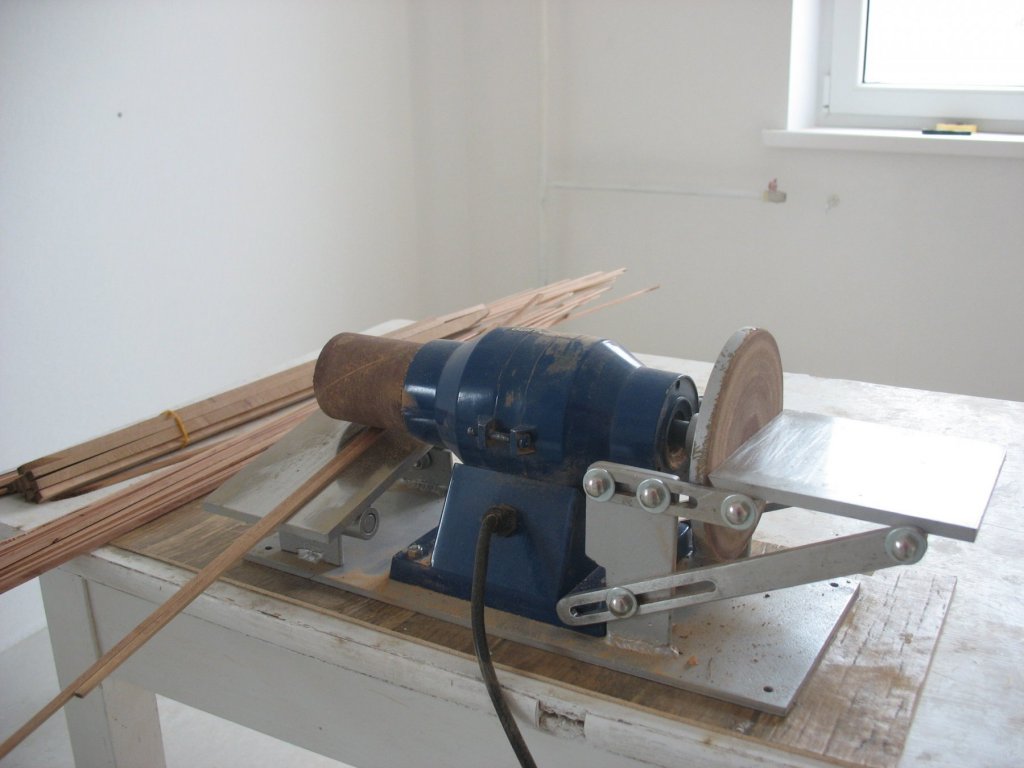
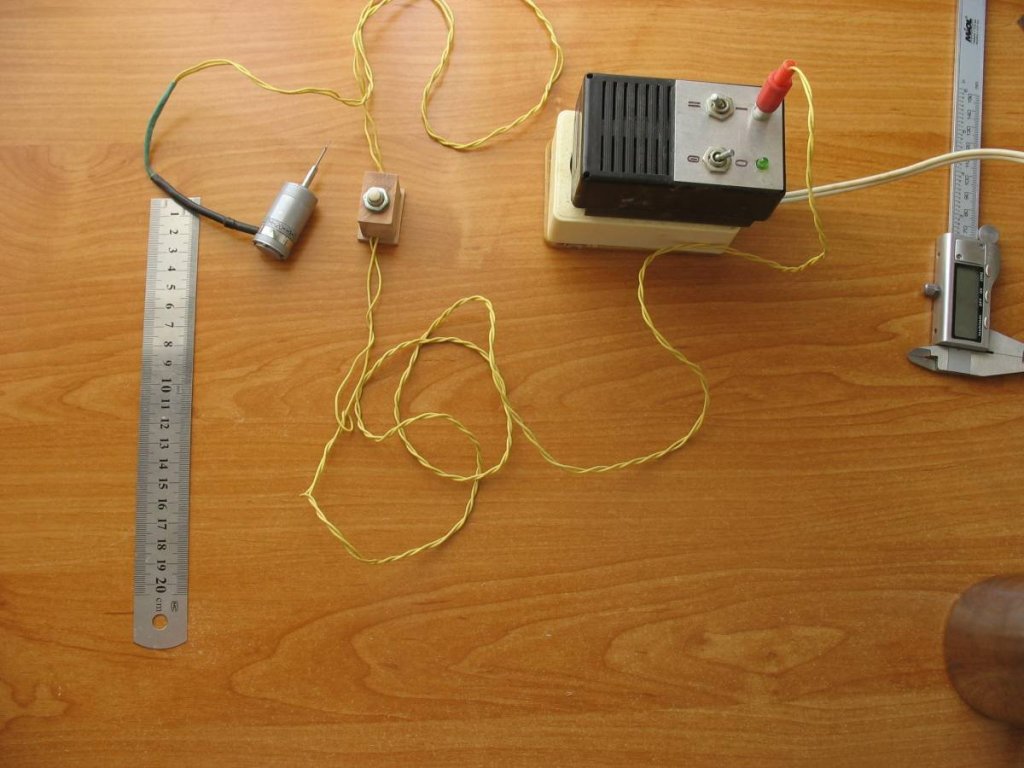
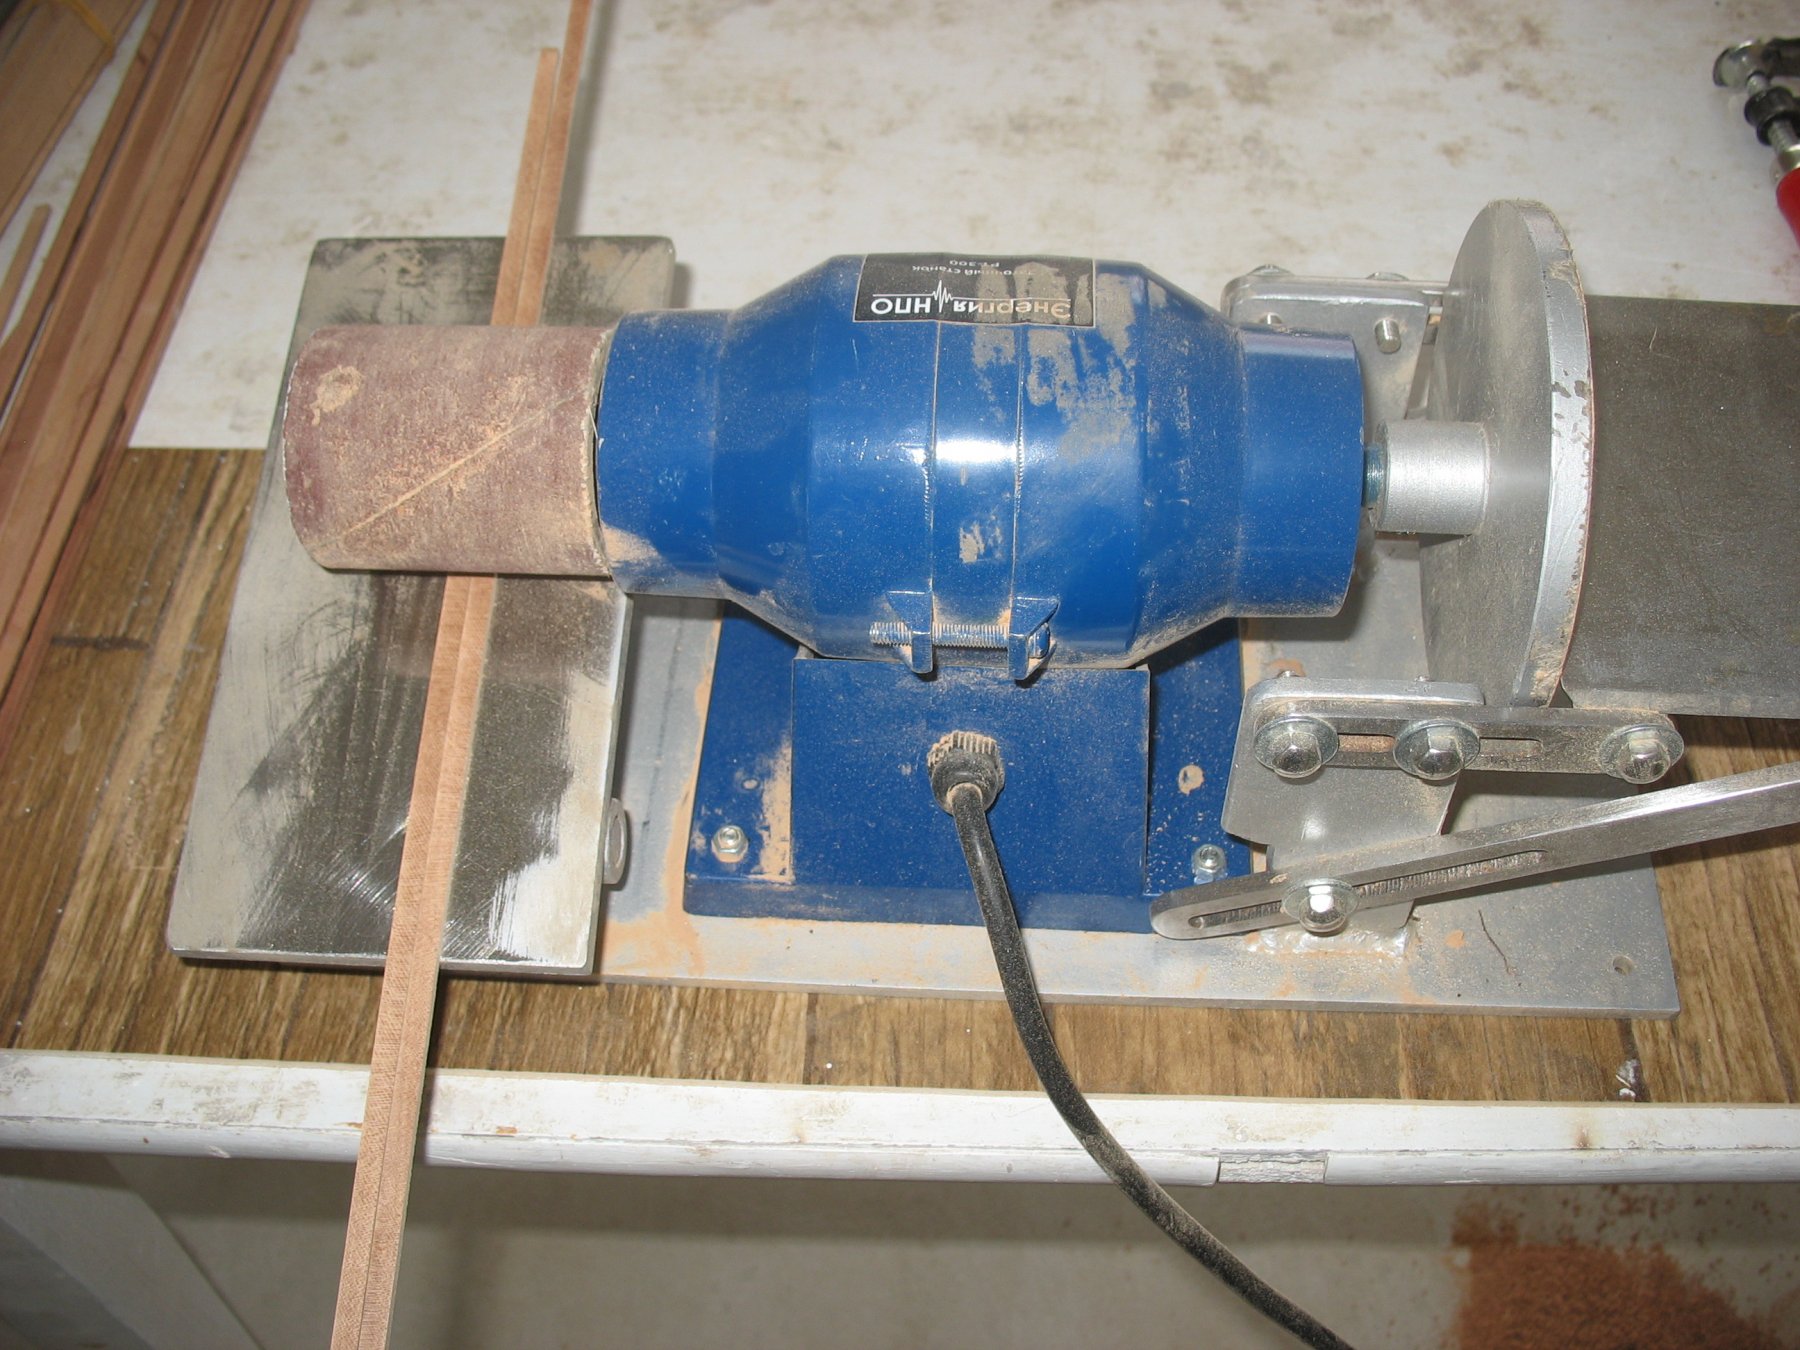
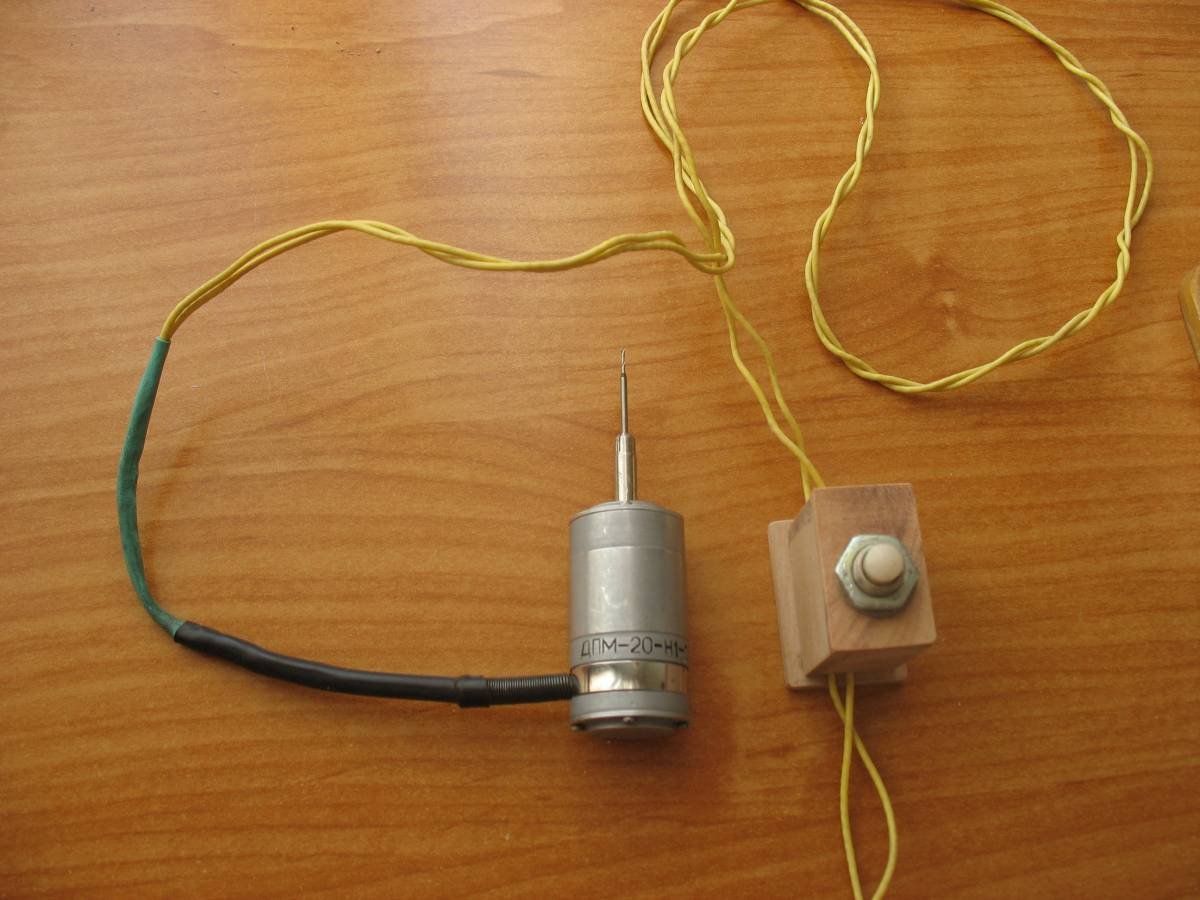
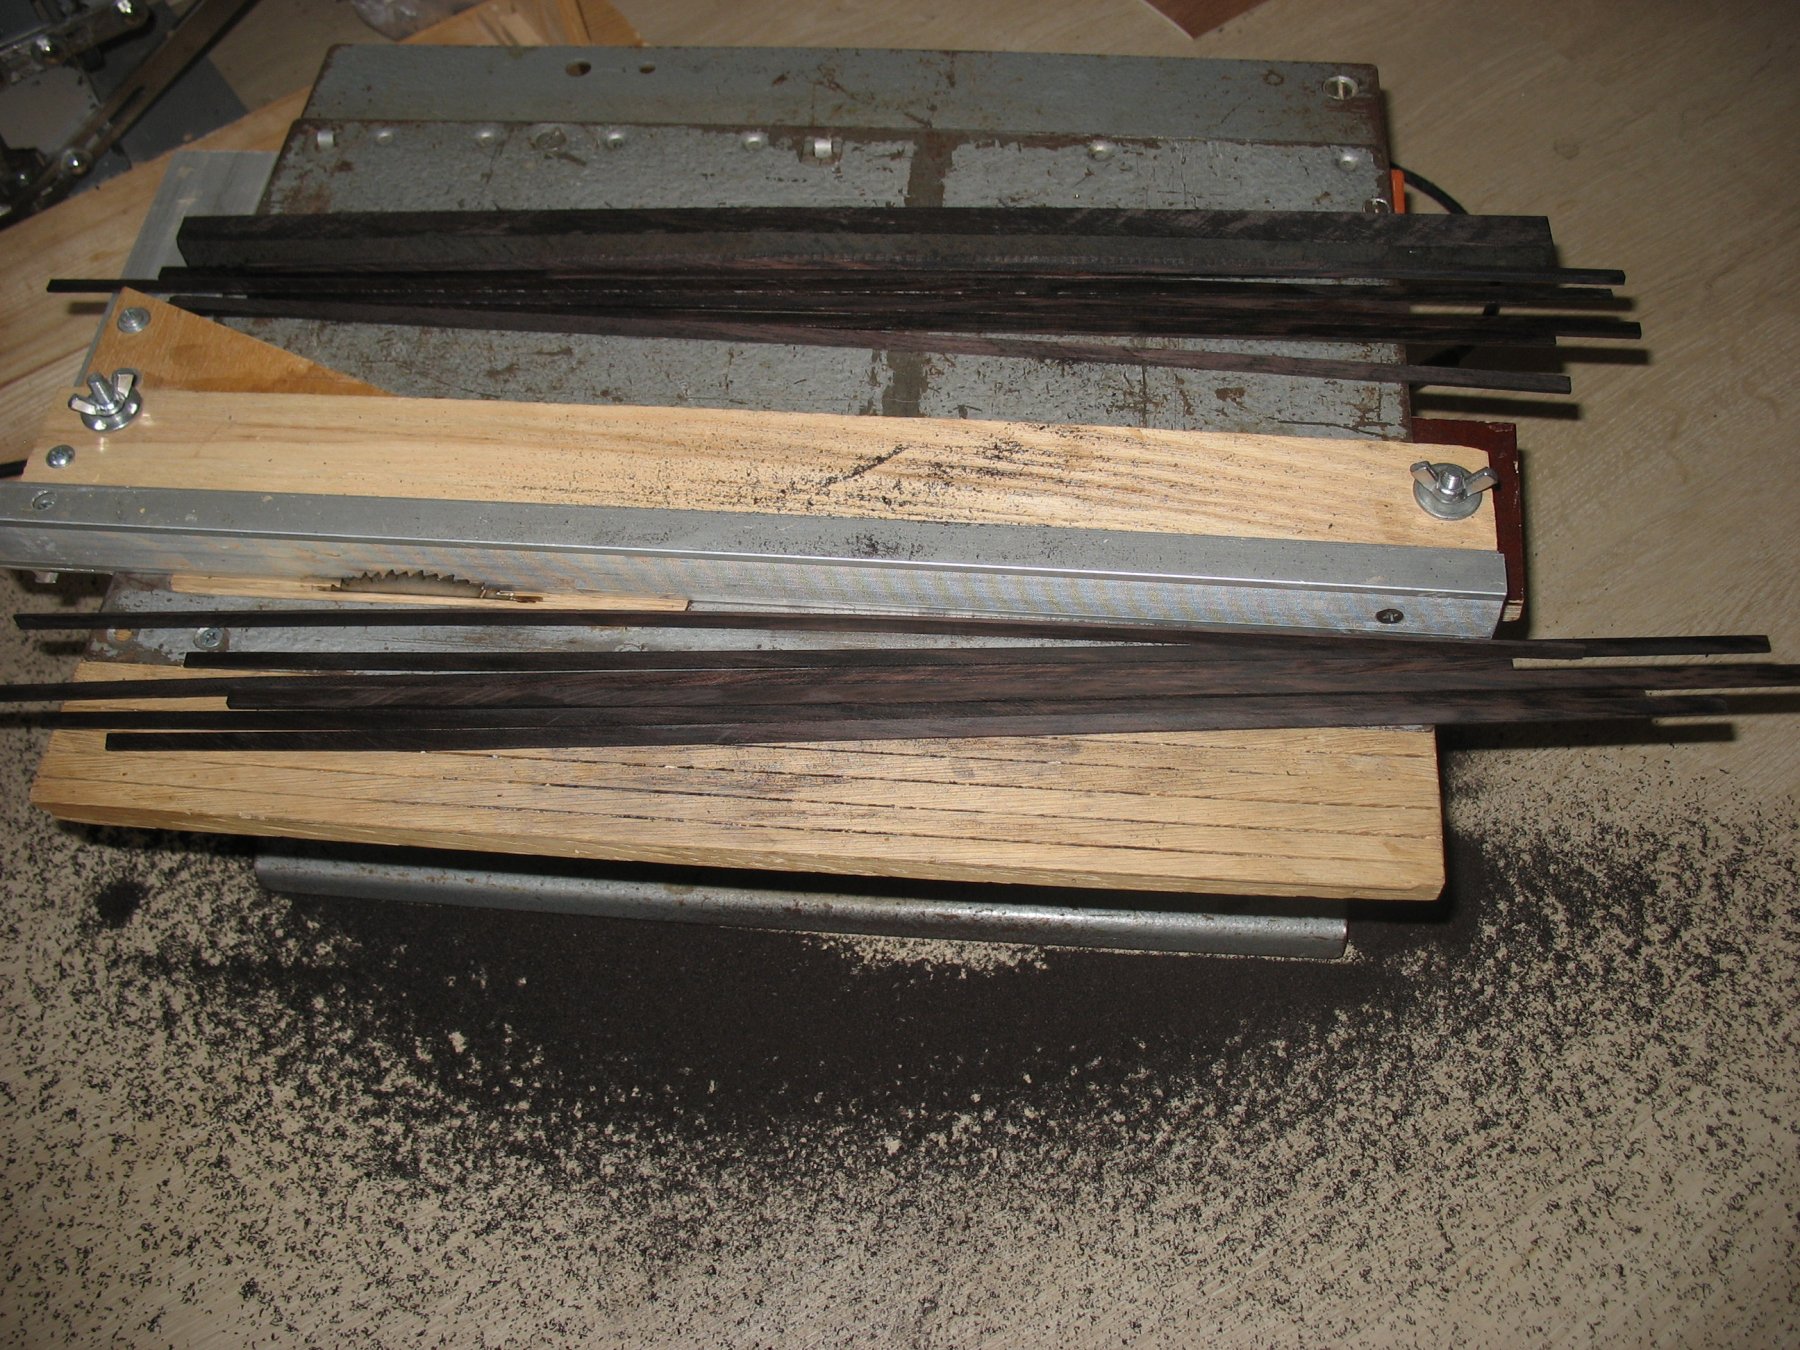
My greetings, dear Dave.
Before the beginning of the building I realised the necessity of such instrument.Unfortunately, to my point of view, the PROXXON instruments are unreasonably expensive . That is why I have found in the internet photo of such instrument and asked my brother, who works with metal, to make me one. As a result I have two machines in one and it was a lot cheaper.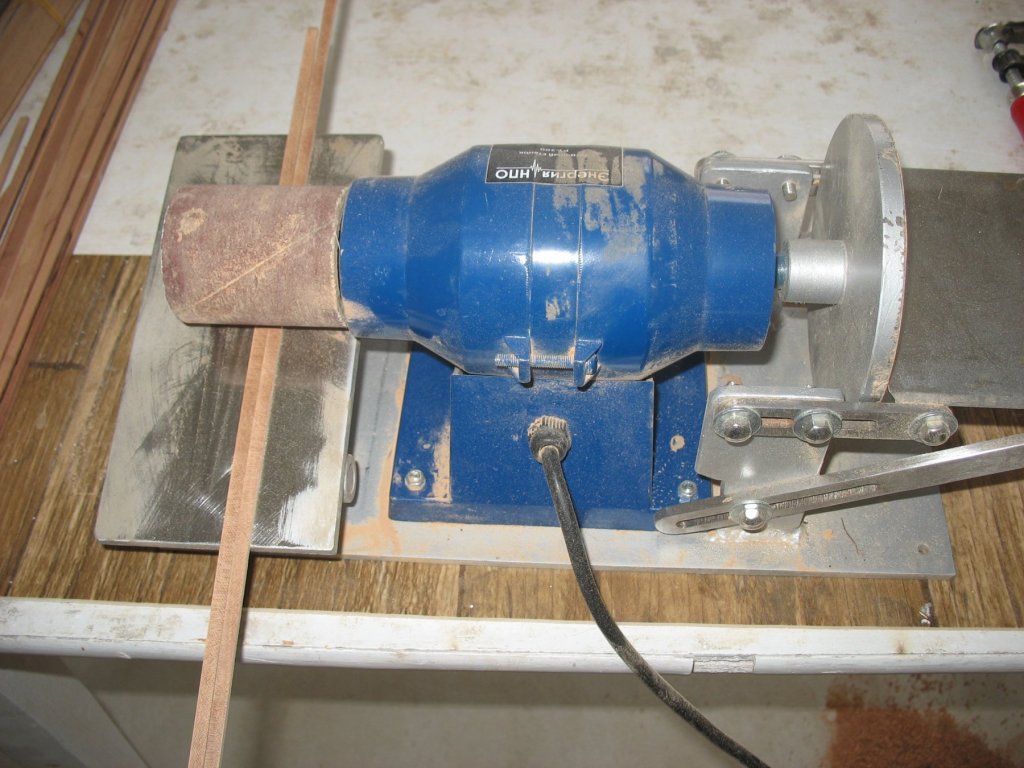
-
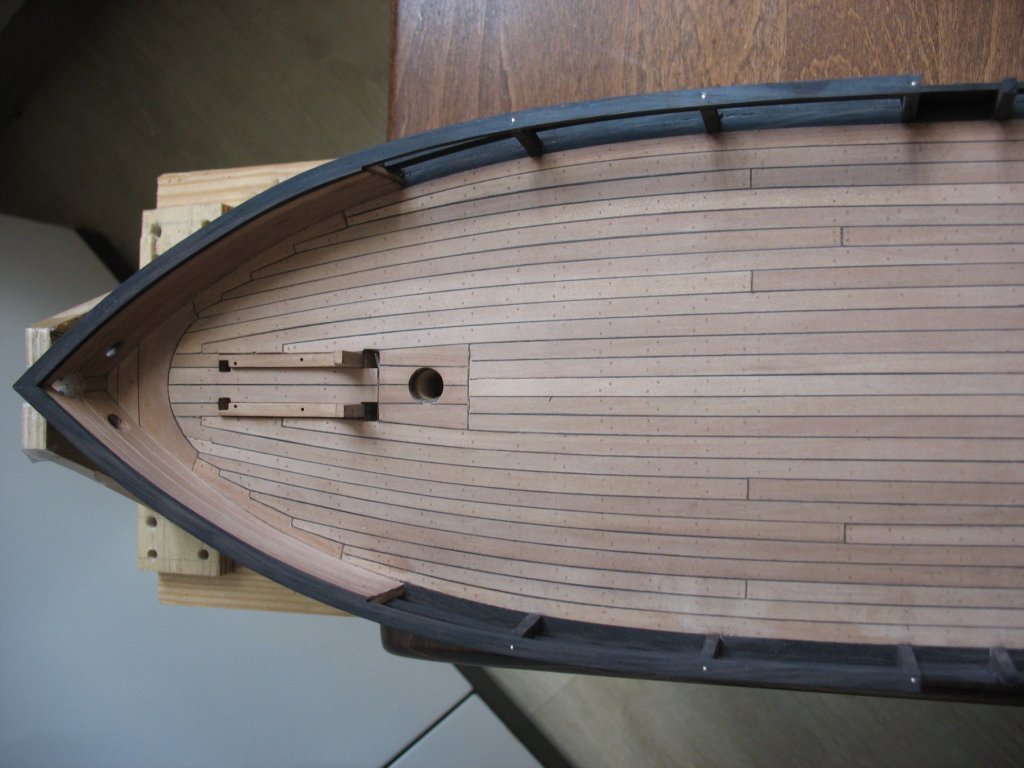
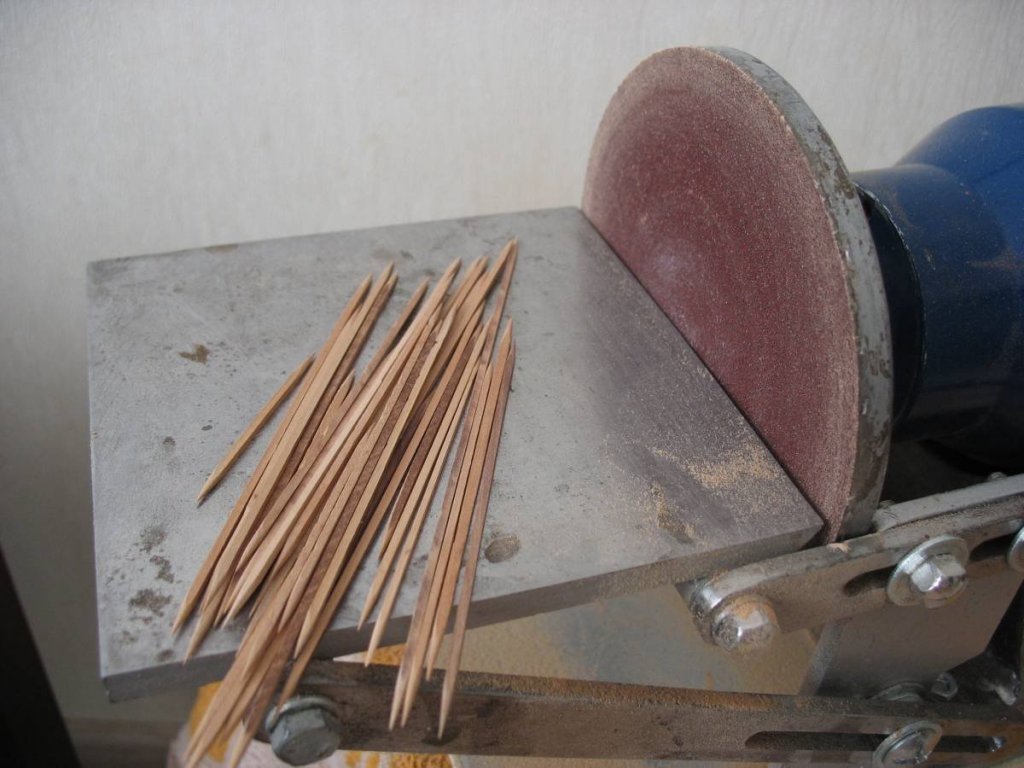
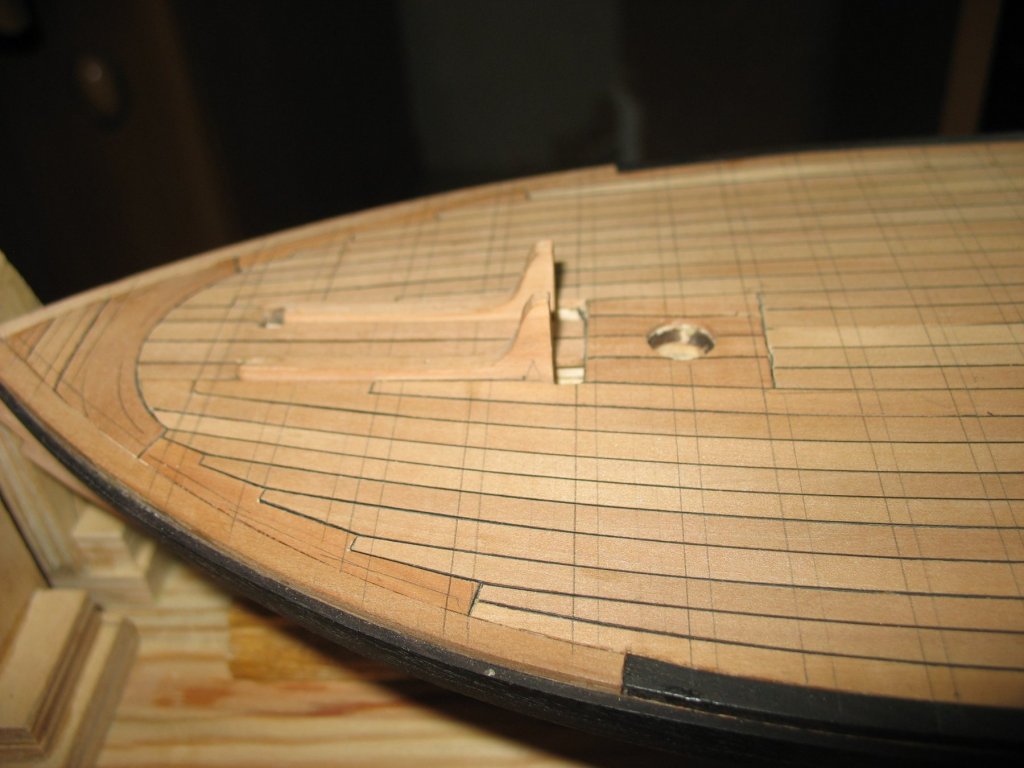
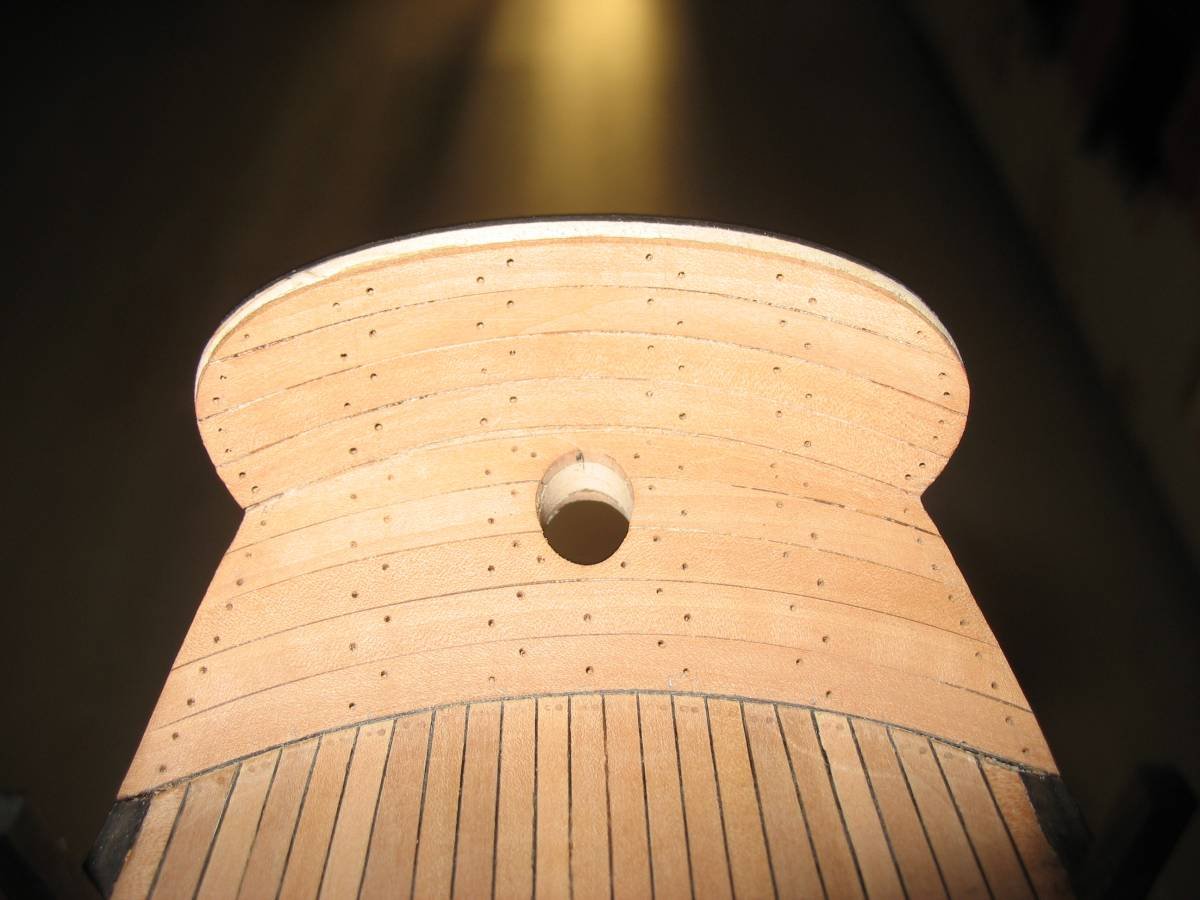
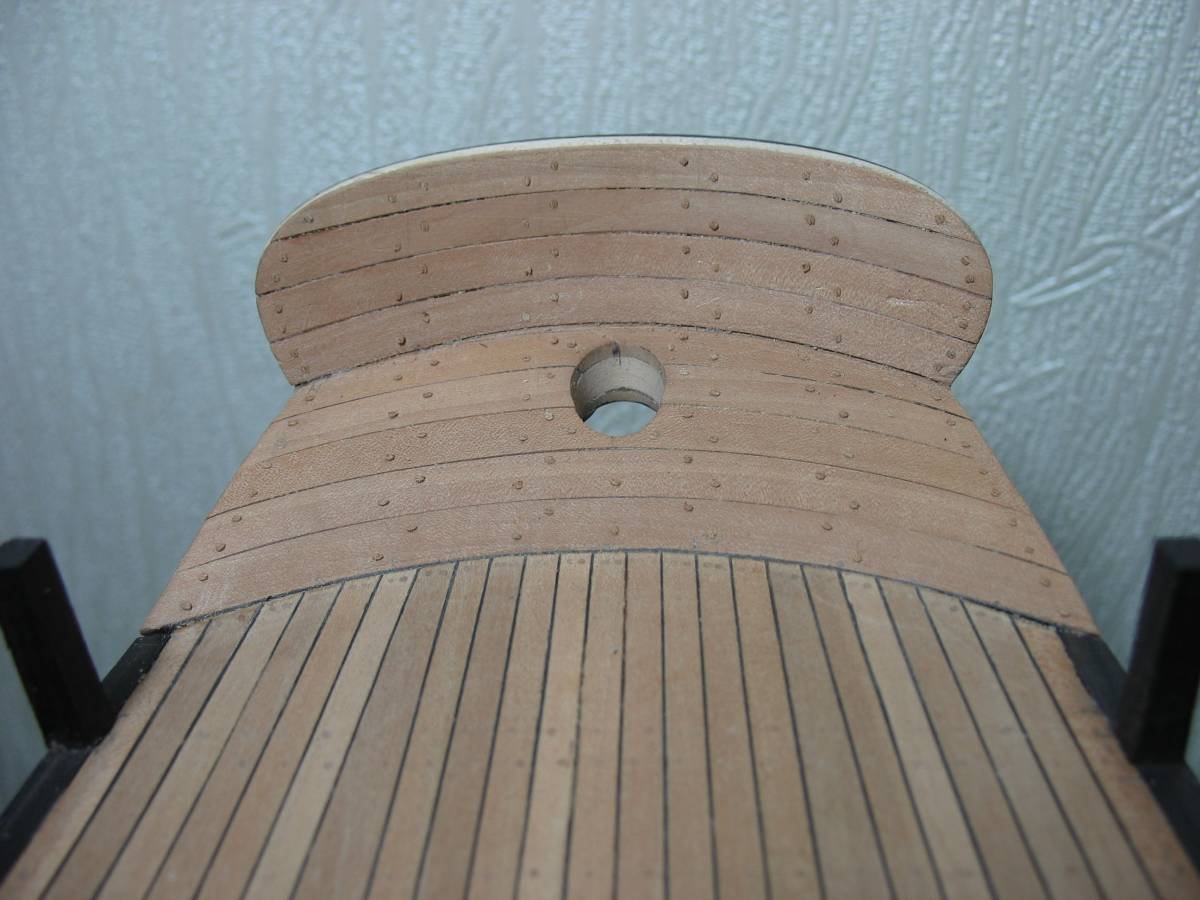
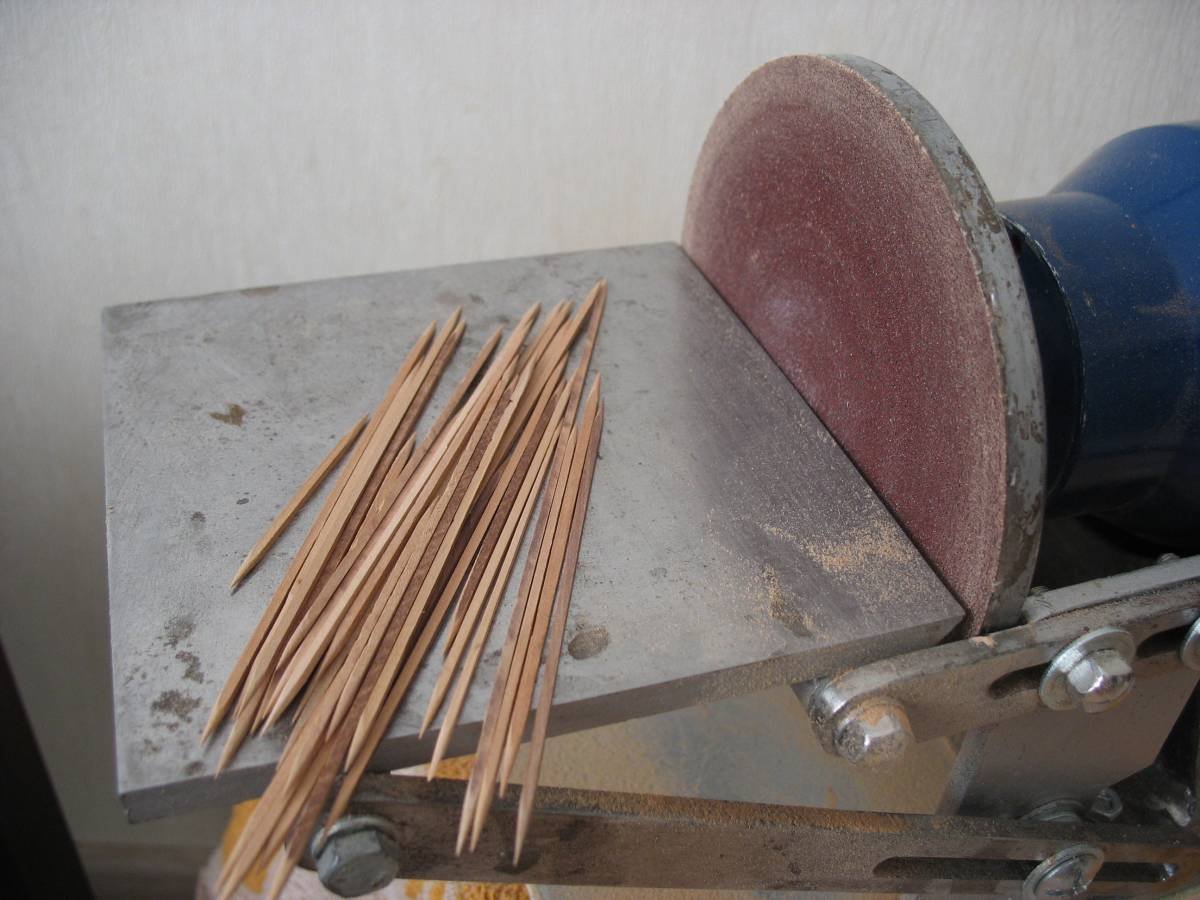
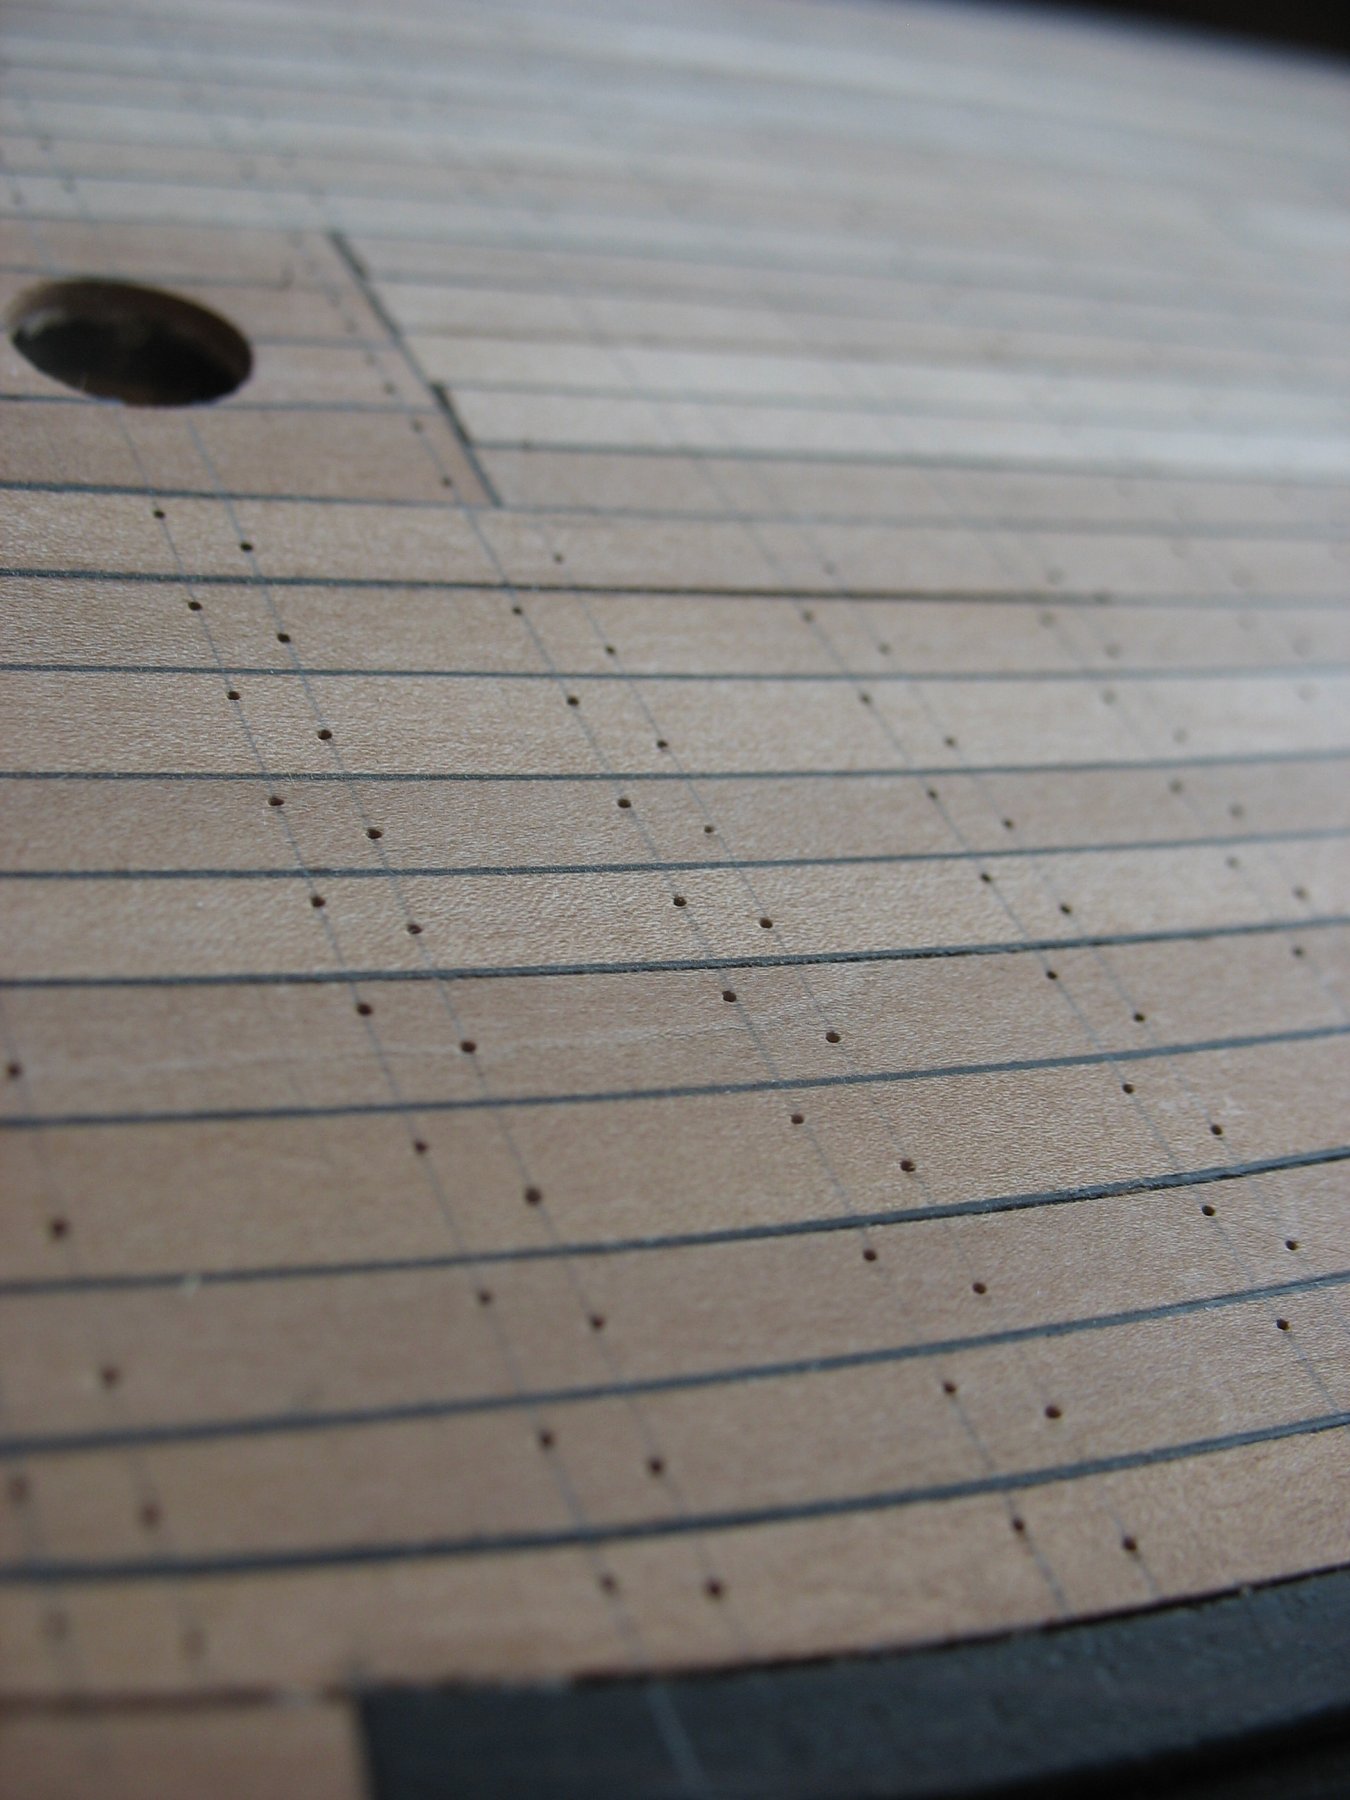
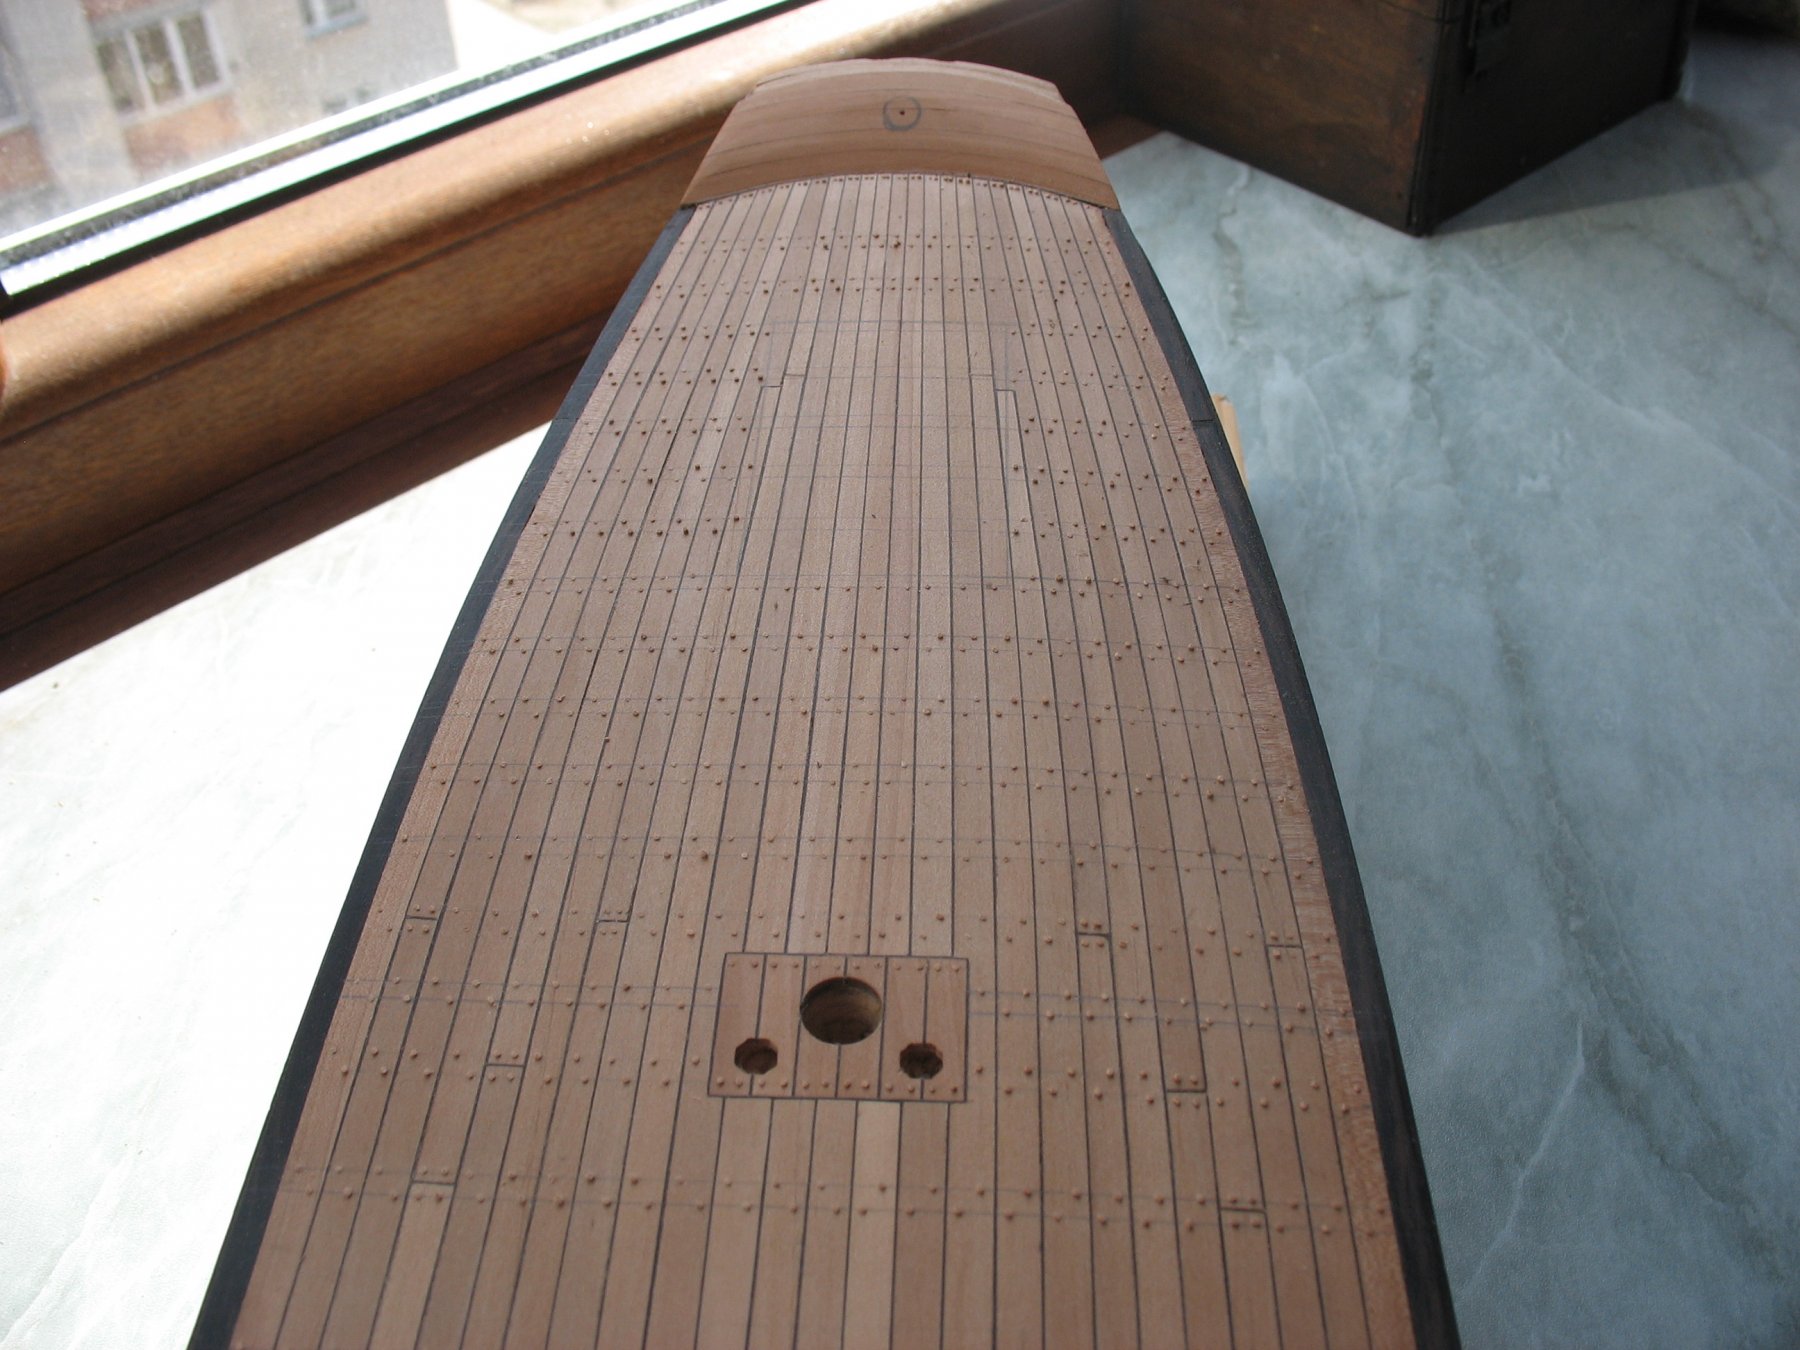
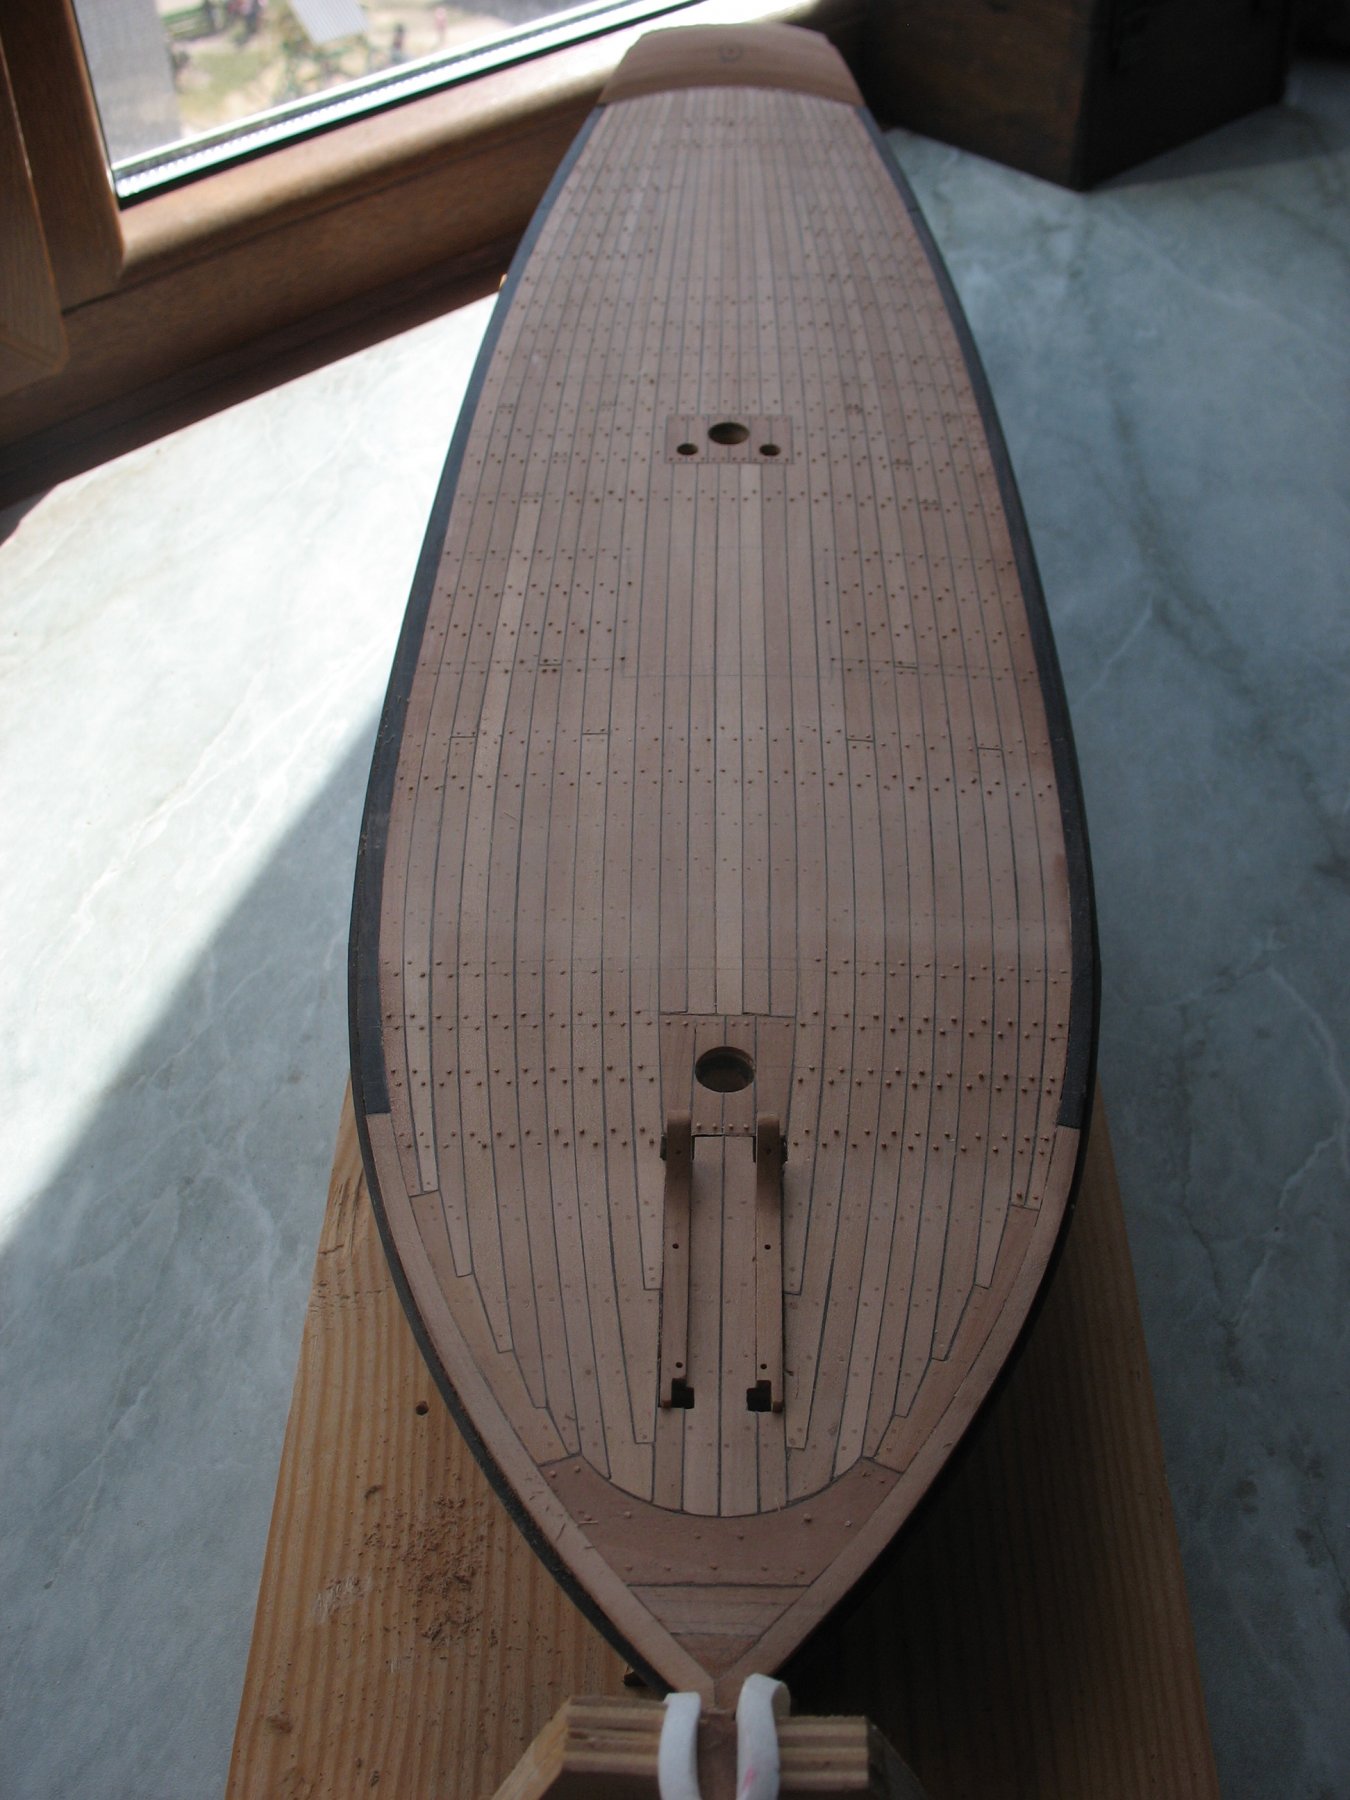
Treenails of the deck.
Unfortunately, I didn’t master the make using the syringe needle, after a few failed tries I gave it up… I haven’t had enough patience. I decided to sharpen on the grinder. After some try-outs I opted for the pear tree instead of the toothpicks. D=0,6 mm.


- dvm27, Keith Black, tkay11 and 17 others
-
20
-
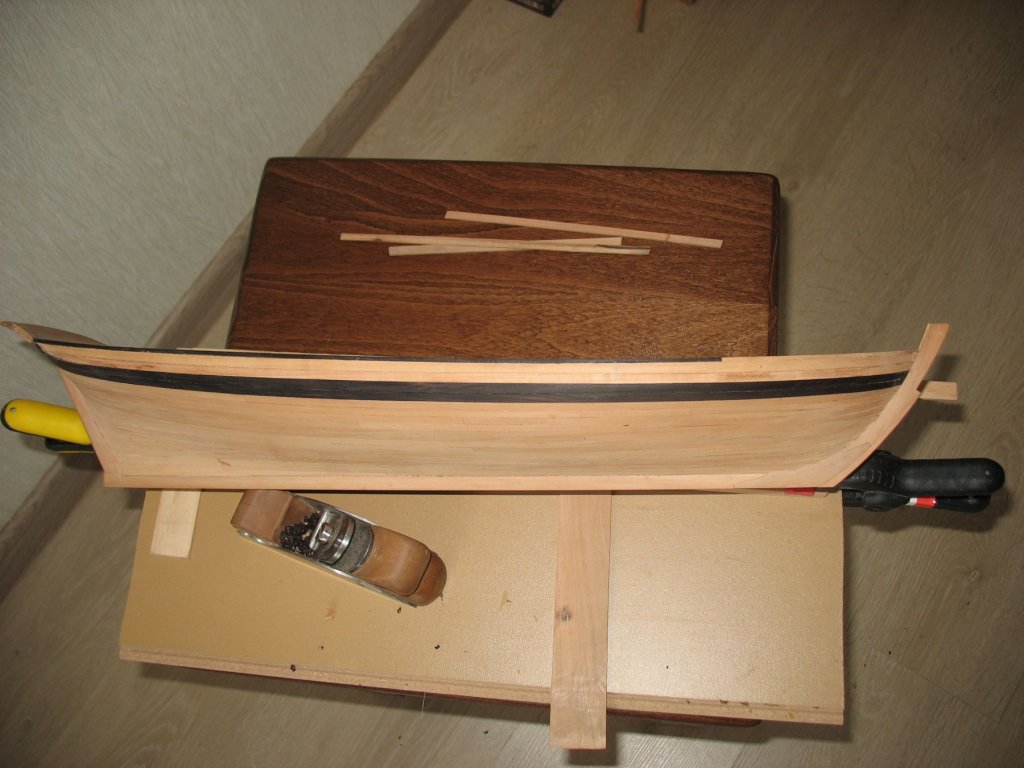
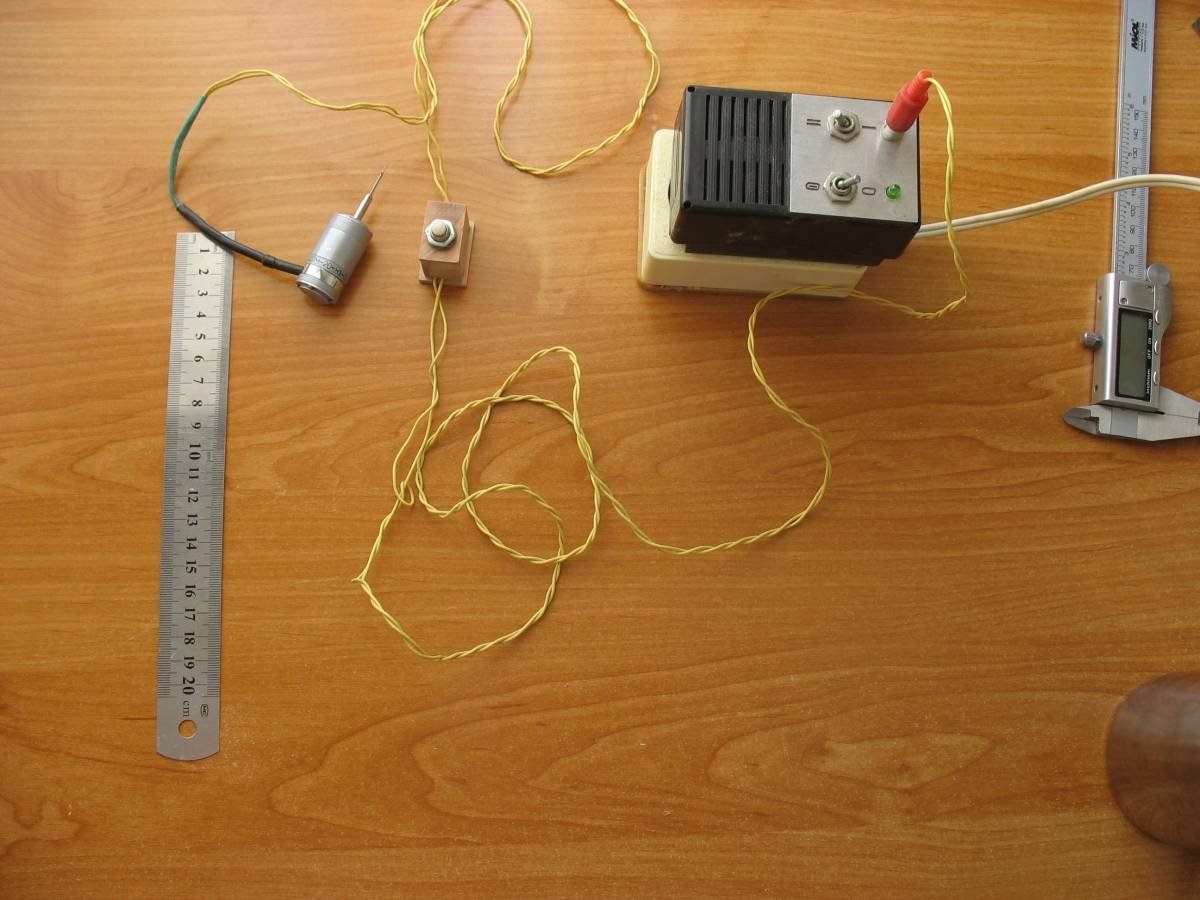
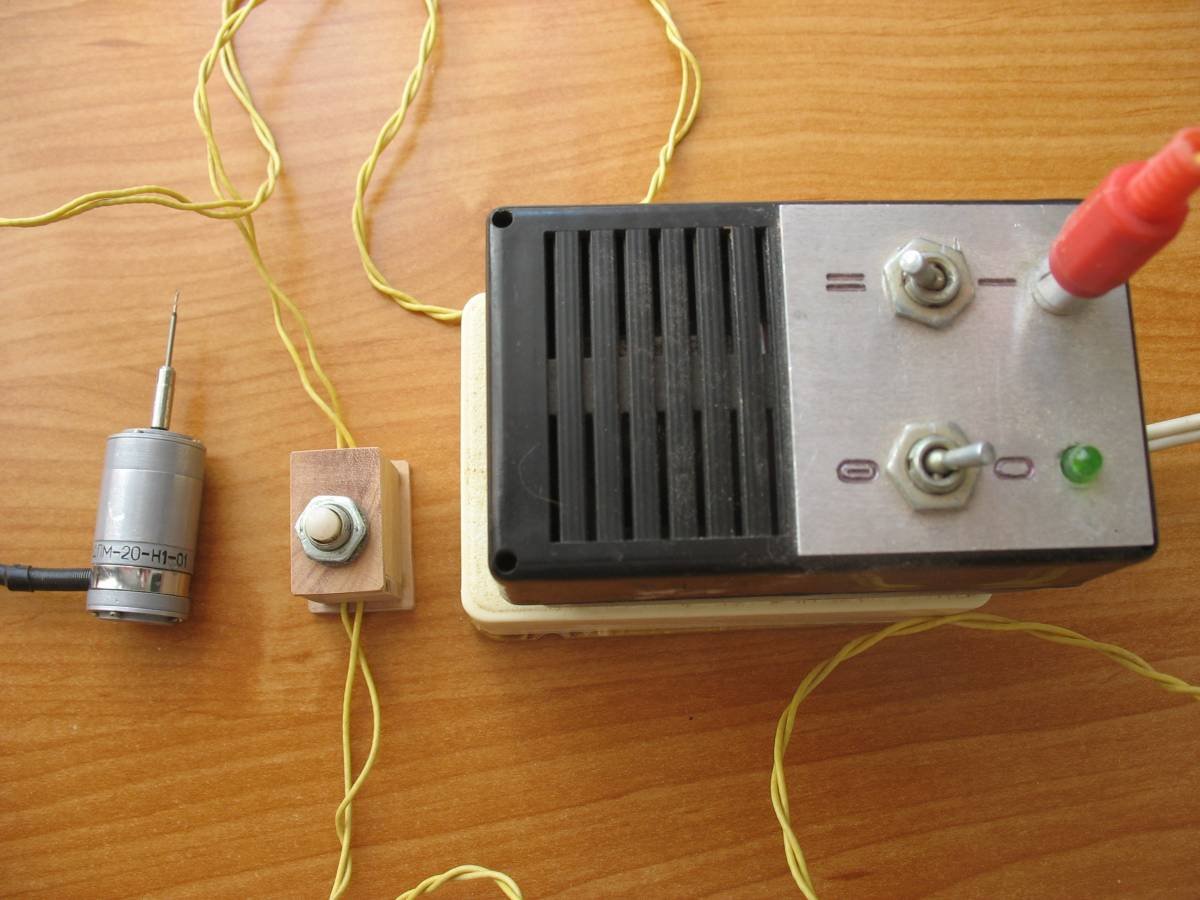
I have finished the covering of the second broadside.
Sketching and putting treenail in place are still to be done. I’m still trying out on samples. As I will have to drill a lot, the manual drill will not be the best solution, I had to work on and upgrade my mini-drill. I bought it on flea-market a long time ago, but couldn’t find any use of it. Yesterday I installed a small switch and now I’m testing it.


-
19 hours ago, druxey said:
Well done for doing the planking over again! It's a hard decision, but one I'm sure you are glad of now.
Dear druxey,
Yes, you are right, making this decision wasn't easy, but I had an example of the outstanding Masters in front of me and I really wanted to get even if for a little closer to their quality of work. In the end I was satisfied with the results, even though I had to redo my work many times. Plus I have gotten experience out of it.
19 hours ago, BETAQDAVE said:While this method obviously works well for you, I am wondering why you don't just make the frames, fill the spaces solid with blocking, shape the hull and proceed directly to the finish planking rather than adding two additional layers of sub planking onto your solid blocked and shaped hull? It seems like a lot of additional work to accomplish the same result. Or is there a method to your madness?
") Because as I can say there is no denying the quality of your results.
Because as I can say there is no denying the quality of your results.
Dear BETAQDAVE,
It's hard to give a definite answer on the choice of the method of making a hull. I found this method used by Snarlev, and at that moment I thought it was the easiest and the least labor consuming.When working on "Sperwer" I used a different method, and I could say that each one has its own advantages.
18 hours ago, KeithAug said:Kortes
New planking looks good - how did you remove the old planking?
Dear KeithAug,
The covering was removed by means of heating by a hot air gun, it wasn't hard due to the fact that I used PVA glue.
My best regards, Alexander.
- mtaylor, FriedClams, BETAQDAVE and 5 others
-
8
-
Taking into account experience and mistakes.

- bruce d, Keith Black, KARAVOKIRIS and 24 others
-
27
-
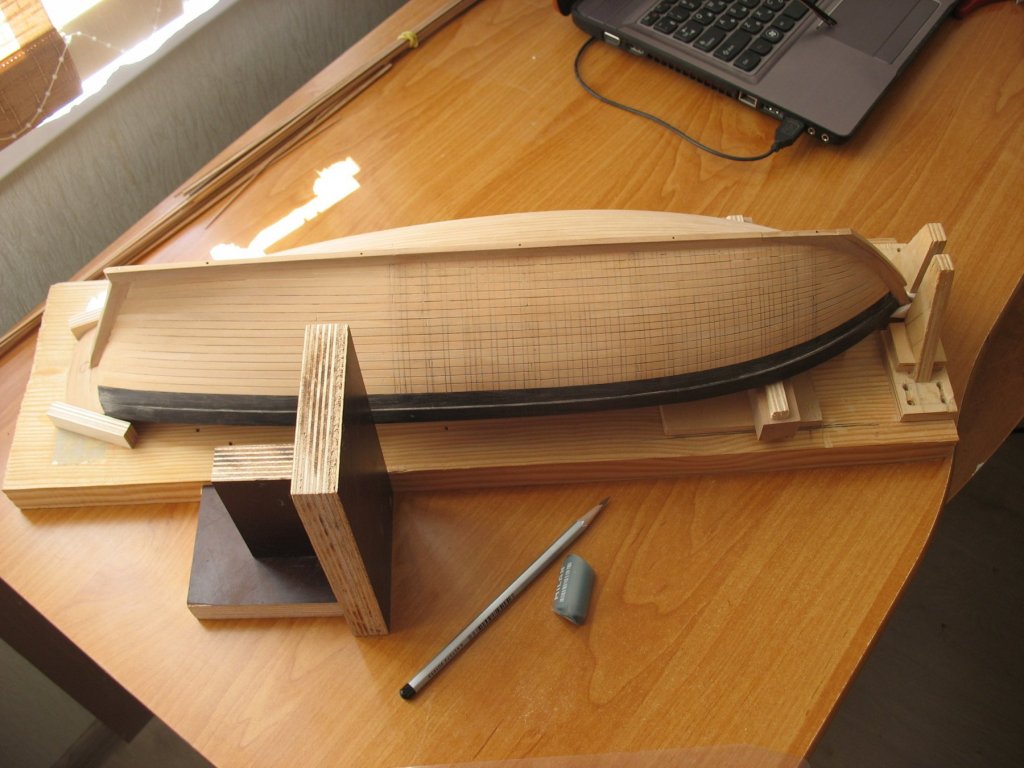
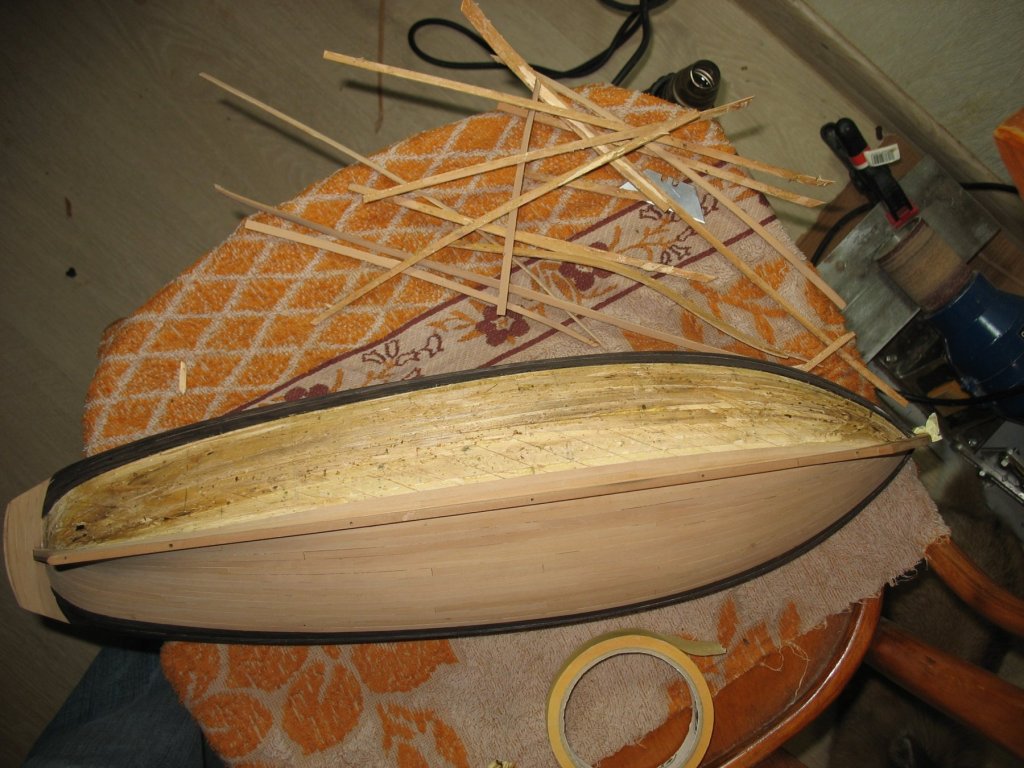
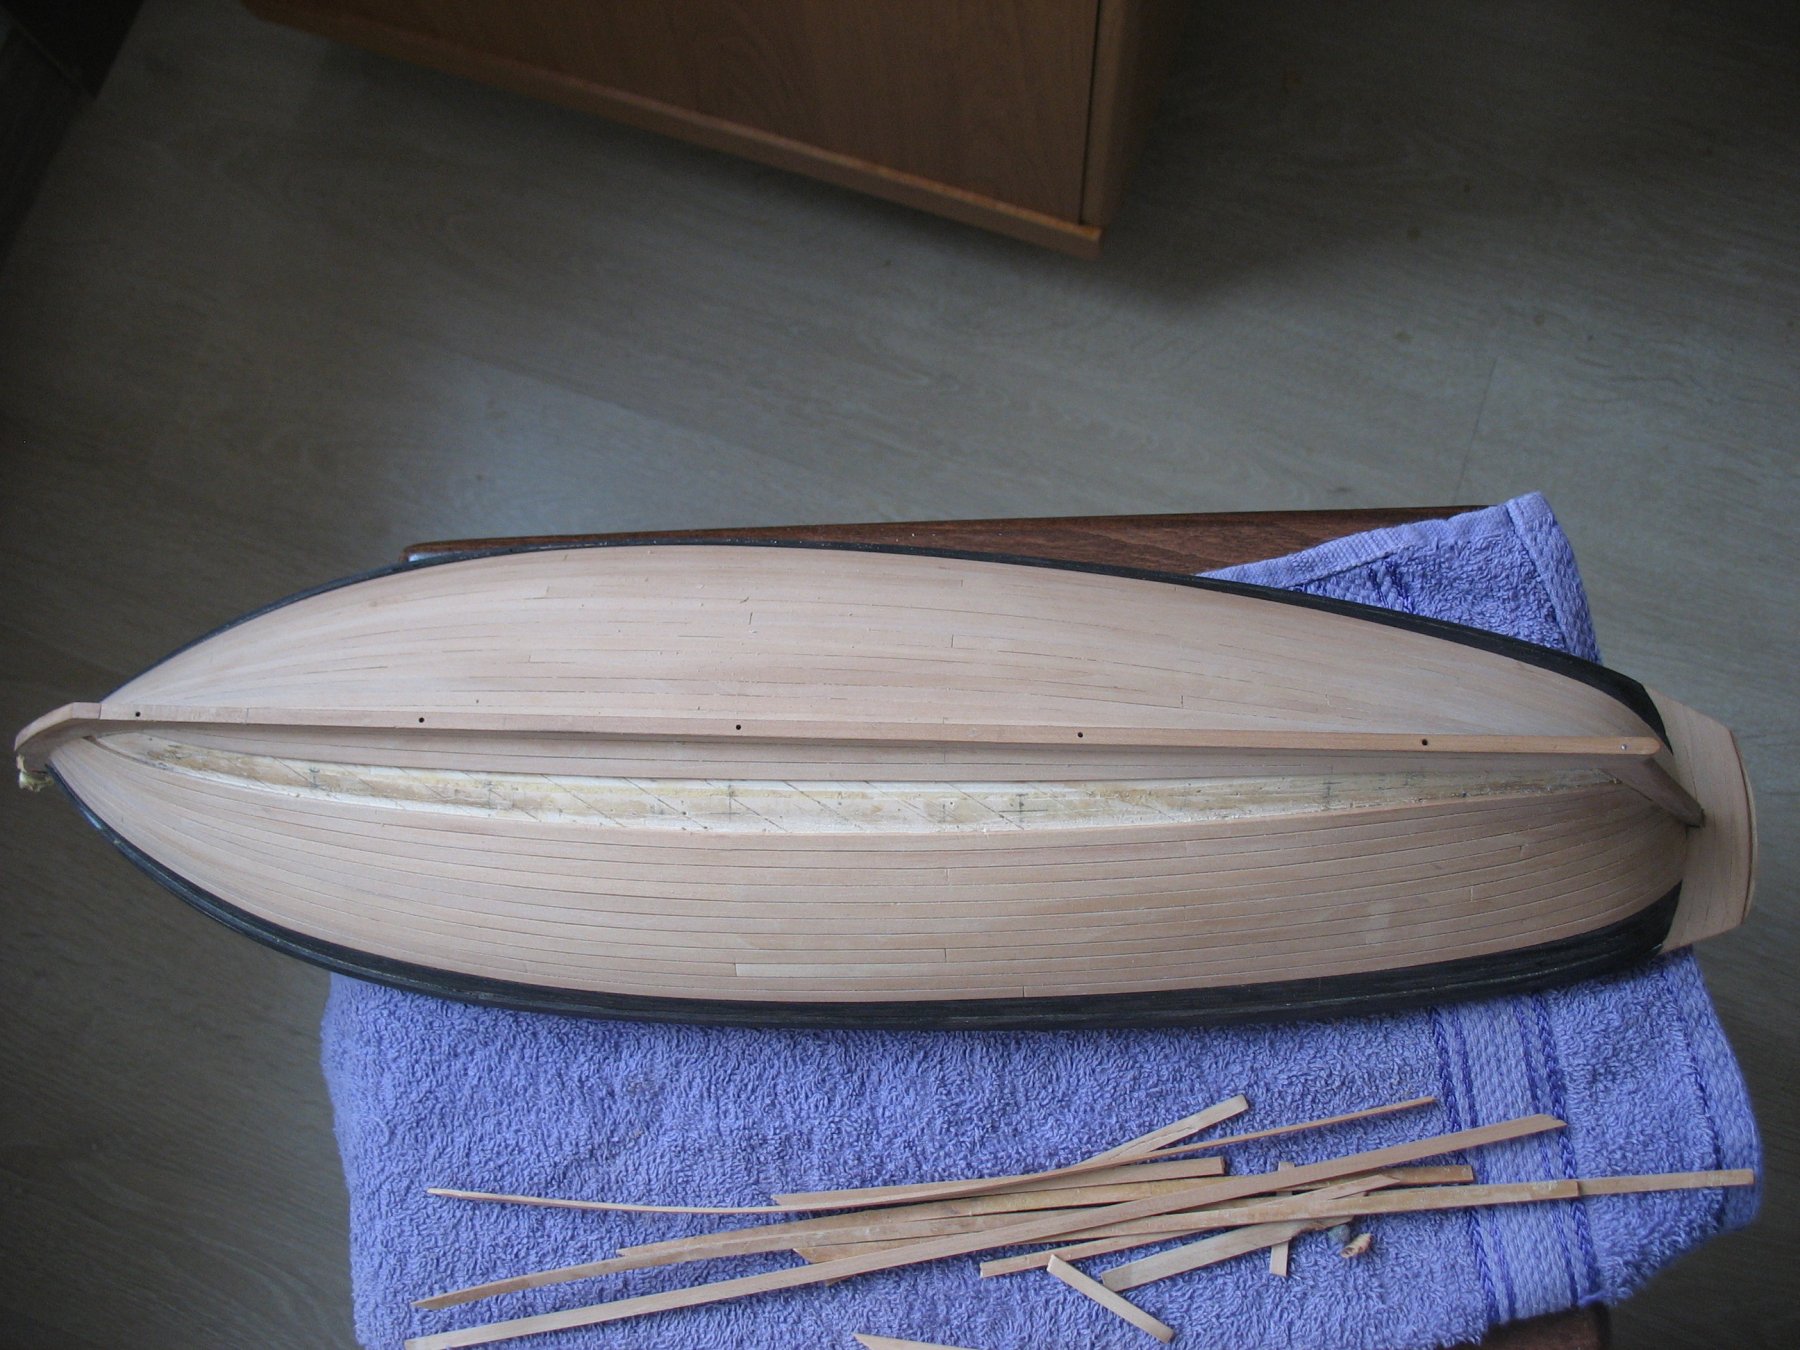
After some consideration, I decided to re-do the covering.
- GrandpaPhil, druxey, mtaylor and 5 others
-
8
-
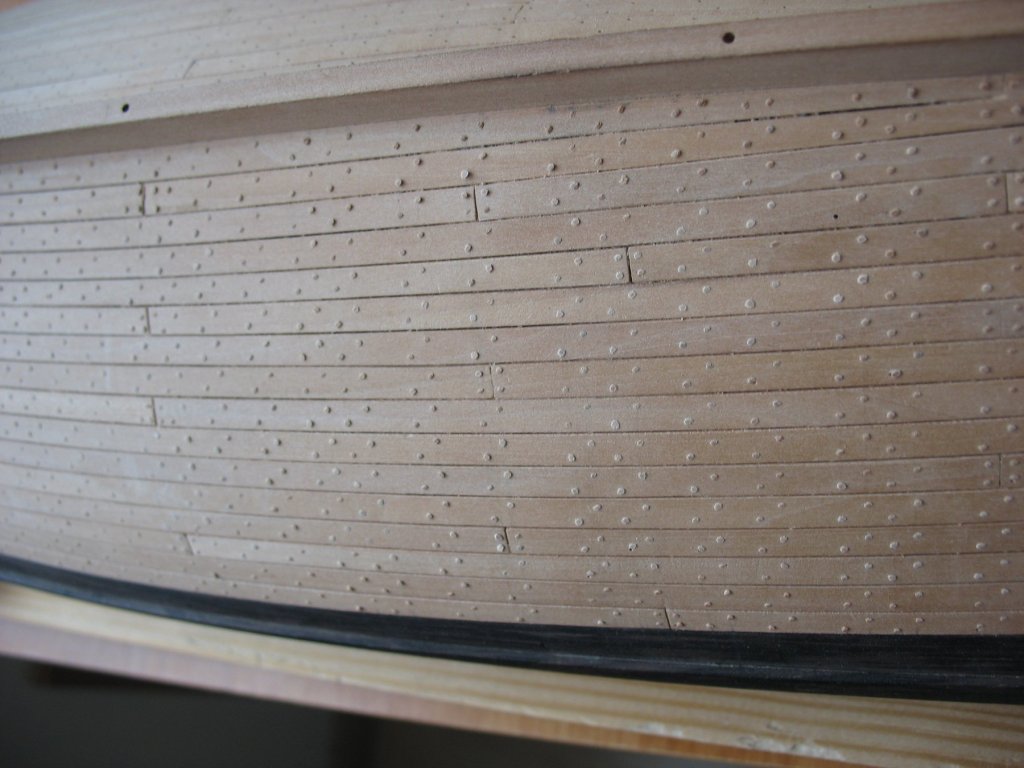
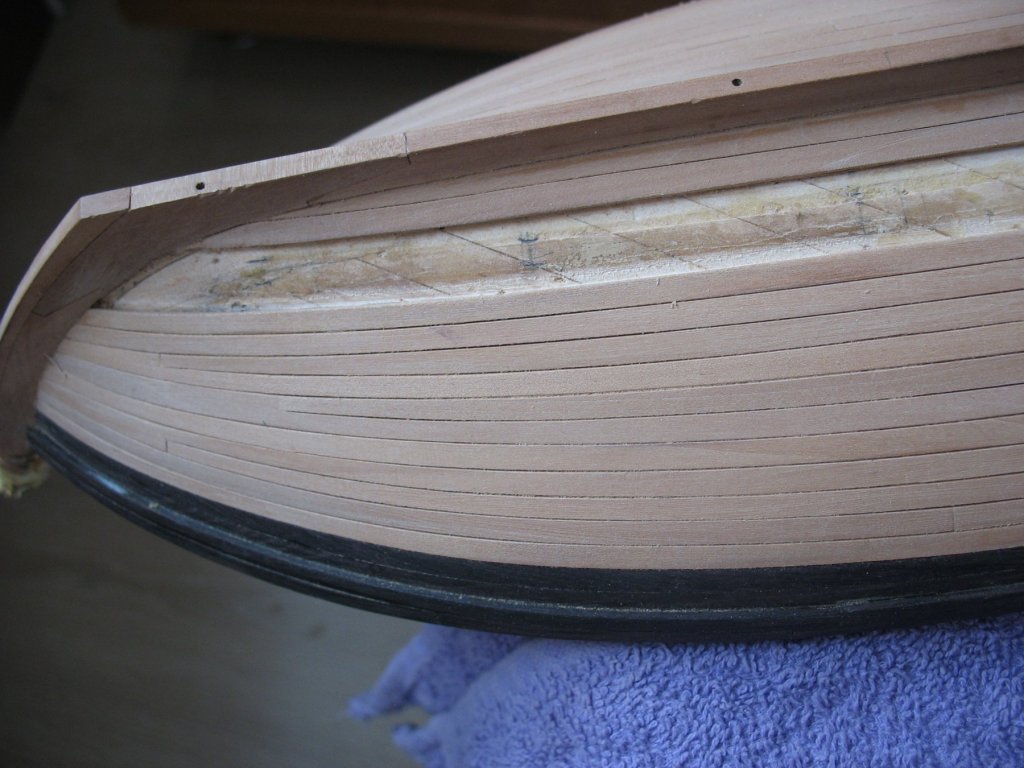
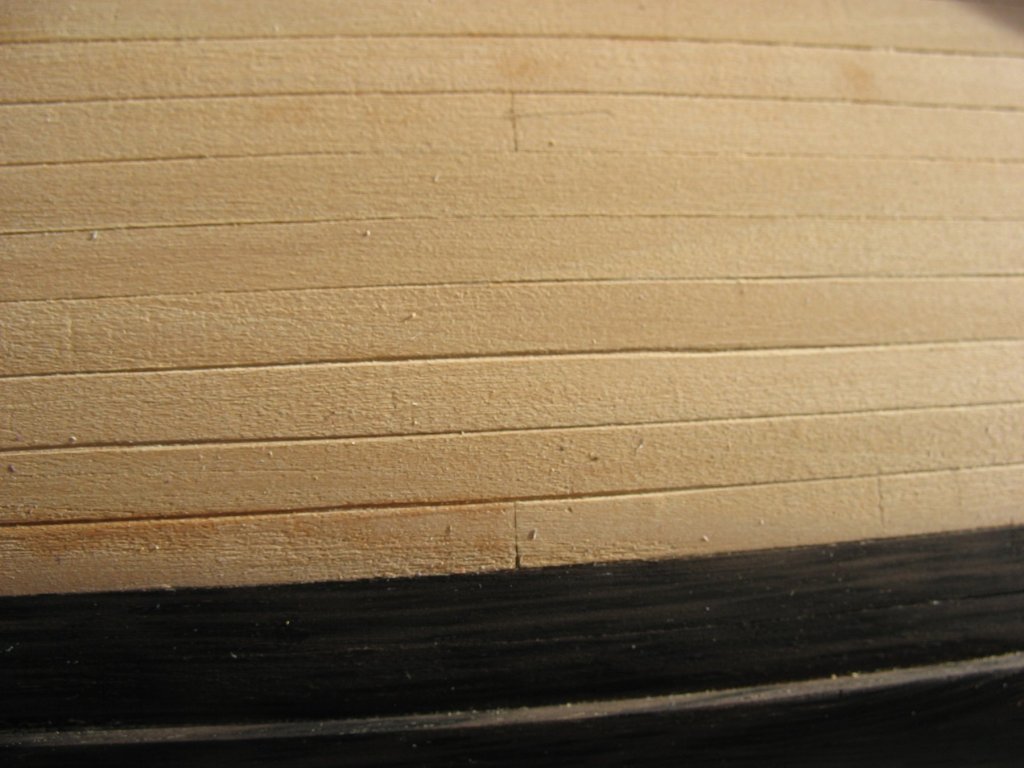
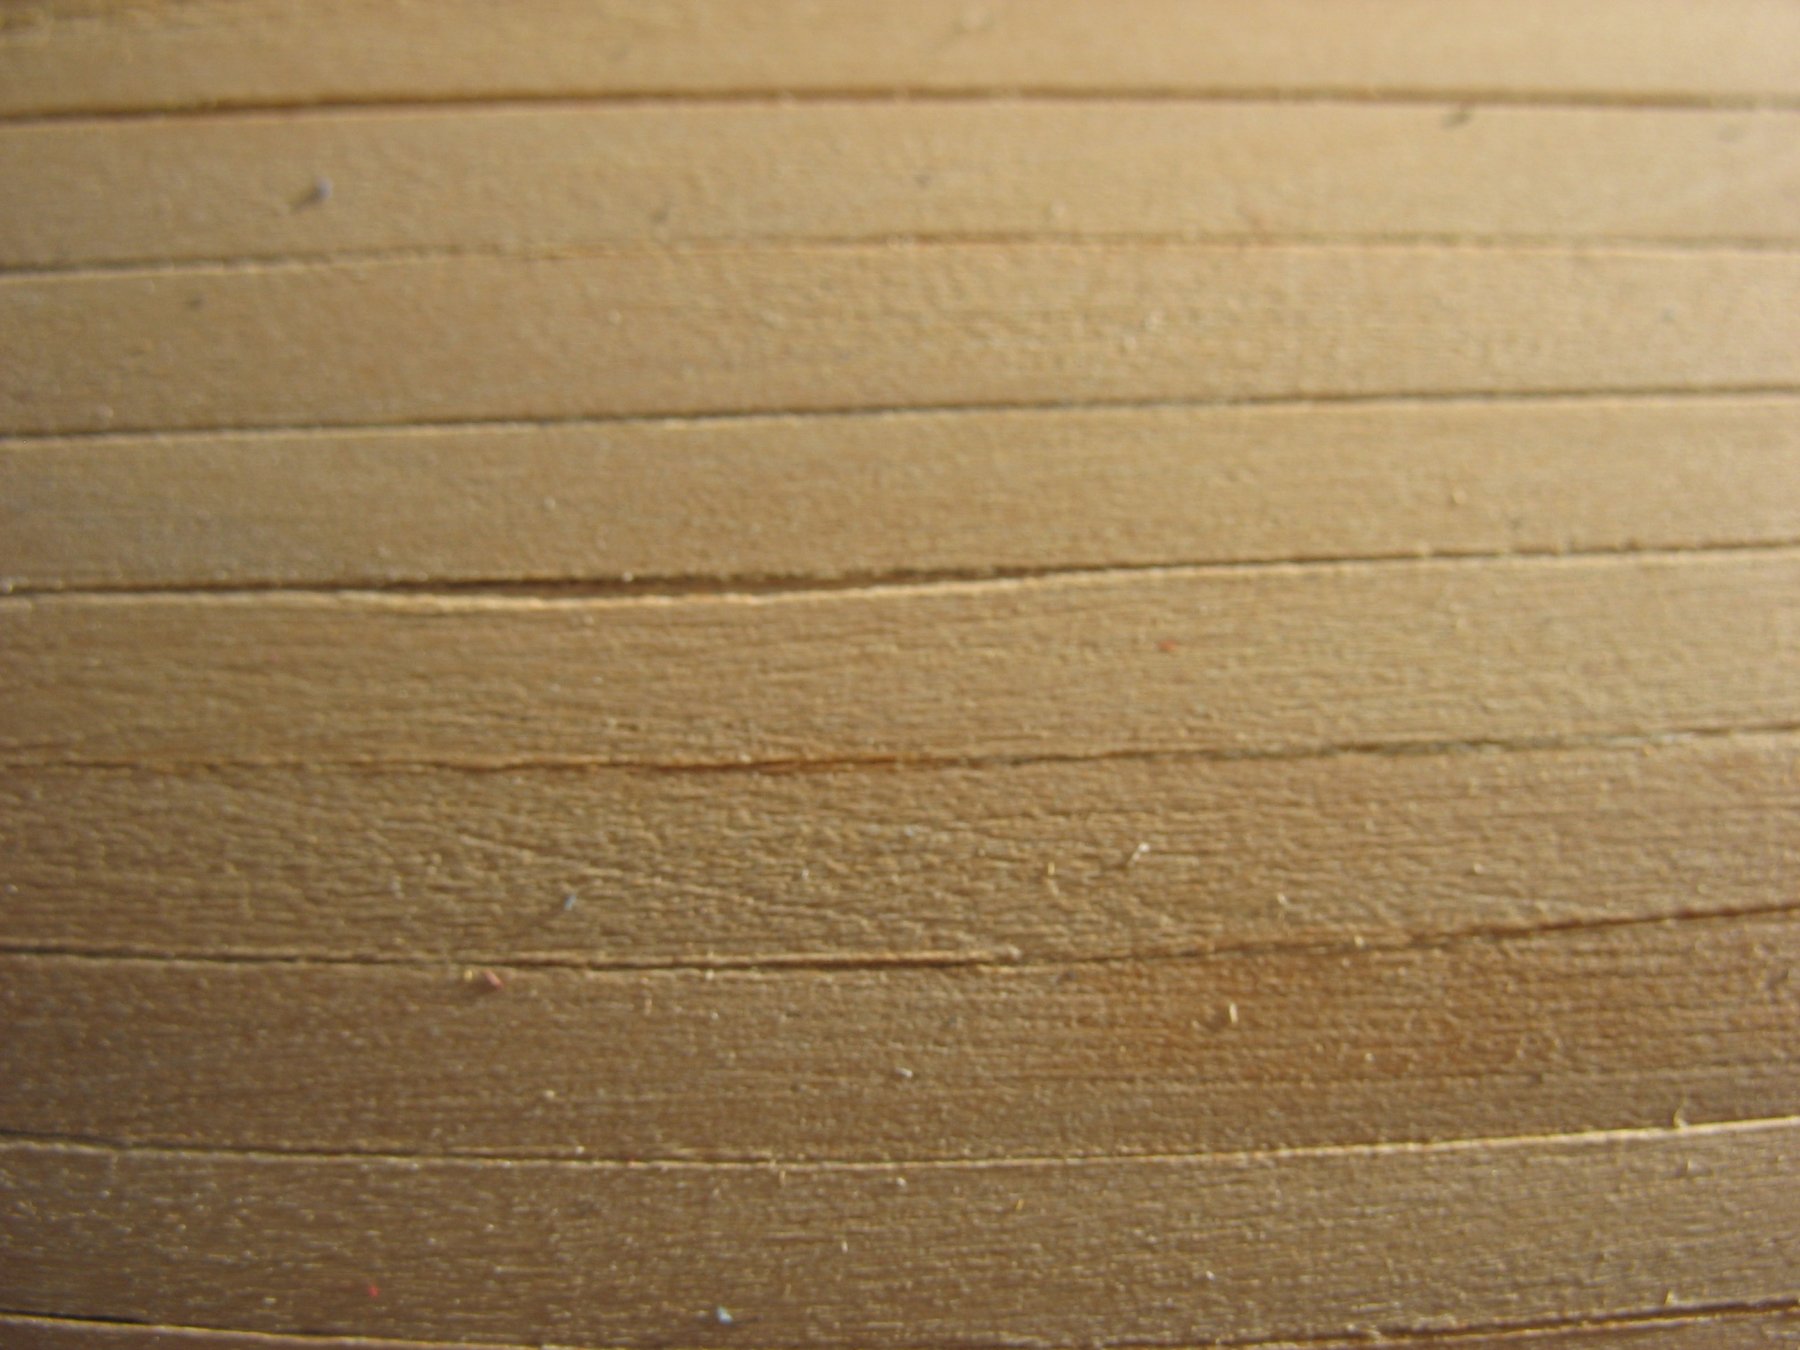
Now, some of mistakes…
In order to warn my colleagues, who , just like me , don’t have too much experience, I wanted to highlight my mistake in the process of covering.
More than once in the working process I made sure that THE BEST IS THE ENEMY OF THE GOOD. After having completed the covering I decided , following the example of the Masters, to highlight the joints between the laths a bit. As a result, I haven’t succeeded in it, but I ruined the covering. The reason turned out to be banal – the glue on the plank ends, which wasn’t erased in time.
- GrandpaPhil, Keith Black, druxey and 4 others
-
7
-
-
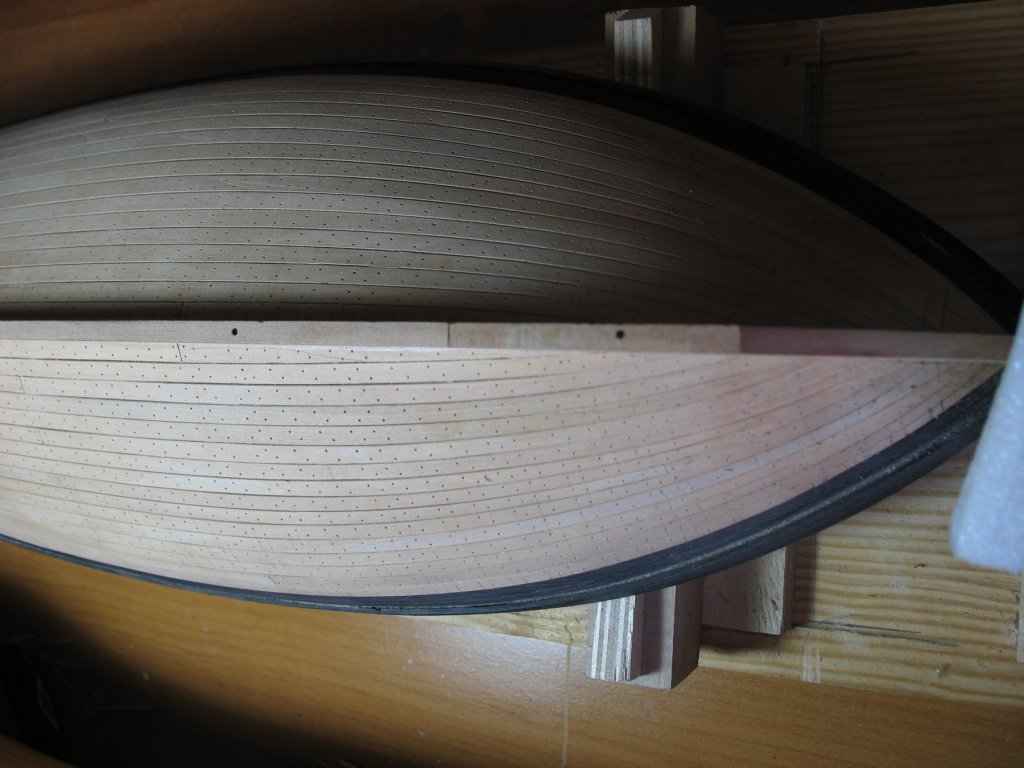
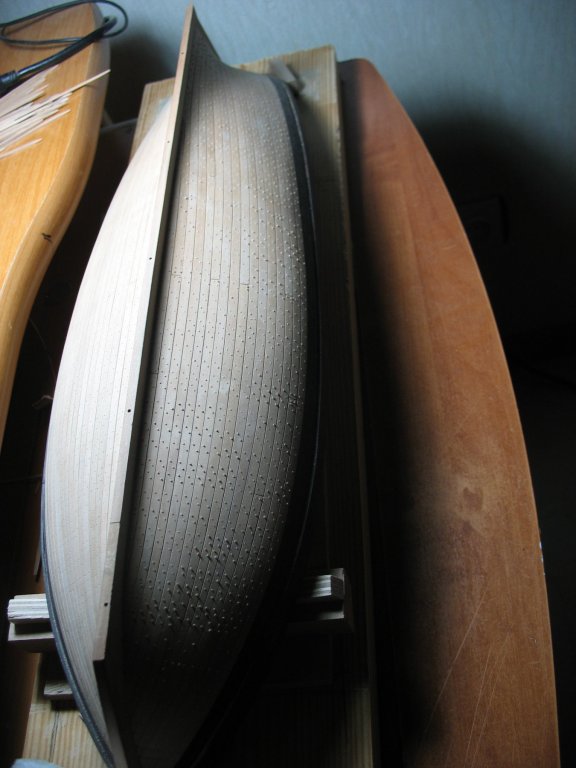
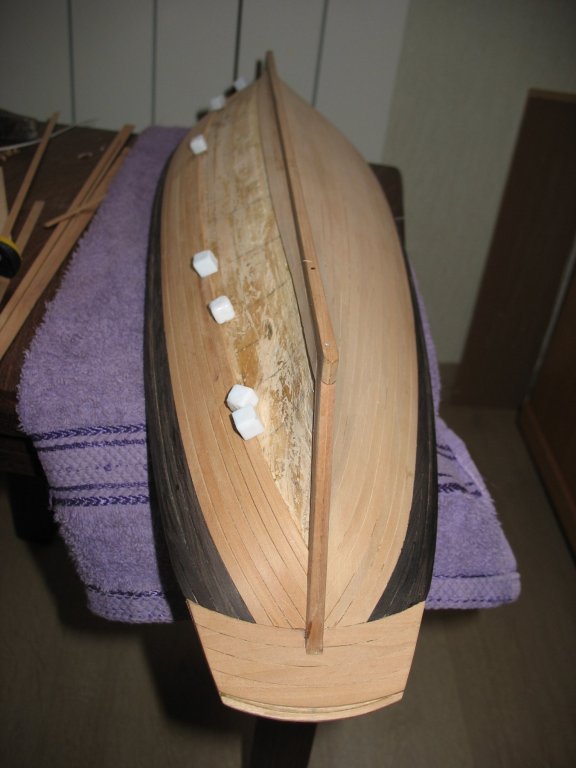
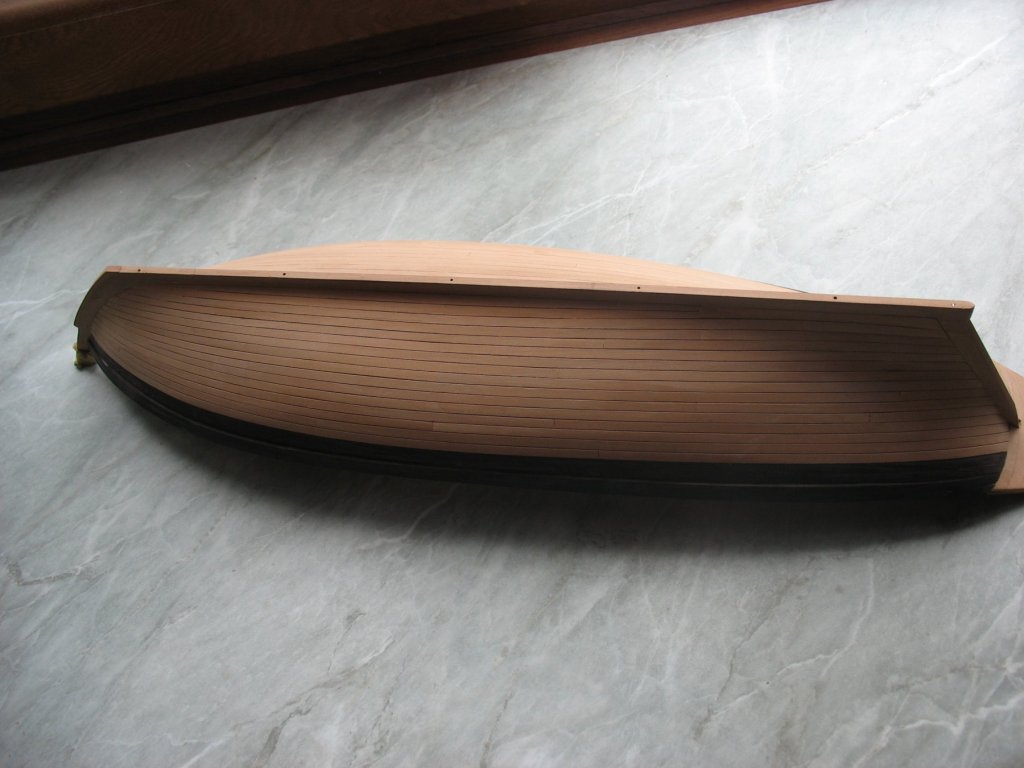
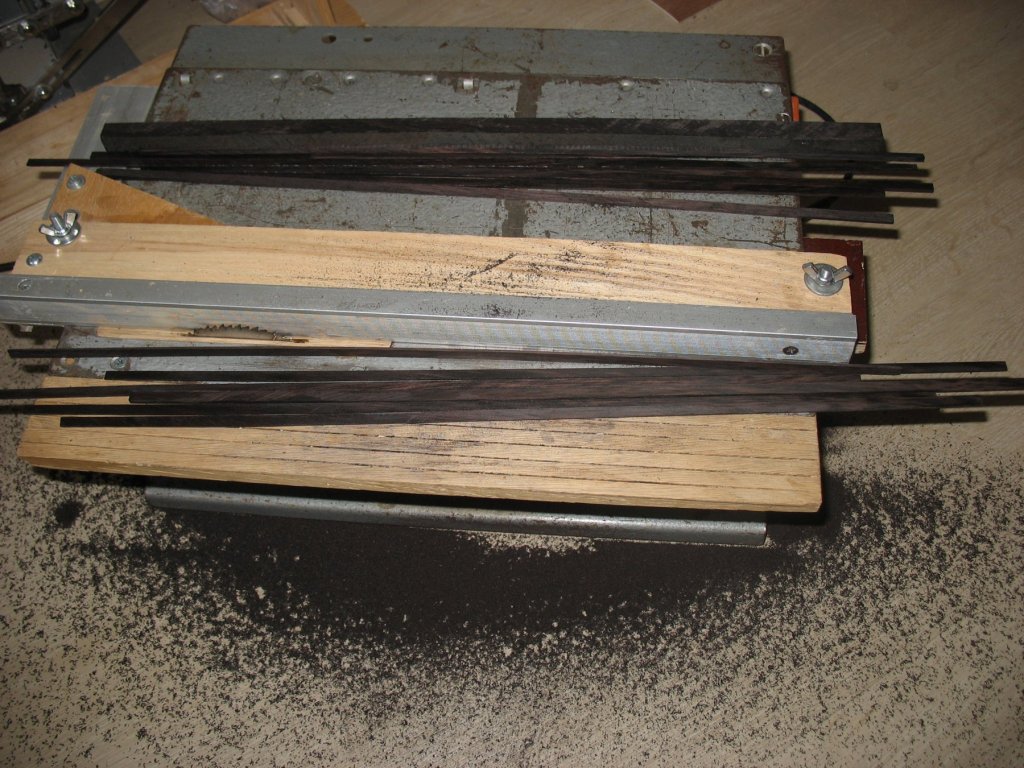
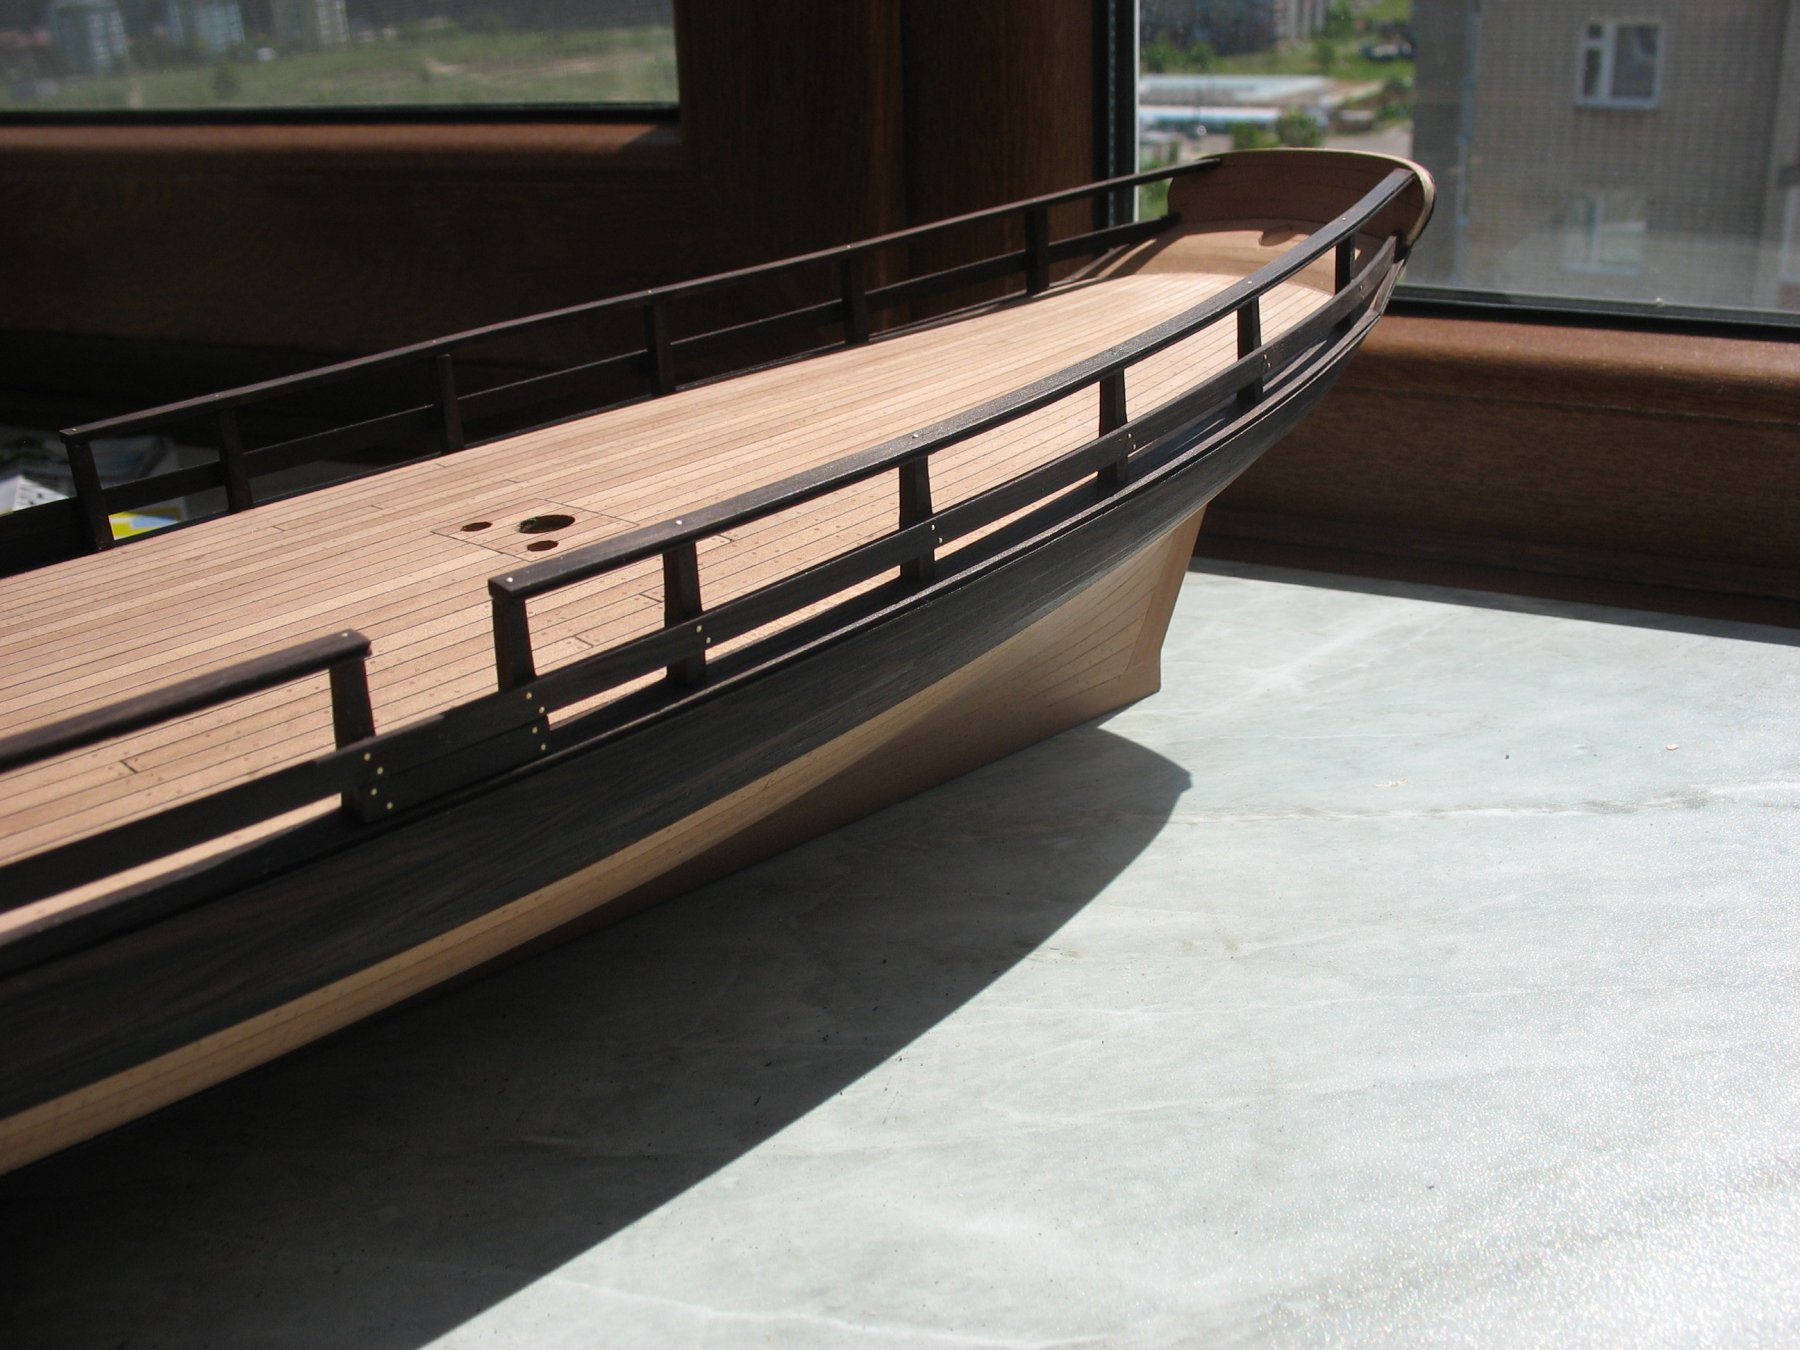
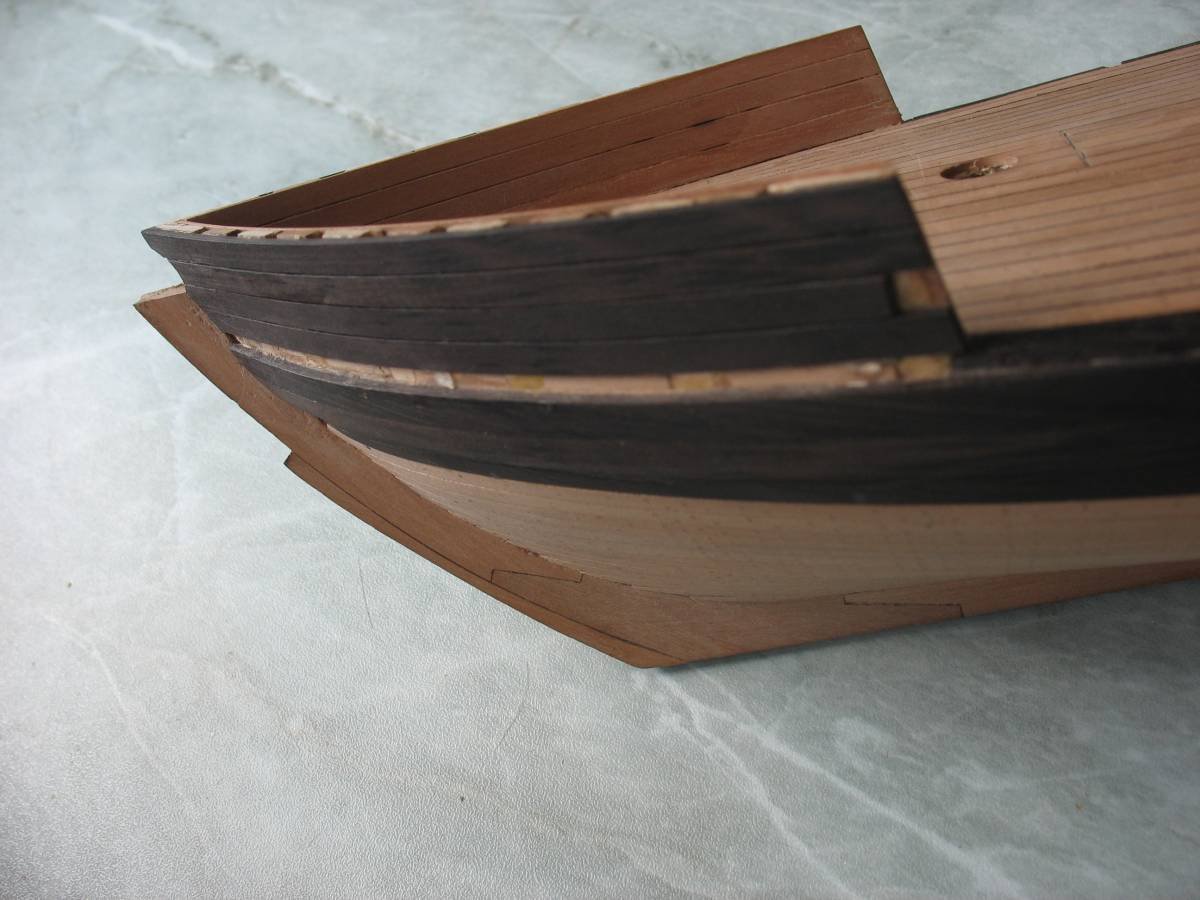
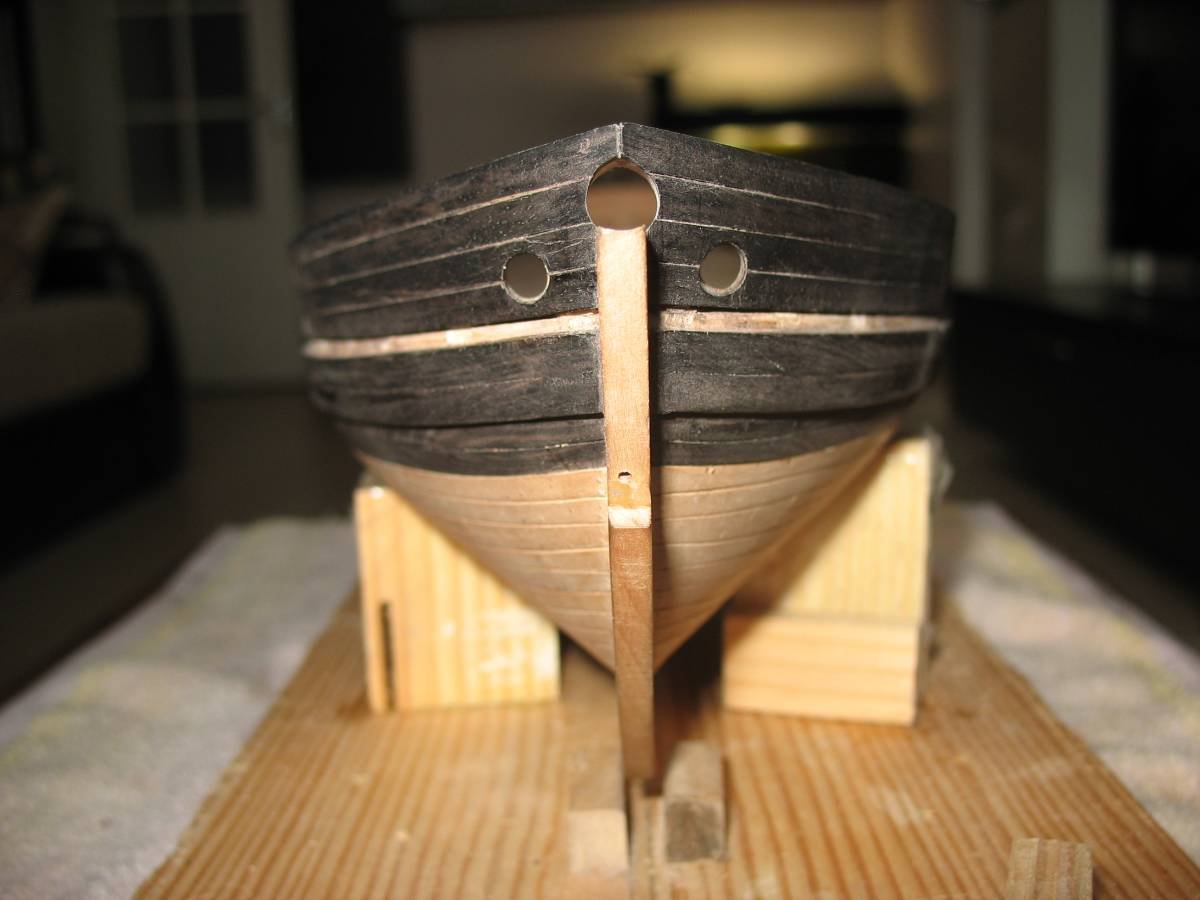
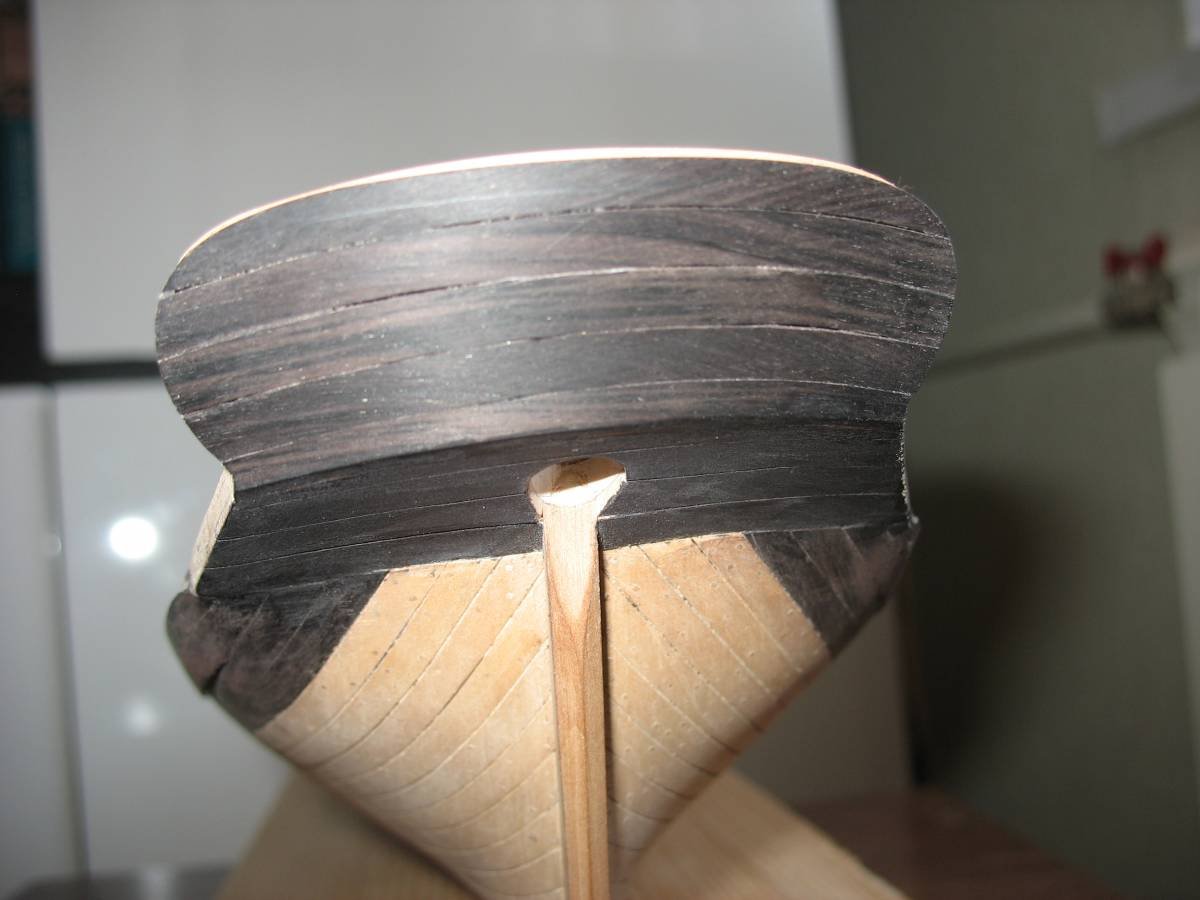
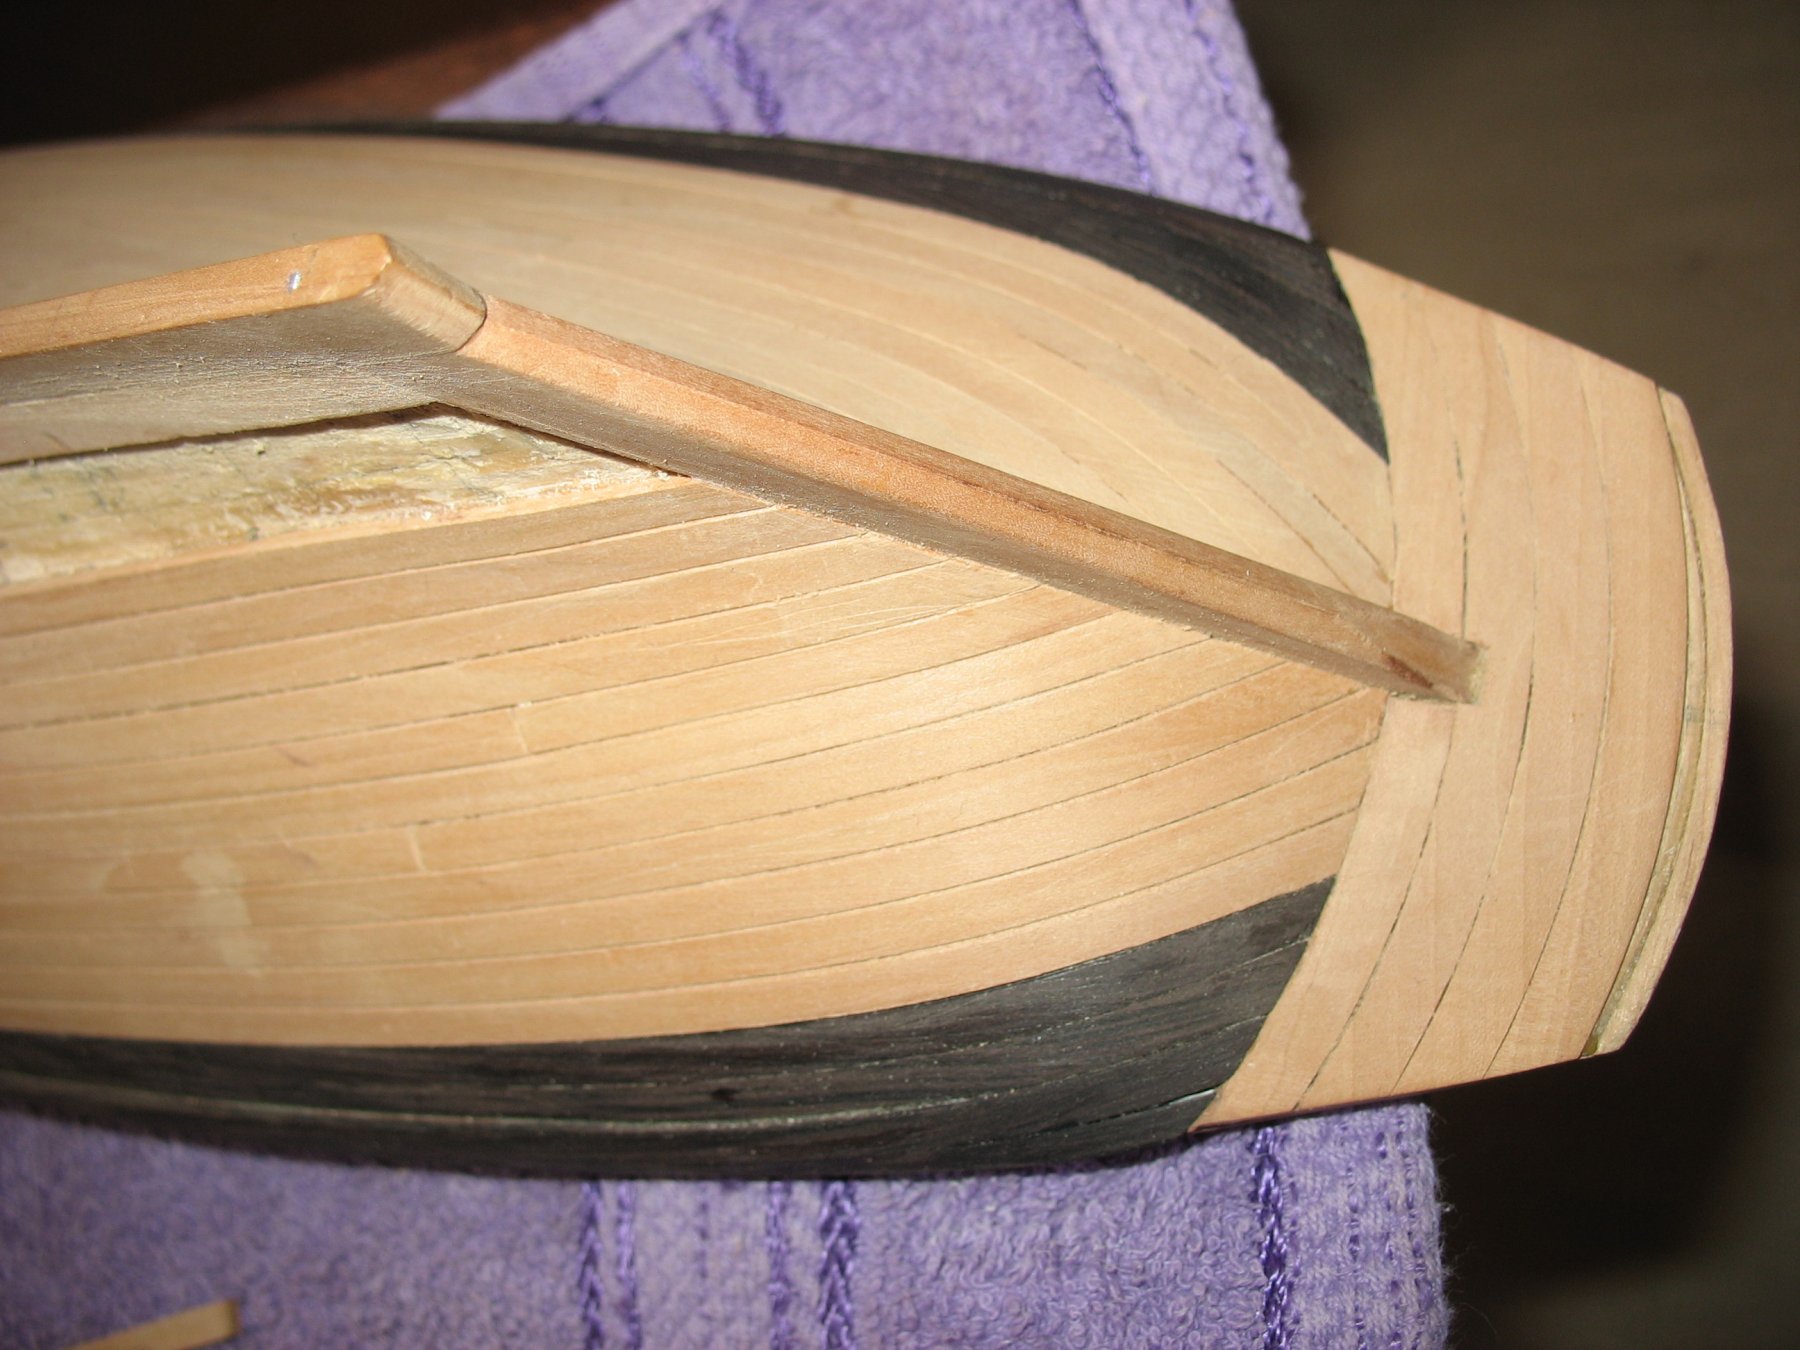
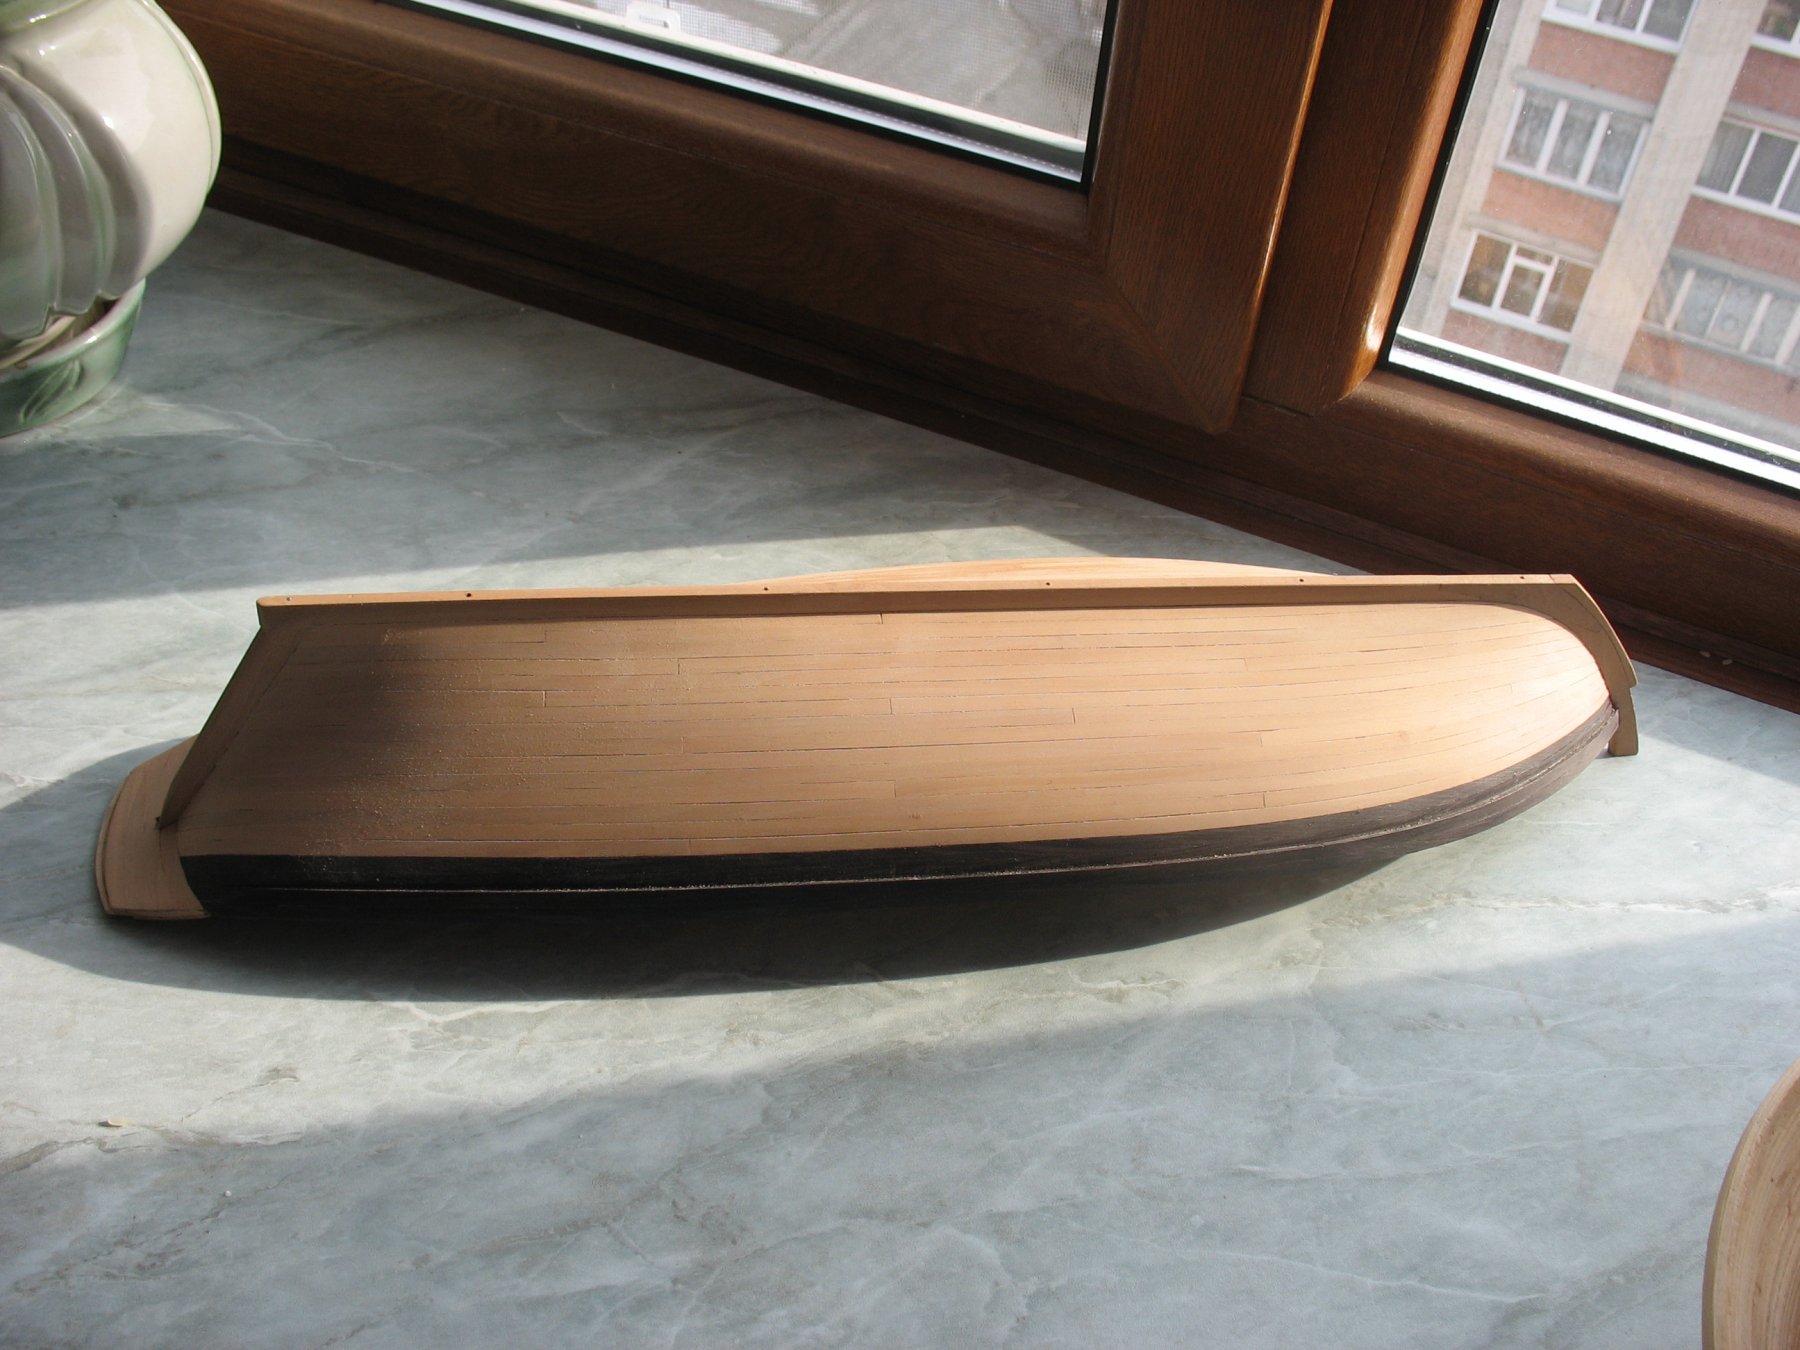
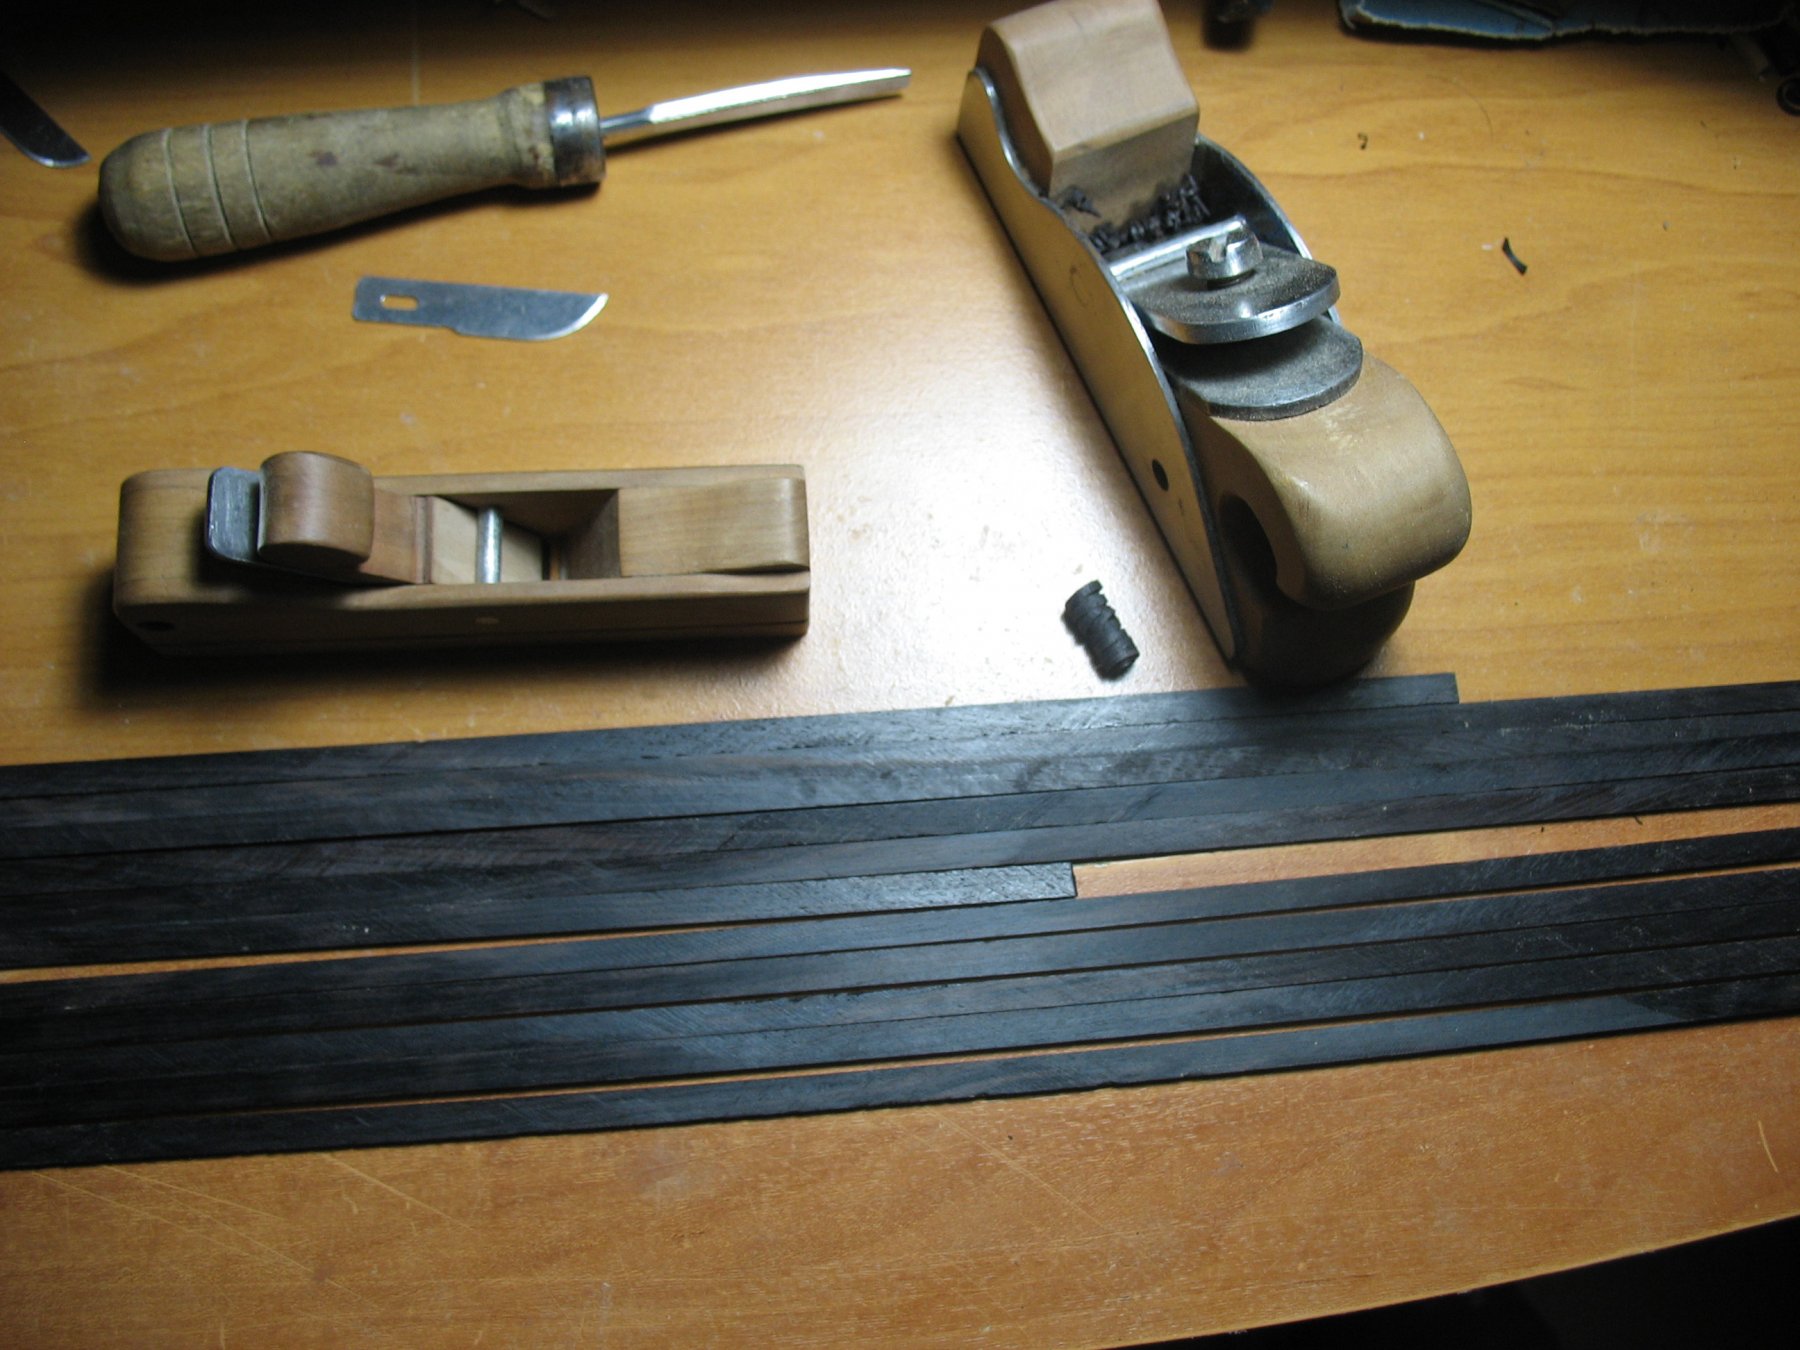
Rubbing strip and two upper belts I decided to make out of black hornbeam. It turned out to be a very technological material.

- Keith Black, JOUFF, BETAQDAVE and 5 others
-
8
-
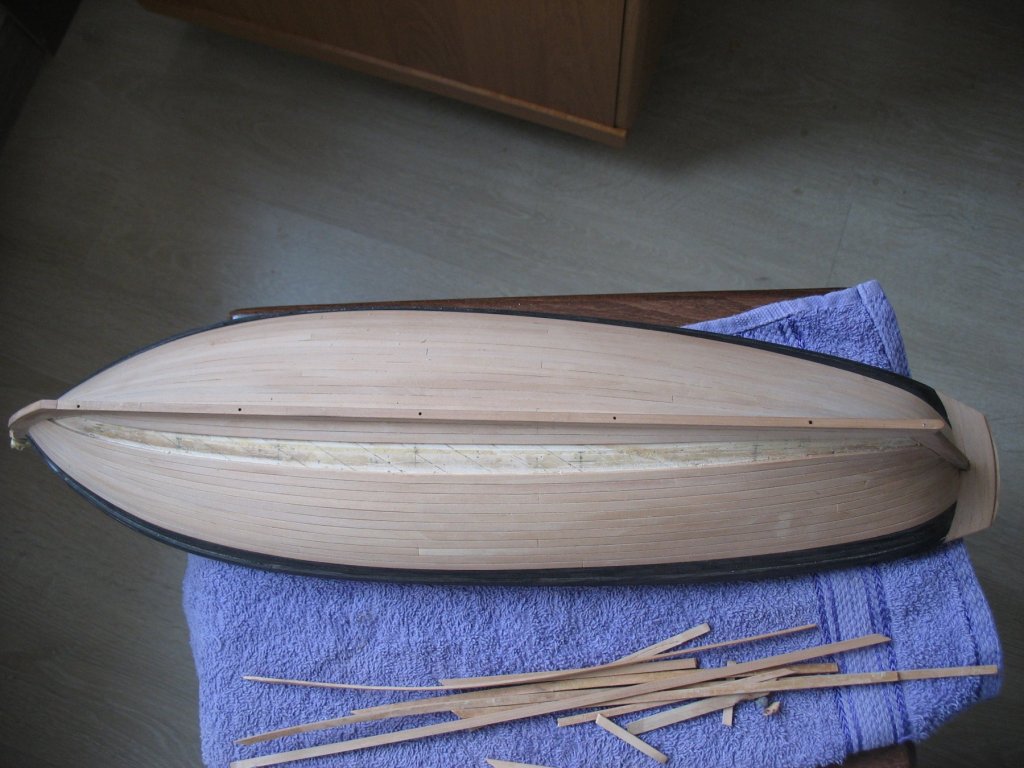
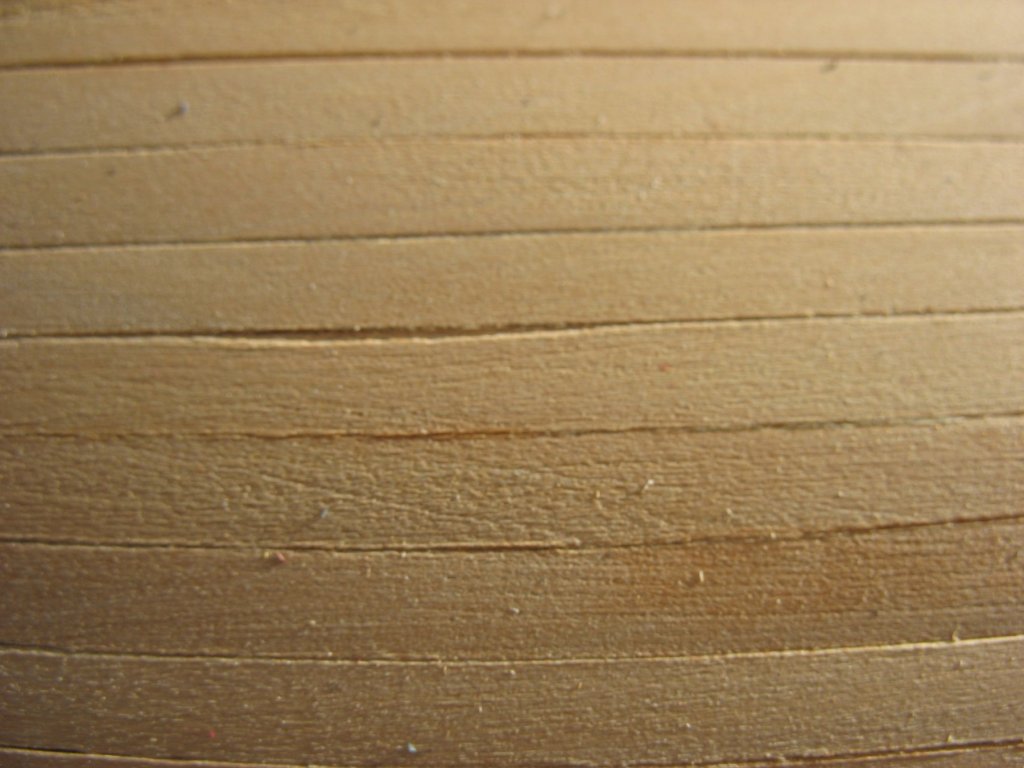
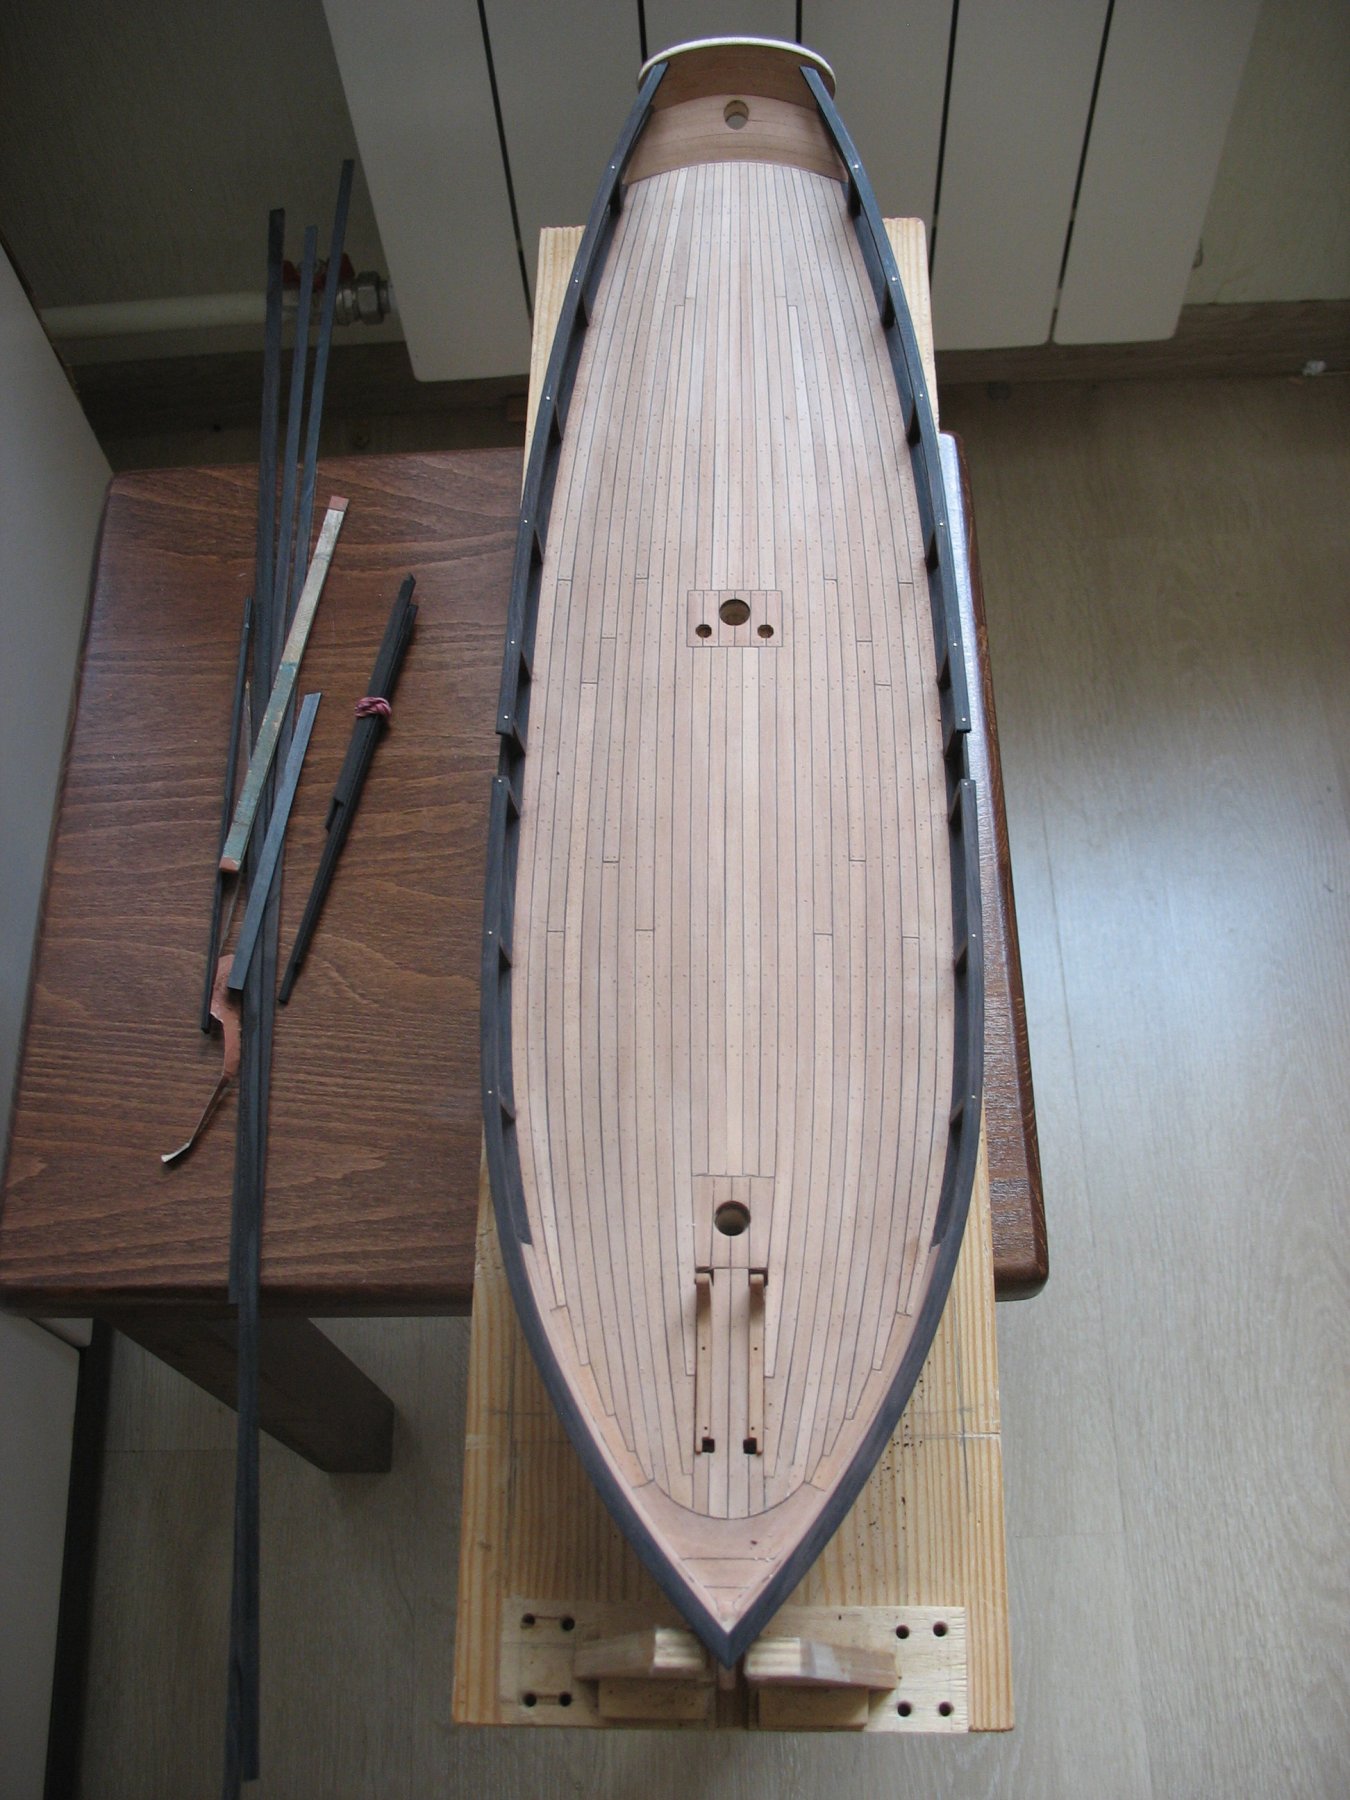
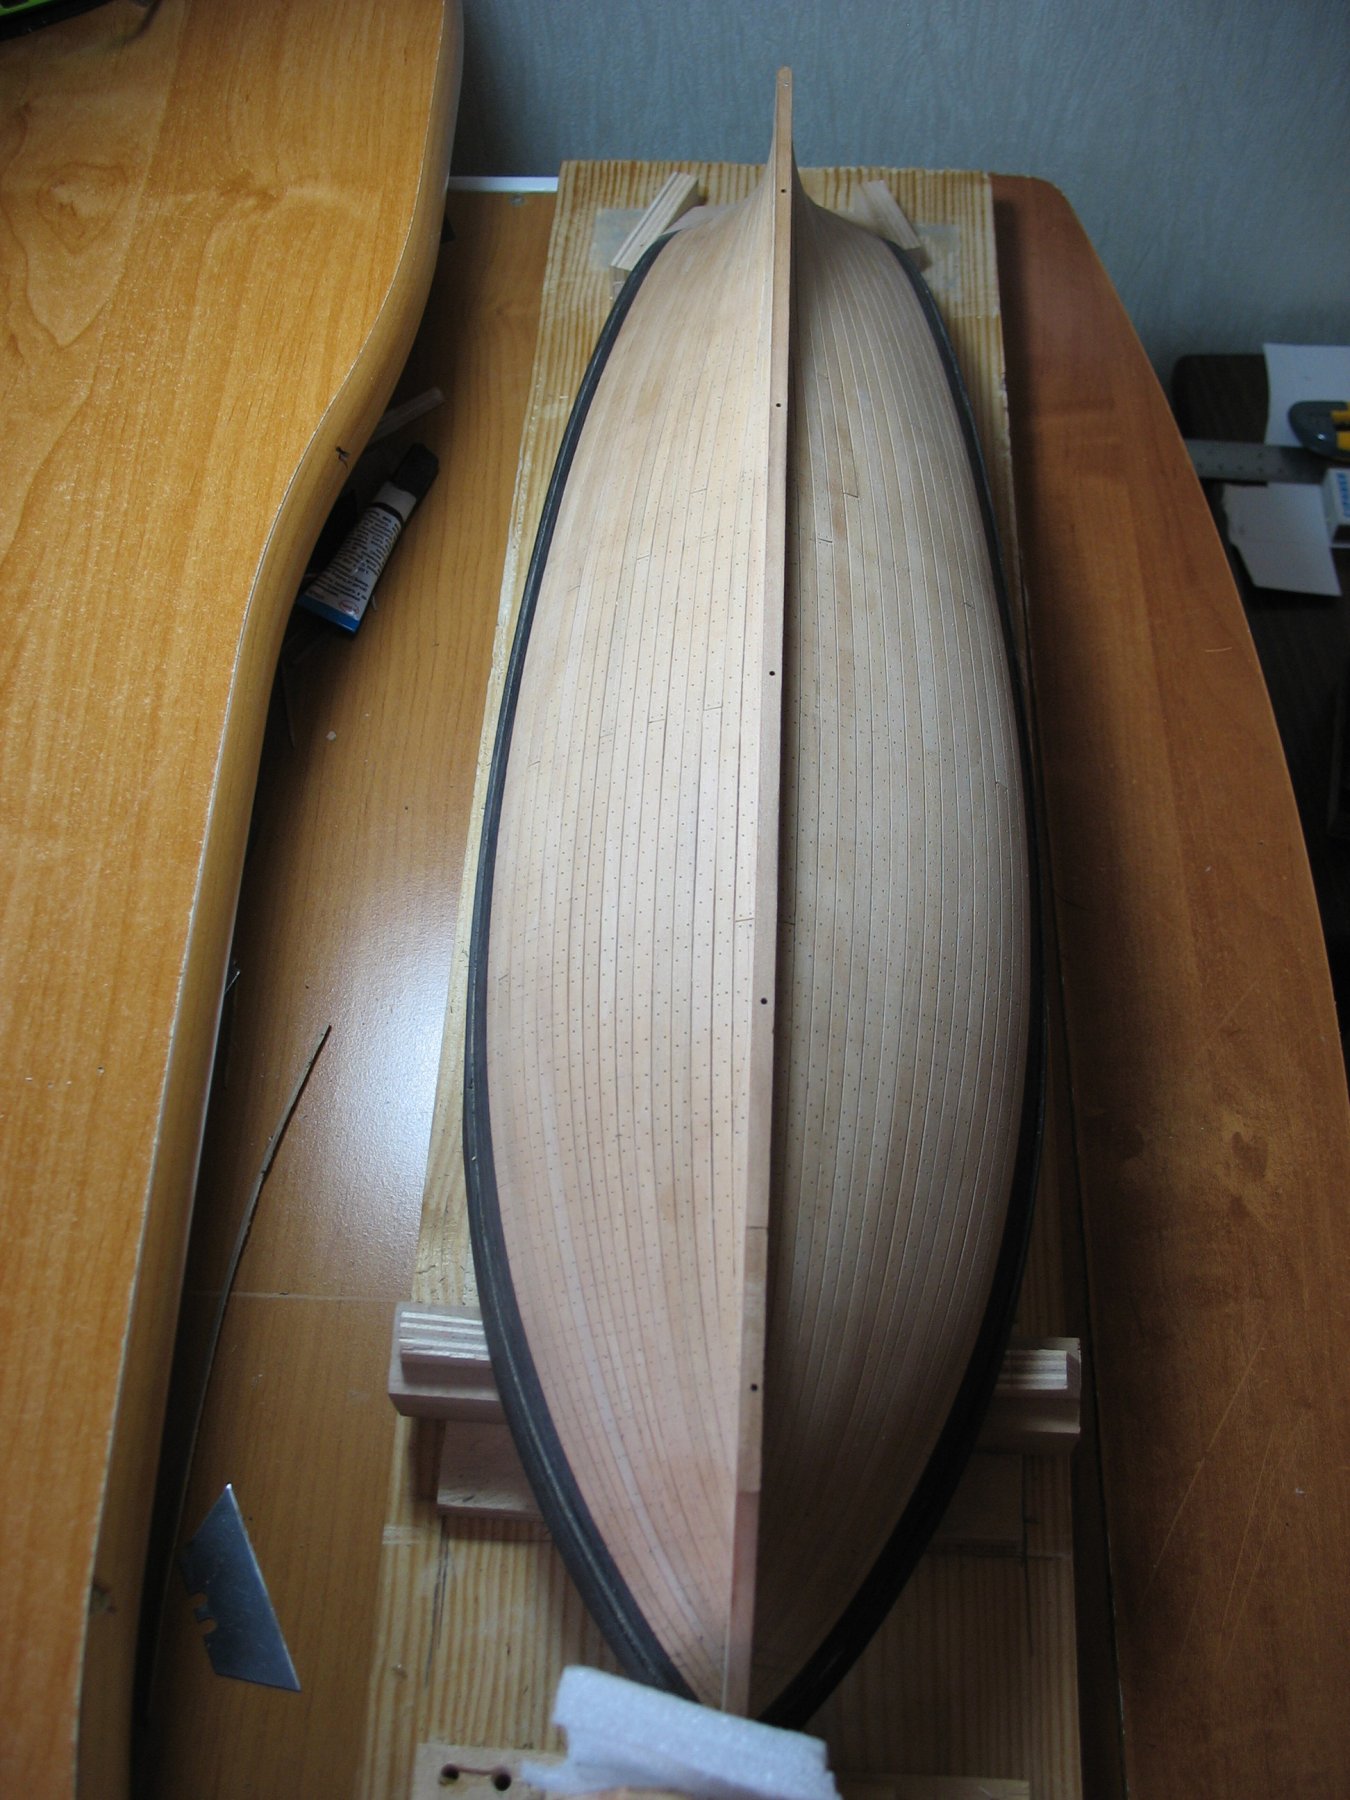
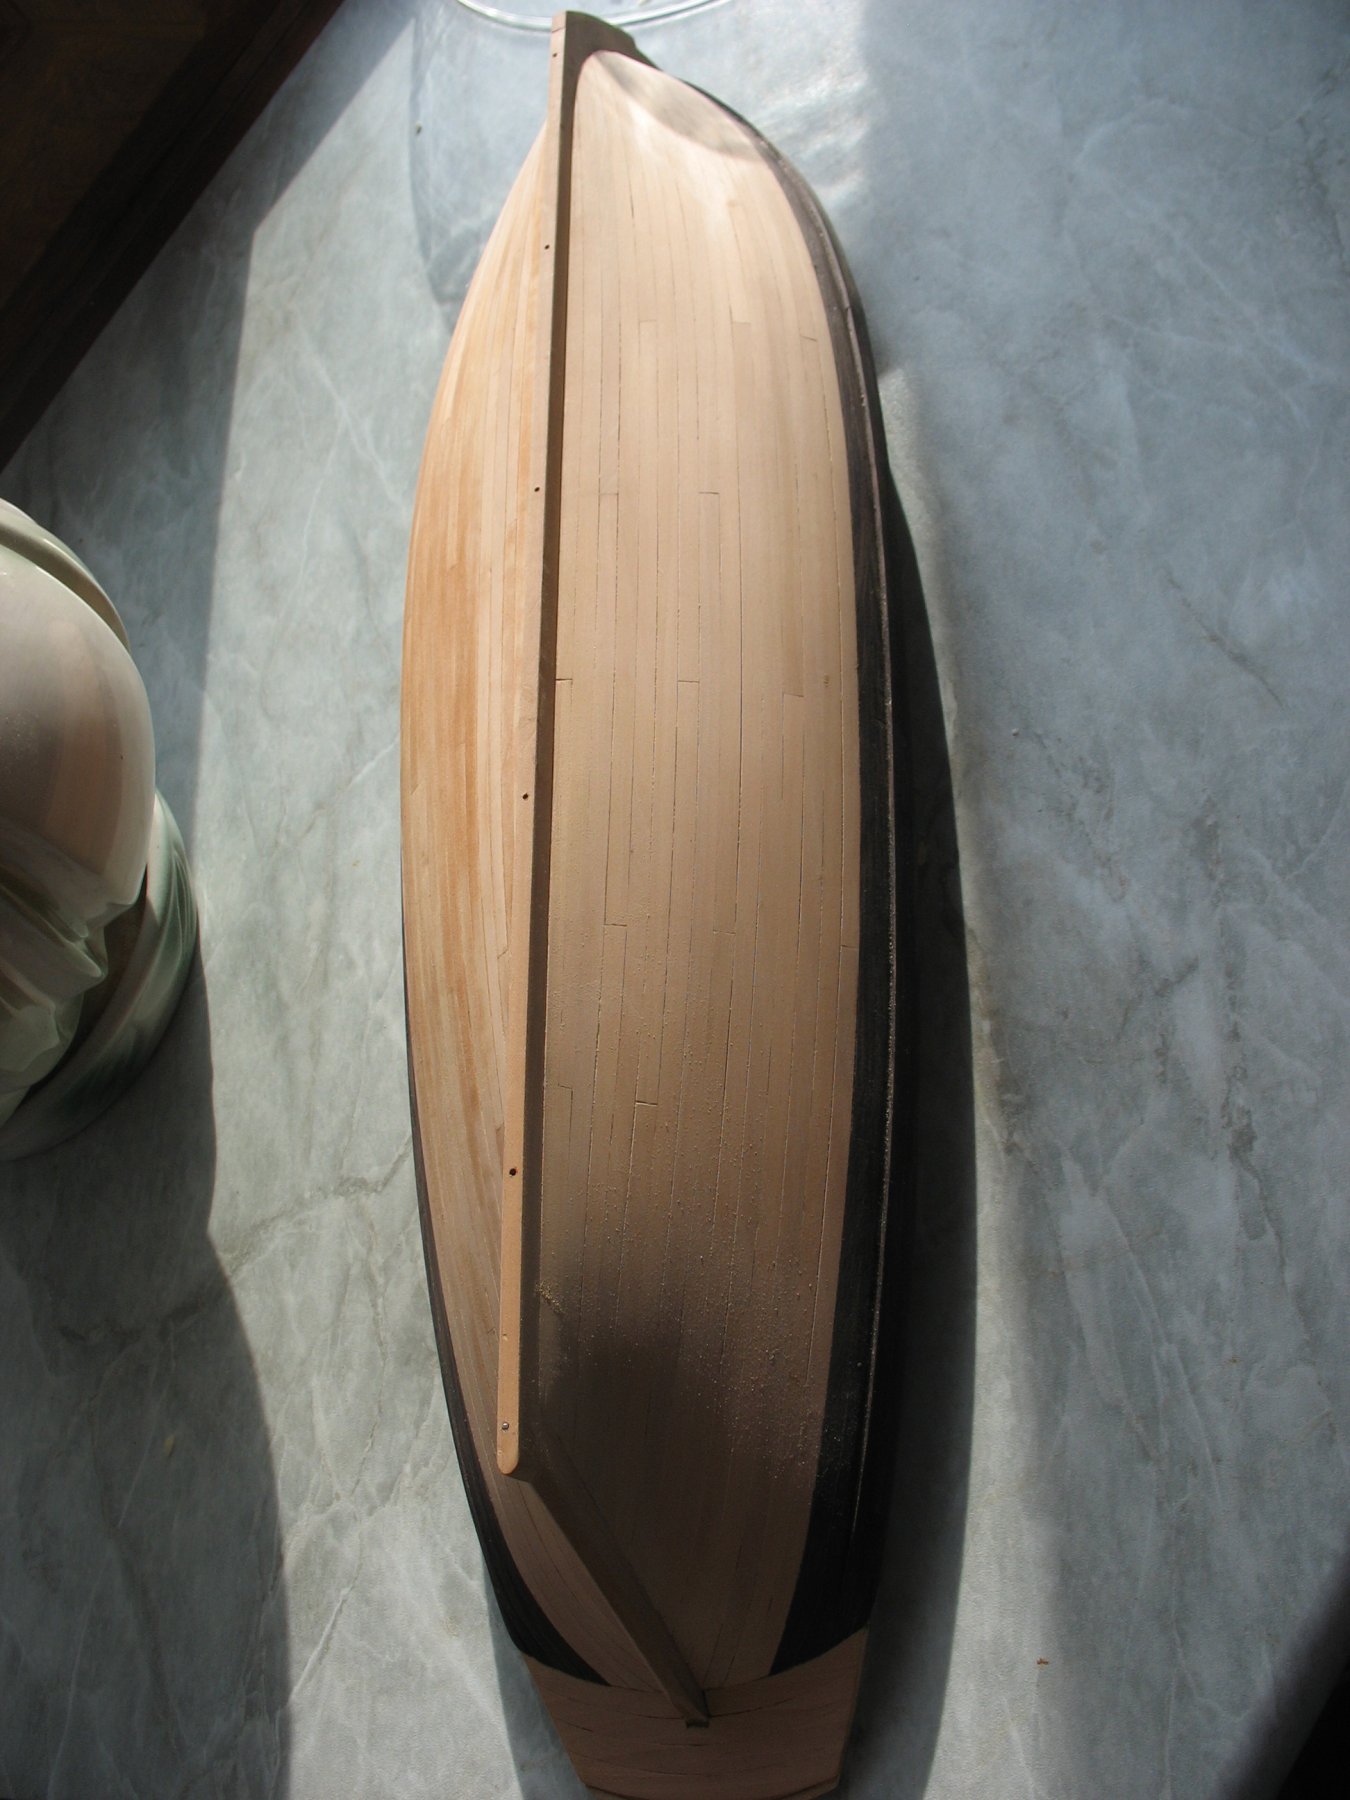
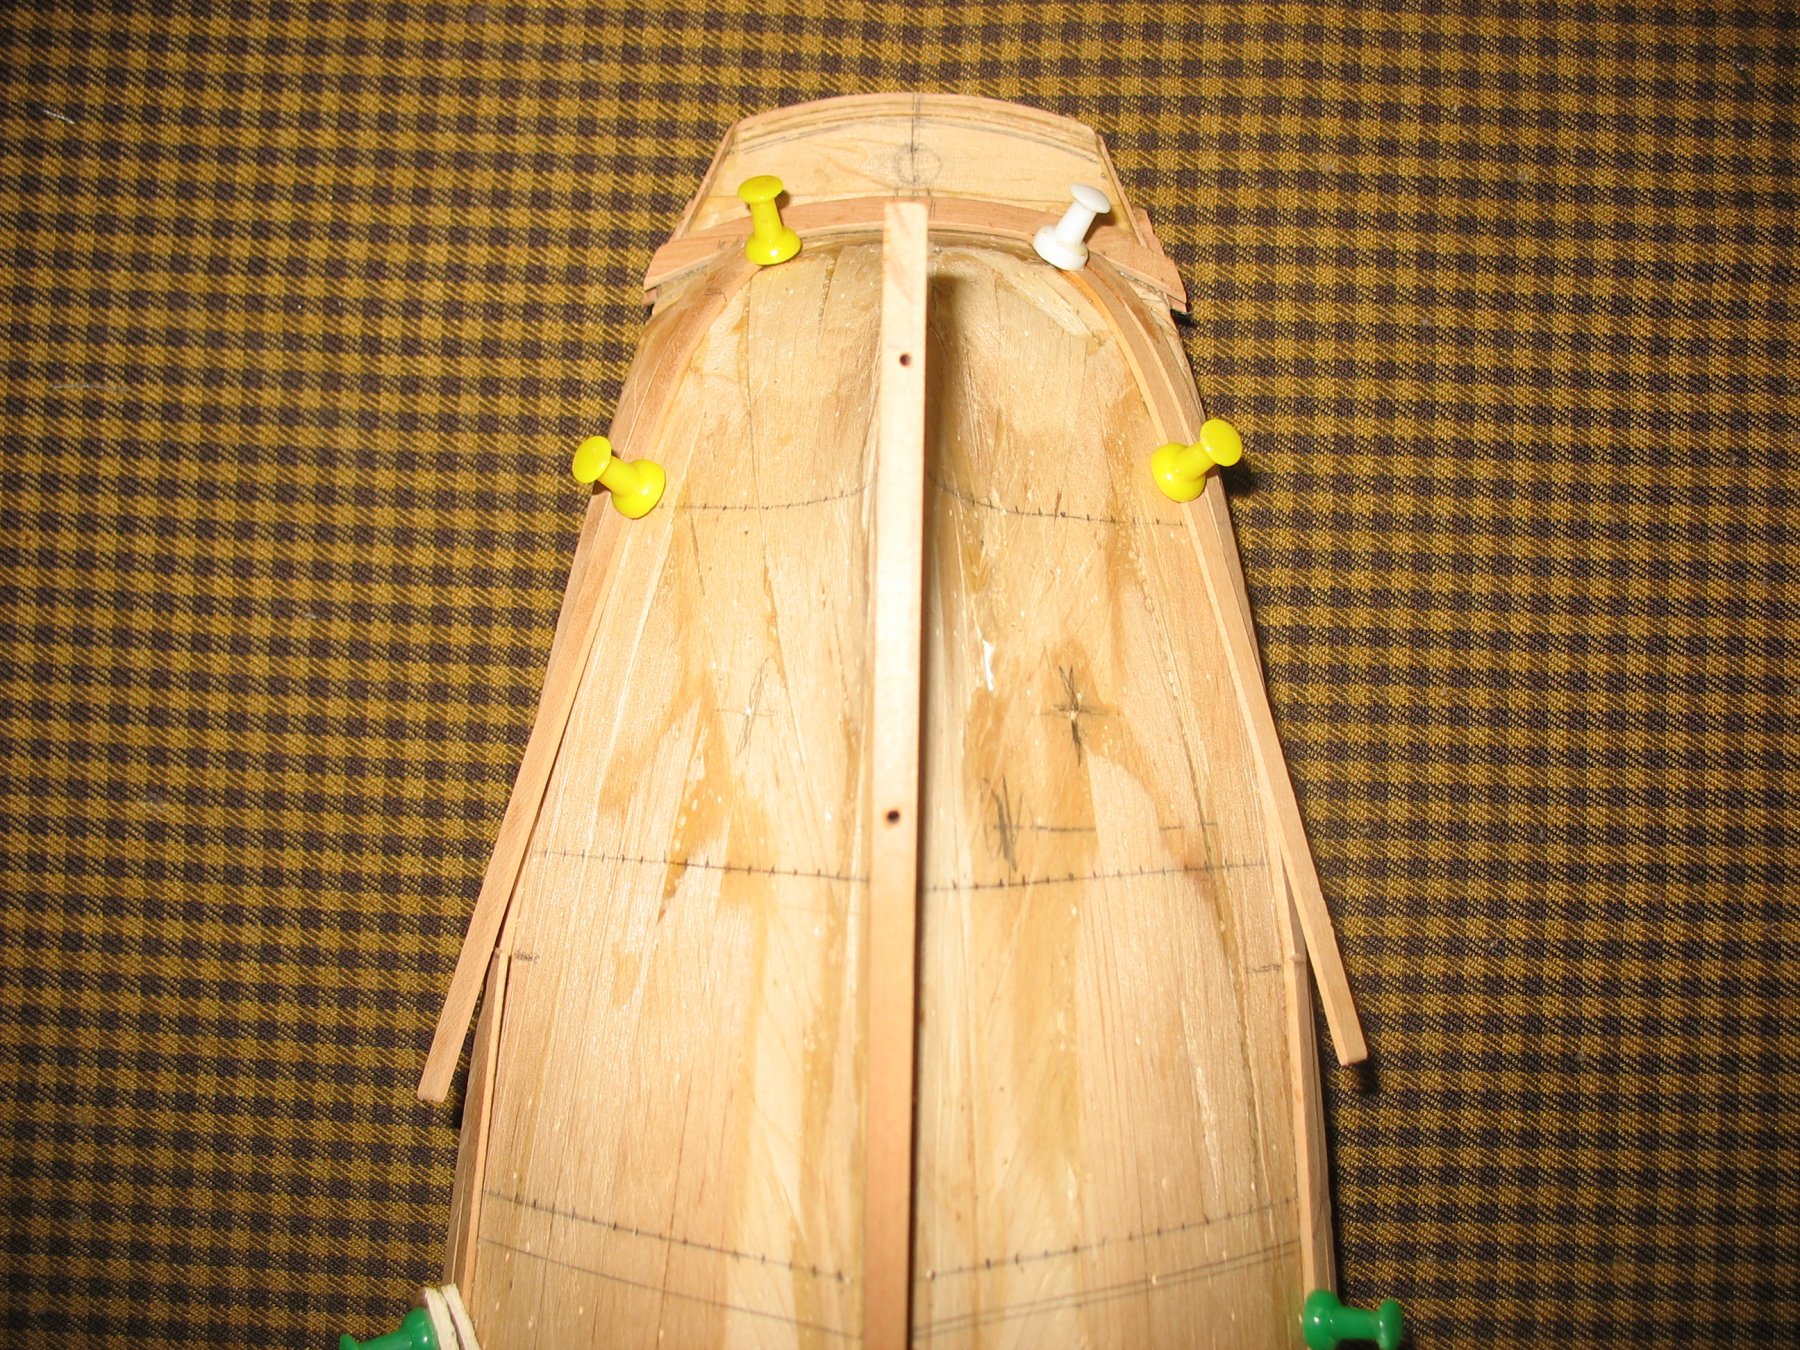
Following my photo –report – here are some photos. Covering.

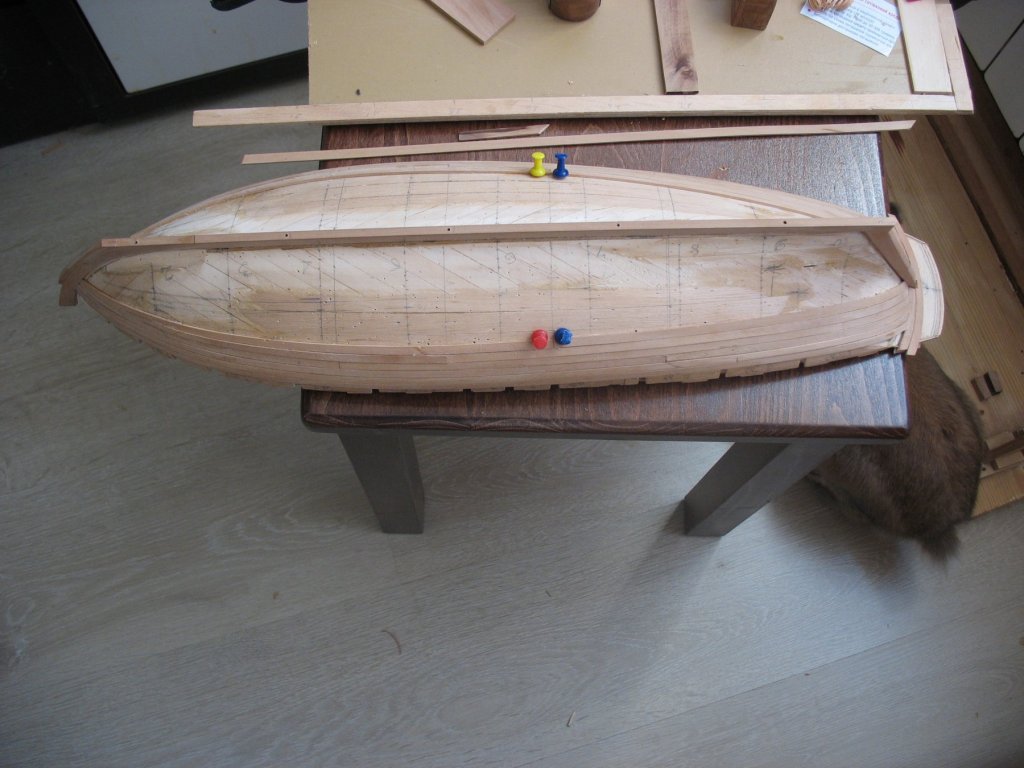
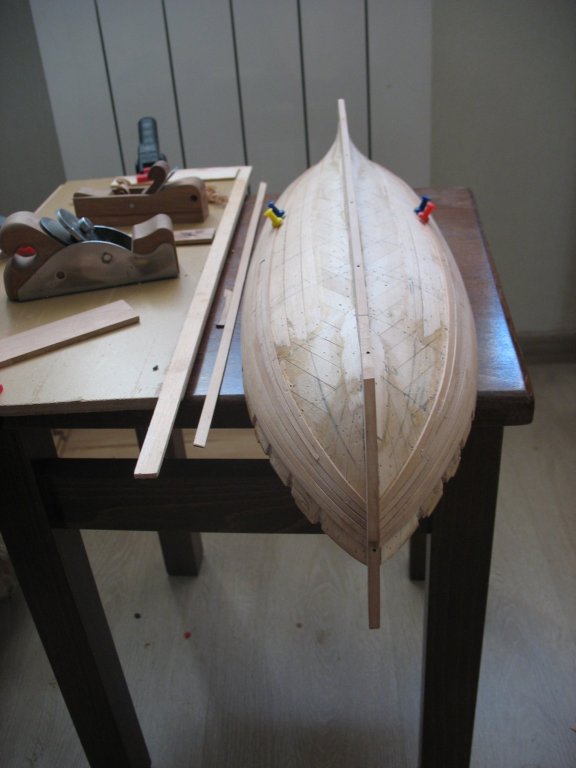
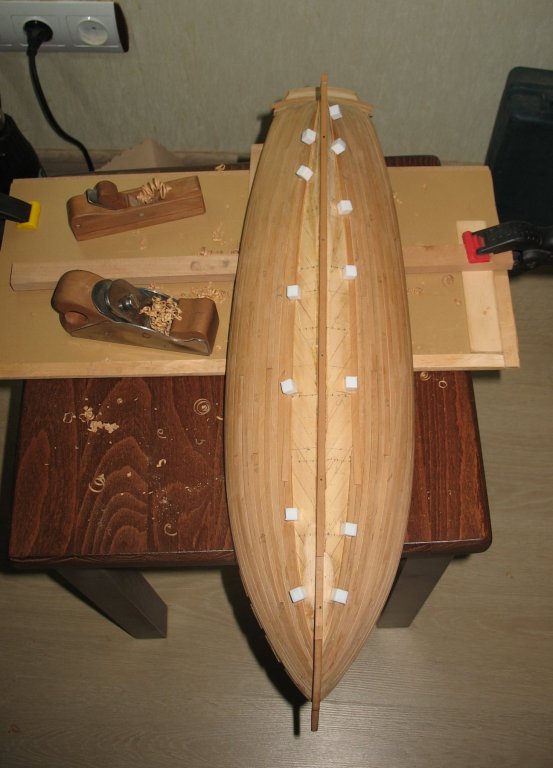
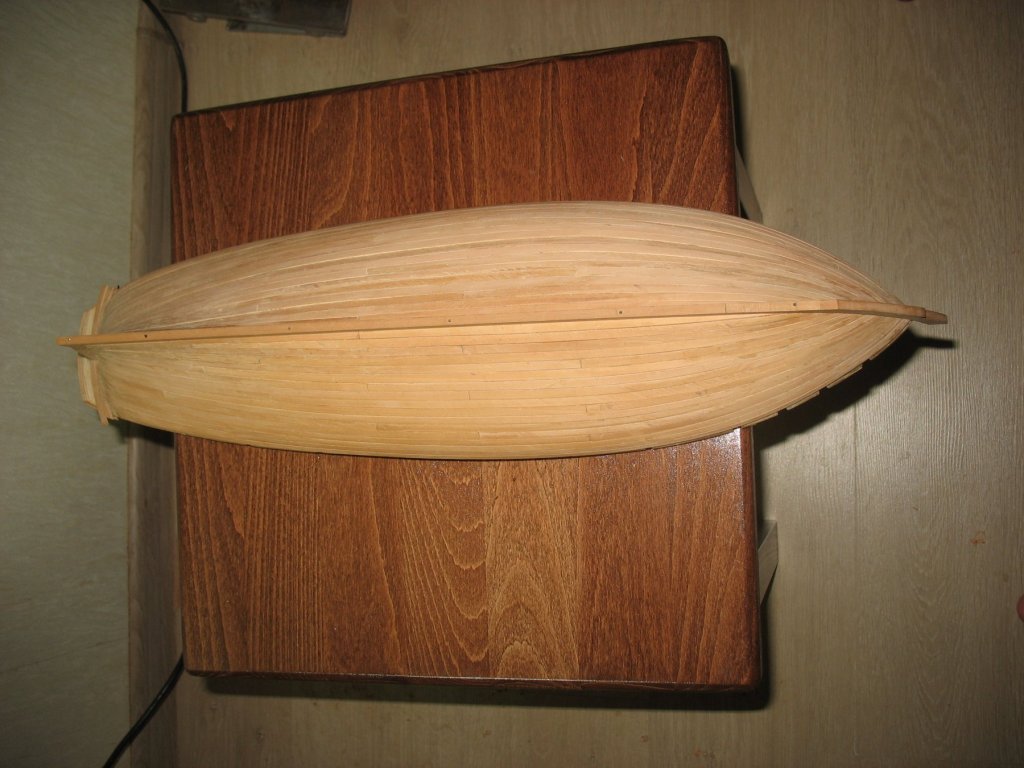
- mtaylor, yvesvidal, GrandpaPhil and 10 others
-
13


.JPG.f8924aa835bc9a96df42b4ef74d1733c.JPG)


.JPG.ddae2c84101c0a0302c3b85eea978bc5.JPG)
.JPG.ab2aa08a0a579be594f557a96811ec8f.JPG)


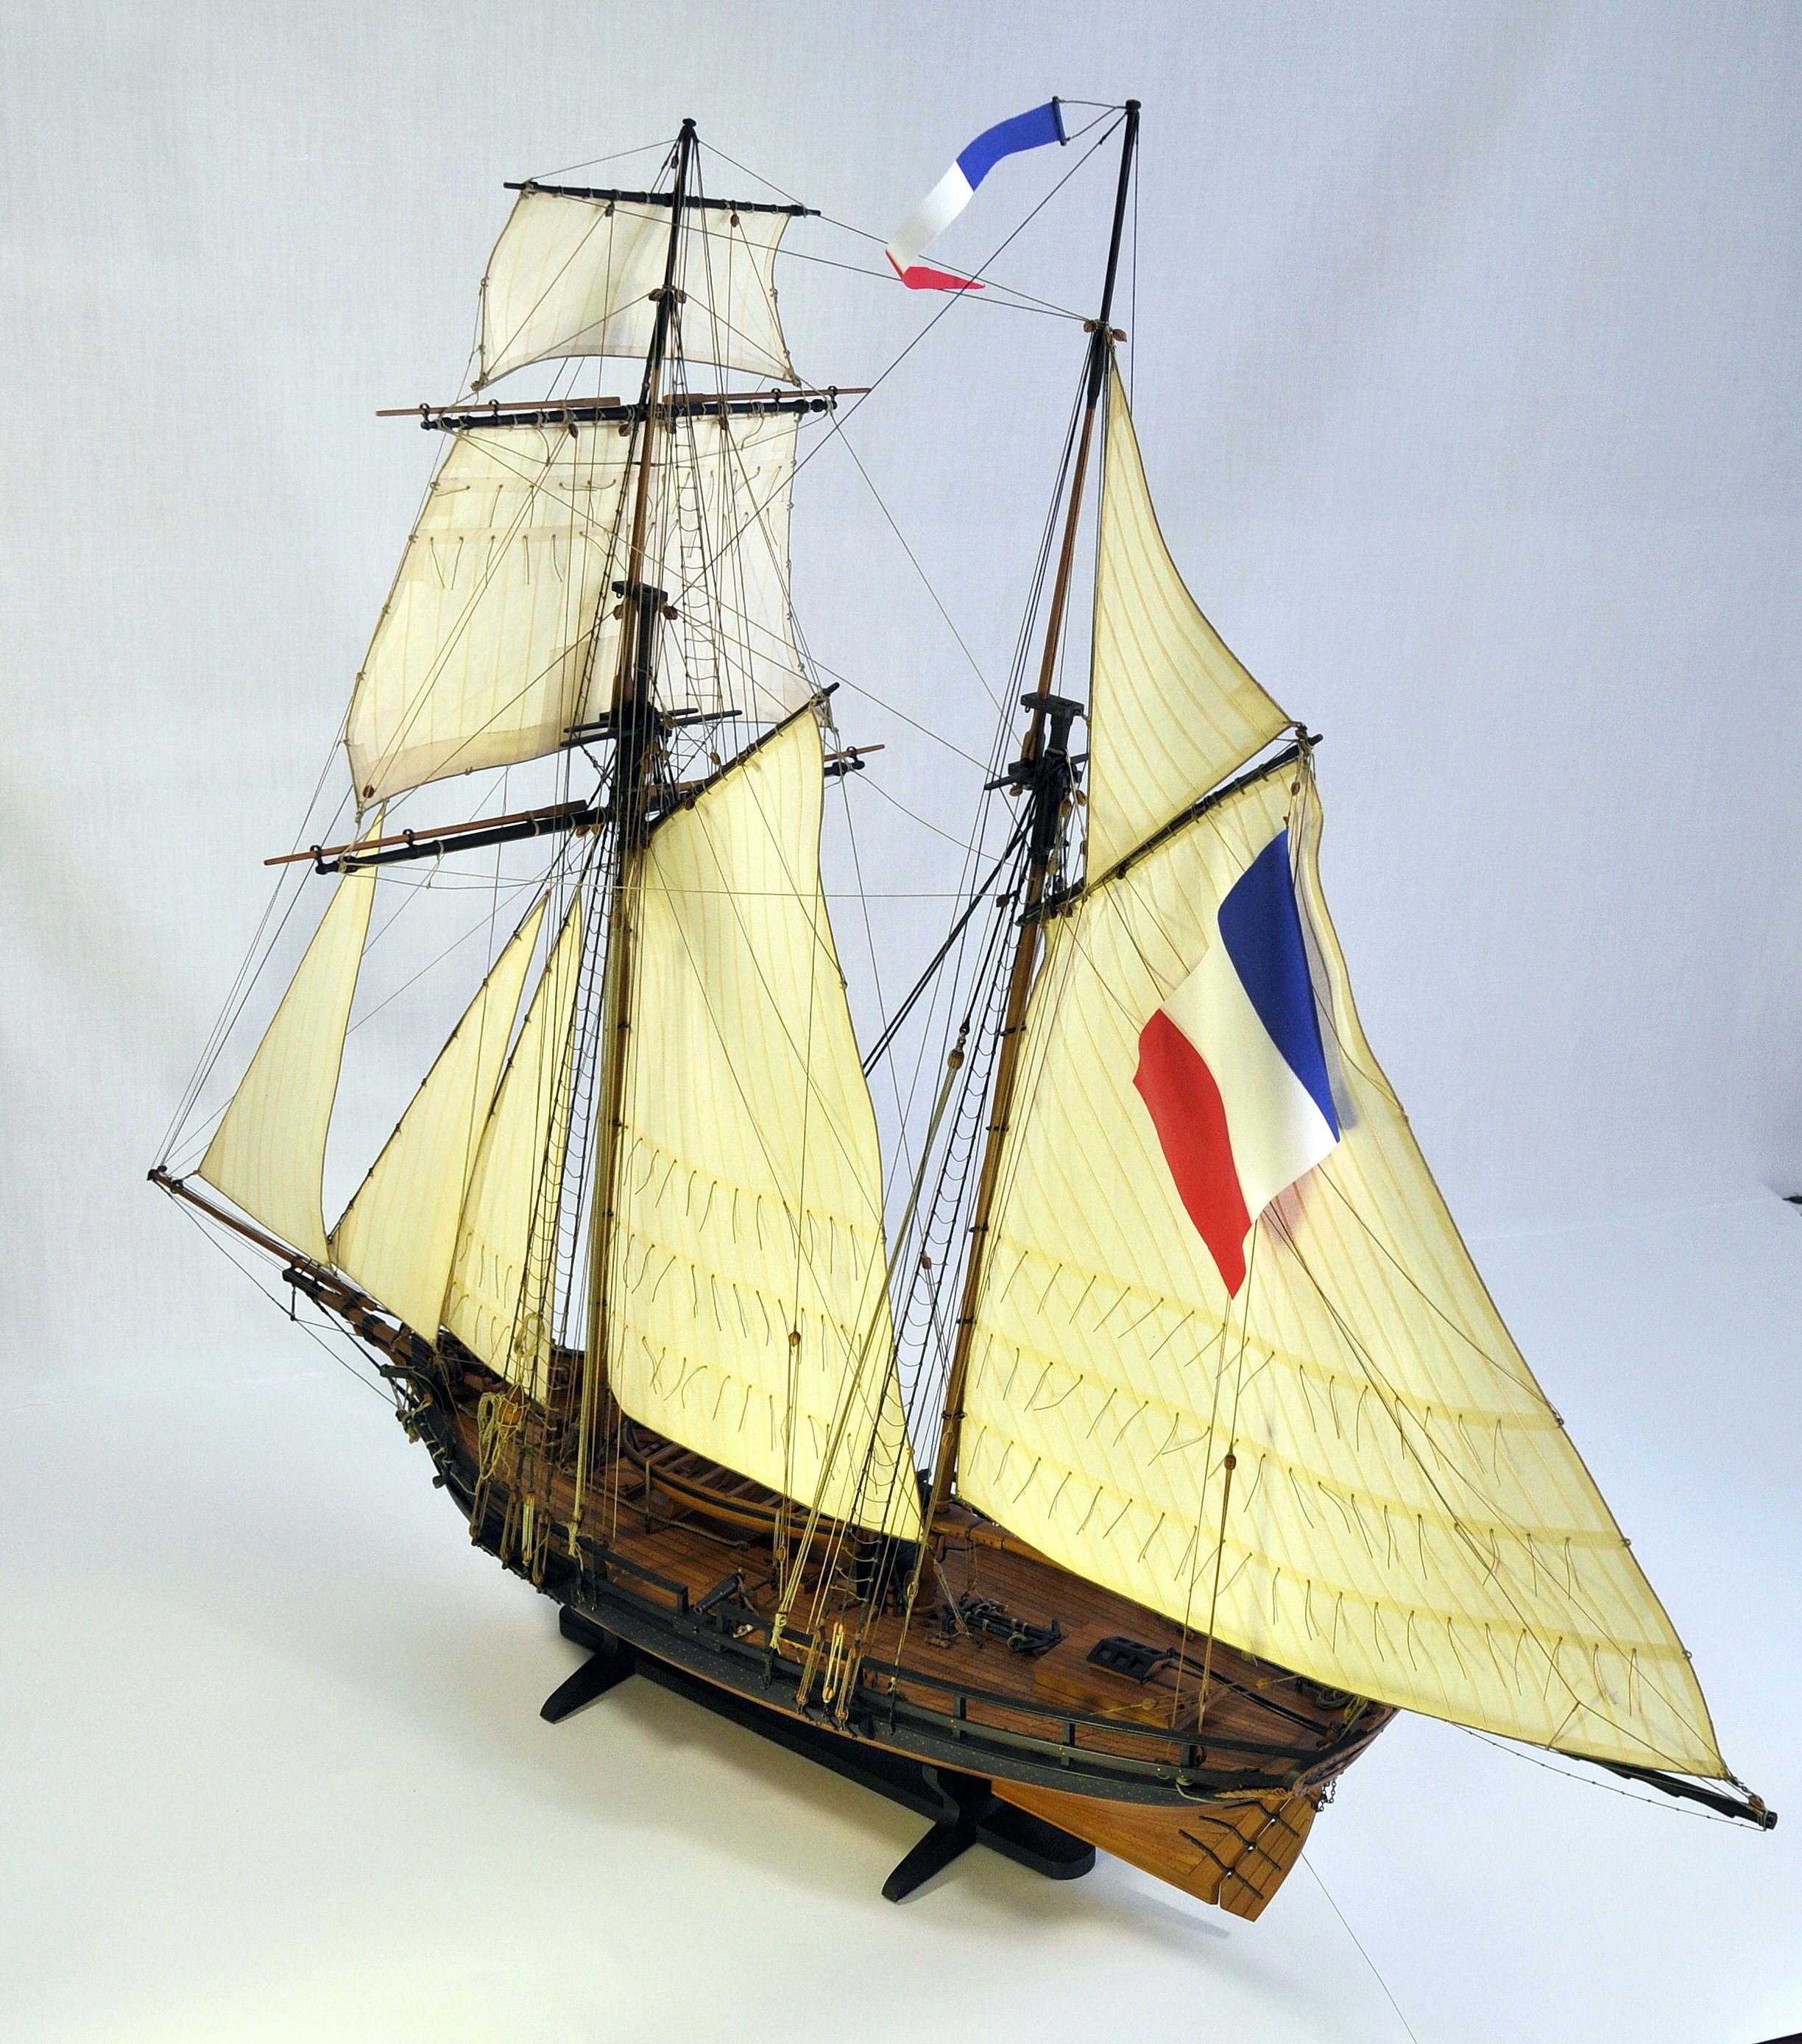
La Jacinthe by Kortes - FINISHED - 1:42 scale - French schooner
in - Build logs for subjects built 1801 - 1850
Posted
Now, the same procedure with the hornbeam.