HOLIDAY DONATION DRIVE - SUPPORT MSW - DO YOUR PART TO KEEP THIS GREAT FORUM GOING! (Only 72 donations so far out of 49,000 members - Can we at least get 100? C'mon guys!)
×


John Allen
-
Posts
1,257 -
Joined
-
Last visited
Content Type
Profiles
Forums
Gallery
Events
Everything posted by John Allen
-
Micheal, I purchased one at Lowes in Mobile, $ 19.98 US it was awhile ago but would that be that much a price differential between Can & US. It is a great little addition.
-
 Lawrence, Thanks for the like, in Some historical journals there were varied descriptions over 60 to 70 years different observations depending on the writer. One said seagoing navigational canoes were up to 80 feet with 100 paddlers, I doubt that was a single hull most observers stated the Waka Tuau war canoe was un-seaworthy in heavy weather, So 60 ft. paddlers. I agree foot pedal works good of you remember to take your foot of the pedal, have the pricks in the hand to prove it thankful for low rpm. Happy paddling
 -
Masterful work, have used wood on all your carvings and what kind. Did you use any other material beside wood?
- 27 replies
-
- 5
-

-
- carrvring
- micro wood carvring
- (and 3 more)
-
Dave Caught up on the build, beautiful build neat, clean and pristine!
-
Danny after watching your build I think it takes a lot more patience and skill working with paper and the PEs than a stock wood build. Man your getting down and dirty at such a small scale, the results are stunning. KUDOS This Buds for you or a Boatrocker Ramjet Whiskey Barrel Aged Imperial Stout.
-
Bob, Extremely neat and clean build one to be proud of.
- 682 replies
-
- 4
-
-
- halifax
- lumberyard
- (and 1 more)
-
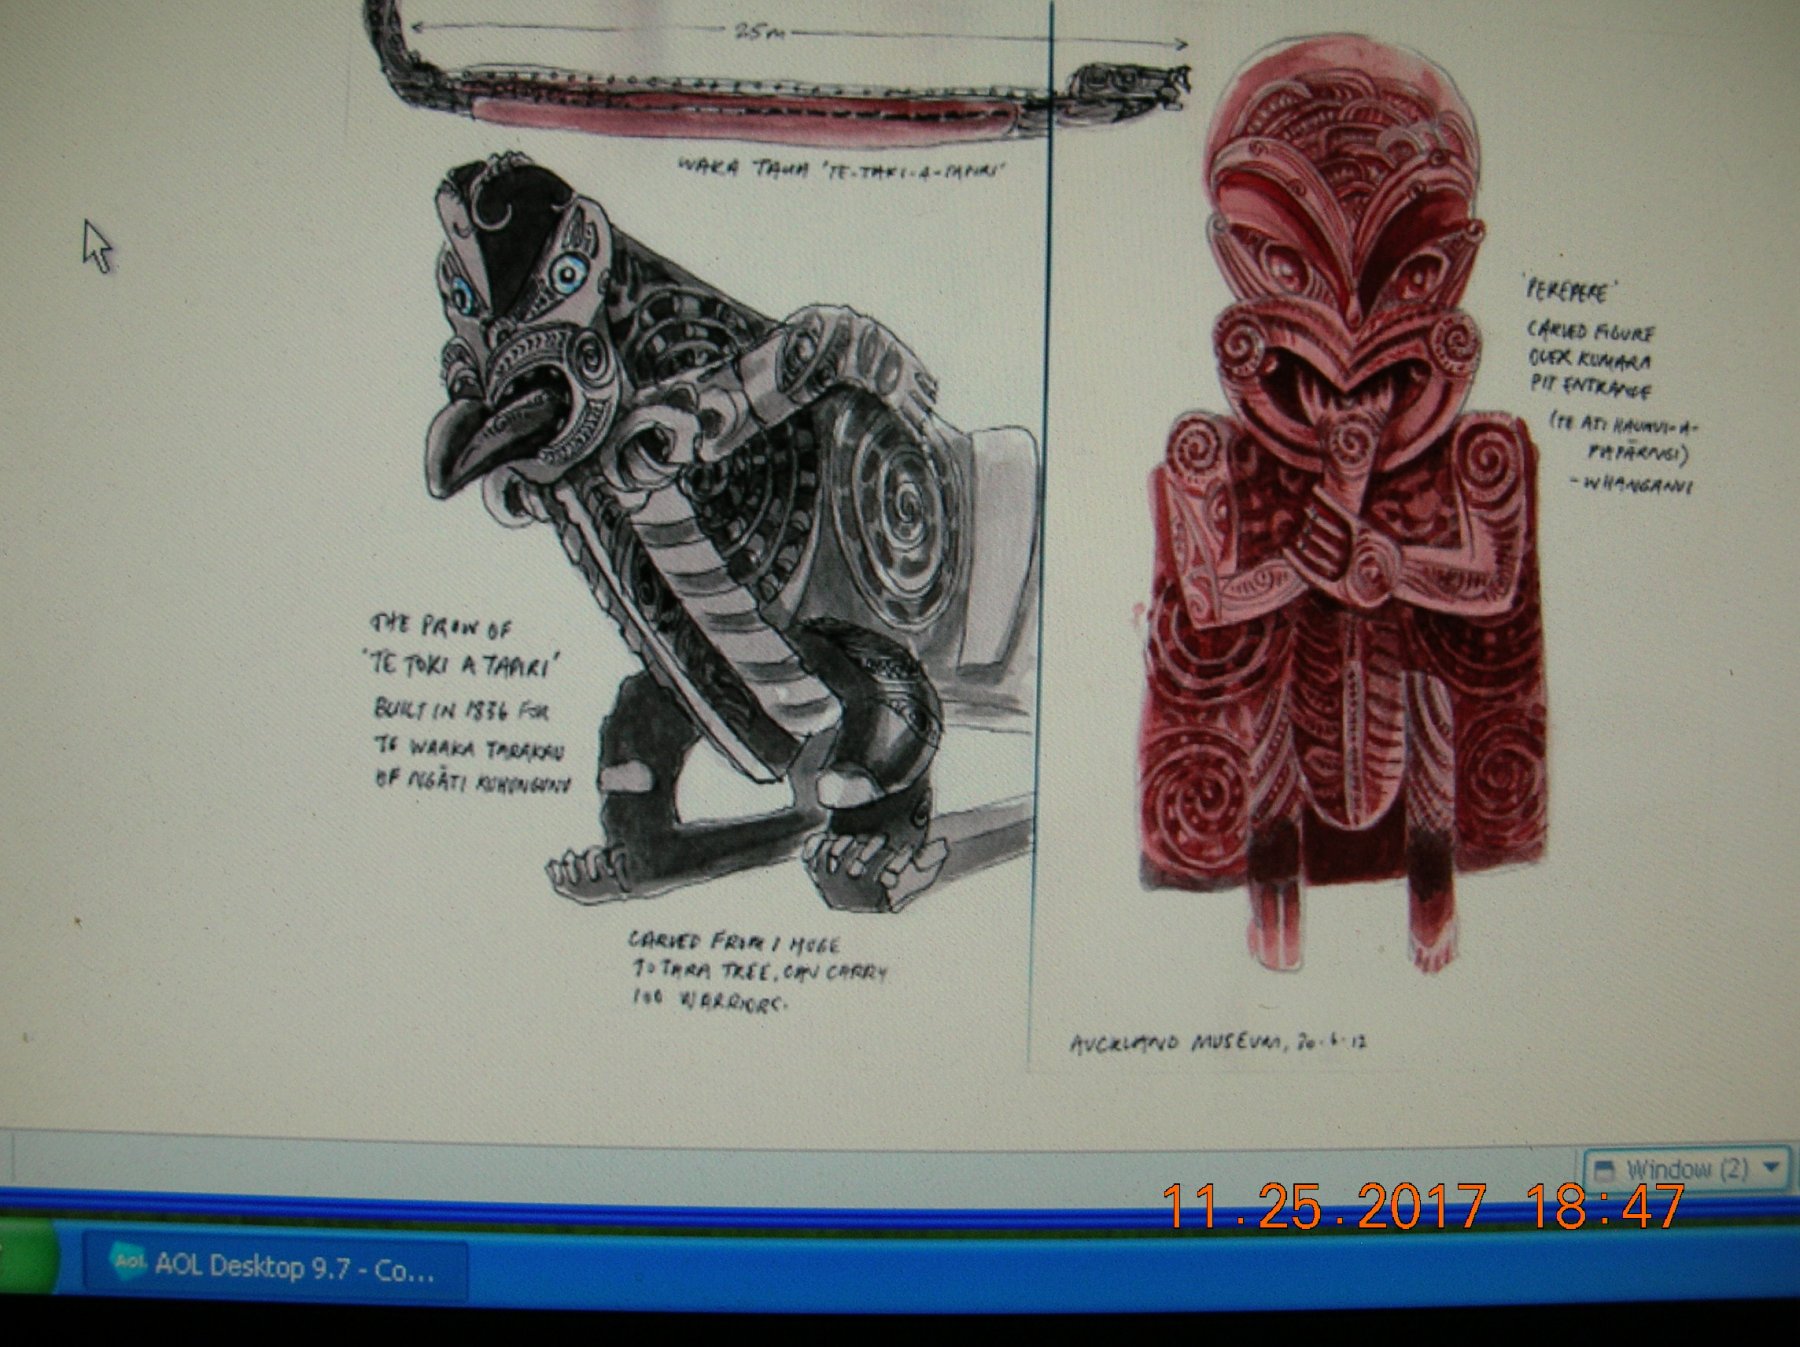
Denis, Denis, Thank you for your interest and posting. I did a lot of research before I started this project for several reasons, 1 Knowing absolutely nothing about the Maori history, culture, social and religious practices I felt the need to educate myself. 2 Quite a few of the builders on this site are from the New Zealand area and I did not want to embarrass myself or embarrass myself as little as possible.(my biggest gaff so far was miss-spelling WaKa-Waca after looking at it a thousand times thanks Dan). 3. I wanted it to be as historically accurate as possible. 4. Your right about the shell which I will add after completion of the carvings, it was also placed intermittently down the sides of the hull blow the gunnels I have mother of pearl and some abalone that that will be set into some of the filigree of the carved stern posts. That said as noted in historical journals Waka Tuau were observed painted red and black for death, also had a sail used when going down wind that could be thrown up and taken down quickly and was stored on the thwarts between paddlers, it was made of flax or raupu (bulrushes) and was observed with woven designs. I am sure I will make many more foo pahs I appreciate and welcome all constructive input to educate me and help improve my build.
-
Dan, Thanks for the conversion, embarrassed by the spelling I've looked at it a thousand times,
-
Thanks Keith Then you can continue to finish that beautiful Altair and never get tired or run out of gas.
-
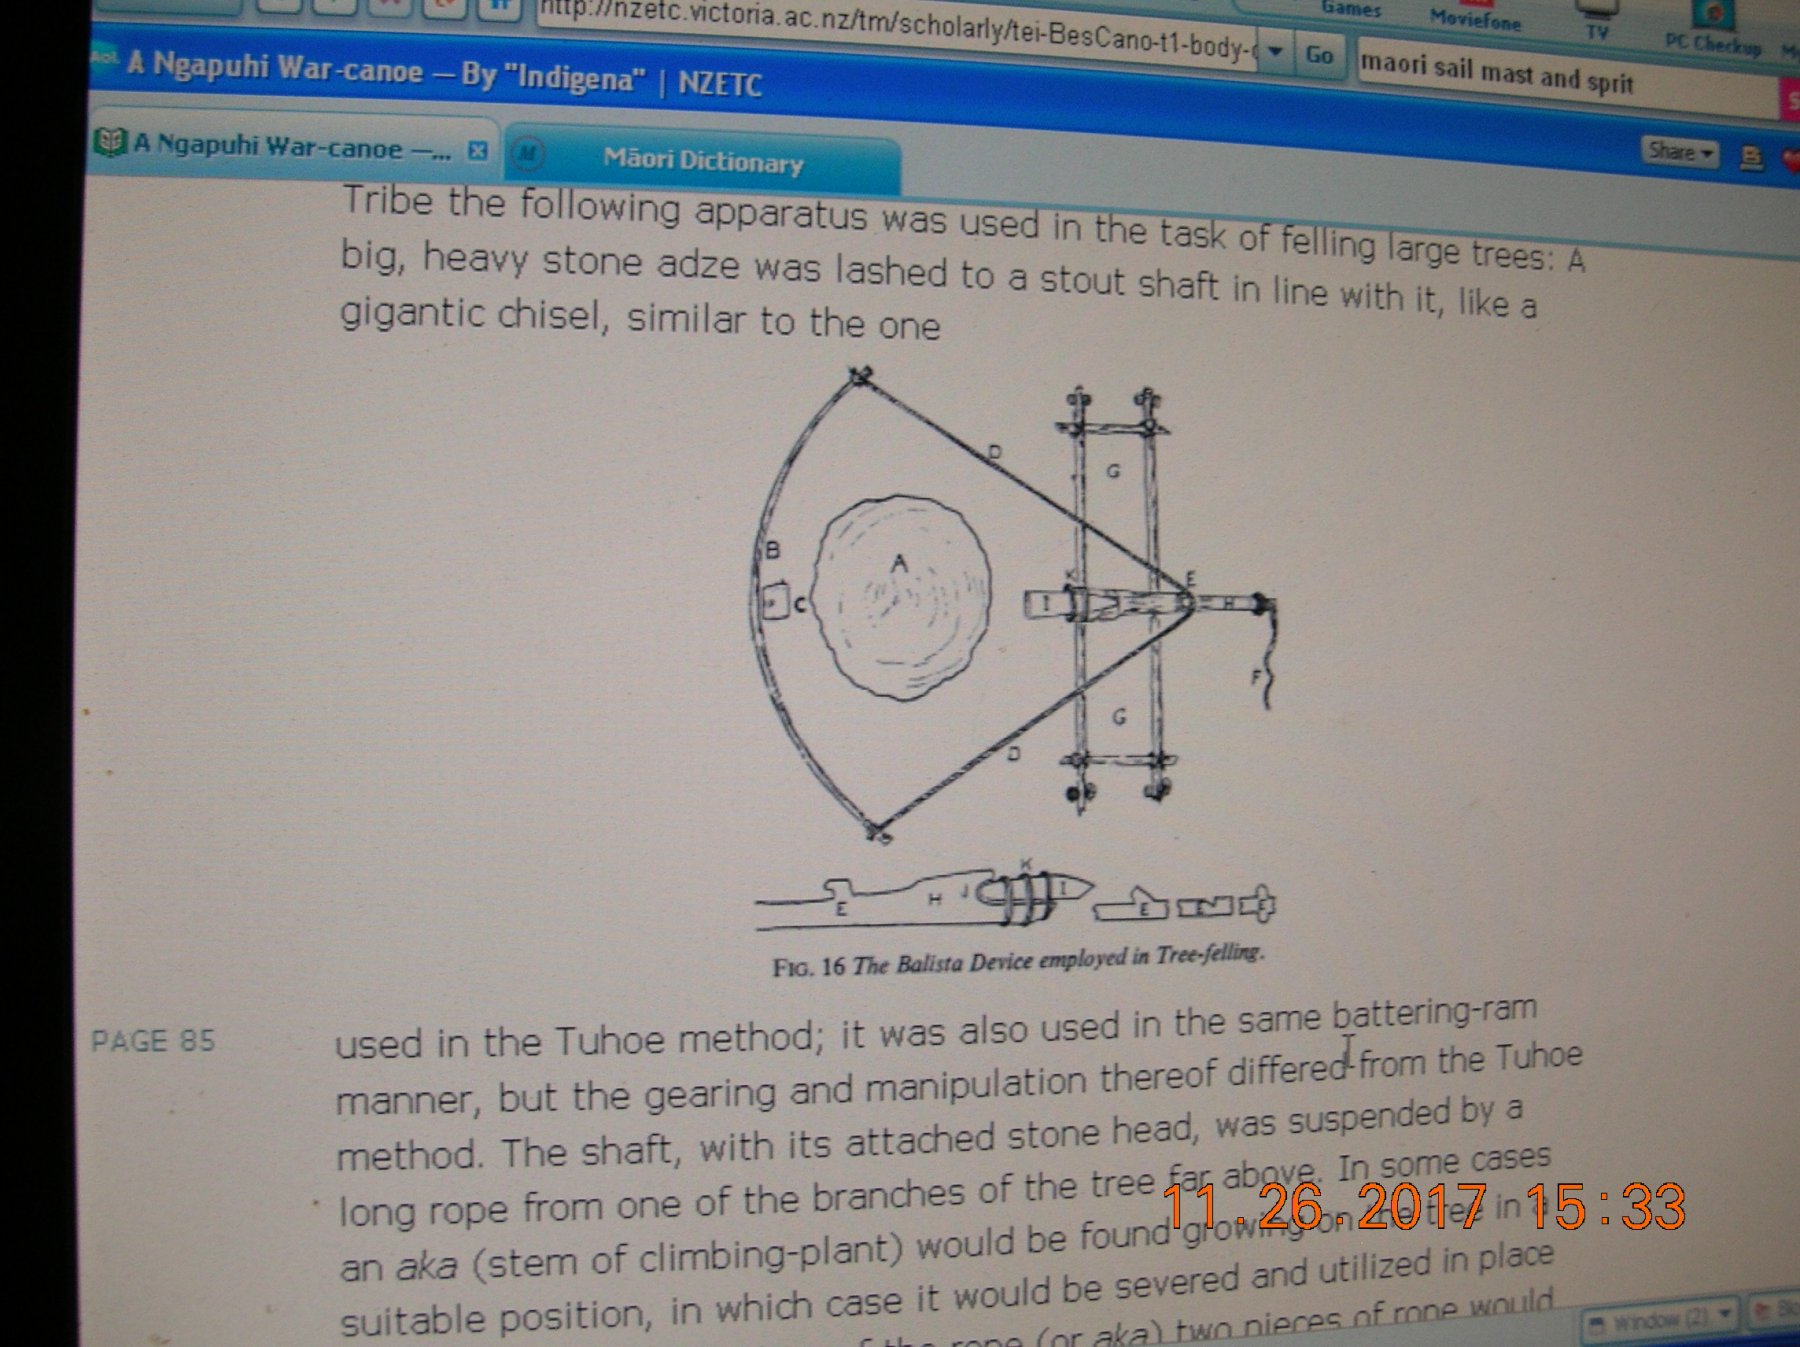
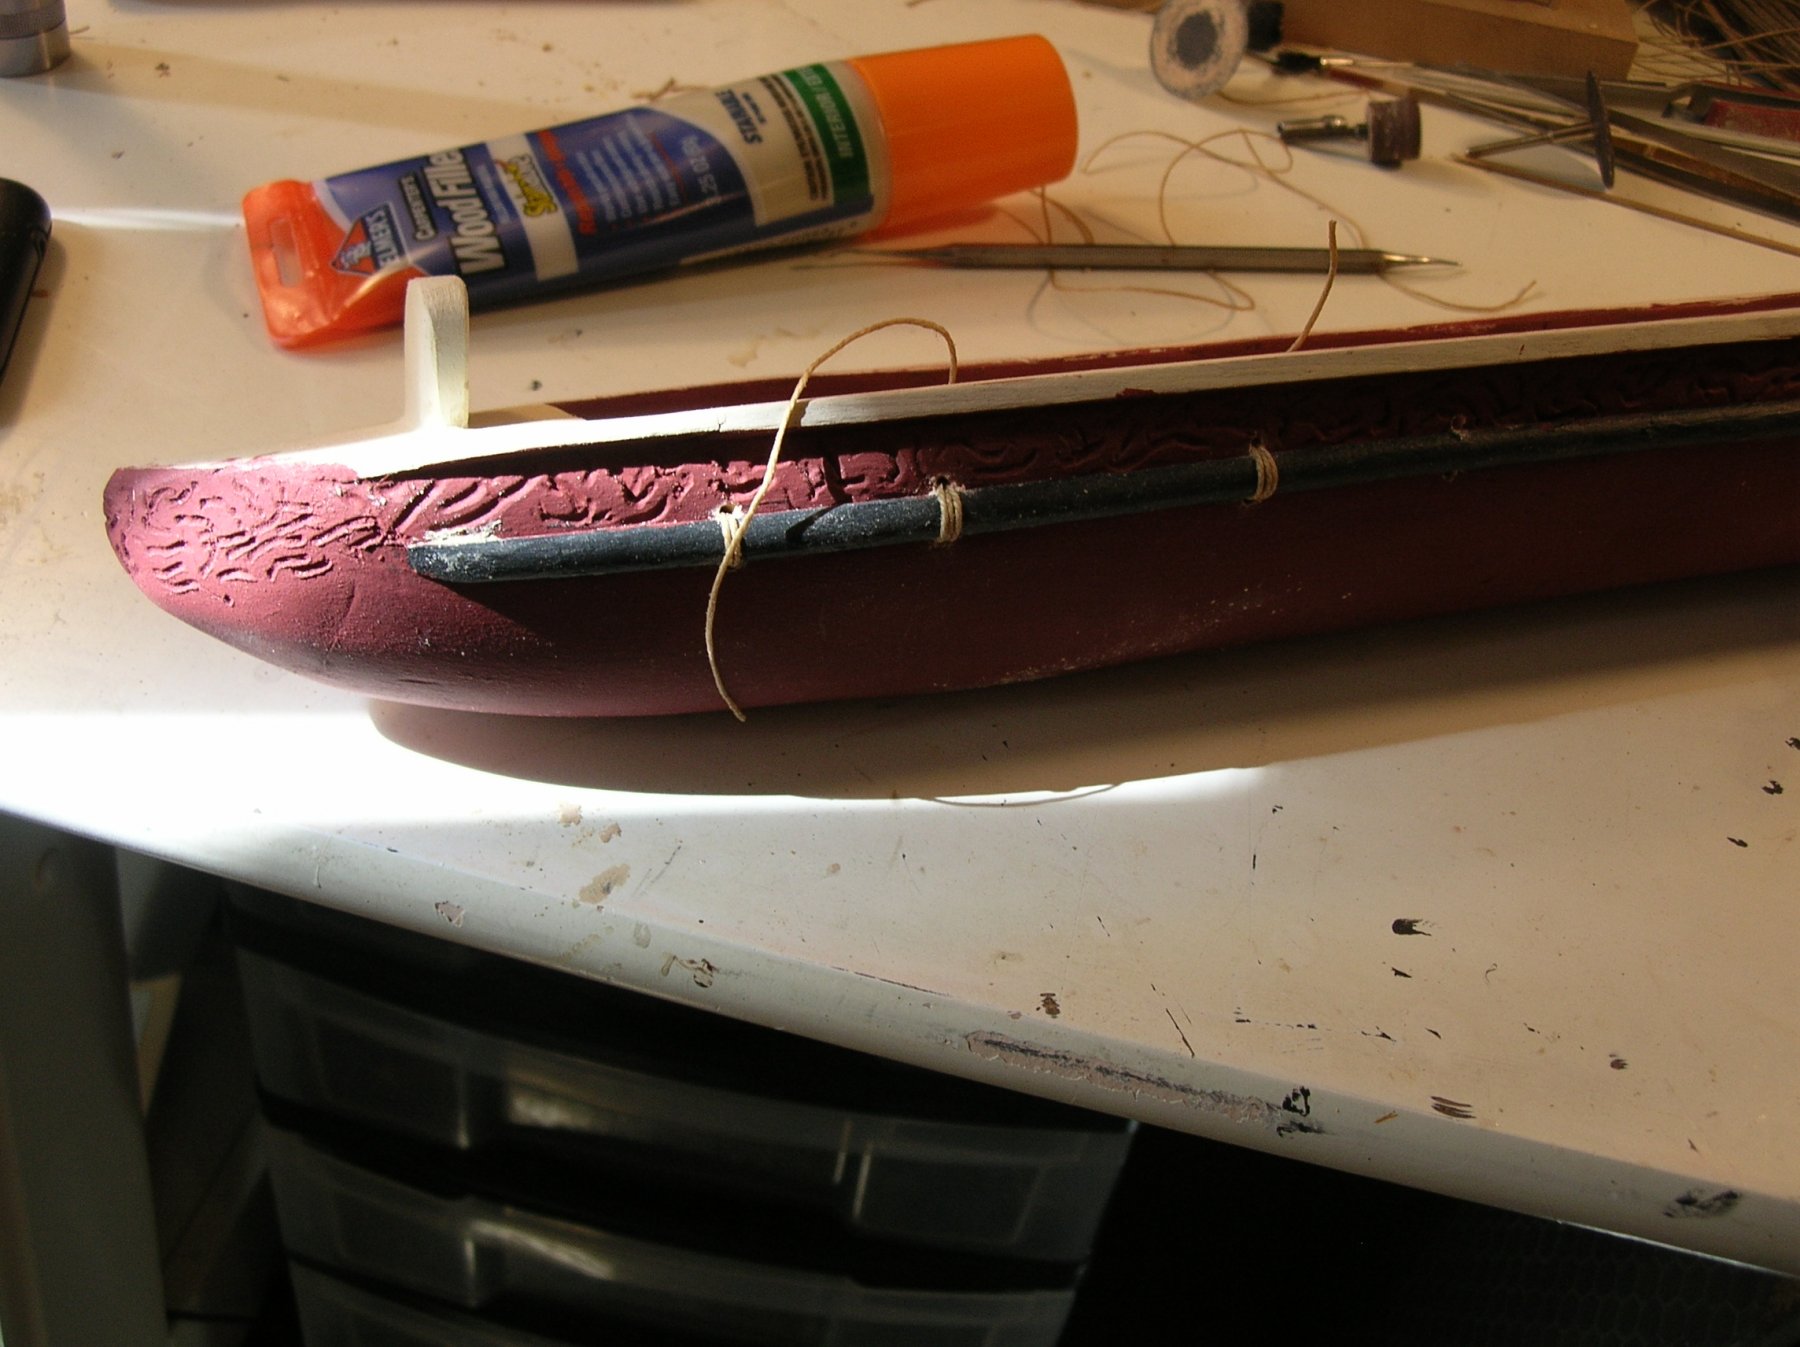
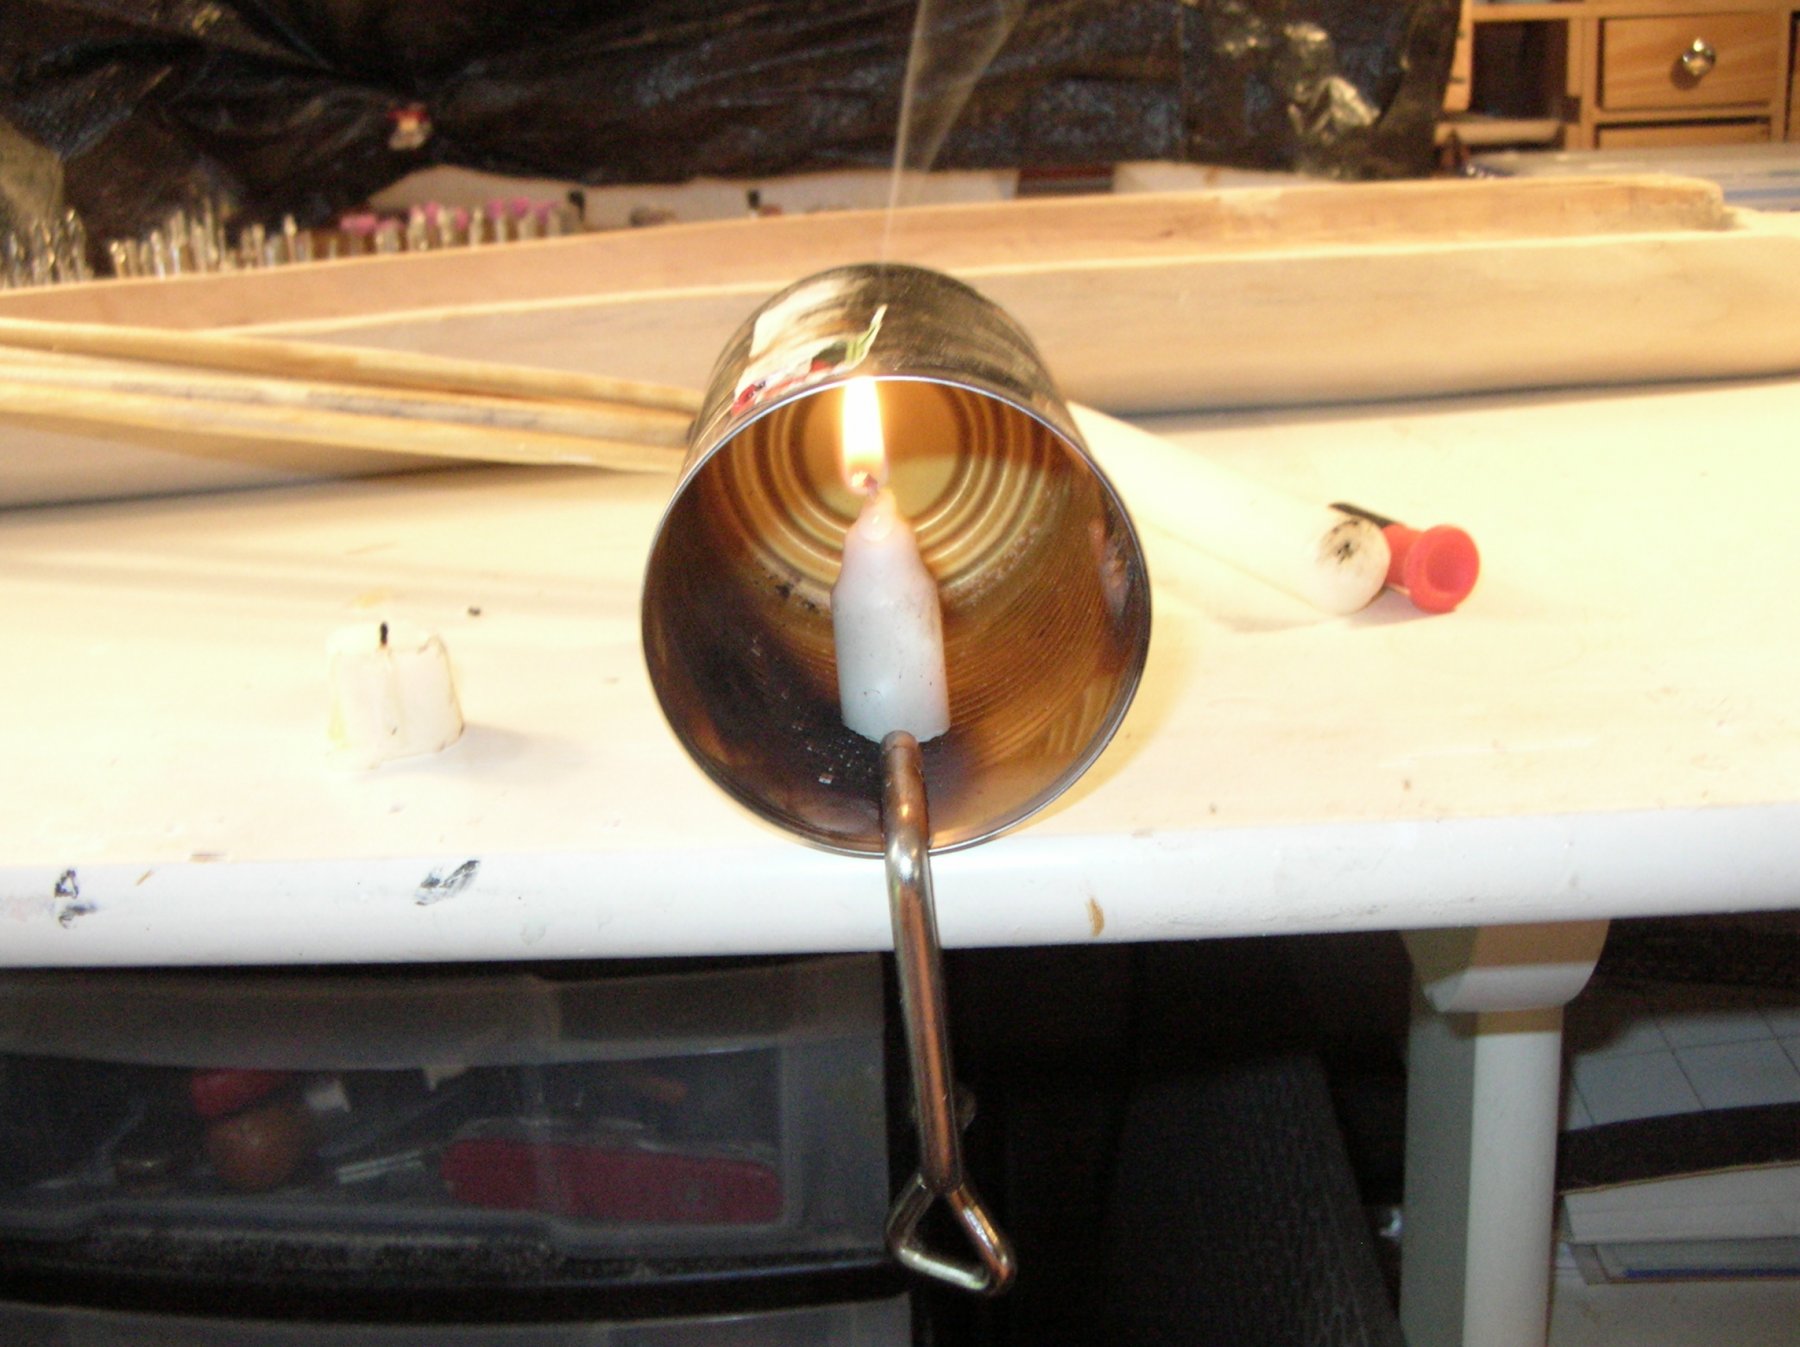
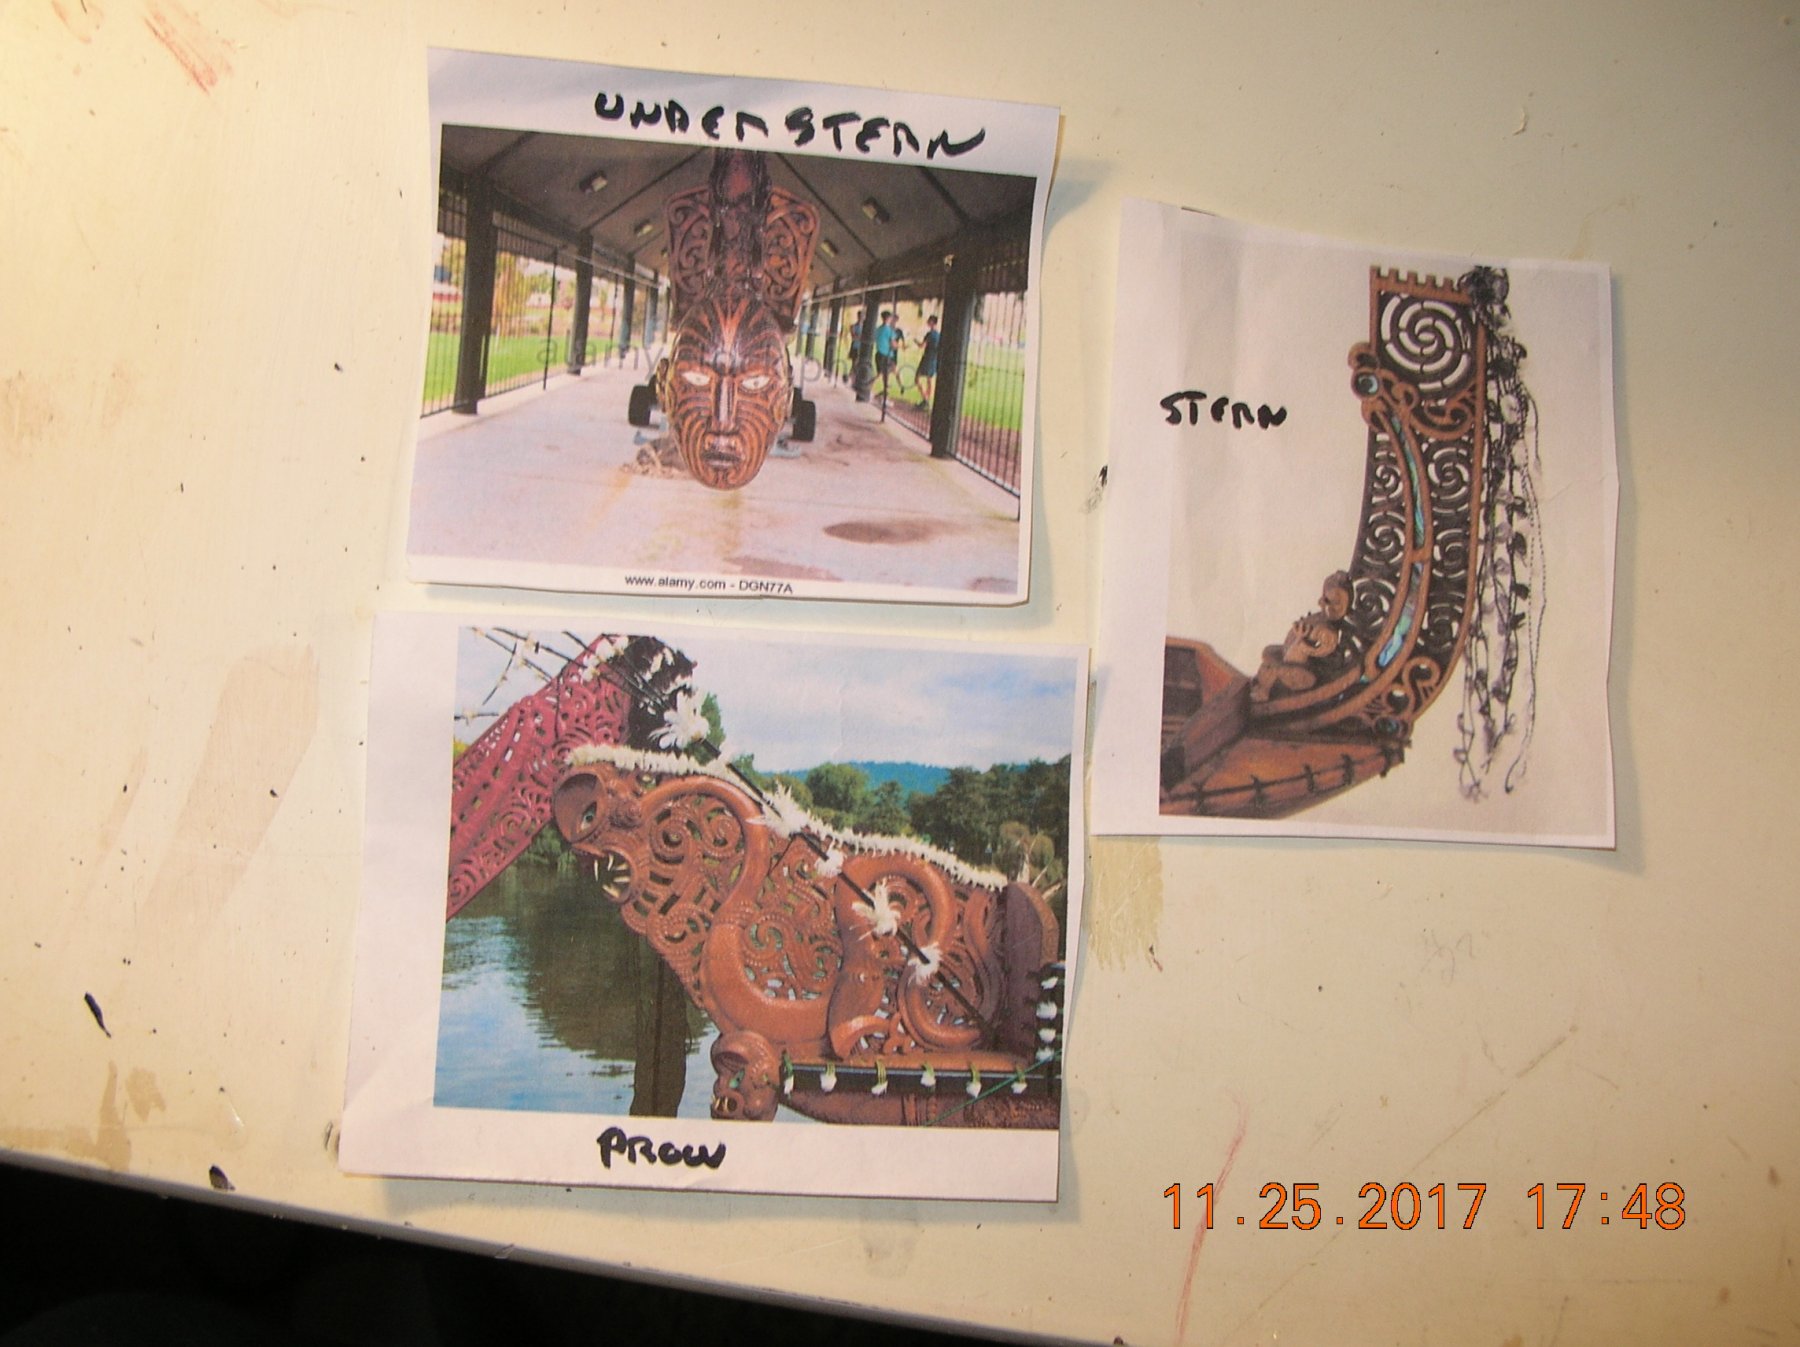
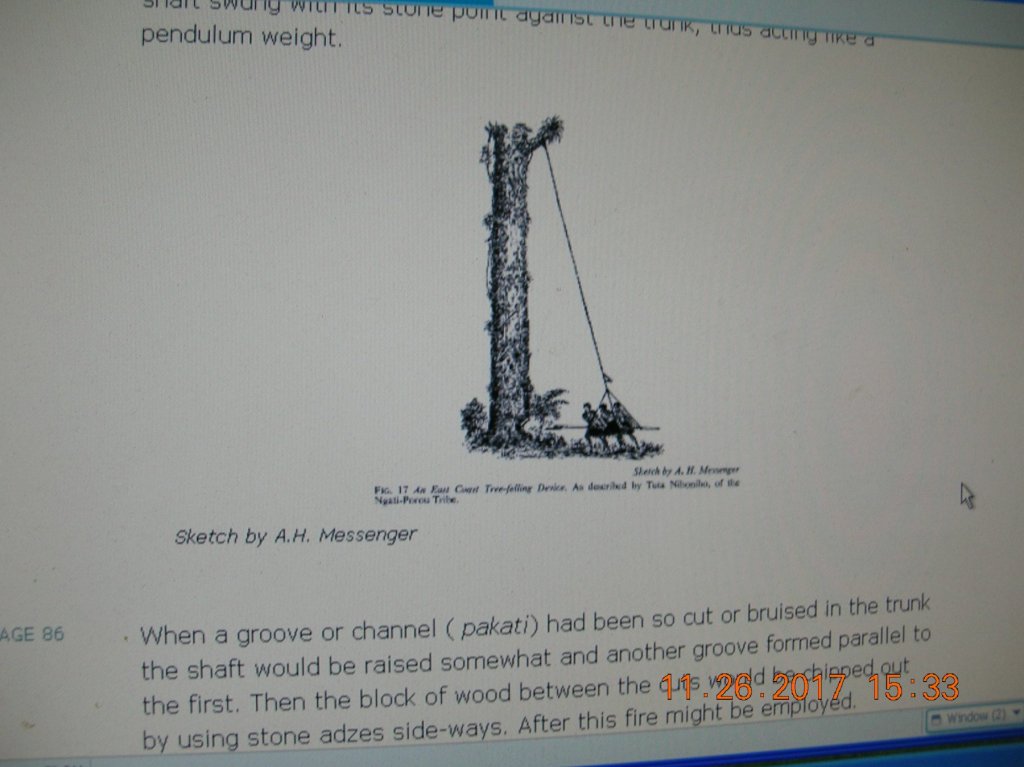
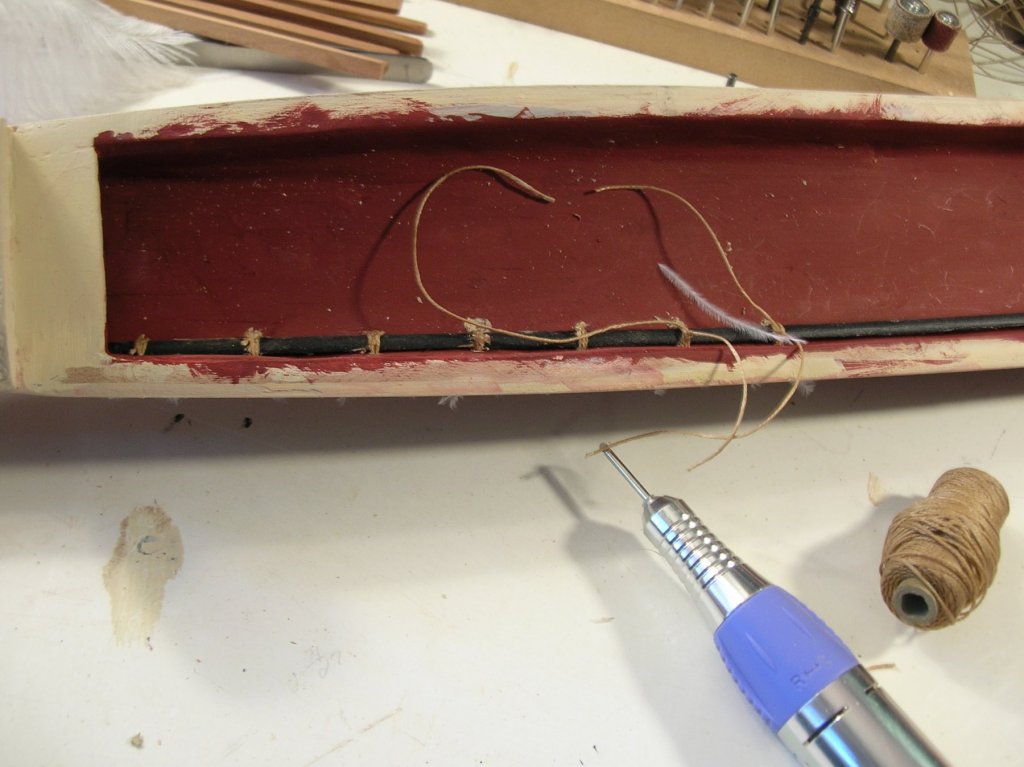
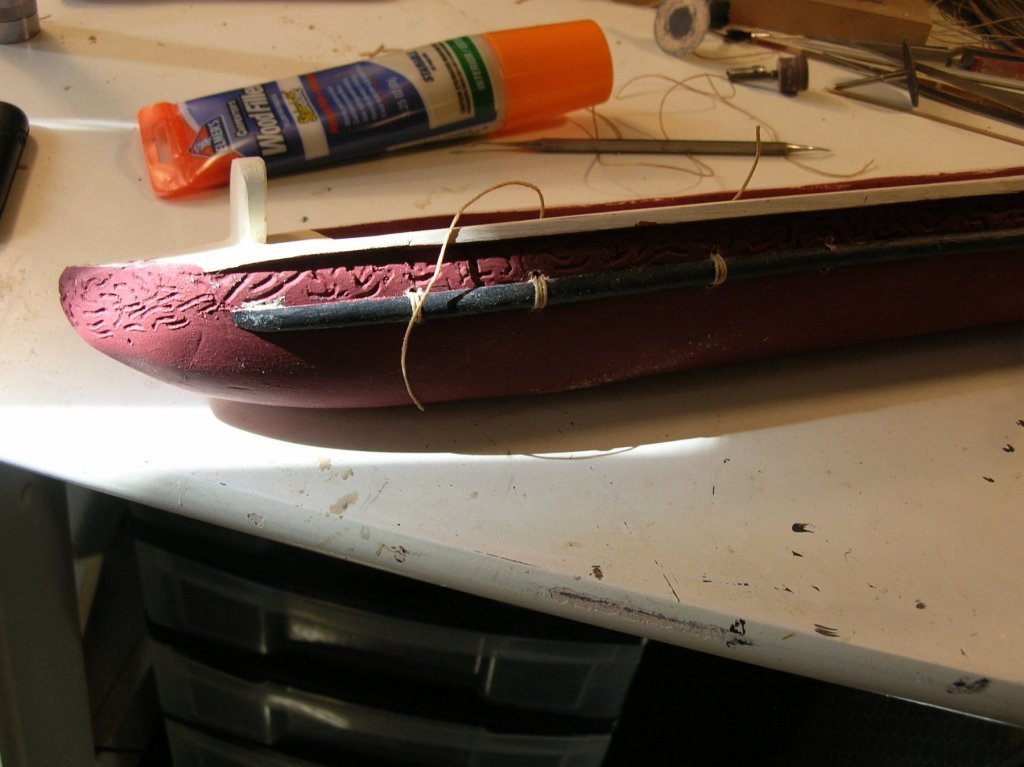
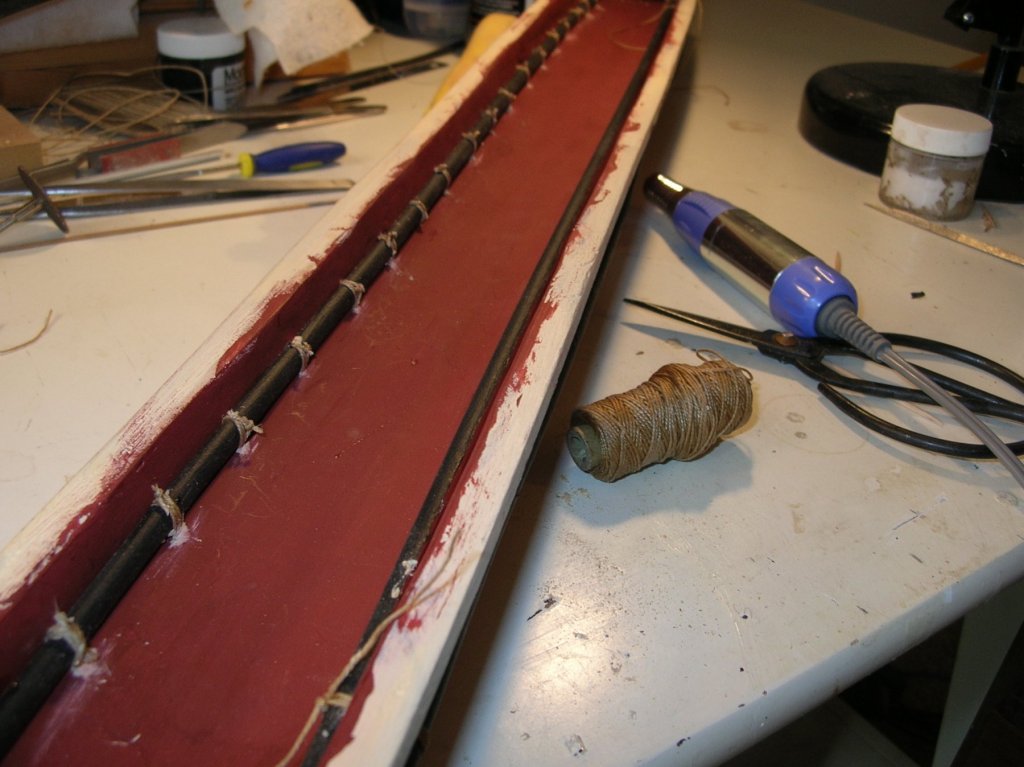
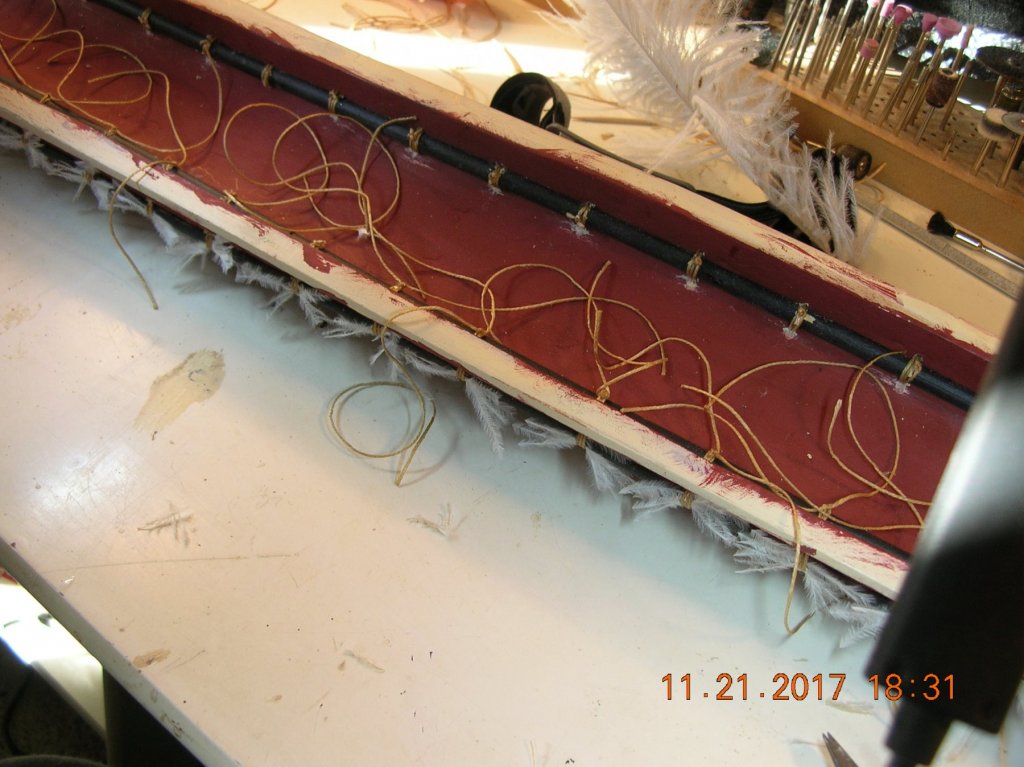
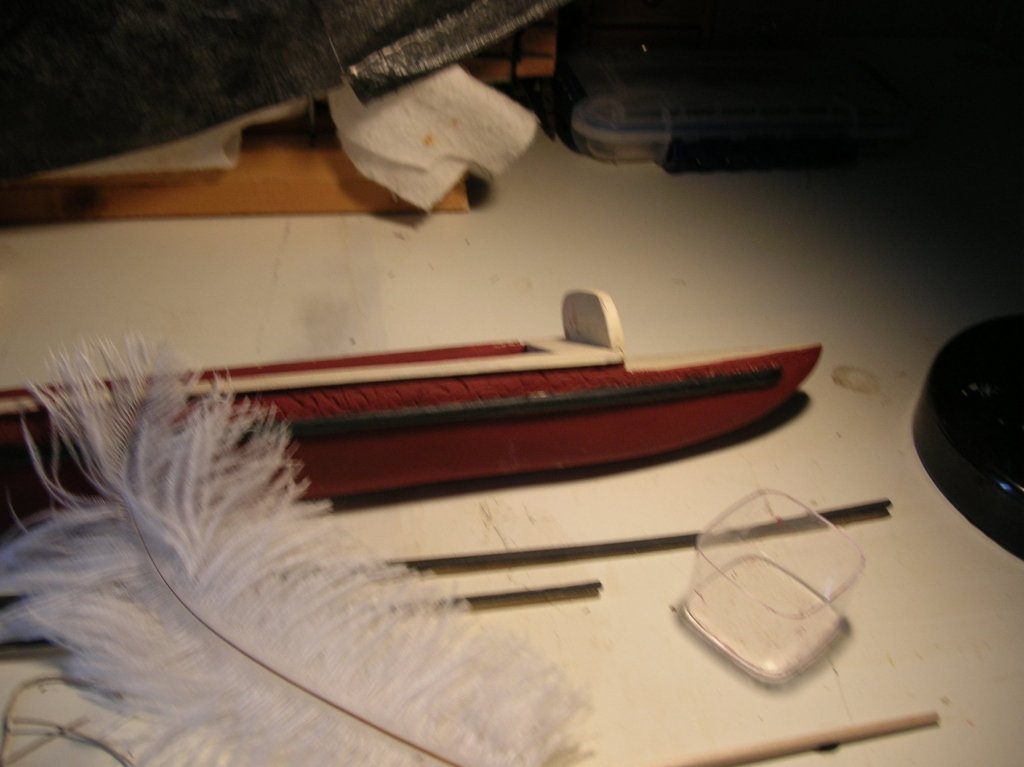
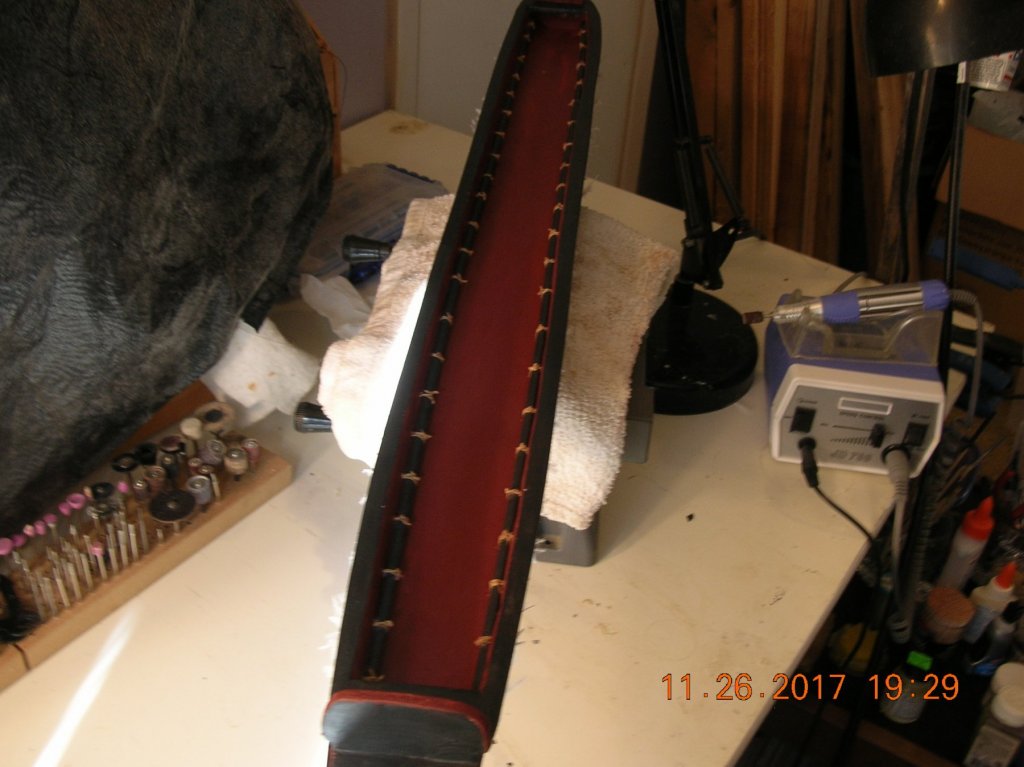
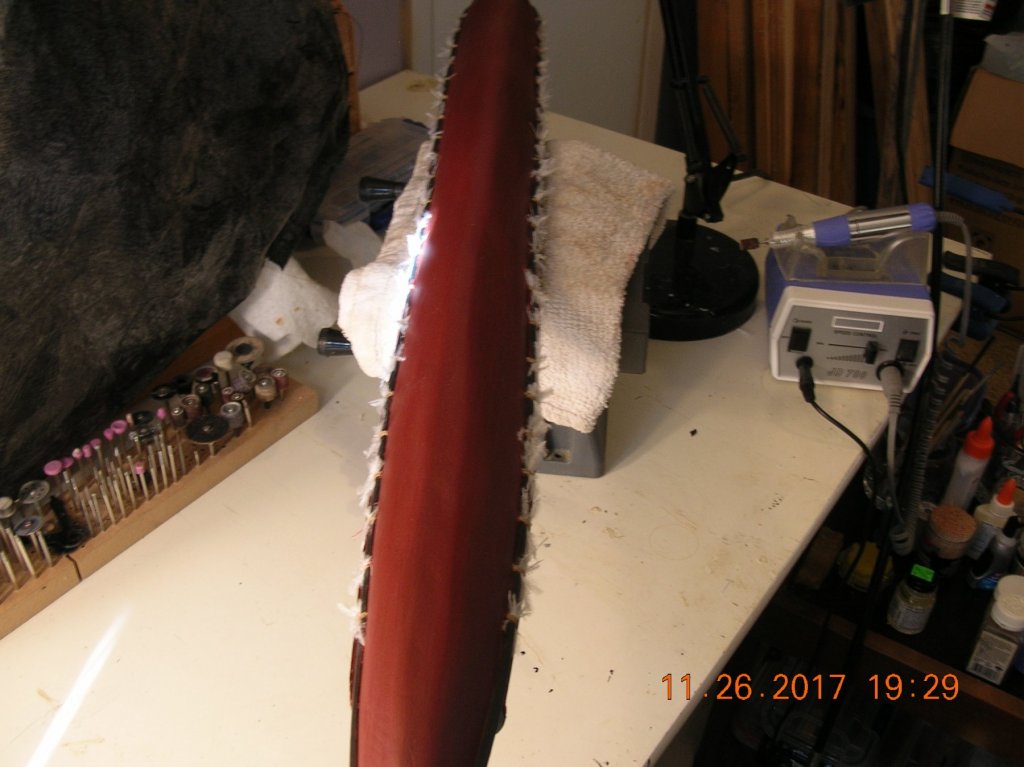
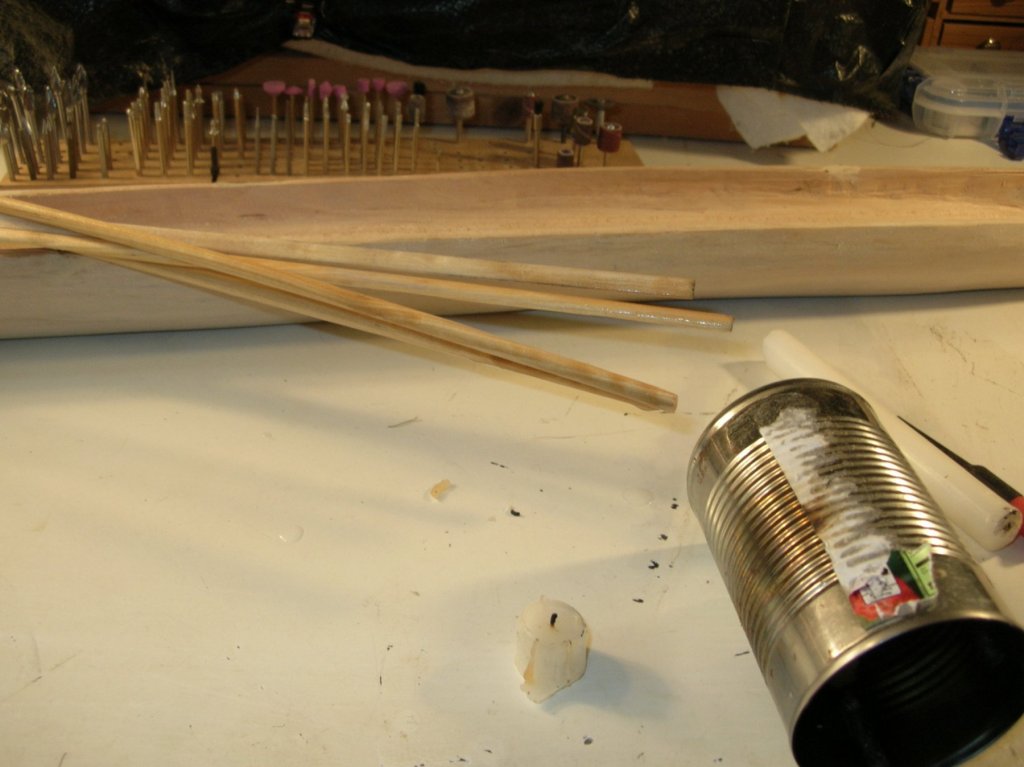
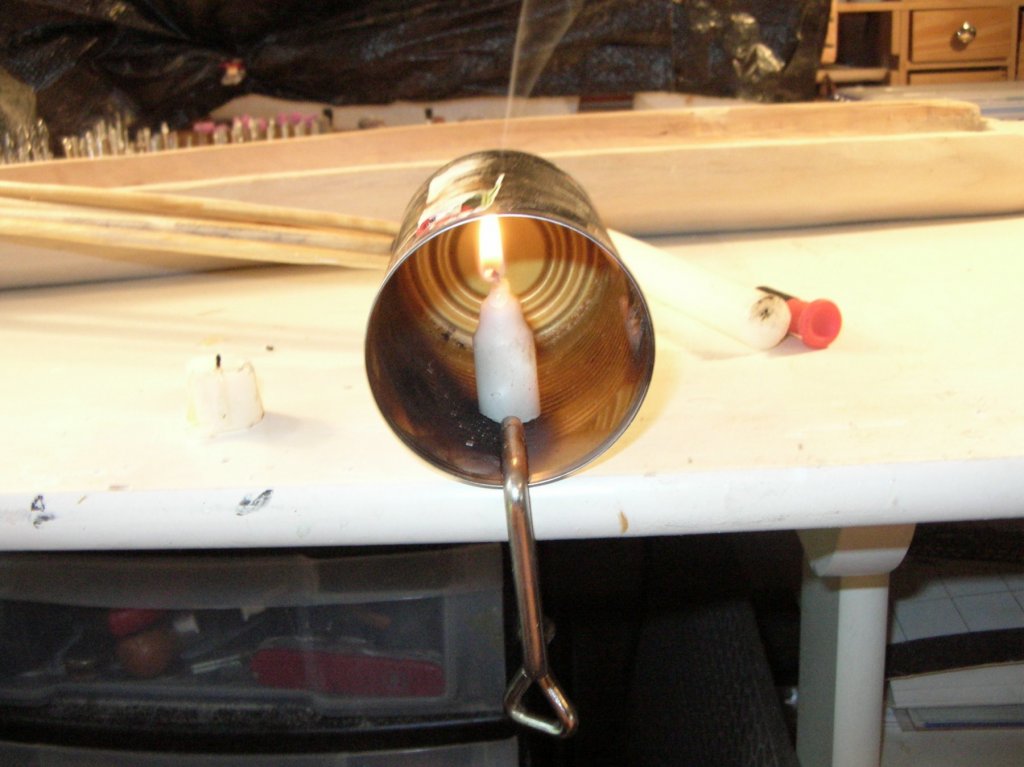
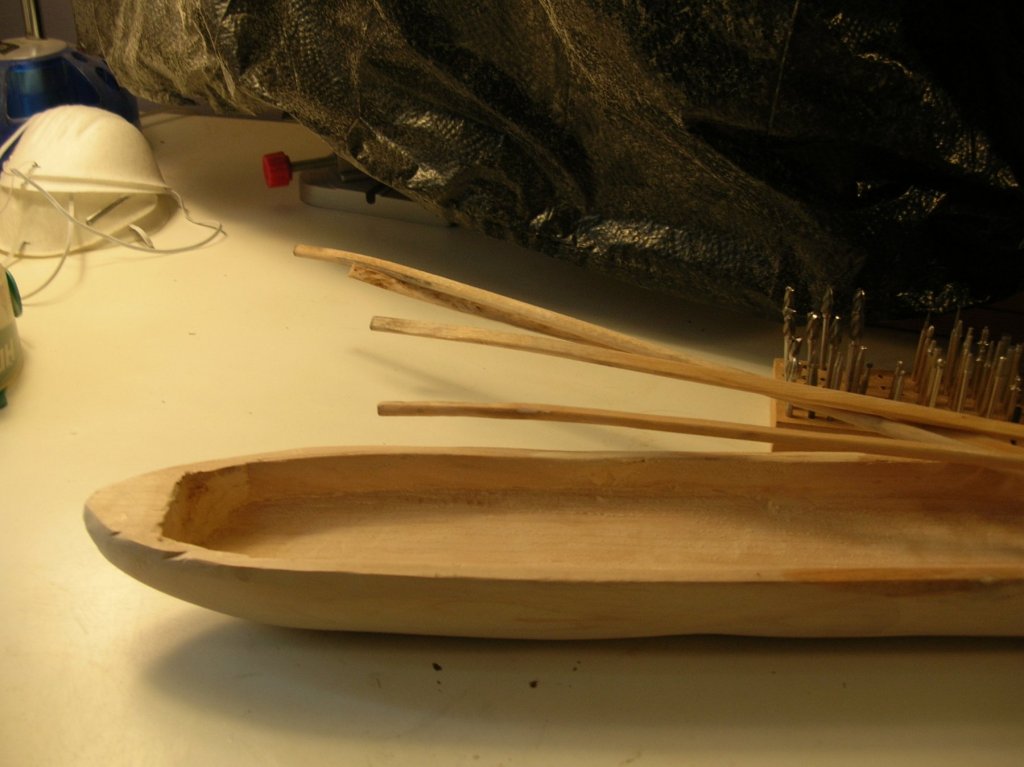
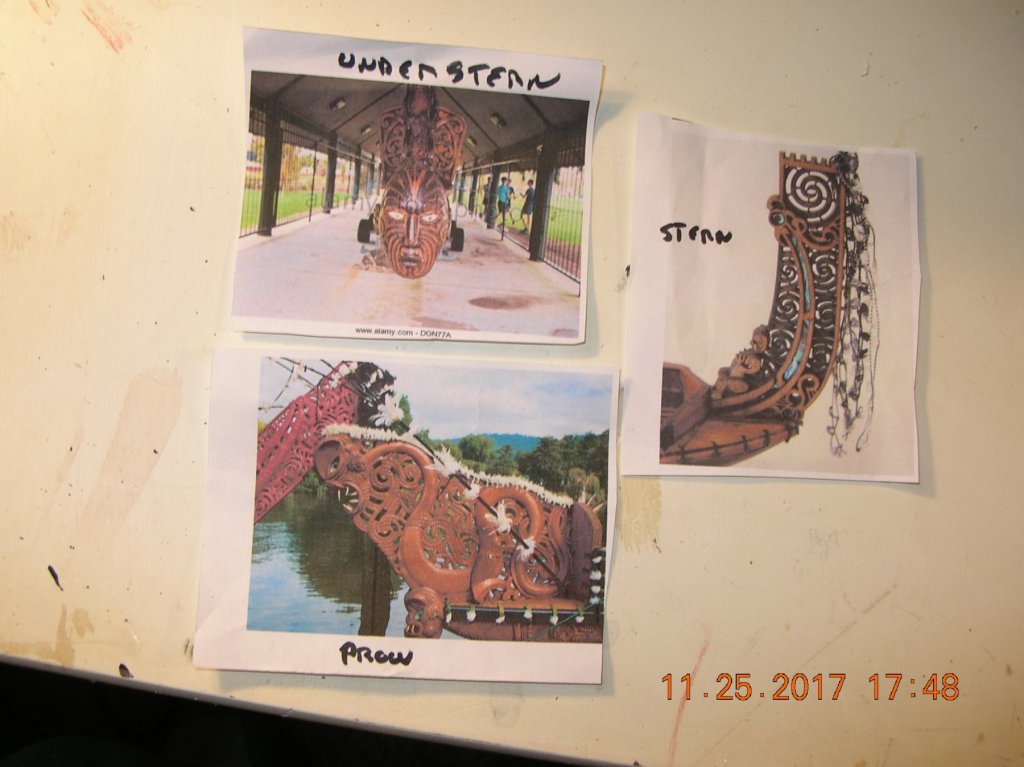
The build log on my Victory was not approached properly; I am okay with that one. That being said after belonging to this group for over 3 years and observing the proper way MSW would like to see logs formatted I believe it’s up to the builder to follow that pattern. One it’s informative and two telling the ups and downs and boo boos and corrective methods to repair, it helps every other modeler in procedure, tools, homemade jigs and where to go when a difficult problem arises. I believe this one site has all the information and members that go out of their way to render assistance. I will keep the beginning of the log I posted but will post more information as I go along relating to history, and resources that have gone into the construction of my Waca Tuau (Maori War Canoe.) Boss is recuperating nicely caught up on my laundry and can begin posting. Sources cited Victoria University of Wellington New Zealand Electronic Text Collection, TEARA the Encyclopedia of New Zealand, Herb Kawainue Kane a visual collection of Hawaiian History War Canoes of the New Zealand Maori, Wikipedia, AOL images of Waca Tuau, Revolvy, a Maori Translation Dictionary, Illustrations from the journals Abel Tasman, James Cook, Joseph Banks, Richardson and Gilsman. Jeff Evans Waca Tuau (thanks to Louie da Fly Steven) Passed on Totura wood cost, I traded some Cypress for Basswood, since the build will be painted in historical colors it didn’t make sense to go with Totura. The Waca was Tapu (sacred) the Hapu (clan or tribe) and prepared the area around the tree years ahead of felling. Bark was removed from one side of the trunk and the area around the tree would be cleared and food planted for workers. Lower roots were removed with hand adzes, a fire built at the base then charred wood was removed. When they got to a certain point a frame was built supporting a large adze weighted with a heavy stone and used like a battering ram to remove wood. This was a highly sacred undertaking if an accident or death took place the canoe was abandoned (numerous canoes have been found unfinished) It could take 3 weeks to fell a tree; after the tree was felled it was dragged to the river after basic shaping by teams of men pulling using ropes made of Raupu (bulrush). It could take up to a year to finish a canoe. A typical Waca was between 40 to 90 feet in length. They were highly decorated there was a lot of symbolism in regards to the intricate carvings and feathers from Albatross, Gannets, and Pigeons that adorned a Waca. These canoes had strakes inside and outside the hull. They provided balance, and flotation. My first MISTAKE was using dowel, the twisted grain was a nightmare to bend after shaping. (In another post shaping masts Dan Vadas stated he used square stock it provide an easier and cleaner way to shape a mast and I agreed stupid me did not follow) If I had used square stock I would have saved myself a lot of anguish and bending would have been easy. I use a can, and candle to bend soaked wood. Its fast can due 2 or 3 at a time can even add a twist to a bend. Attached strakes inside and out and laced with a waxed cord, was tedious to say the least. Back filled bottom and top holes inside and out with wood filler. Started attaching Albatross feathers, Have finished the carving, etching, painting, and clear coating to this point. The next step is adding the thwarts, carving of the bow and stern decorations paddles sail and Taiahas Maori fighting stick (see this video https://www.youtube.com/watch?v=4YtCeVC_NfY) I wouldn’t go against him with a loaded 45. The one glaring mistake I made was on the carvings on the basswood between the gunnels and thwarts. They are not historically accurate. I should have taken a plank of Boxwood carved the reliefs than added it in between. Do to the configuration of the carved hull I could not redo and add that was a real disappointment. It will be corrected on the next one. The following pics are what will be carved and added to the prow, stern and the head directly under the prow carving not the stern.


- 66 replies
-
- 15
-
-
Moxis, First class, 2 questions #1 will you paint foil and what procedure # 2 would a thicker foil be as pliable. I have a CSS Hunley on deck and thinking ahead I am mixed between solid and frame. Looking at what you have done it may be simpler on a solid hull to use the foil as plates on yours it looks pretty darn good. Problem painting? will follow you to the end great looking build impressive
-
Charlie, Here is a possible simple but stupid suggestion, coming from one that has less experience than most of the others making suggestions. Place the grating as just a grating re-position the stack behind the foremast and use Marks suggestion of card stock for flashing. OK all ready for my beat down.
- 31 replies
-
- 3
-
-
- ventilator
- flue
- (and 4 more)
-
Adrian, Masterful work, neat, clean, and pristine. If you do not win the competition everyone here will be disappointed good luck.
- 184 replies
-
- 3
-
-
- ruby & arthur reed
- lifeboat
- (and 1 more)
-
Jesse Lee, It wont really resemble a MSW Syren with the changes you have made, first class. The stern, rudder, and wheel in addition to all the other refinements changes the whole aesthetics of the build. Kudos this Buds for you
- 1,306 replies
-
- 9
-
-
- syren
- model shipways
- (and 1 more)
-
Don, Like the stained hull for a change over painting it white, very nice build keep on keeping on
- 104 replies
-
- 1
-
-
- king of the mississippi
- artesania latina
- (and 1 more)
-
Impressive, you have out done the basic kit ten fold Kudos.
- 67 replies
-
- 1
-
-
- philadelphia
- model shipways
- (and 1 more)
-
Keith, I swear when you think it can't get any better it does with the post of each pic. I think I would insure this one. If you ever have to evacuate do it in this order Altair, wife, dog. (kidding of course) Again amazing one of the cleanest builds on this site.
-
Am in the process of finishing, very first thing read the instructions front to back until yout tired of looking at them. The most frustrating thing was finishing one of the plans then 2 pages later you find out you should have completed an assembly on a prior page. The explanation of rigging on the last 2 pages of plans could be better, also when conducting the rigging you'll find out that numerous rings should have been already added. Just read ahead study placement of hardware and you will see those areas it should have been added in an earlier plan. I was not as ready for it . Made a lot of mistakes,was able to cover and hide most of them. Lost a lot of time redoing. Very pleased with the way its turning out considering, but should have waited before tackling. I have this ego that pops up from time to time that ignores advice like your getting now and boy do I pay for it sometimes. Go slow, read ahead, review other builds, Gdales Vic iis a good one, no question is too stupid I asked a lot of them. Good Luck
-
Charlie, It may be easy to order hollow and solid stock brass from Model Expo or the other Hobby something forgot last name. It seems it would be easy to solder one appears to be a very simple shape. I might be missing something in your post at times I have a simple mind. Good Luck
- 31 replies
-
- 2
-
-
- ventilator
- flue
- (and 4 more)
-
Don,
Your big day celebrate it with gusto. Treat yourself right today.
Again Happy Birthday and many more to come.

-
review BlueJacket Shipcrafters Lobster Boat: A Review
John Allen replied to Cathead's topic in REVIEWS: Model kits
Eric, Beautiful build such a classic model. Please forgive an old man his senility, poor eyesight, and stupidity (always look before you jump) -
review BlueJacket Shipcrafters Lobster Boat: A Review
John Allen replied to Cathead's topic in REVIEWS: Model kits
I noticed no stern cleats were these not supplied by BJ -
Looks great, did any of your travels and research find the boat you were looking for South Alabama archives BLB Mobile area.?
- 420 replies
-
- 3
-
-
- captain roy
- lugger
- (and 2 more)
-
On your home page go to more, then to articles and databases go to framing and planking. Scroll down several pages and there are some good line drawings showing the lay of the planks to illustrate what Dan relayed. What was relayed about appearance of first layer is very true its easy to put lipstick on a pig-filler-sanding-and voila a beautiful planked hull.