vulcanbomber
-
Posts
396 -
Joined
-
Last visited
Content Type
Profiles
Forums
Gallery
Events
Everything posted by vulcanbomber
-
I'm coming to clean the dust off now Sjors! Thank you. It's a double edged sword though, the only reason I'm having more time is the business is going slow at the moment, we shall know by end of March if it is worth continuing with it or not. 😕 Thanks Tony, it's good to be working on Pegasus again. and catching up with the builds.
- 161 replies
-
- 3
-

-
- pegasus
- victory models
- (and 1 more)
-
An interesting build Sjors. She is coming along nicely.
-
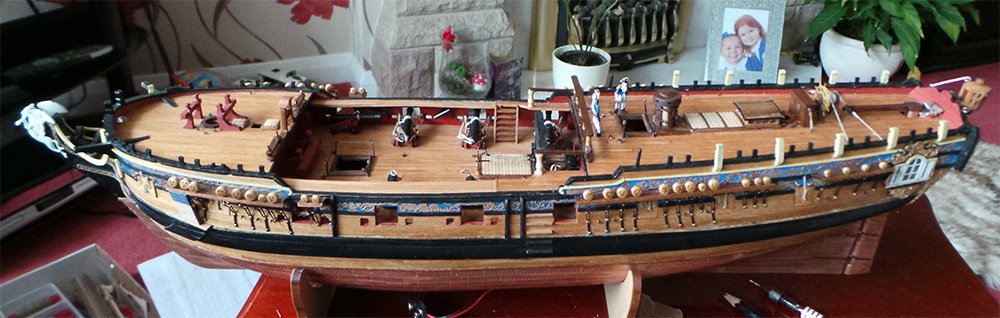
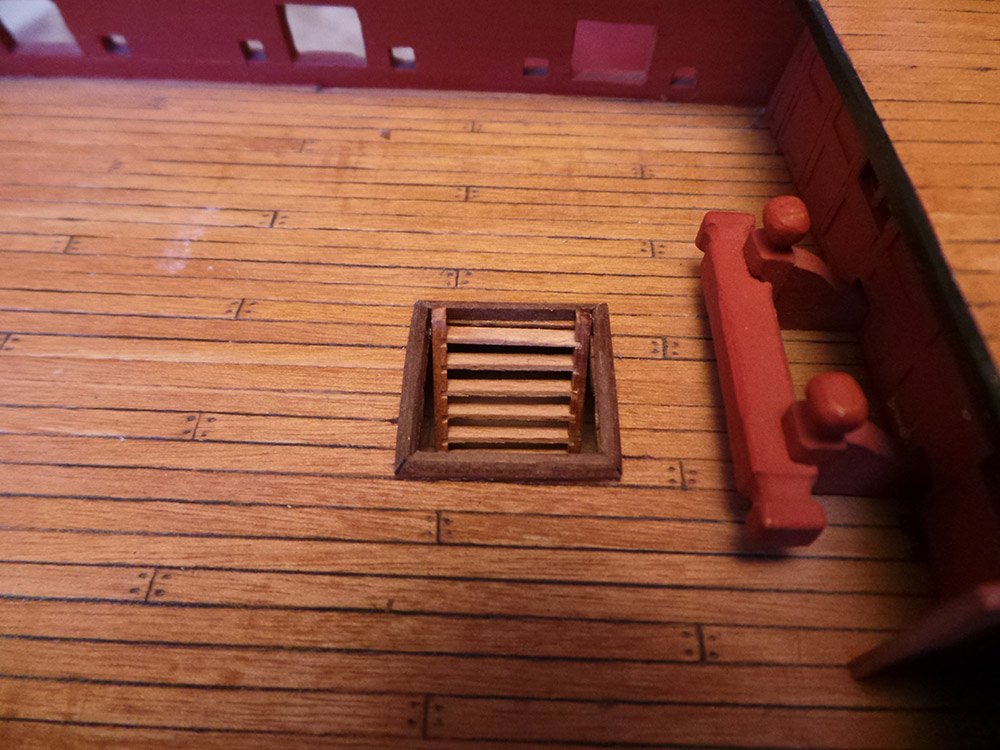
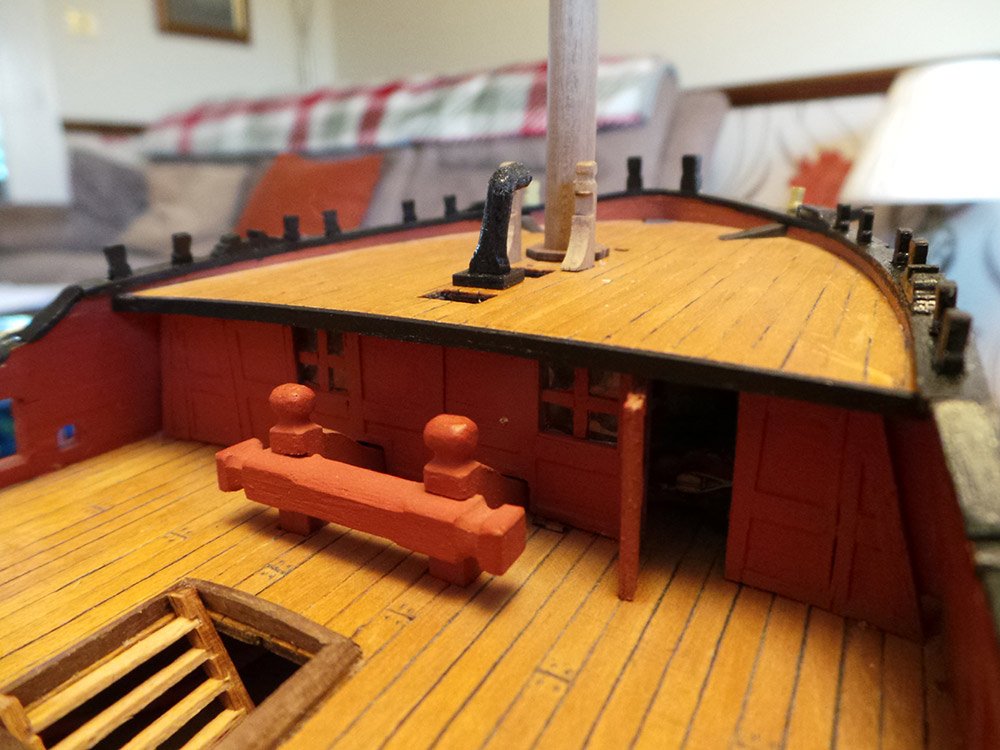
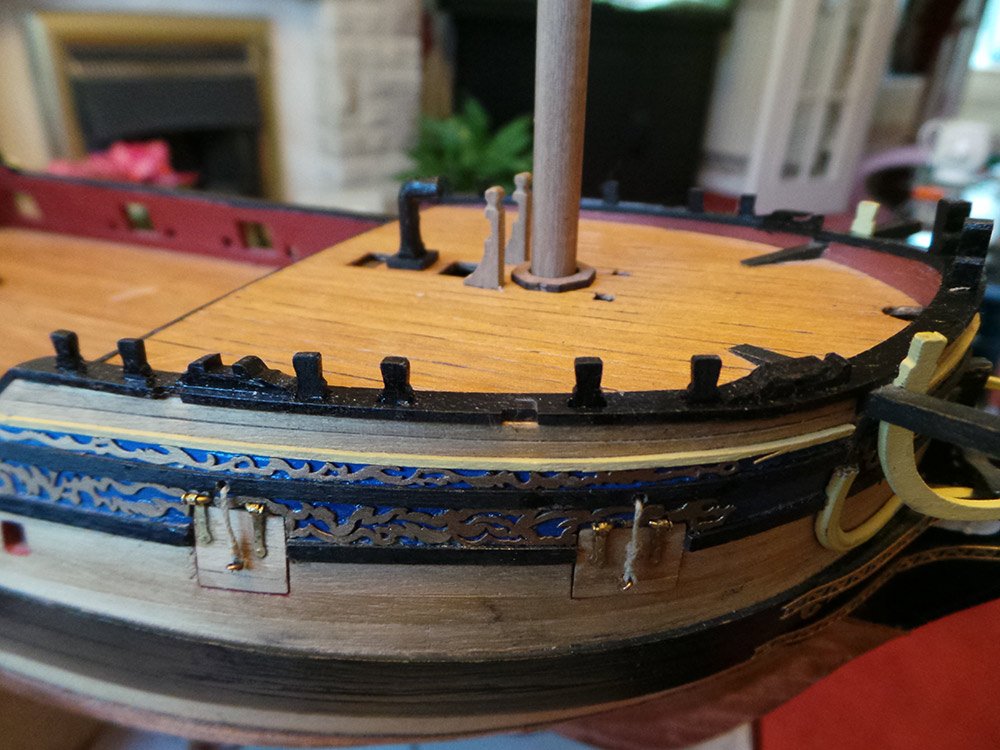
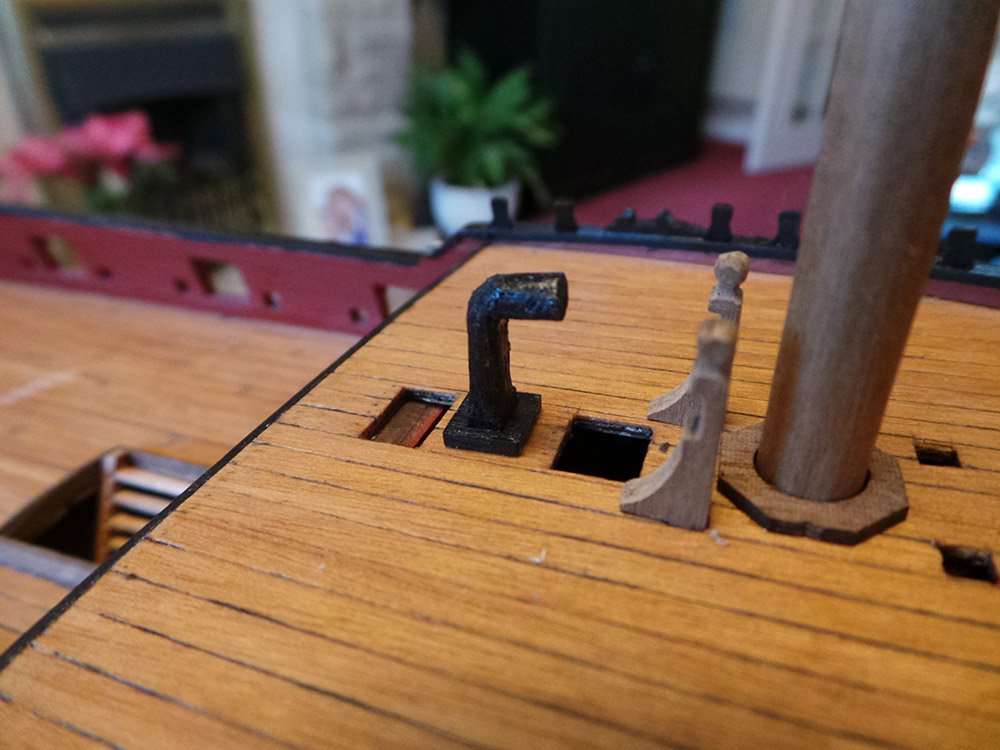
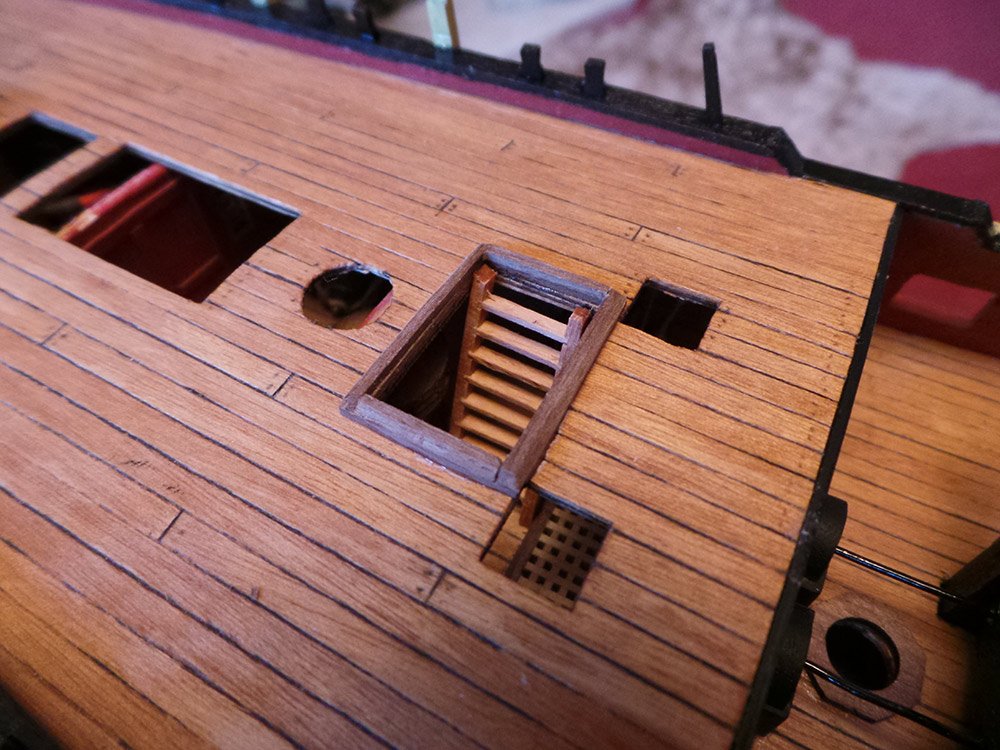
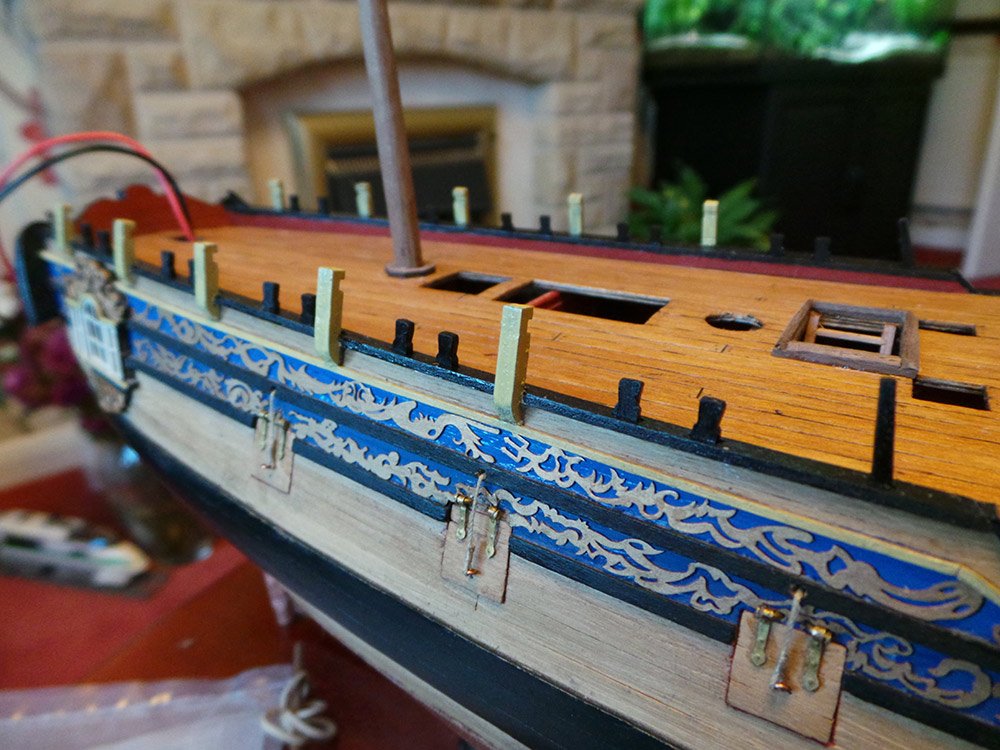
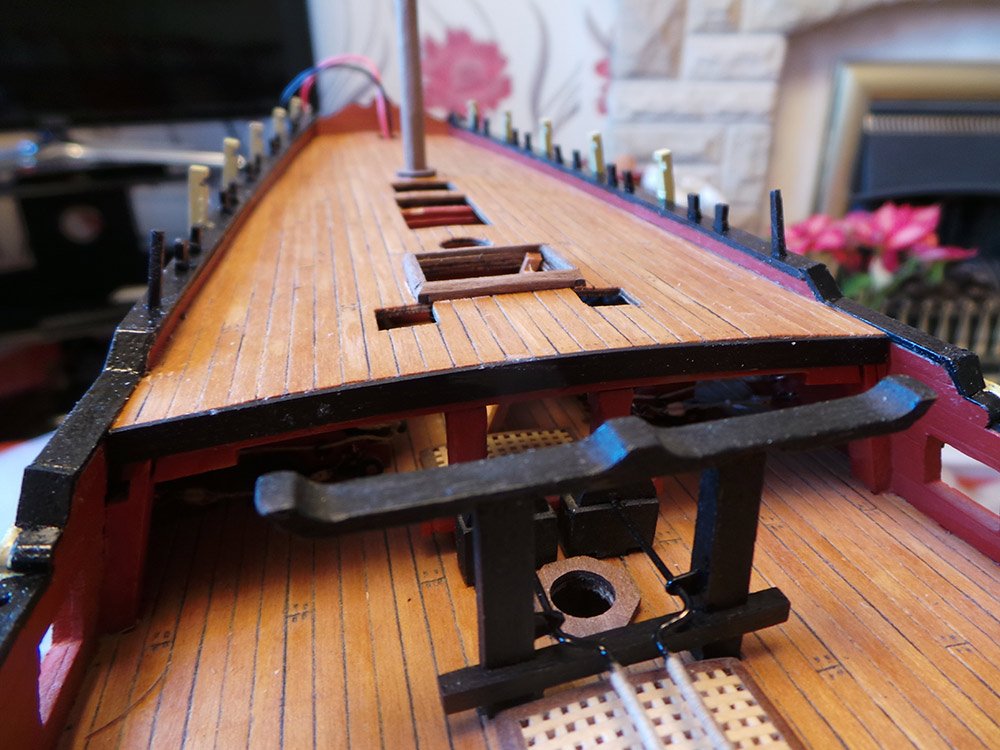
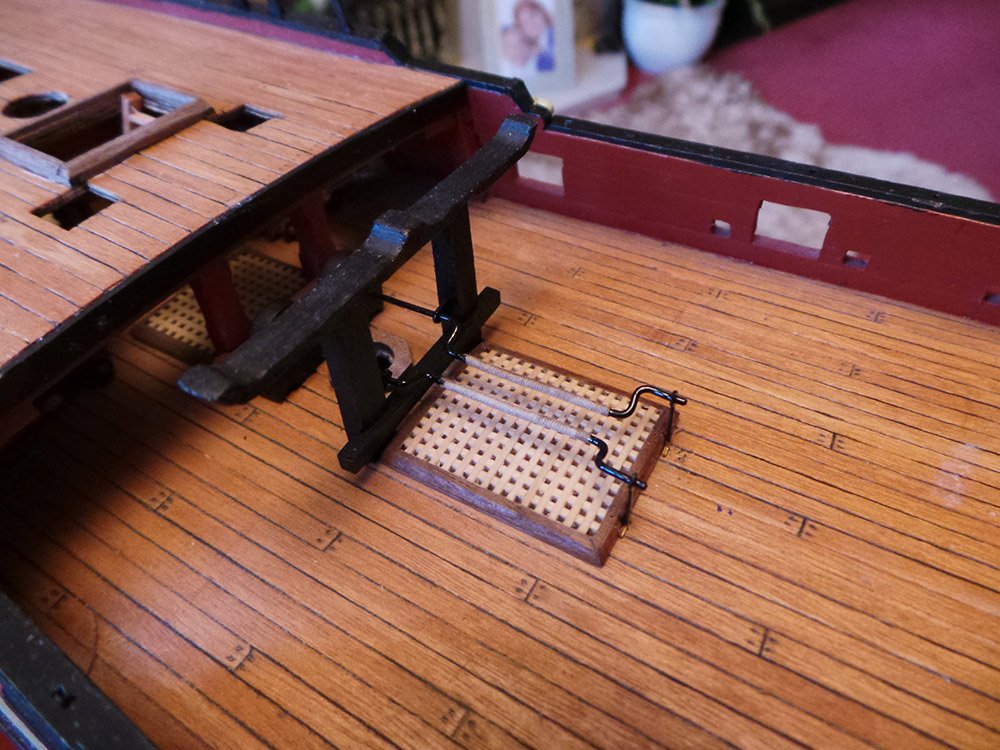
Thanks for the homecoming guys! Hi Jan, no I haven't worked on the cross stitch either. It is so fine that I had to give it a rest, then other things got in the way. I am planning to resume it at Easter. Just an update, it doesn't look like much, but it has taken some time to do. I have fitted the pump handles: ladders in the main deck and quarter deck: Timberheads and the posts for the swivel guns, scratched a chimney for the stove. Capping to cover the edge of the false deck at the bow: and quarterdeck: I have found Blue Ensigns Pegasus build log helpful with lots of info and improvements to the kit. I am hoping I can incorporate some of them in my build. I intend to make the elm tree pumps, the binnacle, and change the skylight. I am toying with the idea of changing the swivel guns, but not decided yet.

- 161 replies
-
- 10
-
-
- pegasus
- victory models
- (and 1 more)
-
I love the lines of the Cutty Sark and one day I hope to build her. I shall follow your build with interest.
- 207 replies
-
- 1
-
-
- billing boats
- cutty sark
- (and 1 more)
-
The San Francisco has a special place in my heart. She was the first ship I built, (though the original version, not the San Francisco II) and I learnt a lot along the way. You are making great progress. She is looking great.
- 59 replies
-
- 1
-
-
- artesania latina
- san francisco ii
- (and 1 more)
-
Your Revenge is coming along nicely. I like the way you are problem solving along the way. Isn't it a satisfying feeling to know you have found solutions that improve the kit, but also make it unique! I like the lighting too, I think it gives an extra interest.
-
Thanks, guys for your comments and likes. It is good to be back!
- 161 replies
-
- 2
-
-
- pegasus
- victory models
- (and 1 more)
-
That's what we are here for. As we say: "The only silly question is the one you don't ask". So don't be afraid of asking for help and advice. I received a lot of help and advice on my first build and learnt a lot during the process. I am on my second build at the moment and still like to ask for help and advice when I need to. You have done a lovely job on the planking.
-
As long as the mast holes are in line, you should be ok. It does not seem to matter to much about the size of the gap. But it is your ship and if you want it to look more like the instructions, then move the stairwell over, but personally, like xodar461, I would leave it as it is.
-
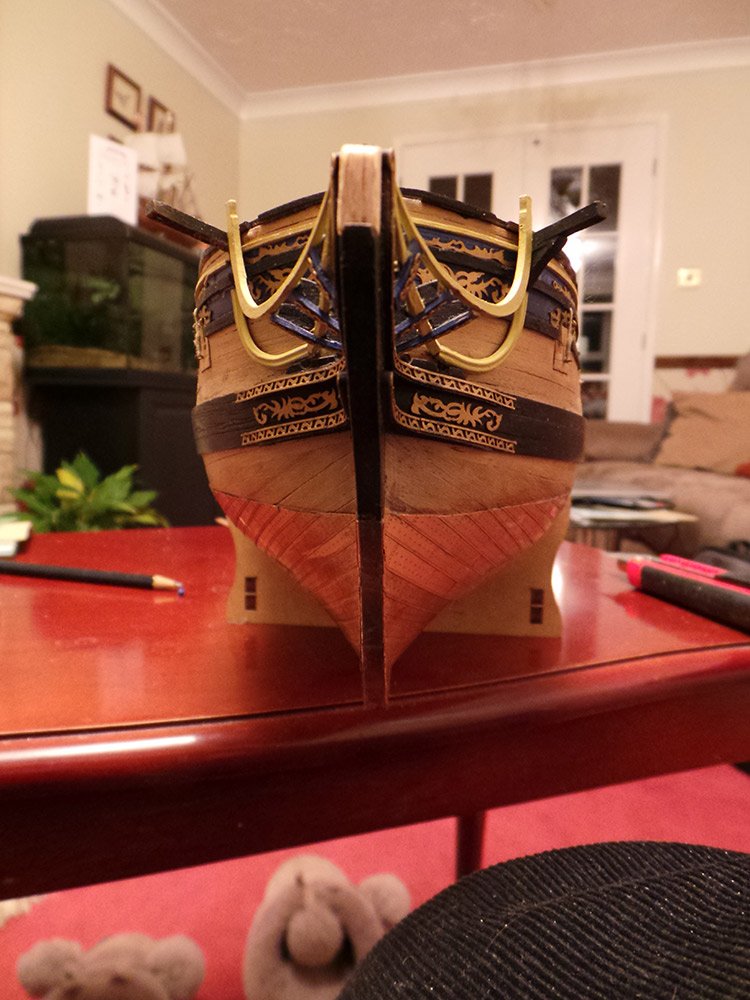
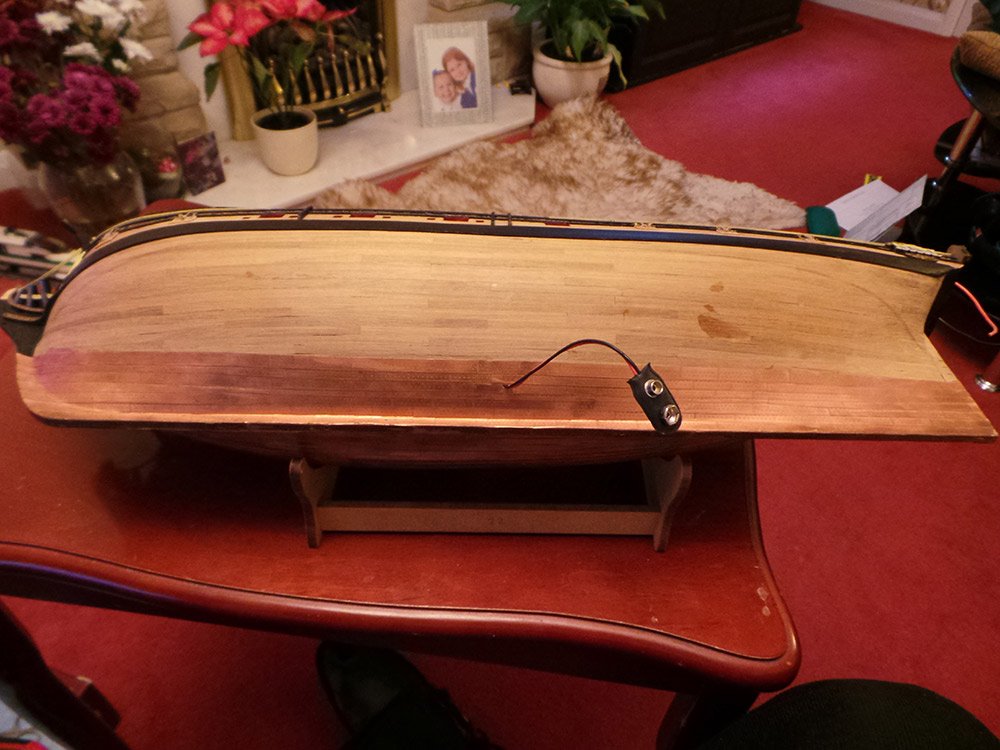
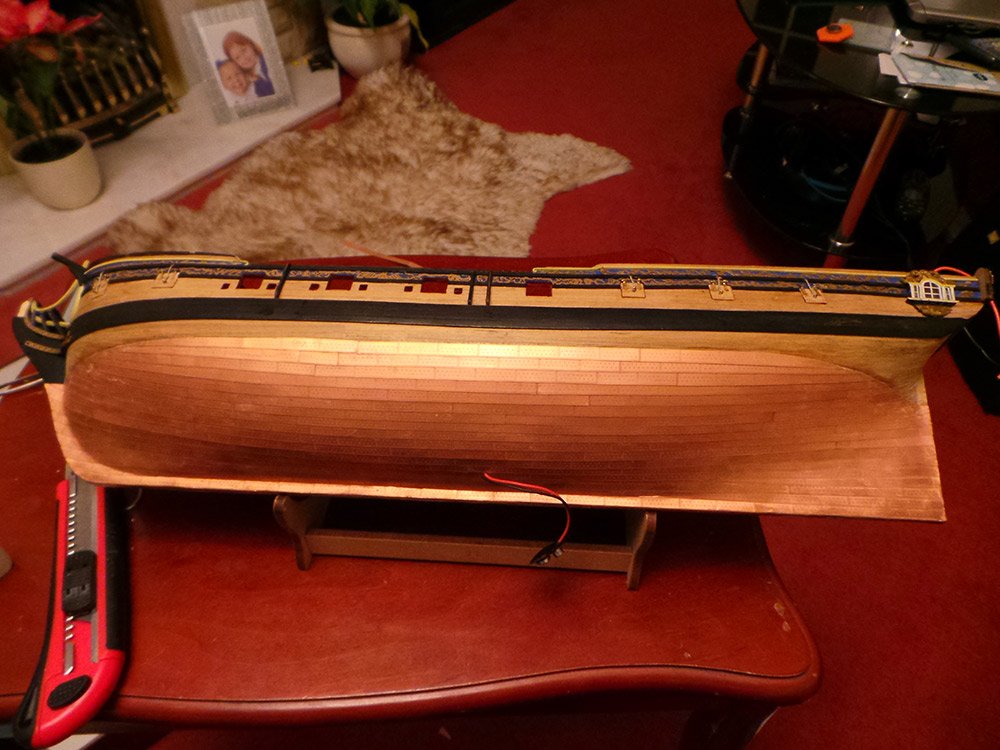
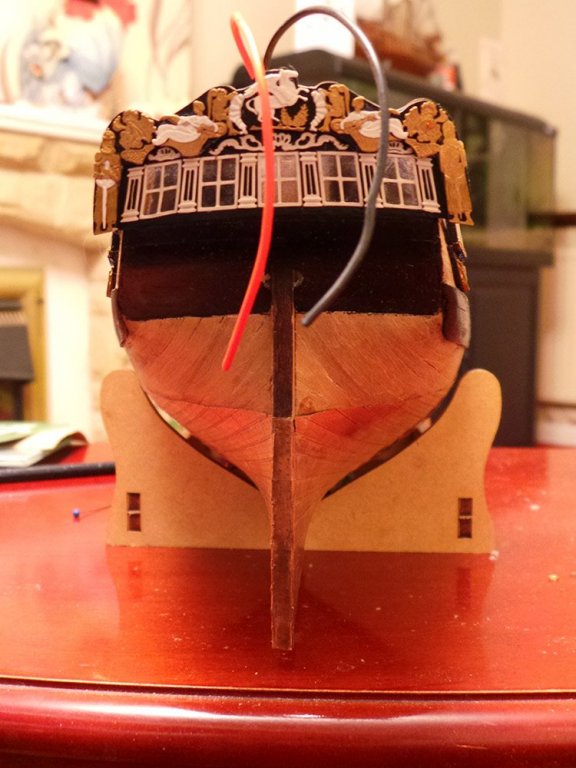
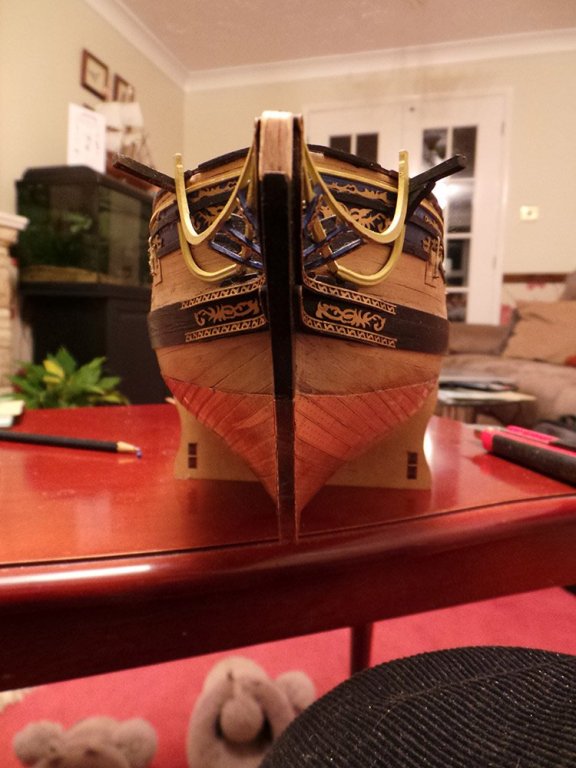
I didn't realise how much I hated doing the coppering, until I looked at the date of my last post. Wow is it really 4 years?!! Well I thought it was about time Pegasus had her bottom completed! I have a bit more time now, but still not as much as I would like. The first pic is where I left off 4 years ago, and now she is done. I still don't like coppering and I think it will be the first and last time I will do it, but I don't think it has turned out too bad.
- 161 replies
-
- 19
-
-
- pegasus
- victory models
- (and 1 more)
-
Hello Dewey, thanks for your comments, I'm glad you found some help in my log. It is only through others help that I managed to get a pleasing result with my San Fran. Hello Kip, Yes, I remember almost giving up with it right back then, but with yours and others' encouragement, I overcame the problems and learned a lot along the way. How is your modelling going? I really must get back to my Pegasus sometime.
- 122 replies
-
- 1
-
-
- finished
- artesania latina
- (and 1 more)
-
Hi Chris, sorry for the late reply. The pattern you have planned sounds fine to me. The size and lengths of my planks were fine, it was the pattern that was wrong. If you look closely, they are just laid in a normal diagonal pattern, At the time I didn't know about the staggering pattern. Good luck with your build. I thoroughly enjoyed building the San Fran and she is an excellent ship to learn on, Not too simple, jusy enough of a challenge to make it enjoyable. If you have any questions, please don't hesitate to ask, I will always do my best to answer. I may even find some time to finish explaining how I rigged her!
- 122 replies
-
- 2
-
-
- finished
- artesania latina
- (and 1 more)
-
You've got a nice build going there. She is coming on very well.
-
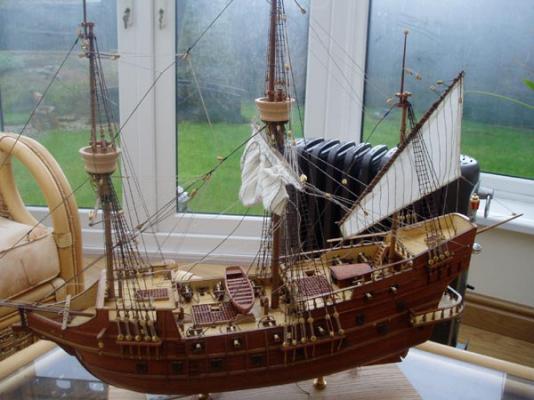
I like the first photo, she looks lovely.
-
Sjors, I glass of wine or two helps my memory, plus I have had to dig out my trusty book on rigging!!! Thanks for looking in John, I have made it my mission to complete this log - it is well overdue! Tuciship, welcome to MSW and thank you for looking through my build. It was my first wooden ship model and I learned a lot constructing it.
- 122 replies
-
- 1
-
-
- finished
- artesania latina
- (and 1 more)
-
Looking good, and it's surprising how problems are always overcome in the end. Well done!
-
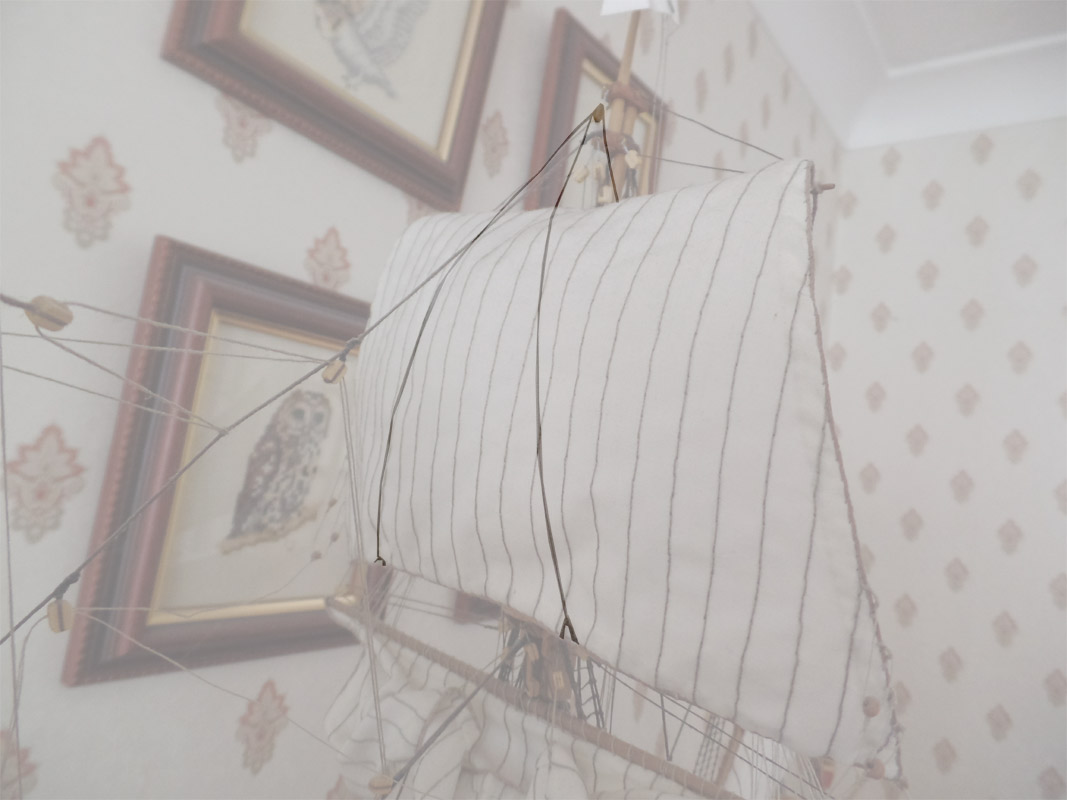
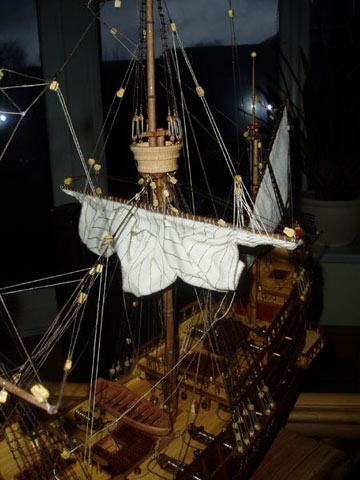
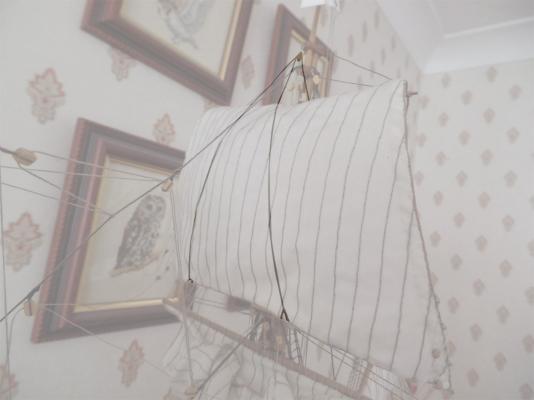
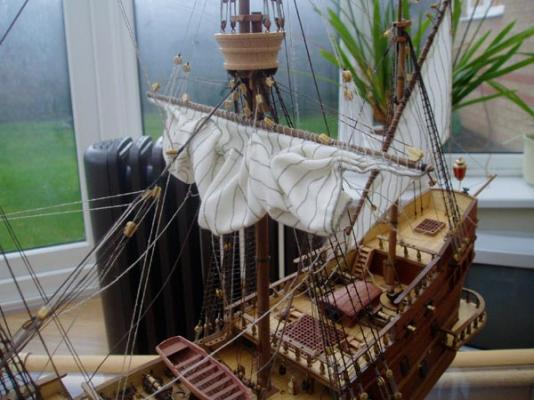
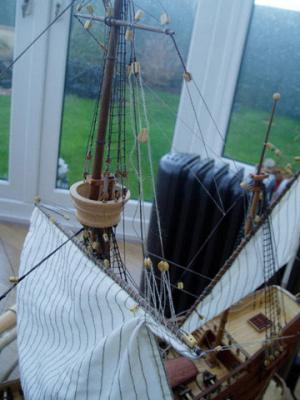
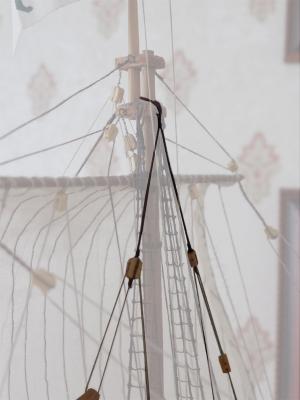
I added the buntlines, can't remember if these were in the kit plans or not. They were attached to the bottom of the sail and ran up the front to a block and the fall went behind the sail and down to the deck. They are in the raised position on my mainsail, bringing the sail up to the yard. The white lines seen coming from the front of the sails, near the bottom are the bridles and bowlines, these, again, are not in the kit plans and I added them myself. I will explain how I did them next.

- 122 replies
-
- 7
-
-
- finished
- artesania latina
- (and 1 more)
-
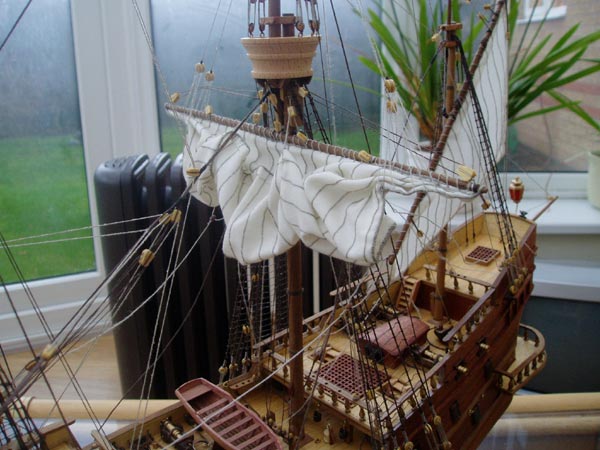
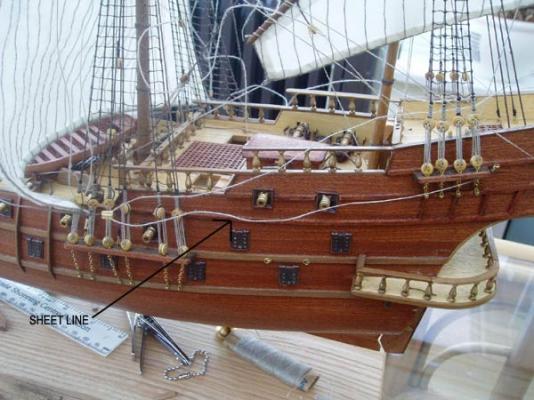
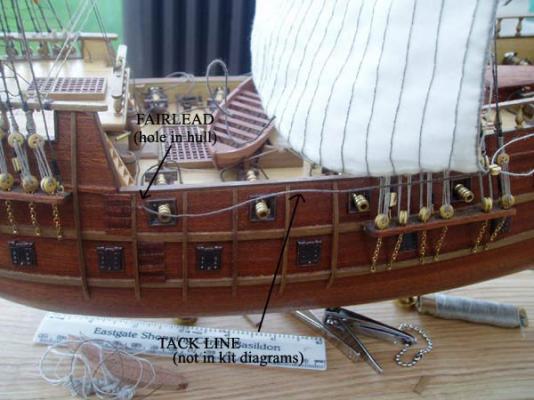
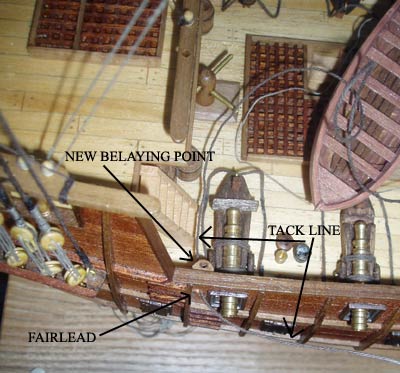
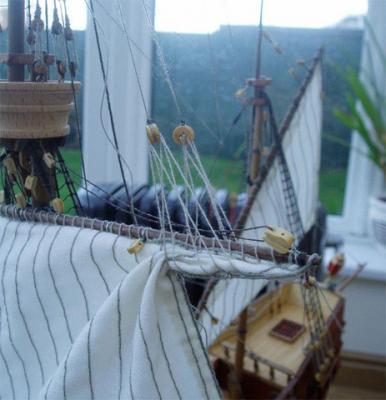
Next were the sheet lines, these were on the kit plans, but the tack lines were not, which I added myself. A fairlead needed to be drilled in the side of the hull to accommodate the tack line for the mainsail, as was a pinrail, neither of which were in the kit plans..
- 122 replies
-
- 4
-
-
- finished
- artesania latina
- (and 1 more)
-
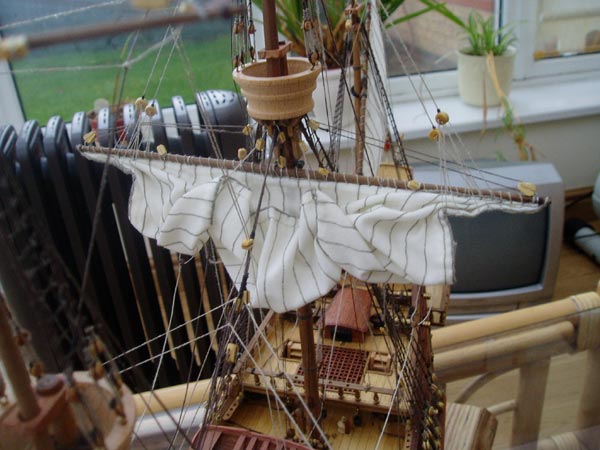
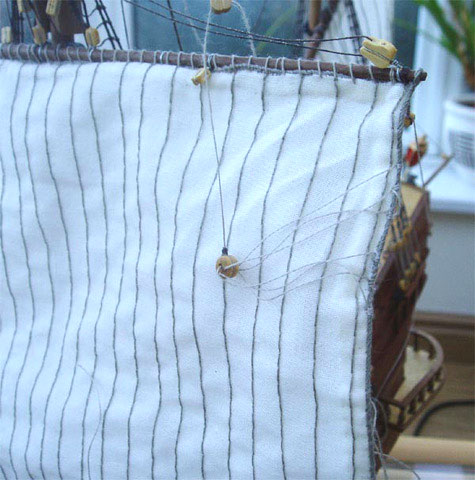
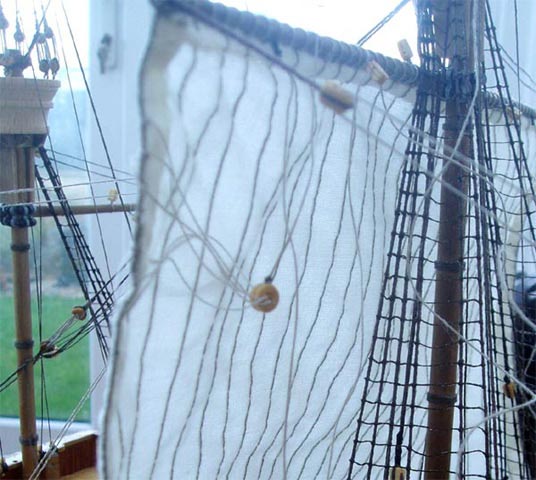
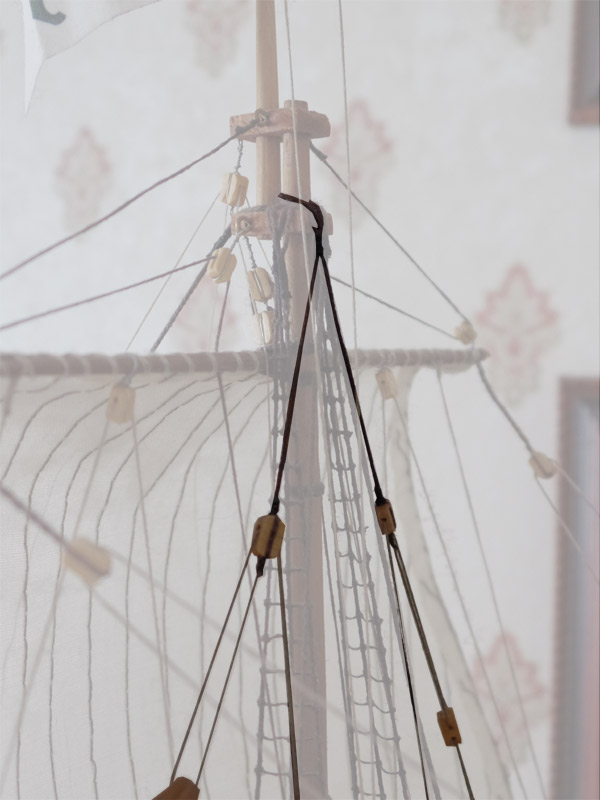
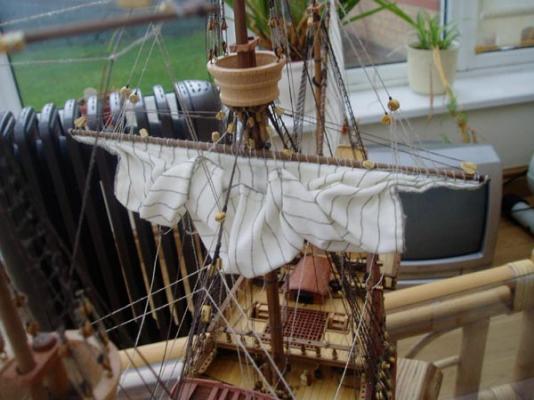
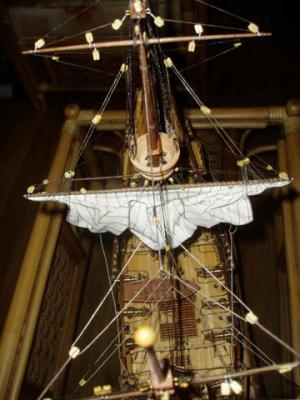
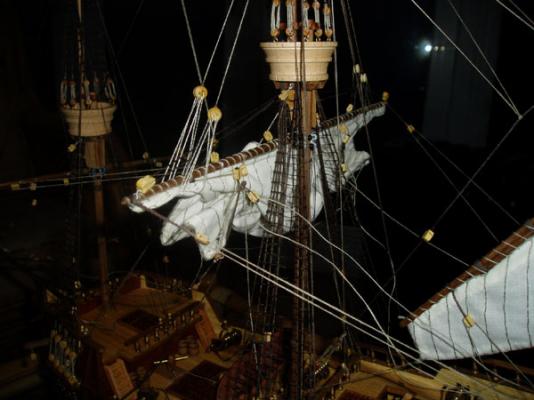
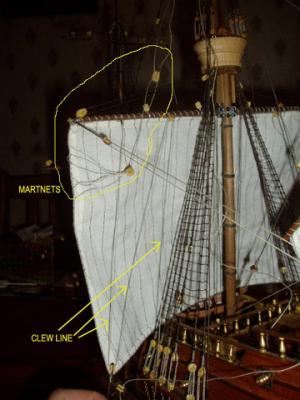
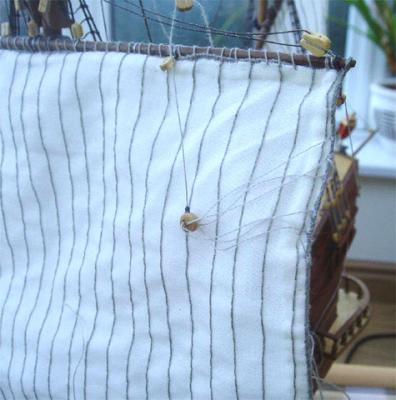
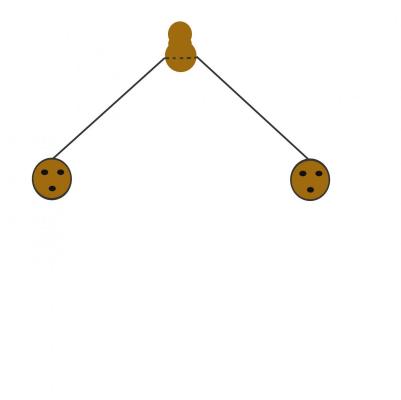
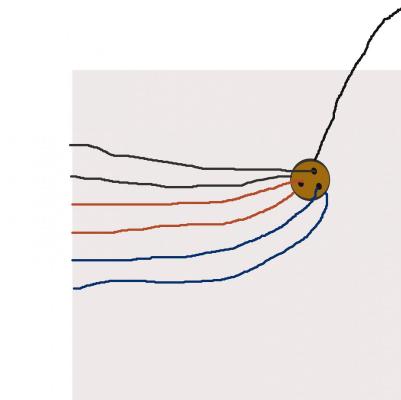
Continuing with the running rigging... The clew lines were attached as per the kit plans and were quite straight forward. The next thing I tackled were the martnets. I put them on both the foresail and mainsail. For each martnet two deadeyes are needed, one violin block, and one single block. The following is how I added the martnets to the Port side of the yard and sail: Take one deadeye and a length of thread. Sieze one end of the thread around the deadeye, pass the free end through the hole in the wide end of the violin block and sieze it to the second deadeye. Next, working at the back of the sail, a length of thread is attached to the side, about a half inch below the yard, then taken through a hole in the dead eye, back to the sail edge and fastened off about quarter inch below where the thread started (shown in black on the image). Repeat with two more lengths of thread and the last two holes of the deadeye. (shown in red and blue on the image. Repeat this with the deadeye on the front of the sail. It should look something like this when completed. The last two steps need to be repeated for the starboard side of the yard and sail. Next was to add the rigging to the martnets. I took a length of thread and folded it in half to get the centrepoint. I threaded it behind the tip of the topmast until the middle of the thread was behind it. I then siezed the thread to form a loop around the topmast tip. On each end of the thread I siezed a single block. To complete the martnets the fall was added. One end of a length of thread was siezed to the single block hanging from the topmast, the other end was threaded through the top hole of the violin block, back up and threaded through the hole in the single block and then down to the deck. (see above picture) I displayed the martnets pulled up in preparation to furling the sail on the main, but left in the 'down' position on the fore ad belayed the end to a pinrail.

- 122 replies
-
- 3
-
-
- finished
- artesania latina
- (and 1 more)
-
What's a little dust between friends??!! She's looking good Sjors.
- 1,616 replies
-
- 2
-
-
- caldercraft
- agamemnon
- (and 1 more)