


GrandpaPhil
-
Posts
4,906 -
Joined
-
Last visited
Content Type
Profiles
Forums
Gallery
Events
Posts posted by GrandpaPhil
-
-
-
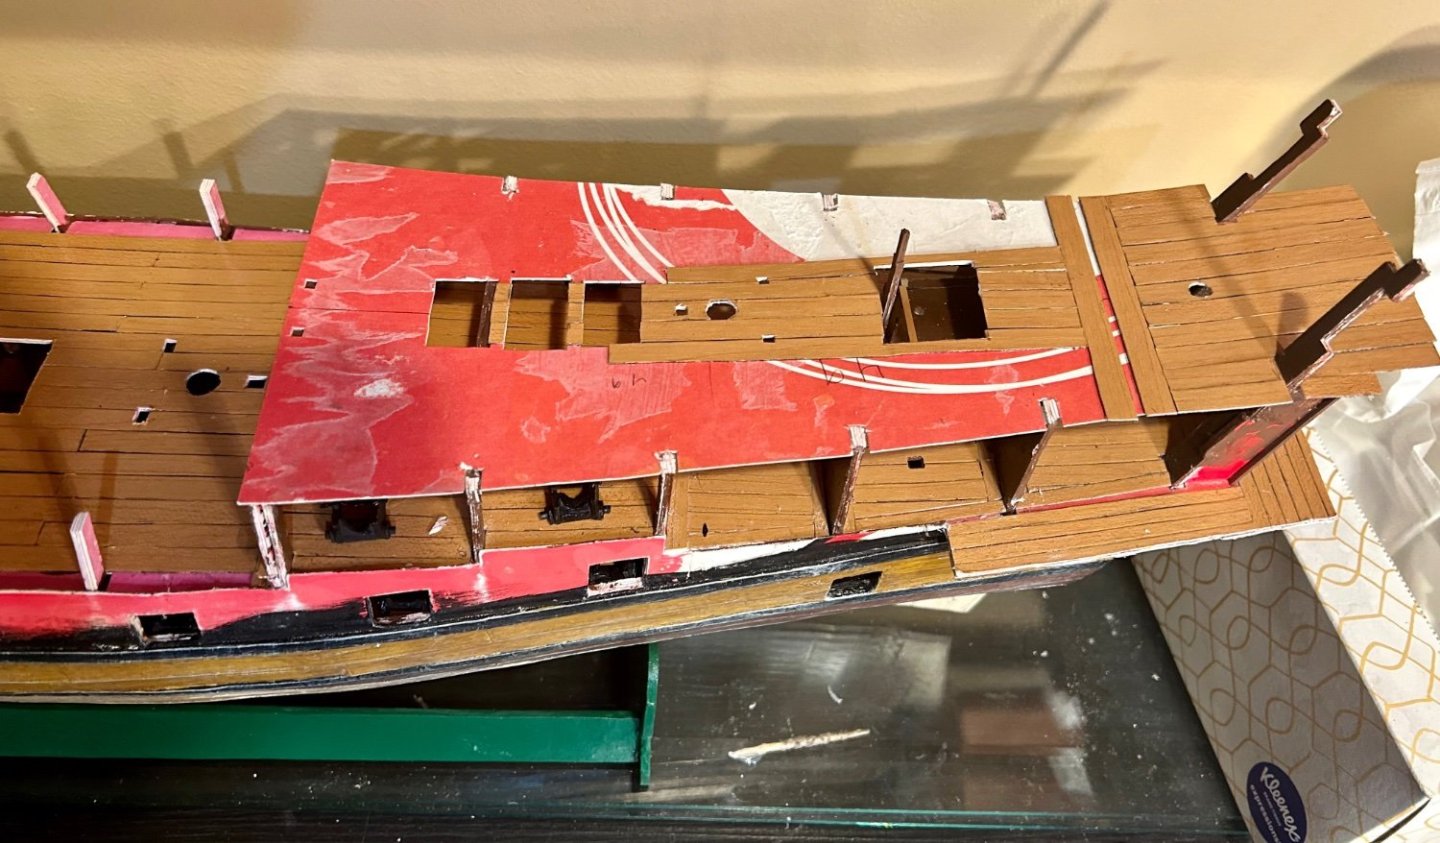
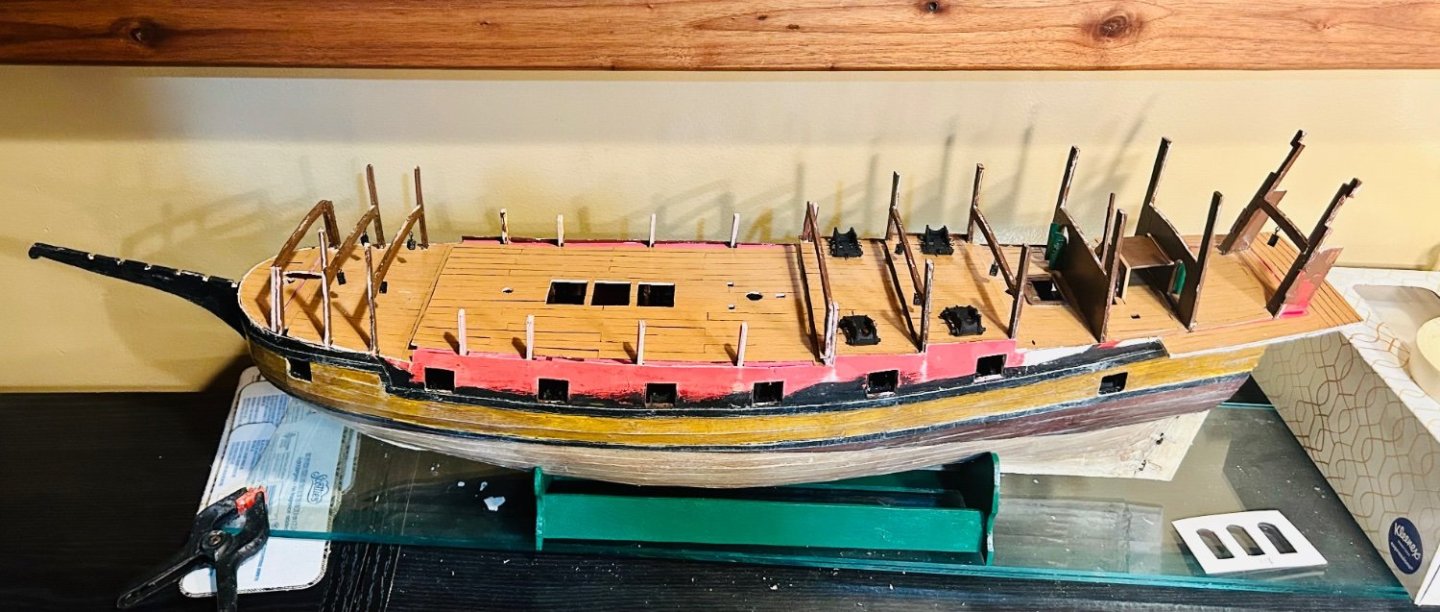
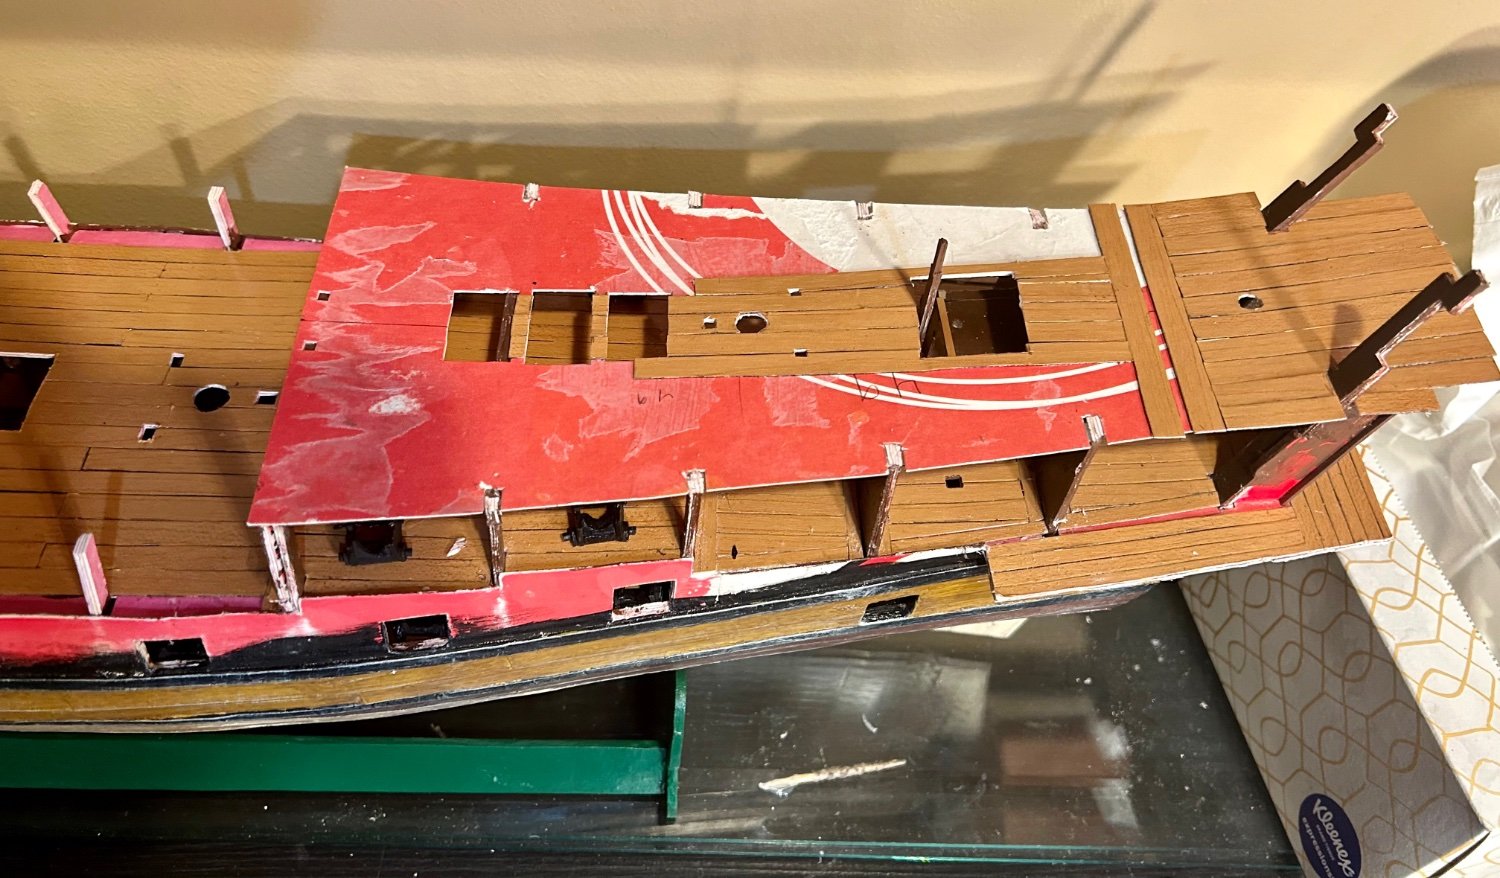
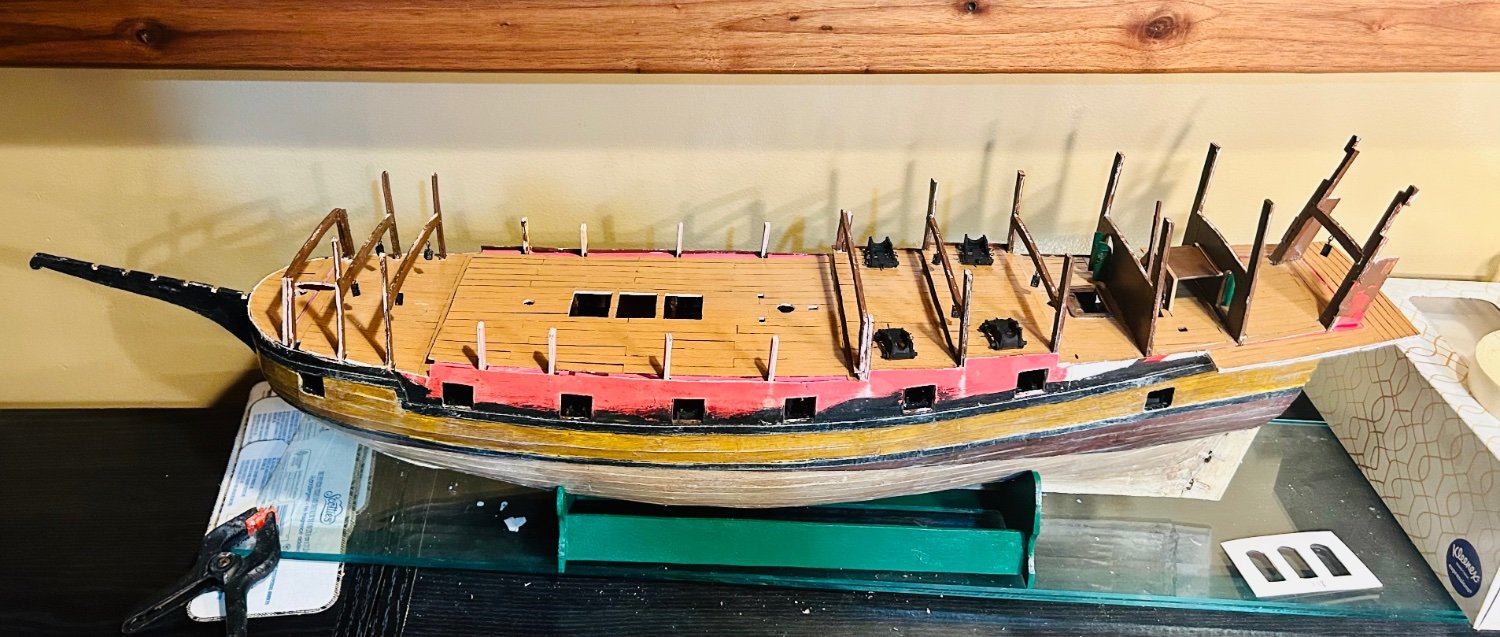
The quarterdeck is planked and all remaining deck beams are in place:

I traced out the next sets of parts.
So, those will be copied in the near future and glued down to cardstock.
I got my Orel Vasa in the mail today.
That will be fun to modify and build up in 1/64 scale.
I have 4 Orel kits now.
I have a Seahorse De Zeven Provincien coming too.
That will be my first Seahorse model, and it will also be used more as templates than an actual kit.
They will all be a lot of fun to build up.
- Rudolf, Baker, John Fox III and 4 others
-
 7
7
-
Thank you very much, Patrick!
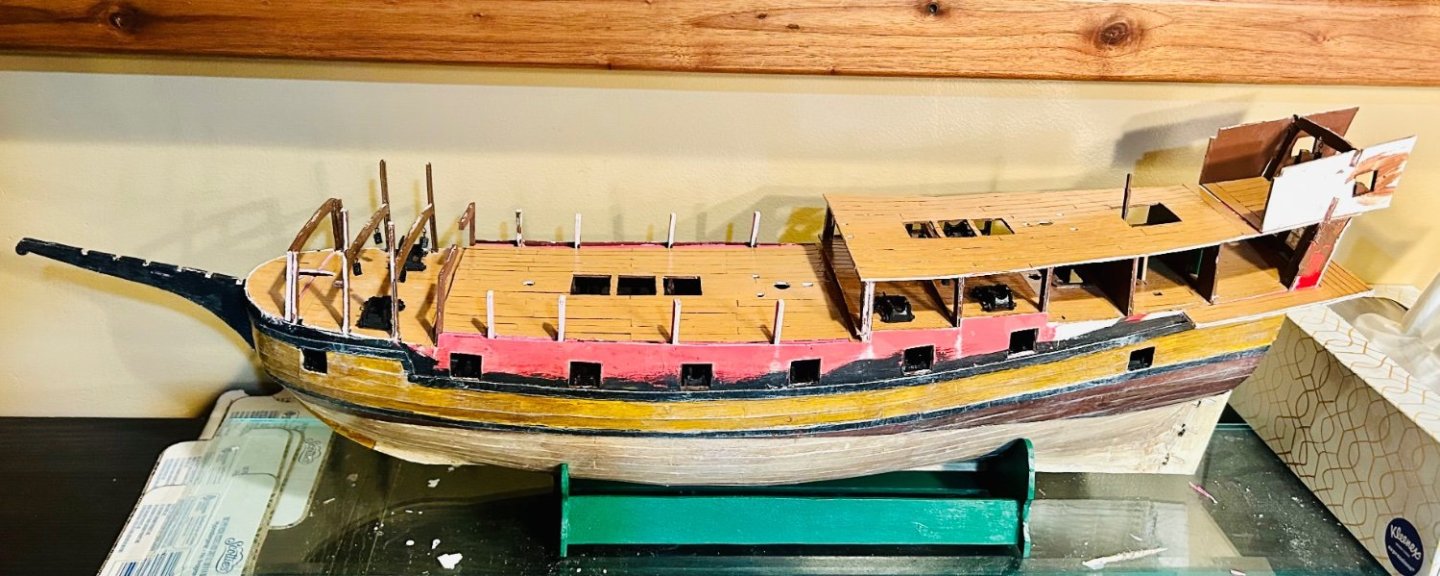
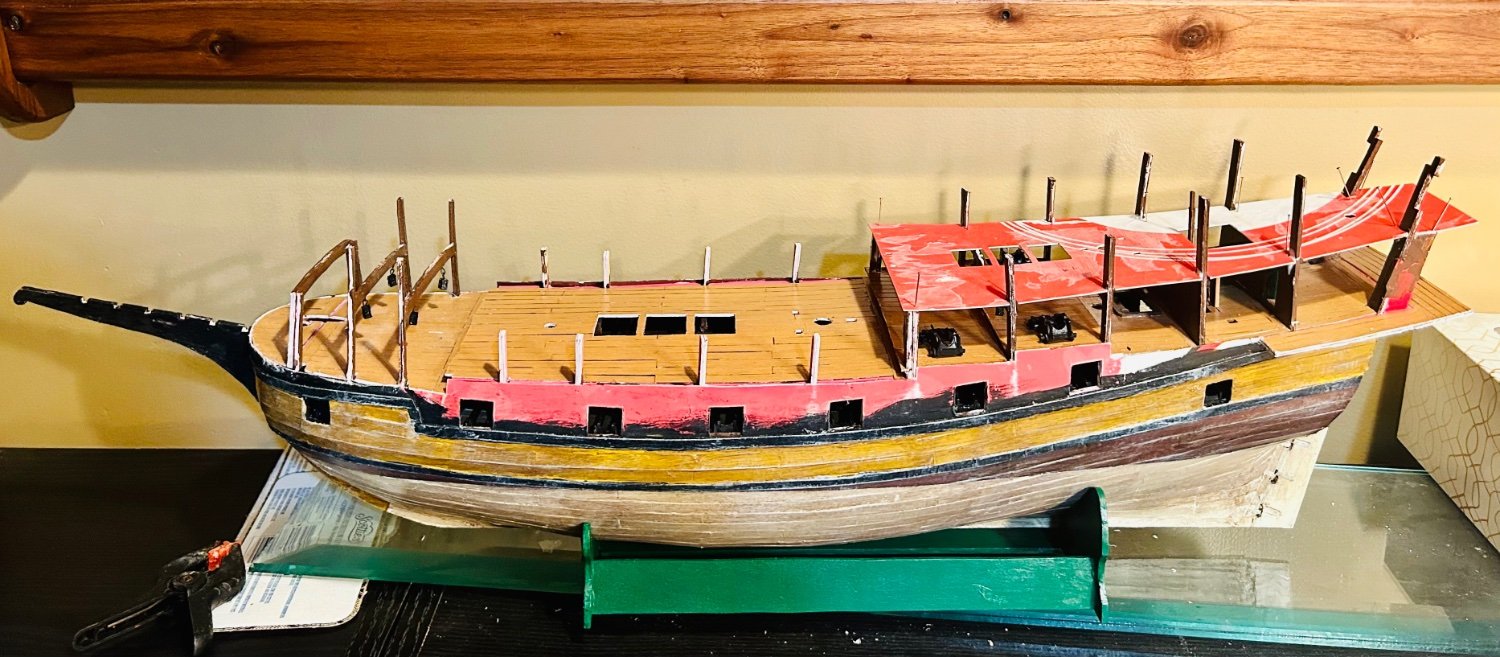
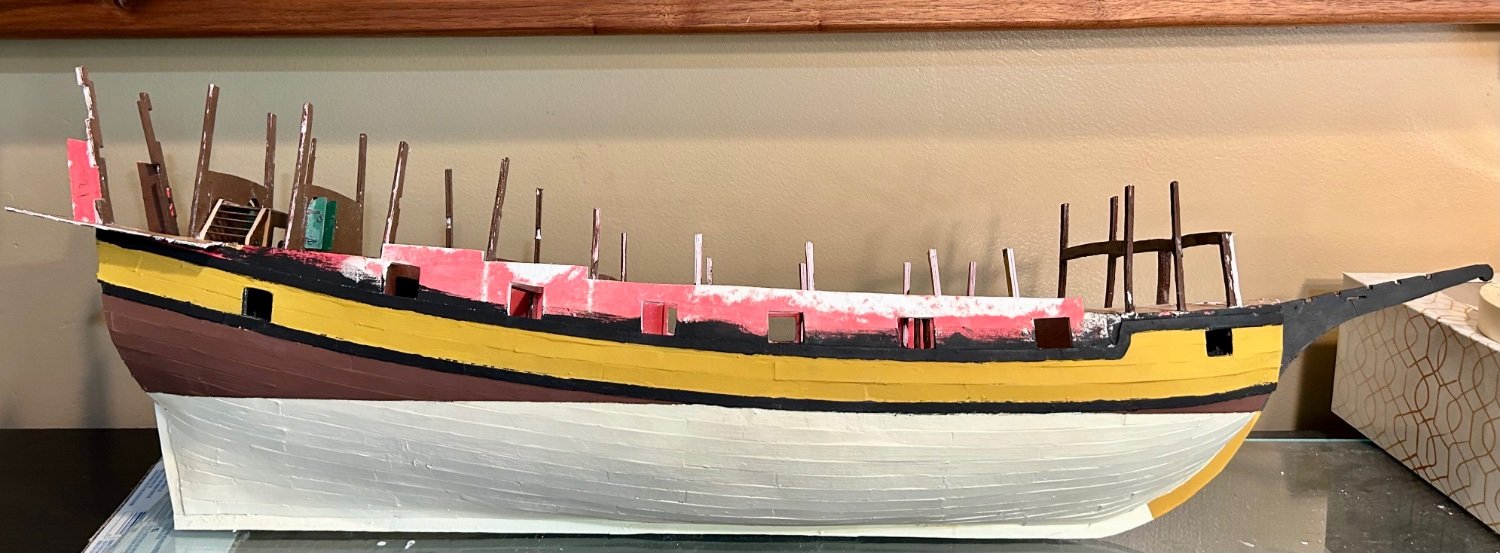
The stern piece is done and in place:
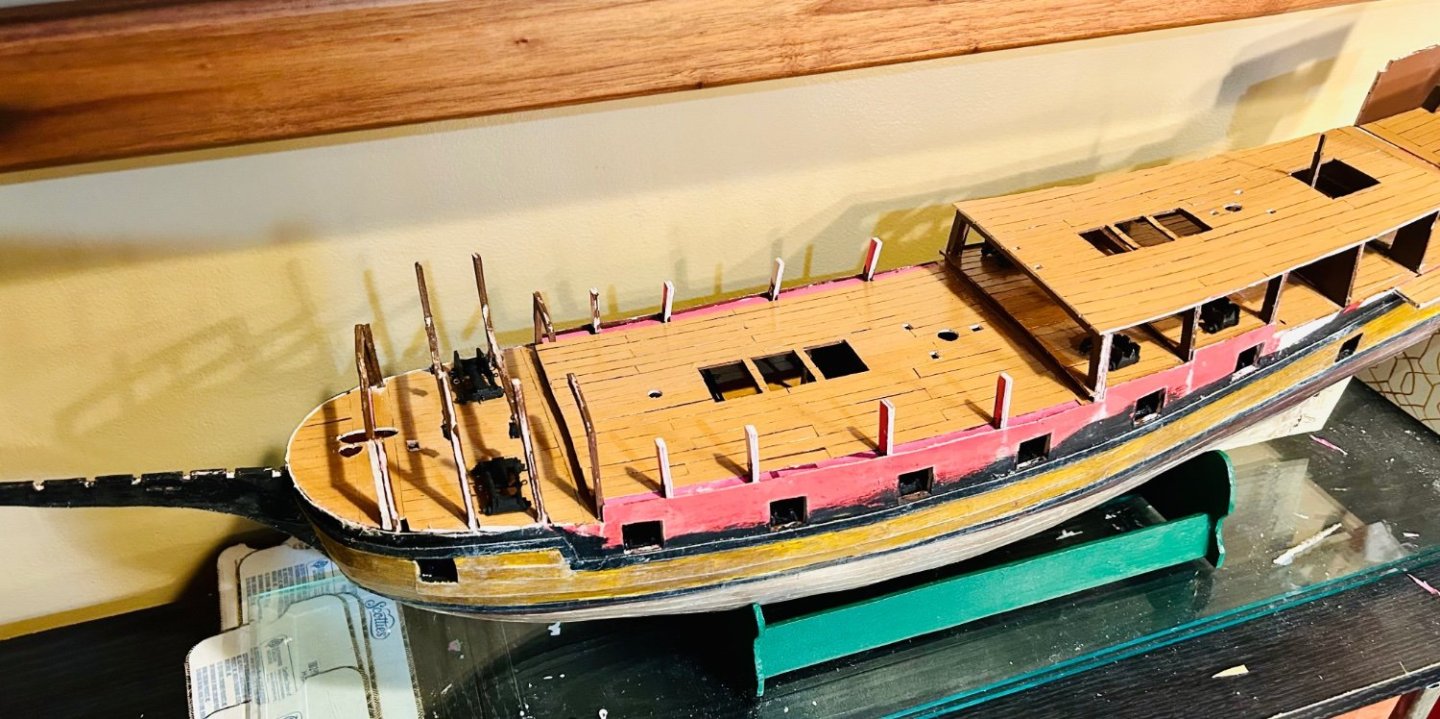
The planking of the quarterdeck is about a third complete:
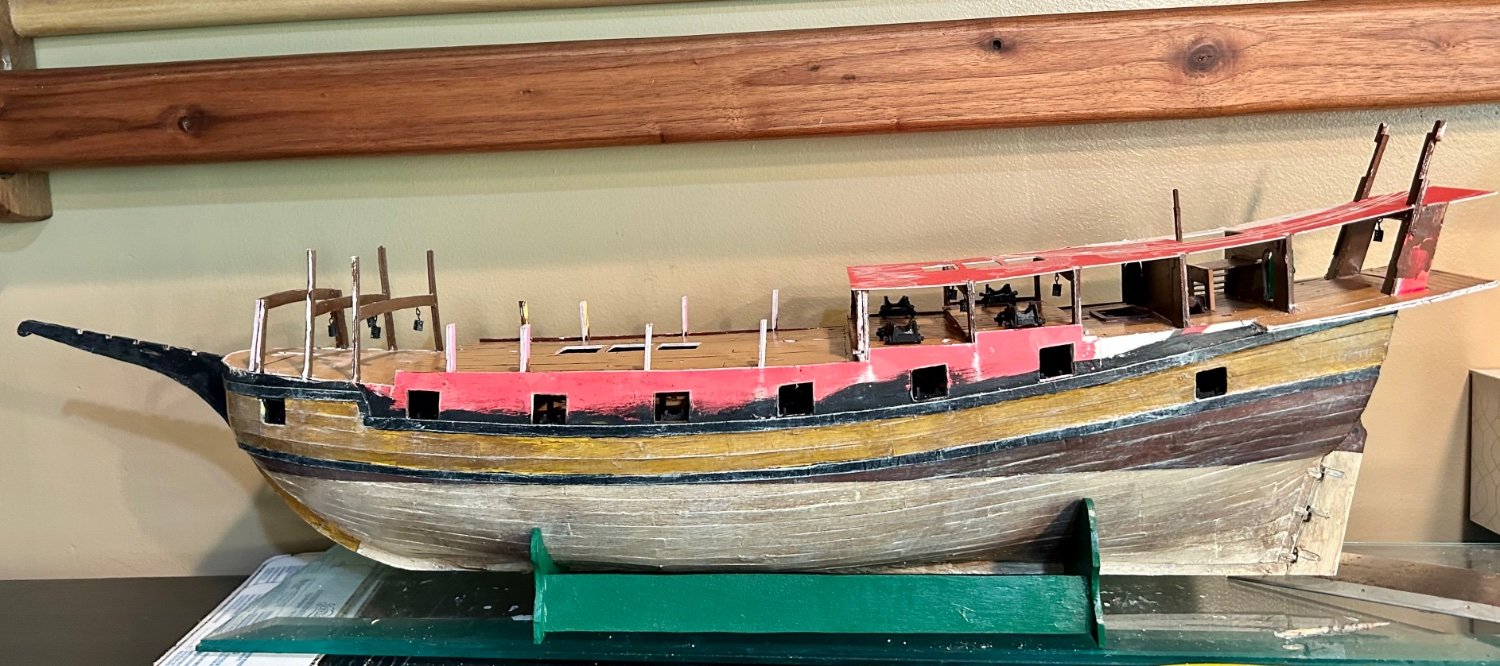
The Revenge is proceeding nicely.

This is by far the most complex project that I have ever undertaken.
I am learning a lot and having a lot of fun. -
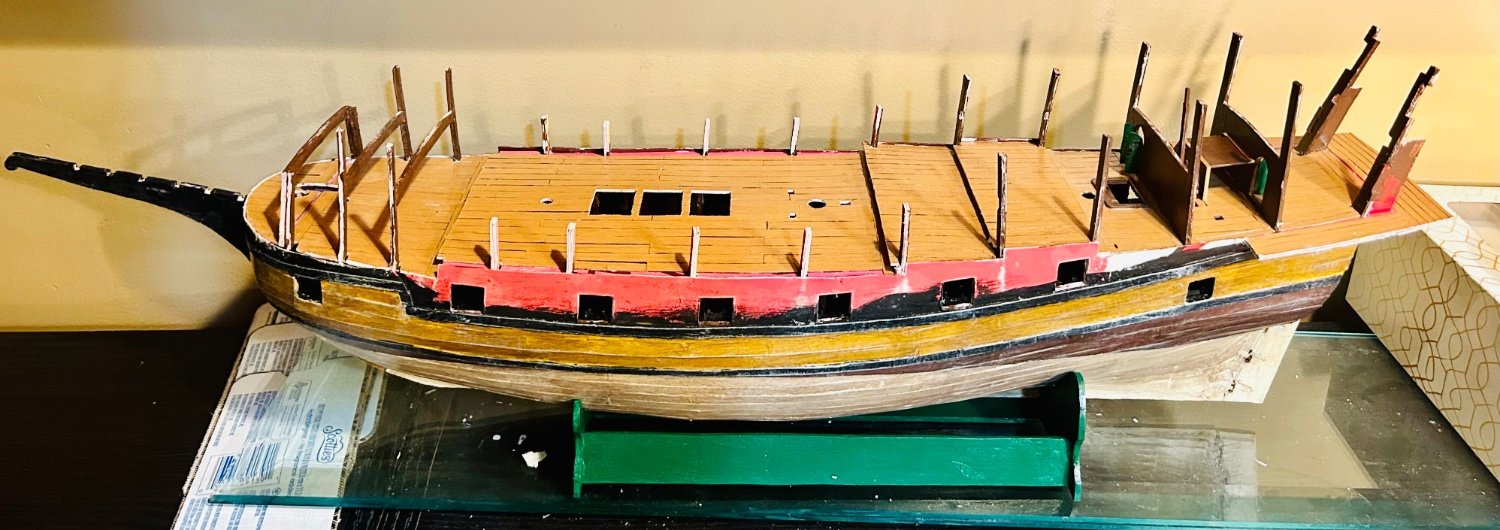
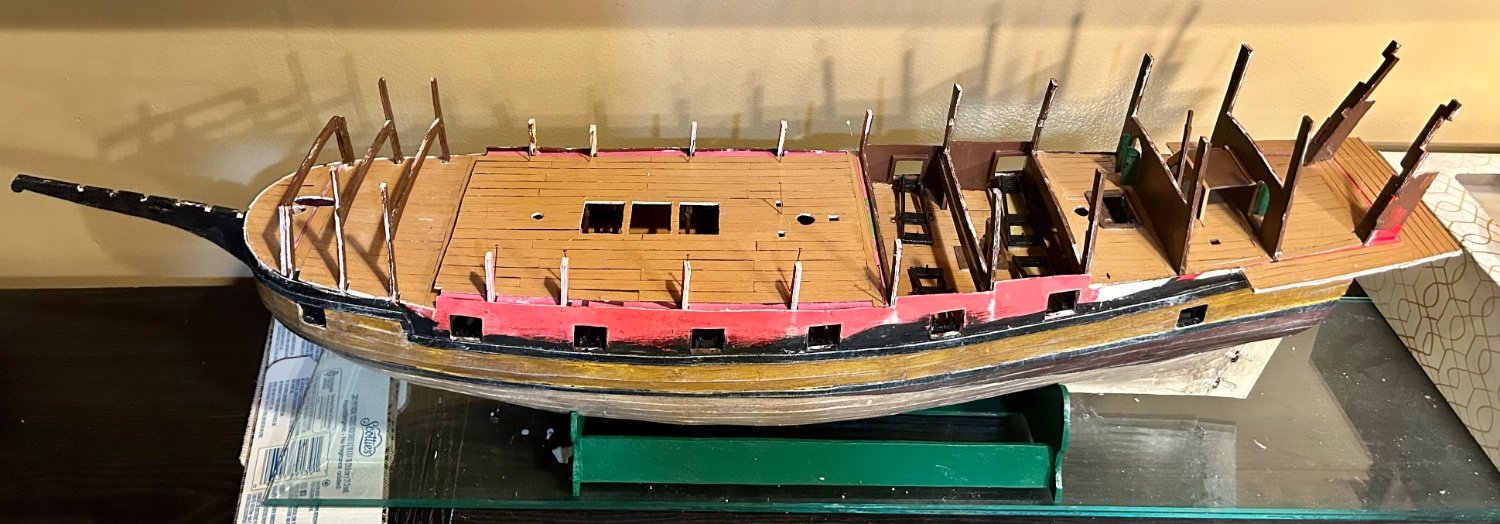
The quarterdeck bulkhead pieces have been trimmed off:

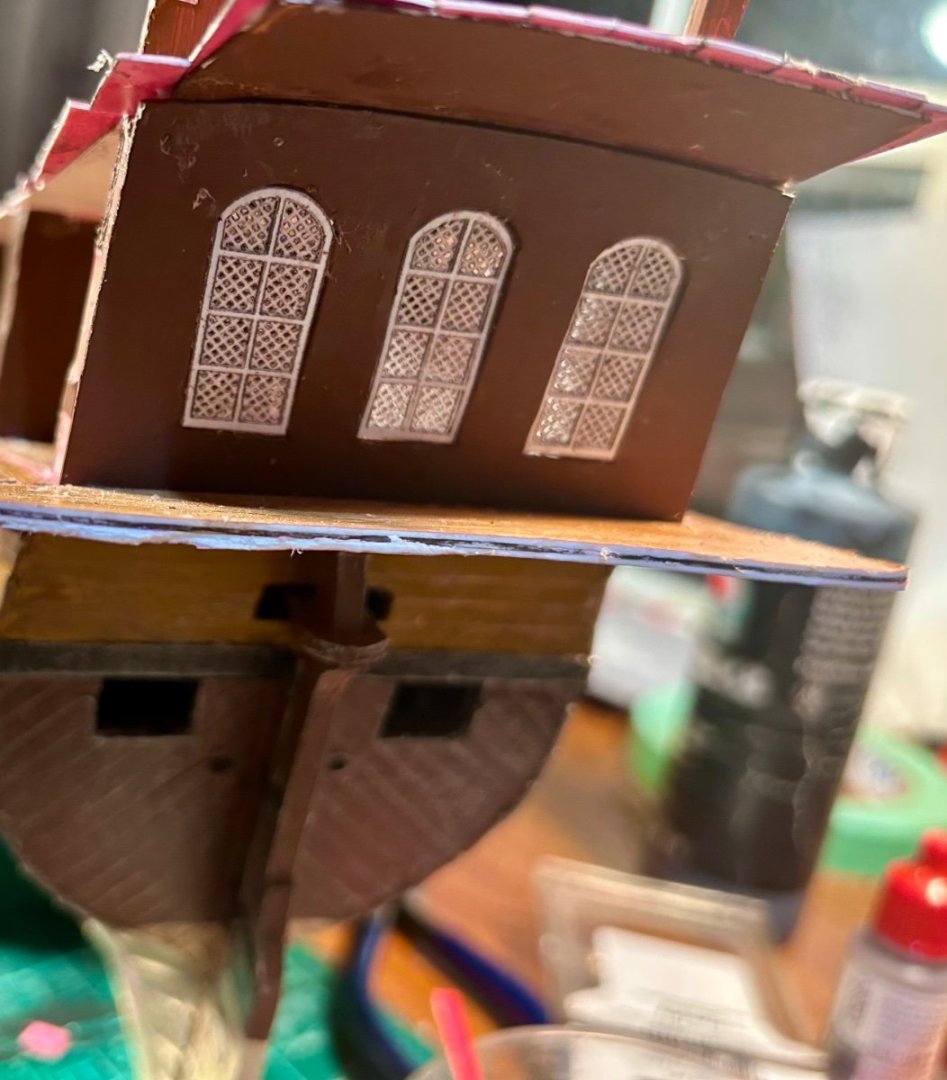
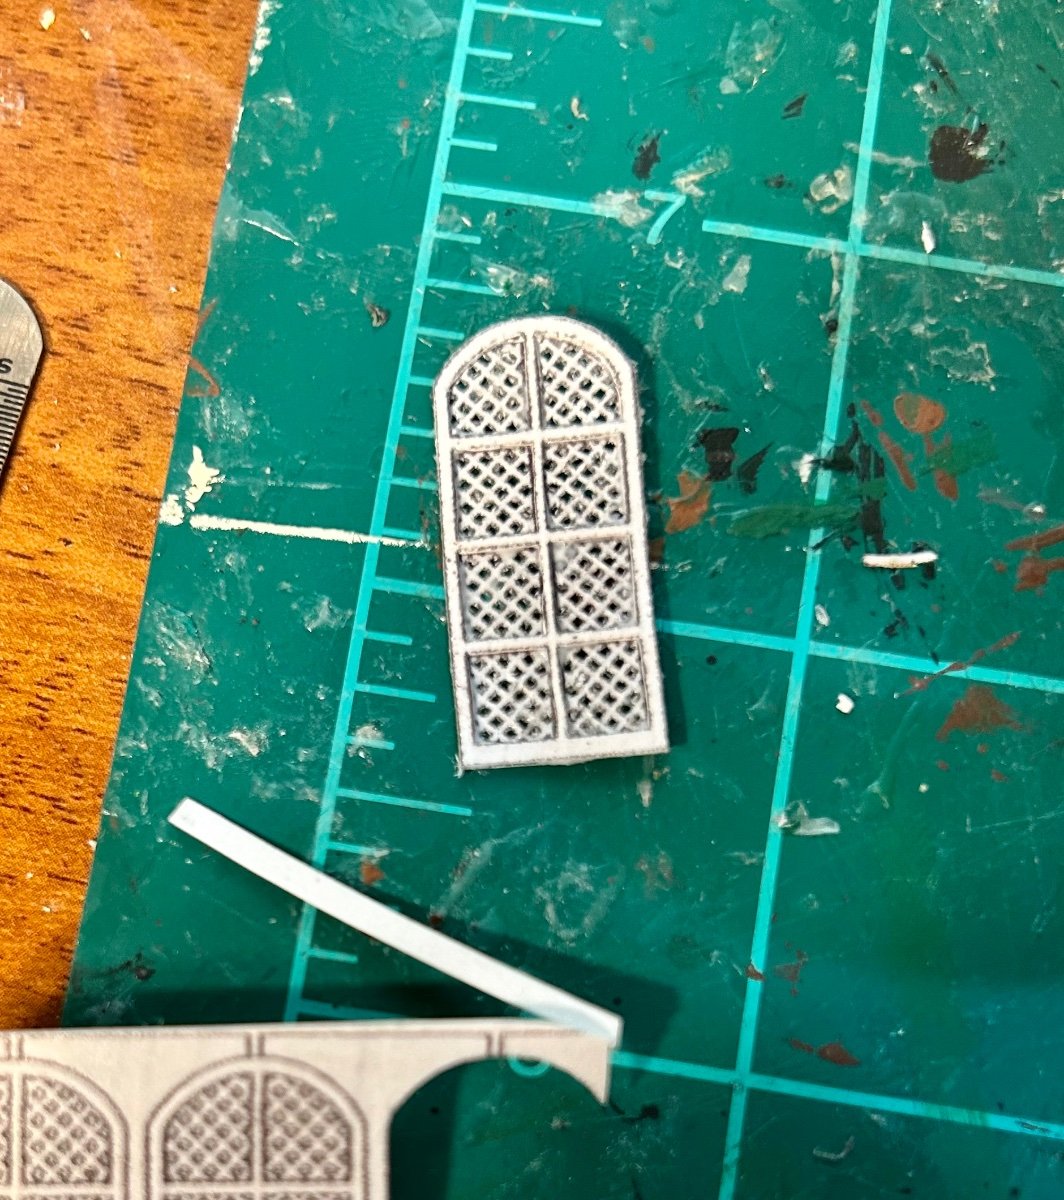
Working on the stern windows:
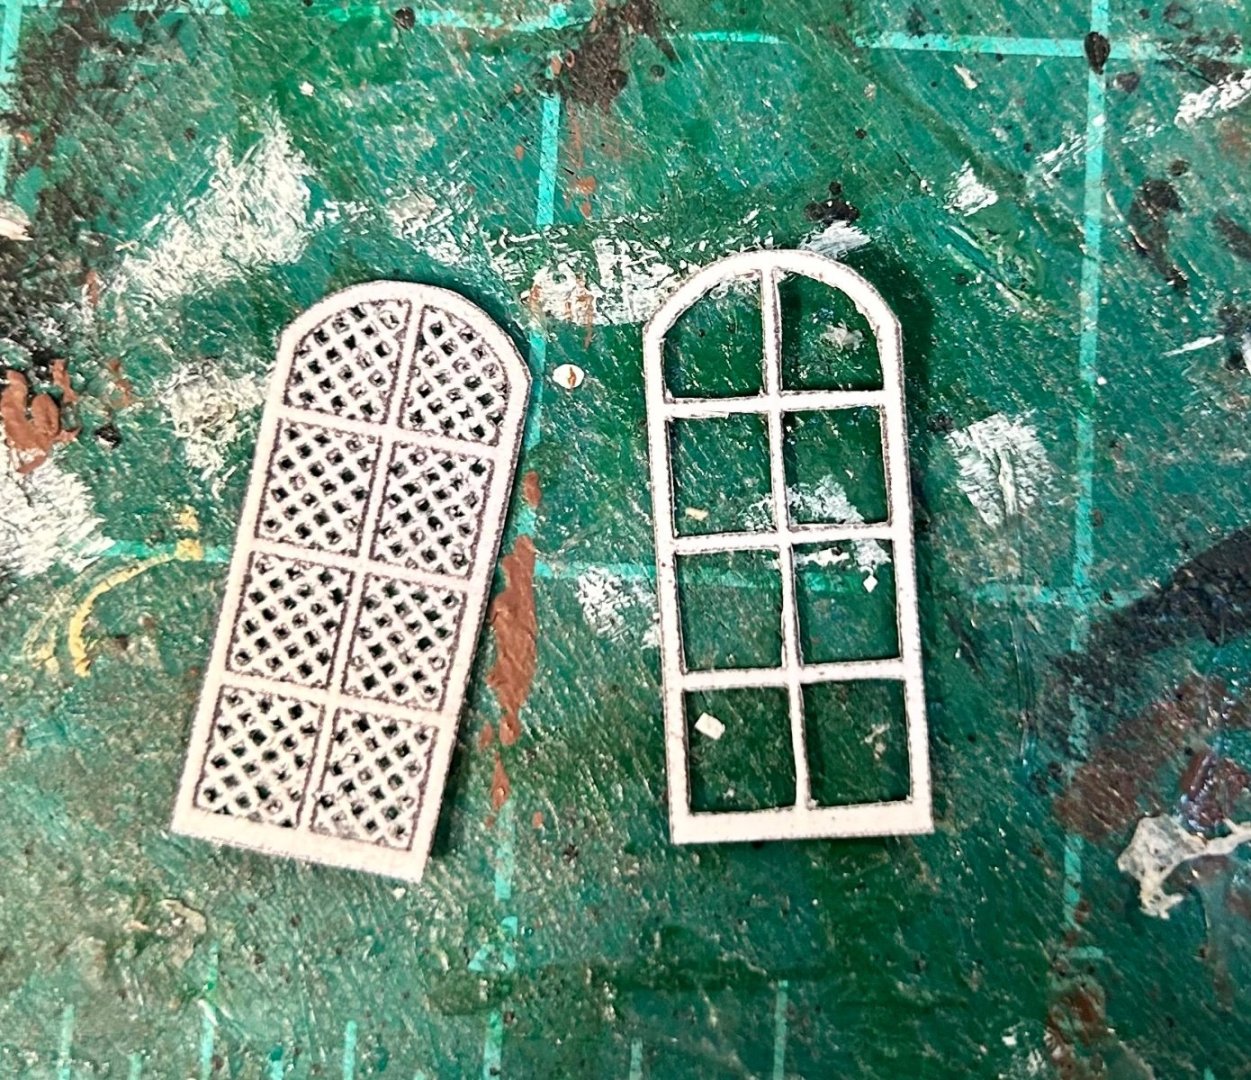

It is a two step process.
I copied the window pieces twice.
Once onto regular paper and once onto cardstock.
I am using the regular paper to make the lattice by cutting out all the holes with a scalpel.
I am making the window frames from the cardstock and then gluing them together.
The finished window looks a lot better in person than in the pictures.
There are three across the stern.
I have two to go.
-
-
Here is the main deck with the beams for the next decks in place, with the lanterns:
Here’s the quarterdeck glued in place:
I’ll finish the transom piece with the stern windows and add that shortly.
-
-
-
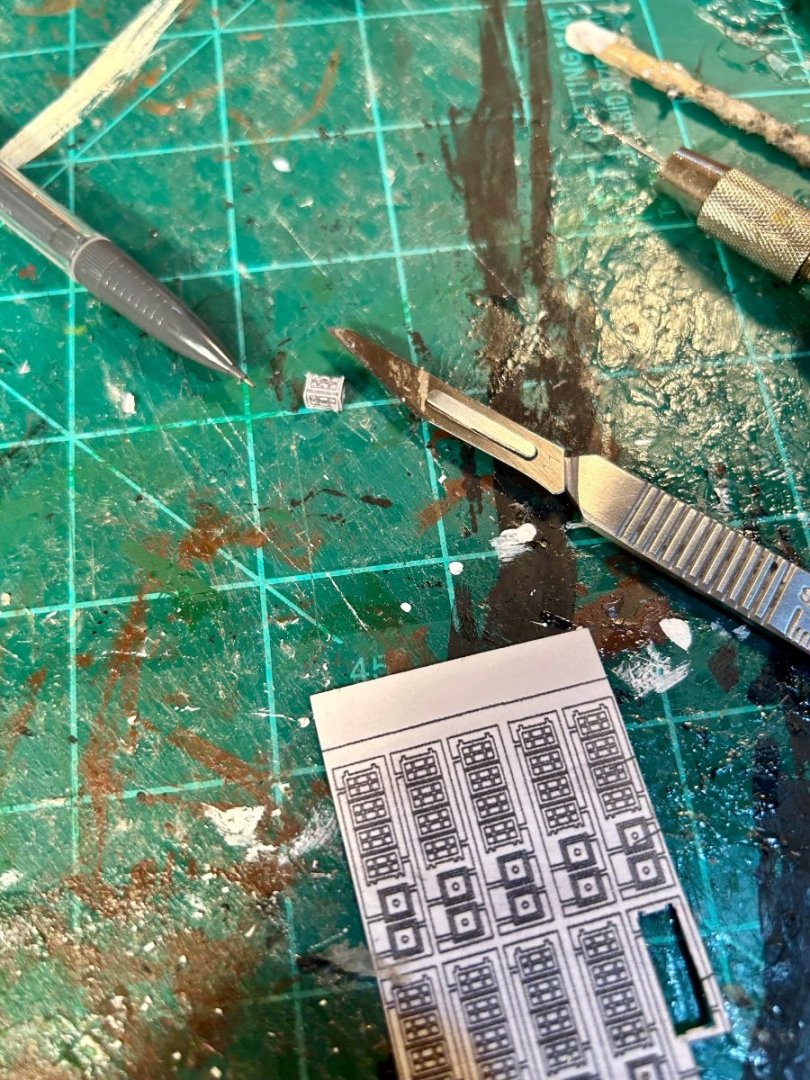
I photocopied the plan sheet for the brass photo etched sheets onto thin cardstock.
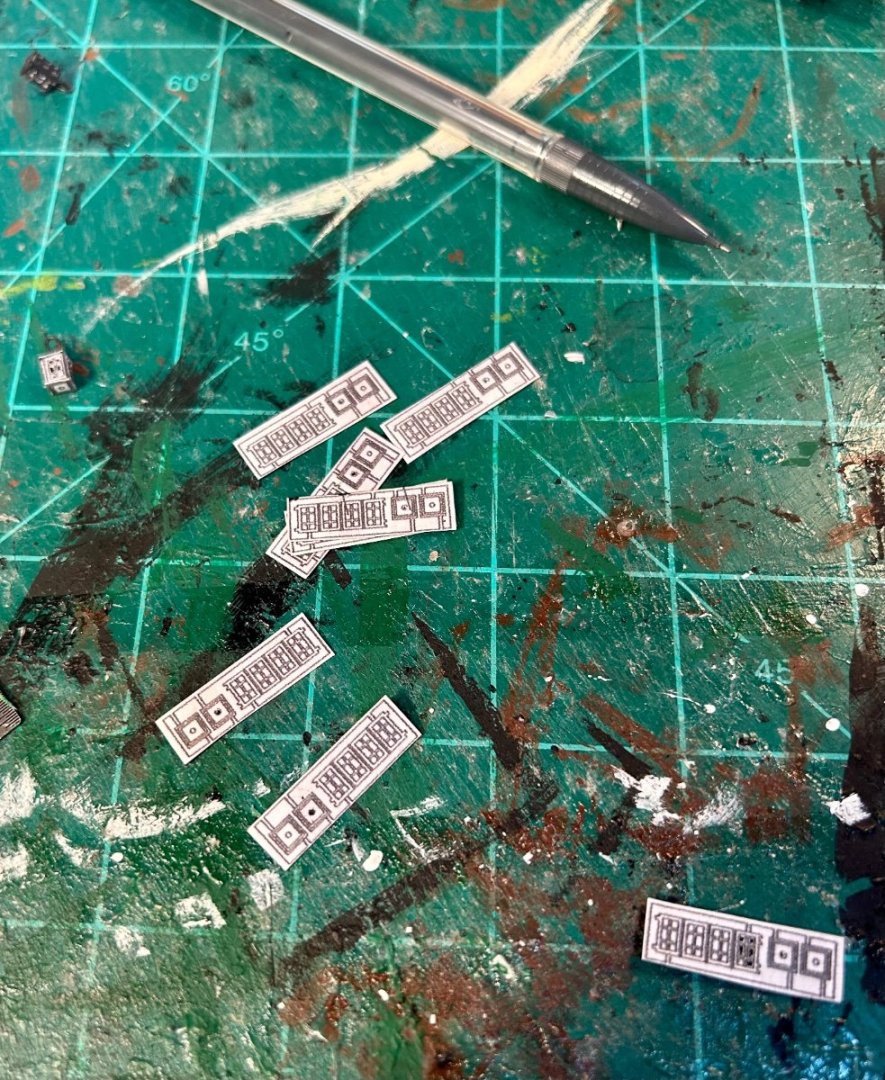
I sealed both sides of the cardstock sheets at the parts I am going to use.
The pieces that would have been thin brass, I will most likely just cut out and adjust as needed, like the lanterns above.
The pieces that go to door frame mouldings, the quarter badges and other trim pieces, will be fully glued to wood and be carved as appropriate.
The cardstock should reinforce the wood pieces so they don’t split out as they are being carved.
- mtaylor, Glen McGuire, catopower and 2 others
-
5
-
Tiny lantern prototype:
I need to make 6 of these.- John Fox III, Baker, clearway and 3 others
-
6
-
Check out Grainger. They have good stuff and their prices are usually decent.
- Knocklouder and Peanut6
-
2
-
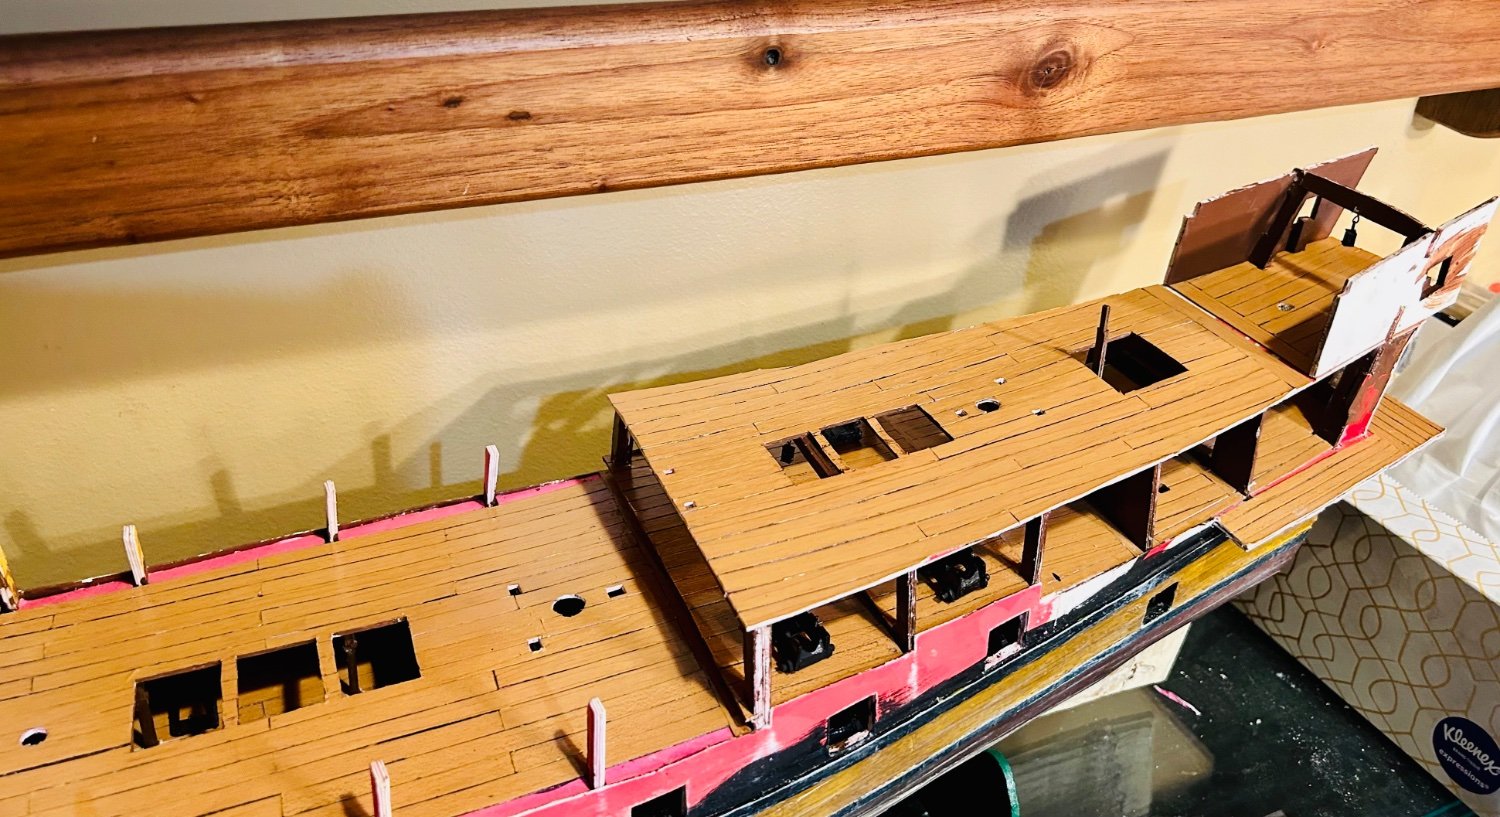
The main deck is made and in place now:

The gundeck is now completely sealed in. -
The majority of the gundeck is sealed in now:

I realized tonight, that you would have to boroscope the model to see all the detail work on the gundeck now, to say nothing of the orlop deck, lol.
This is the first time that I have ever made a fully enclosed deck before.
- Glen McGuire, mtaylor, Thukydides and 2 others
-
5
-
-
The gundeck is nearly ready to be sealed and then closed in:

I will add the final gunport sills after second planking the upper part of the model.- Baker, mtaylor, Thukydides and 4 others
-
7
-
-
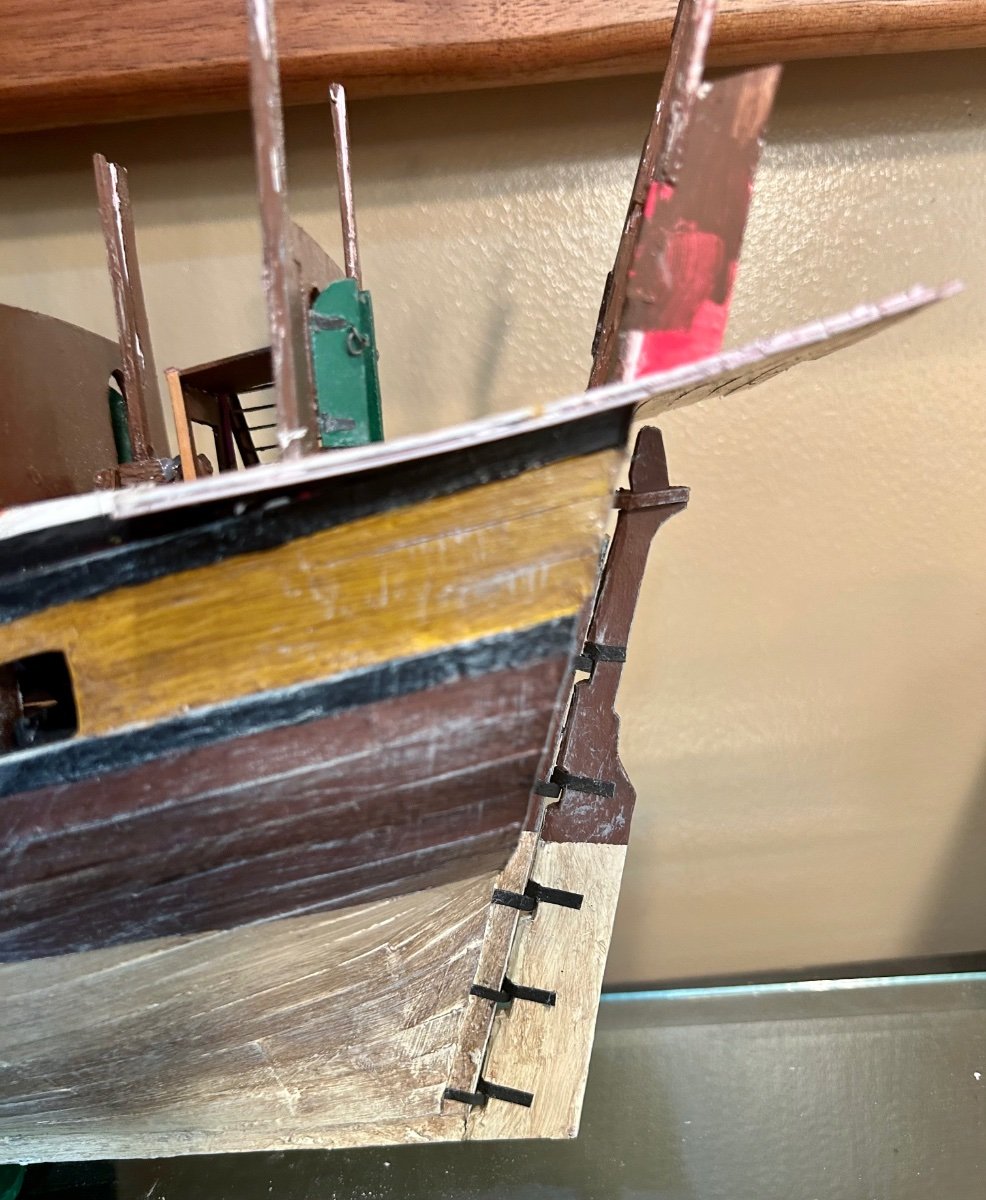
The lower part of the hull is mostly complete now:

The pintles and gudgeons on the rudder needs some minor paintwork:

I need to paint the ones below the waterline that dingy white.
There are a couple places that need touched up in the same fashion, from where the green on the base came in contact with places it should not have, while the paint was still wet.
Then it will be time to complete the gundeck.- John Fox III, Glen McGuire, davyboy and 1 other
-
4
-
Thank you, Allan.
That’s what I figured.
I made the pintles and gudgeons from card and the pins from pieces of toothpicks.
I embossed the bolt heads with my pounce wheel.

I think it looks alright.I’ll repaint those pintles and gudgeons below the waterline with the dingy white after this round of gluing dries.
-
-
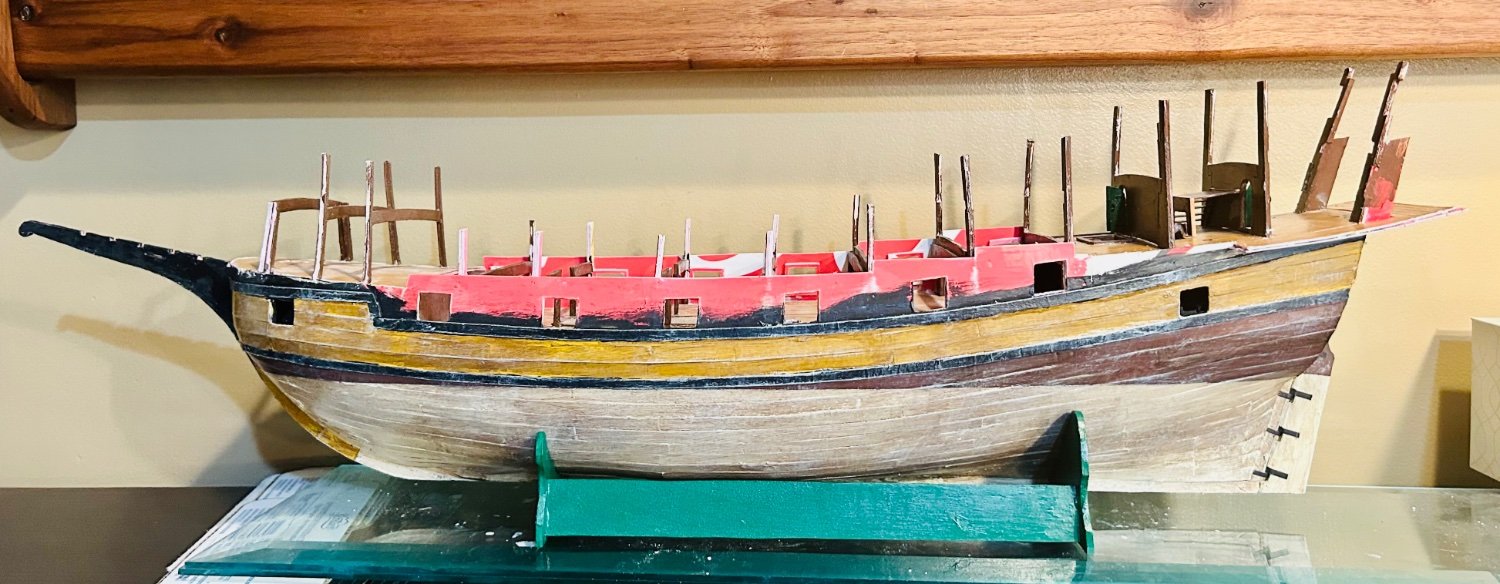
I gave the hull a heavy patina:
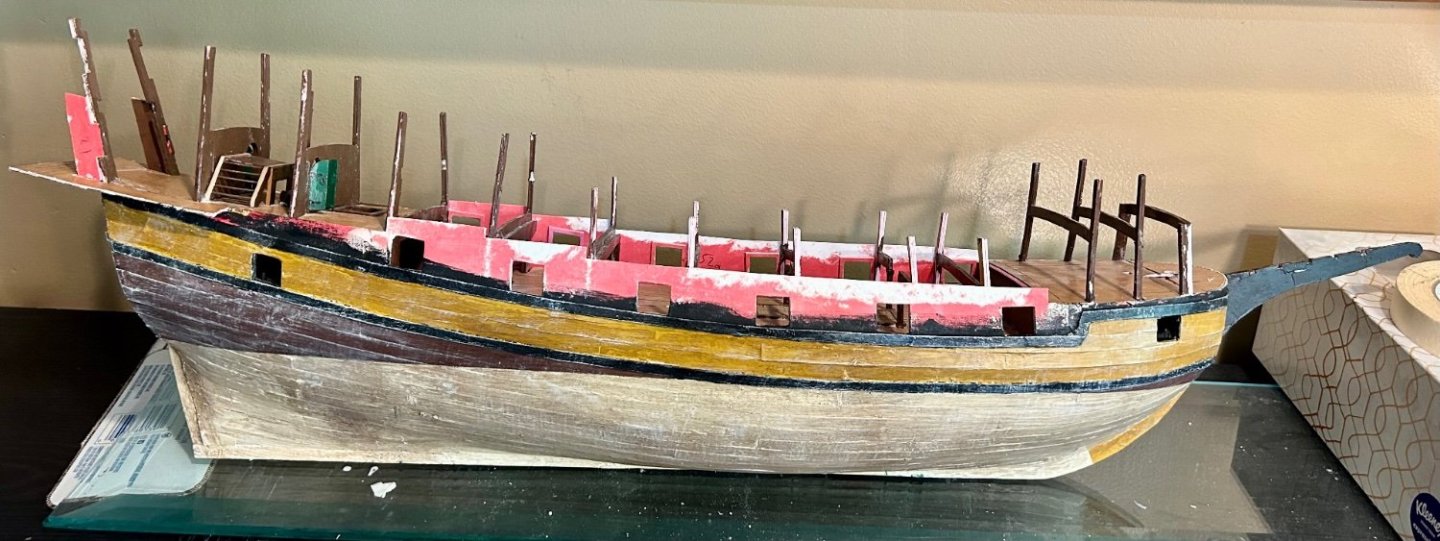
I think I went a little overkill on the weathering and antiquing.
I should probably adjust the paint a bit, but I’m curious how this plays out.It currently looks like I found it in an antique shop.
- mtaylor, Canute, Glen McGuire and 2 others
-
5
-
The base coat is done:
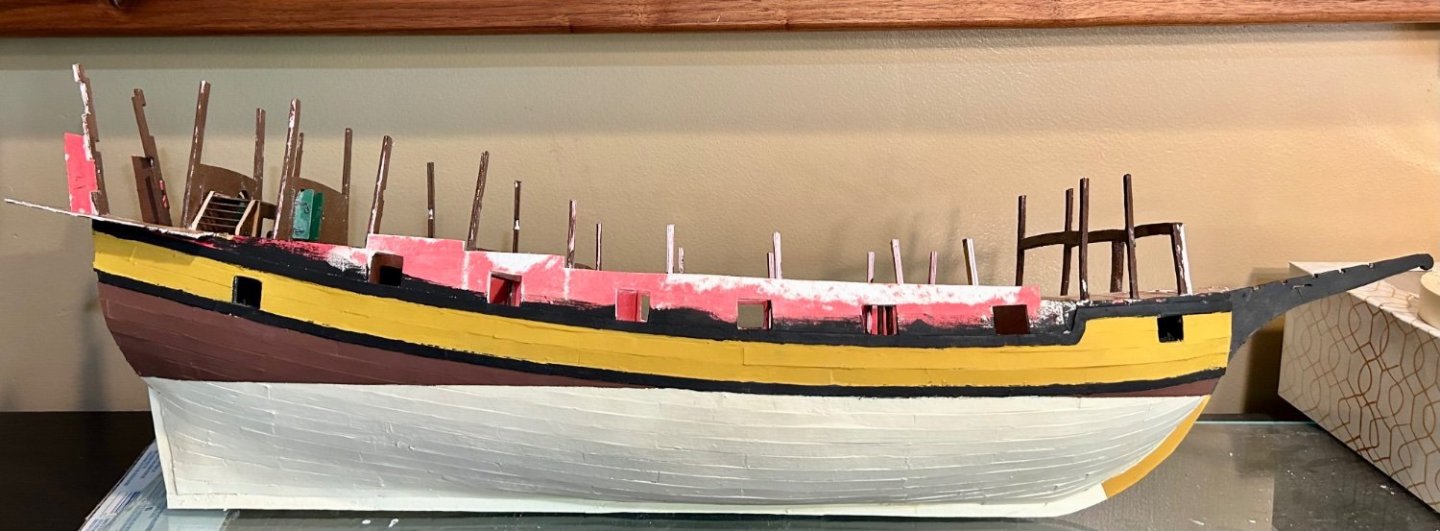
I am going to add a wash to the model with a strong tone wash from Army Painter.
That will add texture increase depth.
I am also going to paint the cradle a forest green so I can glue the hull to the cradle to simplify handling.
- Canute, mtaylor, John Fox III and 2 others
-
5
-
-
-


The San Marco mosaic ship c. 1150 by Louie da fly - 1:75
in - Subjects built Up to and including 1500 AD
Posted · Edited by GrandpaPhil
They look like timber heads or bitts to me, or something that fulfills the same function.
They could possibly be tie off points for oars or sweeps as well.
Possibly dual purpose?