DONATION DRIVE - SUPPORT MSW - DO YOUR PART TO KEEP THIS GREAT FORUM GOING!
×

.jpg.01e54eff8de6be562e7bc1146f40d40a.jpg)
Matt D
-
Posts
629 -
Joined
-
Last visited
Content Type
Profiles
Forums
Gallery
Events
Everything posted by Matt D
-
.thumb.jpg.6d6ee4bdbfaac2c58ecc77e7b80ae374.jpg) Planking is a big job on this model and it takes a long time. Mine took many months. What you’ve done so far looks really good.
Planking is a big job on this model and it takes a long time. Mine took many months. What you’ve done so far looks really good. -
Oh, don't worry about it - it's only 19 months worth of work to make another! Looking back over your photos, I want to tell you that your moldings along the sides look spectacular. That pear along with your excellent shaping work really look good to me.
- 642 replies
-
- 4
-

-

-
- winchelsea
- Syren Ship Model Company
- (and 1 more)
-
"Chief, get behind me". That chair looks fantastic!
-
Your Winnie is looking great, Don! You've made a ton of progress on her.
- 144 replies
-
- 1
-
-
- winchelsea
- Syren Ship Model Company
- (and 1 more)
-
Your pear rudder looks great, Rusty! Two hands on the model while you're turning her over and you'll be fine. But use a spotter if you can.
- 642 replies
-
- 2
-
-
- winchelsea
- Syren Ship Model Company
- (and 1 more)
-
Before you get there, the last plank seems intimidating. But when you get there, it’s pretty straightforward. Just take your time on the fit and make sure you are happy with your tick marks as you get closer to it.
-
Jorge, your model looks amazing! The carvings came our so beautiful.
-
I used my 10” Jet table saw to mill all of the planks for my HMS Winchelsea. It’s not ideal, but it can be done. The hard part is that the fence is useless for trying to cut really thin pieces. So I built an accessory table on top of the saw with a homemade fence. I only needed two thicknesses: 3/64” and 1/16”, so the fence piece was just screwed in place. As Joe said, I lose a lot to the wide kerf. One thing I considered was buying a thin kerf 7-1/4” blade for it, but I haven’t made that move yet. If your choice is to make due with the saw you have or don’t make a model, then make it work with the 10”. Eventually, I will buy a model saw - probably a Byrnes.
-
Your work is absolutely beautiful, Ainars!
-
That looks great, Dave! And congratulations on the baby. Being a dad is one of the best things life has to offer. What make and model is your CNC/laser/3D printer?
-
That looks excellent, Greg! Planking this model is a big job. For me, it seemed like it would never end. The part I found most challenging was getting the transition from the counter to the stern post to look good. Yours looks to be in good shape. I found that the third belt looked like even the 5/16" planks would not be wide enough right at the stern post and I was afraid I'd come up short. But the first few planks are pitching up and that angle gives them a little bit more width where they meet the stern post. I needed that in mine. That may be useful information to you or it might just give away the errors in mine.
-
Thanks, Vladimir! I used the grating kits from Syren. They’re not too difficult, but they take a good bit of sanding. The really amazing part is how well they fit in the coamings.
-
You’re not alone, Greg. I had a different problem and had to tear mine off and redo it also. Like you said - it’s an opportunity. I’m sure you’ll be happy with the second attempt.
-
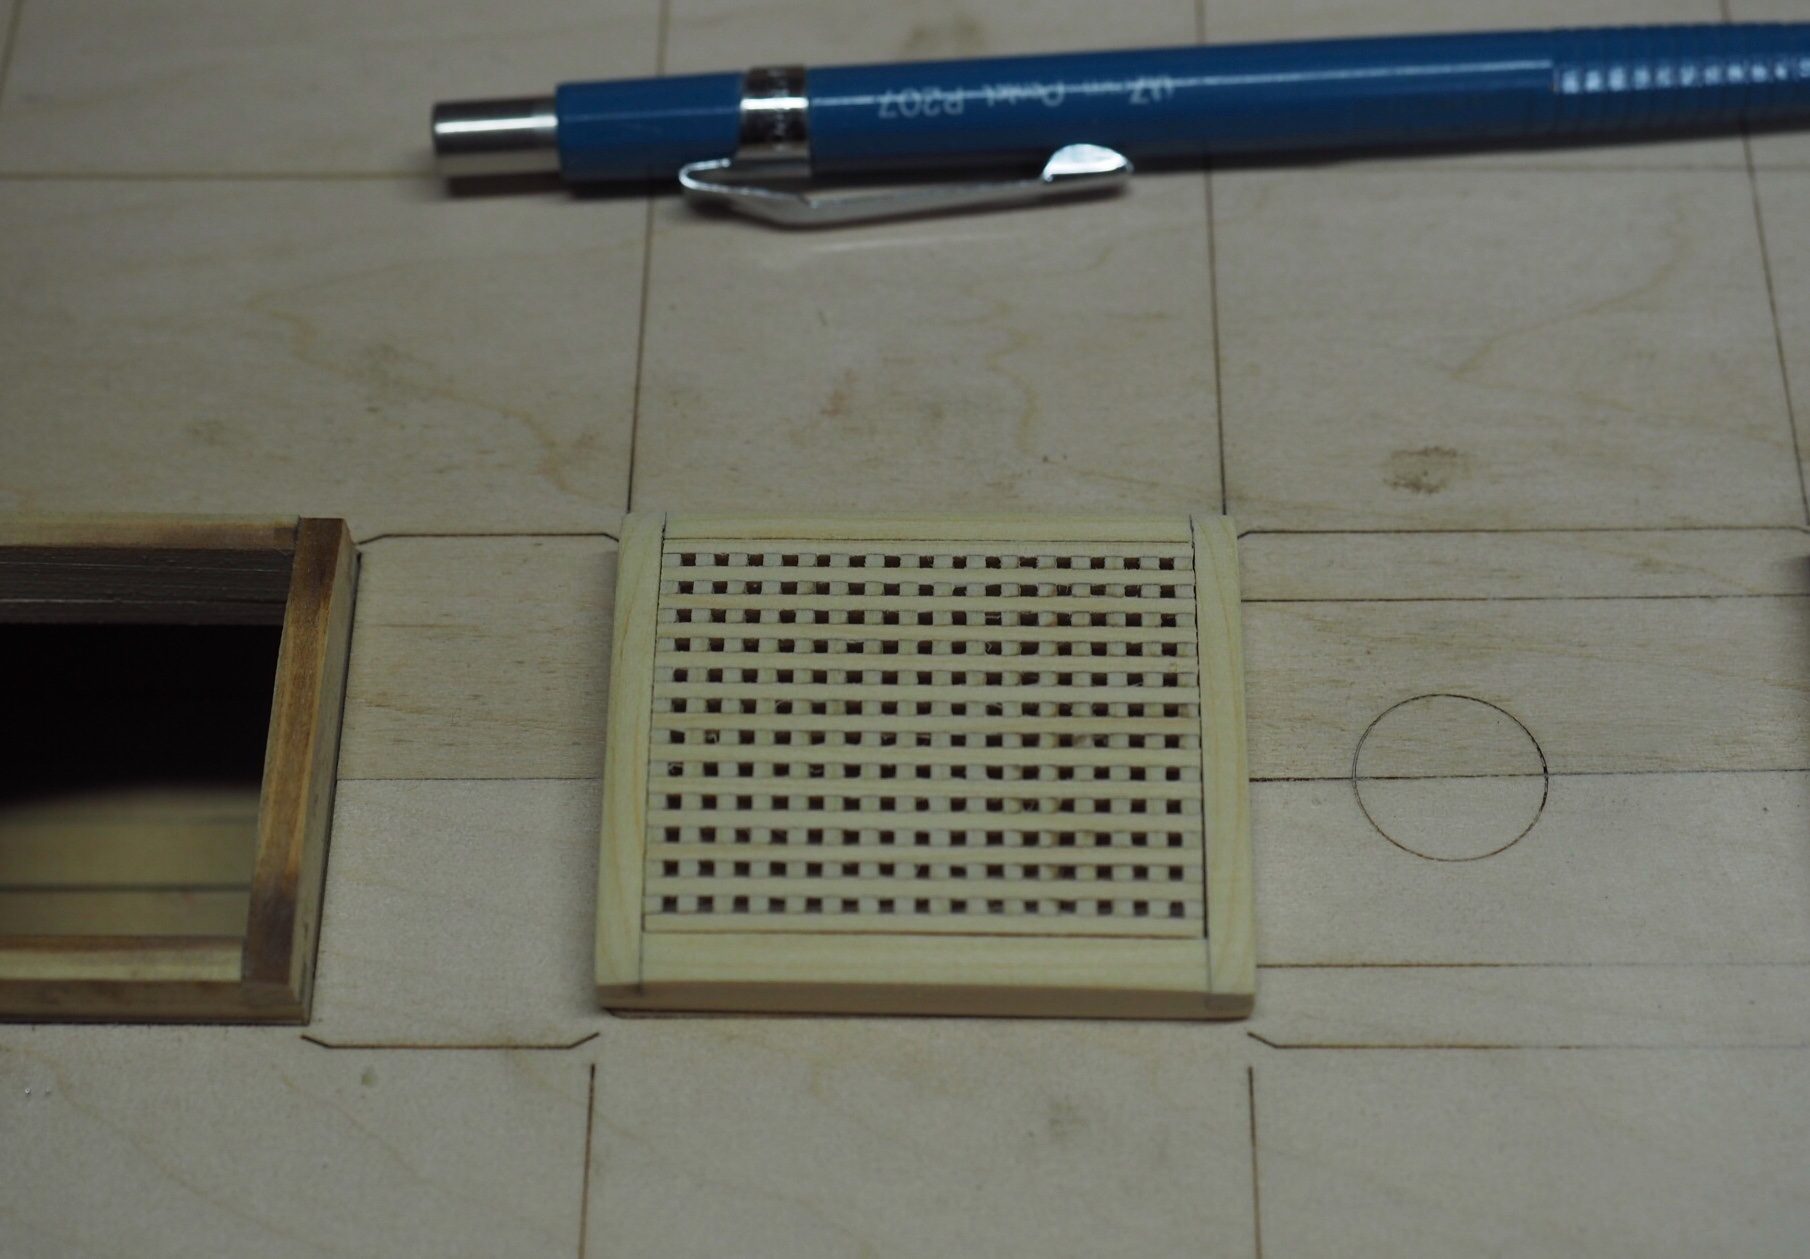
Thanks, Frank! Thanks, JJ! You're actually way ahead of me. I've only just started the spirketting and have a ton of work left on all the inboard planking. I just couldn't help myself and had to make the coamings and gratings. They're great fun. Chuck took really good care of us in that the spacing on the coamings is designed to fit the gratings perfectly. That was the first thing I was concerned about when I started. I thought I just got lucky on the first one and then I checked the spacing on the rest and they're all designed to fit like a glove. This was my first time making gratings at all and I found that I had to be really patient while taking them off of the build jig. If you pry them off too far on one pass, it will start to twist and come apart. So instead, I just pried until I saw it move and then went to the next slat. Just for reference, mine are Alaskan yellow cedar.
-
I couldn’t resist starting on the gratings and coamings. They were calling to me from inside the box! I’ve actually been looking forward to making Chuck’s gratings since before I started the Winnie project. So here is a picture of my first coaming and grating, ready for paint and WOP.

-
JJ, you’re a genius! Thanks for sharing
-
This sounds very strange. I know that the first time I printed mine, I let the printer do its default, which turned out to be reduced to 95% give or take. Your problem seems much more severe. I recommend you download the bulkhead files and take them via thumb drive to an office supply store or fedex business store and ask them to print them for you at 100% scale. There are either one or two sheets that need to be printed on 11x17 paper, too.
-
Your planking is looking great, Greg! I had to shim mine in a few places. You’re wise to wait on finishing painting the wales. I kept finding reasons to sand the hull a little more and kept messing up the paint on the wales.
-
Beautiful, Bob! You've been busy. Those eye bolts look amazing! You did an amazing job on keeping them consistent in size and shape. Were they hard to make?
-
They look great, Justin! I’m glad to see you recovered and it’s going well for you.
-
Your rope looks excellent! Was it hard to make on your first attempt?
- 950 replies
-
- 1
-
-
- syren
- model shipways
- (and 1 more)
-
I'm glad I'm not the only one who feels that way!
-
Greg, she’s looking really good. Your tick marks look neat and tidy. Planking seems tedious, but the results are so satisfying.
-
That looks like an amazing kit! I’m excited to follow your build, James.
- 355 replies
-
- 3
-
-
- vanguard models
- Sphinx
- (and 1 more)