Mirabell61
-
Posts
7,406 -
Joined
-
Last visited
Content Type
Profiles
Forums
Gallery
Events
Everything posted by Mirabell61
-
 Is coming on very nicely Puckotred, Looks like the kit provides good Fitting lasered parts Are you intending to do an (RC) float- or a stand model? Nils
 -
Hi Puckotred till now I was not Aware that there is a Bohuslän kit (and even in 1:45 !!)on the market again, thanks for sharing the News, and hopefully for your build-log to start with the keellaying soon. Shall Keep tuned .... Long time ago I built Buhuslän from the former Billing Boats kit in 1:50 scale, which disappeared many years ago from the market. If you are interested you can see my finished kit Model in the Gallery. Cheers Nils
-
Johann beautifull work, you realy know how to get fellow members exited, candy for eyes and Soul, thanks for sharing the look into your build-log. And by the way you produce excelant photos as well Nils
-
beautifull build Giampiero the impessive line of that ship can clearly be seen, wonderfull Nils
-
I like your build Remco beautifull neat and tidy handcraft work Nils
-
Beautifull model Mark, Ilike the lines of that ship and your acurate, neat work in achieving this build so far... Nils
-
Congrats Richard, it has been a pleasure to see this wonderfull build rise from keellaying to slip into her element down the slipway, may she have always a handwide water under the keel Nils
-
Hi Doug, If you wish, have a look into my (mirabell61) build-log for "HMS Pegasus" swan class... cheers, Nils
-
Hi Michael, your rigging and all the Fitting out and the choise of materials and their dimensions provide the confedence that this cutter could be magnified to actual size and sailed in a good breeze with filled red gaff sails and humming stays..... Beautifull build Michael I like it Nils
-
beautifull neat and tidy work Doug, I like the ship and rigging in the way you do it Nils
-
How to sew sails on your wifes sewing machine
Mirabell61 replied to Mirabell61's topic in Masting, rigging and sails
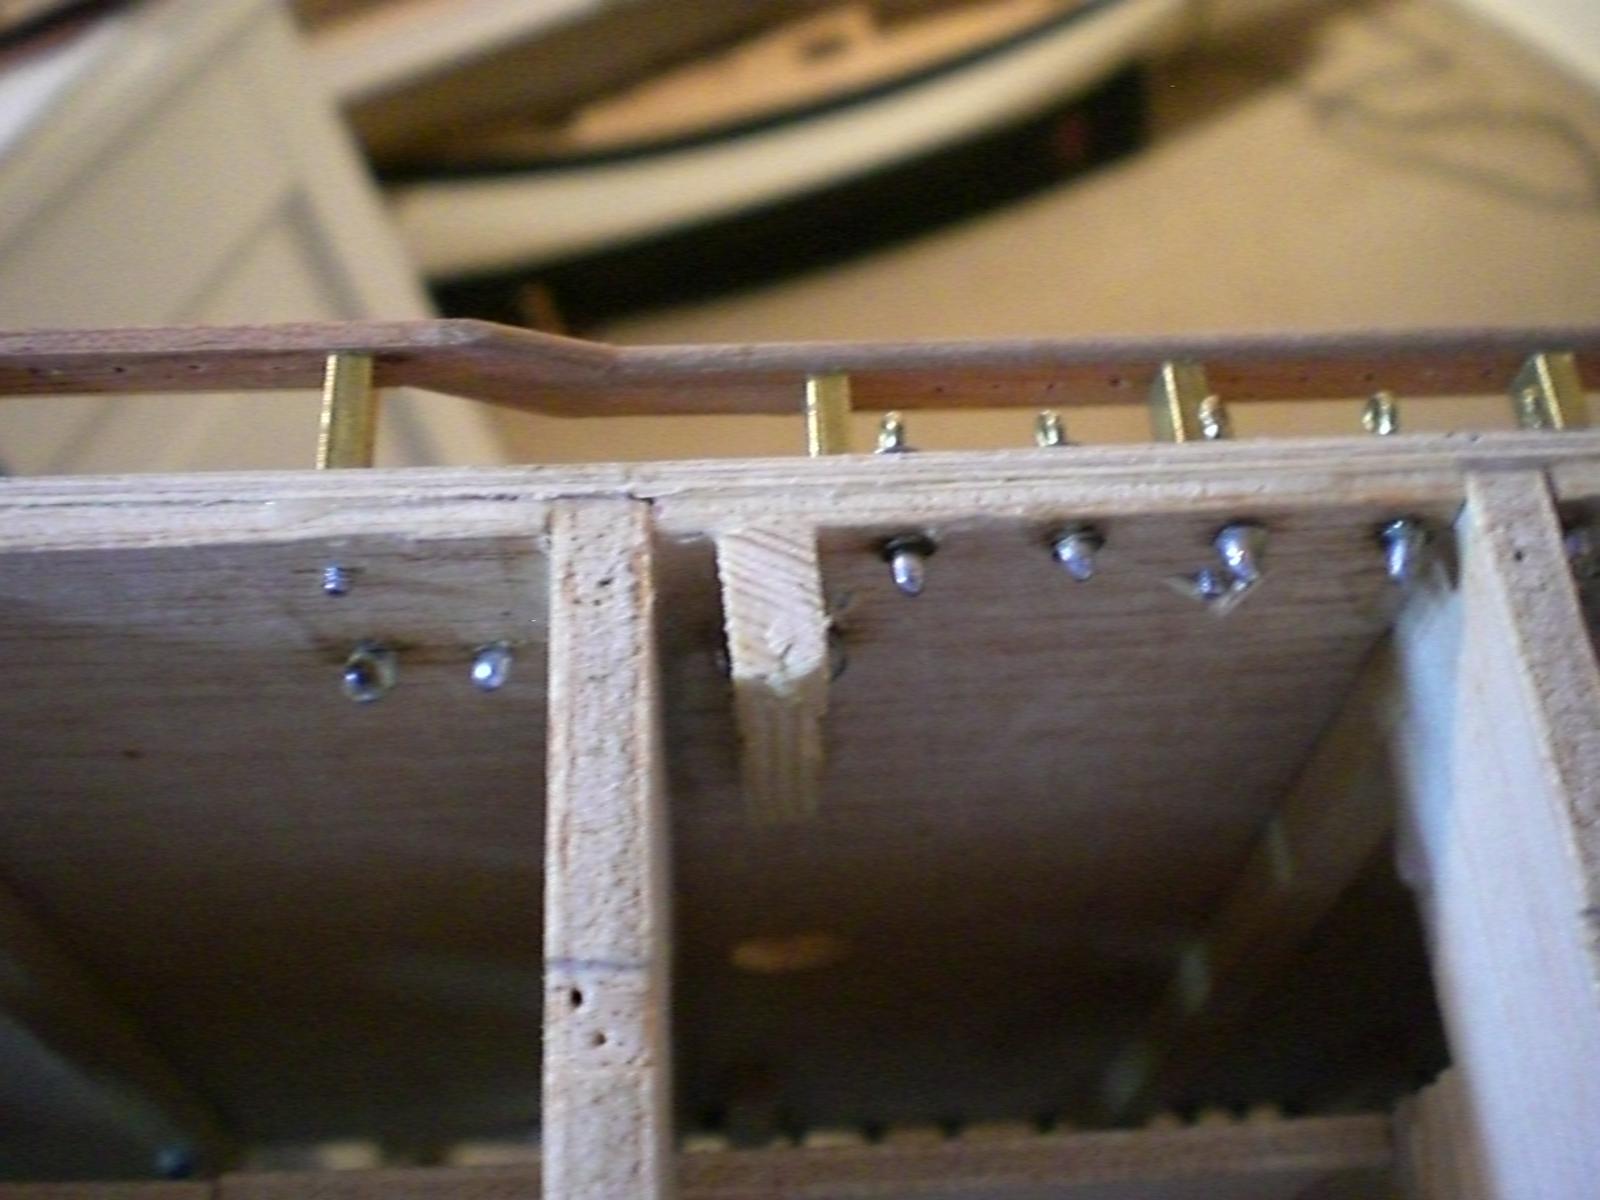
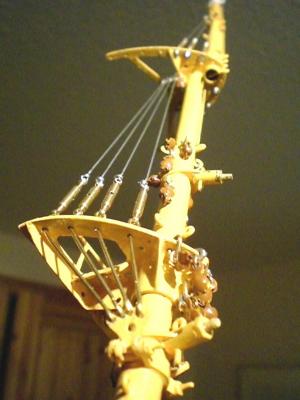
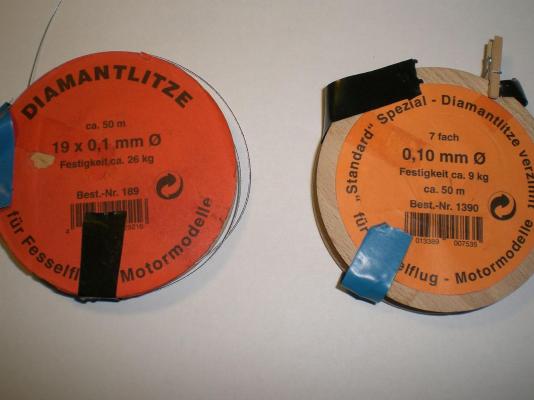
Kimberley, the cord Comes in 50m lenth on wooden spools in either 0,3mm thickness or 0,5mm thickness. I found These at Ebay, but probably you can find them when Google-ing up "Diamantlitze", or on enclosed Web link http://www.rc-toy.de/1390+-+Graupner+Diamantlitze.htm The pics enclosed Show you what I meant relating to fastening Point above resp. underneath decks. I remember that the plastic model hulls usually come in two halves, glued together with the decks carefully fitted in place before, unfortunately not allowing Access to the deck underneath afterwards. If you require a sturdy stresstaking basepoint you shall have to treat your deck before it is permanently glued in. One pic Shows (still without ratlines) the spanners in the upper shroud cores (the smallest spanners I know of in brass are fitted with M1 left and righthand thread and spanned by the common sleeve on the two spindles. all this probably will not be of much help when rigging smaller plastic models, but I asume in case of someone rigging up a Clipper or other tallship in plastic could be considered in order to avoid slacking loose lines Nils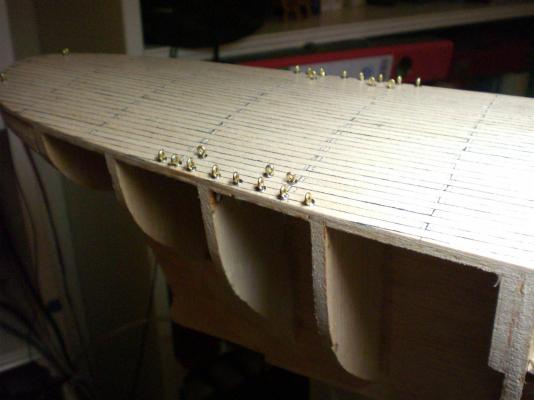

-
How to sew sails on your wifes sewing machine
Mirabell61 replied to Mirabell61's topic in Masting, rigging and sails
Hi Kimberley as far as the plastic kits sails are concerned I have no experience at all. It can help to reinforce the plastic masts with wire inlay in case they come in semi halves from the mold. For larger scale Wood built ships I use thin galvanized multisoul wire cord you may know from in circle flying wire controlled model aircraft. This is very flexible, has a high yeald strength and is easy to solder. When using this on shrouds, stays, backstays etc... in combination with spanner Fittings you can Play bassguitar on the strings. It is necessary though to povide durable and well placed Counter bases beneath the main decks. Unfortunately I have no Surplus sail in the Moment to send to you, but I`m sure that other fellow MSW builders may be able to help out here. Nils -
Aah you`re quite right B.E. the state of my Pegasus always Looks at me when I step into my modeling Office and I turn the spotlights on The coppering is already getting dark and dull and I asume I need a kick to boost the next sequences in build. Funny, in the past it could often happen that I become "pregnant in mind" with a new build idea/desire and I caught myself in grooving in on something interesting, but that did not happen here yet. So I`m quite confident that it shall go on soon Cheers Nils
-
admirable model B.E. ! also nicely presented sea surface structure, model colours, sails, and the Little figures all around that bring life into the ship. Is the glass/acrylic protection case self made ? it Looks great Nils
- 126 replies
-
- 2
-

-
- le superbe
- heller
- (and 2 more)
-
excellant good neat work Bob I`ll watch the "Essex" on her way... Nils
-
Impressive work with the full functional Tackling Michael combinations brass / Wood, two colour rigging, etc, I can feel with the fun you have, as you admit yourself by doing the Fitting out, shall be staying tuned for the next Pics Nils
-
Hi Danny I just love that model of yours, all the high skill work is presented by non hiding the fabulous wood juctions and fitting out work from beginning on... Nils
-
Beautifull work Karl, its like looking into a 18th century real ship after being Fitted out at the shipyard Nils
- 662 replies
-
- 4
-
-
- bonhomme richard
- frigate
- (and 1 more)
-
superb modelling Gaetan, you sure are pushing the degree of skill skywards.... would love to see more of your fabulous woodwork and Fitting out as you go on Nils
- 728 replies
-
- 1
-
-
- le fleuron
- 64 gun
- (and 1 more)
-
How to sew sails on your wifes sewing machine
Mirabell61 replied to Mirabell61's topic in Masting, rigging and sails
Hello Heinz I liked to hear that my method of sailmaking was of help for your intended Cutty Sark sailmaking. Trust the stainless steel wire reinforced bolt rope Feature is understood an no Problem. It is correct, that it is a bit difficult to Transfer the requirements for the sew-work to a good sewer Person who is not generally involved in the model rigging. This is really the reason why I started to do Trials on the sewing machine by myself. The method proved allright for both complete sail sets on Gorch Fock II and Pamir At the end of page 1 (of this post) there is a leaf in JPG formate with scetches of the sewing sequences. Please let me know of what sequence your sewer shall require Special advice for. Feel free to ask I shall be happy to help. Further Details can be exchanged via email addresses (mine is : nils.langemann@t-online.de) or by Personal Mail (PM) on this forum Regards, Nils -
very nicely built whaleboat Buck reminds me of Mobby Dick film Scenes in the whaleboats..... Nils
- 515 replies
-
- 1
-
-
- artesania latina
- whaleboat
- (and 1 more)
-
very impressive build Tony it`s a real delight to study your build log from begin to the current state, a masters work ! Nils
-
Hi Remco thanks for your remarks in your post #265 and for sharing all your build-log from begin to date, it`s real eyecandy to study in all Details Nils
-
Allan a lovely nice and clean built boat you Show us, thanks for sharing. Frames and beams arranged as it should be with These classic boats, a Little pitty that These wooden Features are not visible any more afterwards Nils
-
Hi Giampiero thanks for sharing your fabulous Model, very neat and accurate work, from the state it is already presenting, it shall certainly grow to a spectacular Piece of model art Nils