
Check out our new MSW Sponsor Innocraftsman
×

ZyXuz
-
Posts
429 -
Joined
-
Last visited
Content Type
Profiles
Forums
Gallery
Events
Everything posted by ZyXuz
-
 well done, Grant! and thanks for sharing the way of making them
 -
Lower Deck Modification The kit's original plan on the lower deck has only gratings. Feeling that it's too 'plain', I've decided to add a stair to a level lower... the orlop. I planned to locate the stair at the very front of the gratings in the original plan, something like this: To make it, I'll need to add a false deck beneath it, and that again need to modify the false keel and some affected bulkheads. The yellow line shows the location of the stair and gratings on the deck which will be cut off; while the red shaded area shows the area to be removed to fit the orlop deck. That will be total of 4 bulkheads (5, 6, 7, and 8) affected. Some procedures... First, I cut off a 'hole' on the false deck. Here is where the stair and gratings will lay. Then the bulkheads.. I made the height of the lower deck to orlop 25mm, which is the same as the height from upper deck to lower. And the keel's part... Finally, after all the cutting and sanding jobs, the orlop can now fit between the bulkheads. I started planking on the same night, and chalked edge of planks for better detail. Actually, it doesn't need to be fully planked.. I mean, I could just plank the center part of the board.. I planked them full to treat it as a good warm up for the higher deck planking. Then, I added treenails to the planks. I done it using pencil, not really satisfy with the result.. might use drilling and filling method on higher level. On the rest of the weekends, I started the lower deck planking. Anyway, before I begun I've changed my mind to add a space between the stair and gratings (which design I referred from the HMS Pandora). So, it's how it turns out now. Just a quick sharing on how I make my planks. Since I'm planning to stagger my planks by 1/3, so I made their lengths 105mm so that they can be easily divided by 3. After a whole long night of planking... the remaining parts will be planked after the hull planking is done, because I still need those frames to guide the hull planks. OK, after all... the stair hasn't made I was thinking of making the stair first, but then worrying of doing the hull planking might damage it, so I will move it together with other deck fittings Next, I'll work on the stern modification. Thanks for viewing!!
-
Mike, Thanks! The drill press is not that good though.. it actually doesn't 'bounce' back smoothly so, it is more to a milling device for me for cases that need to press and release, I'll just do it by hand Ianmajor, woah, extended below the keel? haha.. that's bit awful Anyway, regarding the stern gallery.. it's really a great improvement. I also did notice from some samples on the net. No rush, Ian!!! I'd love to see more slow and detail works from u like the stove!! :) Anja, Ya, this model is much more challenging than my Race Horse! Thanks!!
-
Wasa by DiKri - Corel - 1626-1628 1:75
ZyXuz replied to DiKri's topic in - Kit build logs for subjects built from 1501 - 1750
just caught up your buildlog.. and I mz say ur Vasa is just brilliant! -
HMB Endeavour by mikec - Eaglemoss
ZyXuz replied to mikec's topic in - Kit build logs for subjects built from 1751 - 1800
fantastic work!!! I love every fittings of yours.. especially the hatch! u really put efforts on them -
well done on the fittings, Lou
-
Mayflower by harrypsk - Constructo
ZyXuz replied to harrypsk's topic in - Kit build logs for subjects built from 1501 - 1750
just caught up your build log.. that plank tapering technique is just simple and brilliant! Thanks! -
wow, I tot it would need only a solder and flux will do to make that stove until I read your post thanks for the detail tutorials and sharing!
-
wow.. nice clinker planking! Well done!
-
Laying Keel and Fitting Bulkheads Just one week before this, I've already made my DIY keel clamp for this build. The previous one which I used for my Race Horse is no longer strong enough to hold a ship size like this. So, this is how it looks like: First problem... the bulkheads don't fit to the keel. Didn't happen on my previous build.. Argh~~ so close... Fortunately, I've also made myself a DIY drill press last week.. just that it's not completed yet, I'll still need to add compound table to it. Anyway, it helps a lot on sanding the bulkheads' slots wider. Here it is: There's actually a screw at the right which it to stop the drill at desirable position. To fix the slots, I used a HSS square router bit. It works well so far So, after like 45 minutes I've done them all, and I thought the bulkheads can now all fit... I was wrong... Now comes the problem that the slots on the keel are not wide enough too to fit the bulkheads... oh Corel... And then some issues commonly seen... So, after a whole long night of fixing and sanding.. I can finally put my decks and bulkheads on. This is how she looks like now. Anyway, they are not glued yet. Just sitting in place so that I can plan on my modification to be made. Cheers!!
-
Thanks for the tips, Peter I really love the color theme you added to your Unicorn, and the white waterline just made the model looks even better. Gonna 'steal' some of your ideas to my ship
-
yea.. I really love this kit I'd most probably remake the metal stern gallery parts by re-sculpting them.. they can be good references anyway
-
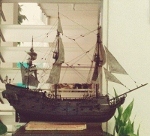
Greetings!!! After resting from ship modelling for 2 months, I am finally back! (Not a long time tough... ) I've been lucky enough to win this kit from an auction at a cheaper price right after my Race Horse, and it's in great condition. She arrived my door 2 weeks after that, and I've been studying the plans and instruction since then. Thanks to Ianmajor and Mike who had discussed about this ship earlier in other topic, so I can now plan for some modification on this ship. The wide waist of the Unicorn really makes this model a good ship to add more fittings on. Anyway, here's some quick peeks to the kit. Brief Introduction According to Corel Kit Historically, the frigate Unicorn has left as no tales of outstanding war feats or important enterprises, those which often mark the career of a man of-war so that be remembered even after his disappearance. All we know is that this ship has been designed by F.H. af Chapman for H.M.S Fleet in 1700s. On the other hand we have many accurate data regarding its construction. In fact, Chapman, member of the Swedish Royal Academy of Sciences in his admirable volume "Architectura Navalis Mercatoria" printed in Stockholm in 1768, gives an extremely detailed account of the calculation relating to the design of the ship and not only the constructional ones, but also those relating to the study hydrodynamic-resistances. All this together with a most beautiful drawing of the frigate, which have used to develop this model. The results of Chapman hydrodynamic investigation are clearly visible in the lines of the hull which are quite advanced for the epoch in which the ship has been built. So... In conclusion, even Corel doesn't really understand much about the ship! You can try search through the internet or wikipedia, and you will find there were around 6 Unicorns between 17th to 18th Century!! LOL!! Here's the link. Anyway, I do agree with Ianmajor that this HMS Unicorn is the one as mentioned in wikipedia which serviced from year 1747 to 1771. "... the Unicorn having a beakhead bow, a unicorn figurehead , two-light quarter galleries and only five pairs of quarterdeck gunports... " This line describes real close to the ship Check here if you're interested to know However, whether it's historical accurate or not, I'm gonna kit bash it Time to unbox!! The instruction plans of Corel is a bit... err... mehh... The font used is too small... might need magnifying glass (just pretend the sunglasses as magnifying glass ) Anyway, the picture instruction are good Excellent wood quality Some well cut strips.. Same goes to dowels Shiny figure head Terrible capstan... Despite the excellent quality of the wood strips and dowels, some fittings are badly shaped.. This is one example. Smaller blocks and gratings are to be trashed too I love this!!! Even the cannons are already blackened! And the stern gallery... hmm I don't blame the manufacturers for this, there's no way they can provide their customers well carved galleries.. planning to remake them. It's challenging, but learn a new skill.. y not? I'm overall satisfy with this kit. at least the wood quality is much better than Sergal ones.. oh ya, the ship cradle is included too! I've just done putting on the bulkheads, but haven't taken pictures.. Will upload them soon! Cheers!
-
very detail works.. i love the sand buckets
-
they are real neat, Mark.. Well done!
-
nice work on the block rigging.. they look very neat!
-
well done on the treenail, Jason! the hull looks so much nicer now
-
Ian, this is one most detail model stove ever made!! you shd take part in World Genius Record!!! brilliant work!!
-
glad to see you start a buildlog.. Royal Caroline is a pretty model to build It's a good start, and I love the rabbet line u added yourself
-
wow! the hot can is a great idea!!! and the result is awesome too!! thanks for sharing it!!
-
nice painting job on the stern gallery!
-
Impressive ratlines!!! really neat and clean!
-
oh man.. it's a paradise!!! I wish one day I could travel there! Thanks for the nice pictures!
