HOLIDAY DONATION DRIVE - SUPPORT MSW - DO YOUR PART TO KEEP THIS GREAT FORUM GOING! (Only 69 donations so far out of 49,000 members - Can we at least get 100? C'mon guys!)
×


BANYAN
-
Posts
5,946 -
Joined
-
Last visited
Content Type
Profiles
Forums
Gallery
Events
Everything posted by BANYAN
-
 Just an exercise sent to try your patience mate I am assuming (sorry no real other option of word) it is easier for you to cutaway and extend/fill-in other bits of the decking after plugging the hole a bit, than it is to remodel the superstructure? Which is more correct to the scale/actual size of the ship? Good luck but I know you'll be able to salvage the situation. cheers Pat
 -
Hi Mikie, One way is to mark the small line for the slot, dimple the start point for several drill holes (to stop the bit wandering) and drill out a series of small holes along the line with the appropriately sized micro-drill bit - ensure one hole is at the near top and bottom of the slot. use a sharp blade to score the edge of the slot and cut out the waste; finish with a small file. If you have a mill this can be a lot easier - just ensure you set up the piece in the vice/holding jig on the sliding table accurately. That's how I did mine (at scale 1:60). cheers Pat
-
Very nice work - great detail. It's a pity the customer took the lion before you completed it but I do look forward to your next effort. cheers Pat
-
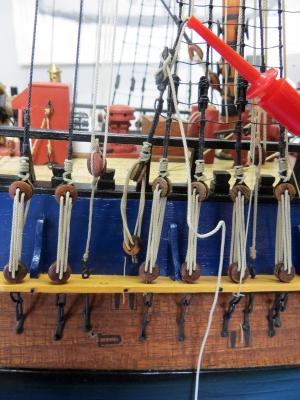
Thanks John, Chris and Mark - glad I was able to recover it. Looking at the photos though show how uneven the line of the deadeyes are - not very seaman like - they actually don't look as bad in reality.
- 517 replies
-
- 1
-

-
- Endeavour
- Artesania Latina
- (and 1 more)
-
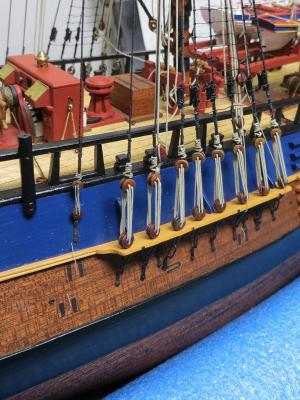
While waiting for paint to dry , I tried a bit of puddening to see how it would look cheers Pat

- 517 replies
-
- 9
-
-
- Endeavour
- Artesania Latina
- (and 1 more)
-
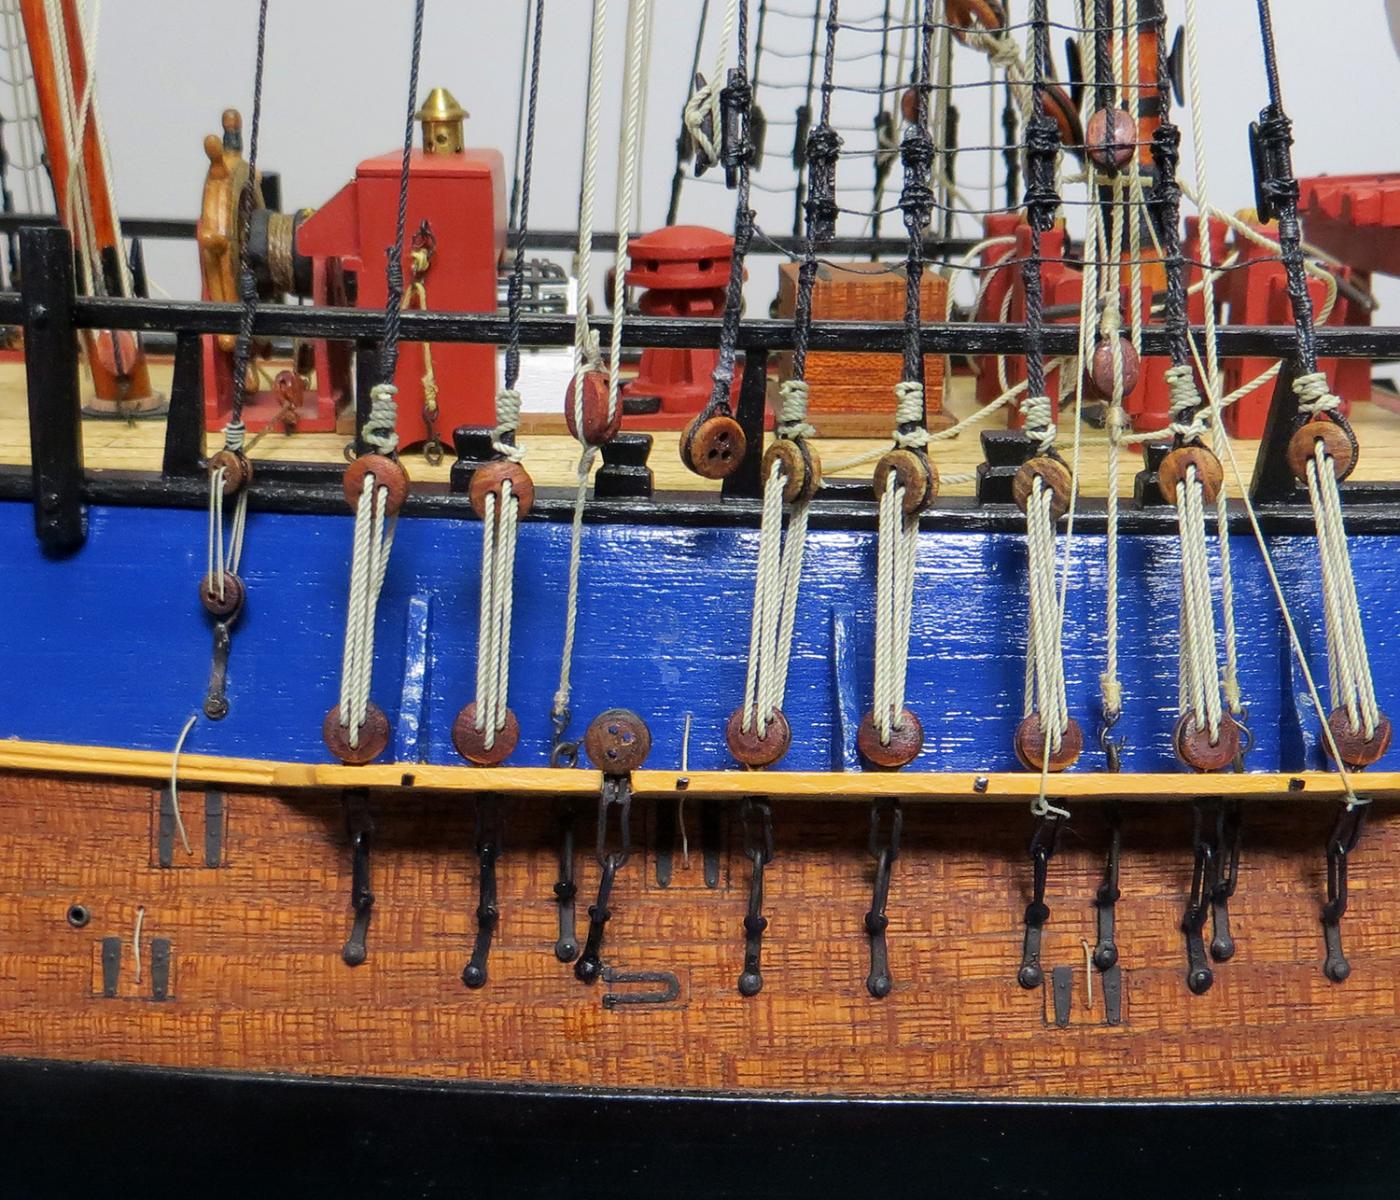
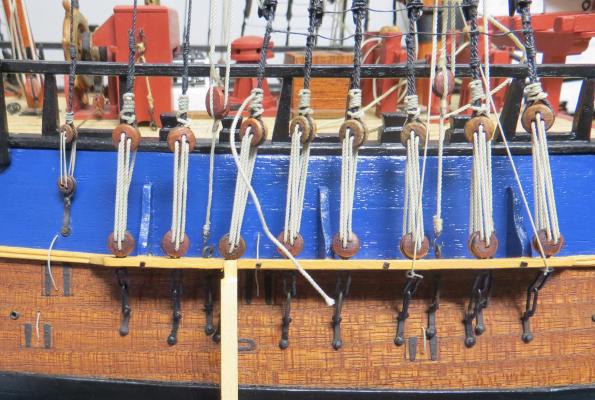
OK folks, repairs completed. I decided to simply reslot the channel as the boat boom (when fitted later) will mask any obvious repair marks. The following photos show most of the process. I temporarily pinned the affected shroud to keep it clear and prevent any slackening of the ratlines etc. I then removed the chain plate, slotted the channel capping in preparation for the repaired chain plate, cleaned up the fitting and resoldered the padeye ring to the chains, then refitted the assembly. I used a scrap piece of wood to create the 'plug' in the channel capping then rerove a new lanyard and touched up with paint. One of the benefits of painting is that it can hide these joints What do you think? Cheers Pat

- 517 replies
-
- 11
-
-
- Endeavour
- Artesania Latina
- (and 1 more)
-
i again Paul, I have found the lathe invaluable, not just for the jobs you have already identified, but also for creating profiles/mouldings, canon carriages, ship's wheel etc. I have found the Sherline an excellent tool - quality + Sorry mate, wasn't trying to infer that you didn't know it was expensive, just pointing out that for a small job such as the mice/buoys it might not have been value for money. PM me if you need further info. I think it is worth considering if you have some spare pocket money ) cheers Pat
- 517 replies
-
- 2
-
-
- Endeavour
- Artesania Latina
- (and 1 more)
-
What a boon that laser cutter is Mark; the new piece is such a dramatic improvement. Now, can you loan it to me to remove (cut away) the capping from my midship channel cheers Pat
-
Happy birthday mate; have a few coldies and a good lie down cheers Pat
-
Thanks Mark, I am still debating whether to take the full length of the capping off the channel or just cut a slot and replace it after repairing the chain plate, and using the boat boom (when fitted later) to assist in masking the joints. I am worried that in attempting to remove the full length of capping that I may cause even further damage and with all the rigging on the mast near complete, that would be a tremendous setback. cheers Pat
- 517 replies
-
- 3
-
-
- Endeavour
- Artesania Latina
- (and 1 more)
-
No worries Greg Hi Paul, Greg is right - I only used the lathe as I had it - a (grown up) file or even sanding stick (with appropriate grits) will work equally as well (just take much longer). The lathe I use is not a cheap solution as I have a Sherline (metric version with extended bed) and I used the compound sliding plate/rail. Sherline is not cheap but you get what you pay for. A cheaper mill will work for you but you need to do a lot more tuning and refining to it, and the accessories can be equally as costly in many cases. cheers Pat
- 517 replies
-
- 2
-
-
- Endeavour
- Artesania Latina
- (and 1 more)
-
Well worth the effort Danny, a beautiful piece of joinery that compliments the build very nicely! cheers Pat
-
That is some very nice planking mate with near perfect symmetry - she will look great with the planking completed. cheers Pat
-
You're progressing well Chris - how're the pool noodles working out for you cheers Pat
-
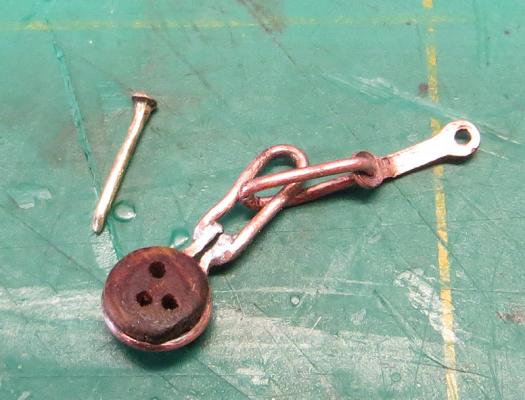
Hi all and thanks for looking in. The chain plate issue was caused by me putting too much lateral force (twisting) rather than longitudinal failure. I was trying to tie off a tackle running end on a shroud cleat and must have twisted the chain plate too much in trying to access it. the plate failed where I had soldered the deadeye ring to the chain part of the plate (a photo will follow) Anyways, still trying to determine the best fix. cheers Pat
- 517 replies
-
- 3
-
-
- Endeavour
- Artesania Latina
- (and 1 more)
-
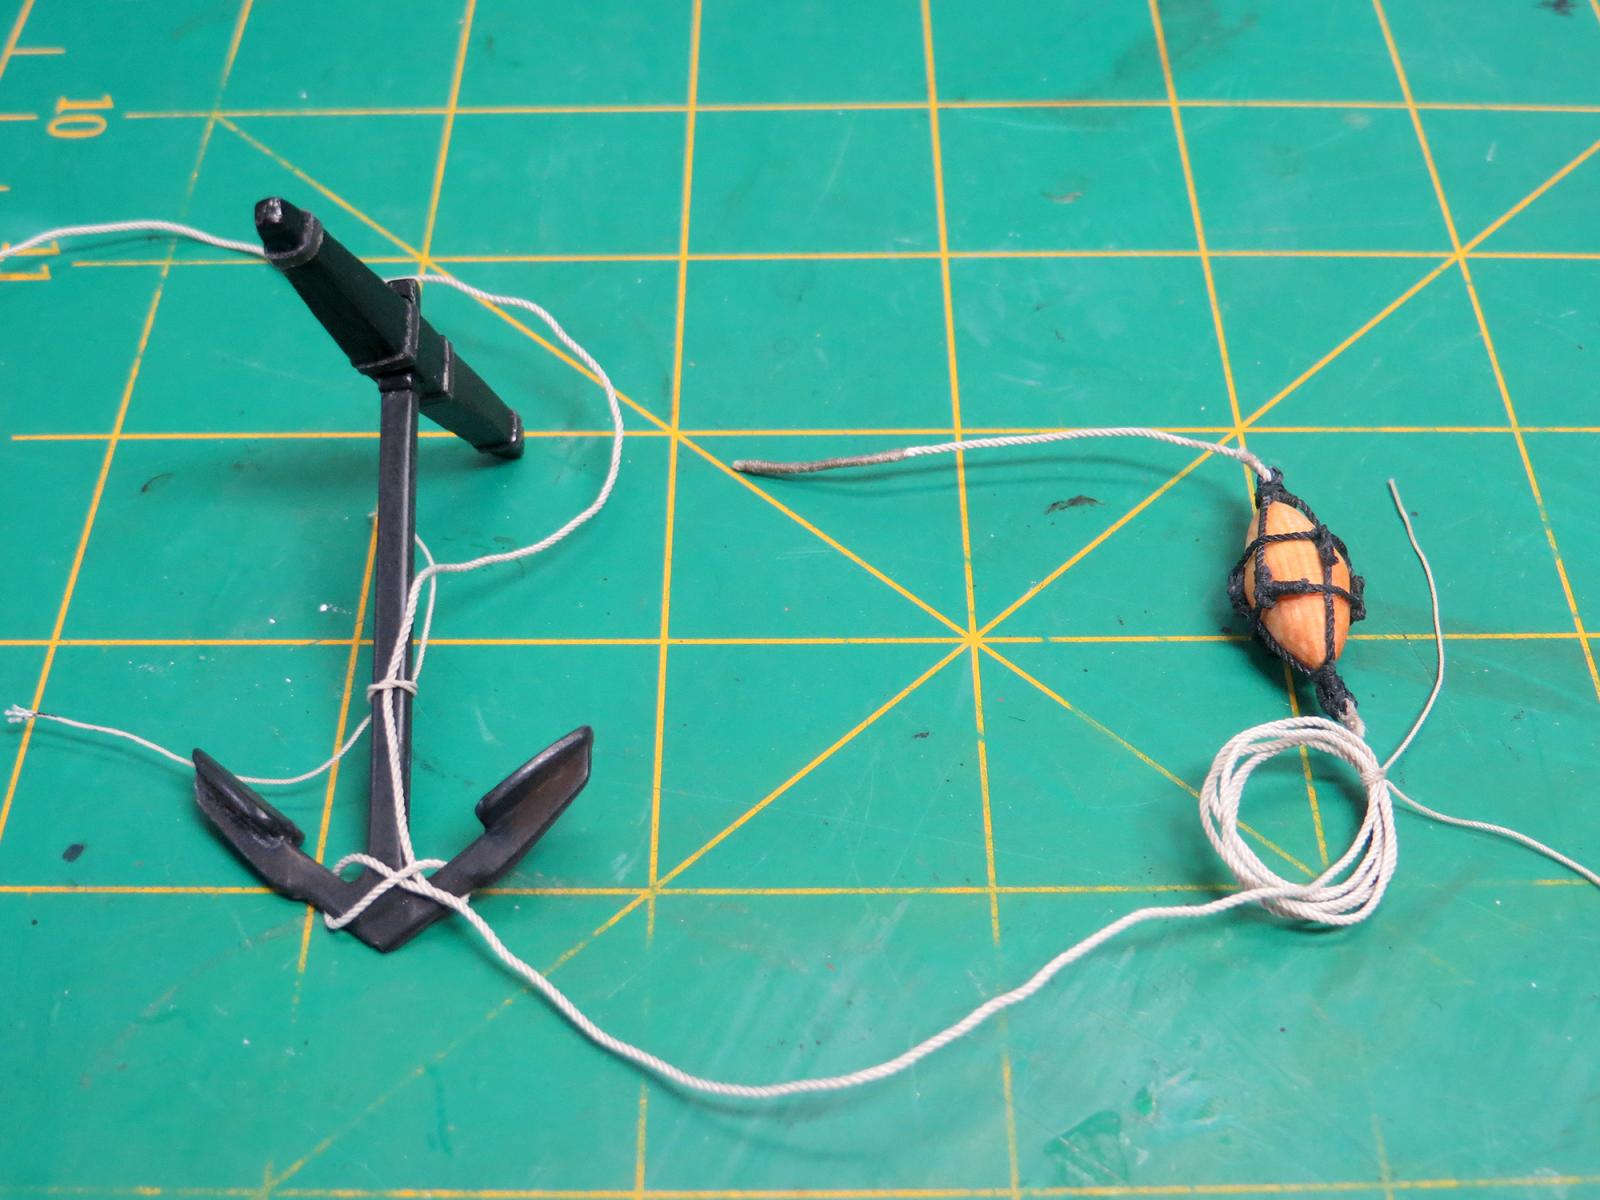
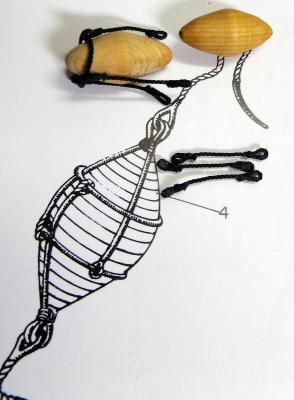
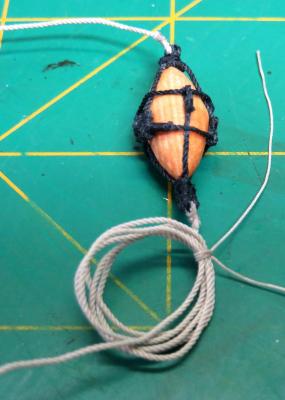
Some further progress on the nun (anchor) buoys, with one complete. Not really happy with it, but at this scale 1:60) it is only15mm (core) so I can live with it - next one should be better. That said, still a bit unhappy with the gap due one slightly too long sling leg. I also made one of the ring ropes to large in circumference and it sits a little low. One small disaster today (photos in a couple of days) with one of the chain plates giving way. I need to remove the leading edge /cap of the channel, remove the deadeye lanyard, repair the solder joint and reassemble - one for Danny's boo-boo forum I think Anyway here is the completed nun-buoy - I left the wood natural to simulate a cork core. cheers Pat

- 517 replies
-
- 10
-
-
- Endeavour
- Artesania Latina
- (and 1 more)
-
This is an interesting article/discussion Dave which I had seen earlier. i decided to stay with Marquardt as he put a reasobale arguement for his case. cheers Pat [Edit: It's interesting that even for a well documented ship that there is still so much conjecture ]
-
Good start mate - keep a good eye on the bow to ensure the planking runs are parallel/same heigh, it is surprising how easy this gets uneven when starting to spile etc. cheers Pat
-
Coming along very nicely Keith. Enjoy the holiday mate, I'll pass on your 'apologies' at our next meeting. cheers Pat
-
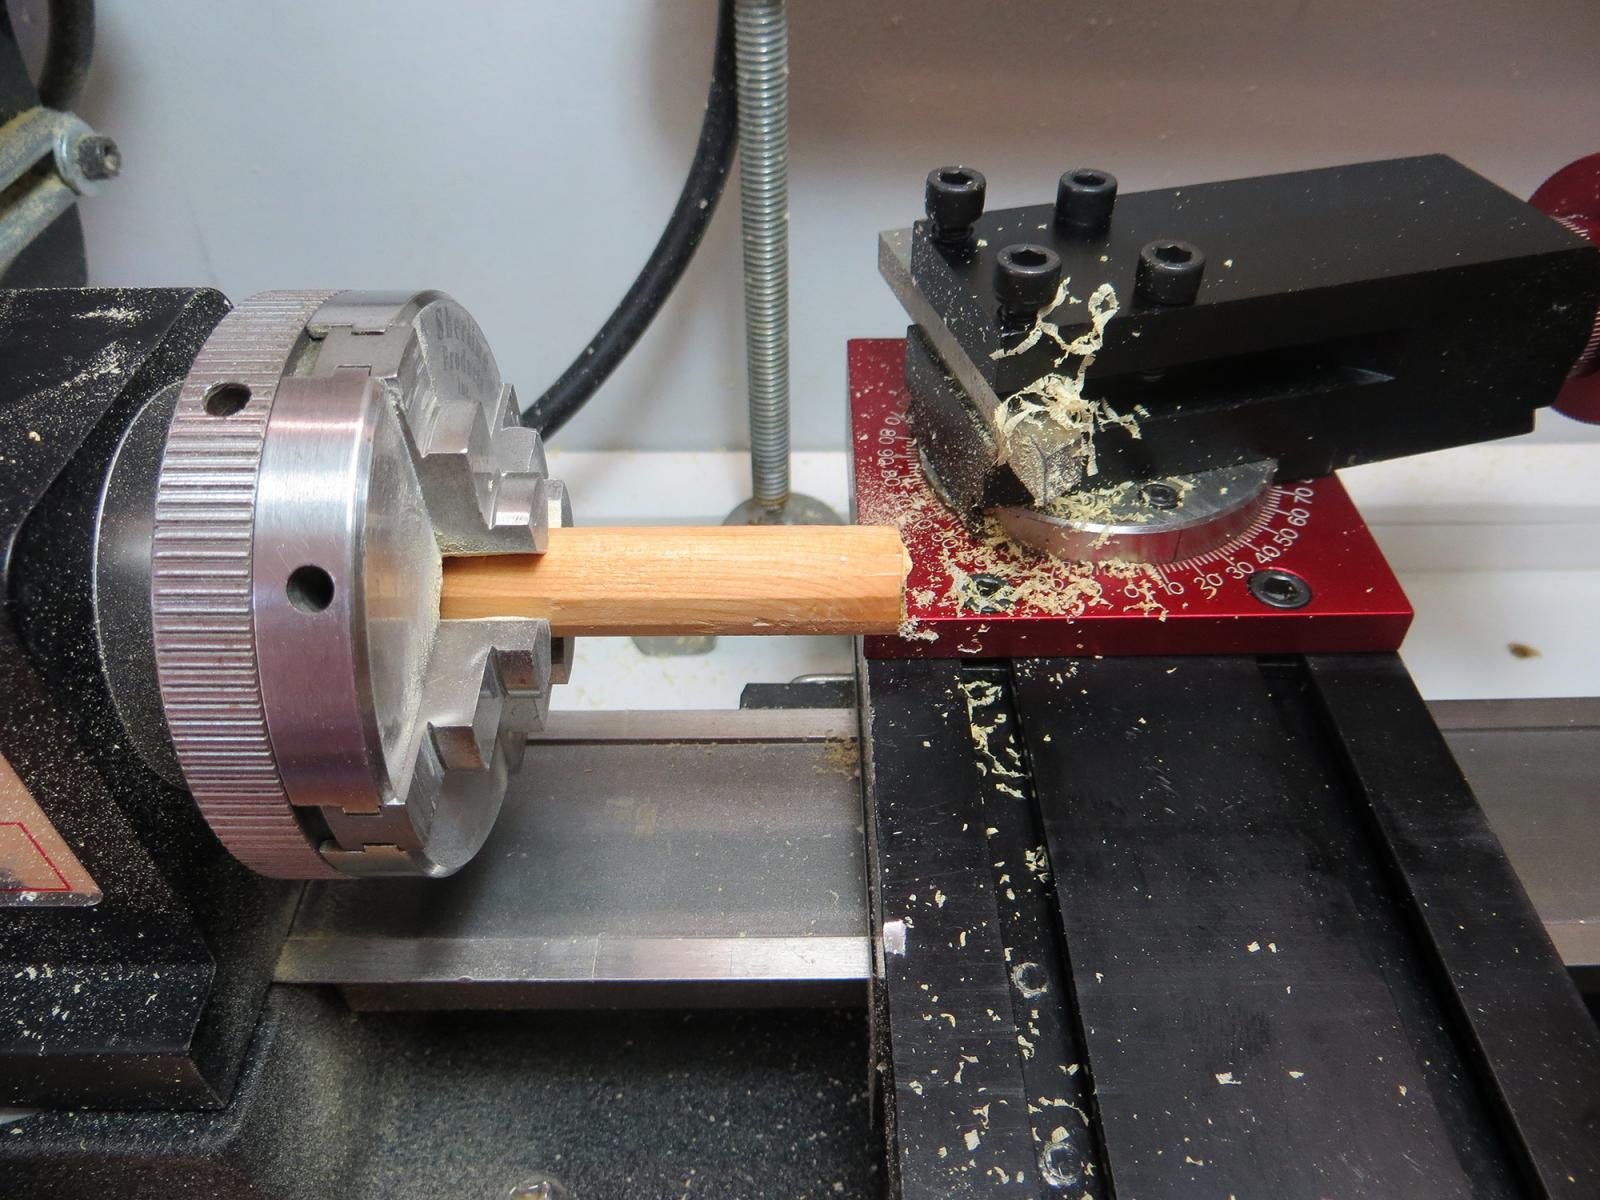
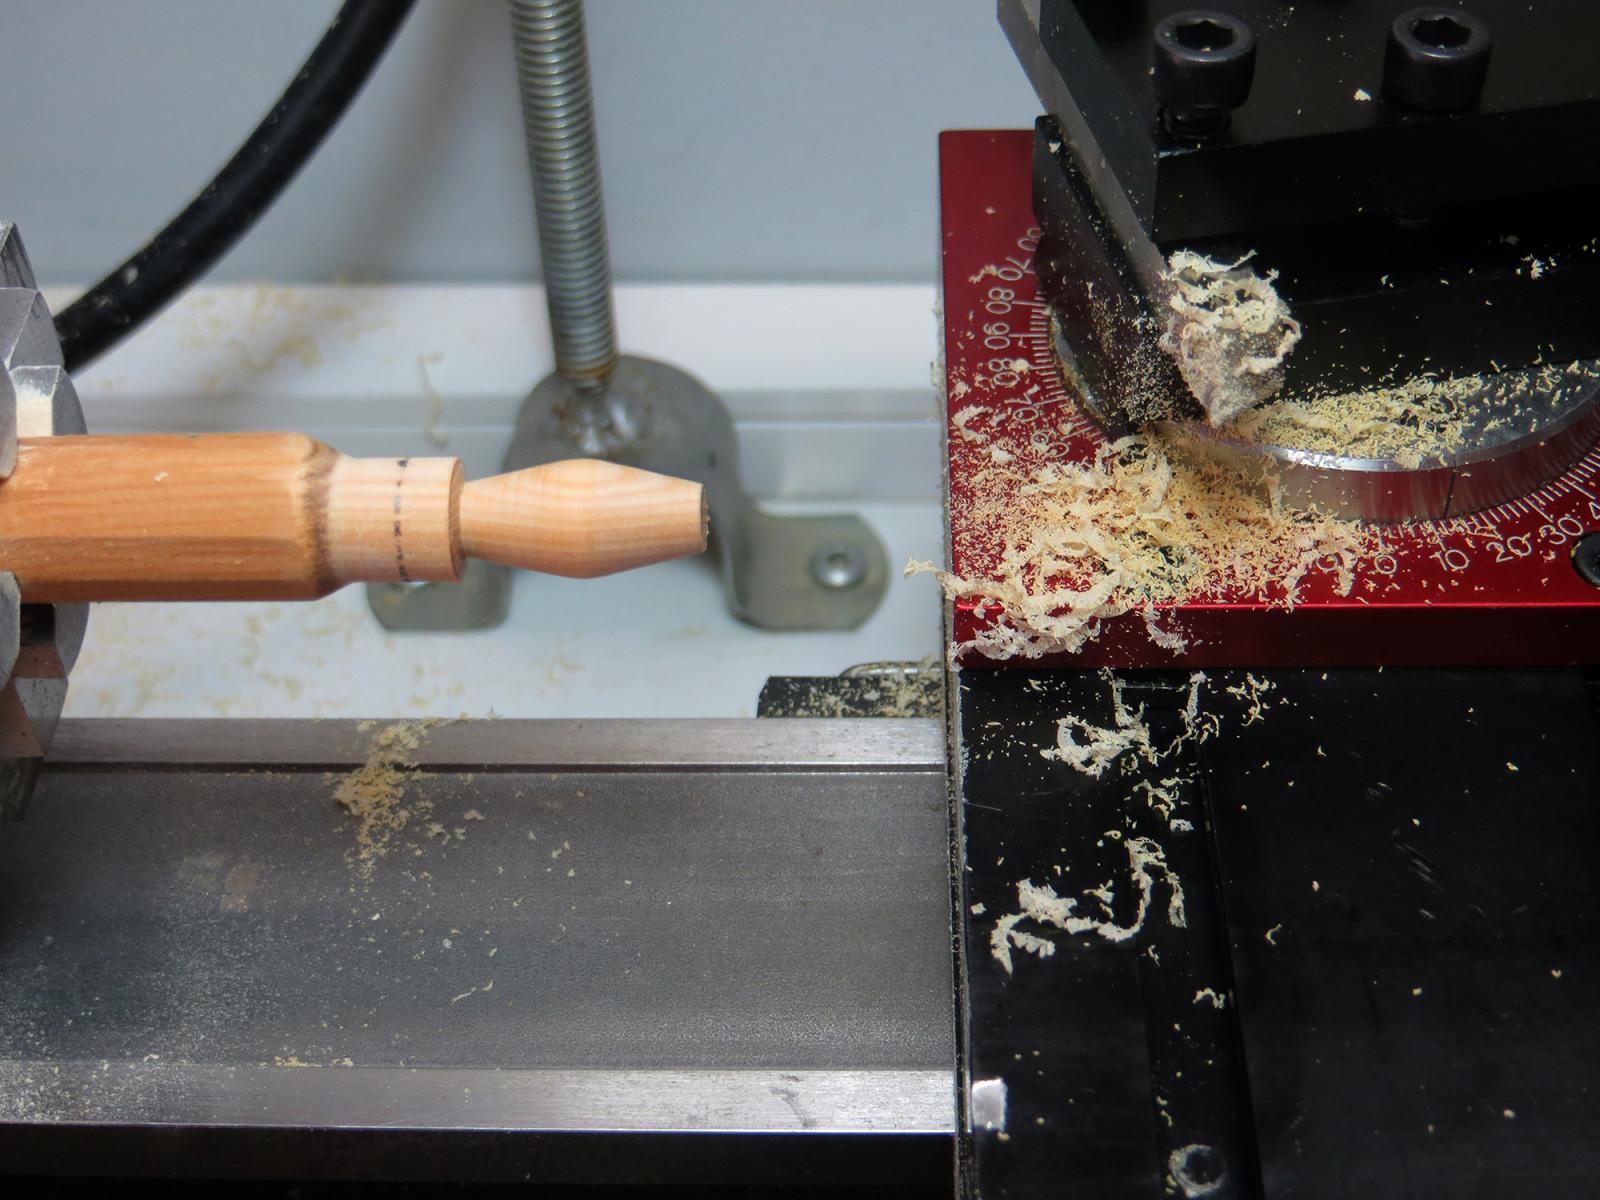
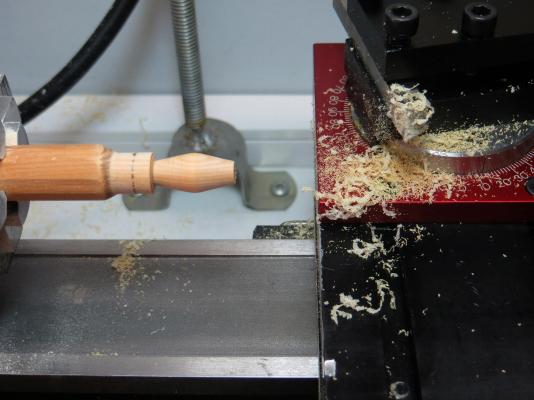
I have also started on the next small job - anchor buoys The stock is some left over material from my masts, which I have turned to 9mm then shaped using a compound slide mounted on the y axis plate of my mill. Some worke still needed to finalise the final shape. cheers Pat

- 517 replies
-
- 7
-
-
- Endeavour
- Artesania Latina
- (and 1 more)
-
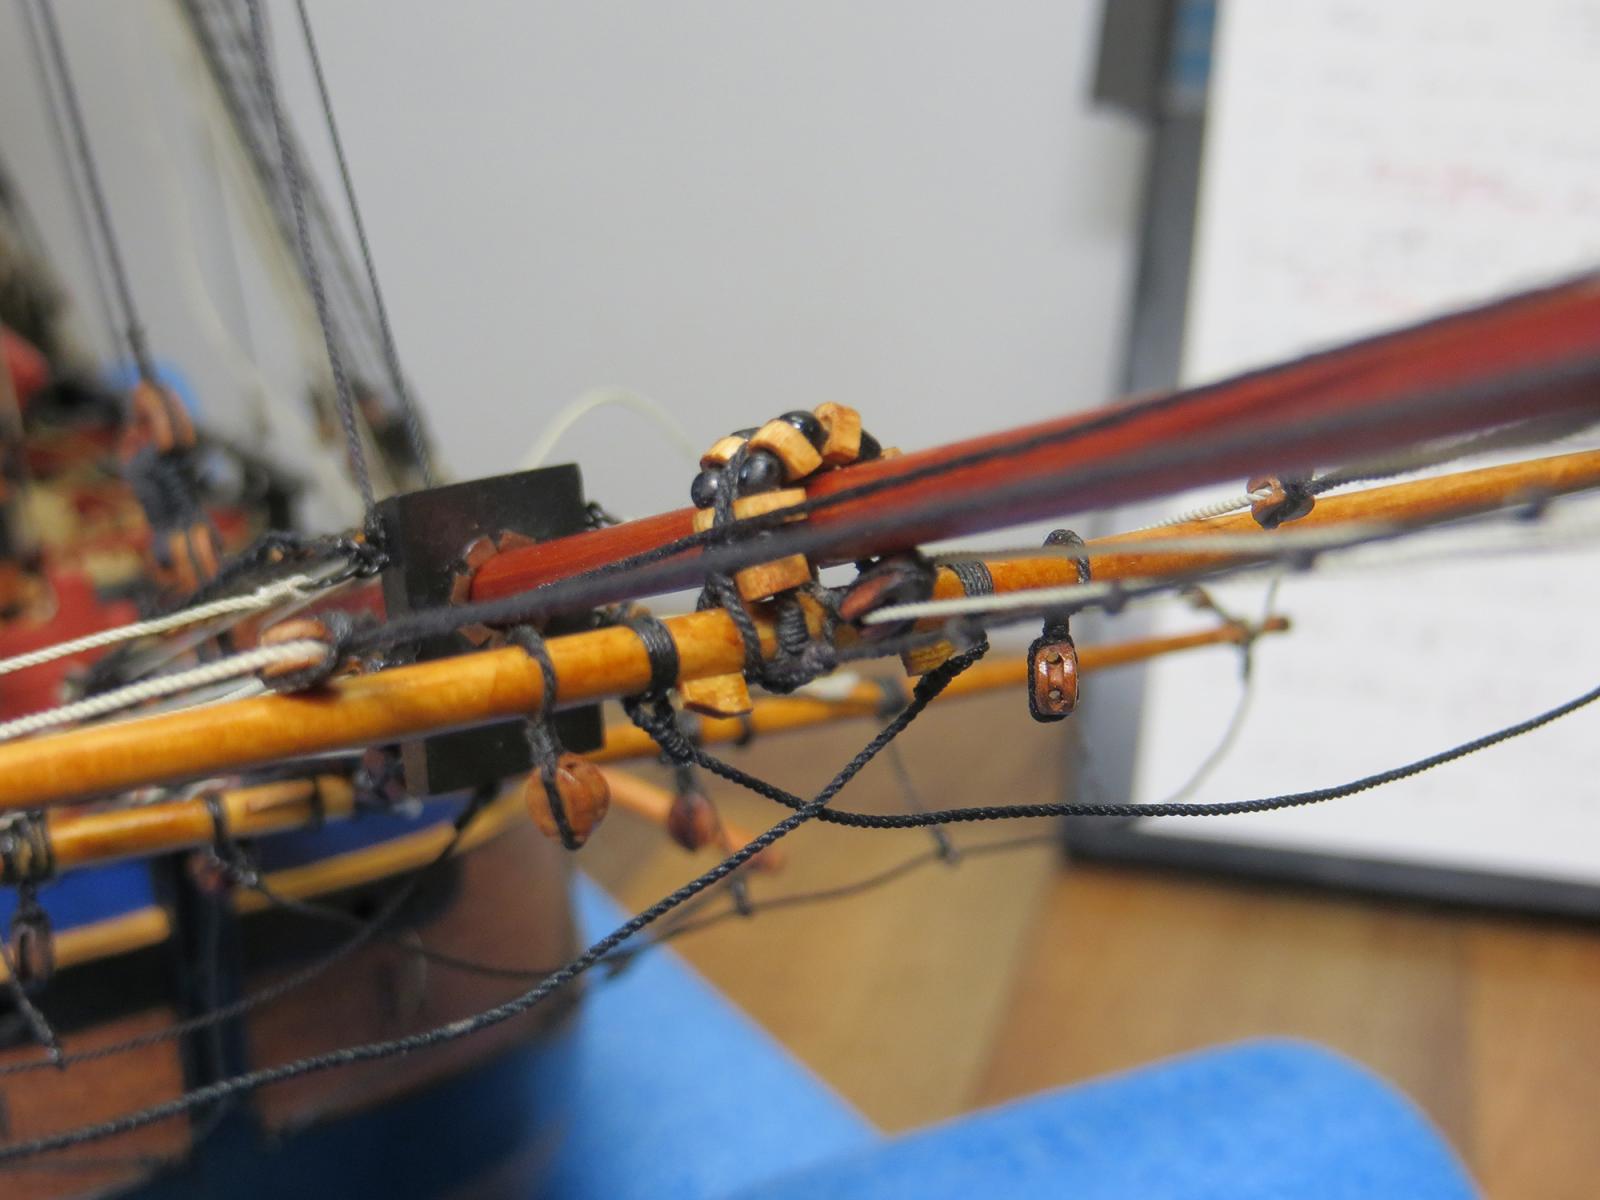
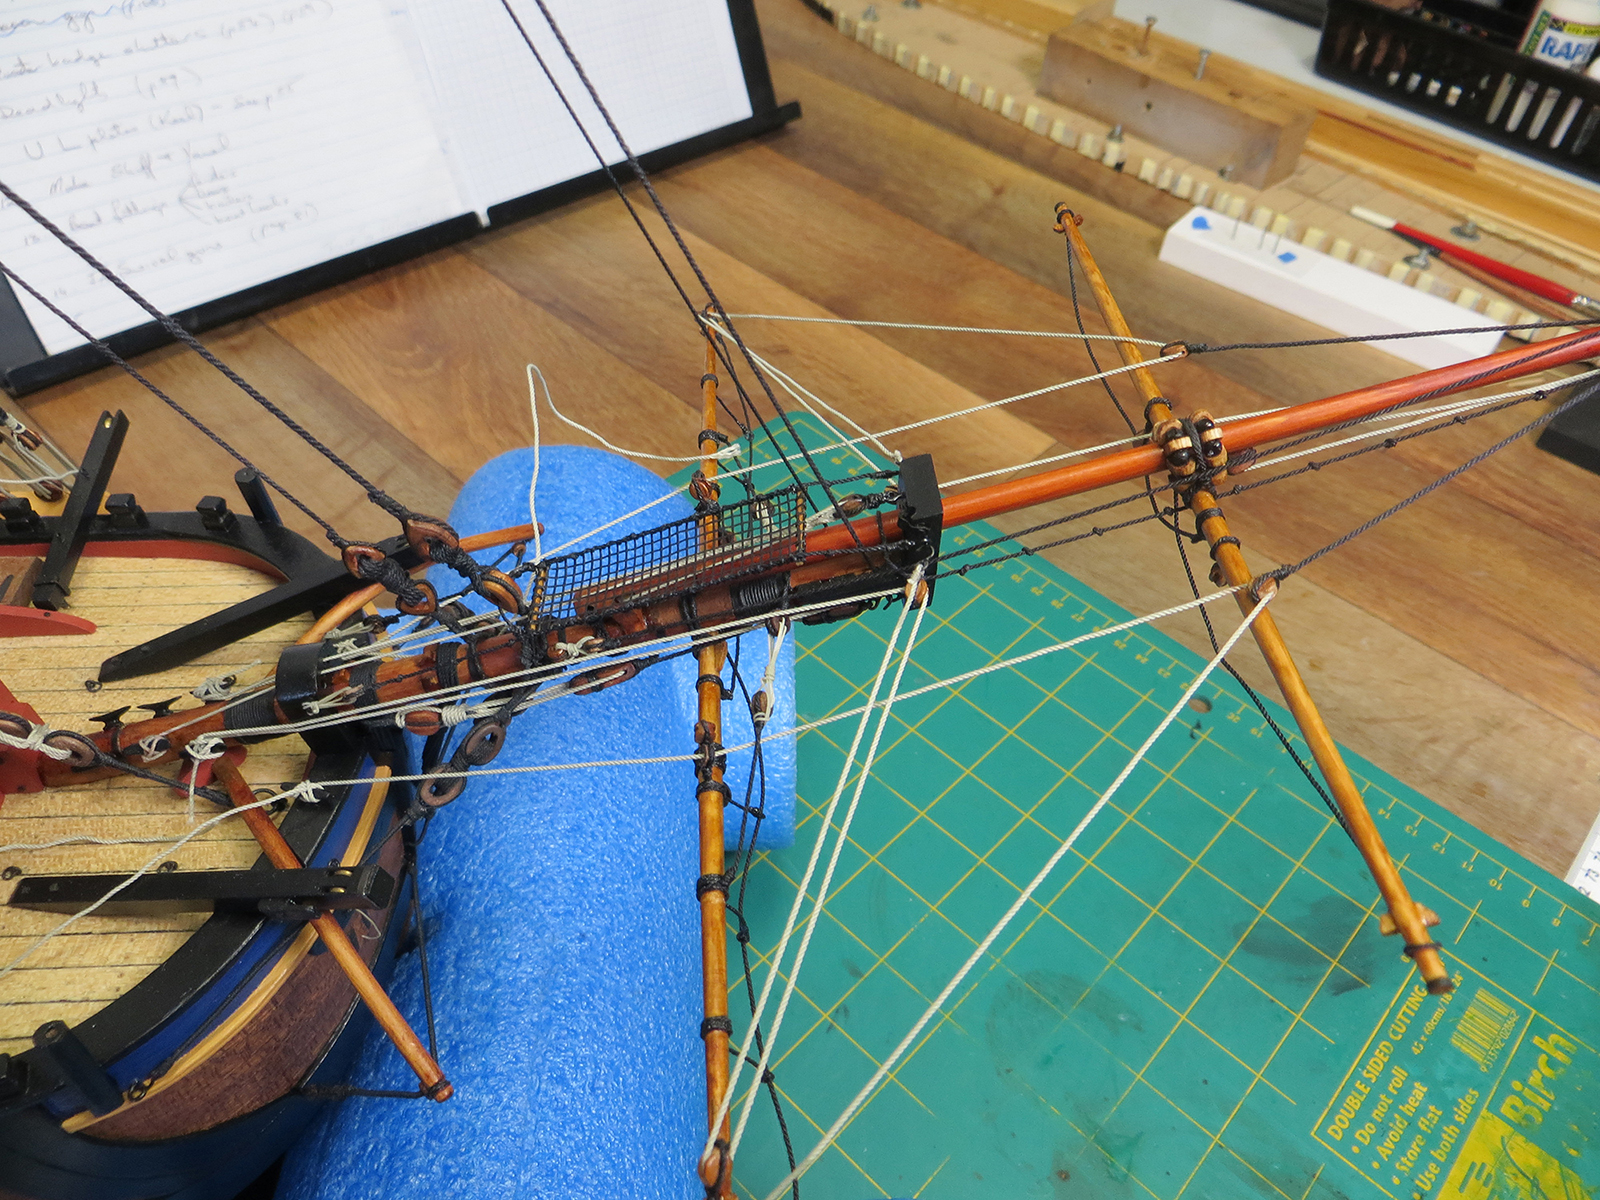
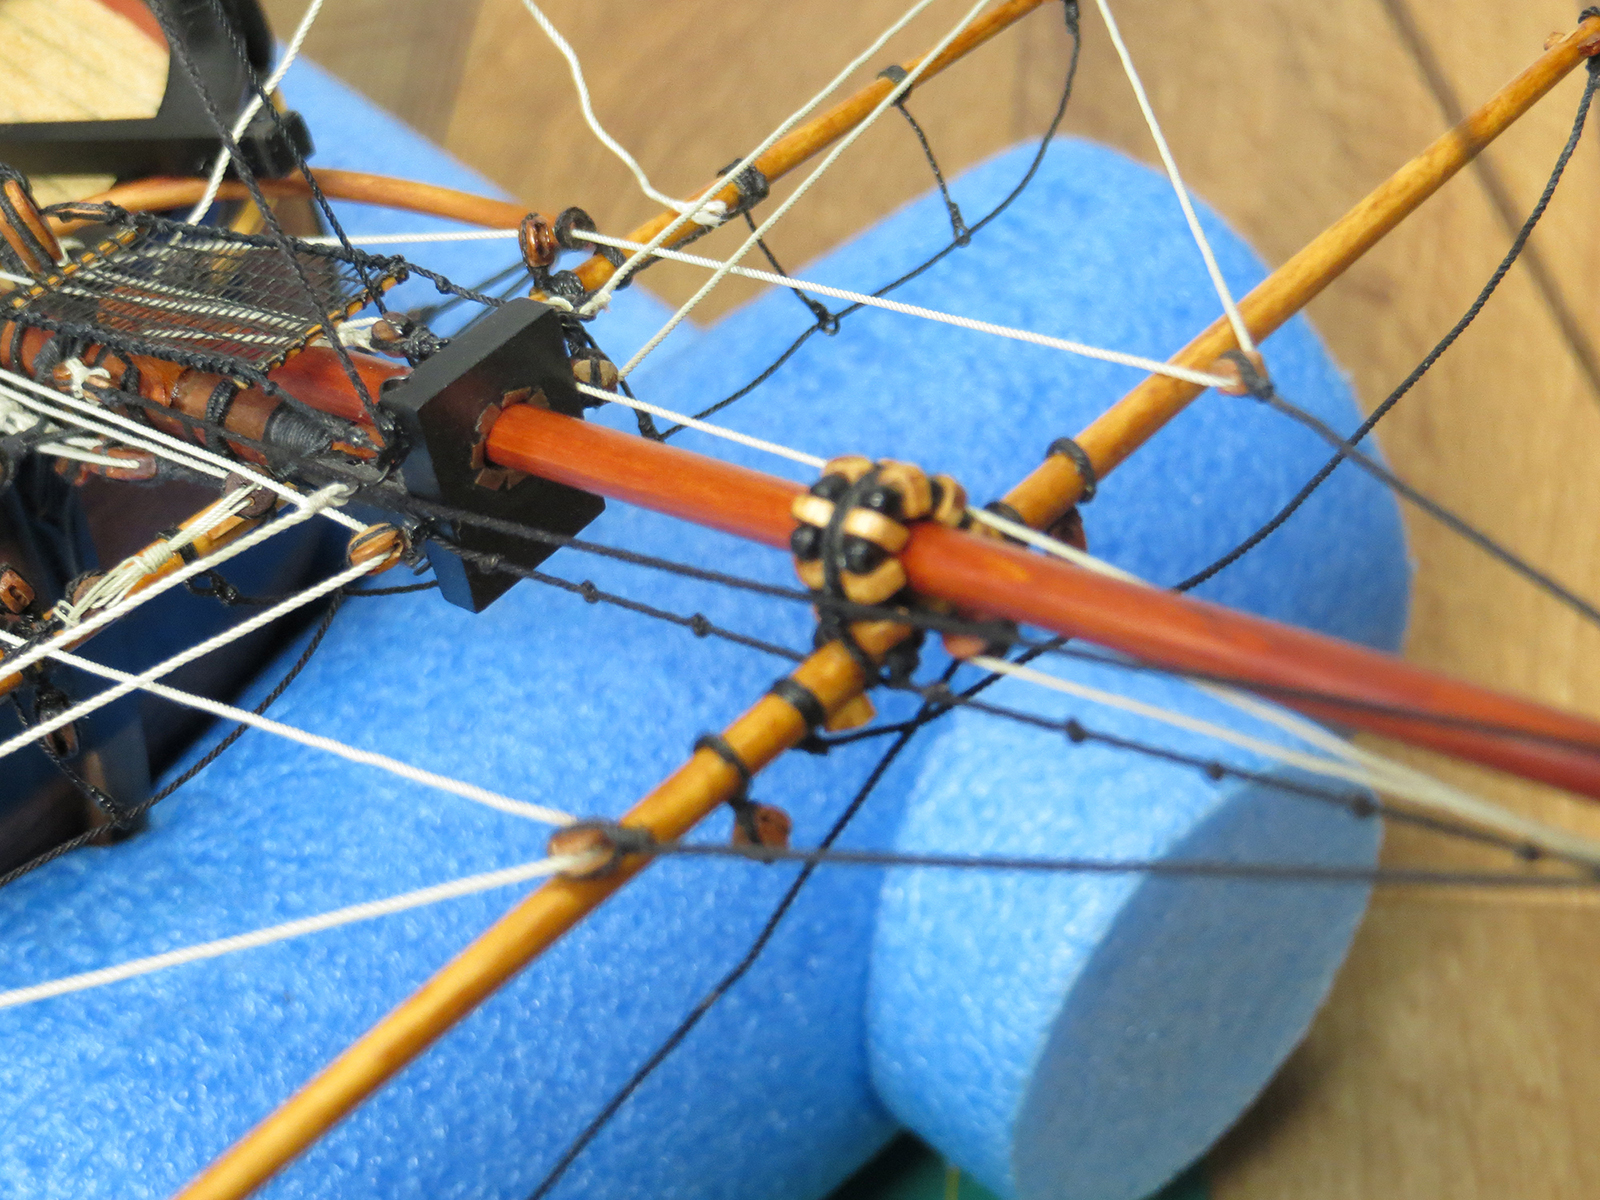
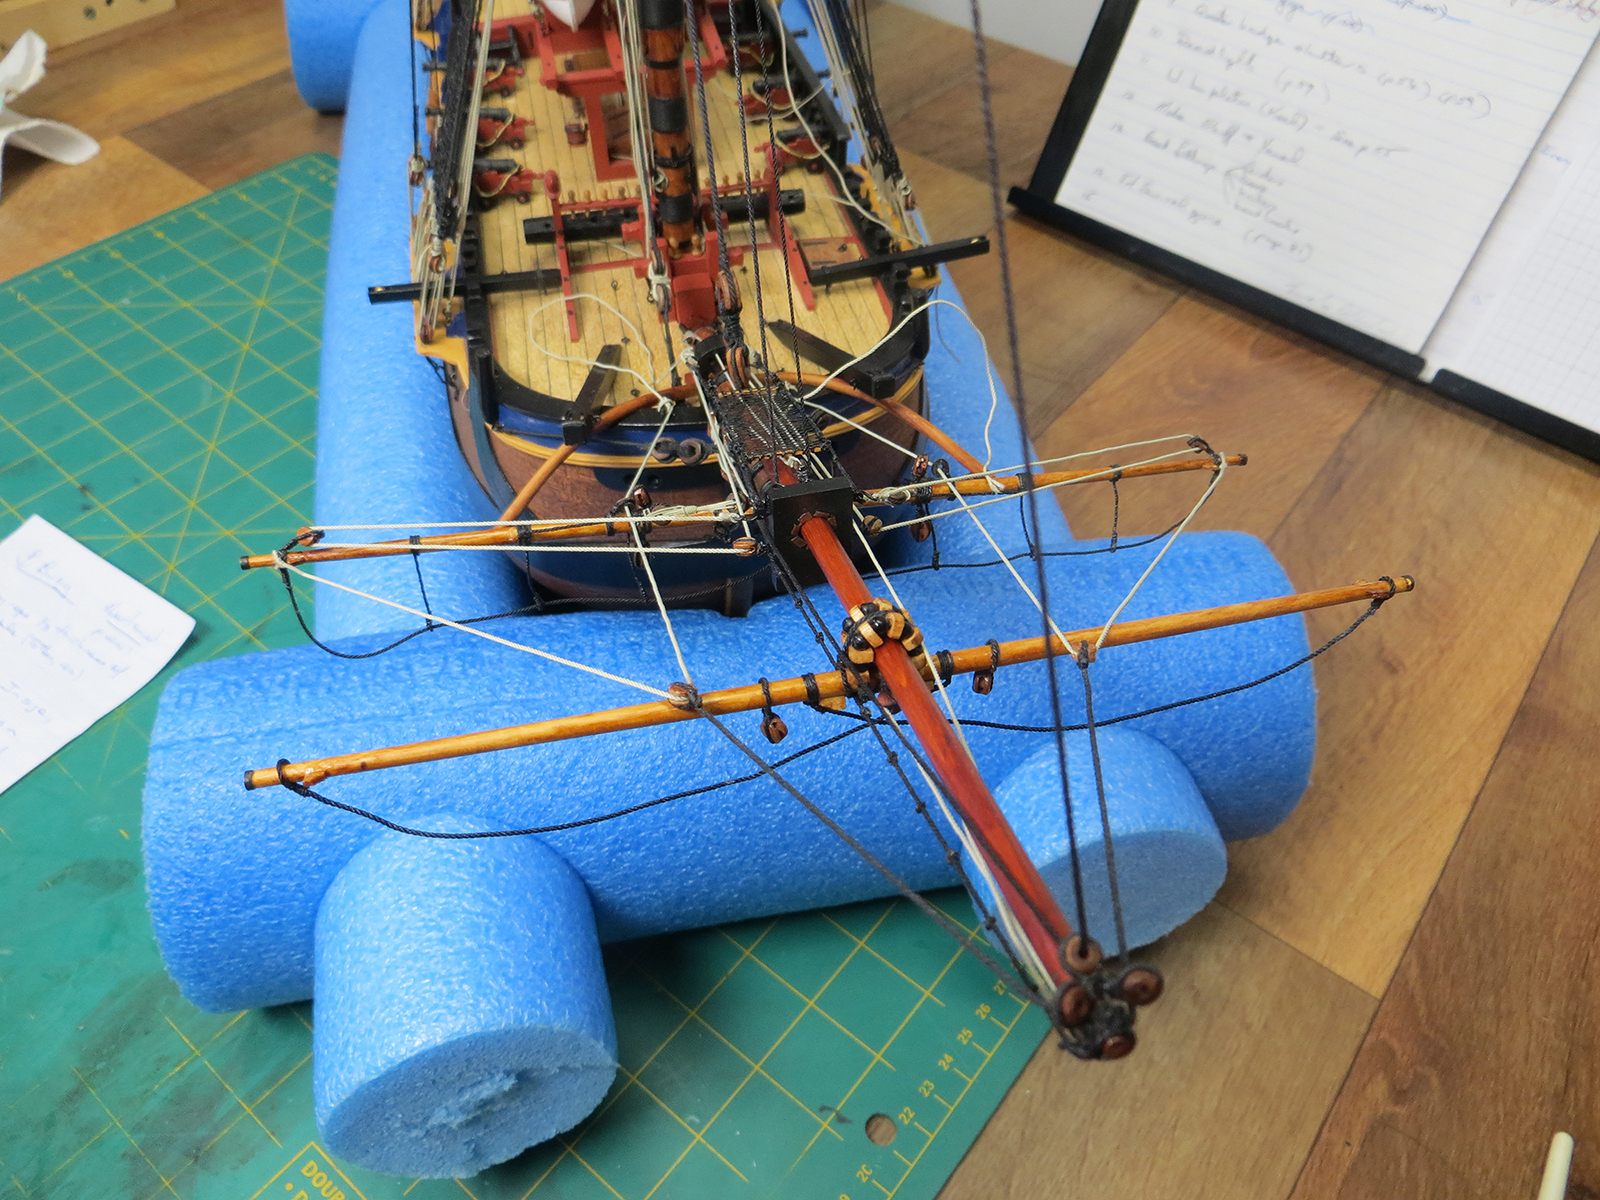
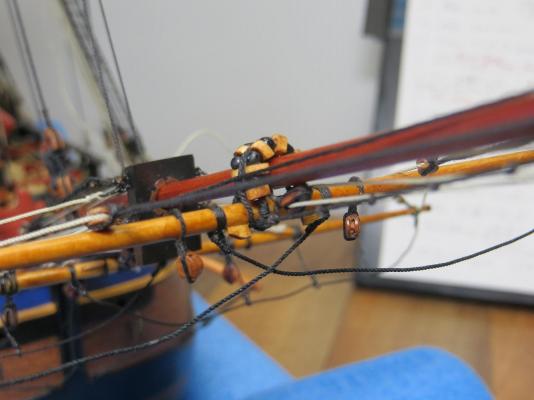
Another small update. the spritsail topsail yard is now fitted and some rigging advanced. The colour of the yards will mature to the darker colour in time but the photos show this much redder than they actually are - in reality they are more brown. cheers Pat


- 517 replies
-
- 7
-
-
- Endeavour
- Artesania Latina
- (and 1 more)
-
Hi again all, Following up on the above discussion, I found a reference (Marquardt) that suggests that the length of the ensign staff above the taffrail is 1/3 the height of the Main Mast (Endeavour = 24yds 4 "). This is 868" or 22047mm. That would make the ensign staff length above the taffrail = 122.48mm at scale 1:60. Using the rule of thumb suggested by Druxey is the hoist appears to be about 2/3 this length, then this would translate to 80.65mm length of hoist for the Ensign. Therefore ,the Ensign at scale 1:60 would be (at 3:5) 80.65 hoist x 134.42 fly. Can anyone find any error in this calculation? Marquardt did not cite his source for earlier 'rule' but I will continue to research. cheers Pat
-
Enjoy the break - you may still be waiting on the US stuff when you get back - I have to agree it is painfully slow and very expensive to boot! cheers Pat
-
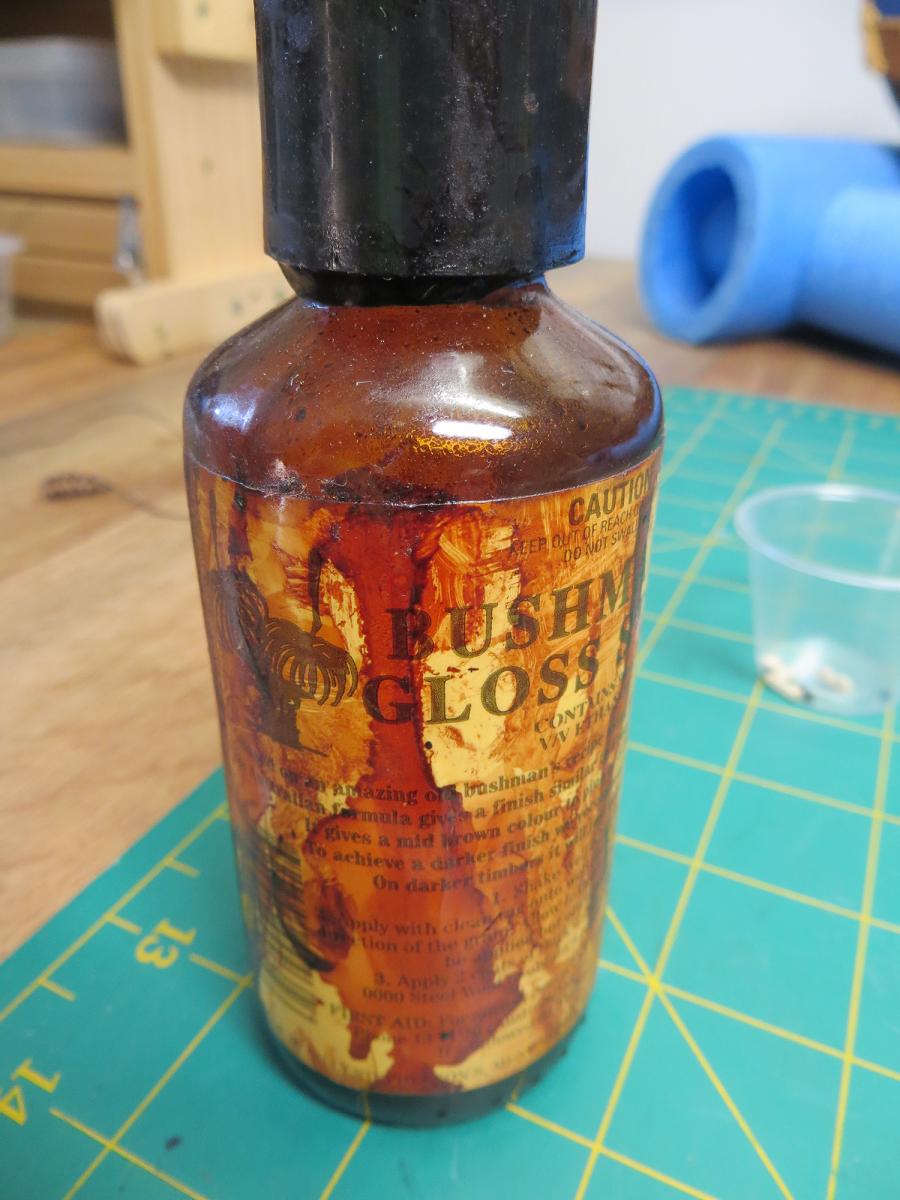
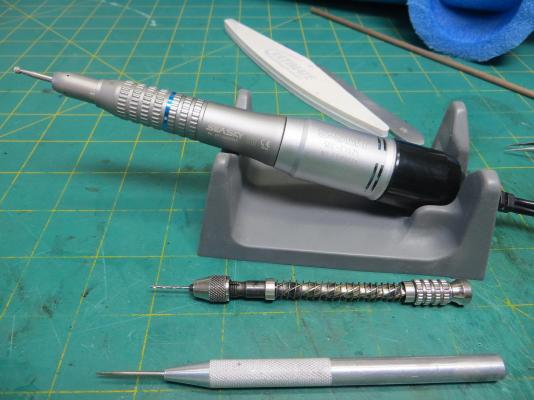
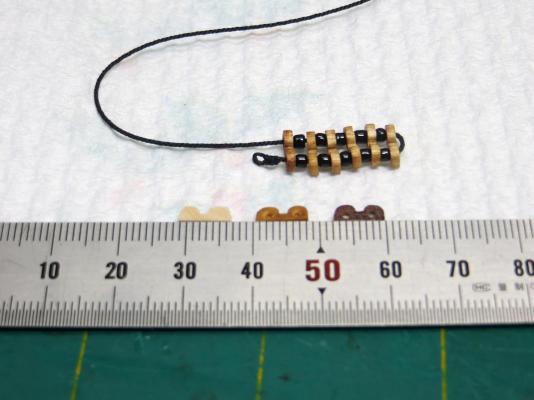
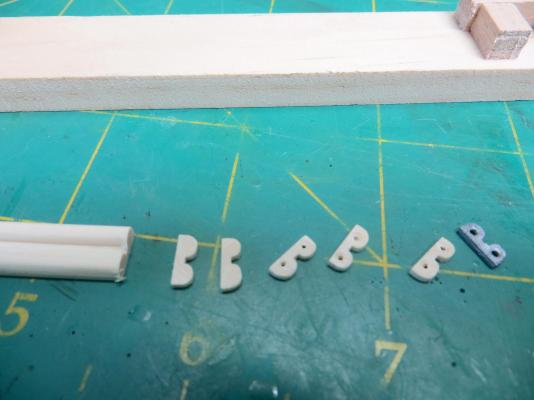
Hi folks, an update on the parrels. I have not been able to source new beads yet but I have remade the parrels from privet (I had a nice heart piece that worked much the same as boxwood - Thanks Jim Lad). I had not mentioned earlier that the base shape was created by thicknessing stock to suitable size, then using my mill with a round over cutter down the middle and on both edges to create the profile. These were then sliced off and cleaned up with small files and sanding sticks. I stained them with an Aussie product (a stain made by bushies in the outback when they had nothing else which imparts a nice colour as it ages). The photos below also show the different items used to create the holes including a dental micro-motor with ball head which created a much neater dimple than the hand tools I used previously. The finsished parrels look OK and if I do not find bigger beads in time I think I can live with these. The finished product phot also shows a privet parrel (raw and stained) compared to the red gum version. cheers Pat

- 517 replies
-
- 12
-
-
- Endeavour
- Artesania Latina
- (and 1 more)