BANYAN
-
Posts
5,966 -
Joined
-
Last visited
Content Type
Profiles
Forums
Gallery
Events
Everything posted by BANYAN
-
 You too mate - 2016 will have to be better - now retired cheers Pat
- 517 replies
-
- 2
-

-
- Endeavour
- Artesania Latina
- (and 1 more)
-
So what was this about blemish lines - can't see them standing up this way Looks great Mark! cheers Pat
-
Thanks Popeye, ditto. I also hope you and your family had a great festive season and have much to look forward to in 2016. cheers Pat
- 517 replies
-
- 3
-
-
- Endeavour
- Artesania Latina
- (and 1 more)
-
Great progress Greg - looking very good indeed. At this pace you'll be finished by NYD cheers Pat
-
Coming along rapidly and looking great Danny; must be a bit of a doddle after the full shiop model? cheers Pat
-
Thanks again to all those whom have looked in and "liked' - appreciate you dropping by. Hi Per great to see you drop in; thanks for your very positive comments. The AOTS has been very helpful with this build. It's going to be a very hot summer this year; lucky for us a cooler Christmas as we have some major bushfires just down the road from us on the "Great Ocean Road" with some 120 properties/homes lost already; the cooler weather had allowed the firefighters a little respite to try and control it. Warming up again later this week - we have already had a couple of days in the 4o+ Cel. range - good excuse for a couple of 'frosties' (beers) cheers Pat
- 517 replies
-
- 6
-
-
- Endeavour
- Artesania Latina
- (and 1 more)
-
Nice work on the stern Mark; ditto John's remarks. We tend to be harder on ourselves than others and mostly the small issues you identify are only visible under harsh (bright) light and close-up photography - the real thing was probably a lot rougher to the eye than you have produced. cheers Pat
-
Thanks for looking in folks and the comments Mark and John - appreciate the interest and encouragement. cheers Pat
- 517 replies
-
- 2
-
-
- Endeavour
- Artesania Latina
- (and 1 more)
-
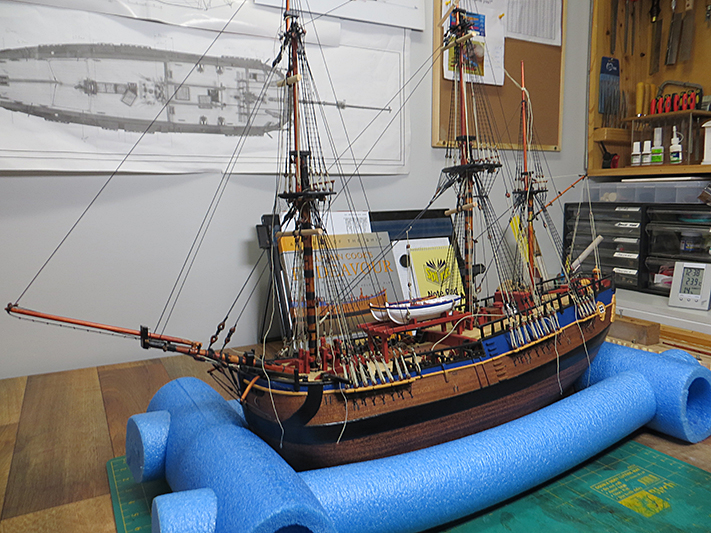
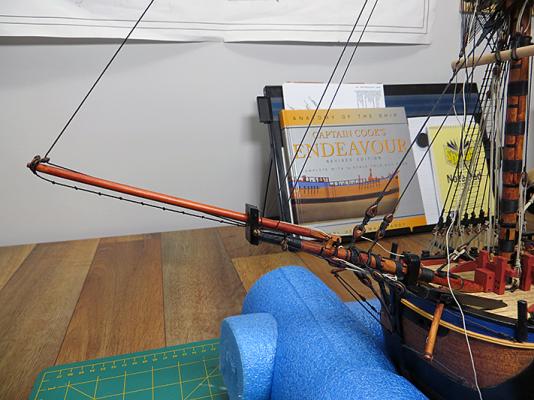
Well the 'knitting' is now done with all ratlines finished That is milestone completed and another started with a good start made on the jib and spritsail yards. cheers Pat


- 517 replies
-
- 15
-
-
- Endeavour
- Artesania Latina
- (and 1 more)
-
Those guns look great Greg - looka like you are just having too much fun with plastic- any chance of a return to the dark side? cheers Pat
-
Great update John; she is coming along very nicely. Our best wishes to you and your lovely wife for a happy and safe festive season and a great modelling 2016. cheers Pat
- 745 replies
-
- 3
-
-
- francis pritt
- mission ship
- (and 1 more)
-
Great to see you back Paul; look forward to the updates on this woinderful build. Ditto re the festive season. cheers Pat
-
Looks ghreat as ir is Mark. This gives you the excuse to have a really good festive season celebration - well two excuses cheers Pat
-
Okay - I'll jump inm also - Happy birthday. Love this log simply for learning the ways you approach each detail. keep them coming (after appropriate birthday celebrations of course ) cheers Pat
- 1,215 replies
-
- 5
-
-
- sloop
- kingfisher
- (and 1 more)
-
A major milestone desreves a major celebration - just don't use any powertools until the hangover is gone Well done mate, looks good. cheers Pat
-
Hi Greg, another nice build you have going here. I am almost finished my Endeavour, so will get onto my Vampire (1:350) soon - be watching this log for hints and tips for plastic models So, I assume the Sydney next in a nice little diorama? cheers Pat
-
Bolt Heads on Brass Strips
BANYAN replied to mikiek's topic in Metal Work, Soldering and Metal Fittings
Mikie, you might also investigate using a punch and die set such as the one shown here: https://www.youtube.com/watch?v=5m4qaRcmXdU There are several different versions from different companies; some use plastic card, others user a shim metal to create the shapes. These are very realistic finishes but the punch/die sets can be a tad expensive - so you will need to evaluate how often you would use it. cheers Pat -
She's coming along very nicely Dave cheers Pat
-
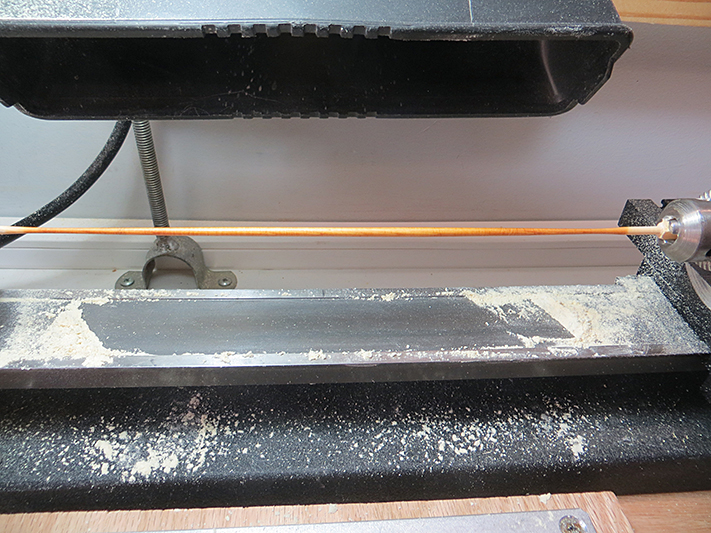
I can't believe the level of detail you have achieved; truely outstanding quality of work Remco. How does that tube jig work? i am assuming you load a dowel and hand file using this as the template? cheers Pat
- 1,215 replies
-
- 3
-
-
- sloop
- kingfisher
- (and 1 more)
-
Nice work on the deck furniture Dave, that will make the deck pop! cheers Pat
-
She looks great John, beautiful model! cheers Pat
- 745 replies
-
- 3
-
-
- francis pritt
- mission ship
- (and 1 more)
-
Very nice work Greg, she looks a treat! Great detail and finish at that scale. cheers pat
-
Starting to look like a lady of the sea Mark, her skirts are almost completed. cheers Pat