BANYAN
-
Posts
5,951 -
Joined
-
Last visited
Content Type
Profiles
Forums
Gallery
Events
Everything posted by BANYAN
-
 Very nice planking mate; looks a treat! cheers Pat
 -
Coming along very nicely Dave; looks good. Always good to start with some hand-made jigs and tool setups; especially when the budget doesn't support something more upmarket that is a nice little setup you have contrived. One word of caution with a Dremel based lathe though is that you will have to take things quite easy as you will soon overload it (not a lot of torque) on larger dowels etc, especially if using hardwood. Will work - just go slow! By that I don't mean low rpm, but rather don't try to apply much sanding or cutting pressure. cheers Pat
-
The build is coming along nicely Keith, and a wealth of information being shared. One small note of caution though - watch the masking tape on the painted lower hull - the longer you leave it there the more likely the gum will adhere to the paint and discolour or mark it. I would consider removing the tape from the paint altogether and mask above the paint line using heavy duty paper or the like to cover the painted area? cheers Pat
-
Thanks Greg - I was aware of this one as the kit had the wrong flags; I got a replacement set from Float-A-Boat here in Melbourne. cheers and thanks for sharing. Pat
-
Also try Hobby Tools Australia ( http://www.hobbytools.com.au/ ) whom have these http://www.hobbytools.com.au/drill-bits-sets-and-accessories/ - Melbourne based supplier but ships Australia wide (and International) - just a happy customer cheers Pat
-
Thanks Kurt, as Druxey says - brilliant find. Now I won't have to put off buying a book because I am not sure if I have it or not. cheers Pat
-
I am Considering a Plastic Build and Need Advice
BANYAN replied to BANYAN's topic in Plastic model kits
Hi Alex, If I understand your question correctly, you are asking for recommendations for the type of glue to use. As this is in a resin kit thread, I assume also for resin models? From the research I have done so far (please note this is my first resin build also) I believe CA and two-part epoxy are best (any brands). For gluing large parts I intend to use a 5 minute two-part epoxy after I have created some alignment pins and mating holes prior to setting it up (to reduce the 'fiddle time' required). Have a look at this article for some ideas: http://www.modelwarships.com/features/how-to/resin/resin-howto.html For plastic/styrene I believe you need one of the specialist glues that actually dissolves and 'plastic-welds' the parts. cheers Pat -
HMB Endeavour by mikec - Eaglemoss
BANYAN replied to mikec's topic in - Kit build logs for subjects built from 1751 - 1800
Nice work Mike; they look great and avoid my errors cheers Pat -
Some very nice joinery there mate; a particularly well thought out storage solution that matches the obvious quality of those tools. cheers Pat
-
Thanks for pointing that out Danny; appreciate you looking in and keeping a weatherly eye. cheers Pat
- 517 replies
-
- 1
-

-
- Endeavour
- Artesania Latina
- (and 1 more)
-
Thanks for looking in Dave and Ron - it took me a while to build up the funds for those 'little' toys. However, as shown in ample logs here, and by previous generations of modellers - you don't need the toys to produce great results - it just makes it a little easier (once you work out the workflow). cheers Pat
-
Hi Graham and a belated welcome to the Endeavour build club The simple answer as to redoing the planks is to ask you a question: can you live with them? You are bound to have some observers comment on it, but the final decisions re aesthetics is up to you. As some form of guidance, I regret some of the minor 'boo-boos' from the earlier stages of my build that I now wish I had redone . A simple way to align your planking is to follow the general rules for spiling/planking (see articles on this site) with one part of the process being marking out the planking lines on the first layer of planking. Use a card strip or a flexible plastic strip on which to mark out your plank widths on the strip. At this stage of my build (and I am still learning a lot) I was not spiling by the rules as such, but instead I started by determining the wale positions, laid them, then planked up and down from that by letting the planks fall naturally where possible (dry fit) and fill the gaps etc etc with stealers / drop planks, and nibbing away any overlap before gluing in place. This means that at the bow etc, it is not a constant 5mm separation (if I recall, these are 5mm strips in this kit), so I was dry fitting the plank on one side, and after establishing where the bottom edge would fall, mark that on the hull and transfer that distance to the other side of the stem and stern whereas, in the middle it was generally an even 5mm spacing. If spiling by the rules, you mark out the planking belts, determine the number of planks and divide the space at each station line by the number of planks to establish the width of the plank at that point. This would allow you to mark out the planking lines before starting. Place the strip on the stem (one side at a time from a good reference point that you can establish - perhaps the top of the wales or such, and having ensured these are level by eye during dry fitting, then use the marks on the ticker strip to transfer the locations of each joint onto your hull. Do this in several vertical locations along the hull and when applying your planks make sure they align with the tick marks - the results should be level planking. good luck Pat
- 10 replies
-
- 1
-
-
- endeavour
- artesania latina
- (and 1 more)
-
That's an interesting arrangement you have proposed Sharpie, and something like that may very well have worked. Can you lean on any experience from how the Egyptians did it? Also, was it definitely rope or could it have been leather, which if wet can be tensioned considerably when dry? She is coming along nicely and an interesting log to boot cheers Pat
-
She's a true little beauty with her 'dress on' mate; those little schooners/luggers certainly had nice lines. cheers Pat
-
I need a new dictionary - I have run out of superlatives for the quality of work and detail of this beautiful model. cheers Pat
- 1,215 replies
-
- 2
-
-
- sloop
- kingfisher
- (and 1 more)
-
Thanks for looking in Mark, Tougharts and all; and for the comments Brian, Greg, John and Mike. Once you get the hang of the workflow it goes smoothly enough. The most challenging bit is tapering the hexagonal piece which can easily go so wrong . cheers Pat
- 517 replies
-
- 1
-
-
- Endeavour
- Artesania Latina
- (and 1 more)
-
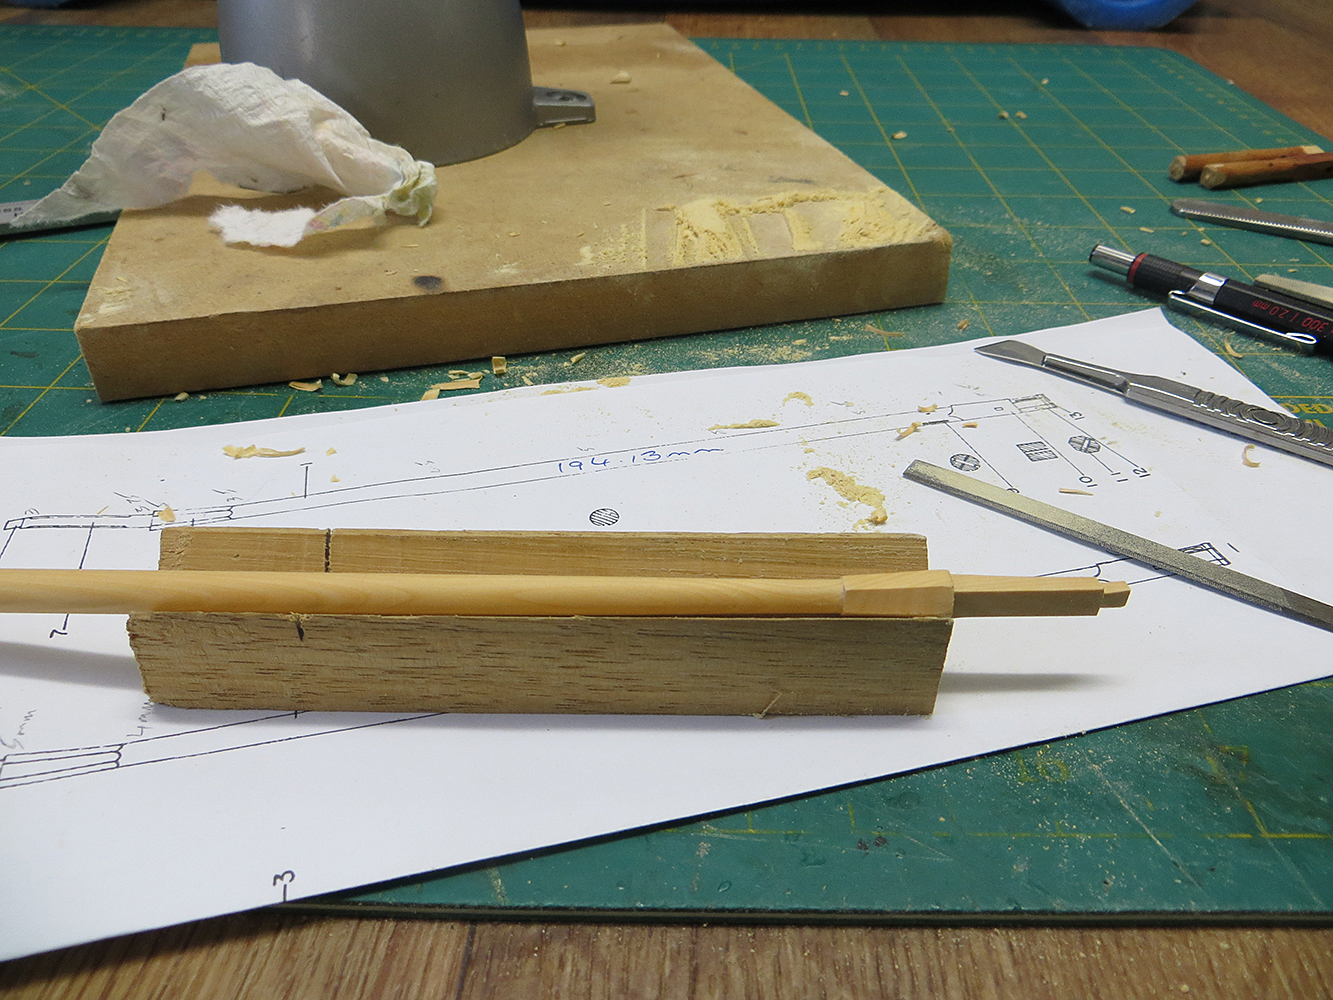
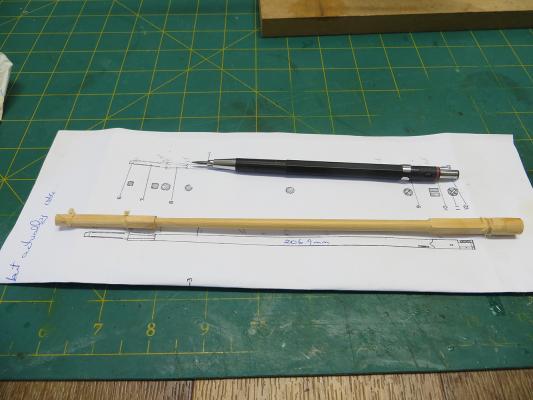
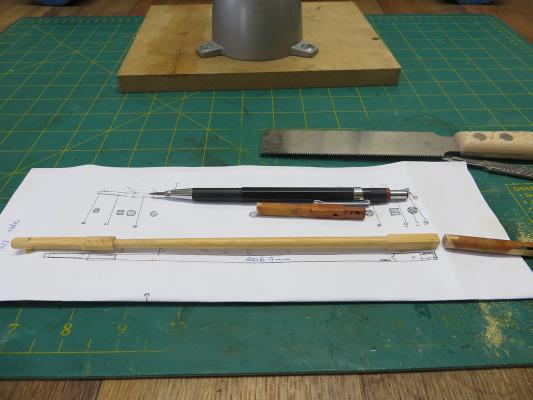
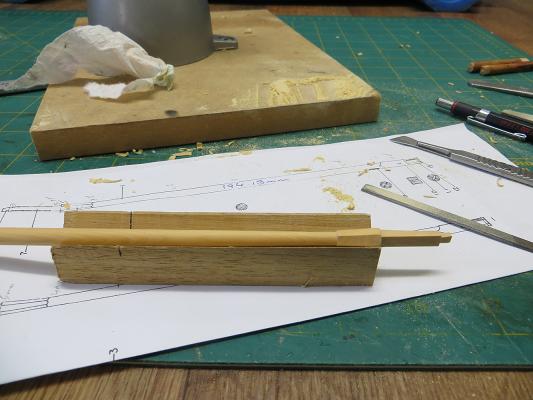
Ok folks, here is the final instalment for today. Having completed the mill work, the remainder is done by hand with a lot of measuring, checking, rechecking - and did I say rechecking . The next photo shows one of my new topmasts (main) with a couple of the offcuts ftom my old topmasts, which shows just how out of scale they were. Some of the shaping I do in a small 'V' block I have now completed what I can for shaping as shown below and the next step will be milling in the slots for the sheathes etc. Thanks for looking in - two down, mizzen topmast next, then the 2 poles for the fore and main. cheers Pat
- 517 replies
-
- 5
-
-
- Endeavour
- Artesania Latina
- (and 1 more)
-
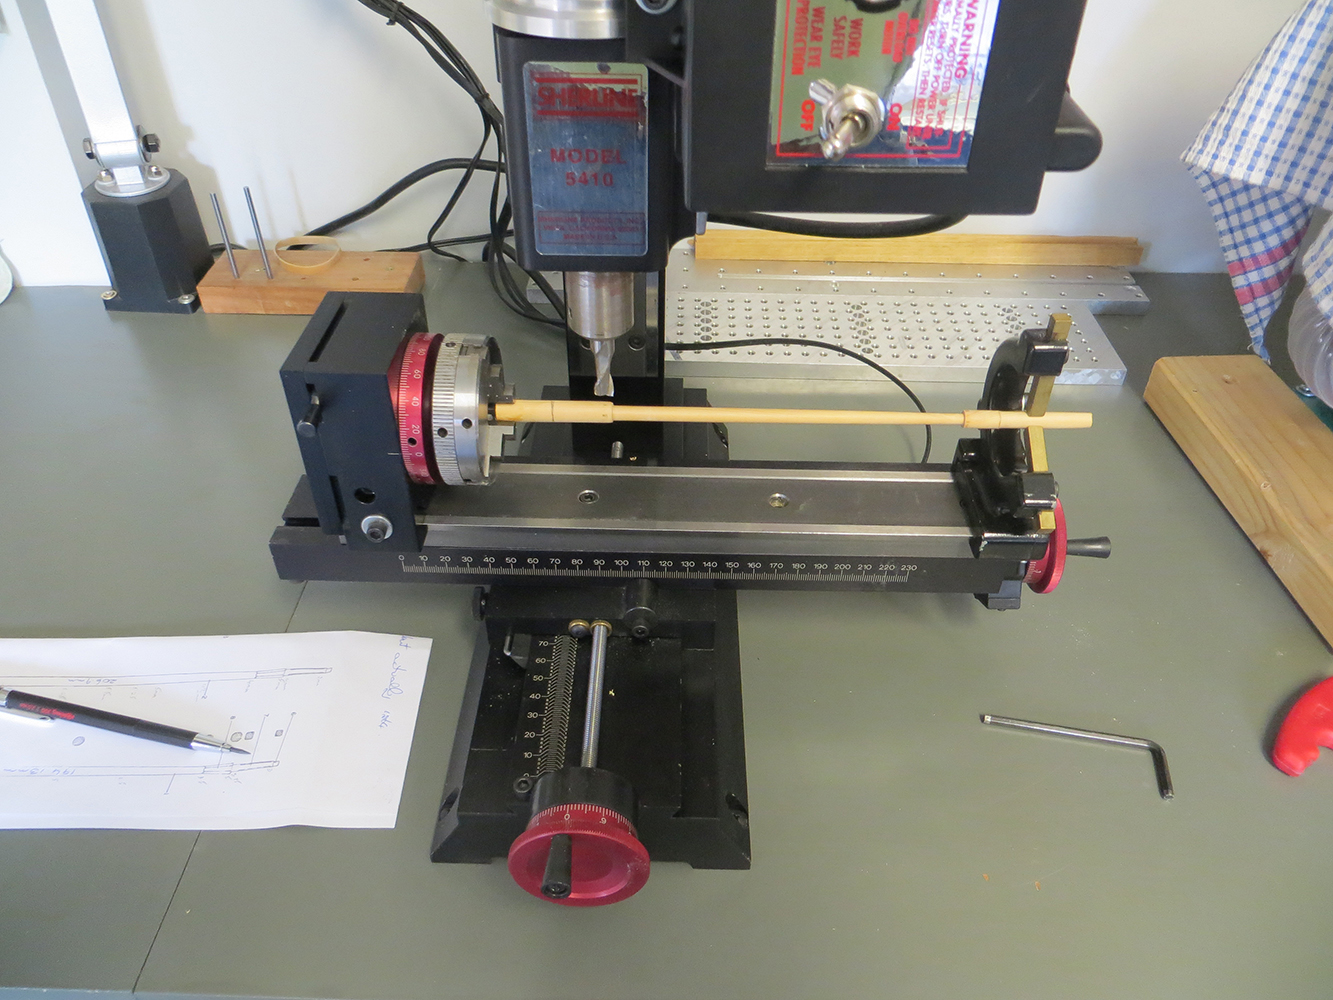
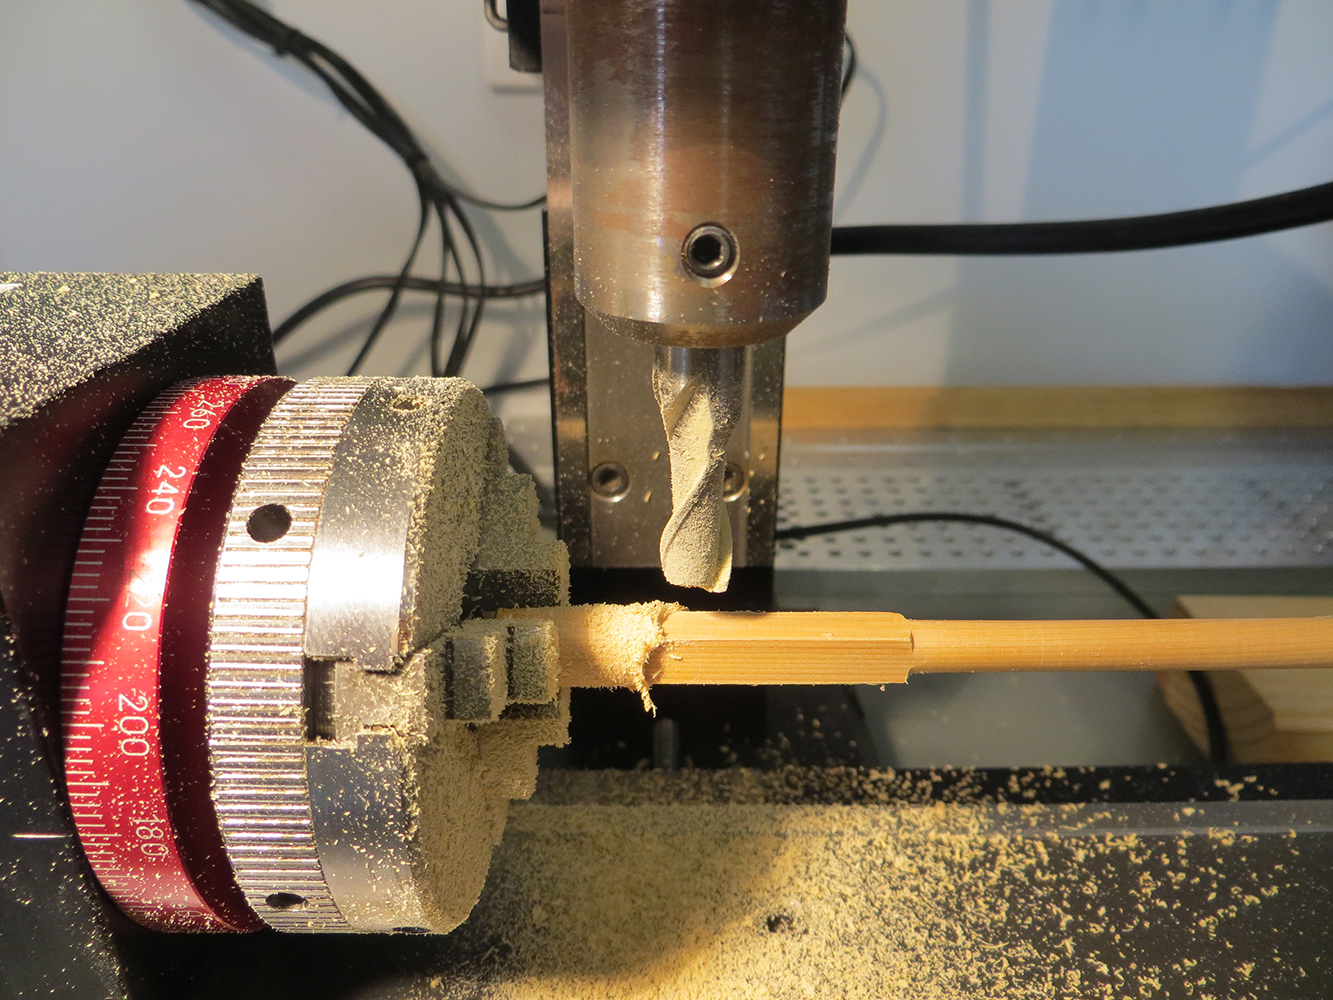
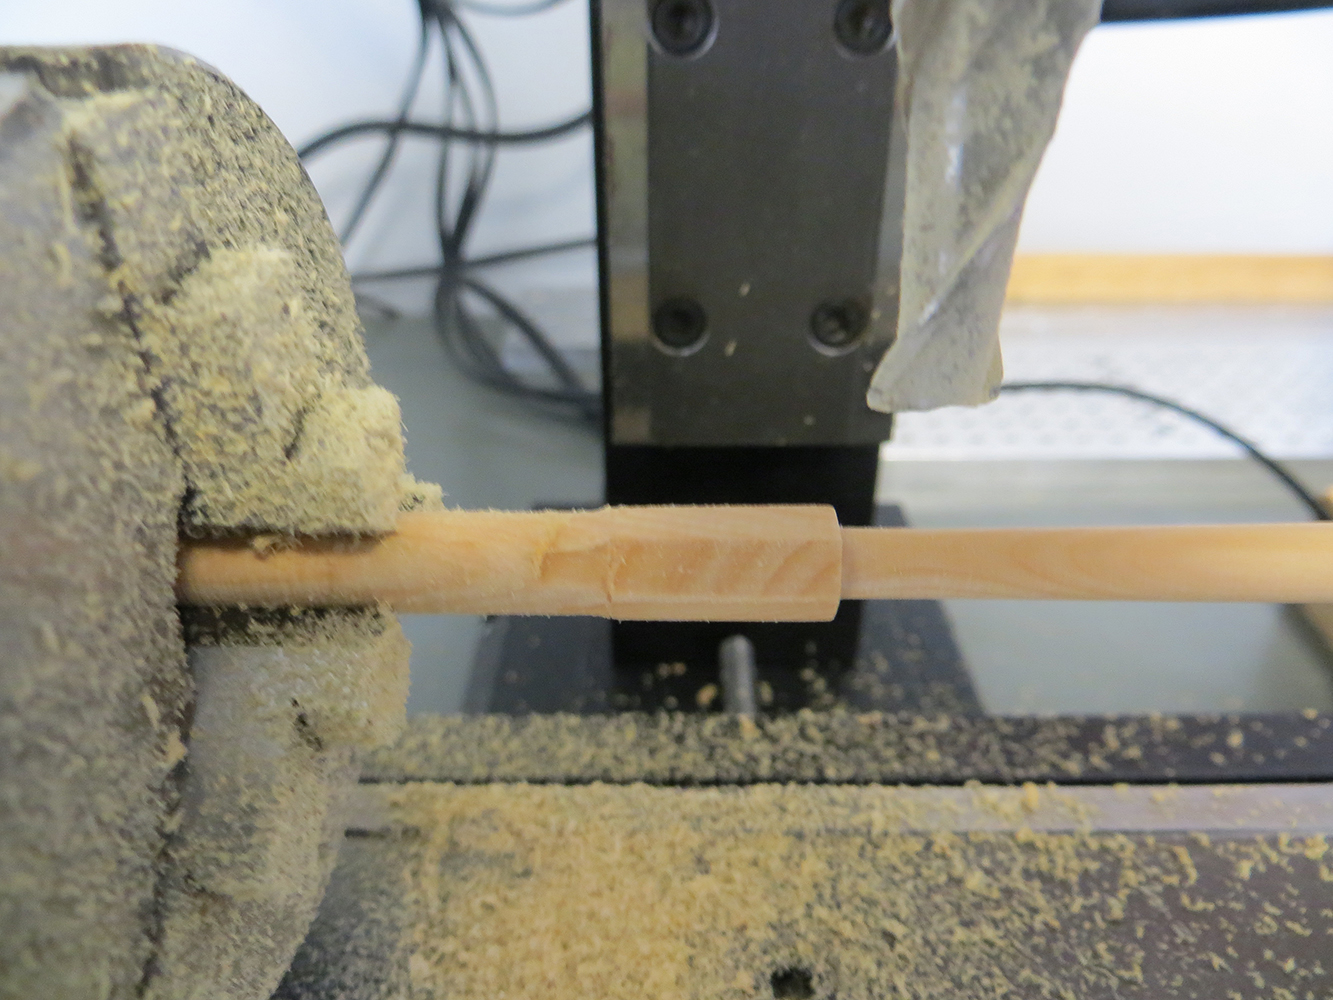
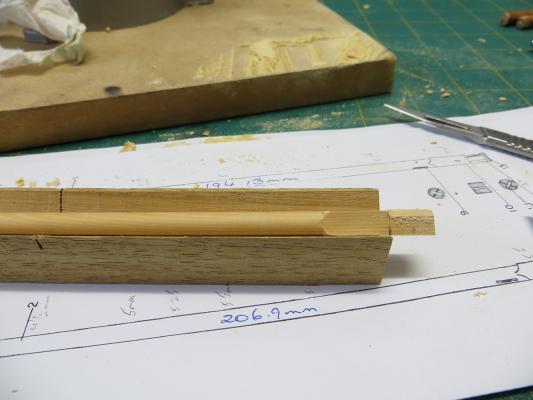
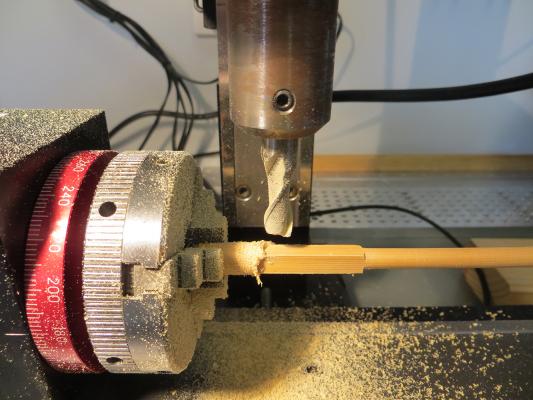
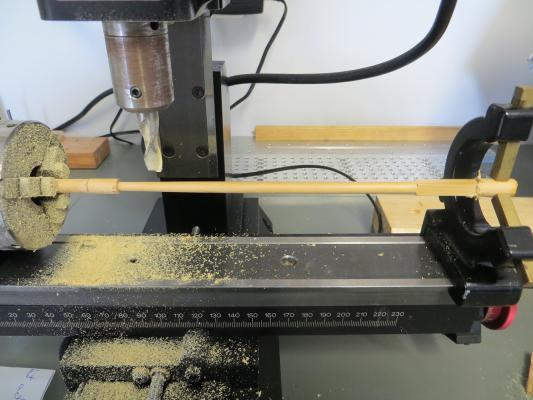
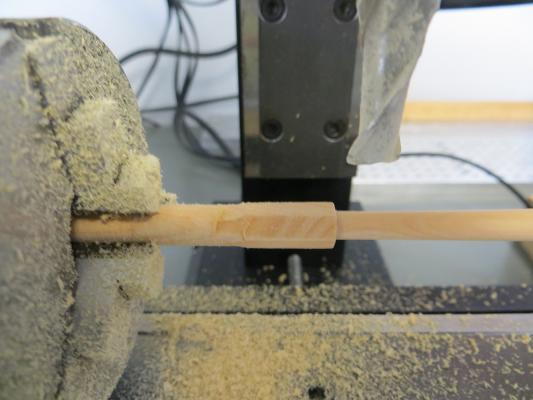
Hi again, The following photos show the milling stage (instalment 2). The picture shows my setup and the various steps involved to mill the flats for the square base piece, the flats for the octagon (which is hand tapered later). I think the shots are self-explanatory without further text. Click on the thumbnails for a larger photo/better look. cheers Pat

- 517 replies
-
- 7
-
-
- Endeavour
- Artesania Latina
- (and 1 more)
-
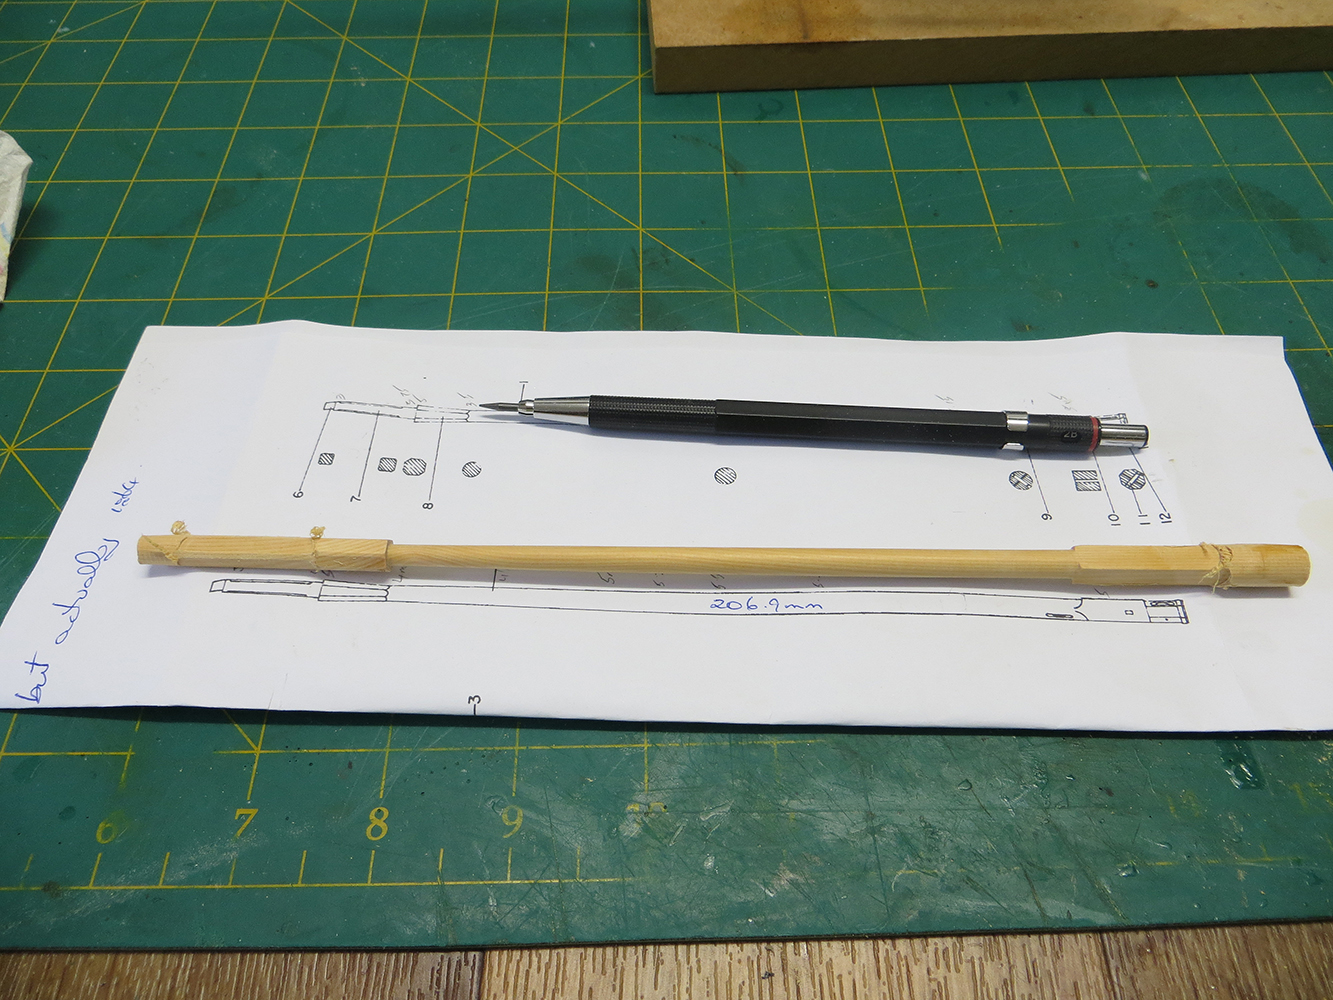
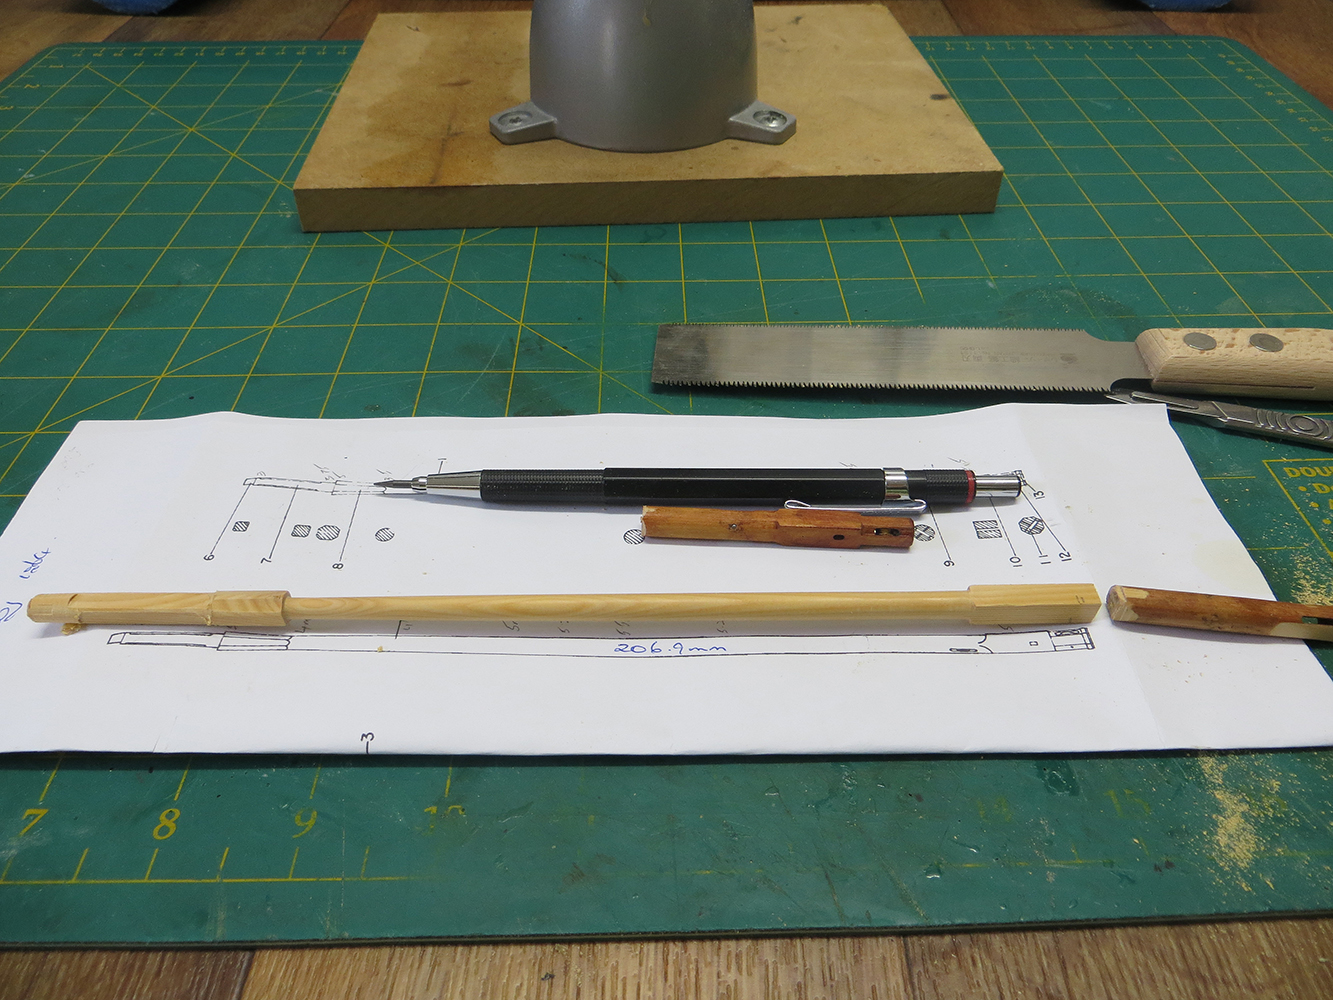
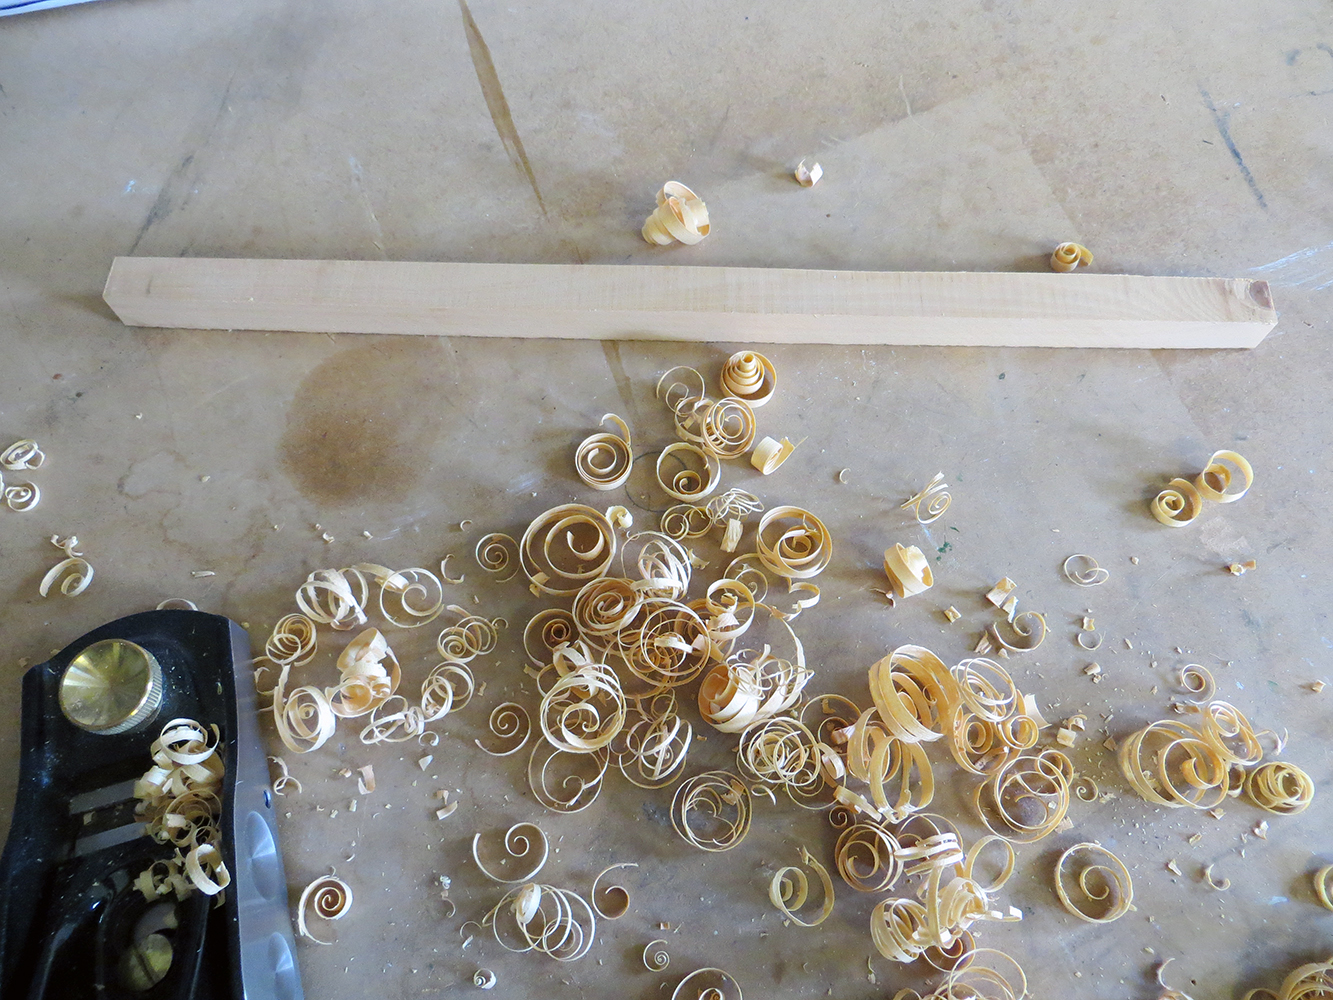
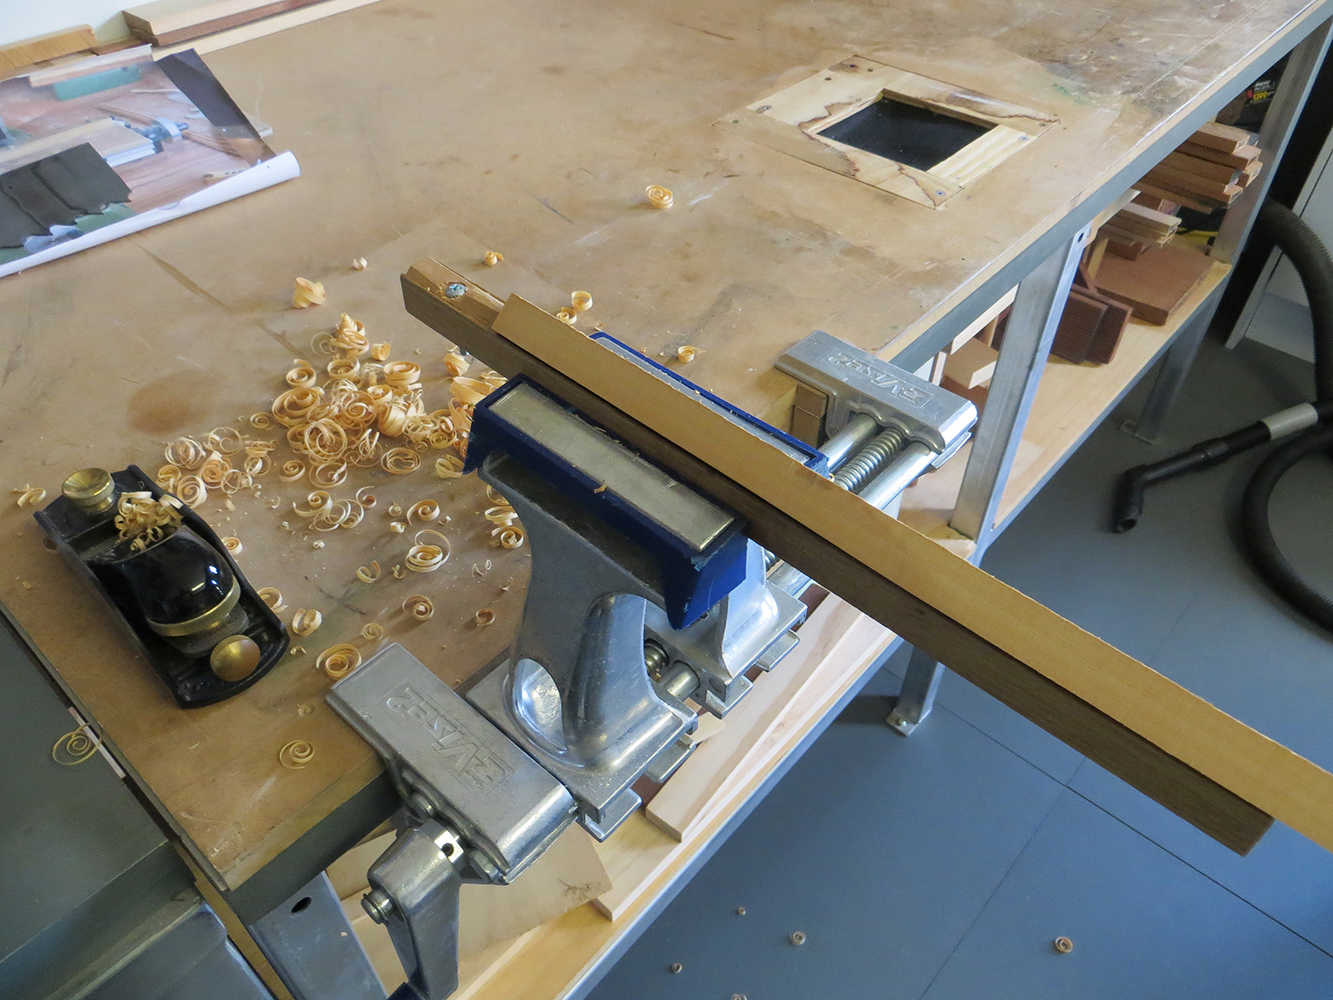
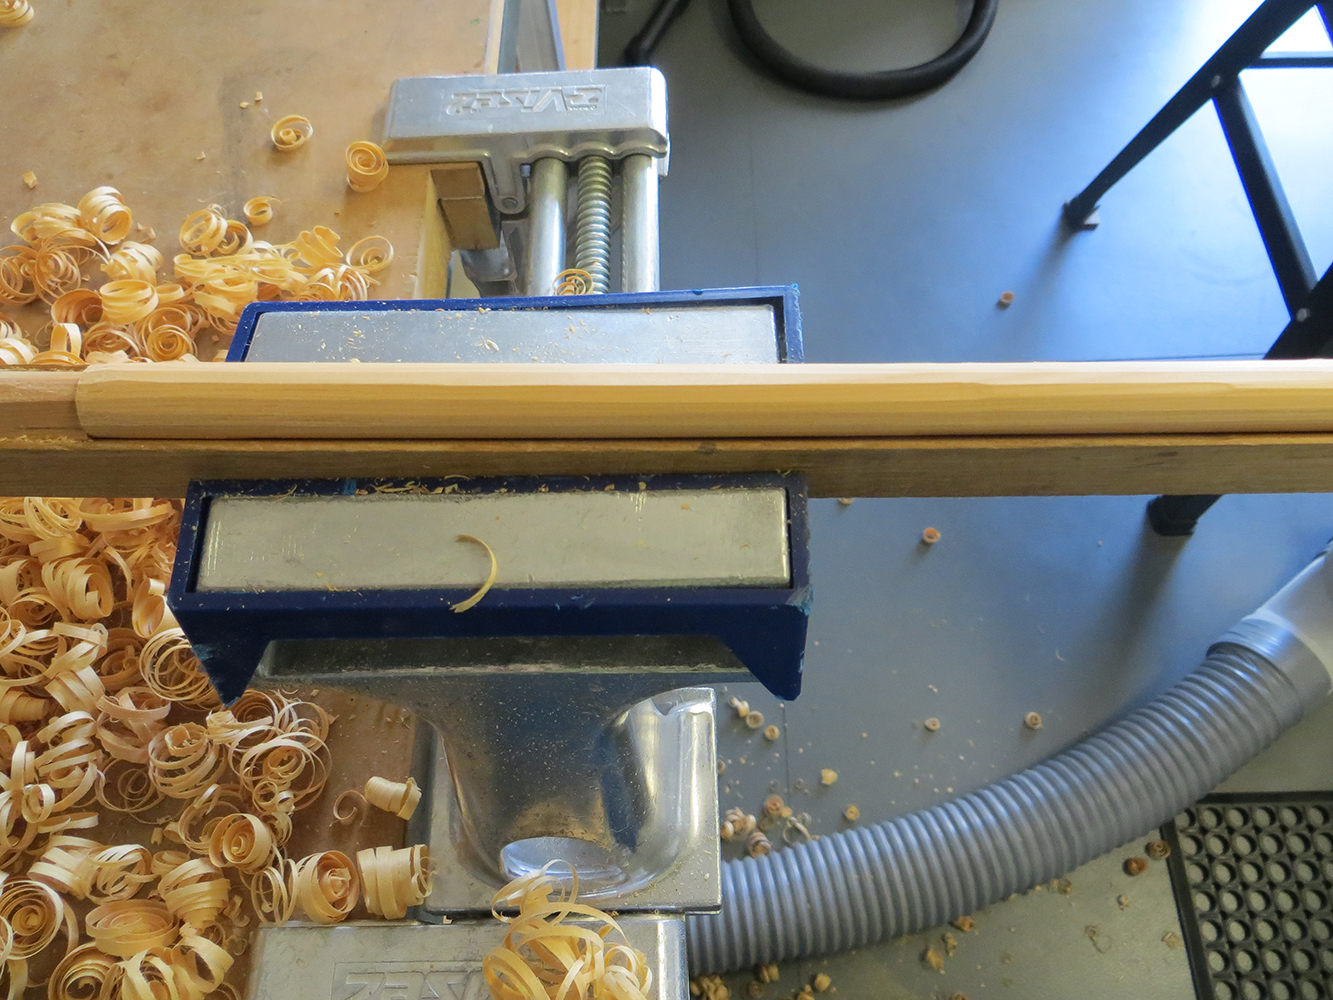
Hi folks, the rebuilding process (for the topmasts and poles) has begun. I remembered to take some photos this time and attempted to show the process I use with some hand tools, a lathe and mill. This can all be done by hand as is evidenced in many fine build logs but I find this works for me. This will be done in 4 instalments with the last being the cutting of the sheave holes which will come later (when all topmasts and poles have been produced). I only managed to salvage one new topmast as either the old masts were too thin to apply the square or hexagon shape, or the sheath holes were in the wrong place. It didn't take too long to get back into the swing of things, but at one mast component a day, it will take a wile - so grab a cuppa! (or something stronger if that floats your boat ) I first cut my stock into square dowel. This is then placed in my shooting board ( a 'V' strip of hardwood with a stop at one end) and the stock is roughly rounded using a plane. I then chuck it into my lathe with a free-spinning tail stock chuck and three jaw chuck. I ensure there is ample waste at each end so that I can tightly chuck the ends without having to worry about damaging the stock or coming to close to the end of piece with the turning gouge, files and sandpaper blocks I use to round the stock and turn it to size. This is done a little at a time with constant checking of size etc against the required dimensions.\ Once finished I transfer the work to an indexing tool under the mill which I will show in the next instalment. Cheers Pat


- 517 replies
-
- 5
-
-
- Endeavour
- Artesania Latina
- (and 1 more)
-
Hey Janos, I'm envious of those gorgeous figureheads you make - let's just call it even cheers Pat
-
The attention and detail you are lavishing on her should result in a very nice planking Mark. Still hangin' there cheers Pat
-
Mike did you see the bit at the bottom about entering fractions of an inch for conversion? A bit clumsy but it seems to work? cheers
-
Mike, have a look at this one - does exactly what you asked I think? http://jbwid.com/scalcalc.htm cheers pat