

Gregory
-
Posts
2,703 -
Joined
-
Last visited
Content Type
Profiles
Forums
Gallery
Events
Posts posted by Gregory
-
-
2 hours ago, jud said:
Pelican Hook being used as a quick release.
...But not found on a cat head of an 18th century boat..
- mtaylor, davyboy and vossiewulf
-
 3
3
-
-
Wow! Putting that little cap on top of the timber is a nice embellishment that would be easy ( for me ) to mess up if you were trying to carve it..
I can see where this method would be great for a lot of situations.. Can't wait to try it on one of my models..
- FrankWouts, mtaylor, john2013 and 2 others
-
5
-
Here is a quick release from Zu Mondfeld.
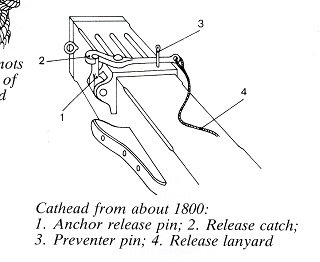
It's not really clear how the anchor would be positioned to utilize this apparatus.
- mtaylor, vossiewulf and jud
-
3
-
I have to withdraw my earlier comment about not seeing the anchor cables around the windless on contemporary models.
Here is one in the Gallery:
P.S.
Just looking at your lastest build pics, and I must say they are an inspiration.
This is just my opinion, and possibly contrary to actual practice, but I think the hawser around one side of the windless doesn't look balanced.
Even so, the workmanship as is, looks superb.
- mtaylor and vossiewulf
-
2
-
From vossiewulf's link:
" NASA pilots flying at NAS Patuxent River routinely intercepted and defeated U.S. Navy Phantom IIs in mock dogfights, until complaints from the Navy put an end to the harassment.
-
Sounds very logical Kieth and Pat...
With a capstan, it was just a matter of unshipping the spokes ( Is that what they are? ) and throwing a loop of the hawser or messenger over the capstan.
- vossiewulf and mtaylor
-
2
-
-
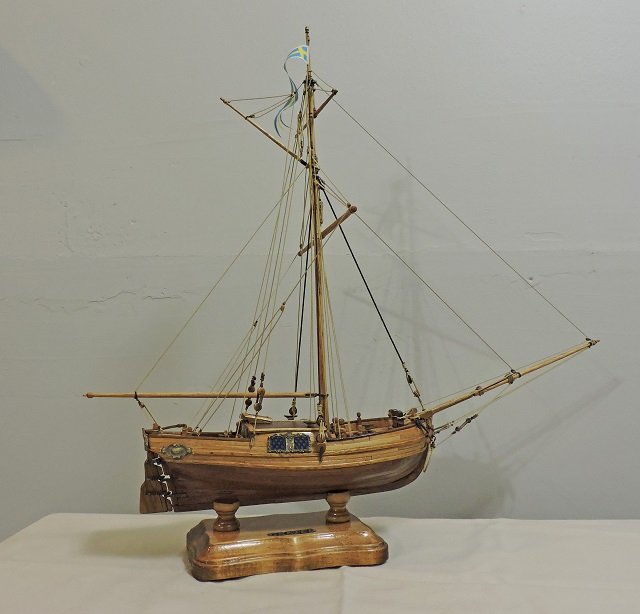
P.S.
Here is one of my favorite examples, as depicted on a model.
I thought I was looking at a full size ship the first time I saw one of the close ups of this model.
- vossiewulf and mtaylor
-
2
-
2 hours ago, wefalck said:
It is tempting to show this, because we are used to see this on modern windlasses/capstans, but the hawsers would only be taken around it, when heaving-in the anchor......
Well said welfalk..
I have not seen any turns around the windless on any contemporary models. I have seen the hawsers passing under the windless,
headed for the cable lockers.
I have seen a few kits, where the plans show a couple of turns around the windless.
On a model, I think wrapping around the windless might serve an artistic purpose, and provide context for observers
outside our ship modeling community.
- vossiewulf, jud and mtaylor
-
3
-
NY has a code for Piano finishes? 😵
- FrankWouts, Canute, gulfmedic1 and 1 other
-
3
-
 1
1
-
Great start! I'm a Mamoli fan.
Were you aware there is a contemporary model in the Royal Museums Greenwich bearing the same name.
The Mamoli model appears similar, but not identical..
- Old Collingwood and zappto
-
2
-
While you have received some great recommendations for other sources, have you considered modifying the one's you have.
I have this kit on the shelf and I pulled out the belaying pins.
If you have a small rotary tool with an adjustable chuck, it shouldn't be beyond the skill you have demonstrated with this kit..
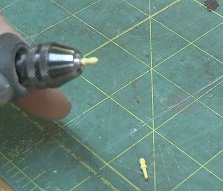
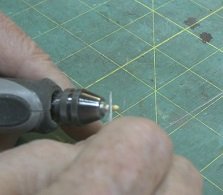
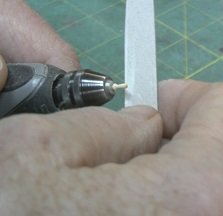
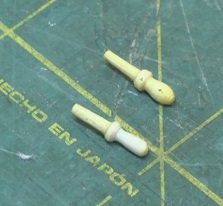
Started with a fine file, and finished off with an emory board..
This was real quick, and I could have refined the final result a bit.. I would also add a little stain.
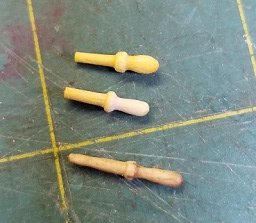
Here is one I made from a tooth pick using the same method. Might be a bit long for this kit.
- src, mtaylor, CaptainSteve and 2 others
-
5
-
I really like the base supports.. I'm going to shamelessly rip off that idea...😂
-
On 3/29/2019 at 7:04 AM, Gregory said:
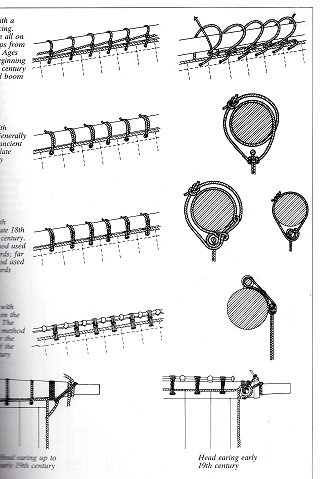
I was surprised that I couldn't find any details in Zu Mondfeld regarding fixing sails to yards...
Was I ever wrong.. In Zu Mondfeld's Historic Ship Models, there is a chapter on " Bending Sails to the yards...
-
59 minutes ago, paulsutcliffe said:
Thanks Gregory and yes Druxey exactly what I meant
I guess what I was trying to say was if you build a scale model replica car you don't leave it in metal, you paint it
...
Regards
Paul
... Unless it's a DeLorean ! 😁
- paulsutcliffe, mtaylor and Canute
-
3
-
24 minutes ago, paulsutcliffe said:
Im not disagreeing with you either just putting it out there for discussion, look at the last page of my Sirius log, its all wood too
Regards
Paul
I apologize if I sounded contentious.. Wasn't my intention..
I thought it was a question of to paint, or not to paint; and I prefer not to..
Your Sirius is beautiful, and a standard I could strive for..
- Keith Black, paulsutcliffe, mtaylor and 2 others
-
5
-
I guess it depends on whether or not you feel compelled to adhere to that tagline..
Getting paint colors " historically accurate " is not very likely, but if you want to settle for " some shade of red " , then that is up to you..
Personally, my goal in ship modeling, is to end up with an " art " piece, that aunt May, Uncle Jack or myself would be happy with on the mantle.
I accomplish that with the natural wood look.
There are countless examples of unpainted models in the Gallery that are far better than what I could hope to achieve..
One of my favorites is Longridge's Victory Model..
- CaptainSteve, paulsutcliffe, Canute and 4 others
-
7
-
I was surprised that I couldn't find any details in Zu Mondfeld regarding fixing sails to yards...
- mtaylor and Louie da fly
-
2
-
-
( Can't resist.. )
Where did you get that boxwood, that you can afford to use where it will never be seen ?
- Canute, mtaylor and thibaultron
-
3
-
A lot of teak veneer shows up on Amazon.. Most are somewhat pricey..
This seems reasonable..
The grain, as others mentioned will be way off for most scales.
I would go with a fine grained wood, and some stain to achieve the look you want..
- thibaultron, mtaylor and Canute
-
3
-
I found this listing on ebay.. I see quite a few eyebolts..
Connie Parts
PS
If I remember correctly, the gun deck calls for a ton of those eyebolts.
99% Of them will not be visible on the finished model..
However it's been a while and I might be confusing the gun deck with the spar deck, where they are quite visible..
-
5 hours ago, irishrover1970 said:
......Oh, and sorry for the initial font size. I cut and pasted that from a note pad on my phone and it just came out that way. I’ve no idea how to change it. “Funny how someone just pops in for no other reason than to tell you that they feel like there being yelled at just from reading oversized text,”wow! Anyway, as for everyone else, thank you very much for sharing your wisdom and great advice. Helps a lot!!!
When you " paste ", look for a little prompt at the bottom of the reply window that says " Paste as plain text... "

Click on it and all will be good..
- mtaylor and pontiachedmark
-
2
Planking Joint Positioning
in Building, Framing, Planking and plating a ships hull and deck
Posted
I would try to help, but I didn't understand the question..