

Gregory
-
Posts
3,079 -
Joined
-
Last visited
Content Type
Profiles
Forums
Gallery
Events
Posts posted by Gregory
-
-
-
Your method I have seen before.. You might consider drilling the holes before shaping the deadeyes..
-
It might be worth the saved effort to use the etched decking on the lower decks, where little if any will be visible on the finished model..
Also, you might consider doing a some fairing of the bulkheads before gluing the framework all together. You will have a much better angle of attack with the bulkheads off the ship..
-
ModelExpo sells the Rattlesnake plans for $35.. They should have more information than the older version, since it sounds like your rigging guide is incomplete.
The also have the Master Korabel Long Boat kits
-
-
There is a nice article on deck planking in the NRG's article data base.
-
-
-
3 minutes ago, Overworked724 said:
Now I need to figure out how to remove the paper backing from the plates without crimping or bruising the copper foil.
Try sandwiching the plate between two pieces of masking tape. When you pull the tape apart the backing should come free. with no damage to the foil.
- NovaStorm and Overworked724
-
 2
2
-
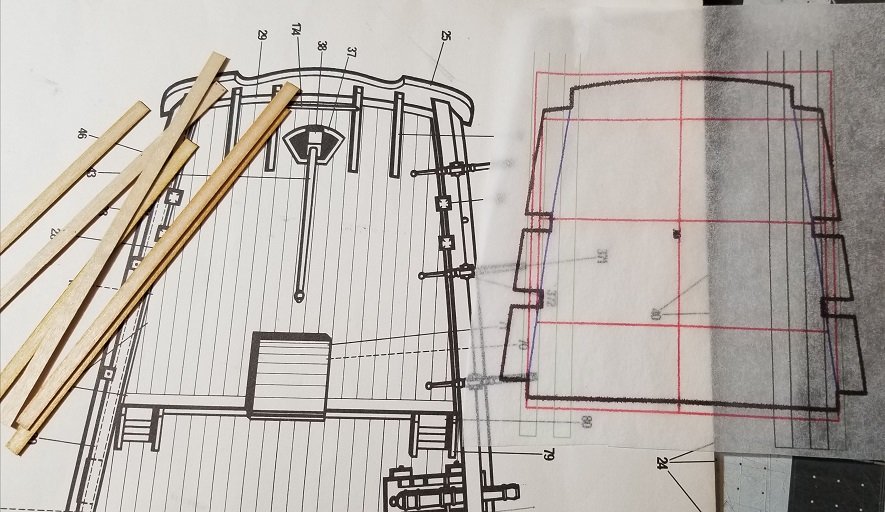
This will take a while longer than the quarter deck, but it should go relatively faster with the lessons learned.
- PeterB010, gieb8688, Edwardkenway and 3 others
-
6
-
P.S.
I have picked up so many tips from the other members here, I may not always remember to give credit where credit is due. With that in mind, I want to say that I got the idea for the scarfed planks near the margin from Chuck's instructions for the USF Confederacy. The instructions for most, if not all of Chucks designs are available for free at Model Expo, and they are an incredible resource for detail work.
However, they are a mixed blessing in that they really set the bar high, and make it a little difficult for me to reach a point where I can say " O.K., That's good enough; time to move on.
-
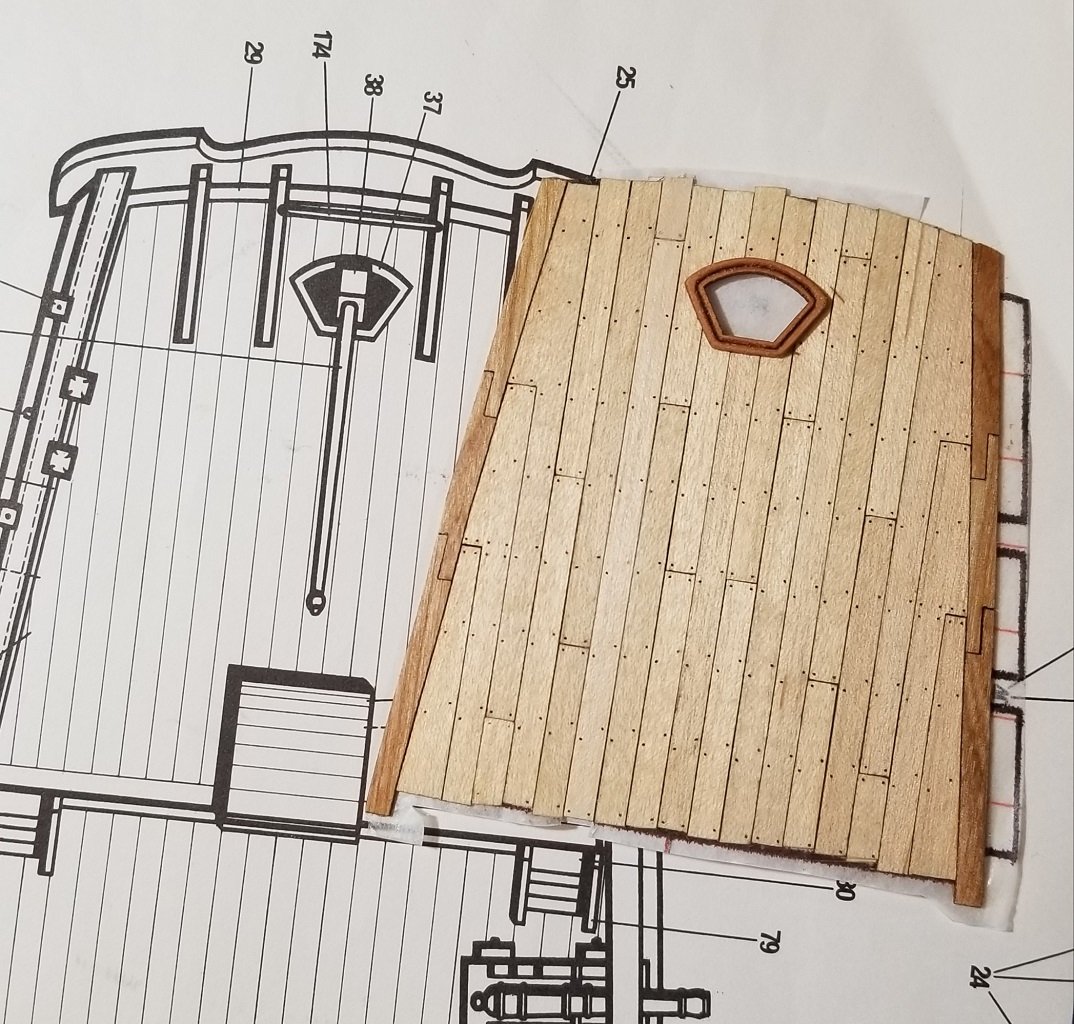
Finished up the quarterdeck planking. If you compare my finished work to the last post, I decided to increase the number of imaginary beams under the quarterdeck. Three would have been unlikely and it made it difficult make the scarfed planks look nailed realistically.
It is my understanding that ' nibbing ' wasn't done in the period ( 1711 ) this ship represents, so I shaped the outer planks with hook scarfs to avoid points butting into the margin.
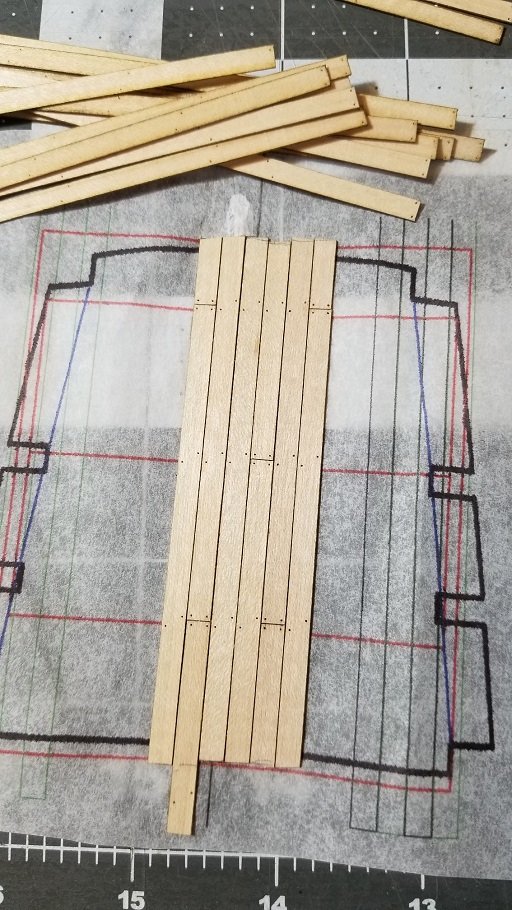
As I was finishing this up, I was reminded of why I like to do this off the ship.. I had completed, or thought I had, the work you see above and was applying some poly when I realized I had left out a plank on the left side of the deck. It was obvious after the fact, but I had spent so much time staring at the tree nail pattern, I guess I saw what I wanted to see.
Anyway I was able to splice in the missing plank/s with very little effort compared to the problem it would have been if all the planks had been glued onto the false deck. Instead of just splicing in a plank, all of the planks to the left of the missing one, would have to have been ripped out.
-
Great build. Will be one of my go-to's for mentorship.
-
Just recieved an email that ModelExpo is open online and shipping orders.
-
Don't forget the build log index..
-
No update for a while but I haven't been entirely idle.
I have almost completed the first planking, but it is uglier than I would care to share at the moment..
I have continued work on my gun carriages. Fine tuning the design, and experimenting with different wood, in an effort to come up with a final plan.
Meanwhile, I'm still exploring the use of my laser cutter to refine what can be done with this kit.
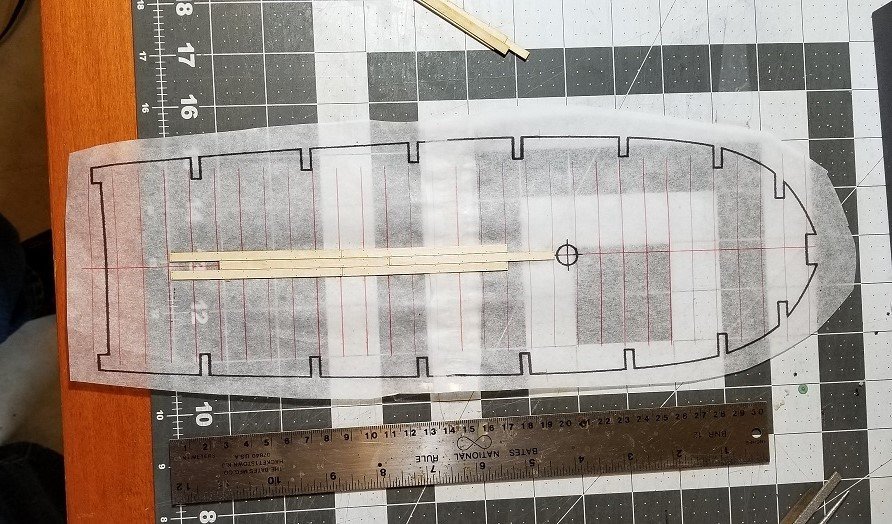
When it comes to planking the deck, I like to do it off of the ship. I print the deck plan on tracing paper, then glue the planks onto the paper.
This is a first effort with planks made from maple veneer with my laser cutter. I feel the laser char takes care of the simulated caulking.
(.. to be honest, not the first effort, but the first time I'm happy enough to show what I've come up with )
I hope to be showing more progress in the near future.
Anyone who has experimented with fabricating their own parts, can probably attest to the amount of time you can spend trying to get it perfect, which never really happens.
-
Do you have a lower end 2D photo editing program with layers, such as Photoshop Elements or Corel Paint shop?
- thibaultron and mtaylor
-
2
-
Sorry for the confusion.. I was replying to VTHokiEE regarding the laser he linked to on Amazon..
- thibaultron and mtaylor
-
2
-
I have had one of those for a while. They do some serious cutting. ( not metal )
You need to be ready to do a little modification to make it versatile, but you can google " K40 " laser modifications,
and see a lot of useful information.
I have heard some people having a bad experience with out of the box alignment problems, or not working at all.
I was fortunate not to have any problems other than the learning curve.
- VTHokiEE, mtaylor and thibaultron
-
3
-
On 3/10/2020 at 4:50 AM, wefalck said:
The glitch is that you can only export/print it from the 'pro' version which costs a moderate 150€.
Does it actually give you a " flat " rendering on the screen? You could do a screen capture , and do some size tweaking in a drawing program where you have print capabilities..
-
Maybe for the strap seen here:

- mtaylor and John Allen
-
2
-
If I recall, all my ModelExpo orders have come by USPS Priority mail. It looks like an 8oz package from Miami to Rhode Island is $8.45
When you figure shipping materials and time spent, $9.95 doesn't seem to be out of line.
It sounds like John is being a real nice guy if he's giving you shipping credit..
-
The interpretation appears to be logical in some respects, like the braces and vang. The topmast doesn't look right.
But there are others who know far more than me.
-

Phoenix by Moreplovac - FINISHED - Master Korabel - 1/72 - Russian Brigantine
in - Kit build logs for subjects built from 1751 - 1800
Posted
Very nice work.
If I may ask, what is the actual length of the little ship's boat?