

Gregory
-
Posts
2,694 -
Joined
-
Last visited
Content Type
Profiles
Forums
Gallery
Events
Posts posted by Gregory
-
-
What works best for me is to scan the plans, then use a Bézier pen in Corel Paintshop to plot the outline of a bulkhead or other part on a separate layer.
I then save that layer as a .bmp which works with my laser engraver.
I believe some free programs like Inkscape will convert .bmp to vector drawings, if you need to convert for your CNC.
-
Historic Ship Models by Wolfram zu Mondfeld Has a lot of information about the purpose of most lines. The information spans several centuries
and many types of rigs. Here is the index, which gives an overview of topics covered.

- Canute, Ryland Craze and mtaylor
-
 3
3
-
-
Here is a little tip I posted about this ..
Probably not real practice, but effective on models IMO..
- thibaultron, John Allen and mtaylor
-
3
-
-
-
-
-
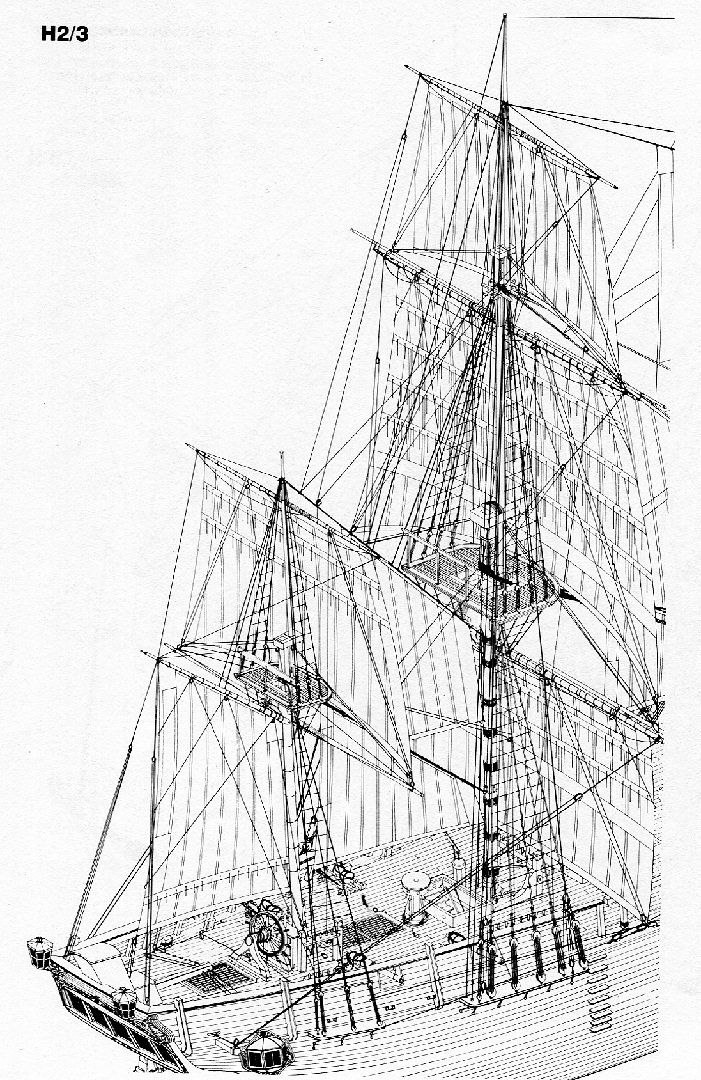
The image I linked to above is from Chuck's prototype, and clearly shows the block on the top mast.
Where did you source your Plans?
Mine came from https://www.syrenshipmodelcompany.com/
Here is a relevant image from sheet 2 of 3.. Standing rigging.
Edited:
Dave, I just had a look at the start of Chuck's log where he posted some plans, which show the stay as you describe.
It would appear there was at least one revision to those plans as provided in the full scale plans available for purchase.
-
What plans are you looking at?
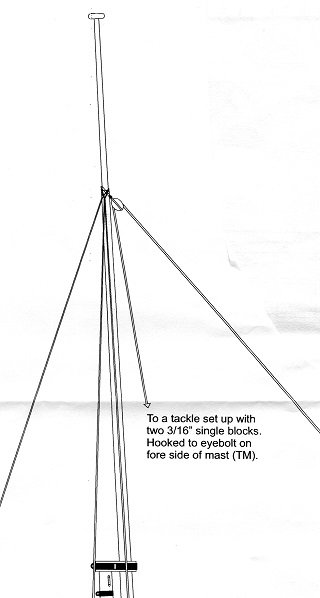
On my plans, included with the starter kit from Chuck, the bowsprit is the standing end. The running end reeves through a block at the top mast, and runs to a two block tackle, attached to an eyebolt down on the mast or on the deck in front of the mast.. Perhaps Chuck can clarify.
I believe this image from the build log, shows it attached to an eyebolt on the deck in front of the mast.
https://modelshipworld.com/uploads/monthly_12_2016/post-2-0-68552000-1483056174.jpg
I'm not 100% sure, because the wording on the plans says " ... an eyebolt on fore side of the mast. "
-
Not sure this is a new idea, but here is what I came up with for making stronger pin rails.
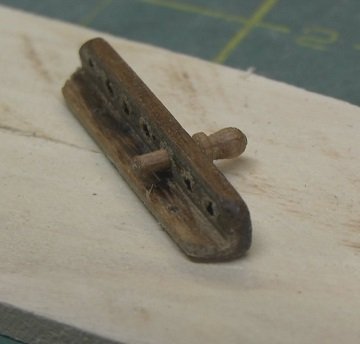
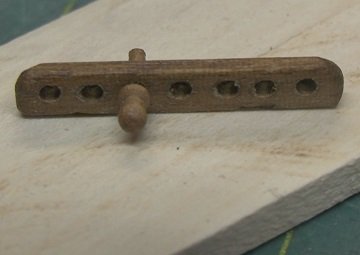
I use L shape stock. The bottom part, which provides a base for anchoring, is virtually invisible once mounted on the bulwark.
-
11 hours ago, JerseyCity Frankie said:
... my theory is that these examples are all Museum ships open to the public. ....
In light of which, the frapping of gun tackle would seem appropriate on a model.
No less so, than the neat coils laying on the deck, often seen on models.
Would those coils represent actual practice on a working ship?
- thibaultron and Canute
-
2
-
22 hours ago, druxey said:
...... As you know, natural ebony is hard to work and glue, as well as creates toxic, messy dust. .....
Considering the un-friendliness as a modeling medium, I'm curious as to the background/tradition on the desire to use ebony in wood ship modeling.
- mtaylor, thibaultron, Altduck and 1 other
-
4
-
Might be able to help with more info... Any pictures?
- thibaultron and mtaylor
-
2
-
-
-
Quote
Hence my question on how you hold the ratlines in place until glued
. When I have done this, I put drops of white glue on the shrouds, and then, lay a small piece of line across the drops of glue on the shrouds
to form the ratline, wiggle it a bit from side to side to pick up the glue, and it will stay in place until the glue dries if not disturbed.
I can make a pic, if this is not clear.
-
Yes.. I think the vote was con=1, sensus = 0 ..
")
-
-
On 7/12/2017 at 9:38 AM, Chuck said:
Gregory...because that was the way it was done.
.............................
Chuck
I realized after re-reading a couple of times, that I may have not made my thoughts clear on this; being that, if this was not the practice at the time, why would a professional
model builder do such a thing?
My opinion was/is, that they would not. Leading me to believe the model is accurate..
-
-
It sure makes me wonder why a modeler would have put the traveler under the tiller.
It doesn't even meet the oft repeated criteria of " it looks good " ..
-
- SawdustDave, russ, CaptainSteve and 4 others
-
7
-

Ropewalk
in Rope Materials and parts resources
Posted
FWIW, to show what can be done on the cheap, here is my first rope machine along with some product.
The upgraded version: