


Dan Vadas
-
Posts
3,261 -
Joined
-
Last visited
Content Type
Profiles
Forums
Gallery
Events
Posts posted by Dan Vadas
-
-
Hi all,
Still waiting on my next model so I've built a "quickie" for my Admiral's neighbour, who is an Elvis impersonator working the clubs etc. It's a free download of a Fender Telecaster Electric Guitar (I have no idea what guitar he actually plays, but it was probably the best one I could find on the Interweb
 ). The model took me two days to make.
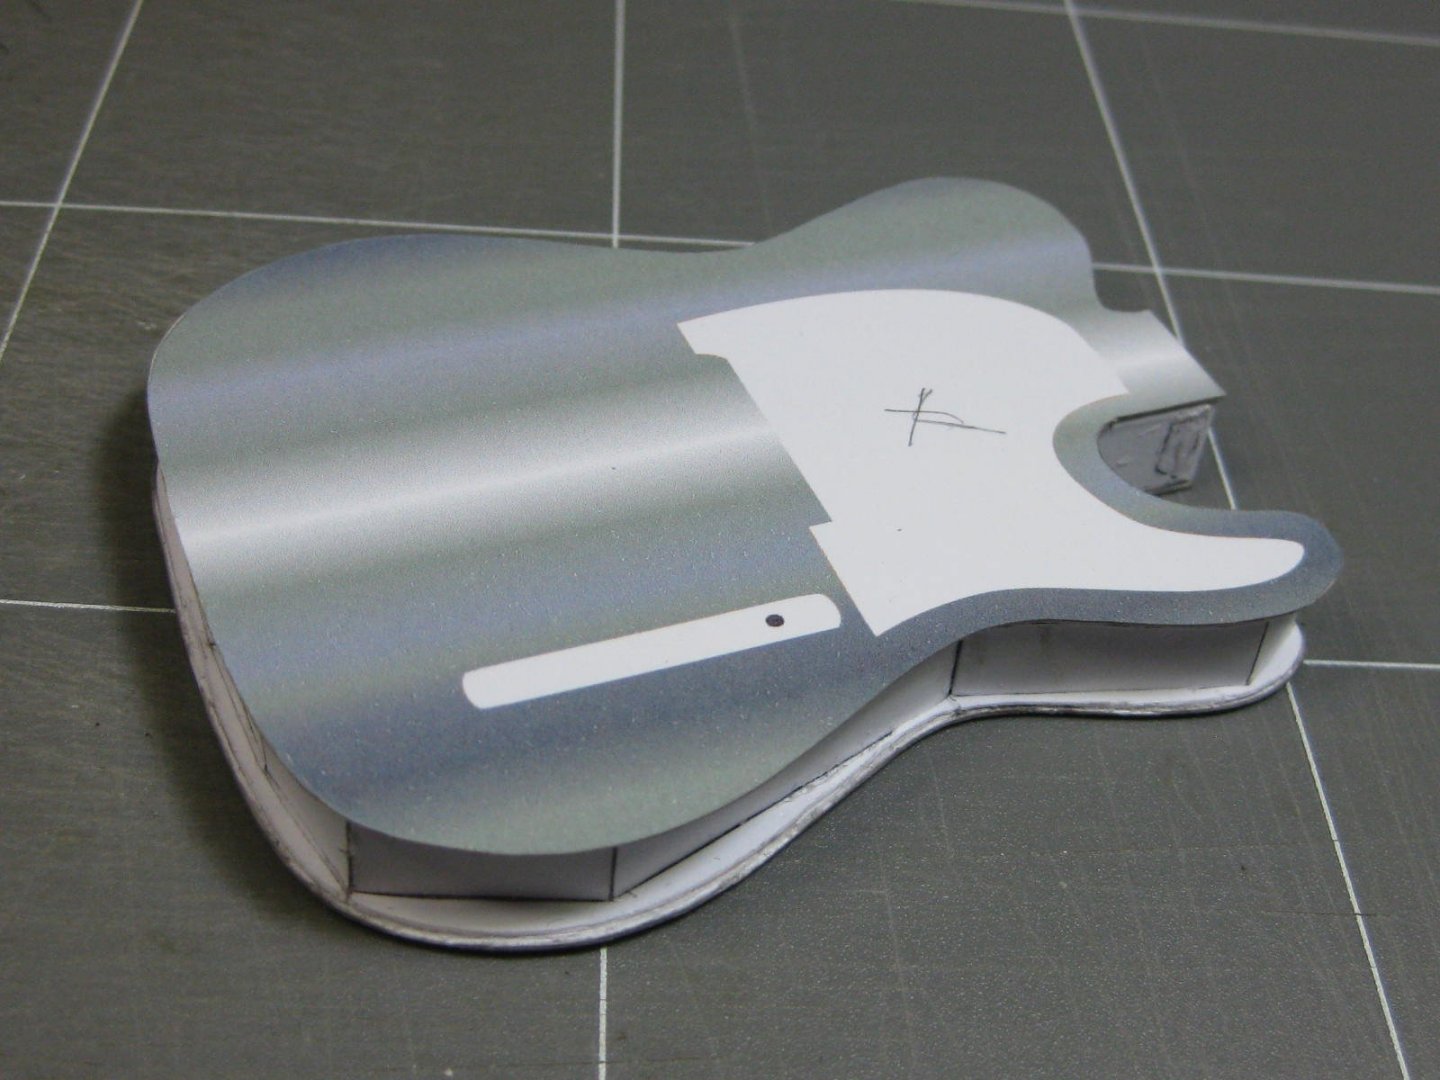
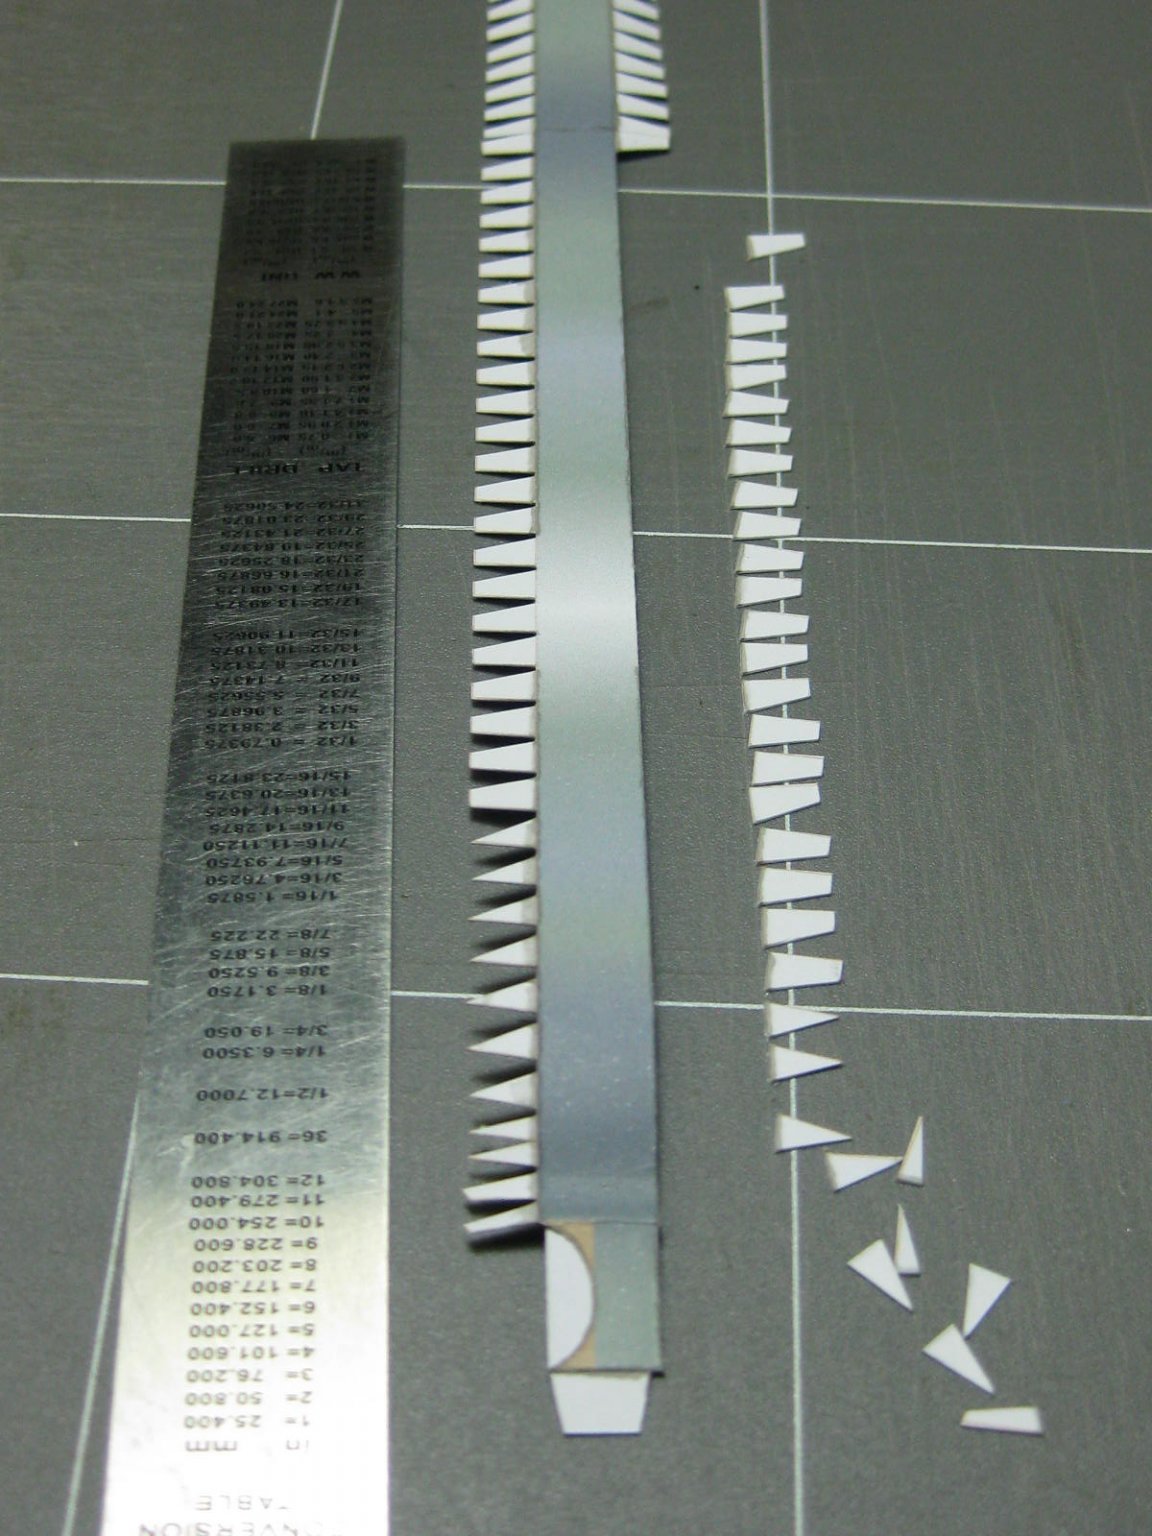
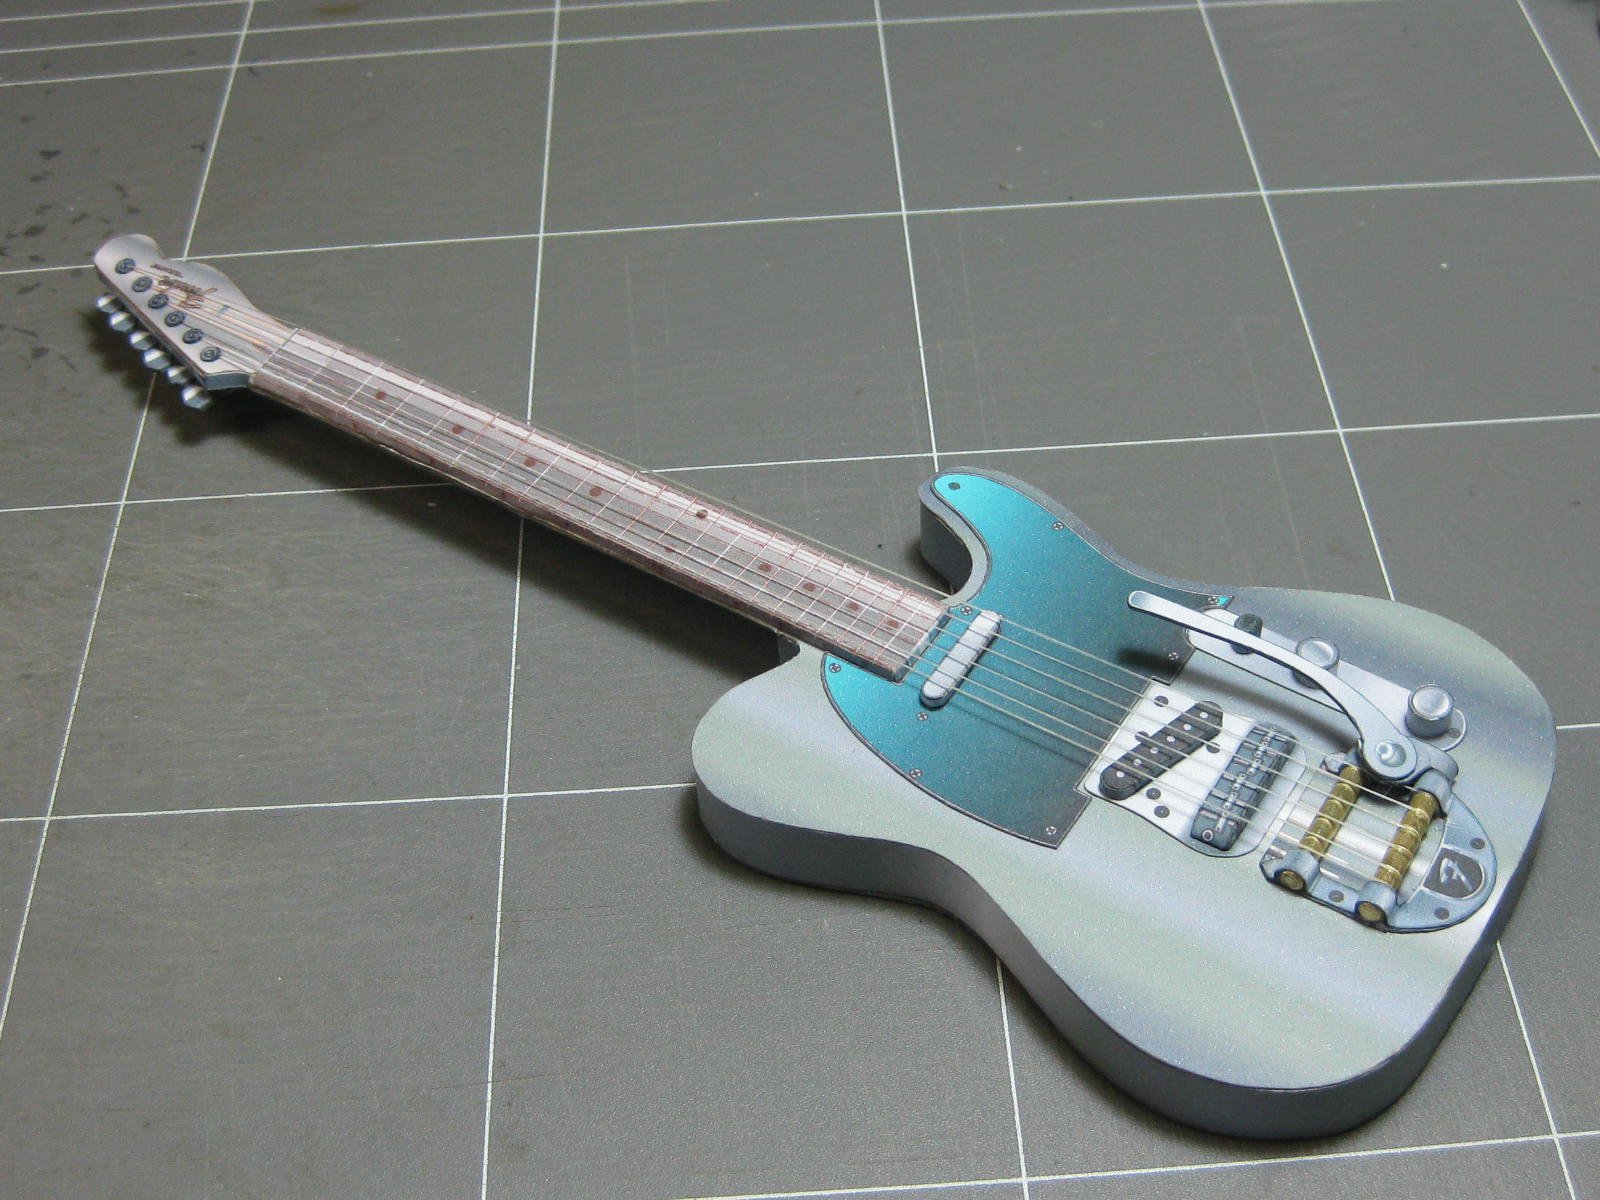
Not a bad design, considering the guy who did it isn't a professional Card publisher. However I "did my own thing" in some areas. First one was to re-colour it - the download was fairly garish and un-attractive IMO. I used Inkscape to turn it into a type of silver for a lot of it.
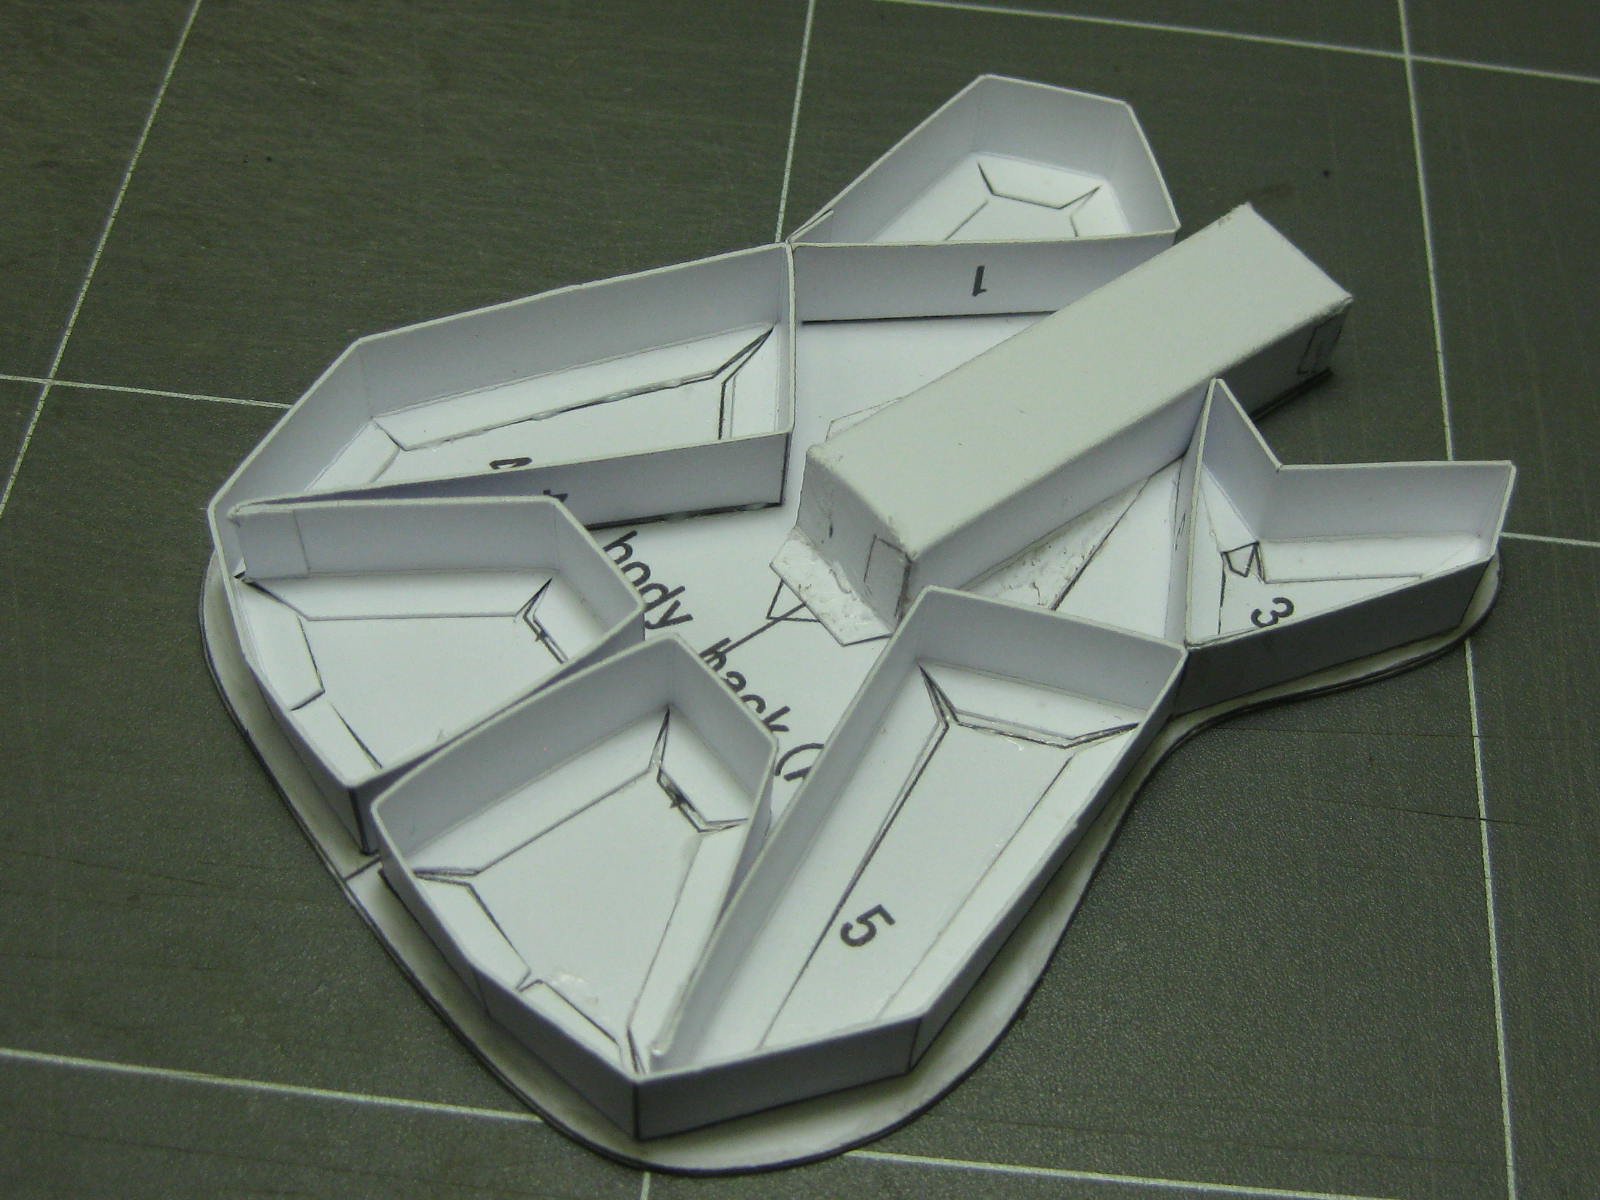
Here's the main body with re-inforcements added :
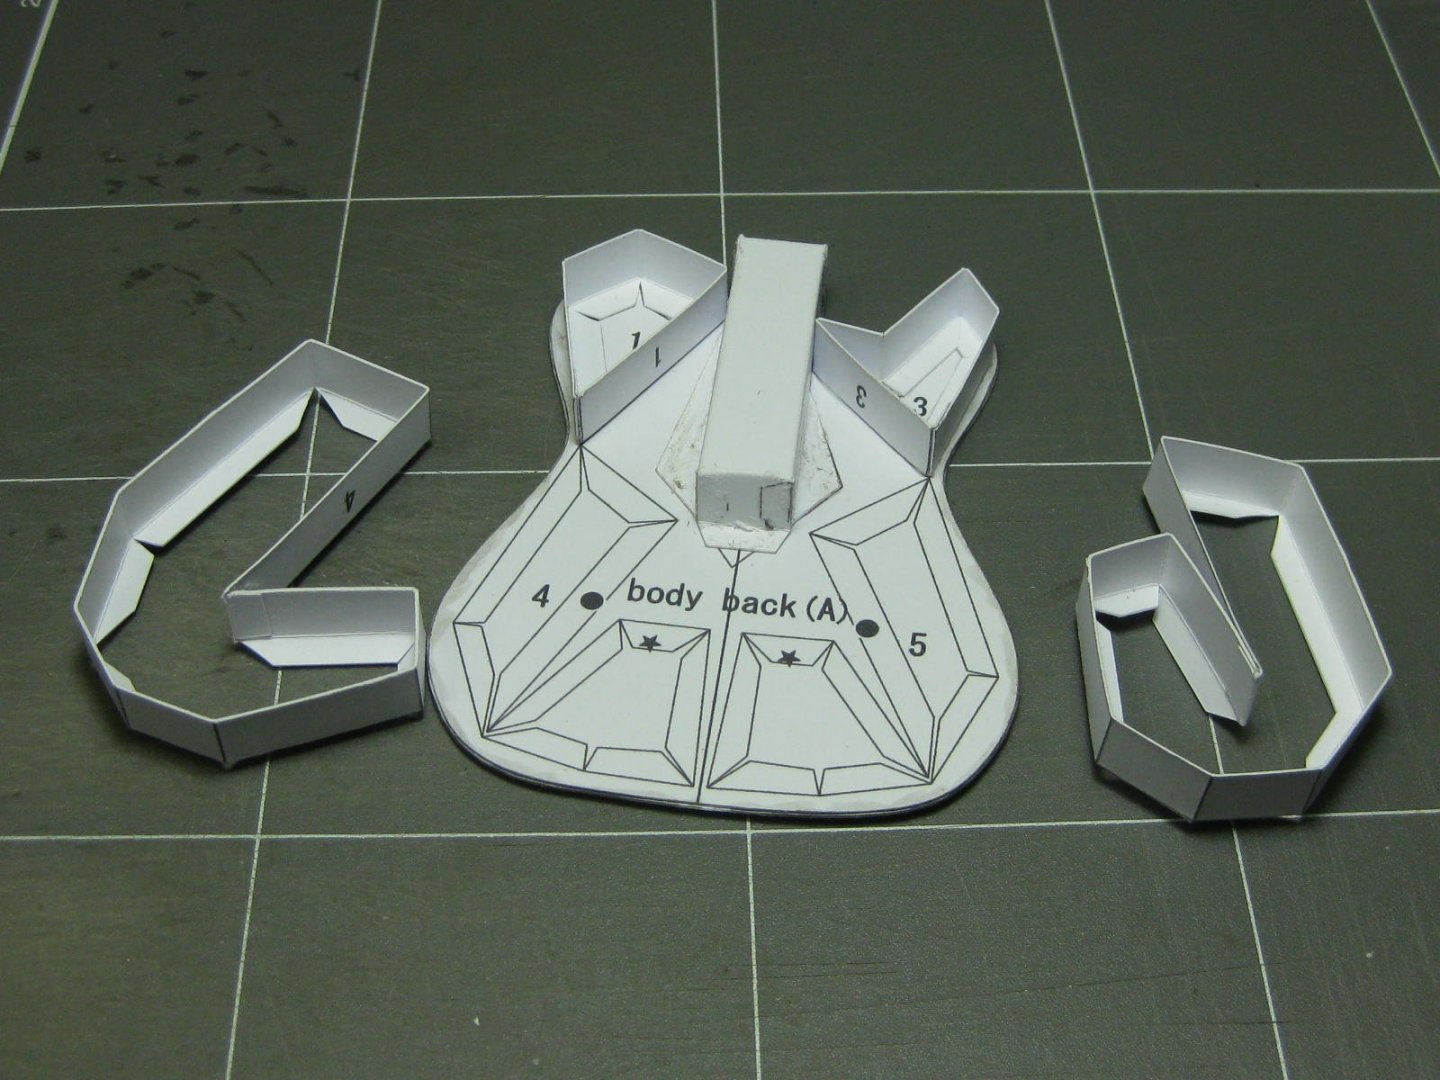

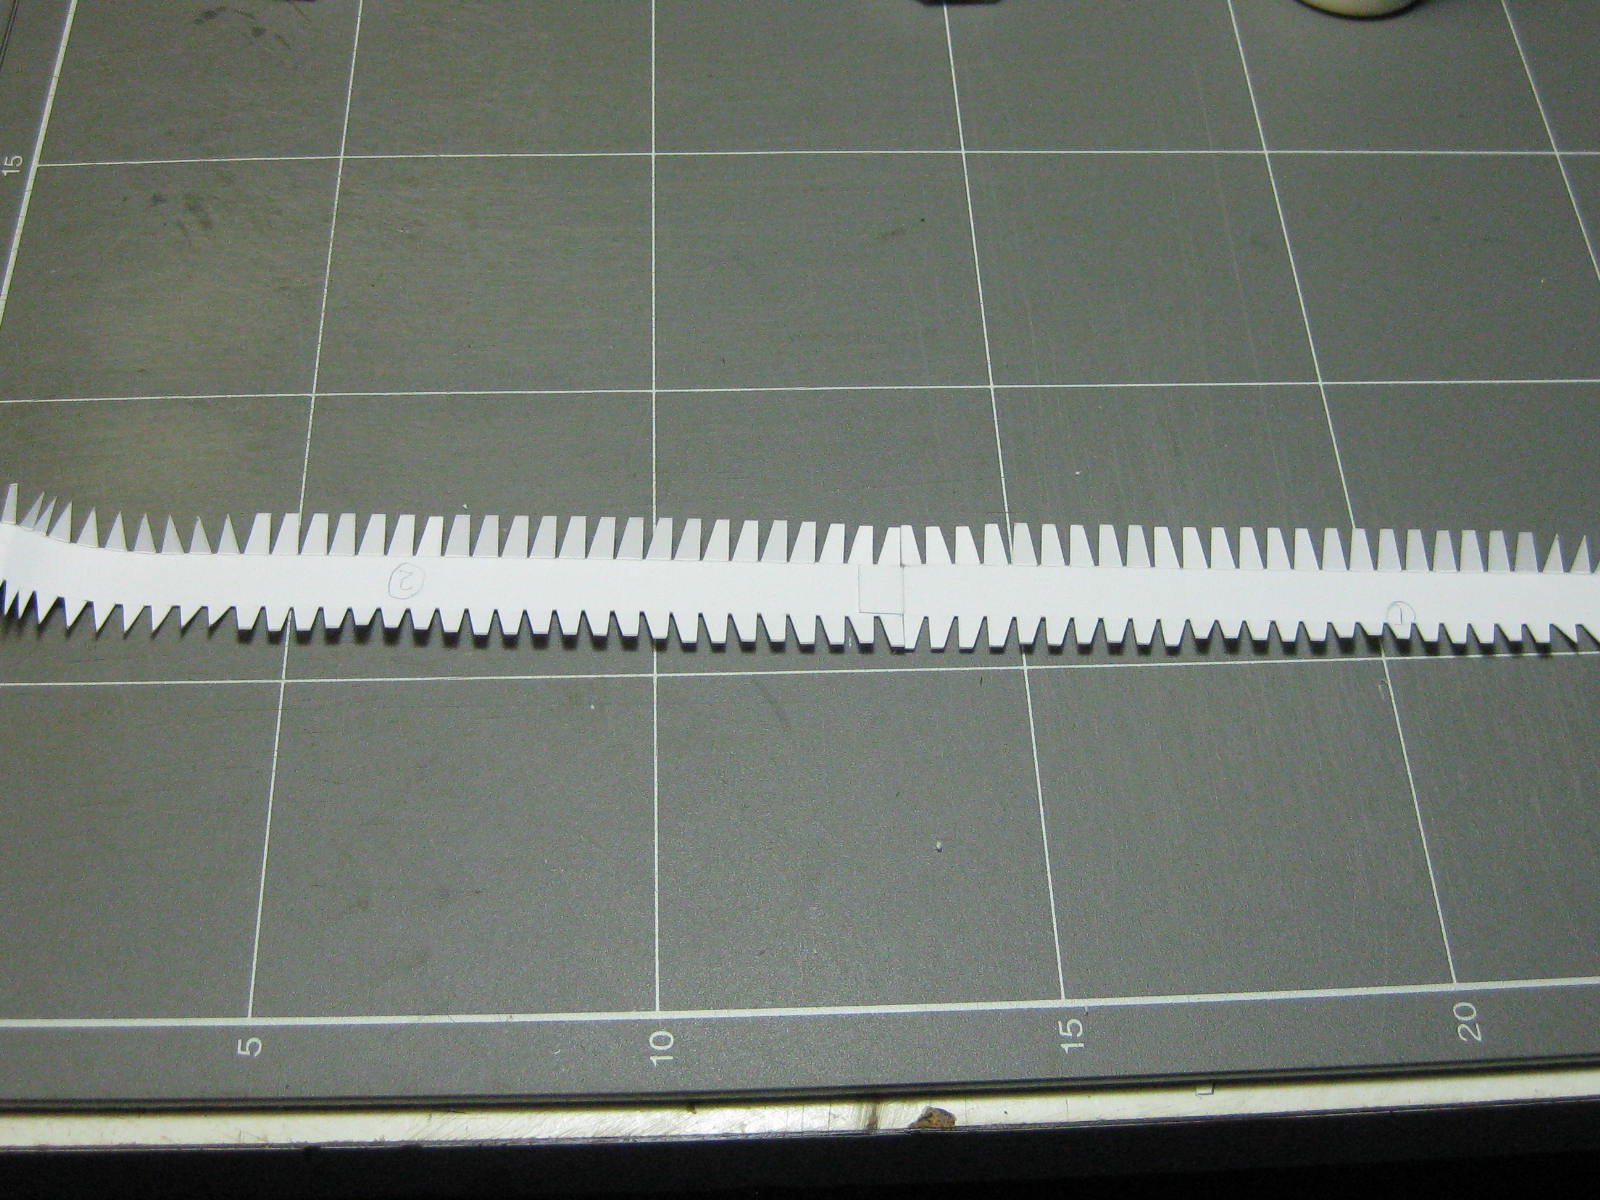
After spending over an hour cutting all the tabs on the side pieces I finished up cutting them all off again, as the fit was terrible :

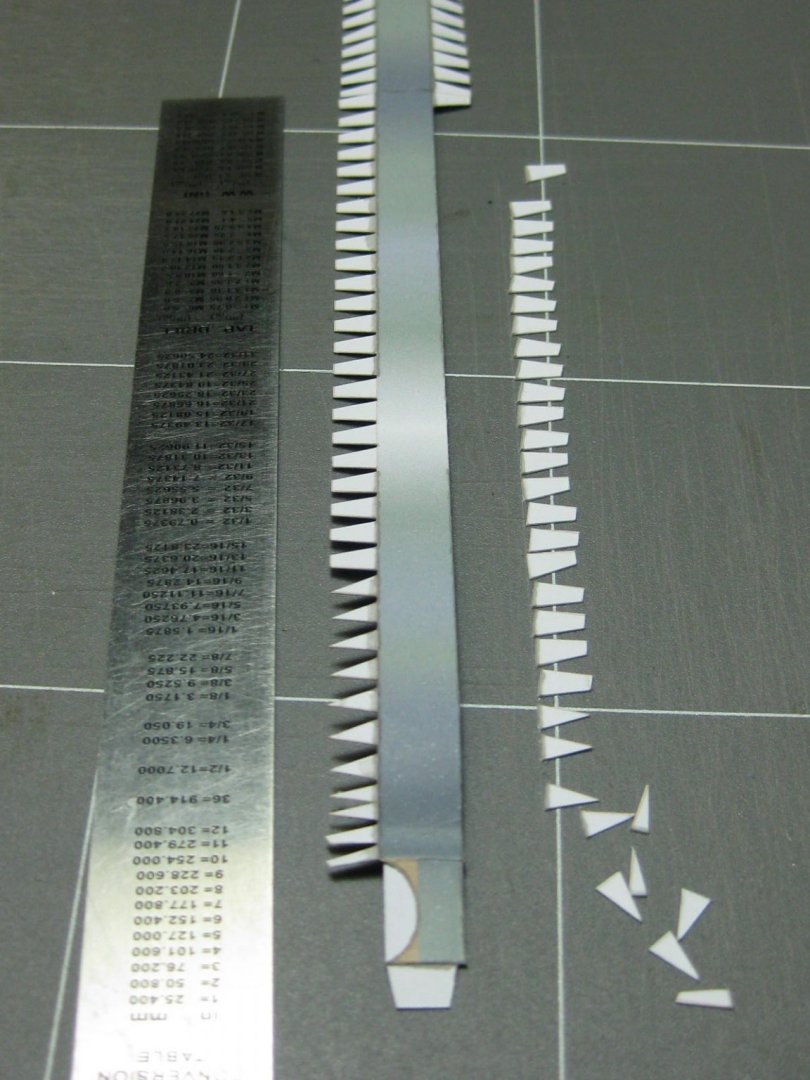
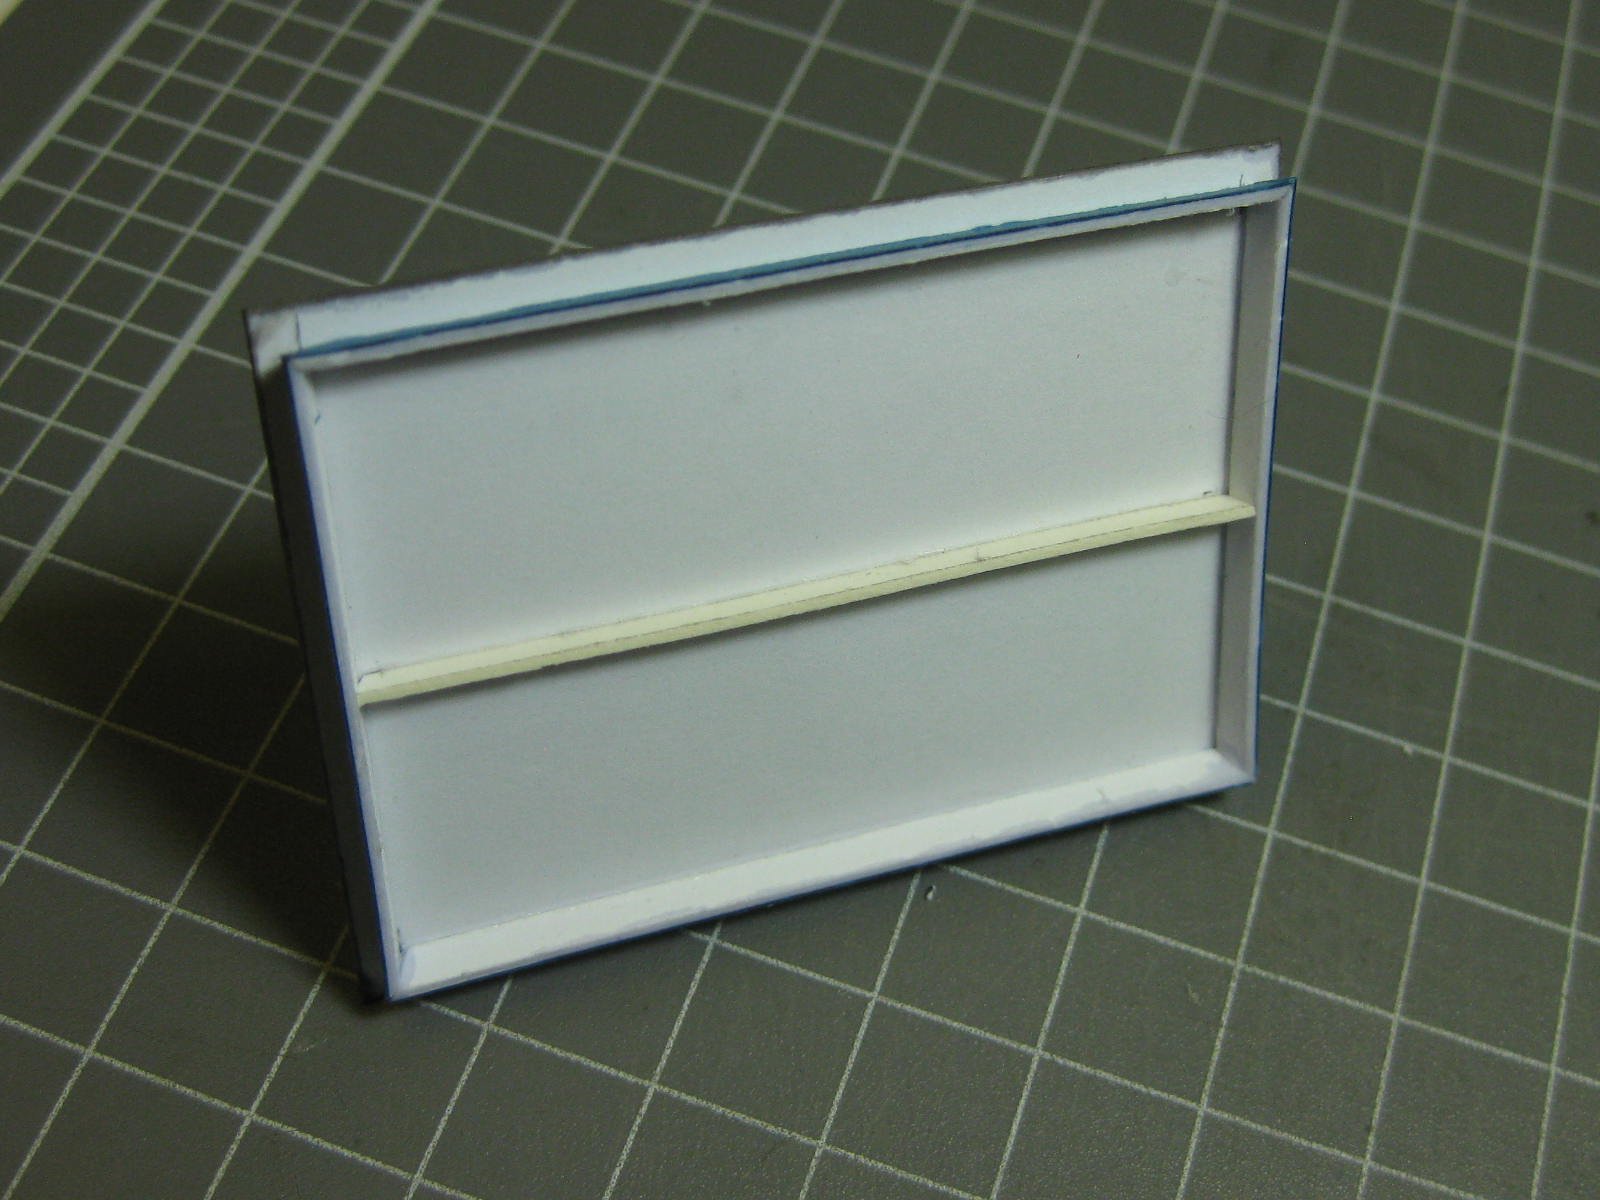
Without the tabs I needed something to glue the sides to, so I cut some 0.5mm card slightly smaller than the front/back pieces and laminated it to them :
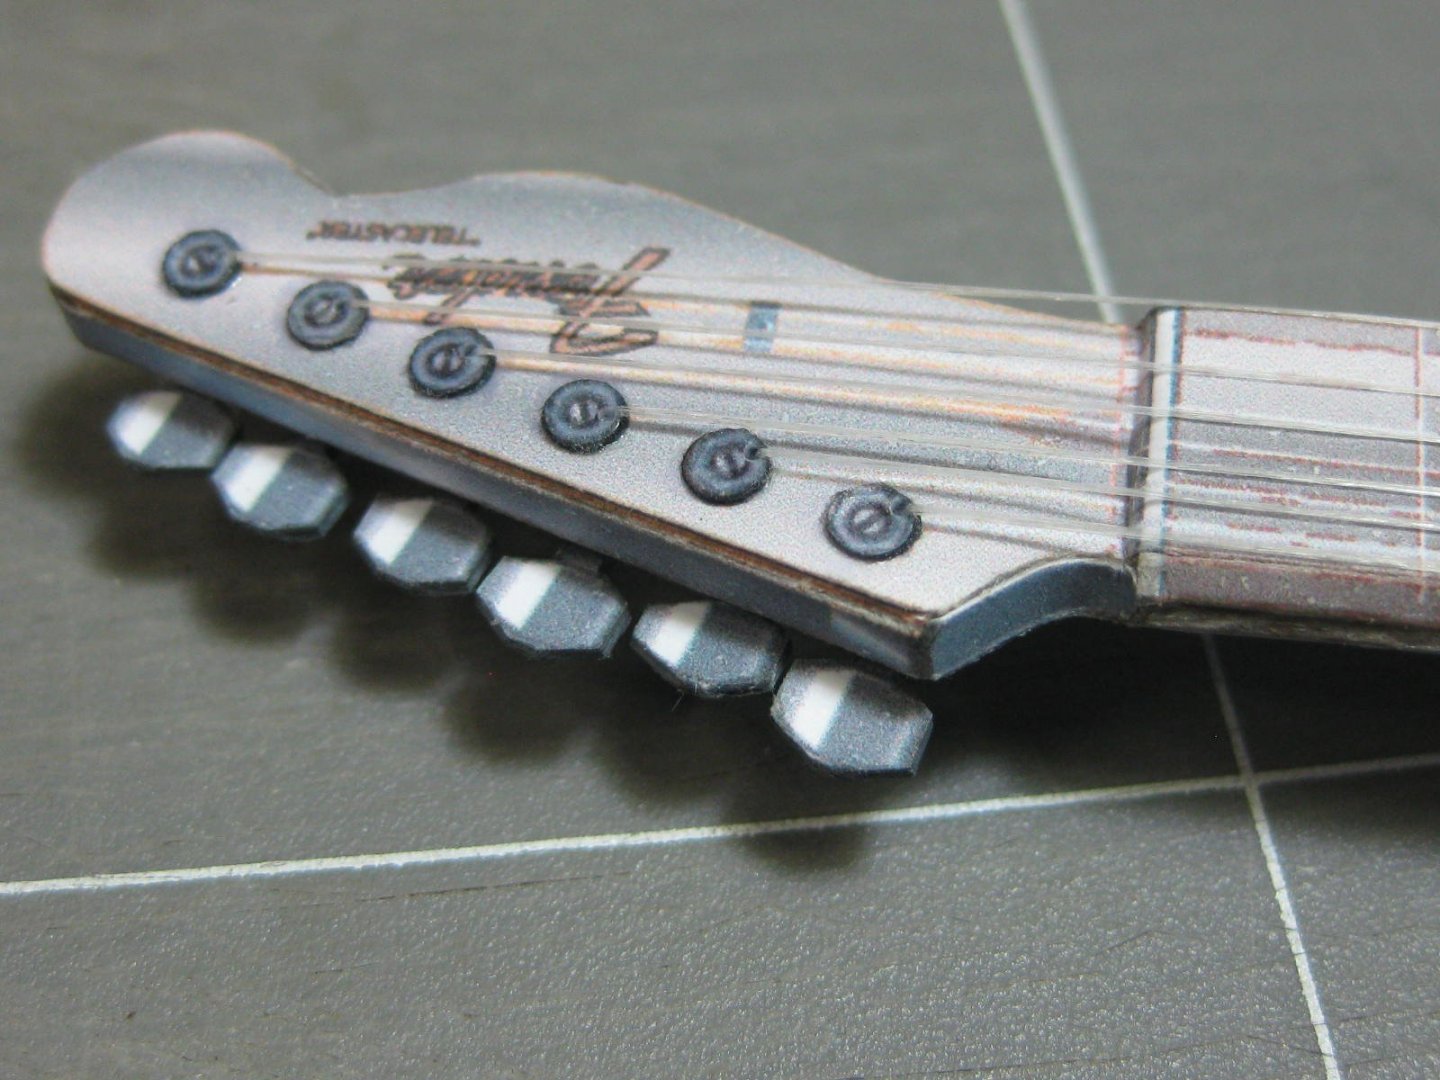
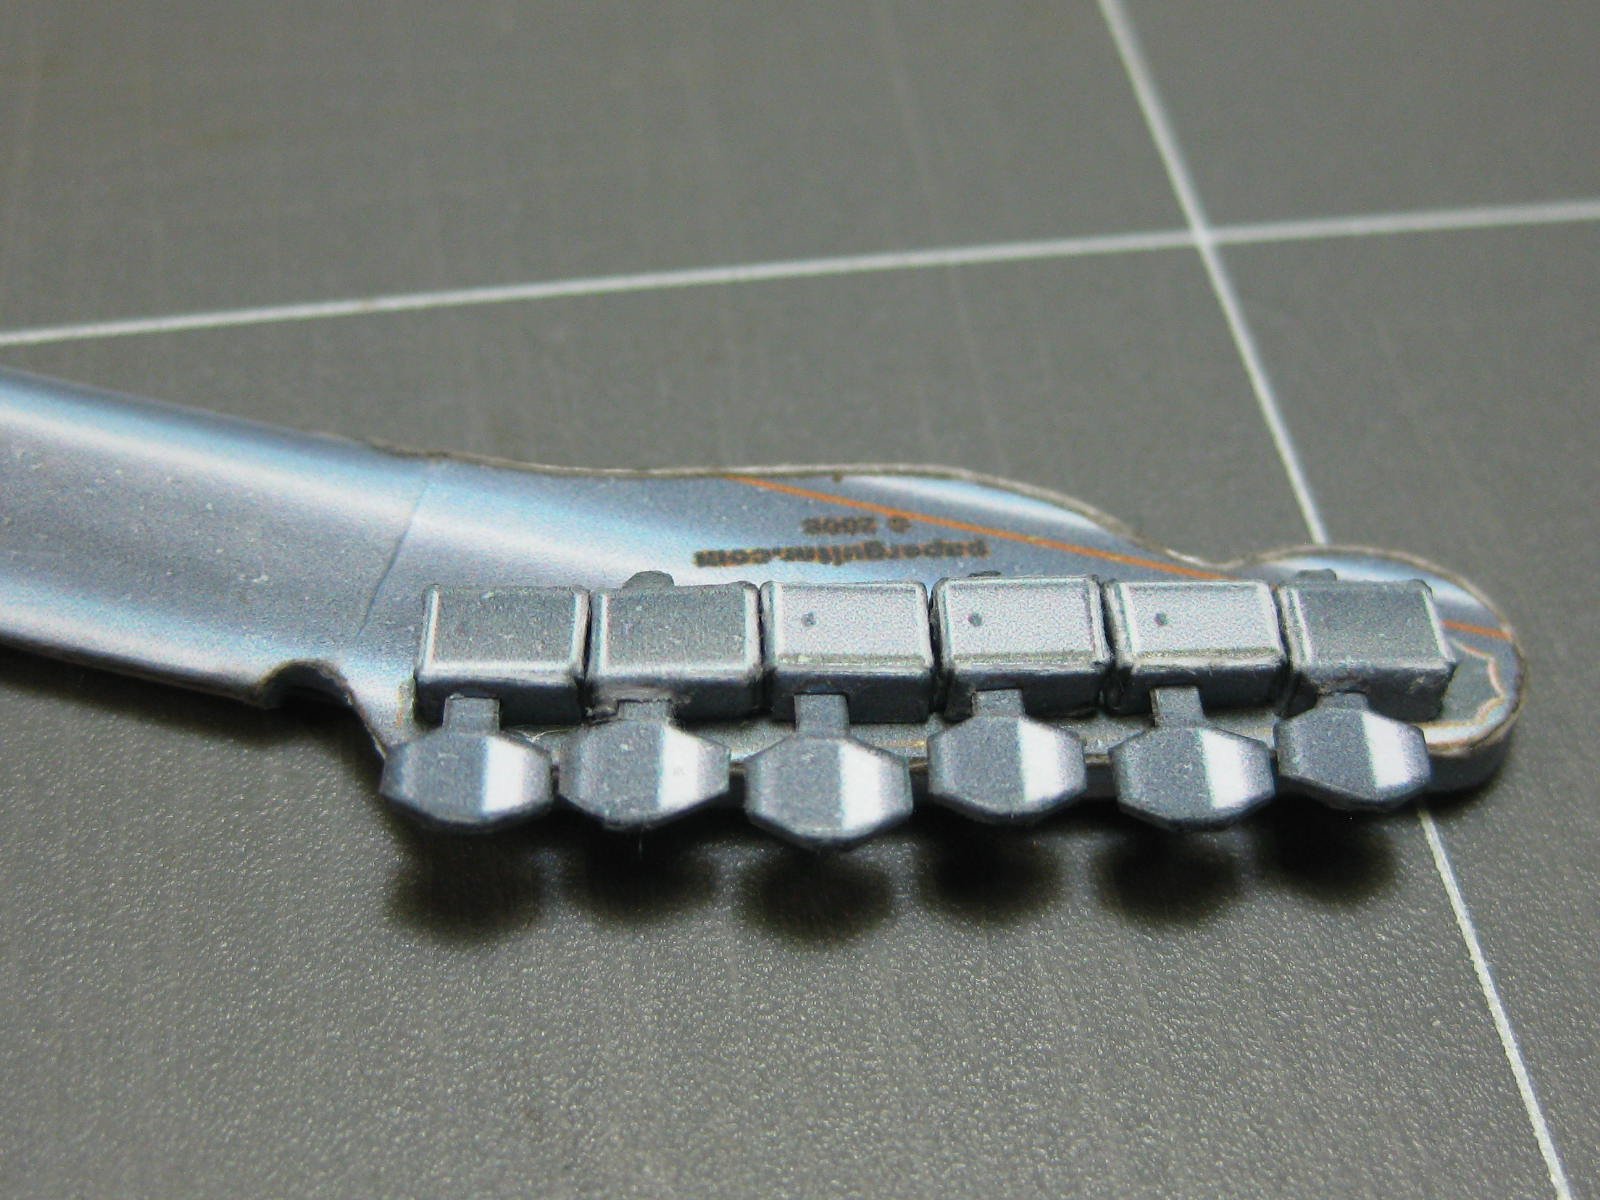
No more build pics, so here's the finished model. The strings are my own addition (the kit only had them printed on). They are elastic rigging cord :

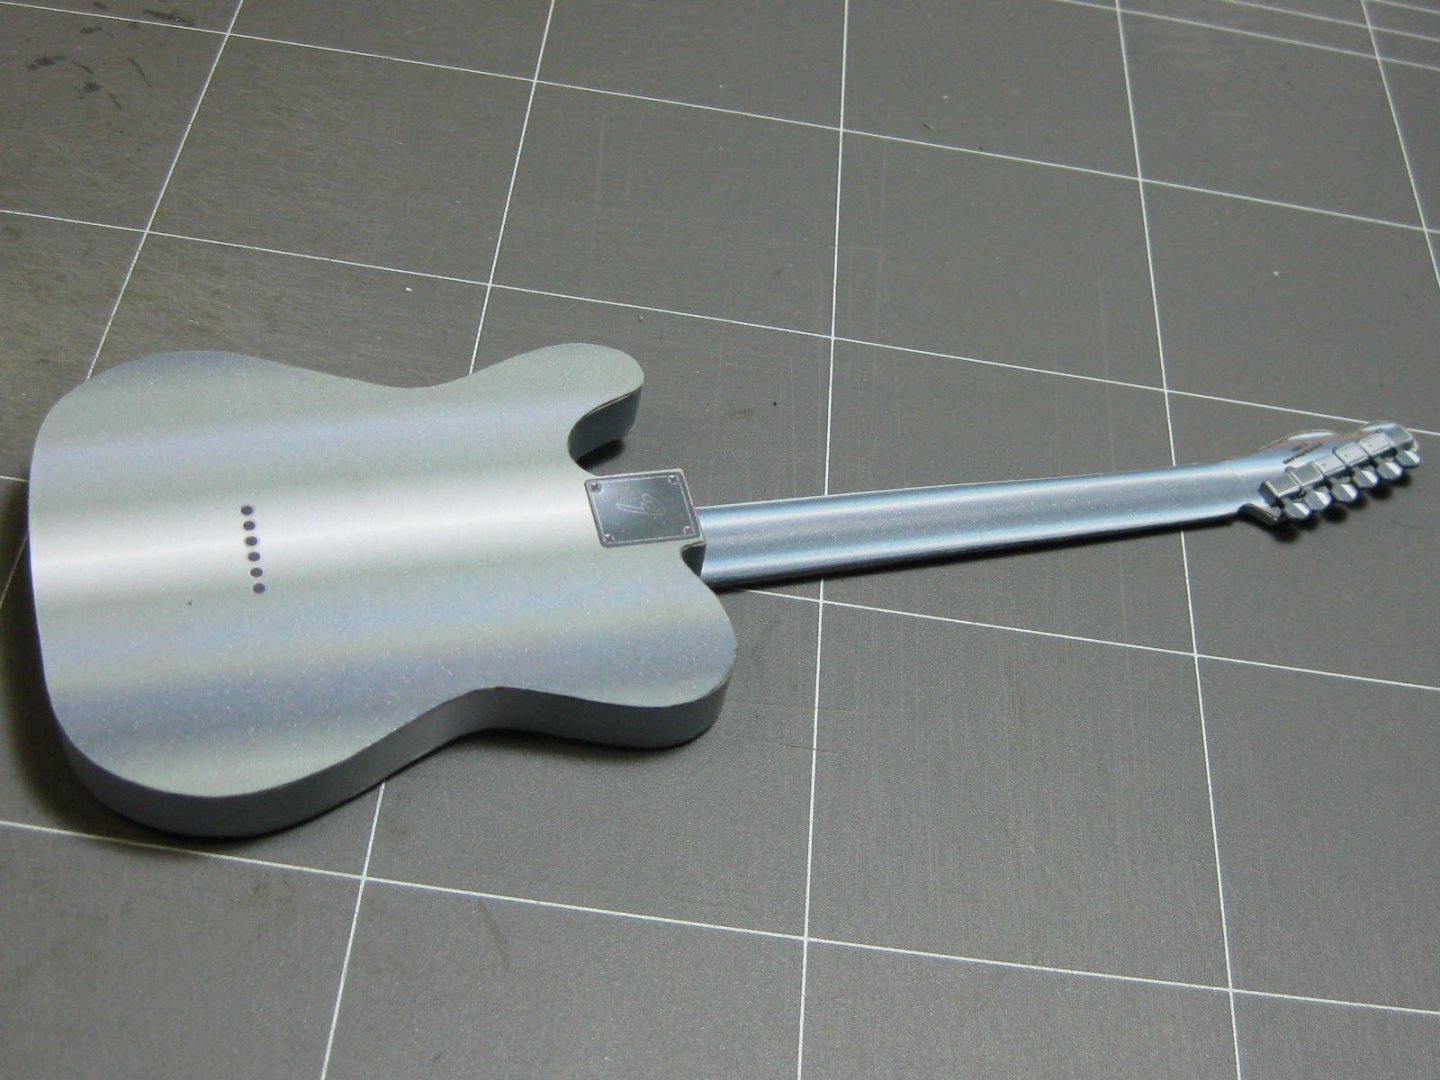
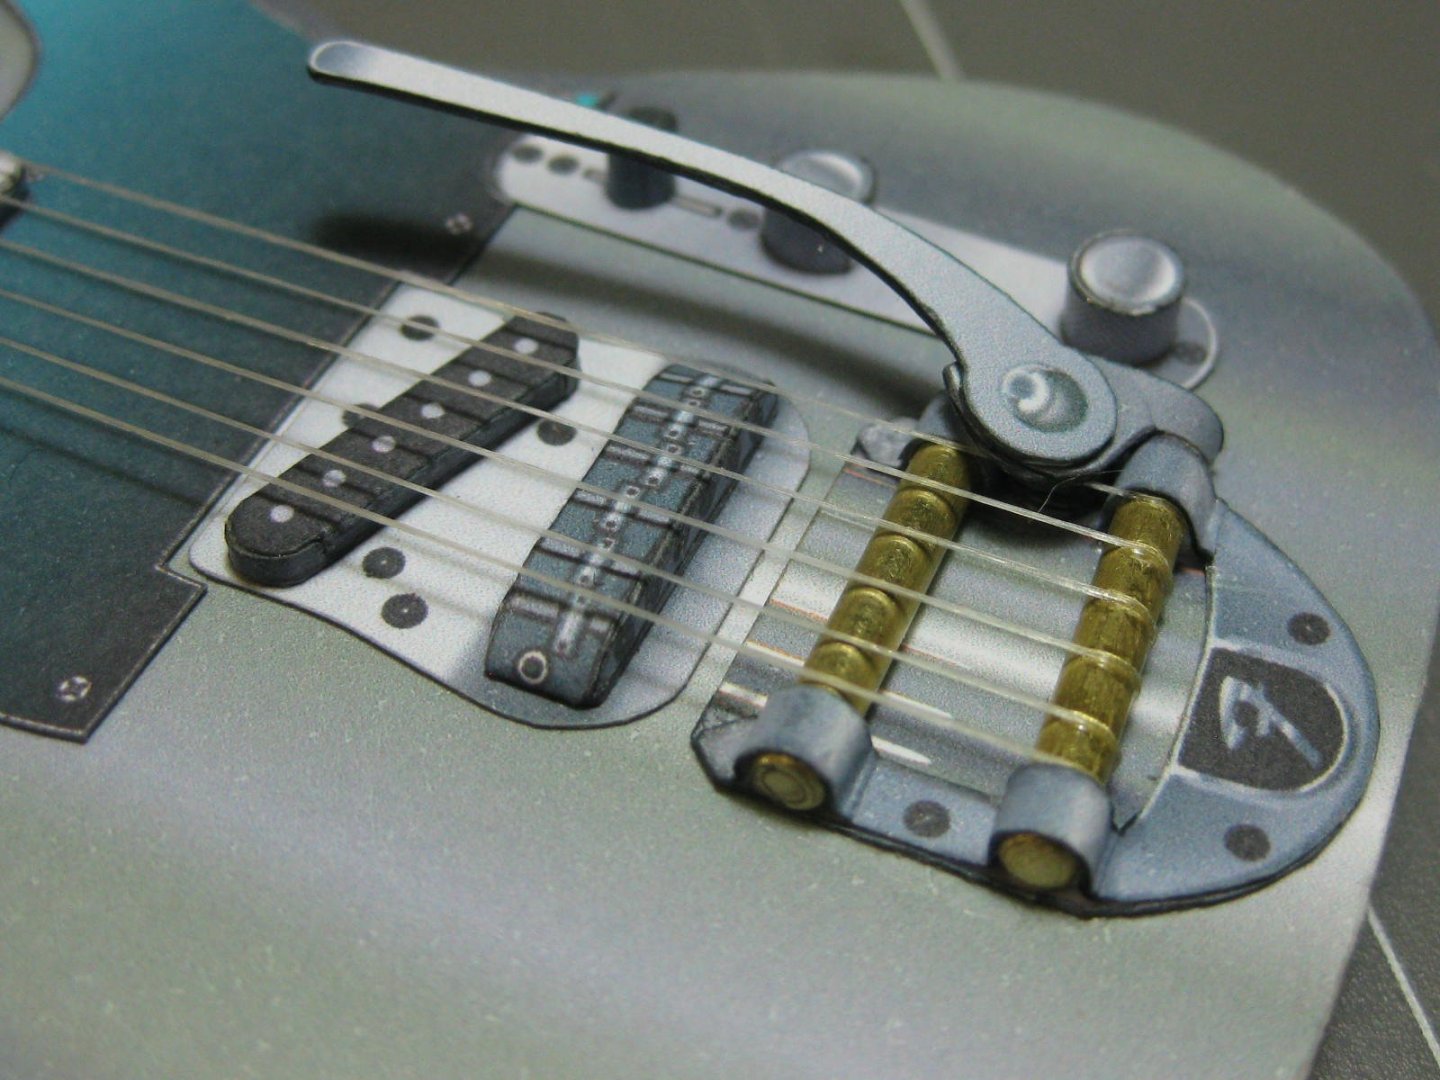
A couple of coats of Gloss clear still need to be applied.
Danny
-
On 1/18/2019 at 7:02 AM, mtaylor said:
For the most part, those usually appear in the scratch area. However, there are some in the kit area. Use this link, and then pick "Ships in Bottles" for a list of all the models.
"Ships in Bottles" is the one category where actually add the Scratchbuilt models to the Kit Index. There are quite a few - 63 to date.
Danny
-
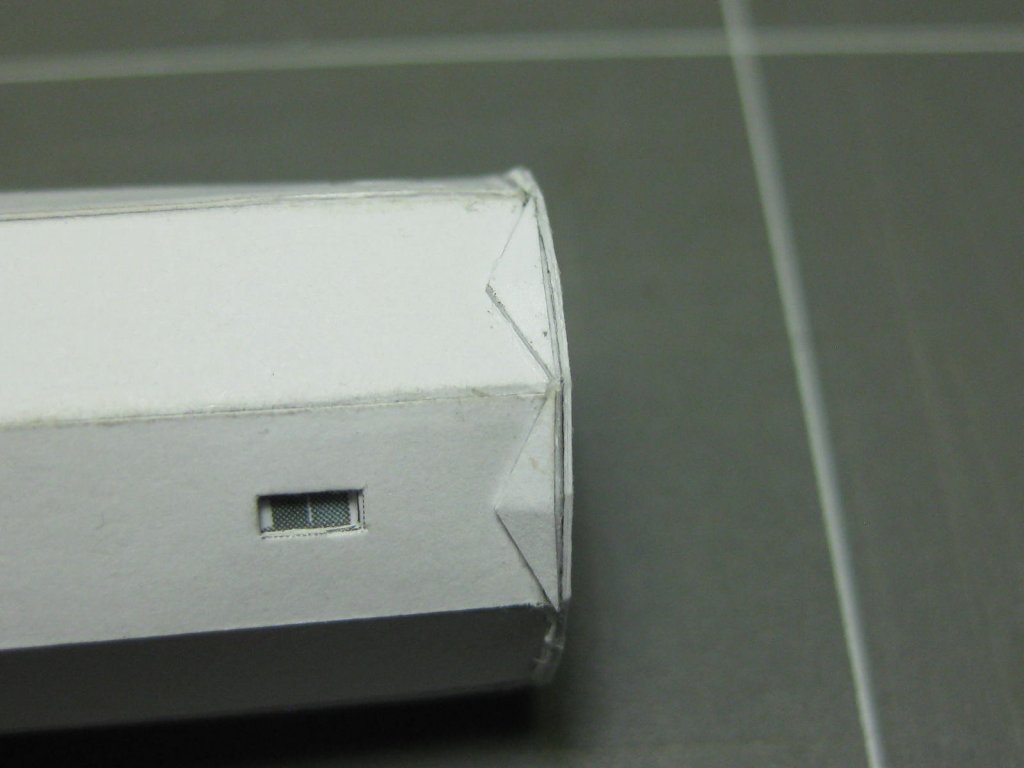
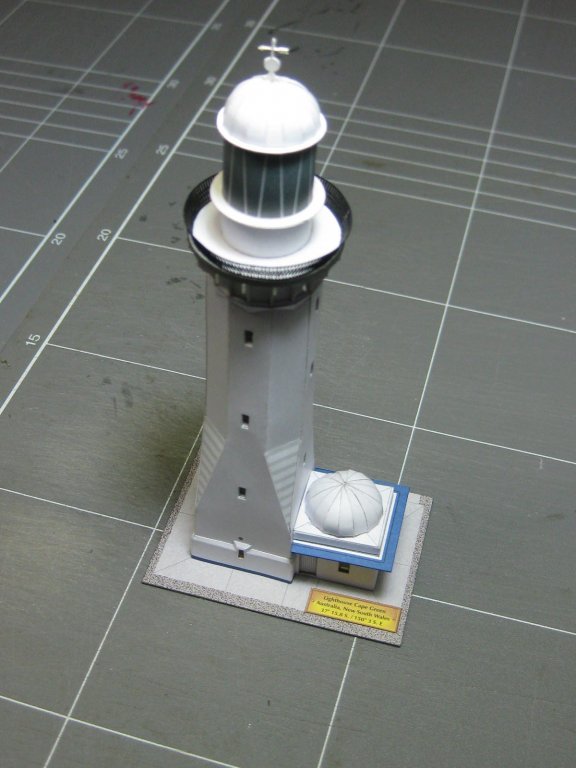
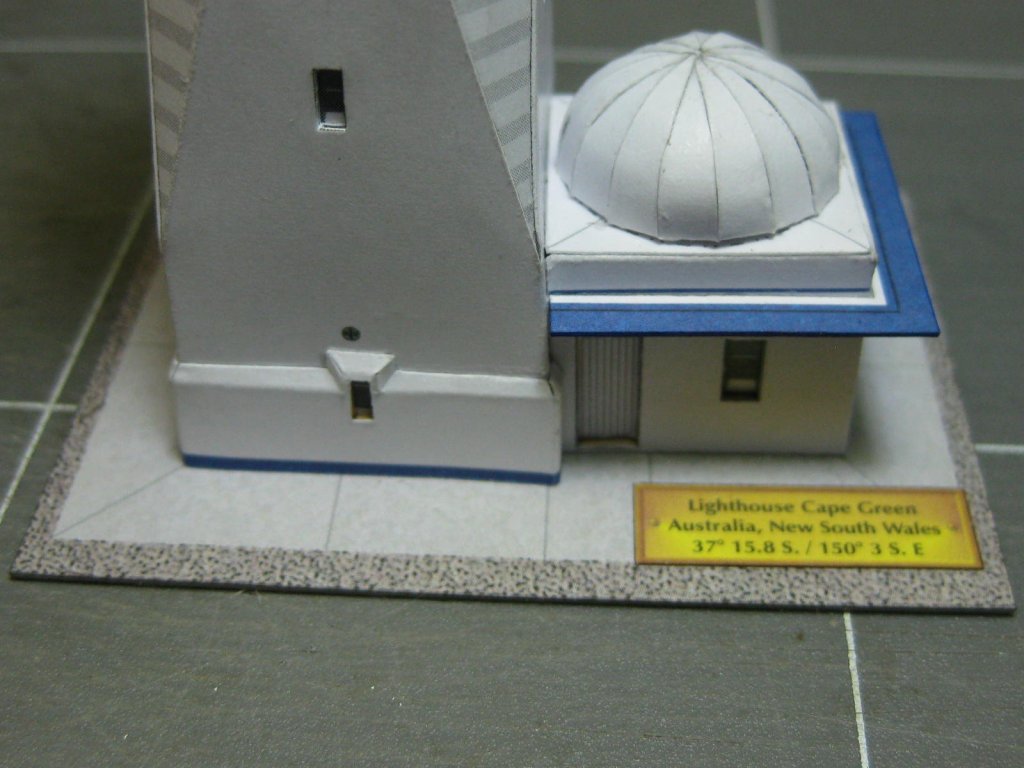
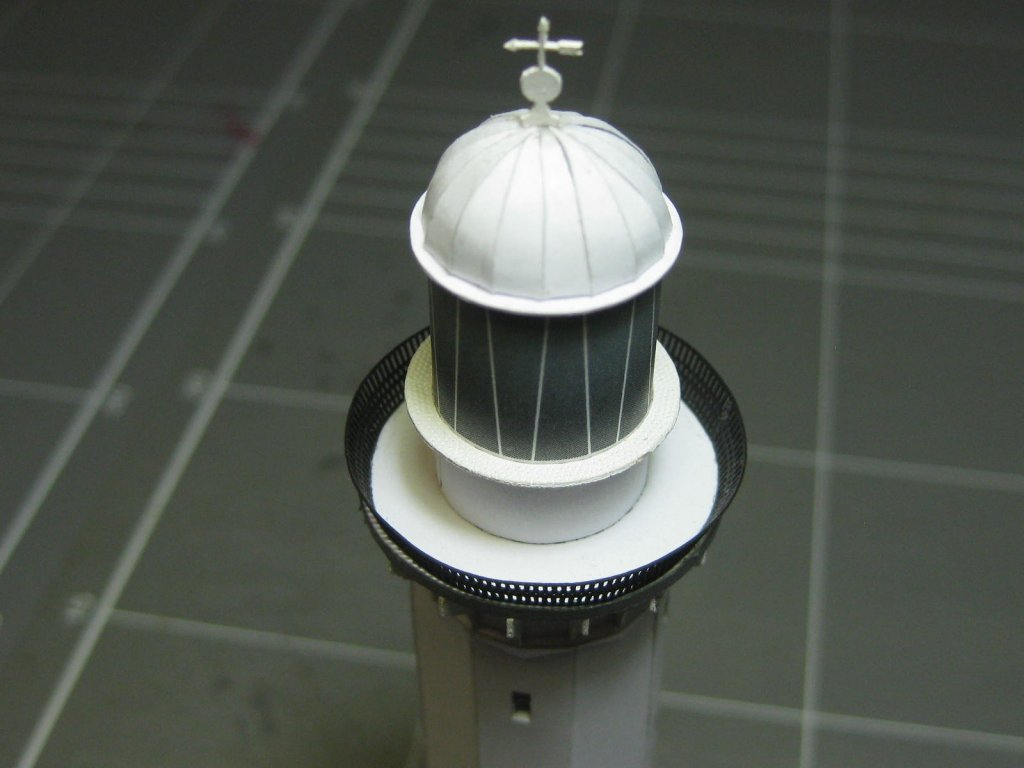
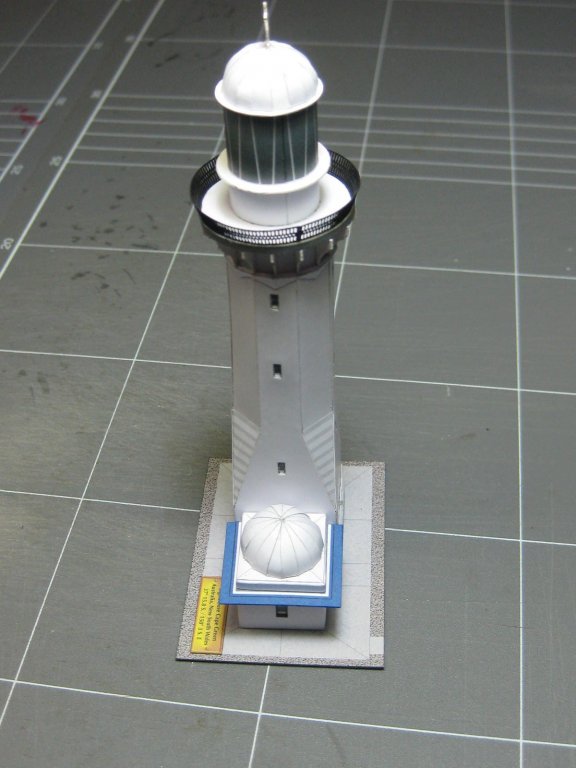
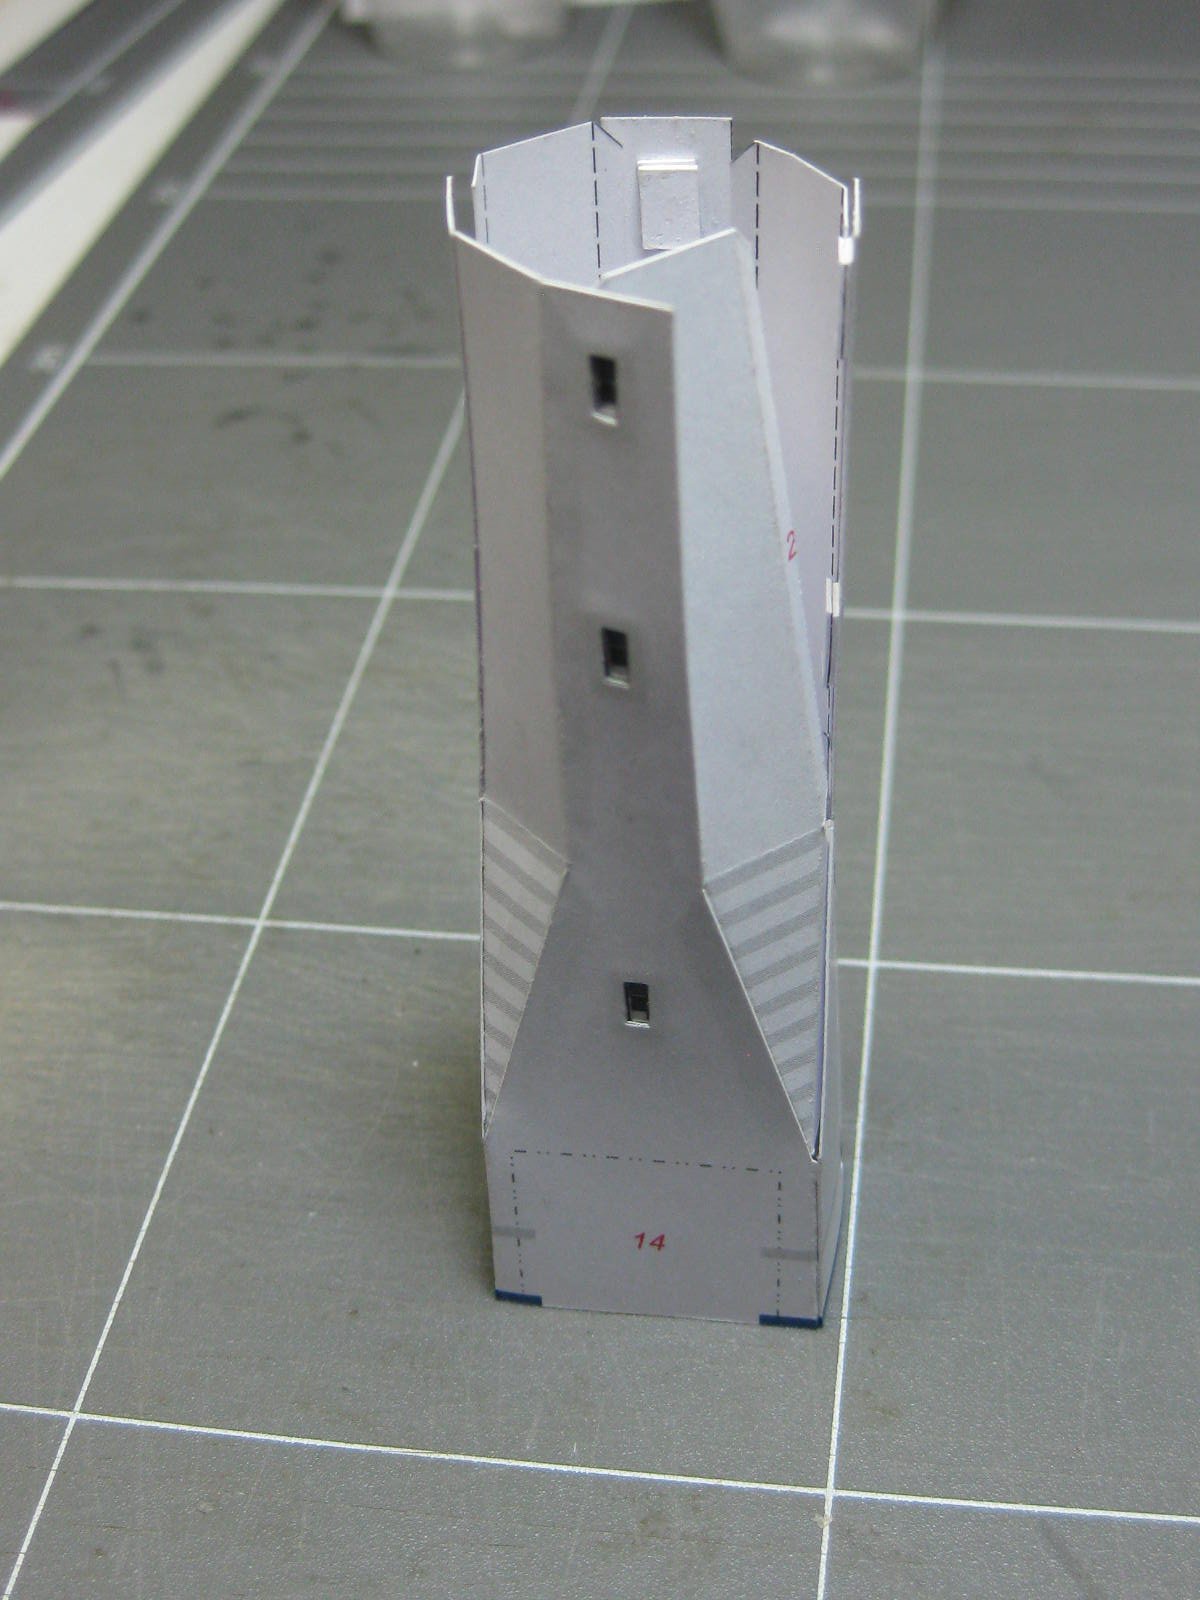
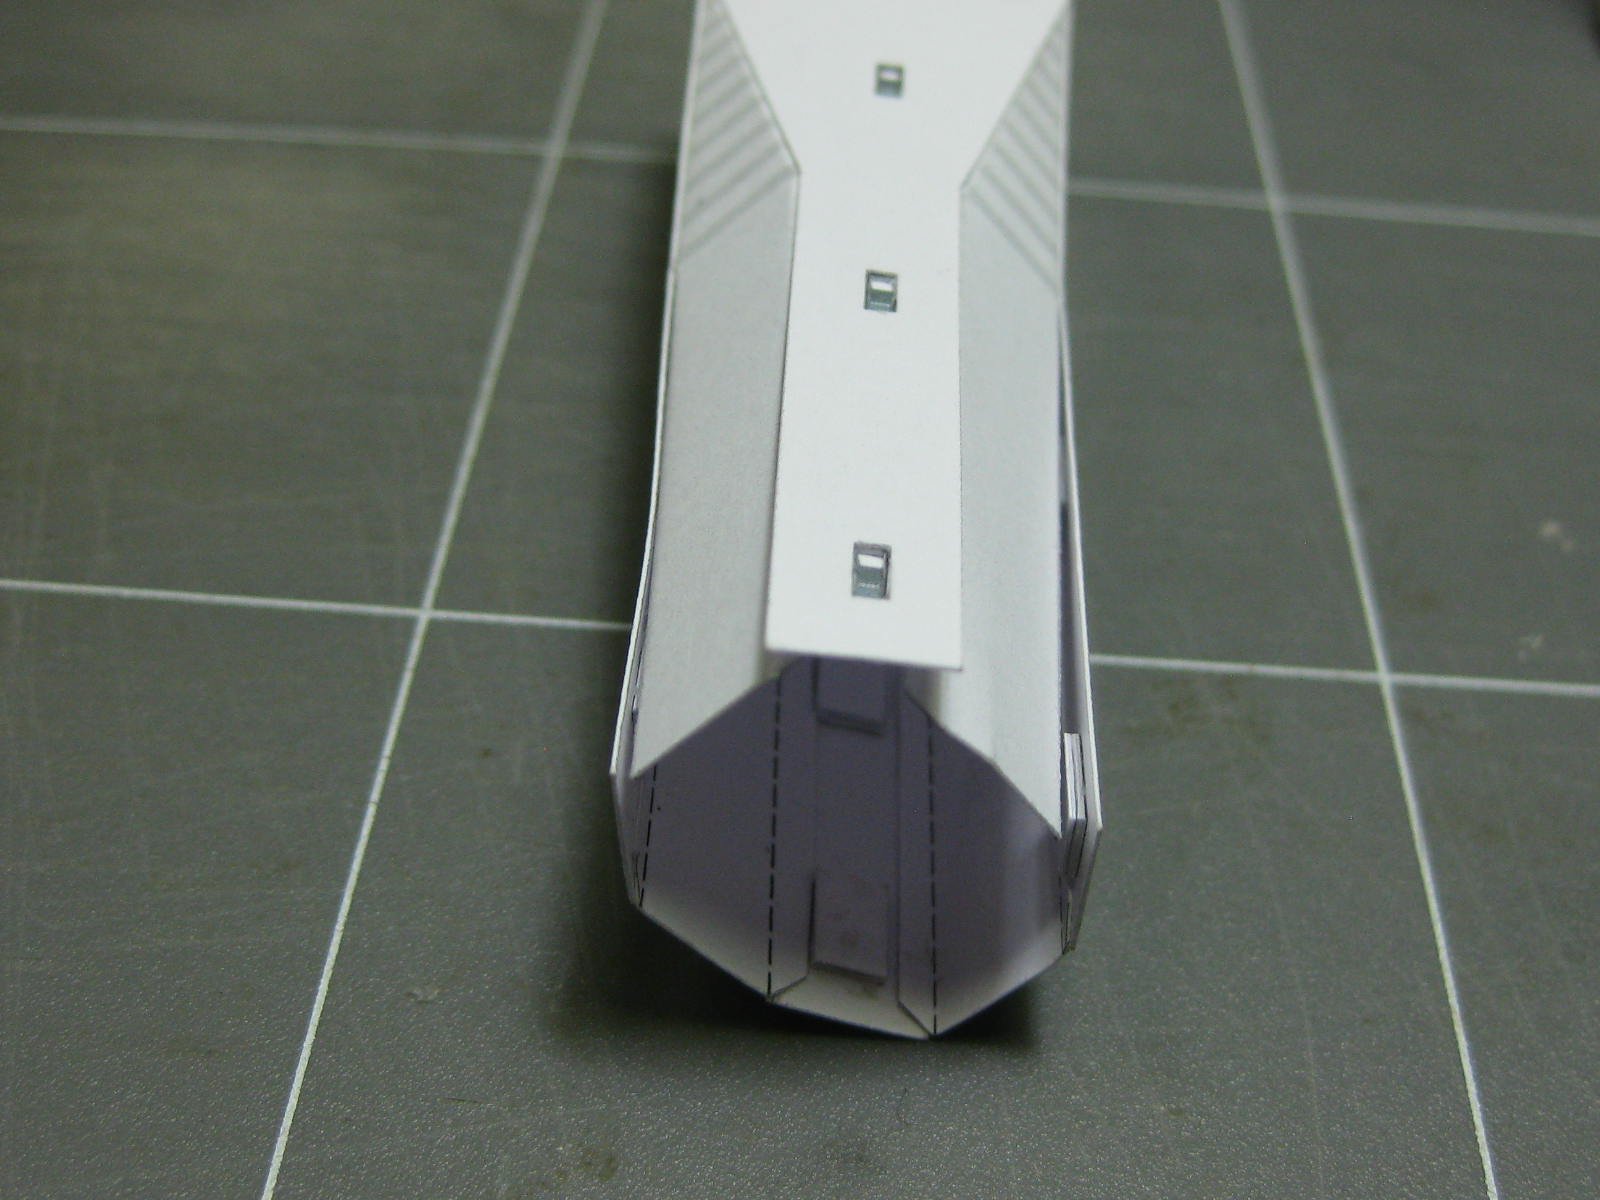
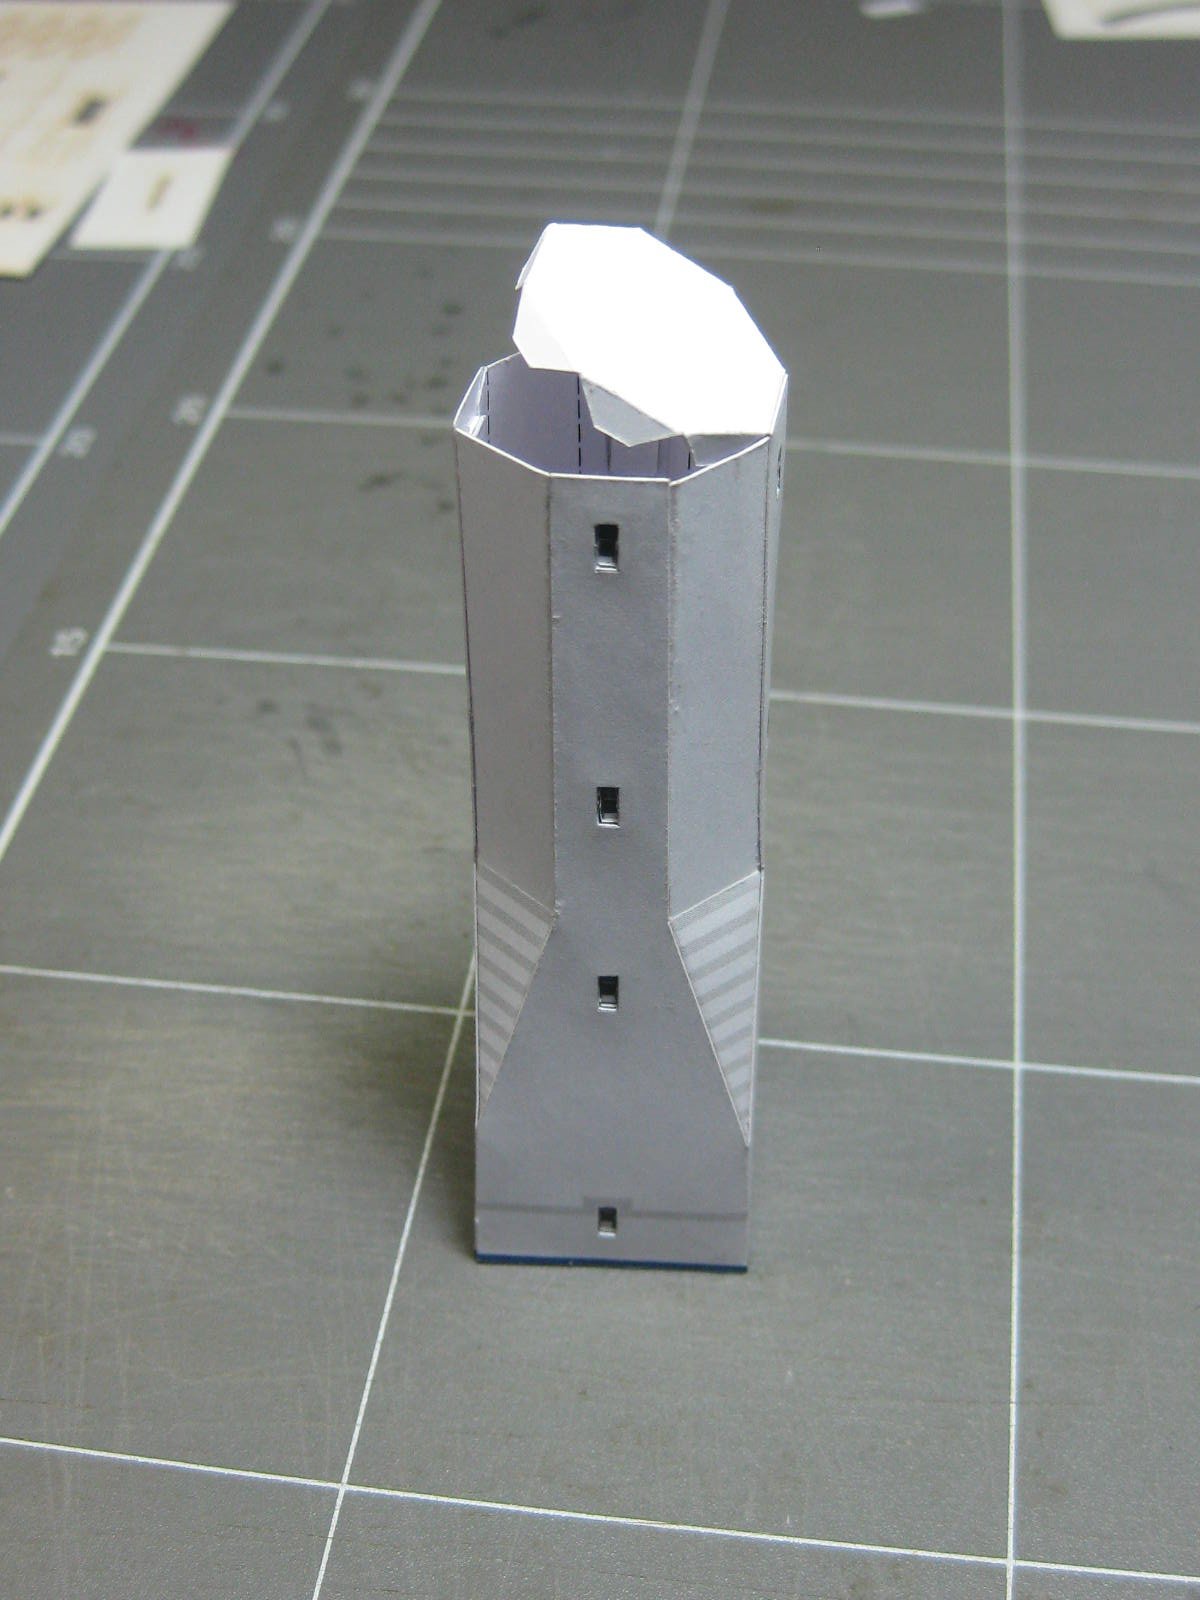
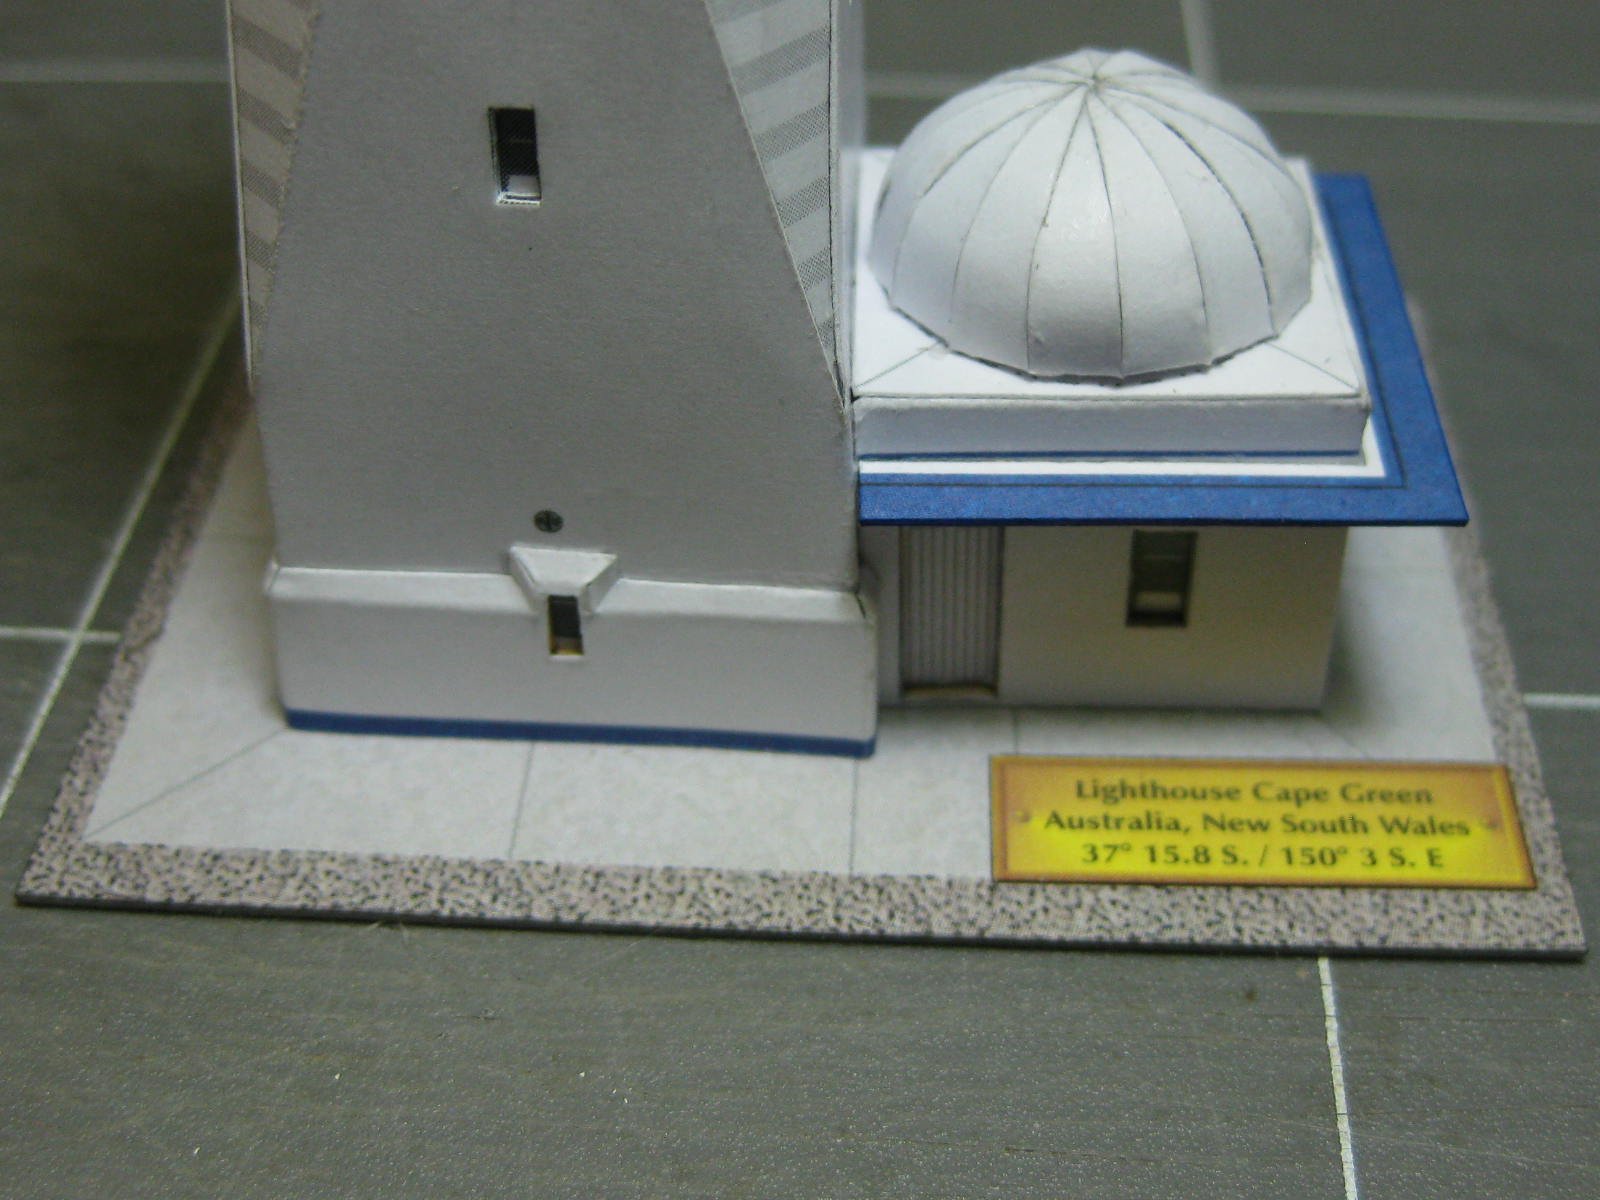
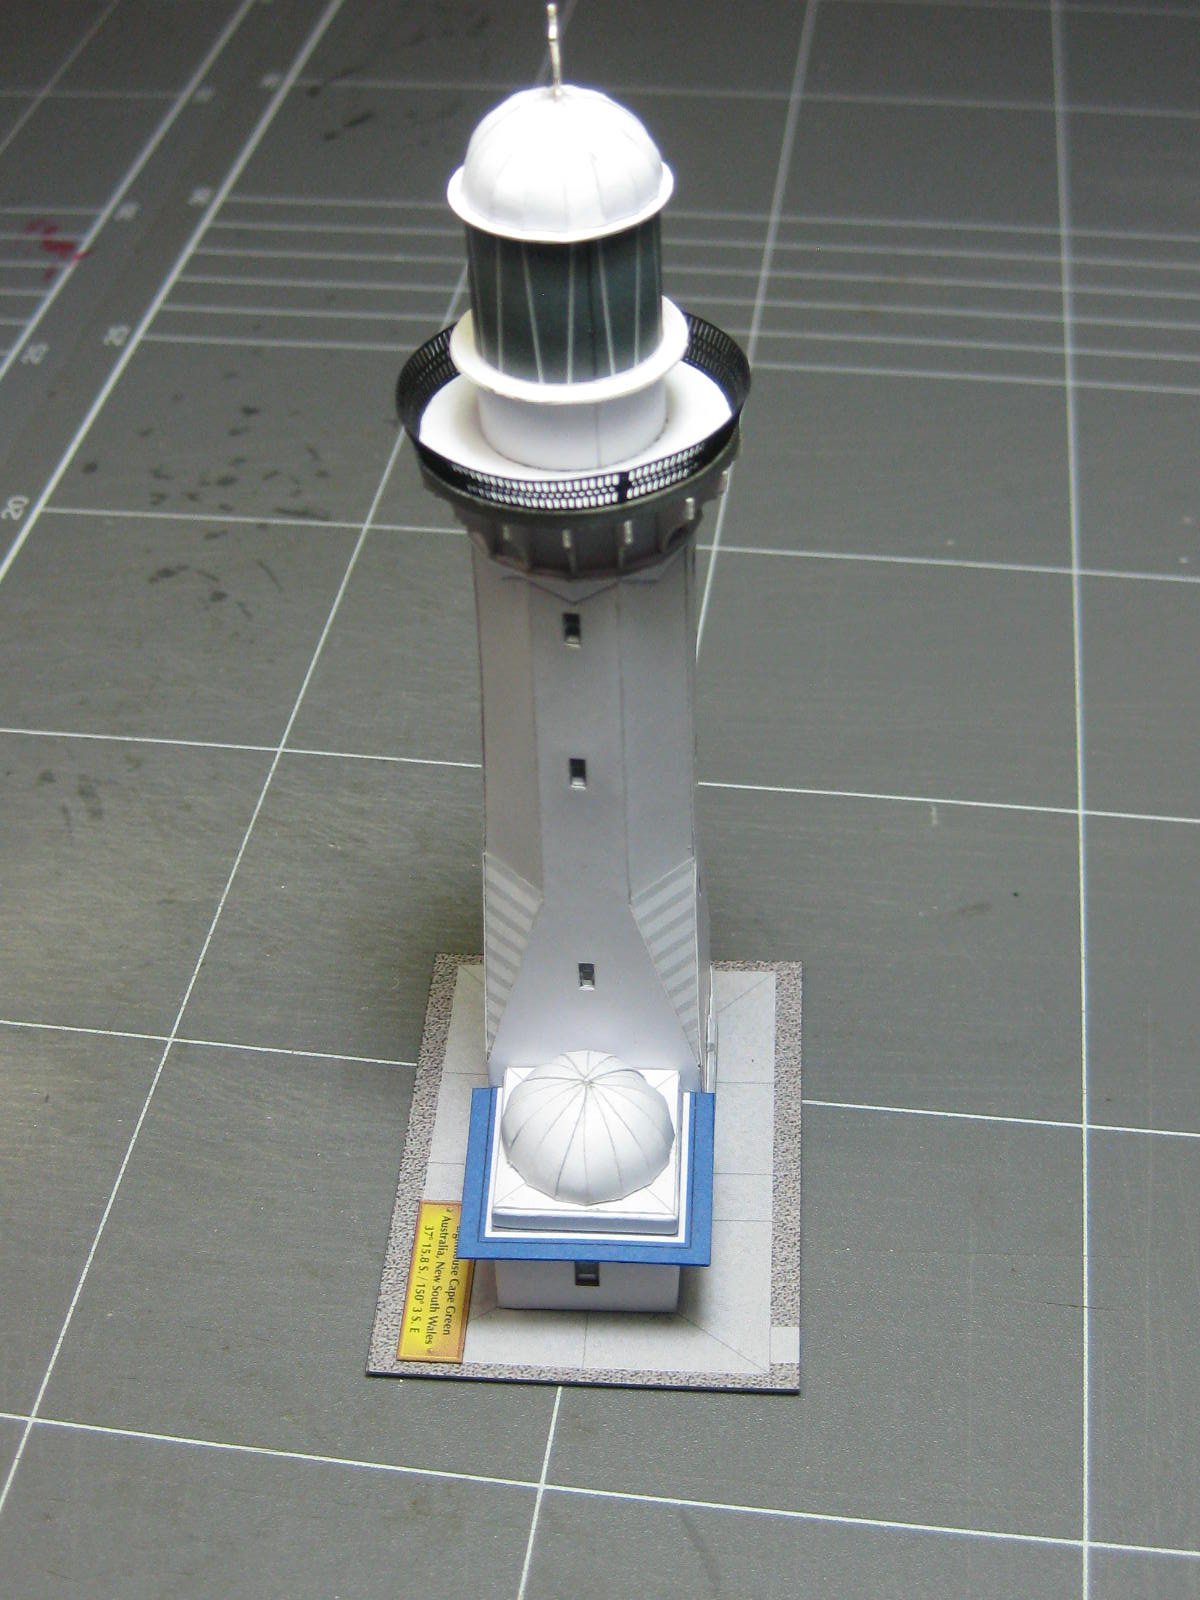
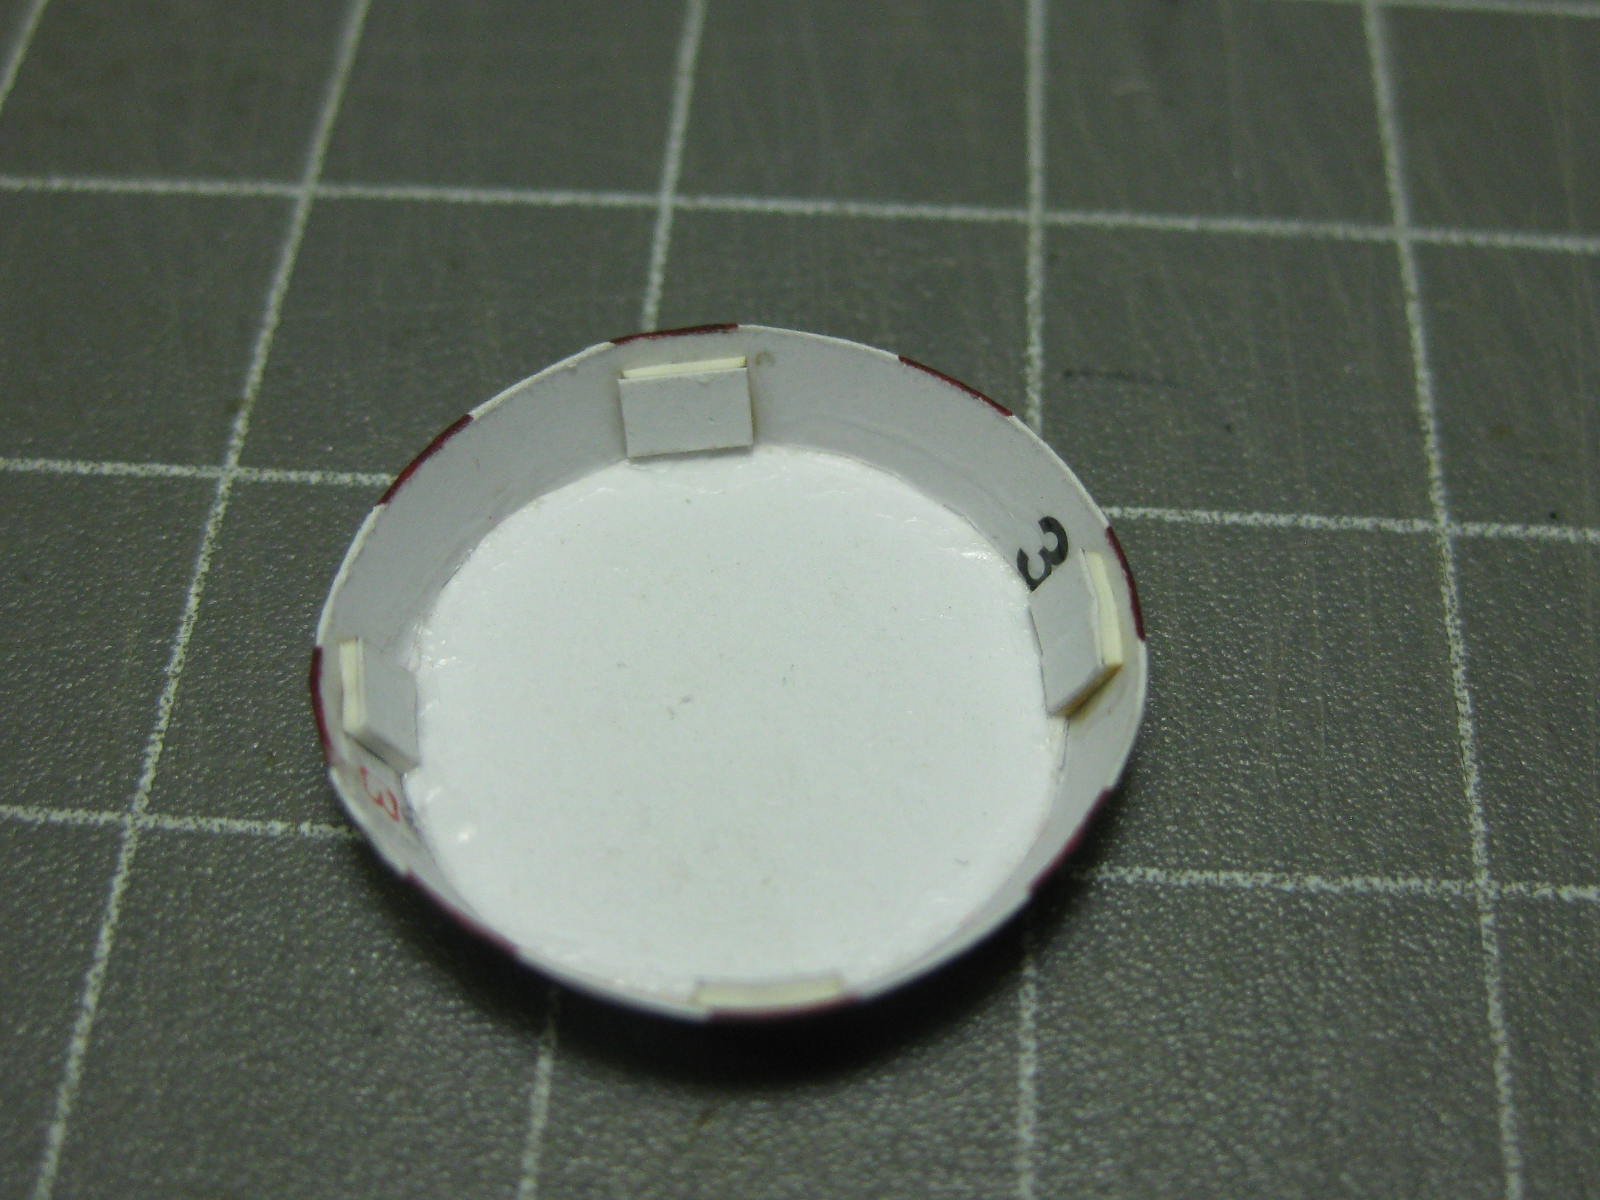
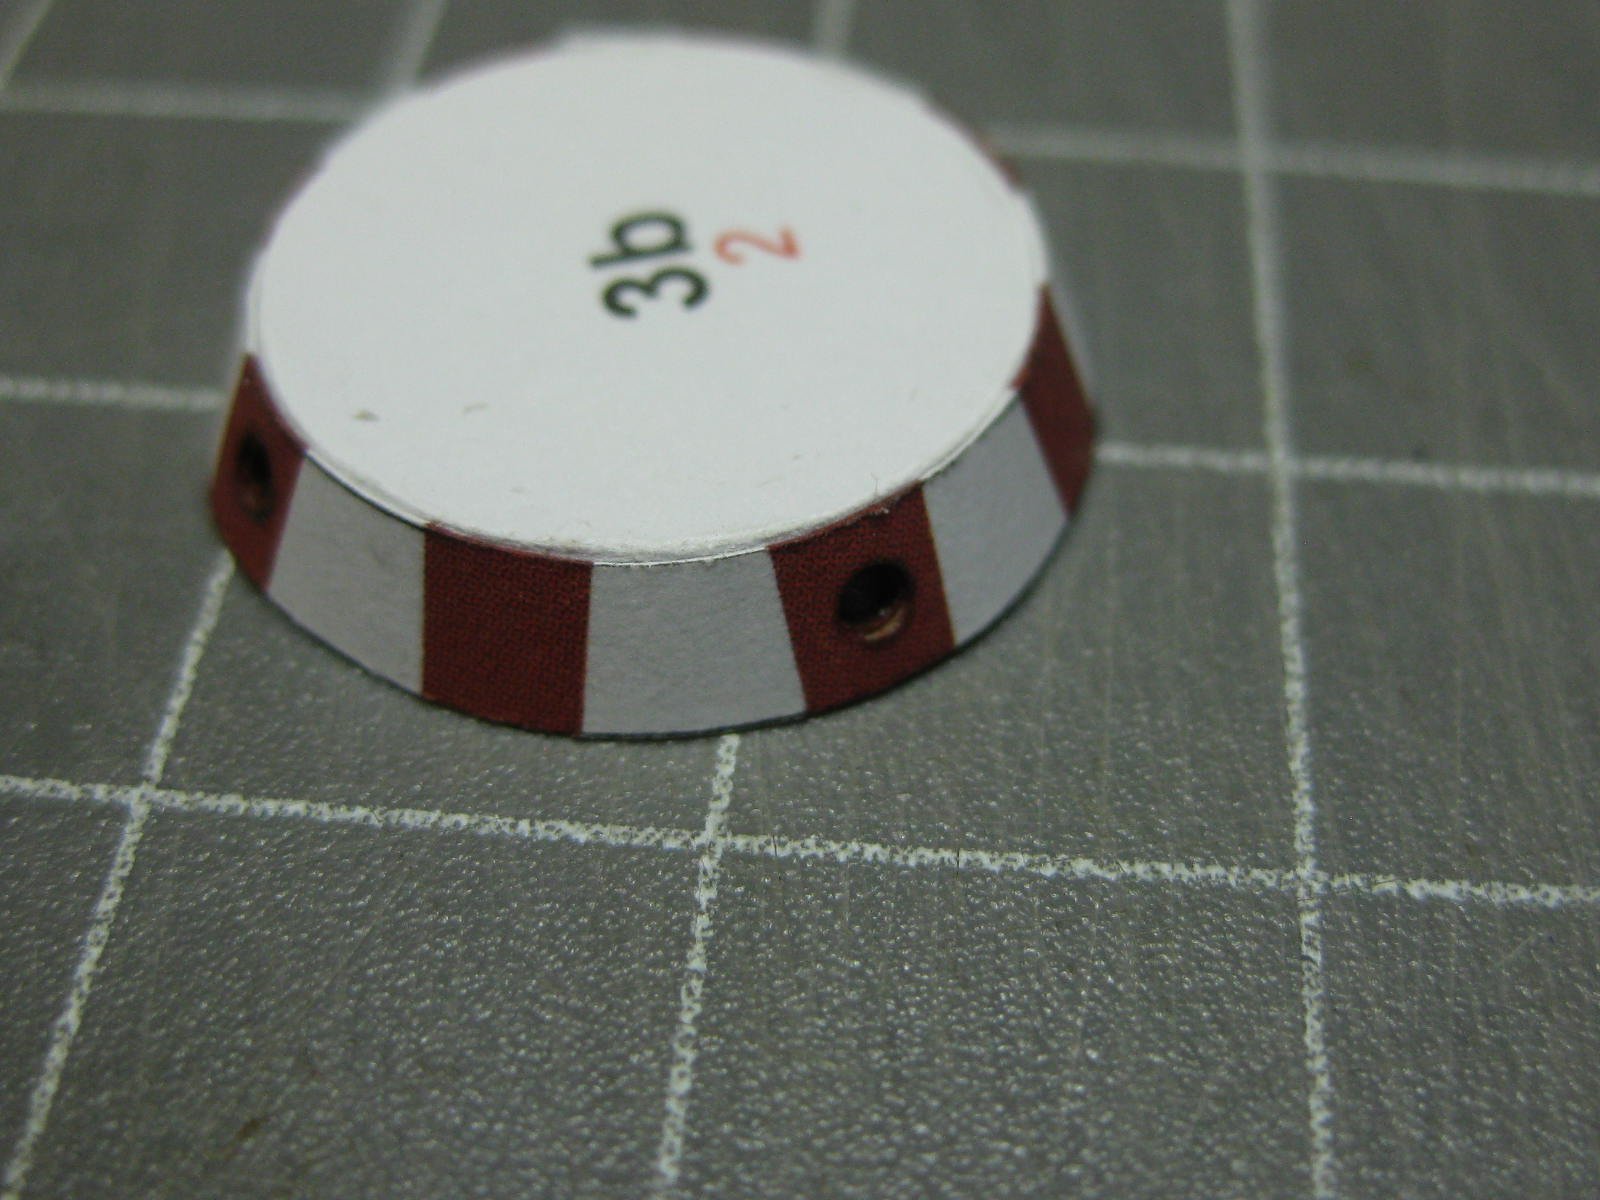
The final lighthouse - Green Cape near Eden on the New South Wales South Coast. At 29 metres high it is the state's 2nd tallest lighthouse. It was built between 1881 and 1883. More info can be found HERE.
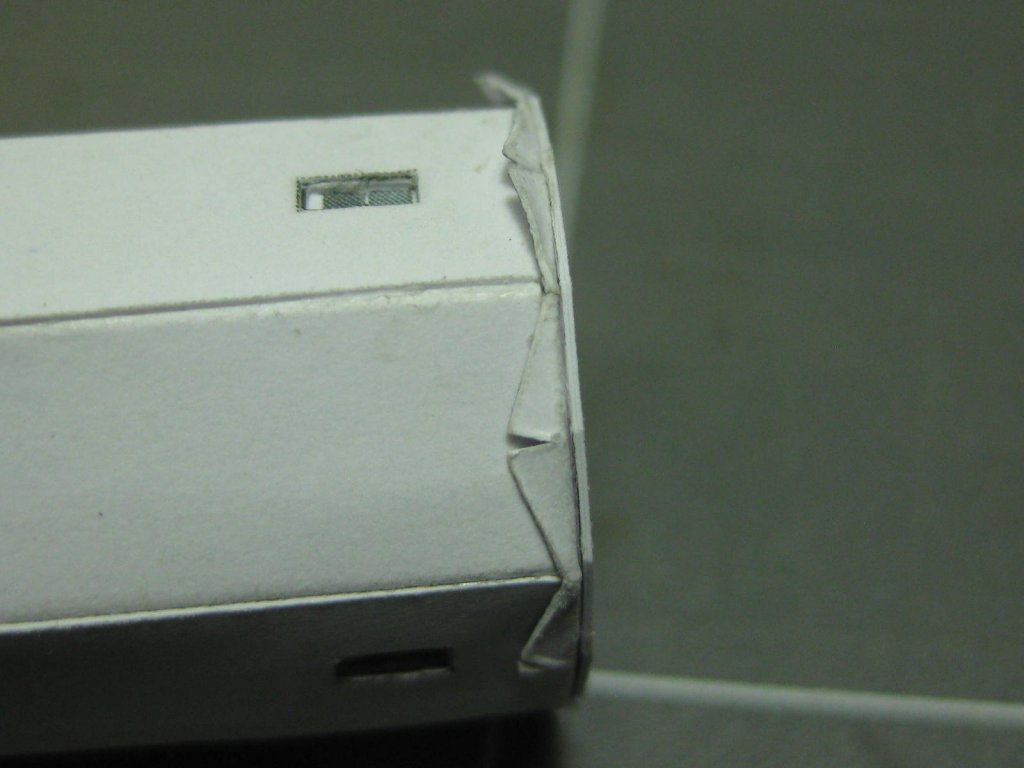
The main body of the lighthouse was a bit tricky to glue together owing to it's shape :
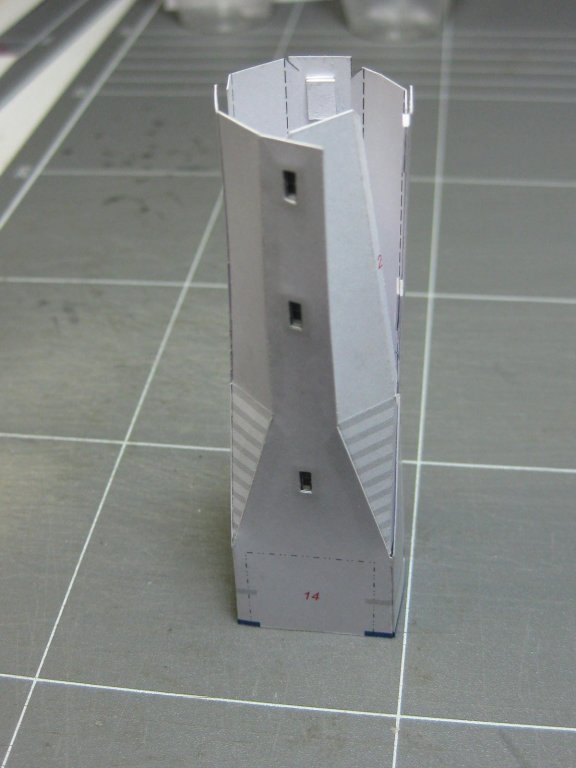
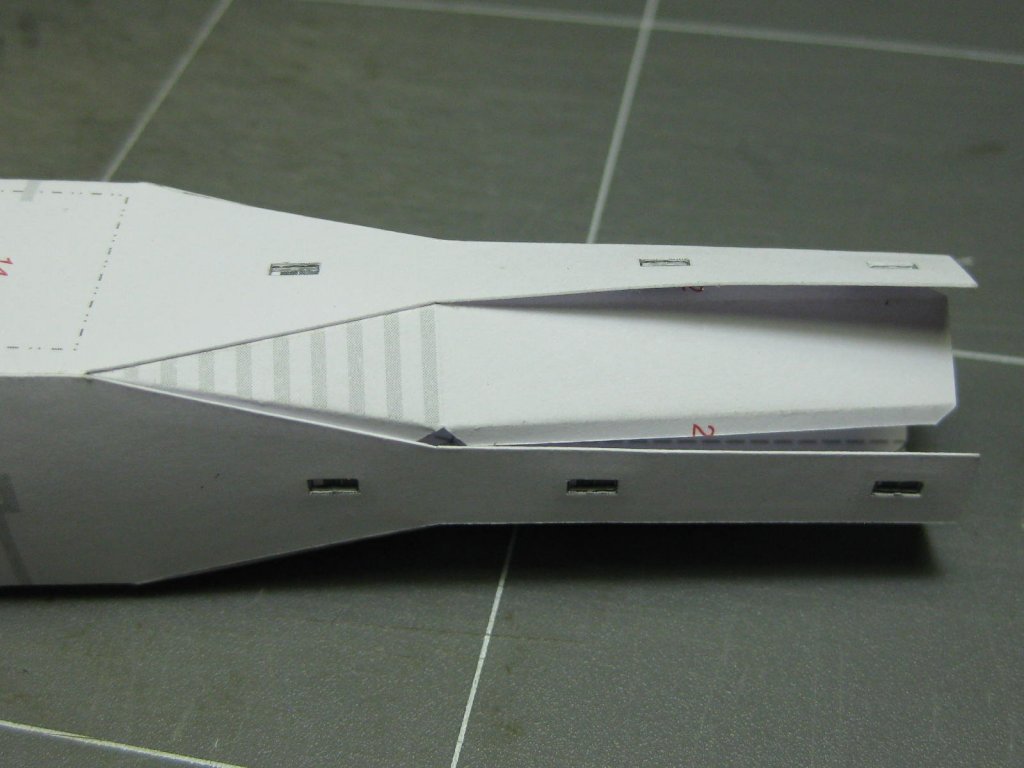
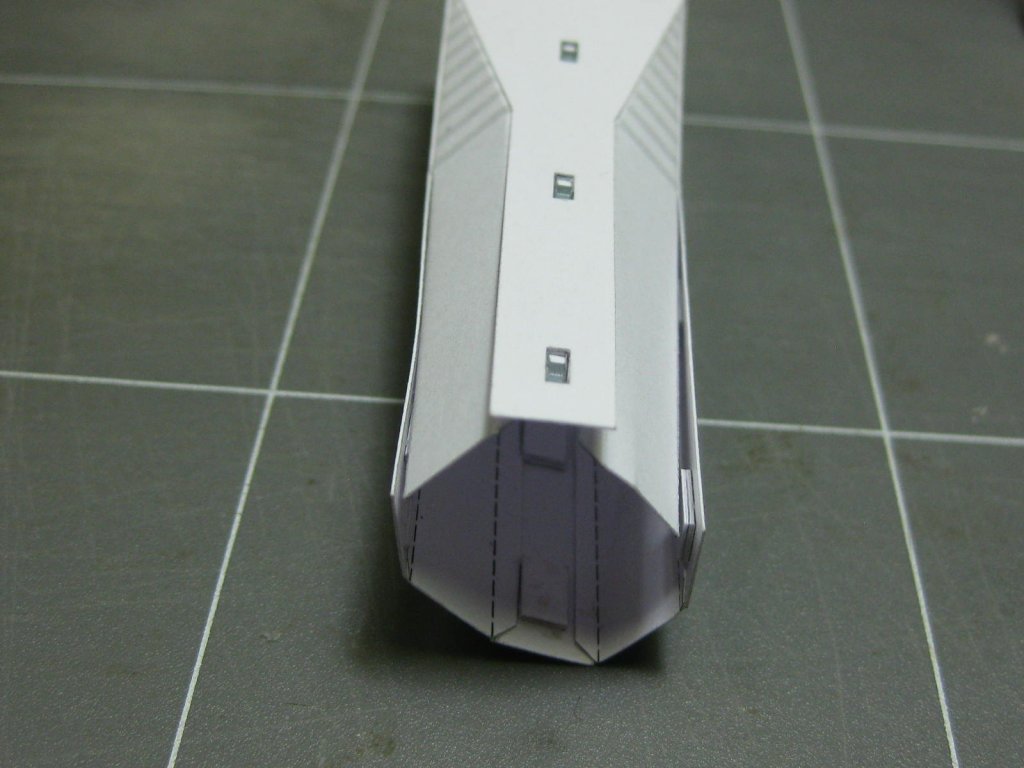

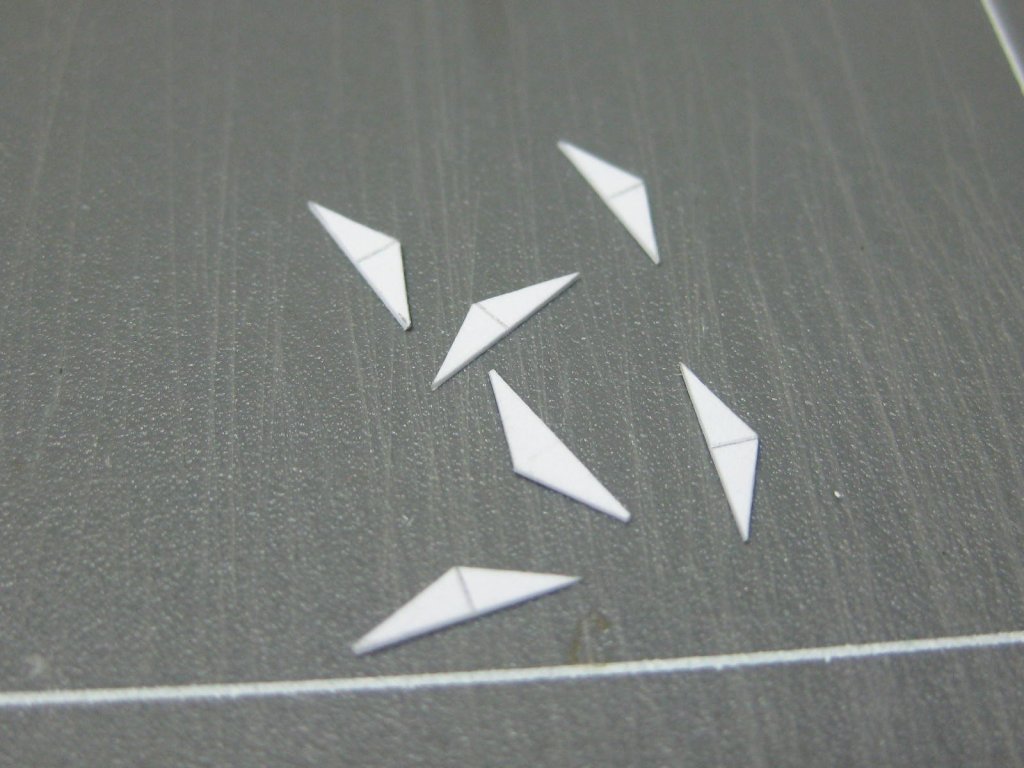
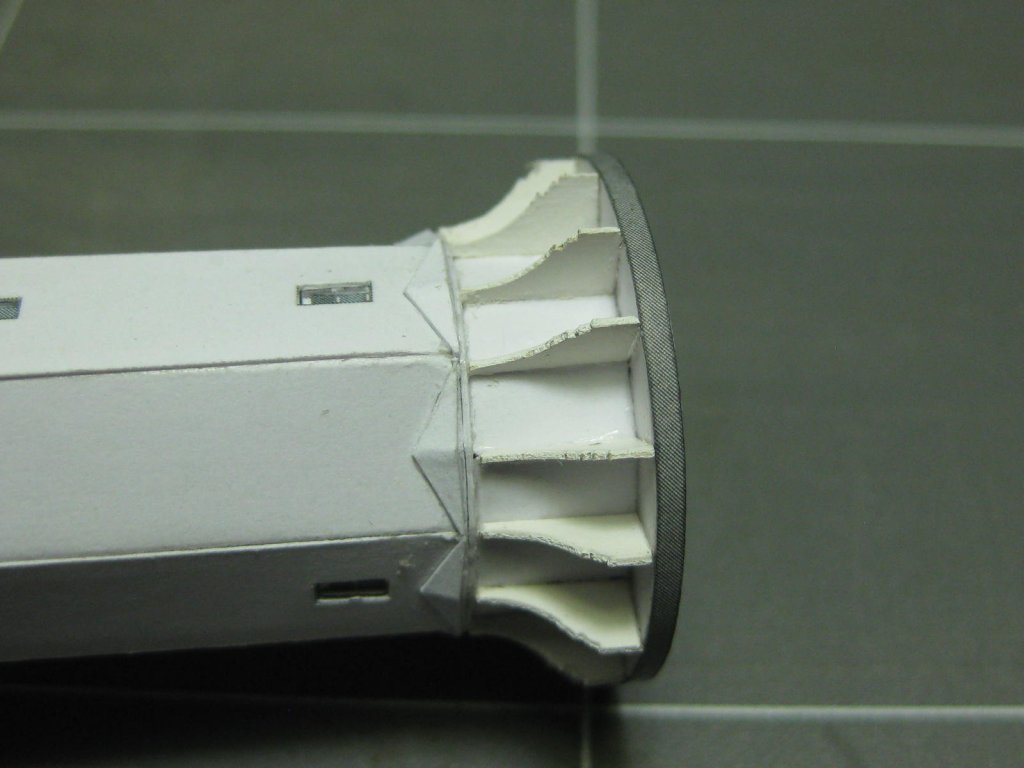
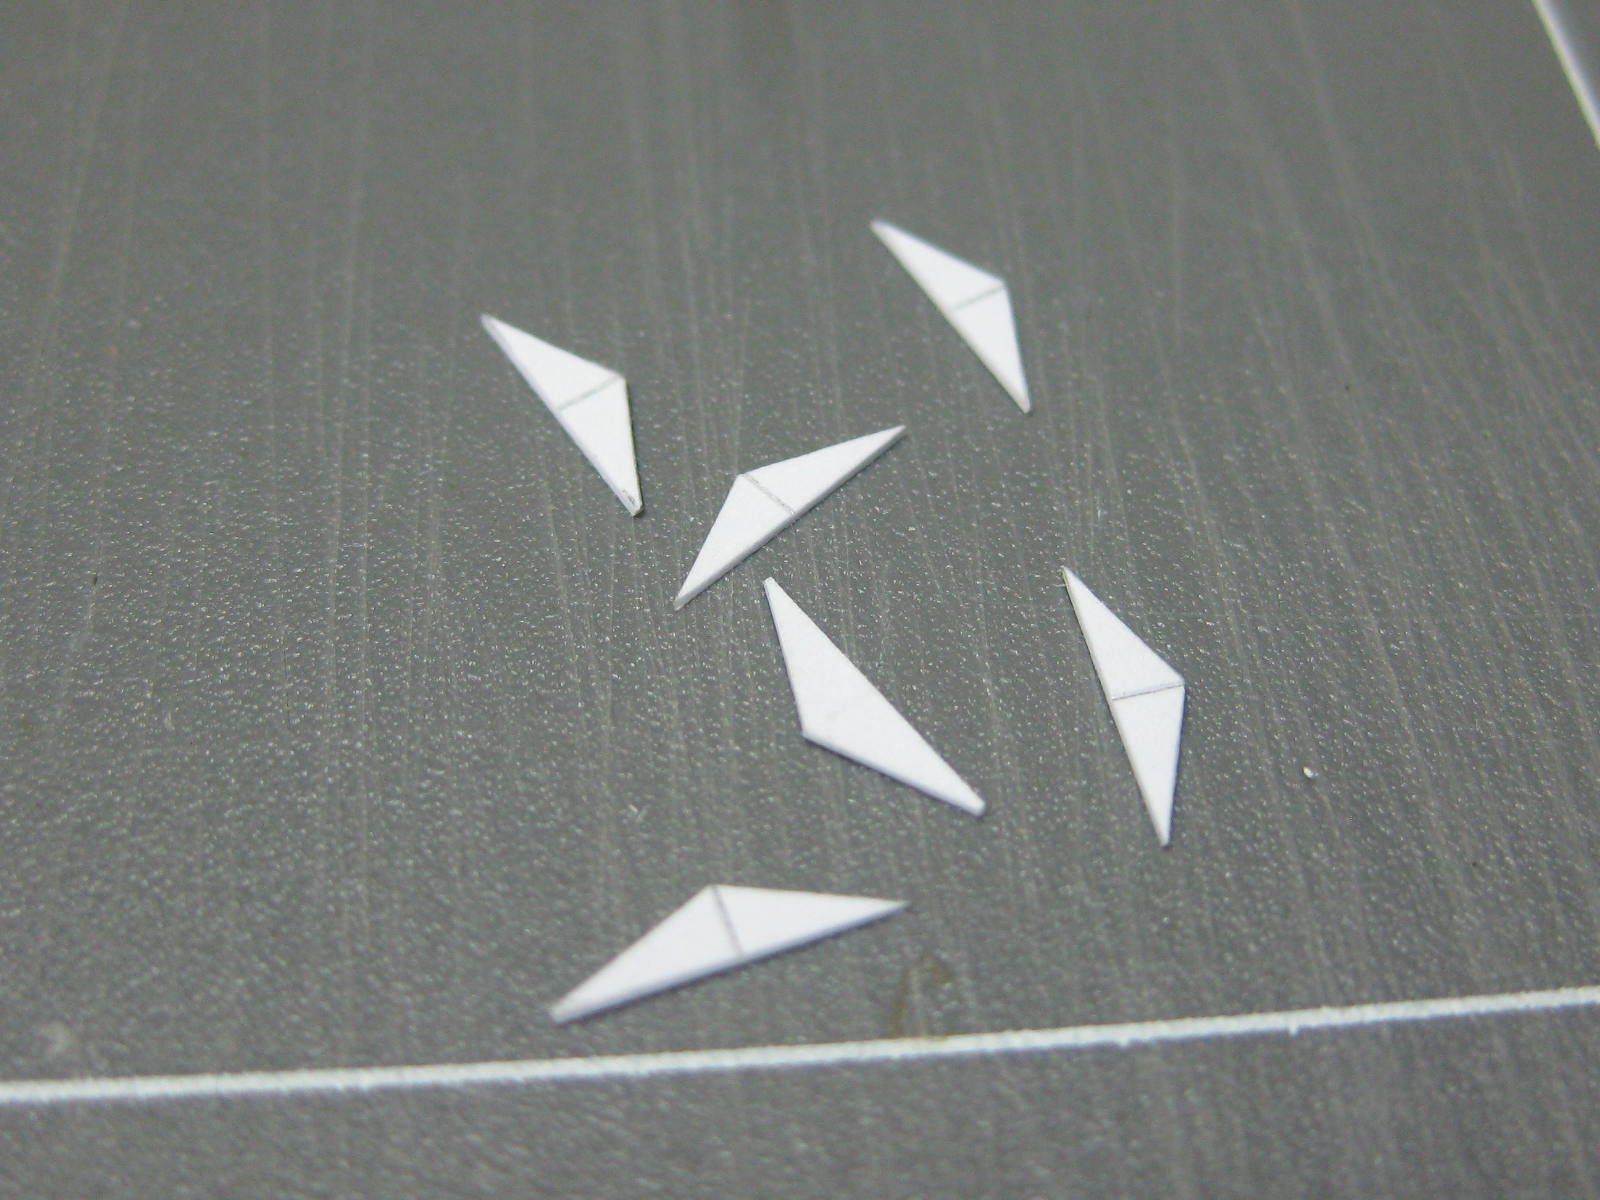
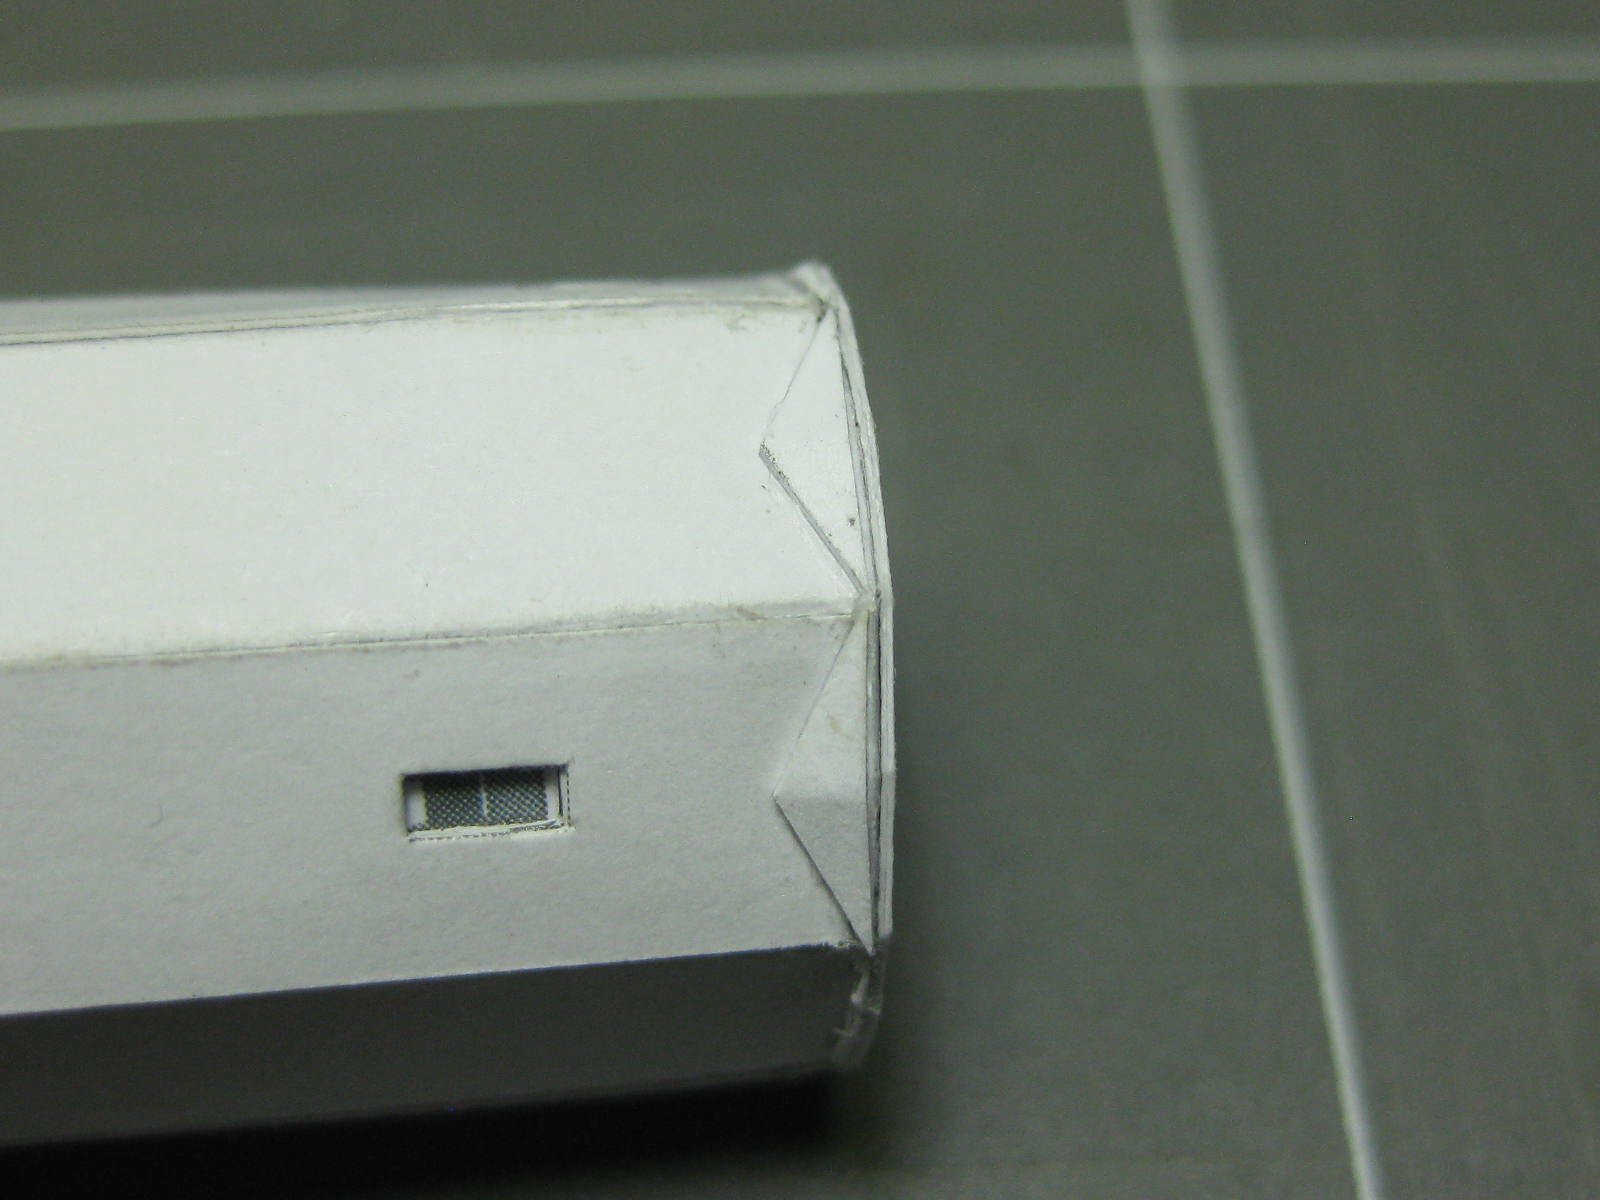
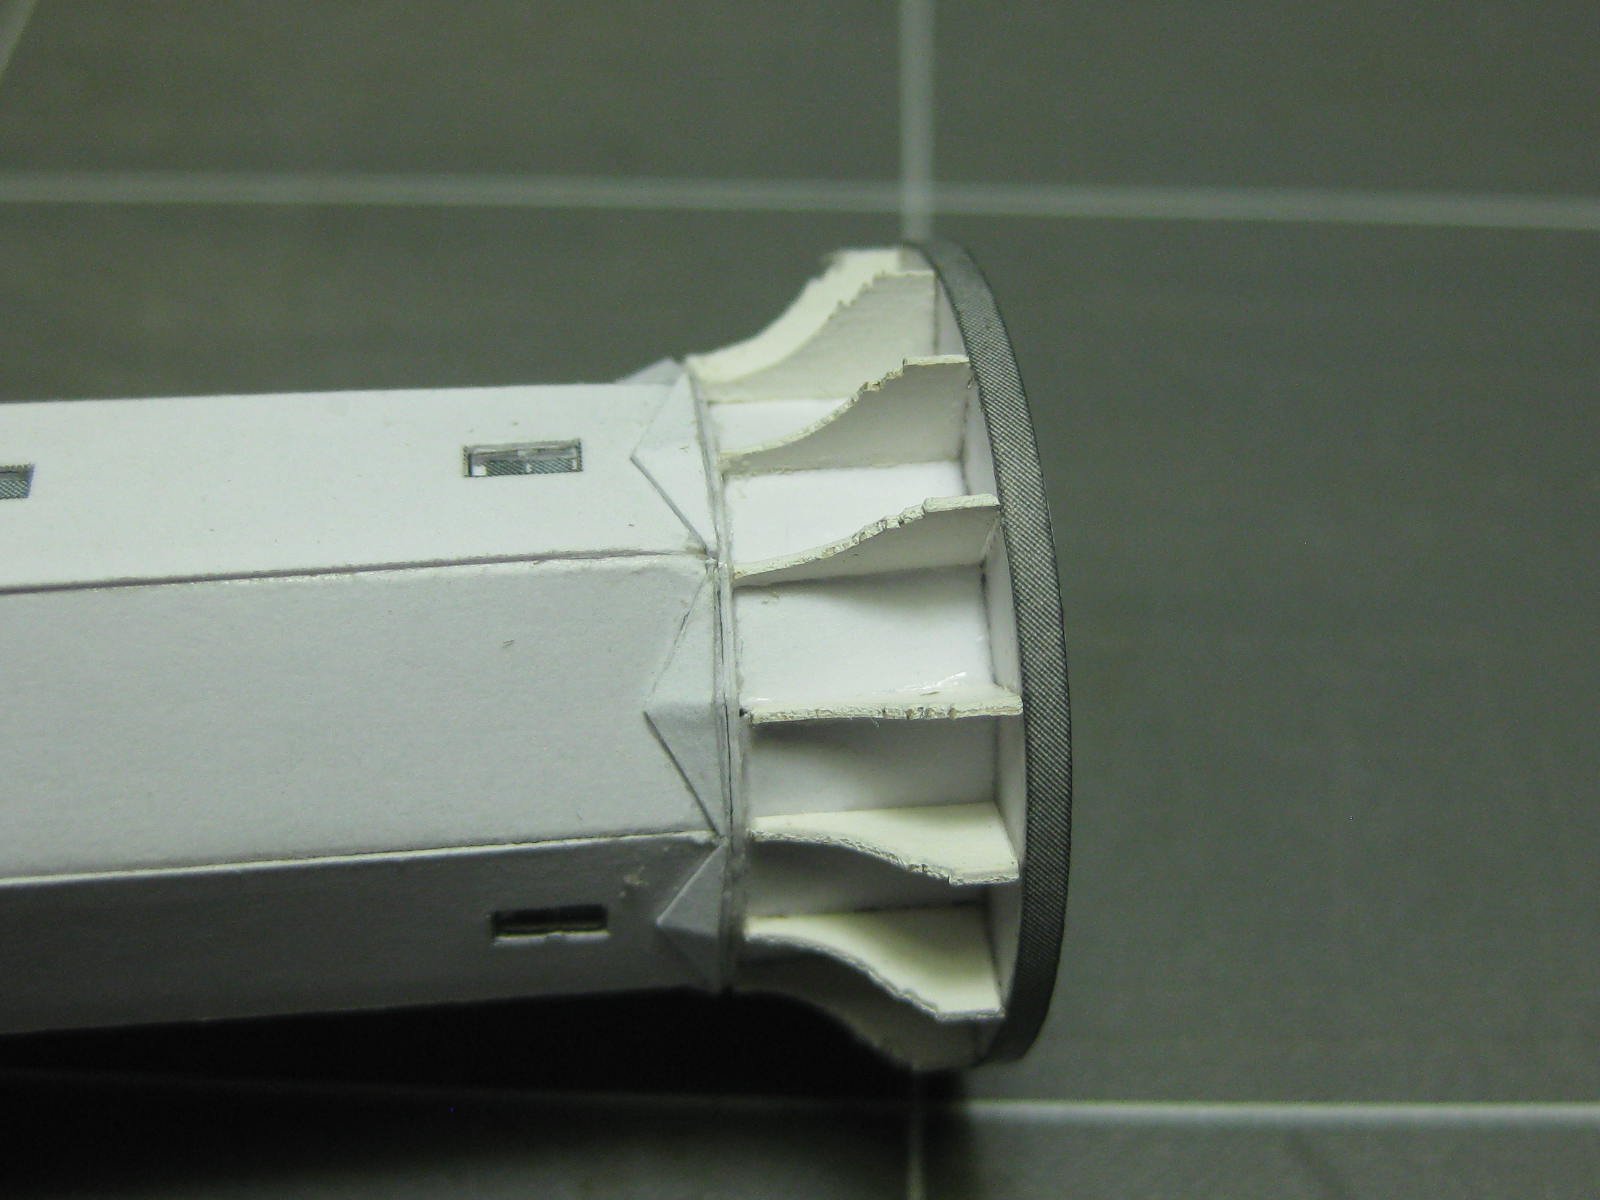
The way this scalloped feature was designed in the kit didn't work, as the card delaminated after folding and the gap didn't close properly. I drew up and cut 8 triangular pieces to replace the original - they turned out a LOT better :
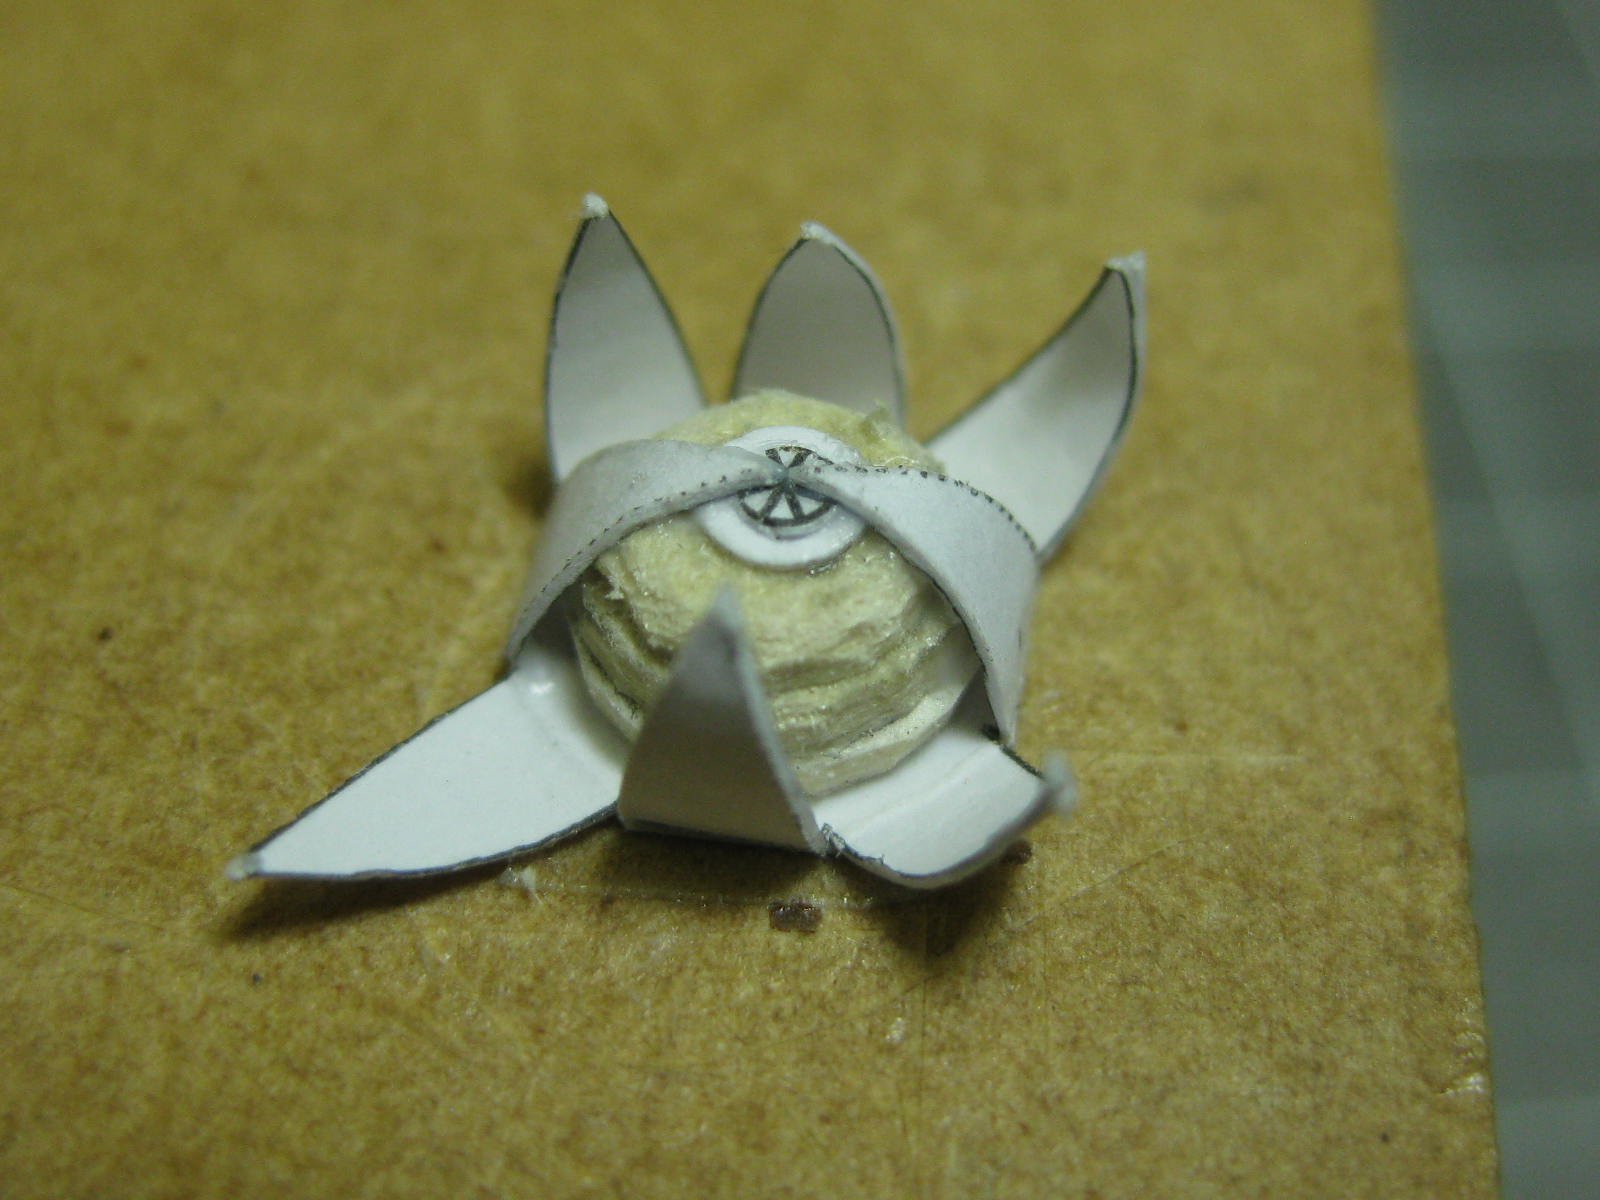
Decorative knees support the platform. These were laser cut :
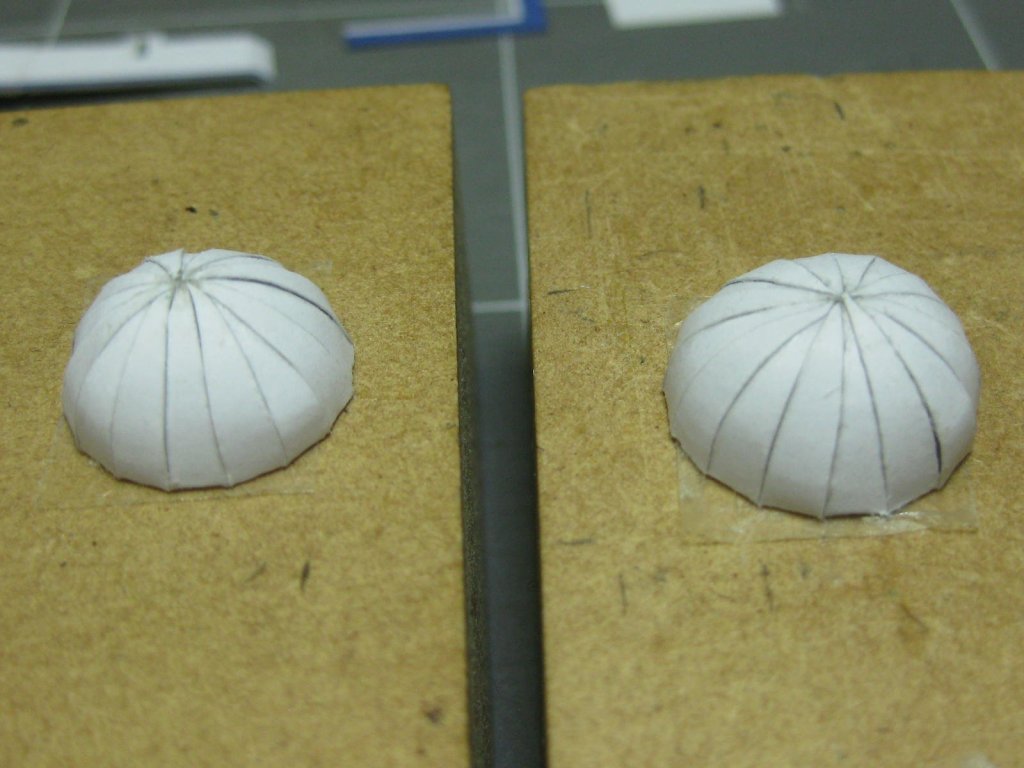
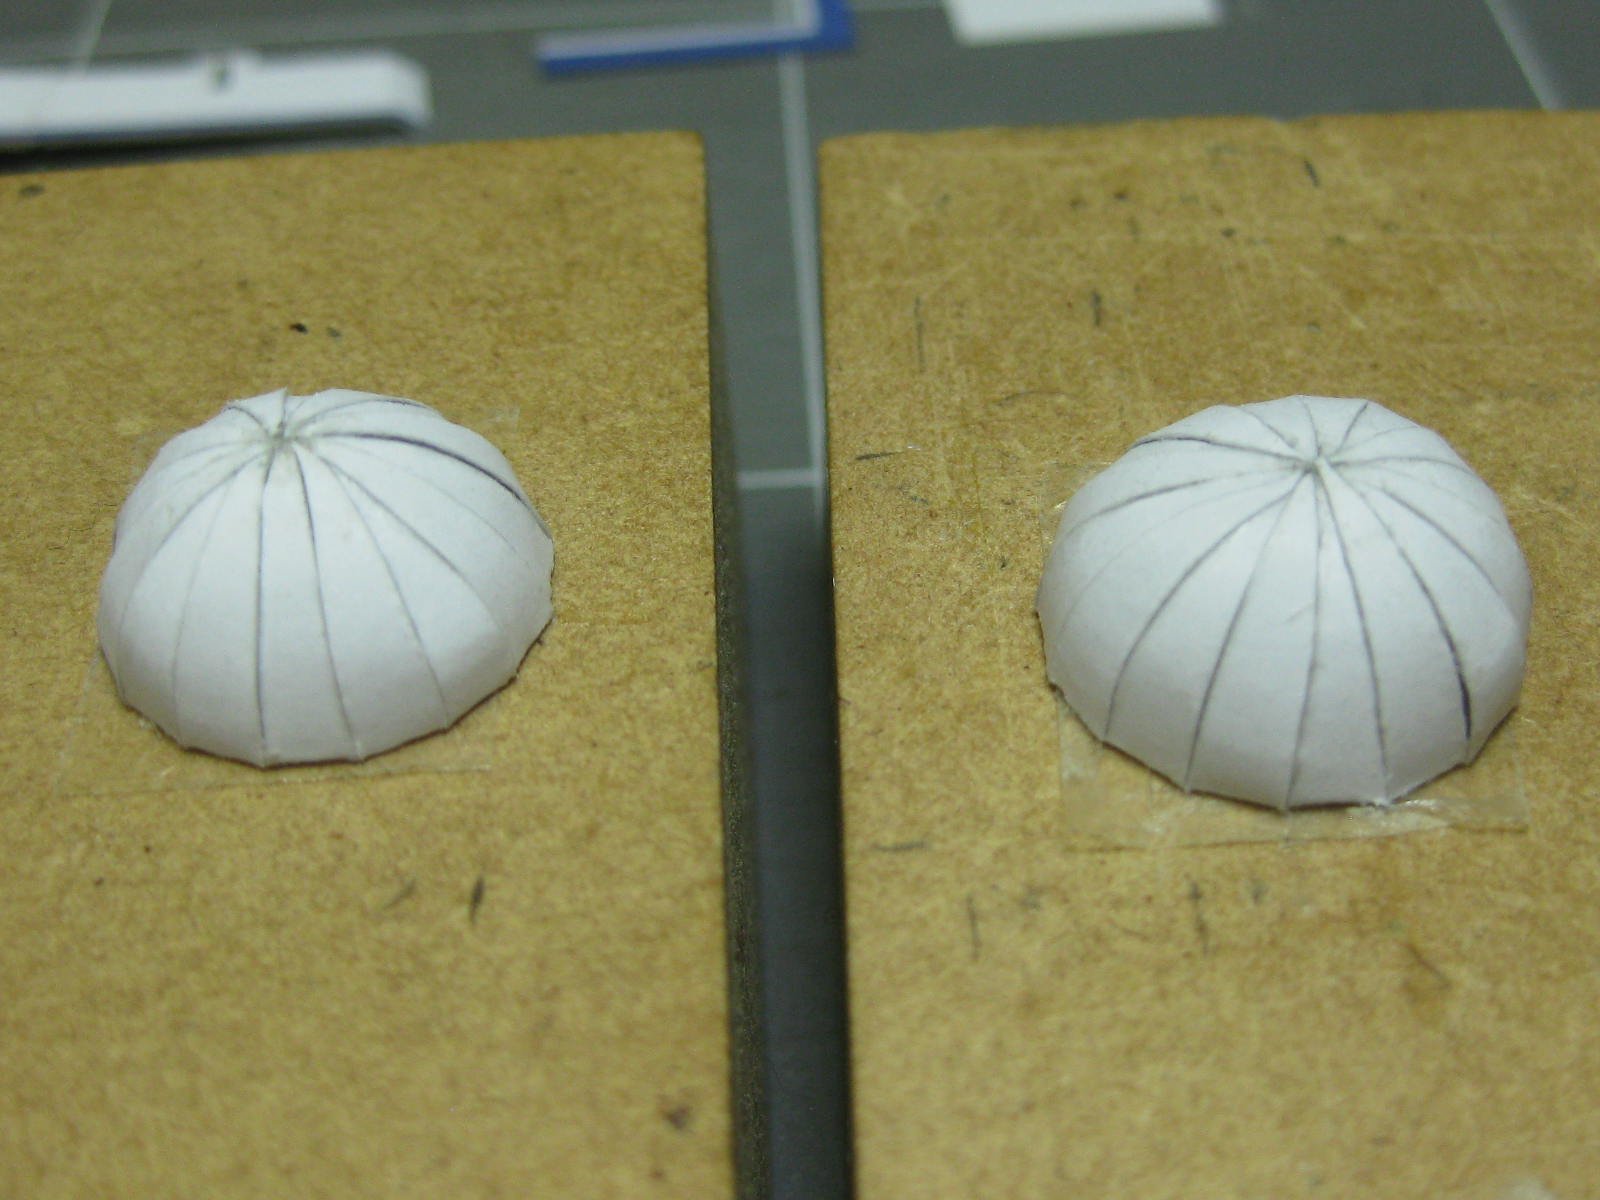
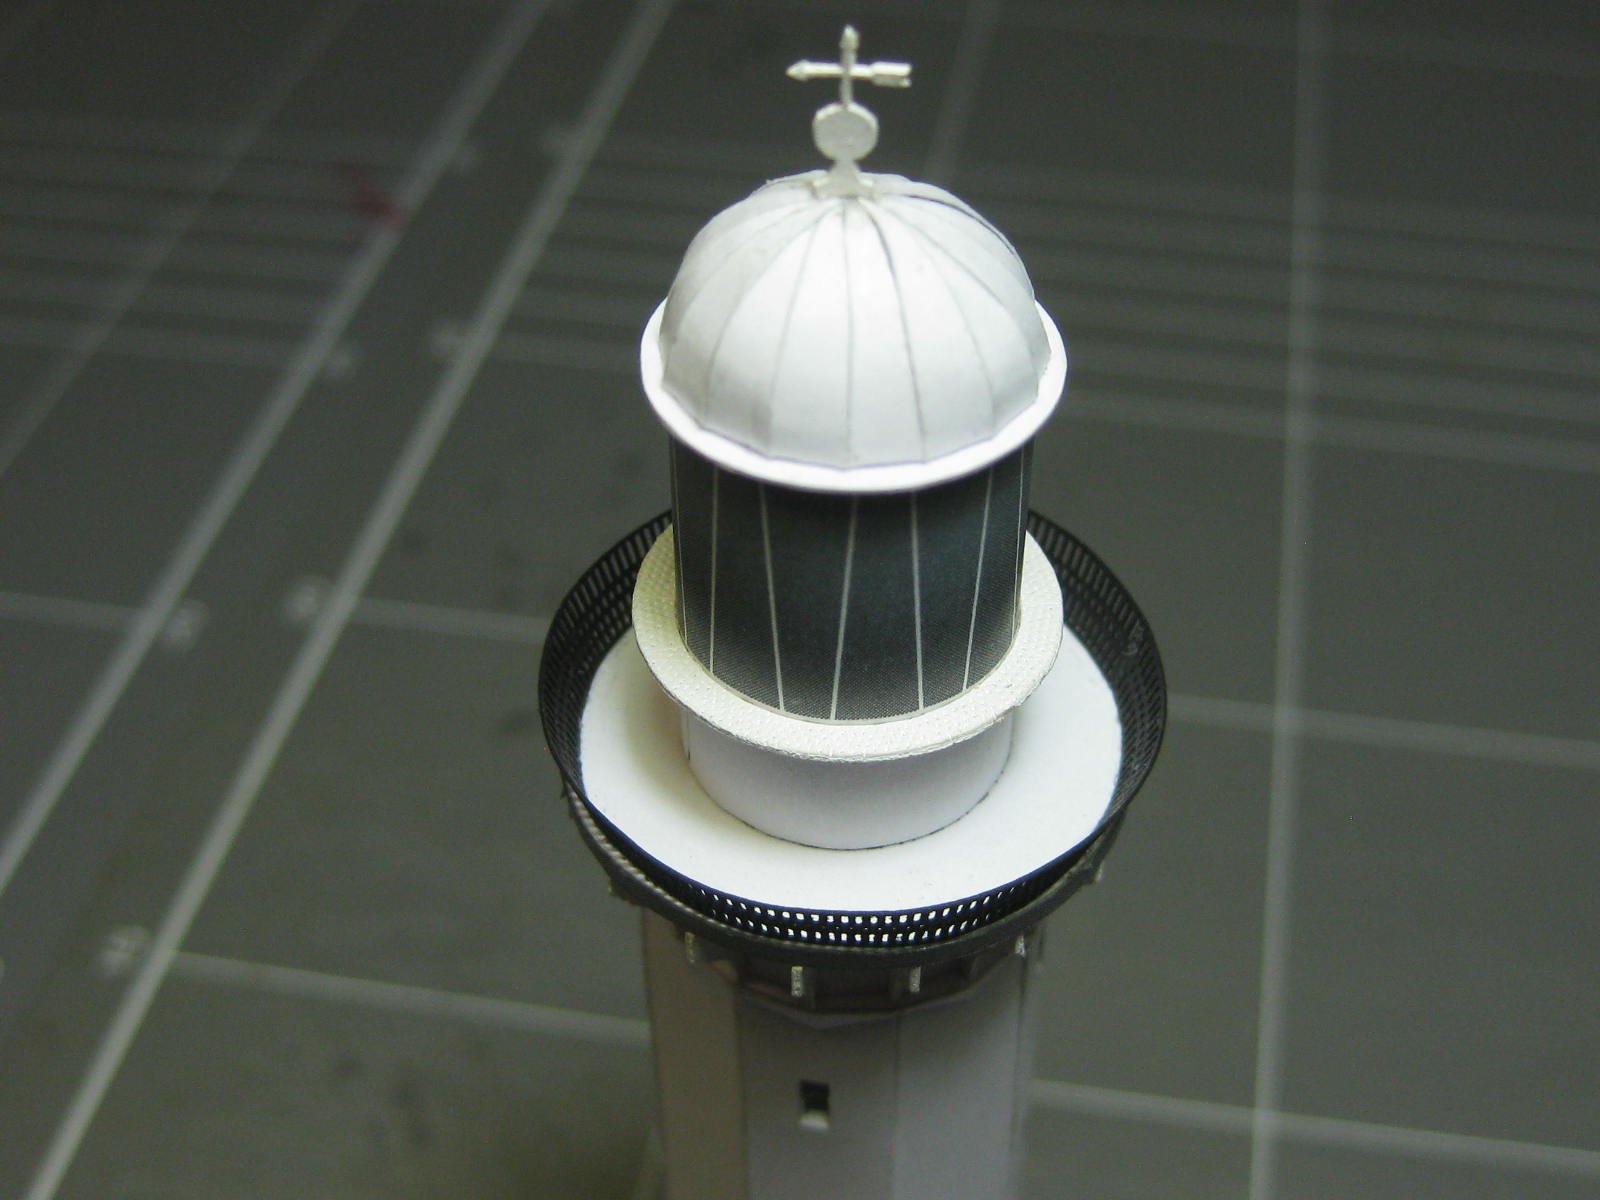
Two domes, one for each building :
The finished model :

Danny
- popeye the sailor, Dubz, Canute and 7 others
-
 10
10
-
12 hours ago, Ian B said:
I can only add to the messages of praise. It is superb
")
I would be paranoid that over the years it would absorb damp or moistier and the edges start to curl or it wilt....
Thanks Ian. I've given it a couple of coats of clear lacquer and it will be kept in a closed glass-fronted cabinet so it will probably last quite a while - longer than me anyway
. My main enjoyment of a model is in the actual building.
Cheers, Danny
-
Thank you to all who have followed, Liked and commented on this build. It's much appreciated
.
Here are the final pics :


Cheers, Danny
-
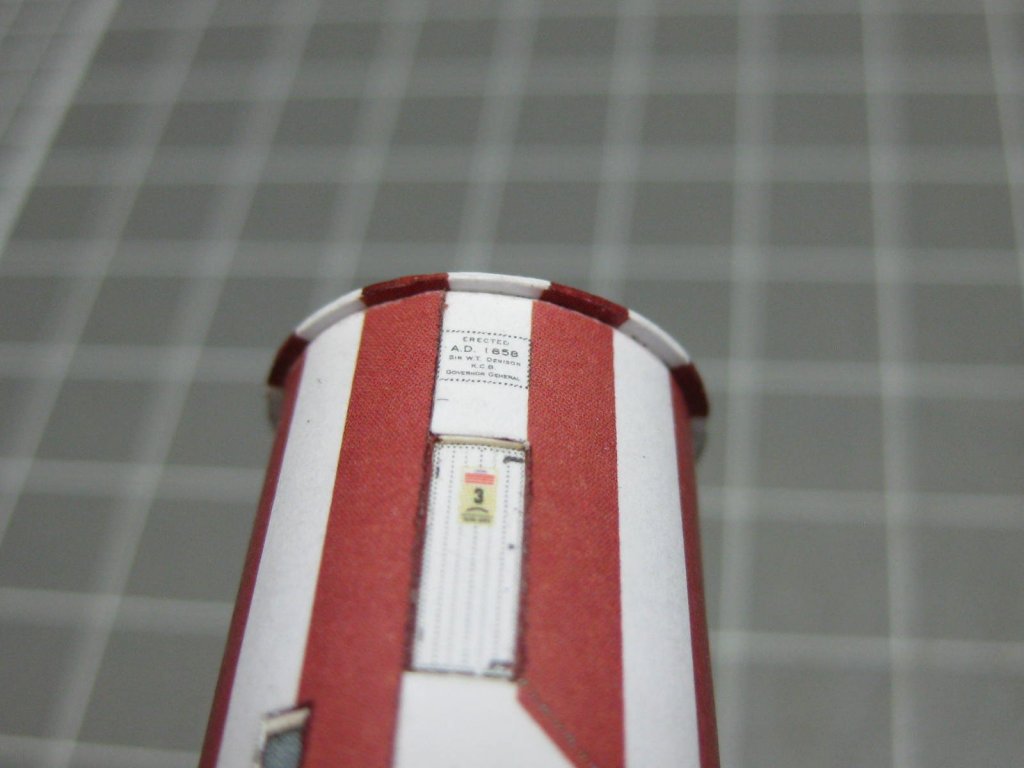
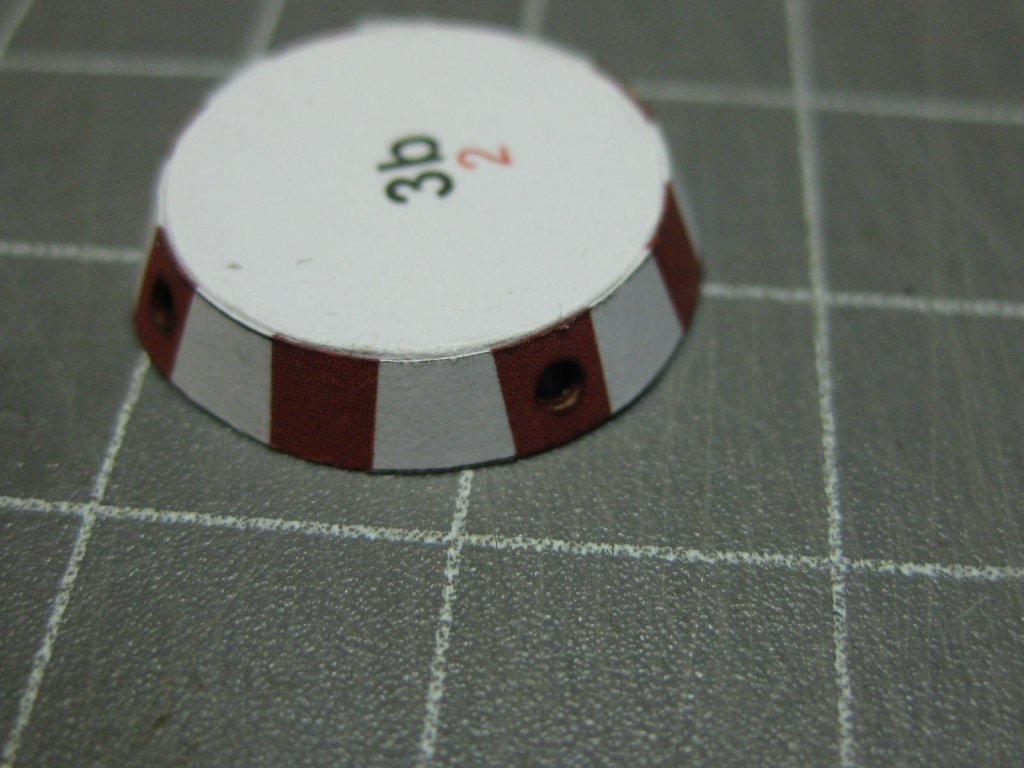
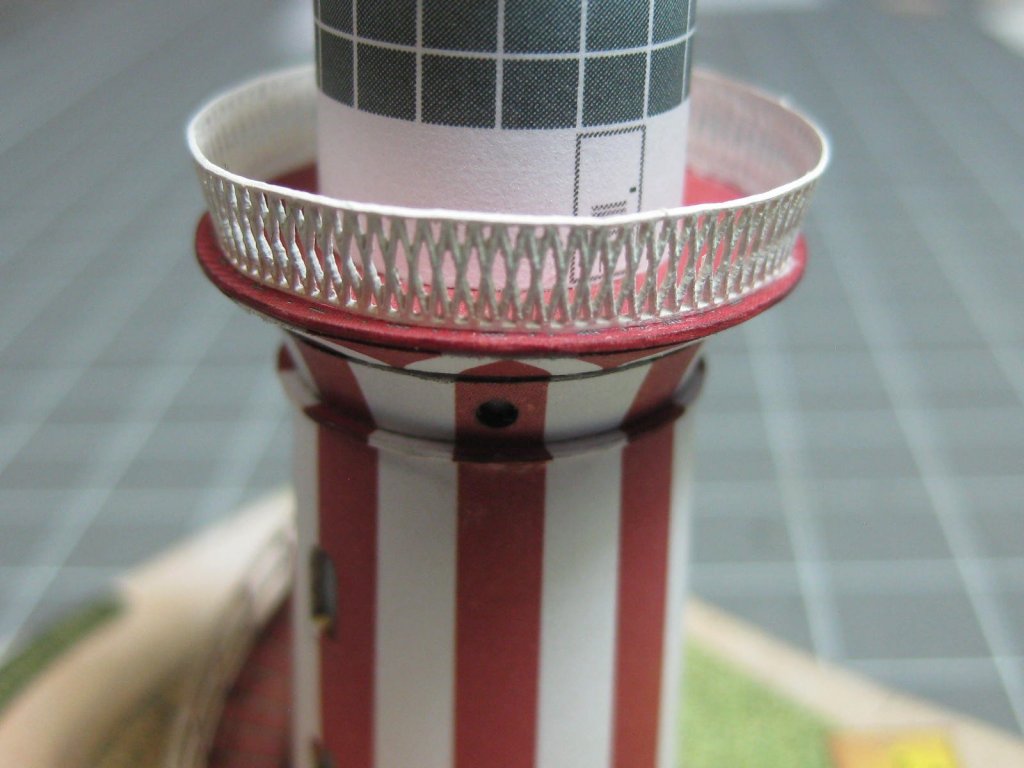
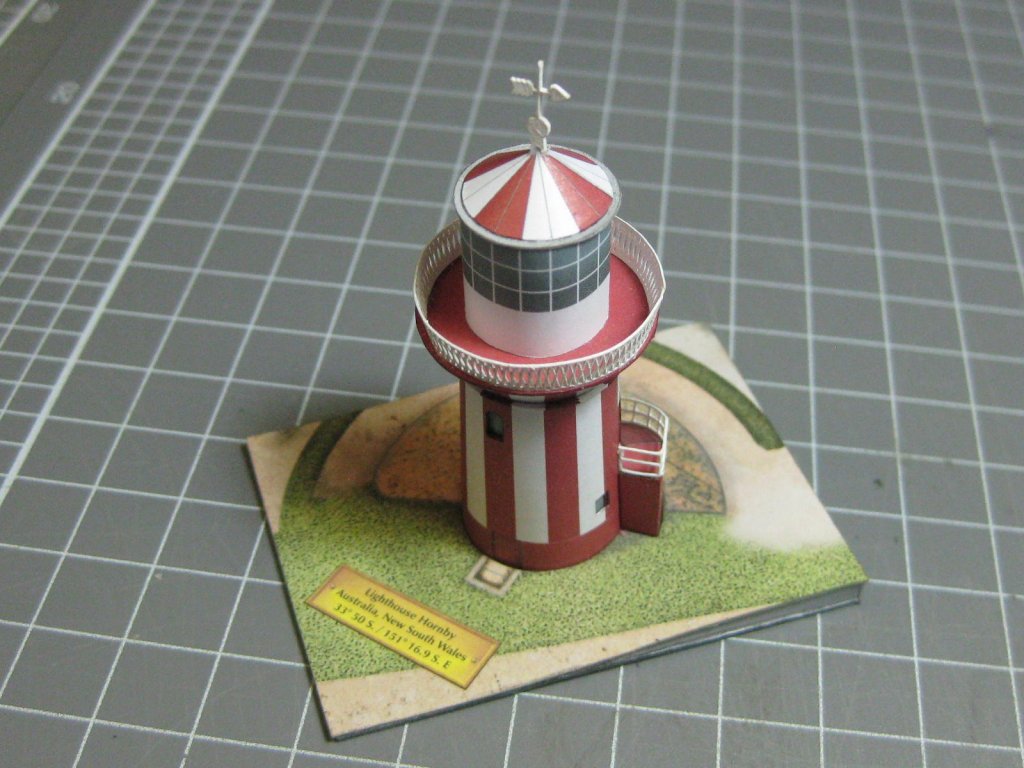
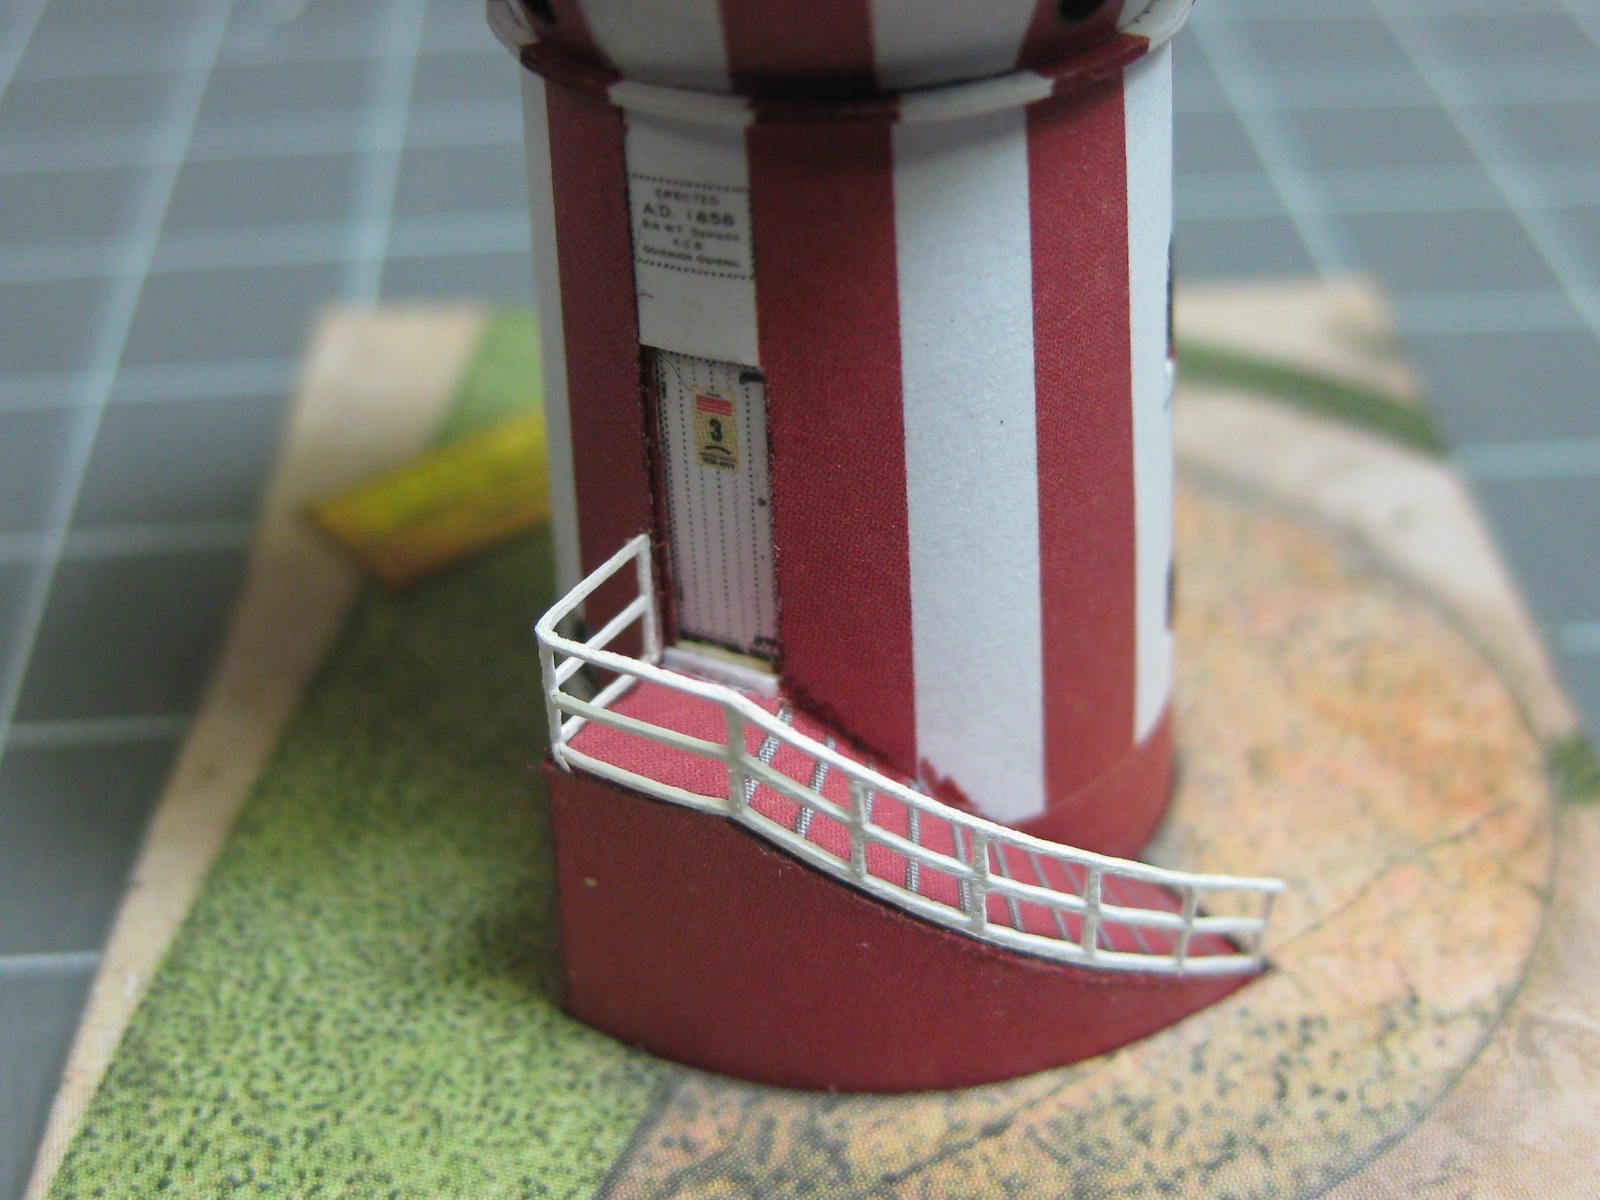
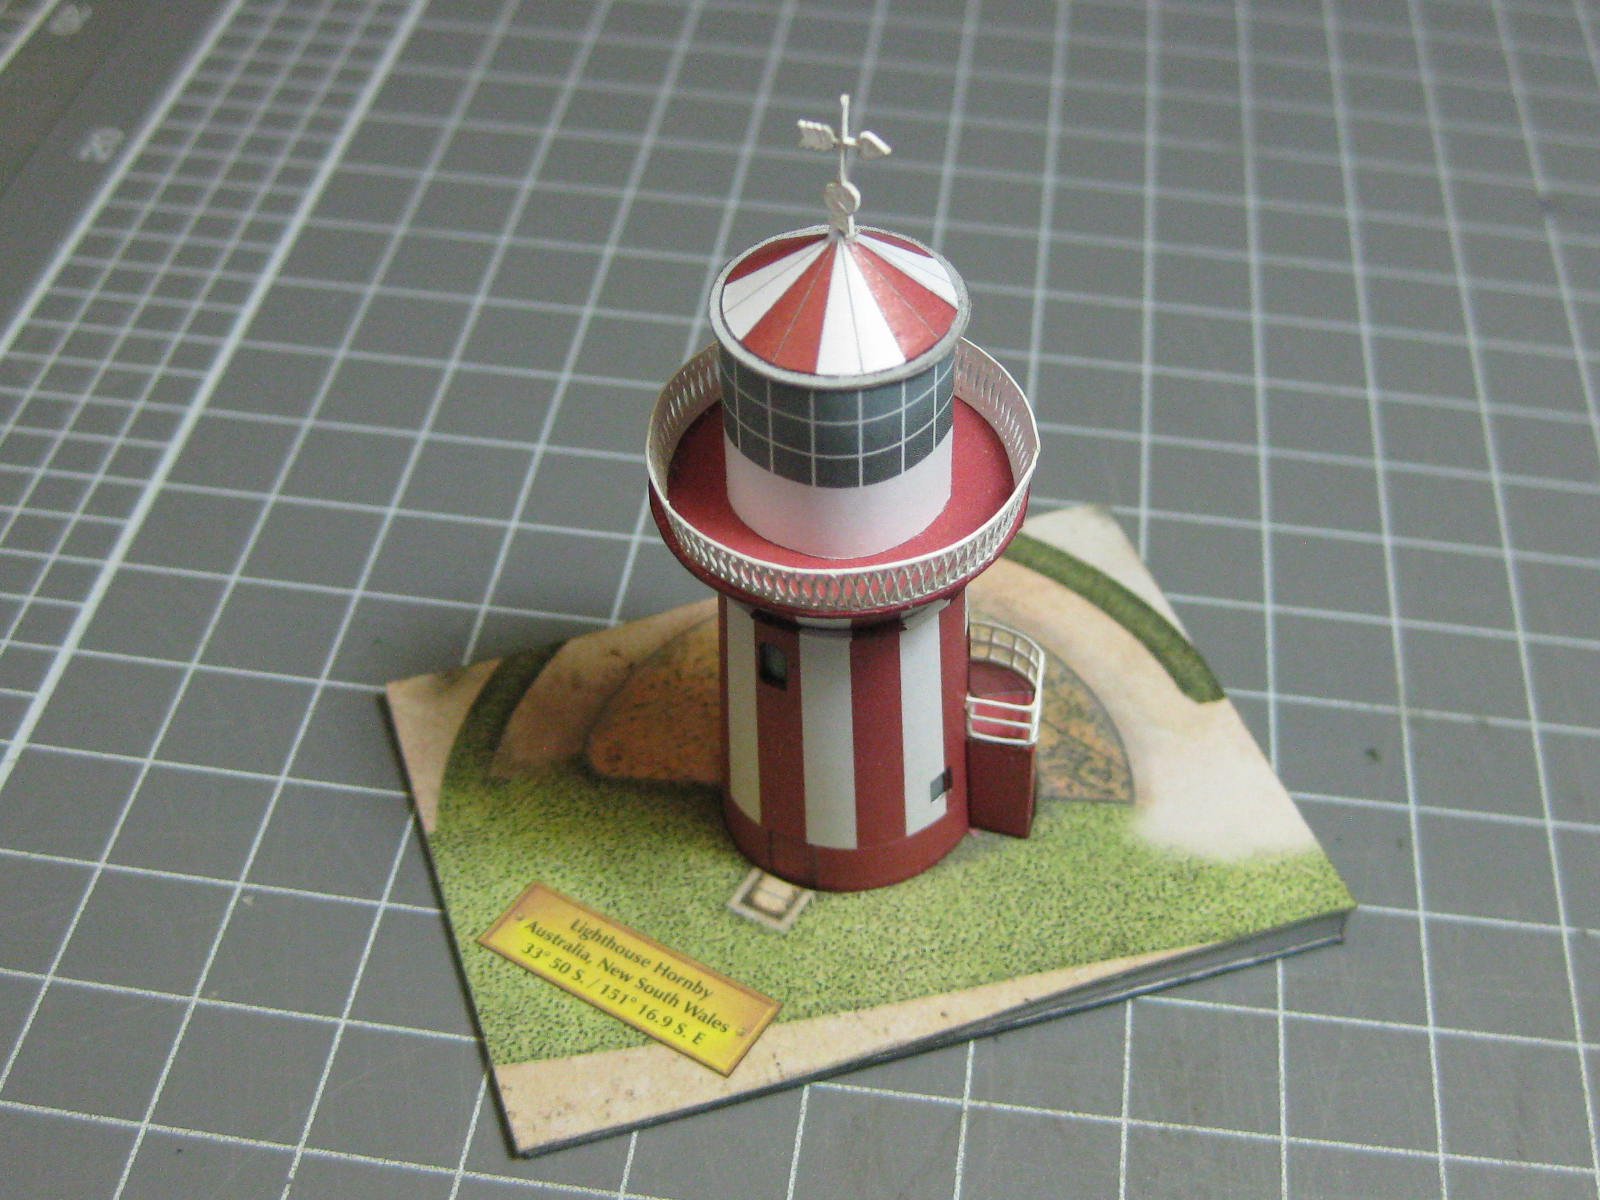
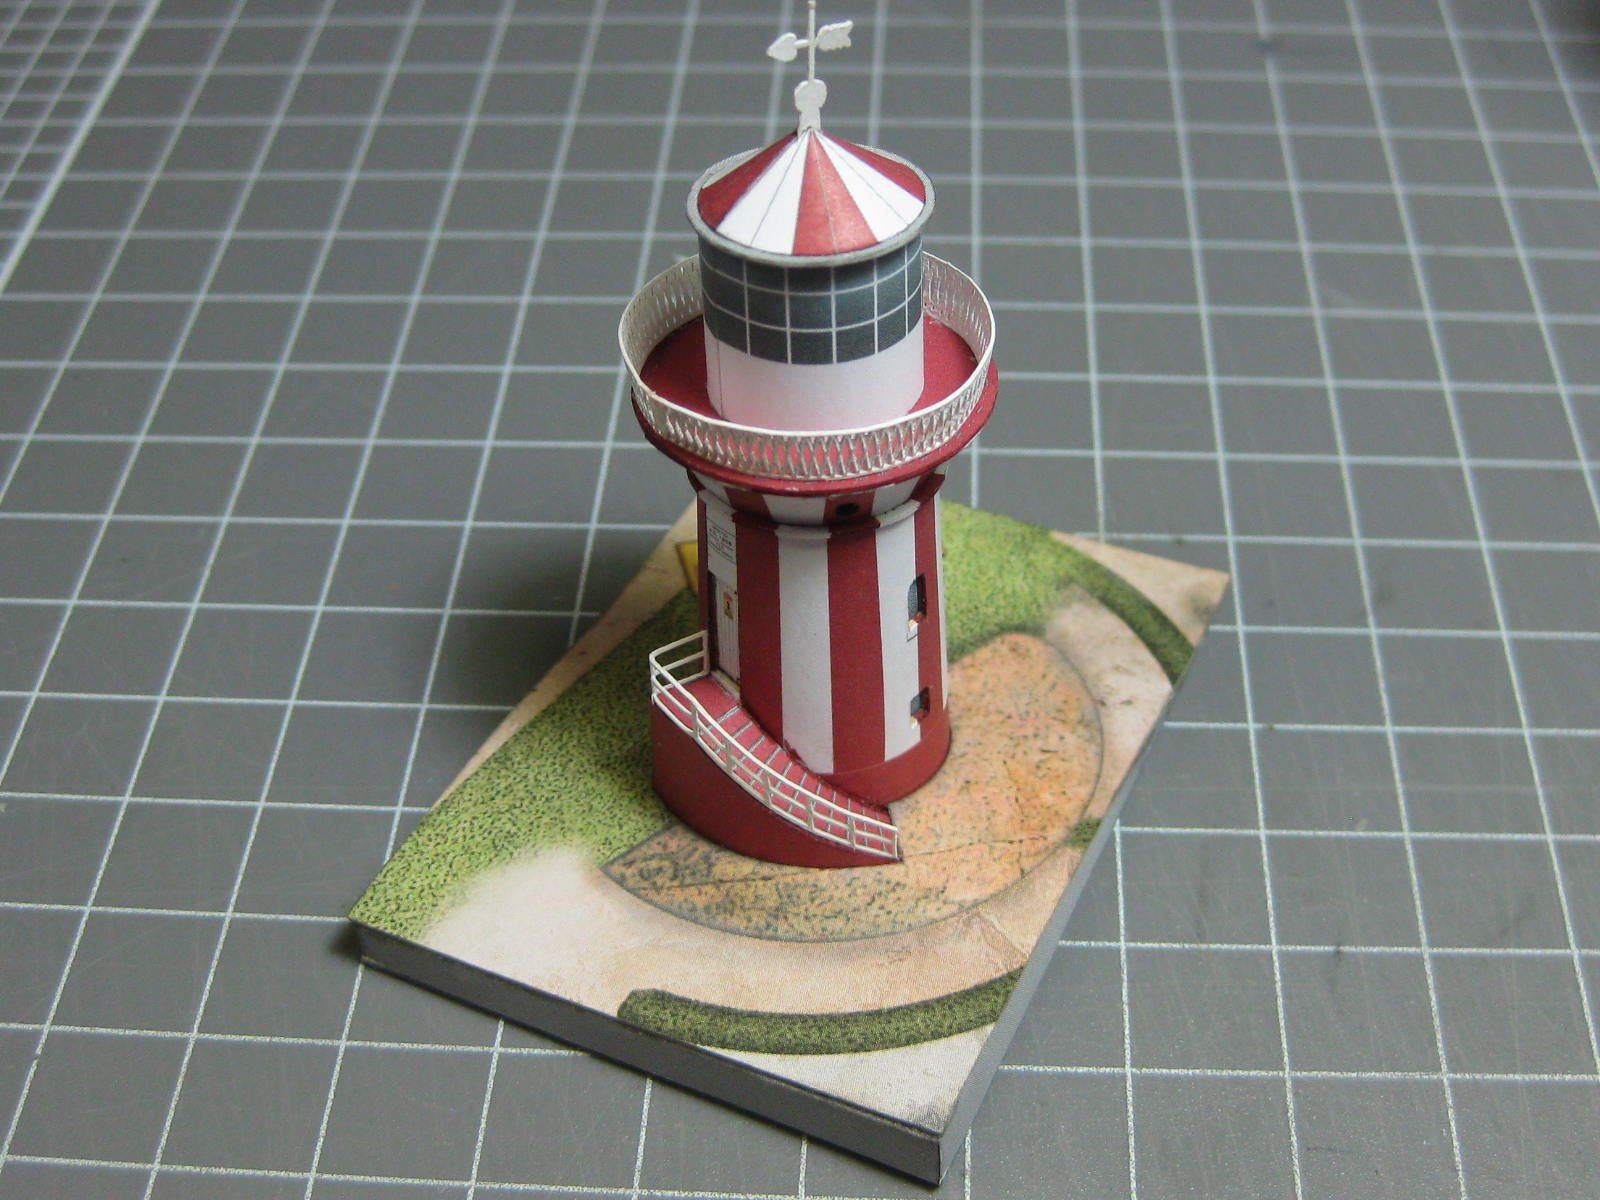
The Hornby Lighthouse at Watson's Bay, Sydney. It's also known as the South Head Lighthouse. Built in 1858 it was the 3rd lighthouse built in Australia following the wreck of the Dunbar with the loss of 121 lives. More information can be found HERE.
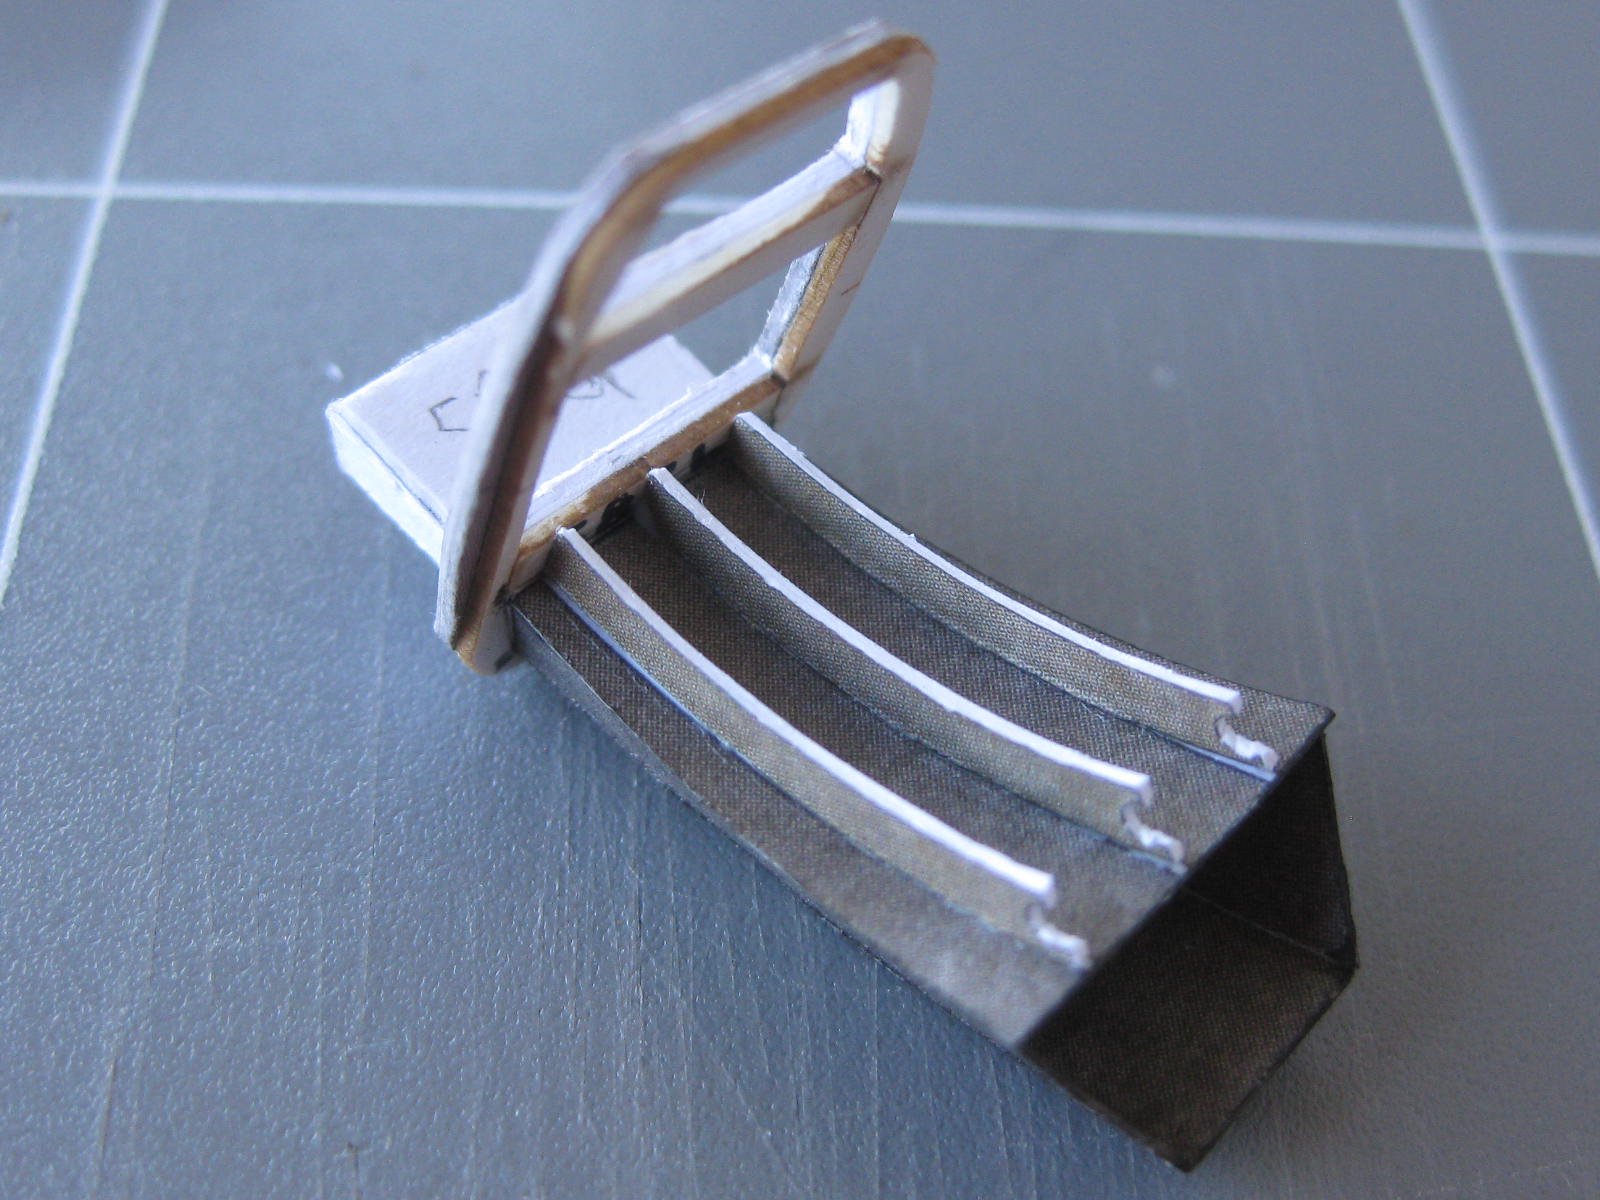
This is the simplest of the four in the kit - it only took me a day and a half to make. Lining up the red stripes was critical to the outcome :

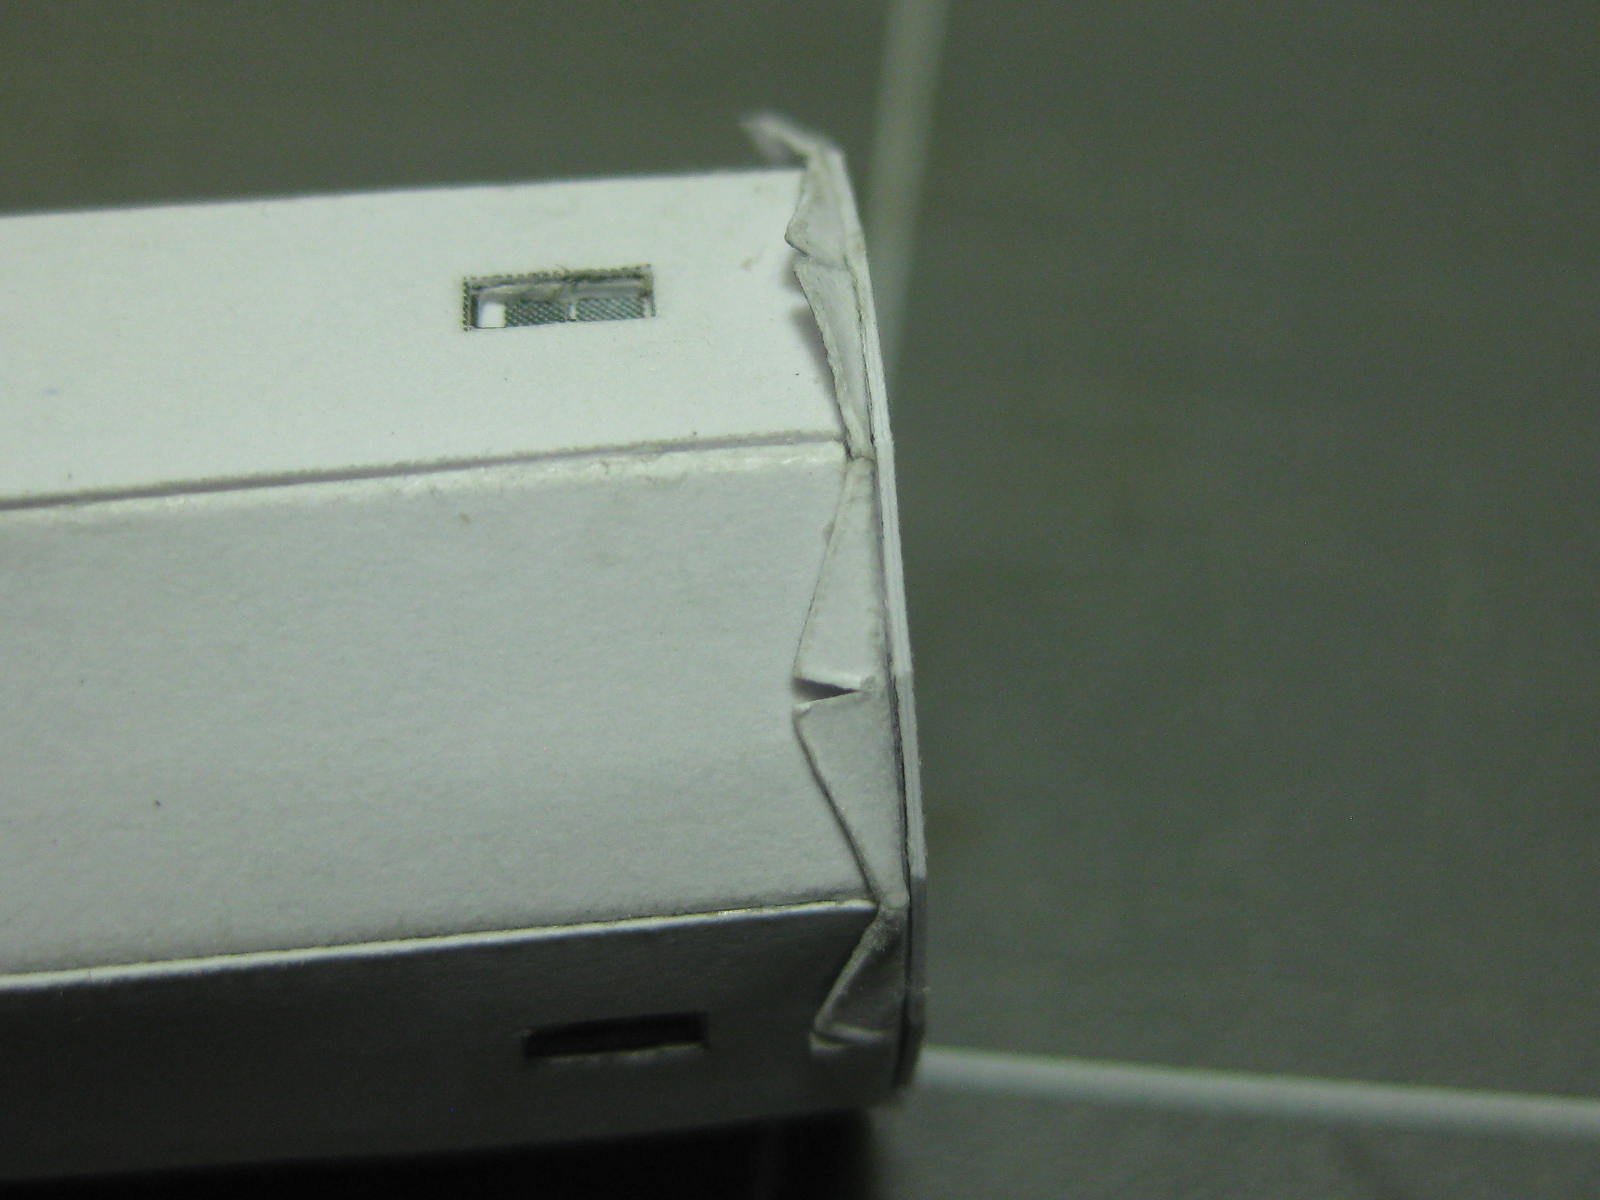
Most of the windows and doors are recessed. These little portholes took a bit of planning when fitting them :

The finished model. The railings are laser cut card :


Danny
- hexnut, Dubz, GrandpaPhil and 7 others
-
10
-
4 hours ago, popeye the sailor said:
Odd that they didn't have you reinforcing the entire assembly.......the blades are reinforced. has to be a lot of weight...........not of paper, but the length doesn't do it any favors. do you think a coat of flat lacquer would help?
The wires go most of the way into the central part. In hindsight I probably should have painted the reinforcing piece with CA before skinning it. I think the card itself probably has a bit of flex in it - it wouldn't take much over that short distance to make a much bigger difference over the length of the blades. I think the only difference a coat or two of lacquer will make is to add more weight to the blades - I've already coated all the relevant control parts with CA, which improved the amount of "droop" in the blades. I'm reasonably happy with the result
.
If I were to build another helicopter I'd design my own system for attaching the blades. Nothing drastic, maybe just replace the card control reinforcing part with some brass tube silver-soldered together, which would then be covered with the kit skins.
I'm currently giving the model a coat of Model Master Semi-Gloss clear, pics of the completed model will be posted shortly.
Danny
- Old Collingwood, mtaylor, lmagna and 2 others
-
5
-
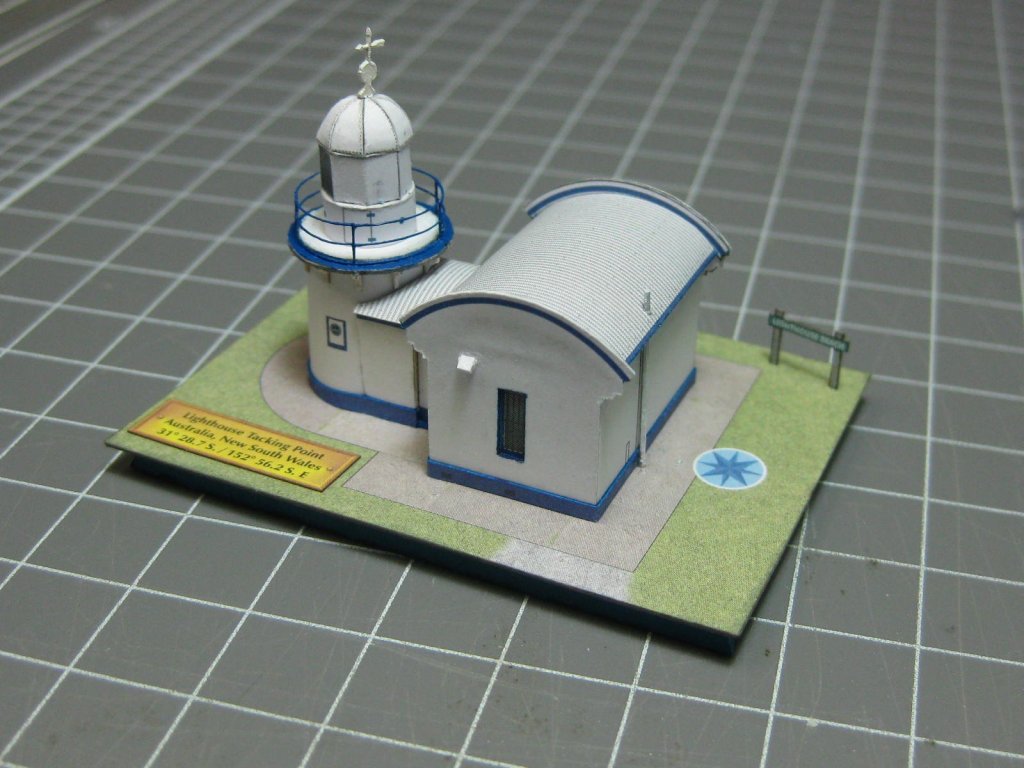
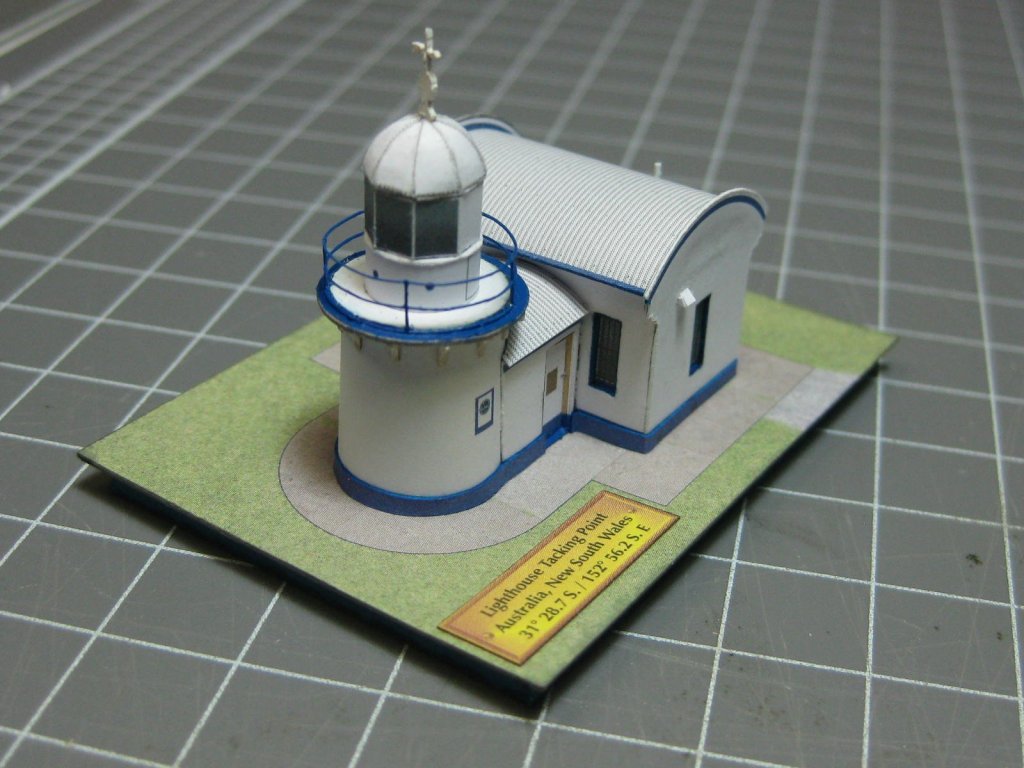
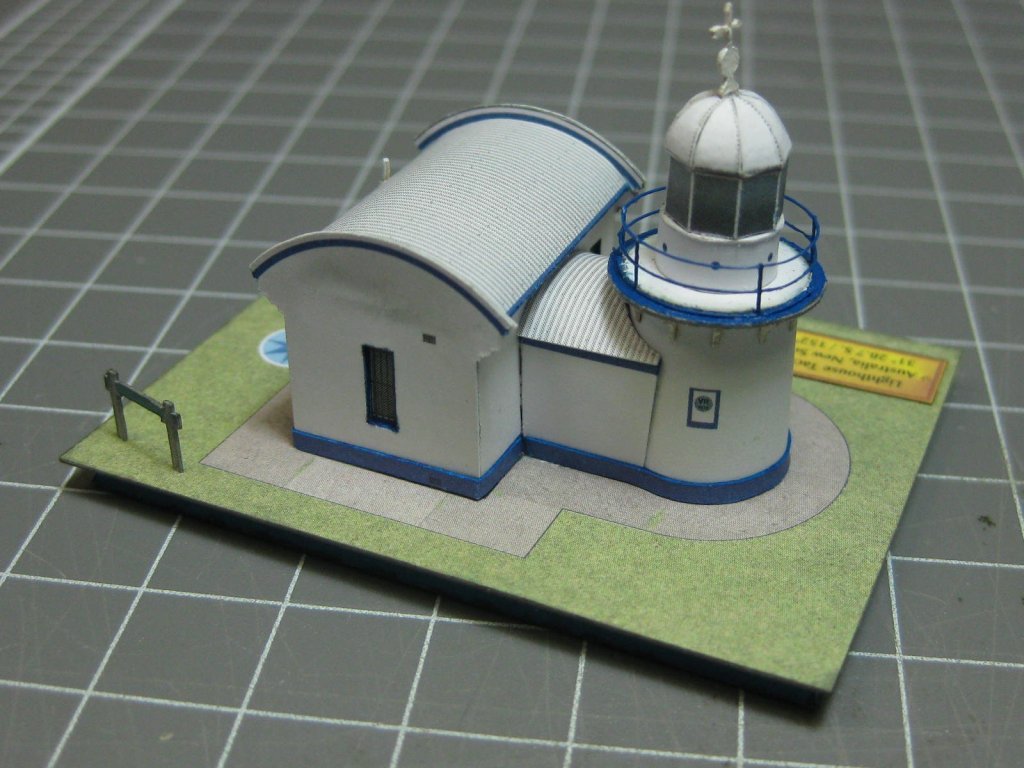
Hi all. Having finished the Cape Byron lighthouse and the M24D Hind helicopter, and still waiting on my next kit, I'm making the other 3 lighthouses that came with the first. These won't take long, so I hope my other kit turns up soon. Here are pics of the three :
Tacking Point, Port Macquarie :
Hornby - Watson's Bay, Sydney :

Cape Green, Eden :

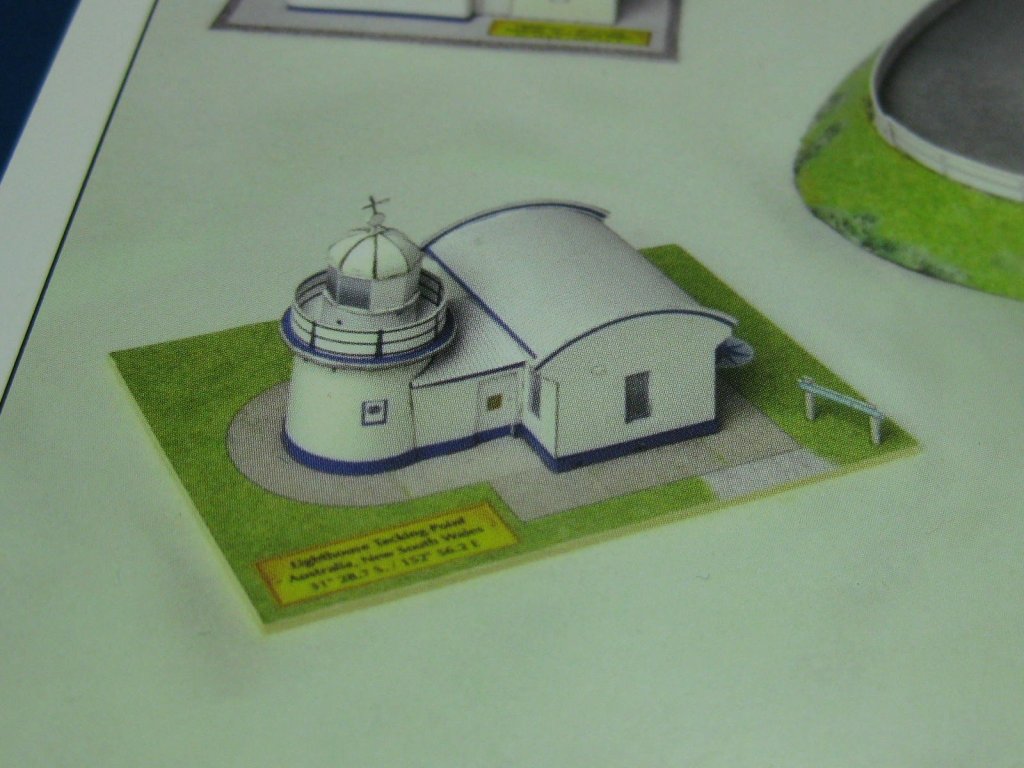
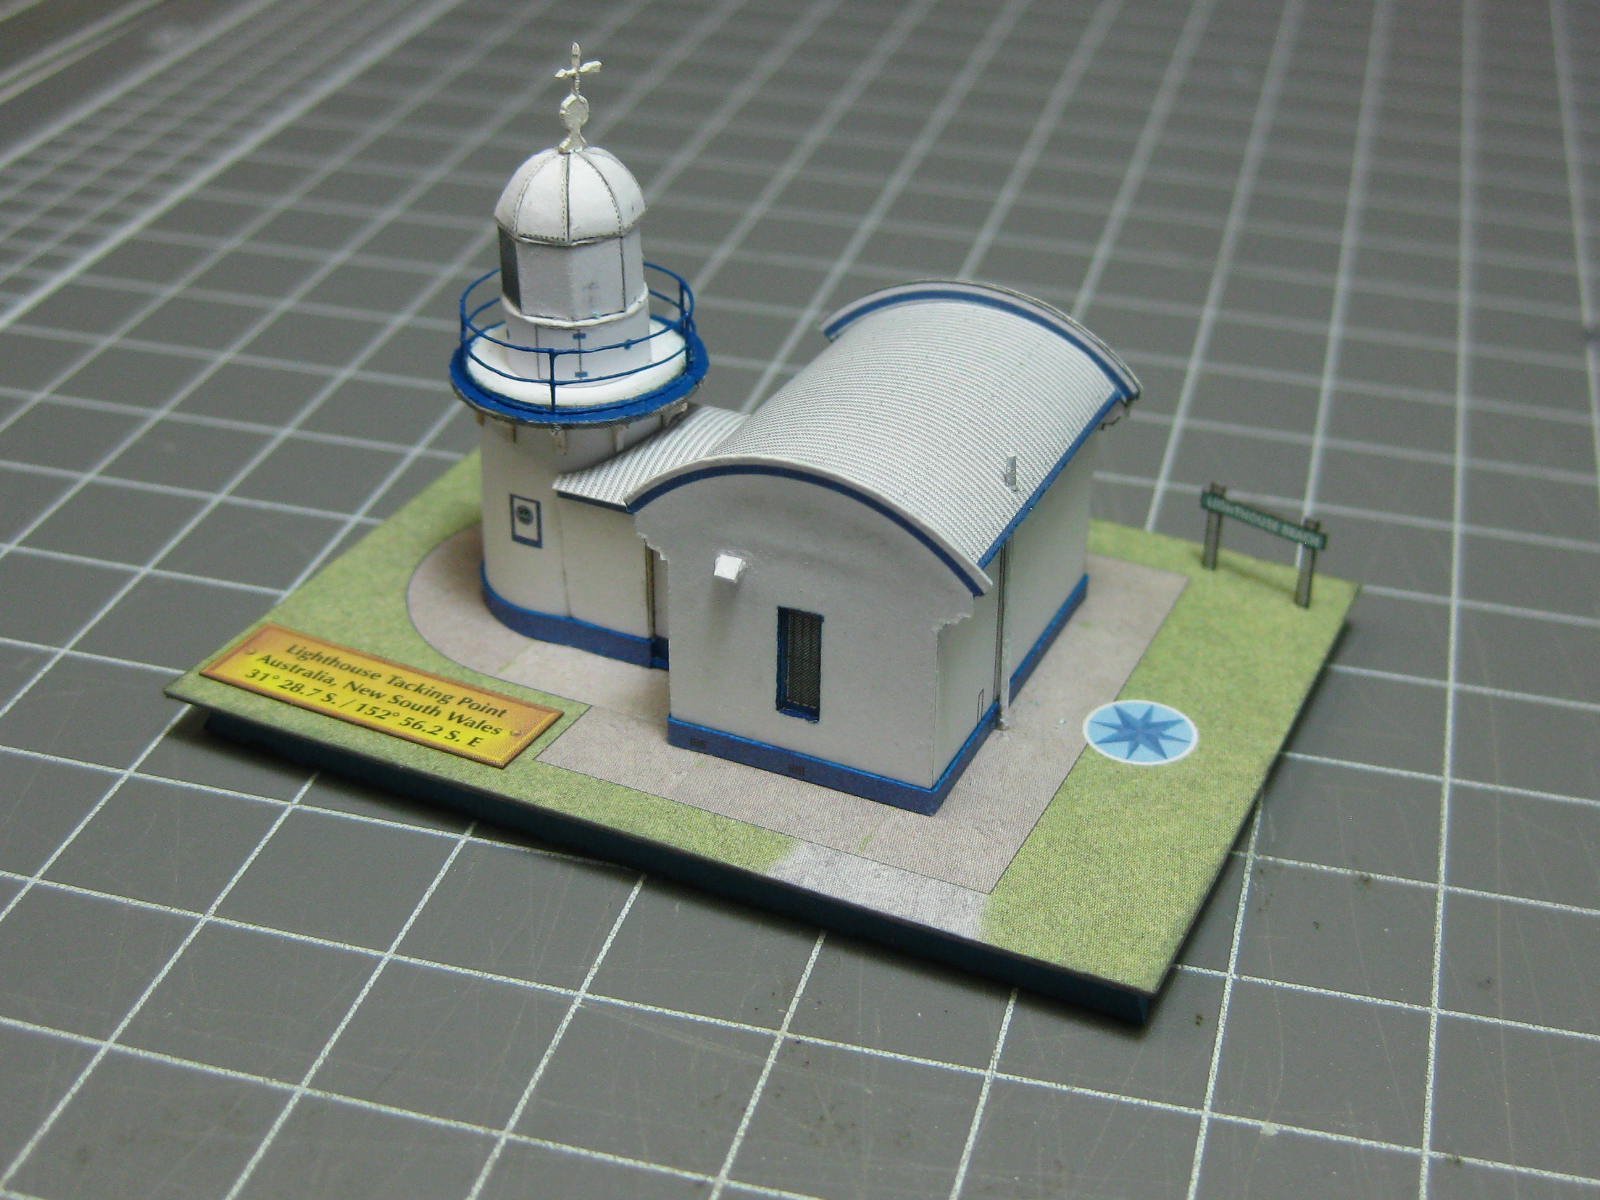
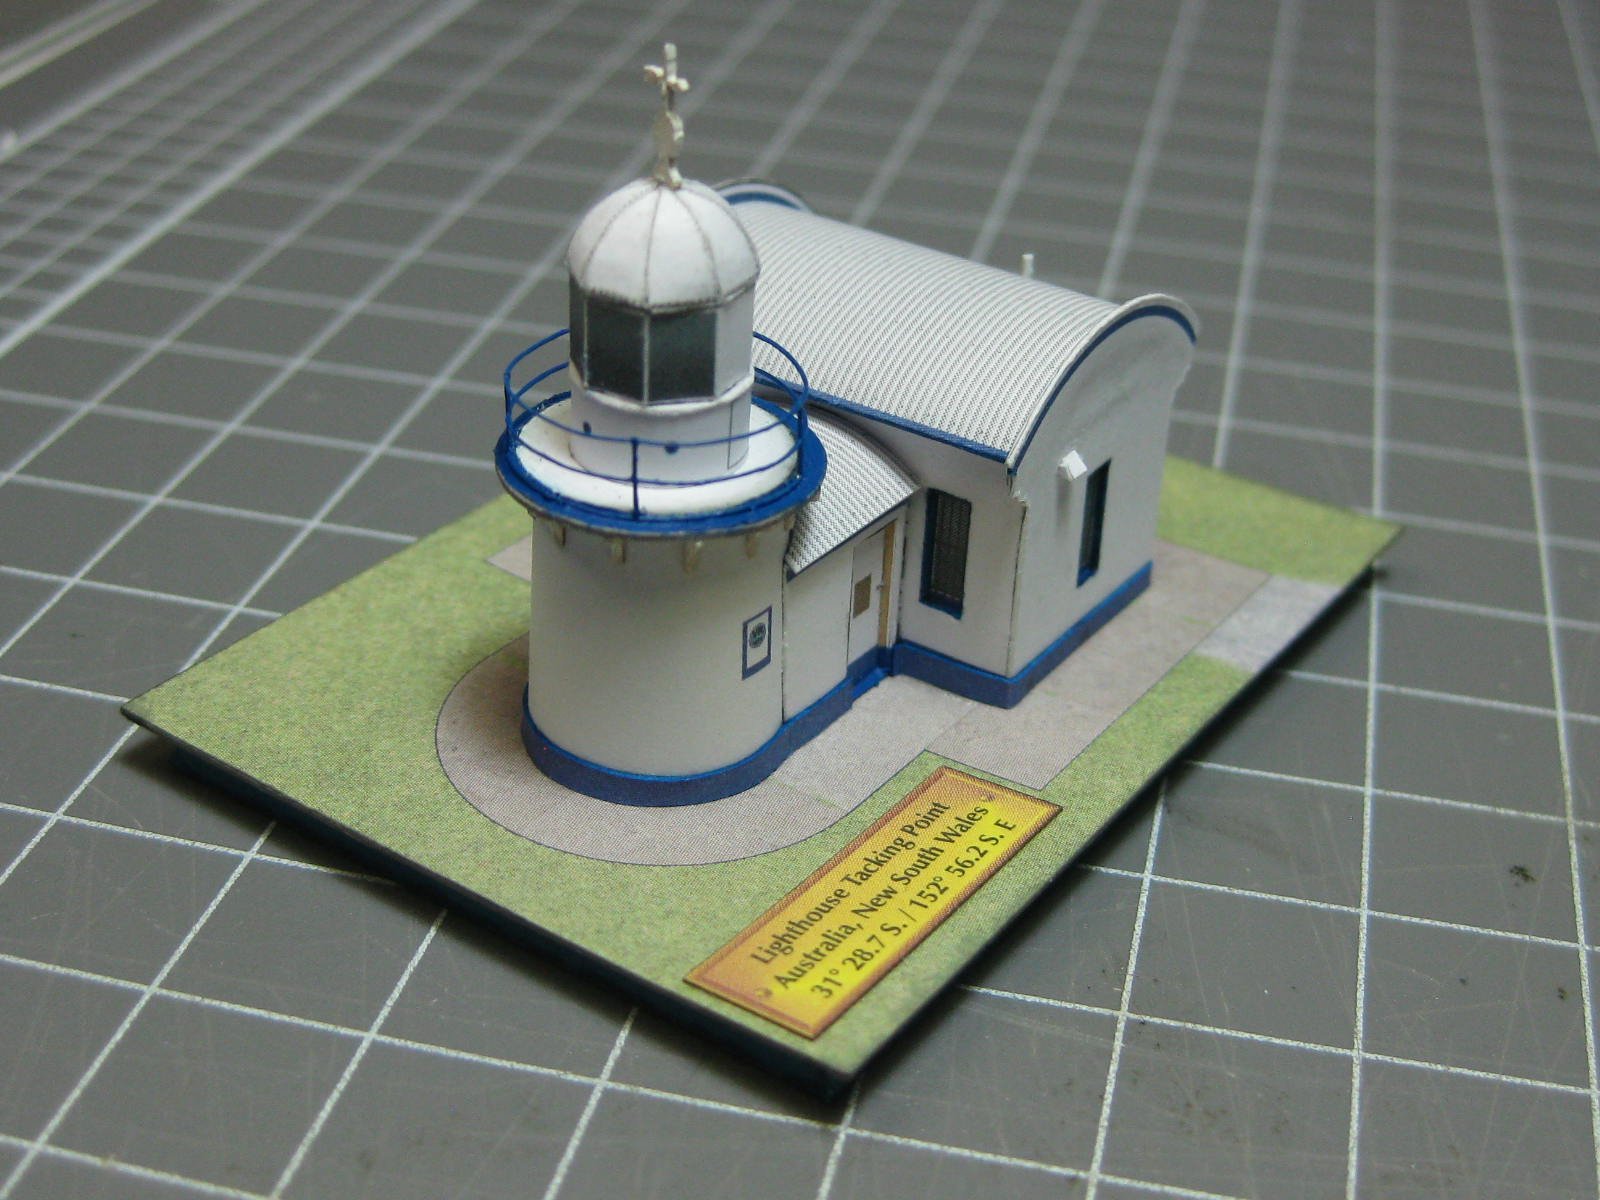
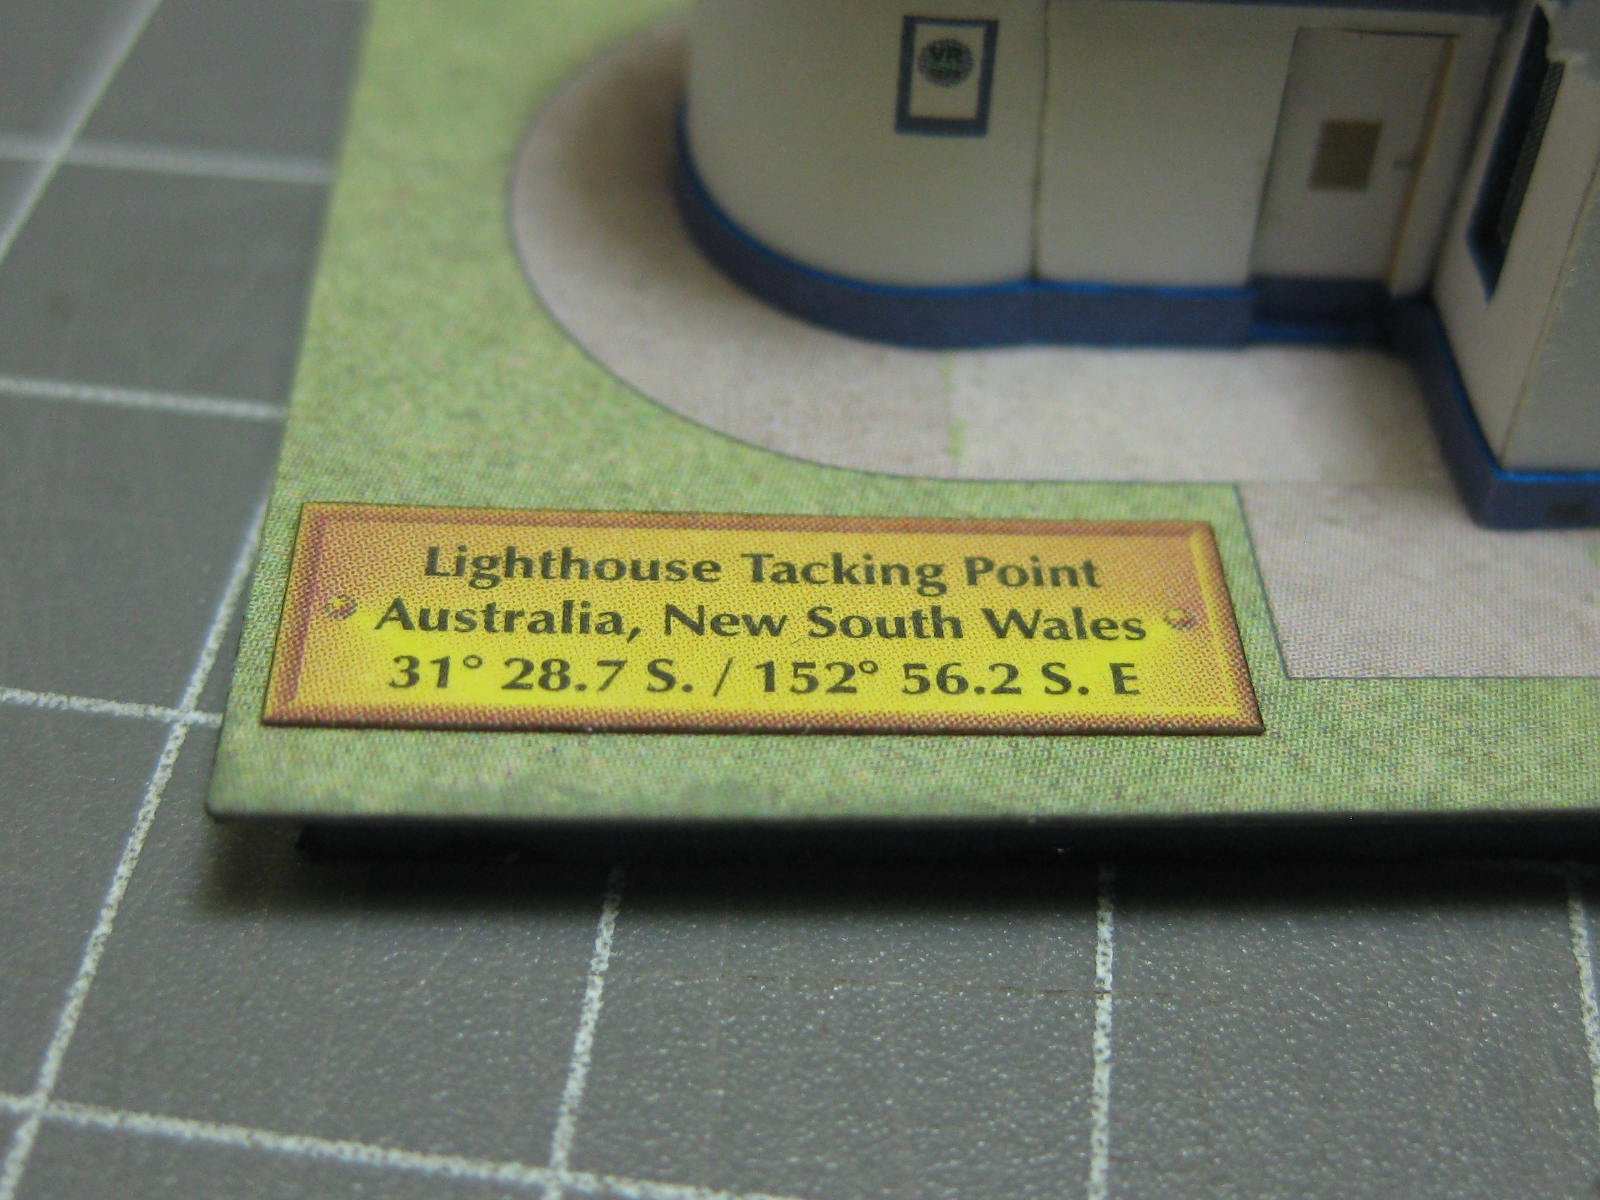
First up is the Tacking Point lighthouse near Port Macquarie NSW. It was built in 1879 and was the 4th of five lighthouses built around that time on the NSW mid-north coast of similar design. More information can be found by clicking HERE.
I'm going to donate it to the Port Macquarie Maritime Museum so it can keep company with my HMS Vulture, which I donated to the Museum several years ago. They have a cabinet full of models built in unusual ways, but as far as I know this will be the first one made from paper.
I've actually finished this one already - it took me 2 1/2 days. Here is a pic of most of the parts, some of which I've already prepared :
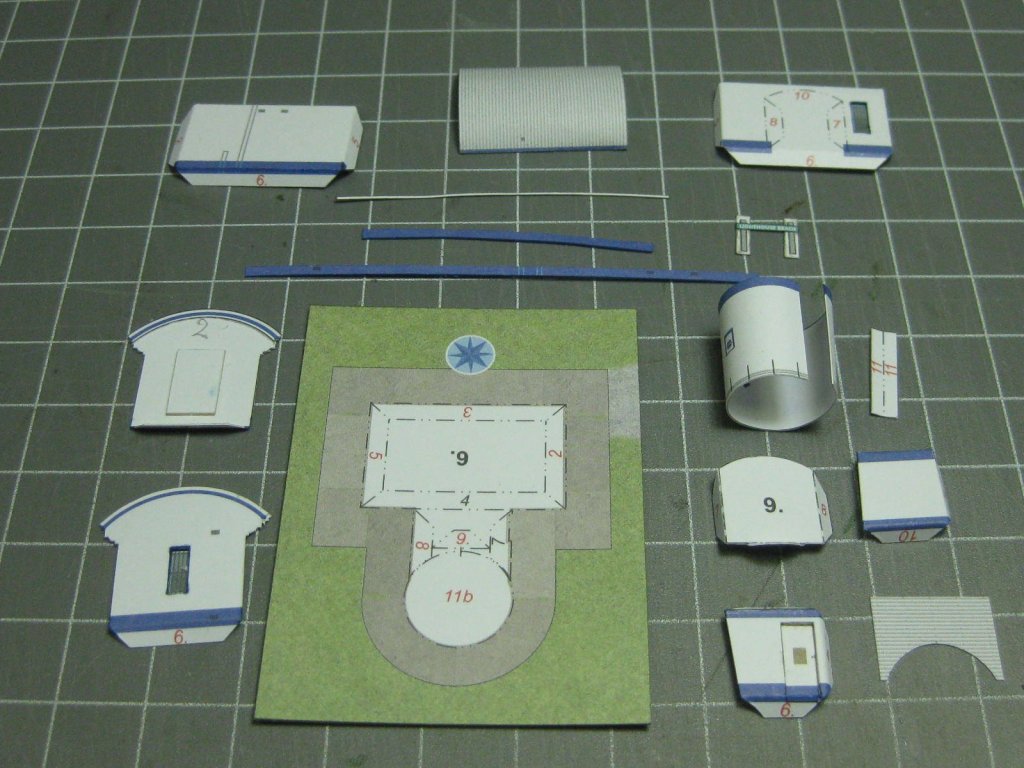
I reinforced the base with a few card strips :

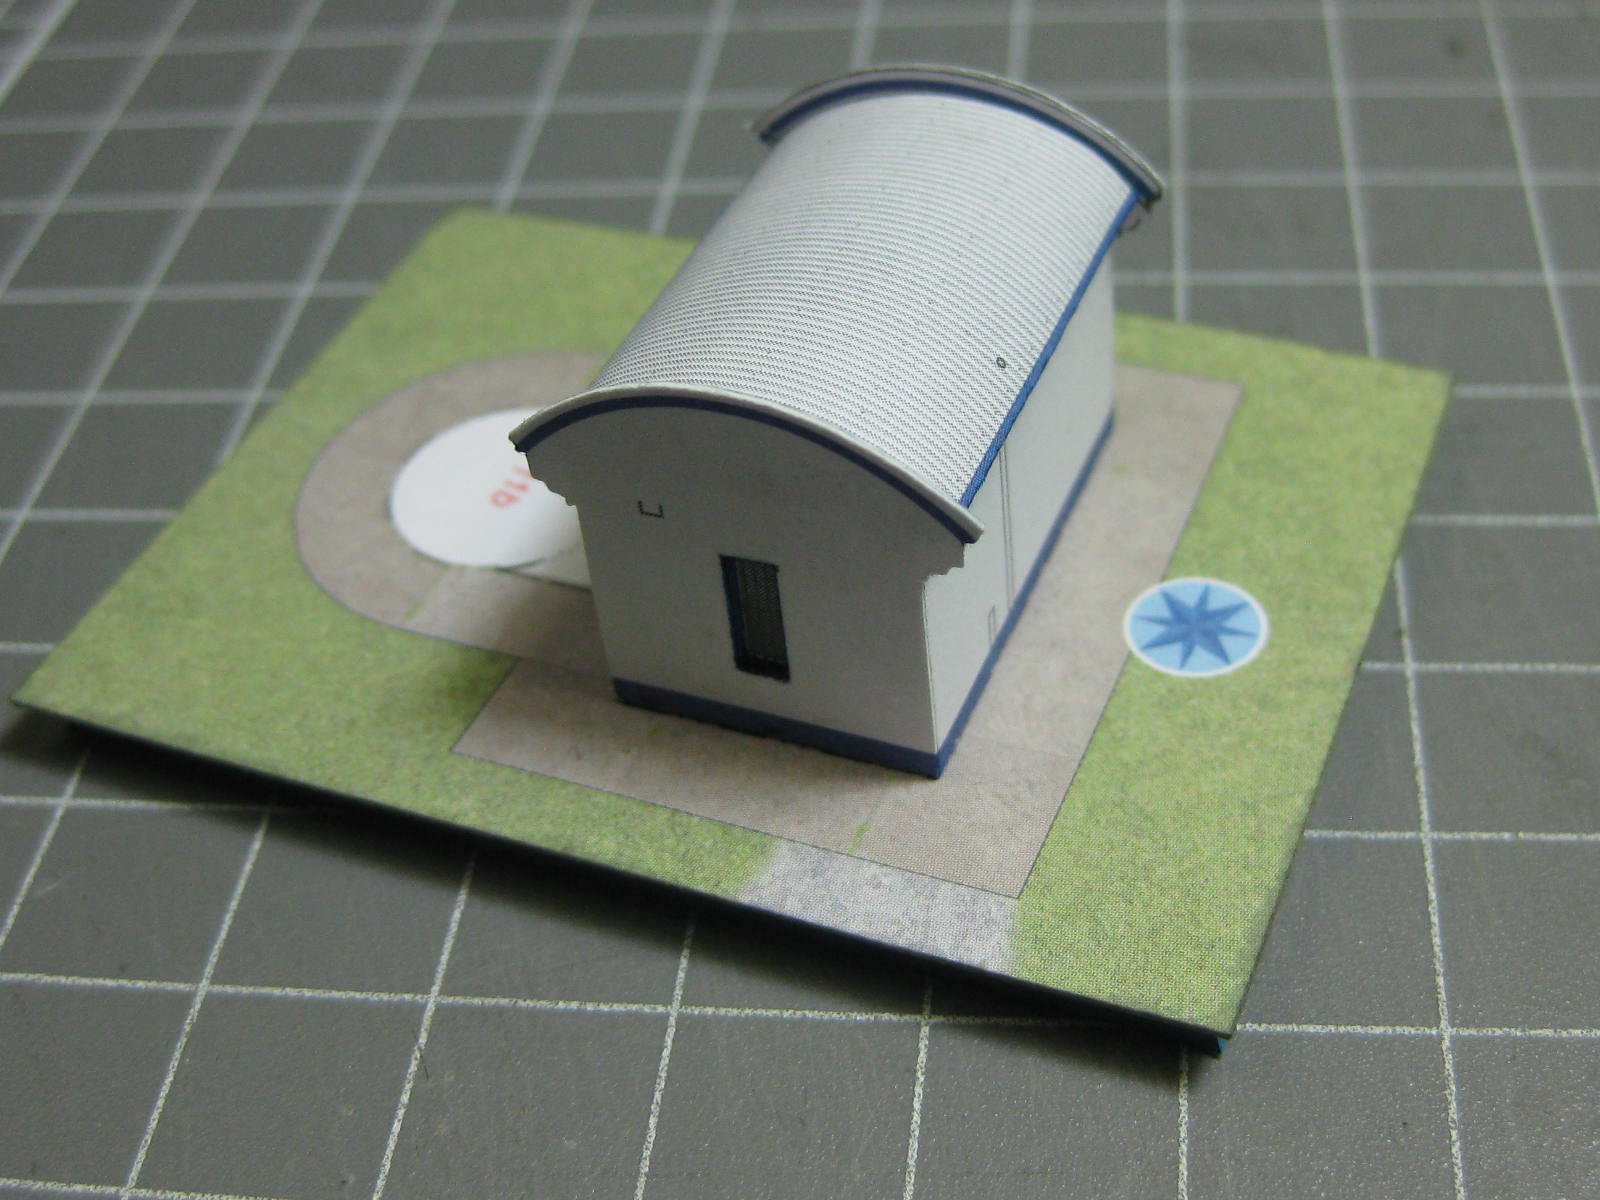
The utility building :

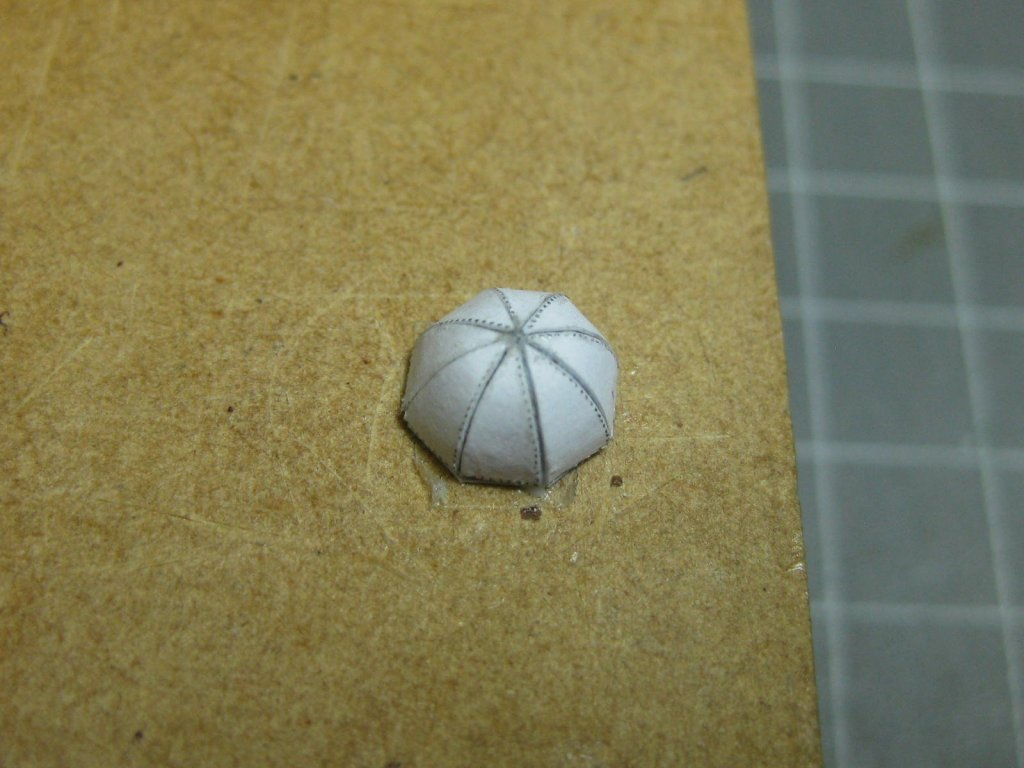
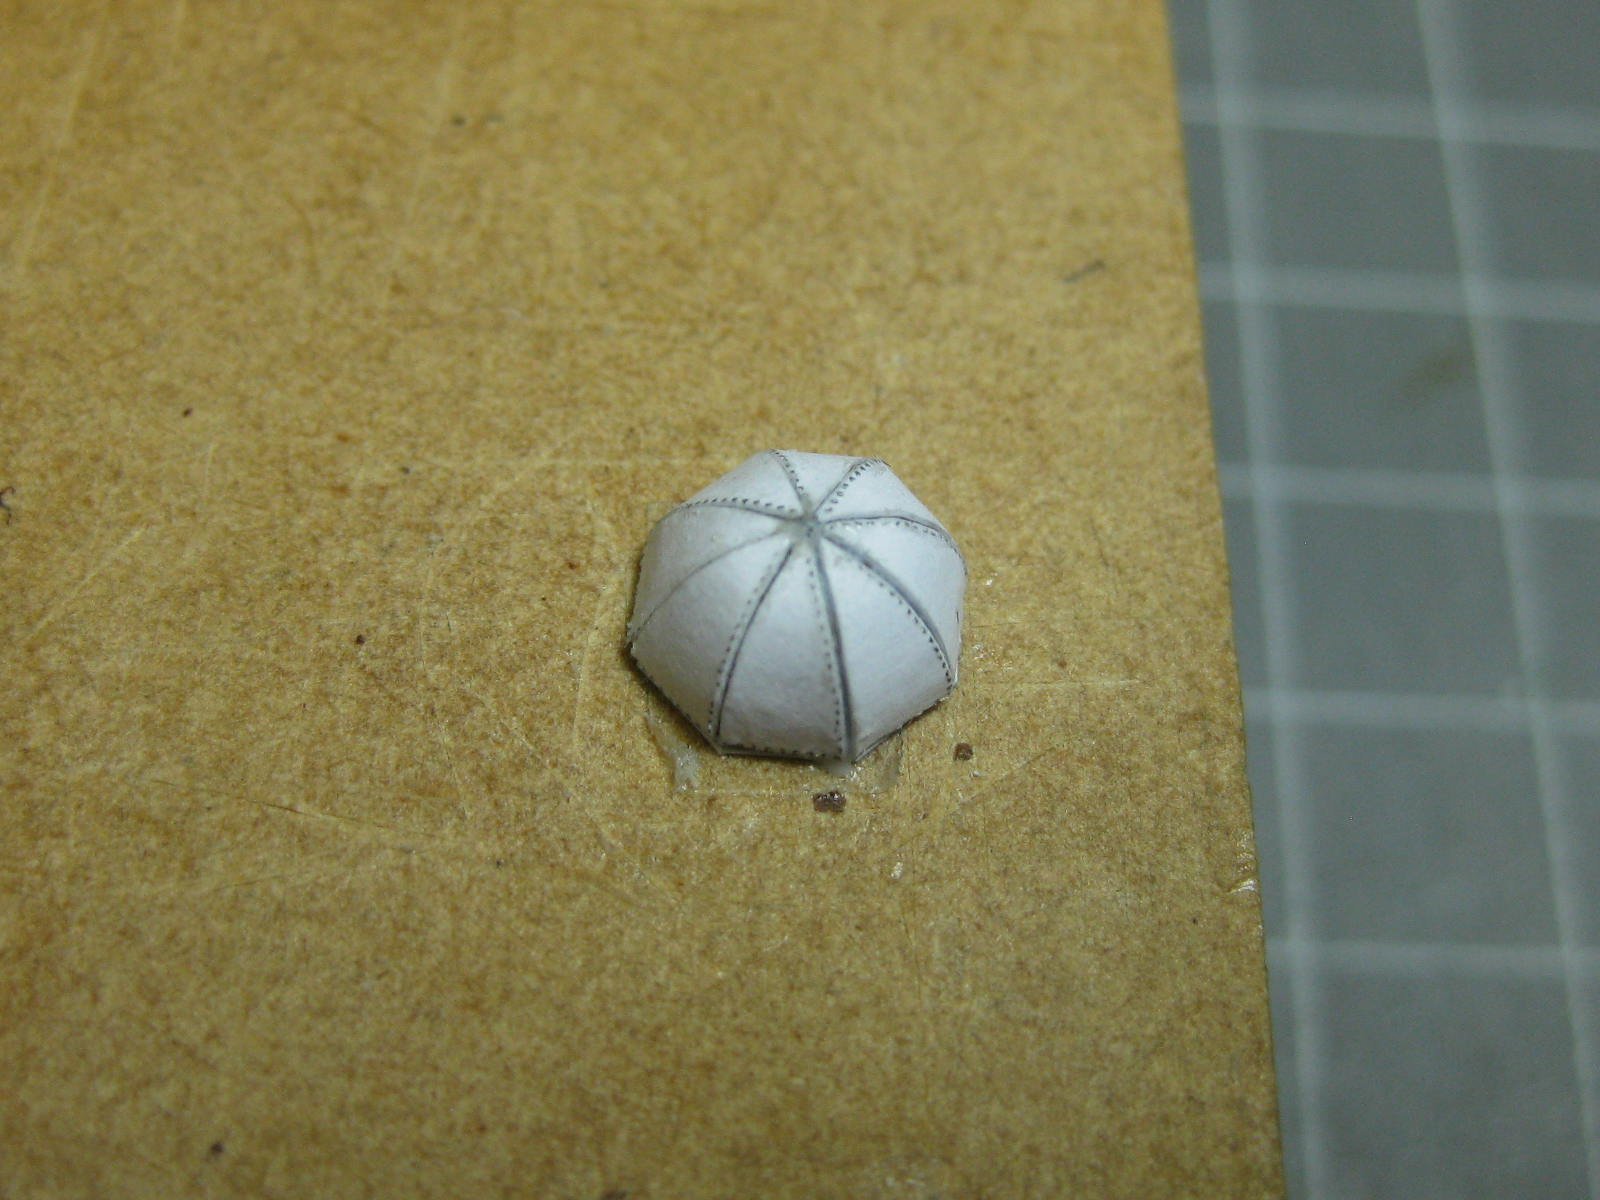
The dome for the light. The additional card in the middle is a method I've used for previous domes - it makes it much easier to glue :

The completed model :

Danny
-
-
On 8/12/2019 at 6:31 AM, Old Collingwood said:
MH53's would often team up with C-130s and do budy up refueling.
OC.
As seen HERE in this video. I know it's not a Hind in the video but the principle is the same.
Danny
- Canute, Old Collingwood and mtaylor
-
3
-
On 8/12/2019 at 4:45 AM, MEDDO said:
Looks a bit lightweight but I think it might be a midair refueling boom but I could be wrong. Great work
Do they actually refuel helos in midair? A scary thought with the blades whirring overhead
 .
.
EDIT - it seems they do :
They can have that to themselves
.
Danny
- mtaylor, popeye the sailor, druxey and 3 others
-
6
-
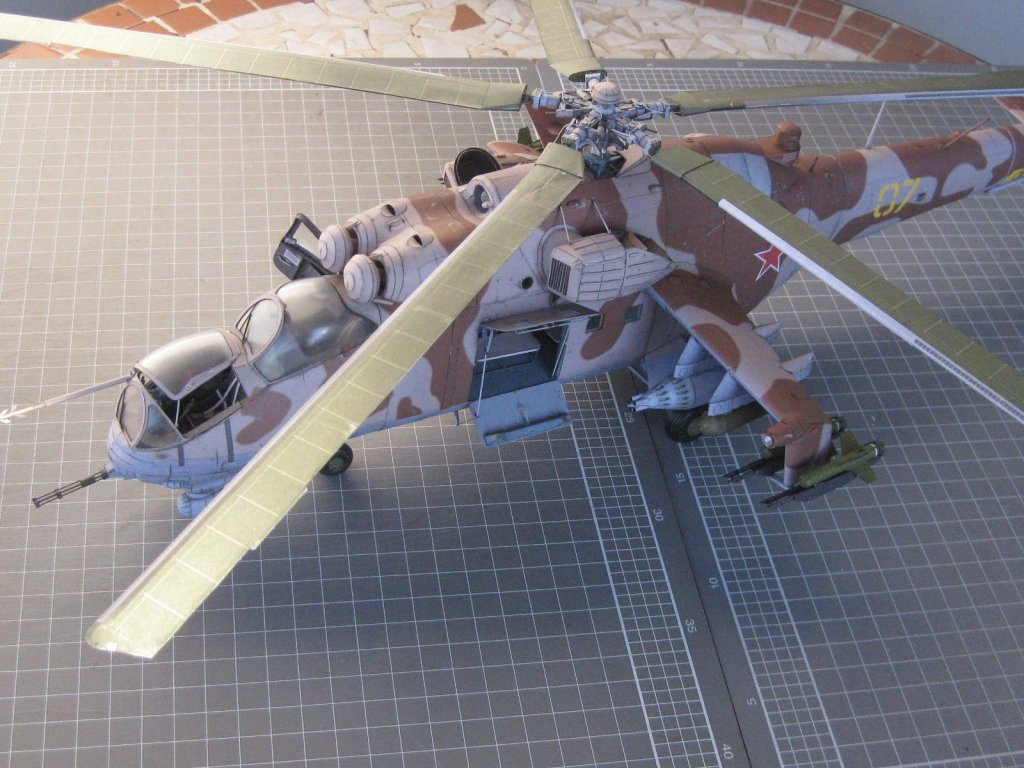
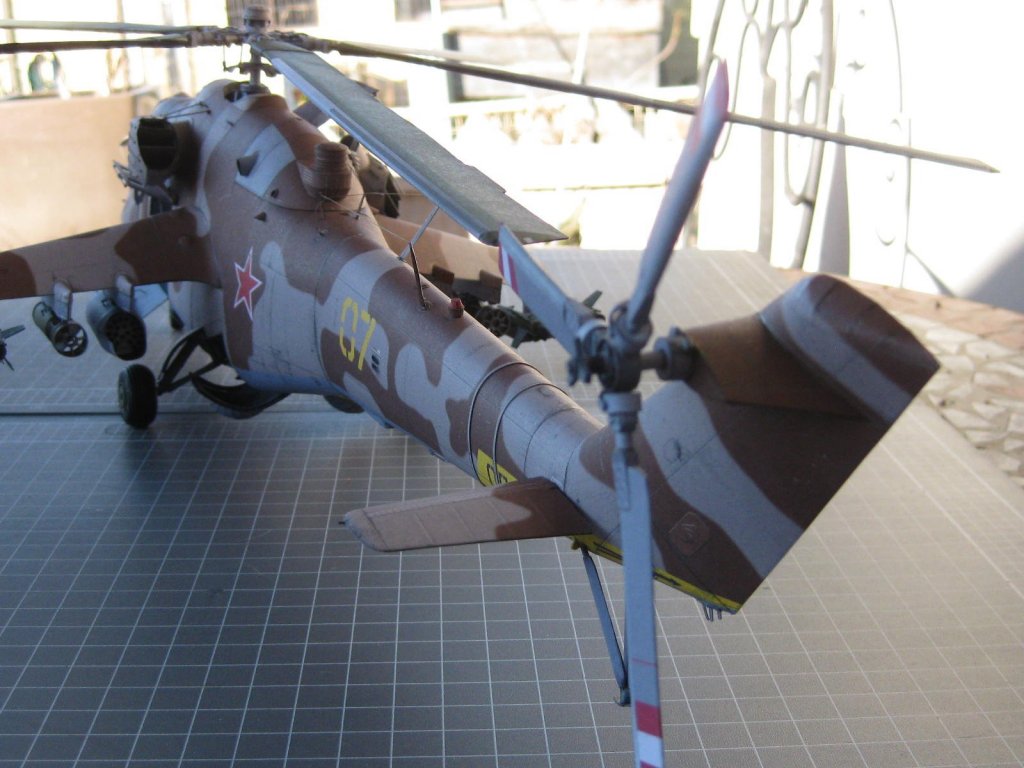
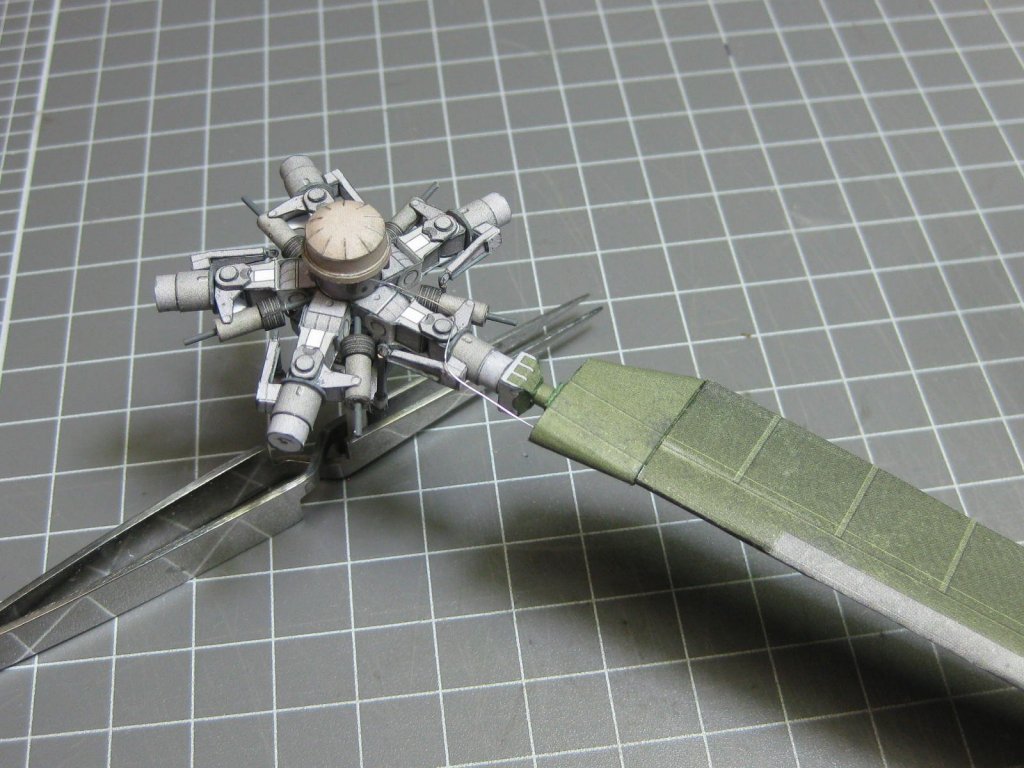
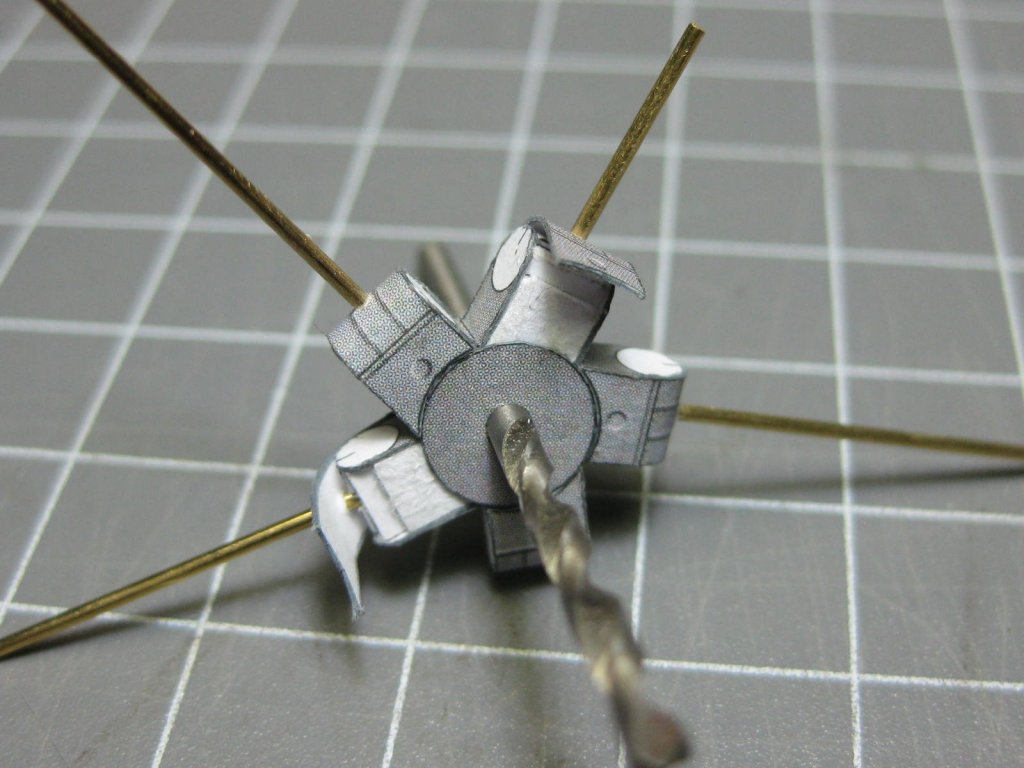
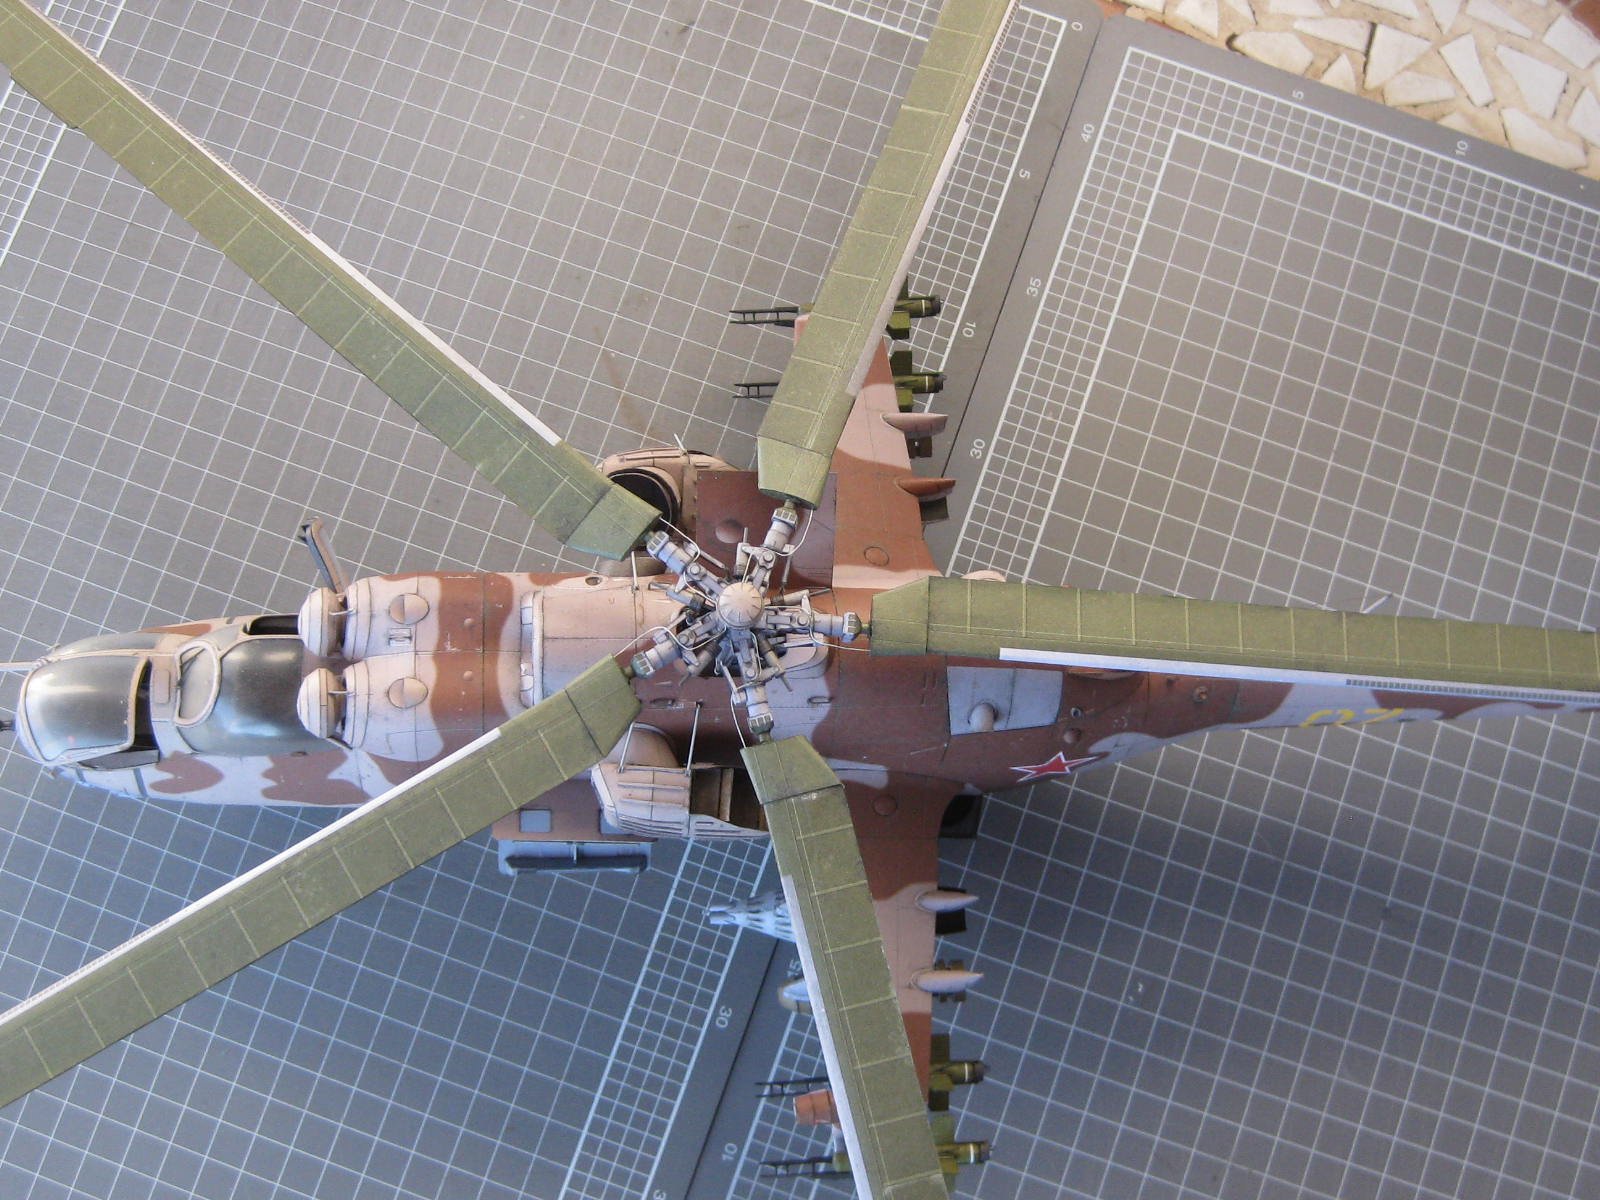
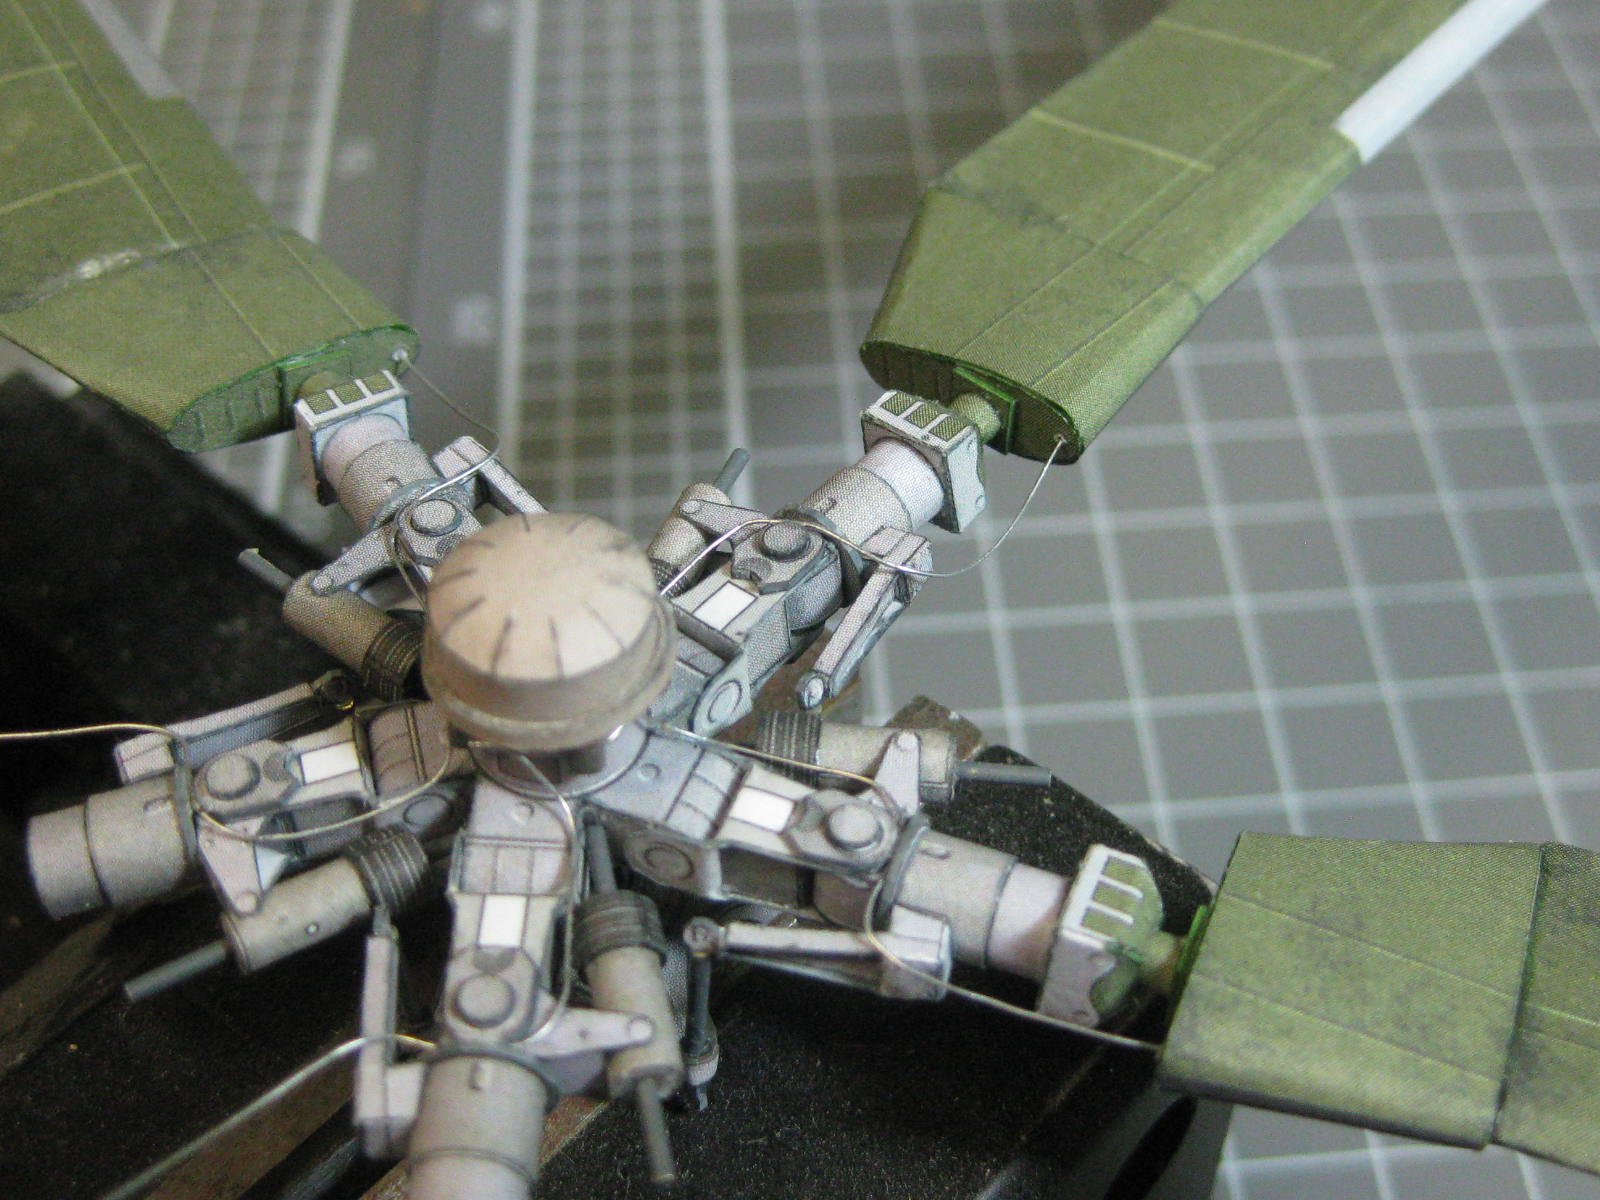
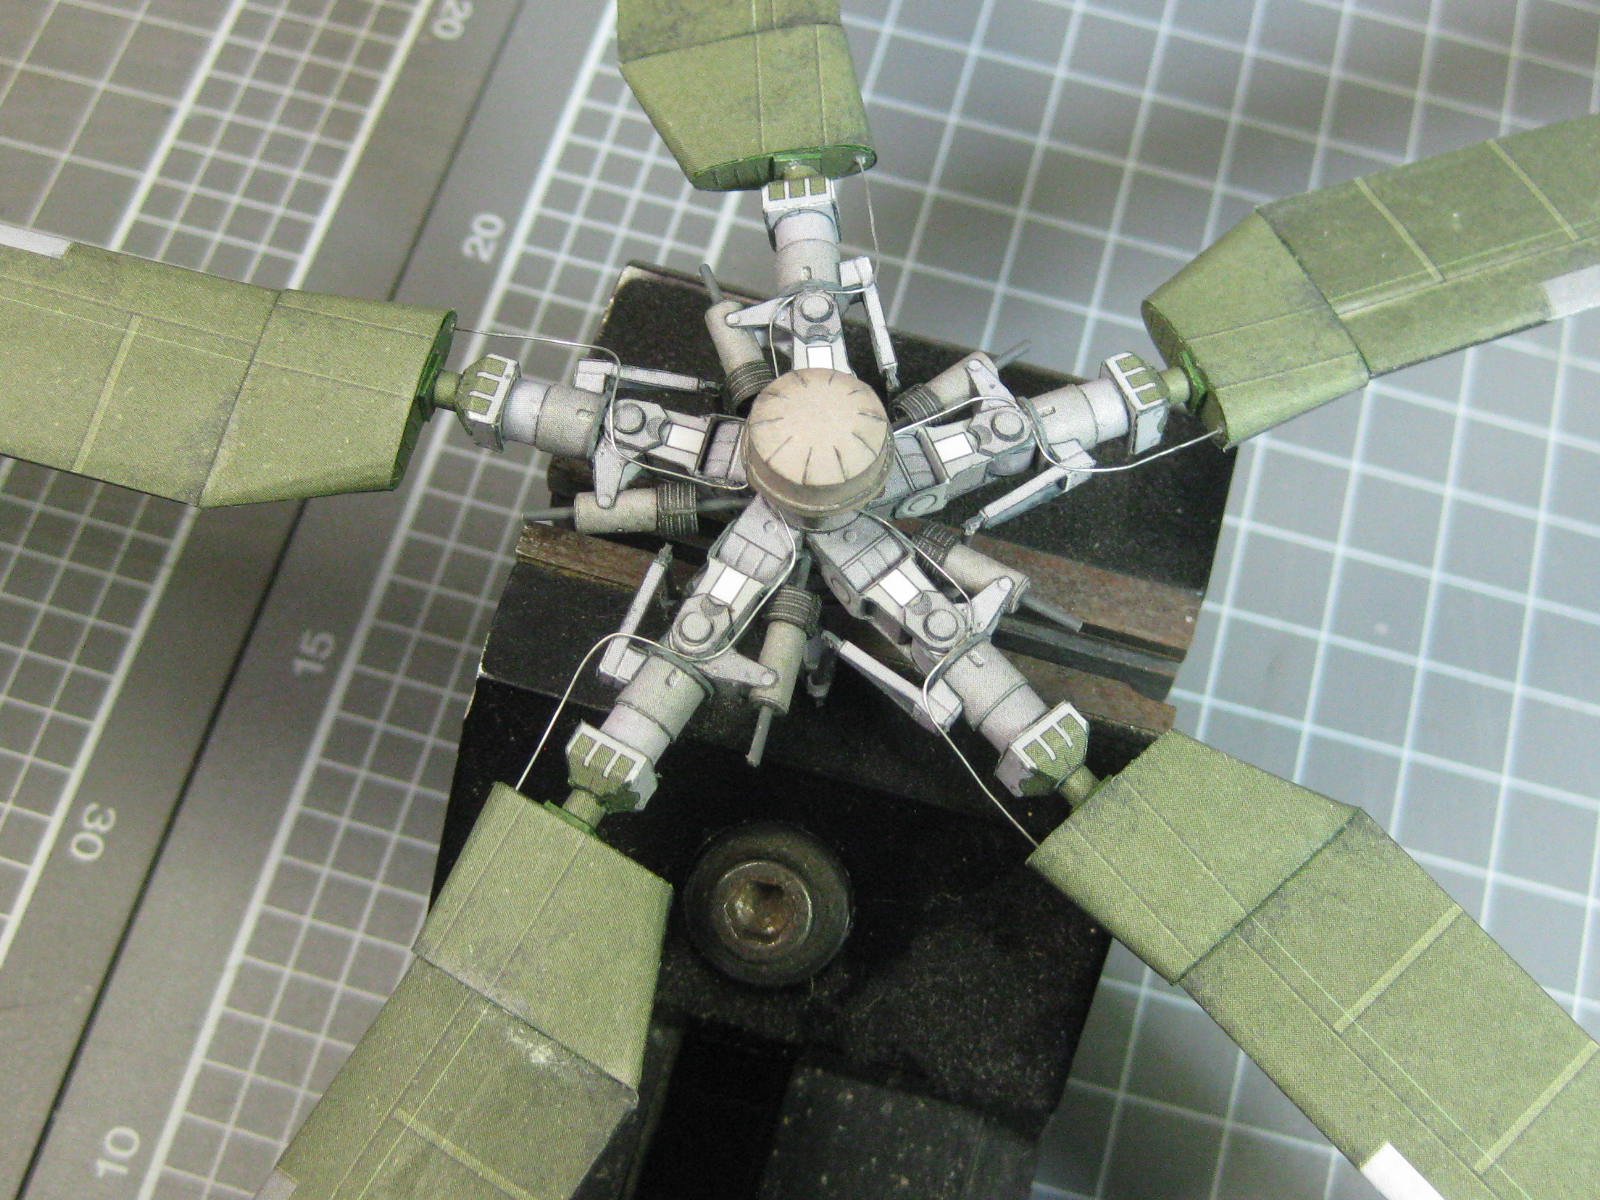
Last things to complete were to glue the rotor blades into the central control :

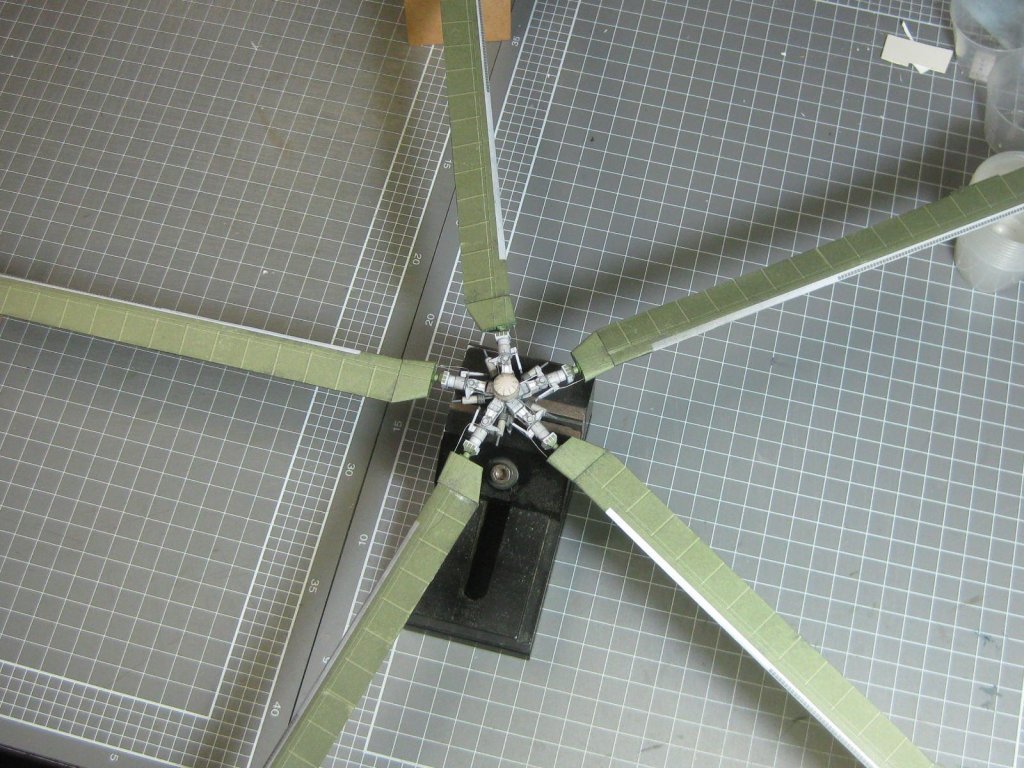

The blades could be a problem as time goes by. I'm not very happy with the way they are fitted - the control arms seem too weak for the weight of the blades, so I wiped CA glue over virtually all the control arms to try to stiffen them up a bit. It worked to a certain degree but time will tell.
Danny
-
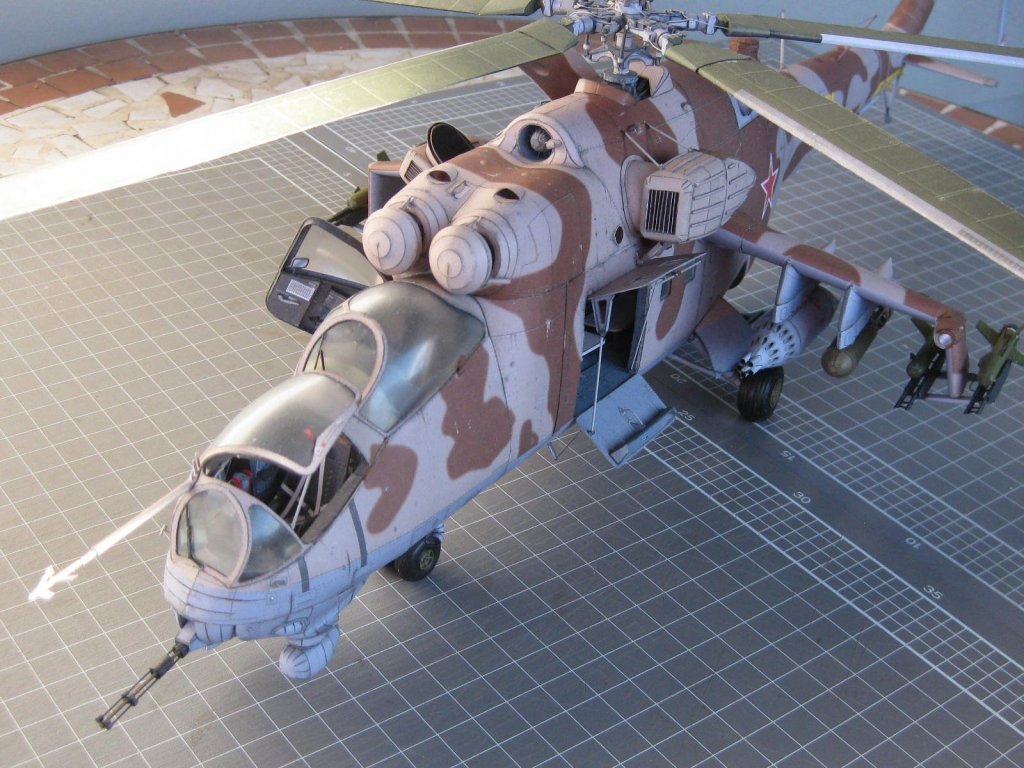
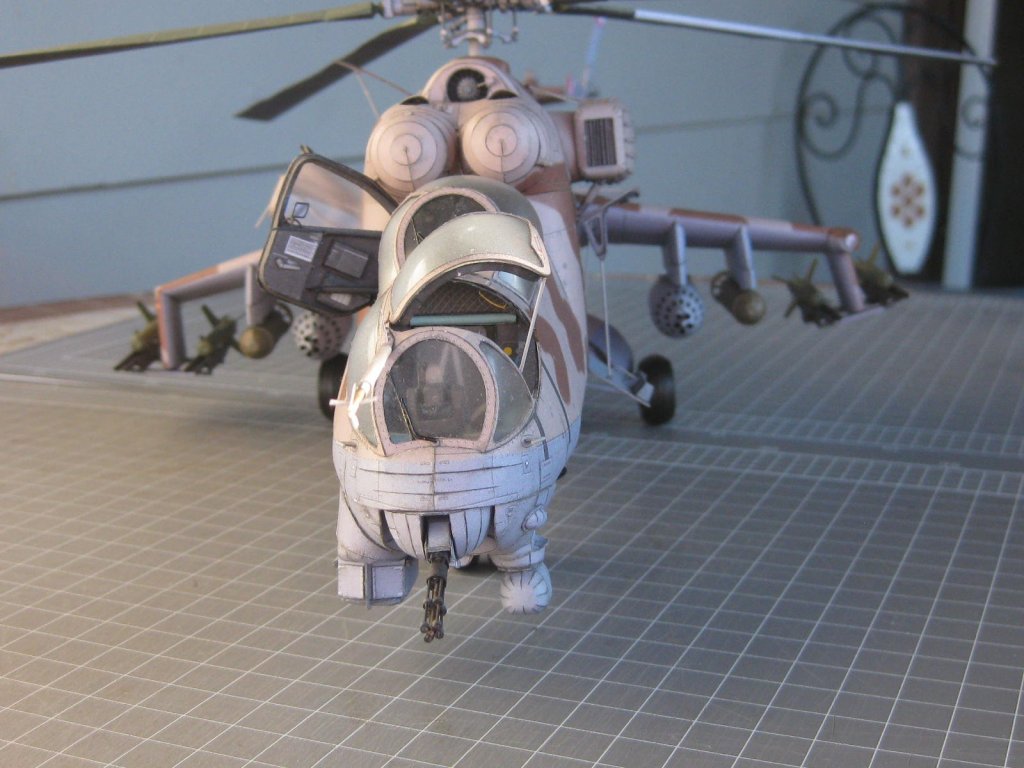
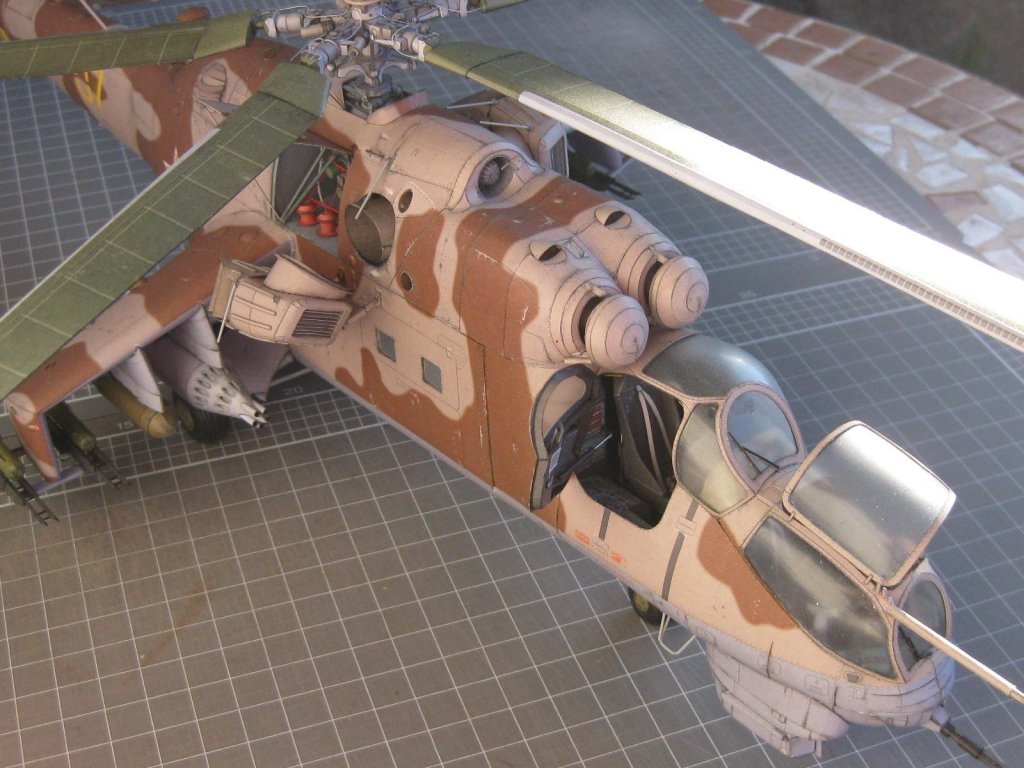
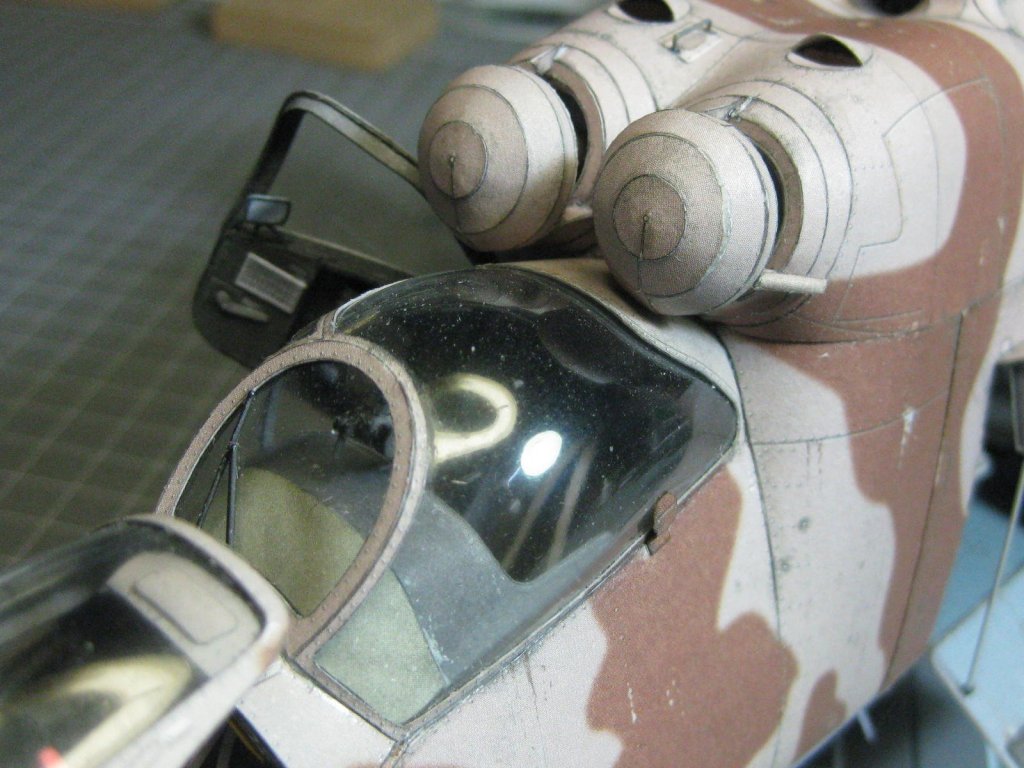
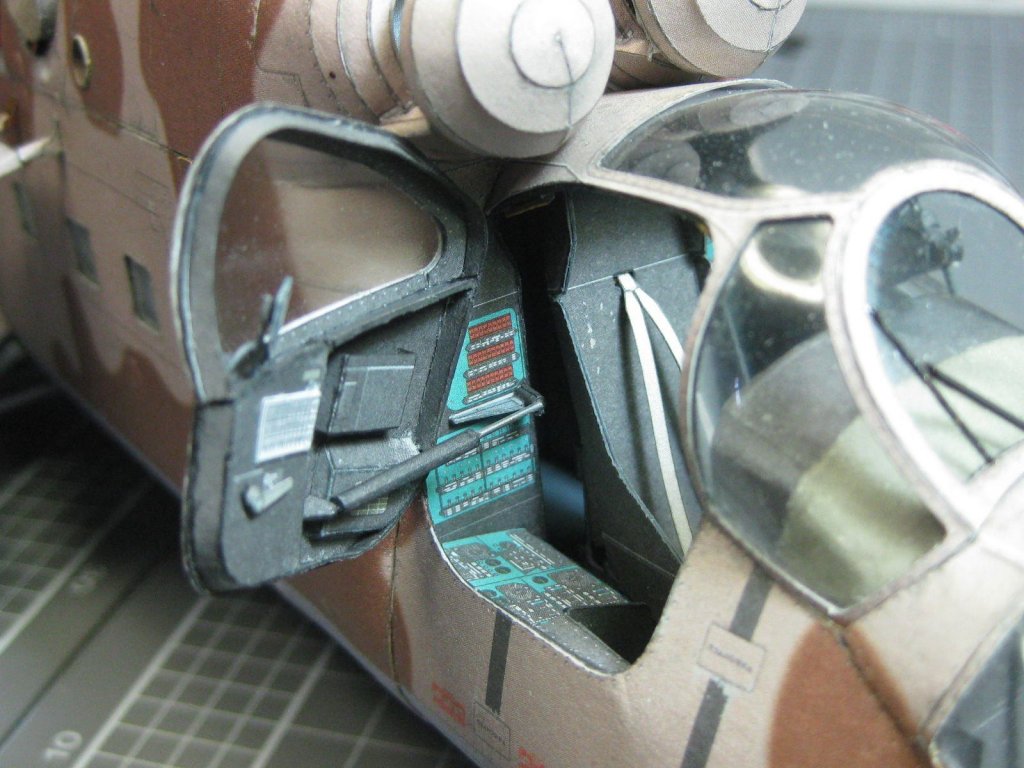
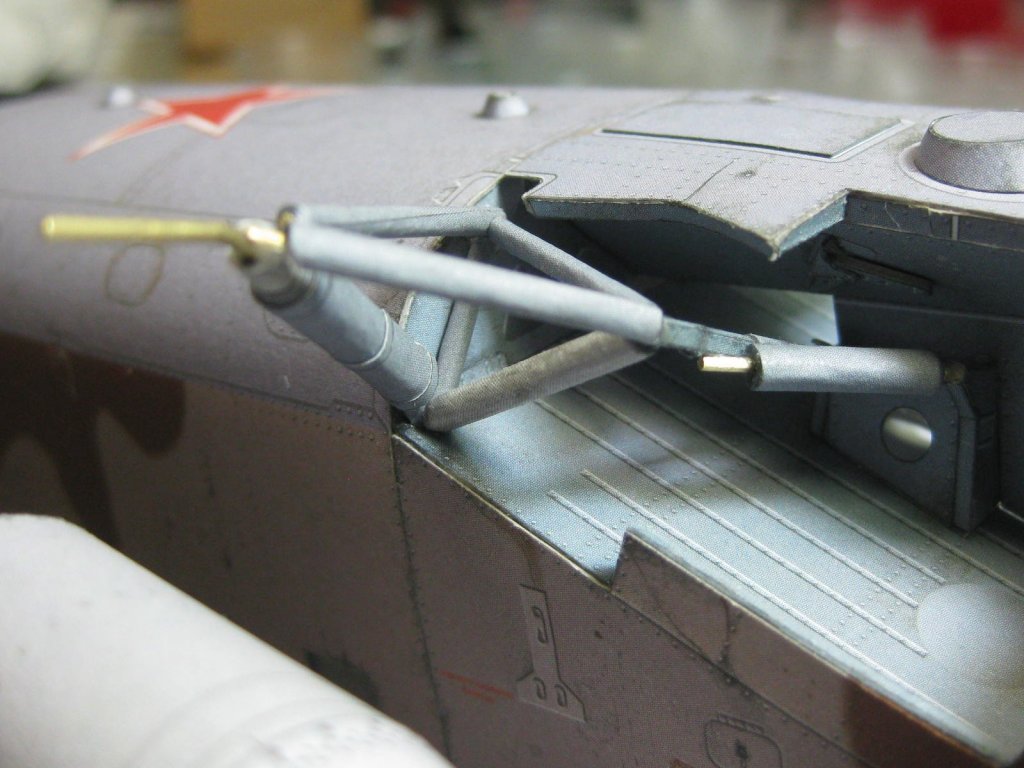
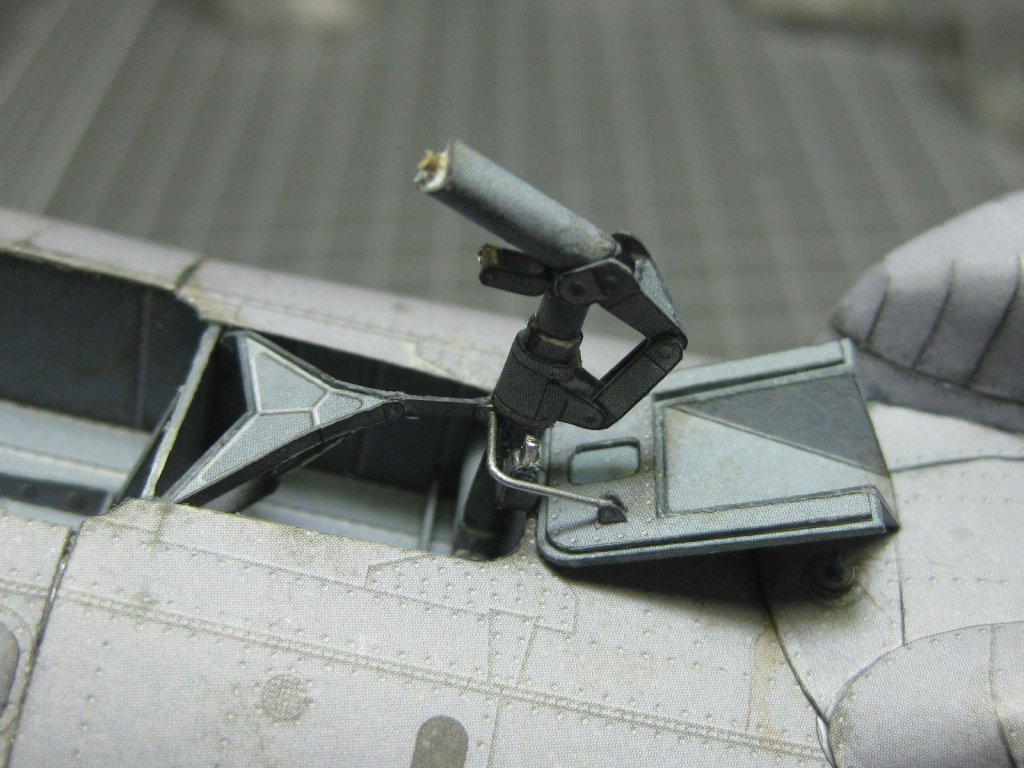
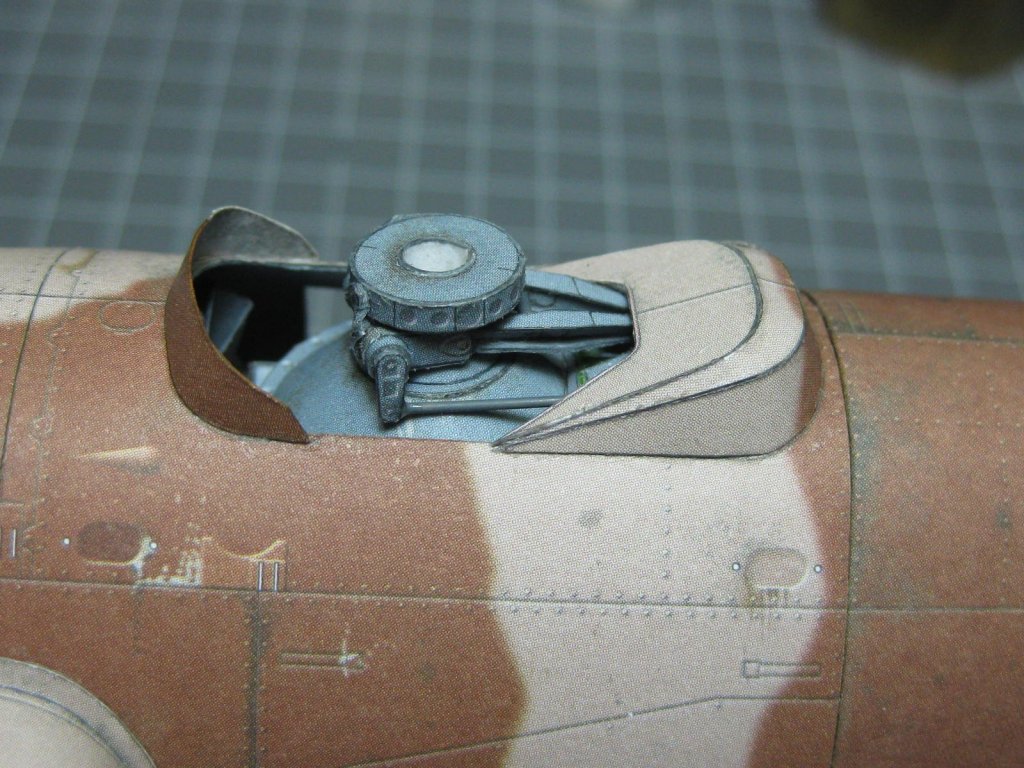
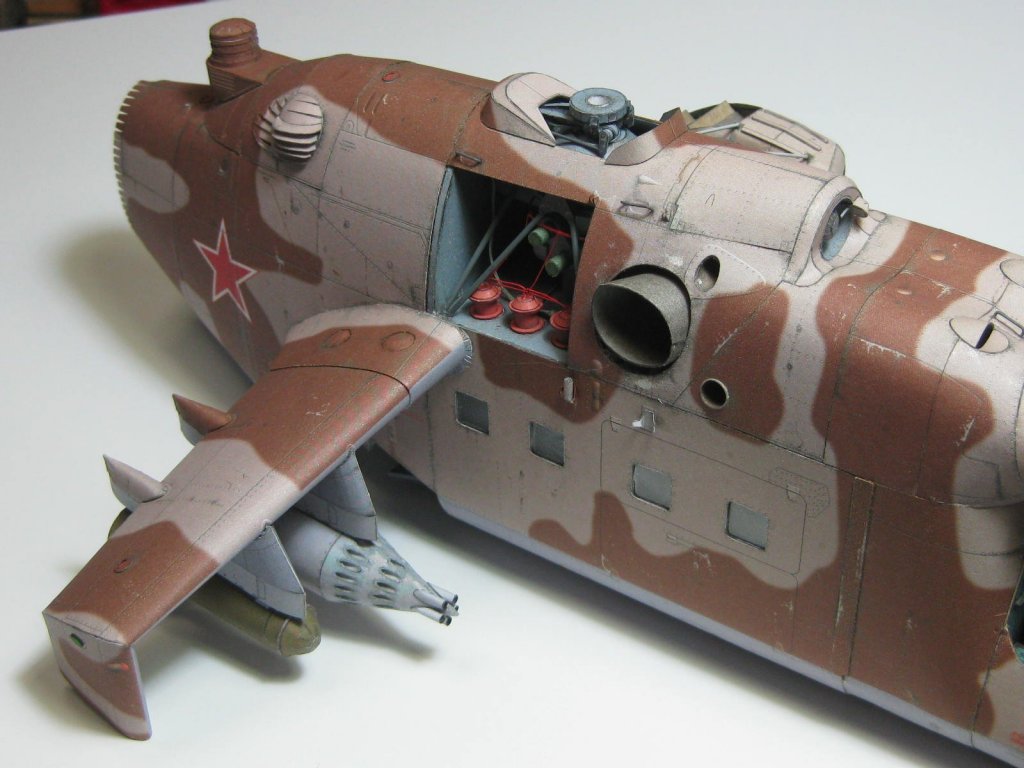
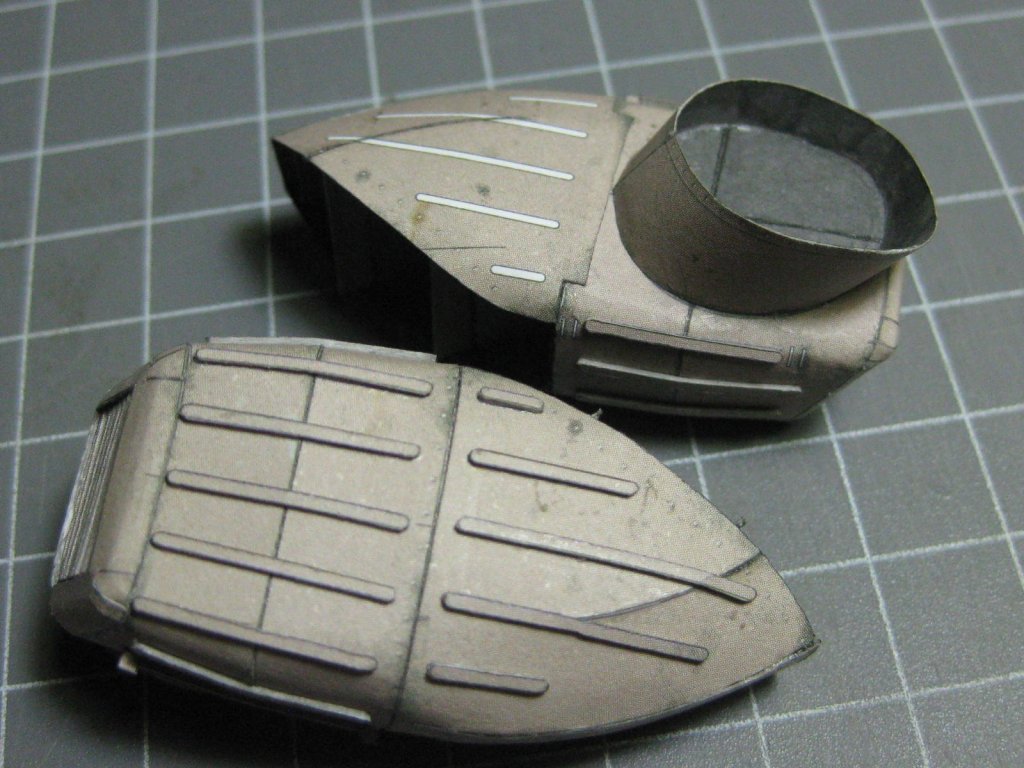
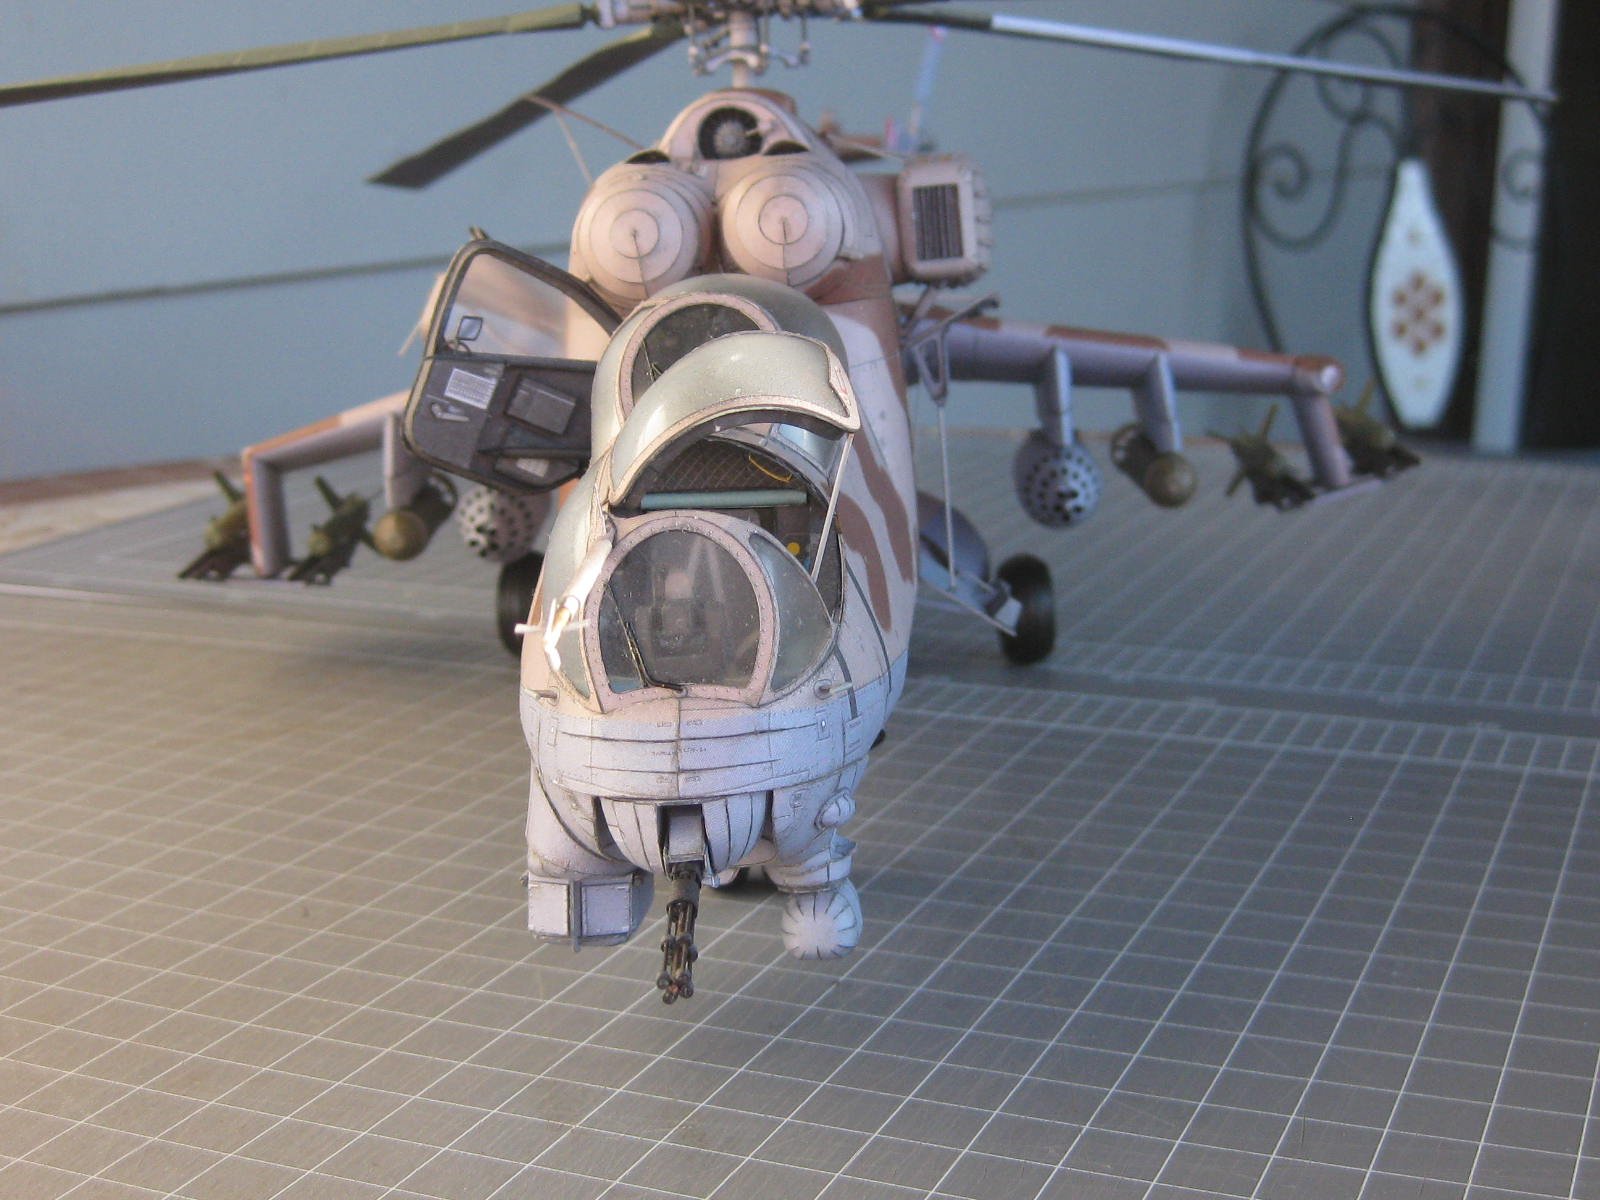
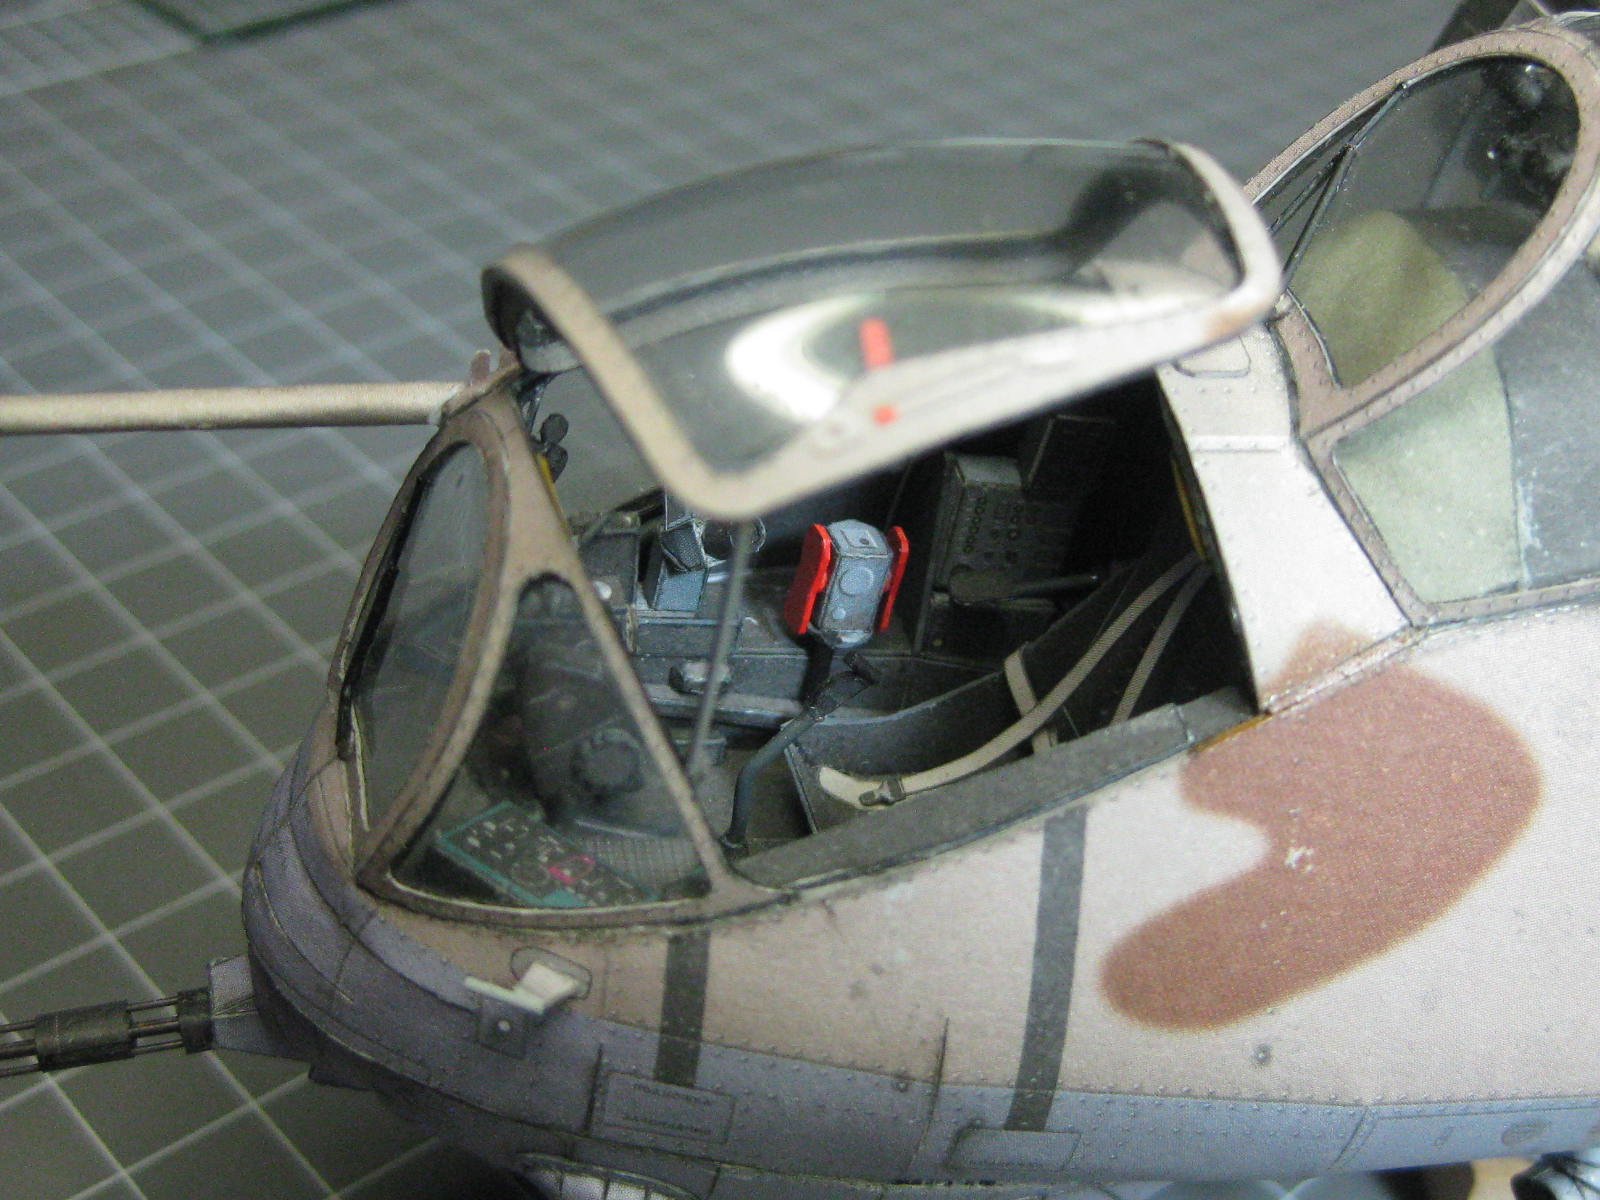
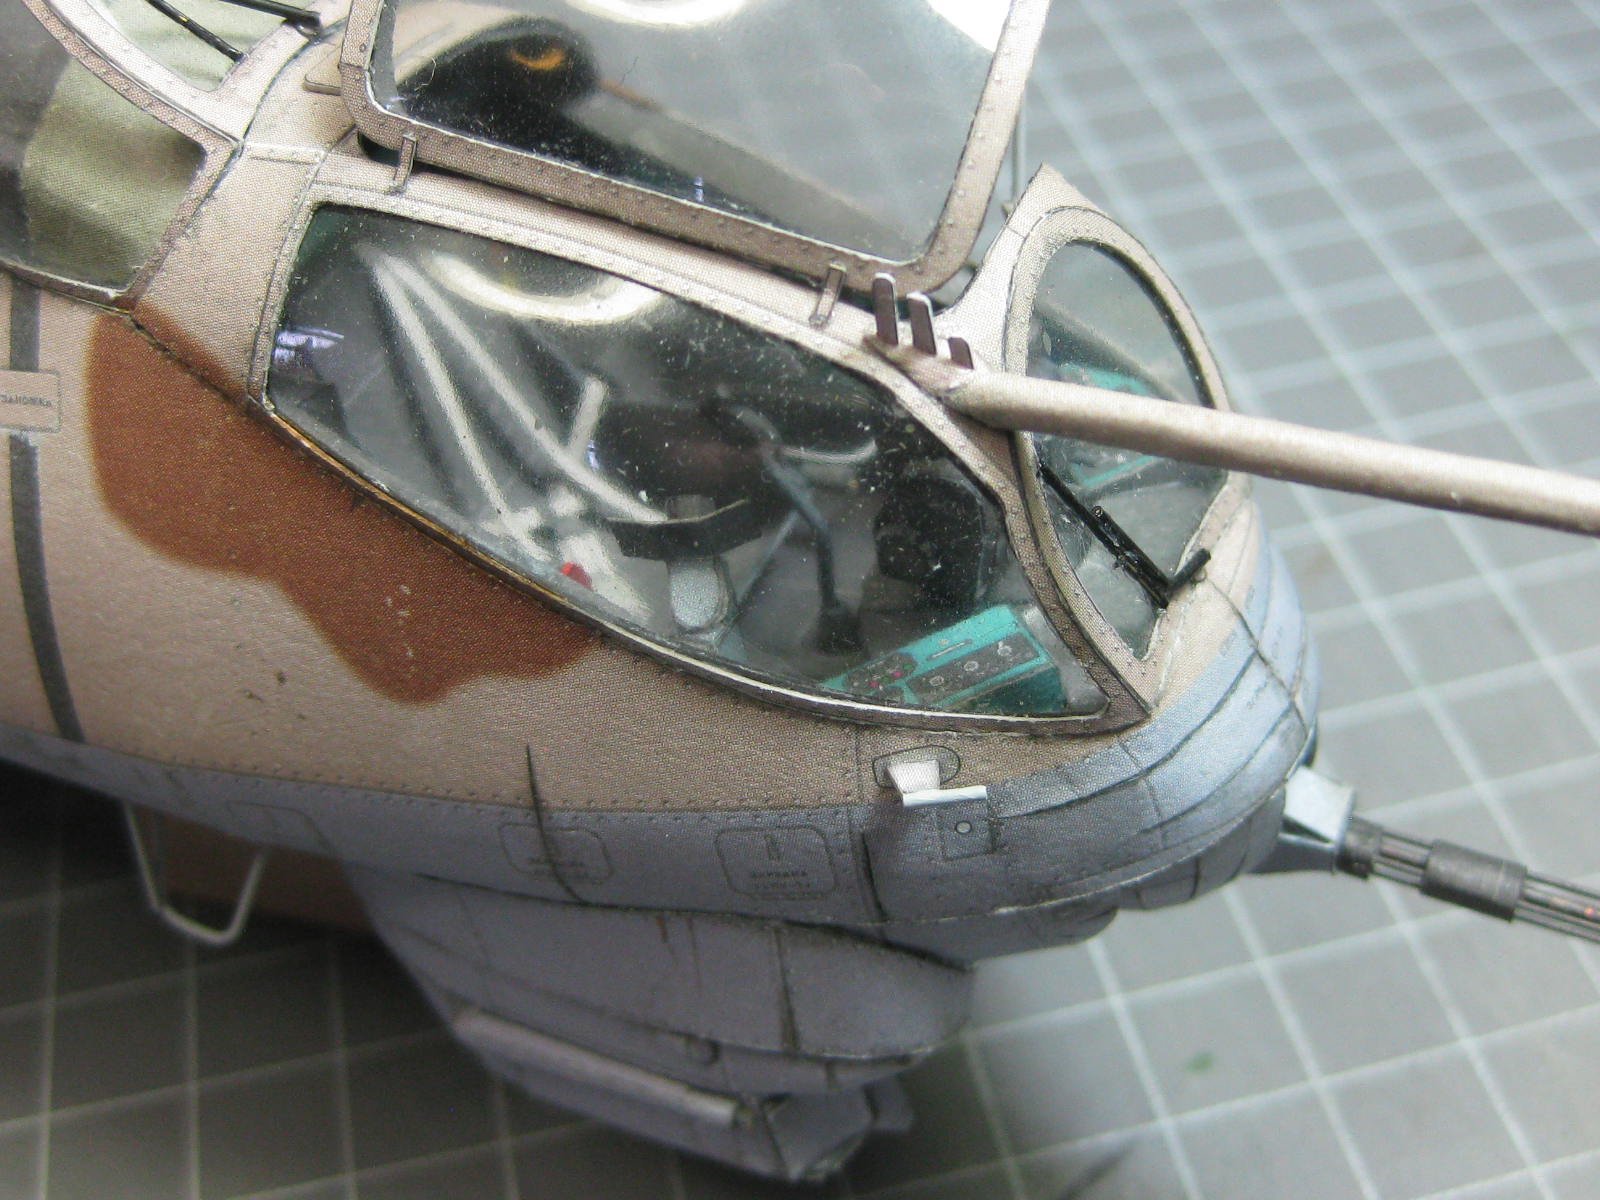
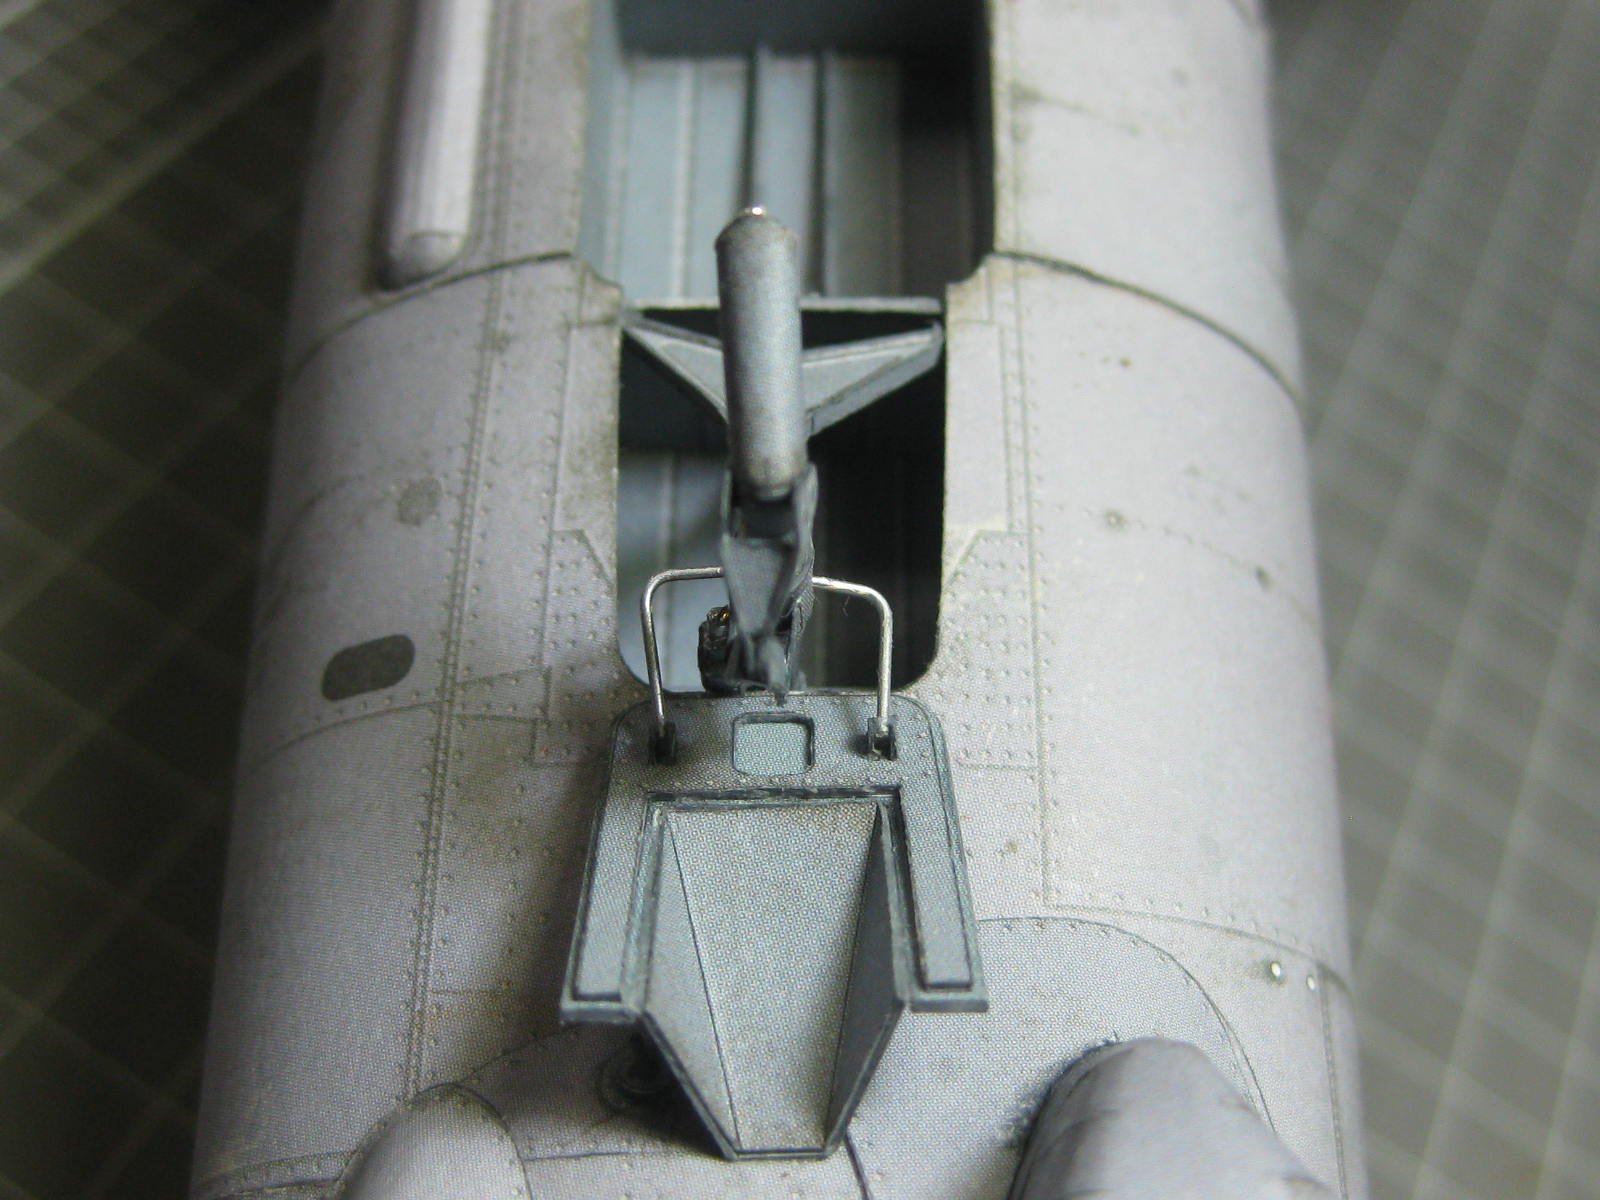
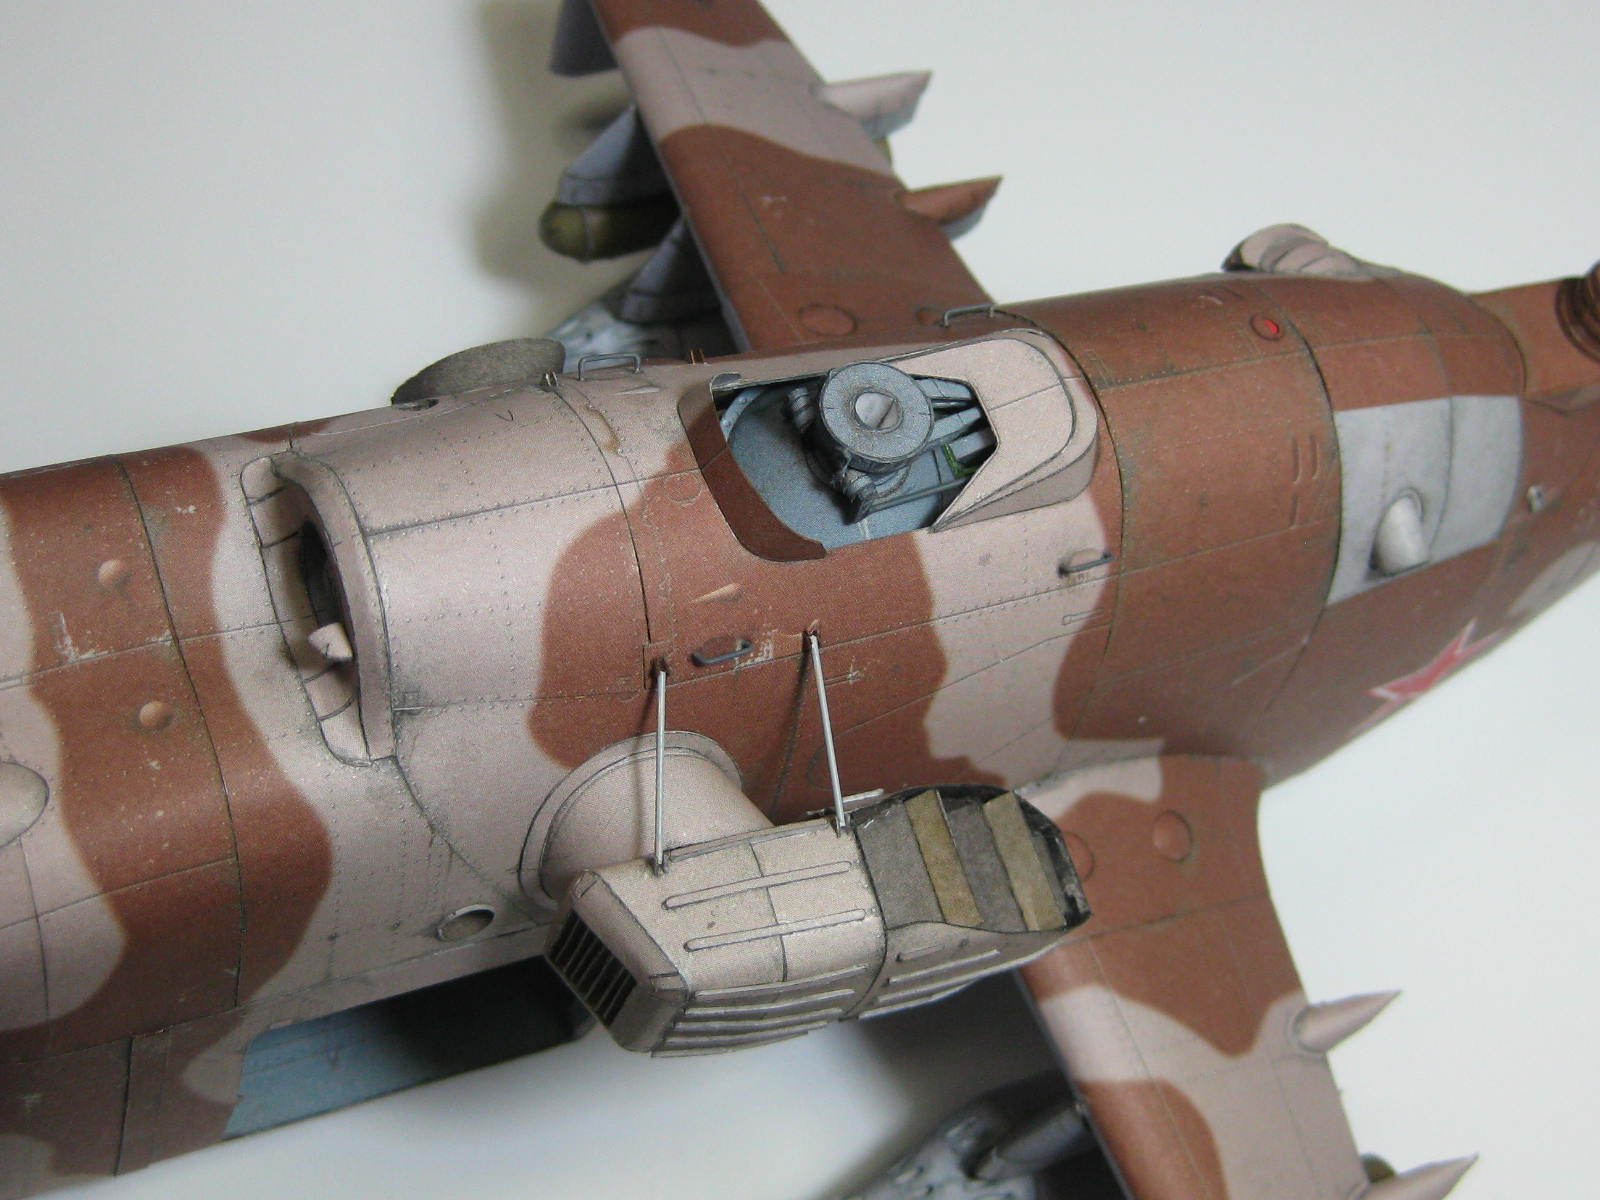
The two canopy doors were fitted next, followed by the Gatling gun and the probe. Any thoughts on what the probe was for? I'm thinking maybe a lightning rod? :
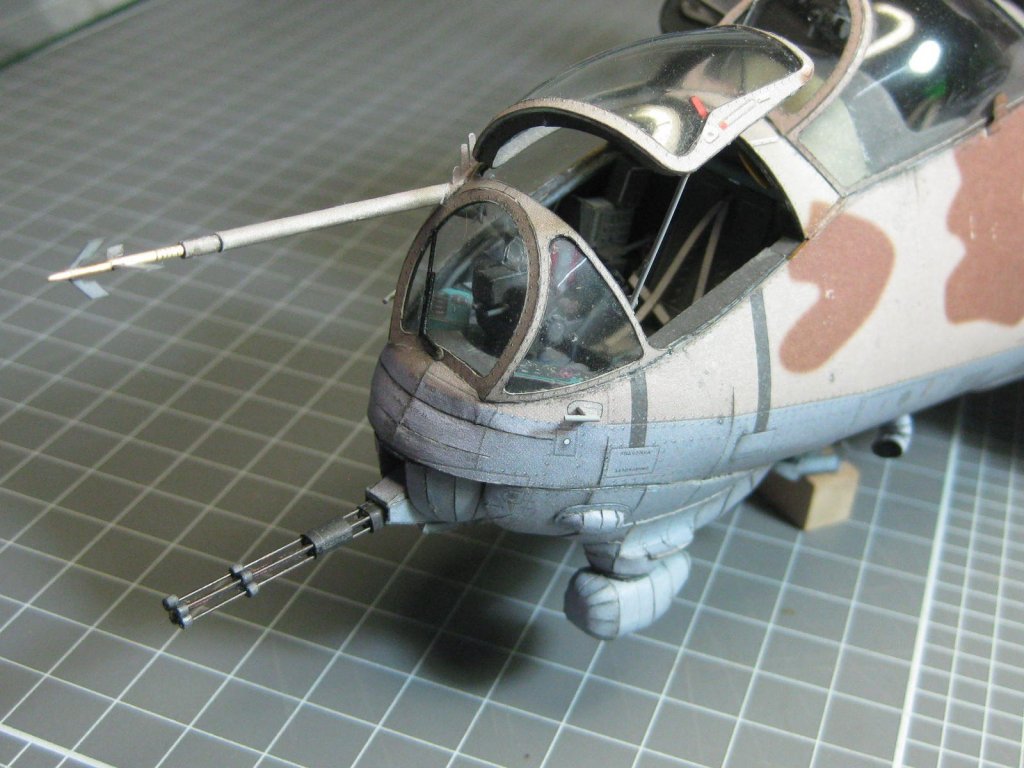


Danny
-
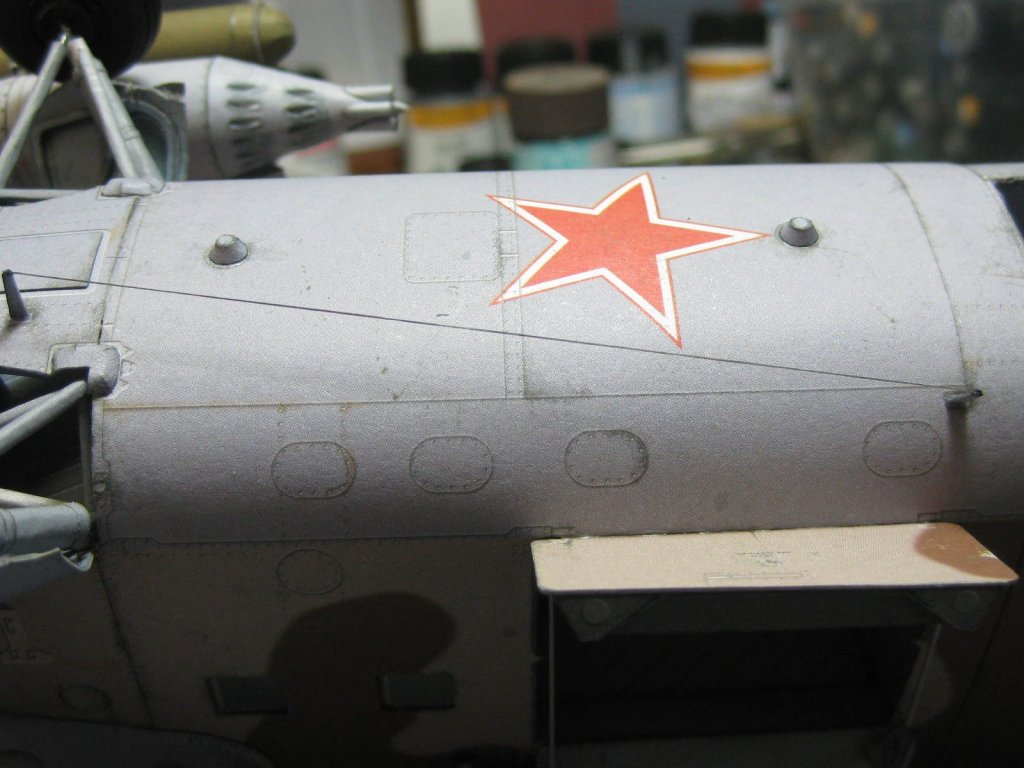
On the home stretch now. I've fitted both halves of the fuselage together :
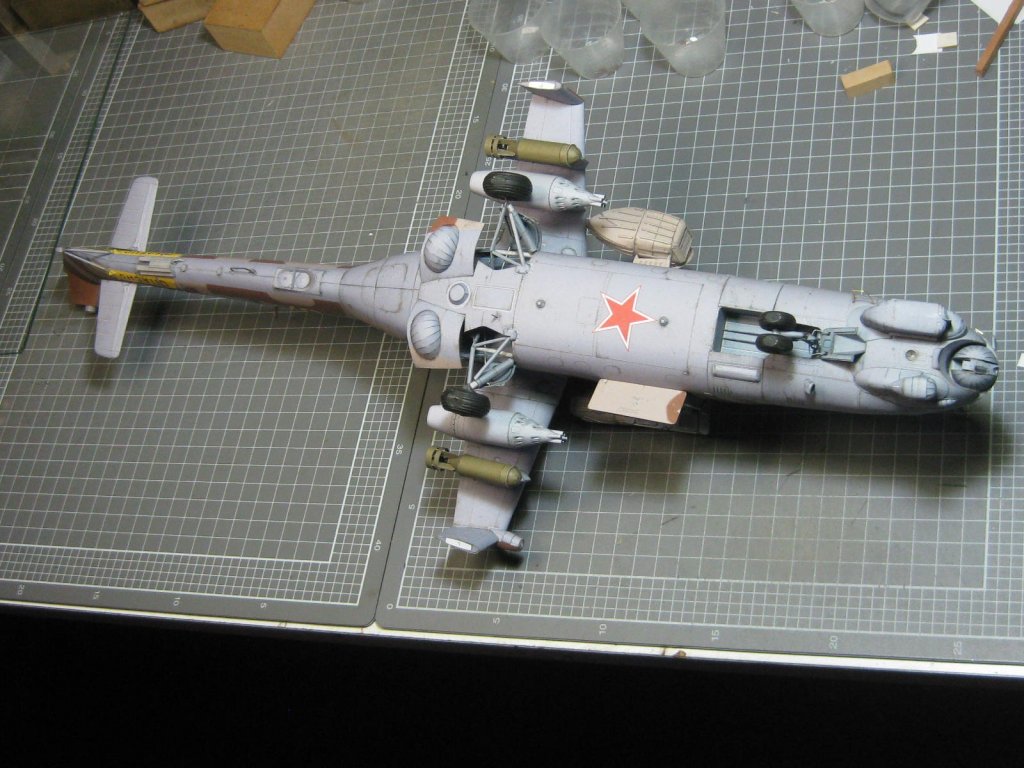
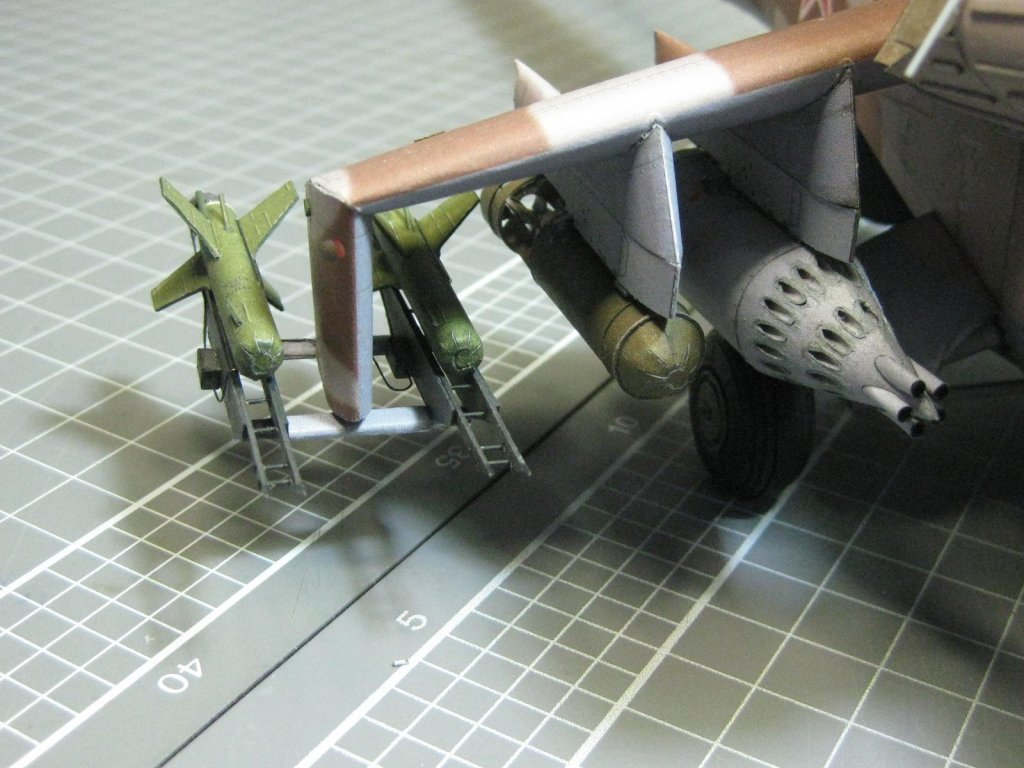
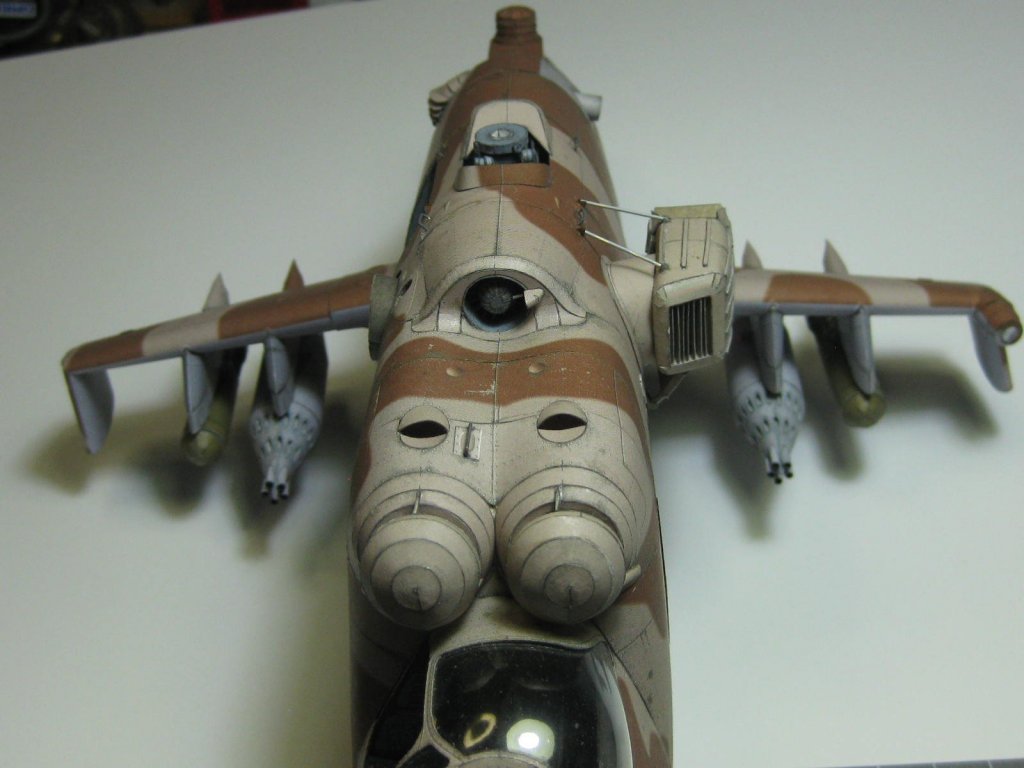
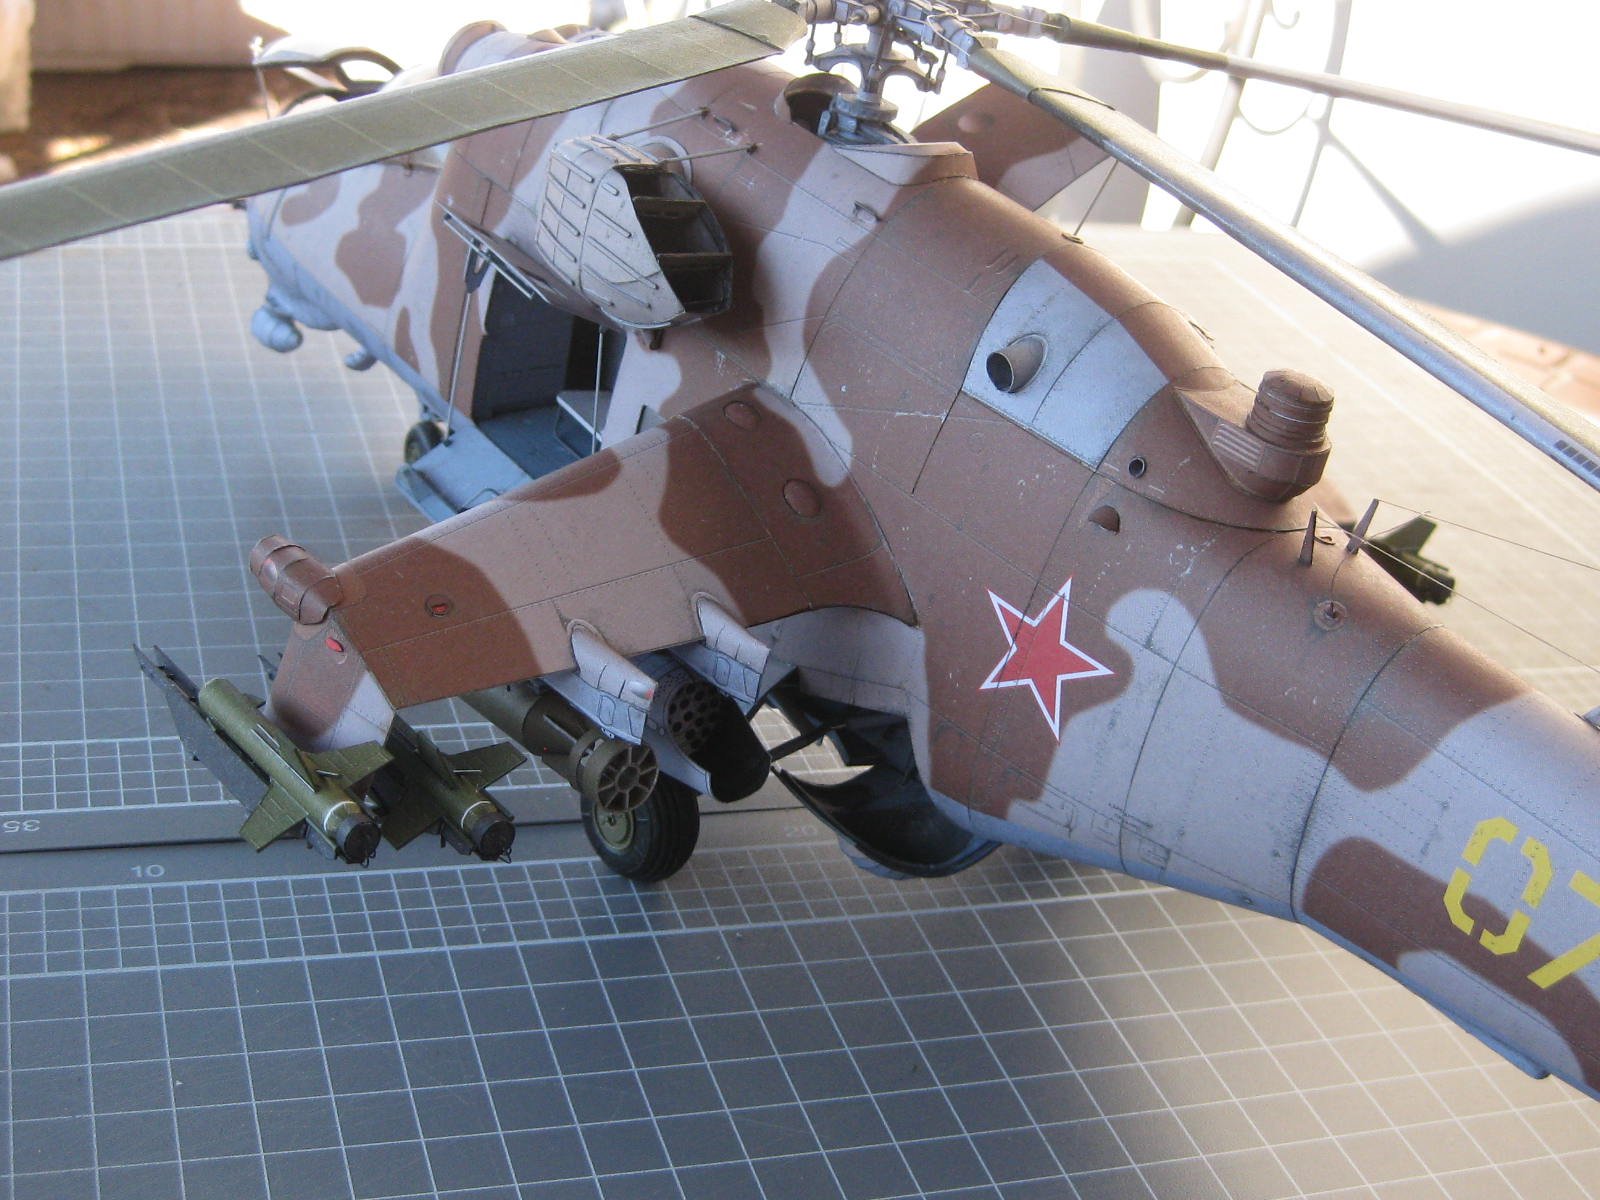
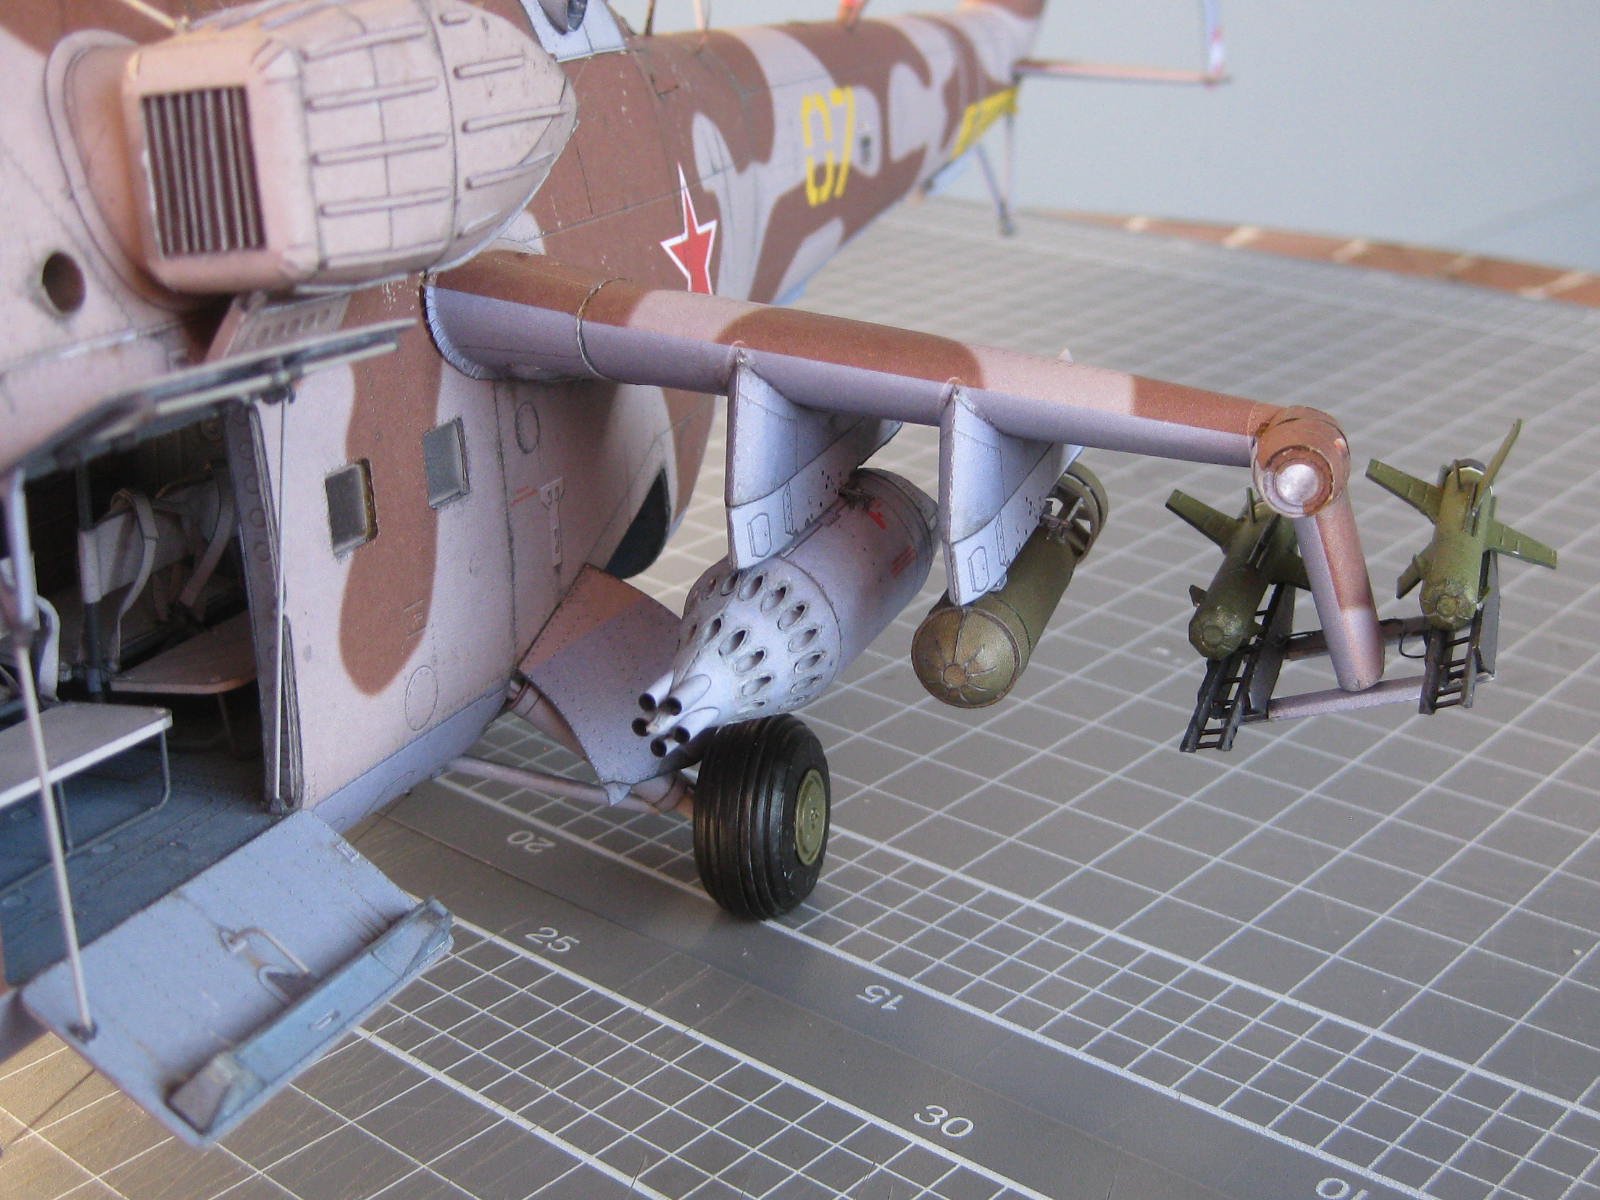
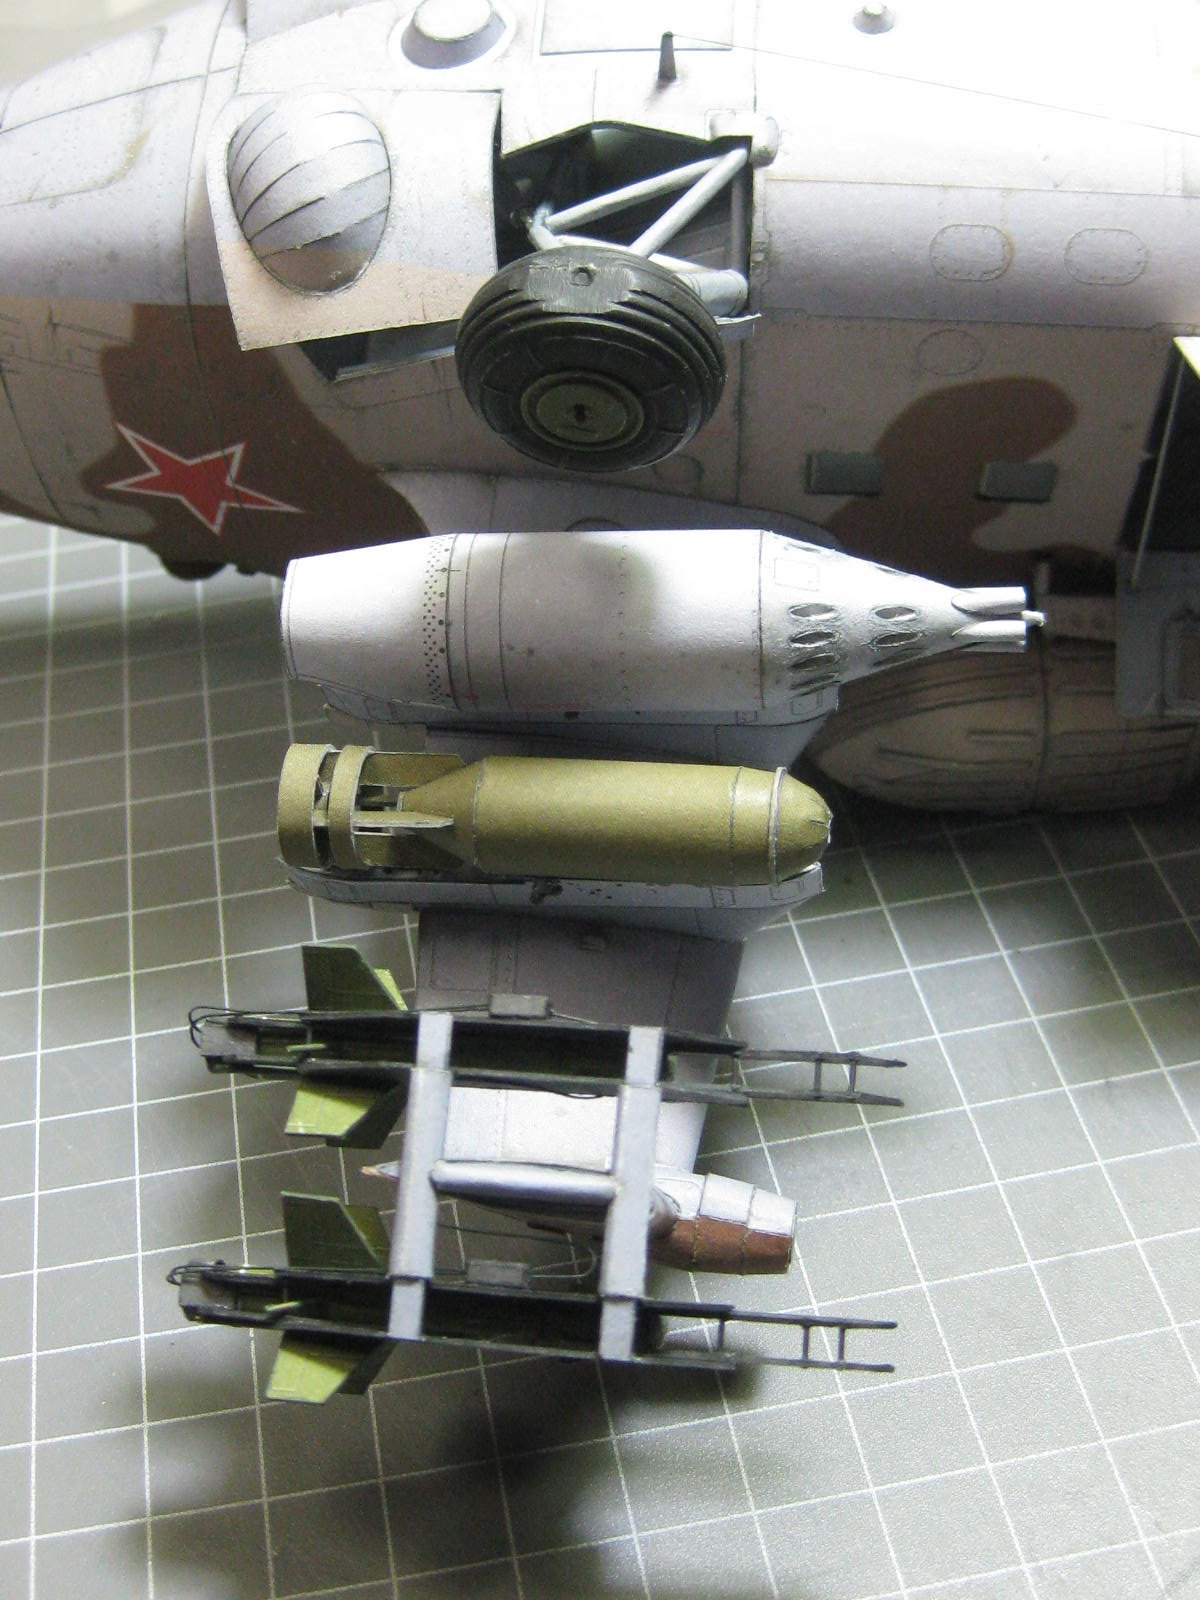
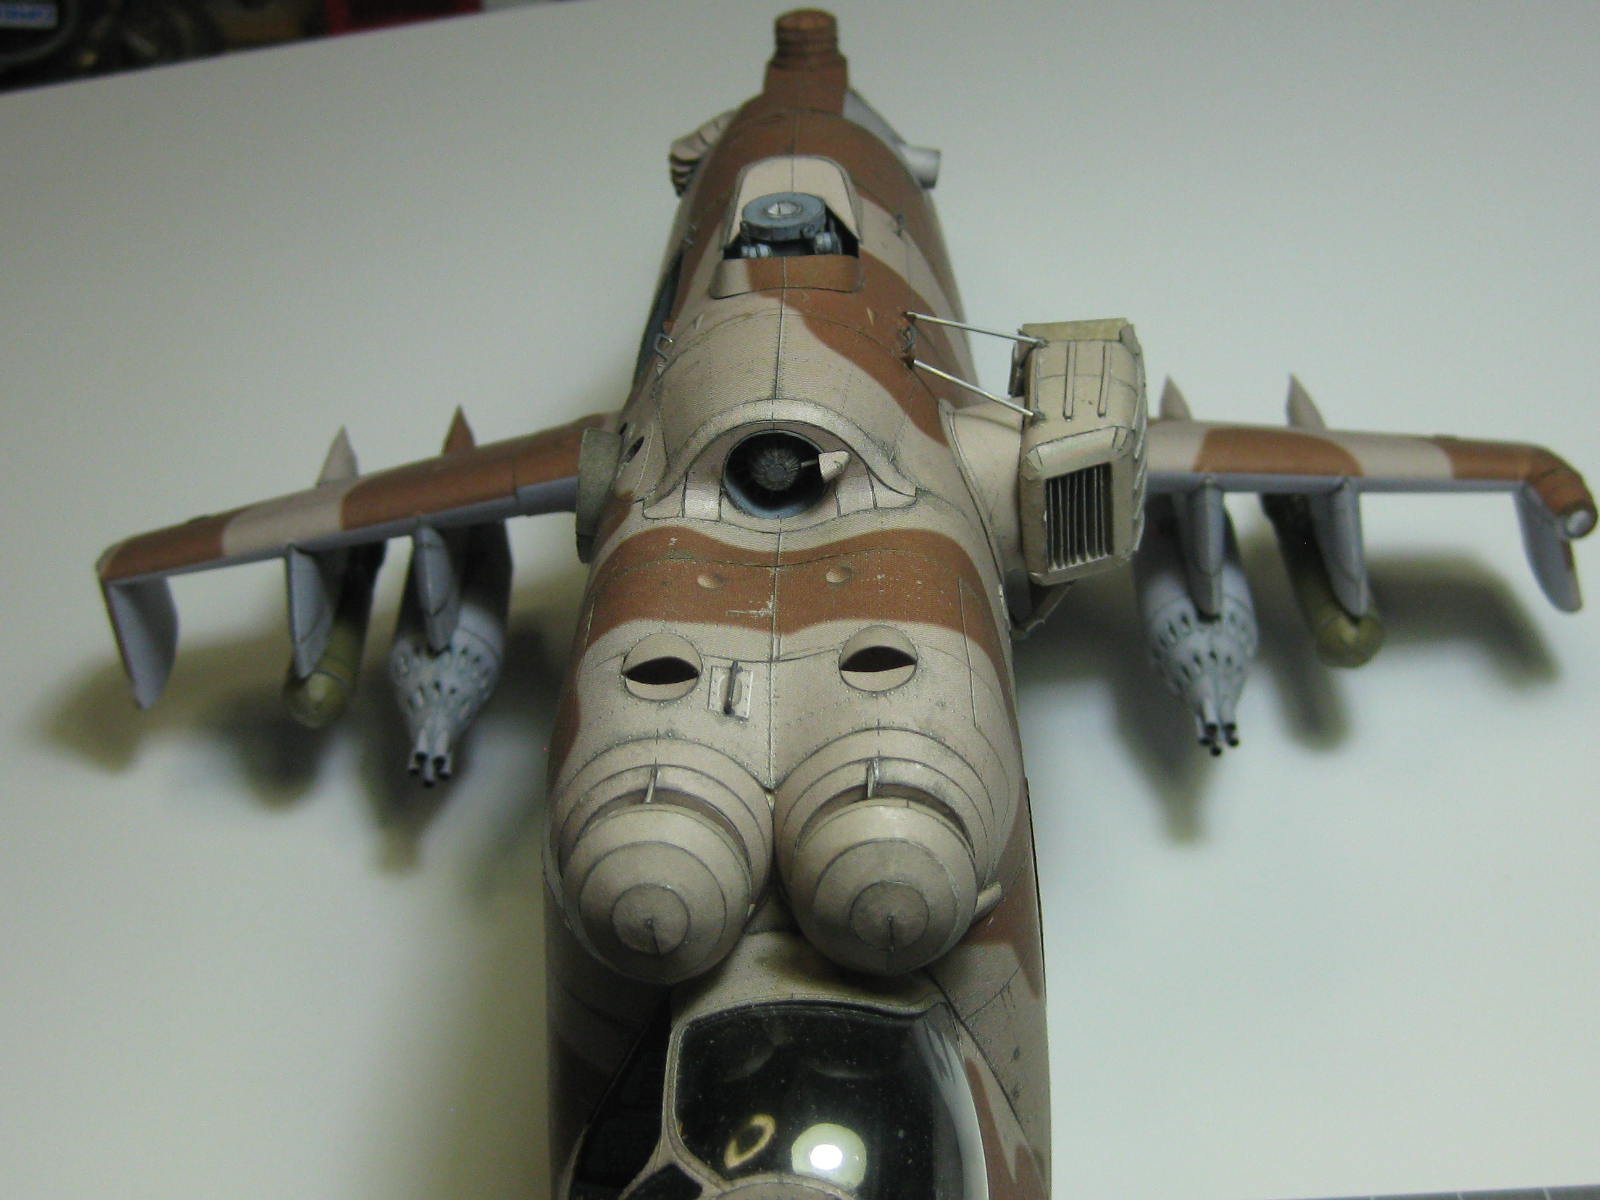
Now came time to fit the missiles to the weapons platforms :

Last thing to fit before turning the helo back up the right way was the lower antenna :
Danny
-
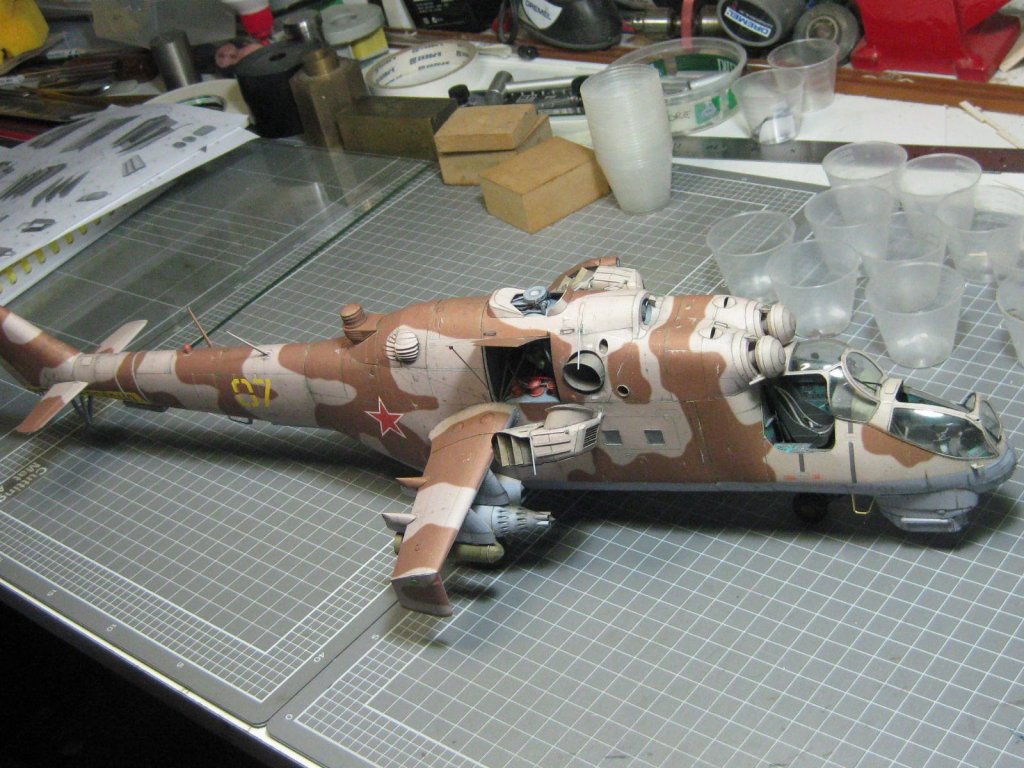
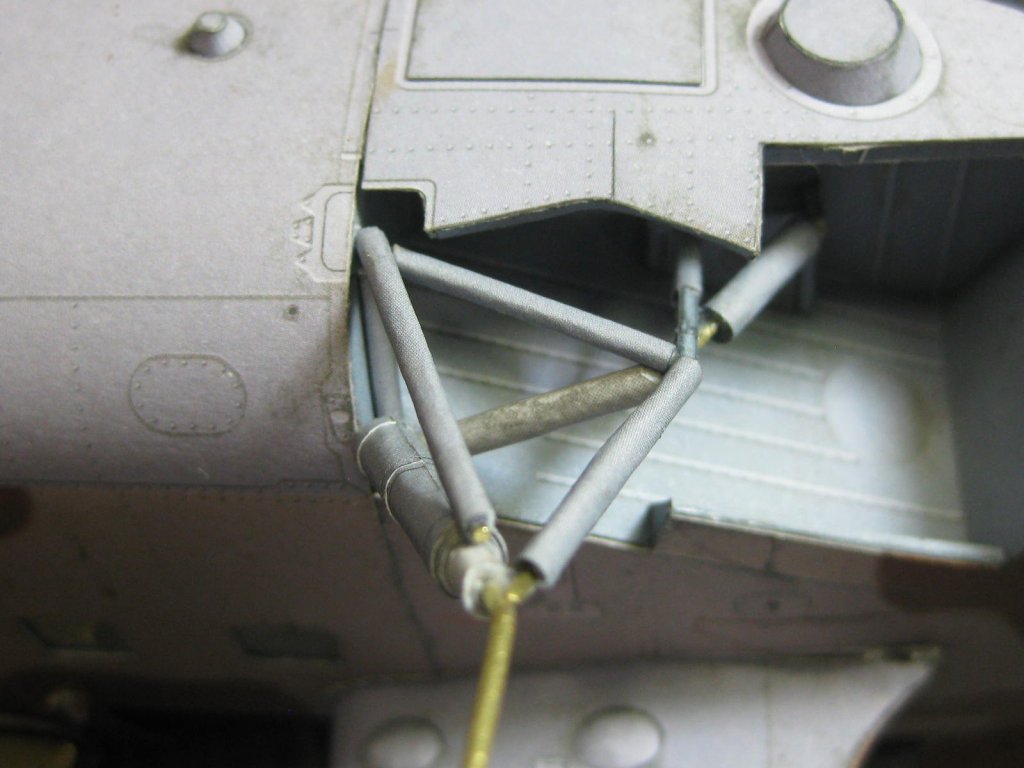
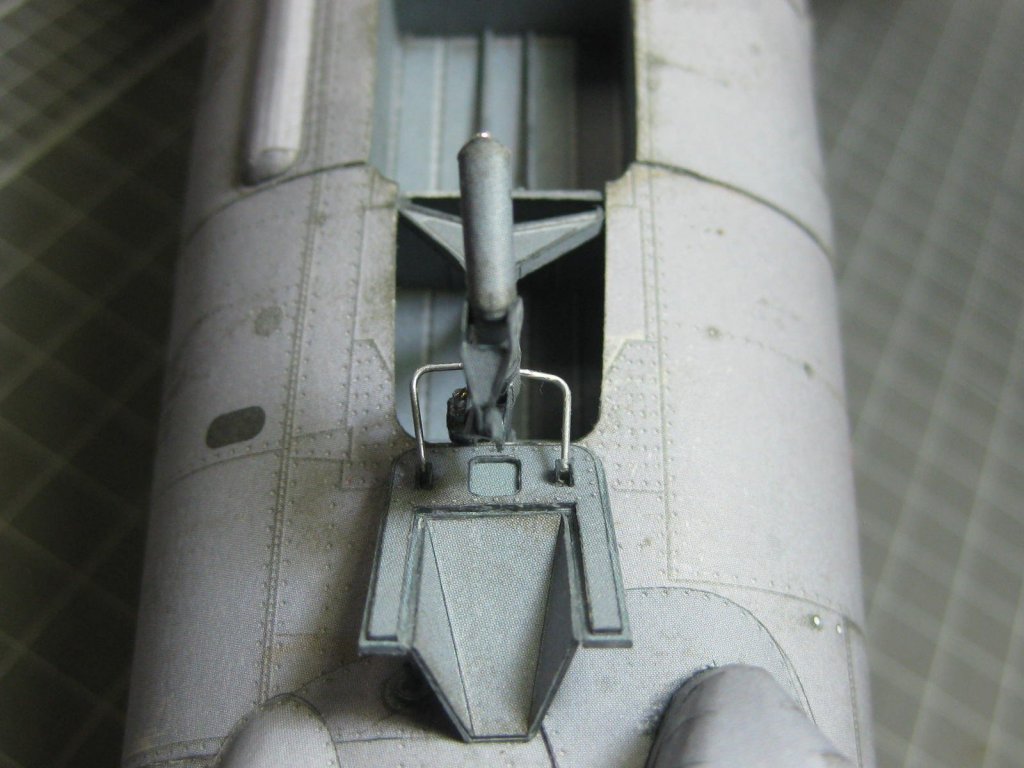
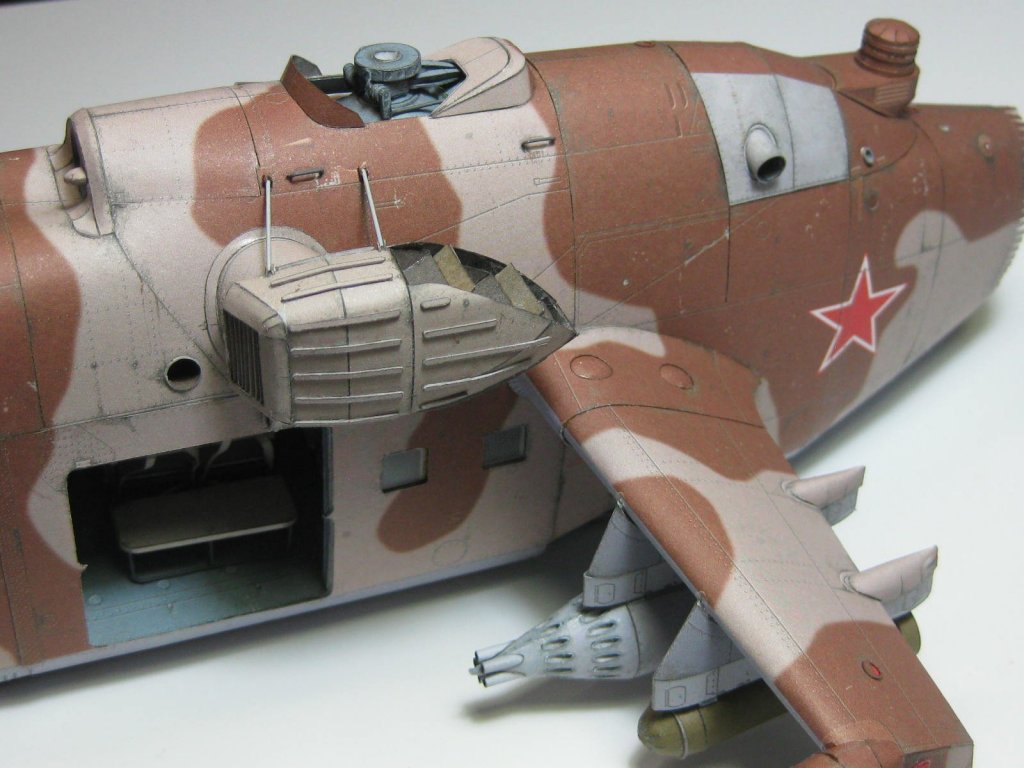
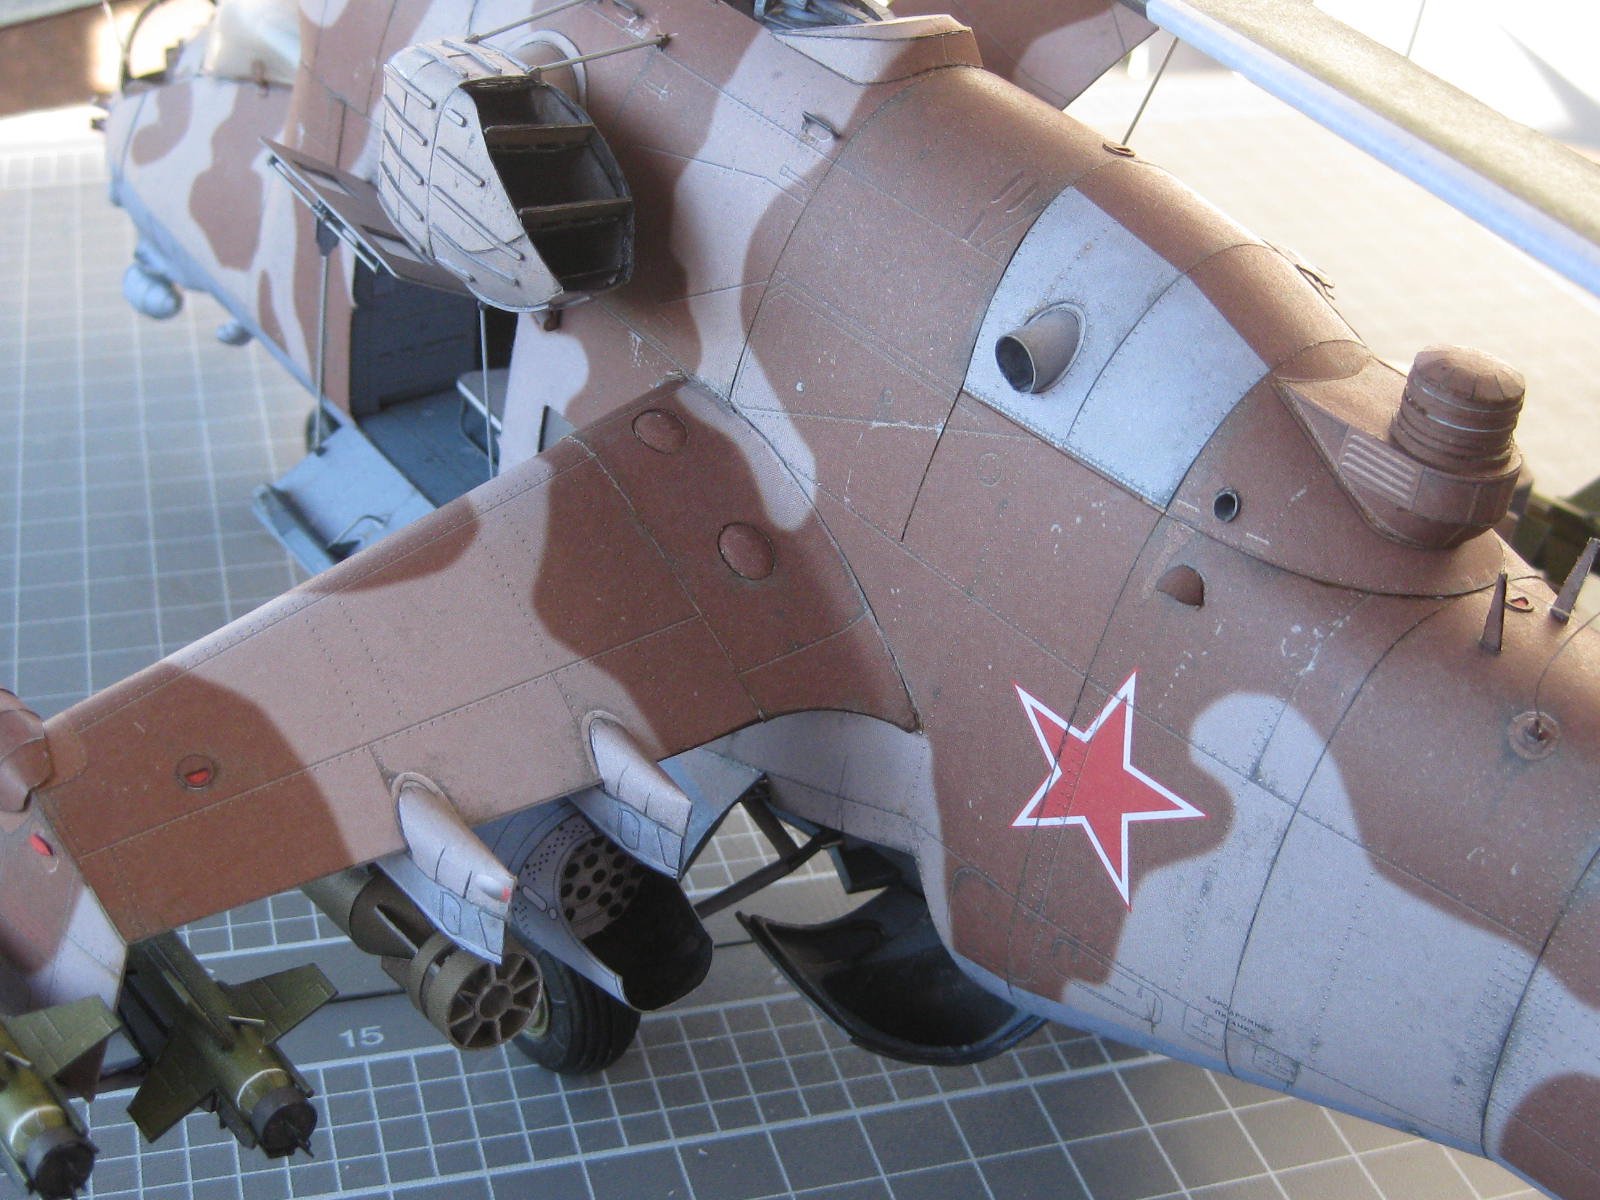
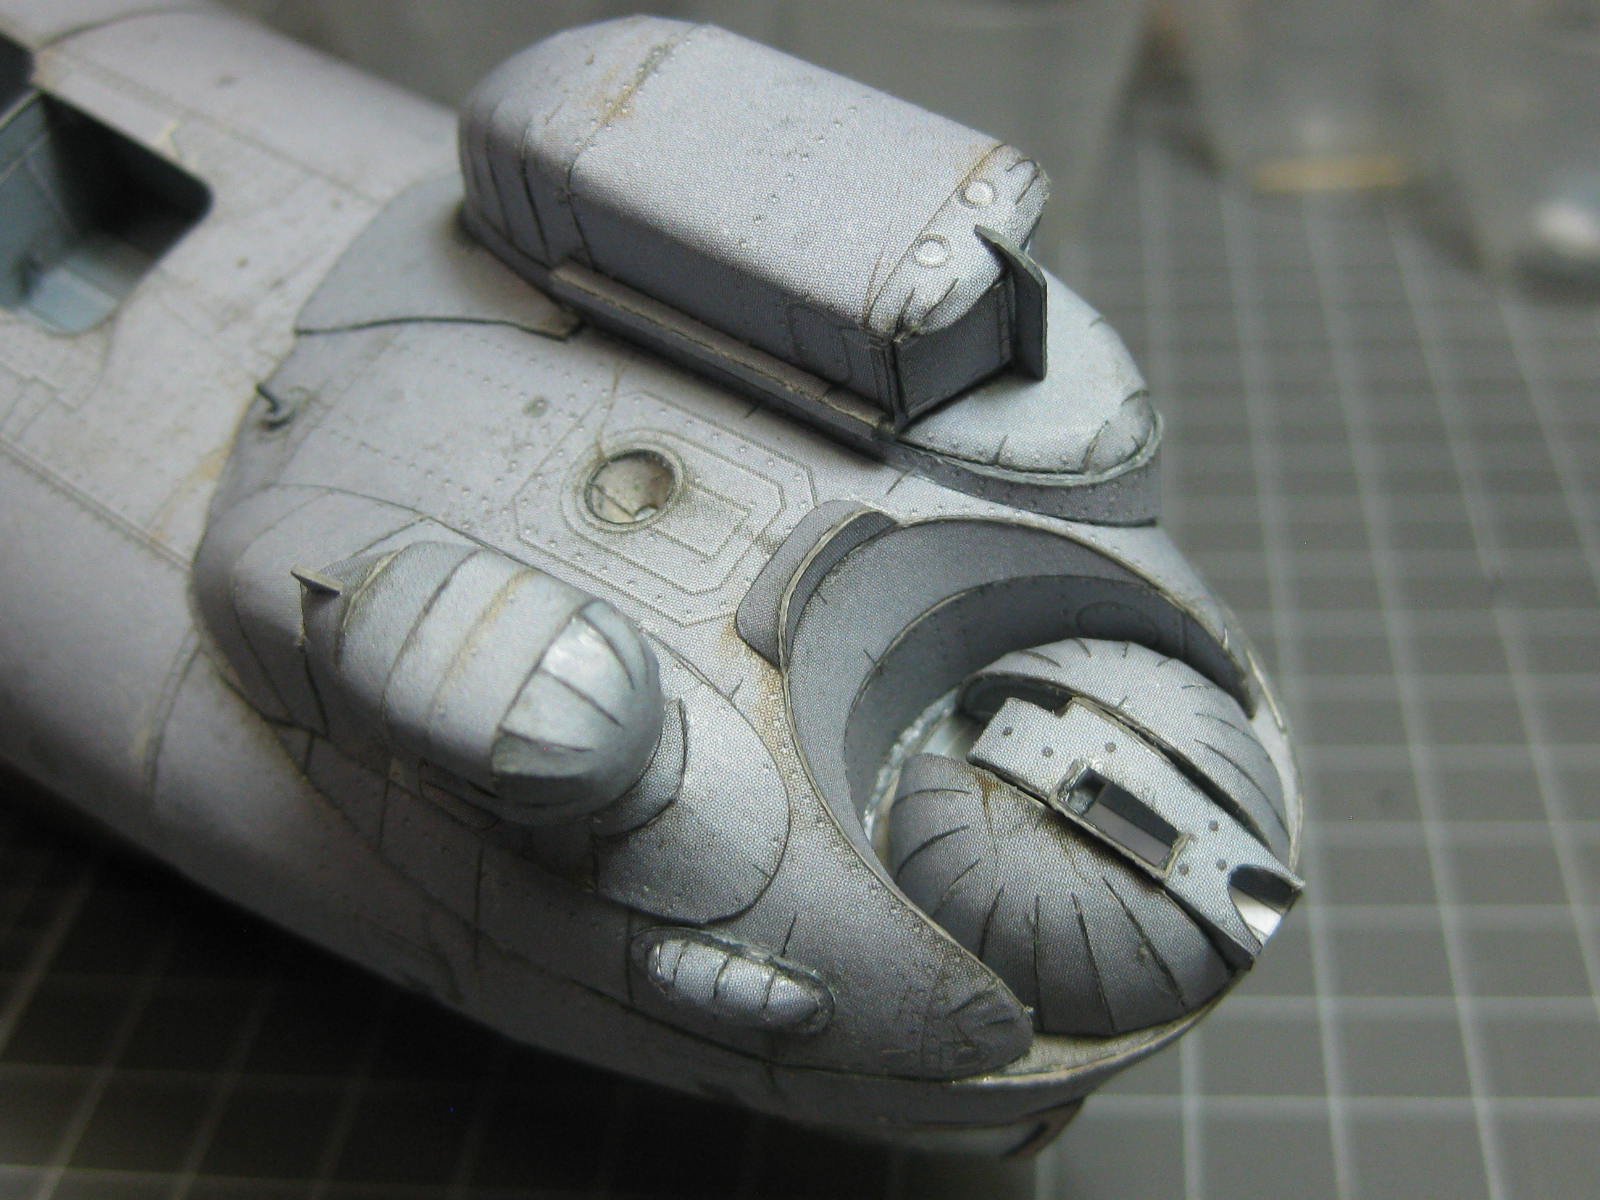
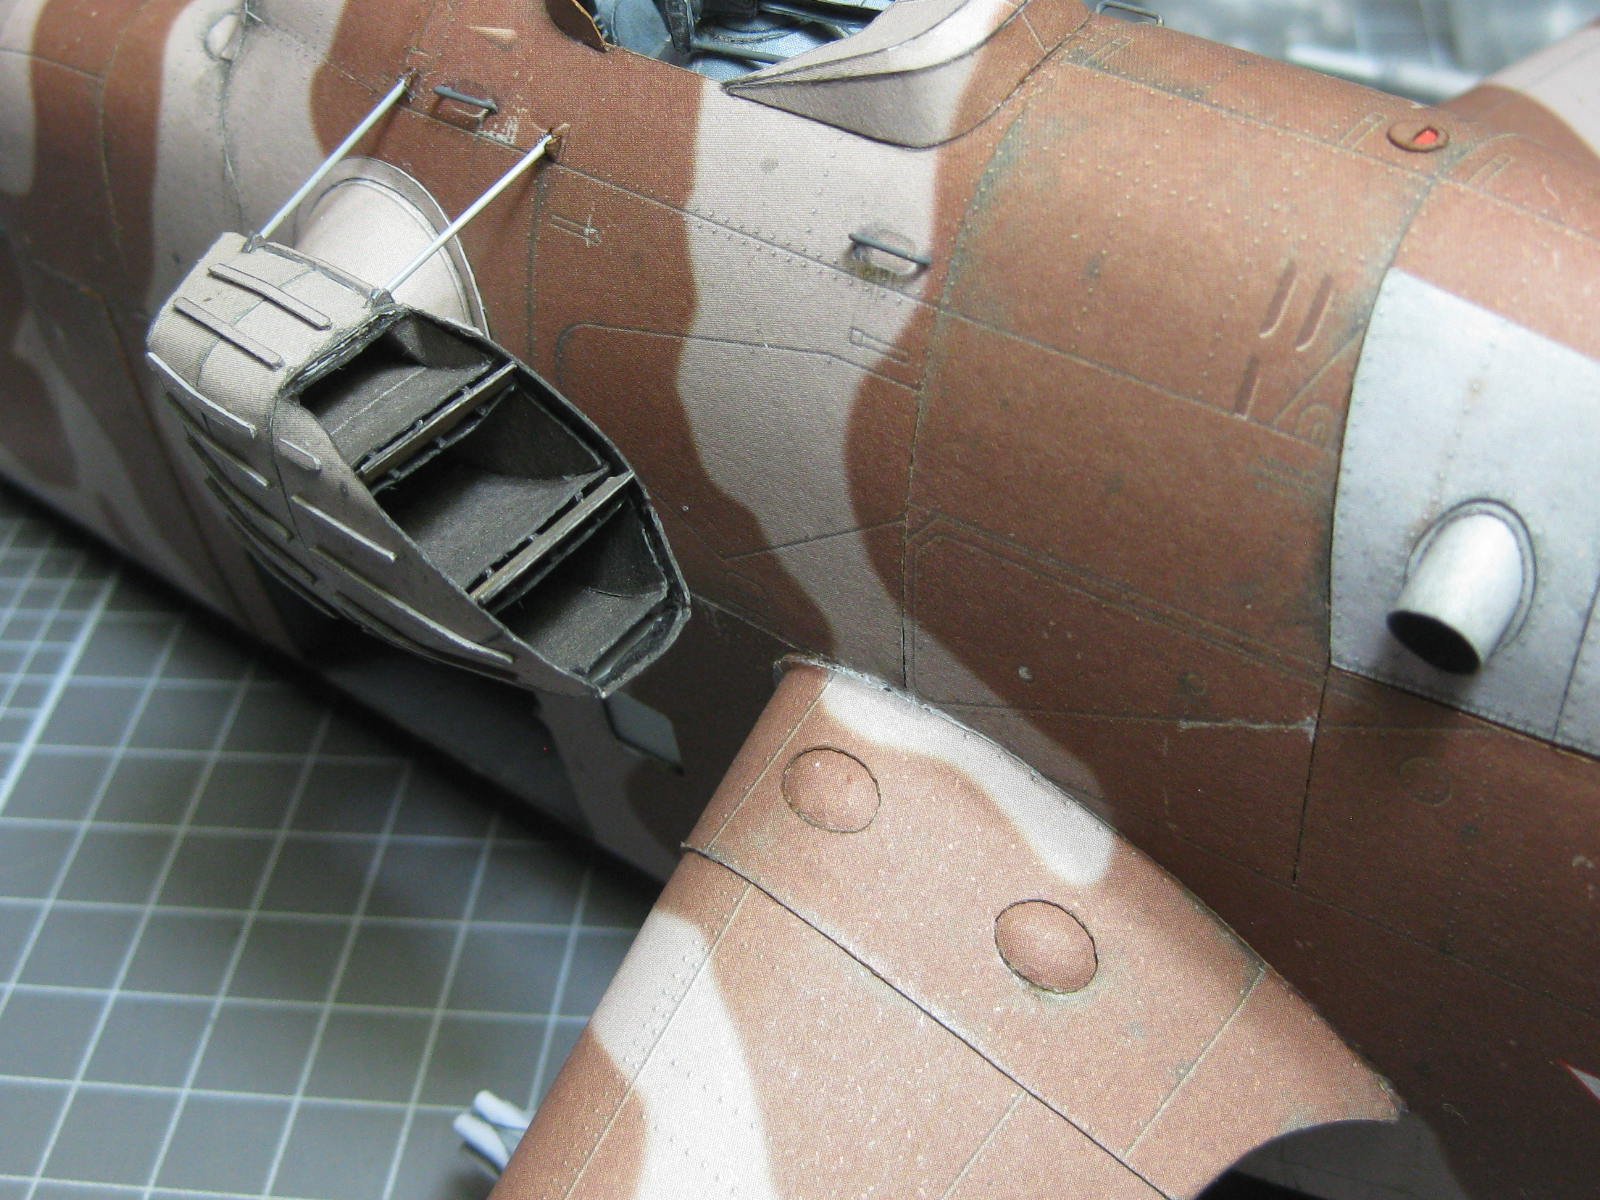
Now I fitted the Gatling Gun turret which can swivel and elevate. The gun itself will come later - something easily caught on accidentally :

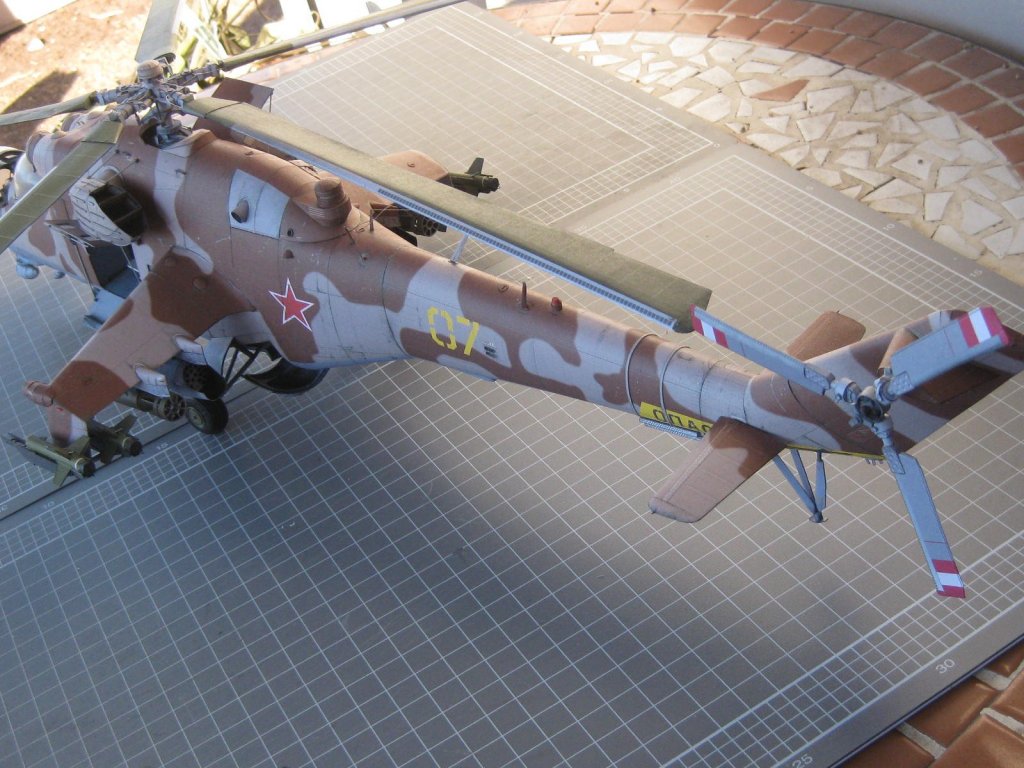
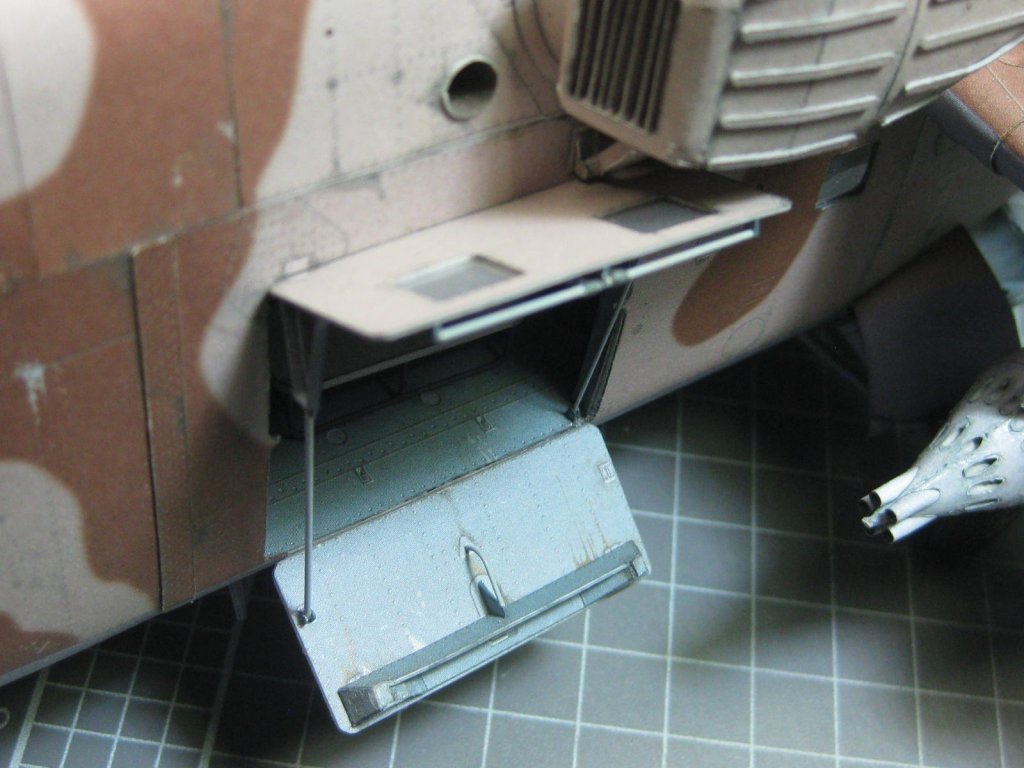
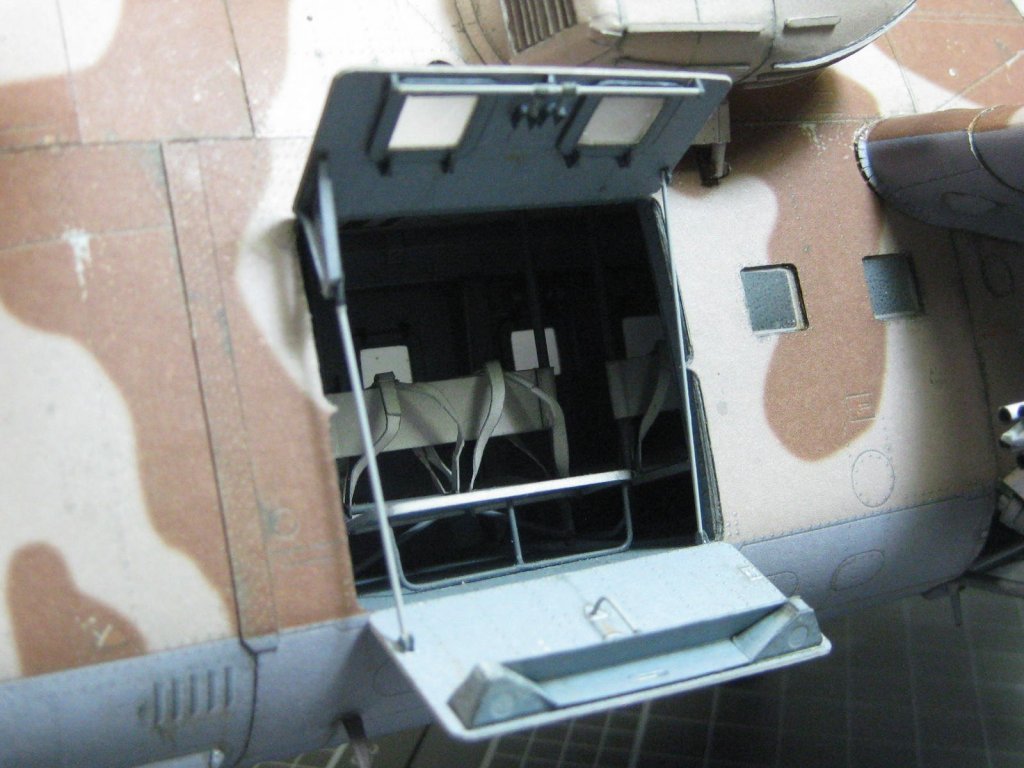
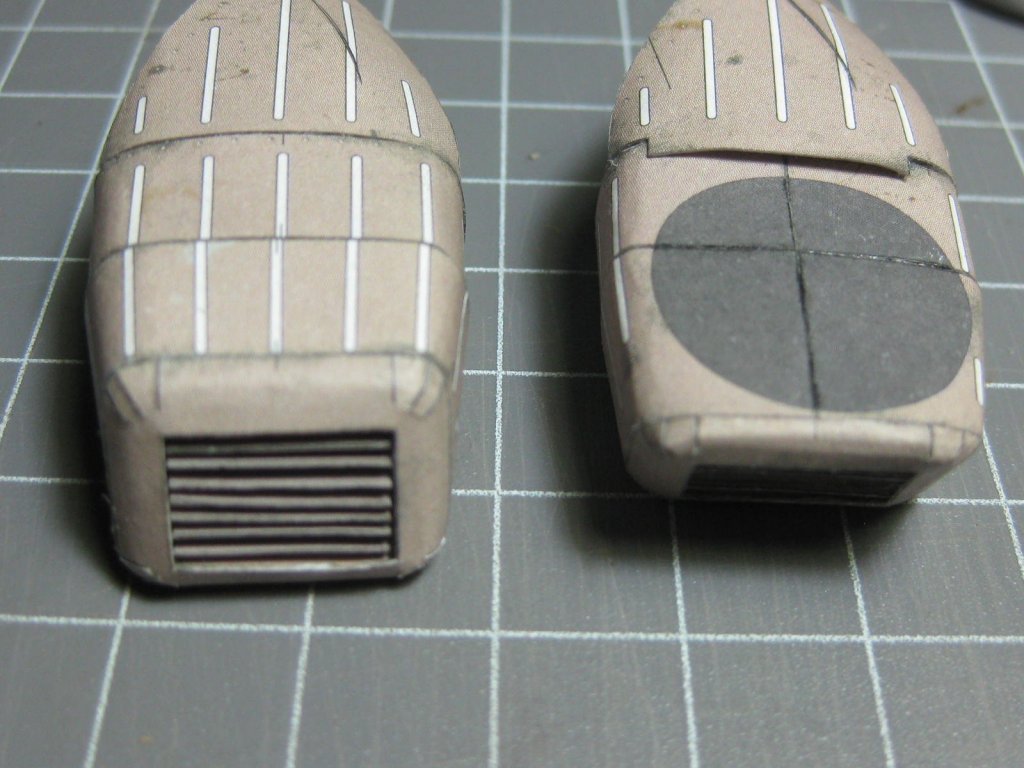
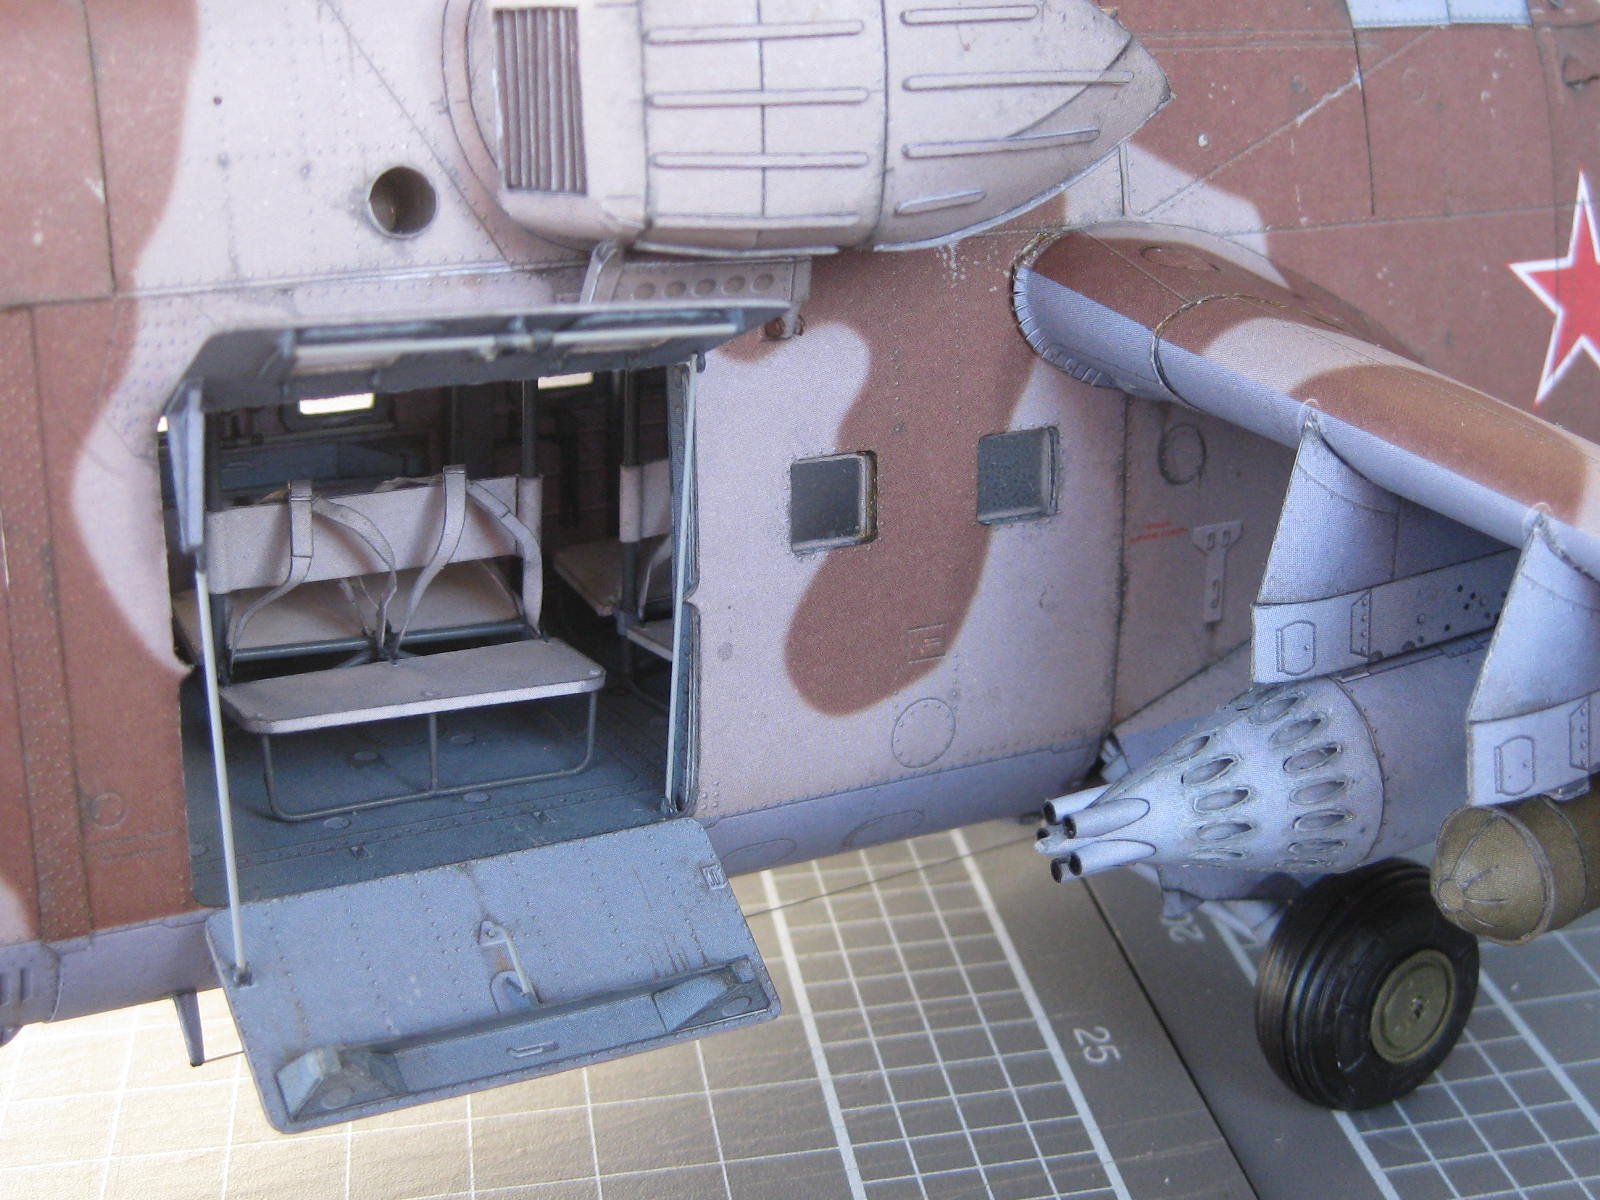
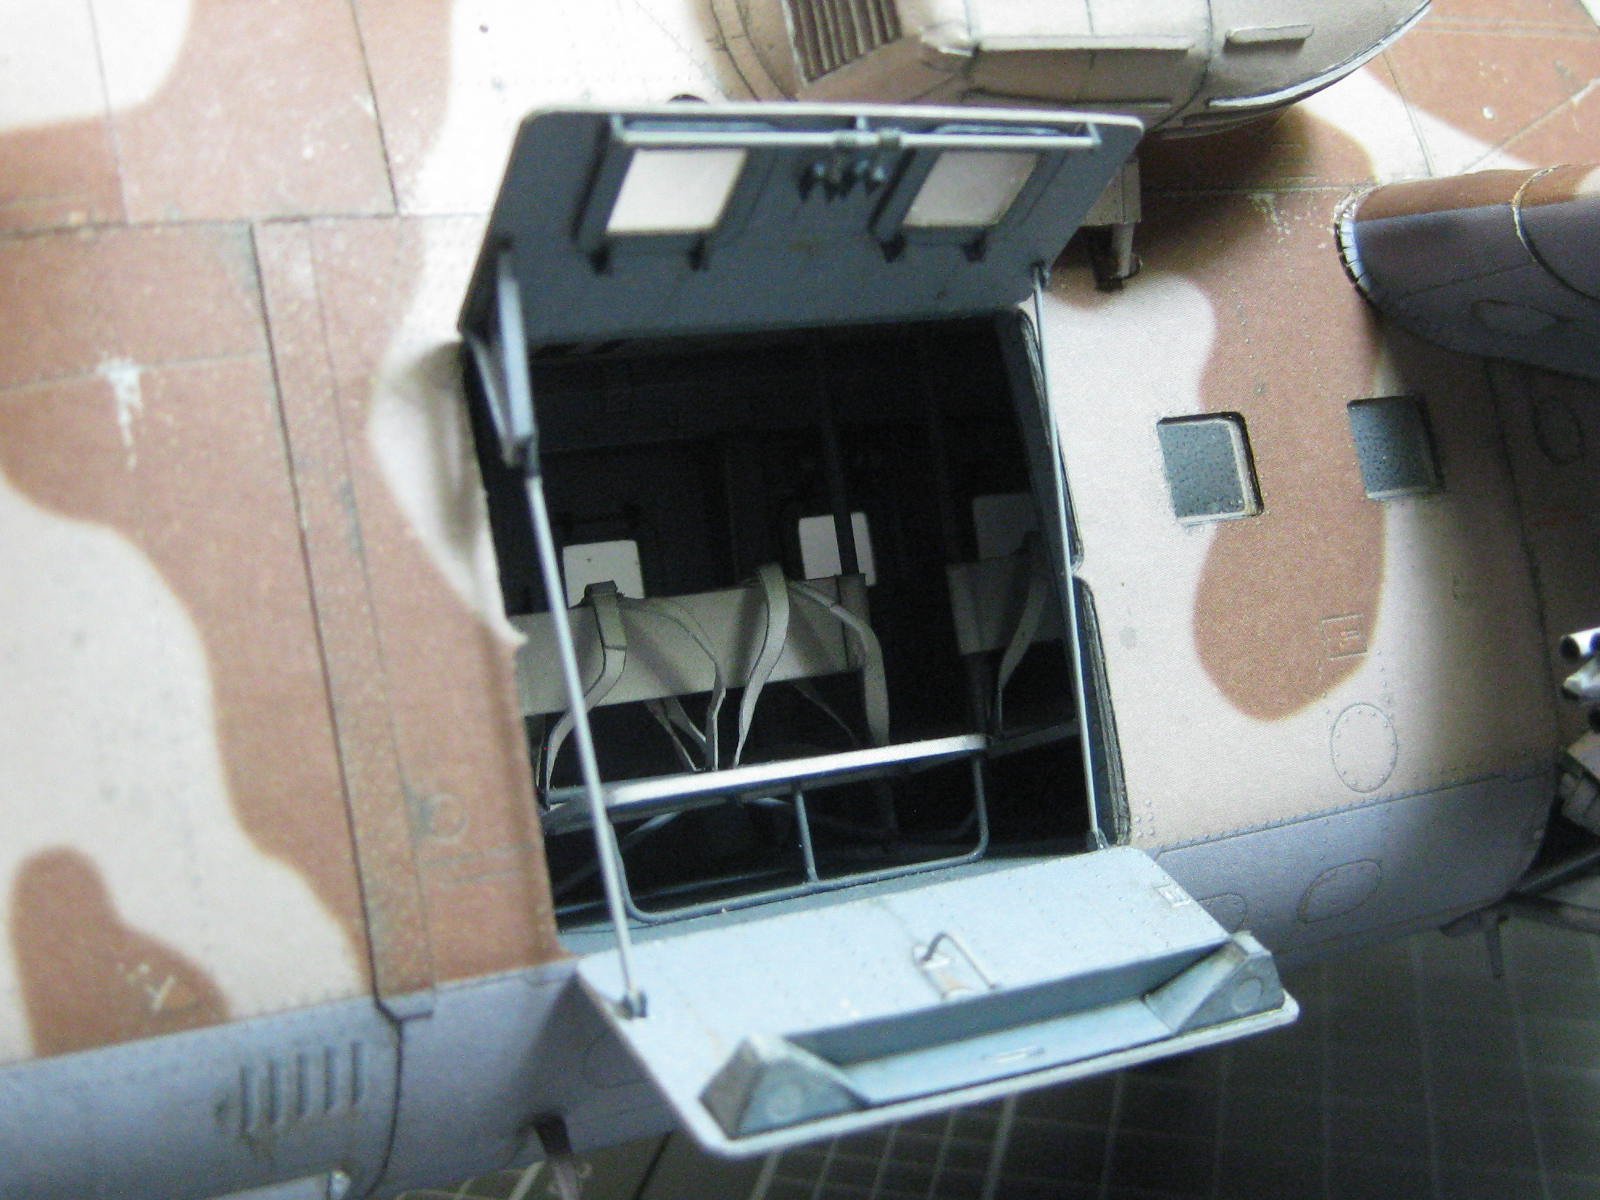
Both the opened rear compartment doors, the right side transmission door and the right side exhaust cooler have also been fitted. Again all parts can sustain handling, albeit carefully :
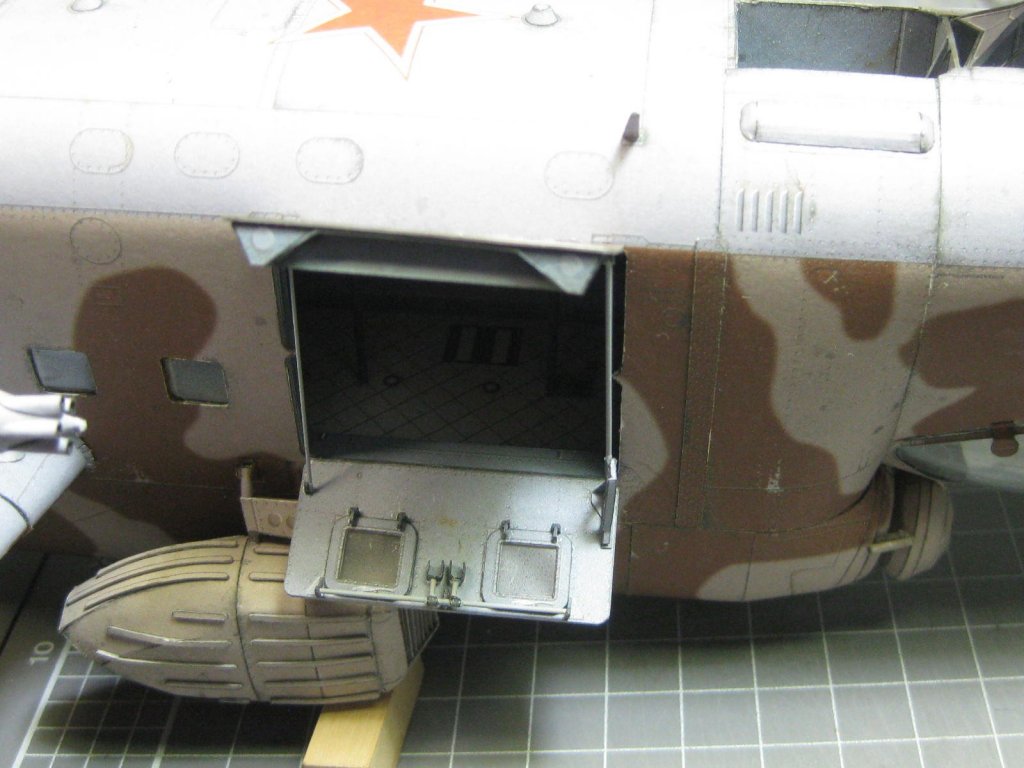


Danny
- druxey, Dubz, Old Collingwood and 10 others
-
13
-
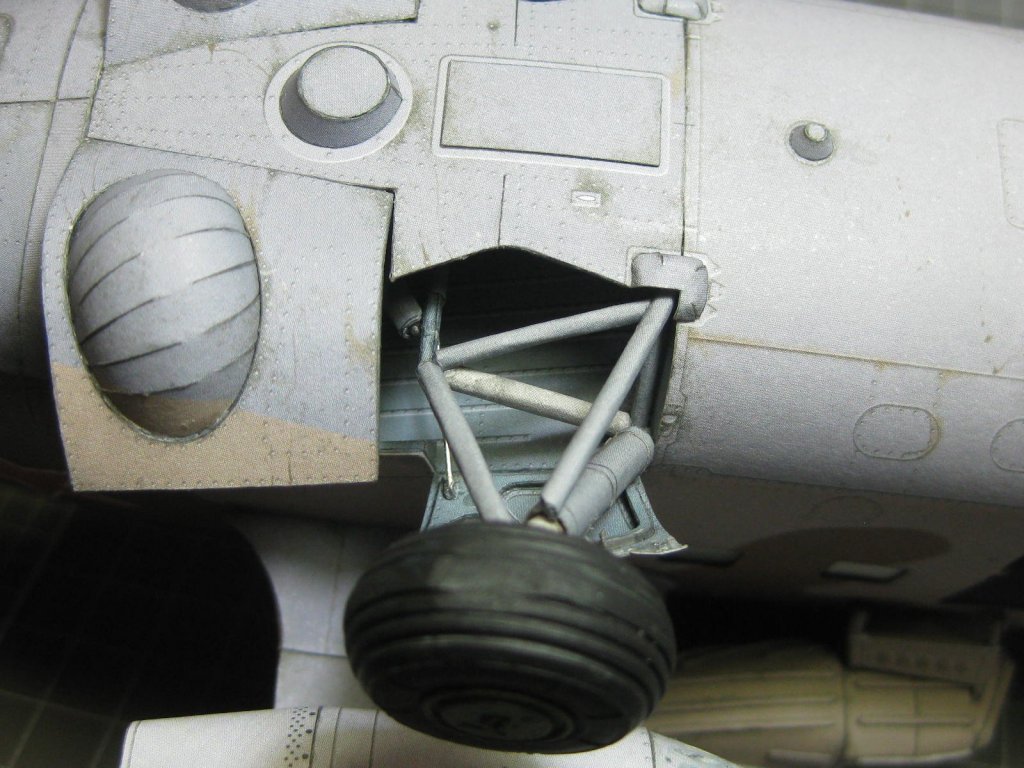
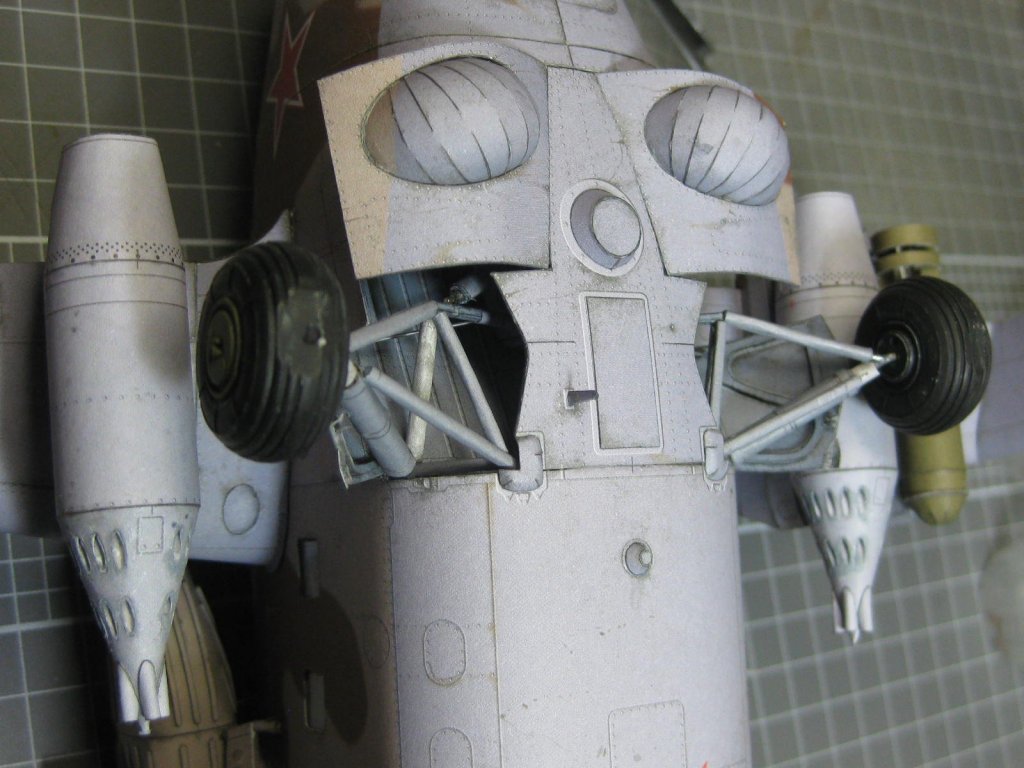
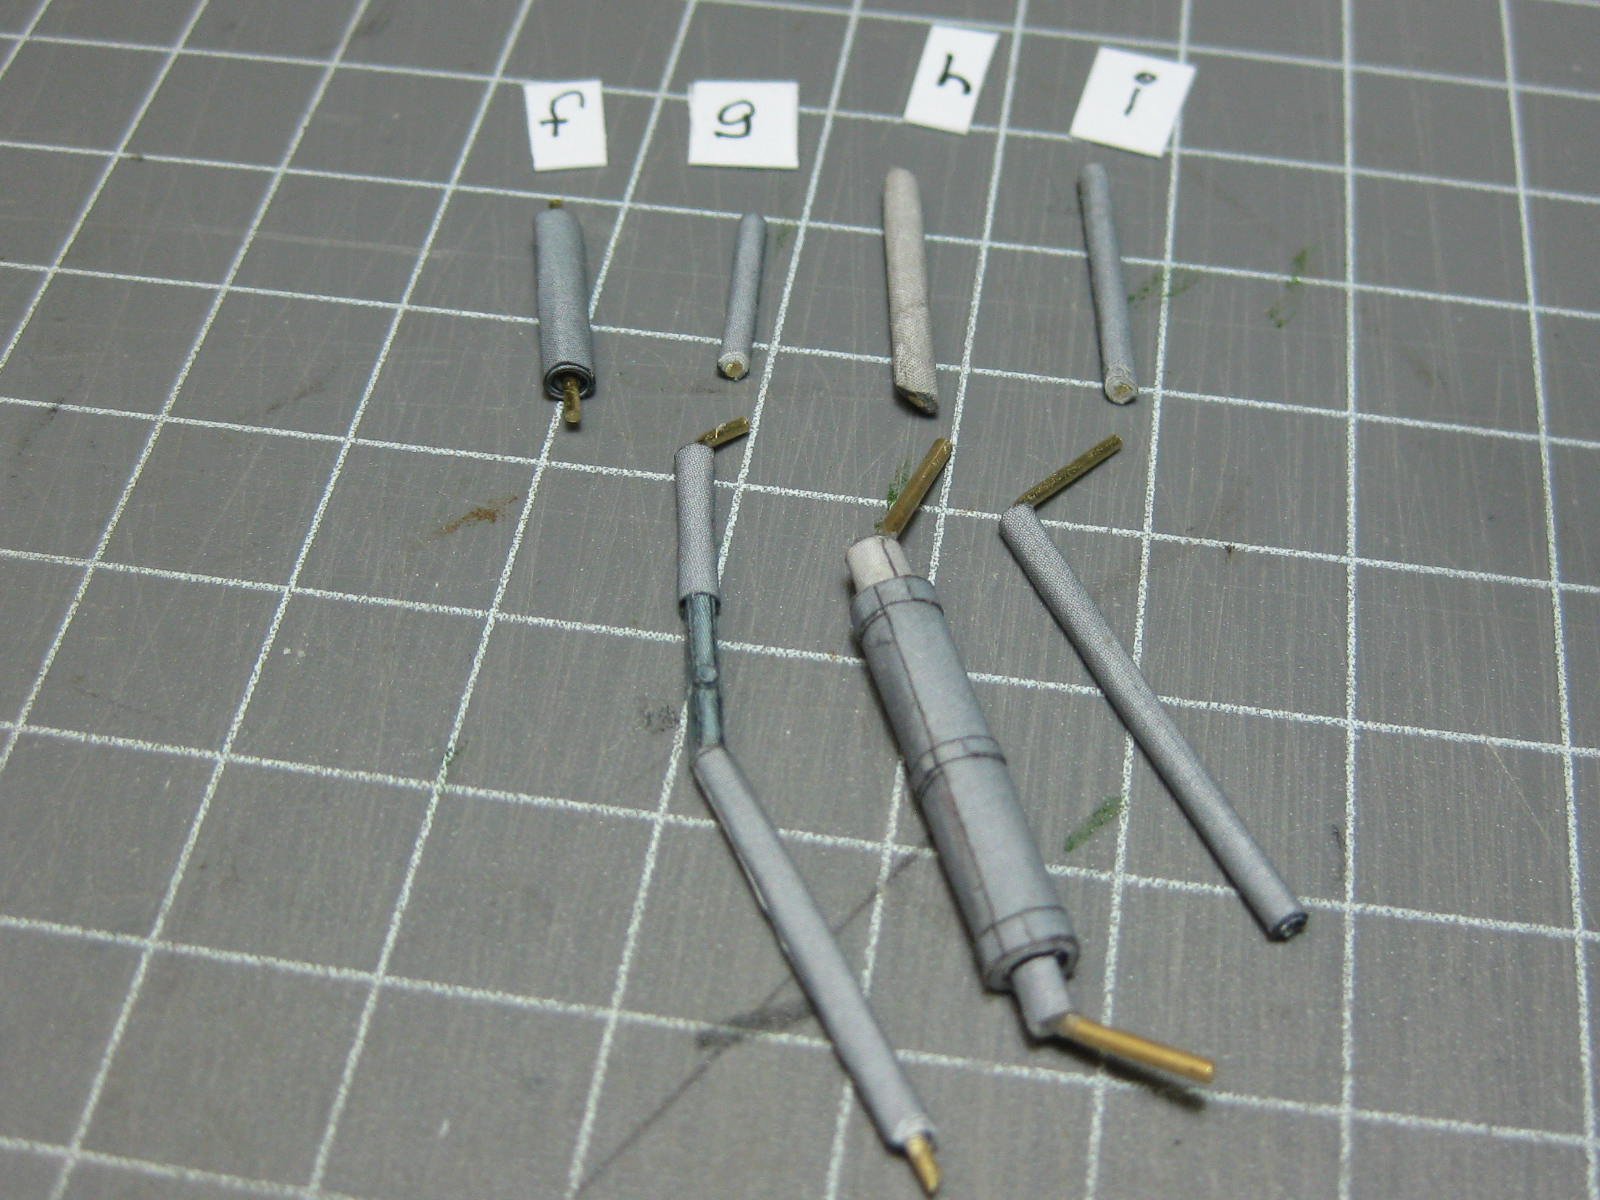
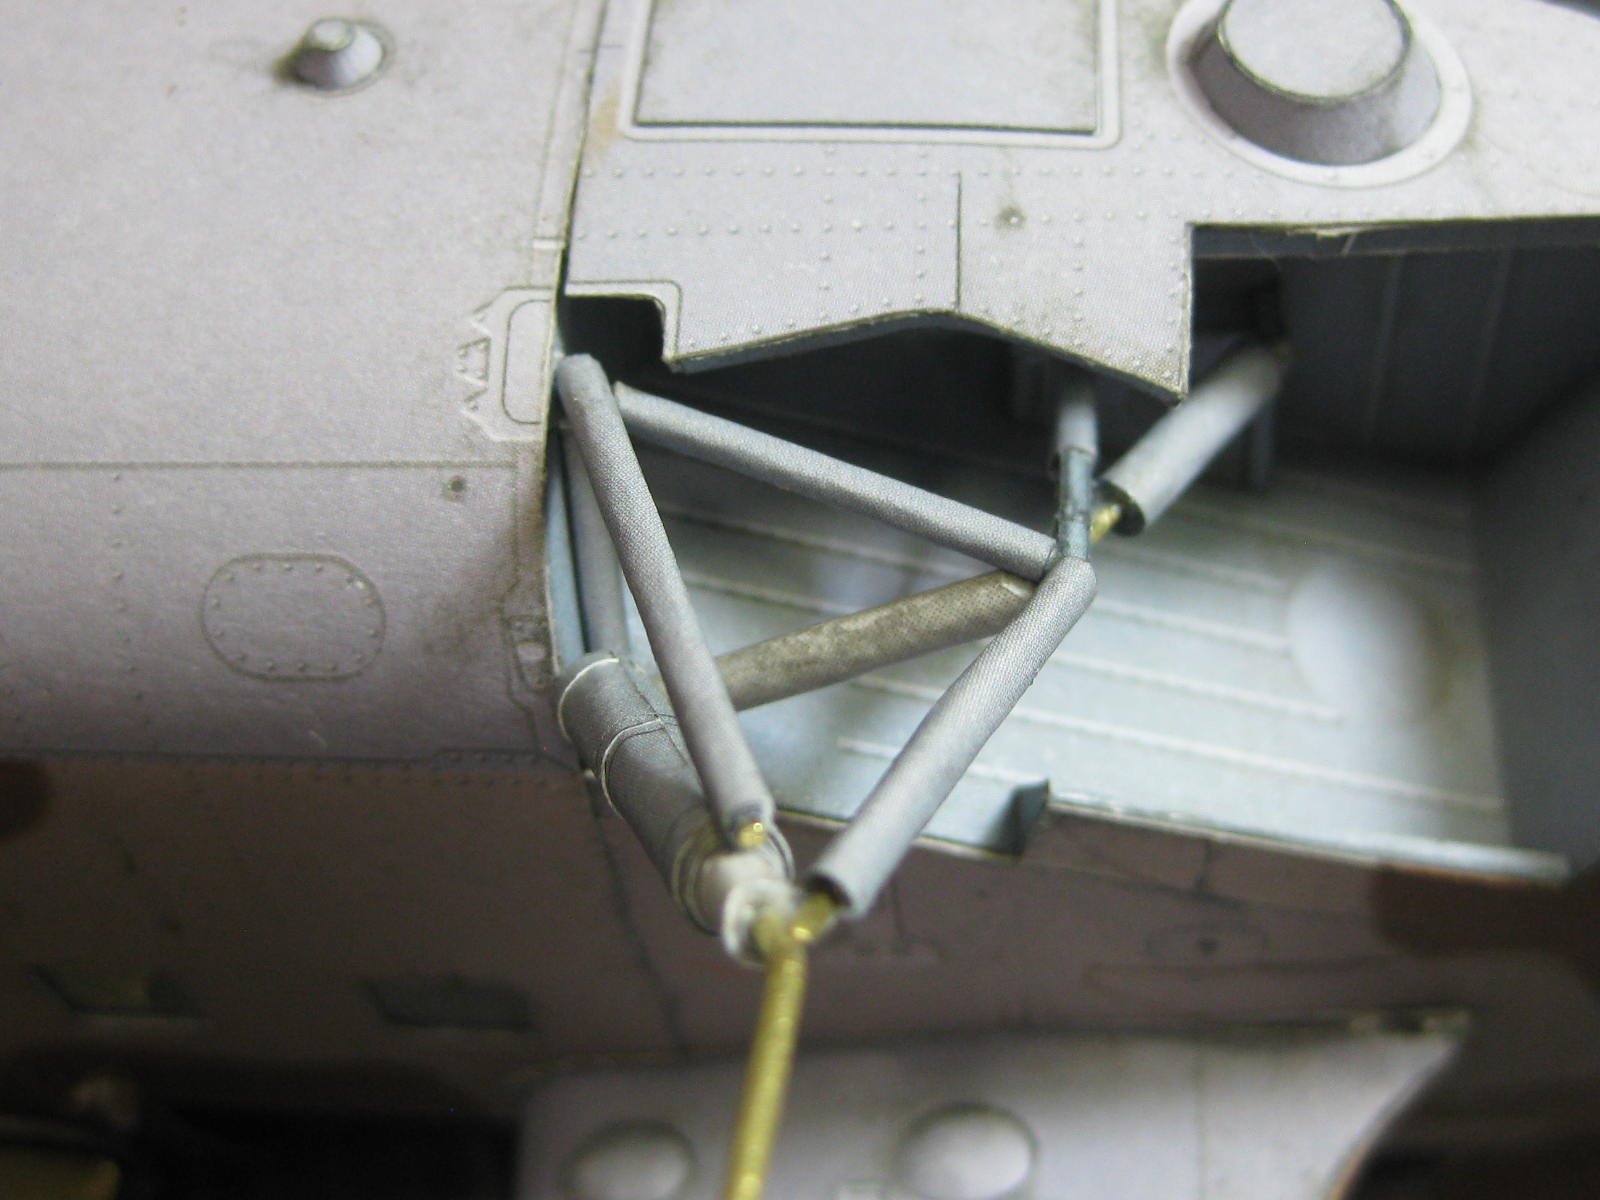
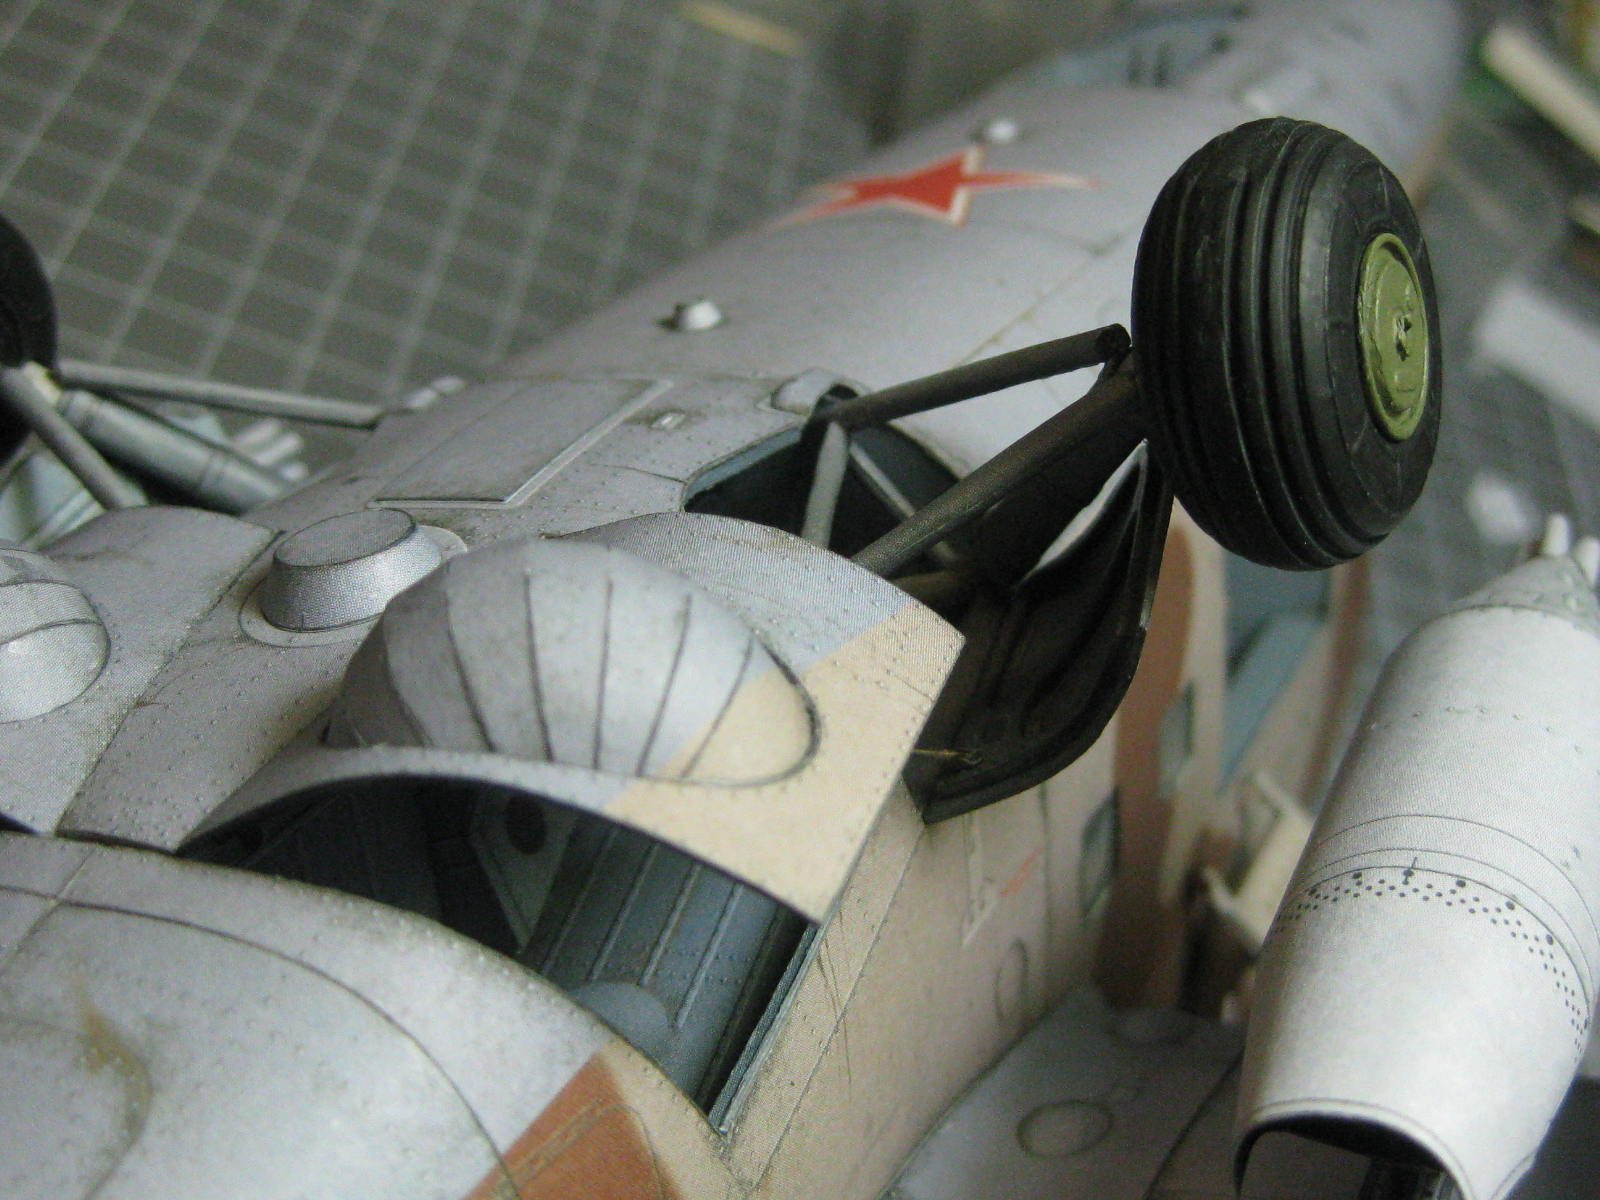
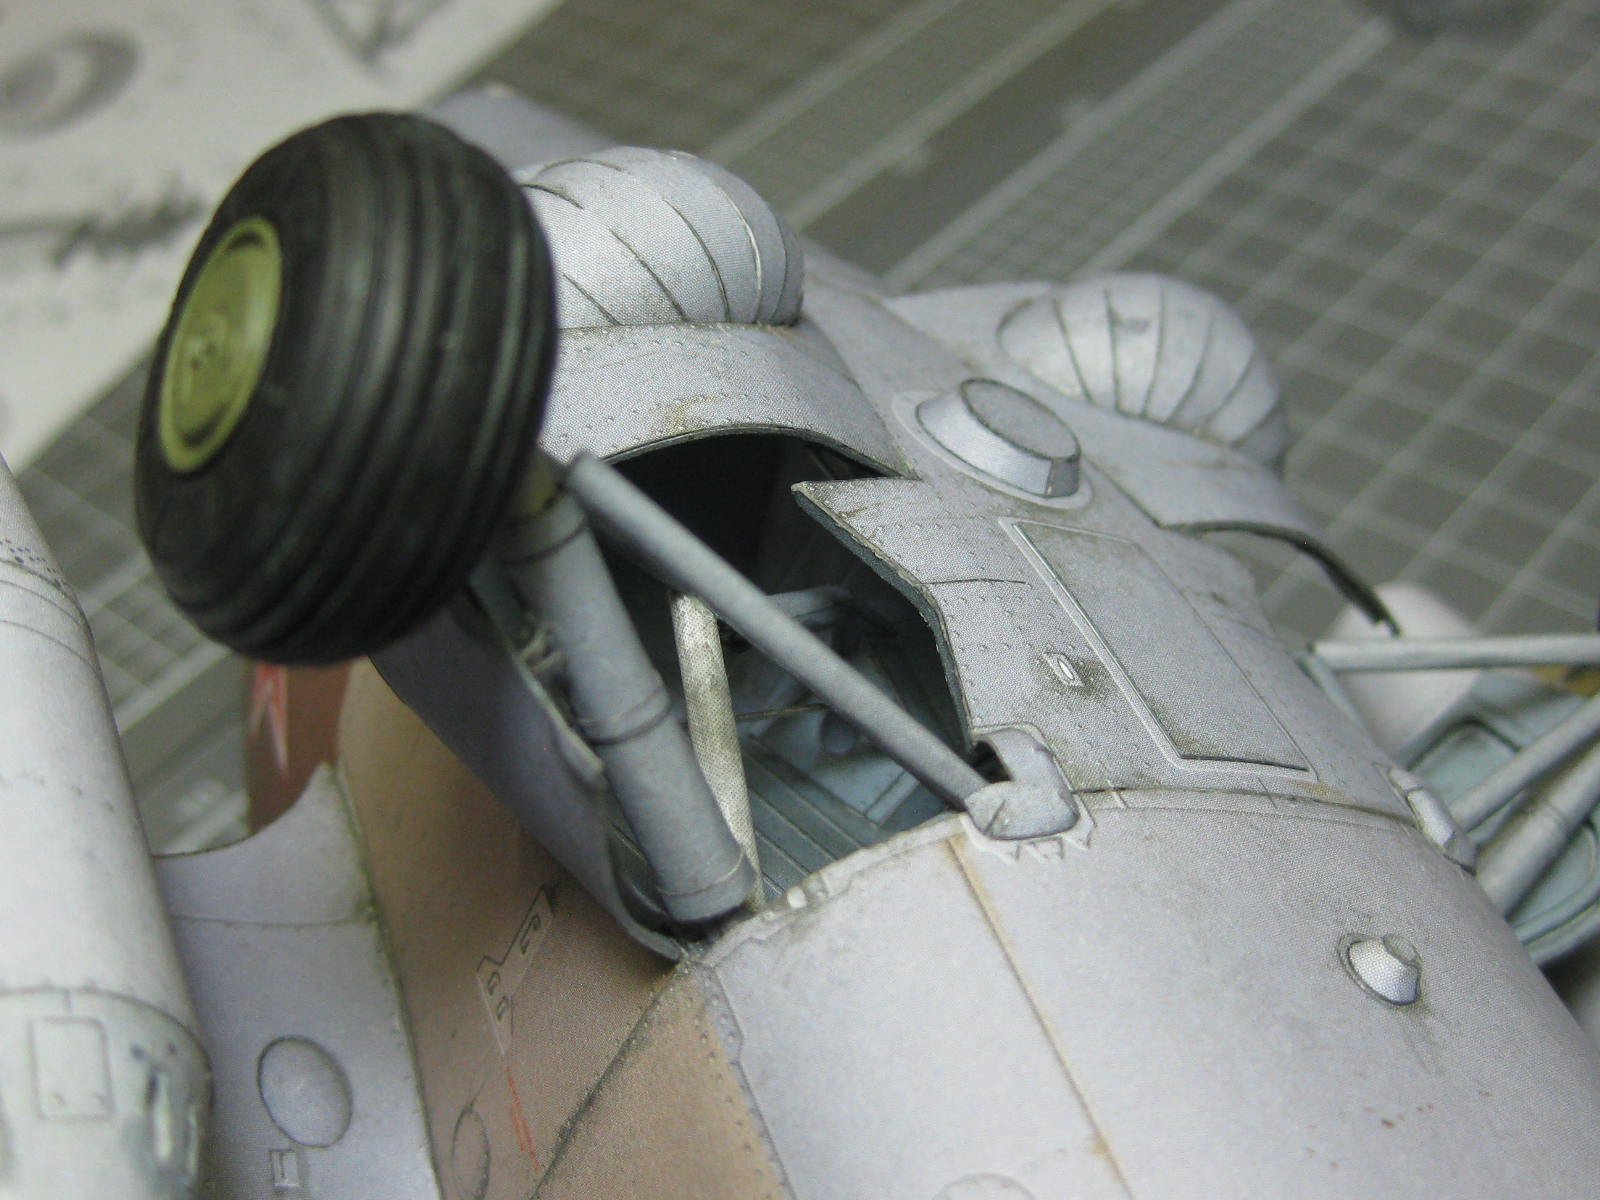
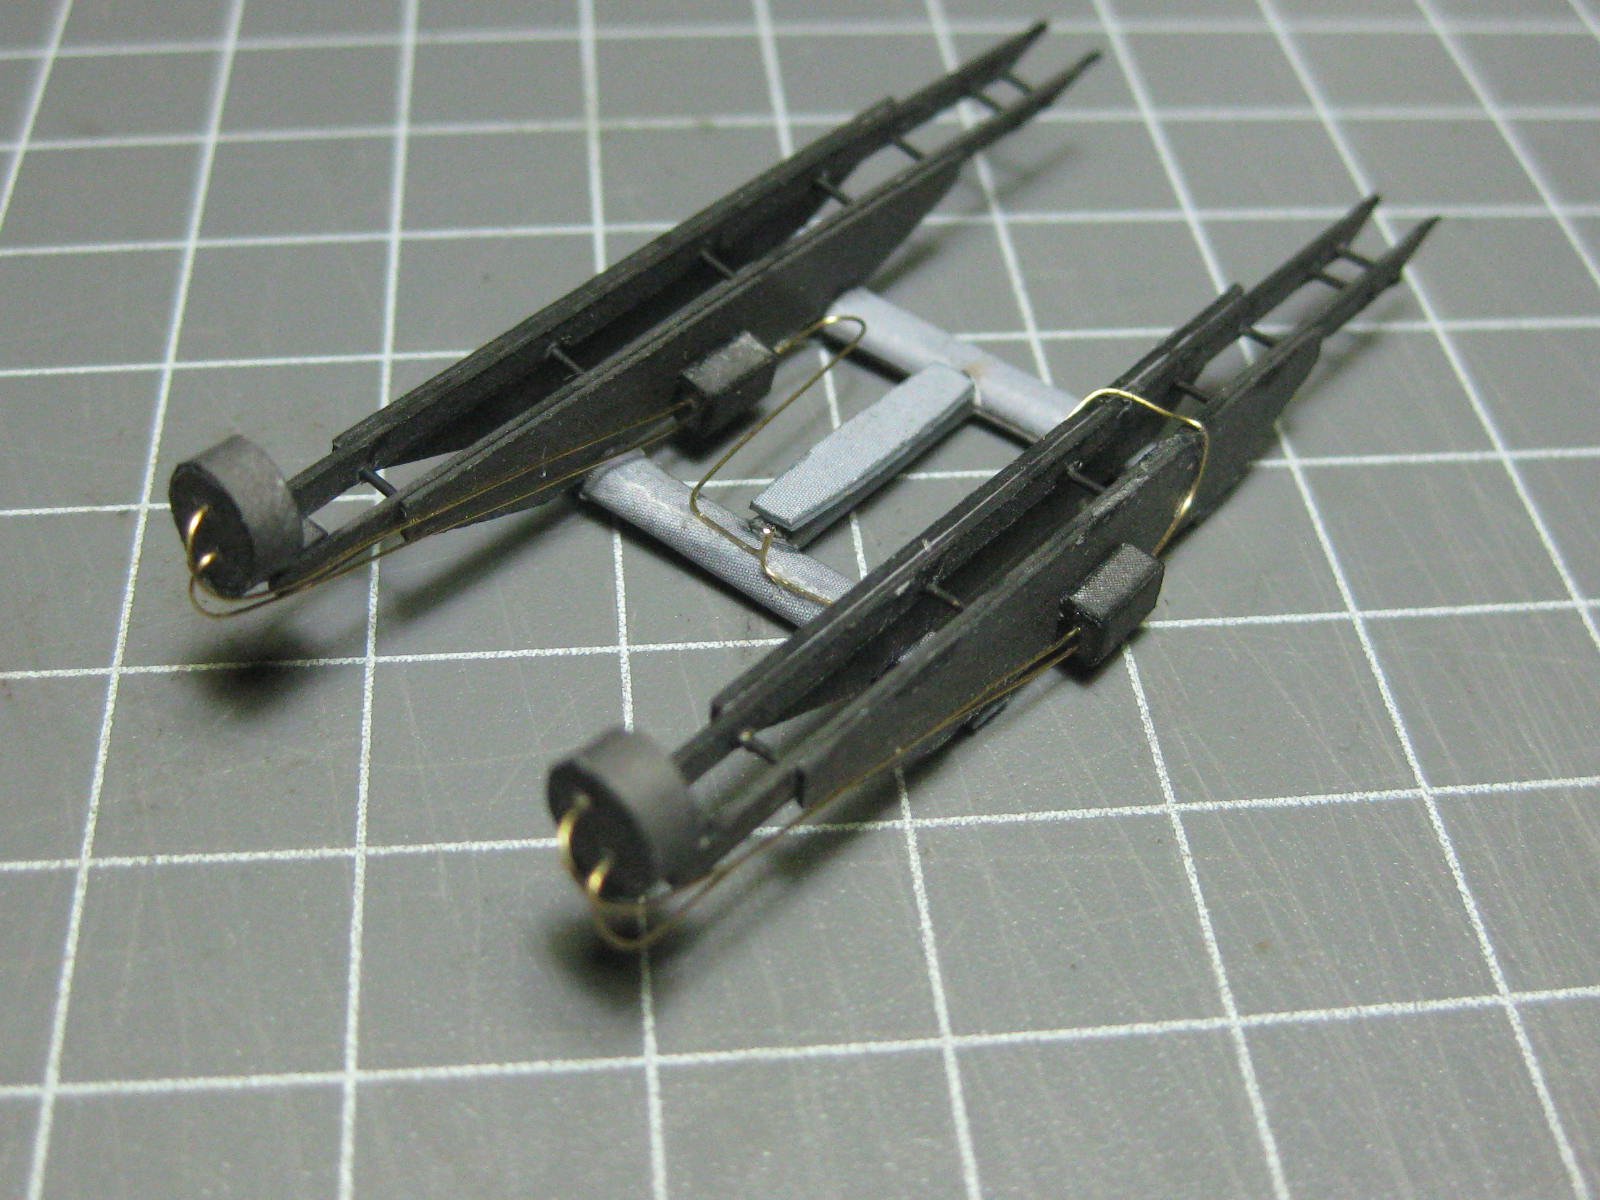
The parts for one side of the main landing gear :
I cut angles on the ends of some of the struts for better adhesion. Here's a landing gear nearing completion :
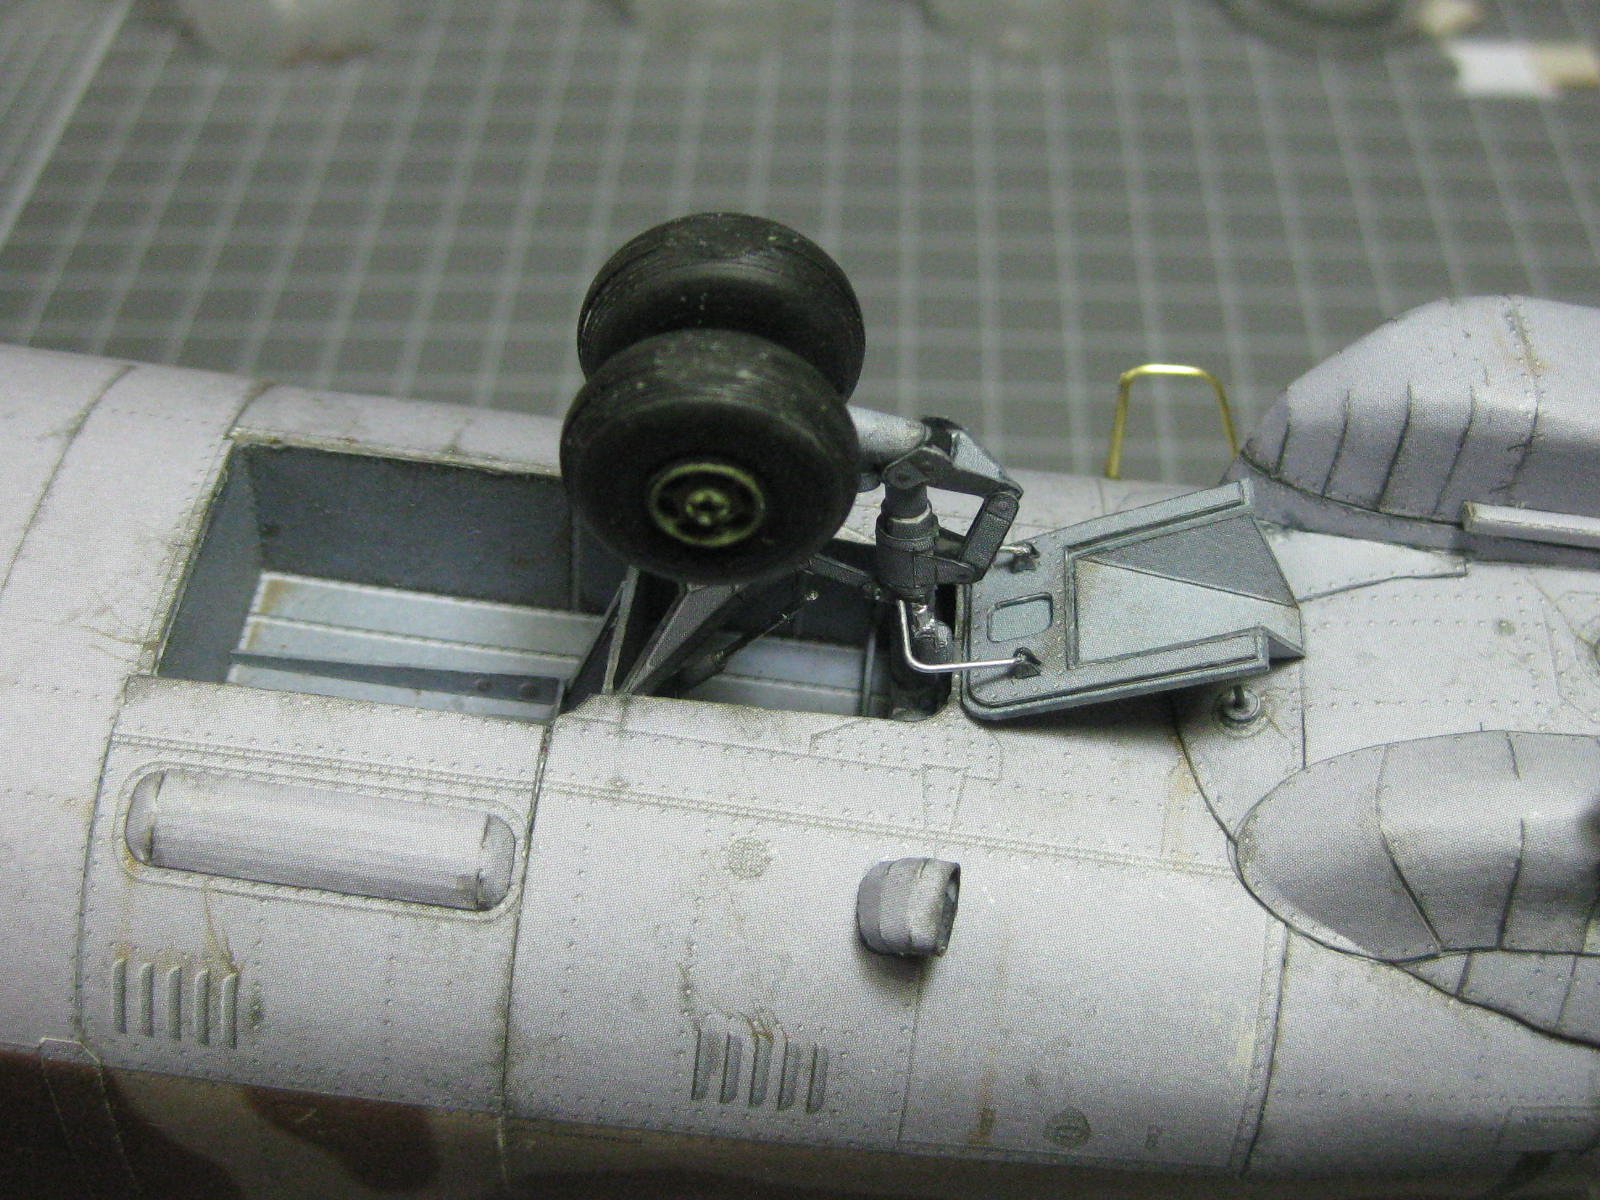
Next job was the landing gear doors and the wheels. Everything has turned surprisingly strong despite my earlier fears that these parts would get damaged :
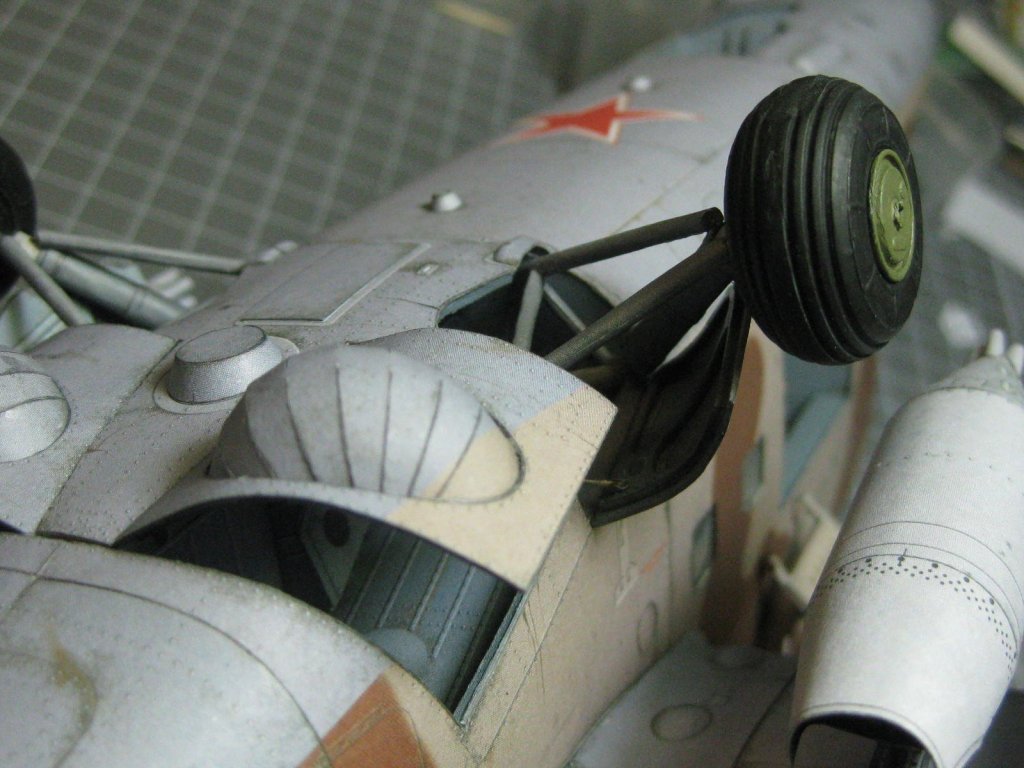

The nose landing gear fitted. I used wire to pin some of the joints, and once again it's a lot stronger than it looks :
Both landing gears completed :

Danny
- Canute, druxey, Old Collingwood and 8 others
-
11
-
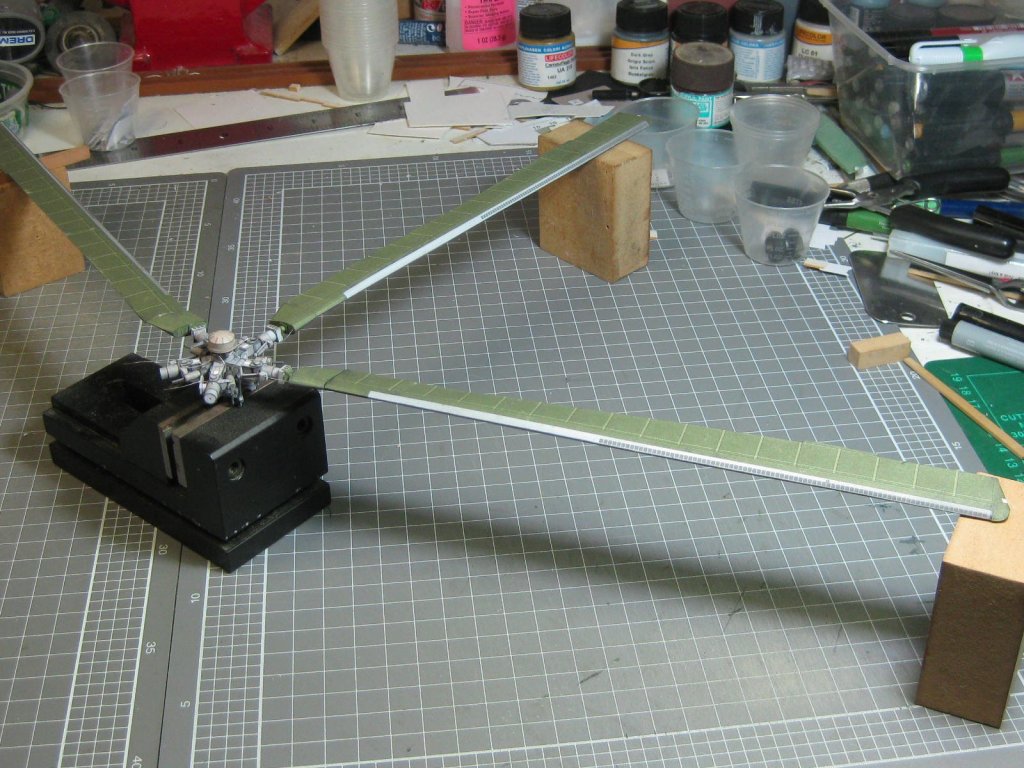
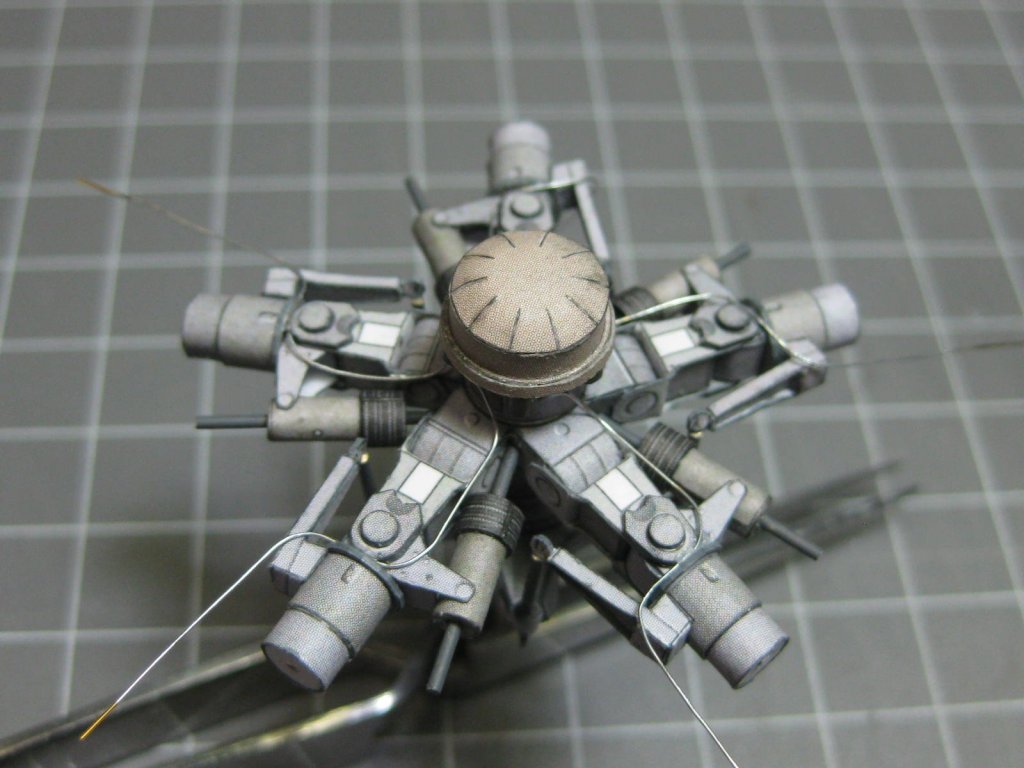
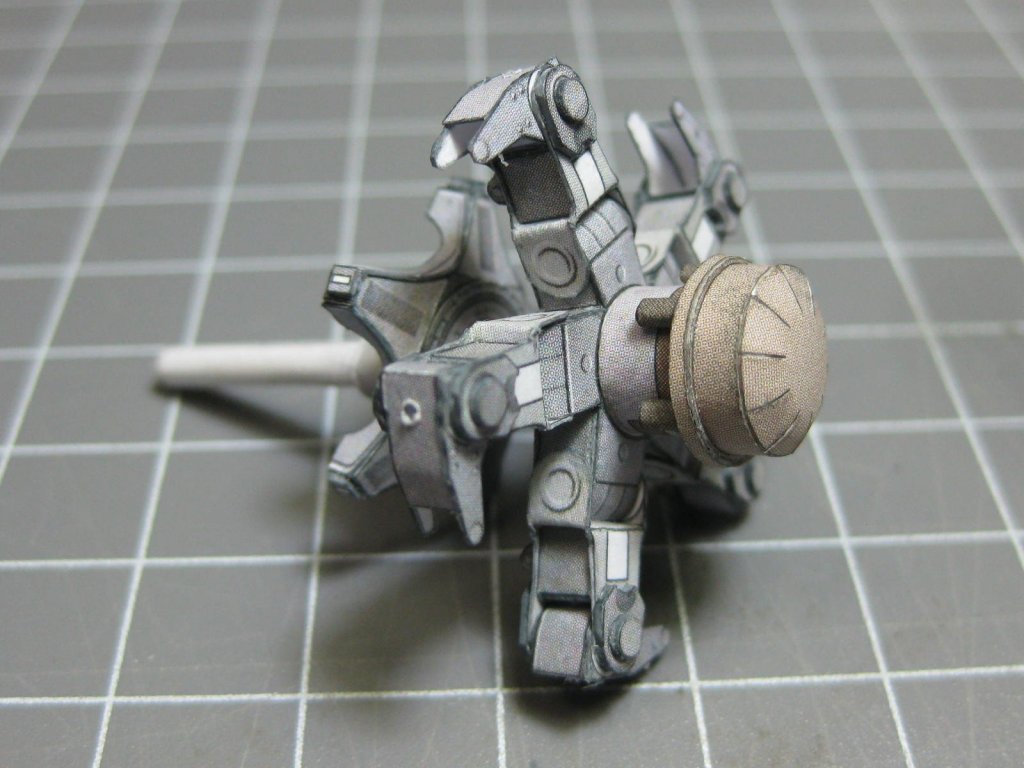
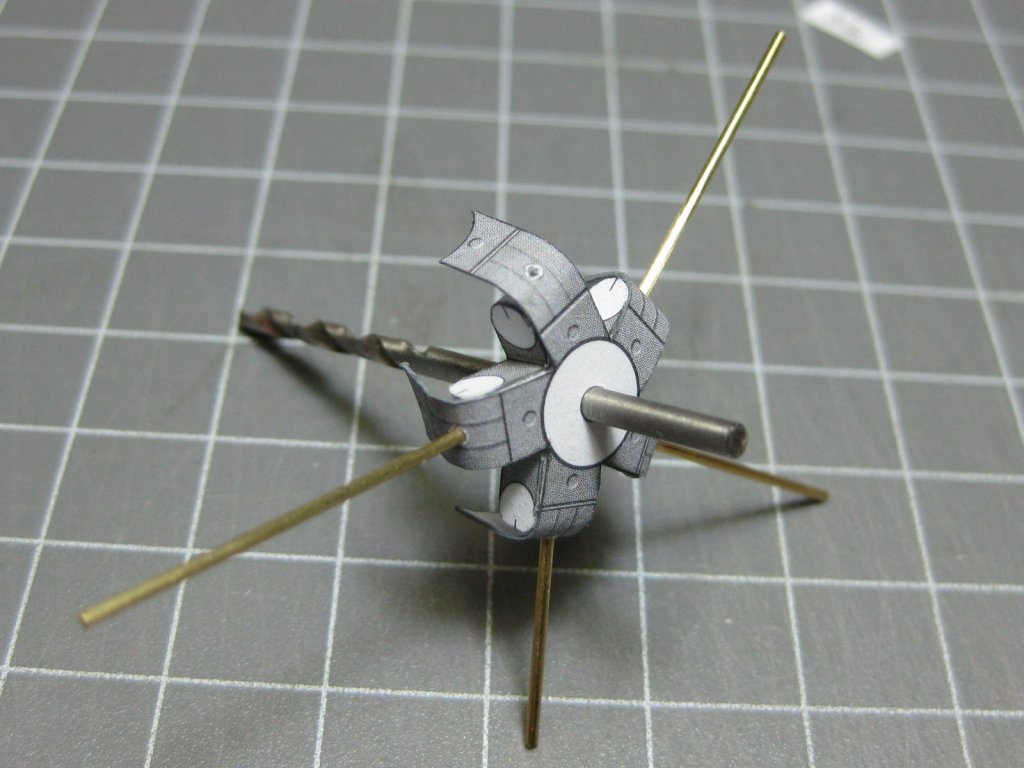
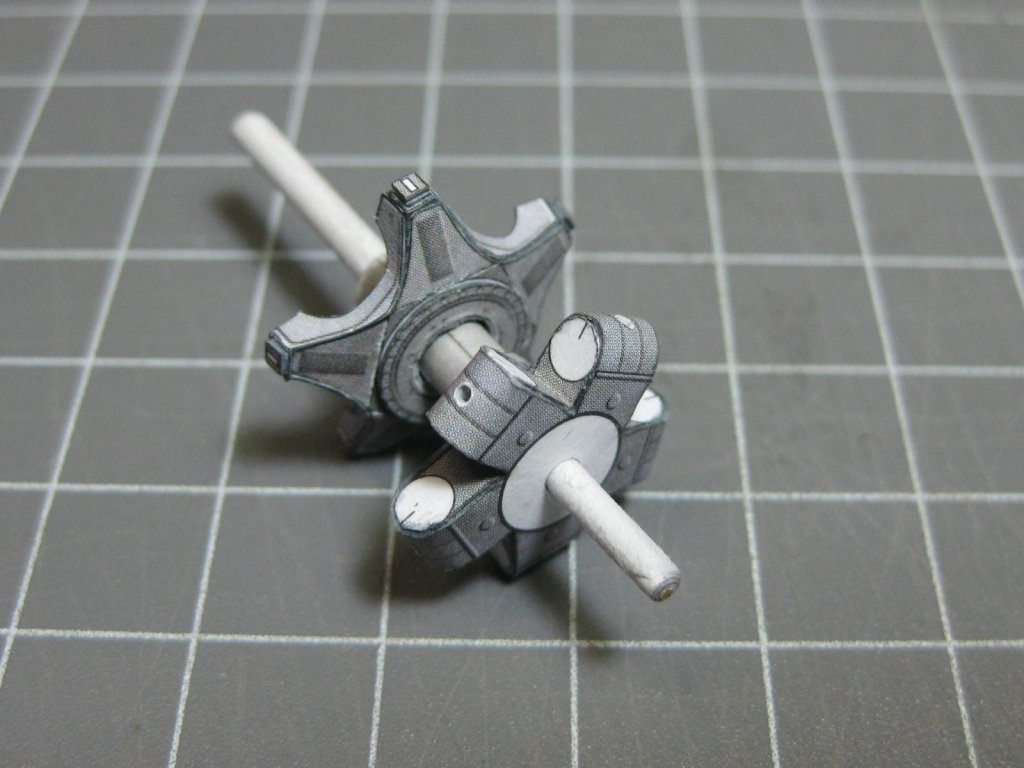
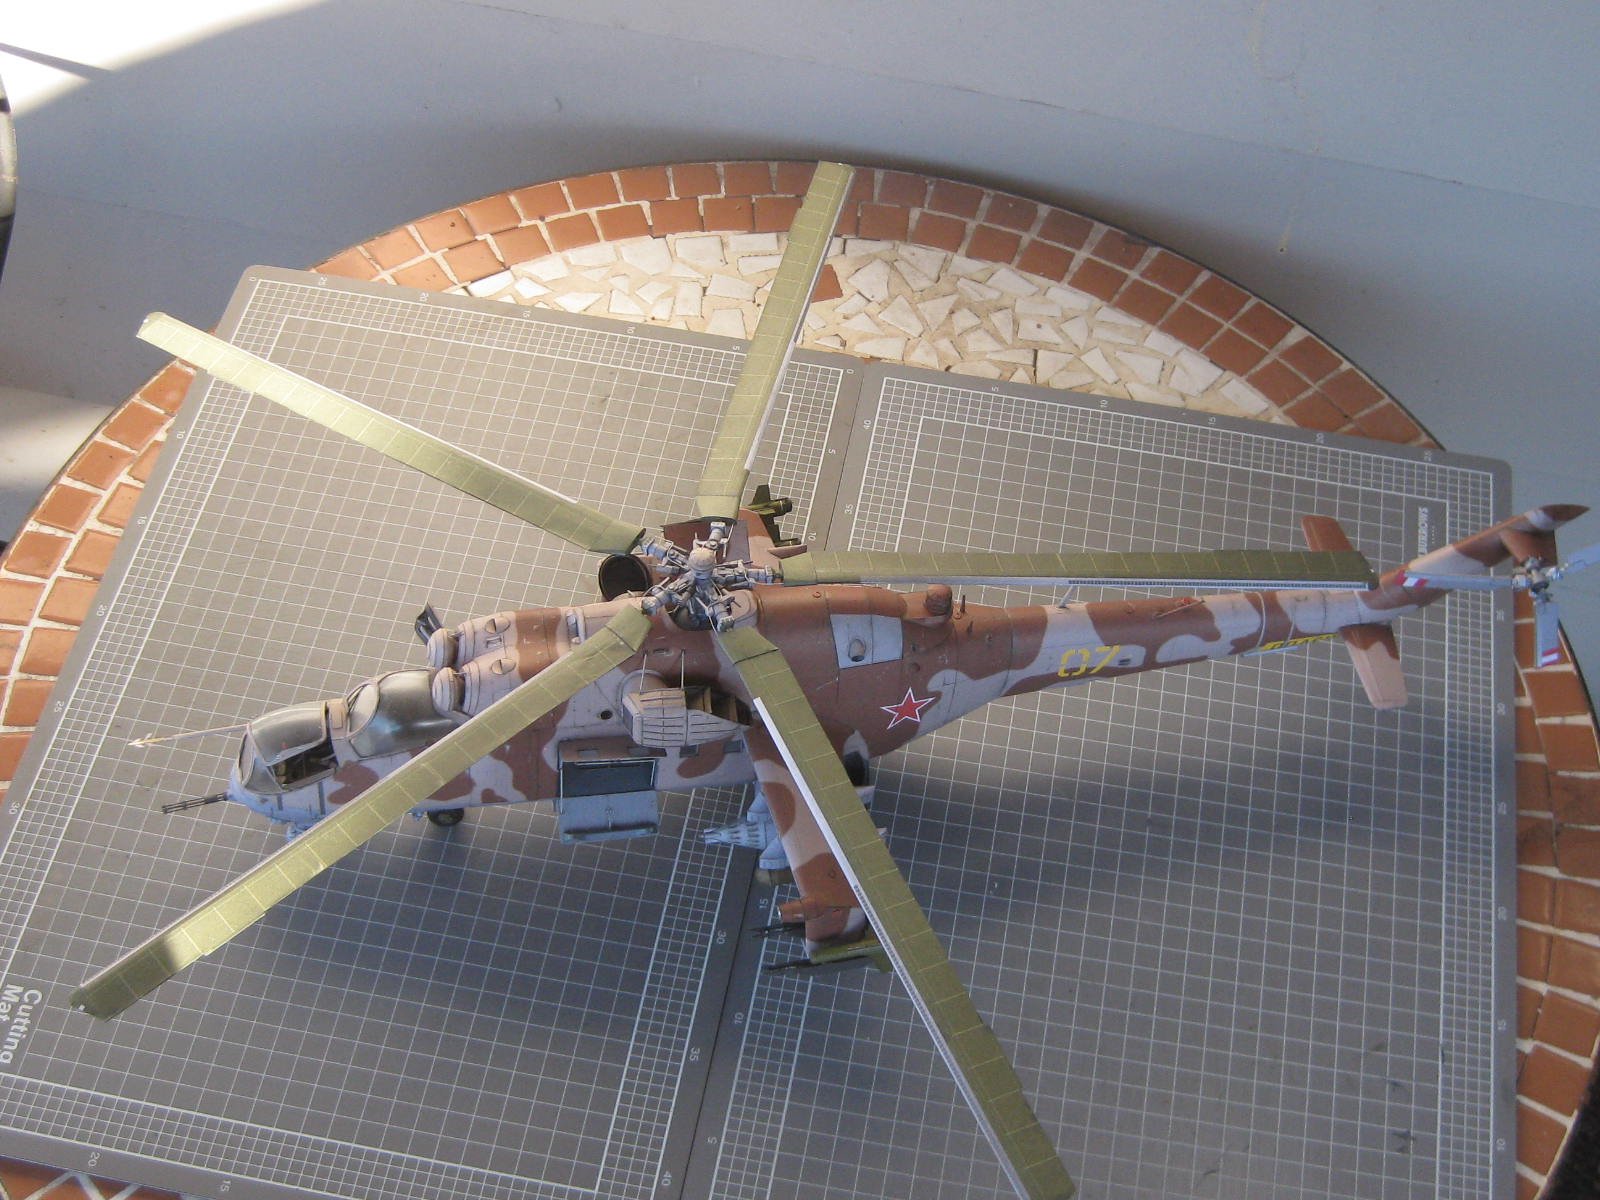
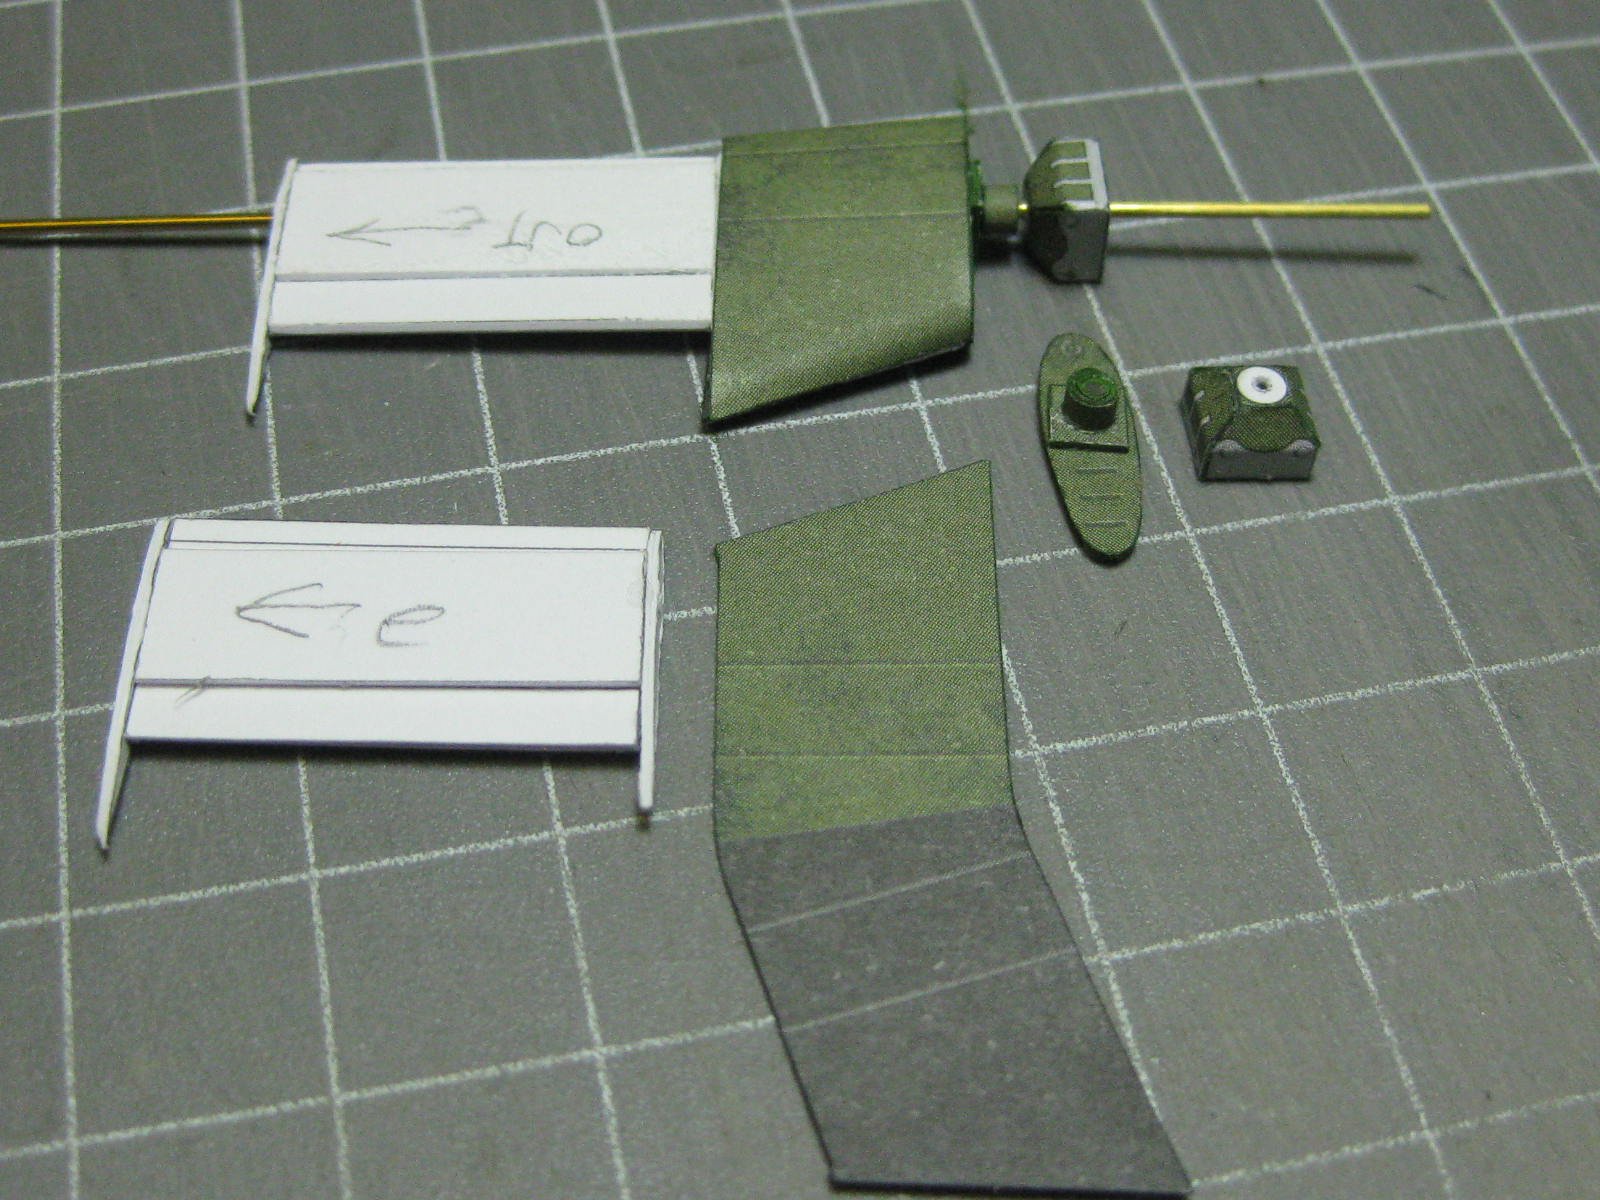
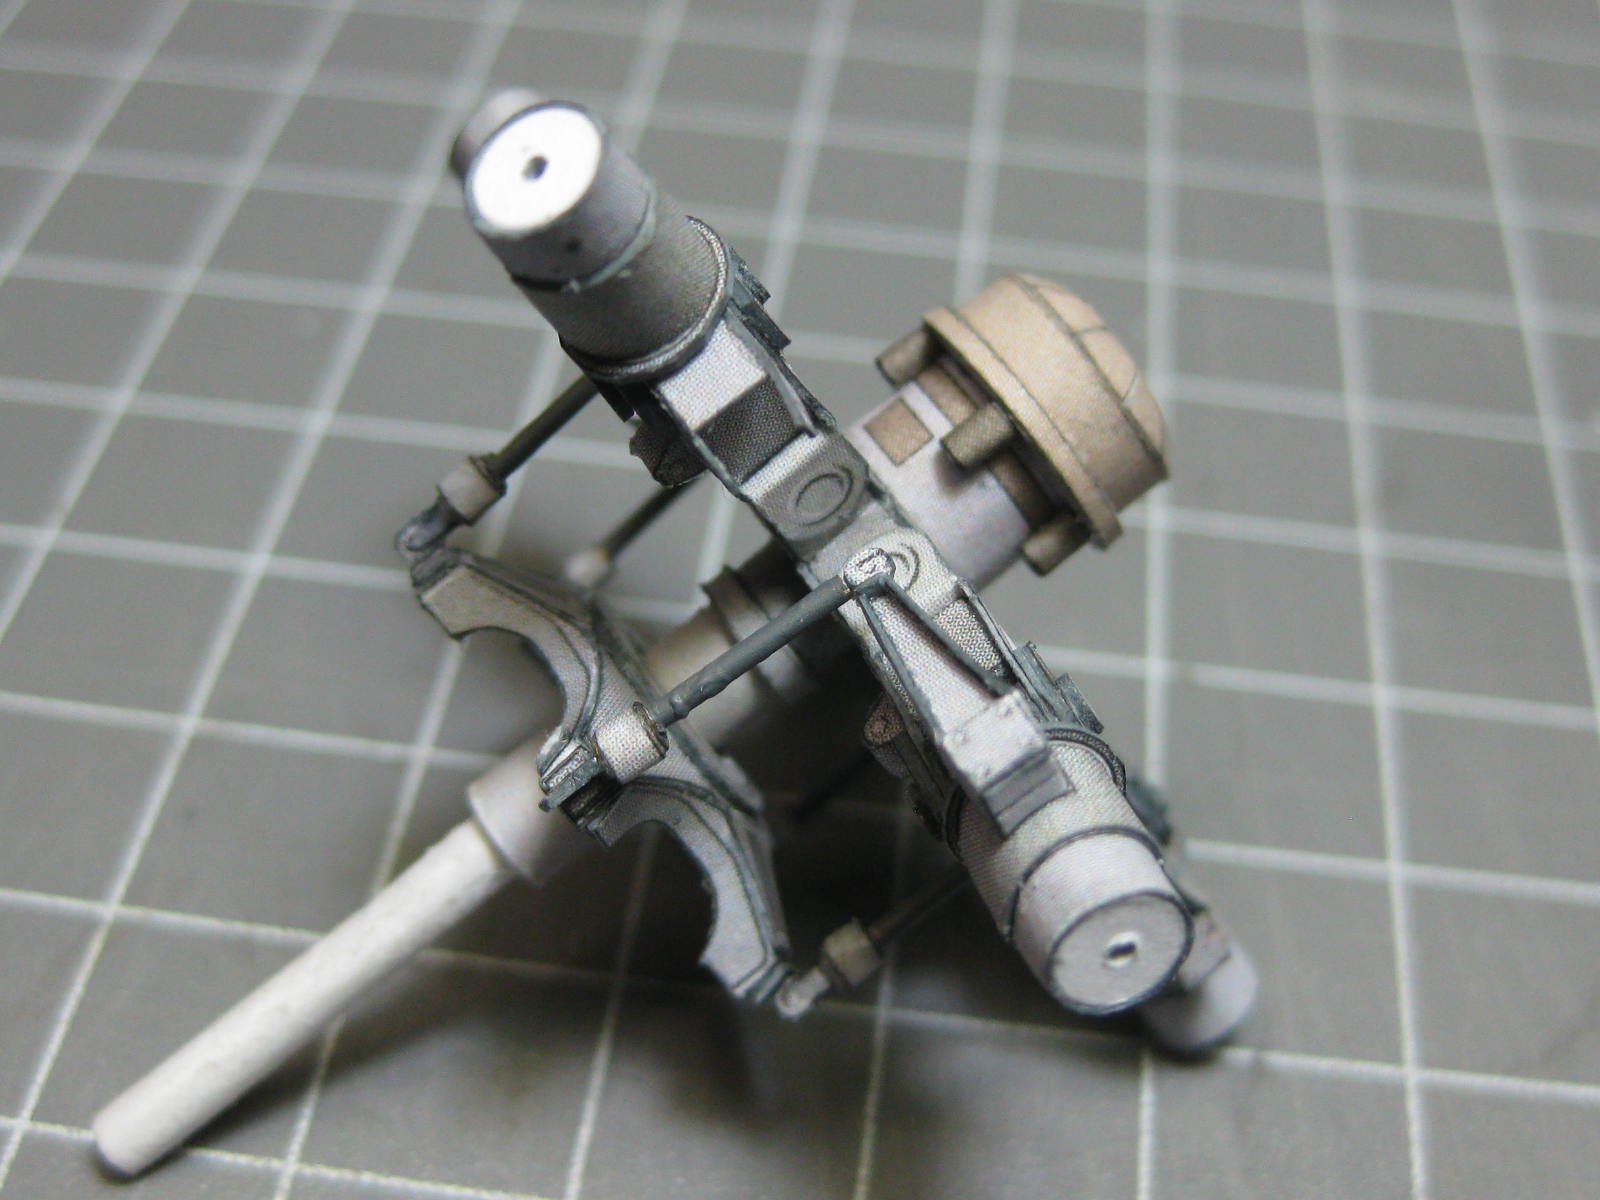
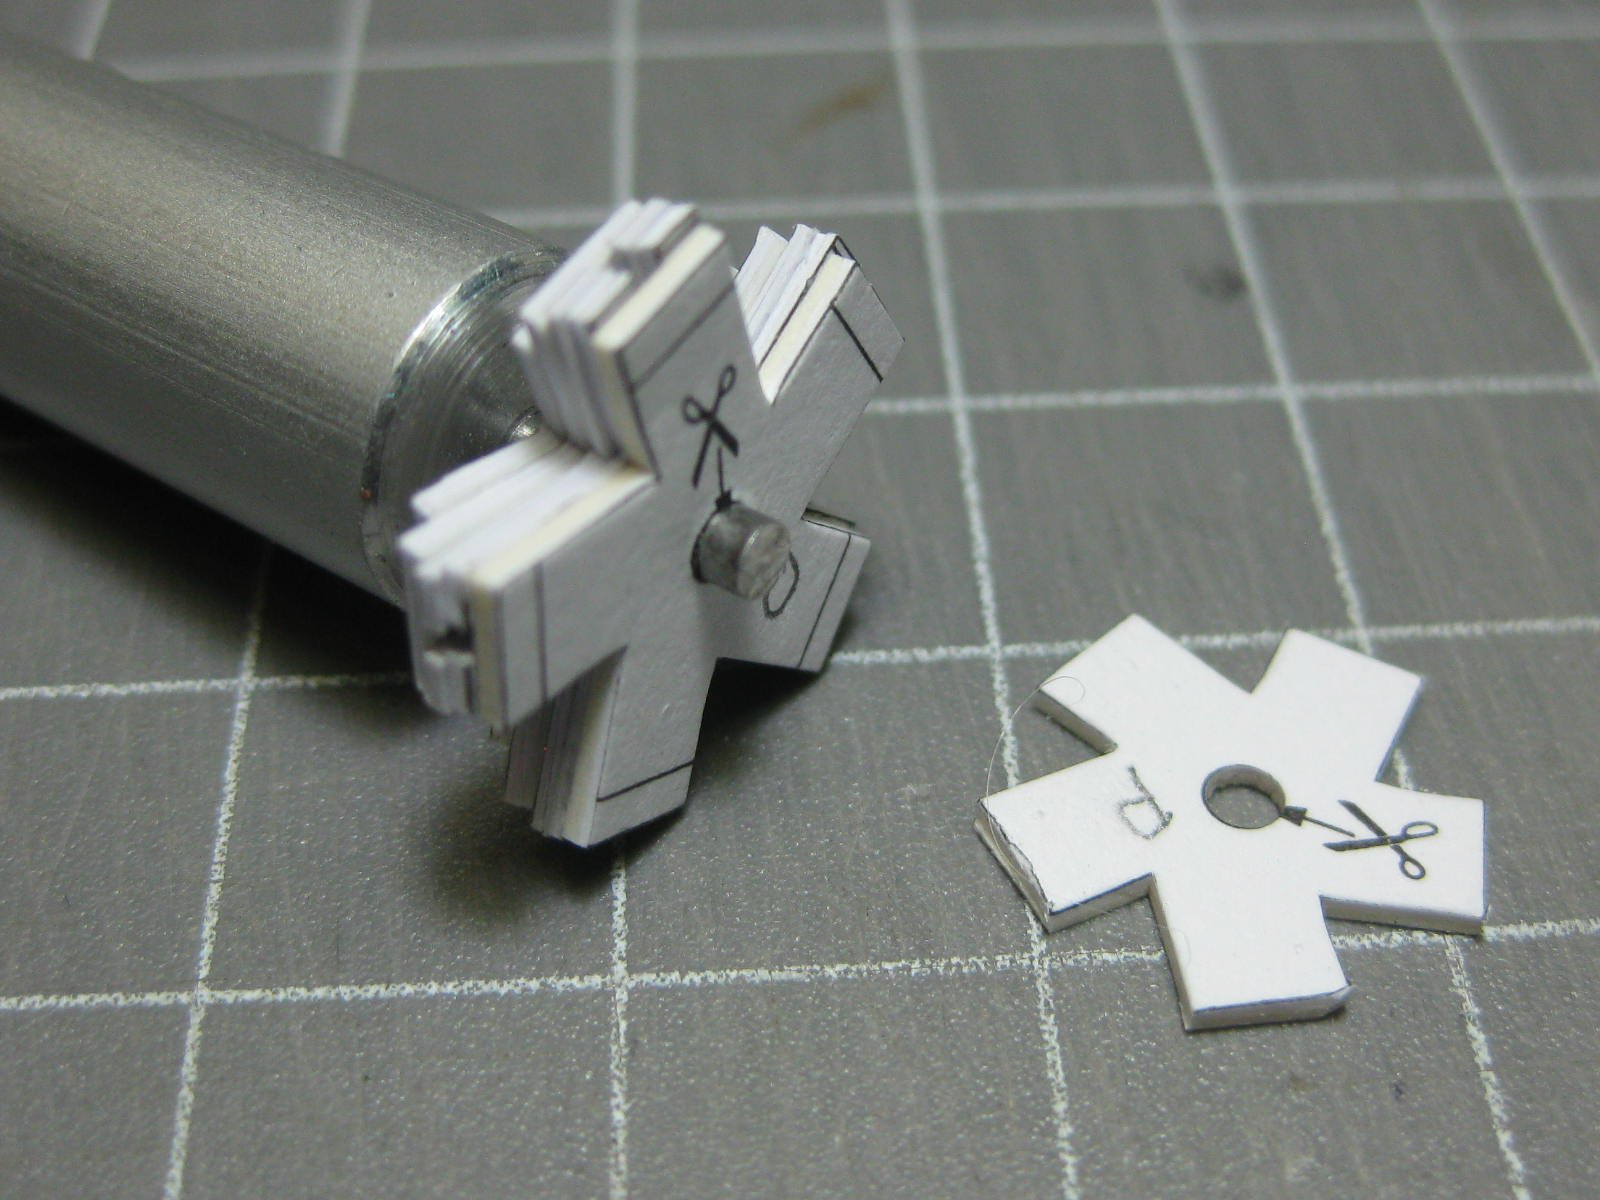
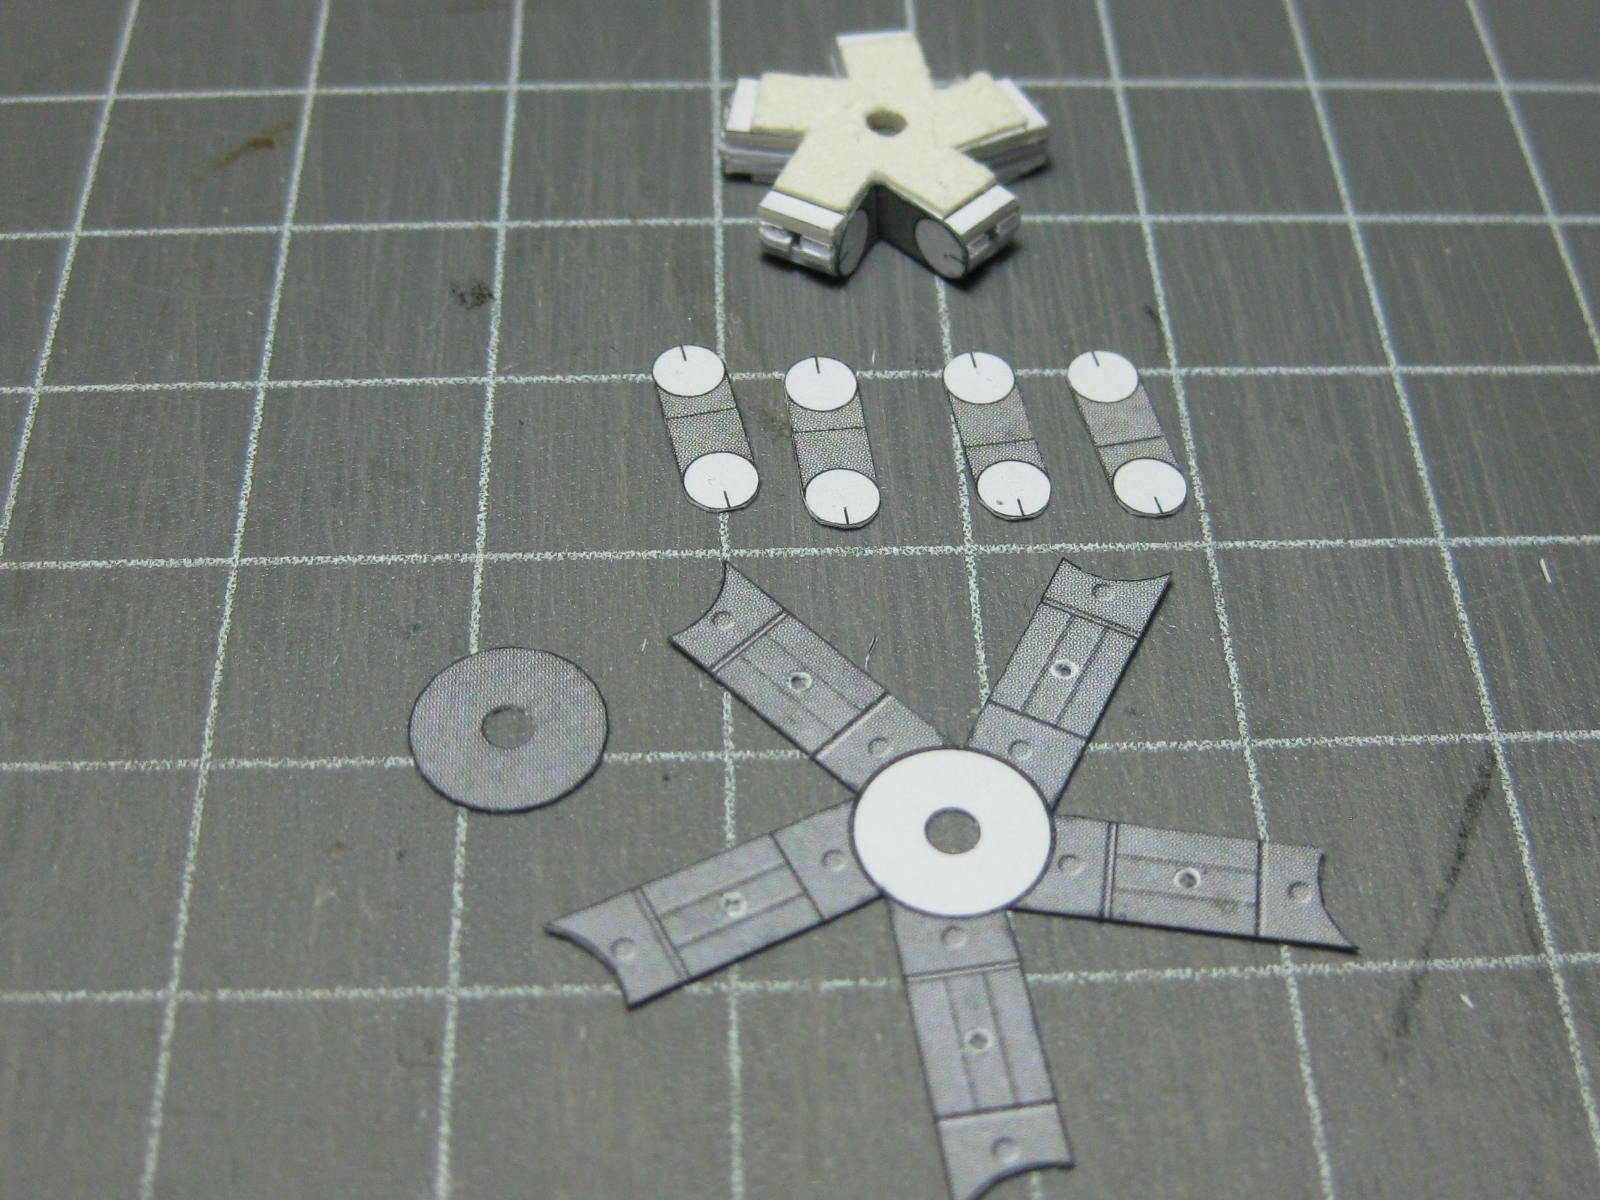
Starting the main rotor blades :

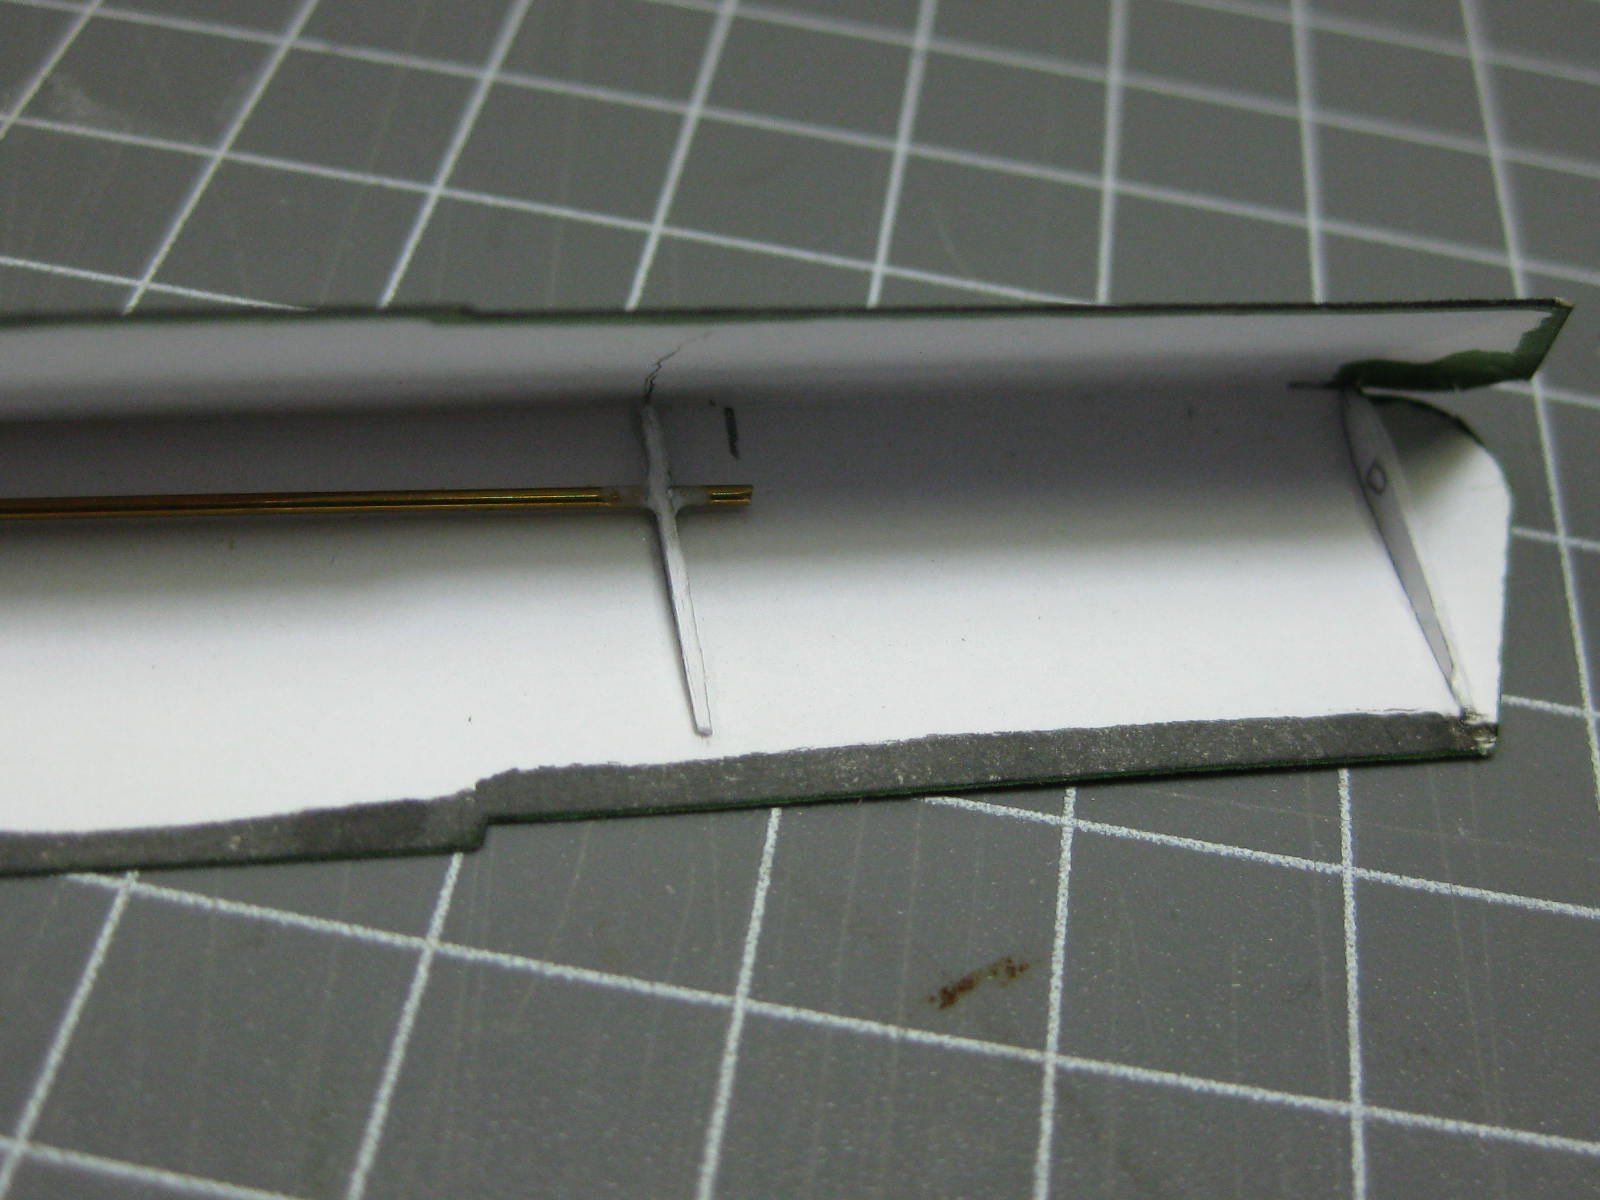
I made an extra rib to support the end of the reinforcing wire. This is a rare design flaw in the kit, they just leave the wire floating around :
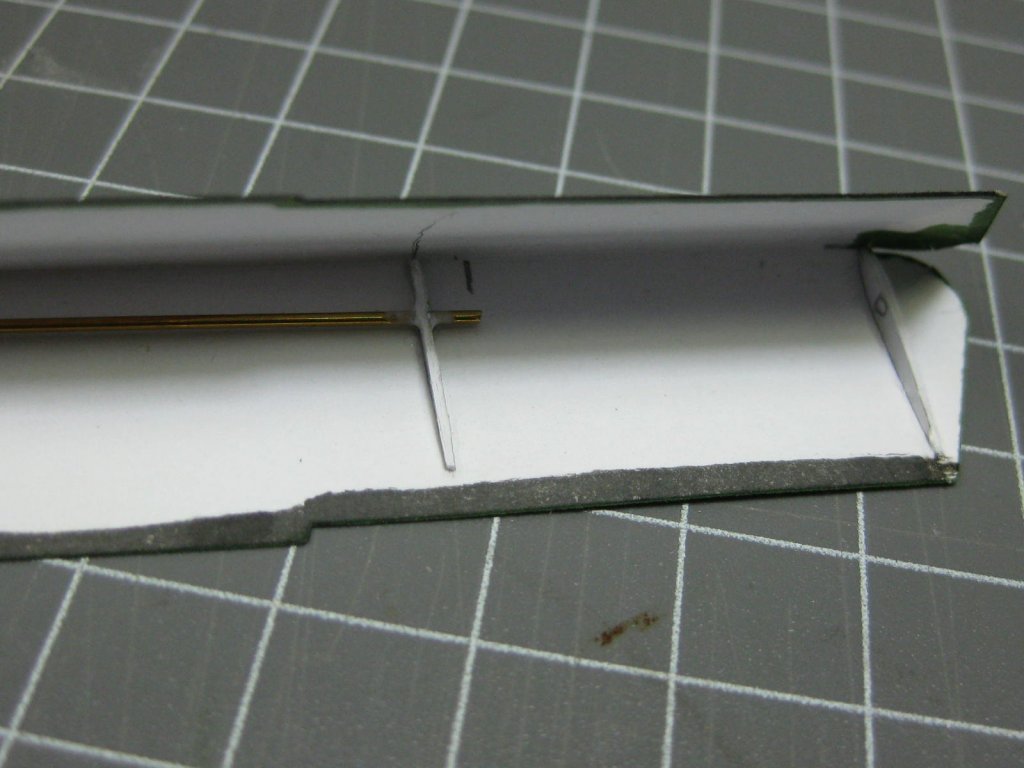
This was one of the most challenging pieces to glue due to the length of the seam - 235mm with a minimal amount of twist in the blade. One of the blades finished up with a slightly bigger twist than the others, but not enough to lose any sleep over :
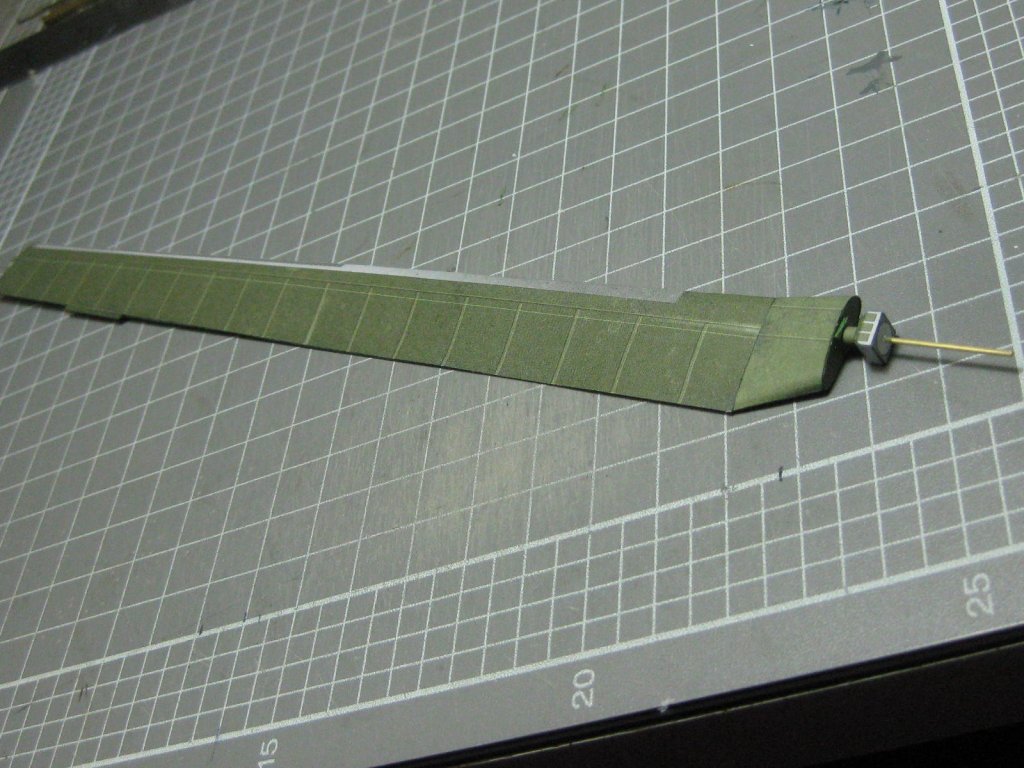
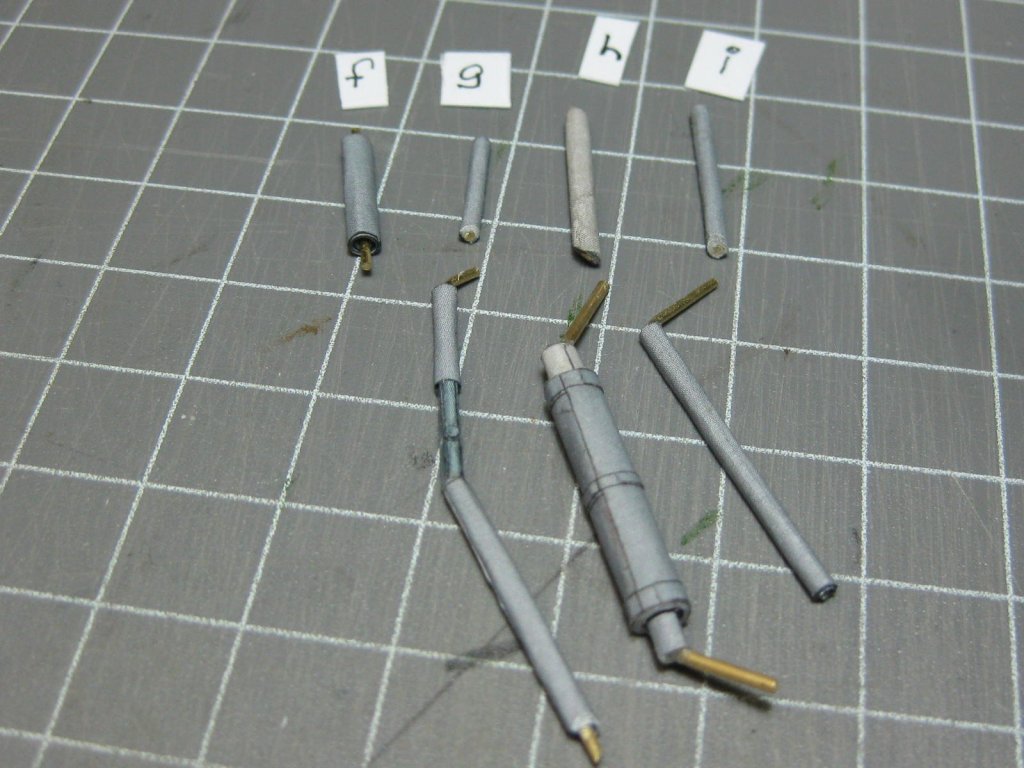
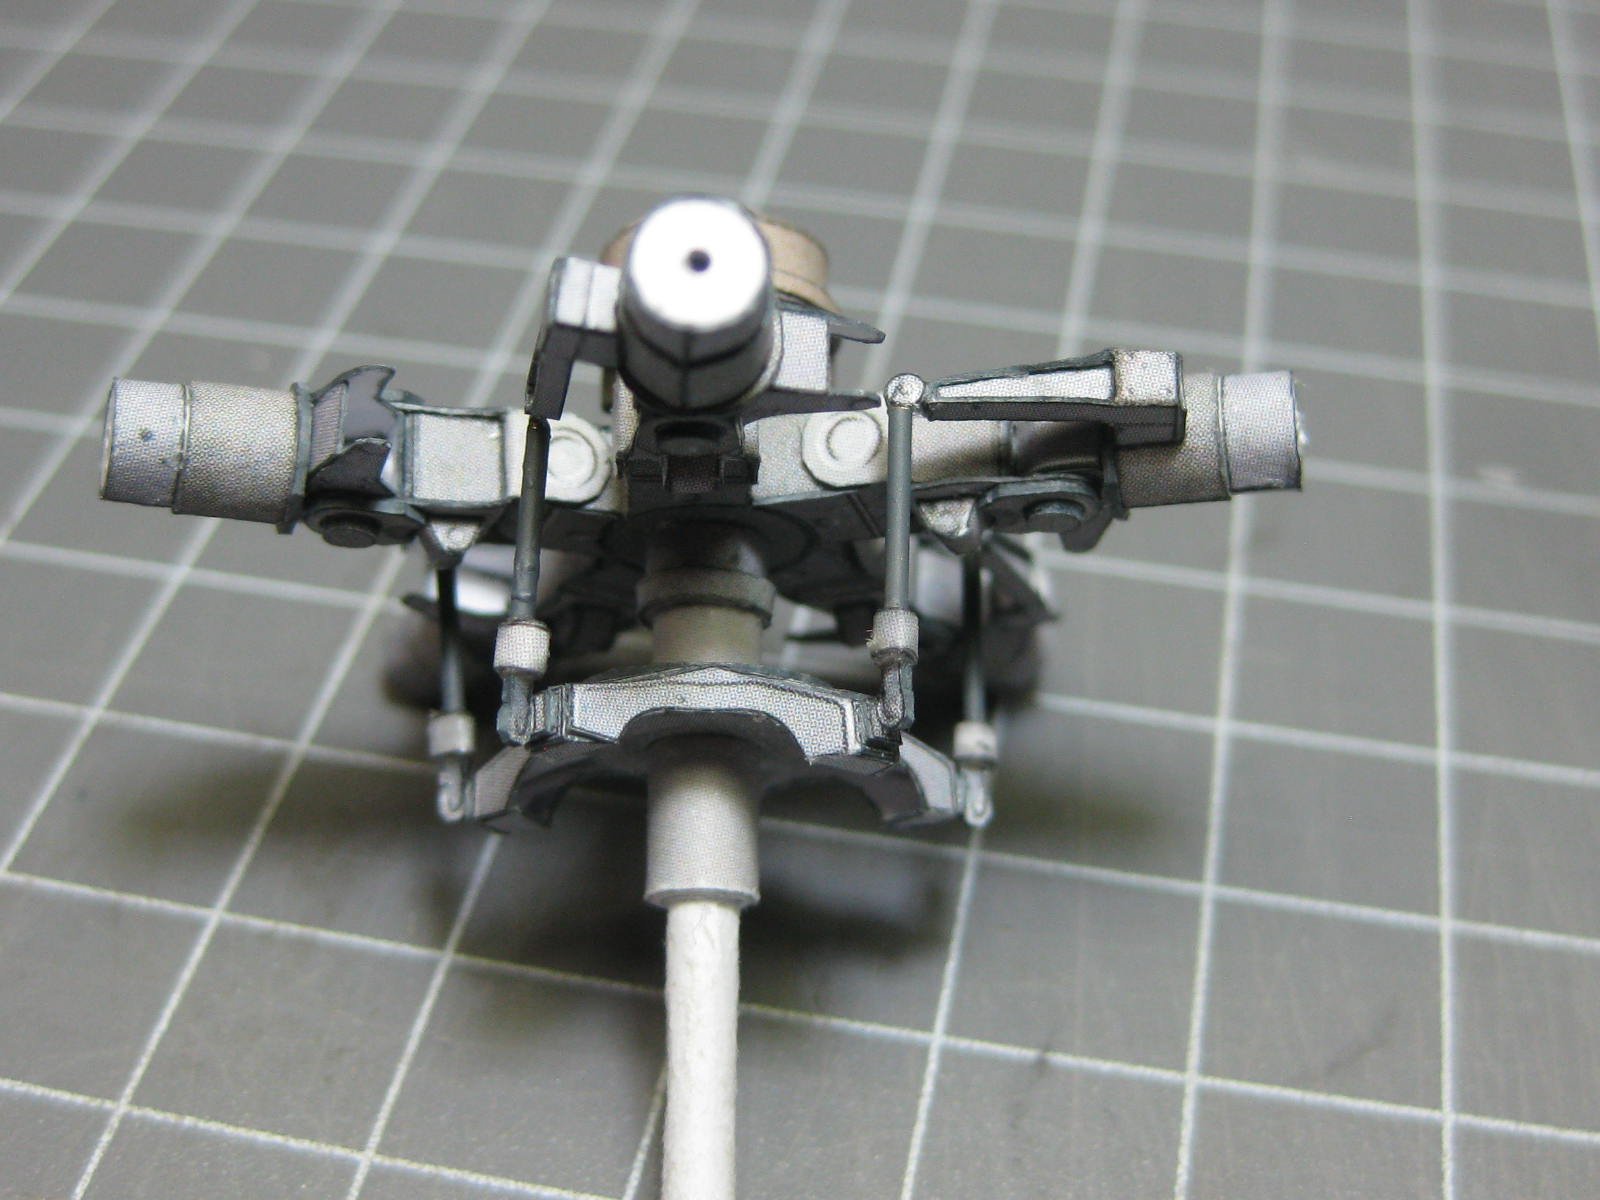
The blade temporarily fitted to the rotor control while I fit the hydraulic lines, made from 0.2mm wire :
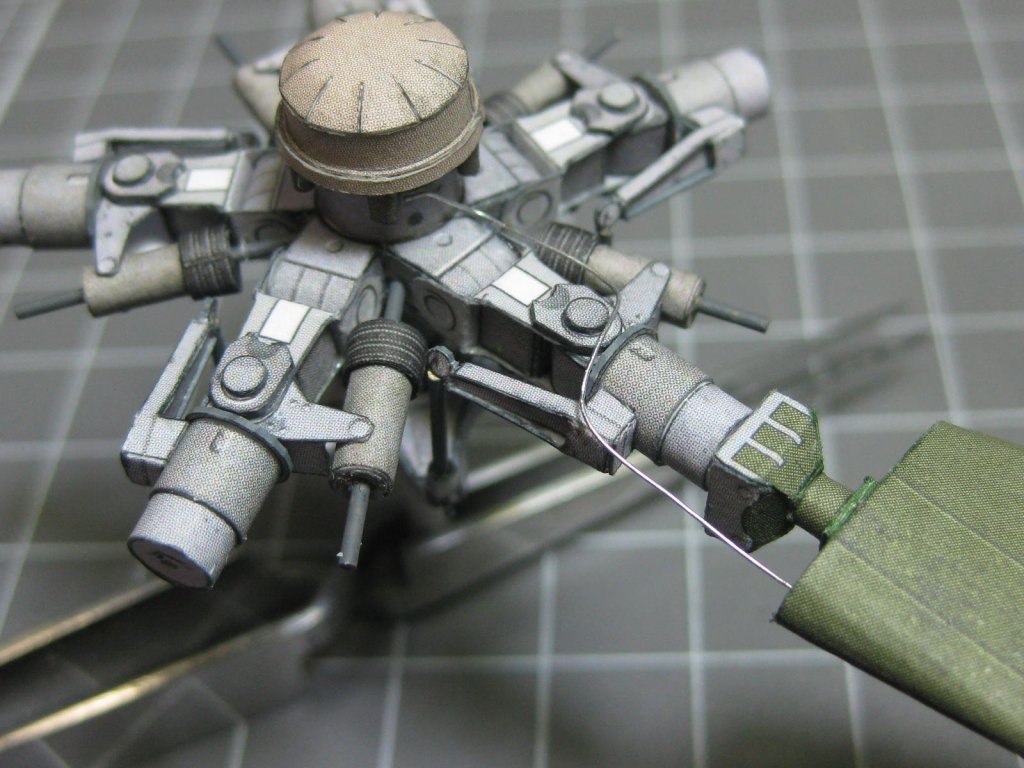
I'm thinking of making the rotor blade as a removable part for ease of transport to model shows etc. They are a snug fit onto the shafts and fairly easy to attach and the hydraulic lines slip into a slightly oversize hole in the end of the blade. The overall diameter of nearly 0.5 metres would make transport difficult.
Danny
-
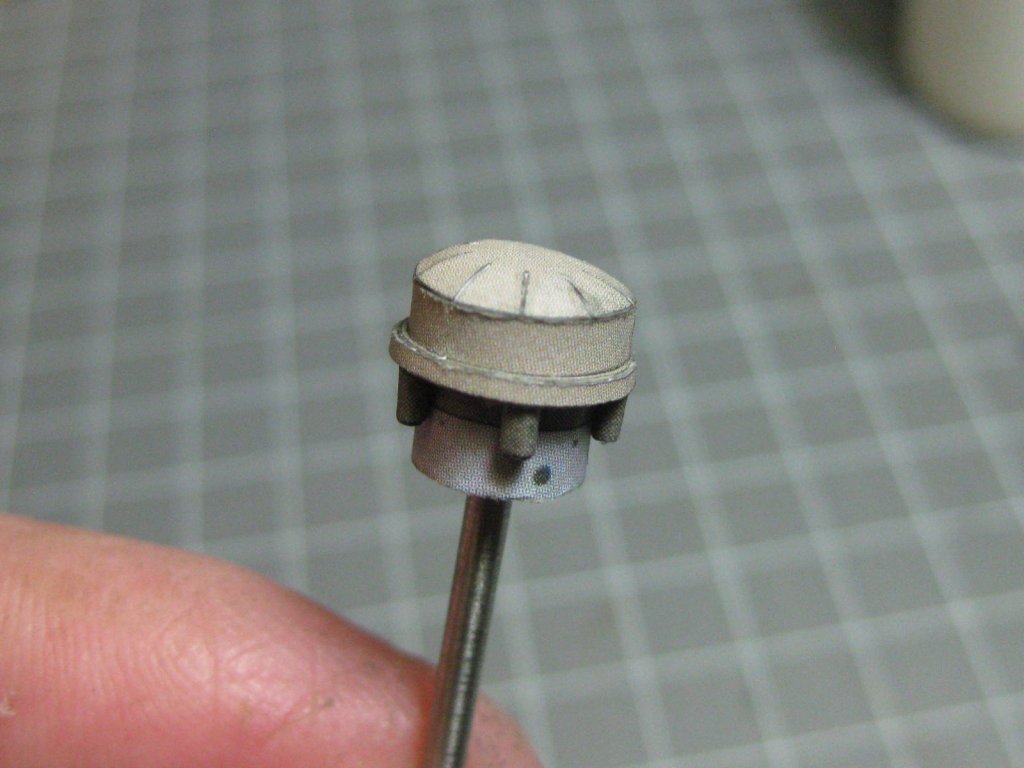
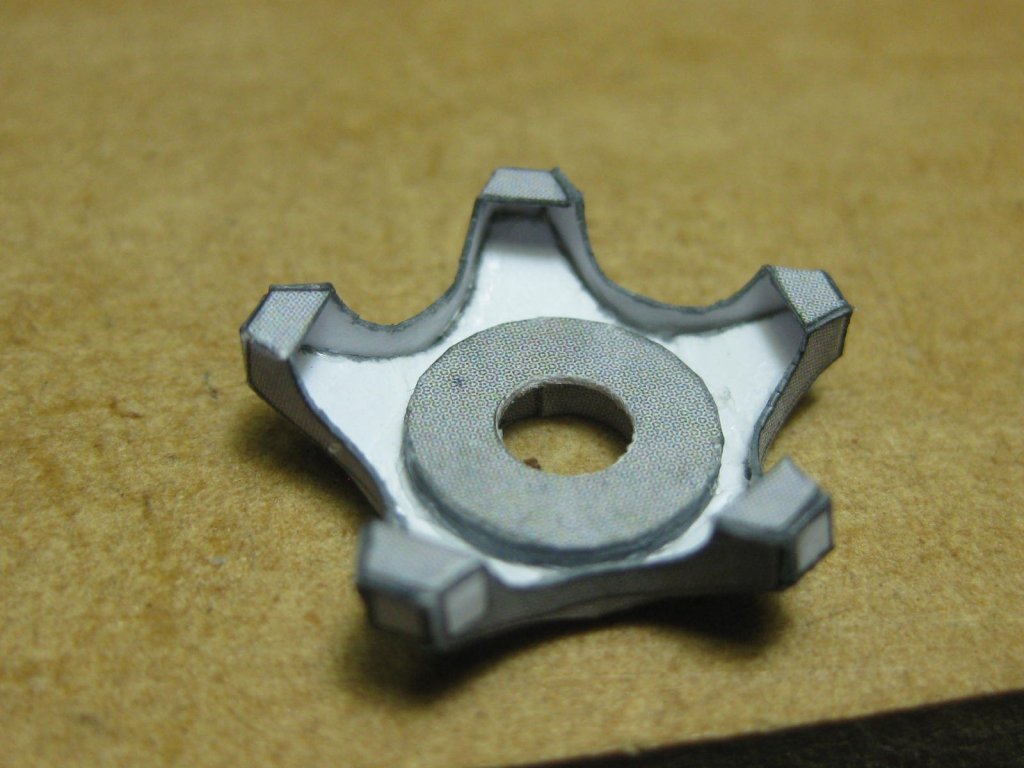
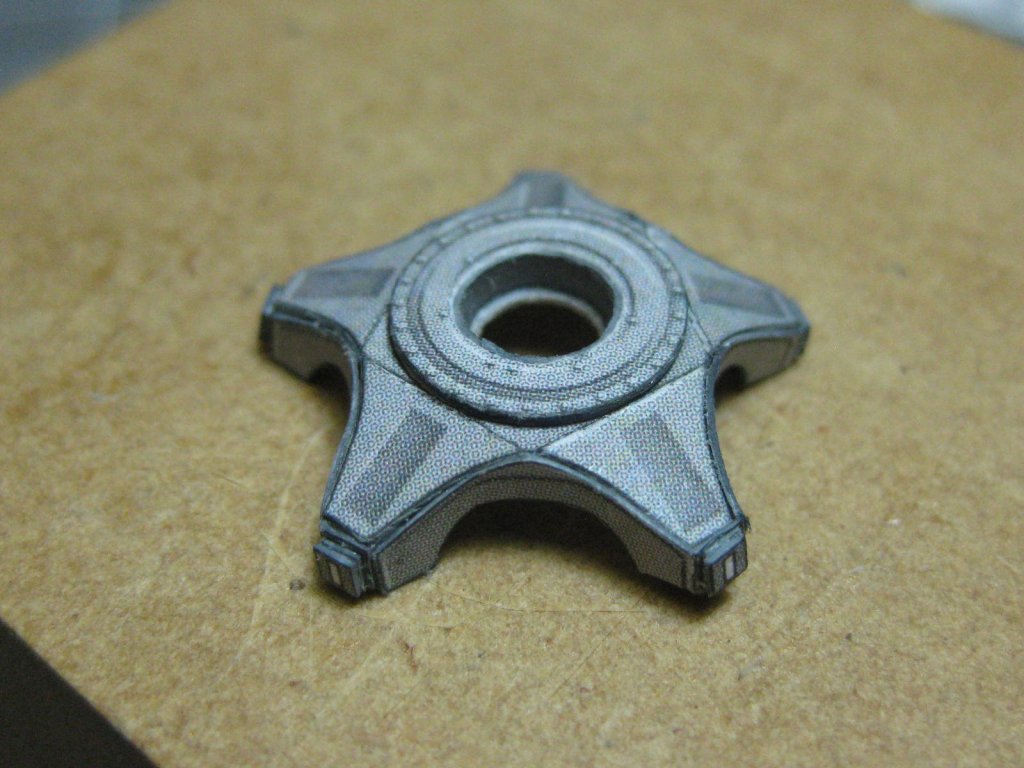
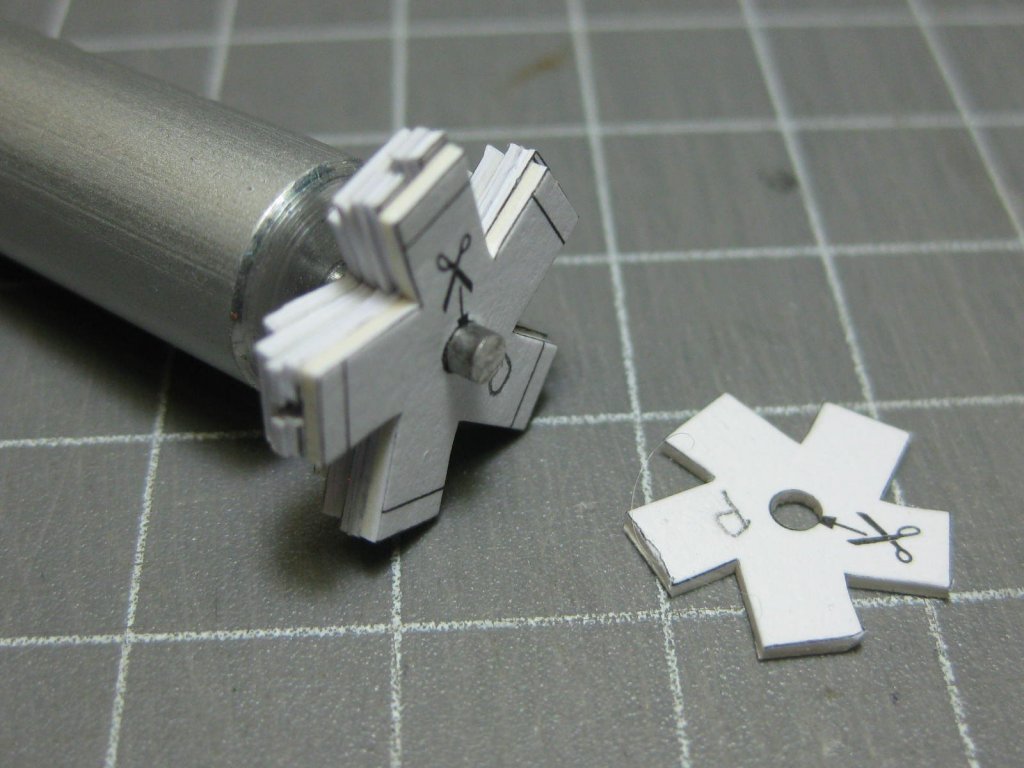
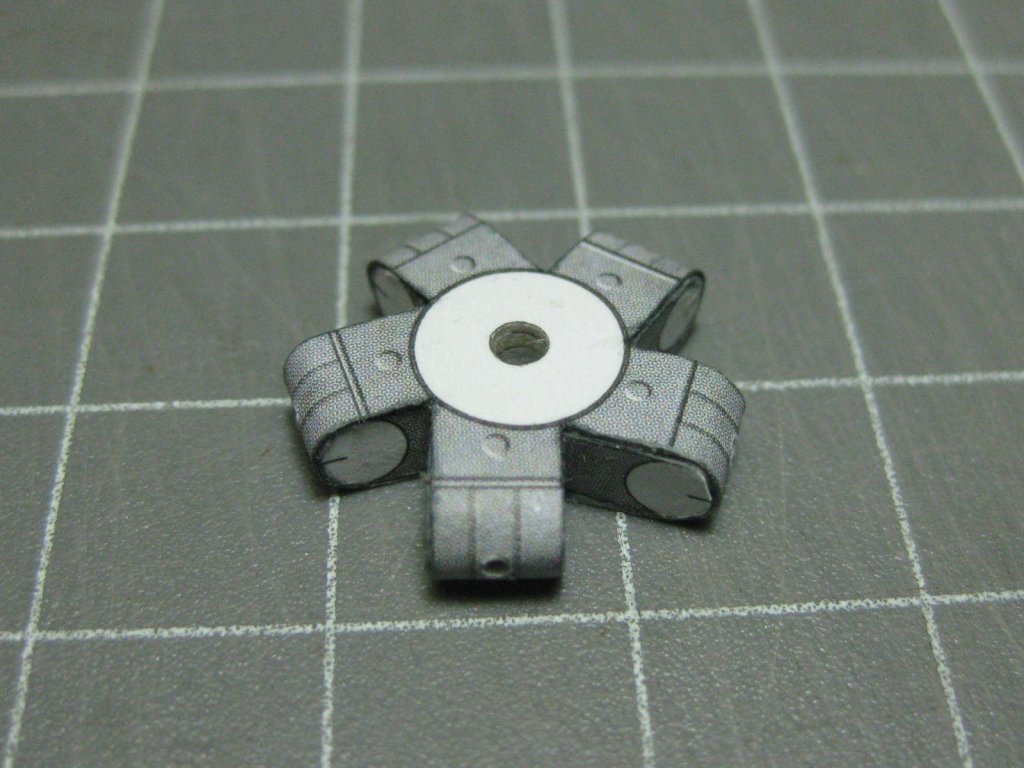
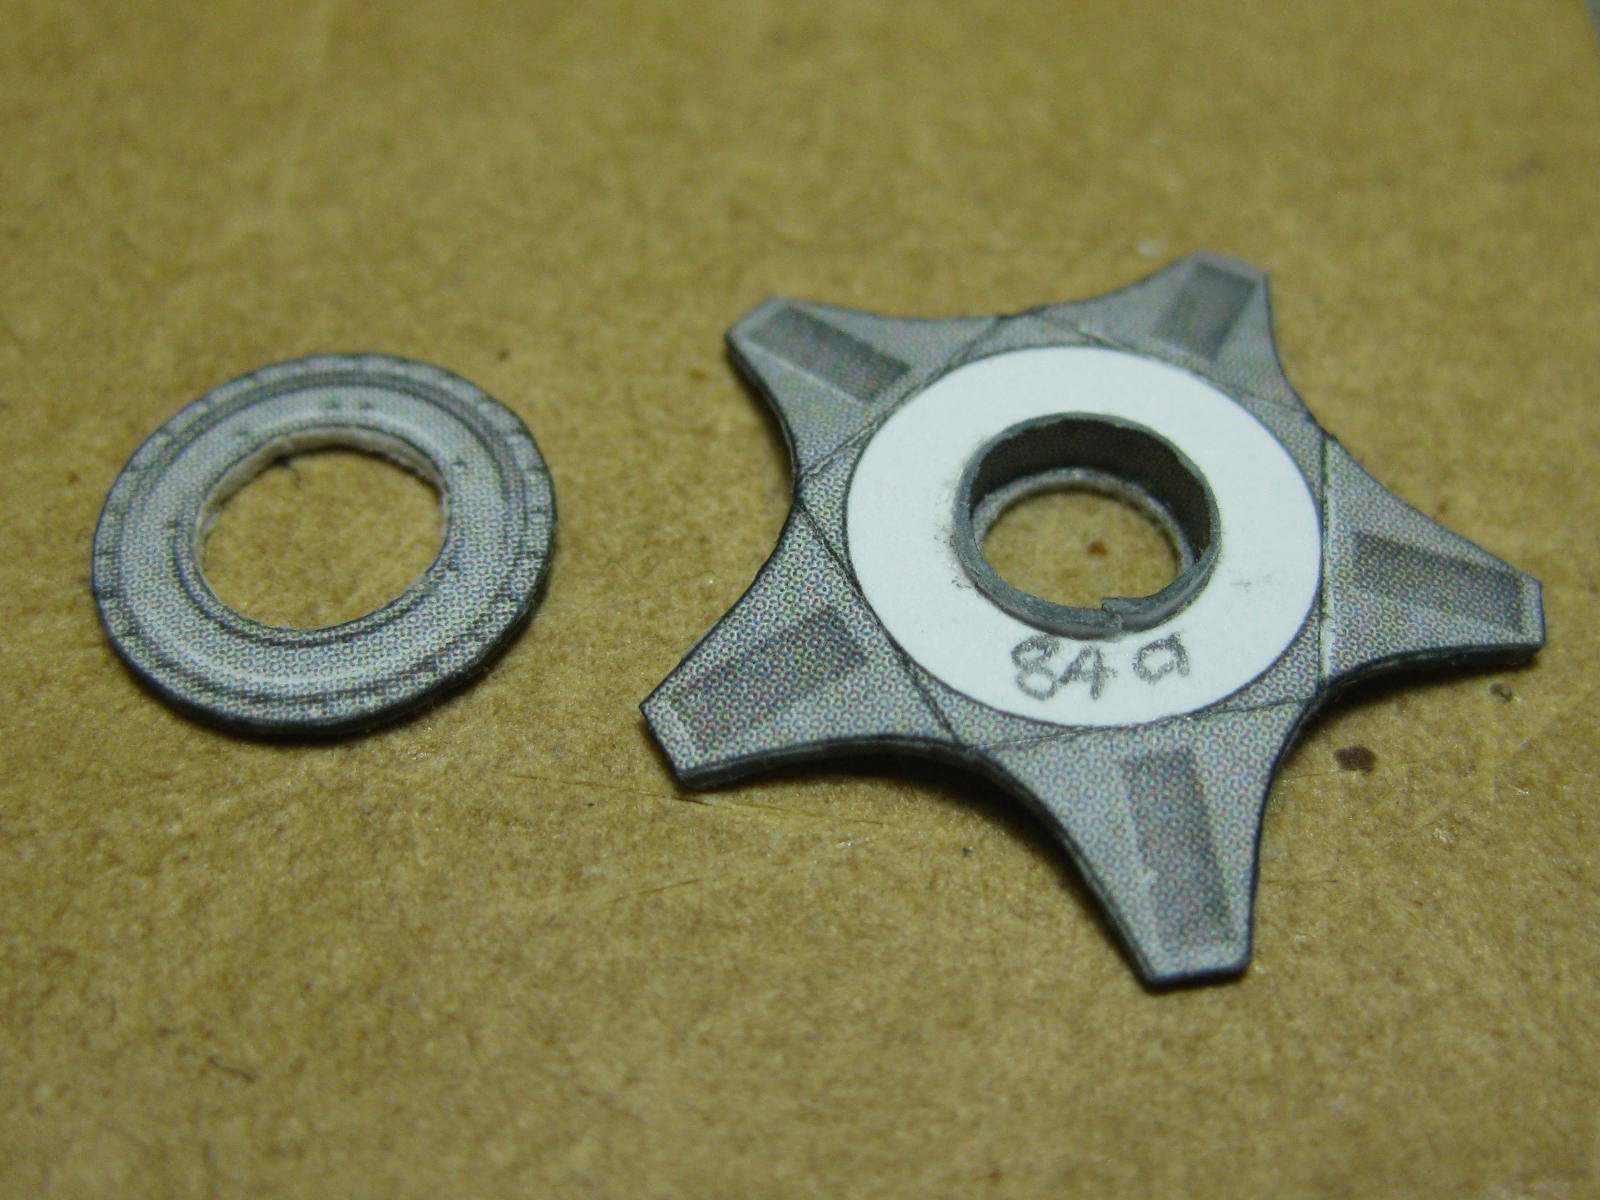
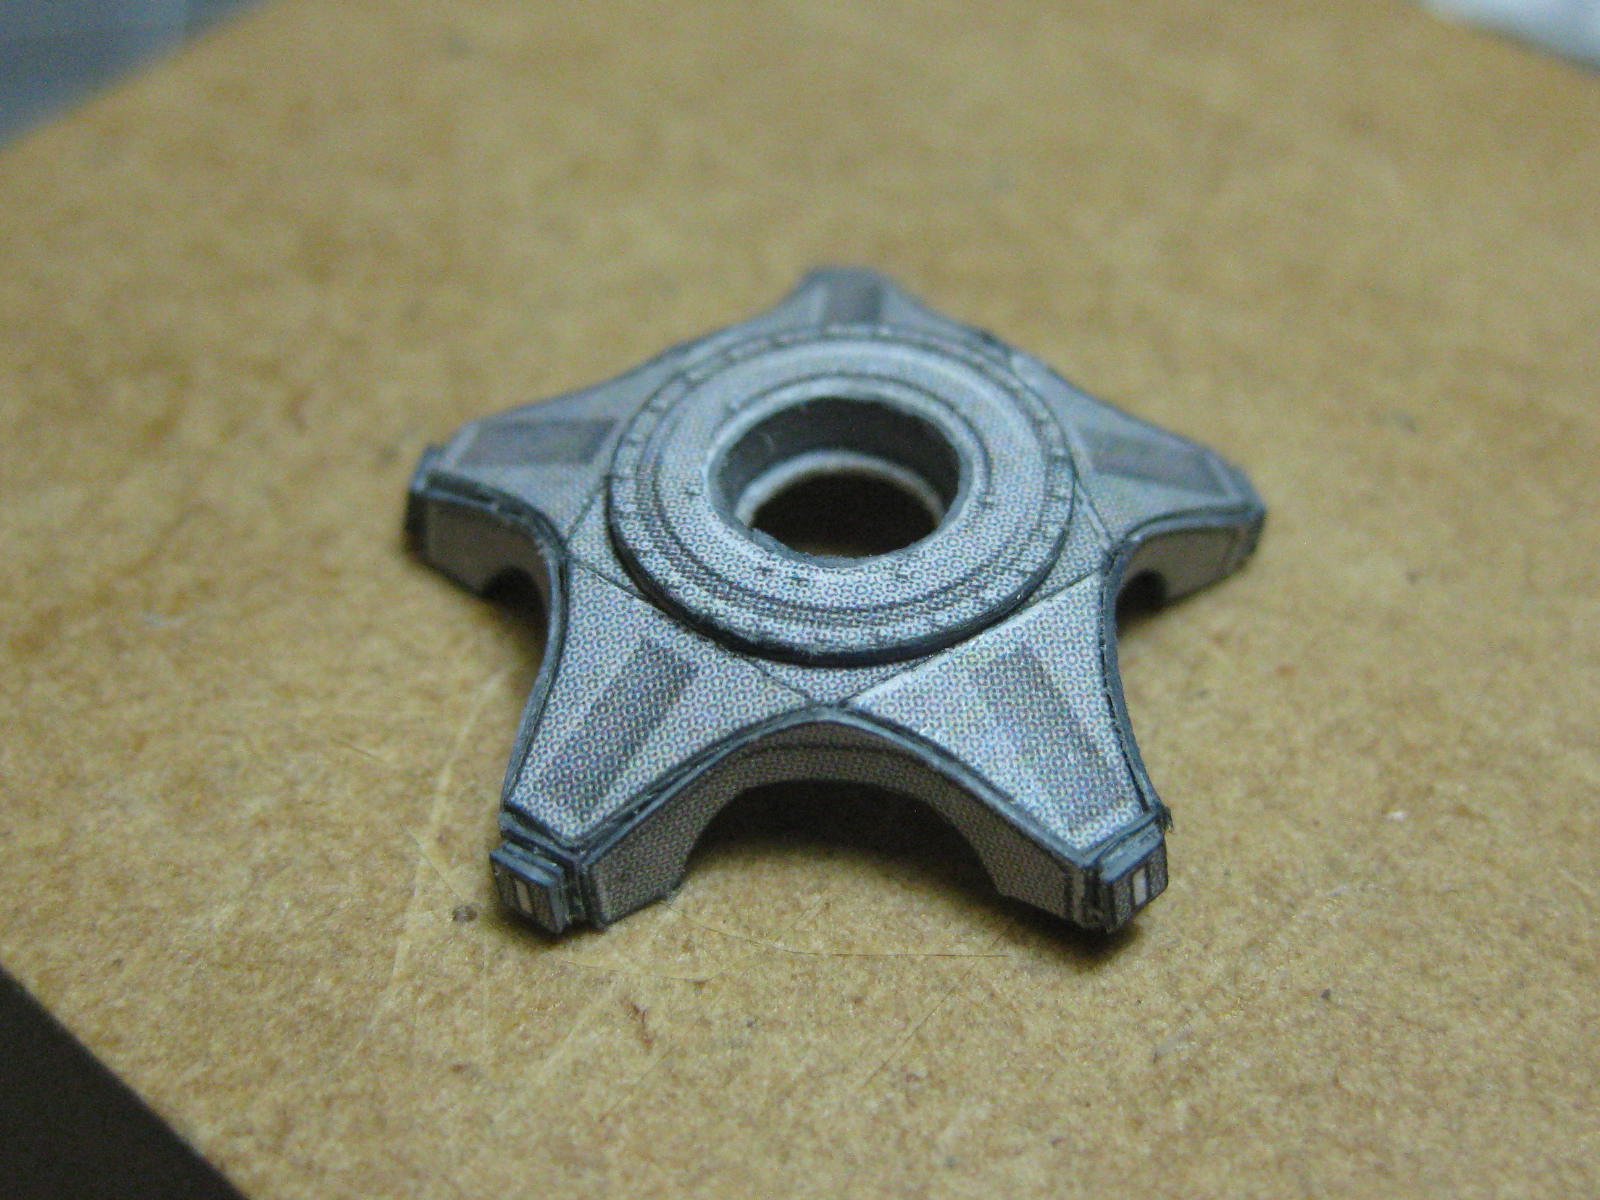
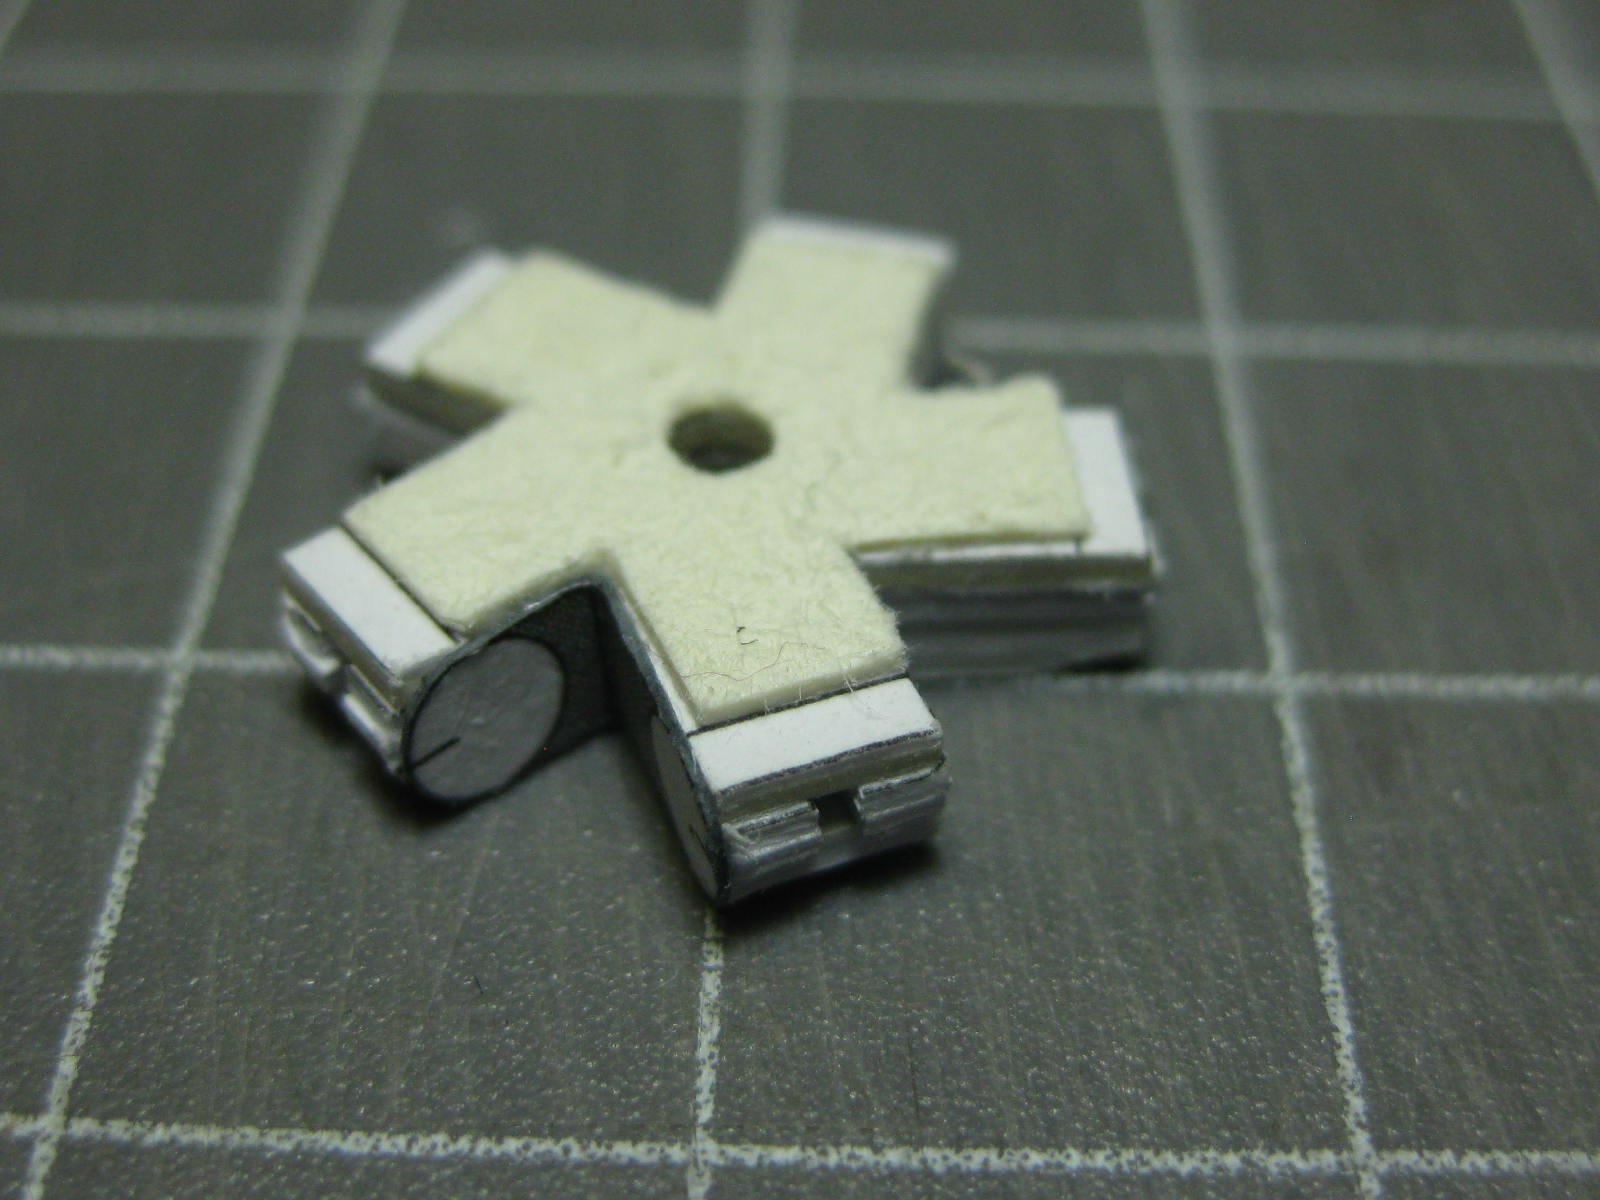
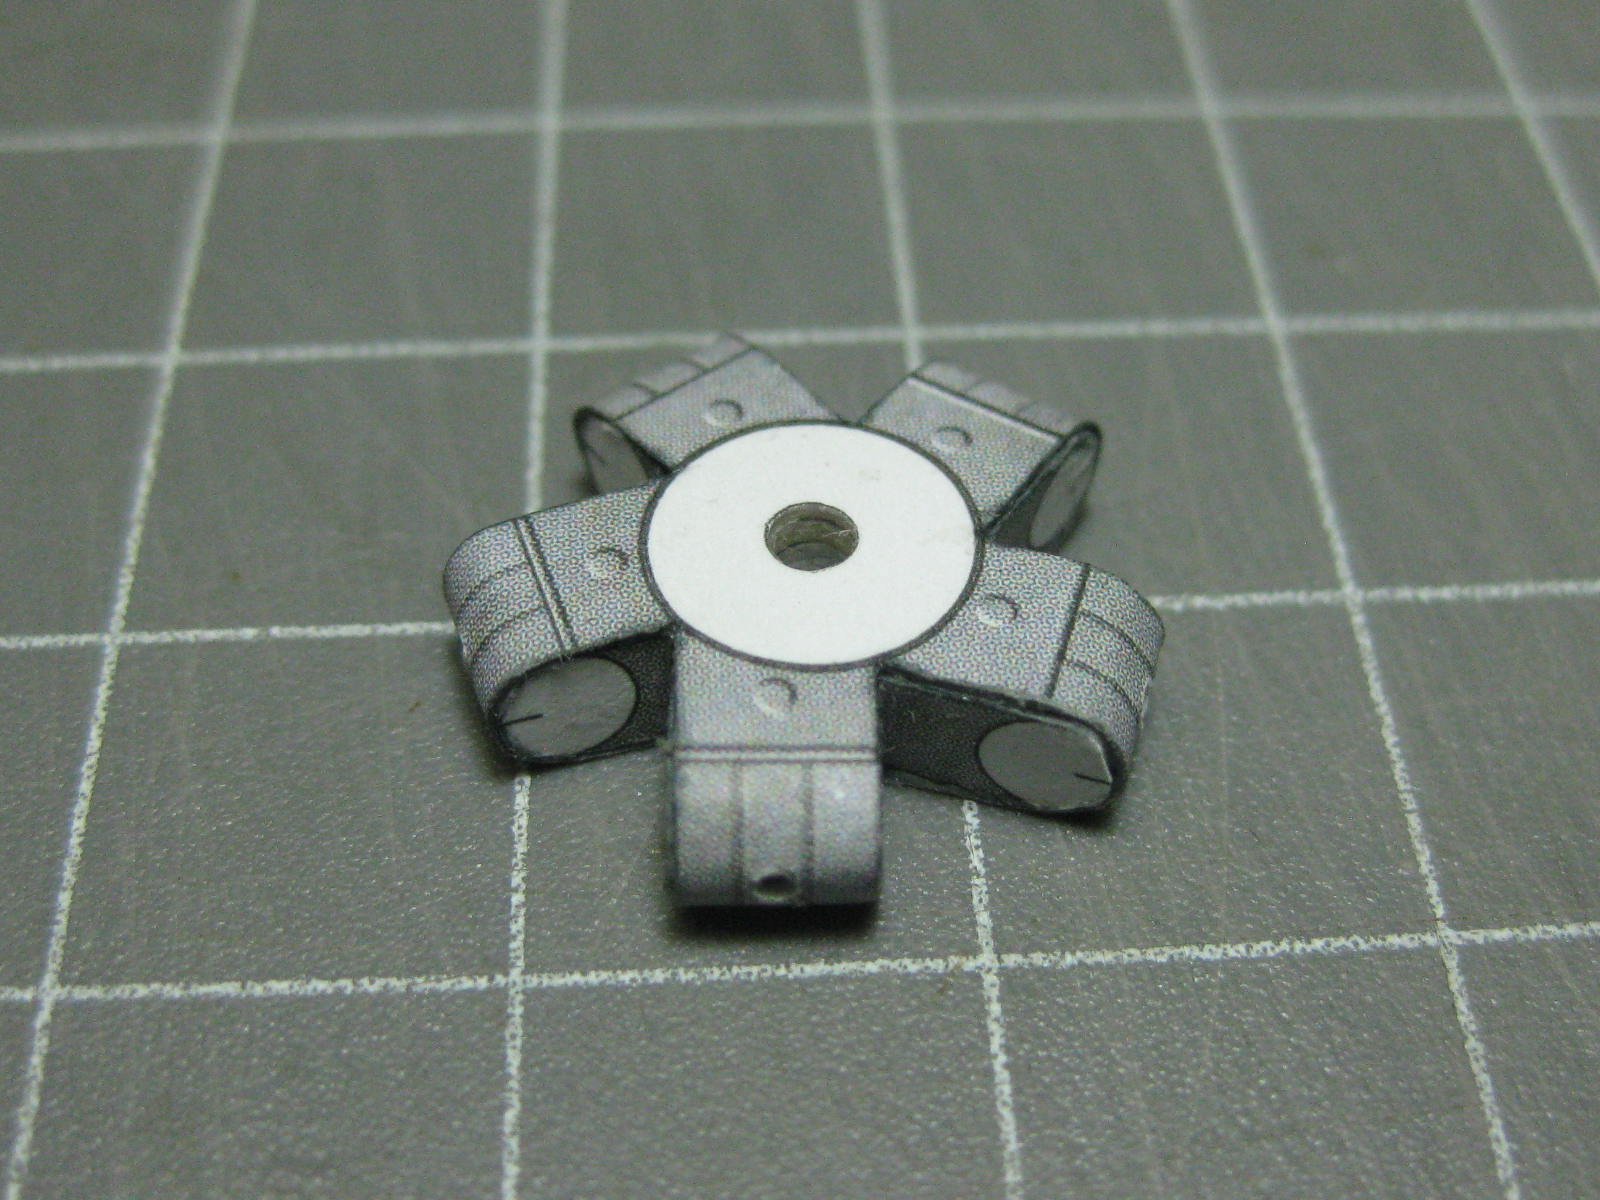
The top cap :
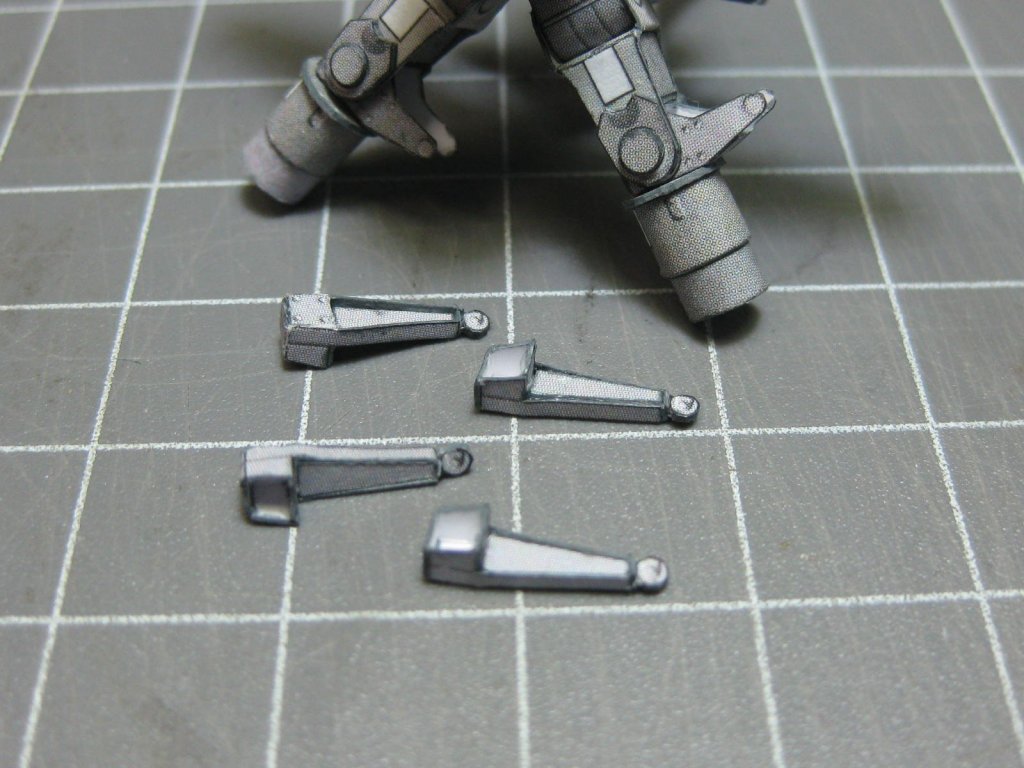
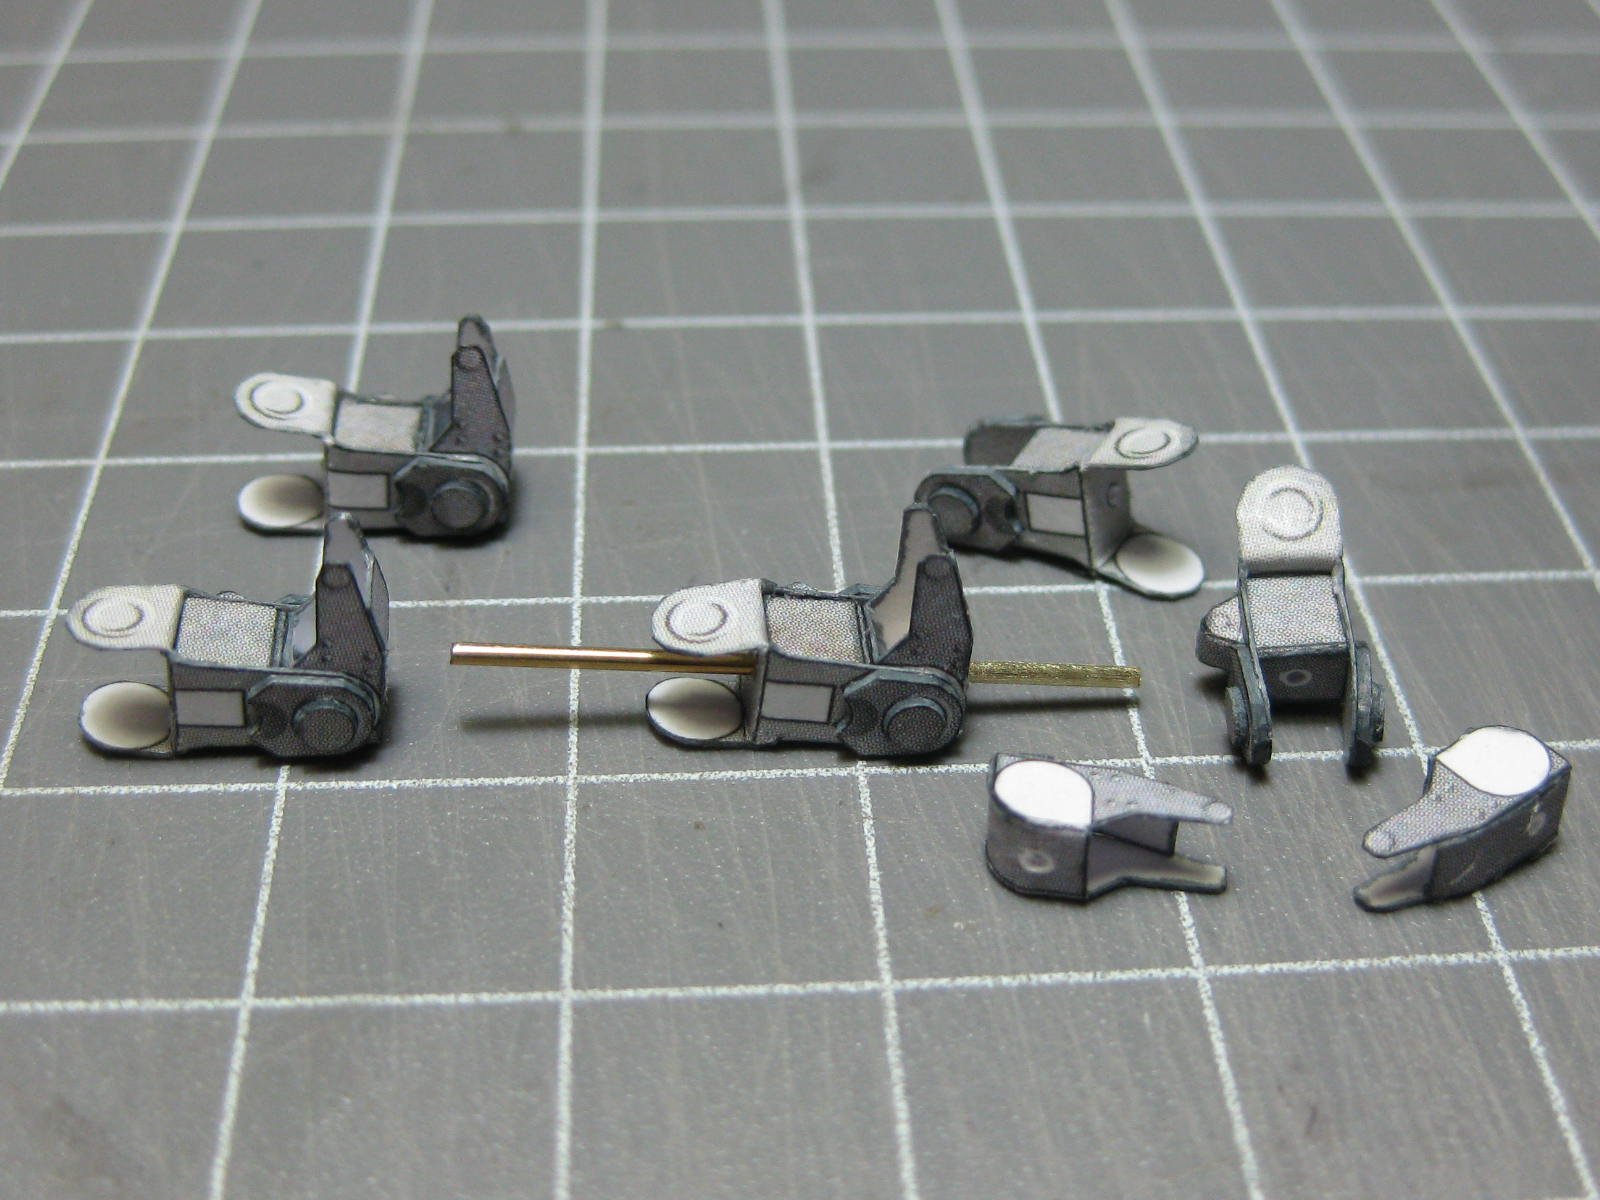
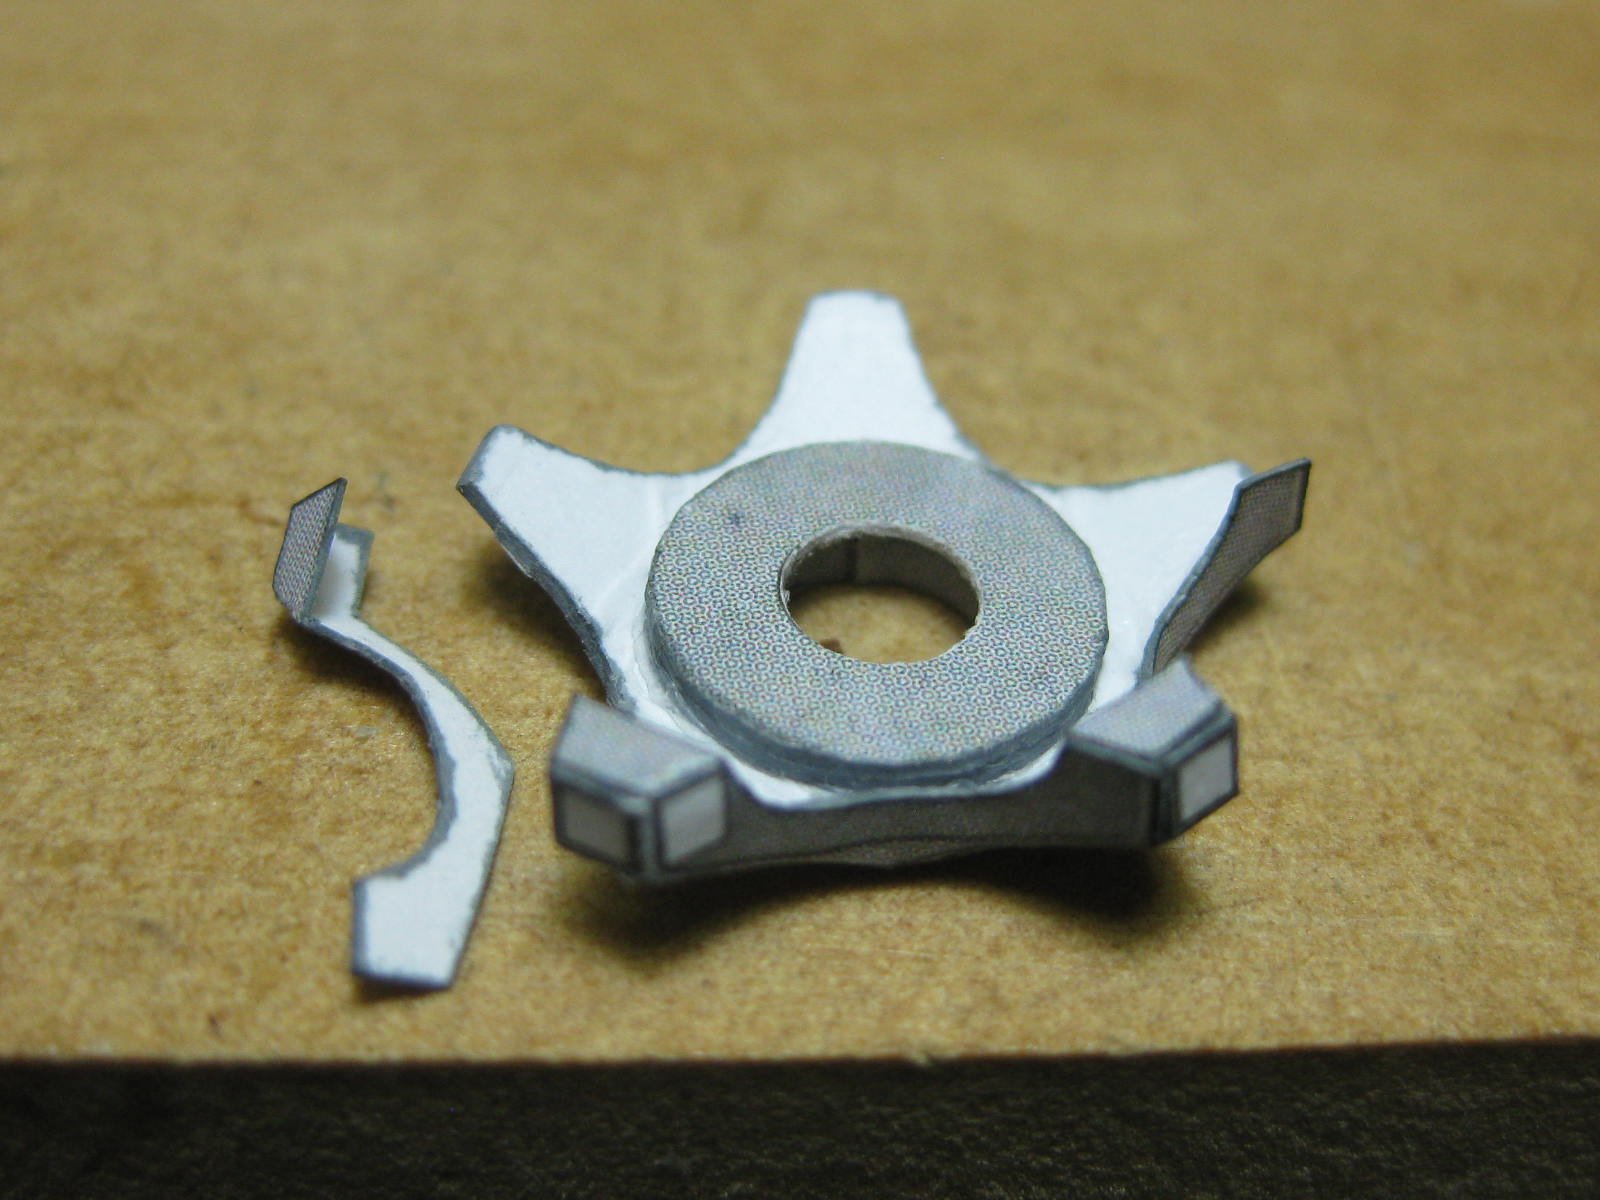
The five support arms. Once again I used a piece of wire to keep everything aligned while fitting :


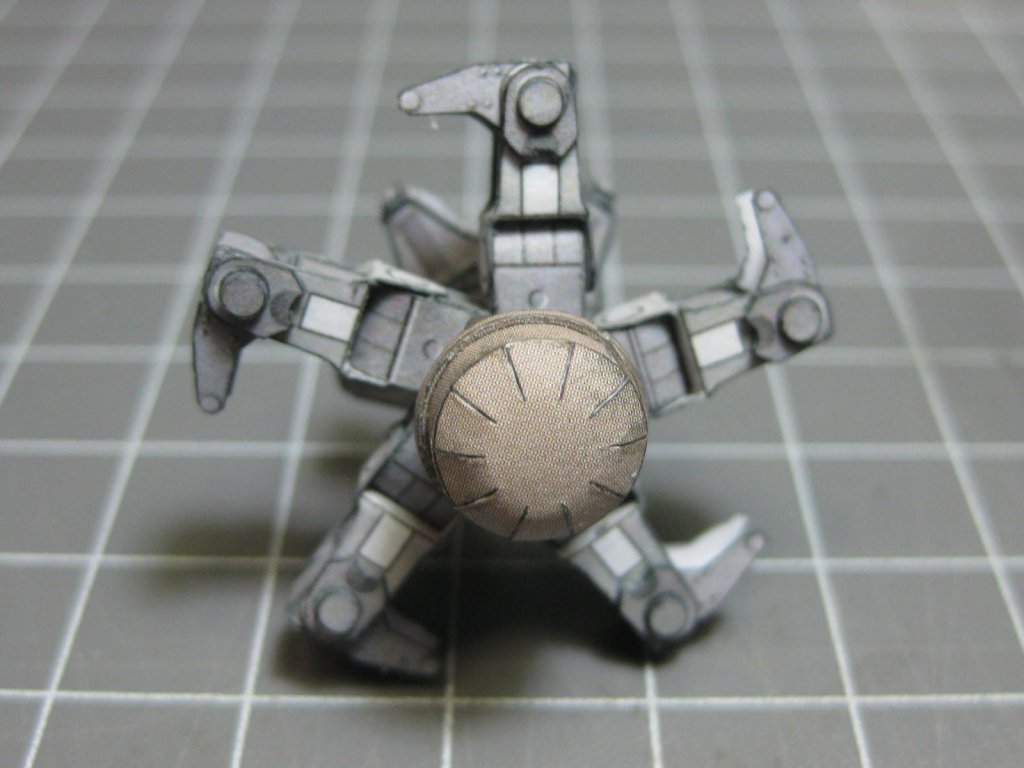
A control arm fitted to each support arm :
Danny
- GrandpaPhil, mtaylor, Canute and 6 others
-
9
-
4 hours ago, Candice said:
Any advice on easy DIY ways to hold the stern planks in place while they dry, apart from physically holding them while watching TV or something
A drop of strategically placed medium thickness CA glue can do the trick. Don't rely on it as a permanent glue though, use the PVA glue as normal. A little experimentation may be needed.
Danny
- mtaylor and BLACK VIKING
-
2
-
On 7/31/2019 at 10:48 PM, rwiederrich said:
I'm sure it will be loved by the Admiral and will find a place of honor.
Rob
I took it to her place this morning - she's stoked with it
. She's giving it to her grandson who's name happens to be ......... (drum roll) ........ BYRON .
Thanks for the comments guys
. Now it's back to the Hind helicopter.
Danny
- Altduck, Canute, paulsutcliffe and 1 other
-
4
-
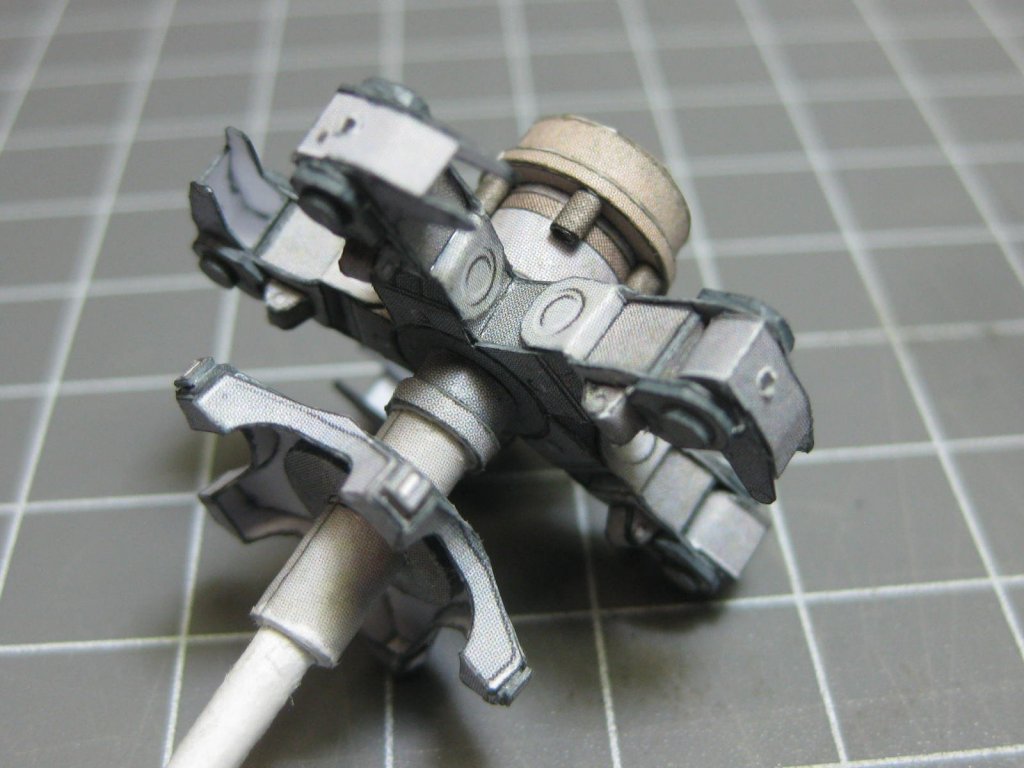
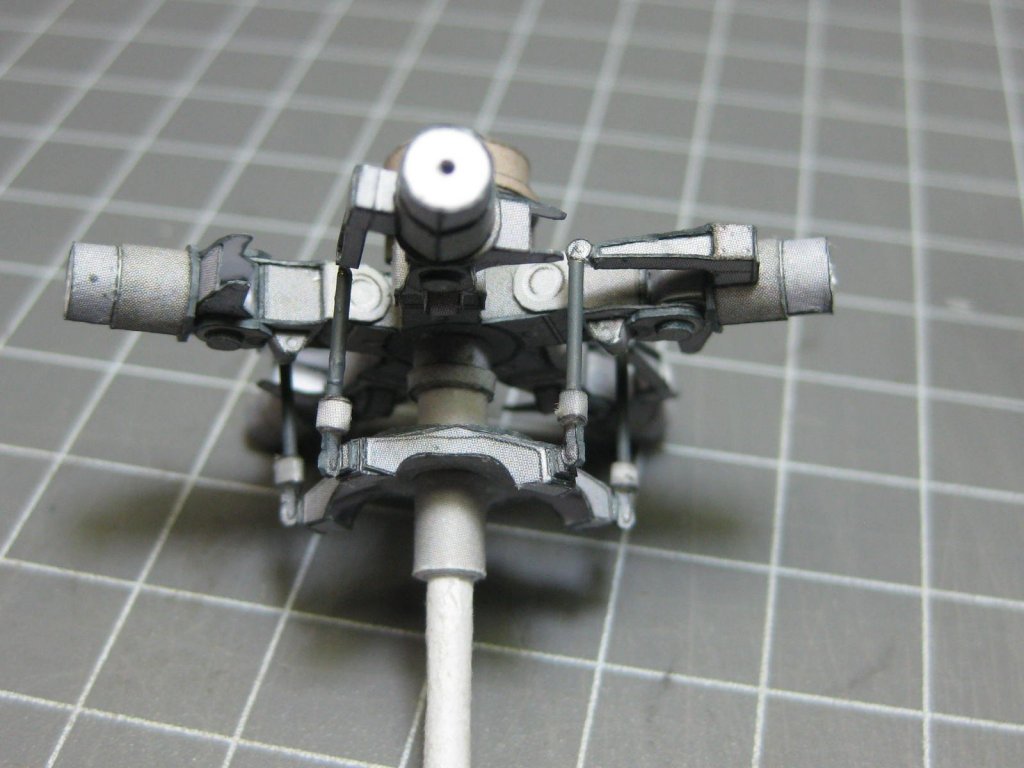
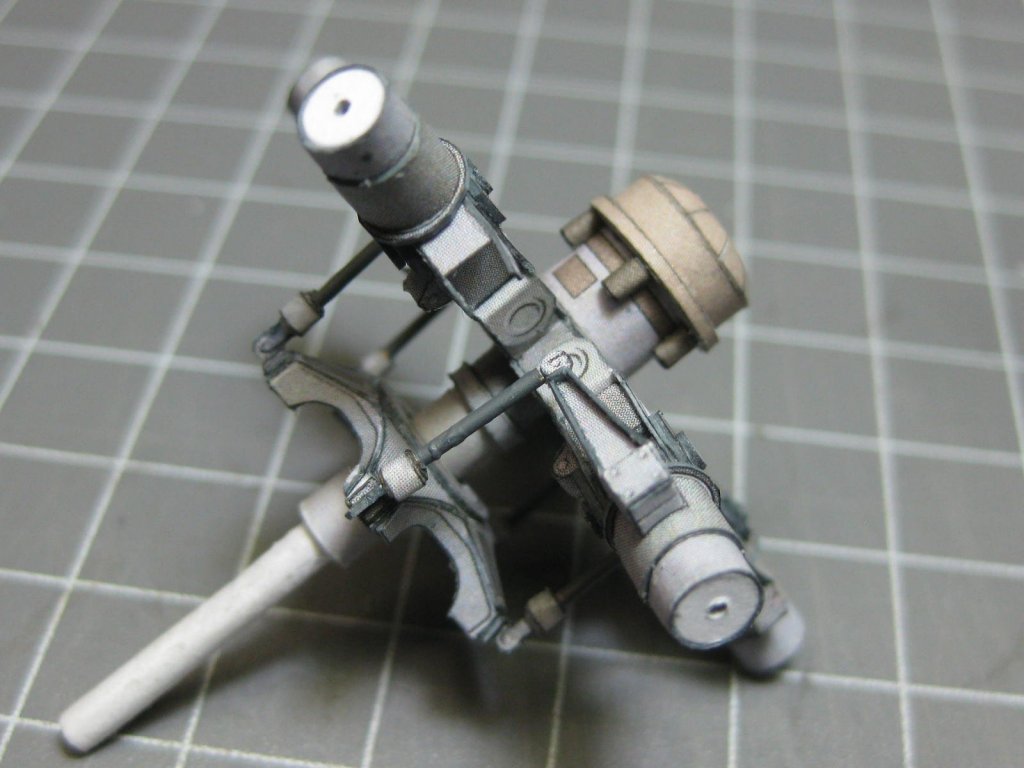
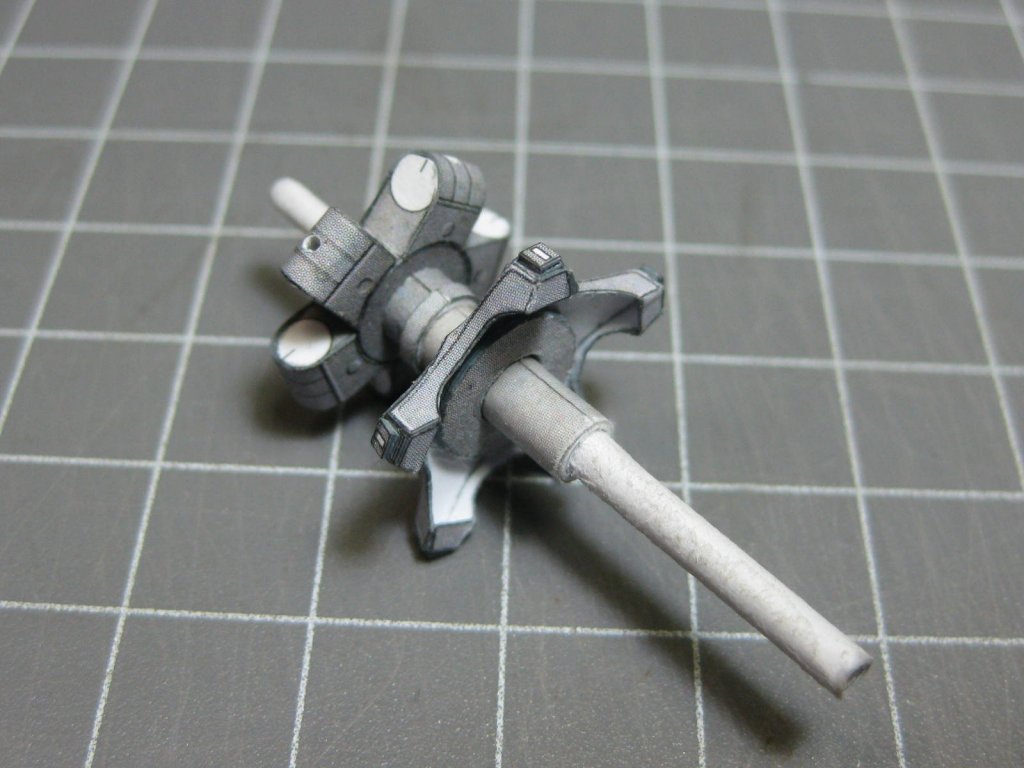
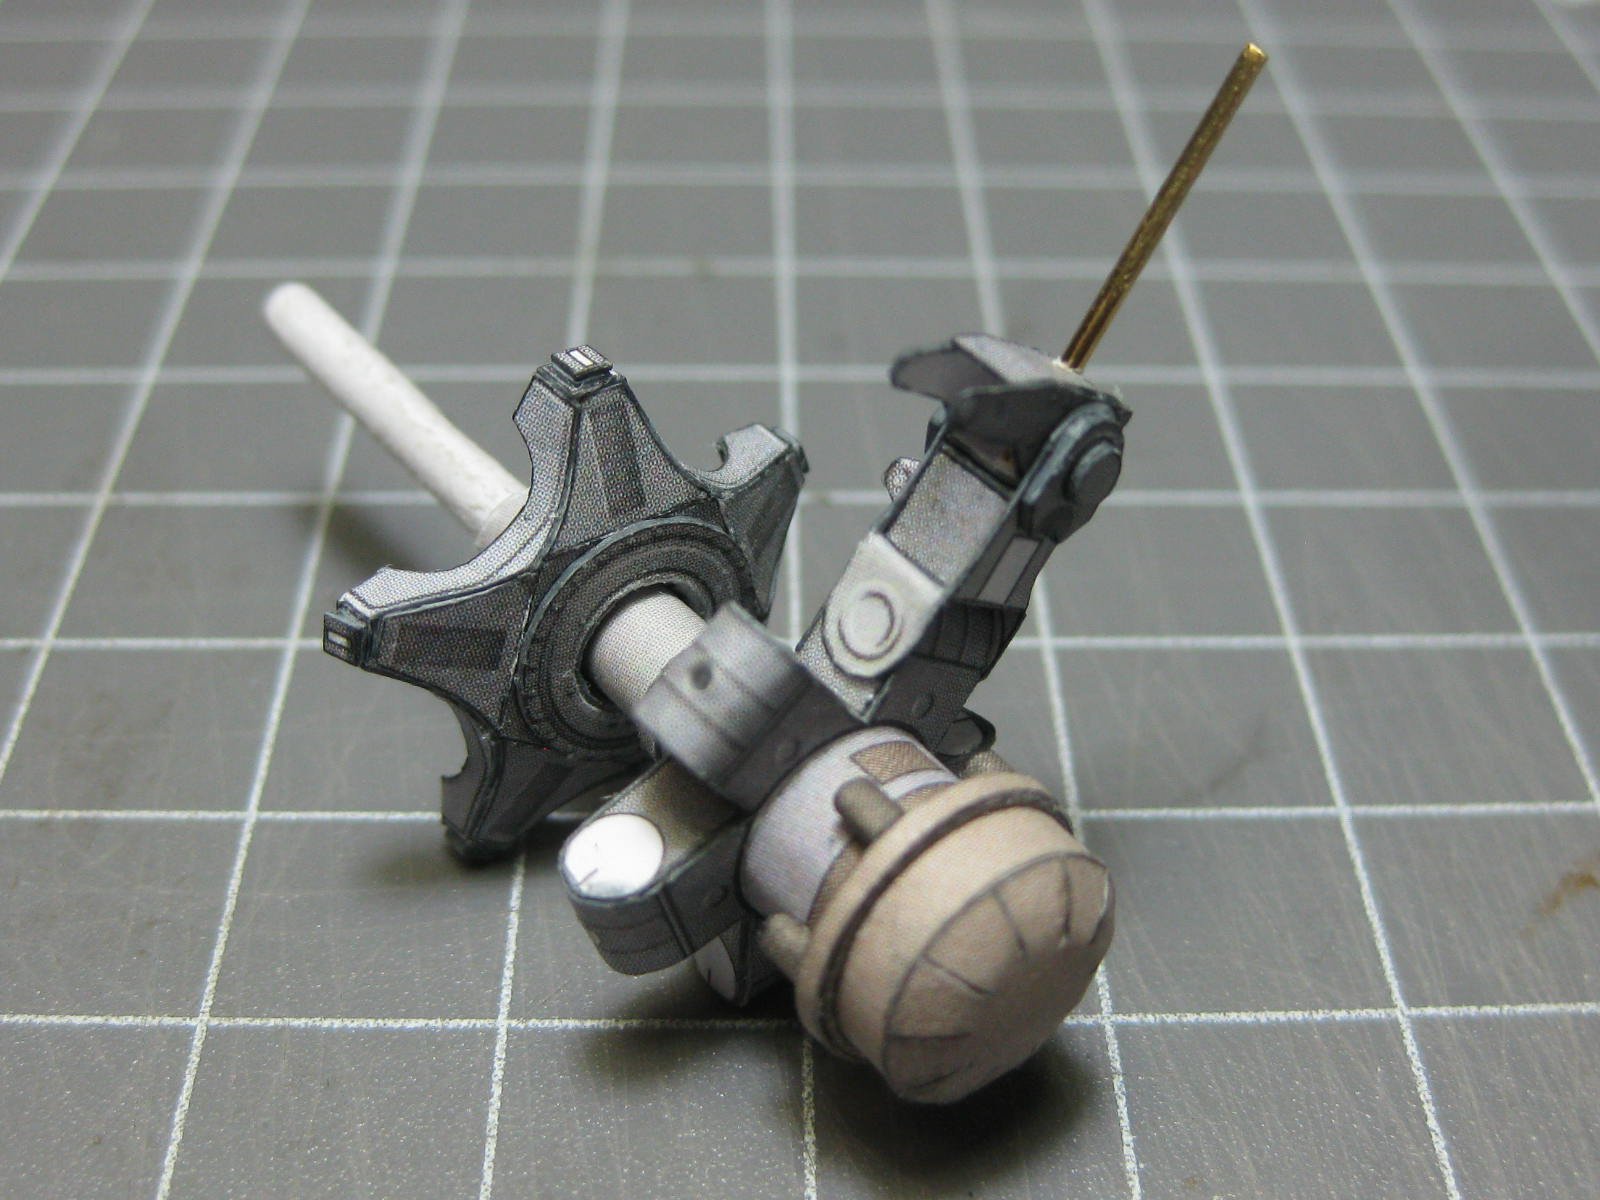
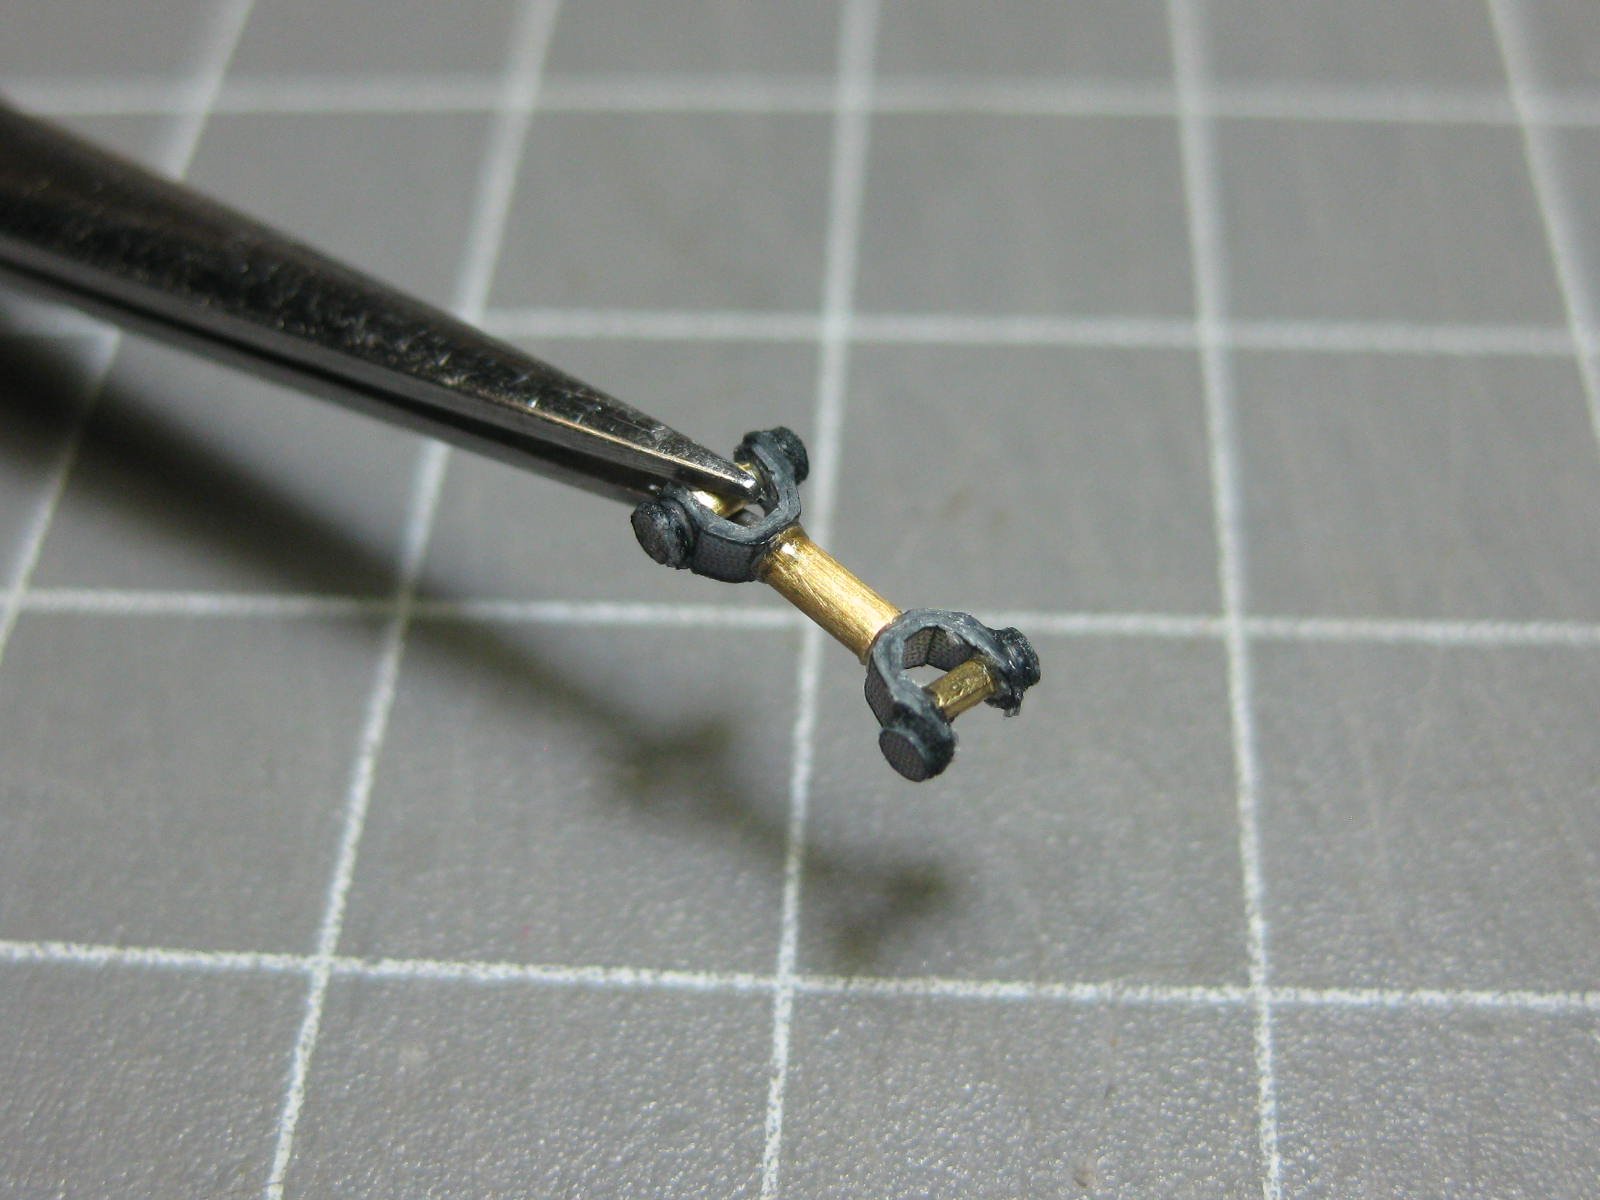
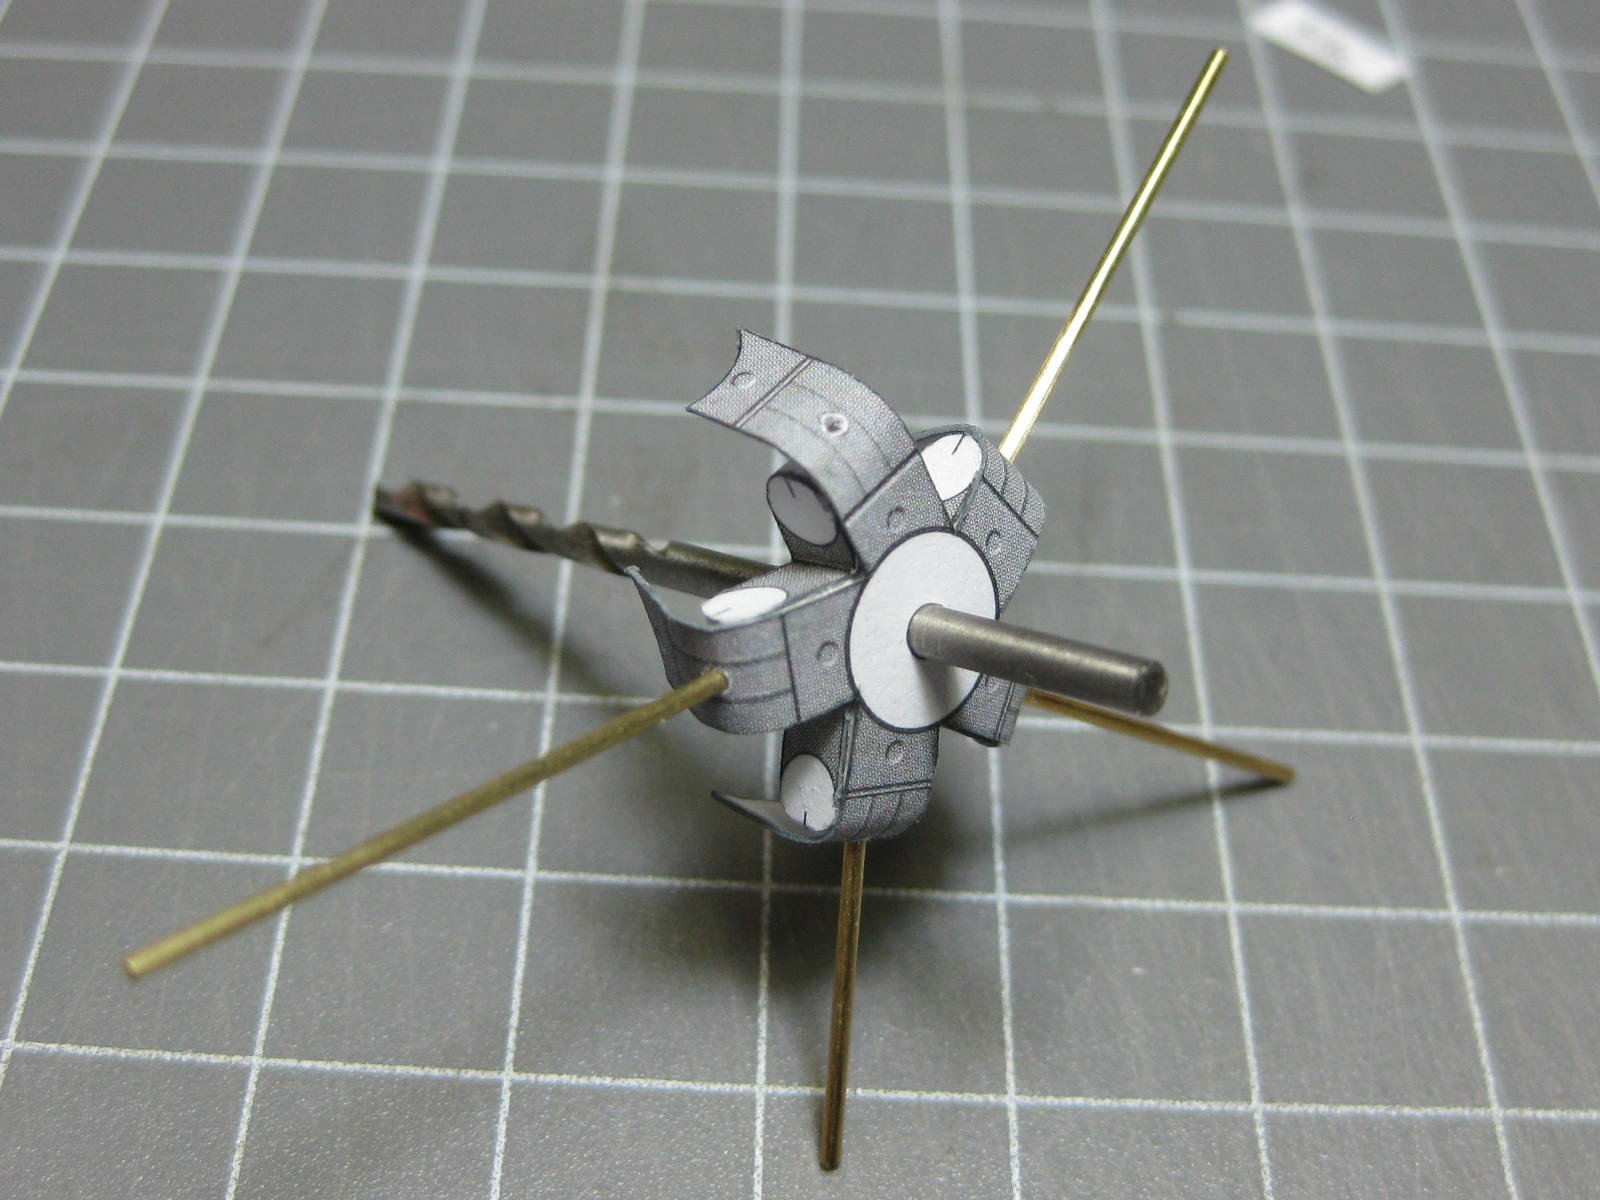
Now for a REAL fun bit - the control system for the main rotor. Here are most of the parts :
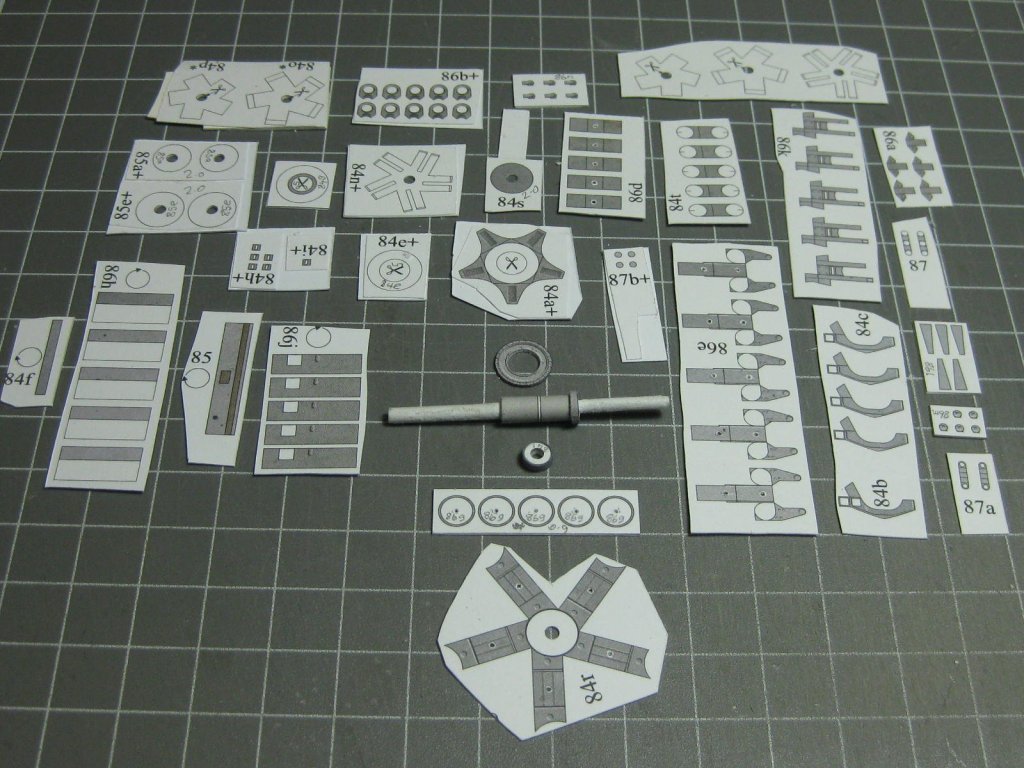
The lower part :

A "drive shaft" part which controls the angle :
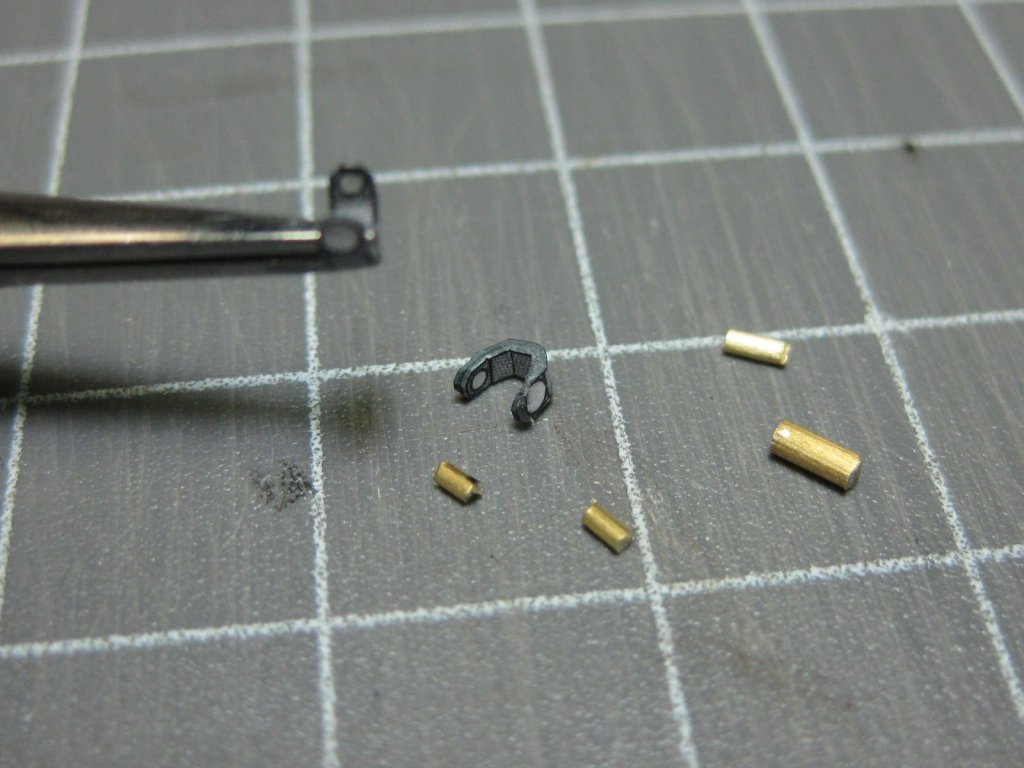
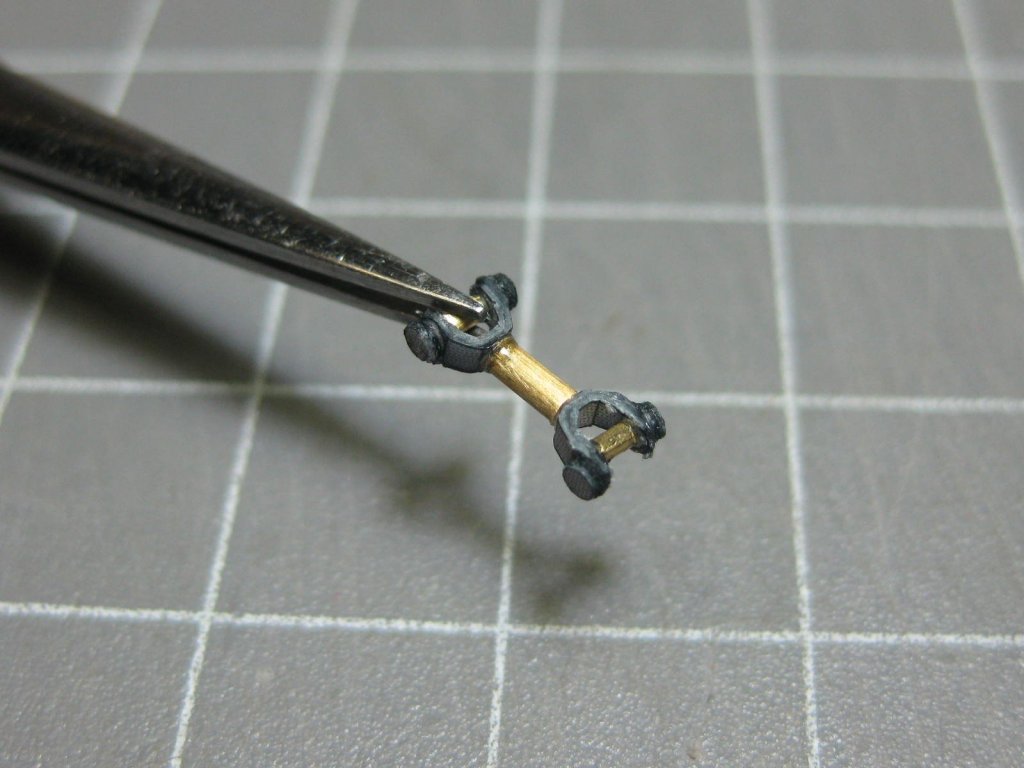
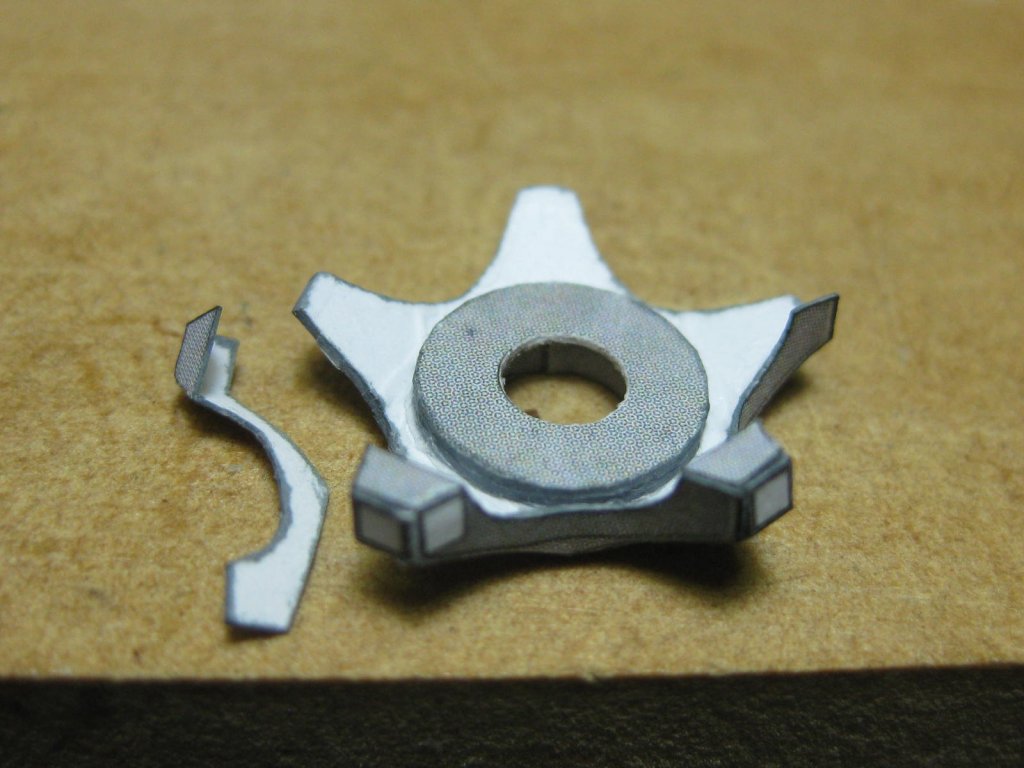
The upper part. I used a 2mm punch to keep the centres aligned while gluing the pieces together :

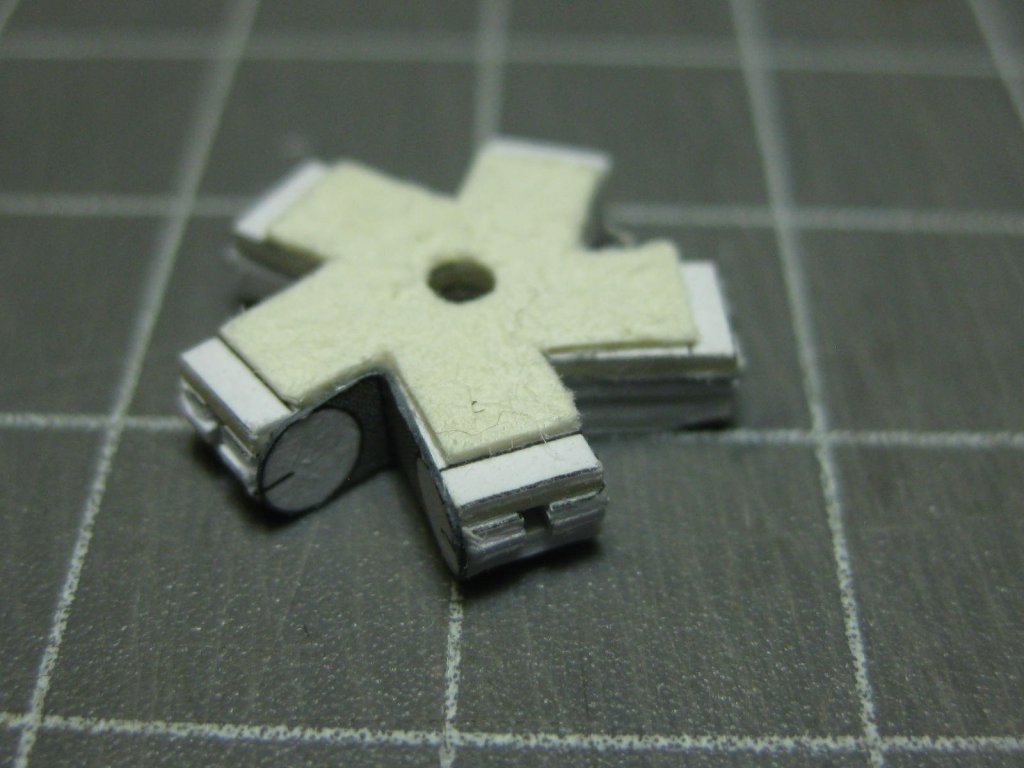
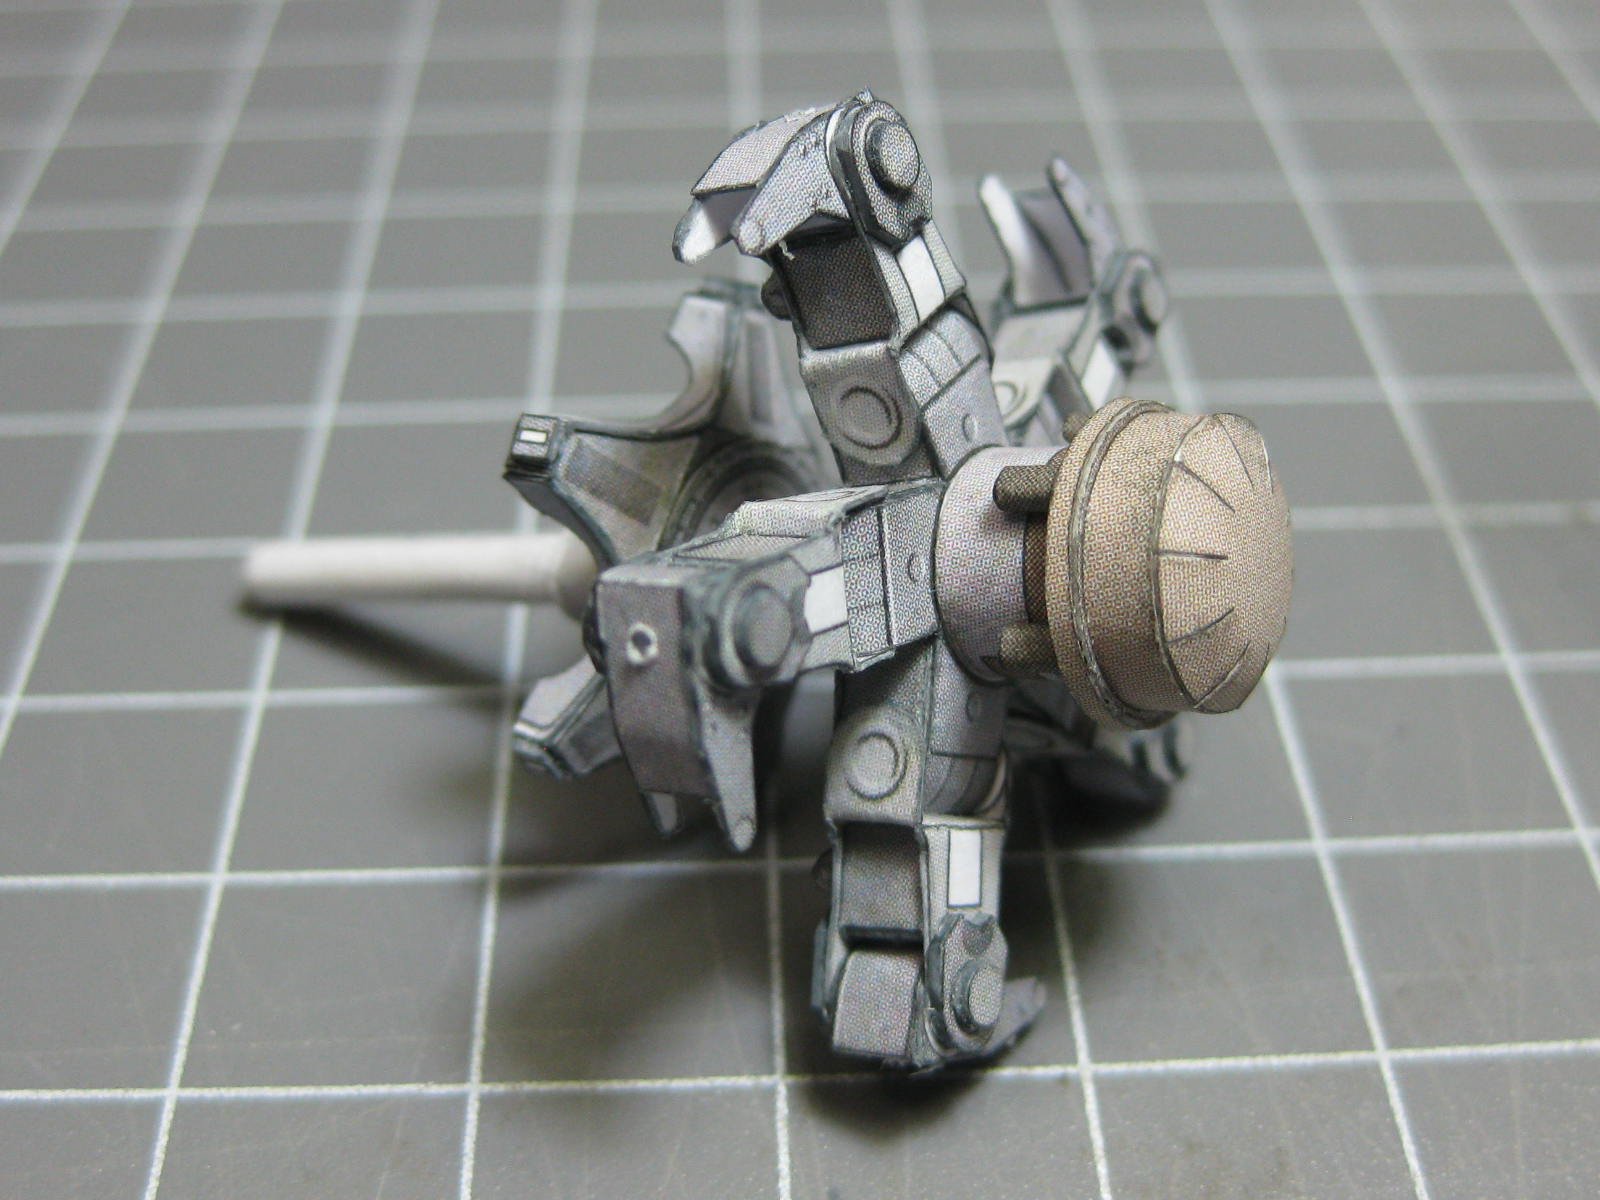
The upper and lower parts fitted to the main shaft :
Danny
-
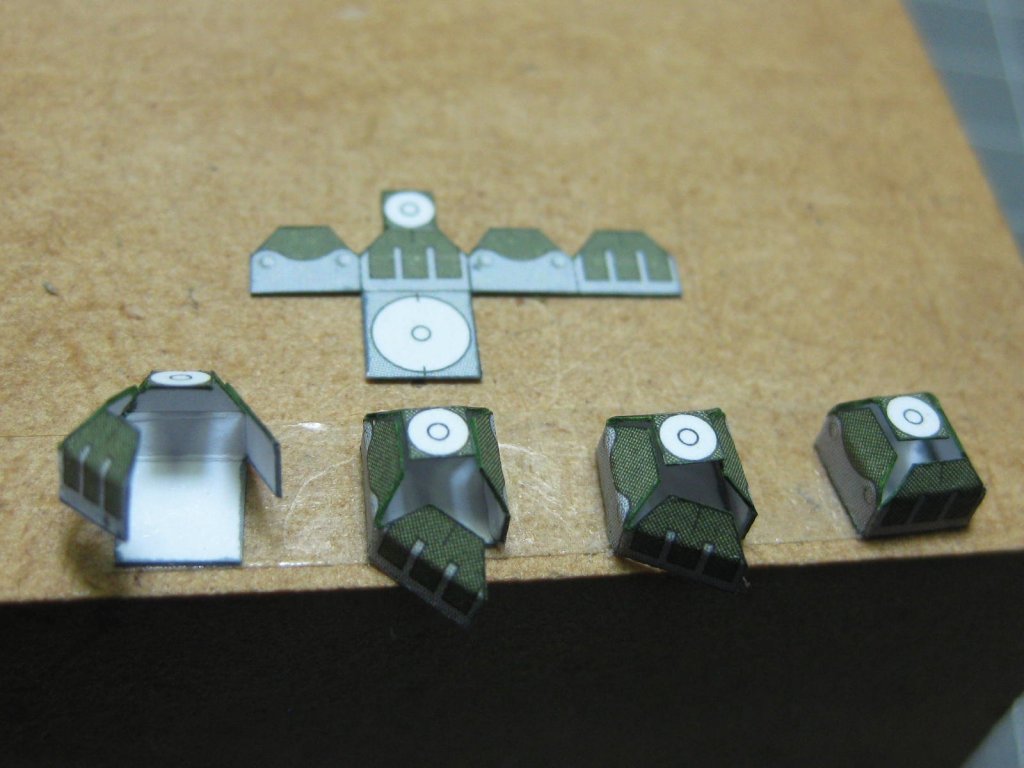
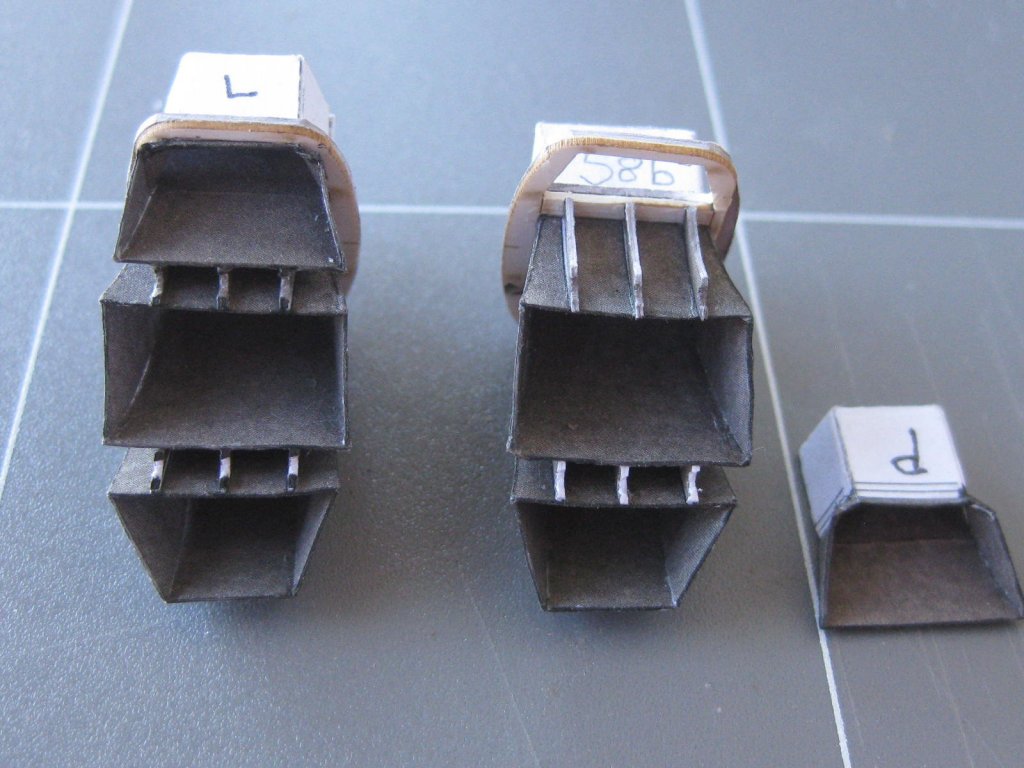
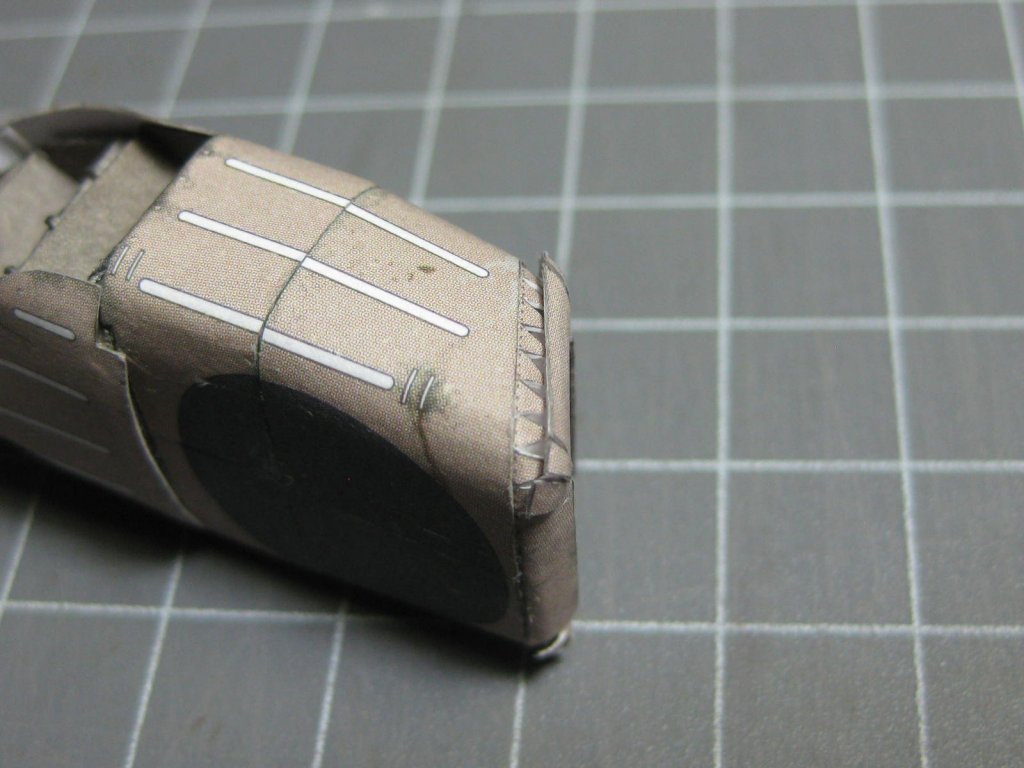
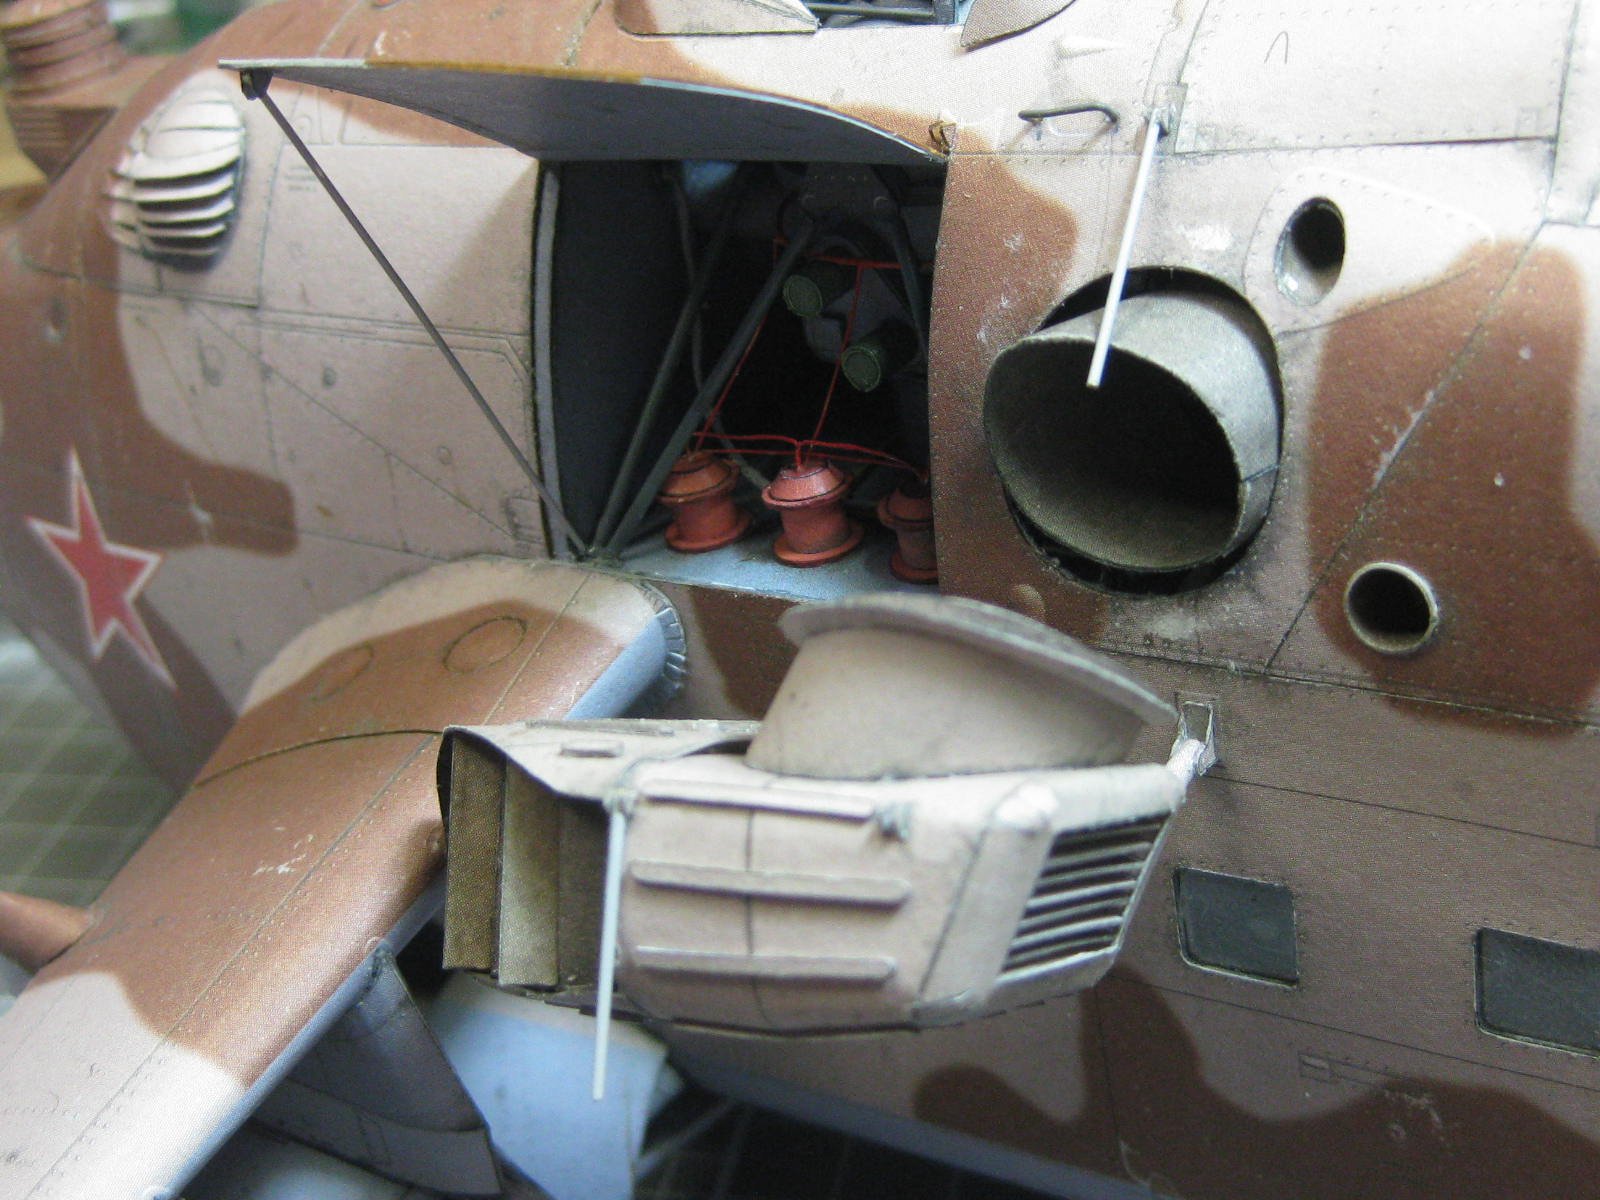
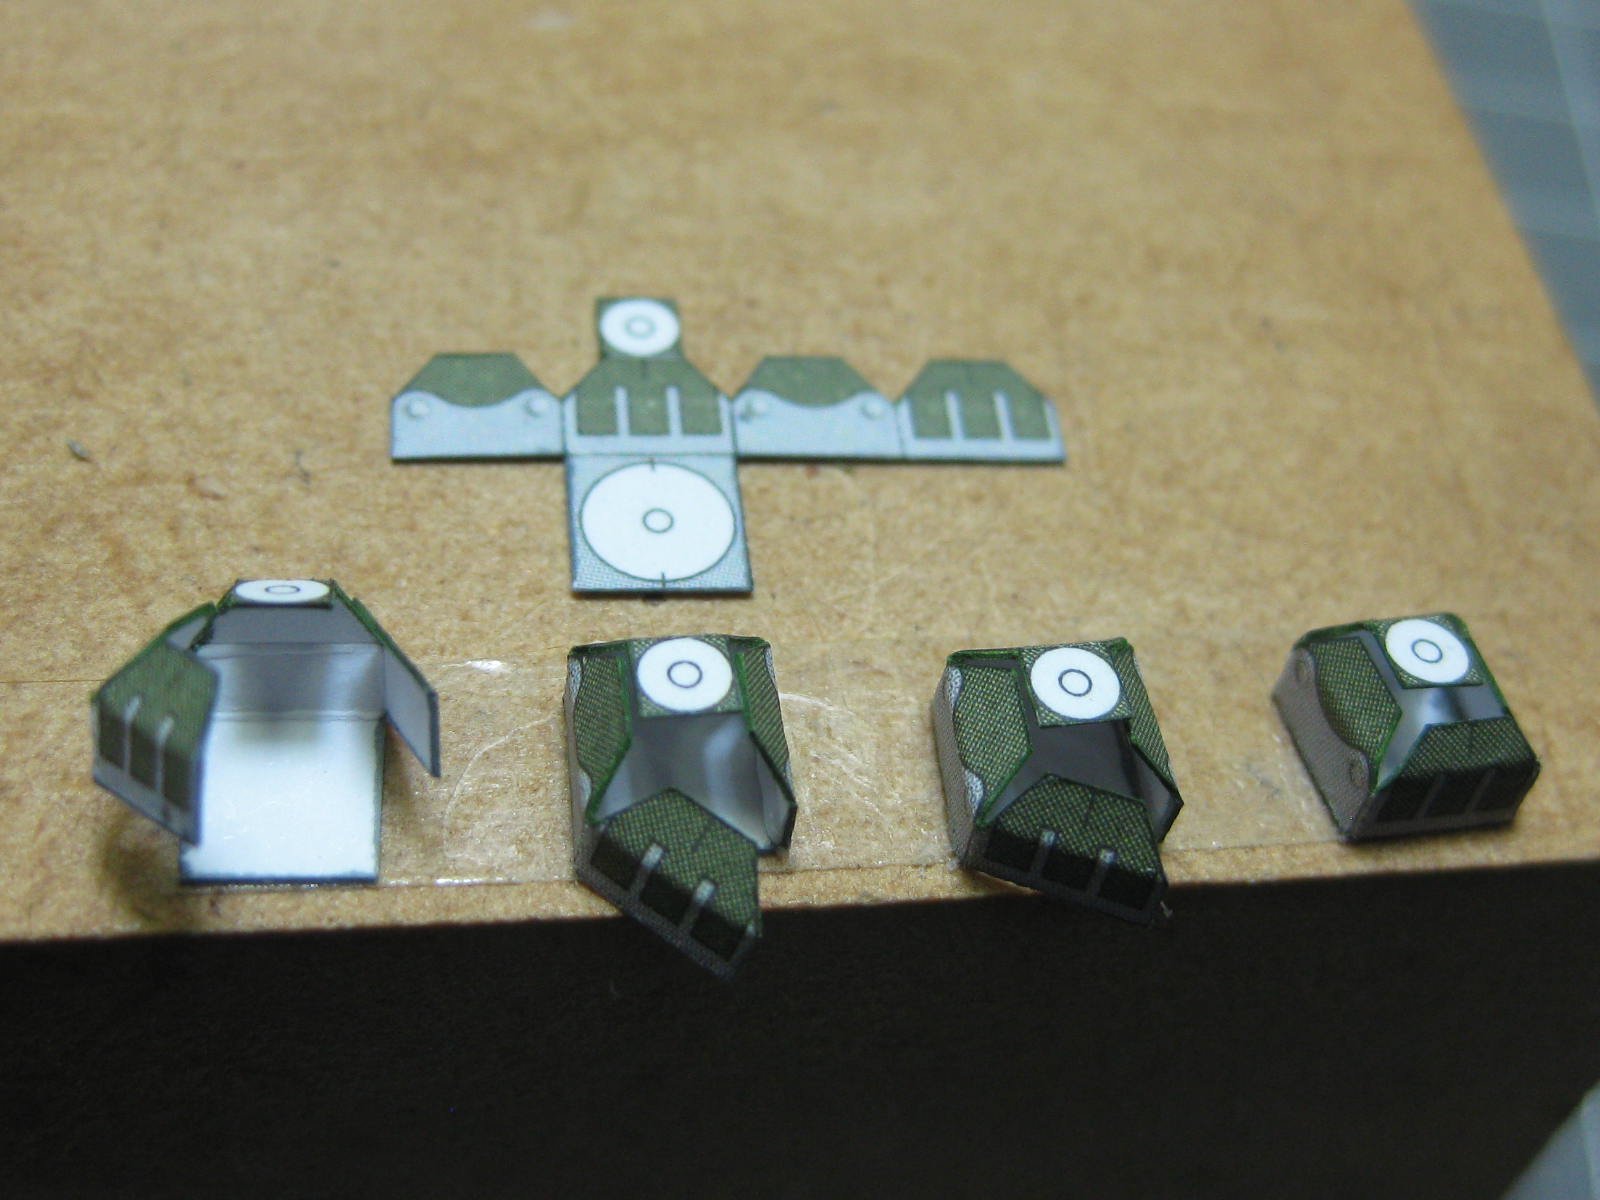
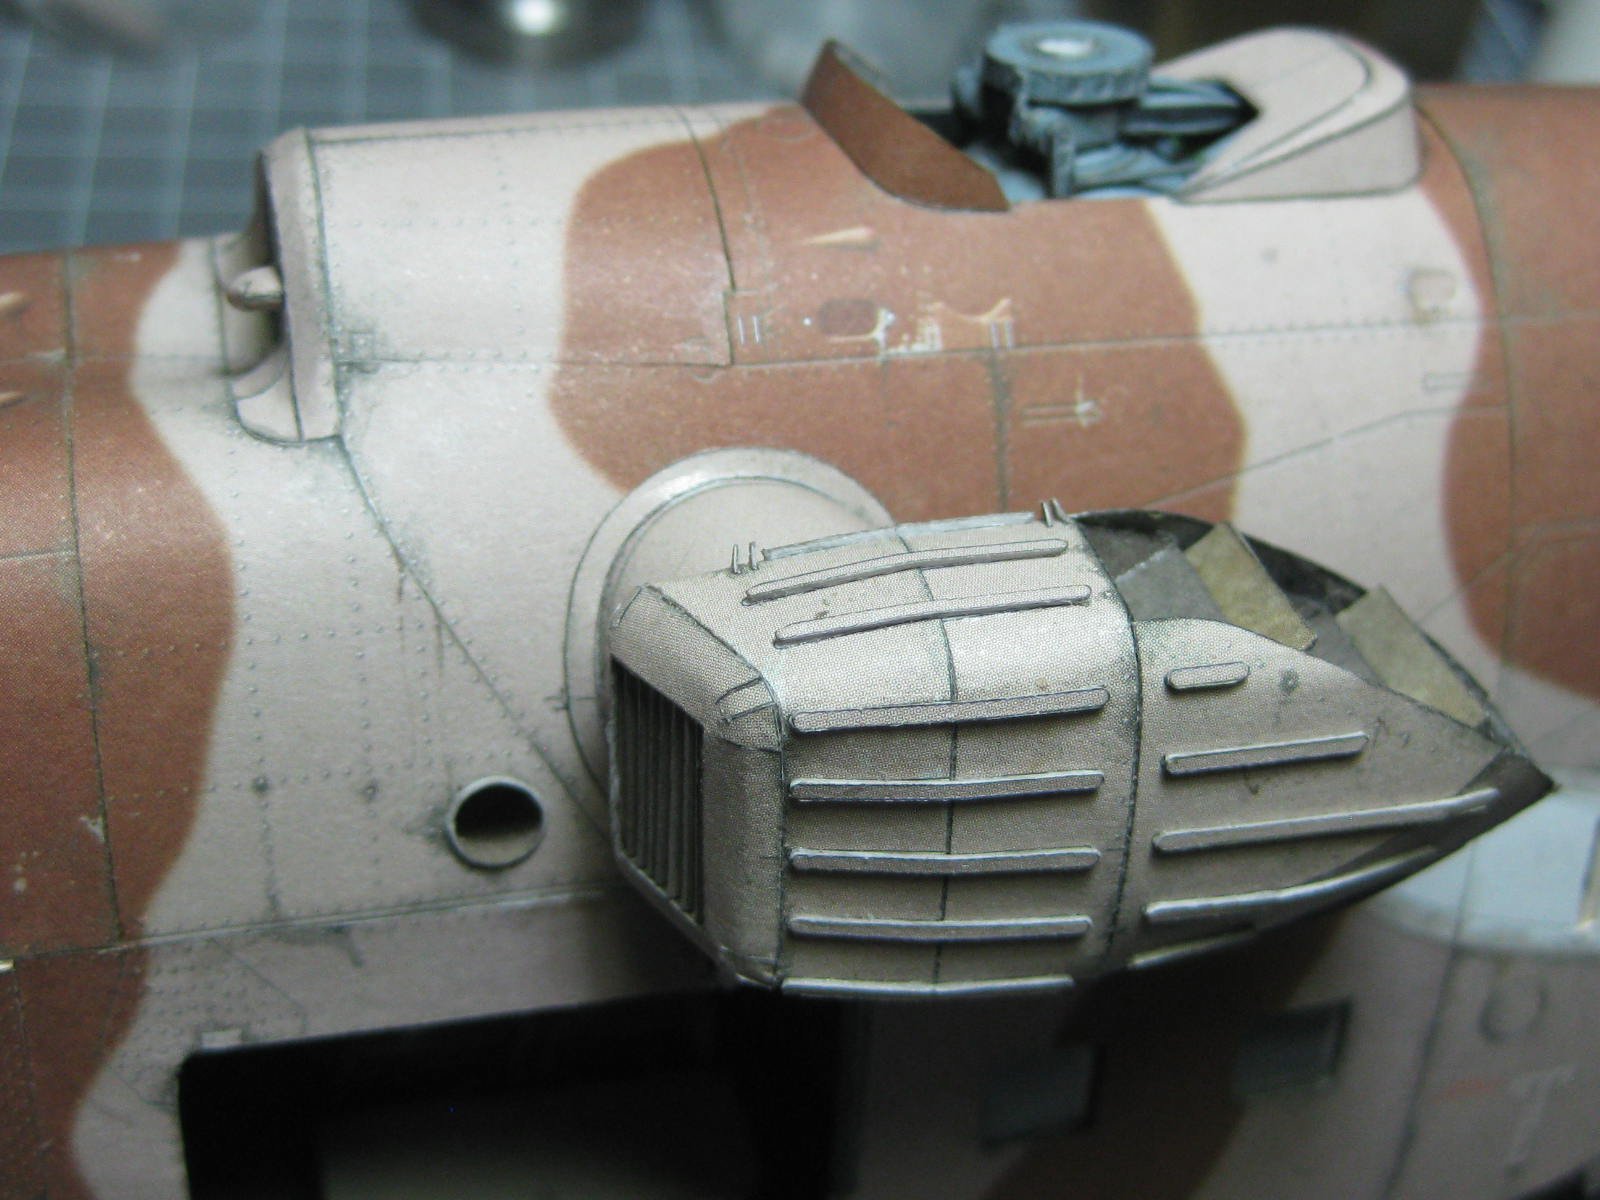
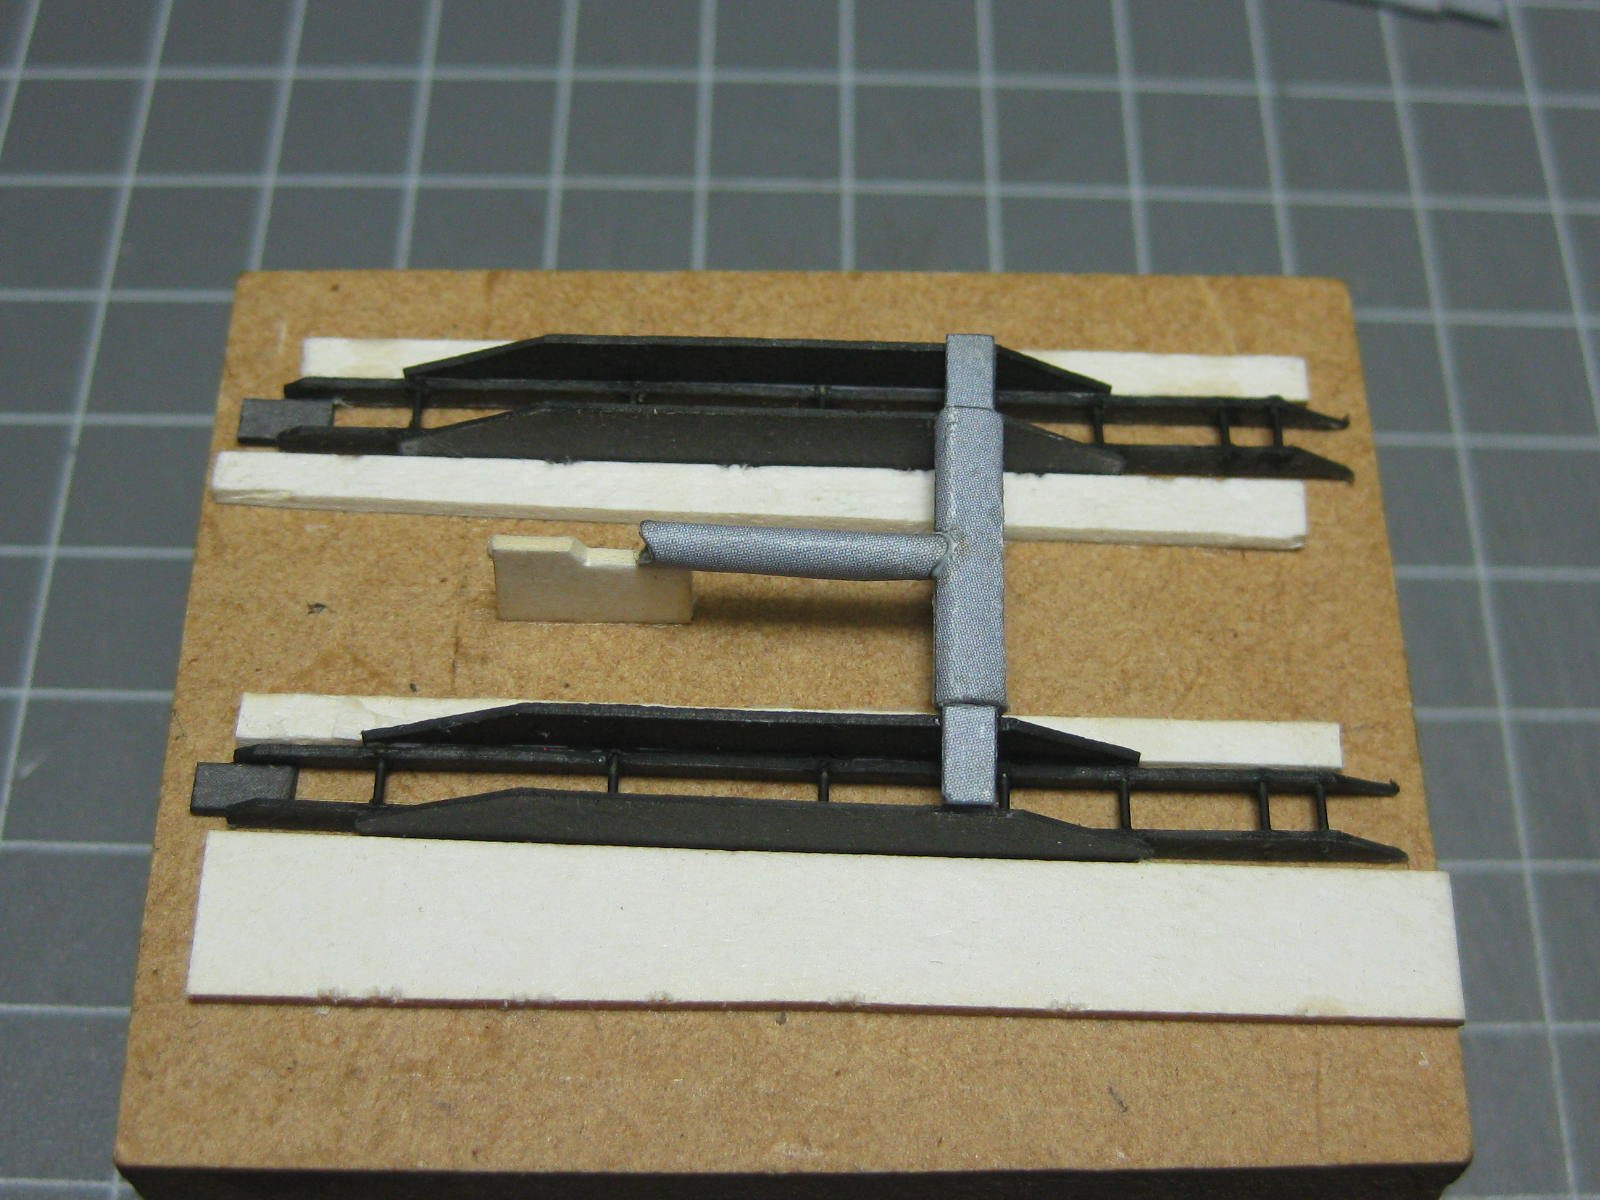
The final pieces of the exhaust coolers are two flanges :
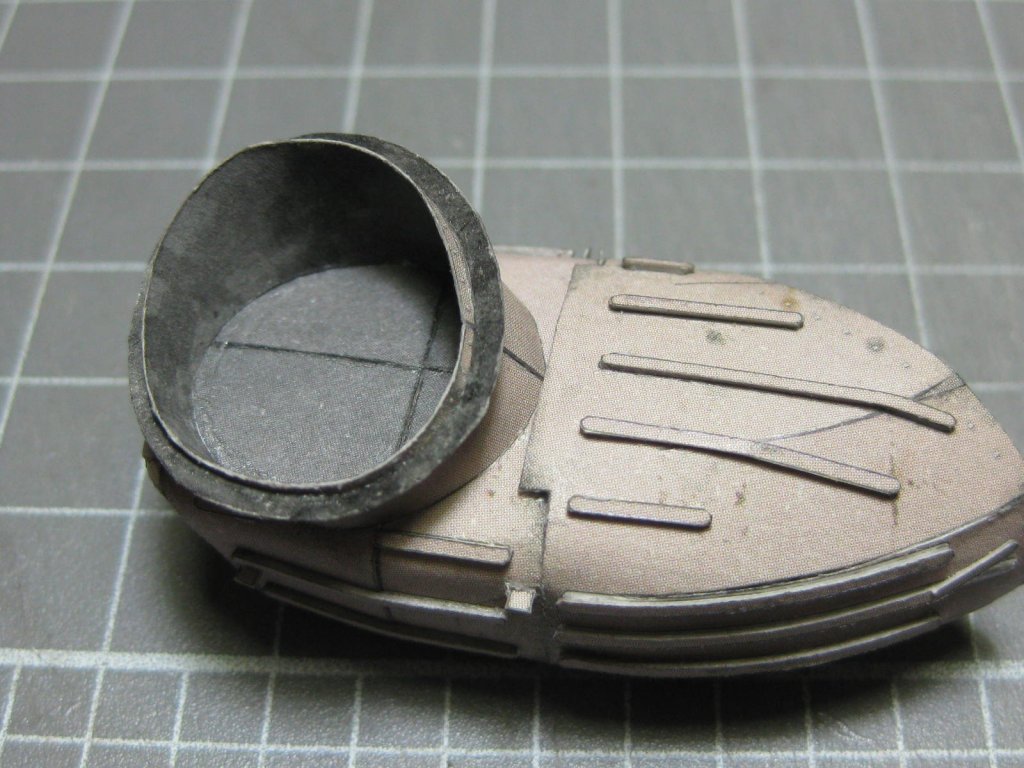
The coolers fitted. I'll fit the right side one later, as it will be in the lowered position :


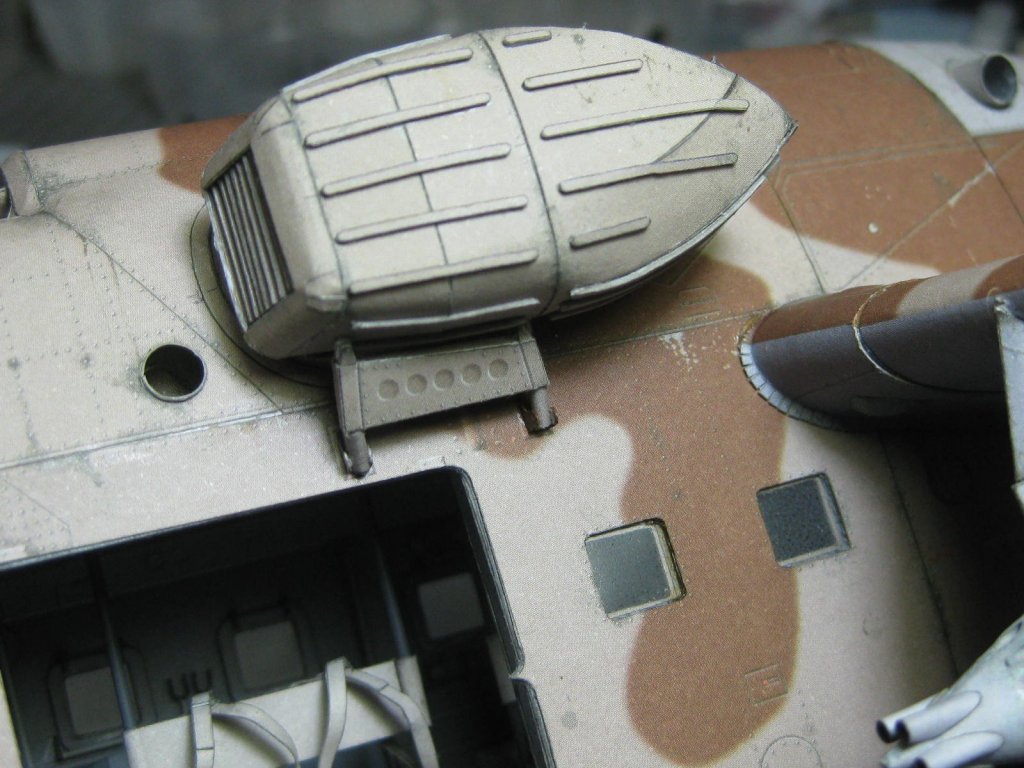
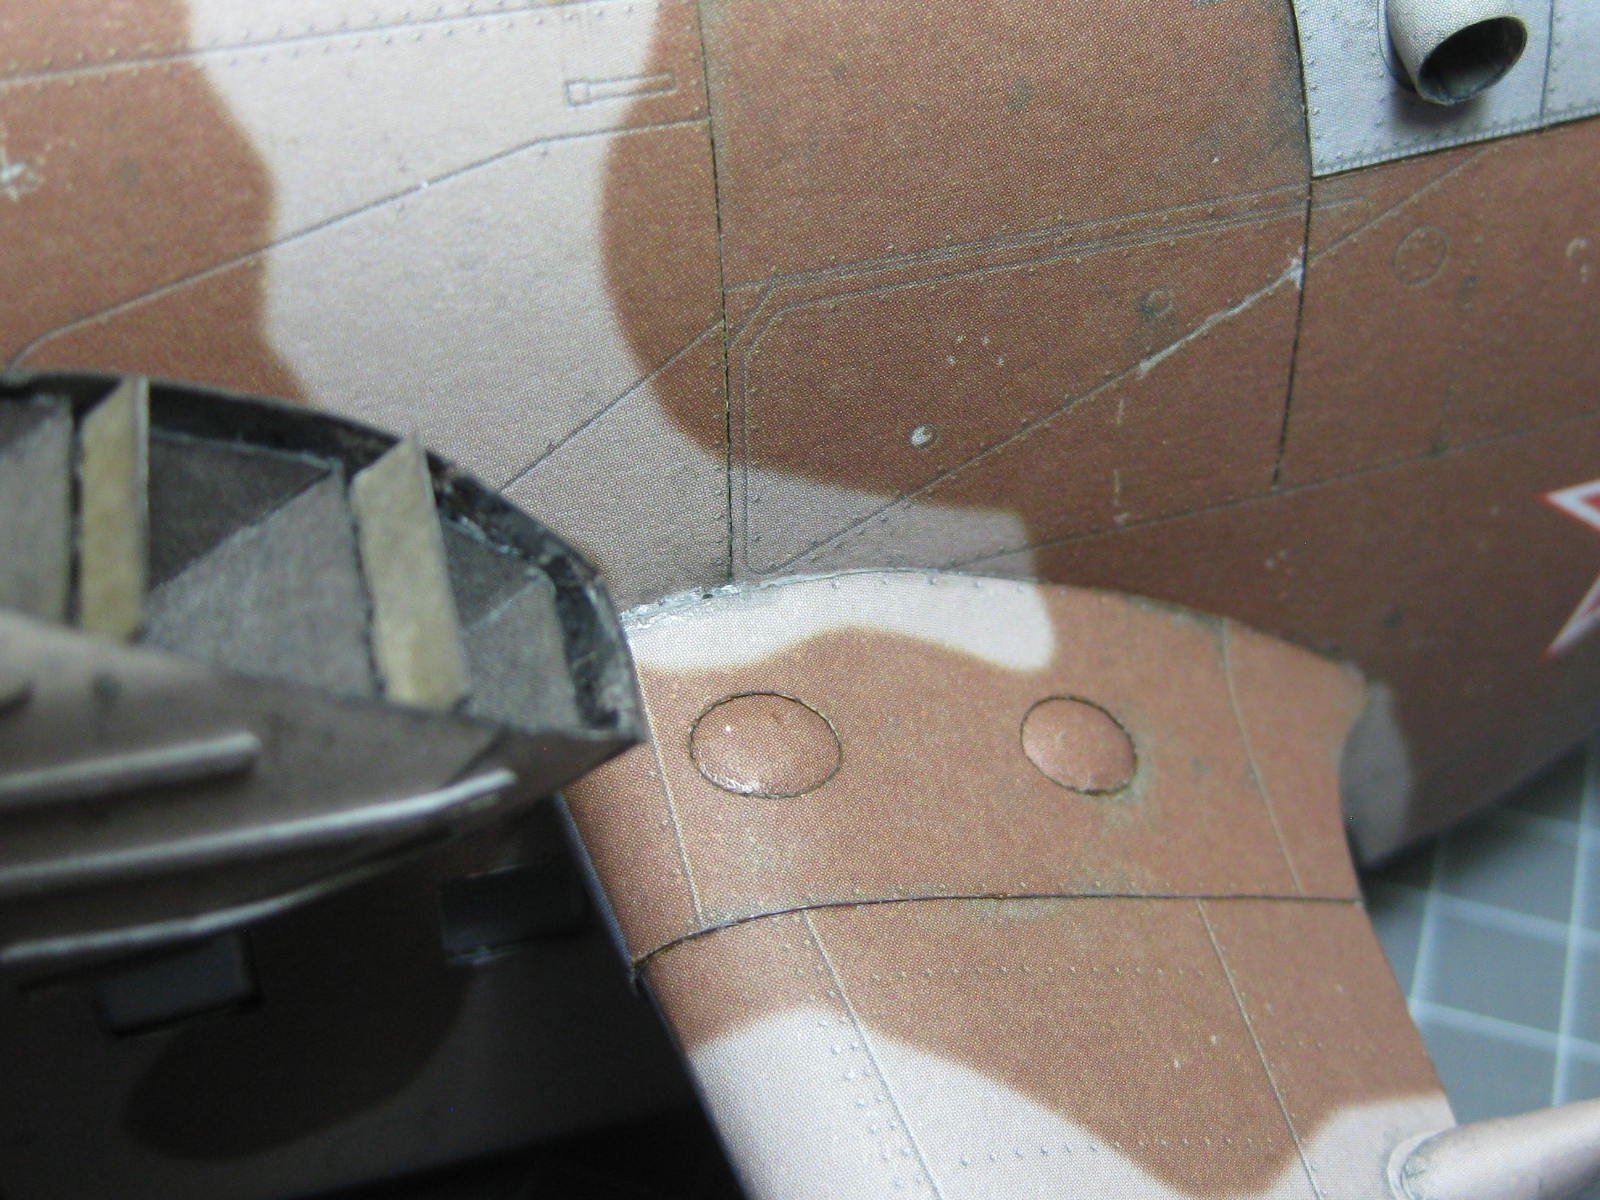
I've re-installed the part that broke off earlier and fitted the guards around it :
Then I fitted the weapons platforms :

Danny
-
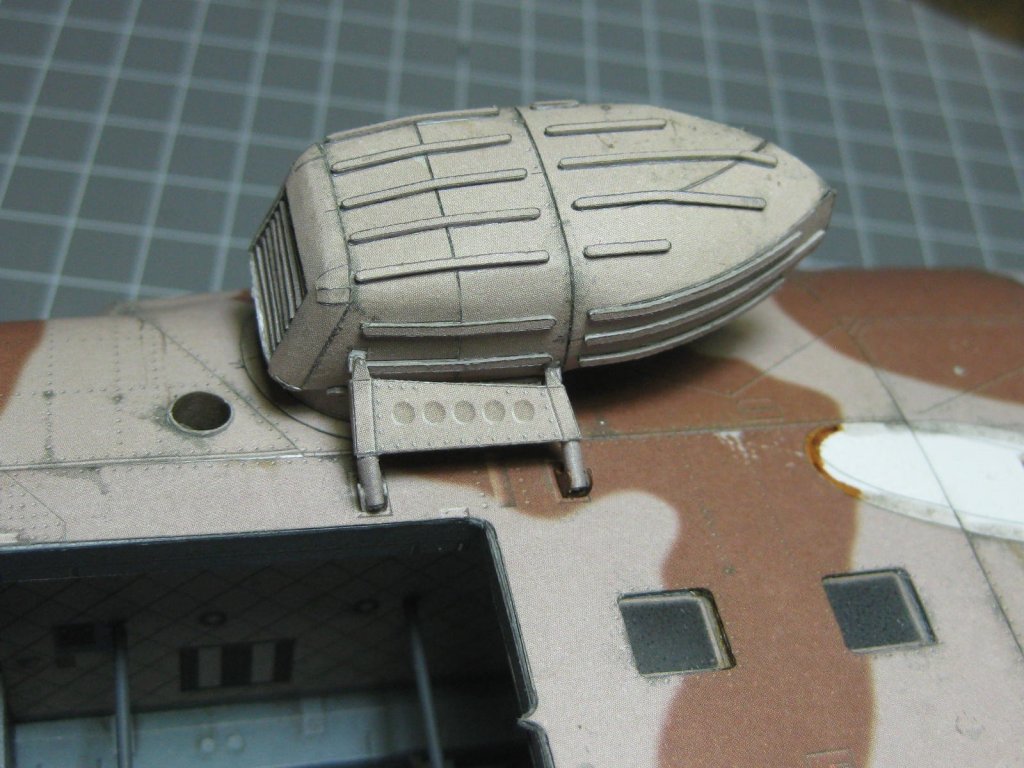
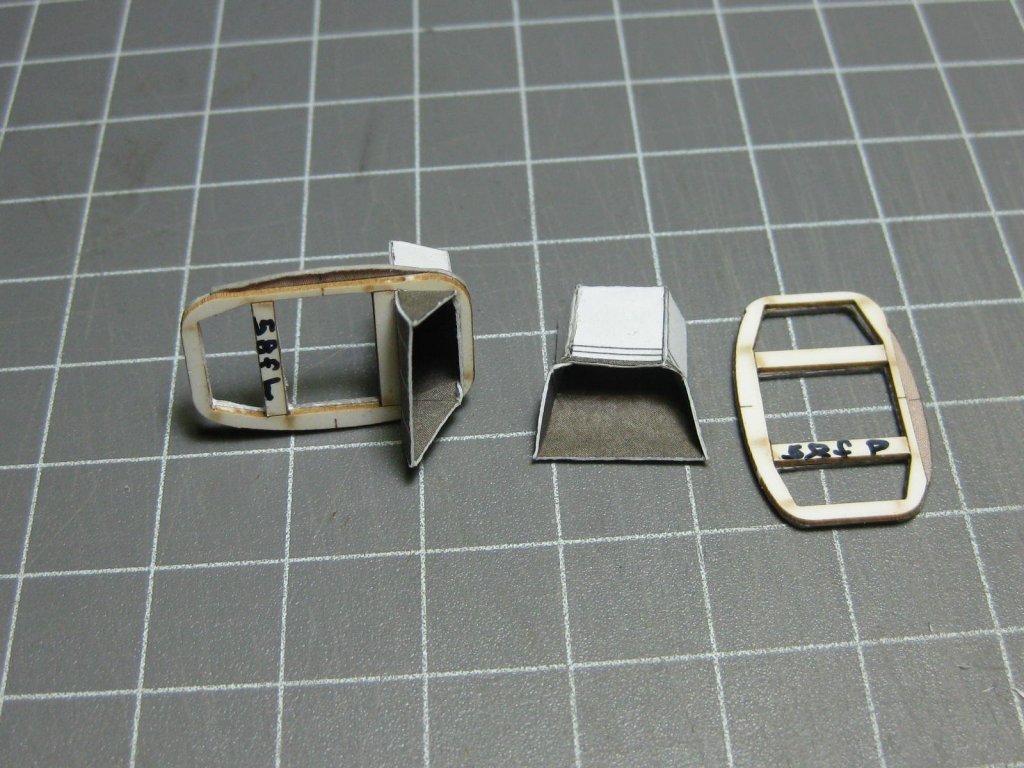
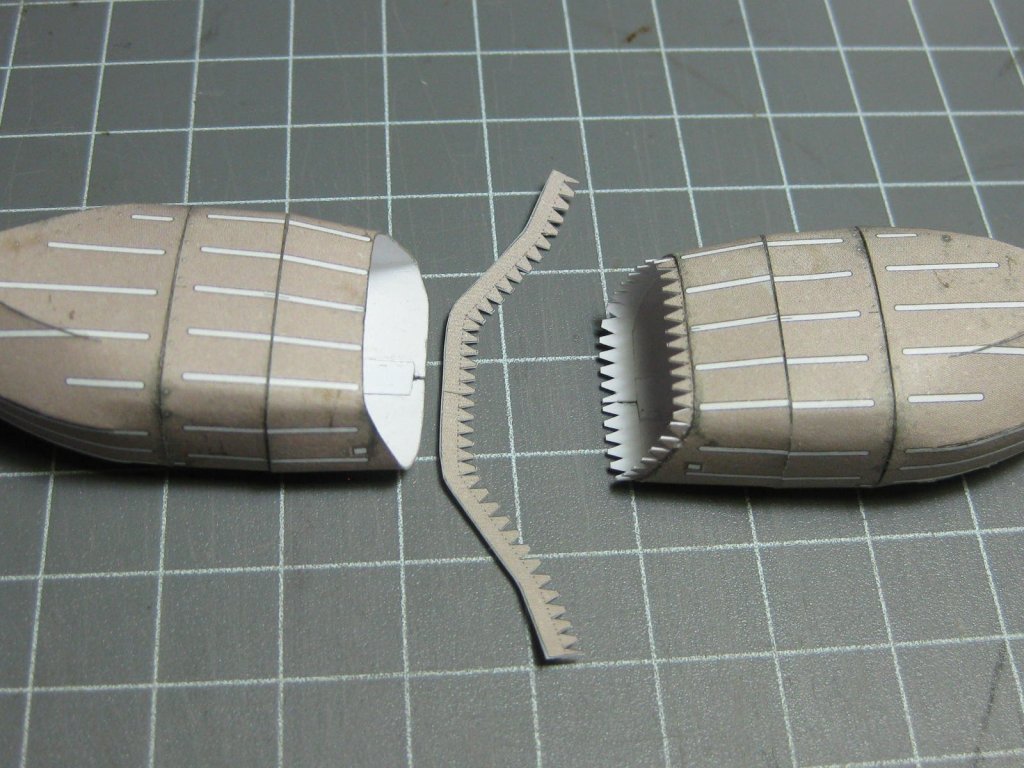
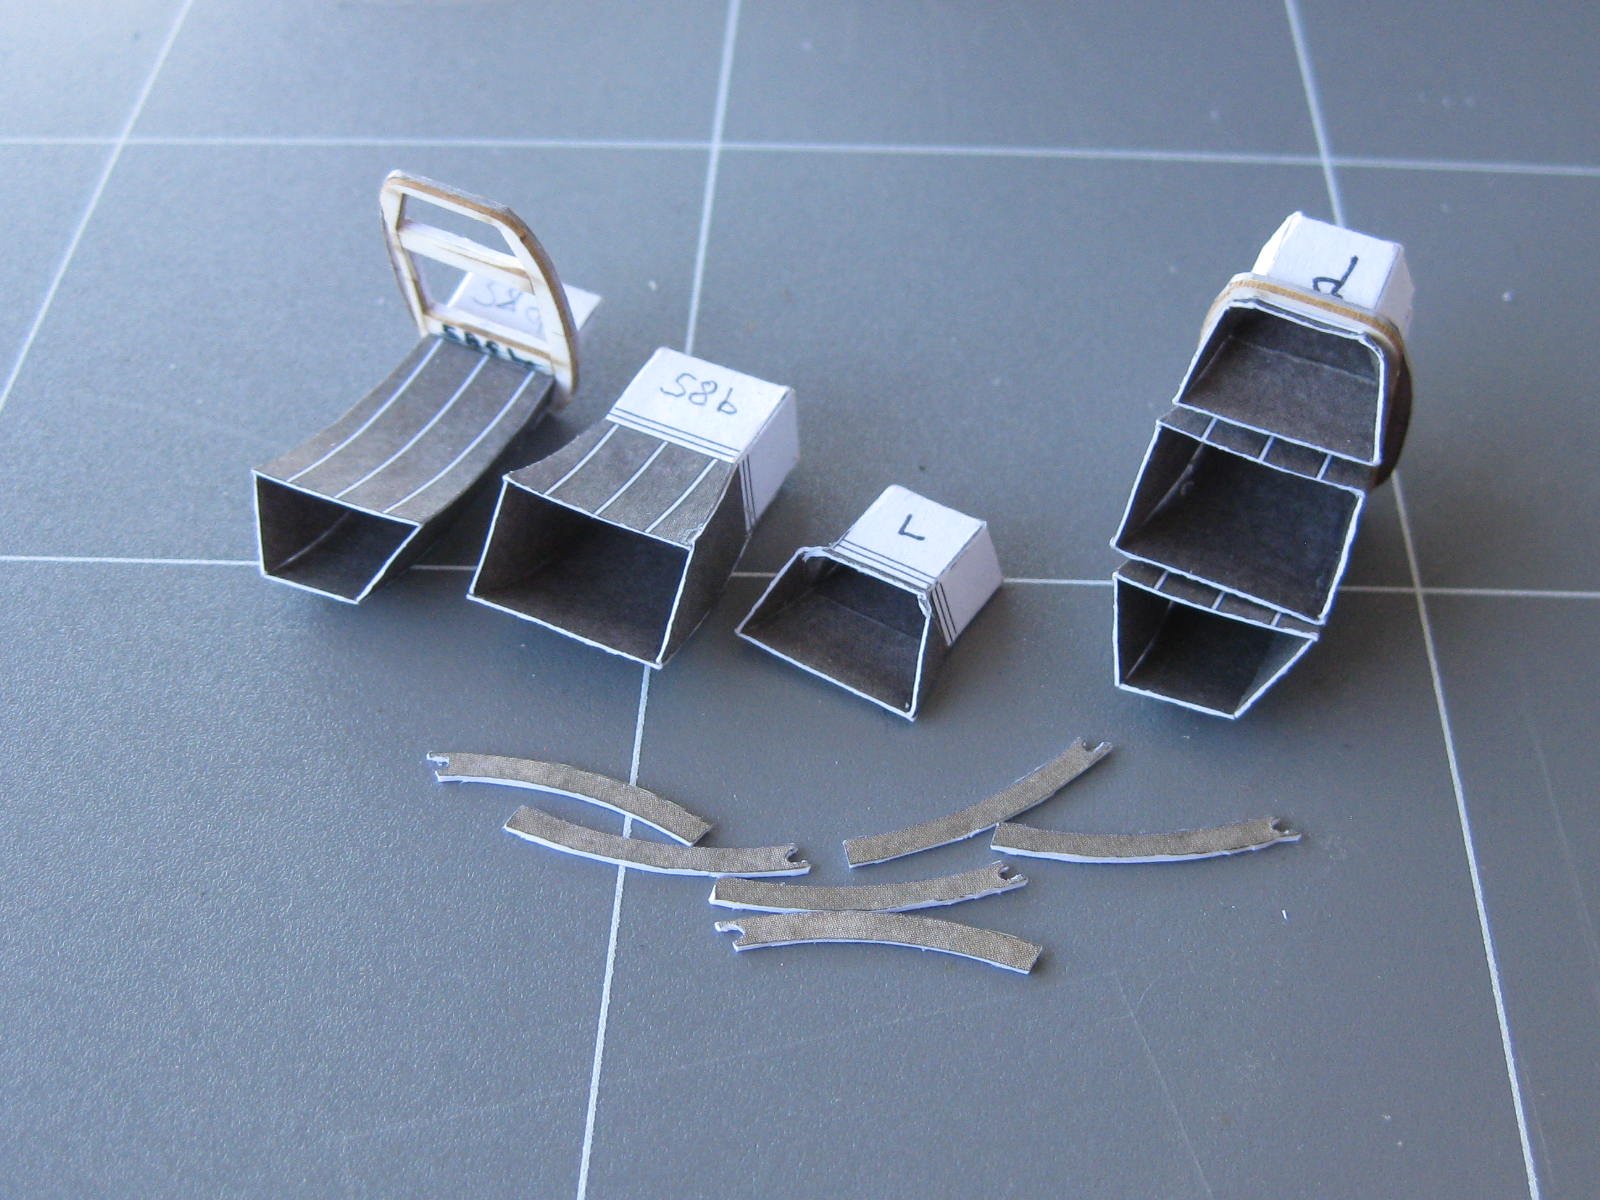
I'm guessing these are some type of exhaust noise suppression units (aka mufflers
") ). They are quite complex assemblies which needed very careful cutting and gluing at every stage to ensure that no problems arose later on. I'm very happy with the final results :
). They are quite complex assemblies which needed very careful cutting and gluing at every stage to ensure that no problems arose later on. I'm very happy with the final results :


Danny
-
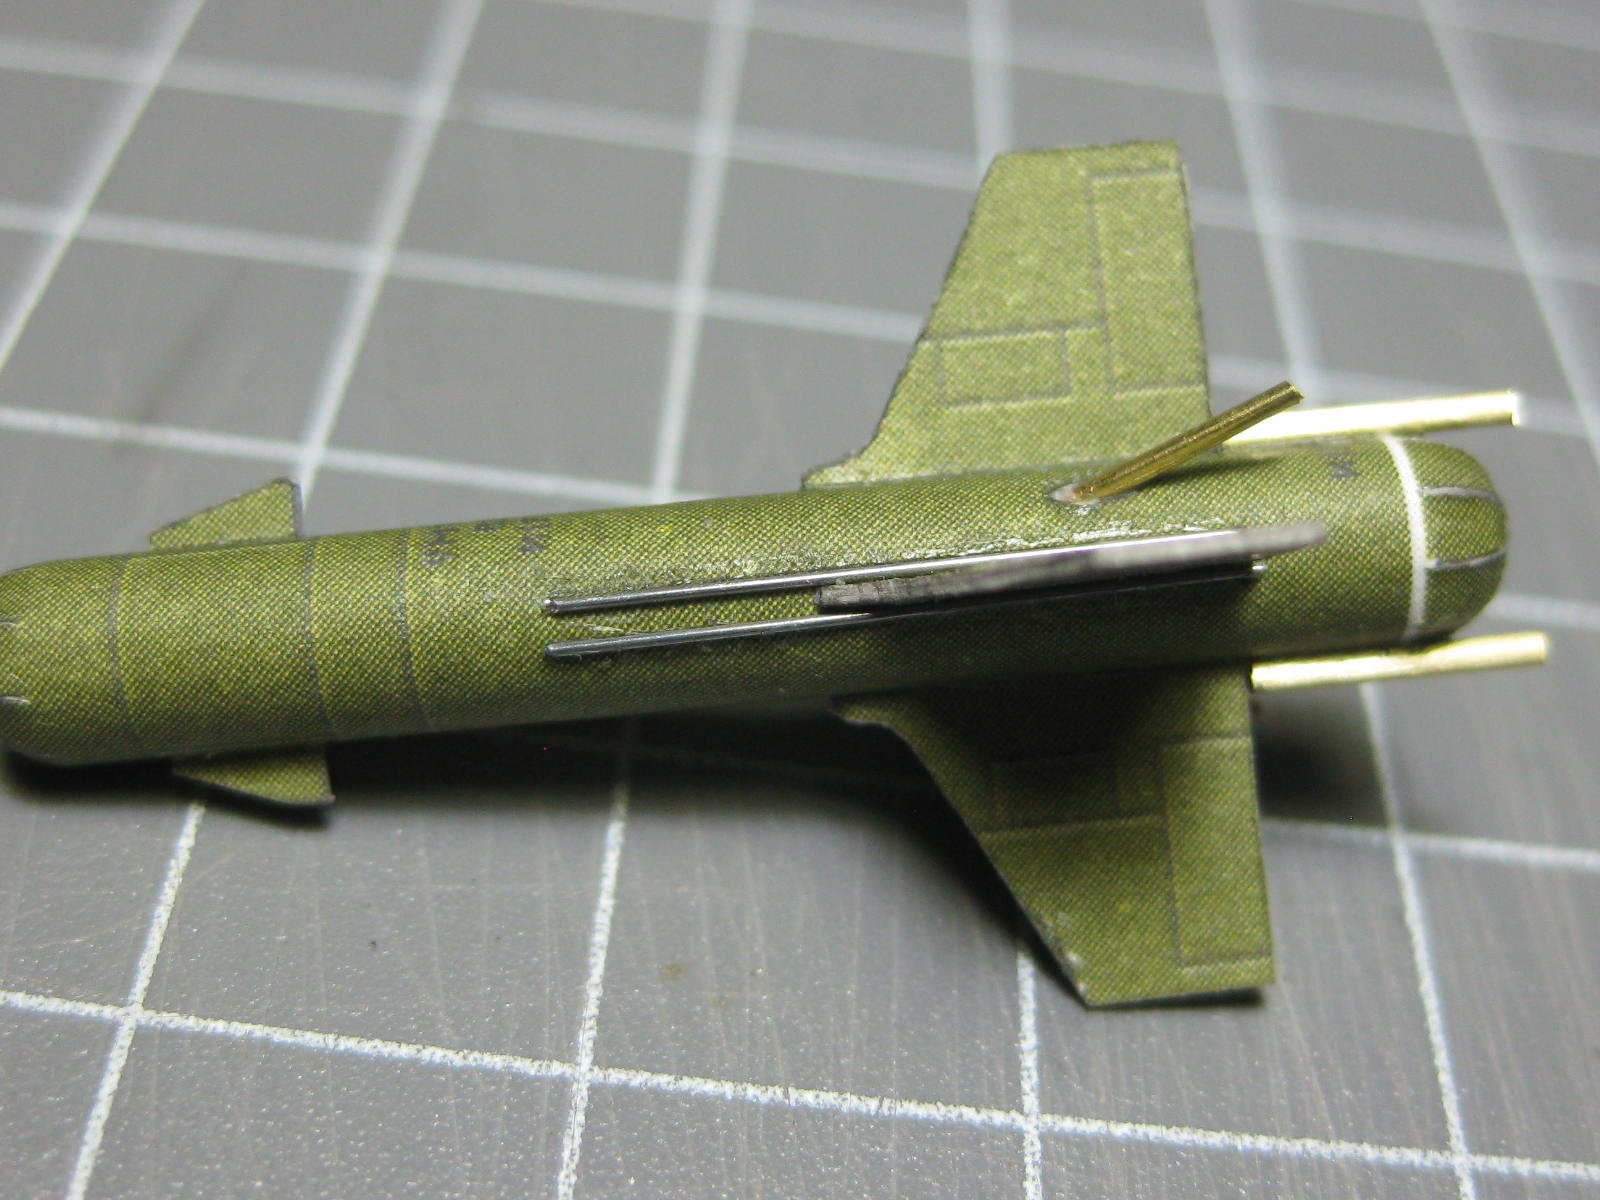
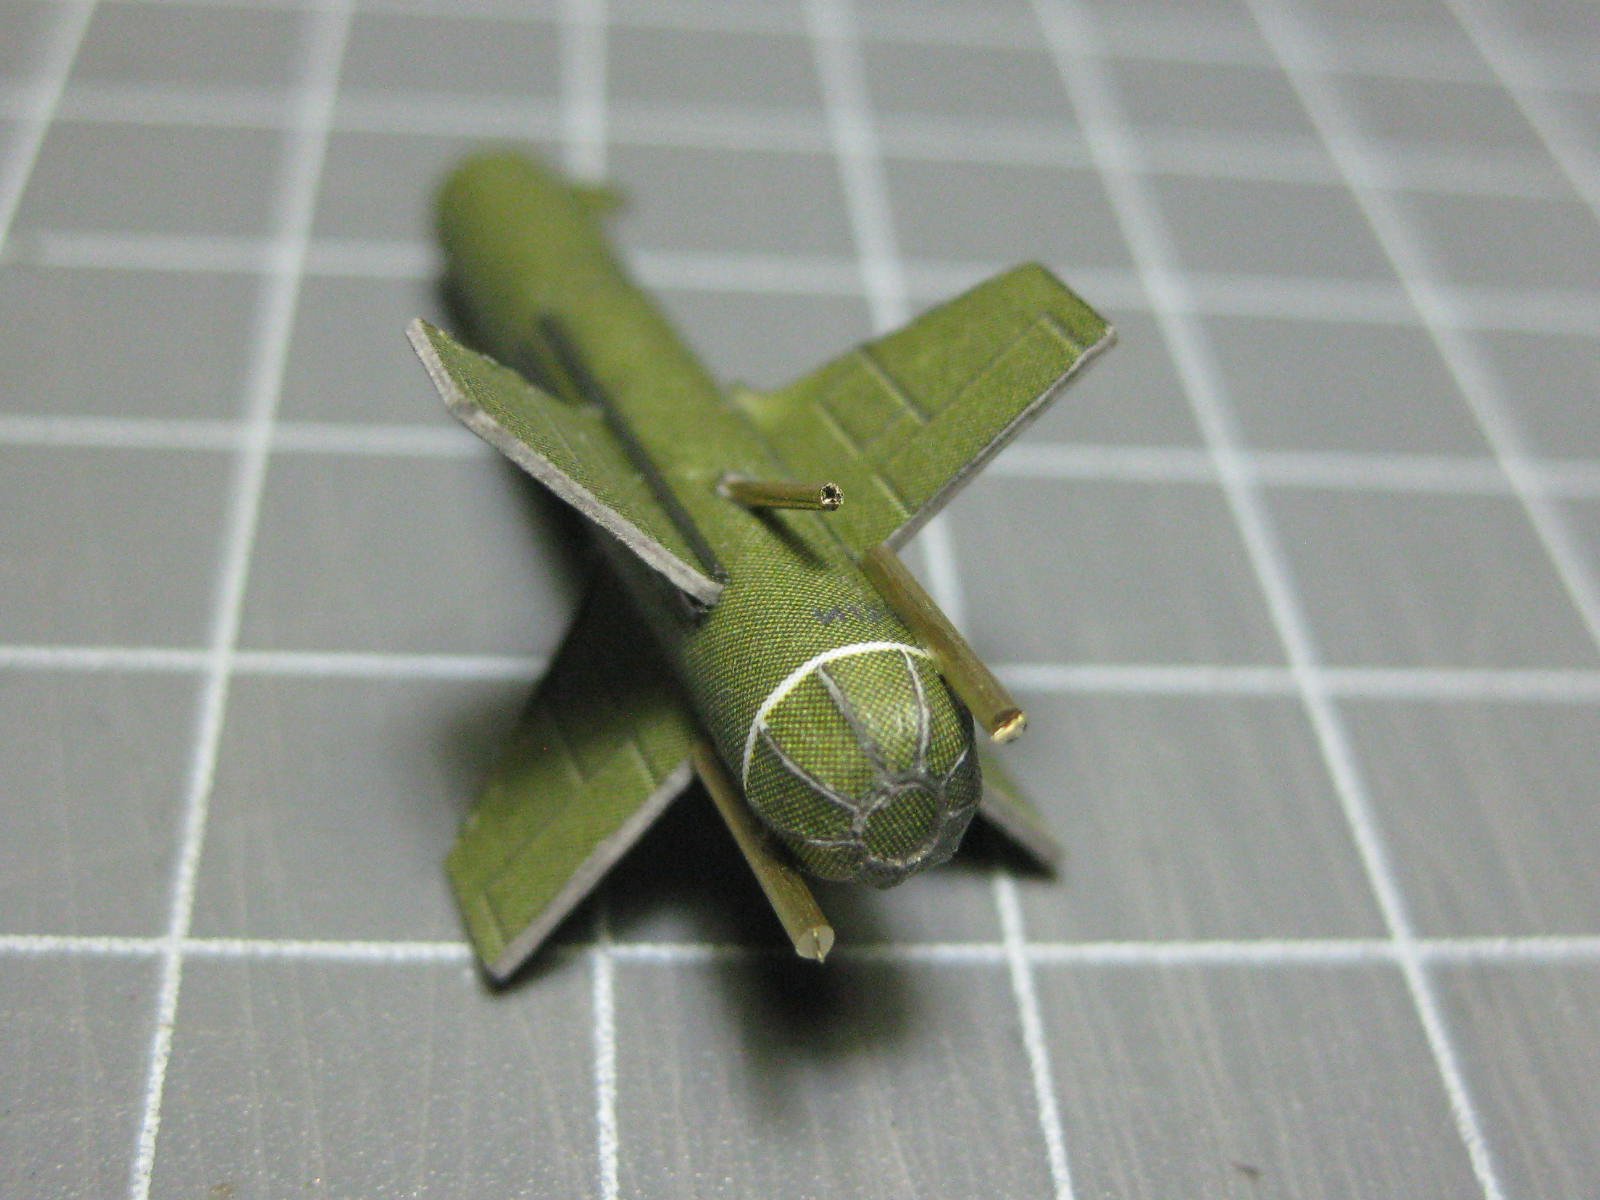
Now that I've finished the Lighthouse it's back to this model
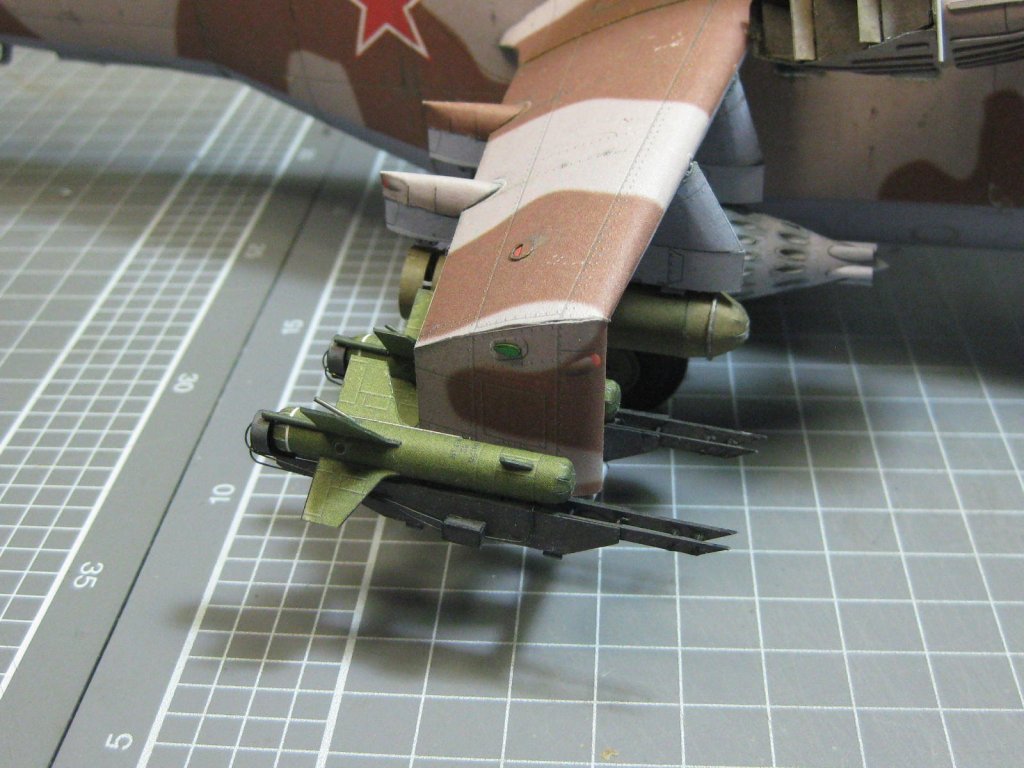
. Moving along with the missile brackets, I used the jig to assemble them :
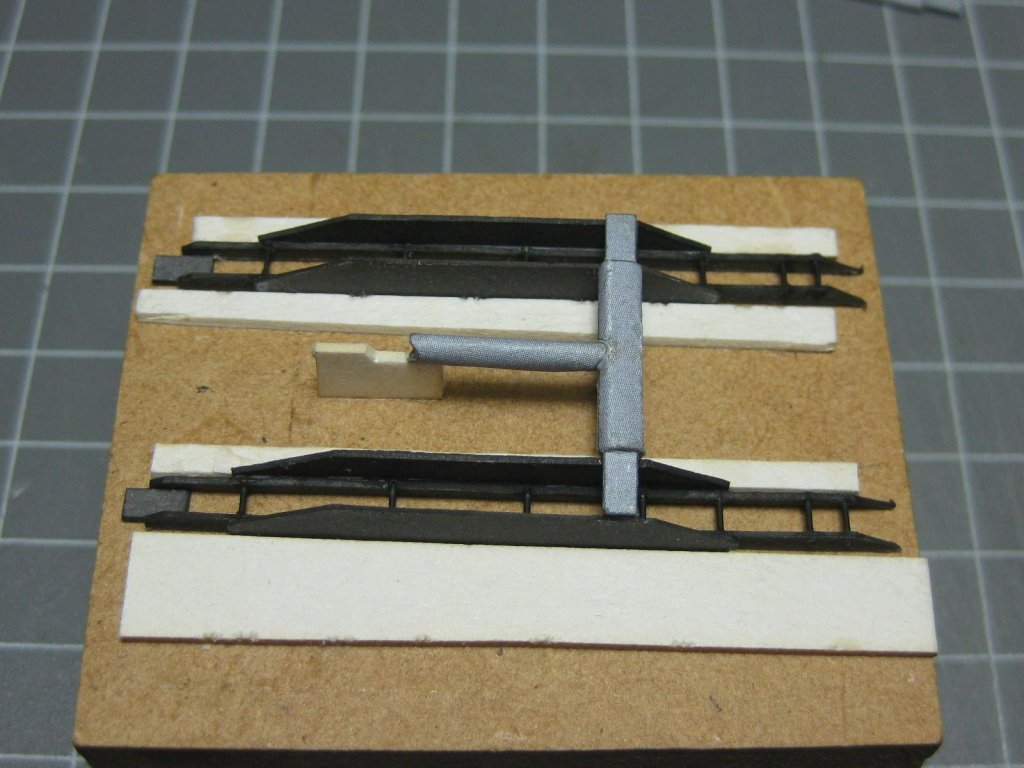
Next I added the air lines made from 0.2mm wire :

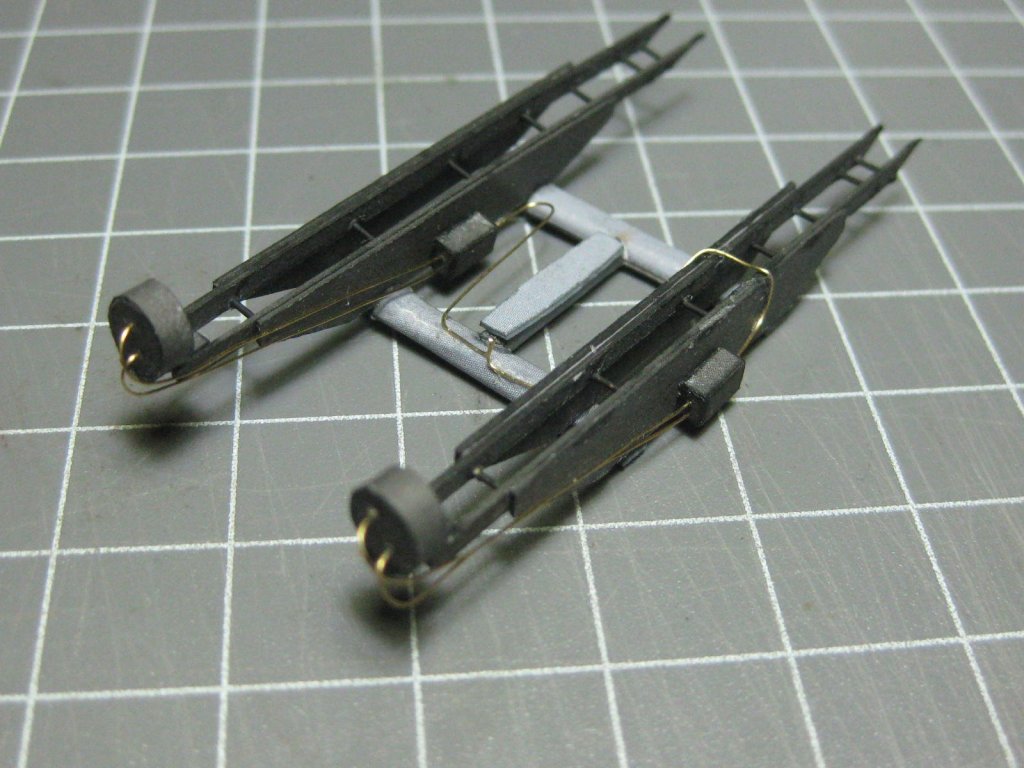
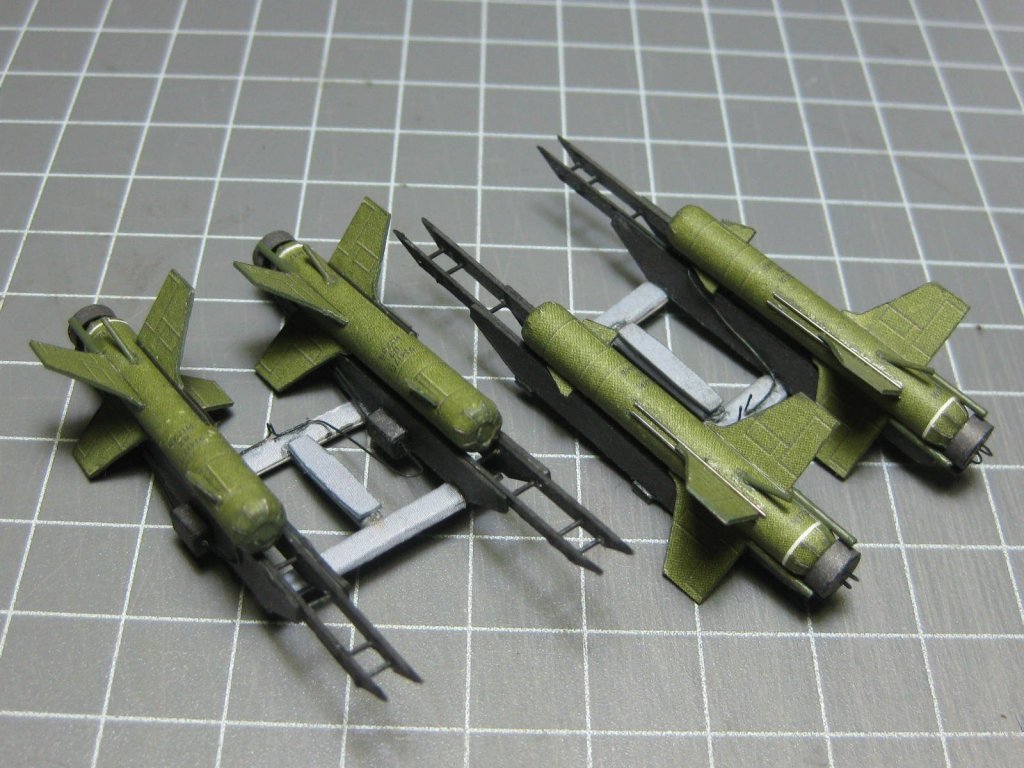
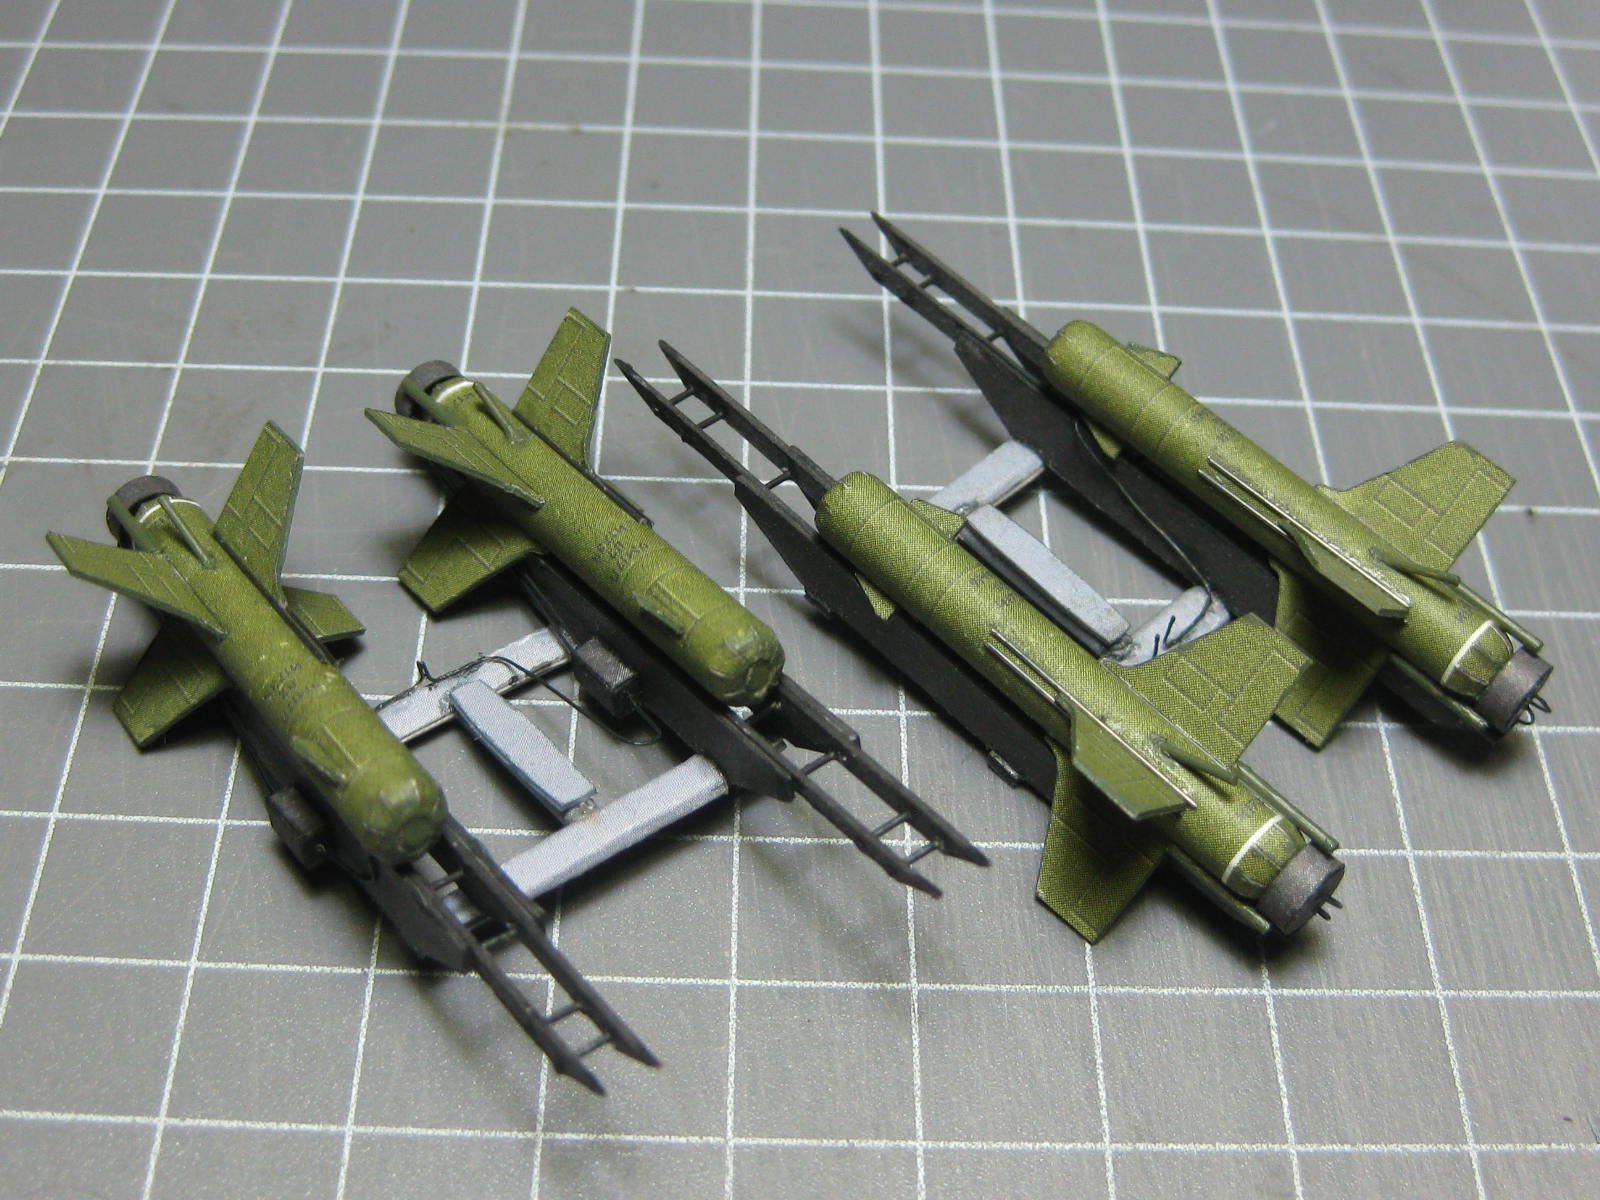
The completed missiles. I forgot to take progress pics. The wire pieces haven't been painted yet :
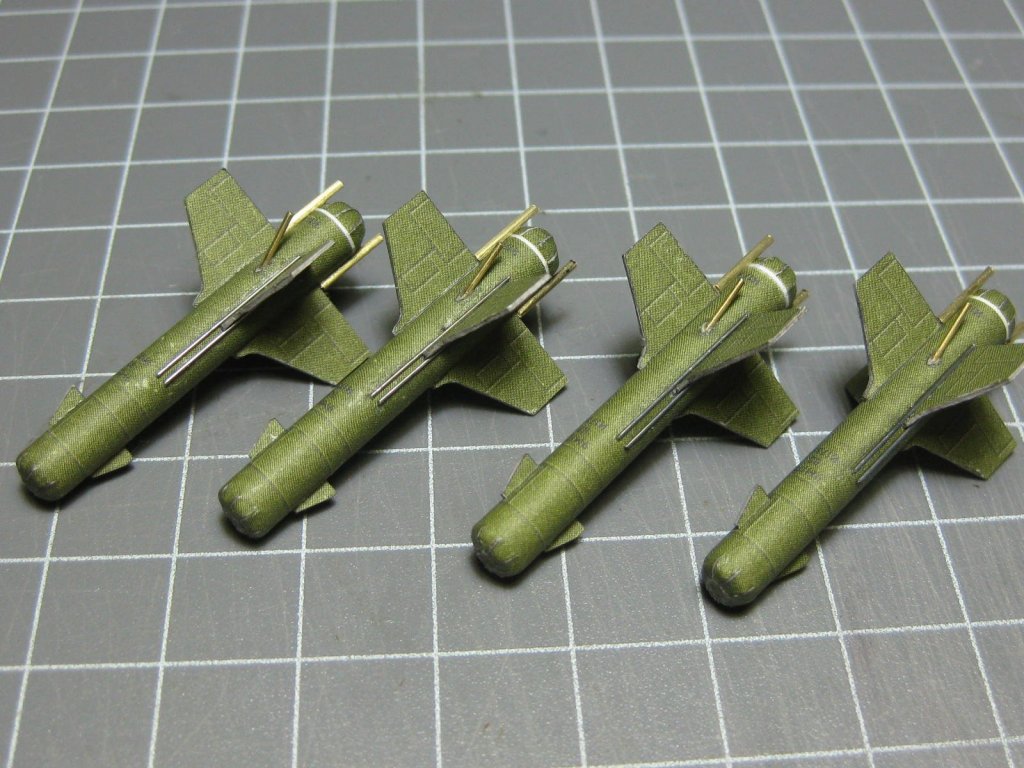
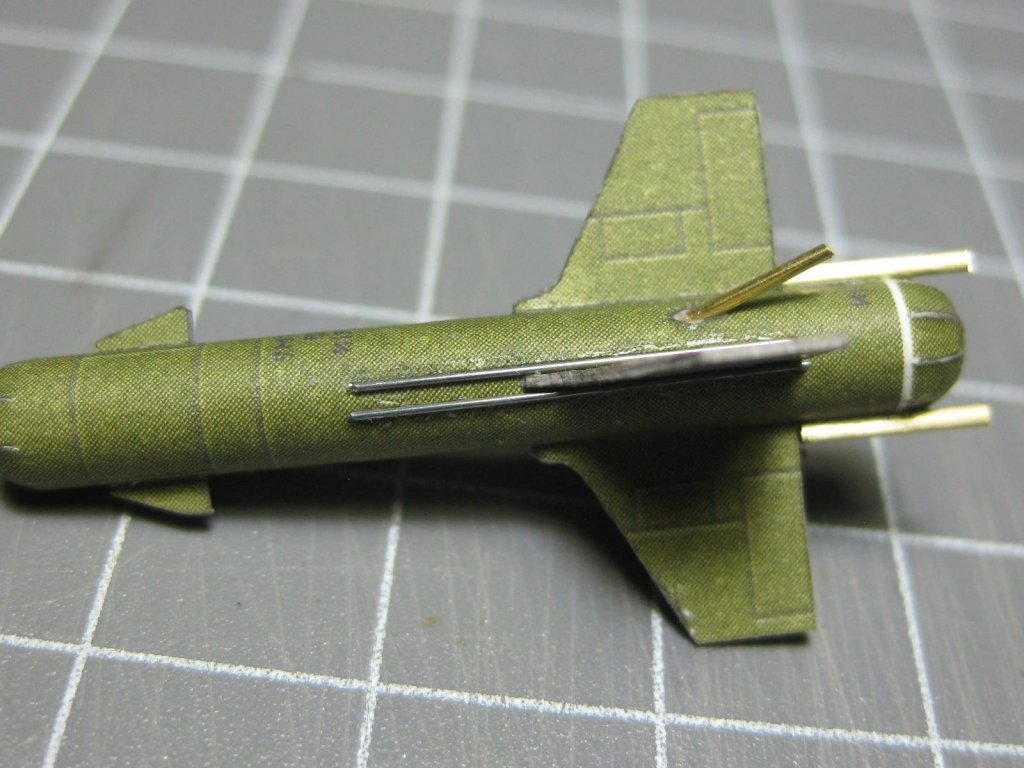
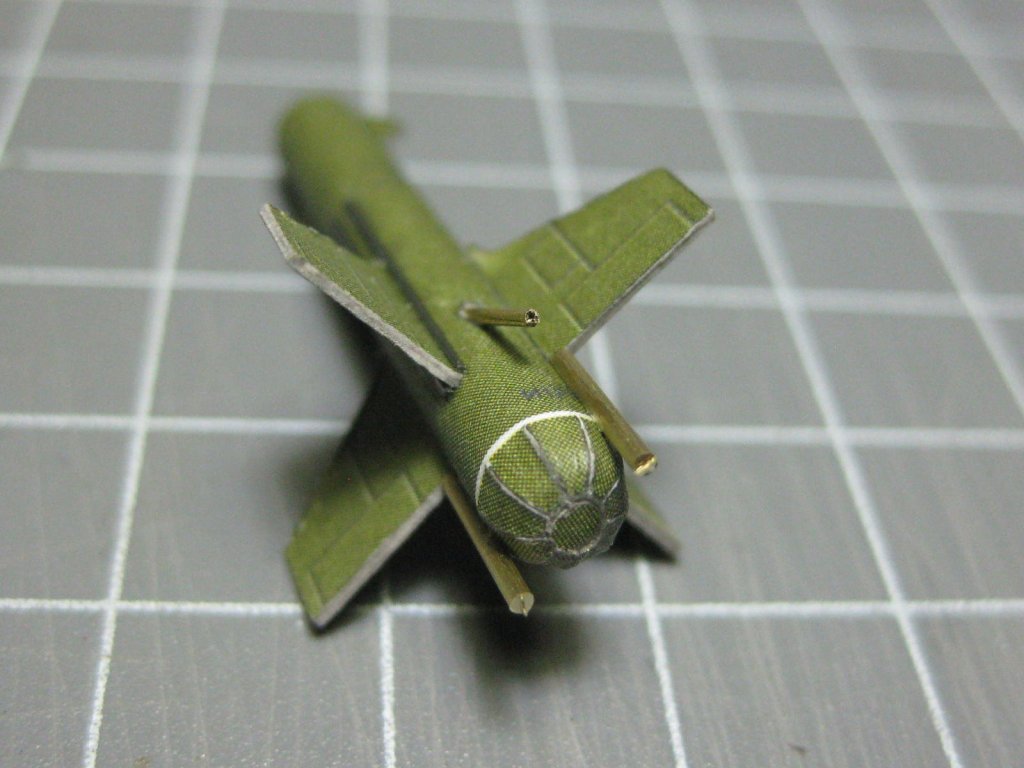
All finished and fitted to the racks :
Danny
- popeye the sailor, druxey, lmagna and 6 others
-
9


Fender Guitar by Dan Vadas - CARD - FINISHED
in Non-ship/categorised builds
Posted
It's already tuned Mark")
 .
.
Definitely not - you may as well ask me to perform brain surgery . I have nothing but admiration for those who can design even simple paper models, let alone something like the Mi-24D Hind helicopter. That's a skill in another universe as far as I'm concerned. I'll stick to building
  .
.
Danny