


allanyed
-
Posts
8,149 -
Joined
-
Last visited
Content Type
Profiles
Forums
Gallery
Events
Everything posted by allanyed
-
 Hi Clementine I am guessing it is a kit instruction but never the less, why would there be two bolts for each of the small hinge plates for the gun port lids, but only one on each of the pintles on the rudder? I would think there would be a minimum of three on each of the pintles but could very well be wrong. Allan
 -
Gregg, I am glad to be of at least a little help. I am happy to receive information/help/constructive criticism but not everyone is, thus my hesitancy. Allan
- 65 replies
-
- 3
-

-
- Ballahoo
- Caldercraft
- (and 1 more)
-
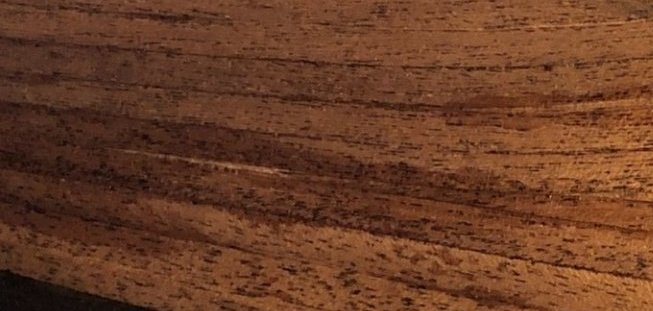
Ahhhh, teak decks. The old adage, would you rather spend your time on the boat working on the teak decks or would you rather be sailing? Not enough time for both. Do boat yards use teak anymore? Teak and mahogany are endangered wood species so with most of the remaining trees in Myanmar and their problems, is it even possible to get teak in any quantity? We have a carved 7 piece teak salad bowl set from 1969 (wedding gift). The boss keeps a close eye on it in case I get any crazy ideas about using the wood for other than salads. Allan
-
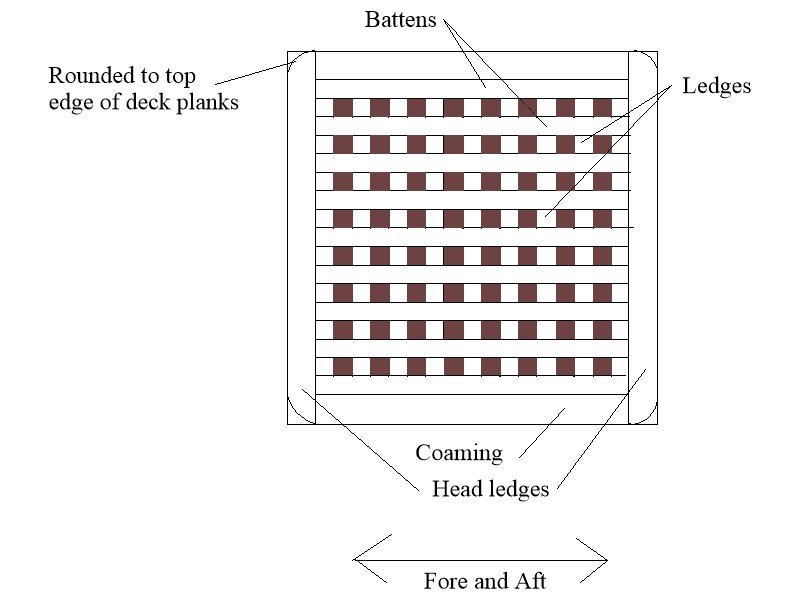
I really hope you don't mind but I disagree with Bob. I realize the average viewer would not notice or care. and some may call this nitpicking so please take it for what it's worth. I realize it is too late for this project, but something that you may find to be of interest for future builds. The gratings never have open sides, and the battens run fore and aft, not athwartships. Also, the head ledges rest on the coamings not the other way around. Picture and 1000 words etc. below.

- 65 replies
-
- 3
-
-
- Ballahoo
- Caldercraft
- (and 1 more)
-
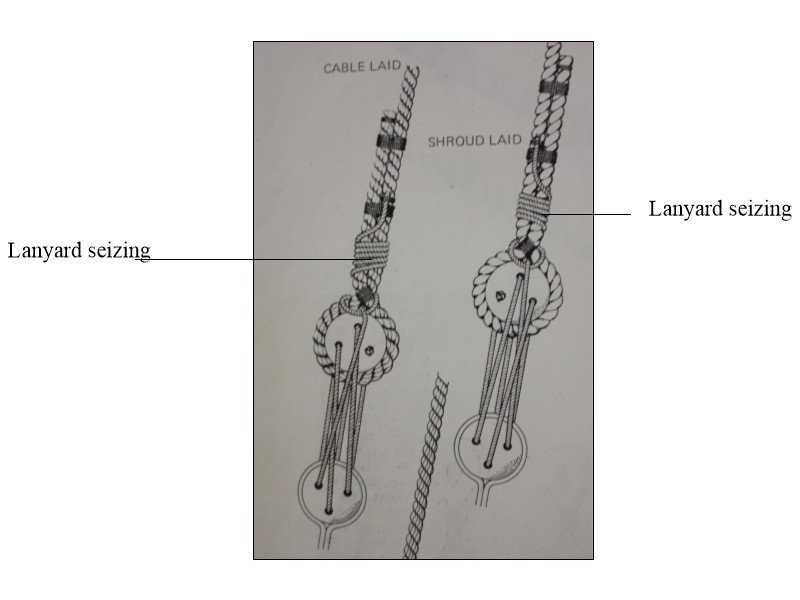
I may just be lucky but rarely have had this problem. Once the shroud is secured to the upper deadeye I hold the shroud between my thumb and forefinger at the top then run them down the shroud to get any twist out of it before running the lanyard through the deadeyes. Sometimes it takes a couple tries but it works. Allan
- 19 replies
-
- 10
-
-
Interesting techniques. Thanks for sharing your video. Allan
- 135 replies
-
- 1
-
-
- Occre
- Santisima Trinidad
- (and 2 more)
-
Hi Ed, I love the schooners and your hull, fittings and furniture look great! Something you may want to consider for future builds for realistic looking sails is to use a non-woven material like silk span and also forget sewing. There is no woven cloth in existence or a sewing method that will be to scale at 1:64, or even 1:48. There is a lot of information on this here at MSW and there is an excellent booklet by master builder David Antscherl on making proper sails that you can get from SeaWatch books for about $8. Allan
-
Soleil Royal 1/72 - Artesania Latina Ref.22904
allanyed replied to modeller_masa's topic in Wood ship model kits
Agreed. Katsumoto has a great point. If you look at the build logs there is an inordinately high percentage of one or two brands that do exactly as Katsumoto suggests in addition to them doing a lot of research before marketing a kit. Allan -
Bienvenu Monsieur Haricot. Kev gives great advice!! Too many newcomers start with overly complex or one of a plethora of poorly designed kits. If wooden ships are your choice, take a serious look at the Model Shipways' Shipwright Learning Series designed by David Antscherl then you will have few, if any, problems if you follow up with a more complex project from Syren or Vanguard. Allan
-
Just tuning in. A few things that jumped out at me and made me smile. The blocks are really fine! Are these from the kit or after market or did you make them? I see sheaves so am guessing you made at least some of these yourself. Your upper deck cannon are rigged with two single blocks according to and as described by Caruana in The History of English Sea Ordnance, volume II. It seems many Victory models erroneously show two double blocks for all sizes of cannon for this era. I agree with you that the cloth and sewing of sails in most kits are awful so kudos to you for going your own way and improving in this. Allan
-
For information on this one hour lecture, -----> https://www.thewellingtontrust.org/events/shipwrecks-in-the-thames/?mc_cid=ce56ddafb7&mc_eid=fc416e3d21 Allan
-
- 2
-
-
Hello from Canada’s west coast
allanyed replied to Twokidsnosleep's topic in New member Introductions
Welcome to MSW Twokidsnosleep. Love the screen name and it will apply double when they are teenagers and out for the evening and late getting home. -
FWIW, The models of America at the NYYC has her with a copper bottom as does the model at the San Francisco Maritime National Historical Park. Allan
-
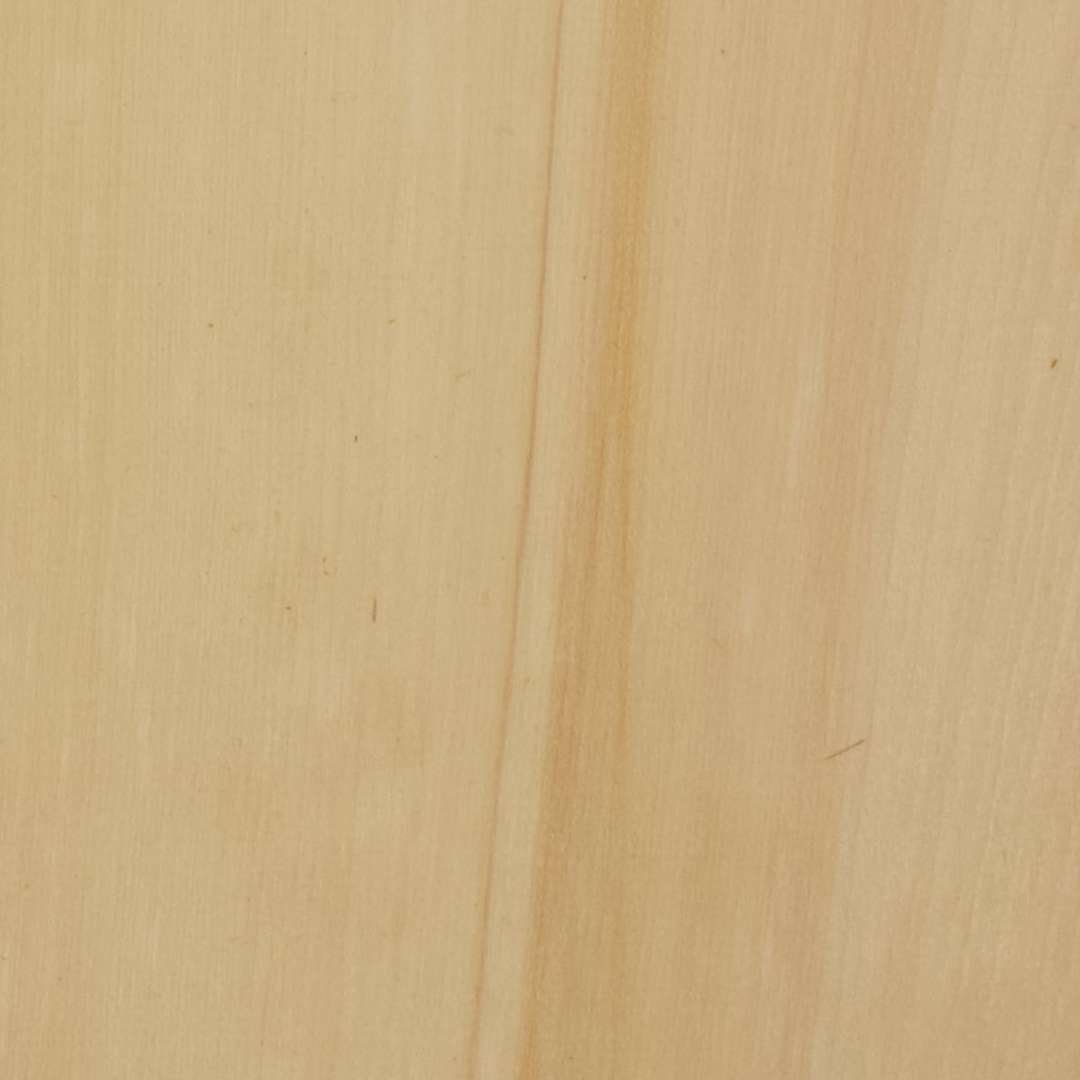
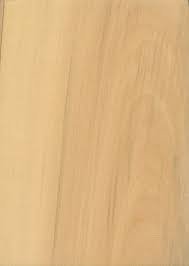
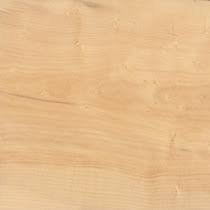
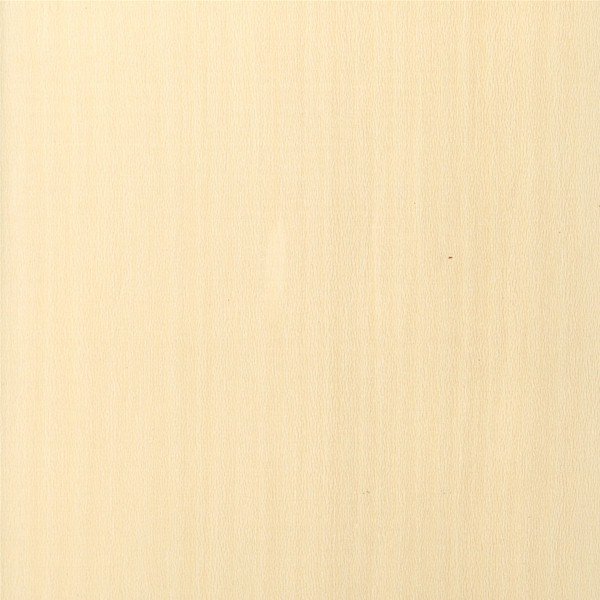
The real thing varied. The 18th century British Navy materials were largely oak, elm, and Deal based on numerous contracts that call out specific species to be used. These are not really preferred by most model builders as the grain shows so is way out of scale. Walnut-like wood that we see used by some, not all, kit makers is, I believe, to save money as realistic appearance does not seem to be a consideration in those cases. Many folks, me included, think the color is nice, but it is porous and these tiny holes can be seen and looks awful if scale is important. Contemporary models used a variety, principally boxwood as well as other species. Castello and Alaskan cedar are current favorites when considering tight grain and hardness. Fruit woods such as pear were often used and are still a good choice today. Basswood looks very good but is quite soft compared to the others. Still, it looks far better than the walnut mentioned above. The key is little to no grain and sufficient hardness to hold an edge for shaping, carving, &c. Some pics of various tight grained species and the open grained stuff found in many kits follows. Alaskan Cedar Castello European box Holly Swiss pear "Walnut" from a kit
pear.jpg.209e5ad1b6be562f95418ca30f8fc6c3.jpg)
-
You really should move this thread to a build log. This is not the best place to be posting your build. Just a suggestion. Allan
-
Taylor, Welcome to MSW 😁 Never, and I mean NEVER, post your email address. I am sure a moderator will remove it for you, but if you see this soon, go to edit and remove it to avoid unwanted spam. If you research some contemporary contracts you will likely get the spelling for that era. One example from a contract from an earlier time, October 14, 1808 for the HMS Astrea. Spelling and grammar are as found in the contract. To fix Bumpkins for the Fore Tack, cut Holes for the Gammoning, and to finish the Head with Timbers, Gratings, Seats and Fenders, all compleat, in the handsomest Manner, and equal to Ships of her Class built in His Majesty’s Yards. Allan
-
Dave, You are very wise to be researching each thing before moving forward. Were the four methods on the hawser tie off based on contemporary information, or other kits. If contemporary, it would really be interesting to see how this varied. Regarding coils, I posted this video in the past, but if you did not see it, it might be helpful. Allan
- 362 replies
-
- 6
-
-
- Amati
- Lady Nelson
- (and 2 more)
-
Well done Dave! One small comment, I really hope you don't mind. The hawser was secured to the ring with an inside clinch or similar knot, not seized so it was easy to remove. The sketch below is from page 129 of Lees' Masting and Rigging. This may be what you have, but it looks like it is seized in the photo. Allan

- 362 replies
-
- 2
-
-
- Amati
- Lady Nelson
- (and 2 more)
-
Painting the hull
allanyed replied to Steve47's topic in Building, Framing, Planking and plating a ships hull and deck
Steve, She looks really good!! Would love to see more photos of the details. Allan -
Gsx The rigging method of the lanyard on the deadeyes is a new twist, for me at least. How do you tie off the lanyard to the shroud? Are all of the lanyards left loose on one end so you have some rope to work with to get up to and seized to the shroud? Hard to tell from the photos if there is a running end available to tie off properly. As the distance between every pair of deadeyes is different as the angle of the shrouds change, is pre-rigging to the proper spread between deadeyes looks difficult? The drawing below is from David Lees' Masting and Rigging, page 42. Thanks for sharing your build! Allan
-
Ran out of appropriate adjectives a couple years ago to describe your work. BIG thanks for continuing to share your project with us. Allan
-
Poly rope - Which adhesive product?
allanyed replied to LyleK1's topic in Masting, rigging and sails
Your research/testing is impressive to say the least. A great lesson for everyone so as to allow each to decide what they like best. Great post Dave, thanks Allan -
Dave and David Be sure to peruse the list of tutorials in the Articles data base here at MSW. There is a wealth of information, including how to taper and spile or wet bend the planking at the bow to avoid the make-believe style of planking shown in many kits. Allan
-
On the use of steel parts in modelmaking
allanyed replied to starlight's topic in Metal Work, Soldering and Metal Fittings
FWIW, many of us have gone to copper wherever possible. It can be cleaned then inserted, shaped, installed, and so forth, then blackened in situ with diluted liver of sulfur. The LOS will not stain the wood and works instantly. As with blackening brass or steel, a clean surface is best. Allan

