


allanyed
-
Posts
8,149 -
Joined
-
Last visited
Content Type
Profiles
Forums
Gallery
Events
Everything posted by allanyed
-
 Very nice blocks and deadeyes! Are these from the kit or did you upgrade with a third party supplier and/or make your own. Allan
 -
Welcome aboard David!! Glad to see you giving ship modeling a go. Yours is not alone, but as stated above there are many here that can help you get through it. Keep in mind there are a couple alternatives that would be much better choices to start to hone your skills. Allan
-
Ships Pumps
allanyed replied to bdgiantman2's topic in Discussion for a Ship's Deck Furniture, Guns, boats and other Fittings
Brian It might be that thin air in the mile high city as much as the hour of the day. 😁 Allan -
Siggi, What material did you use for the templates, wood, card, or ???? Thanks!! Allan
-
Me&Suzy Just open a build log and move the photos and text. I am sure more folks will see your work and help you as you wish. Are the gratings supplied with the kit? The reason I ask is that they do not look like a real grating nor do the head ledges and coamings around the gratings. Most kit makers do not seem to understand how gratings and the coamings and ledges were made thus supply their own make-believe design. Allan
-
You are right Biker Mart, there are a lot of folks like you that don't care if their model is accurate or not and are very happy with some kit manufacturers' make-believe designs which is absolutely fine. There is nothing wrong or right about anyone's choice, this is a hobby for most, not a vocation, so no matter the choice, it is right to that builder if they are happy. On the other hand there are many model builders that do care about the details. To answer your question about who cares, it would be interesting to have a poll to know what percentage of modelers cares about accuracy and what percentage don't care. You may very well be in the majority.😁 Regarding the copper plates fasteners you mention as slightly out of scale, they are closer to 400% out of scale and reversed showing rivet heads which were never used rather than what shuld appear as tiny dents from nails being driven home. It would be like using an 8mm block where a 2mm block should be used, not exactly "slight" To each his own and to whatever makes the builder happy. Allan
- 49 replies
-
- 1
-

-
- victory
- billing boats
- (and 1 more)
-
On the use of steel parts in modelmaking
allanyed replied to starlight's topic in Metal Work, Soldering and Metal Fittings
Of which nationality and era are you concerned? what parts are you looking to make from steel? Stainless steel was not invented until 1913. Allan -
Ships Pumps
allanyed replied to bdgiantman2's topic in Discussion for a Ship's Deck Furniture, Guns, boats and other Fittings
I doubt a Google search will be of much, if any, help, plus will take a lot more time. Go to the Royal Museum Greenwich Collections website as mentioned above and type in what ever you are looking for in the search box. In this case just go to https://www.rmg.co.uk/collections/search/pumps deck washing. It will take about 5 seconds to get to the page with the contemporary drawings that are currently available, then you can open them and save them in your files and/or scale and print them as you wish. Allan -
Welcome Rob I very much enjoyed reading your introduction. Yes you will have plenty of teachers but it sounds like you will be one of them as well. Happy to see you here. Allan
-
Ships Pumps
allanyed replied to bdgiantman2's topic in Discussion for a Ship's Deck Furniture, Guns, boats and other Fittings
Brian, A quick search turned up several contemporary drawings on the RMG Collections site of deck washing pumps in cross section views from 1807 and 1825 that should lend some help to you. Allan -
Your attention to detail even surpasses the books and is a joy to see. Can't wait to see it in person! Allan
-
Further to Dziadeczek's post I found the following information which is good for us. Mercerized cotton is a special kind of cotton yarn that is more lustrous than conventional cotton. It is also stronger, takes dye a little more readily, produces less lint, and is more resistant to mildew. It also may not shrink or lose its shape as much as "regular" cotton. It has also been described as shiny. I am not sure I like to idea of more lustrous, but the other attributes are helpful for modeling purposes. Allan
-
David, The following from Steel may help, although it is some years after Endeavour. https://maritime.org/doc/steel/mastplate5.htm Yard arm is not a term he used, but the details of construction may be useful. Page 40 of this treatise gives proportional dimensions of all yards as well, although Lees gives the same information for a lot of different time periods. https://maritime.org/doc/steel/ Allan
-
I think one problem is that there are dozens of sizes of blocks and rope on any given ship. For our models, 5 or 6 sizes would probably be satisfactory for most folks, but using only 2 or 3 might be an issue for some. If you go to the Danny Vadas spread sheet in the articles base here at MSW you will get all the rope sizes based on the formulas he took from Lees Masting and Rigging of English Ships of War although he used the wrong formula for the years 1670-1710 so every mast, spar and rope is the wrong size for that particular era. Before 1670 and from 1711 to 1860 the spread sheet seems to be accurate. The rope you show indeed looks like rope but is very fuzzy and from the photo appears to be very shiny as well. But, if you are happy with it, that is the crux of it. Allan
-
The MK blocks look to be very nice in appearance. I looked on-line but they only appear to go to 5mm which is the equivalent of 9.45" at 1:48, where as there are blocks up to about 16" needed. Do you know if they make them in larger sizes as well? Also, the blocks you show for Syren look nothing like what is on their website for the new CNC made blocks which go up 6.35mm. Photo below of the Syren blocks. Allan
-
Seizings - what am I doing wrong?
allanyed replied to David Lester's topic in Masting, rigging and sails
Thanks Greg, I am anxious to see the pics!! Allan -
Seizings - what am I doing wrong?
allanyed replied to David Lester's topic in Masting, rigging and sails
David, What material is the rope and the seizing material made of? How are you wrapping the seizing line to begin with? This video should be useful in actually making your seizing, just using a needle and your seizing cord in place of the full size rope in the vid. At our scales it is not so easy, but can be done without any glue, although I would use a dab of the applicable glue anyway. I hope some other members will post some show and tell methods that they use with success that do not include CA. Allan -
SUbaron Note that tea has a pH of about 5 thus on the acid side of neutral and the sails will degrade more quickly compared to sails not stained with tea. For the future, consider that cloth sails cannot be made to scale nor can the sewing of the seams of the panels and edges be to scale for the more common scales of 1:48 and smaller. If you wish, you can research a lot of information on alternative non-woven materials such as silkspan and associated acrylic coatings in many discussions here at MSW. There is an $8 booklet on making sails by David Antscherl available at Seawatch books that shows how to make excellent looking sails that are not out of scale and any color you want without worry of using an acidic stain like tea or coffee. Allan
- 111 replies
-
- 2
-
-
- Swift
- Artesania Latina
- (and 3 more)
-
Lurked for a few weeks. Here's my intro
allanyed replied to Mark m's topic in New member Introductions
Welcome aboard, hope you enjoy the voyage. You decision to start with the three kit series is extremely wise! You will learn excellent techniques and it will provide a basis from which you can move on to a larger project down the road. Depending on your tastes and desires for future projects it will also help you to study which of the few more complex kits are worth an investment in time and money and the others which are a not. Being confined, if you will, there is always room for a small library which will help you as you move along. And, of course, researching MSW subjects here will help you avoid many pitfalls and provide you with over 40,000 advisors. Allan -
Go with the above recommendations if possible. I would rather melt a horse hoof on the kitchen stove (while the admiral is away) and use that rather than use CA on any rigging. Learned the hard way about using CA a long time ago. Allan
-
Or, some builders may want to consider using each casting as a maquette then making these out of wood like the real thing. Allan
-
Old Salt, Great idea. If the builder wants to end up with an Admiralty style model without rigging it will save some money in not paying for materials that will not be used. By the same token they can order the rigging set later or get/make their own blocks, rope, &c. as some bulders like to do. Nothing wrong with having choices and it seems to work for Syren. Allan
-
Dave, I am with the replace everything you can if it is not right crowd. Be picky though, some things may be fixable or good as they are. I assume you are referring to Chuck Passaro's Syren Ship Model Company. Regarding rope, as you are no doubt aware, for standing rigging 18th century ships were most often coated with Stockholm or similar pine tar thus dark brown, not "road" tar black like seen in some kits. Chuck provides it in this color as well as typical tans for running rigging. There is a long thread here at MSW from 2017 on the subject of standing rigging color and coatings. https://modelshipworld.com/topic/15655-stockholm-tar/ As to blocks, many members replace kit blocks with more realistic looking ones for obvious reasons, but as normal it is your choice. As explained above cost is always a concern for the kit maker as well as the end customer, as it should be, so the decision to spend extra money comes down to the individual's desires and budget. Below is the color of Syren's great looking rope.
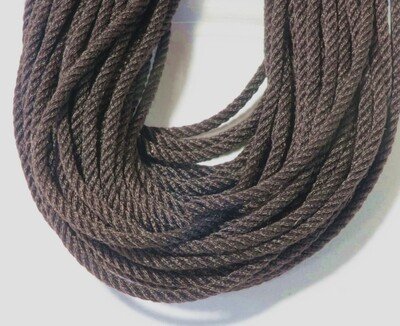
-
Welcome from another Florida member!! Allan

