


marktiedens
-
Posts
1,737 -
Joined
-
Last visited
Content Type
Profiles
Forums
Gallery
Events
Posts posted by marktiedens
-
-
Yep - didn`t even notice until after I posted

Mark
-
Hi Frank - the carronades are indeed cast. They are pretty well done with little or no mold lines. The carriage" wheels" are a little wonky, but can hardly be seen once painted black. There are no pictures or instructions on how any of the cannon or carronade carriages are to be assembled, so I am just winging it from pictures elsewhere in the forum & past experience. Also not real happy about the coarse grain on some of the deck fittings, but it doesn`t look that bad in person & won`t be noticeable once all the rigging is done. The camera is very unforgiving!
Mark
-
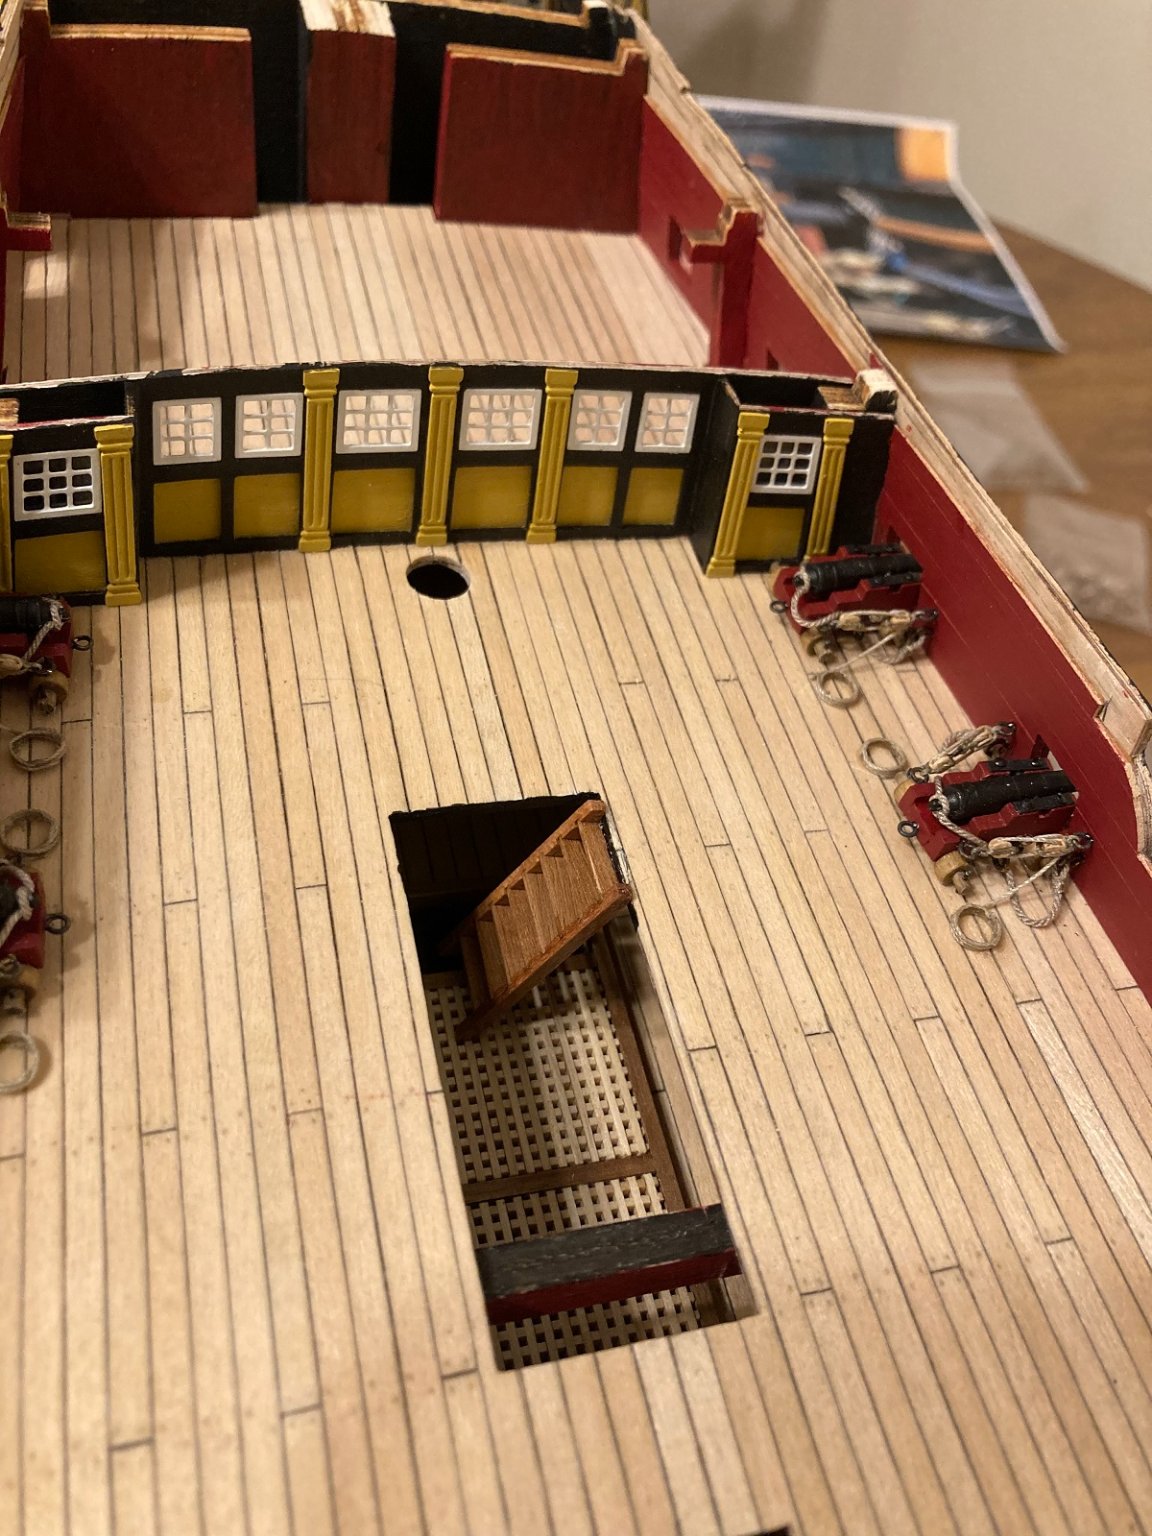
Hi everyone - still working on the cannons. One note about that ladder - the bottom of it is supposed to sit on the coaming of the grating down below, but if I did that, the treads would not be anywhere near level, so I will leave it as is. Once the poop deck is in place, it`s near impossible to see the lower end anyway. Seems that Model Shipways just provided generic ladder kits - the grooves for the treads are not angled nearly enough

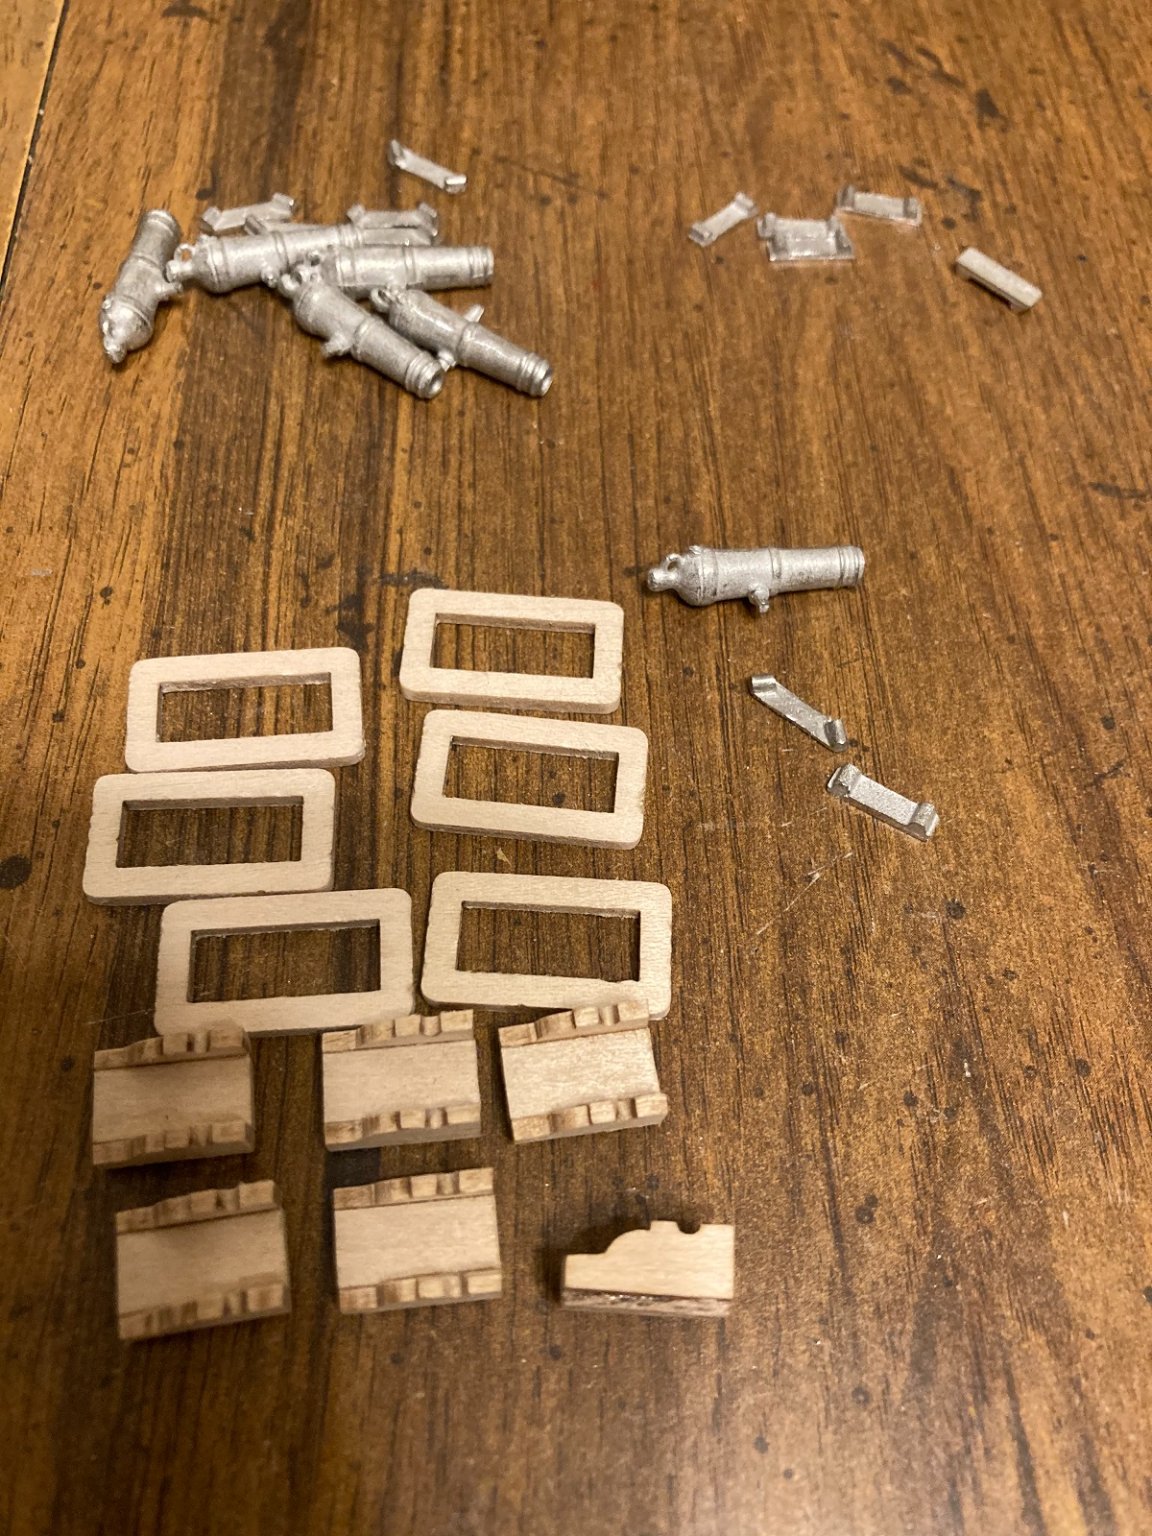
I thought I may as well build the carronades for the poop deck
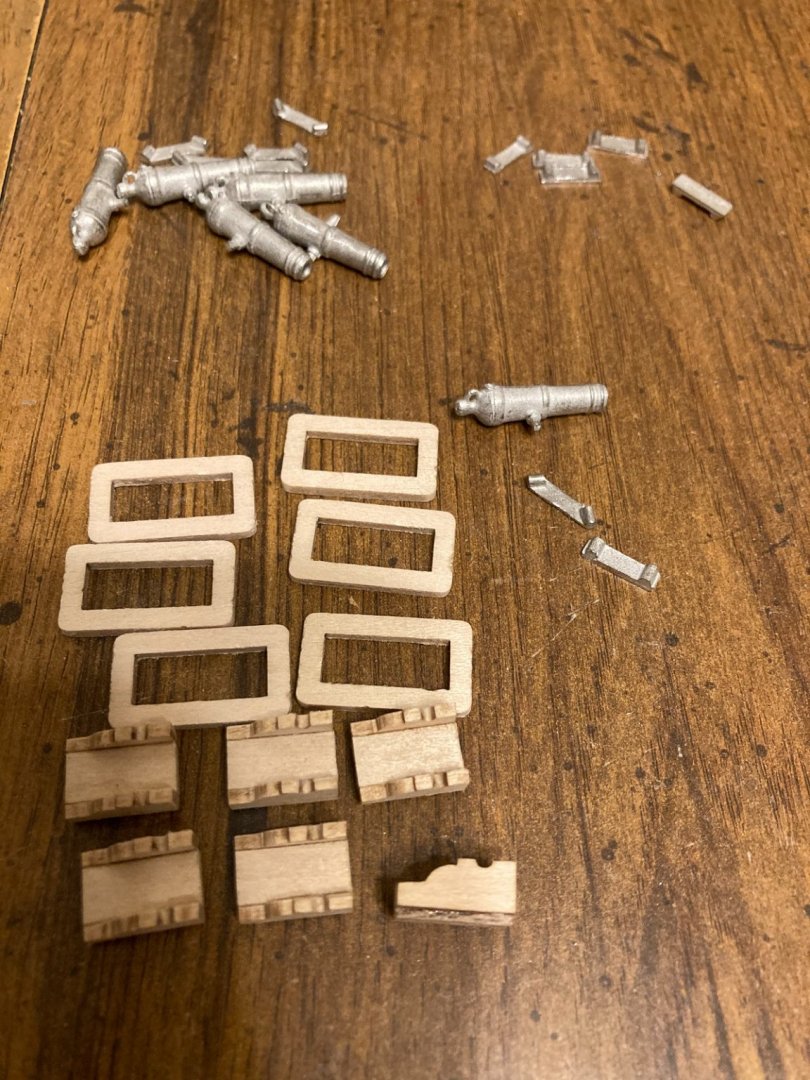
Also, taking a break from the cannons to build some of the upper deck fittings

The cannons are going really slow due to rigging those tiny blocks
 .
.
Thanks for looking in.
Mark
-
-
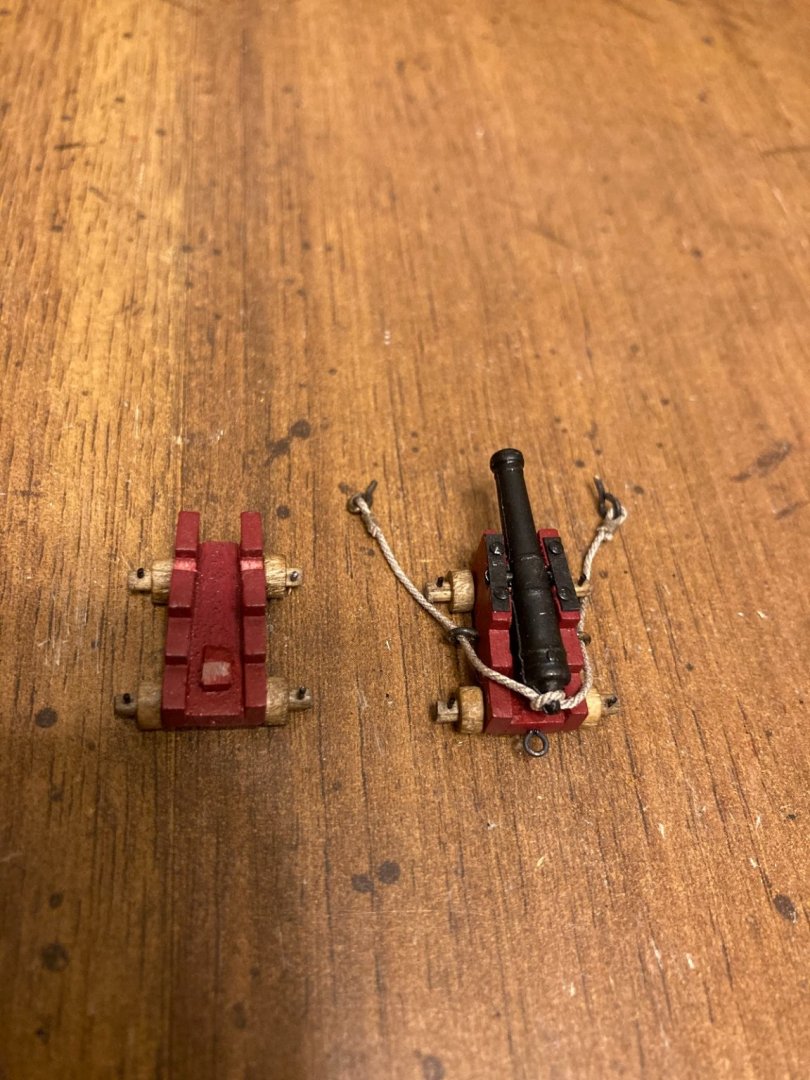
Hi all - been working on the cannons for the upper decks. First off,the carriages were supplied as 3mm thick - way to thick,so I thinned them down to 2mm. The carriage beds were cut as a straight rectangle, so I sanded them down to be narrower at the front. Next, the trucks were only 3mm in diameter - made the carriages look like one of those cars with a space saver spare you see sometimes - so I got some 4mm ones from Model Expo - much nicer. The cannons were painted satin black & the breech ropes were added. The trunnion caps are simply black cartridge paper. These carriages are way too small to show a proper clasp, so I just added some small black nails to them. They are somewhat flat because the trunnions were way to small in diameter for the cut-outs in the carriages. The tackles will added when I get some more blocks from Syren. This is also a test of my new iphone camera - seems much better than my old stand alone camera
") !
!
Mark
- Old Collingwood, gieb8688, KurtH and 11 others
-
 14
14
-
How about leaving the damage & claim it hit a flock of birds?
 You could even paint some blood smears on it!
Mark
-
Thanks for the kind words
. You are doing a fine job with this kit - I was able to cover much of the plywood edges with gobs of paint,but even with that it would have been nice to have plywood that didn`t fall apart just by looking at it!
Mark
-
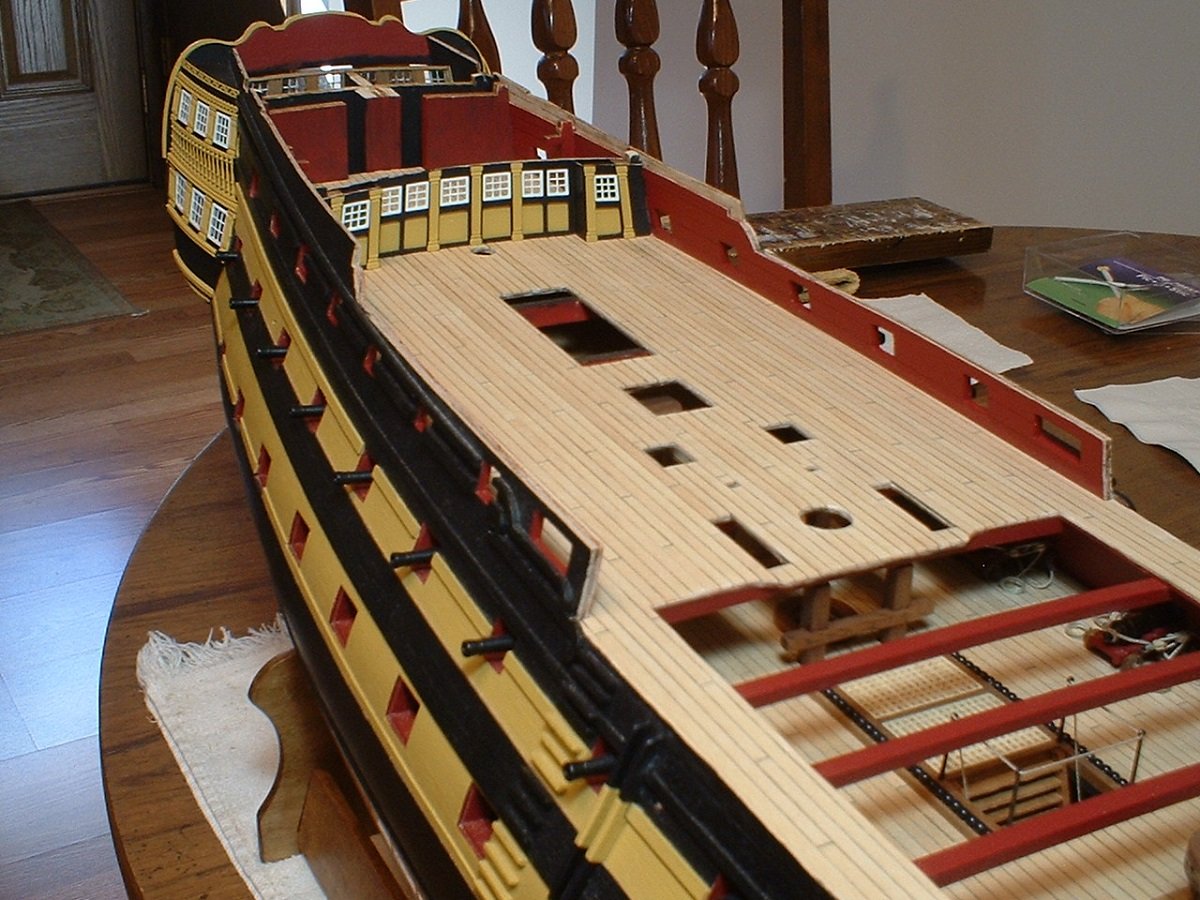
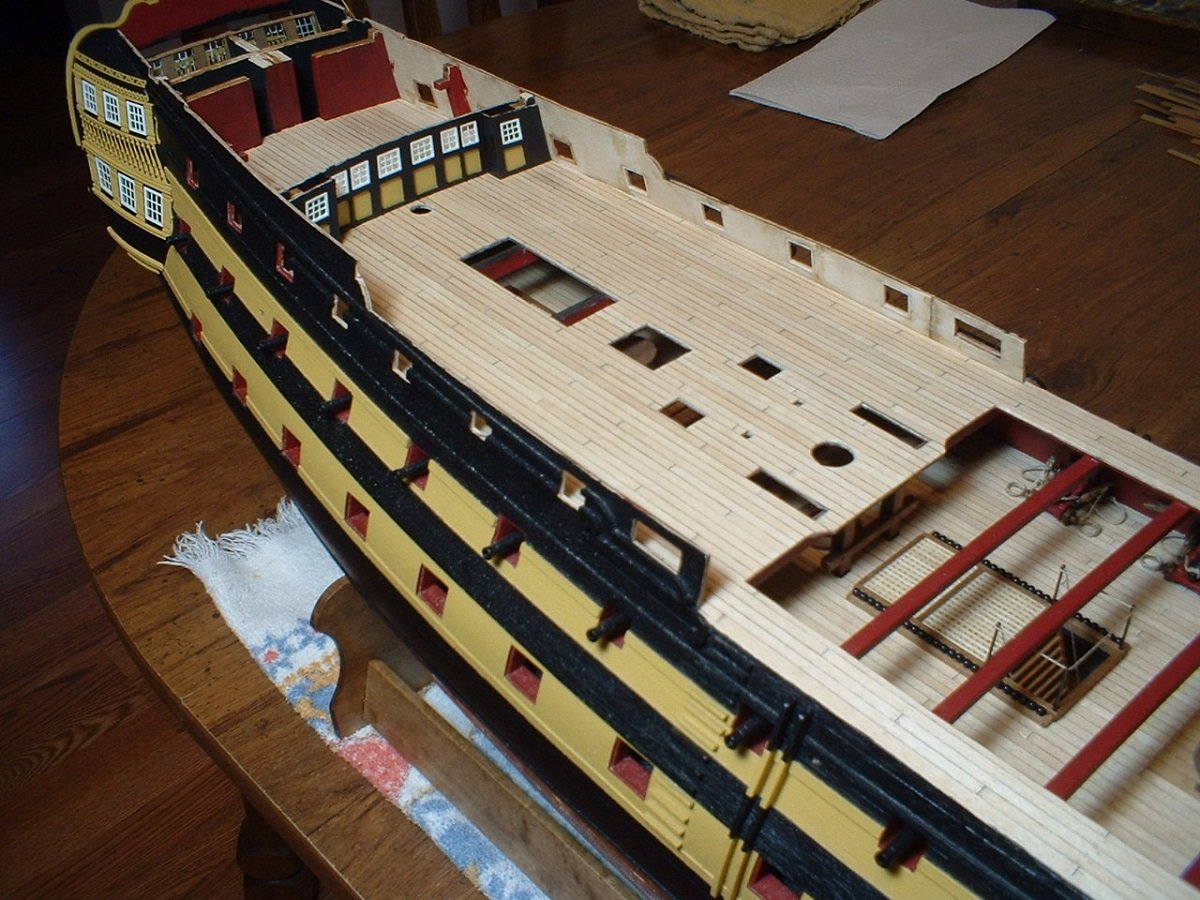
Not a lot to show,but the inner bulwarks were planked & painted along with adding the columns on the bulkhead,which can barely be seen after the poop deck is added. I left a notch in the bulwark planking for the forward-most poop deck beam to sit on. The bulwark planks were pre-painted to avoid making a mess of the deck.
Mark
-
-
Nothing wrong with spacing it out as long as you have a safe place to store all the sub-assemblies & can remember where you left off. I tend to lose my train of thought if I put things aside for too long,but that`s just me
.
Mark
- mtaylor, Canute and Landlubber Mike
-
3
-
Hi Sean - I have built the Royal William & the bulkheads & other structural parts were laser cut,which would indicate I built a newer version. However,even at that ,many of the other parts needed to be scratch built or shaped from the supplied timber. This kit is a major undertaking & I would not recommend it to someone who has only built one kit. Having said that,I wish you the best if you decide to go ahead with it. I don`t know about the older kits,but the cast decorations in mine were excellent & the dowels were not pre-tapered. The kit contains only very sparse instructions,but the plan sheets are outstanding. The Euromodel website has much more detailed instructions written by a fellow modeler & member of Model Ship World. His name is Peter Coward & goes by the name of pirate pete007. You may want to contact him using the personal message function for more detailed info. It does build into a real beauty if you have plenty of time & patience!
Mark
- uss frolick, Canute, Gregory and 4 others
-
7
-
-
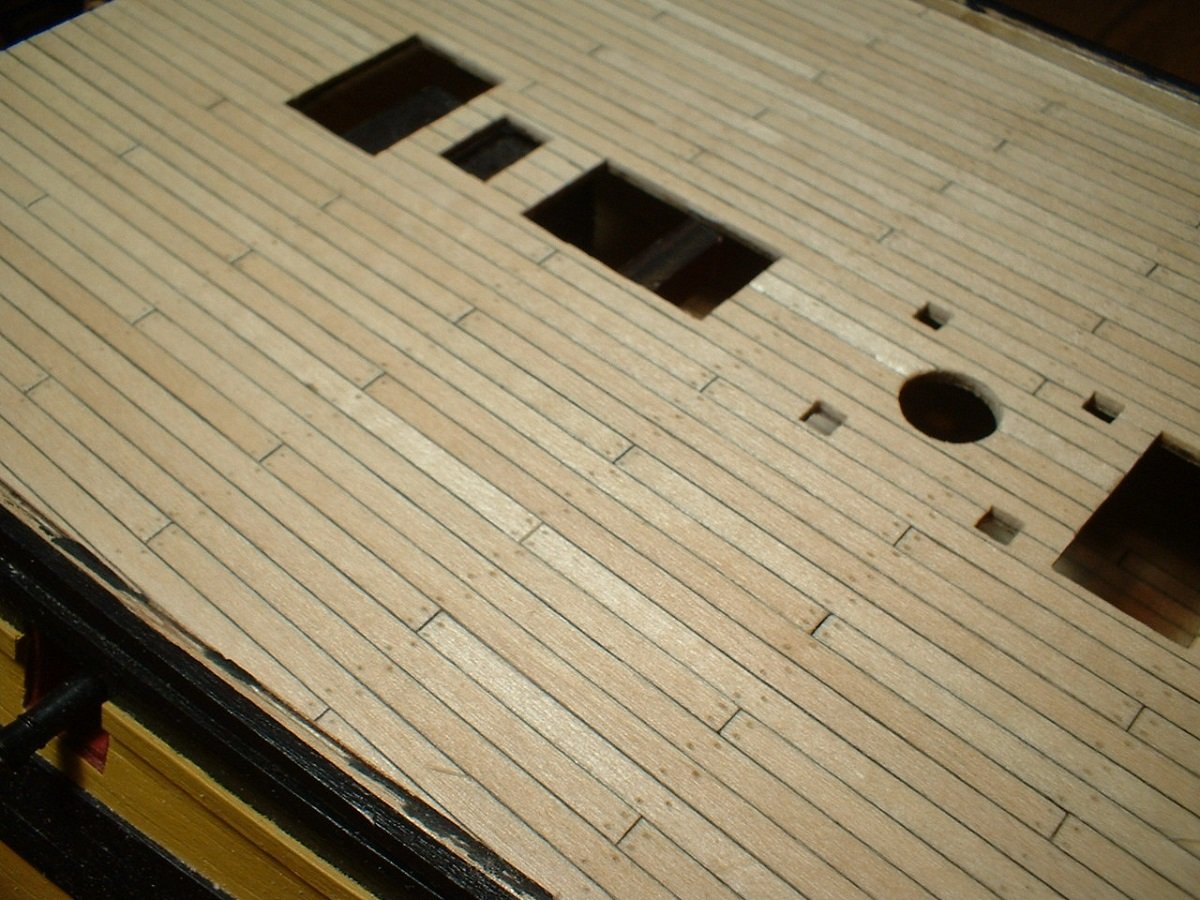
Thanks guys - I was going to use an even smaller bit,but a #78 was the smallest my pin vise would grip tightly. Also,some of the planks did not fit together as tightly as I wanted due to some of them having rough or splintery edges. Spent a lot of time sanding the edges,but that was a little difficult to do with the planks being only 3mm wide.
Mark
-
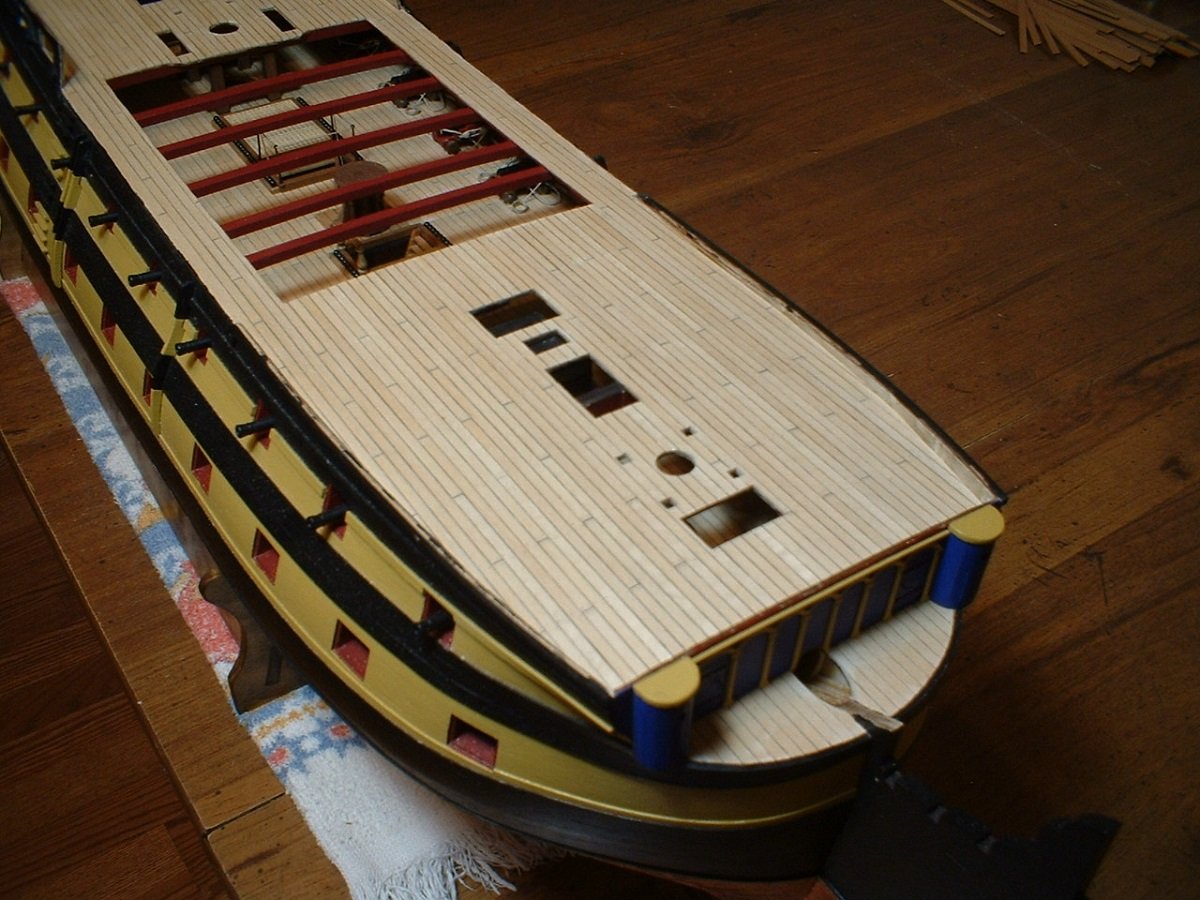
Another little update - the upper deck is now planked. I used a pencil on the edges of the planks to darken them,then a #78 drill bit was used to make a small indentation to simulate treenails. The deck was then scraped & sanded & a coat of poly applied. The treenails can`t be seen at arm`s length,but show in the close-up - just what I was aiming for.
Mark
- rafine, egkb, mort stoll and 16 others
-
19
-
Looks really good!
Mark
-
Yes,it is frustrating,considering the price & size of the kit. You are making a good go of it,though! It tested my patience more than once.
Mark
-
Just one last word about the Lotus
. We used to have one come into the Toyota dealership where I worked - it had a 4 cyl. Toyota engine in it!
Mark
- lmagna, mtaylor, Old Collingwood and 5 others
-
8
-
Another beauty - I like it!
Mark
- Egilman, Old Collingwood, CDW and 4 others
-
7
-
-
Congratulations on a nice looking ship!
Mark
-
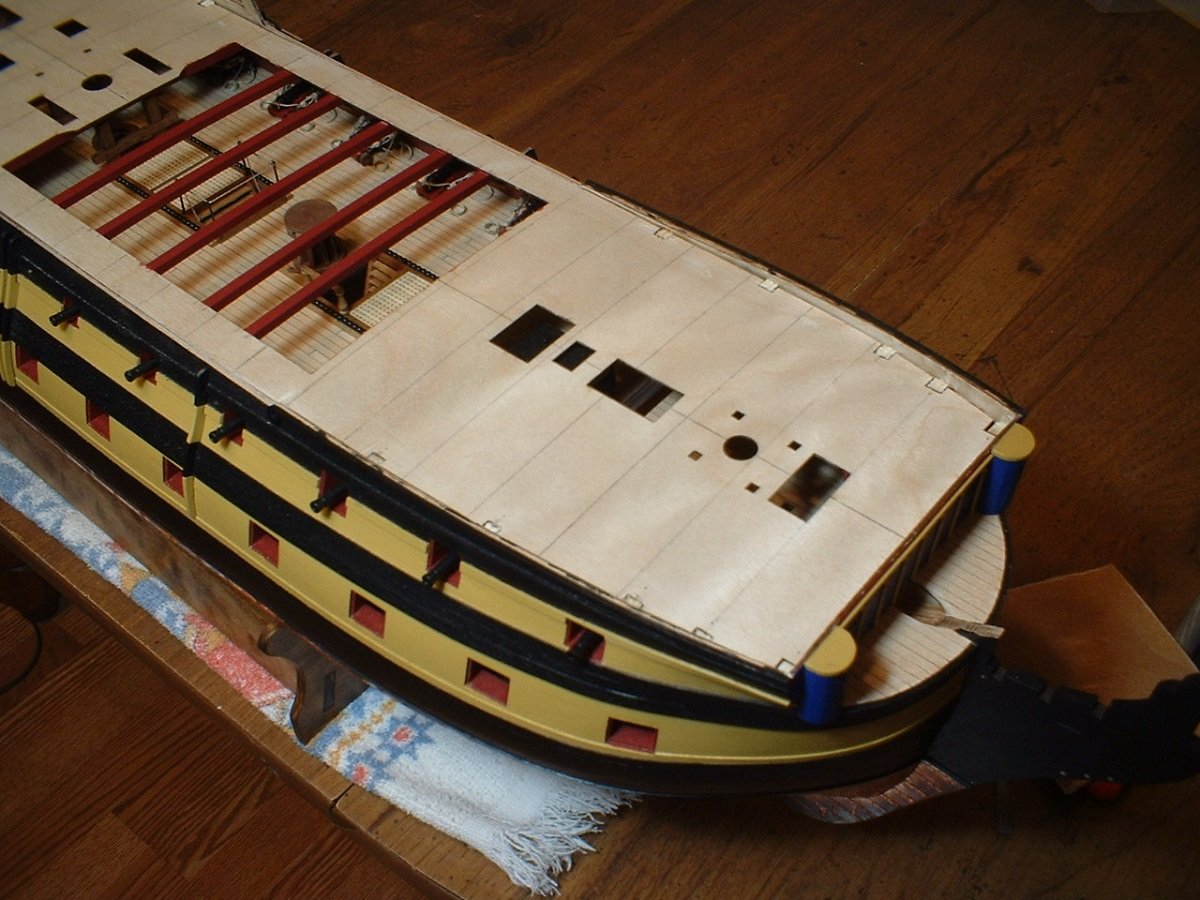
Yep,it`s all going together pretty well. I should be further along than I am - just taking my time trying not to mess anything up. Speaking of messing things up,I just noticed I didn`t make the mouldings on the upper part of the hull properly - they should have a profile instead of being just flat planks. It`s pointed out on the plan sheet with the paint schemes,so I guess I can chalk it up to not paying enough attention to the plans
 . It would have been much easier to have seen that if it was put on the main hull profile plan sheet,though. The good thing is,it`s hardly noticeable with that area painted black along with the chain wales & shrouds covering most of it eventually.
Mark
-
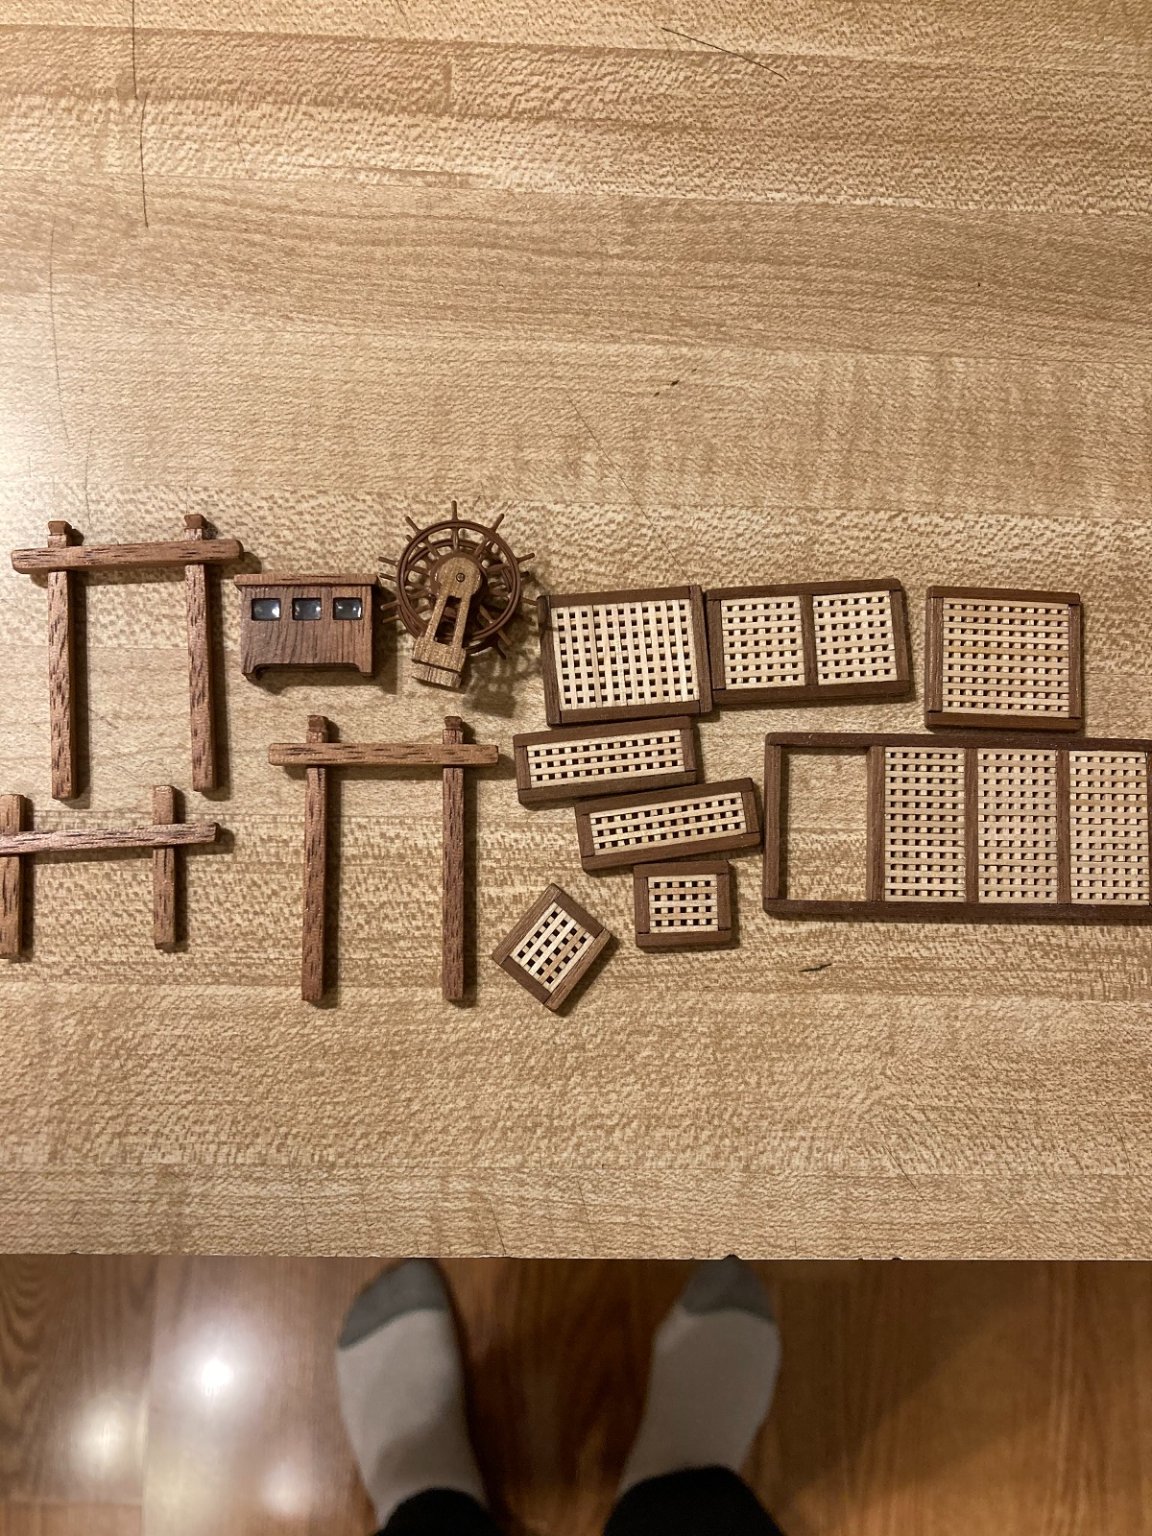
Hi - not a lot to show this time. The upper false deck has been glued in place along with the beams & marked off for a 4 butt shift for the planking. The screen bulkhead was also assembled & glued in place. The instructions say to add the margin planks next,but they are not shown on the plans so I will just add them as I see fit. The columns on the bulkhead will be added after the deck is planked. I had to file a small notch in the second beam from the front to clear the capstan,which was a touch high after adding the platform under it - won`t be seen after the ship`s boats are in place
 .
.

Mark
-
WOW - belongs in a museum.
Mark
-
12 hours ago, CDW said:
Were the Saab's from the 70's? I remember back then when they had some real fans of them, but they were one of those cars you didn't see around very often, an odd-ball. There were a couple of families I went to church with who owned Saab's. If I remember correctly, they had an odd number of cylinders, not 4, 6, or 8. I heard people rave about their crash test safety ratings.
They had some early models that had a 2 cycle engine,but that was before my time. I was referring to cars from the late 70`s into the 80`s (the 900 series). Everything I worked on during that time period had a 4 cylinder engine - many of them turbocharged. I worked on them from the early 80`s until 2013 & only saw two 4 cyl. engine failures. In the mid-90`s GM decided to put a poorly designed V6 in many of them - bad decision!
Mark


Santisima Trinidad by LFNokia - FINISHED - OcCre - 1:90
in - Kit build logs for subjects built from 1751 - 1800
Posted
It`s been very fascinating to watch your weathering techniques! Congratulations on a job well done & thanks for sharing") .
.
Mark