yvesvidal
-
Posts
3,639 -
Joined
-
Last visited
Content Type
Profiles
Forums
Gallery
Events
Everything posted by yvesvidal
-
 So, no checker-board floor in the officer cabin? Yves
 -
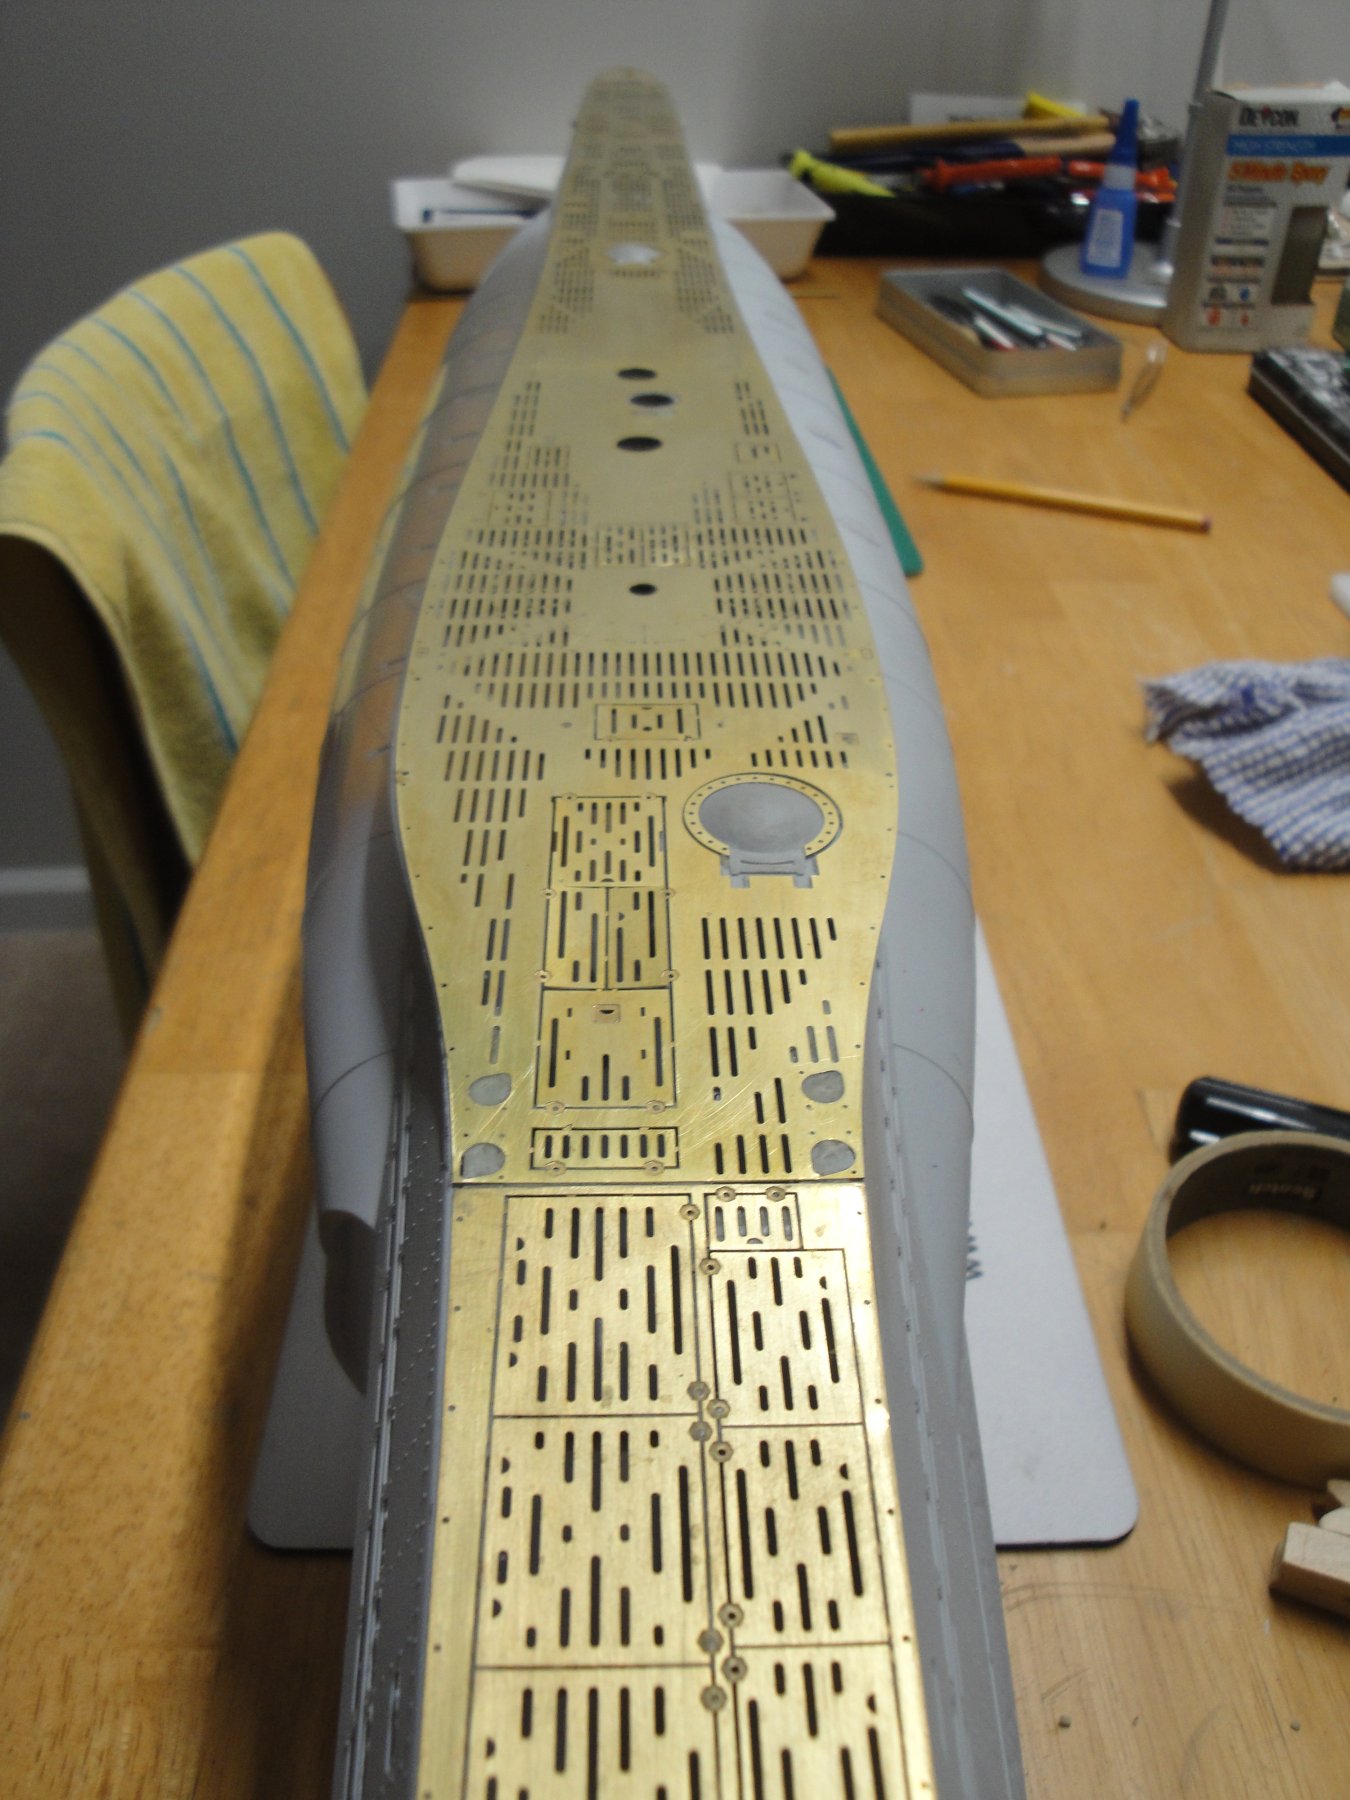
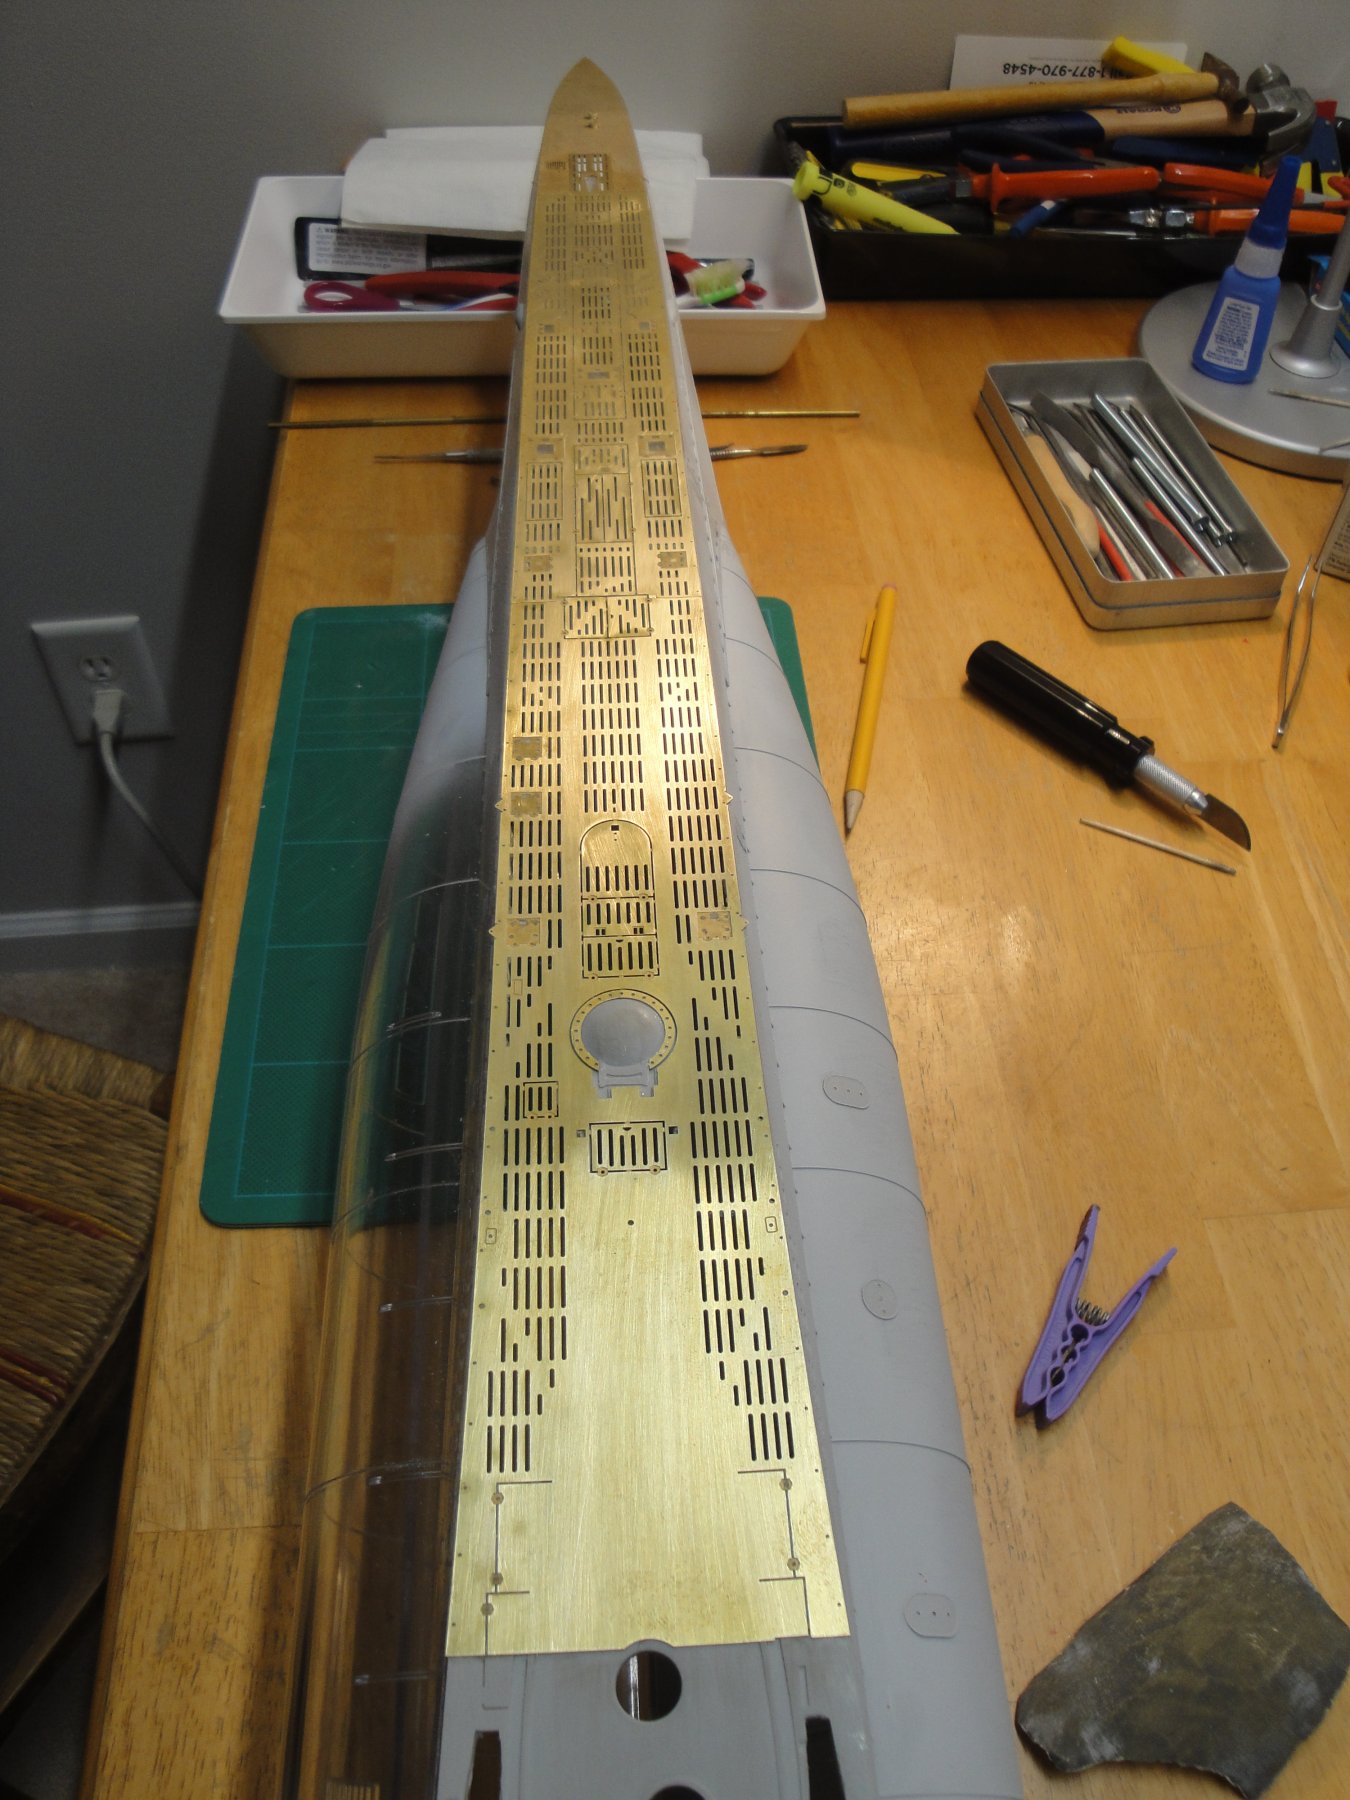
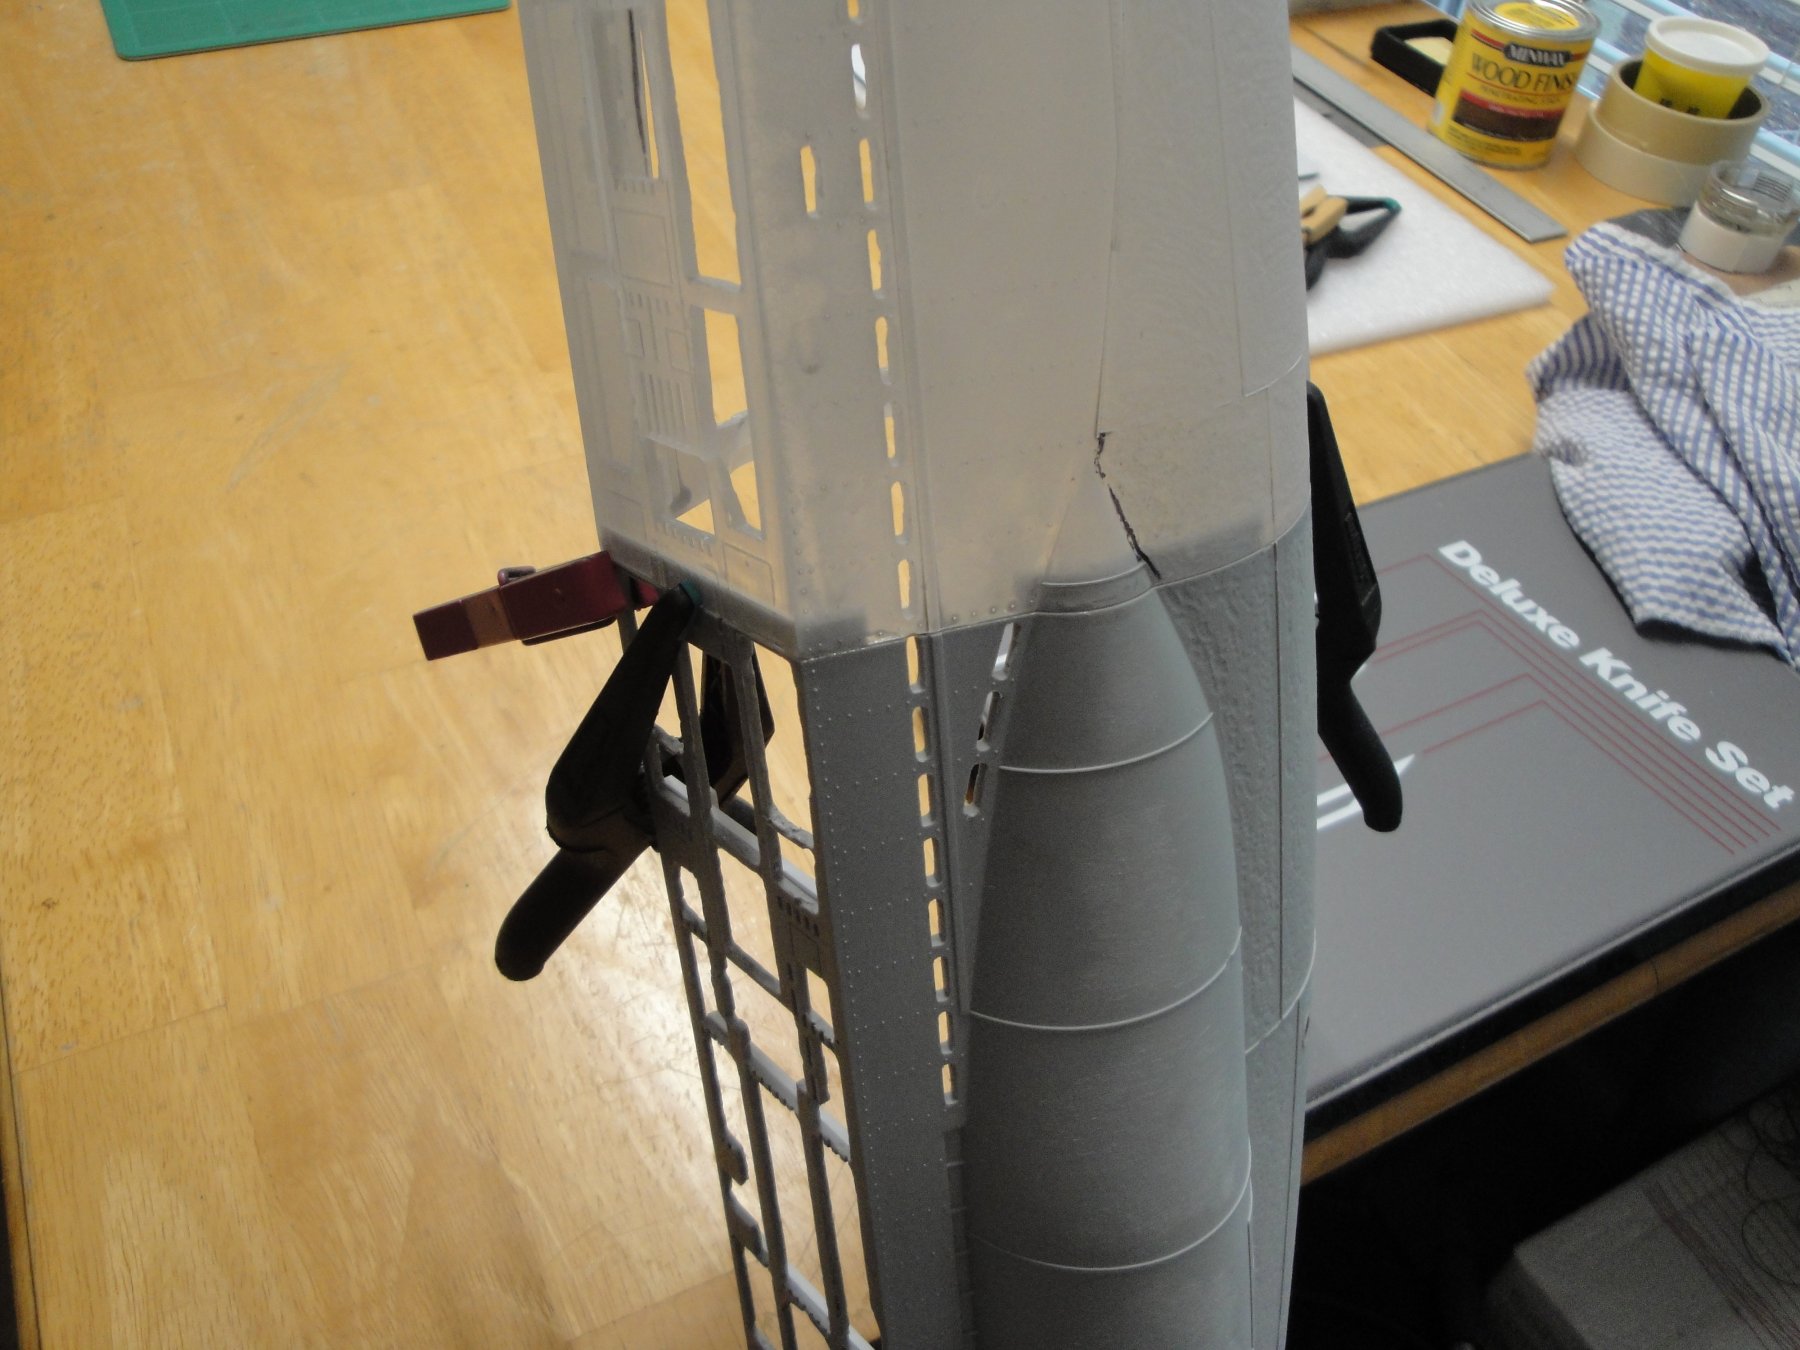
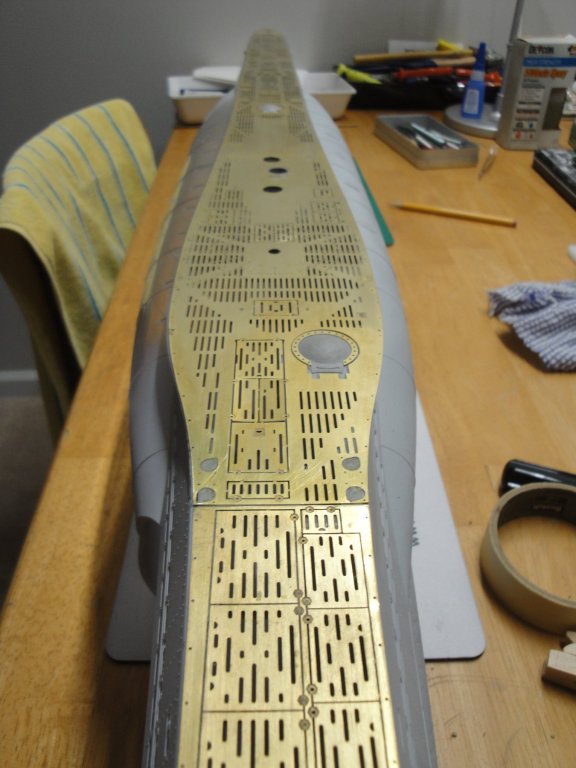
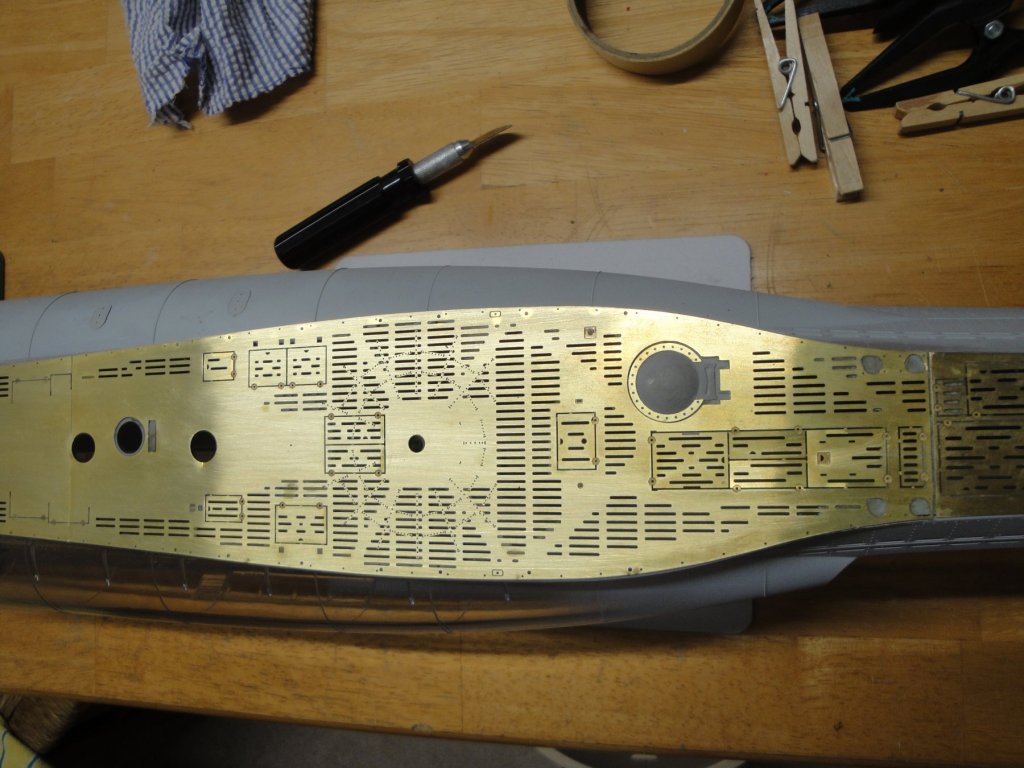
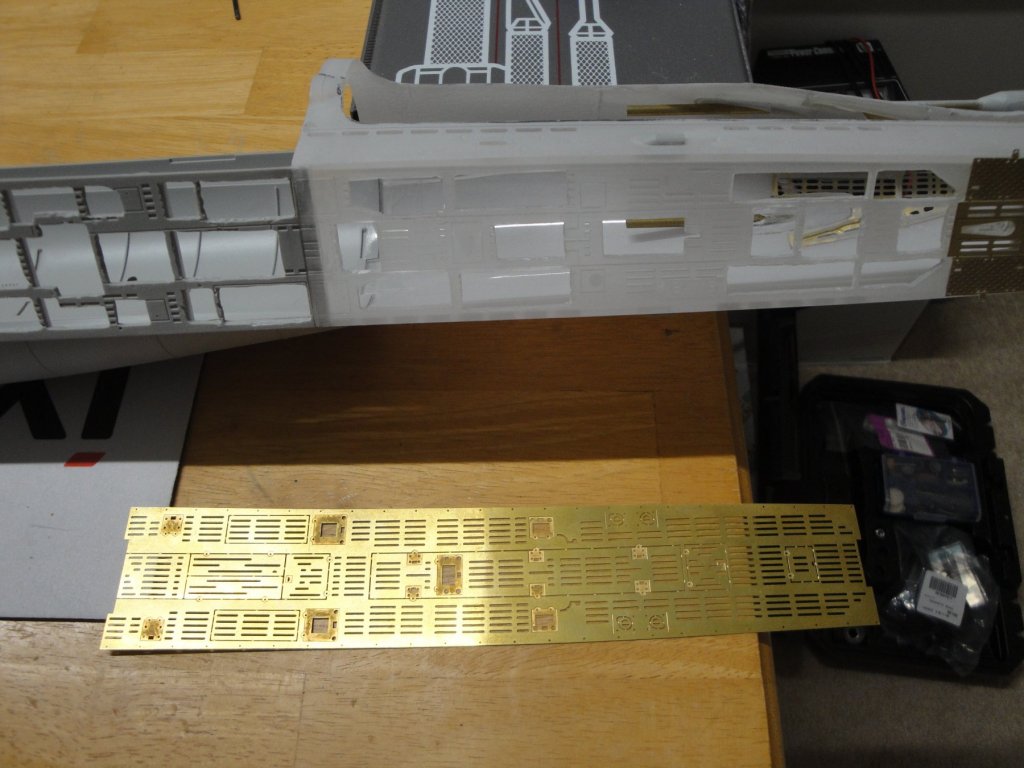
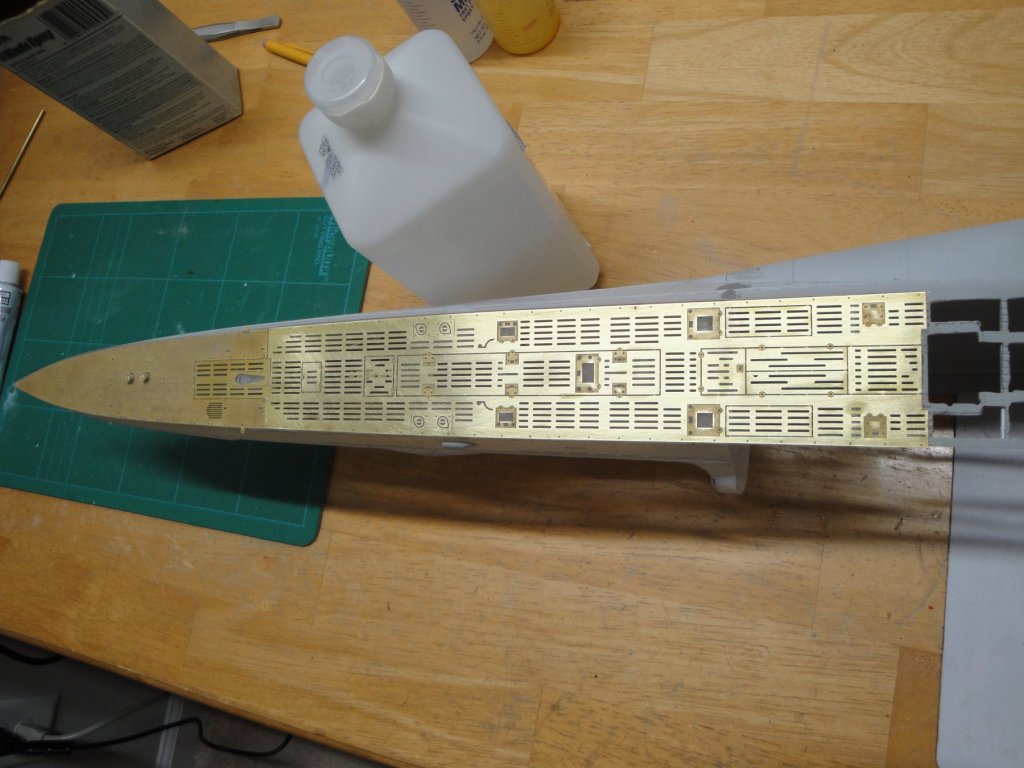
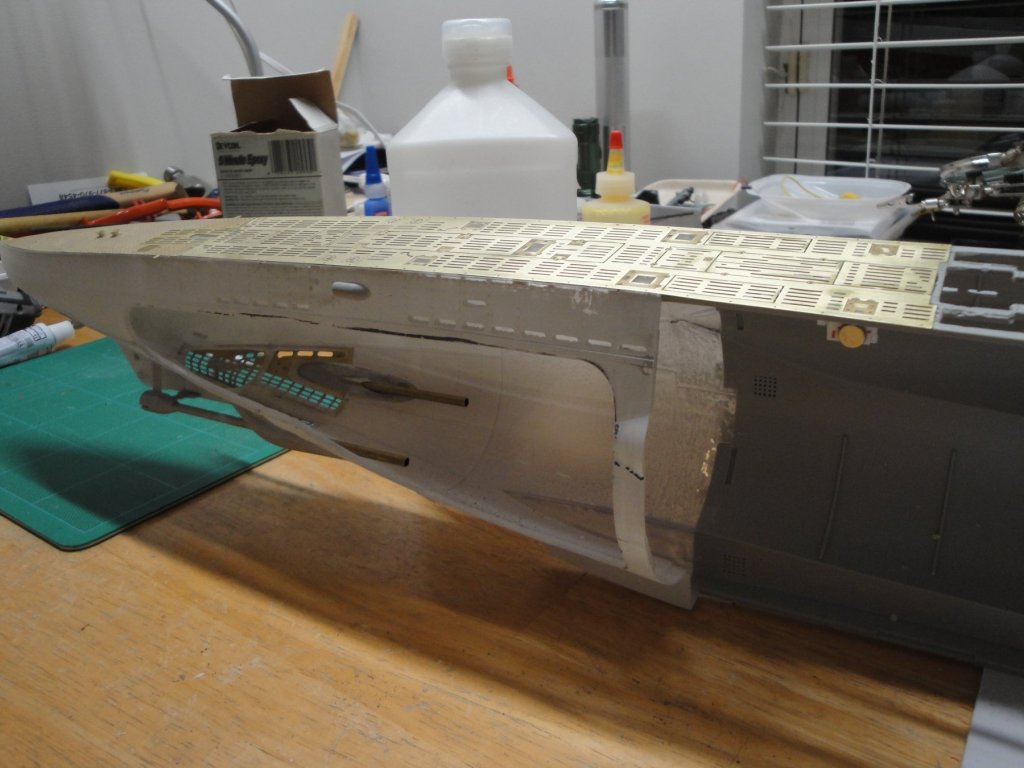
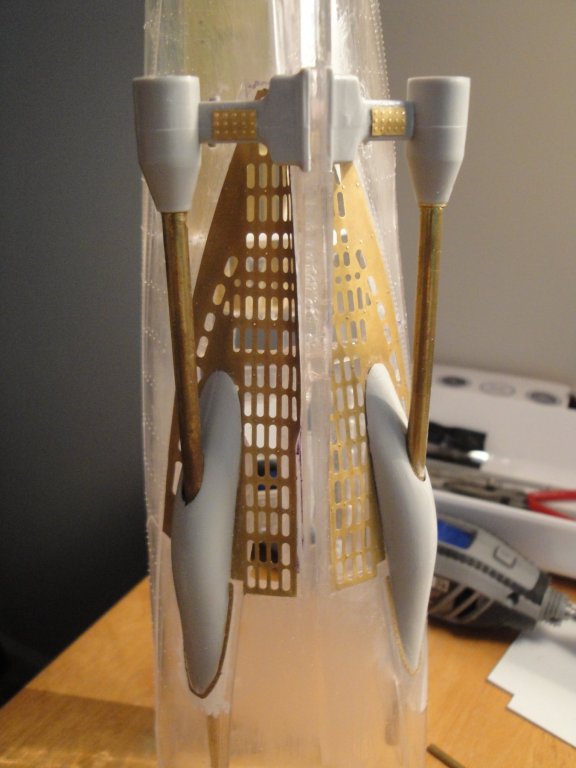
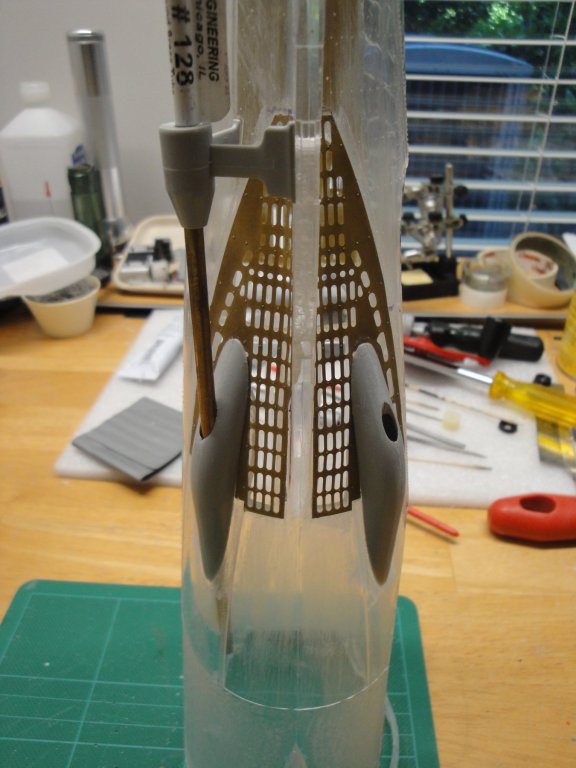
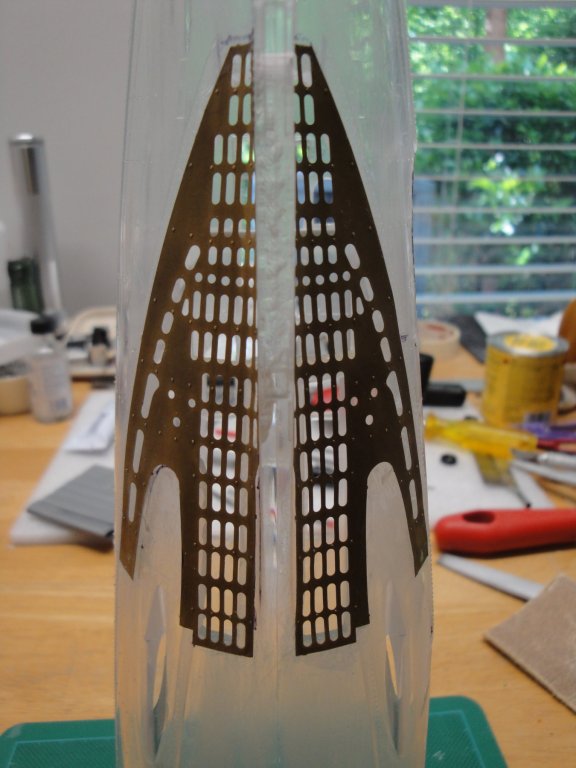
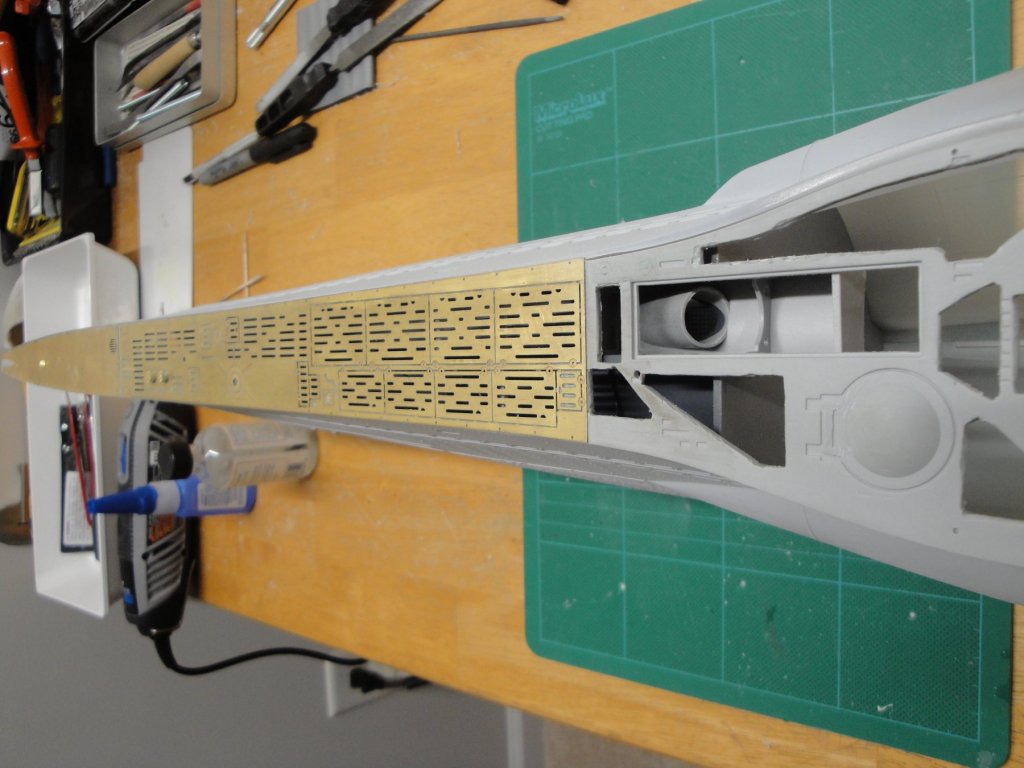
I have to say that this PE deck from RCSUBS, changes the model considerably. It brings a different flavor to this huge model, by shifting the dominance of plastic to metal and turning a simple (although big) plastic model into something a lot more valuable and unique. Despite the enormous amount of work to properly install this PE set, I just cannot imagine having that beautiful submersible with the simple and so grossly molded plastic deck, provided by Trumpeter. I see a lot of very beautiful models of that kit on the Web, but very few people takes the energy and time to install this specific PE set. In my humble opinion, it is today the best PE set one can find for the Trumpeter kit. I am always pleased with the precision and accuracy of the different parts and how they fit together. Now another question for the PE experts: I noticed that the Vallejo Primer tends to flake and peel on the brass parts, when you lightly sand it. I wonder if the Tamiya primer may work better or if I should go with an automotive primer. Any suggestions? Also, what kind of stands do you guys use to present such a model? Where do you find the brass or other metal parts used to display our models ? And NO, I am not going to use the ugly plastic stands provided by the Trumpeter. Yves
-
Et voila! All PE decks have been glued with epoxy: This reinforces the "laced" plastic deck considerably. And our typical claustrophobic pictures: I should get some ordered PEs from Czech Republic tomorrow and it will allow me to resume the work on the front torpedo doors. I also need to think about how I will present the model and design the anchoring points for the stands. Yves


- 760 replies
-
- 16
-

-
This is a fabulous work of planking for a beginner. I would not even do a second planking as the model looks so much like those real fishing boats that you can see on the southern coasts of France and Spain. The real boats are beat up of intense usage and your model is just perfect as it looks. Finish it, some nice weathering and you will have a fabulous piece to show in your home. Yves
-
This is incredible. It is exactly like being on a real boat. How do you make it so perfect ? The patina, the color of the woods, all the details are there. I hope your models end up in Museums where generations of people can enjoy watching them. Yves
- 306 replies
-
- 19
-
-
- schooner
- la jacinthe
- (and 1 more)
-
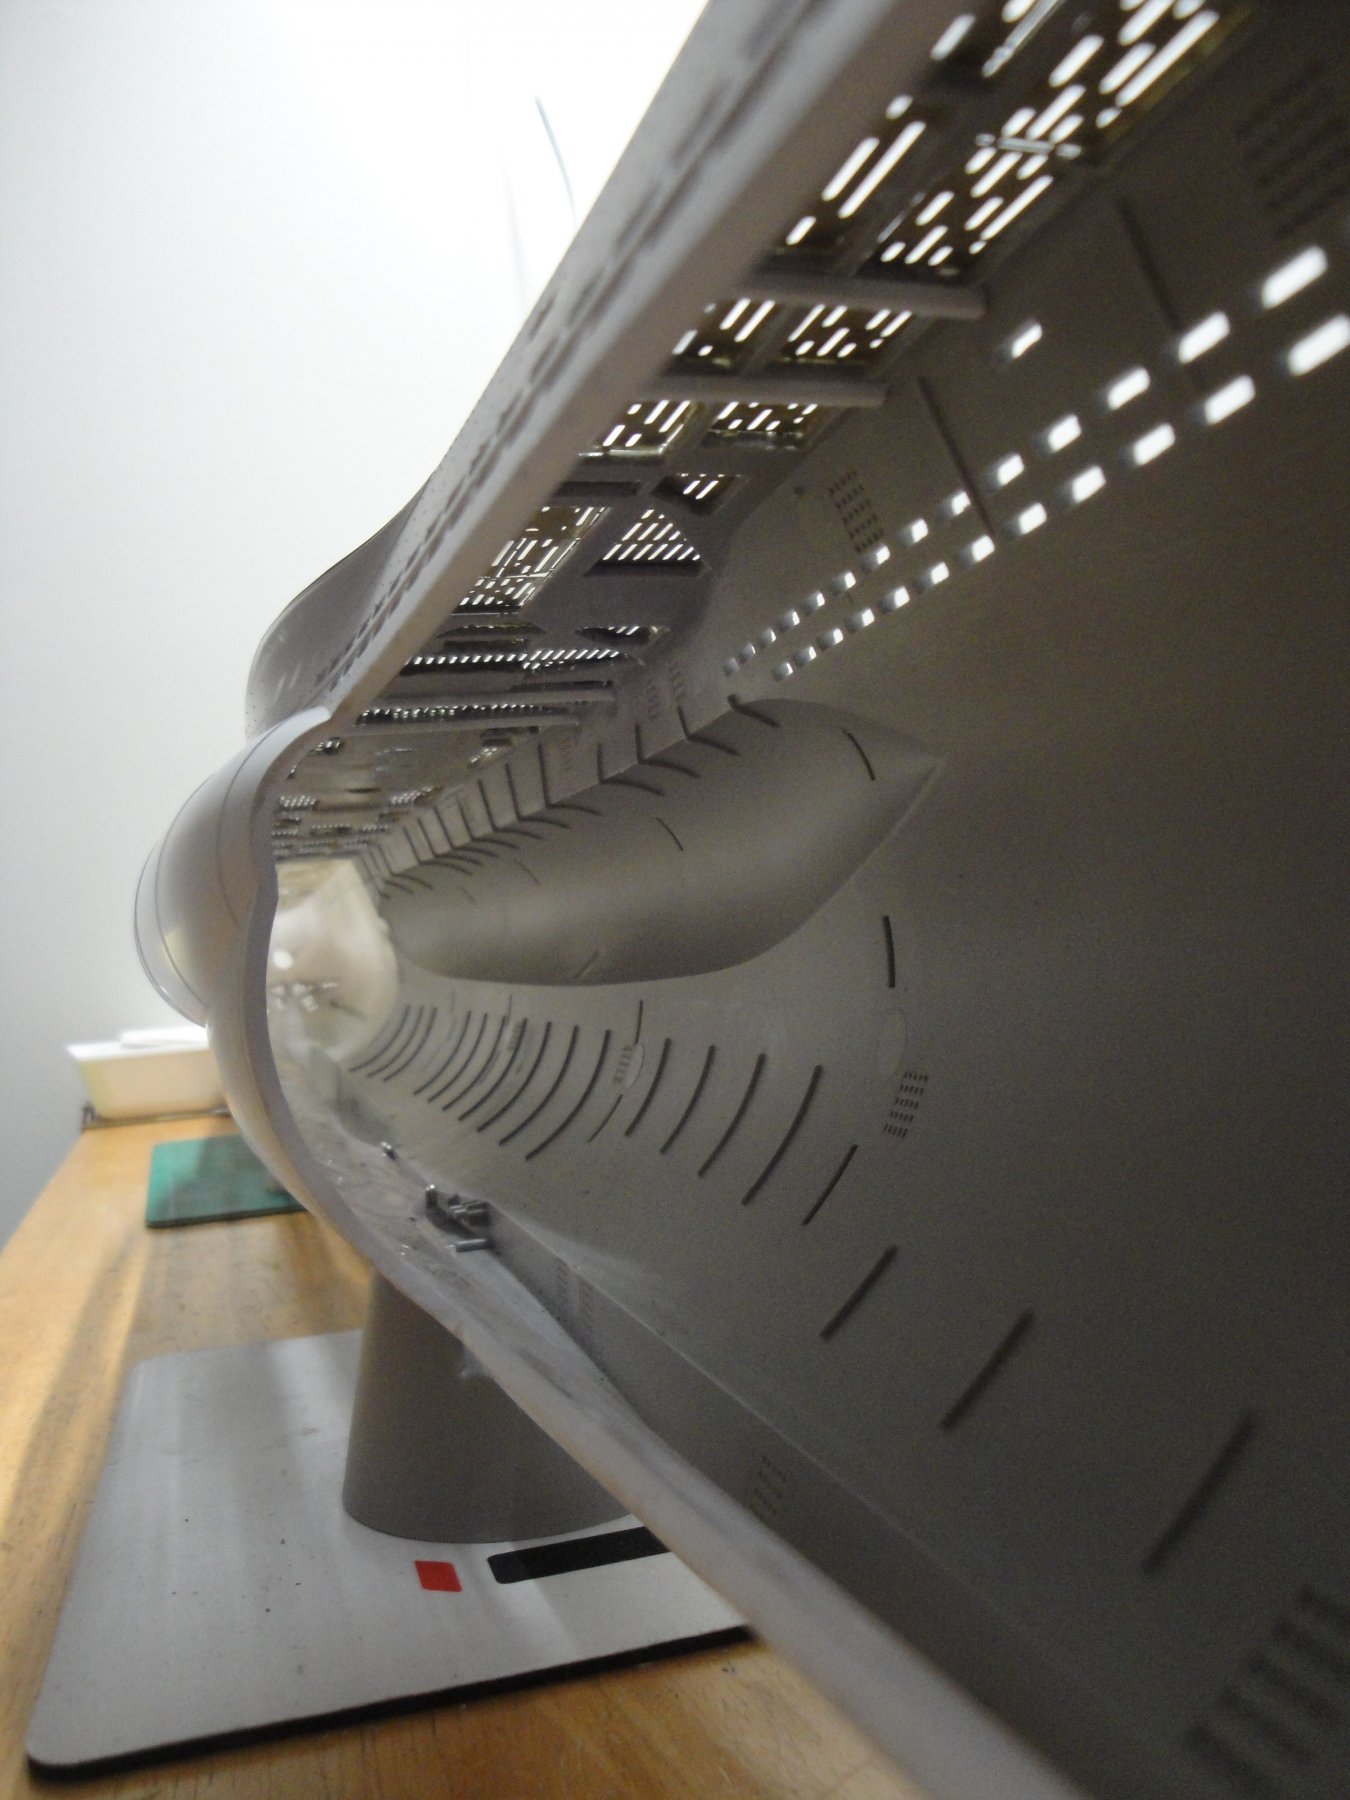
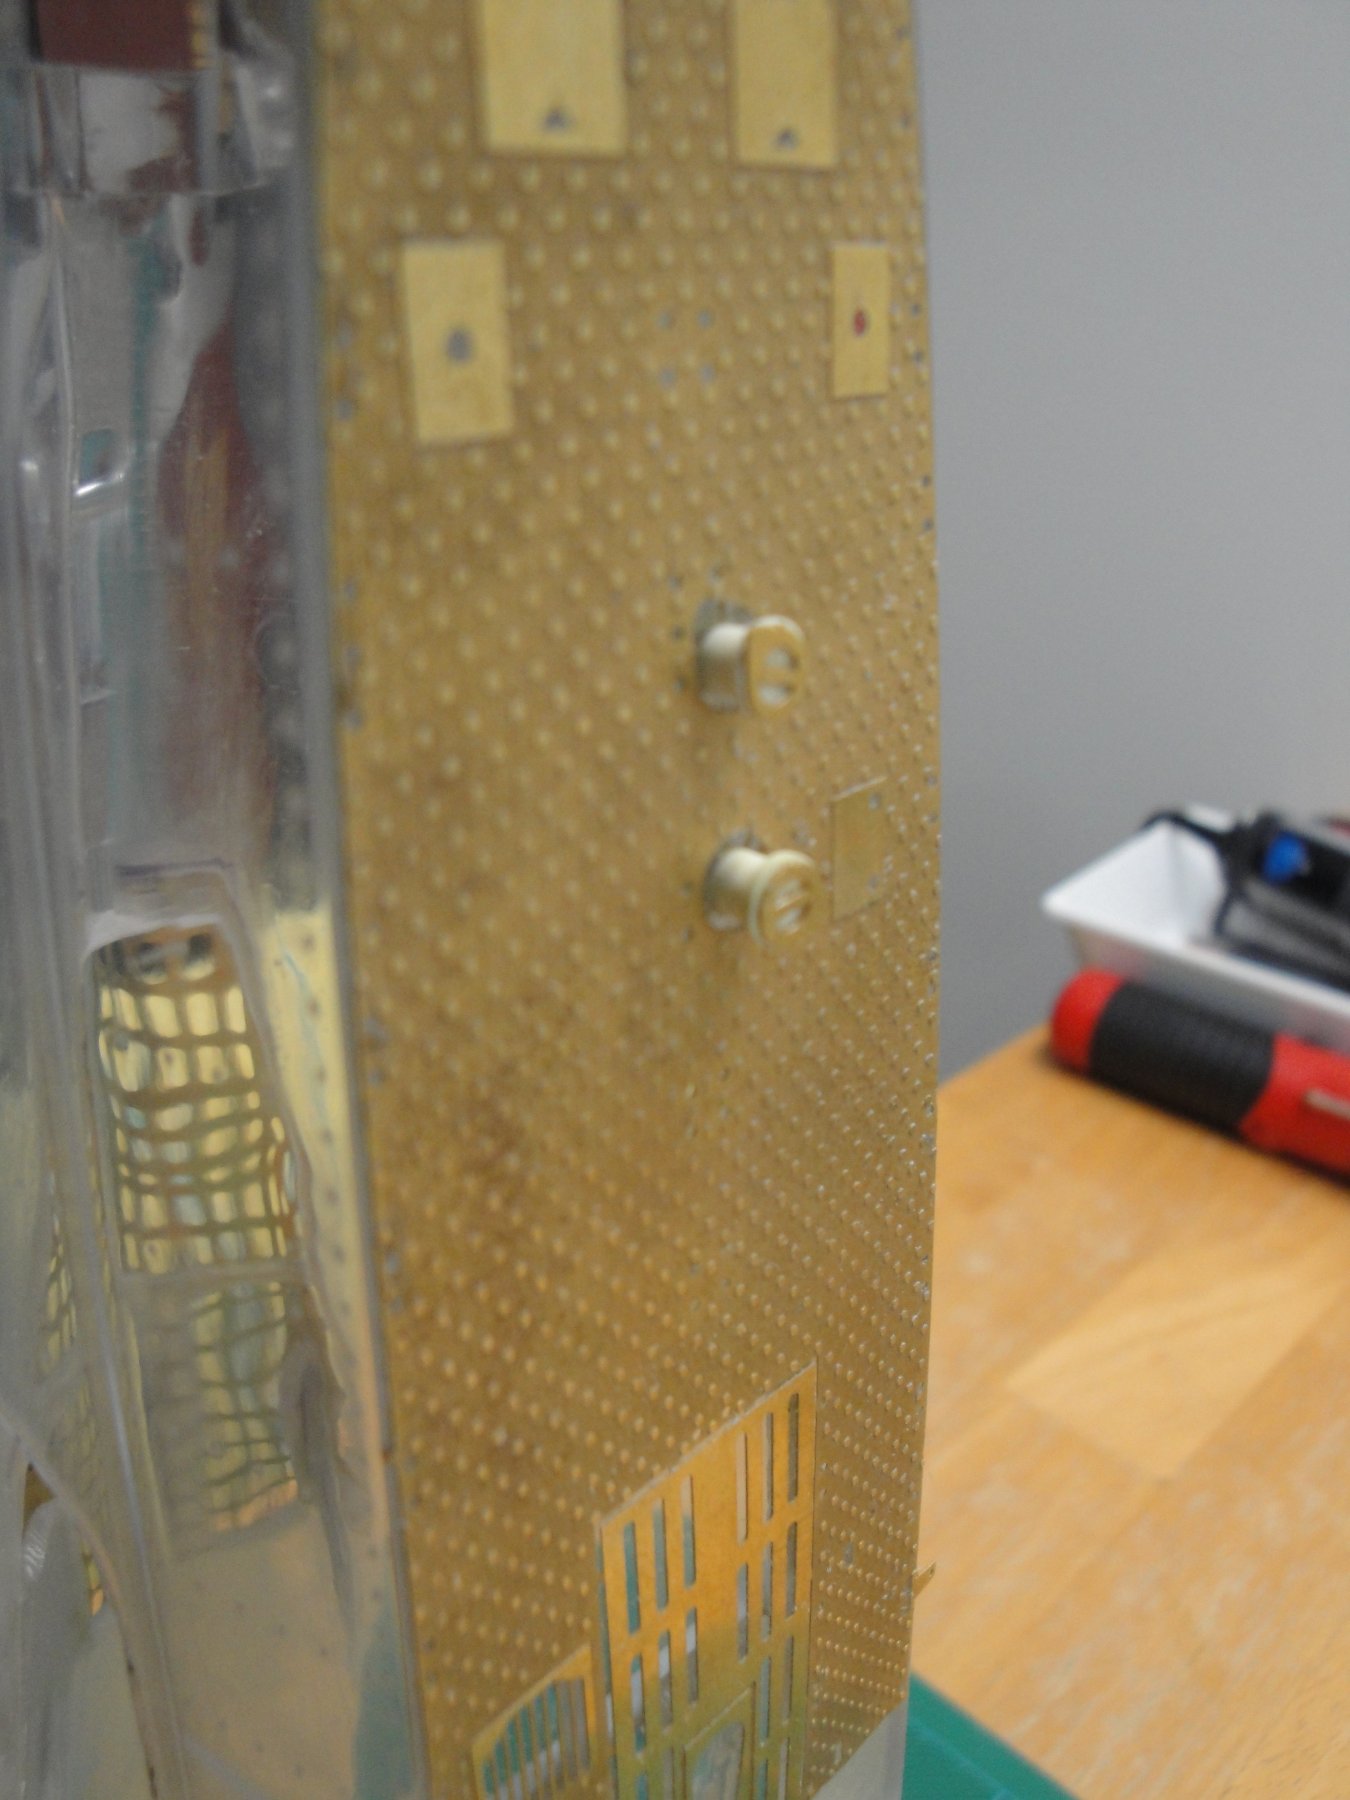
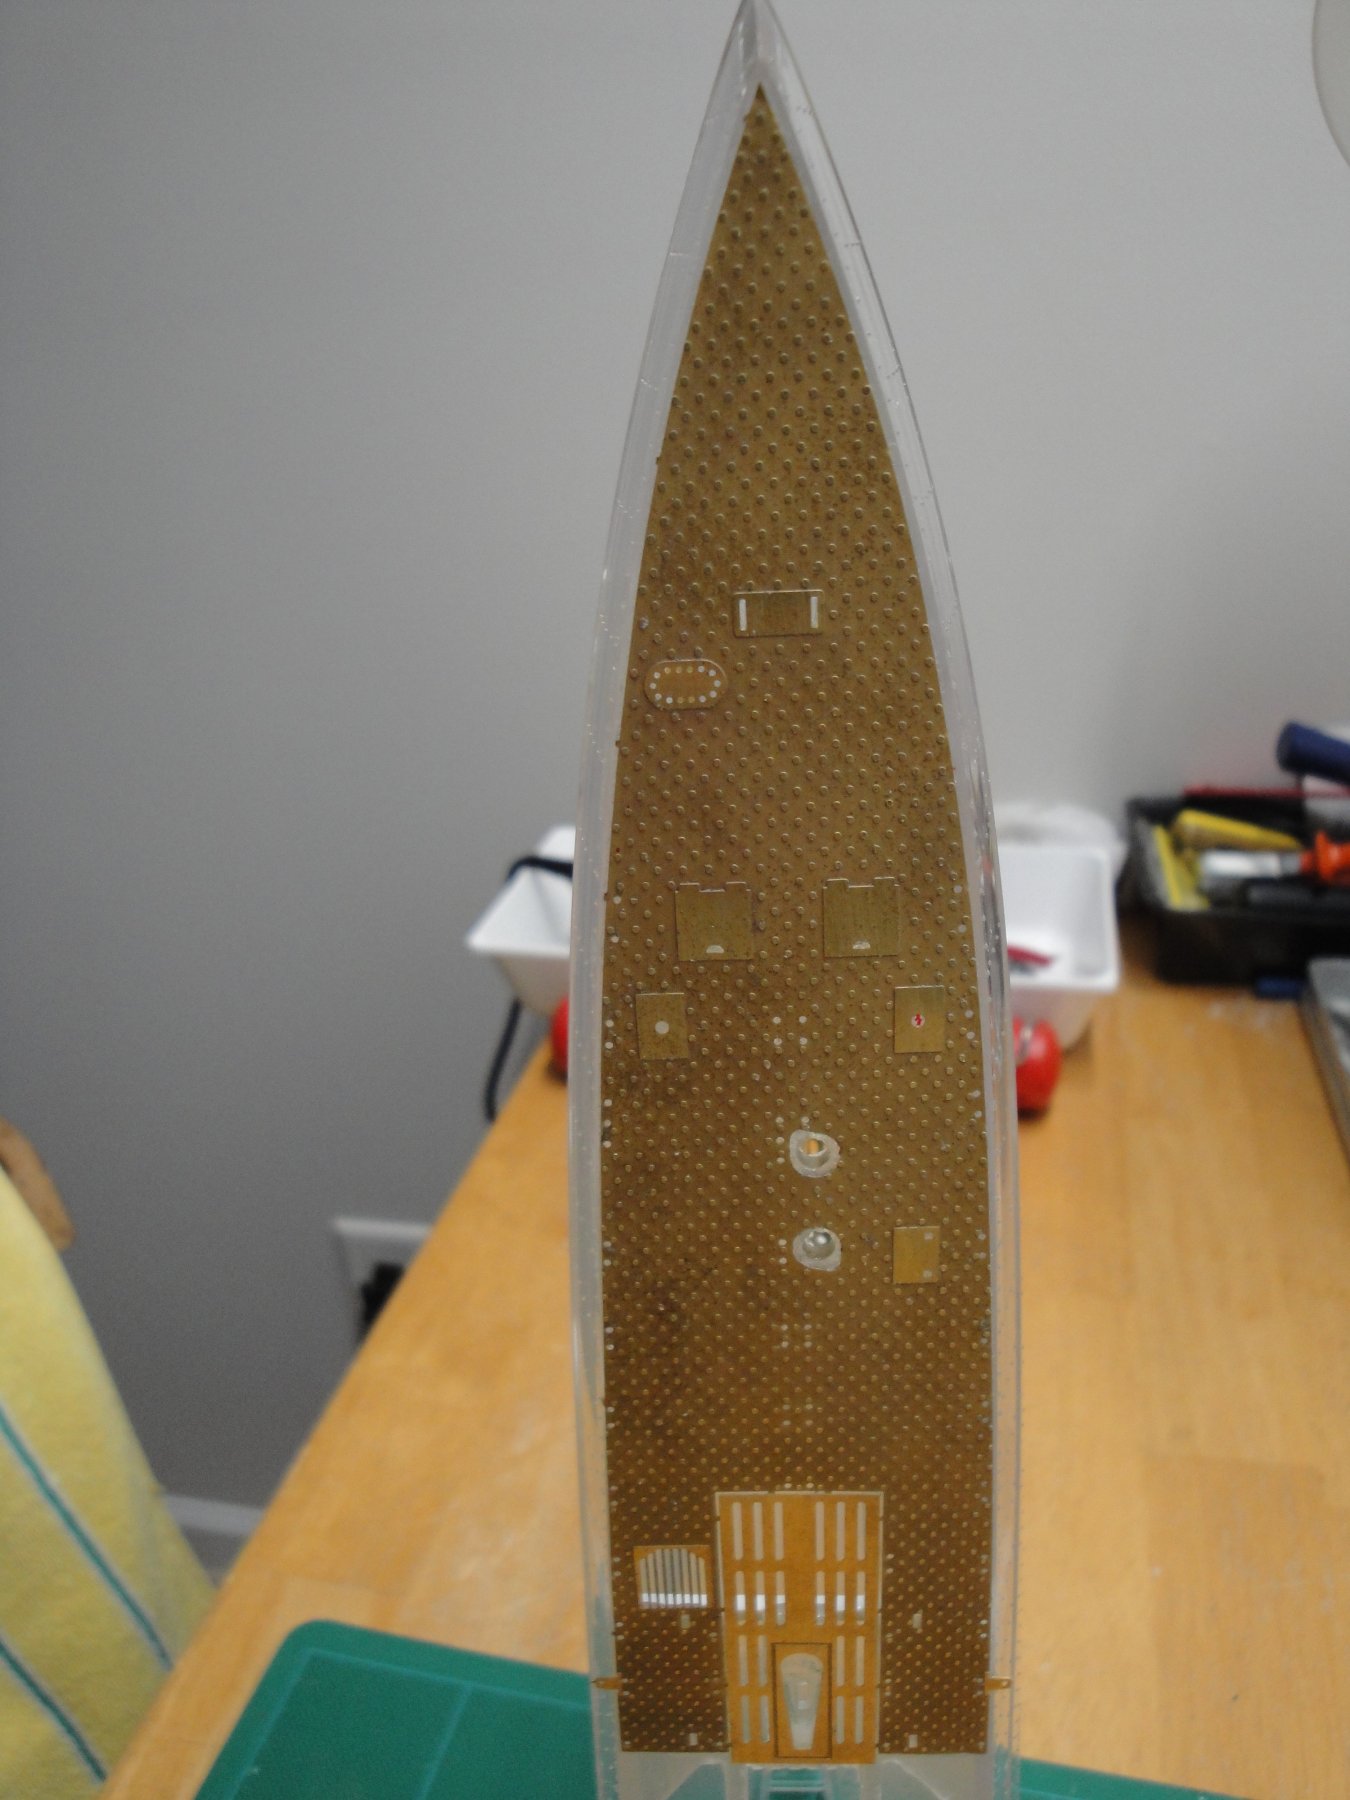
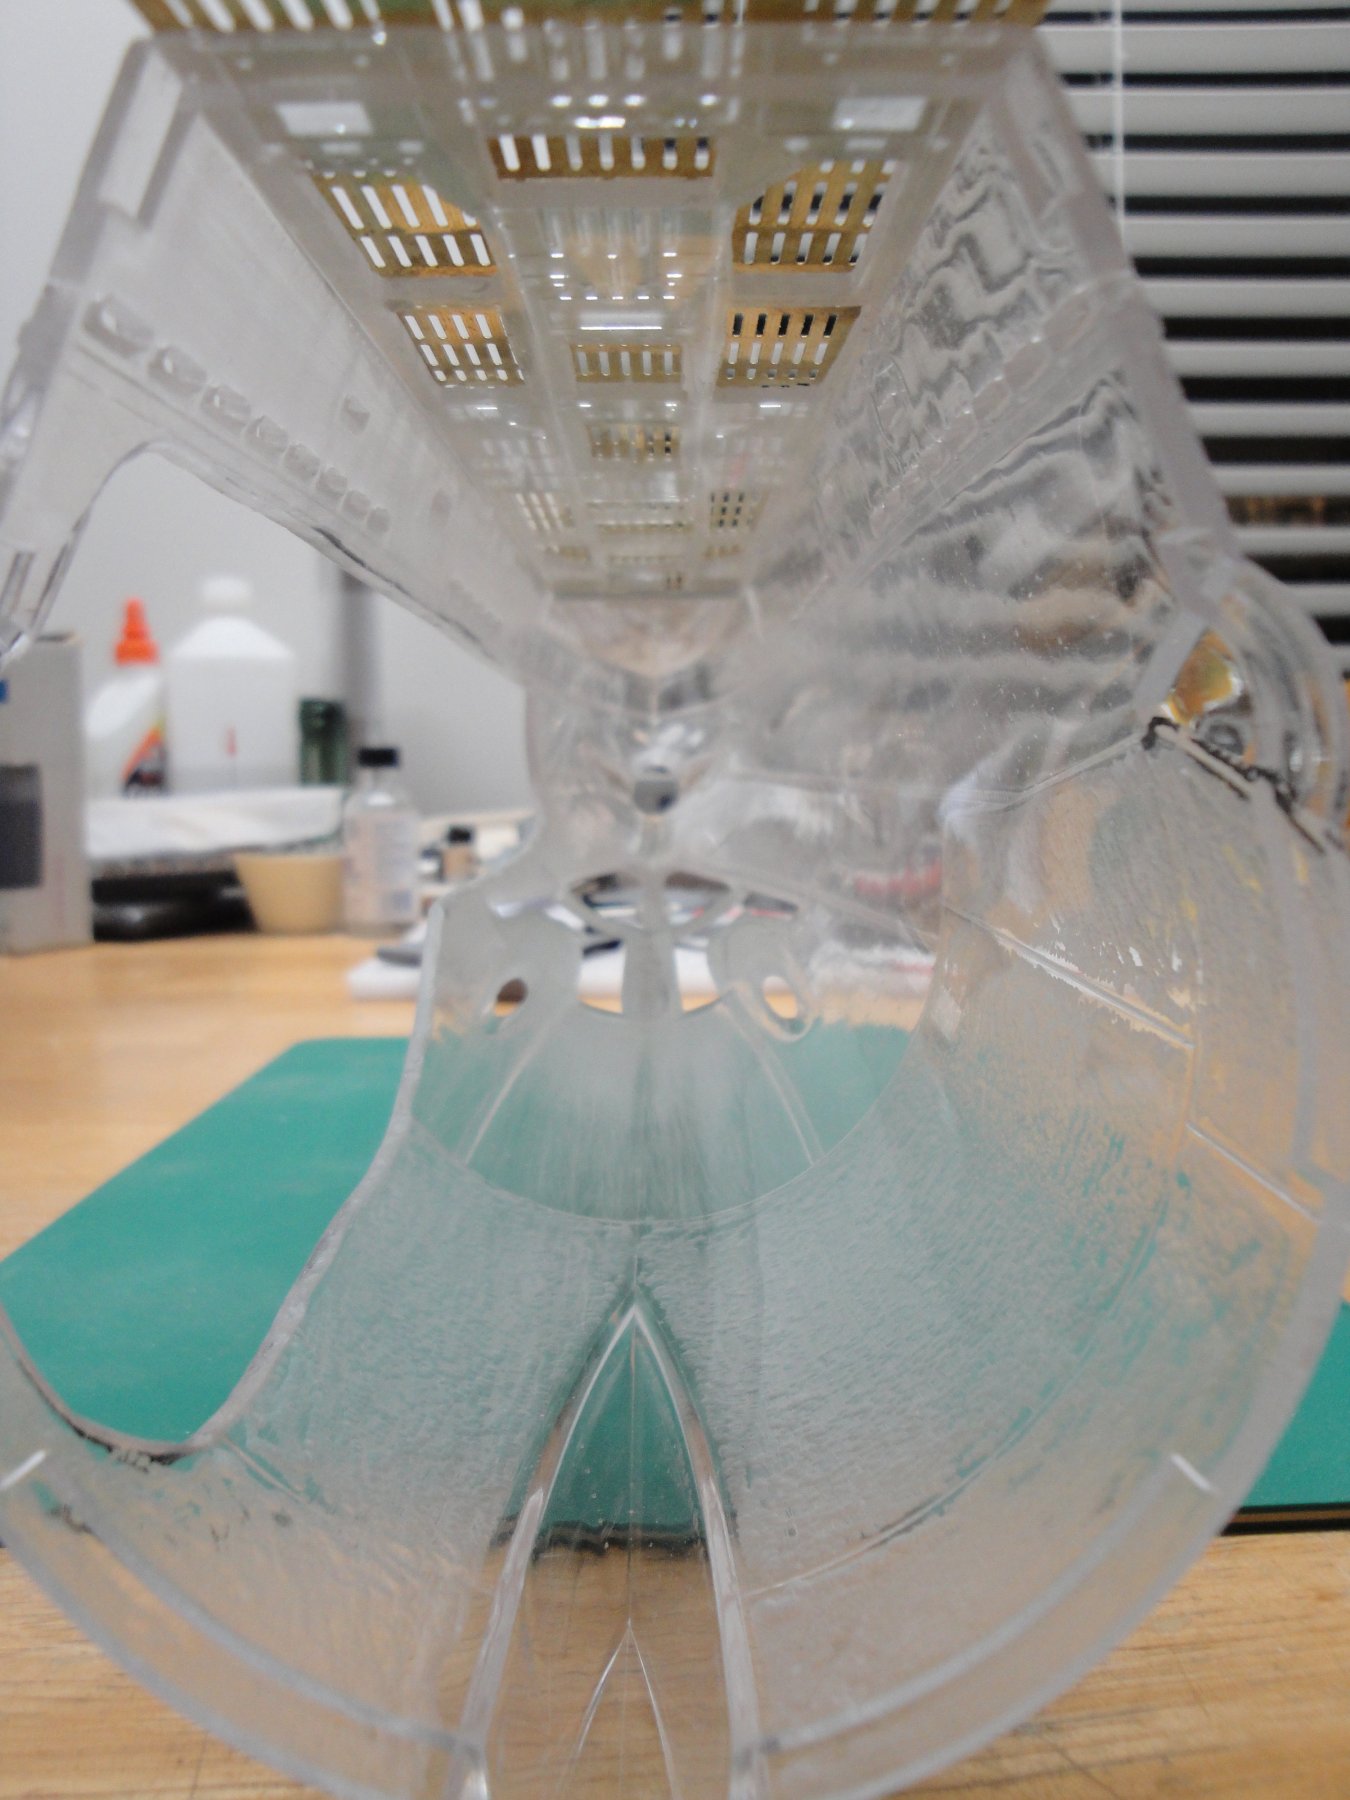
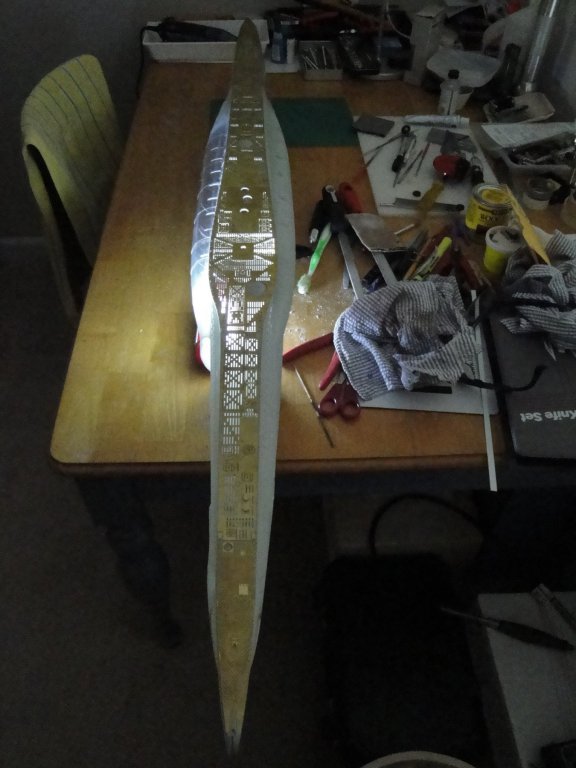
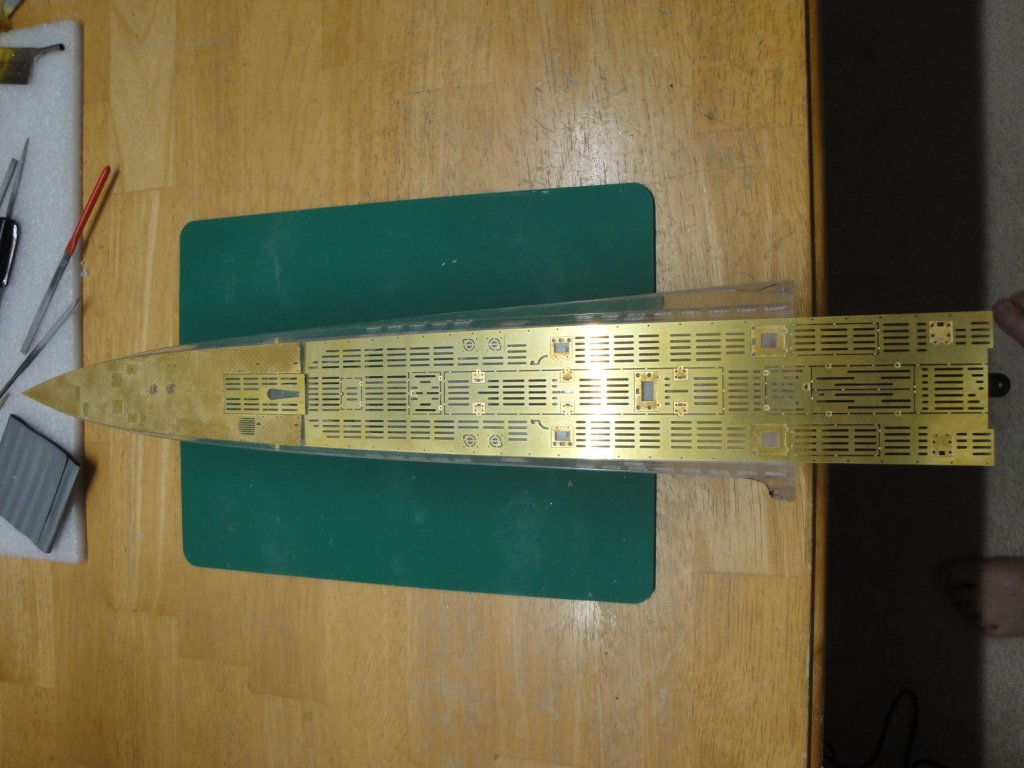
Another piece of PE deck is glued onto the hull. You can clearly see that this section of PE is longer than the stern and sits across hull and stern. This is one of the reasons why I glued the stern to the hull, departing from the Trumpeter instructions. On the other hand, that PE reinforces the connection Stern-Hull and makes the deck a lot sturdier. Here it is, glued with two components epoxy glue. Most of the glue seeping through is removed with isopropyl alcohol. Finally, it is sanded with 1000 grit and cleaned with alcohol. You can see how much cantilever this PE offers: And a view from underneath, showing the numerous openings: Yves
- 760 replies
-
- 17
-
-
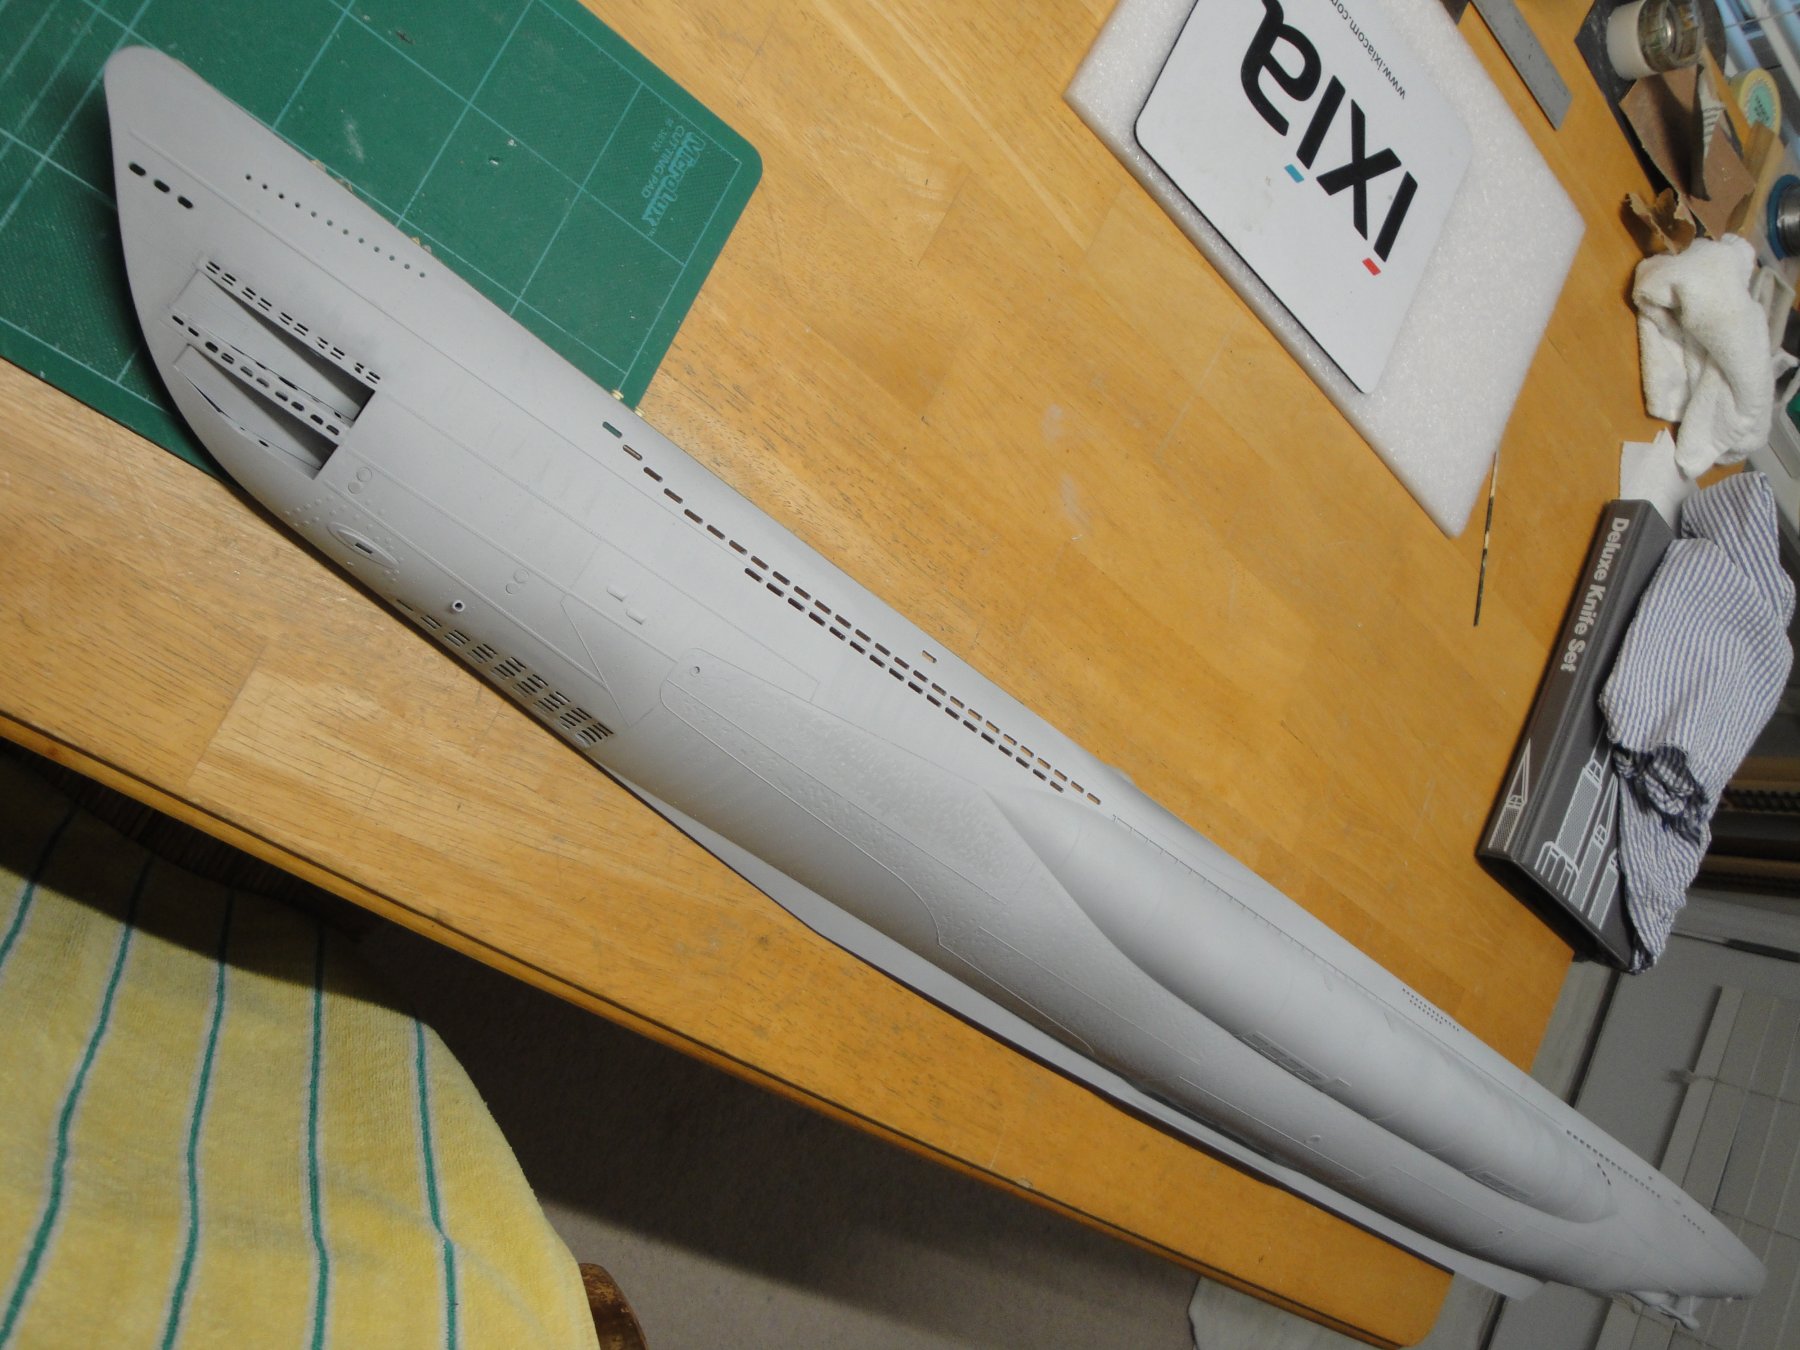
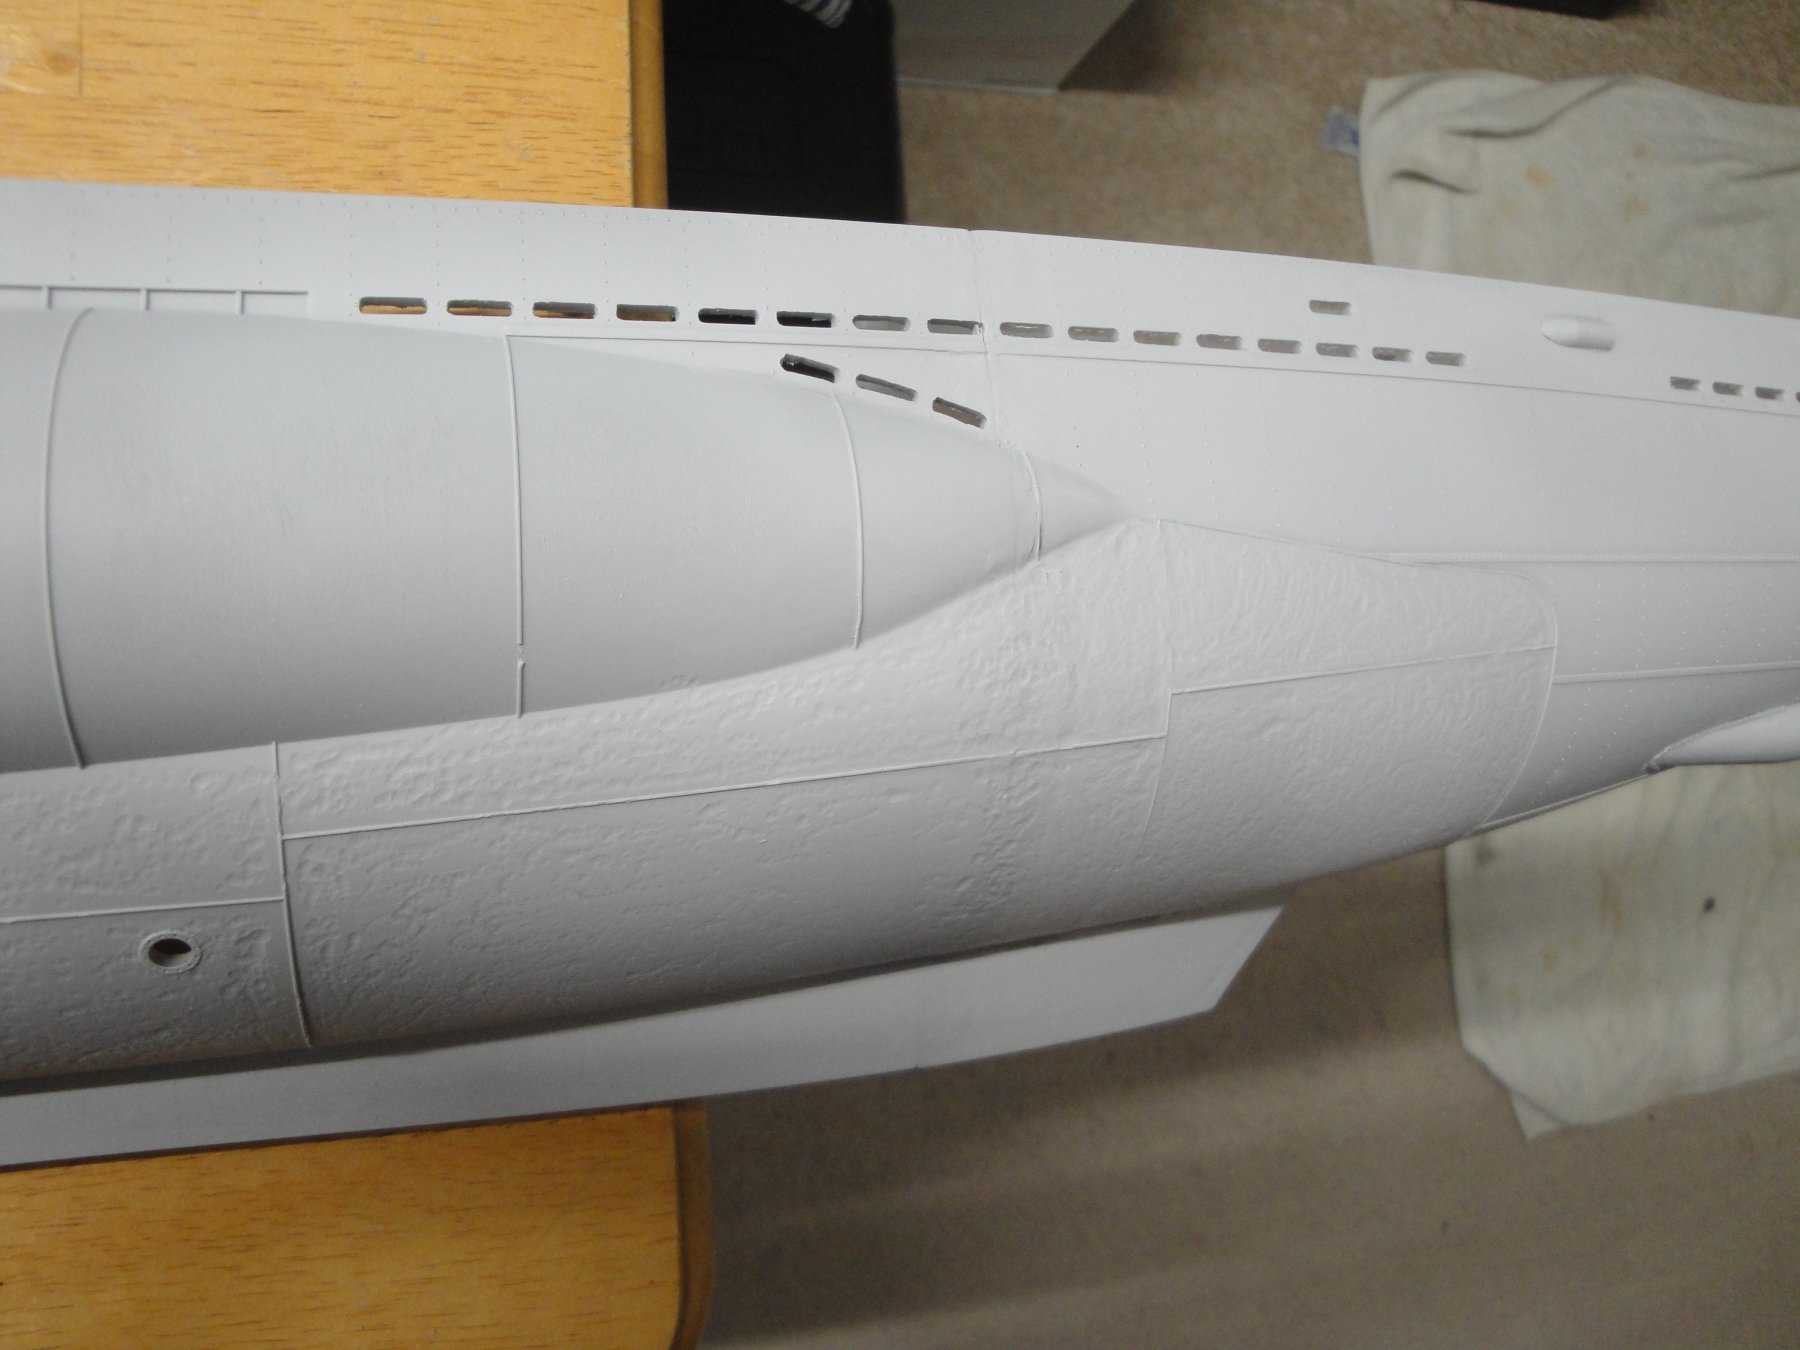
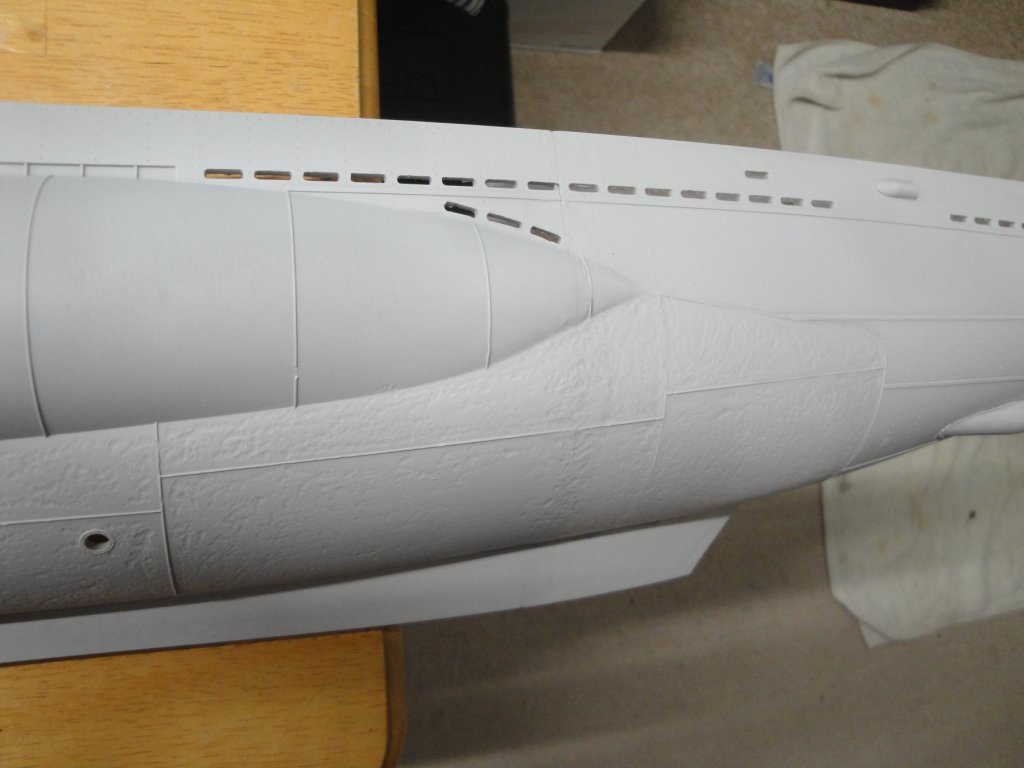
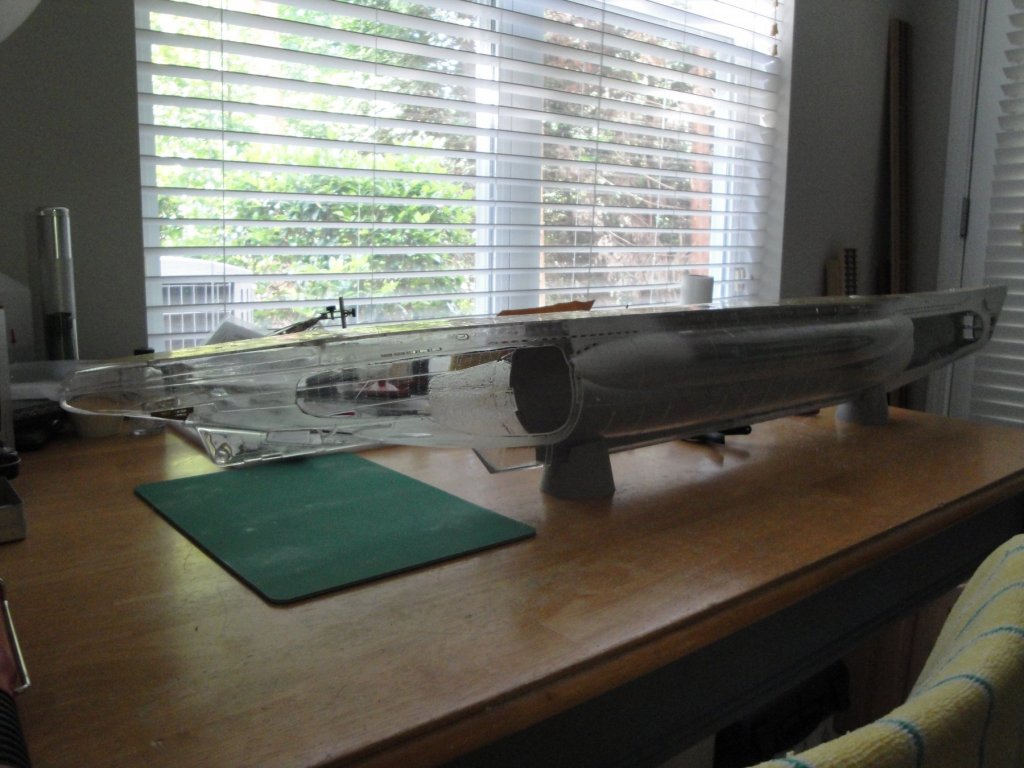
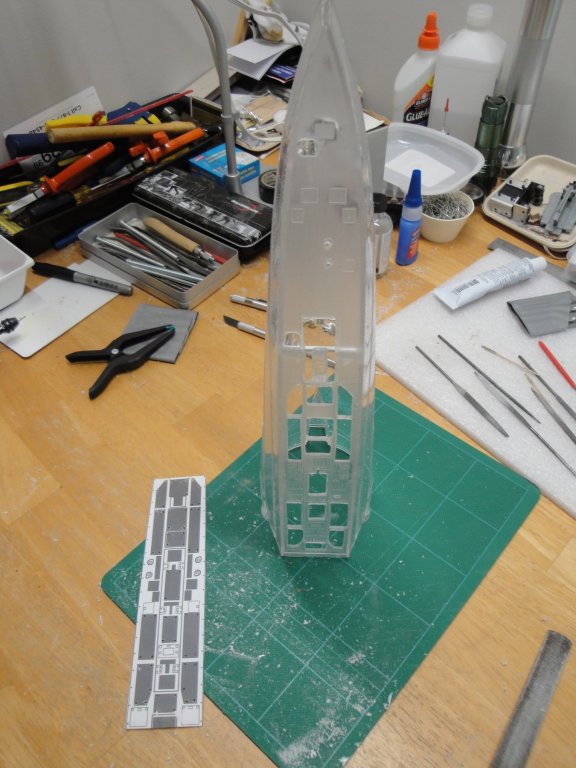
I started puttying the seams and after a while I just could not tell if it needed some more or not. So, I sprayed some Vallejo Acrylic primer to reveal the imperfections. Not too bad, still a couple of places to refine: Yes, it is a monster but what a pleasure to work on something that does not strain your vision: Yves

- 760 replies
-
- 16
-
-
I am a fervent enthusiast of the micro magnets, made of rare earths. These are extremely strong as long as they touch each other. I use them to hold the two halves of my Trumpeter submarine. Yves
- 337 replies
-
- 4
-
-
- finished
- mountfleet models
- (and 1 more)
-
Beautiful work Christian. These windows truly change the appearance of the ship. Yves
-
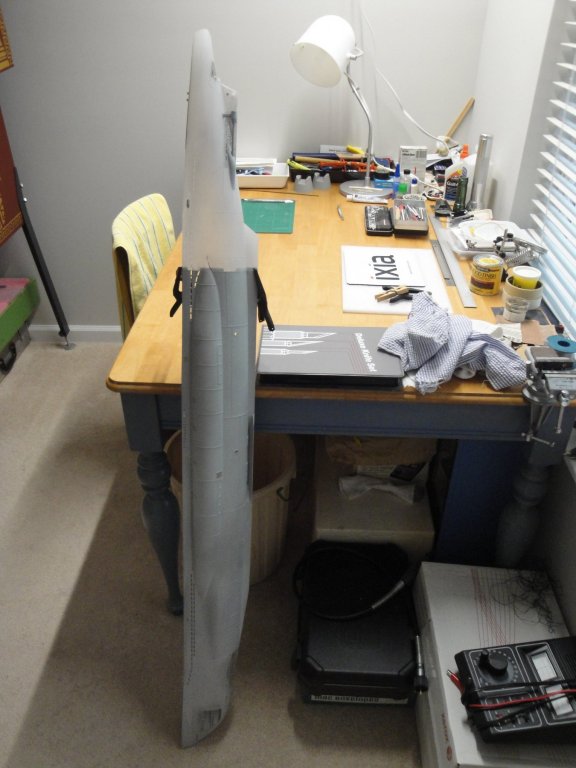
Folks, This is the point of no-return: The Stern has been glued to the Port side. There will be a lot of work of puttying and sanding to make a seamless transition. It truly is a big hull, when it is all put together: This will allow me to install all the PE decks, now. Yves
- 760 replies
-
- 14
-
-
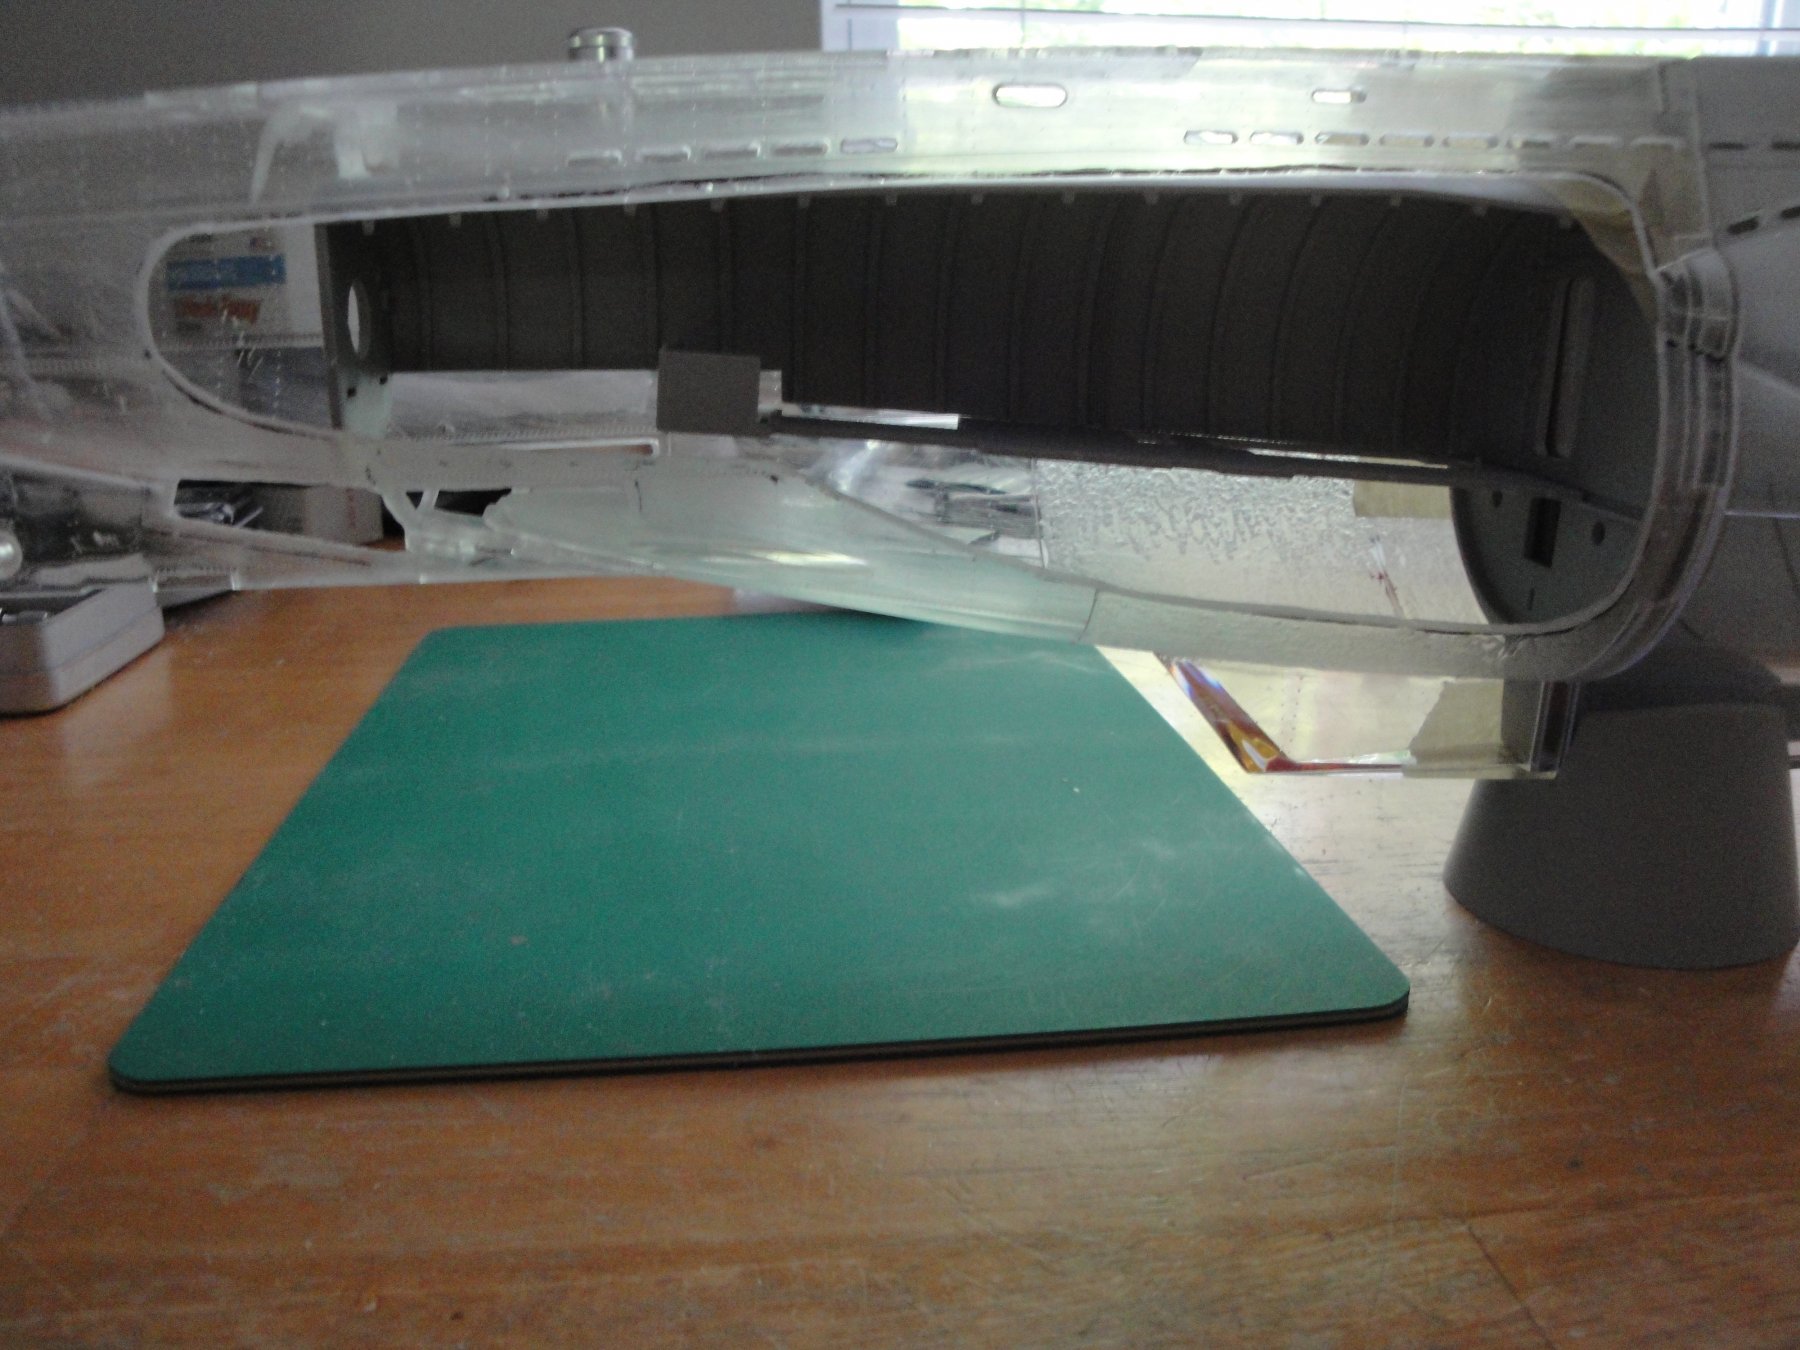
I installed the two propulsion shafts, made of 4 mm brass tube. The sacrificial anodes have been applied to the shaft holders as well as some more PE rivets around the stuffing boxes: With this, I am coming pretty much to a conclusion about what can be done on the stern section. Introducing the diving planes and rudders would be foolish at this stage, as they are by far too fragile. Yves

- 760 replies
-
- 14
-
-
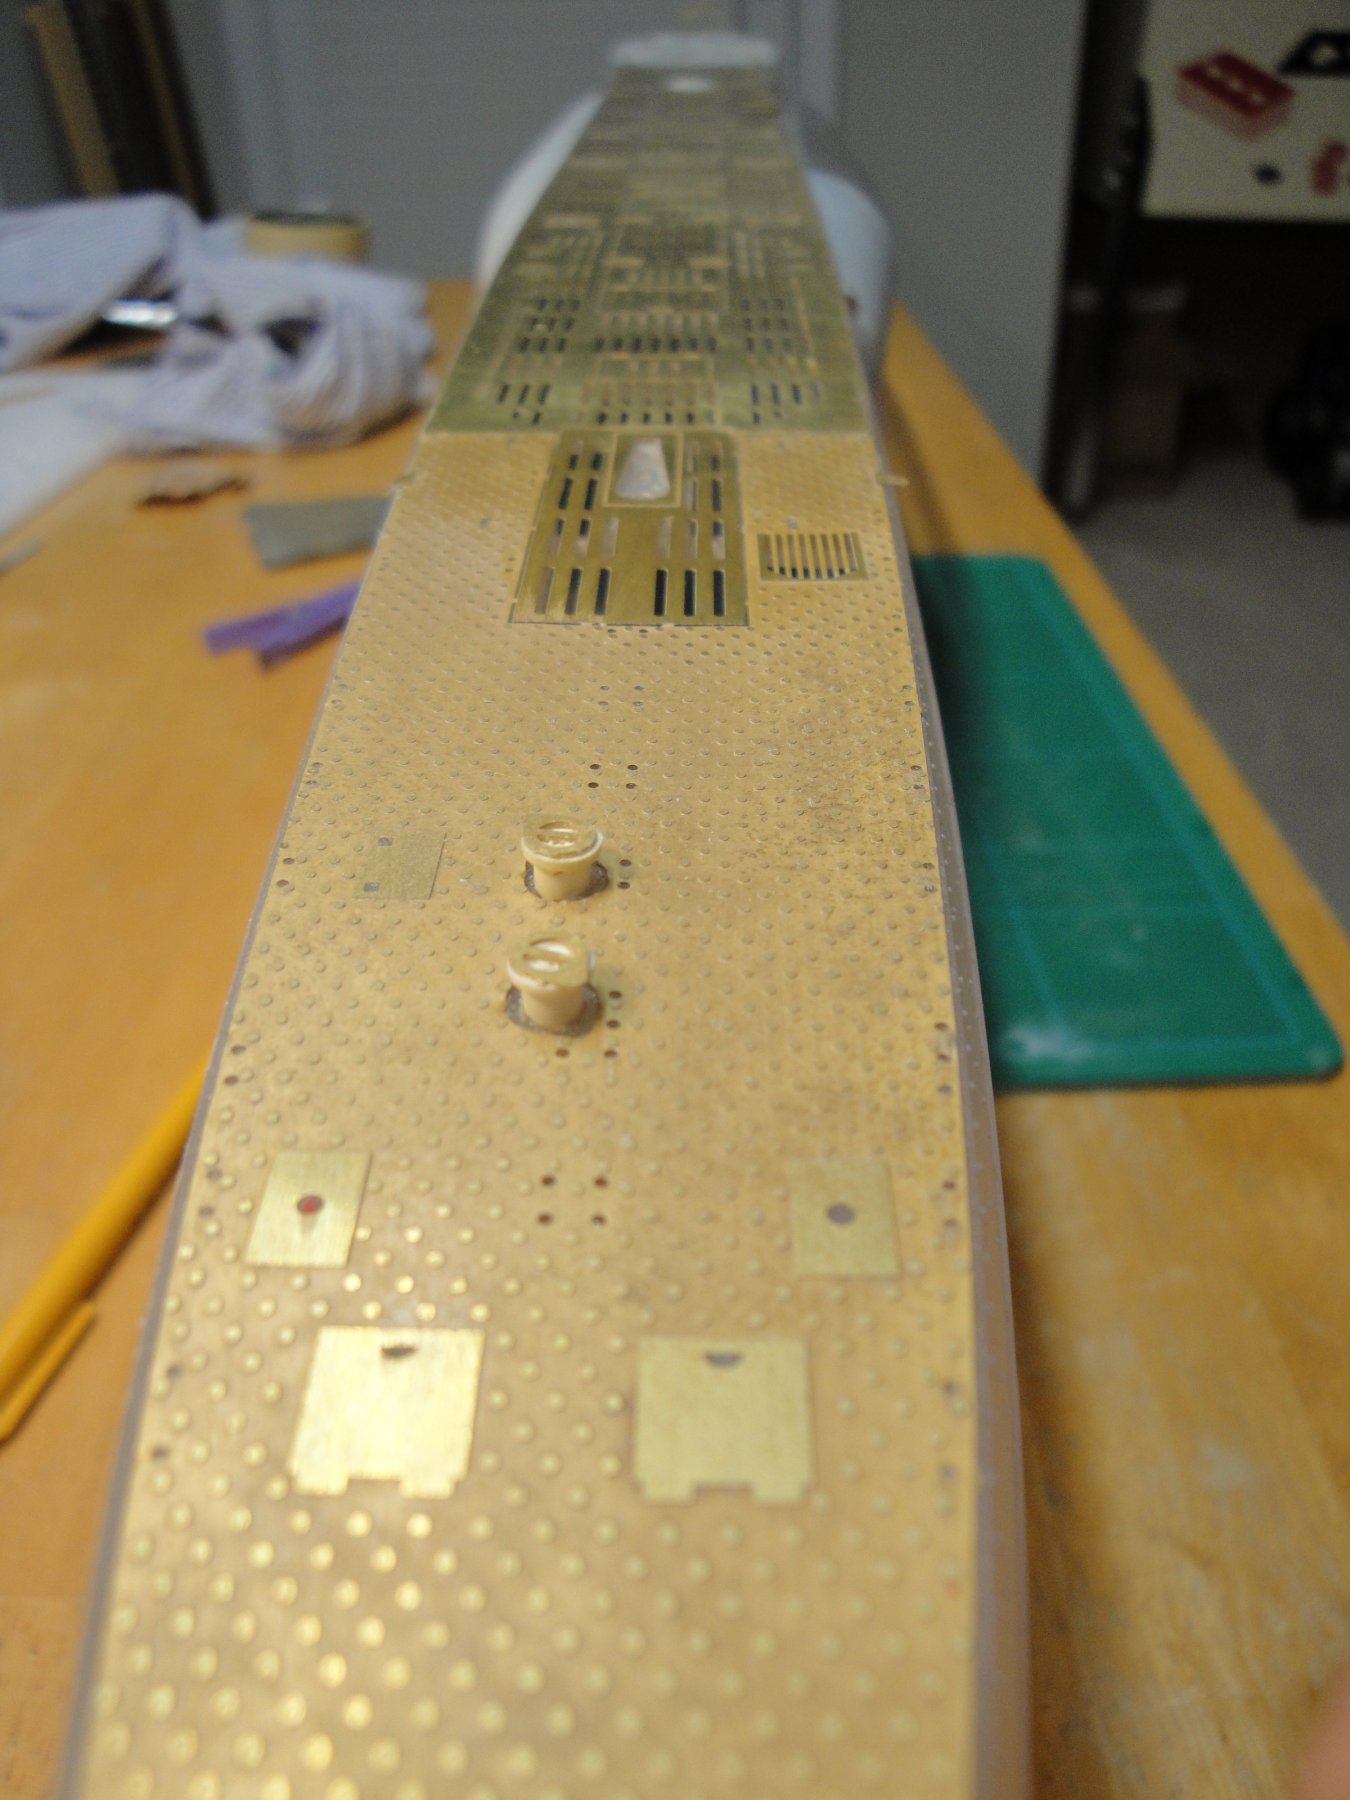
A couple of details on the stern. Preparing the propulsion shafts positioning. I will not be using the plastic shafts provided by the Trumpeter... Instead I will use metal axles of 4 mm diameter. Then the retractable bollards on the deck. I use small optic fiber plugs that fits tightly into a 3 mm hole. The plastic of the plugs allows me to insert them inside the deck or keep them in the erected position. I just glue the PE hat on top of them. Yves


- 760 replies
-
- 18
-
-
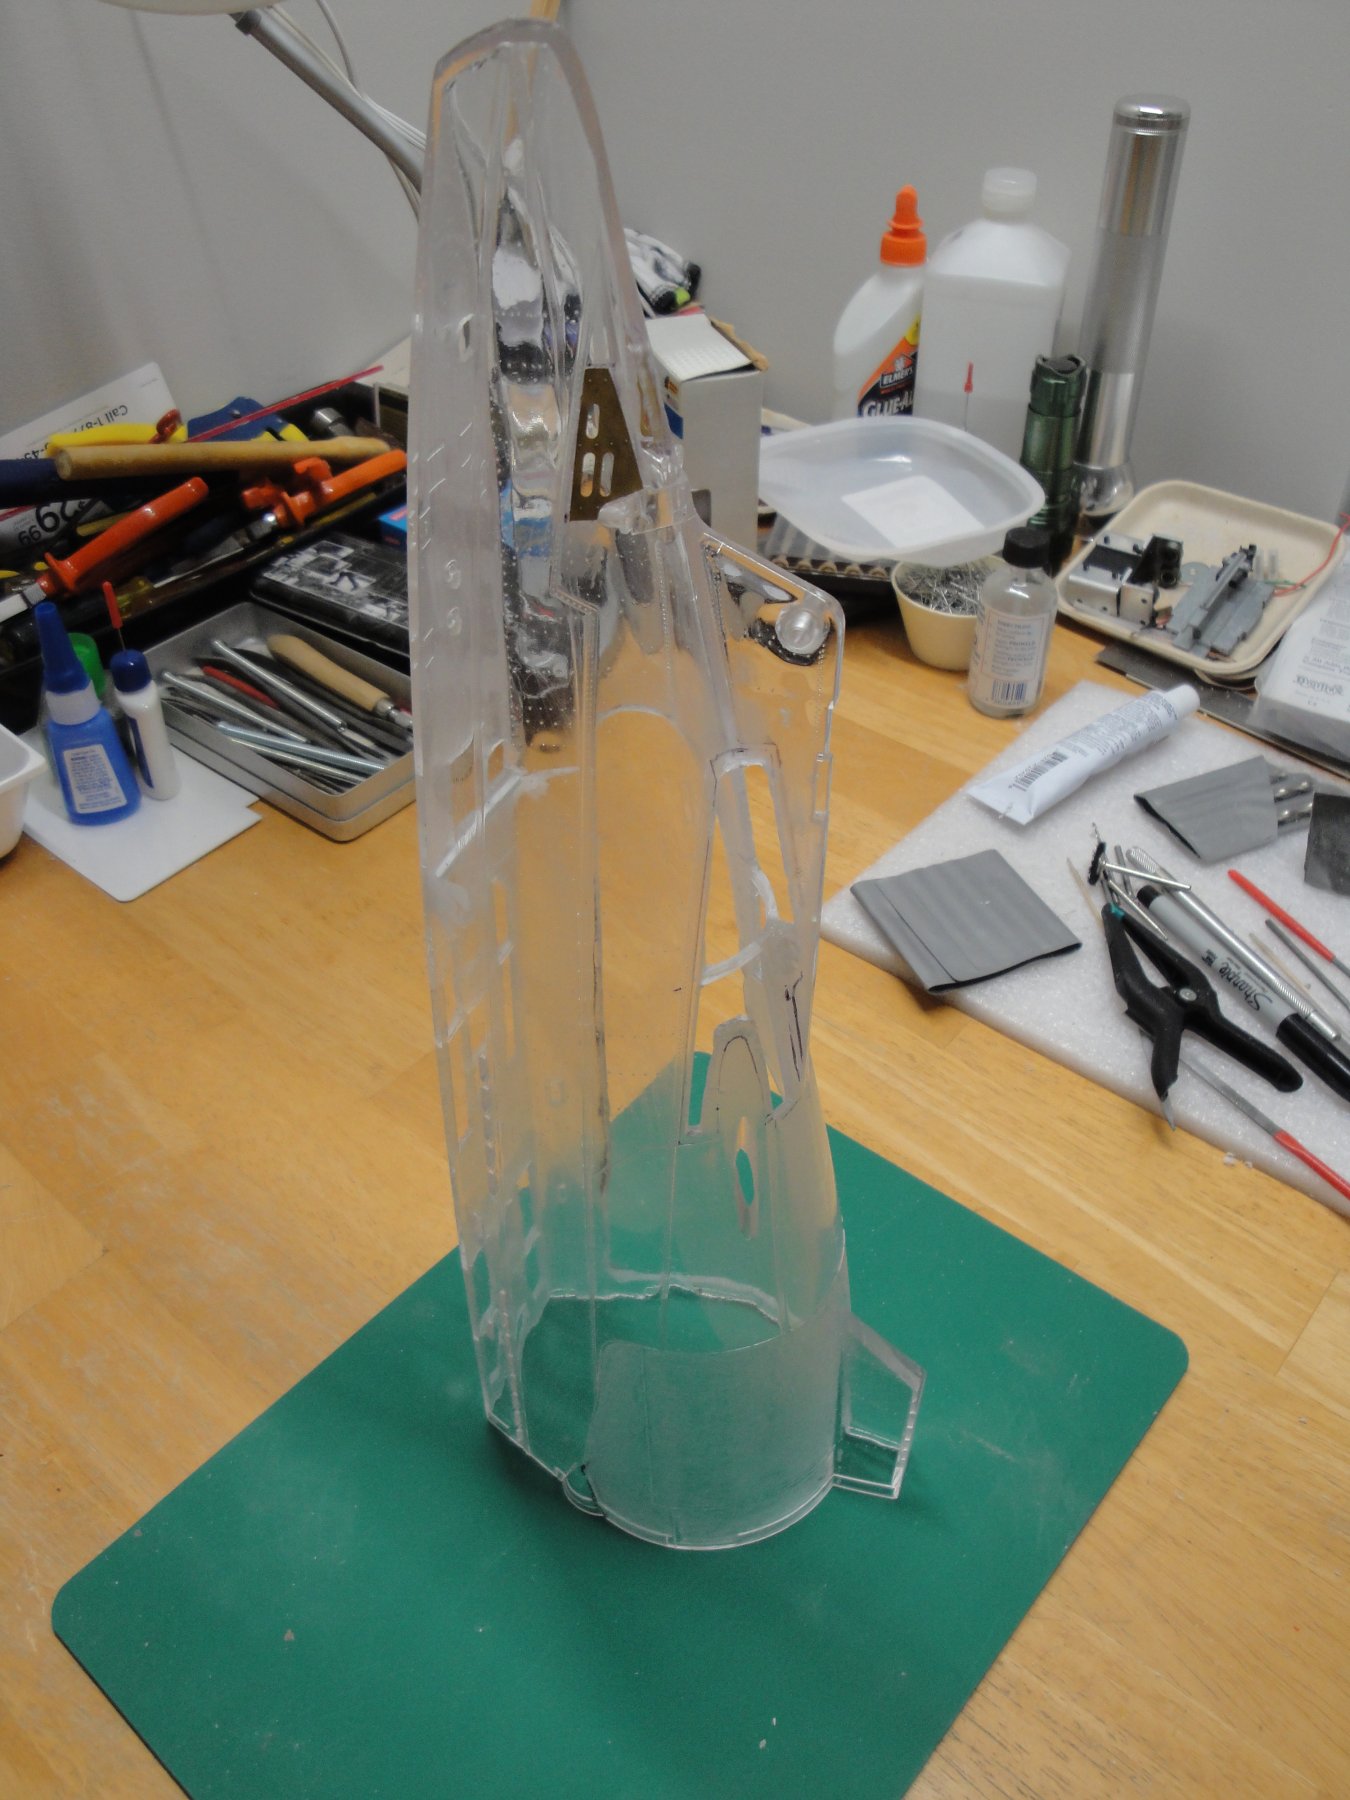
A few progress on the stern and studying the feasibility of my solution. The whole enchilada: Trying a mock-up of the rear torpedo room. It does fit. I may have to file the bulkhead to allow the insertion of the clear half-hull. It should work. More PEs on the stern. Perfect size as always: And the stern deck: Yves


- 760 replies
-
- 15
-
-
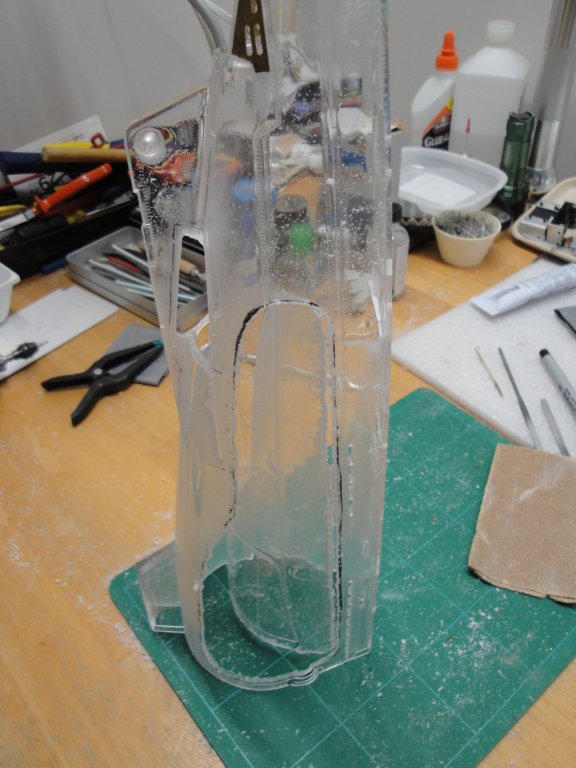
I am reaching a point where decisions must be taken. It is also a point of no-return with the hull. Let's consider a few things: 1) The stern section although perfectly matching the main hull is to be assembled last, according to Trumpeter's instructions. The Stern section is in fact the locking mechanism to the entire hull, keeping all internal modules/compartments sandwiched between the opaque and clear sides of the hull. 2) On the PE set (designed to be the most accurate possible with the prototype), one deck piece is overlapping the junction of the main hull and stern section. It means that this PE piece can only be installed after gluing the Stern to the main hull. 3) To finish the painting of the hull, the stern section should be permanently glued to the main hull, otherwise it will not look right and the seam will show, albeit slightly, on both sides of the hull. In light of the above, and trying to keep an access into the hull, I have thought about the following: a) Verify that the rear torpedoes compartment can be inserted from the main open hull into the stern section, and locked into place on the port side of the main hull. This is delicate as the propeller shafts will be attached to the rear torpedoes/electric motor module. I am once again departing from the Trumpeter assembly that glues the shafts and propellers to the stern section. b) Glue the stern section permanently to the port side of the hull and verify that the starboard side of the hull, can be delicately inserted into the stern section and locked in place with all the magnets I installed. c) Finish the cutting of the clear side, to show all modules, inside. d) Proceed with the caulking/puttying, painting and aging of the main hull and stern section, all at once. e) Install the various modules later on, starting by the insertion of the rear torpedoes room and moving forward. f) Seal the beast by magnetizing the clear (now painted) section to the rest of the hull. I think that may work, while leaving access to all modules for refinements. Yves
-
Let's not forget the drain holes under the "Conveniences"..... Yves
- 550 replies
-
- 1
-
-
- confederacy
- model shipways
- (and 1 more)
-
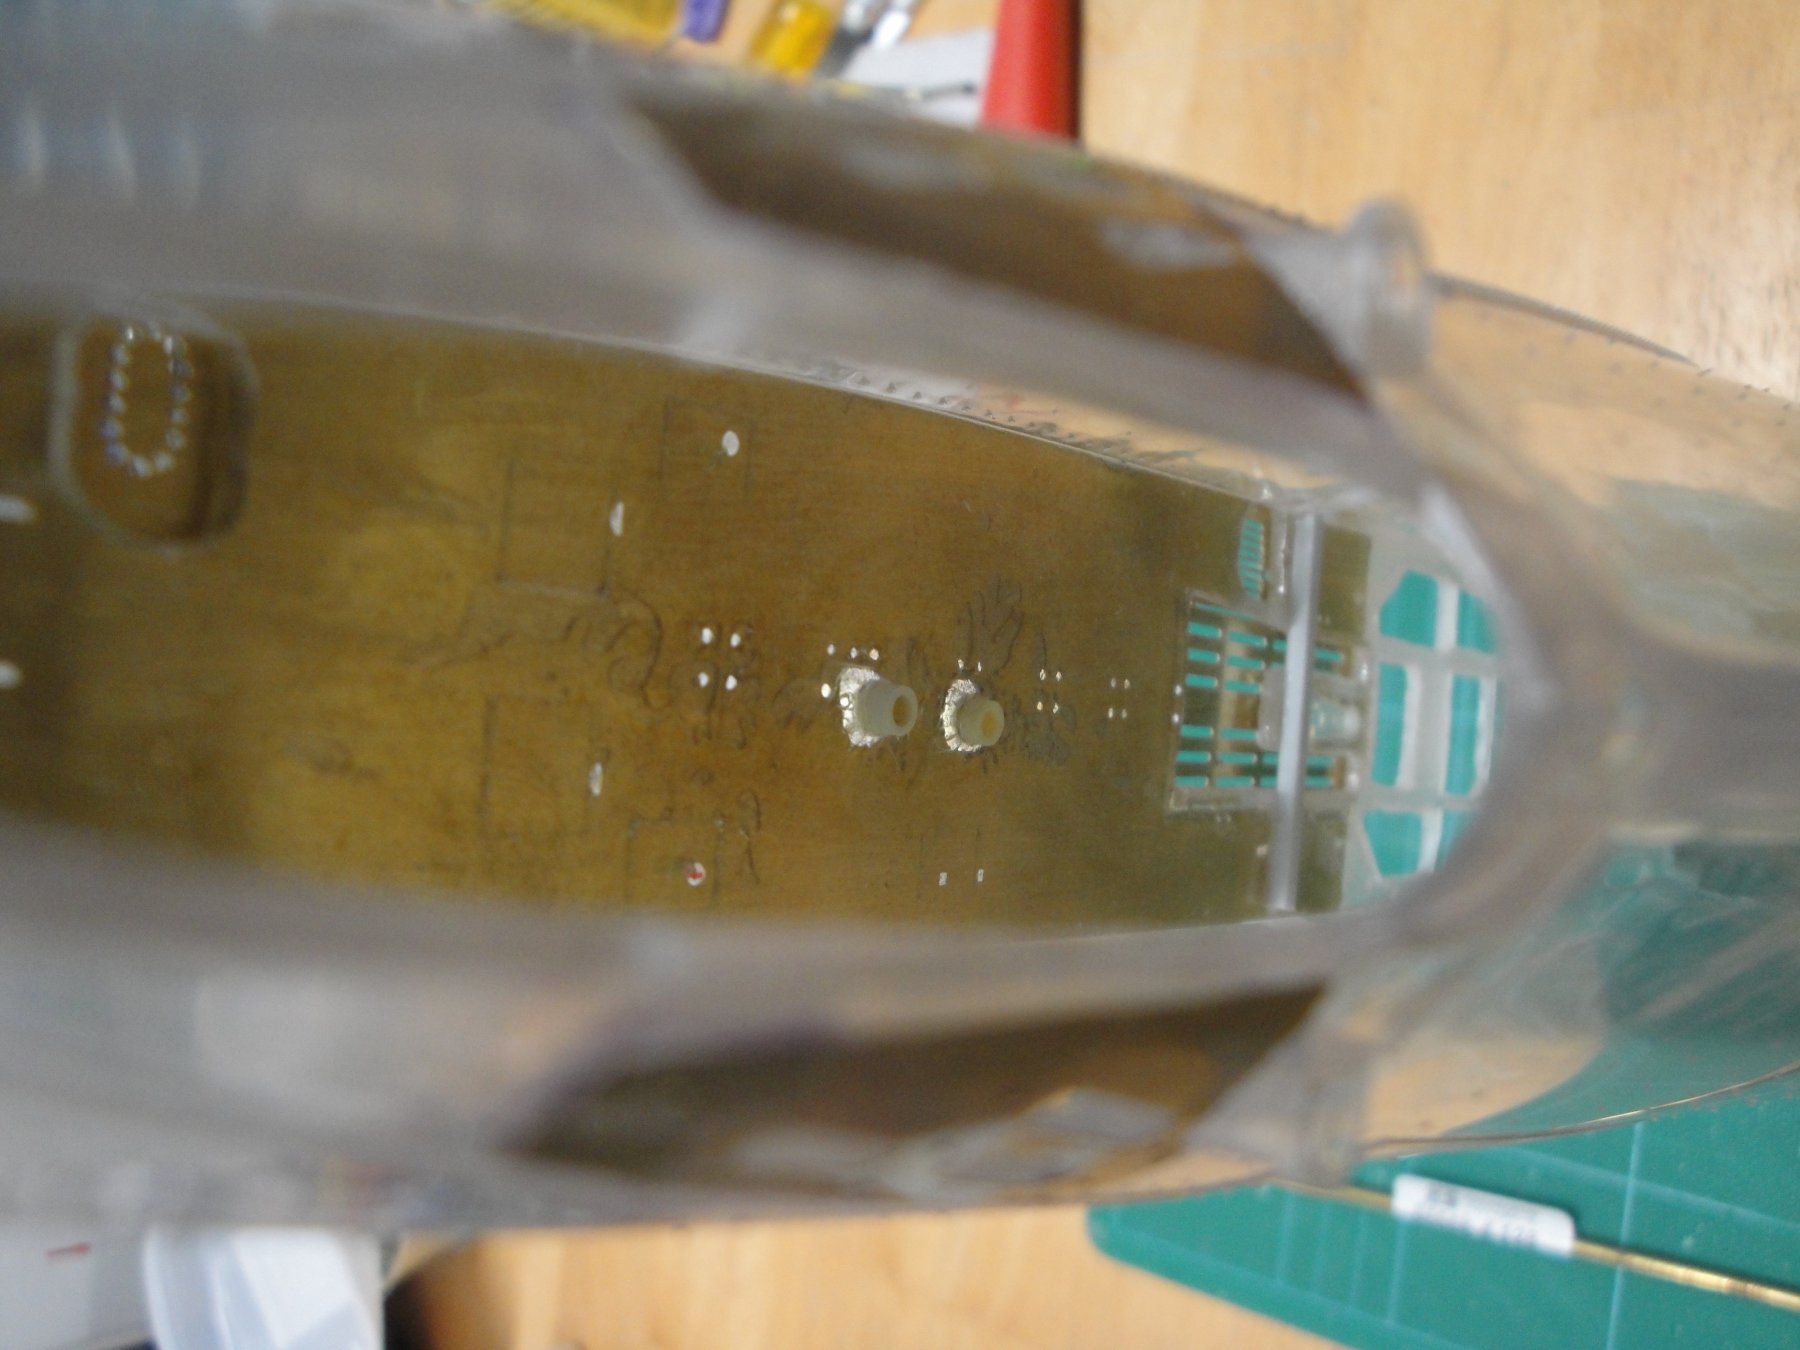
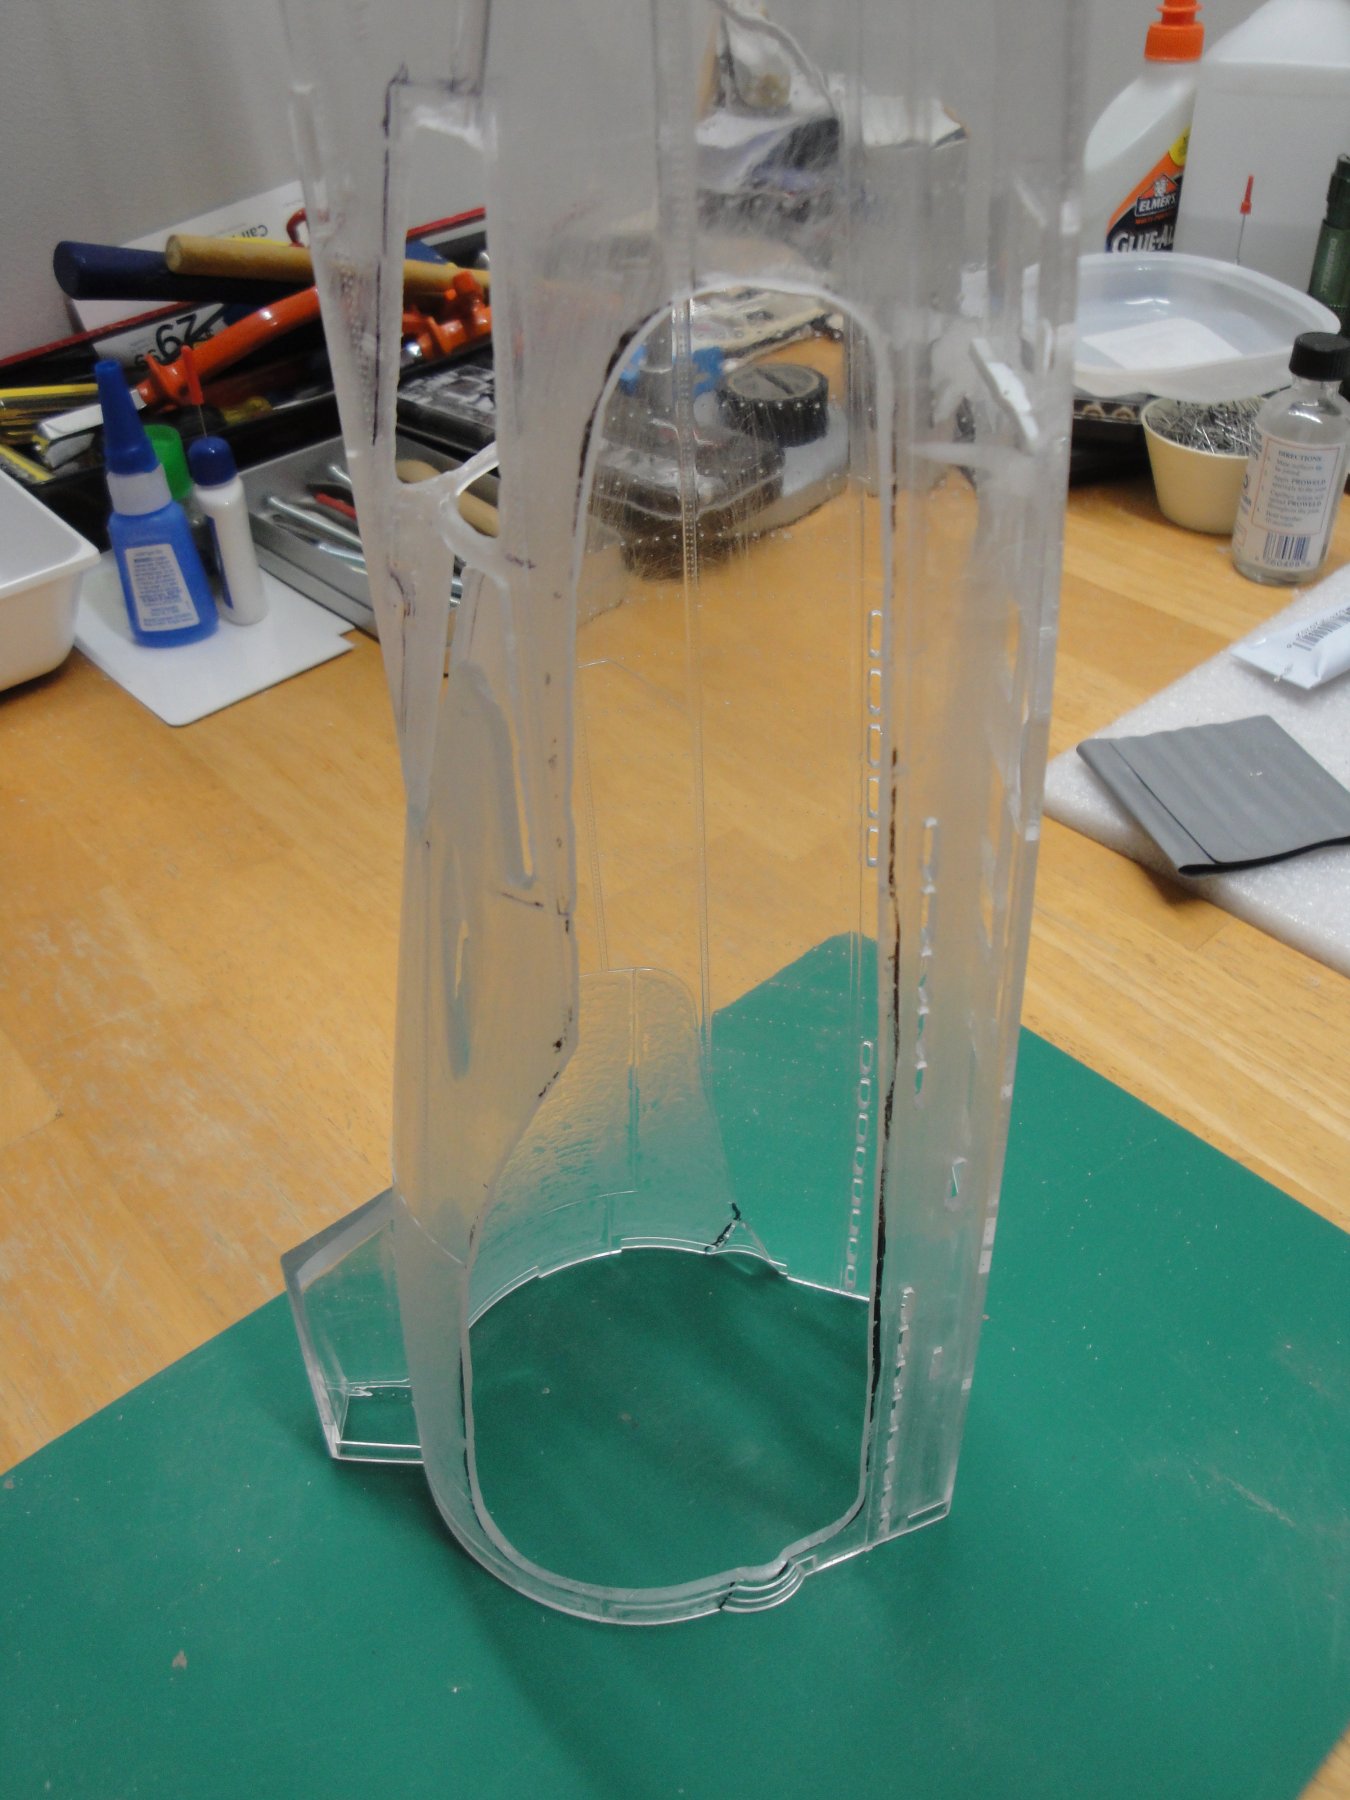
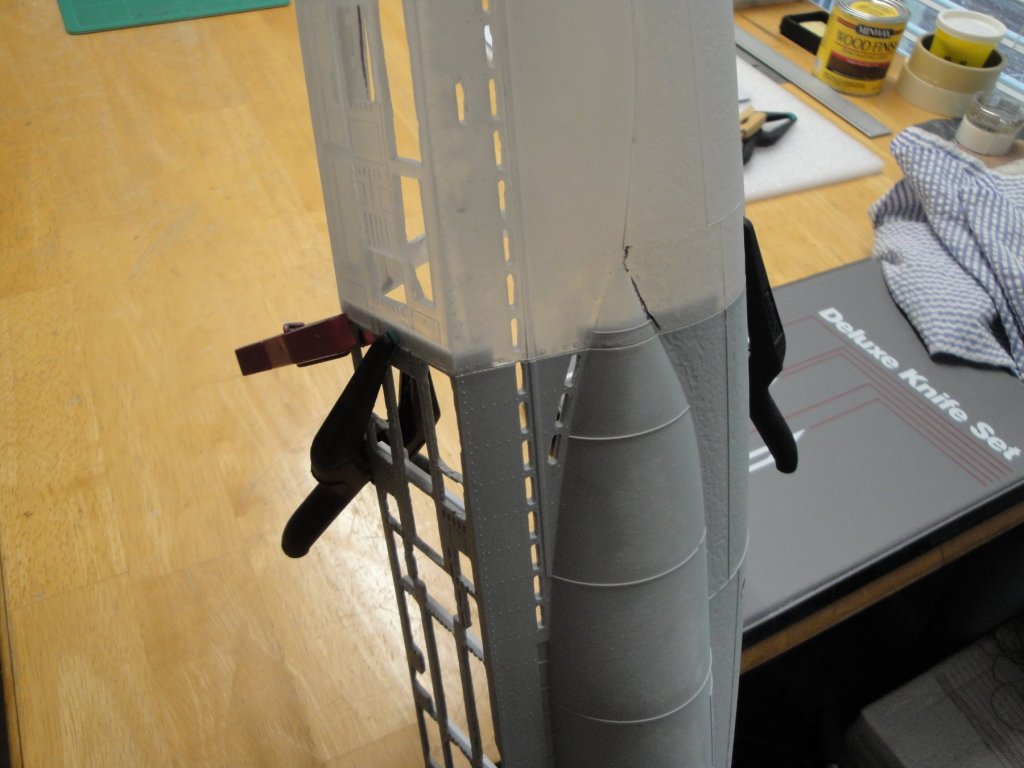
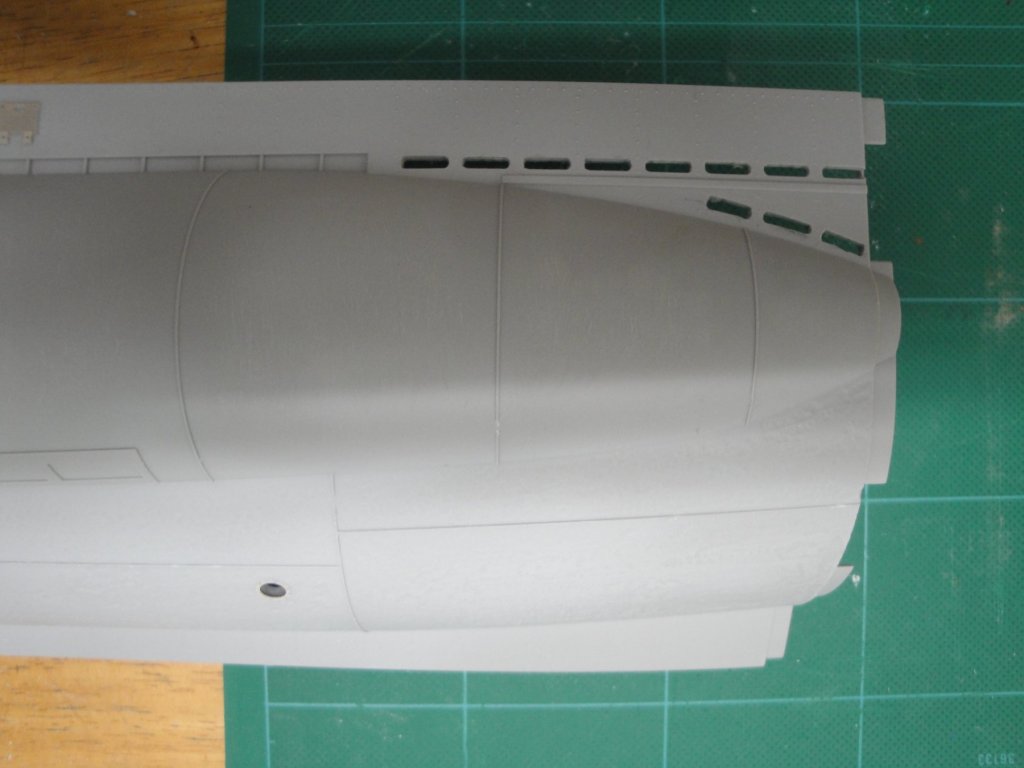
And we are coming to an end with this delicate phase of the construction: The side cut has been completed without any damage: The other side and underneath of the stern have been treated in the same way as the rest of the hull, replicating this rough appearance of the foundry: With the PE: and from the inside: Yves


- 760 replies
-
- 17
-
-
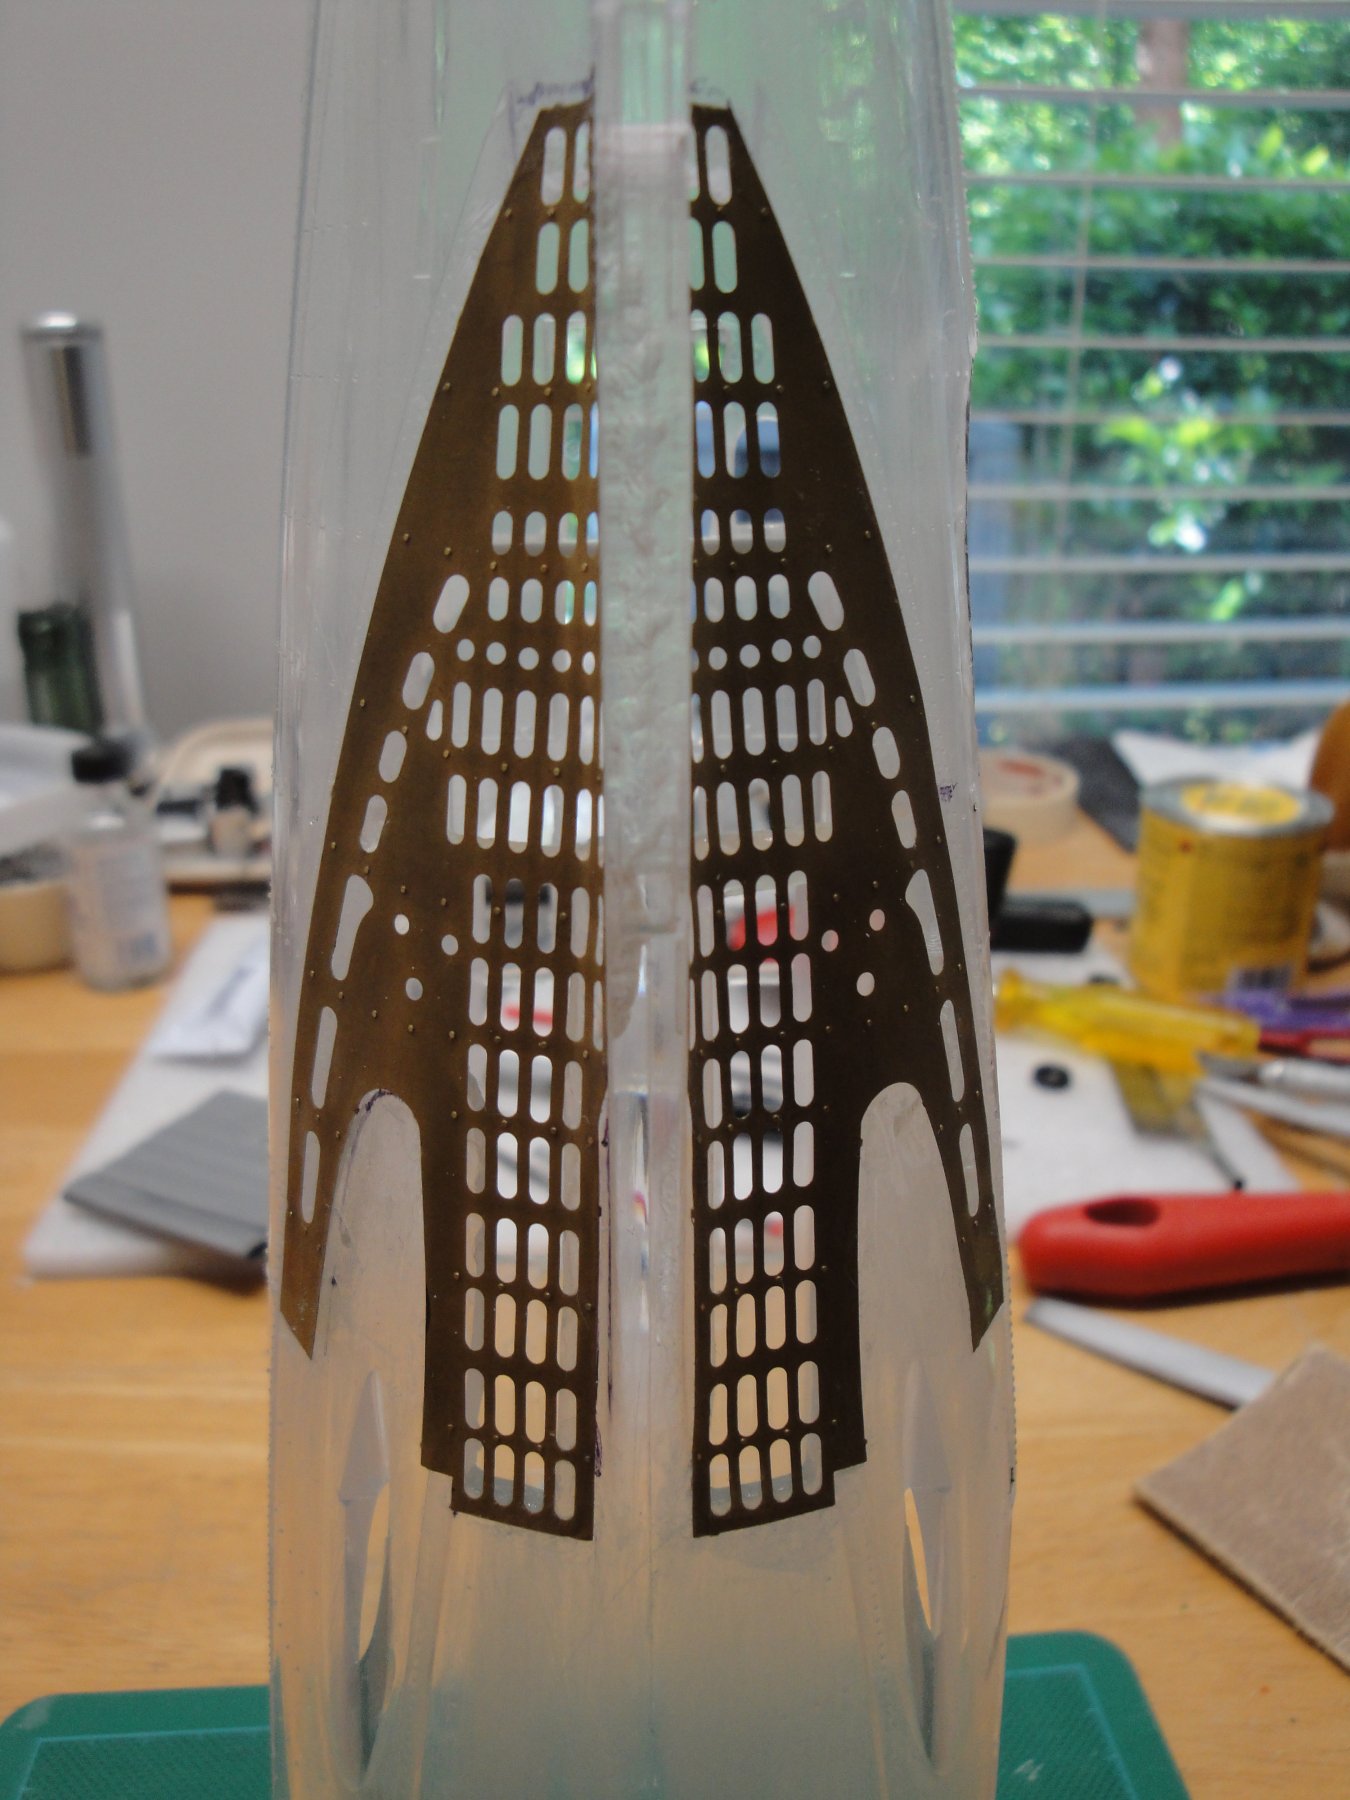
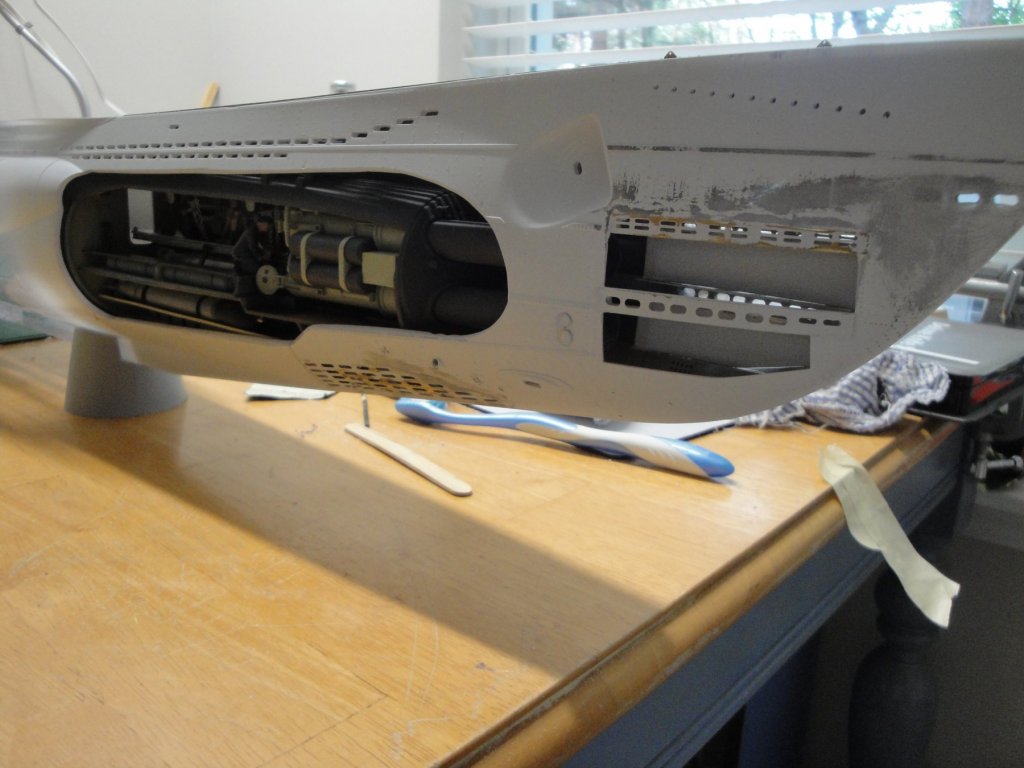
A few updates: I am getting close to finish butchering the stern piece. I have drilled all side flood holes and finished the delicate and acrobatic cutting of the area under the shafts and propellers: Two pieces of PE have been glued. I really love these RCSUBS PE. They fit so perfectly, it is a pleasure to install them. For the section under the shafts, I am going wild.... and open! It is going to look good once the PEs are glued. And NO, I am not cutting anymore that what you see. Let's not forget the massive opening on the side, too..... To finish, our now traditional claustrophobic picture: Yves


- 760 replies
-
- 17
-
-
How about using a BOLD font? I think you are very close. Yves
-
This is superb. The wood aspect is simply amazing. Would you mind elaborating on your techniques to get something so perfect? Are you going to add some scale sailors? Yves
- 128 replies
-
- 2
-
-
- mordaunt
- battle station
- (and 1 more)
-
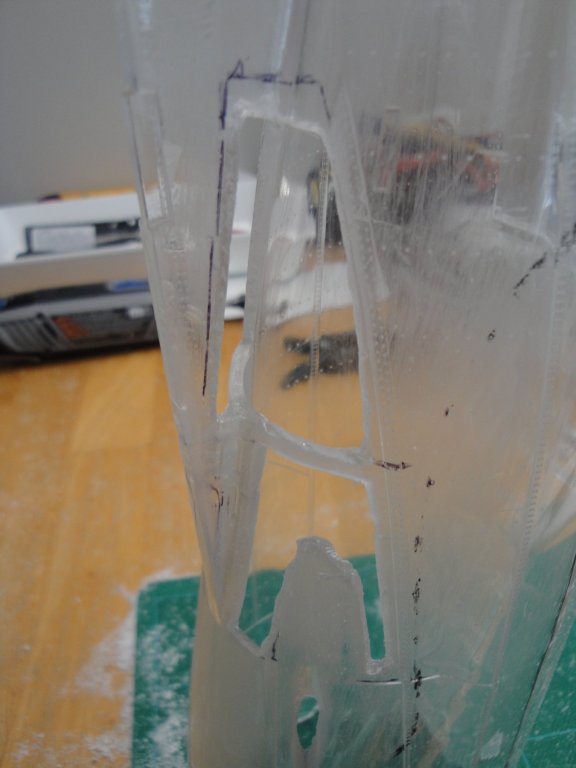
Cog, I thought about it but the stench of melted plastic and the fact that it is even more brittle when heated (and cooled) turned me off. I developed a technique with a very small grinder and files of different width, that works rather well. It is slow though, but as you can see it creates nice and clean cuts. I am almost finished with this piece: side flood holes have been opened and I am working on the PE pieces that are going under the transmission shafts and propellers. After that, the final and big cut will be the side opening to show the rear torpedoes and electric motors compartment. It takes time and a lot of prayers..... Yves
-
While waiting for the torpedo doors to arrive, I started the nerve wracking task of cutting the delicate stern section: I am missing a few openings, but I am not going any further. The material is way too brittle to take any risk at this stage. Once the PE will be glued, I hope to regain more sturdiness. I still have to open the side flood vents and the large openings below the propulsion shafts. Most likely, the next module to be built, will be the rear torpedoes and electric motors room. Yves
- 760 replies
-
- 15
-
-
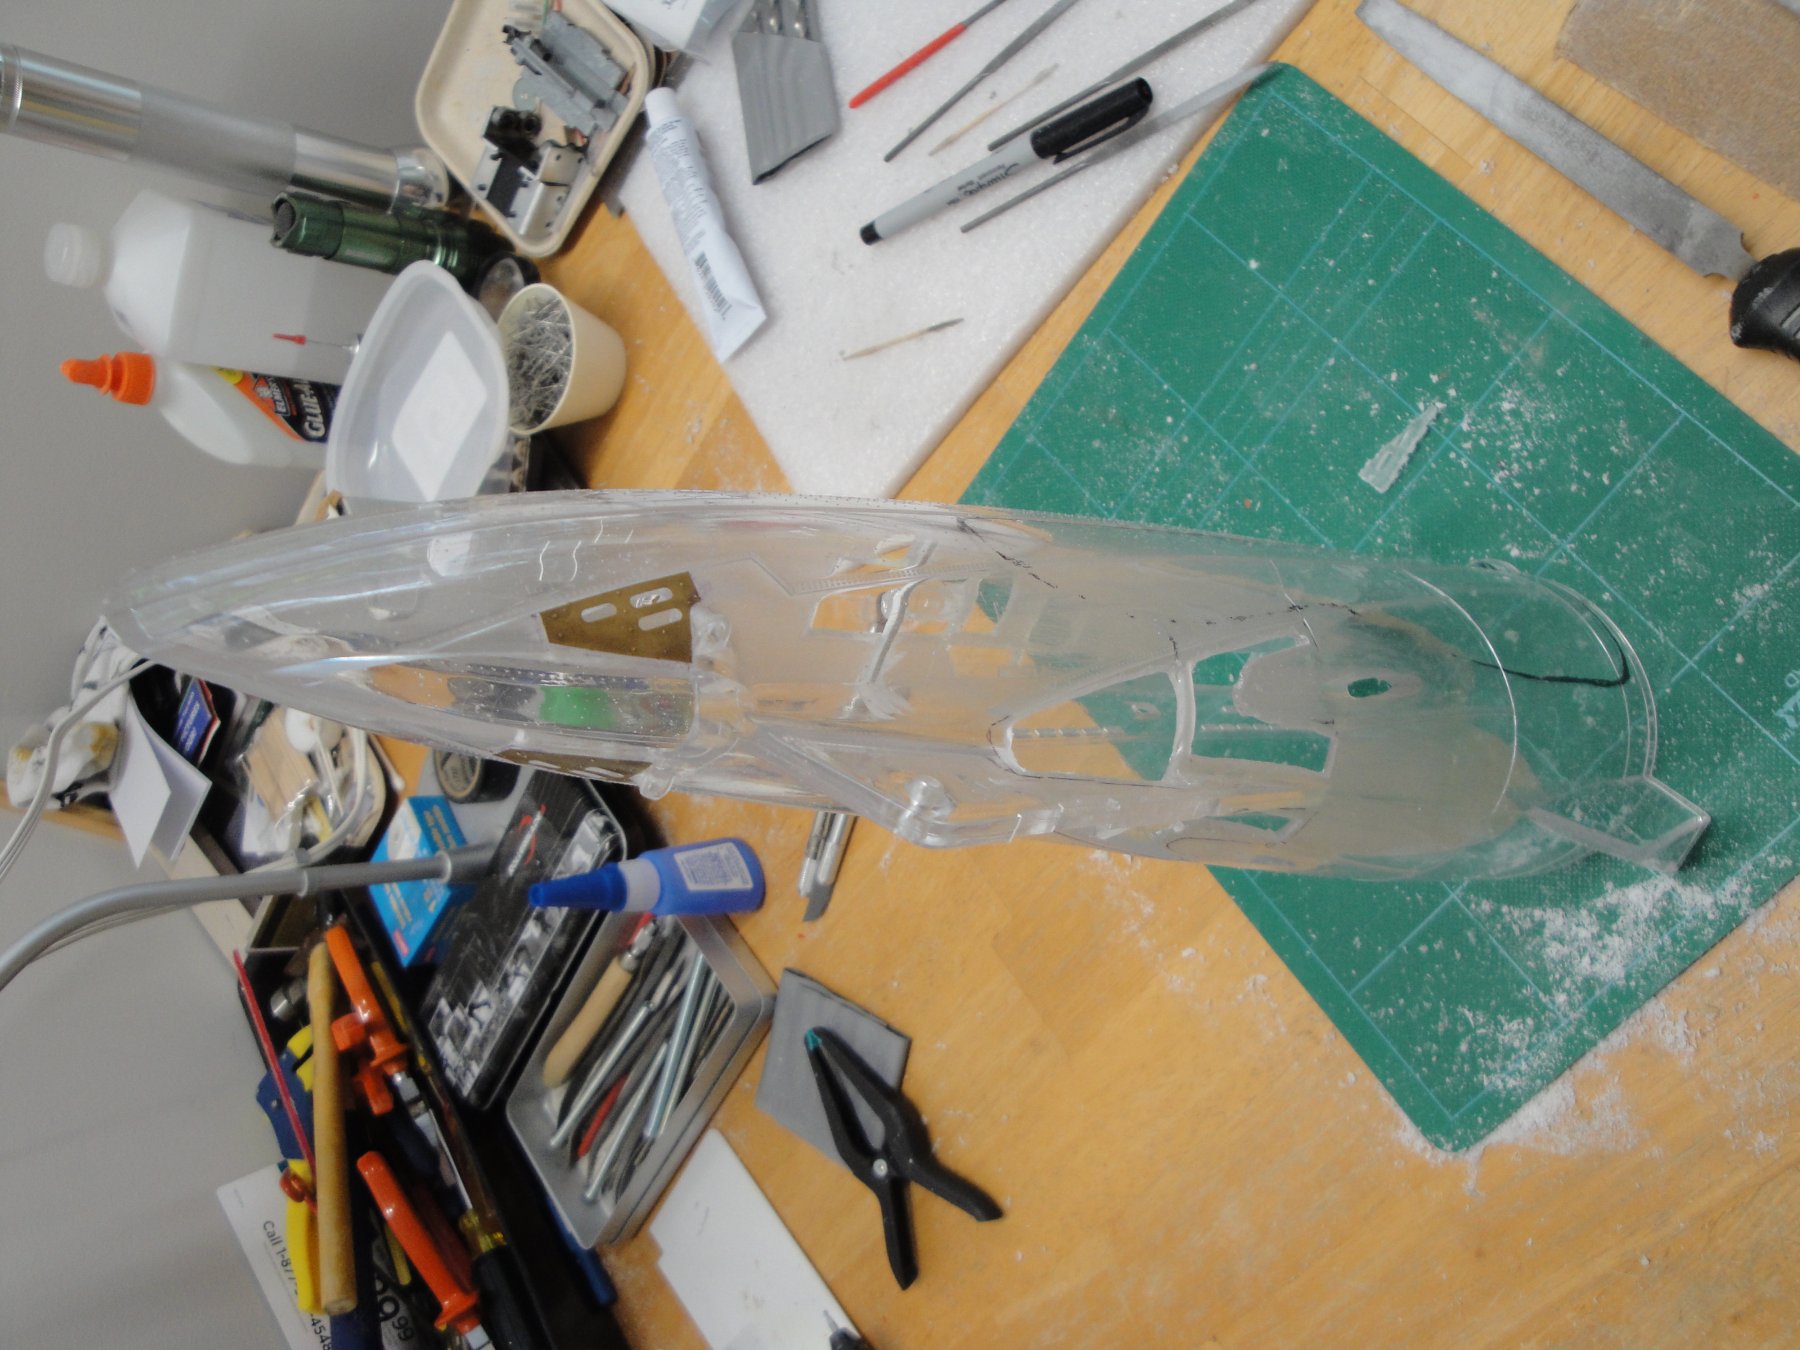
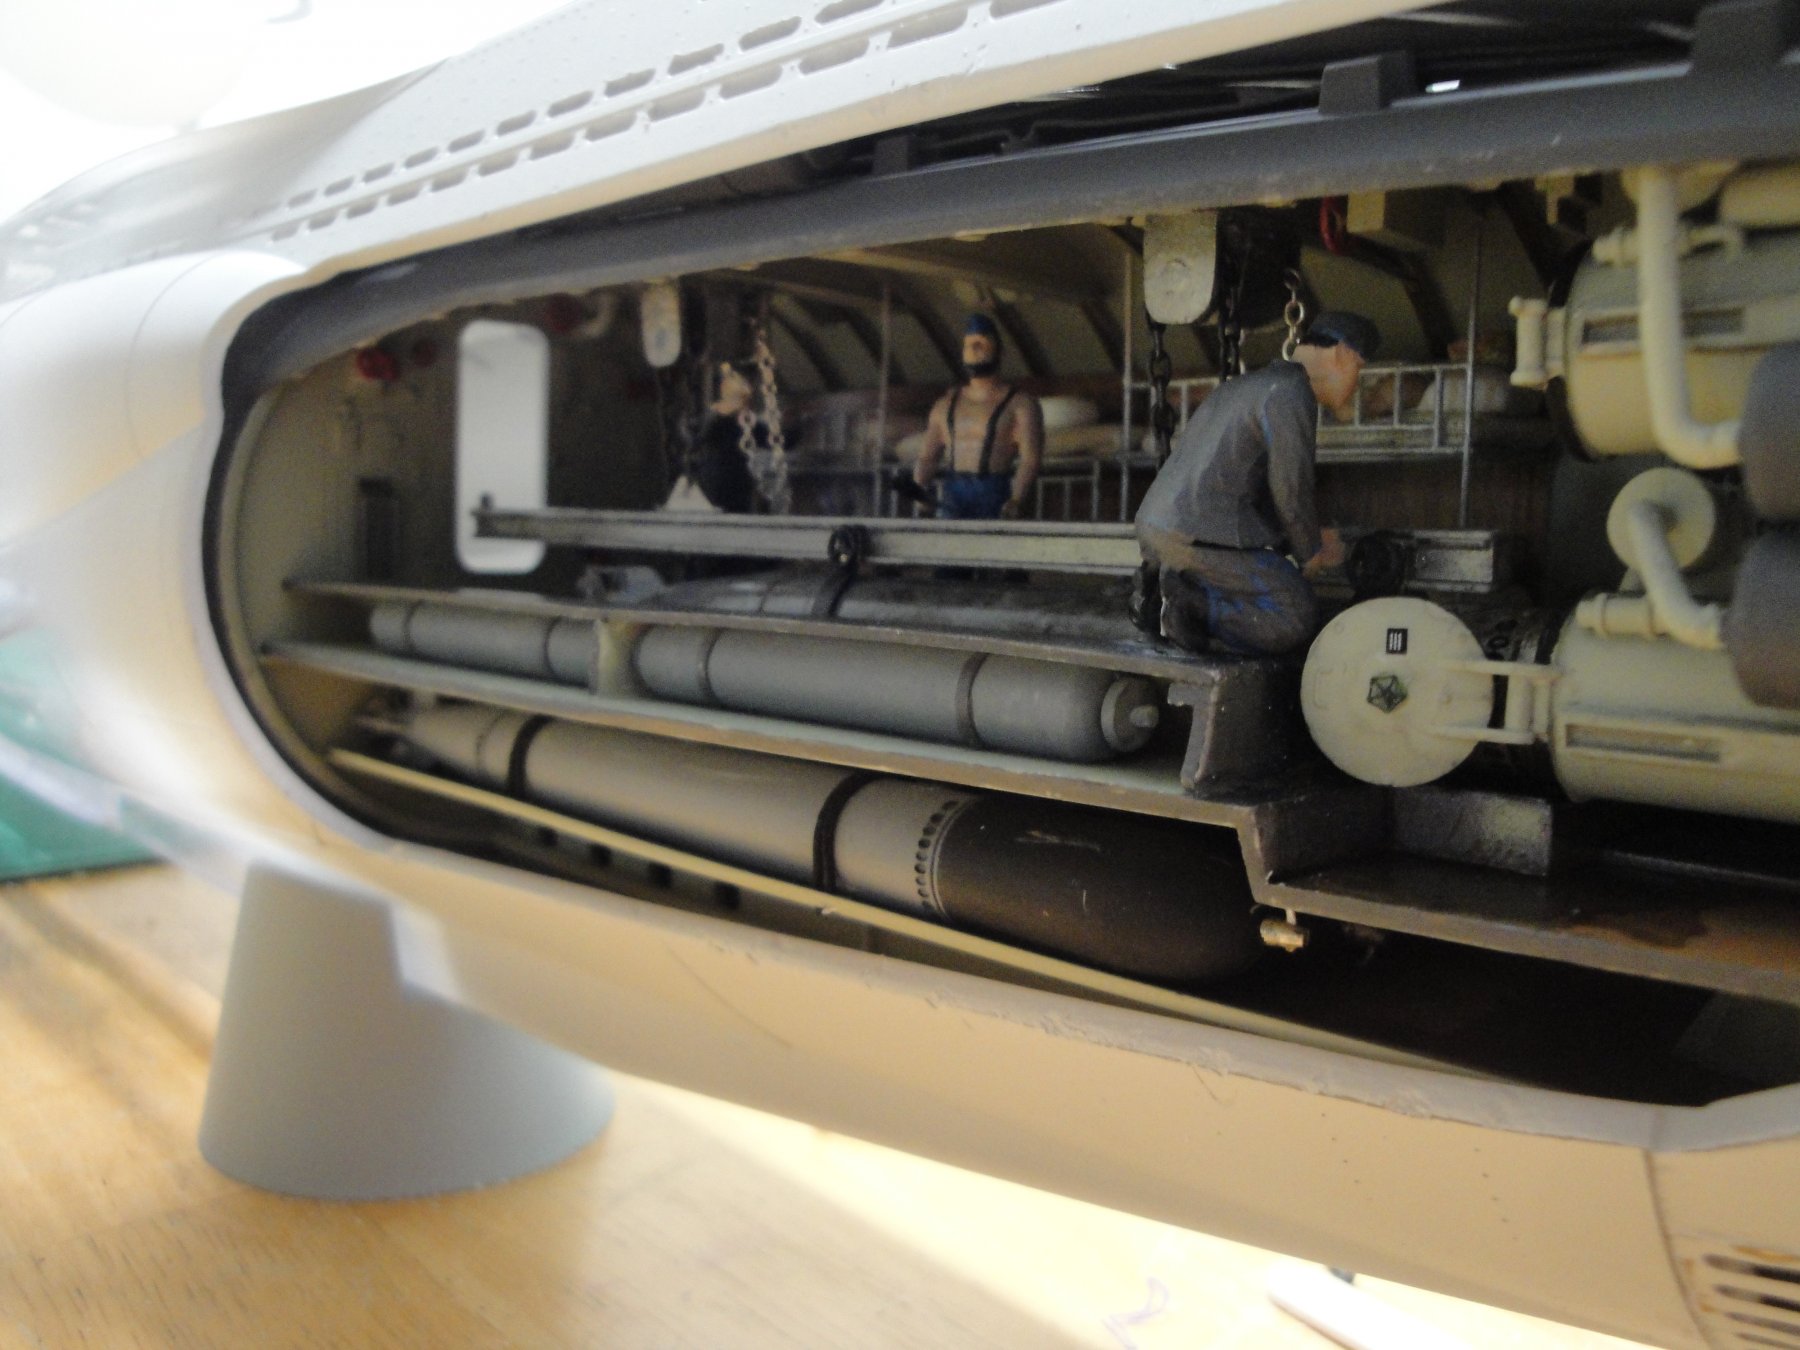
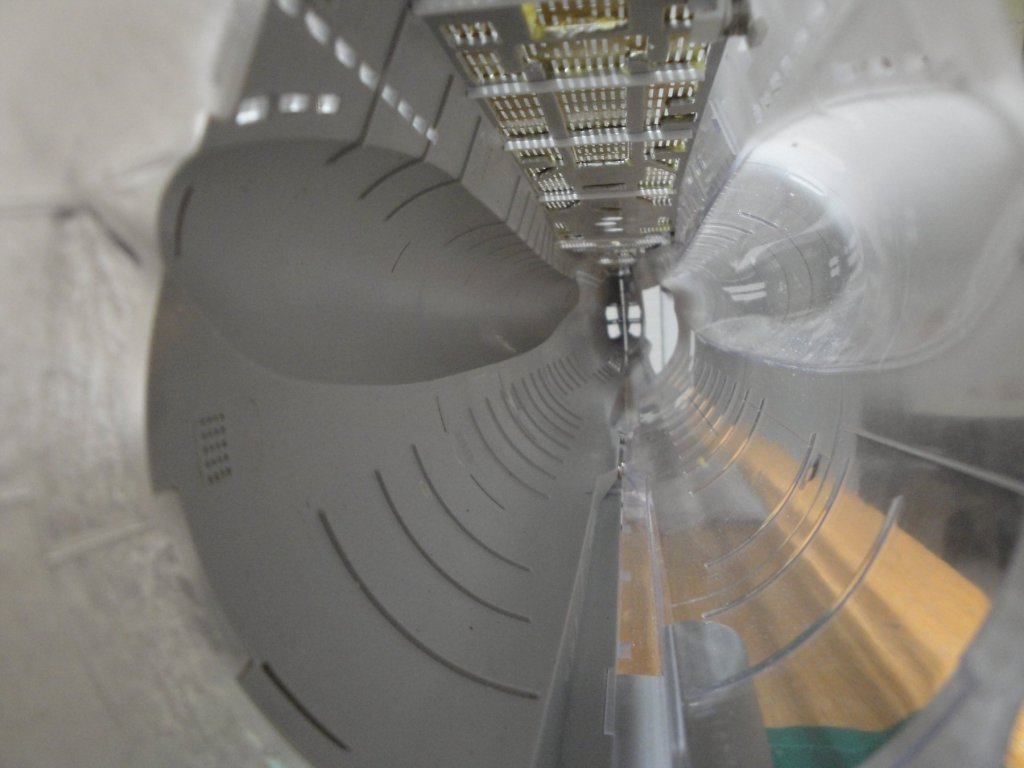
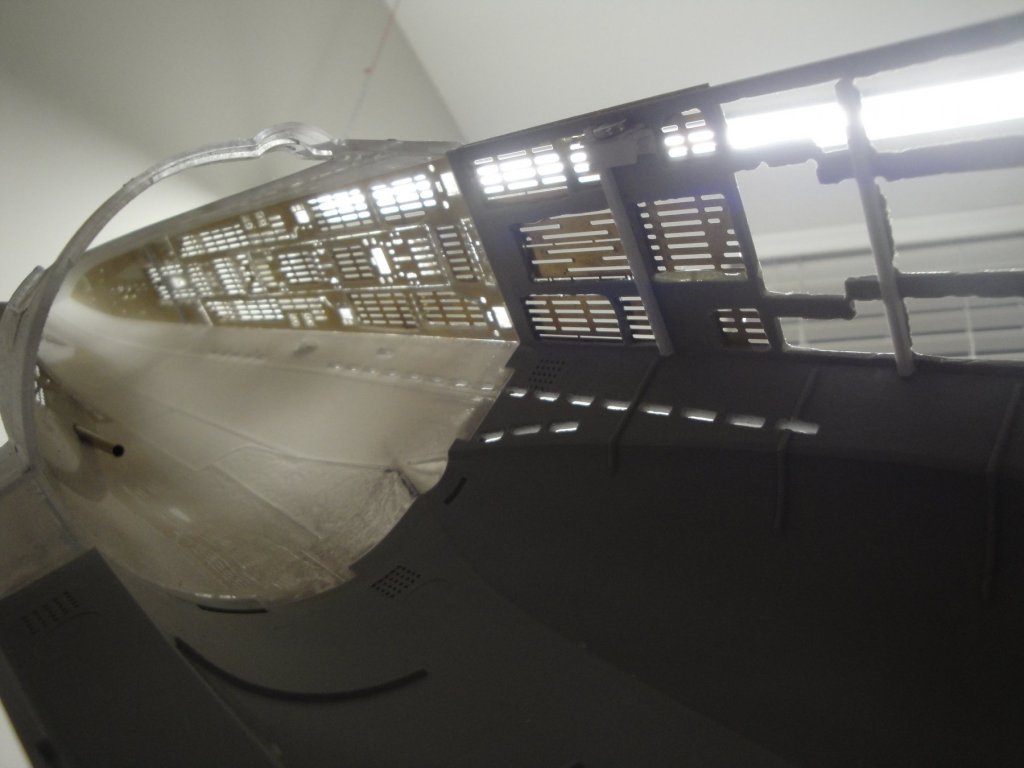
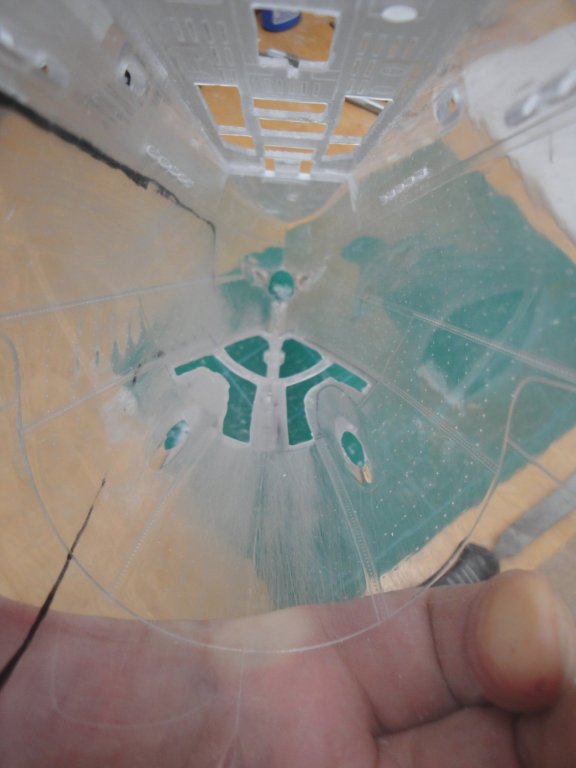
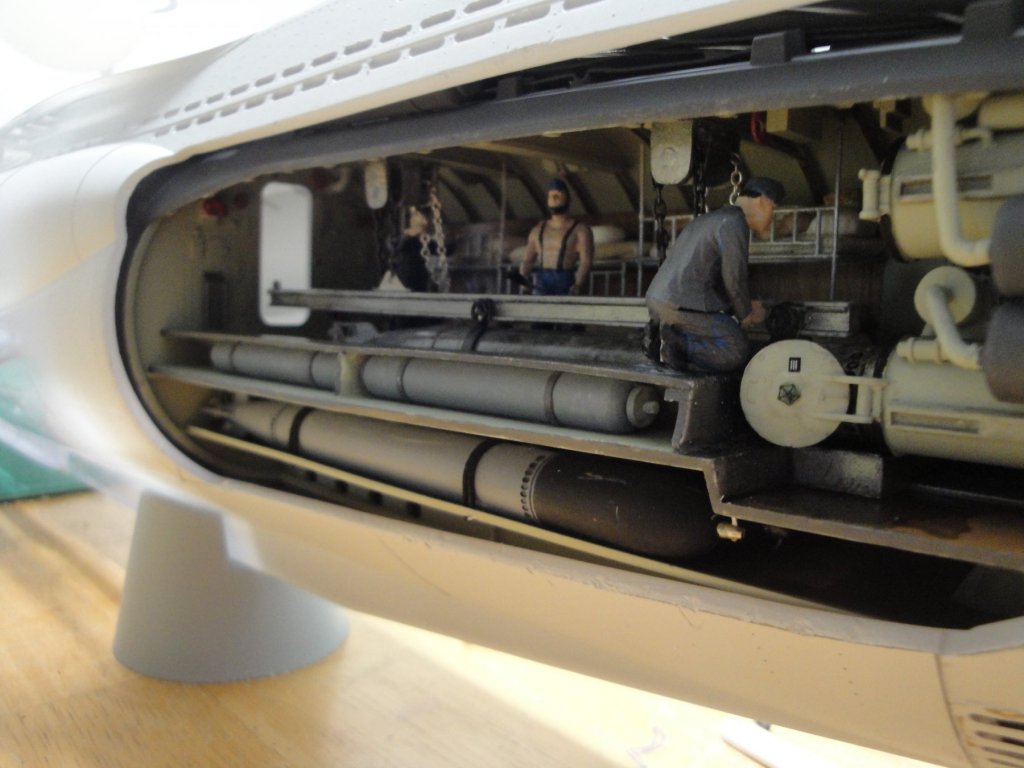
A few little progress. I opened up the three flood holes above the ballast saddles, holes that are missing from most Type VIIc kits on the market. This was done on both sides: I then added a pair of strong magnets, under the torpedoes doors as the hull was slightly apart at that location, due to the length and some inherent warping. The enchilada is starting to come together: A close-up view of the only module I have assembled so far: This is how I want to represent the submersible: all four shutters open, with a torpedo coming out, a tube open and the remaining two tubes closed: The decks, so far. I am waiting to be completed with the torpedo inner doors before making any other progress on the deck. The PE is so fragile and delicate and I need to manipulate a lot the two half-hulls. The torpedo doors bulkhead is waiting for the PE kit from RCSUBS and that may take a few weeks.... I will have to find something else to do in the meantime, which should not be too difficult. To finish our presentation, the claustrophobia picture: Hope you enjoy. Yves


- 760 replies
-
- 16
-