mobbsie
-
Posts
1,493 -
Joined
-
Last visited
Content Type
Profiles
Forums
Gallery
Events
Everything posted by mobbsie
-
 With the care your taking here Adriaan I don't think your planking is going to need much filling, she's looking good mate. mobbsie
 -
OK Jason it's official, you make me sick !!!!!! Your work is absolutely beautiful, I look at my efforts and just want to chuck her in the bin. :D Just Fantastic mobbsie
- 800 replies
-
- 2
-

-
- snake
- caldercraft
- (and 1 more)
-
Coming along nicely John. Keep them pics coming mate. Be Good mobbsie
- 2,250 replies
-
- 1
-
-
- model shipways
- Charles W Morgan
- (and 1 more)
-
Hamilton you have made a fantastic job on the Ratlines, very very well done. Be Good mobbsie
-
Just checking in Matti, there's some very impressive work there mate, well done. Do you think the carving behind the lions head could be some sort of sea serpent, the tail seems to follow the line of the bow rails. mobbsie
-
Hi Guys, I have so far found the screw jaws a better vice to use mainly because it's easy to catch the release lever. If your not completed on a job the release of tension may cause the work to have to be redone. The Bobbin is used to wrap the seizing around the thread, this can then be left hanging until you are ready to tie off. Hope that helps. mobbsie
-
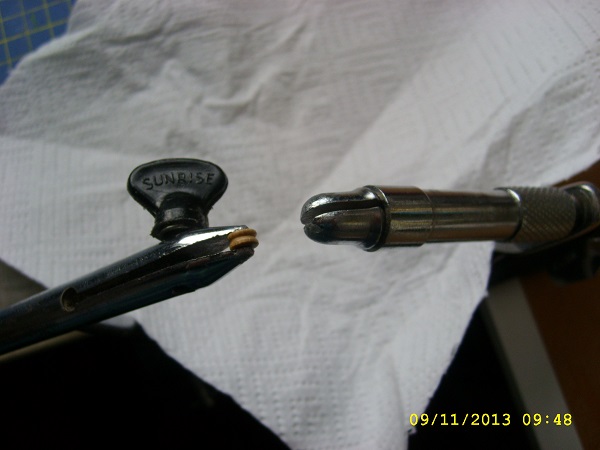
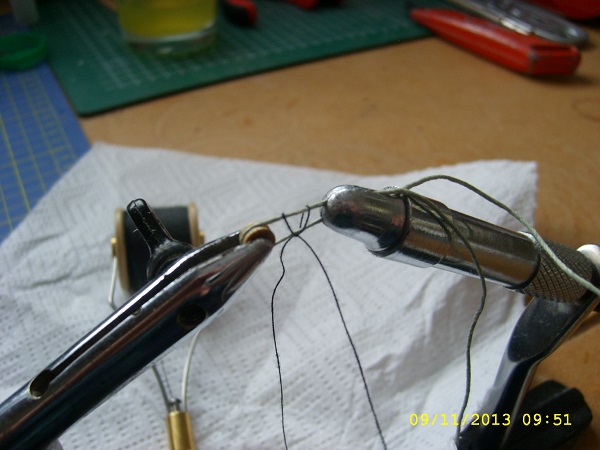
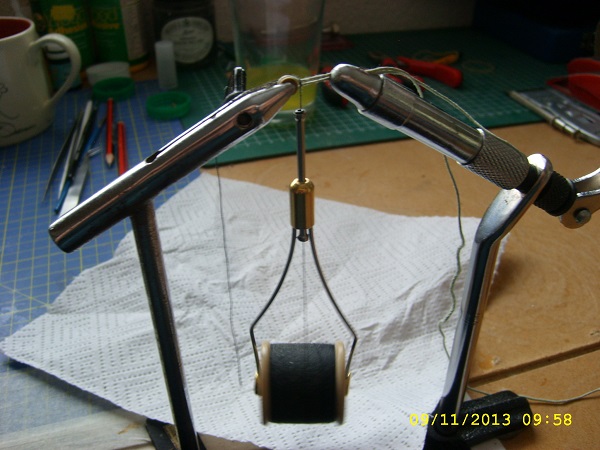
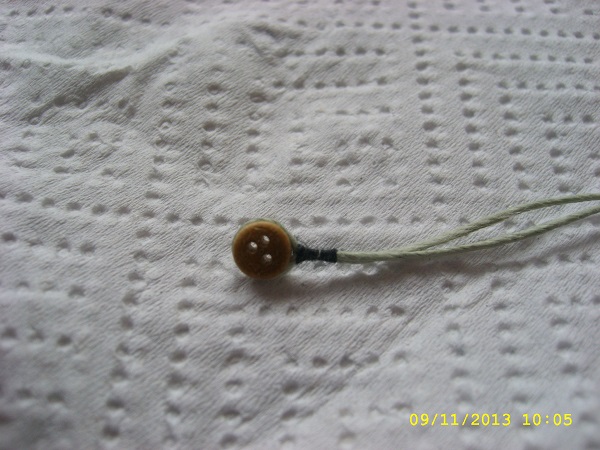
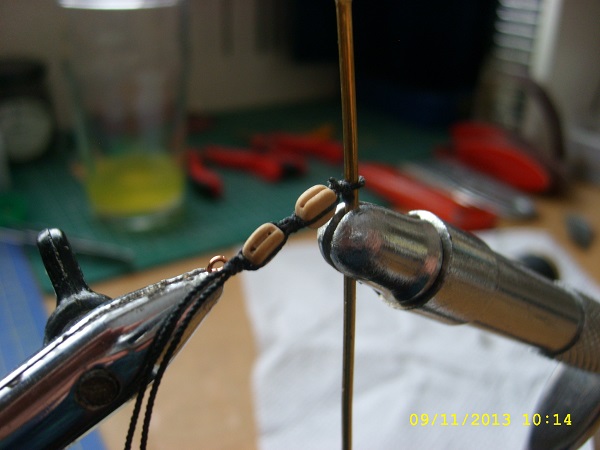
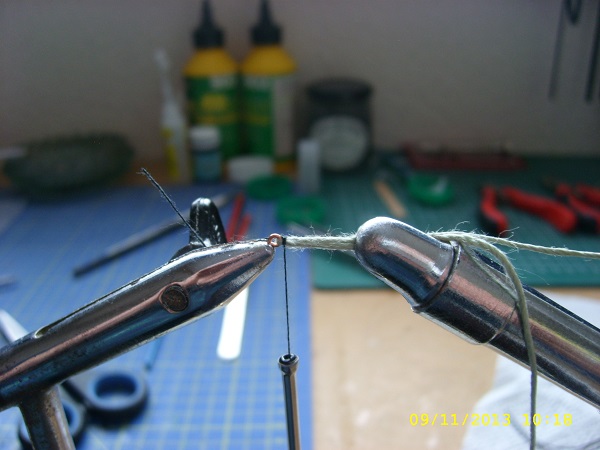
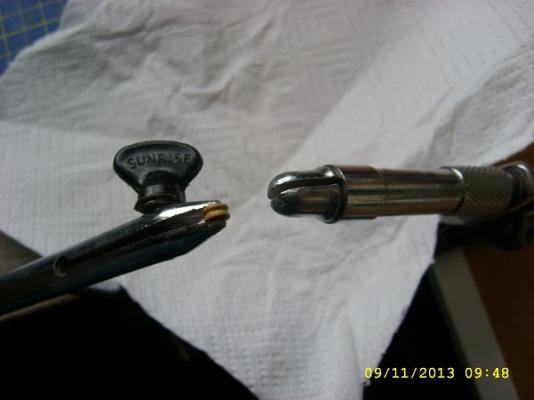
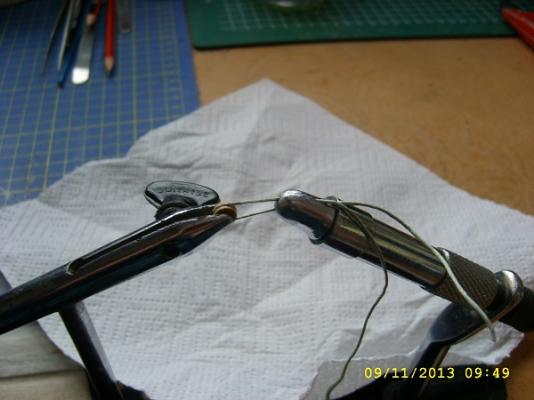
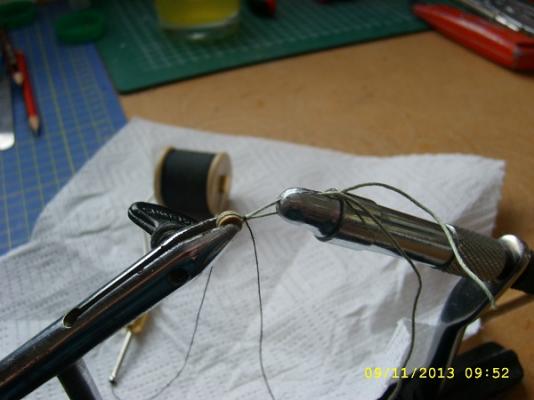
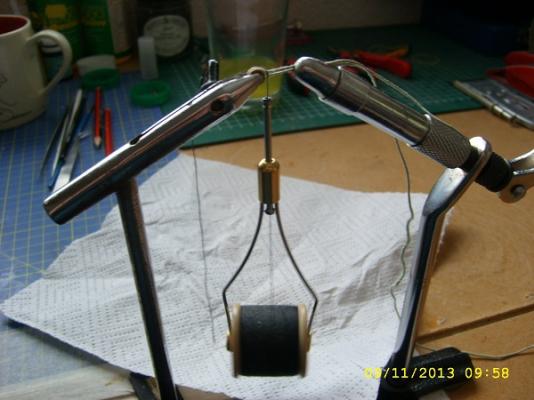
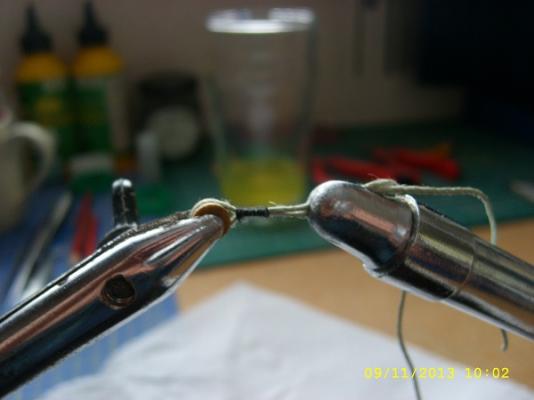
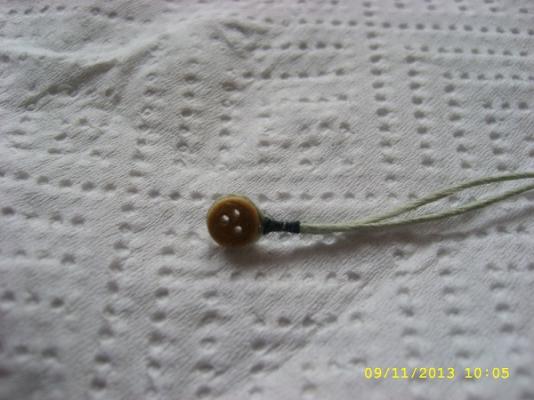
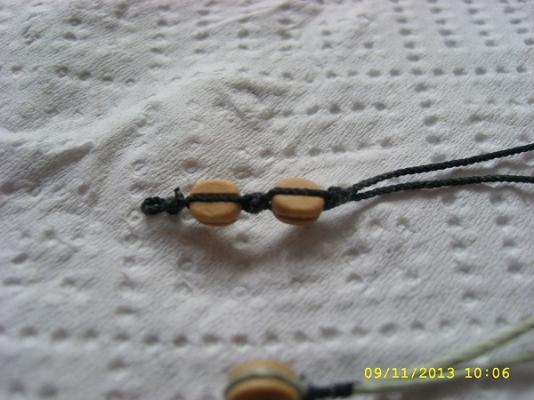
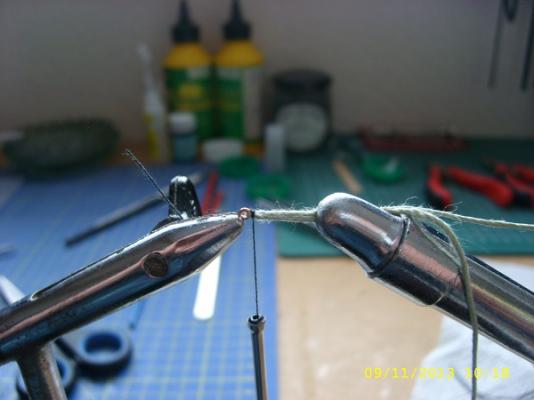
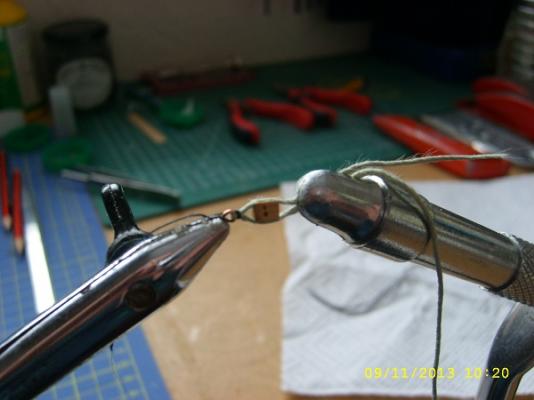
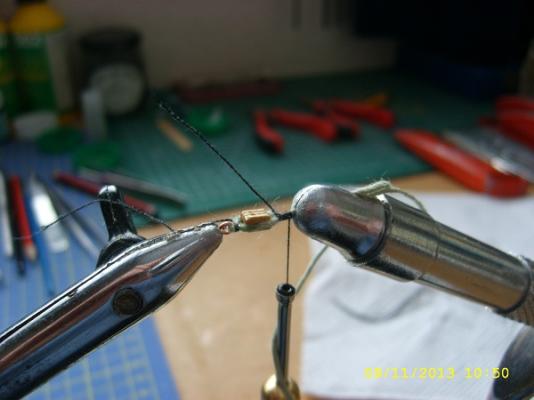
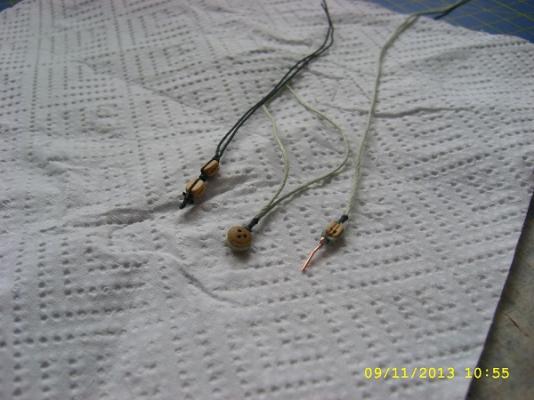
Good Morning Sam / Q. A. I have taken a few pics of my fly tyers showing how I use them, for the purpose of these pics I have not used the correct main thread and the seizing thread is just ordinary cotton. They are a "G" clamps which fits onto the edge of the workspace so the distance can be what ever you like, I'm showing close work. The starting knot is a Clove Hitch and the end knots are 2 x Half Hitches. The first picture is a 5mm Deadeye set up in the screw jaws with the trailing line thread clamped in the quick release. The Bobbin is just hanging holding the line taught The finished item, bearing in mind this is only a demo piece Next is a Long Block, this was completed a while ago but still by the same method but with a brass rod to form the eye. Here is an eyebolt that has been put in the screw jaws a tread attached to that then a 3mm double block tied in. So there we have it guys, hope that's not too long winded and that it shows what can be done. If you have any other questions that I am able to help with ask away. mobbsie


- 32 replies
-
- 12
-
-
Hi Frank, Hope you can read this with your left eye buddy. B) I do hope all went well for you mate and that you are on the mend, just don't go straining it at this early stage, take your time my friend. mobbsie
- 389 replies
-
- 3
-
-
- supply
- caldercraft
- (and 1 more)
-
Hamilton, how your getting so much detail on a ship so small is a wonder to me, she's looking great. Well done mate and keep it up, almost complete now. Super job. mobbsie
-
Hi Sam, I use a fly tying vice all the time when rigging blocks etc. I have two that can be used for holding eyebolts when seizing blocks and use both when I need to hold a length of line. I also use a fly tying bobbin which holds the tying thread and keeps the tension constant. The types I have both differ in age and design, I have had one for 20 odd years which I used for tying sea hooks, this has a screw jaw, the other one has a quick release lever. Neither of these have a grooved jaw, to me that would be a complete pain. I would recommend the use of these handy little tools to anybody, they are so versatile. Hope that helps mate. mobbsie
-
Please accept my very sincere condolences on the sad loss of a dear family member Andy. Have a quick and safe journey home my friend. mobbsie
-
Welcome to the forum Bill & Sateach, with the bunch of guys your getting here your in for some entertainment, hope you don't mind some banter. :D Hope you guys can make space for a little one, gonna join you. Looking for the dust to start flying and that's before the build starts. Be Good mobbsie
-
I think we have a new builder on the forum, no hang on it's Wayne, welcome back mate. :D Good luck with the new catheads, looking forward to seeing the finished item. mobbsie
-
Who's been a busy boy then :D They look great my friend and are going to lift your Victory to a higher level, it's always a pleasure to work with good quality materials. Be Good mobbsie
-
My bet is Sjors nicked them to replace his cotton cannon balls. Looking real sweeeeeeeeeeet Popeye. mobbsie
-
Hi Guys, Thanks guys for the good word, I really do appreciate your comments. Ray, I will not be putting the Aggie in a case either, she is big and adding a case would put the cost of the ship + case at over a £1,000, I couldn't justify that. I will find a spot for her but only with the Admirals permission, I do have a spot in mind so here's hoping. George, Believe me mate she's going to get a whole lot busier, I'm now coming up to the part of the build that I love the most, building the masts, spars and doing the rigging and it's my intension to do it right this time, rope serving, proper seizing and the correct knots. A lot of that work will be done off the ship and added as we go, wish me luck. Randy, Coming from you mate is a real compliment thank you so much. Popeye, It's because of builders like you that we ordinary guys have to try harder each time, just to keep up with your very high standard. Your innovation and scratch skills are immense and are a constant source of inspiration. ( Is your back wet yet ) :D Hamilton, Thanks my friend, I'm following your HMS Blandford from a distance and the detail your getting on a ship so small is truly amazing. She is 25mm longer than my Lower Main Mast. :huh: Lawrence, Its no trouble at all mate, here are the oar lengths :- You have to break the oar into 3 sections, ( inboard, outboard, blade ) 32ft Pinnace, Length 155mm ( without rudder ) Oar Length 72mm, Inboard 20mm, Outboard 35mm, Blade 17mm 26ft Launch, Length 128mm ( without rudder ) Oar Length 72mm, Inboard 21mm, Outboard 38mm, Blade 13mm 24ft Cutter, Length 117mm ( without rudder ) Oar Length 64mm, Inboard 21mm, Outboard 30mm, Blade 13mm 18ft Cutter, Length 89mm ( without rudder ) Oar Length 55mm, Inboard 16mm, Outboard 30mm, Blade 9mm Hope that helps mate, If I can help in any other way please don't hesitate to ask, and thanks for looking in and for the good word. :) A quick update but no pics at this moment but it wont be long, Lower three masts are well on the way to completion and the lower main top is done apart from ringbolts and blocks. I will post the pics when all lower masts and the tops are completed. Until then, Be Good mobbsie
- 1,279 replies
-
- 4
-
-
- agamemnon
- caldercraft
- (and 1 more)
-
Morning Grant or should I say Good Evening, I'll never tire of looking at your blocks mate, so you just keep on posting them pics. :) We changed our clocks last night ( back 1 hour ). Be Good mobbsie
-
Hi Grant, All sorted mate, send away. mobbsie
-
Hey Kevin, by PE I hope you don't mean Plastic Explosive, that would really make it go with a bang. :D Good luck with this project mate, I'm gonna follow. mobbsie
-
I'm slowly getting the Sjors bug here mate " PICTURES" :piratetongueor4: mobbsie
-
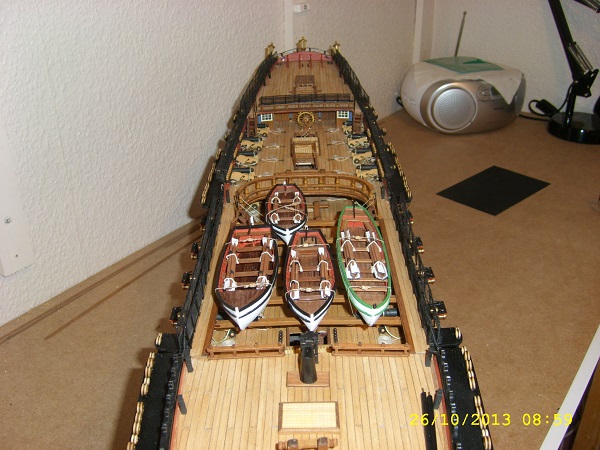
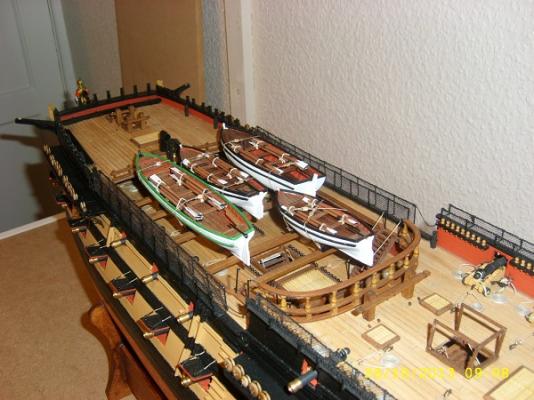
Hi Guys, Mort, Grant & Jeff, Thank you so much for your very kind words, coming from you guys it's a real compliment. As requested some pics of the boats sitting in position on the boat beams, they are not fixed yet because I need to get to some cavel cleats on the gun deck. The boats are in their correct position and order so all that's needed to fix them is a spot of glue on the cradles. I have now moved the Aggy out of the workroom because I am going to be making sawdust, I don't want to have to be cleaning her up because she's covered in the stuff. I could just cover her but when wielding long sticks about some damage may occur. The length of the Lower Main Mast is 465mm, the overall height of the Main Mast is going to be 974mm off the ship. That's it for now gents, thank you again for your kind comments. Be Good mobbsie

- 1,279 replies
-
- 15
-
-
- agamemnon
- caldercraft
- (and 1 more)
-
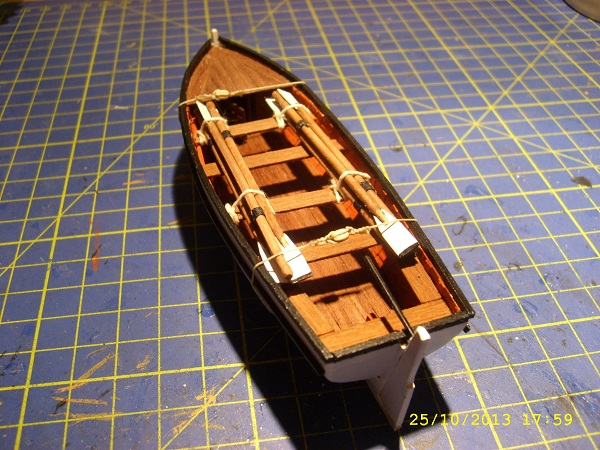
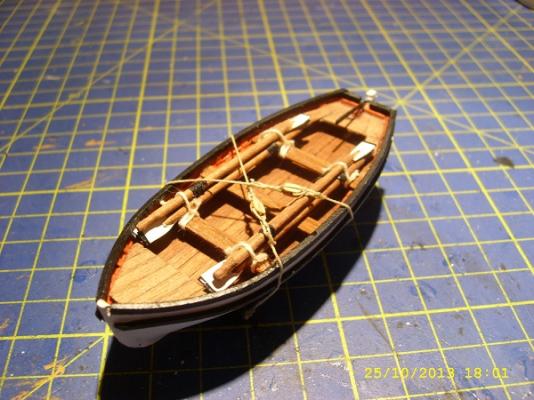
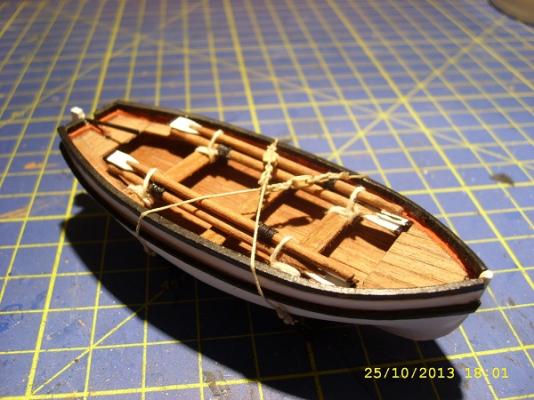
Hi Guys, Wow, I never expected a response like this, makes me feel so very humble, thank you all for the kind words. :) Popeye, All the boats have been lashed to their cradles and will be positioned on the beams, none of the boats are stowed on top of another, I don't have a photo at the moment but I will take one with them in position. With regard to the oars I found the specifications which fits all sizes, Outboard Length is 1.25 x the Beam of the Boat Length inboard is .35 x the Beam of the Boat Length of Blade is .30 x the Length of the Oar This also includes the blade housing on the shaft Width of Blade at Tip Six Inches ( 6" ) Diameter of Shaft 1/48 Length of the Oar As the beam is different on all the boats they are all slightly different in length. I did cheat when making the blades, I cut them from card and trimmed when the oar was complete. Hope that makes sense mate. :mellow: :mellow: Keith, There is no historical colour scheme for any of the boats, I just thought the Pinnace would be used by the Captain or senior officer and so should be different from the rest, I quite like the colour though. I have thought about giving mine to some poor unsuspecting person but I don't know if I could inflict that much pain on anybody, if I tried they would probably ask for the monitory value instead. John ( Jim Lad ) The boats will be placed as recommended in the manual, I haven't put them on yet as there are Cavel Cleats below on the gun deck and I will need to get to them when rigging, with the boats on that would be virtually impossible. Wayne, I think I understood what you were saying, thank you. :D Frank, Sjors is over his ailment now and has put a bit of weight on, I don't think the little boats would do the job. Augie, Your not wrong about the time it takes to knock these little ones out, I suppose I've been working on them for the last 2 - 3 weeks, not continuously because life gets in the way plus I've had side projects as well, of the construction type for he who cannot be named. Sjors, Sorry mate their stopping here, no more room in the case. Hamilton, Pierre & Jim, Thanks guys for your very kind words. Also for those who have hit the like button, thank you very much, it's appreciated. OK gents it's coming up for 02:30 here so it's time for me to hit the sack. Be Good mobbsie
- 1,279 replies
-
- 5
-
-
- agamemnon
- caldercraft
- (and 1 more)
-
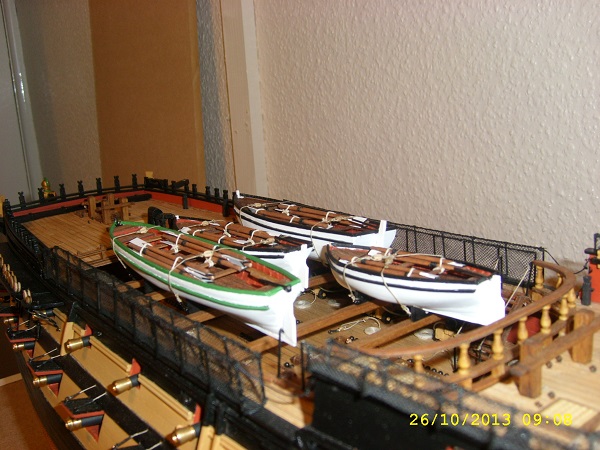
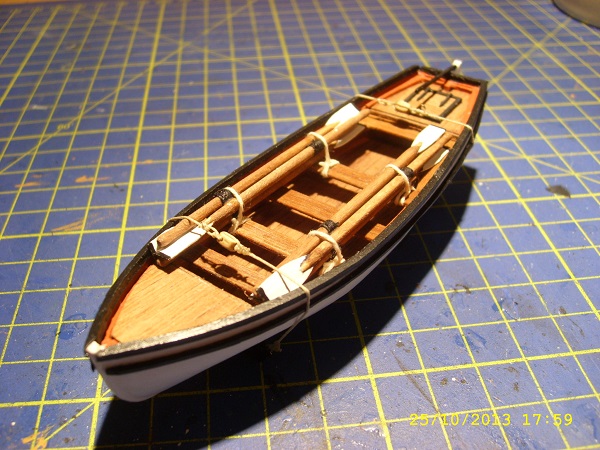
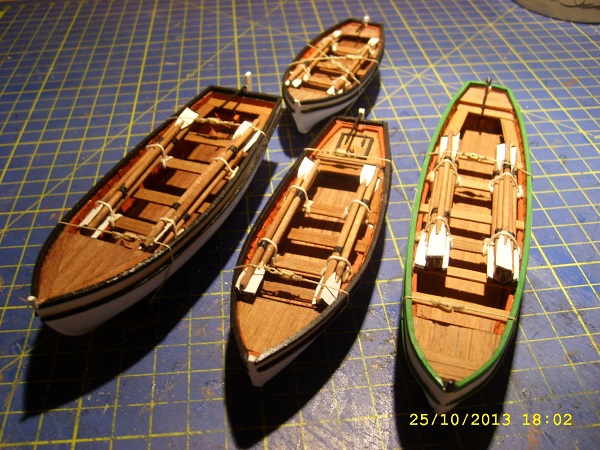
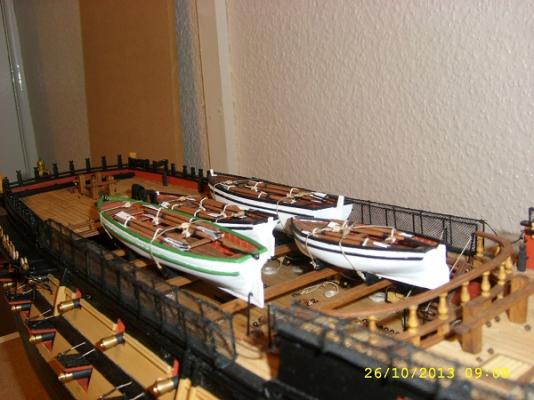
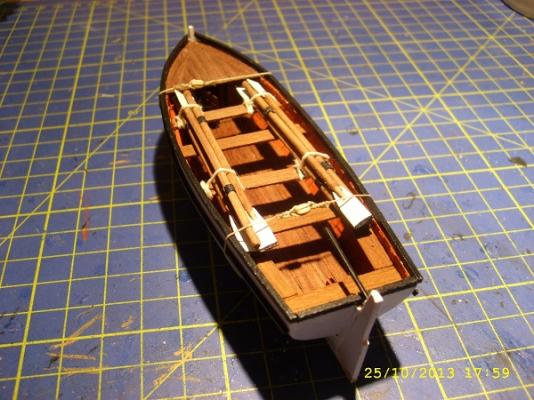
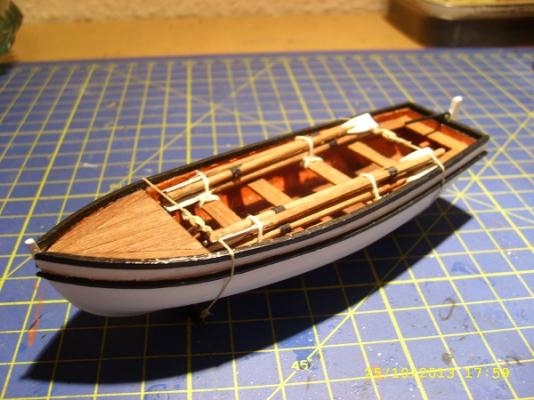
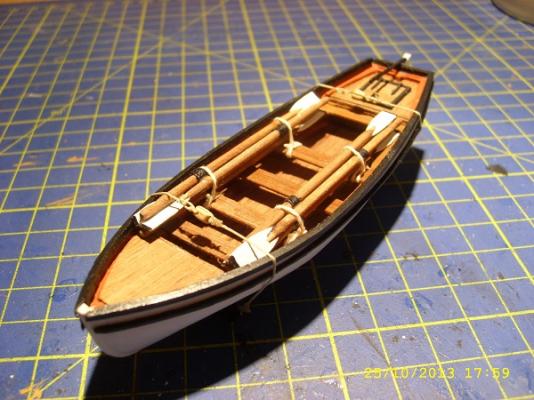
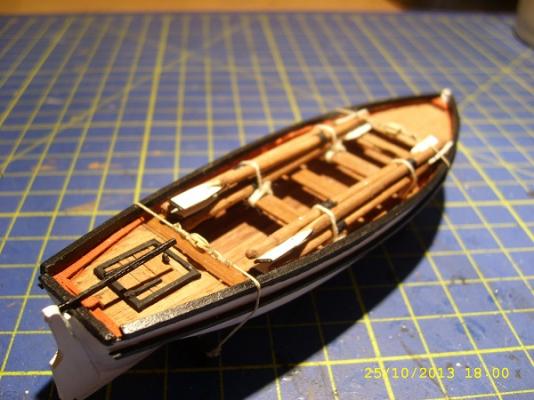
Hi Guys, George, Space always seems a problem, we in the UK suffer the smallest houses in Europe unless you want to pay countless thousands for a larger property, my place is a 3 bedroom end terrace and is one of the larger builds in our street, built in 1950 it is solid but still not enough room for all that I would like to build, so deciding on what to build becomes quite important, I was thinking of Dianna but will probably have second thoughts on that due to her size, I will most likely go small until Caldercrafts Surprise is ready, I still want her. Peter, Thank you for your very kind words. The small boats aren't that difficult but there is a lot of work involved with them, they do suffer some damage to the bulkheads mainly because your used to working on the main hull which is a brute of a lump. I'm pleased that mine are all done. At last the little boats are completed, there was a lot more work in them than I expected but I think they came out OK. The oar shafts are a little thick but the length is right, I got the formular from Milton Roth's "Ship Modeling from Stem to Stern". I do have a few pics which I will post. The 26ft Launch The 24ft Cutter The 18ft Cutter Finally all four boats together as they will be positioned on the ship So there we are, right up to date with where I am, next step is making the masts, the size of walking sticks !!!!!!!!!!!!!!!!! Be Good mobbsie

- 1,279 replies
-
- 13
-
-
- agamemnon
- caldercraft
- (and 1 more)
-
Hey Frank, I've seen some shady looking guys in my time but that crew of yours is something else, I wouldn't trust them as far as I could throw them, and those brothers, cut your throat as soon as look at ya. :piratetongueor4: Ya gotta keep a beady eye on them folks I tell ya. All they need now is a ship to go on, no need to rush though, take your time, just rearrange the ropes from time to time and you never know what might happen. :D You've painted them very well mate well done. mobbsie
- 389 replies
-
- 3
-
-
- supply
- caldercraft
- (and 1 more)
-
Just checking in Popeye and boy your travelling at warp speed on this little lady. Great fix on the repair and staining my friend and well done on the railings and pin rails, I now know there is nothing you cant do. Next step has got to be the DARK SIDE. No excuses. Keep it up mate. Be Good mobbsie