


mobbsie
-
Posts
1,493 -
Joined
-
Last visited
Content Type
Profiles
Forums
Gallery
Events
Posts posted by mobbsie
-
-
-
She's looking absolutely fabulous Bob.
I find rope serving very satisfying and almost therapeutic, with the right equipment it's really very easy.
Rigging for me is the best part of a build, even if it does get very busy.
Your doing a super job mate.
Be Good
mobbsie
-
Hi Andy,
We all had to start somewhere mate, for every problem you have and fix is experience gained.
There is a great deal of satisfaction when a problem is corrected and it doesn't matter if help was sought, you still have to make the repair / fix.
I think in this situation I would follow Spyglass's suggestion and cheat, you just need to work out the width's of the planks either side of the centre line. You know how many planks should go in so you will be able to make the adjustments.
Good luck with the fix and you really do need to open a build log.
Be Good
mobbsie
-
Hey Mark, you have every right to be chuffed mate.
The Taff Rail looks superb and the whole ship is coming together nicely.
I like a ship with a nice bum and she's got one, very well done mate.
Be Good
mobbsie
- CaptainSteve, Omega1234, riverboat and 5 others
-
 8
8
-
-
-
Really sweet John, lovely.
I am sorry to hear about your scare John, I do hope it doesn't become a nuisance mate.
Please pass our regards onto Pam and tell her were both sorry to hear of her injury and hope that it soon mends.
Take better care you two.
Be Good
mobbsie
-
-
Lovely work again Jason, only to be expected really.

Be Good
mobbsie
- mtaylor and Beef Wellington
-
2
-
Your carving is going to look absolutely great Piet.
Continue with what you have there mate, it's looking real good so-far. The relief work will be a real bonus.
Be Good
mobbsie
- JesseLee, CaptainSteve, GLakie and 4 others
-
7
-
Now I wonder what that boat could be, gonna look good in a case mate.

Being an ex-navy guy I have no doubt you have given a great deal of thought about Weight, Displacement and Stability, also if you will need any ballast.
I'm really looking forward to see this boat come to life mate.
Be Good
mobbsie
-
Morning Jack,
Have you tried fabric dyes, When I made the sails on my Thames Barges and Bawley I bought Calico cloth and packet of Terracotta dye.
Pre-wash the fabric to wash out any wax or starch and mix the fabric dye in an old bucket with some salt. When you are sure there are no contaminates in the cloth place it into the bucket and stir.
When you are happy with the colour remove from the bucket and rinse in cold water, hang to dry.
When you making the sails iron (press) the cloth and mark with a pencil the outline of the sail, allowing a little extra for the hem. When that's complete dilute some PVA and brush it onto the pencil lines ( be generous ). The PVA stiffens the cloth and aids cutting and reduces the edges from fraying.
Sorry if I've gone on a bit but it may help.
Good job on bending sails to the spars.
Be Good
mobbsie
-
Looking good Mike, mind if I jump on board.
Be Good
mobbsie
- Landlubber Mike, Eddie, mtaylor and 2 others
-
5
-
-
-
Hi Gents,
Thanks very much guys comments and likes are all appreciated.
Carl, By all means mate, pull up a pew. your always welcome here, I shall be using mikeaidanh's log as a reference quite a lot. His build is superb and definitely one to follow. One thing I do like about this kit is that there is a lot of scratch building to be done although the plan drawing leave a lot to be desired.
Frank, Cheers buddy, one more planking to go, she's triple planked. Final planking will be Pear when it arrives.
Wayne, Thanks mate for your confidence in my planking efforts, I am learning and the final planking will be better.
Ken, Thanks mate, If I were you I'd wait for me to finish the planking before hoping your turns out like mine, good luck with yours mate.
Mark, Thank you very much mate for sharing your wisdom. It does sound complicated but I'm beginning to get my head around the process and the mist is beginning to clear. we'll see.
Thanks Grant, stay tuned mate.
Thanks again guys.
Be Good
mobbsie
-
Hi Gents,
It's been while since my last post and a lot has happened.
Thanks guys for all your comments and remarks and for hitting the like button, it means a lot.
I've completed my trails on the Ebonizer with mixed results and not all good. I put some Pear and Lime in the solution and gave it a 40hr soak to find out the depth of penetration, the results I admit are disappointing, penetration was no more than if it had been soaked for 2hrs, the surface area built up with stain and started to crystalize, when rubbed with a finger a dirty brown stain remained. Not a good result at all.
Best results came from soaking in Tea for approximately 2hrs, allow to dry then soak in the stain for a further 2hrs, allow this to dry and apply a Wipe on Poly to finish. All work that needs to be done must be before staining as the base wood will show through if done afterwards.
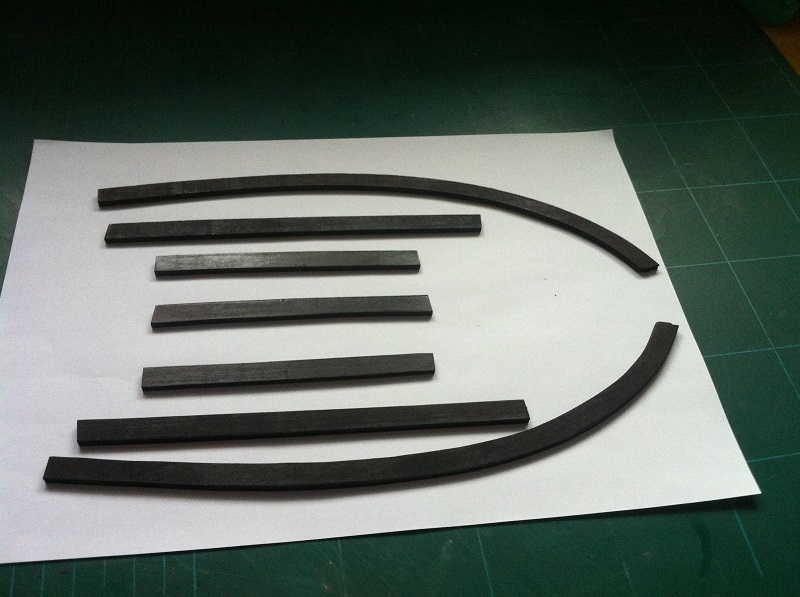
I do have a picture of the Sheer Rails after they have been treated, I'm happy with the results for these.
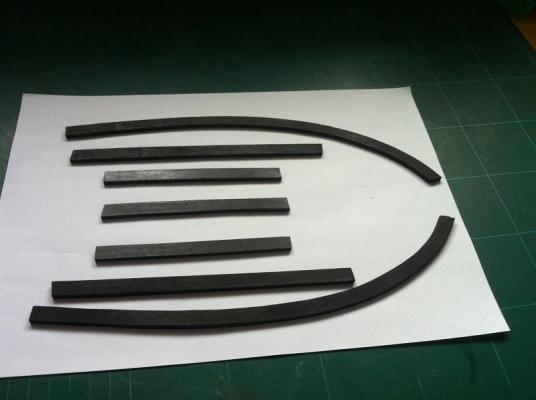
Next up is the update on the Launch.
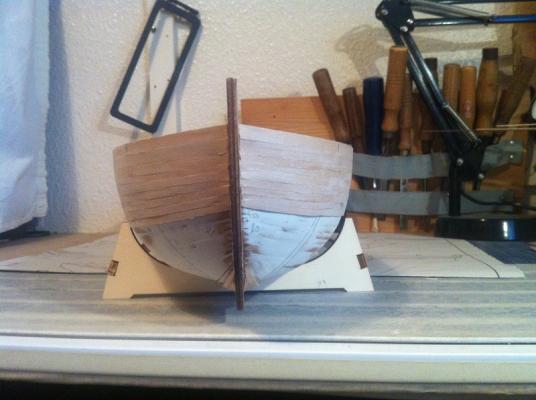
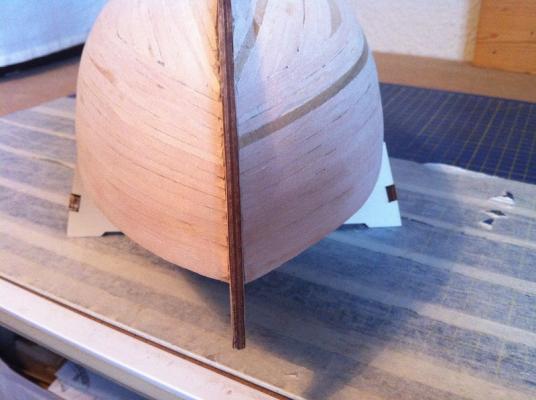
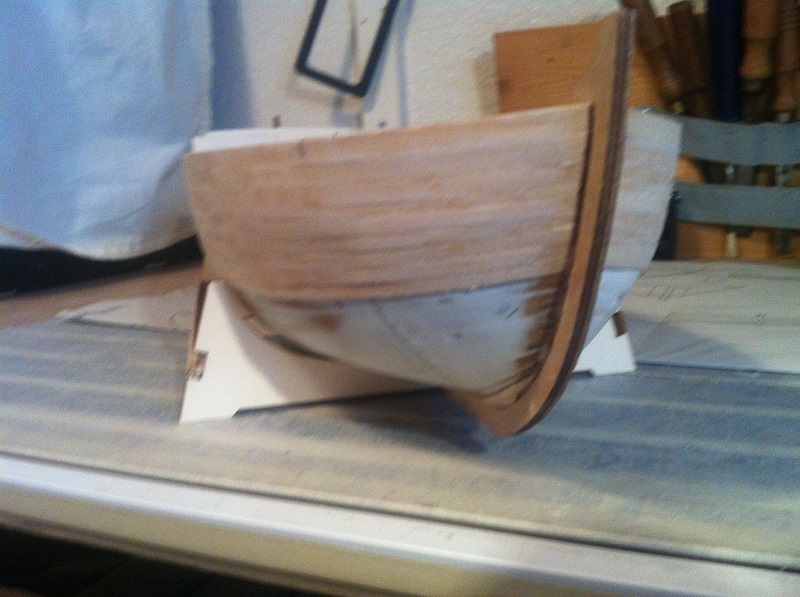
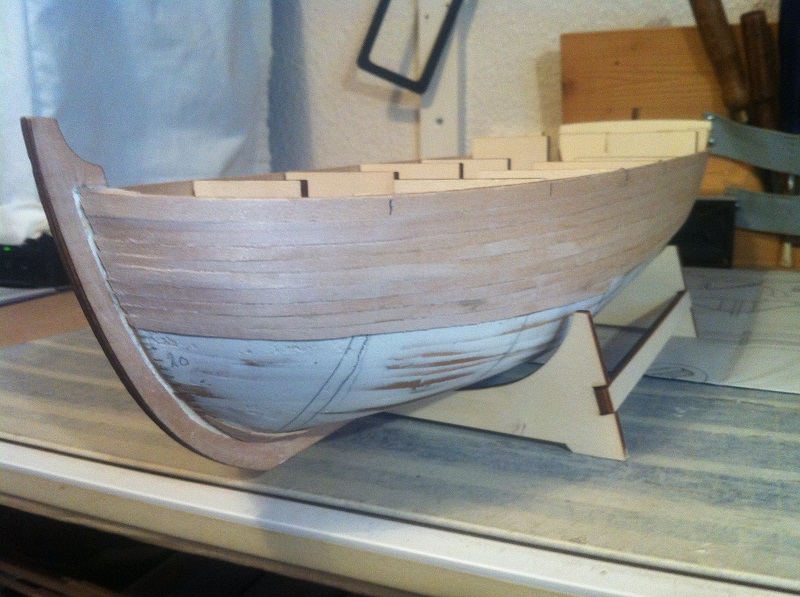
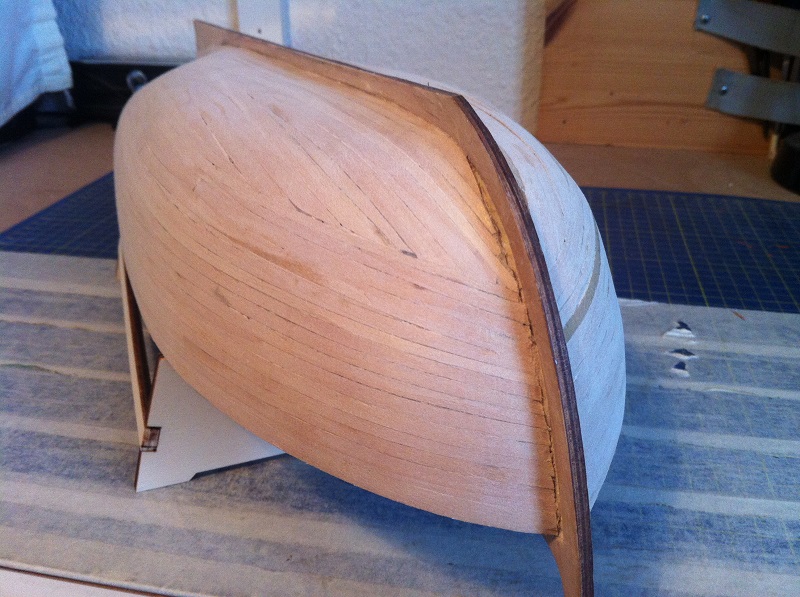
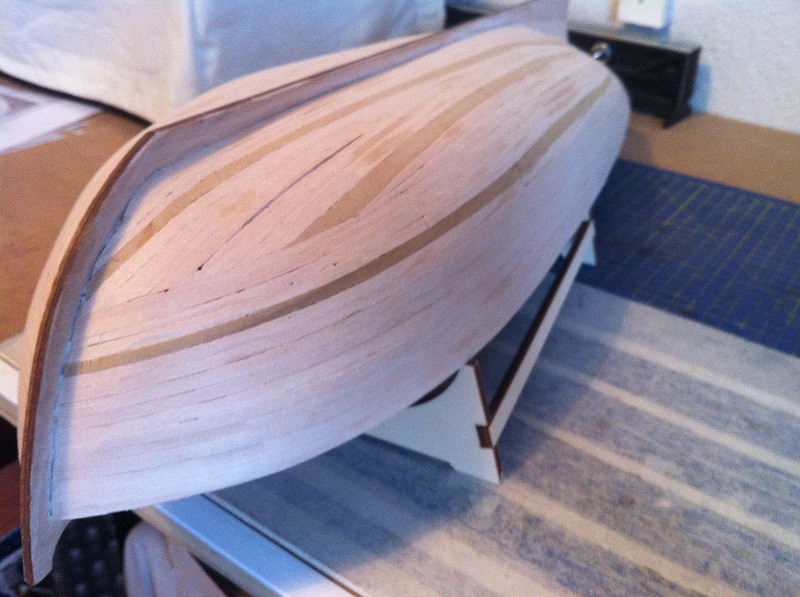
Second planking is now complete, although this is a lot better than the first planking there is still a lot of room for improvement.
The planks are a lot tighter together due to bevelling the edges but I still had trouble with getting a smooth bend on each of the lower strakes around the bow section. Although the strakes were measured at the Bow, Midships and Stern there is some a lot more that can be done and so I've put myself on stand-by to do this properly, if anybody would like to pop round mine and give me a practical demonstration of how to do this please feel free, I have seen the tutorials so feel a little better but putting it into practice is a whole different ball-game.
The final planking will be Pear with the waterline in Holly, the top of the hull will have decorations on top of Red Heart, hopefully this will be a paint free zone but we will see, never say never.
The Pear has been ordered from C.M.B. but is still in tree trunk form and is waiting to be cut, I've ordered Strips and Sheets so hopefully will have all angles covered, I really must get a Thickness Sander, it will save me money in the end, I just need to persuade the boss.!!!!!!!!!!!!!
Sorry about the quality of the pics, I promise to do better next time round.
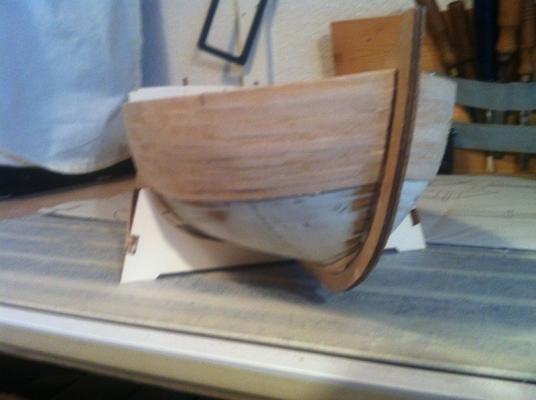
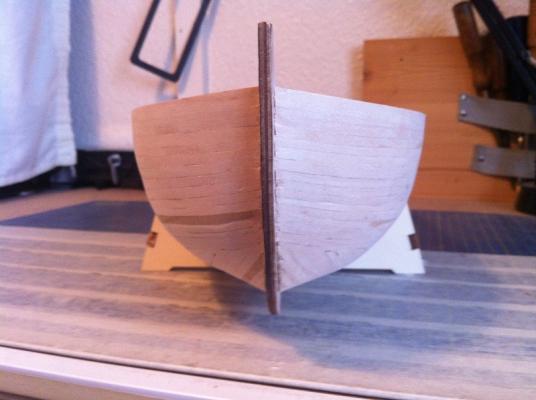
Half way through and not looking to bad
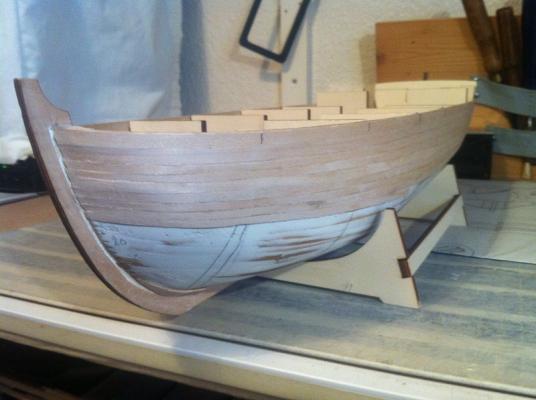
The 2nd planking is now complete, somehow a rogue plank has infiltrated.


So there we are guys, your up-to-date with where I am, Hopefully I will have an update sooner rather than later.
Be Good
mobbsie
-
Hi Bug,
Your actions are to be commended mate.
I can only agree with all the above comments and sentiments posted above and I wish you every success in this worthy endeavour.
I'm sure Augie is nodding approval and very pleased with your decision to take this emotive task on.
Power to your elbow mate, Good Luck.
Be Good
mobbsie
-
Morning Jack,
Let me add a little to the discussion regarding the colour of the sails.
In general each region of the country had a slightly different colour scheme, if you take my neck of the woods ( East Anglia ) East Coast of the UK, the sails on working boats were generally coloured Red with slight variations within, by working boats I refer to Thames Barges, Fishing Smacks, Bawley's, Norfolk Wherries etc.
On larger sailing craft the sails were kept white or thereabouts.
The sails were maintained by an annual service and treated with ground fish and a turpentine like solution, the colour also helped to identify what region a boat came from along with slight variations with rigging techniques should the boat be sunk.
In your case the colour is down to you, your the builder and owner and as such you must go with what you like.
Be Good
mobbsie
-
And another superb build comes out of the Dale shipyard.

Doesn't seem like 15 months since we started this venture and the results are well worth it mate.
You have a lovely model there so you have every right to be very proud indeed.
Thanks for dragging me along mate, I think we've both learned a lot.
Good luck with the Launch and I most definitely will be following along.
Be Good
mobbsie
-
Hi Wes,
I don't have a clue what your doing or how your doing it but whatever it is it looks really crisp and clean.
Keep doing what it is your doing and I'm sure it will all come together nicely, just like your previous work.
I can appreciate a craftsman and shipwright at the top of his game and it seems to me your there.
Good on ya mate.
Be Good
mobbsie
-
-
-


HMS Diana By Barbossa - Caldercraft - Scale 1:64 - The 1794 Attempt
in - Kit build logs for subjects built from 1751 - 1800
Posted
Hi Christian,
Looking really good mate. Glad you were able to get your cap sorted.
For getting really close to trim a knot try using nail clippers, the ones with the sprung lever, they work for me and you can get really close to the knot, a word of caution though, you can get too close and then it's that time when every woman learns to cover their ears.
Hope that helps mate.
Be Good
mobbsie