Jim Lad
-
Posts
9,598 -
Joined
-
Last visited
Content Type
Profiles
Forums
Gallery
Events
Everything posted by Jim Lad
-
Thanks for posting these, mate. Haven't been down the coast for a couple of years. It's good to see that the museum is still alive and well. John
-
 Very cunning, Bob! John
 -
Just catching up with what you've been doing, Tim. Great work, mate! John
-
Thanks, Mike! John
-
Thanks, Keith. David - not sure yet. I usually just give my models a coat of Polyurethane, but it might look a bit bland. Another option is to copper the bottom - the Thursday Island luggers were coppered - but I'm not sure yet. John
- 745 replies
-
- 1
-

-
- francis pritt
- mission ship
- (and 1 more)
-
Thanks for the encouragement again, folks. Popeye - the planking is staggered to comply with Lloyds rules for planking. Bedford - sorry I missed you. John
-
Thanks, Michael. John
-
Again, thanks all for your encouragement. John
-
Just catching up, Alexandru - she continues superbly! John
-
Thanks, one and all. Yes, Pat - those little ships certainly had sweet lines. John
-
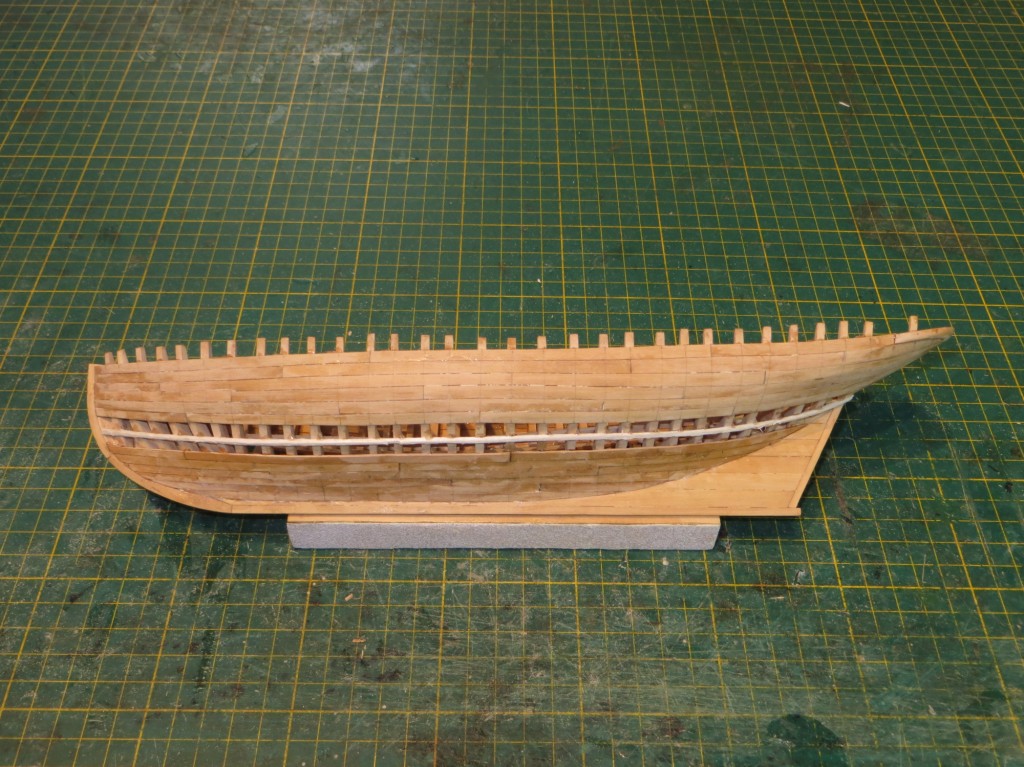
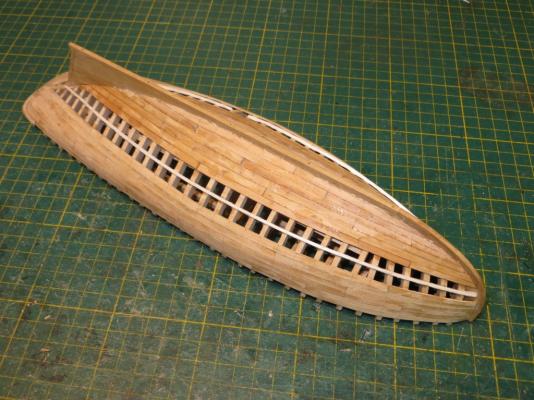
Time for another update. I've reach what is, for me, a real milestone - the last planking batten is ready to be removed, which will leave the hull clear for the final strakes of planking to be laid. John


- 745 replies
-
- 25
-
-
- francis pritt
- mission ship
- (and 1 more)
-
A very nicely completed piece of complex shaping there, Pat. John
- 517 replies
-
- 1
-
-
- Endeavour
- Artesania Latina
- (and 1 more)
-
Absolutely delightful work - as usual. John
-
Michael, This is just getting ridiculous! John
-
That's becoming amazingly complex, Popeye - great work. John
- 956 replies
-
- 3
-
-
- andrea gail
- trawler
- (and 1 more)
-
I feel like I could start cooking on that stove, Bob. John